The Humble Granny Square

Spring Break this year involved a long road trip for my family and me. My favorite way to entertain myself on a road-trip is to crochet and listen to music or pod-casts. Makes the miles go along quickly between stops for food, gas and restrooms.

We drove from our home in the mountains above Boulder to just outside of Kansas City, Kansas. All together it took us about 13 hours, that included 5 stops to re-fuel the car and kids and allow everyone to stretch their legs (including the dog).

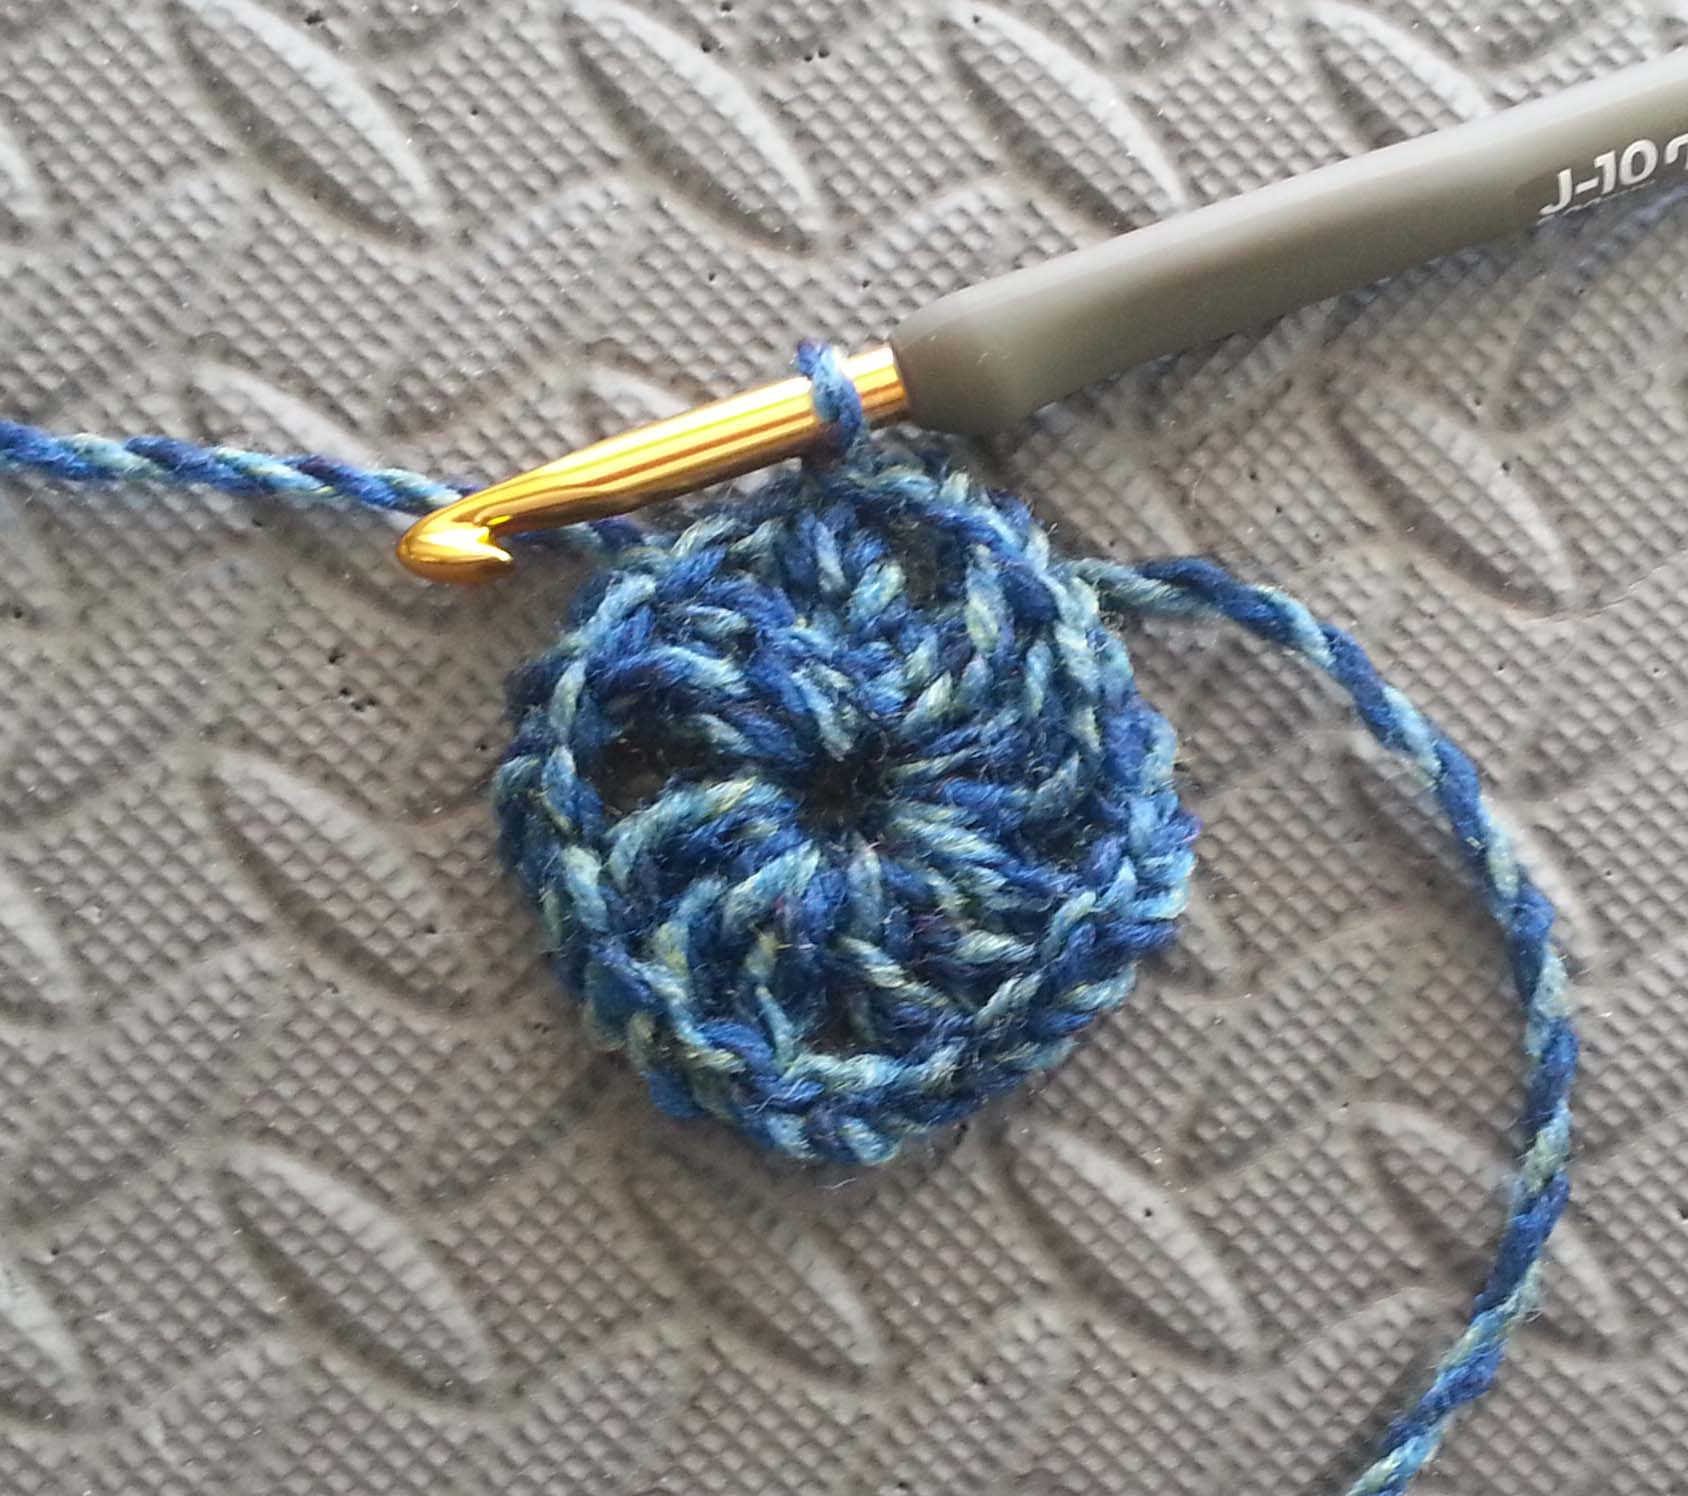
I was capping off our week in Kansas City by attending and teaching at the First Annual Fiber Arts Day that following Saturday. One of the requests for those coming to the event was to contribute at least one 6 inch granny square. So I decided it was time to re-visit this old friend.

It had been awhile since I last crocheted a granny square and I had to experiment a bit to get one the size I wanted.  After I got the hang of it though, I was crocheting up 2 in no time at all.

Granny Squares

I am a big fan of letting the yarn do the heavy lifting, in this case I got the effect of a granny square worked in multiple colors without the tedium of having to weave in lots of yarn ends. As there are more and more yarns like this, with the long runs of colors changing into the next, you can find something in your nearby shops to use this way. When I use these sorts of yarn, I turn with each round since I am not changing the color, this allows me to work into the next chain space neatly.

The following is my recipe for my granny squares.

I used a size J/6 mm hook with Lion Brand Yarns “Unique” in the picture above, for my samples in the pattern I used Lion Brand Yarns “Tweed Stripes”. It didn’t take as many rounds to complete these squares because these yarns are slightly bulky, 4 rounds were a tiny bit shy of 6 inches though. I ended up putting a single crochet edging round to get the exact size.  You can use a lighter weight yarn, but you will need to add rounds to the squares and you may not get a 6″ square.

Instructions:

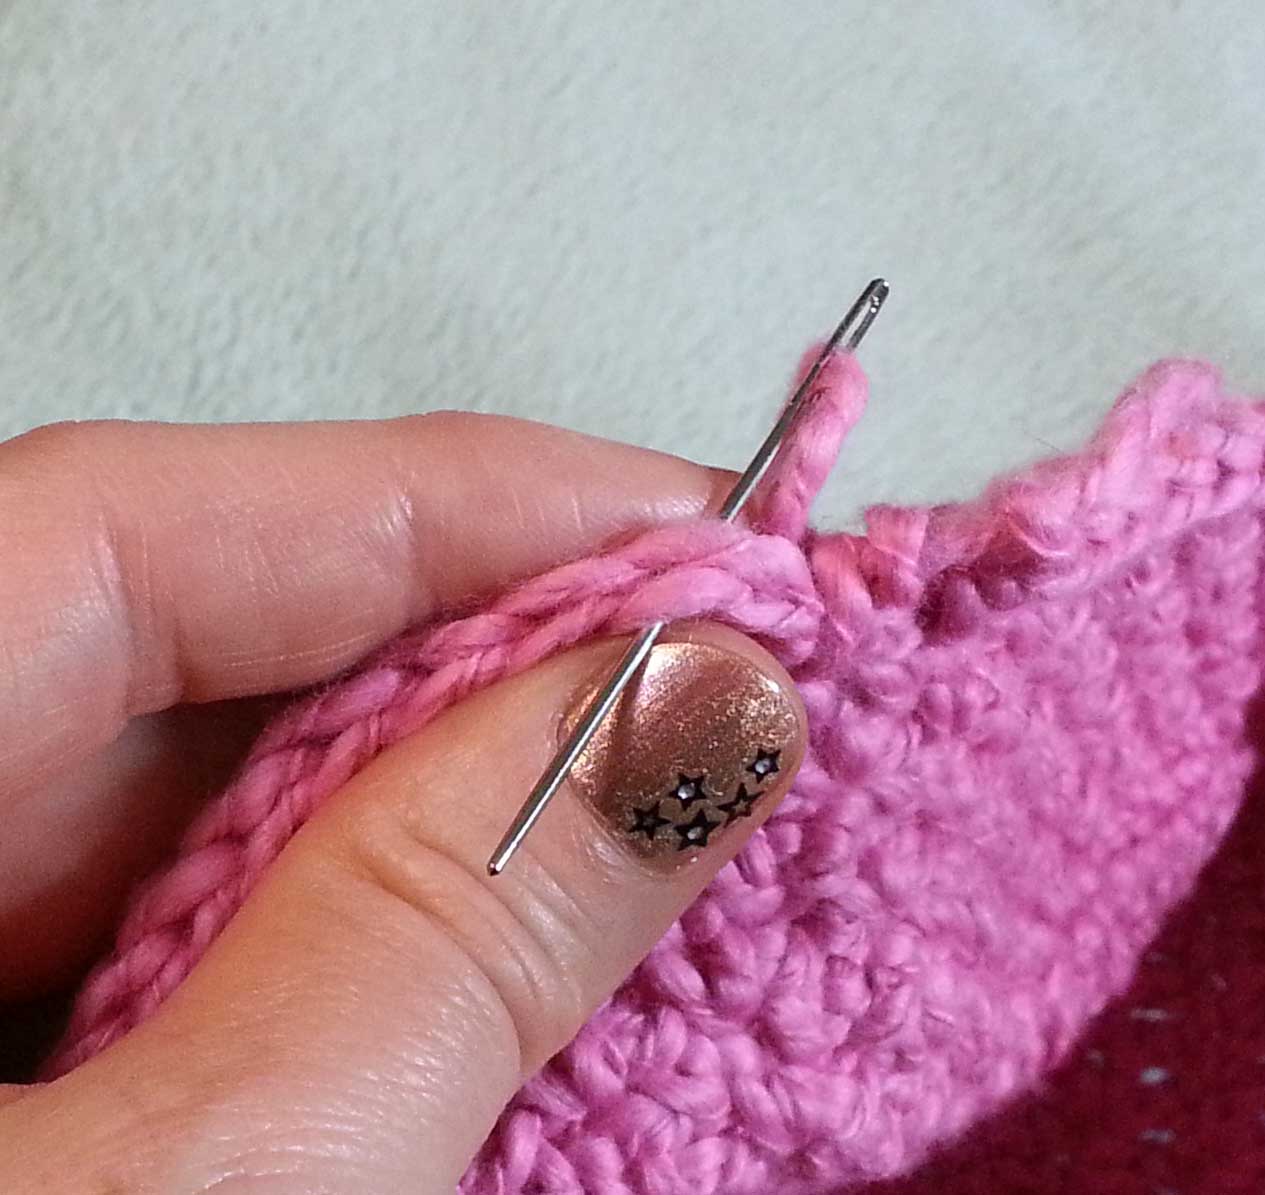
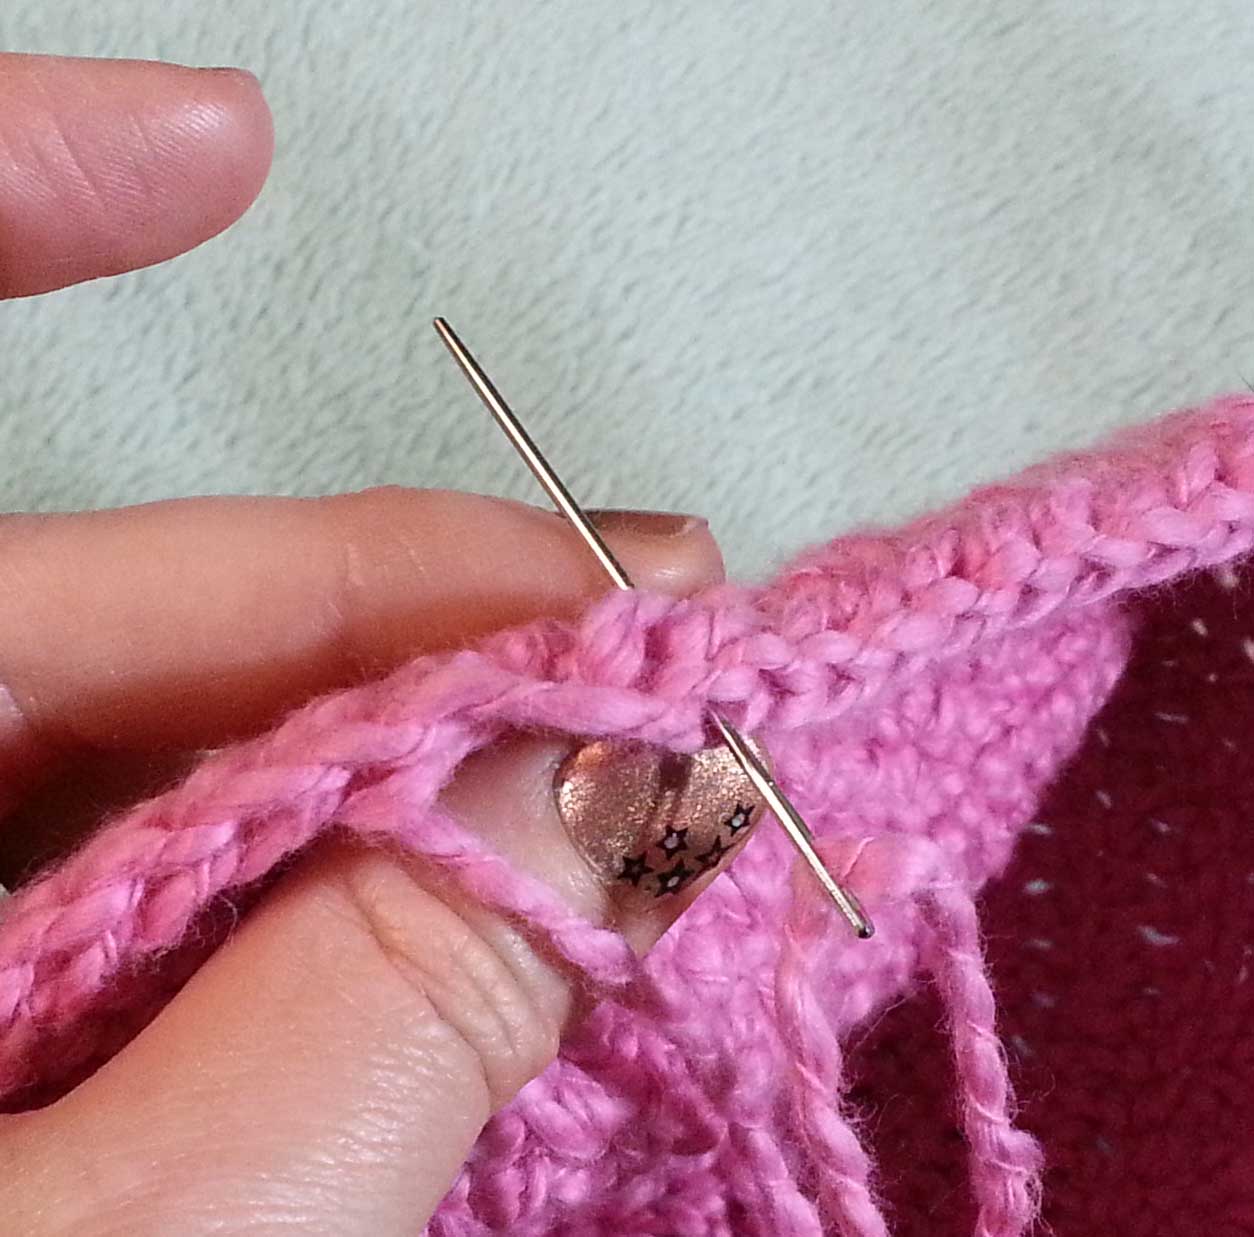
Start with an Adjustable slip knot (I use the adjustable slip knot so that the first chain can expand as I make Rnd 1), ch 5, sl st into 5th chain from hook to make a ring.

Rnd 1 Finished

Rnd 1: Ch 3, turn, (2 dc, ch 2, [3dc, ch 2] 3 times) into ring, sl st to 3rd ch of beginning ch-3. Pull gently on beginning tail to snug center opening.

Rnd 2 Finished_edited-1


Rnd 2: Ch 3, turn, (2 dc, ch 2, 3 dc) in next ch-2 sp, ch 1, [(3 dc, ch 2, 3 dc) in next ch-2 sp, ch 1] 3 times, sl st to 3rd ch of beginning ch-3.

Rnd 3 finished

Rnd 3: Ch 3, turn, 2 dc in next ch-1 sp, ch 1, [*(3 dc, ch 2, 3 dc) in next ch-2 sp, ch 1*, 3 dc in next ch-1 sp, ch 1] 3 times; Repeat from * to * once, sl st to 3rd ch of beginning ch-3.

Rnd 4 finished

Rnd 4: Ch 3, turn, 2 dc in next ch-1 sp, ch 1, [*3 dc in next ch-1 sp, ch 1*, repeat from * to * until reach corner ch-2 sp, (3 dc, ch 2, 3 dc) in corner ch-2 sp] 4 times, repeat from * to * until reach end of round, sl st to 3rd ch of beginning ch-3.

Rnd 5 finished_edited-1


Rnd 5: Ch 1, turn, [sc in each st and ch-1 sp til reach corner ch-2 sp, (sc, ch 2, sc) in corner ch-2 sp] 4 times, sc in each remaining st and ch-1 sp to end of round. Sl st to first sc of round and fasten off.

If you want to make your granny square larger, just repeat Rnd 4 until you reach the size you want, then work Rnd 5 to finish.

I’ll be working on more of these fun squares during our family road trips this summer. They are a great little project to carry along when traveling because they don’t take a lot of time or yarn and they don’t take a lot of concentration either. Once you get a pile of them finished you can join them together to make a blanket, a scarf, a bag or even a jacket.

When the Hat doesn’t Fit

One of my favorite things about crochet is how handy it is for fixing things. Whether it be making decorative motifs to cover stains or repairs in clothing or in this case making a hat fit better.

As many of my readers know, and can guess from my logo/banner, I really like the color – hot pink.  I am also extremely pale due to my Scottish, Irish and German ancestry. So I burn easily and am a big fan of sun screen and broad-brimmed sun hats.

Last summer when my family and I were traveling I found an awesome Hot Pink and Buff colored ribbon sun hat at a shop along our route. I love these types of hats because they can be rolled up and stuffed into a carryall until needed.  Unfortunately it turned out this one was actually a bit too tight in the crown, so I didn’t wear it much.

This past Easter weekend my family and I went to the Denver Zoo for a wonderful sunny afternoon adventure. As we headed out the door I grabbed sun hats for all of us (my boys are just as pale and easily sunburnt as their pasty parents). Not remembering the fit issues with the pink hat it ended up being the one I grabbed.

I made it work for me during the afternoon, but decided something would have to be done about this hat to make it more comfortable and usable. On the drive home that evening I gave the hat a very detailed scrutiny to determine how I could modify it. My initial thought was, remove the crown and use the brim with a crocheted crown.

This hat, and the other ribbon hats I have, are made by a spiraled ribbon that is seamed top edge to bottom edge with appropriate gathers for shaping. This particular hat also had a grosgrain ribbon sewn inside as a hat band. That was part of what was making the hat too tight.

Deconstructing the Hat 2

Deconstructing the Hat

So I started my modification with removing the hatband. Unfortunately that did not create enough ease for a comfortable fit. Next step was to unravel the stitching that held the ribbon together for the crown of the hat, and down into the brim just far enough that the brim (with an open crown) fit comfortably around my head.

Finished Brim

I then used the loose thread to re-stitch the ribbon and finish the end cleanly.

Crownless Hat

I used the thread I had pulled off to sew the ribbon into place and secure the loose end. I now had a lovely wide-brimmed crownless hat. I was a wee bit tempted to leave it this way, but I never like the way these types of hats look on me.

Cottontots Yarn from Stash

Next I went digging in my cotton yarn stash for some yarn to crochet a crown from. I was very happy when I discovered I had a nearly full ball of Bernat’s Cottontots yarn in the “Strawberry” color.

Now you might be wondering why I was obsessively determined to modify this particular hat (no comments from my friends that think obsession is my middle name). It’s not just that I like the look of the color, it’s that the color is very flattering.  As I said earlier I’m pale.  I’m about as pale as you can get without actually being an albino. But I’m not particularly fond of wearing makeup on my skin. Big makeup for me is mascara and lipstick, most of the time I’m wearing tinted lip balm and my naked, well-moisturized face.

But a hat with a predominantly pink brim sheds very flattering color on my face. When my clothing and accessories can boost my color without me doing any thing extra it is a win. One reason why I wear a lot of pink/peach/salmon/coral colors. They give me a punch of color without having to do more than get dressed or toss on a lovely scarf or hat.

Crocheting new Crown

To begin my crocheted crown I measured around the circumference of the crown opening on my new brim. That gave me the measurement I would need for the completed crown. I used my favorite hat stitch: half double crochet, and worked a flat circle until it was the desired diameter (all these numbers are further explained in my post “Pi Recipe”). Once I got to my target diameter I worked evenly in a simple pattern stitch joining each round and turning to keep the pattern.

Pull the tail up thru the last st and use a needle to draw the end thru the top of the st joining to.
Use the needle to draw the tail back down thru the ending st and weave into the wrong side of the fabric.

After I reached the crown depth I wanted I fastened off with an eight inch tail and used an invisible join to finish, this keeps the join from being bulky or noticeable once the crown is attached to the brim.

Invisible Join is Invisible

My crown was now ready to be attached to my hat brim. I gathered up my sewing supplies; thread, needle, and straight pins.

Openings marked for even joining.

I wanted to be sure that the crown and brim were matched well. I put a stitch marker where my join was on the crown then folded the crown opening and flattened it in half to find the point directly across from the join and marked it. I then folded the crown opening so the 2 markers met and used the same method to mark the points half way between the previous points. I continued this way until I had marked the crowning opening with 8 markers. I did the same using sewing pins for the opening on the brim.

Finished Hat

After I pinned the crown to the brim it was a simple matter to sew them together using  thread that matched my yarn. Now I have a beautiful pink hat that fits comfortably and can be rolled up into my backpack or carryall when I am out and about.

So how have you used crochet to make something you already have be more usable for you?

Another Awesome TNNA Show

As some of you know, the first weekend of May (2-5th) was the TNNA Summer Trade Show in Indianapolis, IN. This is the show where all sorts of needleart craft vendors have booths that show their wonderful merchandise for the coming Fall/Winter season.

There is yarn, and tools, and yarn, and accessories, and yarn, and books, and yarn. Yeah, you can tell what I was paying the most attention to.

Most of the folks attending the show, besides the many vendors, are shop owners looking for the products they will be selling in their stores. So there really isn’t much to purchase there. It’s more a matter of talking to the various vendors about how a freelance crochet designer/teacher like myself can utilize their products. The main thing being designing with some of those lovely yarns.

Jill and Tabs on the inbound flight

I took a flight out of Denver on Friday and it must have been the TNNA flight. My friends and fellow designers Jill Wright and Tabetha Hendricks were seated across the aisle from me and one of my seat mates was a yarn company sales rep. The TNNA show is more of a working show, everyone is in and out of meetings so it is sometimes just a quick hug with friends. It was fun to have some time to visit with Jill and Tabs on the flight.

Seattle Skyline Chocolate Bar Karen brought.

I was rooming at the Hyatt with Karen Whooley.  We had a great time catching up between meetings and inspiring each other. We also each brought chocolate to share. I brought my usual assortment of Chocolove bars, with extra “Cherries & Almonds in Dark Chocolate” ones to give to Mary Beth and Karen.  Karen brought a wonderful sculpted bar from Dilettante Chocolates. They are a family-owned company from Seattle that has children in school with Karen’s.

Every time I go to a TNNA show I am always a bit overwhelmed. There is so much to see and everywhere you look there is color and exciting yarn. Sometimes I think I get a bit lightheaded from all the yarn fumes.  I always go with an eye toward a particular goal for my business. This time it was to reach out to more of yarn companies there and see about using their products in my upcoming indie published designs.

I am particularly drawn to the hand-dyed yarns. The colors are always so wonderful and get my brain ticking over.  I also spoke to many of the yarn companies about US made yarns. Some companies are really working on having products that are all domestic, sheep-to-skein production of yarn. Something I am strongly in favor of as it creates jobs in our local economies. As well as being better for the environment since the yarn isn’t being shipped across the planet to get to it’s end users.

Pile of Yarn

Some of the yarn companies were kind enough to provide me with a skein or two of their products to swatch with for my designs. Fortunately I left room in my suitcase to bring those home with me. Keep a watch here on the blog as I’ll be letting everyone know when I have patterns coming out using these yarns.

In the tools department I was very excited to see that Clover has steel hooks now in their Amour line of crochet hooks. For those of you unfamiliar with the term “Steel hook” it is usually referring to the tiny hooks used for crocheting with very fine thread. Those hooks can be the culprit for many hand injuries for crocheters, because they are tiny and steel is a very cold conductive metal.

Clover Amour Steel hook

Clover now has 7 different sizes of steel hooks, ranging from Size 0/1.75mm to Size 12/.6mm. I got a Size 8/.9mm to test drive. So I’ll be writing more about these wonderful new hooks very soon.

Thera-glovesSupport Glove

One of the companies that I was excited to see at the show was American Orthopedic Appliance Group with their many styles of “Thera-Gloves”. They were kind enough to share a sample pair of their “Designer Series” gloves with me that I will be doing a more in-depth review of later this summer. They have a variety of styles of therapeutic support gloves that you can see at their website: http://www.thera-glove.com.

Speaking of hands, I’m always looking for lotions to use on my hands. Colorado is a dry climate and my hands tend to really show it.  Back in January I made a trip to Ft. Collins with one of my friends to visit the LambSpun Yarn Shop. They had nifty “lotion bars”.

They looked like soap and it was suggested that you put them in a soap dish as a way to have them available to use. I really like the formulation, but there is no way putting the bar on a soap dish will work at my house. There are boys, dogs, and a cat. Too many opportunities for something undesirable to happen to the lotion bar. Not to mention I am on the go a lot and want to be able to take my lotion with me.

Milk and Honey lotion bar

It was great to find the Milk & Honey products at the show. Davin makes these lovely lotion bars and packages them in a tin that can fit very nicely in my project bag. She had the lotion bars in 3 different scents and I loved how they are molded in a shape. The little tin in the photo is some of her “Anywhere Balm”  that is lavender/mint. This is a great lip balm and is also now living in my project bag.

By the end of Monday at the show both Karen and I were exhausted. Fortunately our flight wasn’t until 8 p.m. that evening. We went back to the hotel and had a late lunch at the restaurant, which revived us a little. Then it was time to retrieve our bags and take a taxi to the airport. As we were doing that we both got messages that our flight was delayed. We were flying out of Indianapolis on the same flight, but Karen would have to switch to another plane in Denver to complete her journey home to Seattle.

Tired but Happy. Selfie of Us at Airport.

We headed off to the airport and decided to see what the airline folks could do about Karen’s flight. She ended up having to take a different route home. So we said good-bye at the airport when it was time for her flight. As it was, we both got to our respective homes very late that night.

The next morning I slept in late and then spent the rest of  the day unpacking from the trip and making lots of notes about my meetings from TNNA. A week later I am still feeling inspired and excited about the yarns and products I saw there.  I’ll let you know more as I test out some products and swatch with the yarns. Looks like I’m going to be even busier this year.


Accidents Will Happen

This past week has gone by in a flash, I’ve been playing catch-up with work that was on hold while I was gone for the TNNA Summer Trade Show in Indianapolis, IN.  I knew I was on the schedule for jury duty the following week, so was trying to get as much done as possible before being busy with that.

View from my Front Door May 12, 2014

Of course, Mother Nature, decided to throw her own particular twist into things and we got a serious amount of snow that fell for the past 24+ hours. I woke up this morning to over a foot of snow.  We had just gotten the snow tires off the car last week (which makes me superstitious about doing that too early in the season).

Usually when storms like this come thru I hunker down and don’t budge off the mountain until the warm weather returns to melt it all off the roads. Generally that only takes a day or so. With needing to report for jury duty, I did not have that option this morning. So I bravely ventured out to head down the mountain to the Boulder County Courthouse. Unfortunately it didn’t take long to realize this was not going to go well.

Less than 2 miles from my house I slid downhill sideways and into the guard rail.  There is nothing more frightening than the vehicle you think you control suddenly going in an unwanted direction, particularly when that unwanted direction is toward a fairly steep drop off. Guard rails look incredibly flimsy in that moment. Very glad the guard rail was there and that no one was coming up the hill from the opposite direction before my car was stopped by the guard rail.

I ended up rather abruptly coming to rest parallel to the guard rail, concluding the journey with my forehead hitting the driver’s side window. Sat there a bit dazed for a moment, then decided to see if I could pull away from the edge of the road. I was stuck pretty firmly in the snow bank.

A kind soul coming up the hill offered to give me a tow out. He said he would get turned around and come back so he was facing the right way to tow me. Minutes ticked by and he didn’t return. So I put into practice my hours of driving experience and managed to rock my car out and back onto the roadway. I drove just far enough to safely get out and inspect the damage to the driver’s side wheel well. Not horrible but not great either.

I decided I would prefer to pay a fine for missing jury duty, rather than attempt to drive the remaining 20+ miles to town on roads that slick. So I headed very slowly and carefully back up the hill to my home. On the way I saw my would-be-rescuer. He was stuck in the ditch and another neighbor was getting ready to tow him out. We had a chuckle and I headed the rest of the way home, where I got stuck at the bottom of my driveway.

And that is why I wear snow-boots in May. Trudged up the hill to the house and told my boys they weren’t going to school today. Called the school to let them know the boys wouldn’t be there and then sent an email to the Jury Commissioner about my accident. So I’m now rescheduled for Jury Duty in July, when I should be completely safe from icy snow on the roadways.

Tomorrow I’ll share some of my TNNA adventures and show you the goodies I brought home with me.