Part 1 of my “Reading your Stitches” was posted back in June this summer. Originally I was going to show you the Half Double Crochet stitch for Part 2, but I realized I needed to go a bit more basic first. Instead, I’m showing you some guidelines for working into chain foundations.
Even after over 45+ years of crocheting I find that the most aggravating and tedious part of a crochet project is the beginning. My favorite part is after the first rows or rounds are established, then I can just crochet peacefully along. Even a complex stitch pattern is preferable to the start. This is the reason that I tend to design the majority of my projects with small starts that have increases allowing the work to grow from there. Because I want to get to the “good stuff” as quickly as possible.
All that said, knowing how to work into traditional chain foundations is a good skill to have in your crochet tool box.
The typical start for a crochet project is to chain a length and then work back into the chain. Of course this often leads to the question from beginners about how to work into the chain. Which loop do you work under and how many of them?
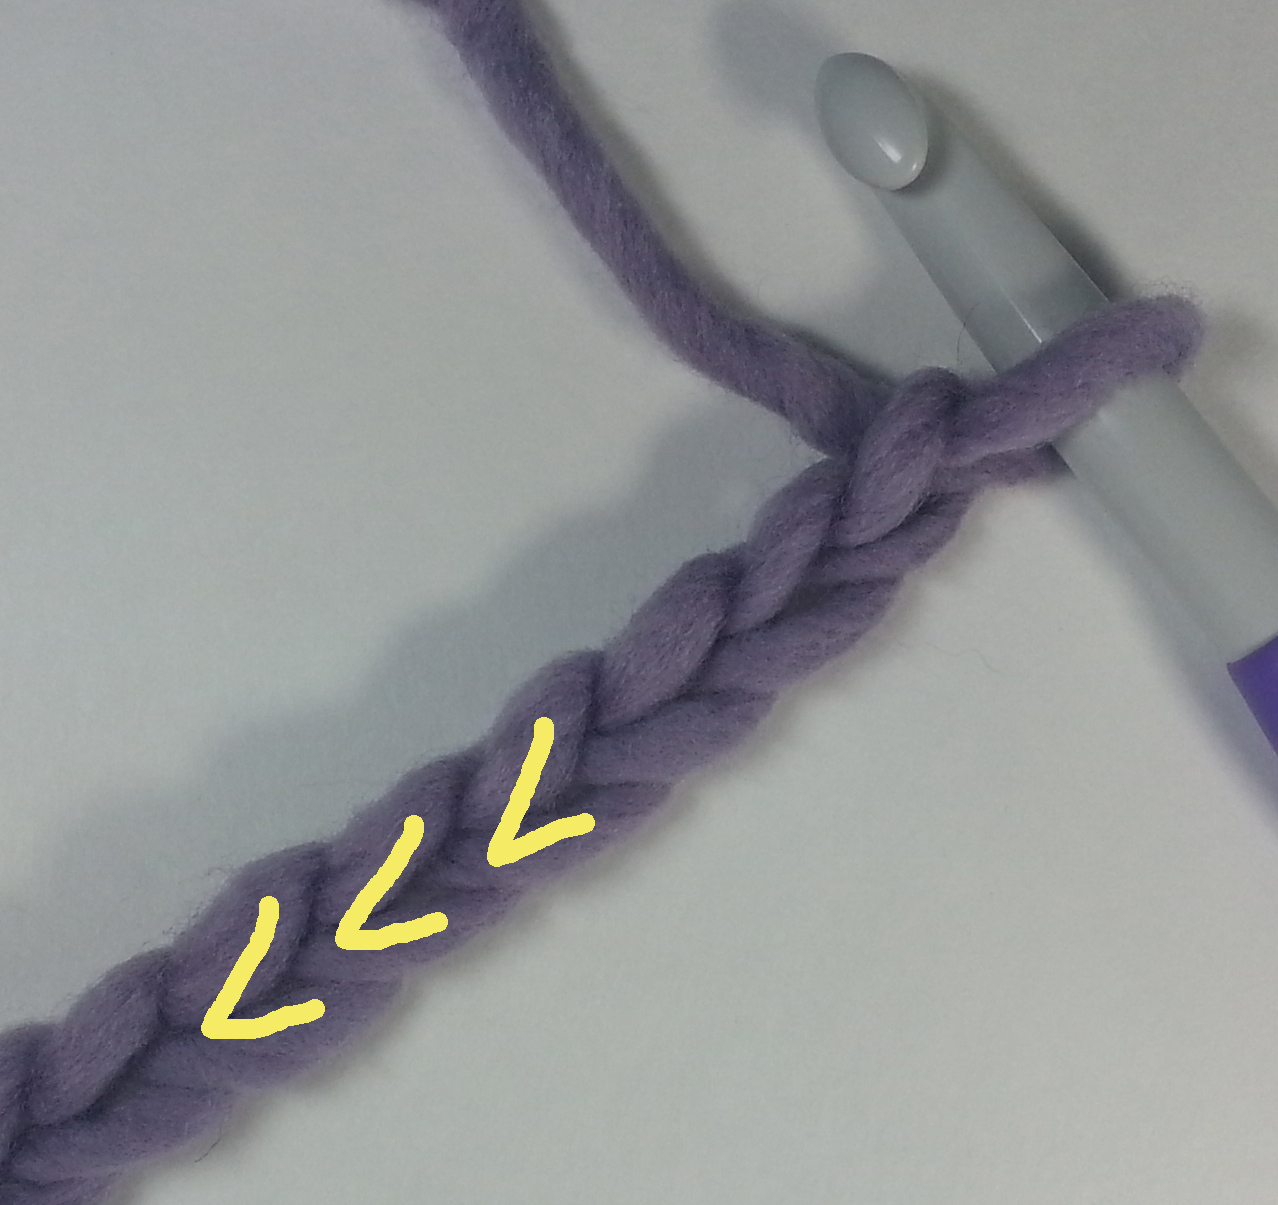
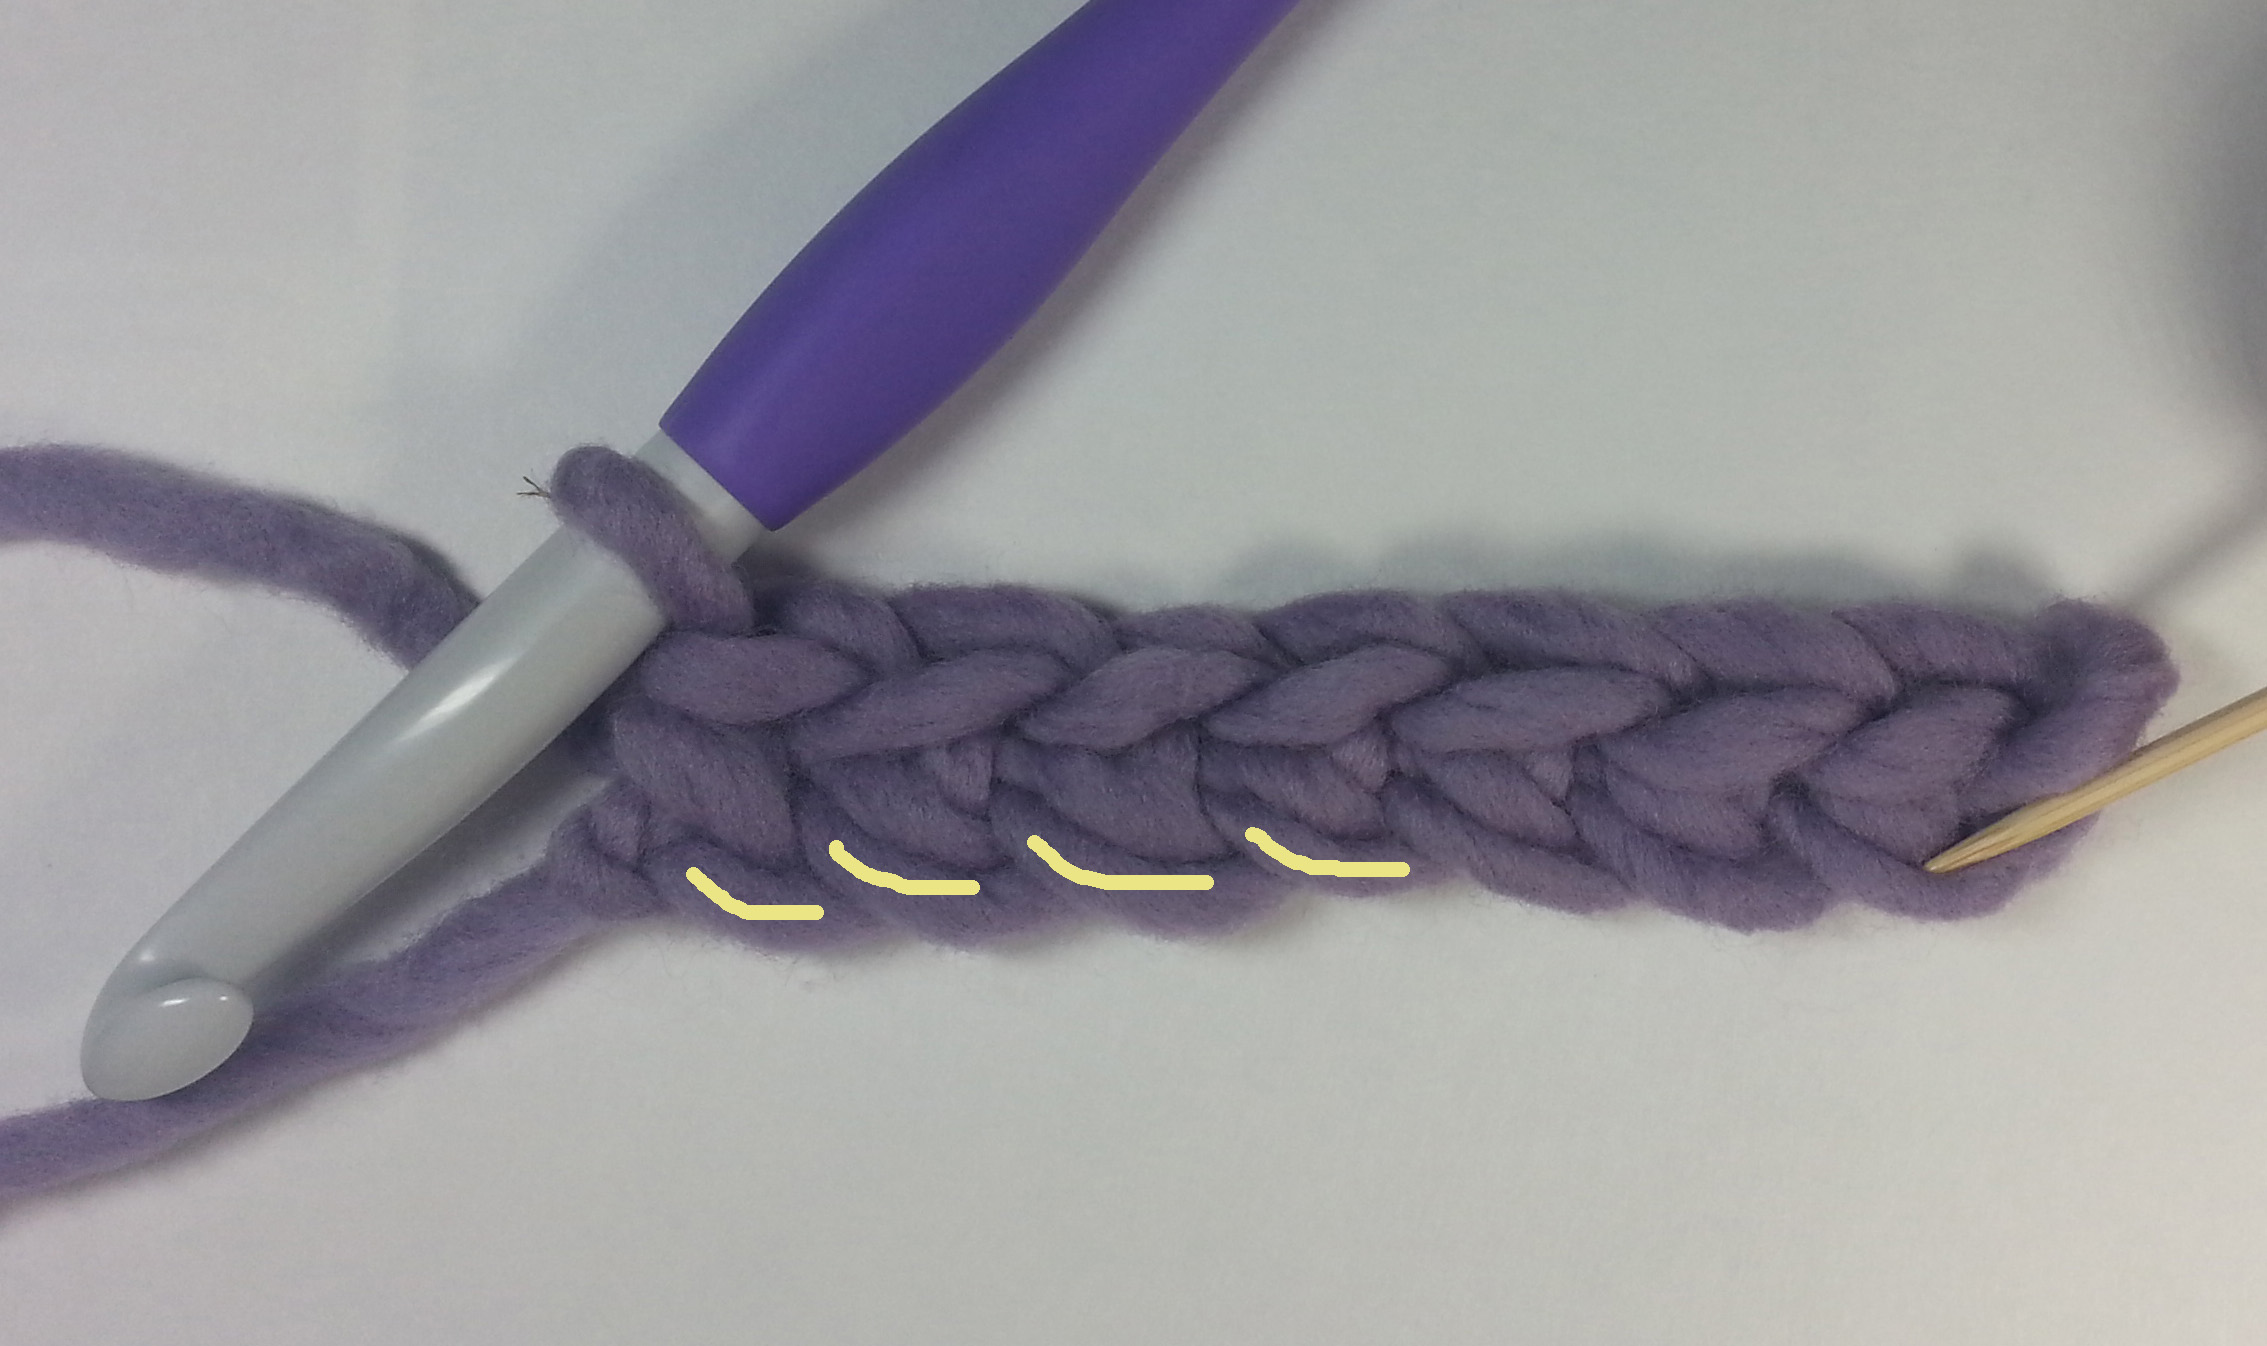
First of all, let’s look at the anatomy of a chain. The tops of the stitches are the V that we saw with the top of our single crochet stitches in Part 1.
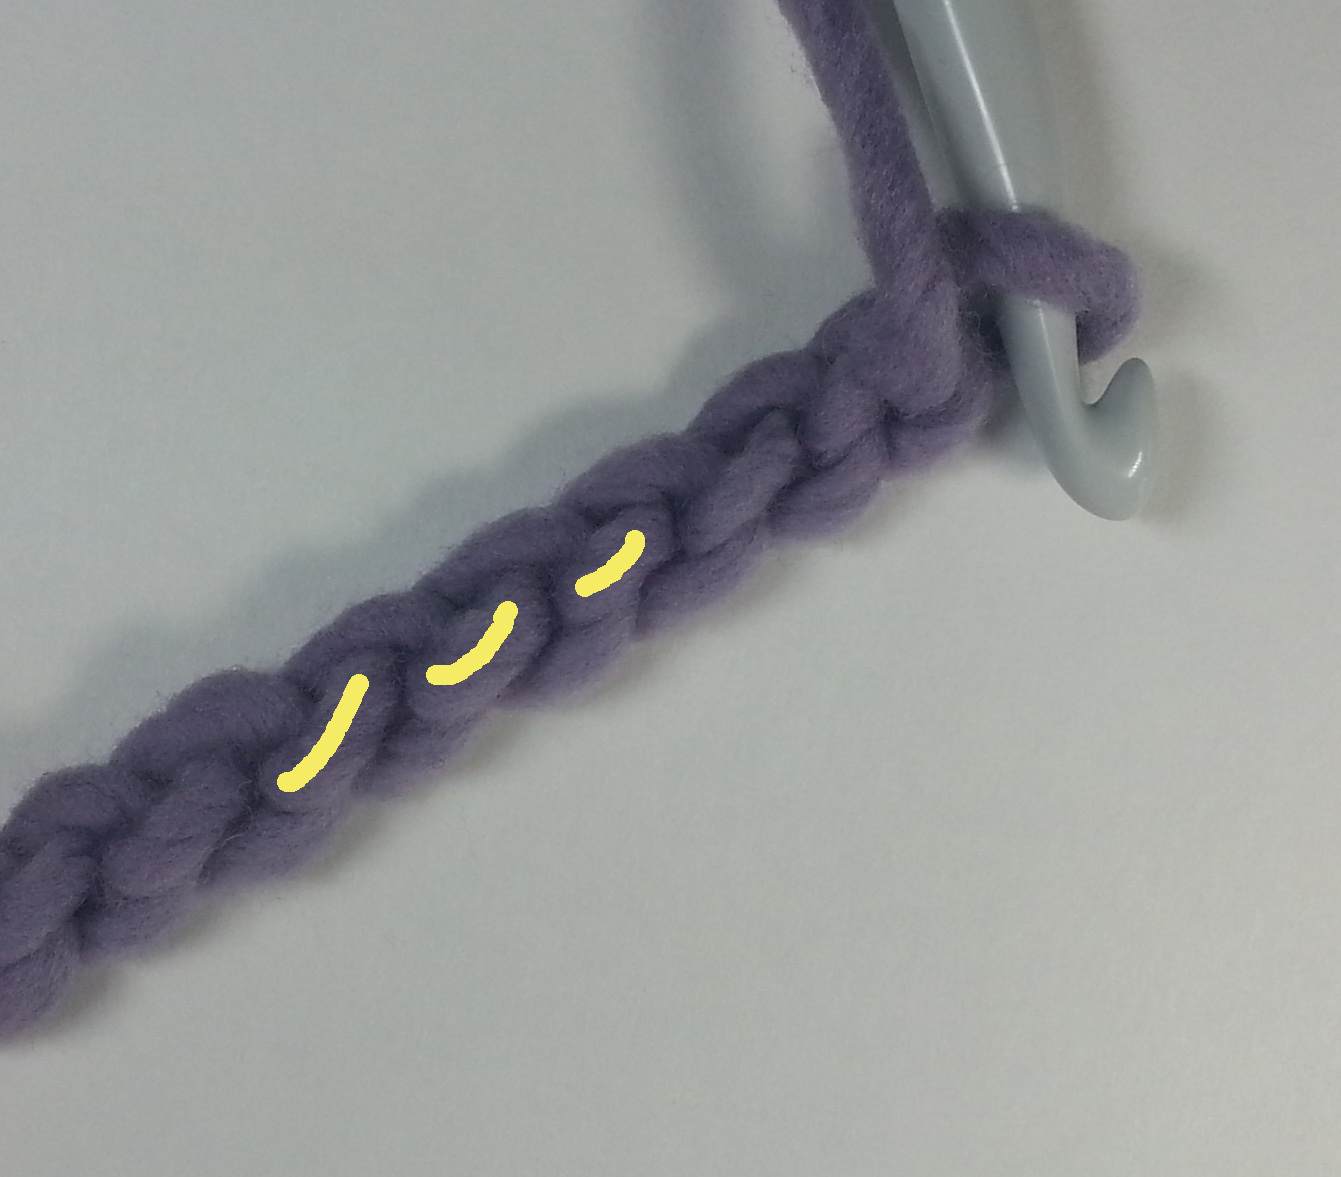
The chain stitch doesn’t have a “post” or “legs”. There is simply the back “bar” or “bump”. You will see either term used in patterns. It will depend on the publication what terminology they chose.
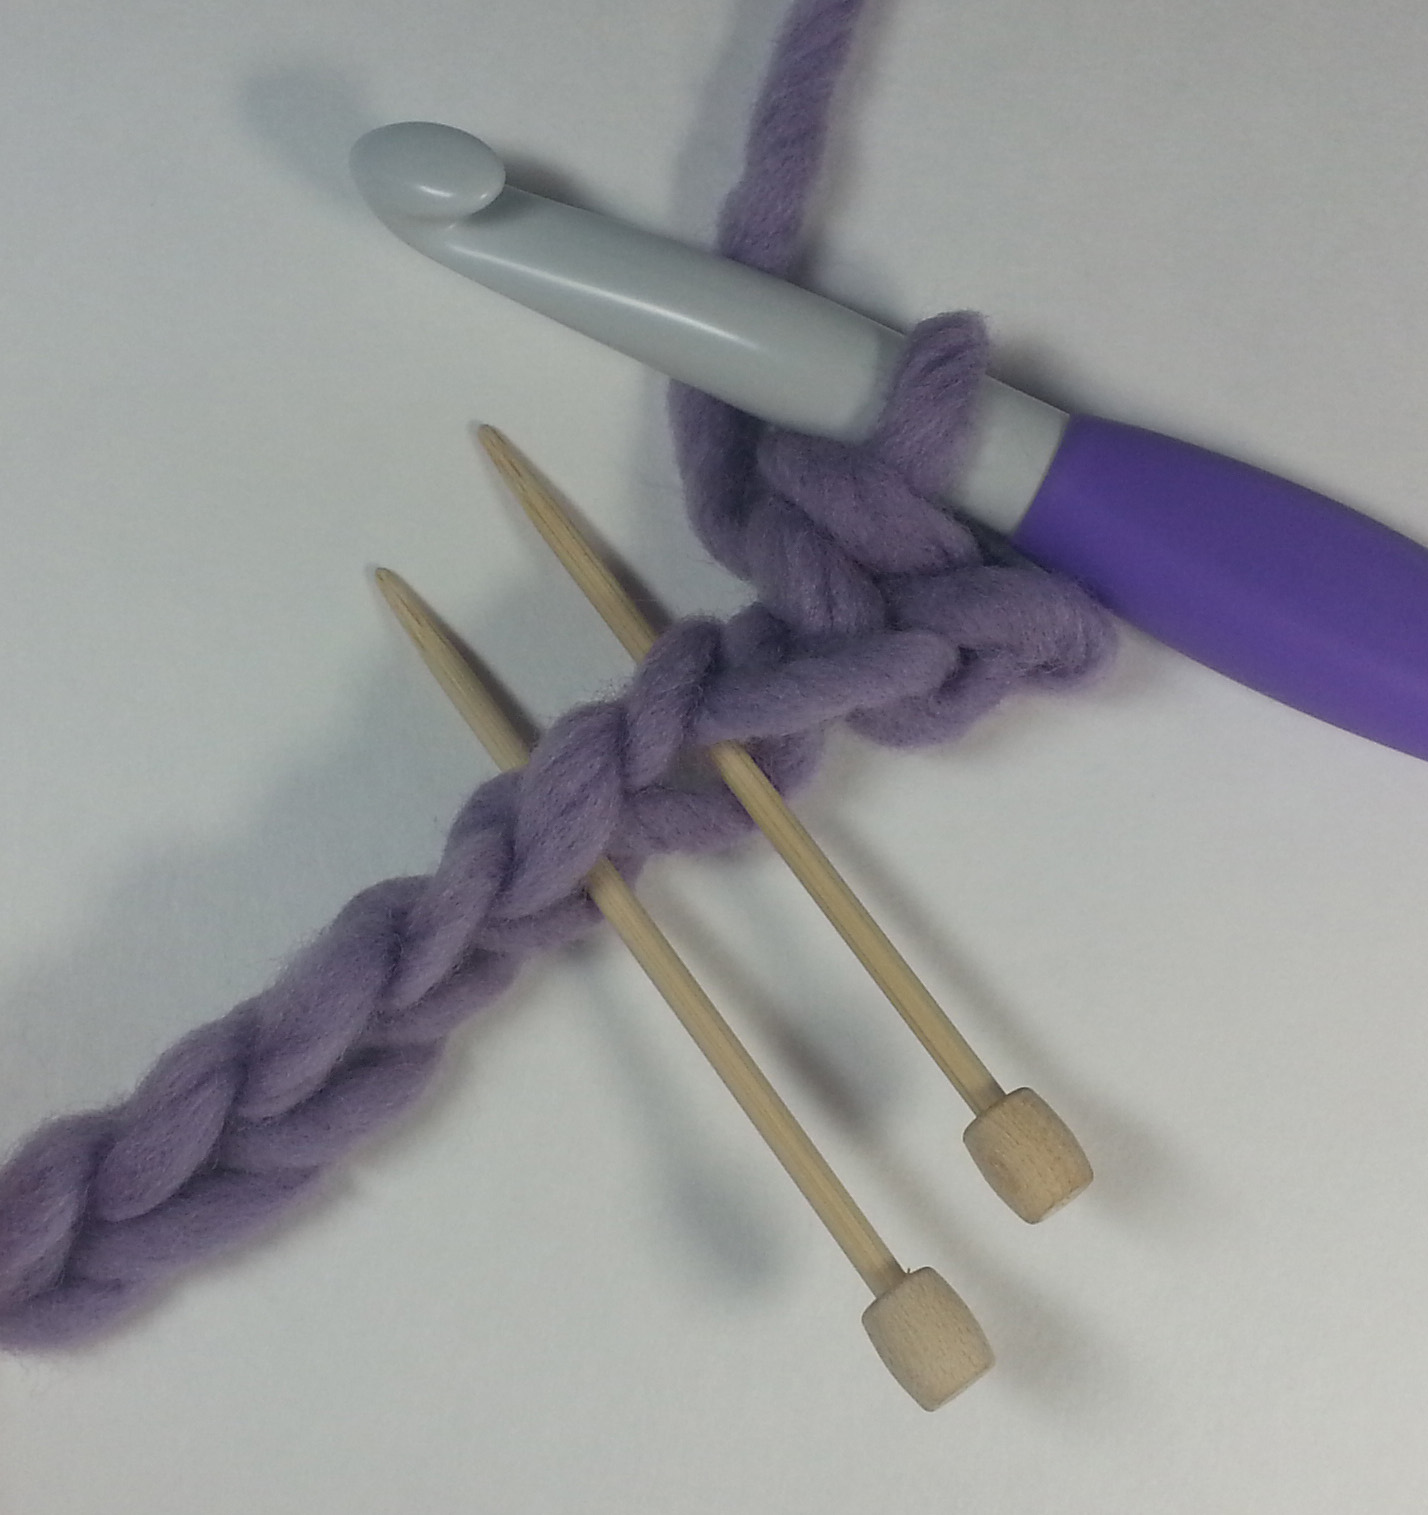
If you find that your chain stitches seem to always be much tighter than the rest of your crochet fabric it can help to use a hook one size larger for the foundation chain, then switch down to the next hook size when you are ready to begin your first row into the chains.


If a pattern doesn’t specify which loop of the chain to use, I tend to use the back bar. I like the way the finished foundation looks as it echoes the top of the stitches on the last row of the project. When putting an edging all the way around the finished project I find the base of this foundation easier and neater looking to work into.
One of the first ways I learned to work into a chain was by going into the center of the V on the top of the chain and catching the back bar and top leg of the V in the stitch being made. This is the more traditional way of working into a foundation chain.
This leaves a single strand at the base of the stitches in your first row. This can work well if you are working pieces of a garment that are going to be seamed together along the base of the foundation rows.

The first row worked into the chain using the traditional method tends to have quite a bit of twist to it before you work additional rows.
It also is more stable when you are starting a stitch pattern that requires multiple stitches worked into some of the chain stitches of your foundation. For example…shell stitches.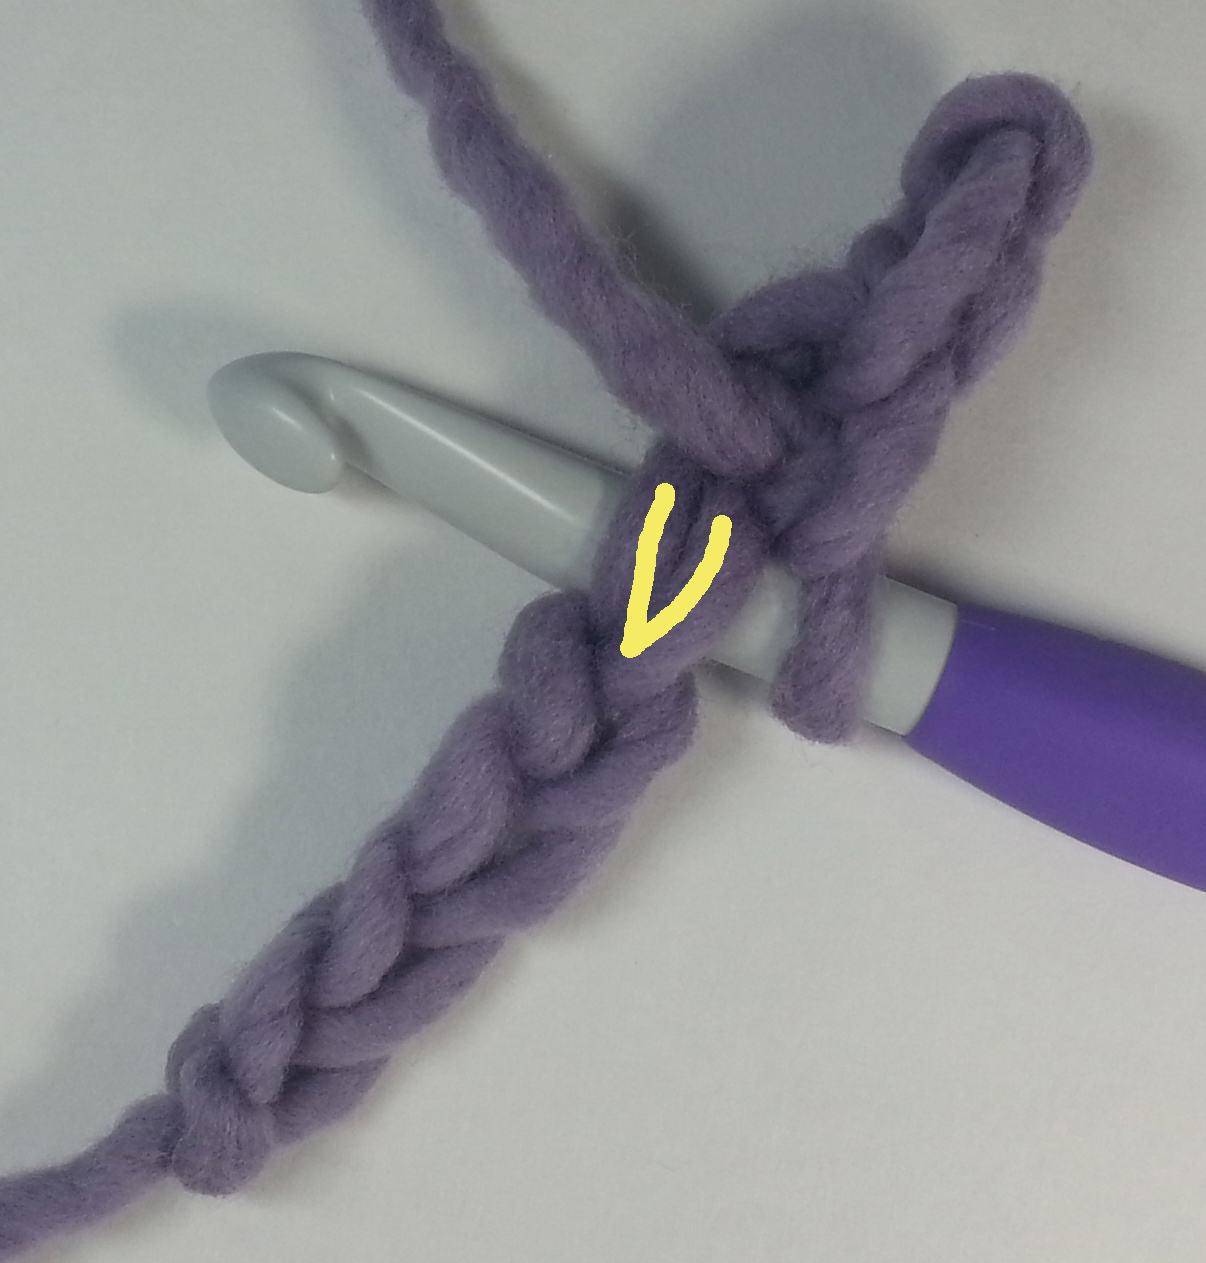
Another option is to work under both legs of the V on each chain st. I find this to be the most difficult way to work into the chain. It does give you a very stable foundation and the single strand at the base is free for seaming pieces together along the foundation. Working into a chain using this method is easier when your foundation chain is loose enough.
The finished row will again have single strands at it’s base, but they will be a bit more centered. This row will have a lot of twist to it like the traditional method of working into a chain.
Now that you have the chain foundation out of the way, we are going to take a closer look at the single, half double and double crochet stitches in Part 3.

Such valuable information and so often overlooked in instructions! When I picked up crochet again after many years, I absolutely mis-read my stitches. Inexplicably, I kept treating the working loop (i.e., the one left on the hook after completing a stitch) as the top of the stitch I just made. No wonder my stitch counts were always off and my work “mysteriously” grew! And I fought that chain stitch V for a long time before learning other ways to work into a chain. I’ve no doubt that I’ll learn more from this series & that you’ve saved many some frustration. Thanks!!
Sometimes it really is the “little” things that save our sanity. Sorry you had to figure things out by trial and error, but I bet you know your stitches very well now. Hopefully you’ll find something helpful in this series and if nothing else, it will be handy when you are teaching someone else to crochet.