Most of my reader’s are experienced crocheters, but today I wanted to address the needs of those of you that want to learn to crochet. These instructions assume that you already know how to make a slip knot and have placed your yarn on the hook shaft. If you need help with making a slip knot click here to see a post that will help you.
One of the things I like to emphasize when I am teaching new crocheters, is holding your yarn and hook so that your hands are comfortable. After all you are starting on a new crafting adventure and you don’t want it to end prematurely due to injury.
Crochet is a craft that utilizes both hands. For most folks it is easier to hold the hook with your dominant hand and the yarn is held in your non-dominant hand. The majority of crochet project samples you will see in magazines and on yarn company sites show projects worked with the hook in the right-hand. When the hook is held in the left-hand the stitches will look slightly different because they will slant in the opposite direction from stitches made with the hook in the right-hand.
Some left-handed crocheters hold their hook in the right-hand and the yarn in the left-hand. They use a crochet technique where they manipulate the yarn more than the hook when making stitches. If you are left-handed you can experiment to see which technique works best for you.
Anatomy of your Hook
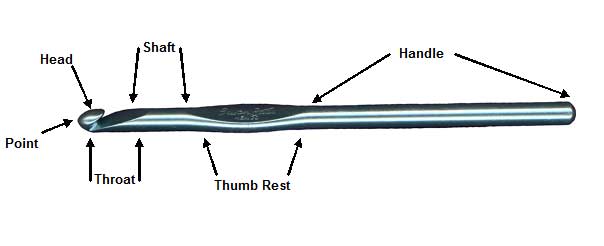
Holding the Hook
There are 2 common ways to hold your crochet hook: Knife Hold, sometimes called the “toothbrush hold” and Pencil Hold. Either is fine depending on which is more comfortable to you. You need to grasp the hook so that the shaft, throat and head of the hook are un-obstructed. Most important is not to hold the hook too tightly. I generally hold my hook using a Knife Hold.
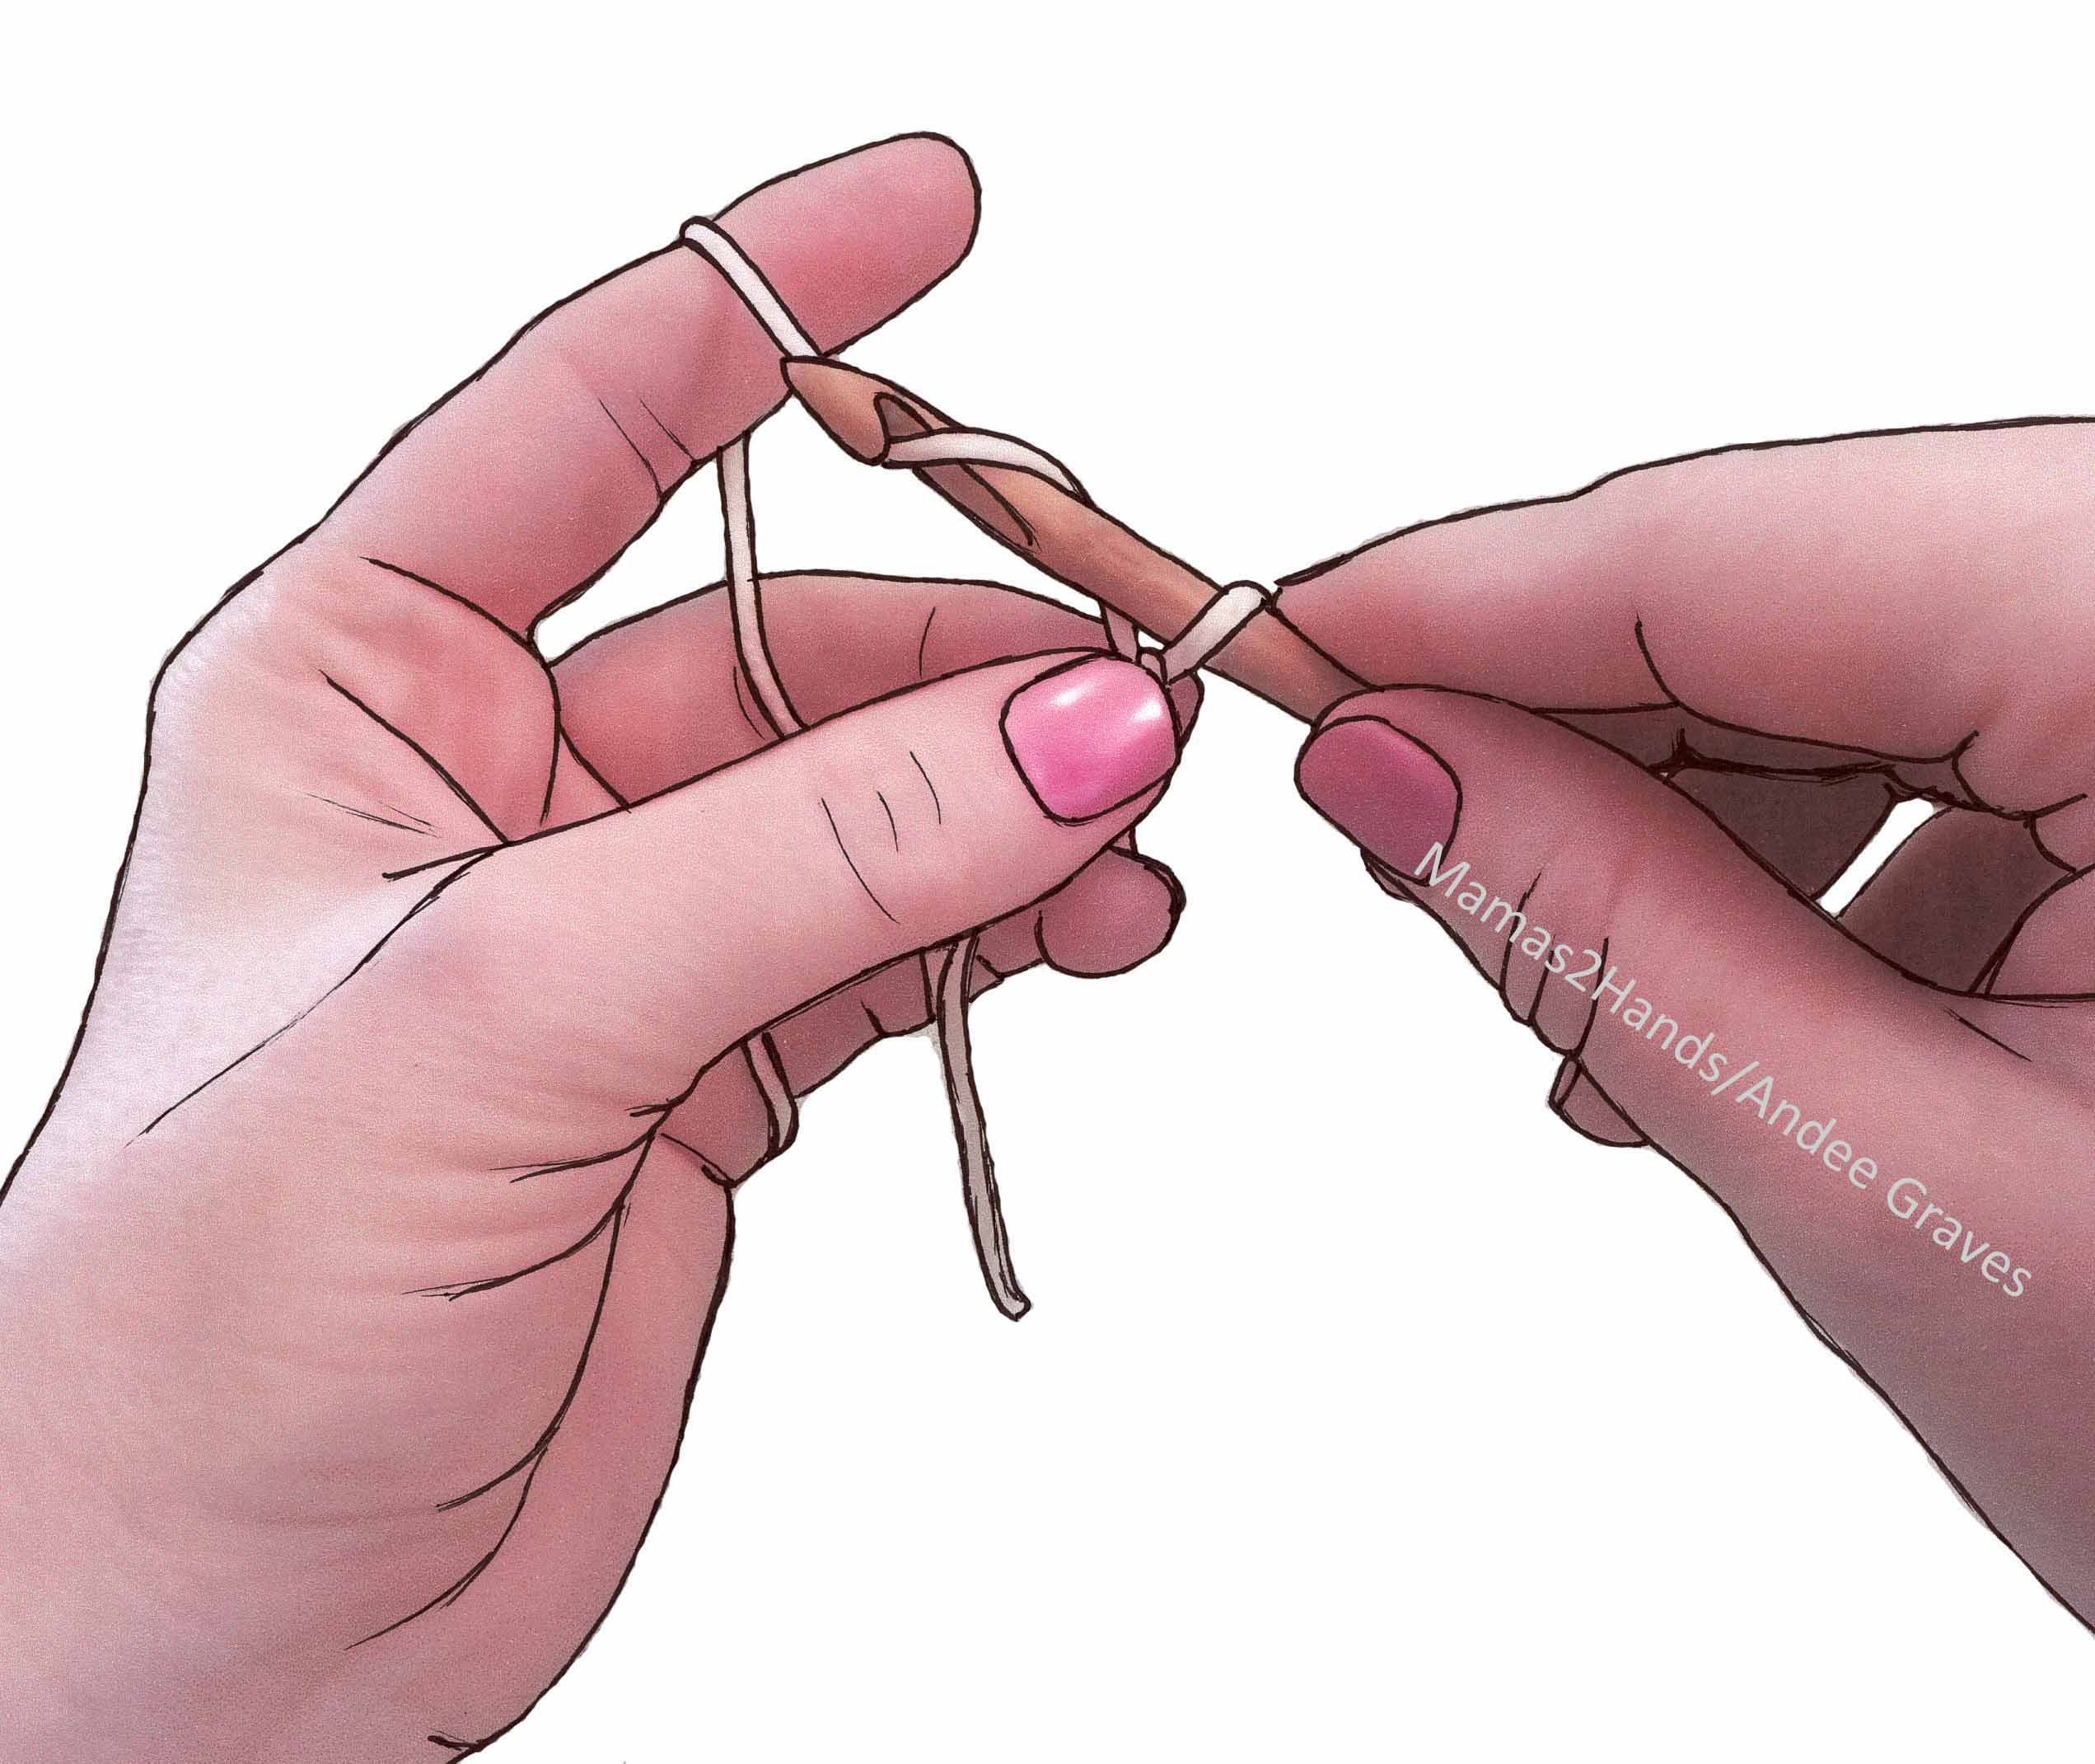
Tensioning the Yarn

“Tensioning the yarn” is just another way to say “holding the yarn”. You want to hold the yarn in such a way that it isn’t too tight or loose. Your “tension” makes a big difference in the uniformity of your stitches when crocheting. The wrap of yarn shown in the above photo is my favorite method. I have very dry smooth skin, for folks with less dry skin you might want to eliminate the extra wrap about the pinky.

Making a Chain Stitch
Step One

Once you have chosen your hook hold and have the yarn tensioned use your non-dominant hand to grasp the base of the loop on your hook (called the “working loop”) with your thumb and middle finger. This creates a strand of working yarn for your hook to move around freely.

Wrapping the Yarn
Step Two
You want the yarn to wrap around the shaft of your hook from back to front. So scoop the head of your hook in front of the working yarn strand and then behind it. This is called a “yarn-over” in crochet. Catch the yarn strand with the throat of your hook and let your forefinger move toward the working loop as you pull the yarn thru it.

You have now pulled up a loop and you need to slide that loop to the shaft of your hook and grasp the base of that new loop with your thumb and middle finger. Let the working yarn slide through your tensioning hand as you return your fore-finger to the original position it was in.
Continue to repeat steps 1 & 2 until you have the number of chain stitches or length of chain that you want. You can use pretty yarns to create lengths of chain to use as ties for packages or other decorative purposes. You can also add beads to your yarn and make beaded necklaces using the simple chain stitch.
Click here to visit my blog post about working beaded chain stitches and for more details on getting started crocheting.
