Another Hat for Thing 2 – part 2

Last night I had crocheted on the new hat for Thing 2 for 10 Rounds. I used the same increase formula I used in my “Little Bitty Noggin Cap” pattern here on the blog, with 8 increases each round.

working-1st-st-andee-graves-m2h-designs

I worked the increase by making the first stitch like a normal stitch, inserting my hook under both strands at the top of the stitch.

2nd-st-bk-loop-andee-graves-m2h-designs

For the second stitch of the increase I work into the back loop of the same stitch. This creates an interesting texture on the crown of the hat and decreases the size of the hole made for the increase.

finished-increase-andee-graves-m2h-designs

The finished increase looks like this. If you look at the hole under the first stitch you will see that it is similar to the other stitches. The hole you see under the second stitch is obscured once the next regular stitch is worked.

I had measured Thing 2’s head circumference (22″) and asked him how he wanted his hat to fit. My husband prefers his hats to be fairly loose, so I actually add ease to the size of them. Thing 2 wanted his hat to be a bit snug, so I calculated that I would want 21″ for the finished circumference, negative ease of 1 inch. That meant a target measurement of 6.69″ for the diameter of the crown before I started working evenly.

Unfortunately, though the math works out, the stitches don’t always cooperate. The expansion of the diameter can be affected by the height of the stitches being used in the hat. Once I had reached 10 rounds for the crown I knew that another full round of increases would make the hat too large. But there is a simple work around for that.

4-increase-points-andee-graves-m2h-designs

In Round 11 I only worked 4 increase points, instead of 8. I used this same method of limited increases in my Simple DC Hat pattern as well. At the end of Round 11 I had 84 stitches around the circumference. Knowing my number of stitches is a great way of checking my target measurement too. I knew that I had 4 stitches per inch, so 84 stitches = 21 inches.

Now I’ve got a lot of rounds of working evenly (without increasing or decreasing) before I’m ready to create a ribbed brim.


Another Hat for Thing 2

One of my crochet traditions is making hats for my family. A couple of years ago I realized that my husband and sons all considered hats for Christmas part of our holiday traditions. This year I made a hat for my husband for Christmas using a cake of Premier Yarns’ “Sweet Roll”. But I didn’t make hats for the boys. I had made a hat for Thing 1 at the start of the school year that he was still happy with and Thing 2 had his hat from the previous Christmas that he liked.

The other day Thing 2 asked me if I had seen his hat. We looked all over the house and even checked in the cars, but it was nowhere to be found. He checked in the Lost & Found at school that day, still no hat. We had to accept that his hat was gone.

first-5-rnds-andee-graves-m2h-designs

I decided to start a new hat for him as part of my NatCroMo celebration since making something for someone else is an important part of crocheting love for me. The original hat had been worked in some discontinued yarn “Lion Wool” that I had in blues, teals and navy. I didn’t have more of that color, but I did have this colorway that I thought he would like. I took the photo above while waiting for an appointment today. The lighting was indirect natural sunlight and the colors on my monitor are showing a bit warmer than the actual colors of the yarn.

10rnds-adjusted-andee-graves-m2h-designs

By this evening I had finished 10 rounds and will be starting the sides of the hat tomorrow. I took this photo using my daylight fluorescent lamps and played with the Pro settings on my smart phone camera to adjust the white balance and the exposure. The color and detail are good, but now they are a bit cooler than the actual colors.

I’ll experiment more tomorrow to see if I can get a better color match. At least the hat is coming along nicely and Thing 2 has approved the colors.

New Camera – New Problems

My poor little YouTube Channel is feeling quite neglected lately. Between the Christmas trips and then the death of my old Samsung Note 2 smartphone my productive time has been seriously compromised.

software-problm

I was working on a project this last weekend uploading the video footage I had shot with my new Smartphone. Unfortunately, though the footage was oriented correctly on my computer screen to review, the clips were upside down when I imported them into my video editing software. That software is a bit older and doesn’t allow for rotating the clips so I may be investing in a software update. That or re-filming the footage to see if I can correct the orientation problem.

The good news is, once I get all this new-to-me technology figured out and working properly, I will be producing more and better quality videos for all my wonderful followers.

my-canon-t6-andee-graves-m2h-designs

This is my new camera that I purchased in February. In a way this camera was partially a Christmas gift. My in-laws knew I was needing a better camera for my work, so they and my aunt gave me monetary gifts to help pay for it. As a micro-business I have to really watch every penny, and I had been saving up to purchase a good camera for the past year. Having my Note 2 bite the dust in January made things a bit of a stretch, but with the help of the Christmas gifts I managed to get this camera and it’s kit.

Some of the accessories that came in the kit are a mystery to me, but fortunately there is lots of information on the internet to help me figure them out. I was happy to find a “For Dummies” E-book that is about my exact model of camera, since the information in the booklet that came with the camera read like a foreign language to me. I’ve been working my way thru the “dummies’ book to understand all the bells and whistles on the camera. Seriously, you would almost expect this thing to wash the dishes, do the laundry and weave in ends.

One of the best ways to learn all this technology is just to use it. Which means I am hoping for some nicer weather to get out and take lots of photos. The great thing about using a digital camera is that I can take loads of photos without all the expensive of having film developed. Hopefully I’ll have some crochet and yarn related photos to show you on the blog before this month is out.


NatCroMo is here Again!

Today is the first day of March, or as I like to think of it…National Crochet Month.

natcromo-andeegraves-m2h-designs

March sort of snuck up on me, my whole family has been dealing with a nasty cold/flu bug for the last couple of weeks. I’m still attempting to recover while taking care of my boys. Have had a kiddo home from school almost everyday.

I’m taking a different approach to blogging this NatCroMo. I’m going to be attempting to have a post up everyday, some days it will just be a quickie like this one, other days I’ll have something more substantial and I may even try to “serialize” some of my posts. So buckle up friends and let’s celebrate some crochet fun this month.

Don’t Fear the Picot

shell-with-picot-edging-andee-graves-m2h-designs

Ah picots, very possibly the most feared and hated stitch in crochet.  Personally I avoided the picot stitch for a very long time. When I would look at stitch dictionaries I would skip over any stitch patterns that contained picots. Or if I used those stitch patterns, I would eliminate the picots.

picot-edgings

In the past I had primarily seen picots used as a decorative element for edgings or borders. These tiny stitches can turn a plain shell stitch into a lavish embellishment, or make “points” have sharper definition.

fabrics-with-picots-andee-graves-m2h-designs

In many of the Japanese stitch dictionaries I own there are stitch patterns where the picot is used as part of the overall fabric not just on the edge. I found this an exciting new way of looking at the picot.

 buttonhole-for-sota-andee-graves-m2h-designs

In my designs I’ve kept with using the picot as an edging embellishment. I used the picot in my “Shells on the Aegean Neck Cozy” to embellish the button hole. The picot directions in that pattern tell you to: “Chain 3, slip stitch in top of previous stitch”. The previous stitch I’m referring to is the stitch made before the “chain 3”.

One of the biggest difficulties I had with picots is that I like to work with a larger hook than usual for the size yarn. I especially like to do that when crocheting garments or wraps. Picot stitches tend to work better with a firmer fabric though, so if you want to add them to your project you need to keep that in mind.

crocheted-love-rainbow-heart-andee-graves-m2h-designs

My little heart “Crocheted Love” uses a modified picot to create the point at the bottom of the heart. I only have you chain 1, instead of the usual 3, before anchoring into the previous stitch. You could try making the heart with more chains in the picot for the bottom point and see how you like it.

There are some yarns that are a little trickier to get good picots from. Highly textured yarns or extremely limp yarns with fibers like rayon or alpaca in them are the most difficult. It is possible to do a picot with these yarns, the resulting stitch will just be a bit different from the traditional picot. I recommend using a smaller hook to help give the picot more structure.

How do you work the picot?

The problem many folks run into is the picot distorting their stitches. When the picot is anchored to a single strand, it tends to pull and distort the stitch it is worked into. This is solved by catching 2 strands when anchoring the picot stitch.

picot-ch-3-andee-graves-m2h-designs

Picots are started with a short chain, usually 3 chain stitches.  I have occasionally seen picots made with 5 chains, I tend to prefer the look of the 3 chains.

picot-insert-pt-for-hook-marked-andee-graves-m2h-designs

When anchoring the picot on the previous stitch, you next insert your hook into the top of the stitch under the front loop (1) and then under the side loop of that same stitch (2).

picot-2-strands-caught-andee-graves-m2h-designs

It is important to be sure to capture 2 strands of yarn with the slip stitch that anchors your picot. Whether that is working into a regular crochet stitch or…

picot-2-strands-ch-st-andee-graves-m2h-designs

into a chain stitch. When anchoring a picot into a chain stitch I insert my hook thru the V and behind the back bump.

picots-loose-and-tight-andee-graves-m2h-designs

You can achieve different looks by how tight you make your picot’s anchoring slip stitch. The picots on the left shell are worked with a loose slip stitch, the picots on the right shell are worked with a tight slip stitch. The differences are subtle and either way is acceptable, you just want to be consistent thru-out your project.

I have found that making my anchoring slip stitch tighter helps off-set my tendency to work with larger hooks. I’ve only tested this working with “worsted” weight yarn and an I/5.5mm or J/6mm hook. I haven’t attempted picots in any of my “extreme” projects where I work “fingering” weight yarn with an I/5.5mm hook or “worsted” weight with a L/8mm, M/9mm or N/10mm hook.

picots-practice-strip-andee-graves-m2h-designs

Practice you picot stitches on a long strip of single crochets, work a second row of single crochets and place a picot every other stitch. I make strips like these to practice stitches and try out new yarns. Even if they don’t come out perfect, they make great ties for gift bags or embellishments for greeting cards.

simple-dc-hat-with-picots-andee-graves-m2h-designs

For another practice project, try making my “Simple Double Crochet Hat” but on the last round of the brim single crochets work a picot after each odd numbered sc.

You’ll find after some practice that you won’t have to fear the picot anymore.

The Greatest of these is Love

“So now faith, hope, and love abide, these three; but the greatest of these is love.”

1 Corinthians 13:13

This bible verse has resonated with me thru-out my life, no matter where my spiritual travels have taken me. The idea that the most important thing that we strive for in life is to live in love.

crocheted-love-rainbow-heart-andee-graves-m2h-designs

This is entirely appropriate, since today is Valentines Day, a holiday that celebrates love. Though some folks view it  as a “greeting card” holiday that focuses on romantic love, I like to look at it a bit more broadly.  I have always enjoyed celebrating it as a holiday about love in all it’s forms.

The love for our children. The love of dear friends that lift us up thru life’s challenges. Even the unconditional love of our beloved furry family members. The love that is expressed as compassion and kindness for our fellow humans on life’s journey.

crochet-love-andee-graves-m2h-designs

Recently I was talking with a crochet friend about how we crochet love into the projects we make. Whether it is love for the person whom we will be gifting the finished project to, or love and compassion for others when we are making projects for charity. There is even the love of our craft that is crocheted into every stitch as we make something for ourselves or (as is the case for me about 60% of the time) a project sample for work.

The image I used for the Crochet Love picture is the stitch diagram for my very popular heart pattern “Crocheted Love” from 2013. This heart has been popular with other crochet bloggers to build on in their blog tutorials and such. This has led to some interesting interpretations of the pattern.

Today I wanted to show you some quick tips on making these hearts. They only take a little bit of yarn and time to whip up to include on a card or as an embellishment for a gift item to celebrate the holiday of love.

The biggest stumbling blocks seem to be where to work the slip stitch that creates the point at the bottom of the heart and the final slip stitch that anchors the last “bump” at the top of the heart.

point-st-chart

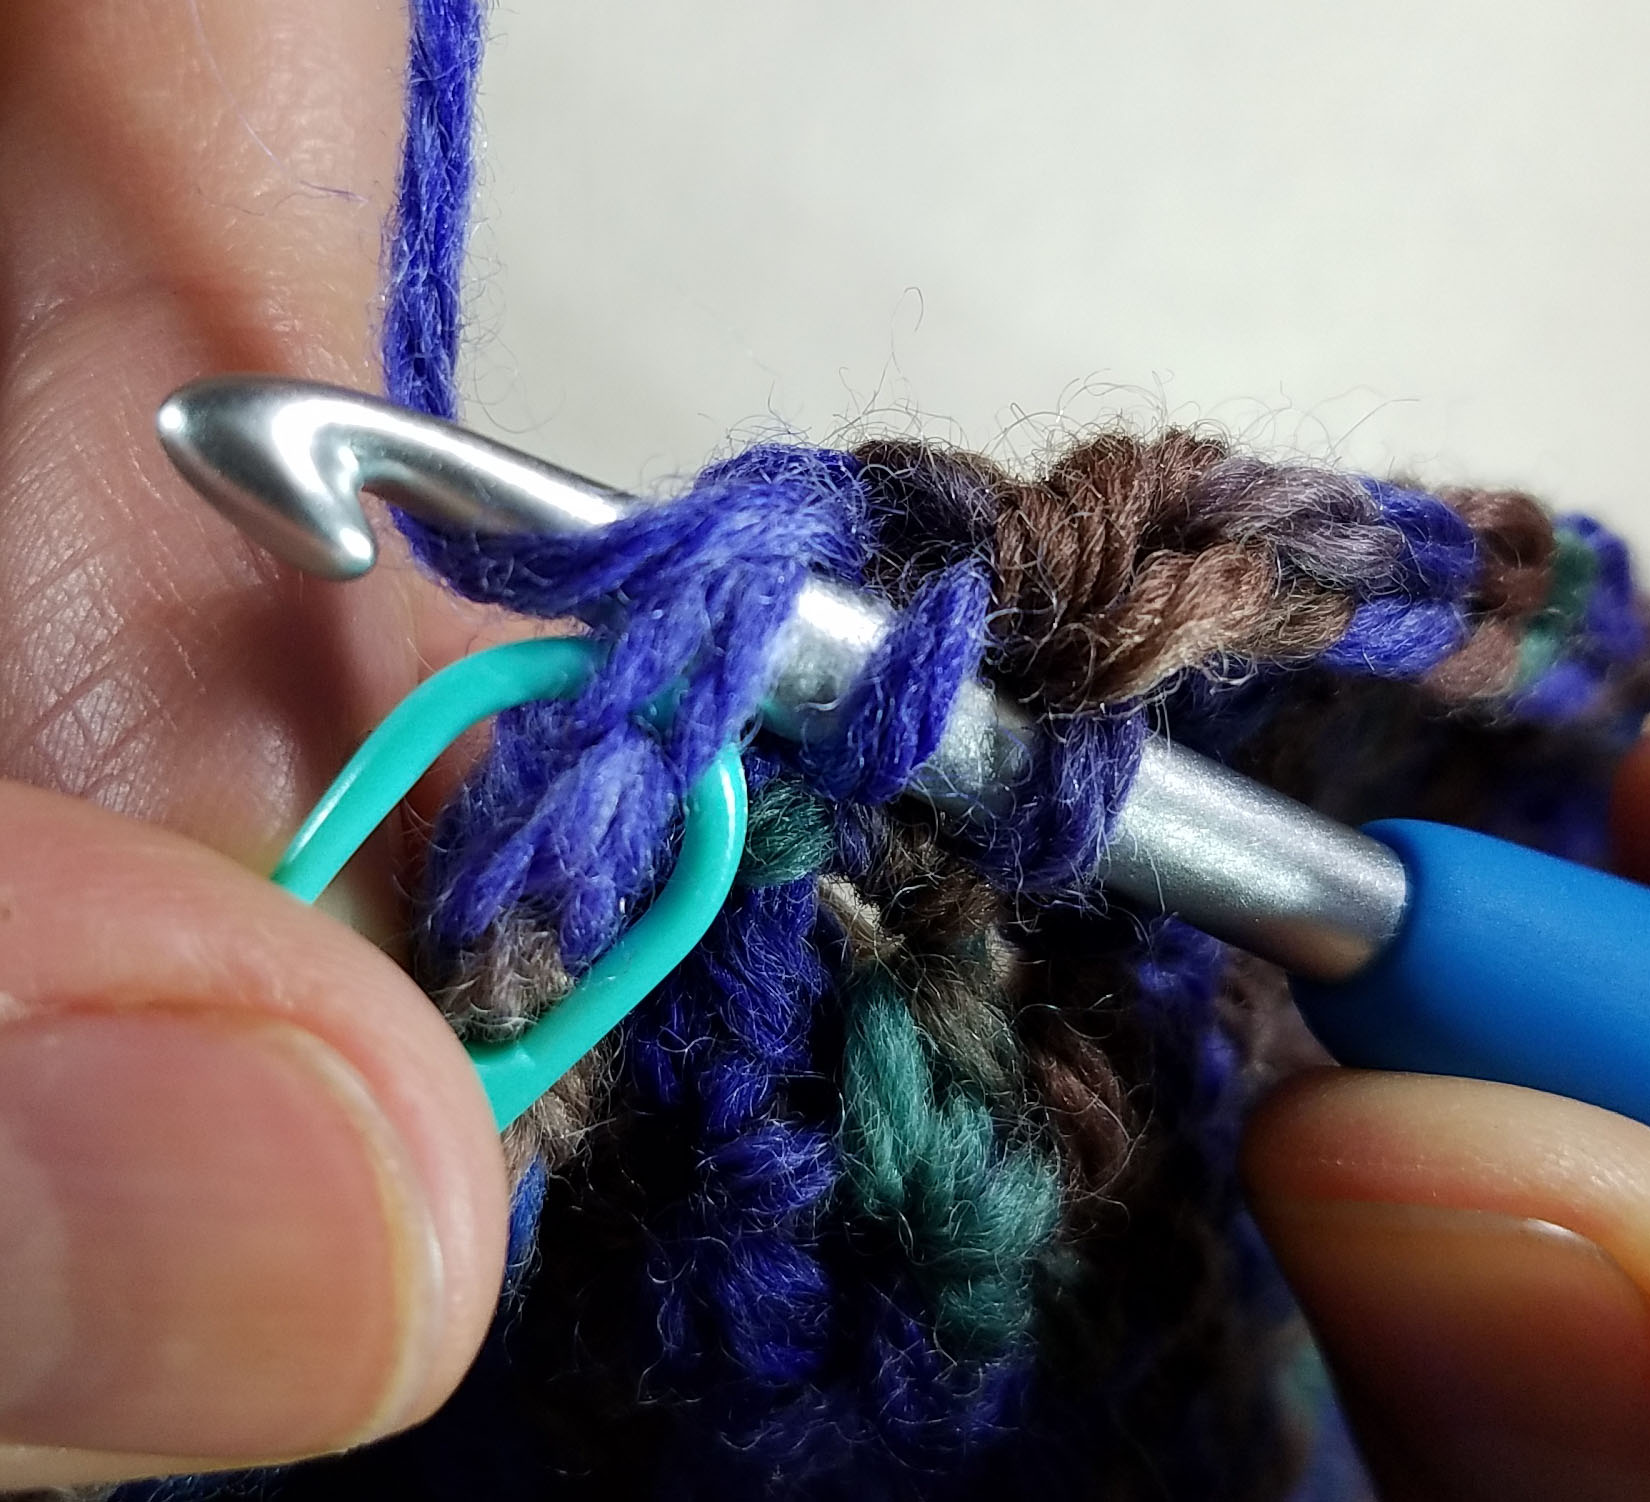
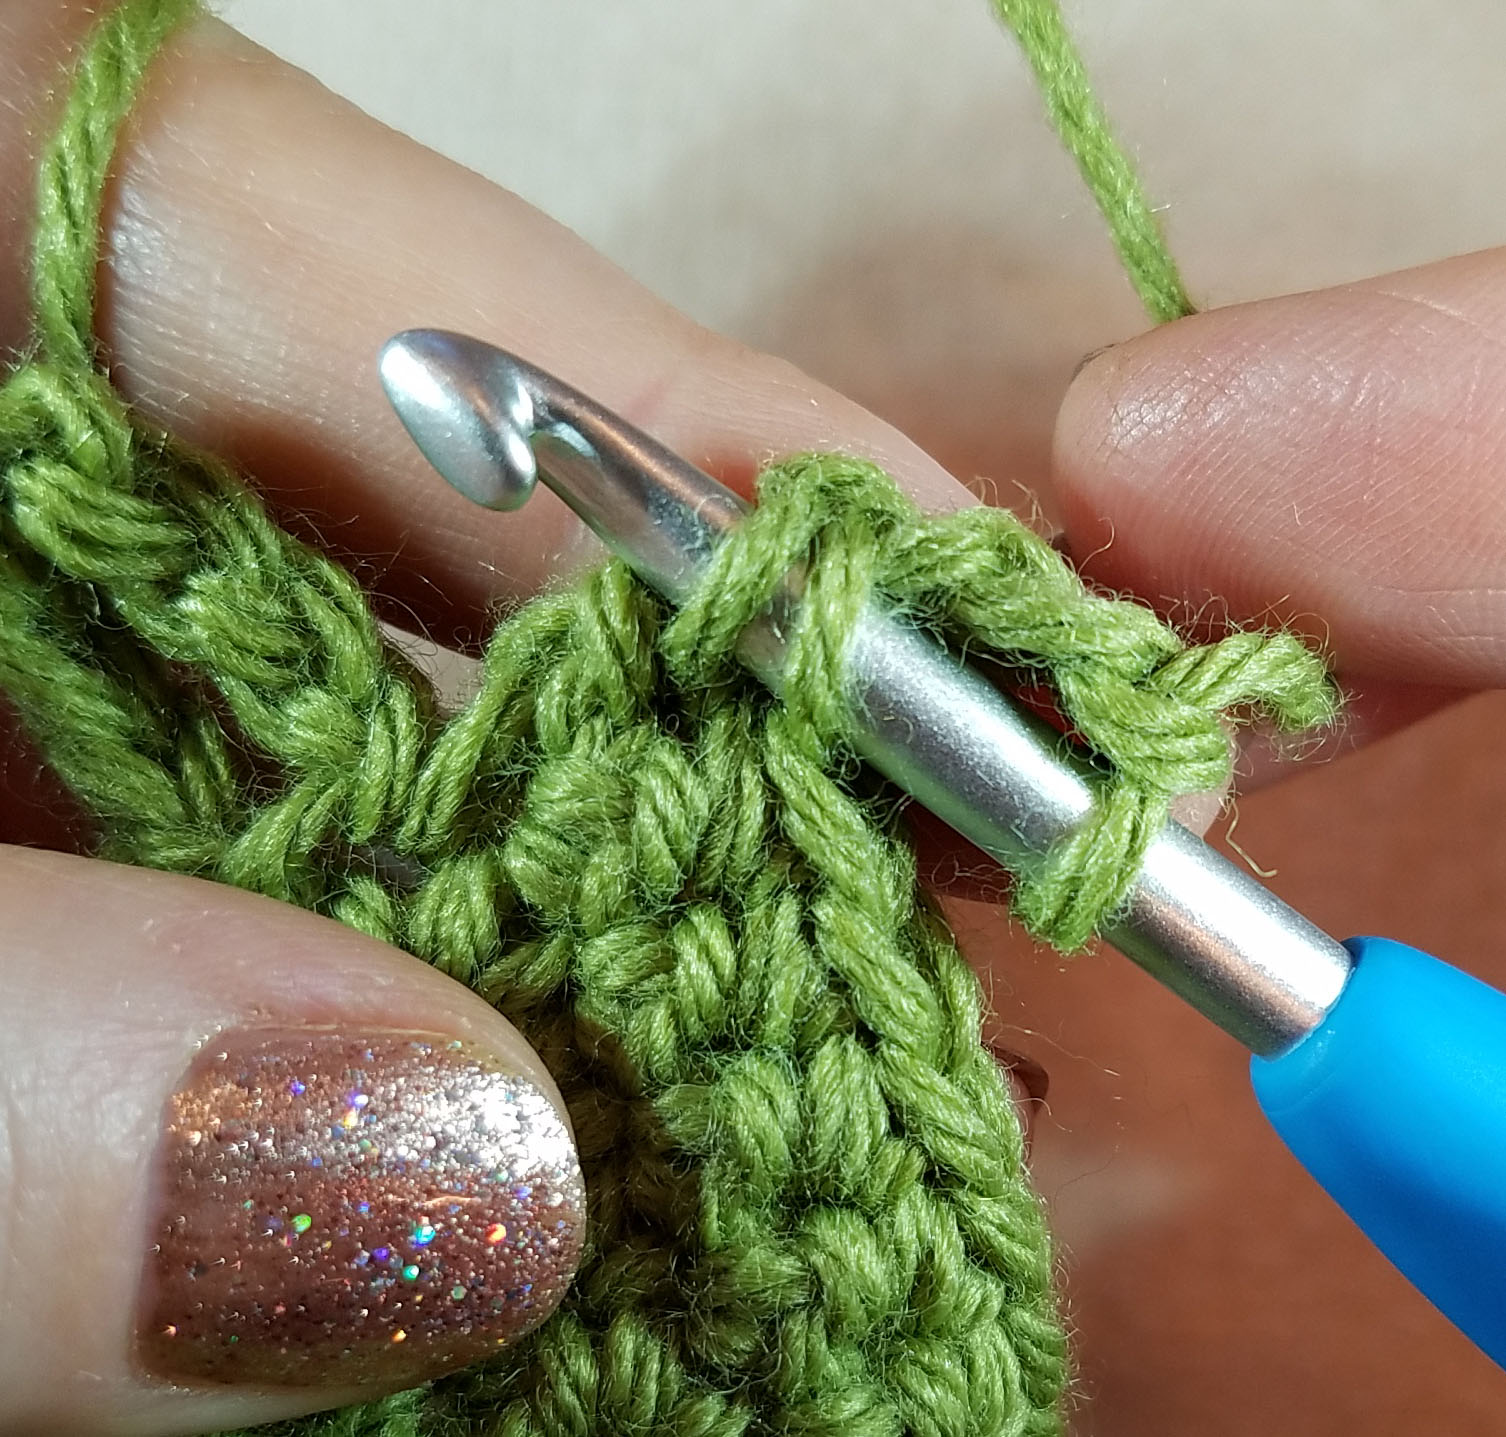
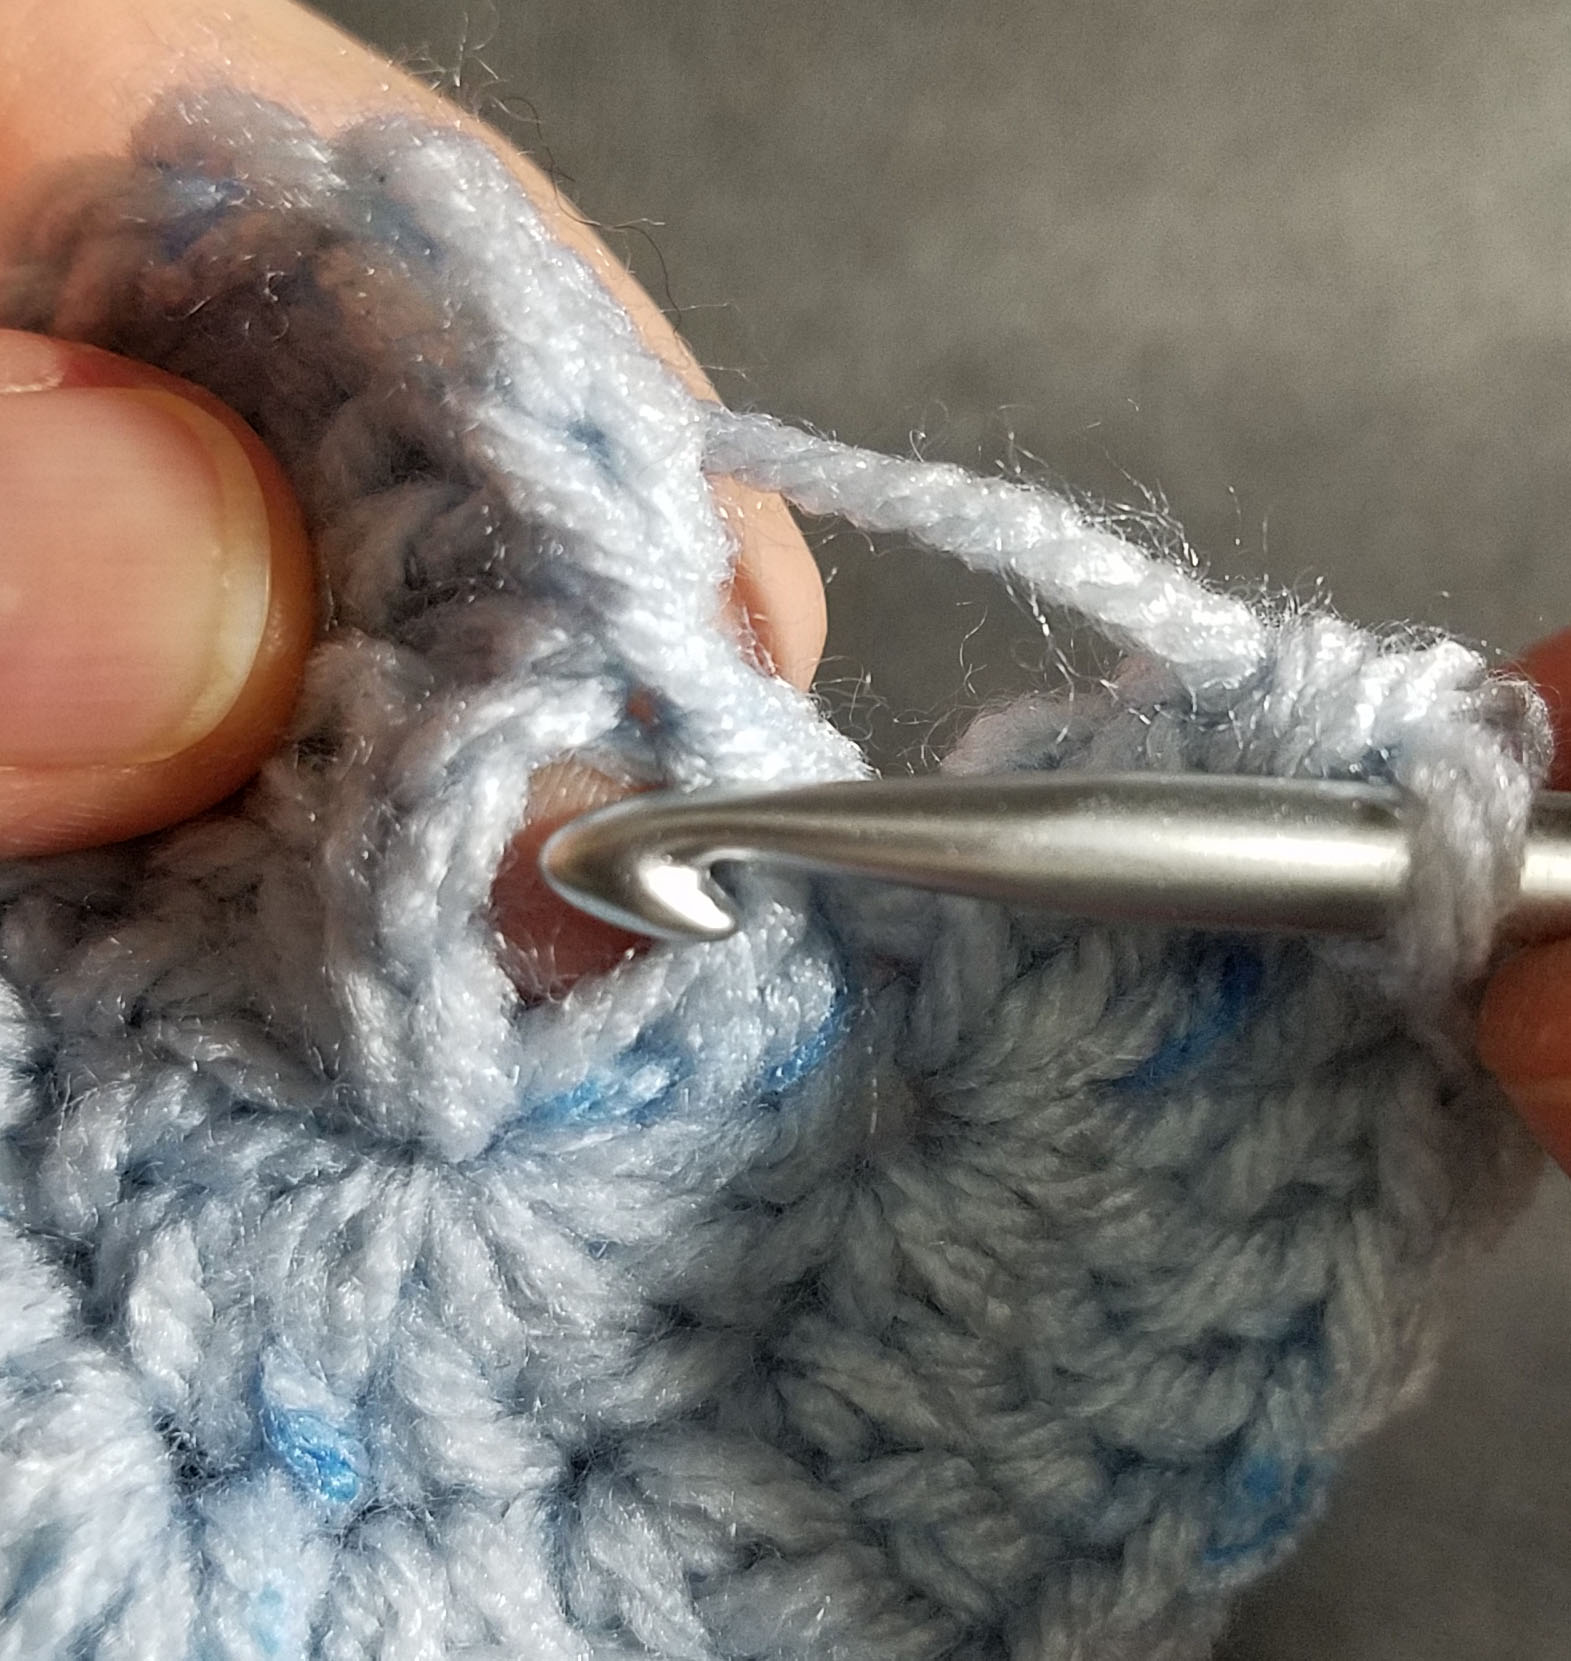
This is a close-up of the stitch diagram for the point of the heart. The conventions for showing the orders of operation in diagrams have the arrow pointing under the chain stitch, but you are actually working behind the chain stitch to get to the double crochet just made.

purple-path-for-hook-andee-graves-m2h-designs

My hook goes under the front loop at the top of the stitch and under the top wrap of the stitch. The lighter weight purple yarn in the photo above shows the path I insert my hook thru.

insert-hook-into-top-of-st-andee-graves-m2h-designs

This image is the hook in place.

yo-pull-thru-all-loops-andee-graves-m2h-designs

Yarn over and pull thru all the loops of yarn, including the working loop on the hook.

point-sl-st-tightened-andee-graves-m2h-designs

Tighten the finished slip stitch.

finish-point-andee-graves-m2h-designs

Make the next 2 dc stitches in the same stitch of Round 1 as before, and continue following the stitch instructions for Round 2.

end-of-rnd-2-sl-st

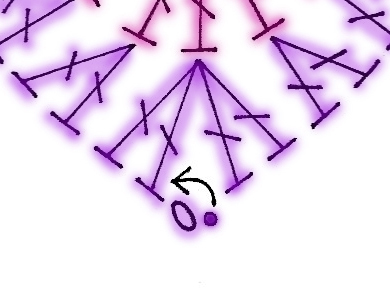
This is a close-up of the stitch diagram for the end of Round 2.

completed-last-7-tr-andee-graves-m2h-designs

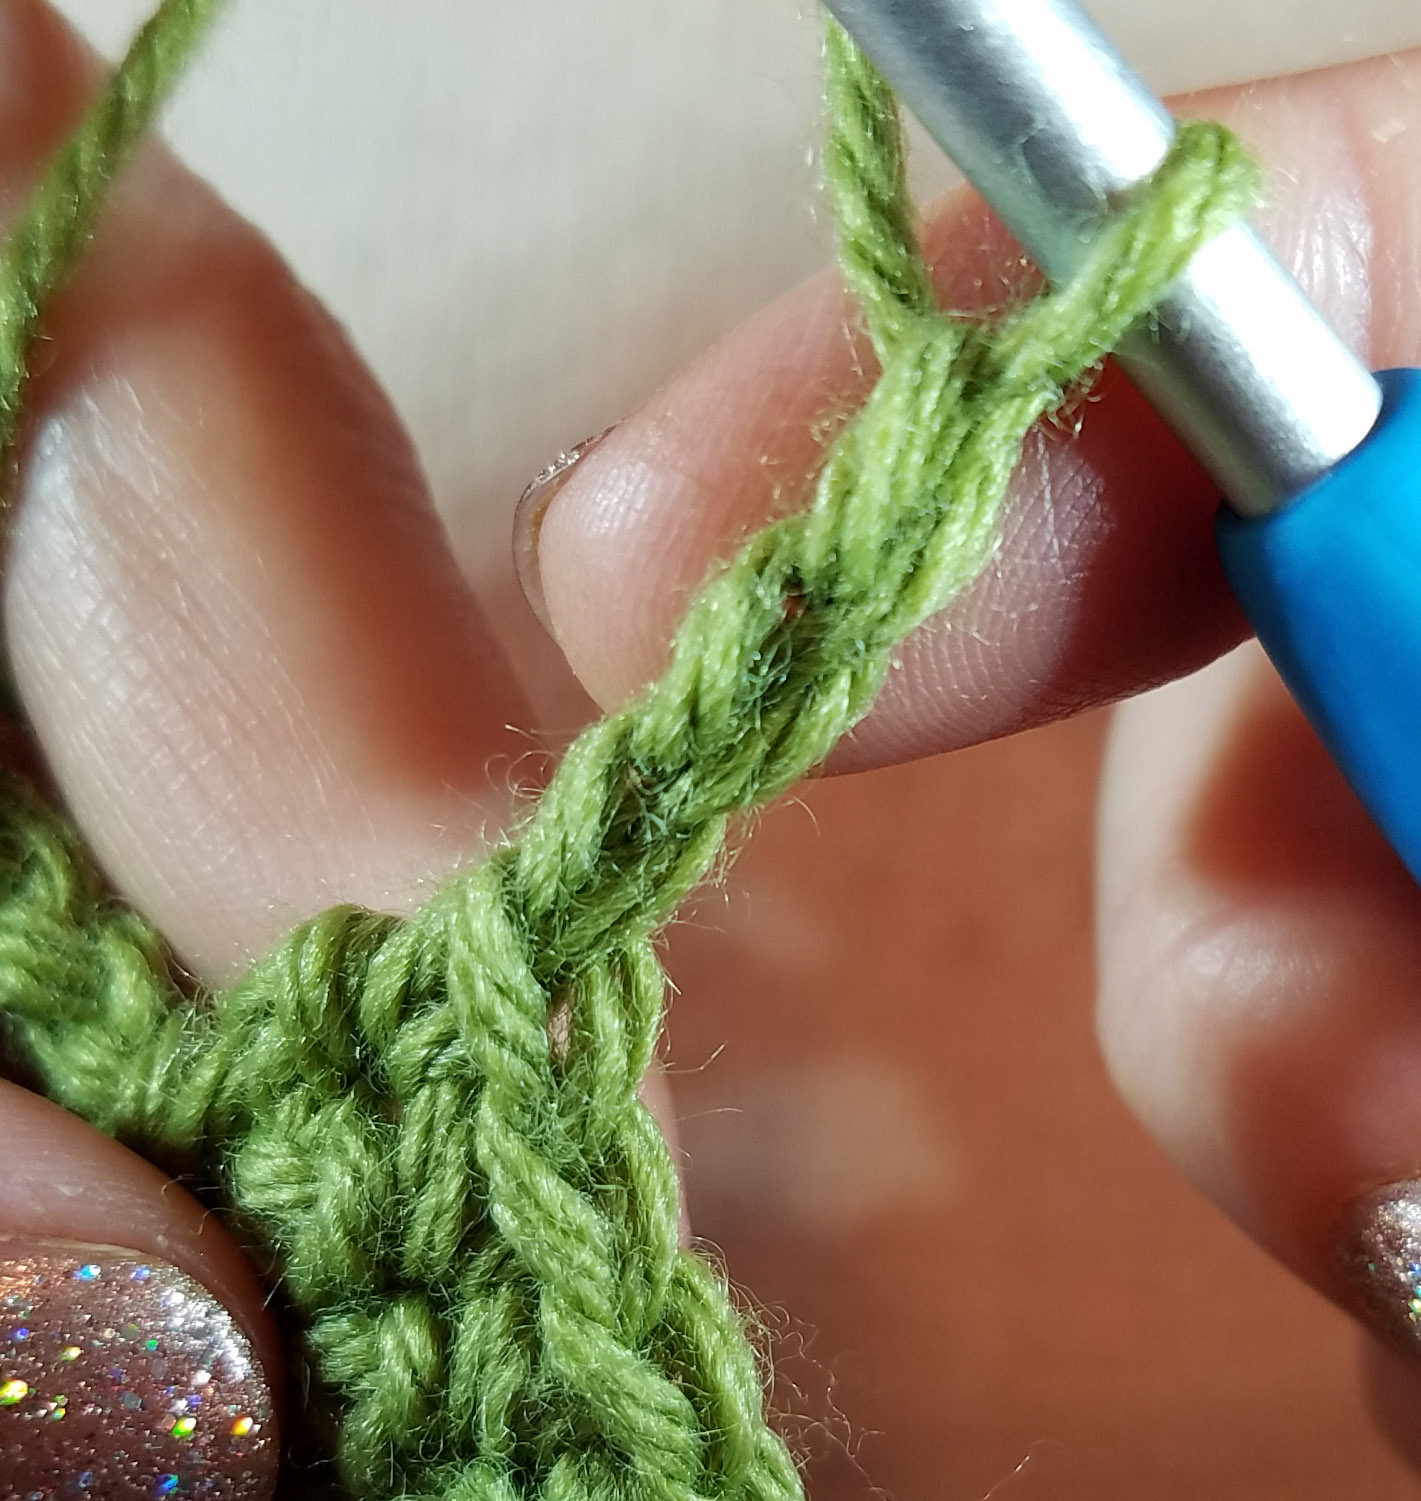
When you finish the last 7 treble crochet stitches you will need to anchor it with a slip stitch.

between-ch-n-st-andee-graves-m2h-designs

Work the ending slip stitch between the final dc stitch and starting chain of Round 1.

end-of-rnd-2-finished

Tighten the slip stitch to create a seamless finish to your heart.

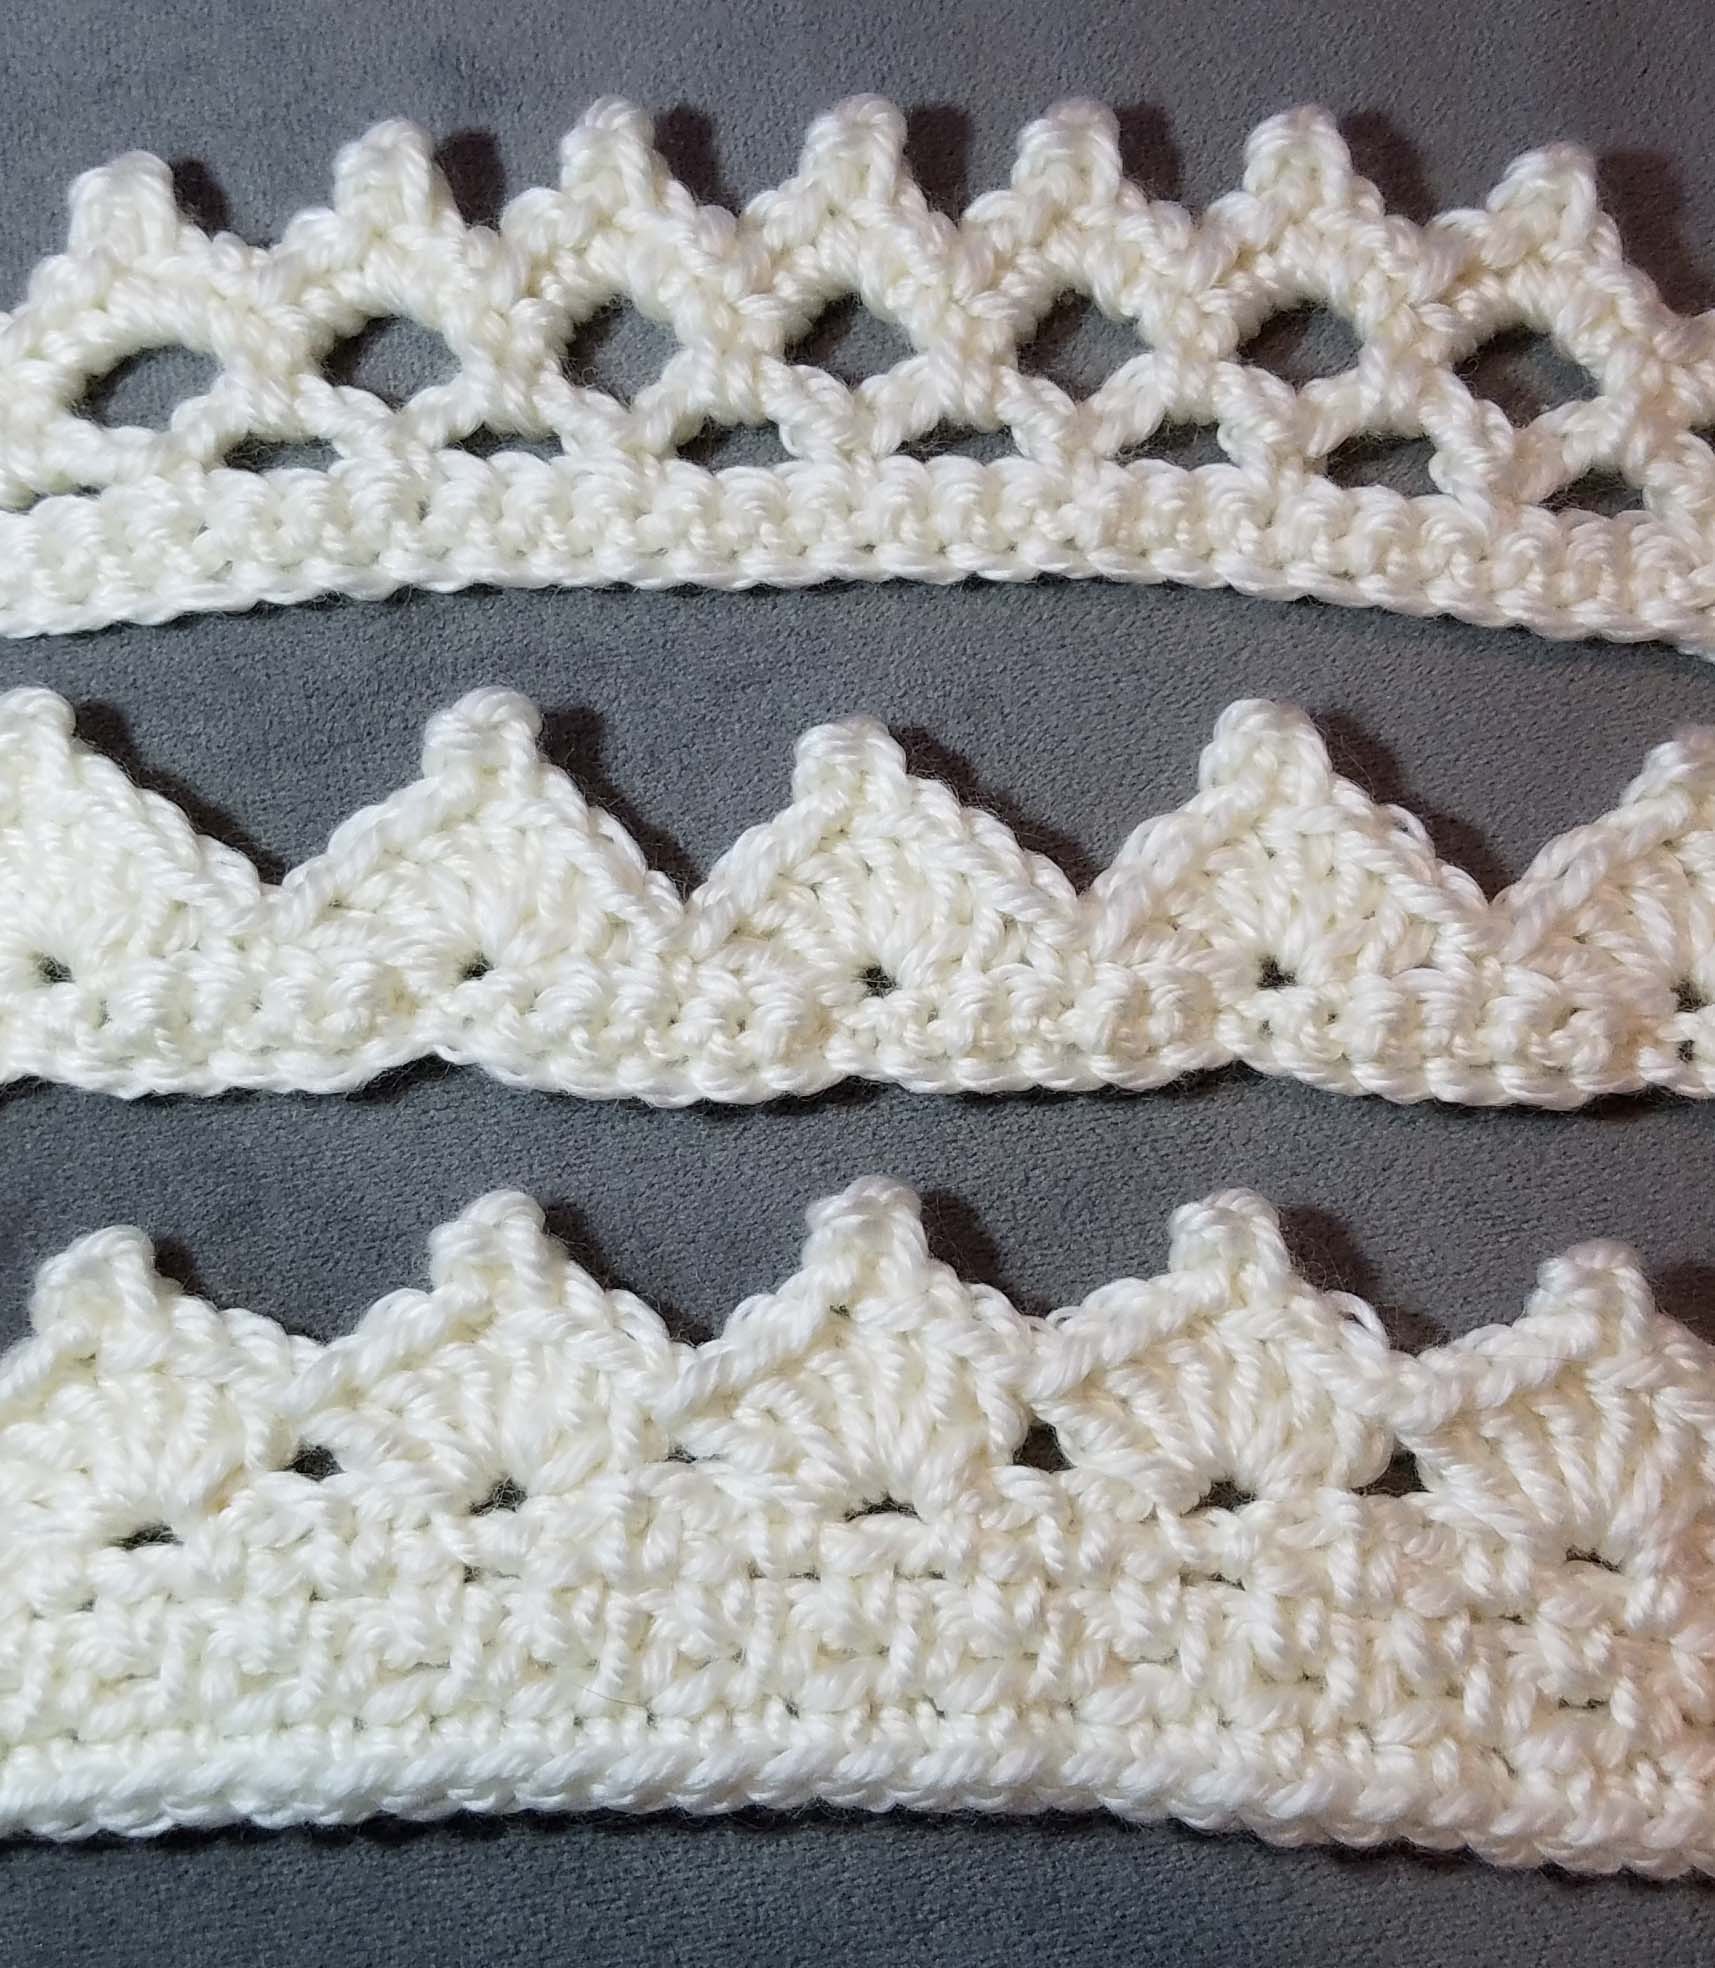
As a little extra bonus today I am including the instructions for making a single crochet border around the heart.

sc-border-heart-andee-graves-m2h-designs

You can use this border to give a more finished look to a single heart or to connect 2 hearts together.

making-cardstock-heart-andee-graves-m2h-designs

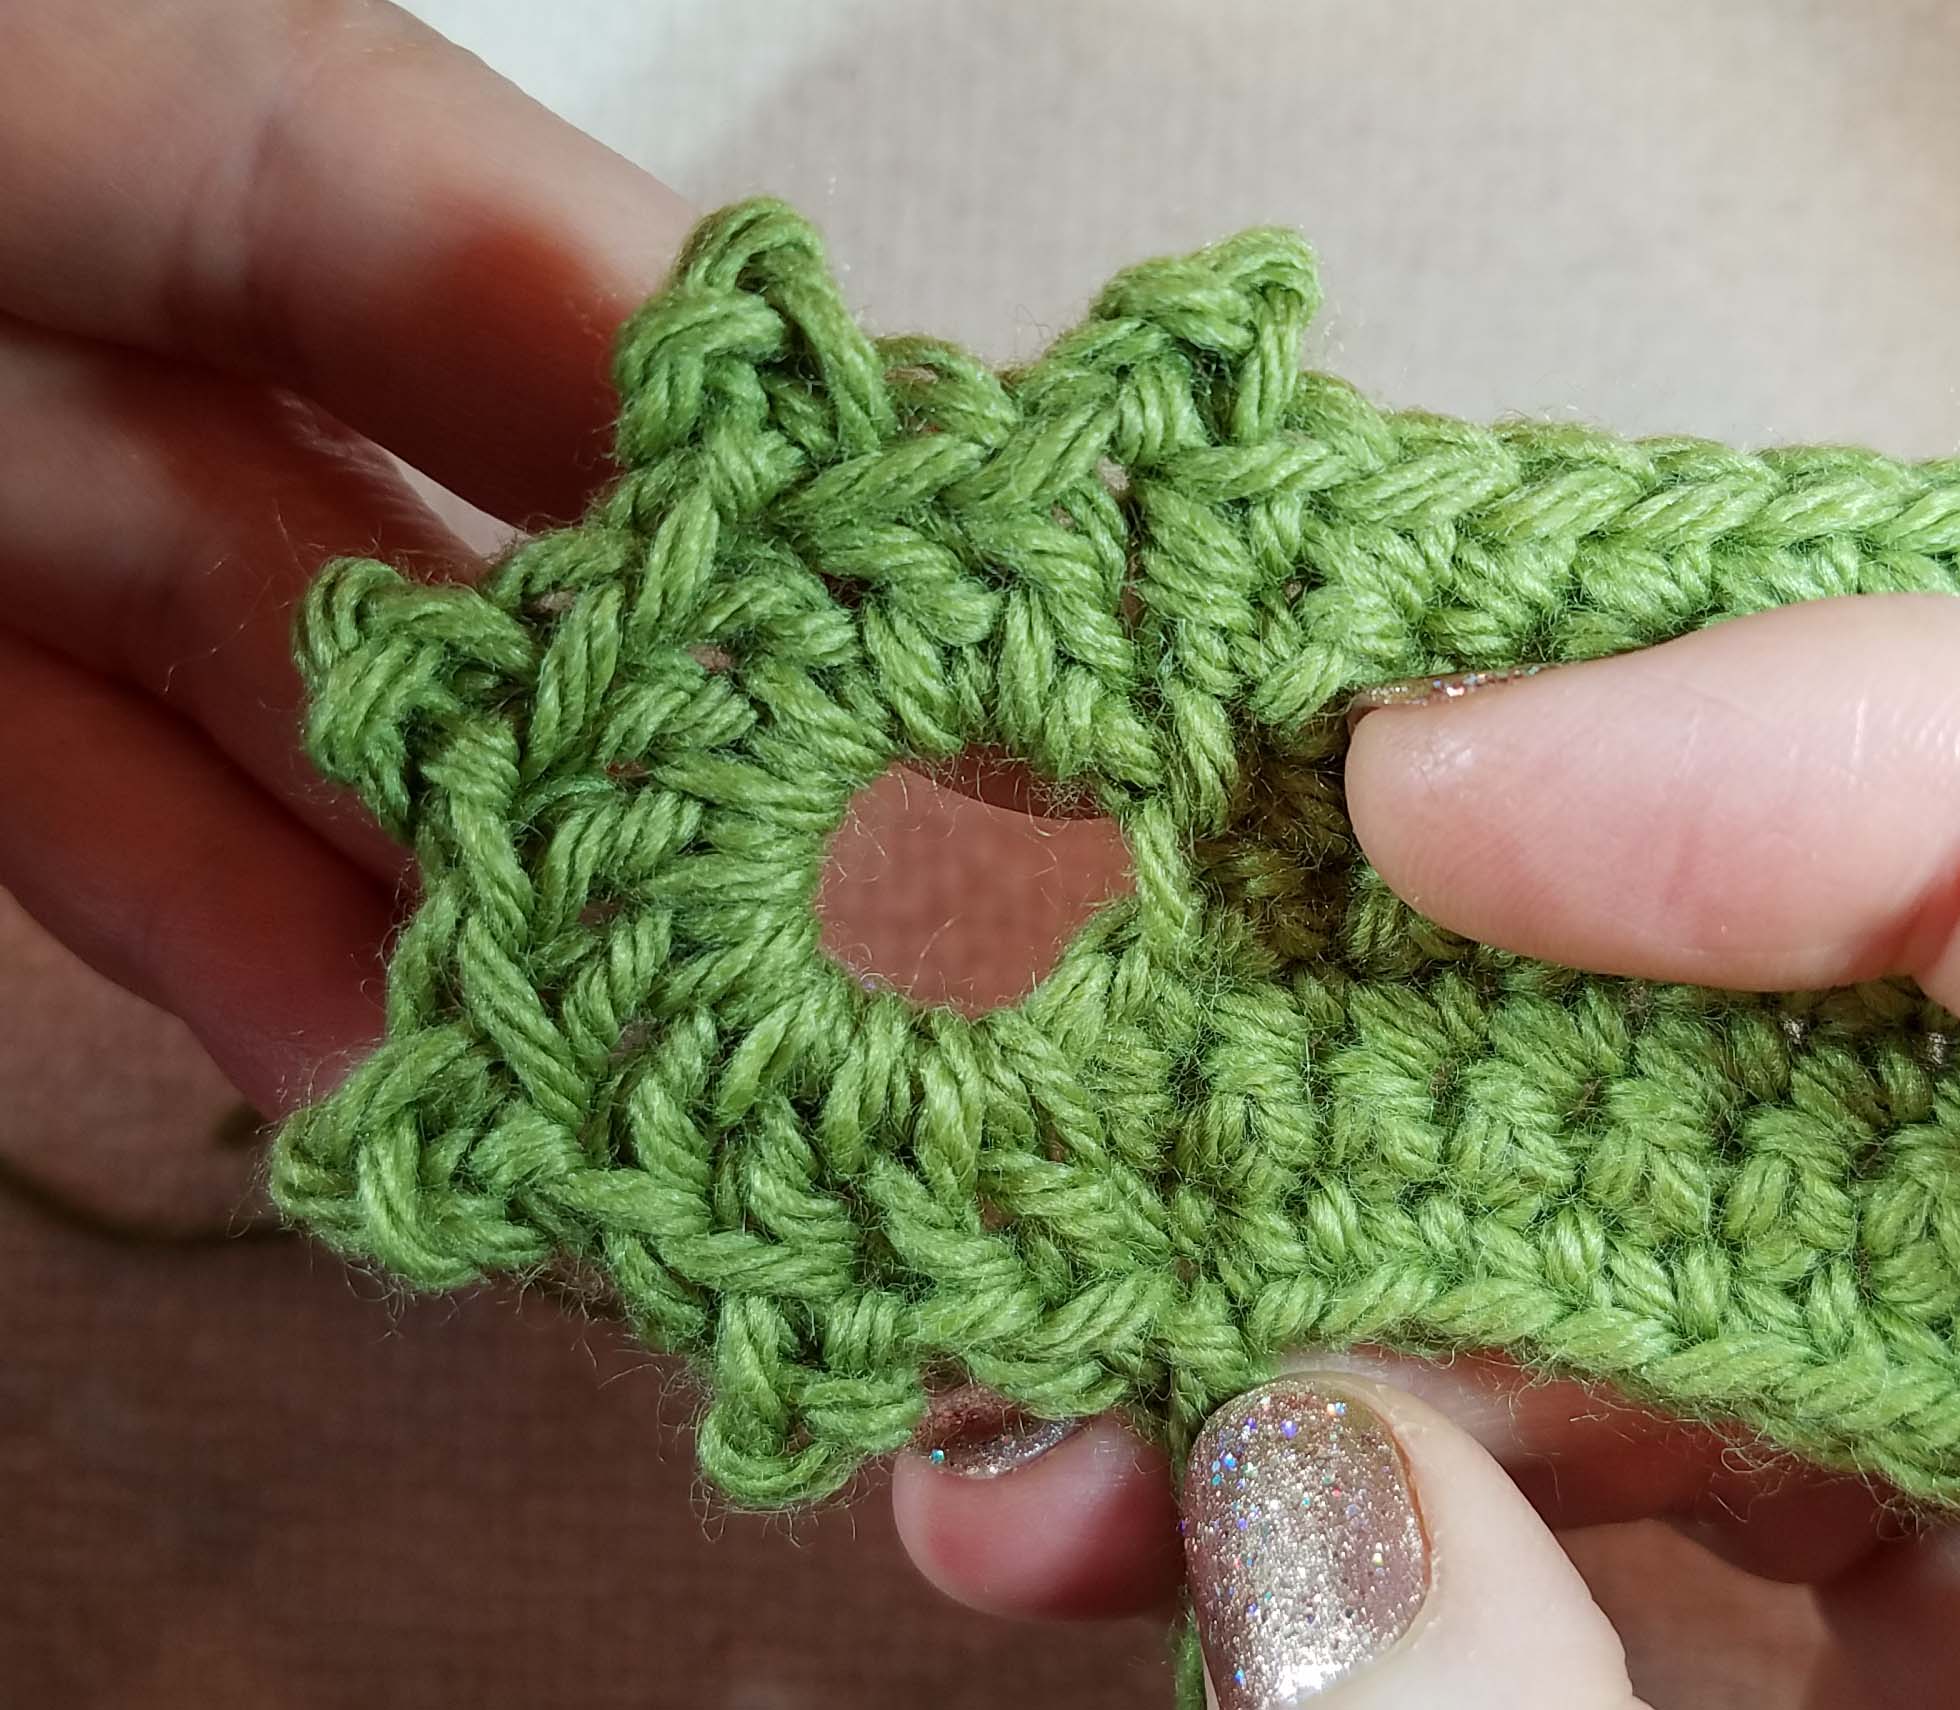
For the heart above I cut out a heart shape from heavy card stock, using one of my hearts as a pattern to draw the heart shape. When I cut it out I trimmed the shape a bit smaller to leave room for the border stitches.

hearts-before-border-andee-graves-m2h-designs

I then sandwiched the cardstock heart between the yarn hearts while I crocheted the border. This makes the heart extra sturdy for hanging from a garland.

Instructions for Single Crochet Border

After finishing Round 2 of Crocheted Love Heart – Do Not Fasten Off, chain 1, starting with first Treble of Round 2 – (sc in next st, 2 sc next st) 4 times, sc in next 5 sts, 2 sc next st, ch 1 and slip st in top of last sc made, 2 sc next st, sc next 5 sts, (2 sc next st, sc next st) 4 times, slip st to first sc of round.

After finishing the border you can cut the yarn and weave in the end, or chain to the desired length to use as a hanging cord for the heart.

If you make your 2 hearts with a bulky yarn and appropriate sized hook your hearts will be a generous size and you can insert some stuffing before completing the border to make a sweet little pillow.

***********

I am going to spend part of my Valentines Day in my traditional celebration of consuming Dove Dark Chocolate hearts. I hope you all have a wonderful Valentines Day and that your life is full of love.

A Crochet Valentine Party

Seems like the weeks are zipping by in 2017. I’ve been busy with my big de-clutter and organize the house project as well as getting all my new technology talking to each other.  Sometime today my newest bit of technology will be arriving, a new camera. This is one with a lot of bells and whistles, my first DSLR.

I just keep telling myself that learning how to use all these new hardware and software technologies will help keep my brain agile. Either that, or my head is going to explode from technology overload.

Fortunately yesterday I got to have some great low-tech fun with my crochet friends at our Bi-monthly crochet group. This is the Casual Crochet group that meets at the Longmont Yarn Shoppe on the 2nd and 3rd Wednesday morning of each month.  Since this gathering was close to Valentine’s Day I brought in cards and chocolates.

hearts-and-card-andee-graves-m2h-designs

The shop has been collecting hearts made from yarn for a yarn-bombing event next Monday. So we all crocheted some hearts to include.  This heart is my Crocheted Love heart from a couple years ago. The pattern is here on the blog.

margies-blanket

We also celebrated with Margie, who finished her Fans & Lace Blocks blanket that she had started as part of our CAL.

claudia-n-anna-marie

Claudia and Anna Marie both got started on a cowl project. Claudia was helping Anna Marie learn the Foundation Double Crochet stitch. Looking forward to seeing how their projects are coming along next week.

Time to head out to pick up boys from school. I will hopefully be back to my regular blogging schedule soon, as you can tell, things have been a bit busy of late.

Vivianne Shawl

vivianne-shawl-andee-graves-m2h-designs-a2

This is my newest M2H Designs pattern the Vivianne Shawl. The name Vivianne means “full of life” and the colorful striping and sparkly beads make this a very lively shawl.

yarn-for-new-pwt-shawl

I used only 3 hanks of Berocco’s “Vintage” worsted weight yarn in different colors to create the uneven color changes. Originally I thought I would use 2 hanks of the dark blue, but I decided I wanted to have approximately the same amount of yarn in each color. Because the shawl is worked top down the rows get longer and the sections of color play out in pleasing proportions. I also mixed things up a little by working a stripe of the next color before ending the preceding color. This stripe has beads added using the “hoist-on” method for a bit more bling and liveliness.

Vivianne Shawl 3 - Andee Graves/M2H Designs

The final 2 border rows are continued in the last color and feature beads added to the stitches to create sparkly drape along the bottom edge of the shawl.

This pattern is available for purchase in my Ravelry Shop for $4.99. In addition to concise text instructions, the pattern contains stitch charts for the body of the shawl and the border, plus photo tutorials for adding the beads.

The Argument with the Smart Phone

I’m betting most of you can tell from the title that I’m not having fun with my new smart phone. In fact, you might be wondering why I have a new smart phone? Simply put, the old phone died. Like really died, is completely Dead, can never ever be revived.

There are days I truly dislike technology. It is great stuff for staying in touch with friends, family and my fans. But when it really comes down to it, I’m a low-tech kind of person. I like to make things with my hands, which is why I have a blog and video channel about crafting and art.

Pen View

My old smart phone was a Samsung Note 2, I had it for 4 years. All I had needed to do in that time was replace the battery and the case a couple of times. I had wanted to upgrade it this past Fall, but the Samsung Note series was having some difficulties. Primarily, the batteries were catching on fire. So there were no Notes to be had. I don’t even know if the Note is ever coming back.

With the death of my old Note 2 I needed to replace my phone. It died the Monday morning before I left on my trip to Phoenix for CHA. So it was a bit of a scramble that week deciding on what phone to get and then getting the new phone set up so that I had what I needed on it while traveling.

After consulting with my husband, and whinging about the unavailability of the Note series, I decided to get the Samsung s7 Active. It’s a hardy phone and I’ll probably have it another 3-4 years.

Unfortunately, getting it to talk to my computer has been a pain. Which is what the argument has been about. I was able to use my old phone as a media device with my computer, making it very easy to upload files from the phone to the computer using a USB cord. This was especially handy for my videos and photos.

I know there is very likely a simple fix for getting this new phone to play nice with my computer. Unfortunately I don’t have a lot of patience for figuring out new tech, so it has been an painful and frustrating couple weeks. I’ve actually decided to take a break from it for a few days as I tackle other tasks.

I’ve been swatching and sketching this week in preparation for submitting some proposals to publishers. We will see if anything comes of that. Submitting proposals is not a guarantee of them being accepted for publication. I like what I’ve come up with and may publish these designs in my own pattern line if the publisher doesn’t want them.

This weekend my husband has promised to help me figure out all the smart phone and computer stuff. Hopefully that means I’ll be back on track very soon.

My first CHA show

sunset-out-the-plane-window
Sunset view out the plane window

Forgive me dear readers for being so tardy with my first post this week. I’ve been recovering from this past weekend. I made a quick trip to Phoenix, Arizona to attend the CHA (Craft & Hobby Association) Trade Show.  I took a flight out of Denver early Saturday morning and flew back at sunset Sunday. It was a super busy time while I was there.

sign-for-networking-event

The primary reason I went was to attend the Saturday evening Bloggers Networking Event hosted by Prime Publishing. There I met a number of vendors and picked up some awesome swag to try out their products.

goodies-from-event

This is a photo of my pile of goodies. It doesn’t represent everyone that was there. Just some of the crafting supplies that I came home with from this event.

big-adhesive-runner

The gals from Scrapbook Adhesives also had this insanely huge adhesive runner. I had to have a picture of them with it so you could see how oversized it was.

Leisure Arts were giving away samples of their new oval shaped knitting loom, unfortunately they ran out. I’ll be getting one in a couple of weeks and hope to do a review of it. The line for the Leisure Arts table was very long, but I did get a moment to visit with them. On Sunday I went by their booth and was excited to see my “Texting Mitts” book in the rack of books on display.

clovers-new-st-markers

While I was on the show floor both Saturday and Sunday I got to see so many fascinating  products. When I visited the Clover Tools booth, I saw my friend Eloise, who was demonstrating knitting and crochet. She had their awesome new stitch markers.

clovers-st-marker-pkg

These markers come in 3 different sizes and are shaped to look like sheep, including a little curling horn on their heads. They are super light weight and the smallest size would be ideal to use for working with lace-weight yarns.

foiled-heart

There were lots of Make-and-Take opportunities. One of my first stops was to check out the Deco-Foil display. The woman there showed me how their foil papers could be used on embossed adhesives thru an ordinary laminator by making this little heart for me. This would be a great idea for making valentines for school exchanges.

Fuseworks Microwave kiln - image from catalog
Fuseworks Microwave kiln – image from catalog

One of the other products I wanted to check out was at the Diamond Tech booth, a glass fusing kiln that you use in your microwave. I’ve always wanted to learn more about working with hot glass, but have been prohibited by the cost of kilns or even kiln fees (plus driving distance). The pendants that they were making in the demonstration were really nice and I am seriously wanting to get their “Beginner’s Fusing Kit” this year.

Fuseworks Beginners Kit - image from catalog
Fuseworks Beginners Kit – image from catalog

Just to make things even more tempting they sent me home with a catalog of all their fun glass project stuff. Various mosaic tools and glass, glass cutting tools, Lampworking tools and sets, plus the glass fusing tools and sets. Oh yeah, I’m in big trouble.

I’m planning on doing a lot more illustration work this year, and was very interested in the Chameleon Pens booth. They were giving away single colortone pens for folks to try them out.

chameleon-colortone-pen

I really like this pen, it is a great tool for creating watercolor style effects when adding color to my drawings. I also tried out their new color pencils. I’ll be sharing a lot more about these tools come summer. You can check out more about their products at their website: www.chameleonpens.com. They also have a Kickstarter fundraiser going until February 17 for their new Color tops product that works with the colortone pens.

amazing-molding-putty

My nearly last stop on Sunday was at the Alumilite Booth to look at their brand of “Amazing, Casting Products”. I’ve always loved mold making and casting. They had a wonderful range of products for both endeavors and were kind enough to provide me with a small sample of their 2 part mold putty. I can hardly wait to play with it.

Well, now you know why I’ve been so distracted since I got back from Phoenix. There is a lot to absorb after such an inspiring weekend. I’ve been spending hours trying to capture all my ideas. There has also been the usual catching up with the family and the household after a trip.

I had hoped to get my video for the Shells on the Aegean Neck Cozy finished this week, but that has been delayed with all this other stuff happening. Instead I’m aiming for having the new video up by next Tuesday, January 31st. Wow, we have less than one week of January left! Looks like 2017 is going to be rocketing along.