I’m excited to be participating in the 2019 Celebrate Mom Blog Hop hosted by Pattern Paradise! Each day in May, a different crochet designer will be featured and share a new free pattern with you! There are lots of fun prizes too, so come join the fun! For the list of designers and all the details, go to this post => 2019 Celebrate Mom Blog Hop & Giveaway
My kids and I have a daily tradition that we start and end our days with a hug. But what do you do when your mom (or other dear friends) are far away? You can make them this lovely shawlette that can be a hug for the times you are out of arms reach.
It uses just one ball of Berroco’s “ReMix Light” yarn. Which is a perfect weight and fiber mix for a summer wearable. The open mesh and lace work also make for a very breathable fabric.
This is a little bit more challenging crochet project as you need to keep track of the changes for the diamond pattern. It is definitely one of those projects where you want to check your count at the end of each row to be sure you didn’t add or miss a stitch.
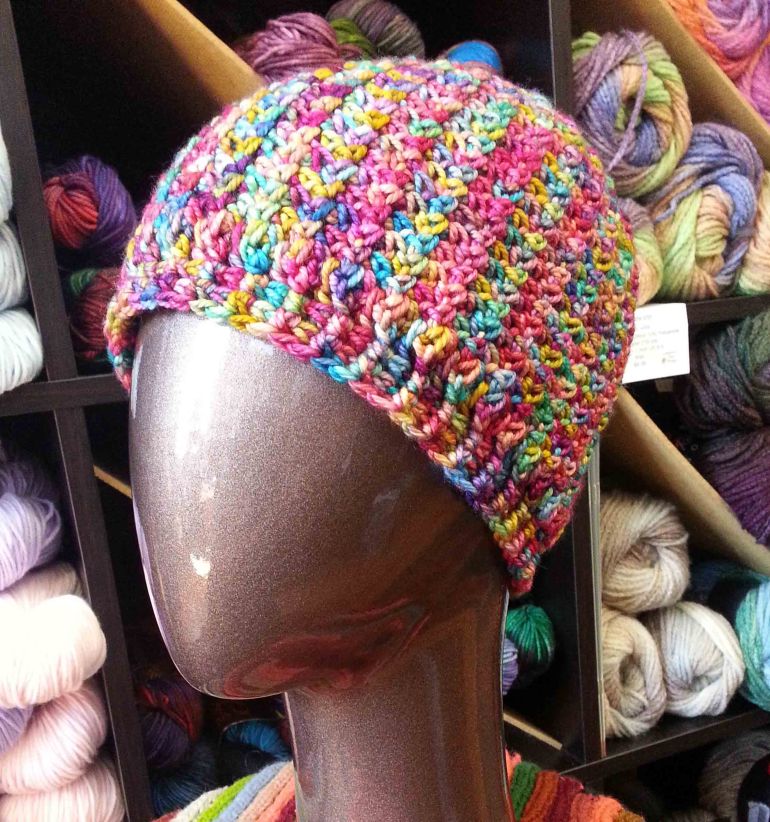
Floating Diamonds Shawlette
Designed by Andee Graves / M2H Designs
Skill level: Intermediate
Finished Size: 59” (149.9 cm) wide x 11” (27.9 cm) tall after blocking
Materials
Yarn: Berroco “Remix Light” 30% Nylon, 27% Cotton,
24% Acrylic, 10% Silk, 9% Linen (3.5 oz/100 g, 432 yd/400 m), 1 Ball of Color #
6977
Hook: 7 / 4.5 mm (or size needed to obtain
gauge)
Notions: Yarn/tapestry needle, Stitch
markers
Gauge: In V-st pattern 16 stitches and 9 rows = 4” (10.16 cm)
Special Stitches or Abbreviations
PM – Place stitch marker
V-st – V Stitch: (dc, ch 1, dc) in indicated place
Pattern Notes
Shawl is
worked top-down from a stacked rows foundation with a center increase point and
decreases at ends of rows. Once body of shawl is finished, yarn is cut and
rejoined at end of foundation to work edging along sides and bottom edge.
The majority of the body of this shawl is
worked in staggered V-stitches. This means the 2 legs of the V-stitch are
worked in the space between two V-stitches.
Instructions:
Foundation
Rows
Row
1: Ch 2, sc in second ch from hook.
Row
2 (RS): Ch 3, turn,
2 dc in sc.
Row
3: Ch 1, turn, sc in first dc.
Rows
4 – 157: Alternate repeating
Rows 2 and 3 (ending with a Row 3). PM in Row 79. [78 “scallops”]
Shawl
Body
Row
1: Ch 2, turn to work along flat side of
foundation rows, slip st in side of first sc row, ch 3 {counts as dc}, *skip next dc row, V-st in next sc row*, Repeat
from * to * until work in sc row before marked sc row, (V-st, ch 2, V-st) in marked sc row, move st marker
to ch-2 sp just made, Repeat from * to * until work in next to last sc row,
skip last dc row, dc in final sc row. [1
ch-2 sp, 2 dc, 78 V-sts]
The marked ch-2 space is the increase
point for the rest of the body of the shawl.
Row
2: Ch 3 {counts as dc}, turn, skip first V-st, *V-st in space before next
V-st, skip next V-st*, Repeat from * to * until reach marked ch-2 sp, (V-st, ch
2, V-st) in marked ch-2 sp, move st marker up to ch-2 sp just made, Repeat from
* to * until 1 V-st is left in row, dc in top of previous row ch-3. [1 ch-2
sp, 2 dc, 78 V-sts]
Rows 3-9: Repeat Row 2. Count at end of Row 9 – [1 ch-2 sp, 2 dc, 78 V-sts]
Row
10: Ch 3 {counts as dc}, turn, skip first V-st, *V-st in space before next
V-st, skip next V-st*, Repeat from * to * 6 times, [V-st in space before next V-st, ch 10,
skip next 2 V-sts, Repeat from * to * 5 times] 4 times, V-st in space before next V-st, ch 10,
skip next 2 V-sts, Repeat from * to * once, (V-st, ch 2, V-st) in marked ch-2
sp, move st marker up to ch-2 sp just made, skip next V-st, [V-st in space before next V-st, ch 10,
skip next 2 V-sts, Repeat from * to * 5 times] 4 times, V-st in space before next V-st, ch 10,
skip next 2 V-sts, repeat from * to * 8 times, dc in top of previous row ch-3. [1 ch-2 sp, 2 dc, 10 ch-10 sp, 68 V-sts]
Row
11: Ch 3 {counts as dc}, turn, skip first V-st, *V-st in space before next
V-st, skip next V-st*, Repeat from * to * 5 times, [V-st in space before next
V-st, ch 6, skip next V-st, sc in ch-10 sp, ch 6, skip next V-st, Repeat from *
to * 4 times] 4 times, V-st in space before next V-st, ch 6, skip next V-st, sc
in ch-10 sp, ch 6, skip next V-st, Repeat from * to * once, (V-st, ch 2, V-st)
in marked ch-2 sp, move st marker up to ch-2 sp just made, skip next V-st, [V-st in space before next V-st, ch 6, skip
next V-st, sc in ch-10 sp, ch 6, skip next V-st, Repeat from * to *4 times] 4
times, V-st in space before next V-st, ch 6, skip next V-st, sc in ch-10 sp, ch
6, skip next V-st, Repeat from * to * 7 times, dc in top of previous row ch-3. [1 ch-2
sp, 2 dc, 20 ch-6 sp, 10 sc, 58 V-sts]
Row
12: Ch 3 {counts as dc}, turn, skip first V-st, *V-st in space before next
V-st, skip next V-st*, Repeat from * to * 4 times, [V-st in
space before next V-st, ch 6, skip next V-st, sc in next ch-6 sp, sc in next
sc, sc in next ch-6 sp, ch 6, skip next V-st, Repeat from * to * 3 times] 4
times, V-st in space before next V-st, ch 6, skip next V-st, sc in next ch-6
sp, sc in next sc, sc in next ch-6 sp, ch 6, skip next V-st, Repeat from * to *
once, (V-st, ch 2, V-st) in marked ch-2 sp, move st marker up to ch-2 sp just
made, skip next V-st, [V-st in space before next V-st, ch 6, skip next V-st, sc
in next ch-6 sp, sc in next sc, sc in next ch-6 sp, ch 6, skip next V-st,
Repeat from * to * 3 times] 4 times, V-st in space before next V-st, ch 6, skip
next V-st, sc in next ch-6 sp, sc in next sc, sc in next ch-6 sp, ch 6, skip
next V-st, Repeat from * to * 6 times, dc in top of previous row ch-3. [1
ch-2 sp, 2 dc, 20 ch-6 sp, 30 sc, 48 V-sts]
Row
13: Ch 3 {counts as dc}, turn, skip first V-st, *V-st in space before next
V-st, skip next V-st*, Repeat from * to * 3 times, [V-st in
space before next V-st, ch 6, skip next V-st, sc in next ch-6 sp, sc in next 3
sc, sc in next ch-6 sp, ch 6, skip next V-st, Repeat from * to * 2 times] 4
times, V-st in space before next V-st, ch 6, skip next V-st, sc in next ch-6
sp, sc in next 3 sc, sc in next ch-6 sp, ch 6, skip next V-st, Repeat from * to
* once, (V-st, ch 2, V-st) in marked ch-2 sp, move st marker up to ch-2 sp just
made, skip next V-st, [V-st in space before next V-st, ch 6, skip next V-st, sc
in next ch-6 sp, sc in next 3 sc, sc in next ch-6 sp, ch 6, skip next V-st,
Repeat from * to * 2 times] 4 times, V-st in space before next V-st, ch 6, skip
next V-st, sc in next ch-6 sp, sc in next 3 sc, sc in next ch-6 sp, ch 6, skip
next V-st, Repeat from * to * 5 times, dc in top of previous row ch-3. [1
ch-2 sp, 2 dc, 20 ch-6 sp, 50 sc, 38 V-sts]
Row
14: Ch 3 {counts as dc}, turn, skip first V-st, *V-st in space before next
V-st, skip next V-st*, Repeat from * to * 2 times, [V-st in space before next
V-st, ch 6, skip next V-st, sc in next ch-6 sp, sc in next 5 sc, sc in next
ch-6 sp, ch 6, skip next V-st, Repeat from * to * once] 4 times, V-st in space
before next V-st, ch 6, skip next V-st, sc in next ch-6 sp, sc in next 5 sc, sc
in next ch-6 sp, ch 6, skip next V-st, Repeat from * to * once, (V-st, ch 2,
V-st) in marked ch-2 sp, move st marker up to ch-2 sp just made, skip next
V-st, [V-st in space before next V-st, ch 6, skip next V-st, sc in next ch-6
sp, sc in next 5 sc, sc in next ch-6 sp, ch 6, skip next V-st, Repeat from * to
* once] 4 times, V-st in space before next V-st, ch 6, skip next V-st, sc in
next ch-6 sp, sc in next 5 sc, sc in next ch-6 sp, ch 6, skip next V-st, Repeat
from * to * 4 times, dc in top of previous row ch-3. [1
ch-2 sp, 2 dc, 20 ch-6 sp, 70 sc, 28 V-sts]
Row
15: Ch 3 {counts as dc}, turn, skip first V-st, *V-st in space before next
V-st, skip next V-st*, Repeat from * to * once, [ch 6, skip
next V-st, sc in next ch-6 sp, sc in next 7 sc, sc in next ch-6 sp, ch 6, skip
next V-st, V-st in space before next V-st] 4 times, ch 6, skip next V-st, sc in
next ch-6 sp, sc in next 7 sc, sc in next ch-6 sp, ch 6, skip next V-st, Repeat
from * to * once, (V-st, ch 2, V-st) in marked ch-2 sp, move st marker up to
ch-2 sp just made, skip next V-st, V-st in space before next V-st, [ch 6, skip
next V-st, sc in next ch-6 sp, sc in next 7 sc, sc in next ch-6 sp, ch 6, skip
next V-st, V-st in space before next V-st] 4 times, ch 6, skip next V-st, sc in
next ch-6 sp, sc in next 7 sc, sc in next ch-6 sp, ch 6, skip next V-st, Repeat
from * to* 3 times, dc in top of previous row ch-3. [1 ch-2
sp, 2 dc, 20 ch-6 sp, 90 sc, 18 V-sts]
Row
16: Ch 3 {counts as dc}, turn, skip first V-st, *V-st in space before next
V-st, skip next V-st*, Repeat from * to * once, [V-st in next
ch-6 sp, ch 6, skip next sc, sc in next 7 sc, ch 6, skip next sc, V-st in next
ch-6 sp, skip next V-st] 4 times, V-st in next ch-6 sp, ch 6, skip next sc, sc
in next 7 sc, ch 6, skip next sc, V-st in next ch-6 sp, skip next V-st, Repeat
from * to * once, (V-st, ch 2, V-st) in marked ch-2 sp, move st marker up to
ch-2 sp just made, skip next V-st, repeat from * to * once, [V-st in next ch-6
sp, ch 6, skip next sc, sc in next 7 sc, ch 6, skip next sc, V-st in next ch-6
sp, skip next V-st] 4 times, V-st in next ch-6 sp, ch 6, skip next sc, sc in
next 7 sc, ch 6, skip next sc, V-st in next ch-6 sp, skip next V-st, Repeat
from * to * 2 times, dc in top of previous row ch-3. [1 ch-2
sp, 2 dc, 20 ch-6 sp, 70 sc, 28 V-sts]
Row
17: Ch 3 {counts as dc}, turn, skip first V-st, *V-st in space before next
V-st, skip next V-st*, Repeat from * to * once, [V-st in next
ch-6 sp, ch 6, skip next sc, sc in next 5 sc, ch 6, skip next sc, V-st in next
ch-6 sp, skip next V-st, Repeat from * to * once] 4 times, V-st in next ch-6
sp, ch 6, skip next sc, sc in next 5 sc, ch 6, skip next sc, V-st in next ch-6
sp, skip next V-st, Repeat from * to * 2 times, (V-st, ch 2, V-st) in marked
ch-2 sp, move st marker up to ch-2 sp just made, skip next V-st, repeat from *
to * 2 times, [V-st in next ch-6 sp, ch 6, skip next sc, sc in next 5 sc, ch 6,
skip next sc, V-st in next ch-6 sp, skip next V-st, Repeat from * to * once] 4
times, V-st in next ch-6 sp, ch 6, skip next sc, sc in next 5 sc, ch 6, skip
next sc, V-st in next ch-6 sp, skip next V-st, Repeat from * to * 2 times, dc
in top of previous row ch-3. [1 ch-2 sp, 2 dc, 20 ch-6 sp, 50 sc, 38 V-sts]
Row
18: Ch 3 {counts as dc}, turn, skip first V-st, *V-st in space before next
V-st, skip next V-st*, Repeat from * to * once, [V-st in next
ch-6 sp, ch 6, skip next sc, sc in next 3 sc, ch 6, skip next sc, V-st in next
ch-6 sp, skip next V-st, Repeat from * to * 2 times] 4 times, V-st in next ch-6
sp, ch 6, skip next sc, sc in next 3 sc, ch 6, skip next sc, V-st in next ch-6
sp, skip next V-st, Repeat from * to * 3 times, (V-st, ch 2, V-st) in marked
ch-2 sp, move st marker up to ch-2 sp just made, skip next V-st, repeat from *
to * 3 times, [V-st in next ch-6 sp, ch 6, skip next sc, sc in next 3 sc, ch 6,
skip next sc, V-st in next ch-6 sp, skip next V-st, Repeat from * to * 2 times]
4 times, V-st in next ch-6 sp, ch 6, skip next sc, sc in next 3 sc, ch 6, skip
next sc, V-st in next ch-6 sp, skip next V-st, Repeat from * to * 2 times, dc
in top of previous row ch-3. [1 ch-2 sp, 2 dc, 20 ch-6 sp, 30 sc, 48 V-sts]
Row
19: Ch 3 {counts as dc}, turn, skip first V-st, *V-st in space before next
V-st, skip next V-st*, Repeat from * to * once, [V-st in next
ch-6 sp, ch 6, skip next sc, sc in next sc, ch 6, skip next sc, V-st in next
ch-6 sp, skip next V-st, Repeat from * to * 3 times] 4 times, V-st in next ch-6
sp, ch 6, skip next sc, sc in next sc, ch 6, skip next sc, V-st in next ch-6
sp, skip next V-st, Repeat from * to * 4 times, (V-st, ch 2, V-st) in marked
ch-2 sp, move st marker up to ch-2 sp just made, skip next V-st, repeat from *
to * 4 times, [V-st in next ch-6 sp, ch 6, skip next sc, sc in next sc, ch 6,
skip next sc, V-st in next ch-6 sp, skip next V-st, Repeat from * to * 3 times]
4 times, V-st in next ch-6 sp, ch 6, skip next sc, sc in next sc, ch 6, skip
next sc, V-st in next ch-6 sp, skip next V-st, Repeat from * to * 2 times, dc
in top of previous row ch-3. [1 ch-2 sp, 2 dc, 20 ch-6 sp, 10 sc, 58 V-sts]
Row 20: Ch 3 {counts as dc}, turn, skip first V-st, *V-st in space before next
V-st, skip next V-st*, Repeat from * to * once, [V-st in first ch of next ch-6 sp, skip
next sc, V-st in last ch of next ch-6 sp, skip next V-st, Repeat from * to * 4
times] 4 times, V-st in first ch of next ch-6 sp, skip next sc, V-st in last ch
of next ch-6 sp, skip next V-st, Repeat from * to * 5 times, (V-st, ch 2, V-st)
in marked ch-2 sp, move st marker up to ch-2 sp just made, skip next V-st,
repeat from * to * 5 times, [V-st in first ch of next ch-6 sp, skip next sc,
V-st in last ch of next ch-6 sp, skip next V-st, Repeat from * to * 4 times] 4
times, V-st in first ch of next ch-6 sp, skip next sc, V-st in last ch of next
ch-6 sp, skip next V-st, Repeat from * to * 2 times, dc in top of previous row
ch-3. [1 ch-2 sp, 2 dc, 68 V-sts]
Rows
21 – 23: Repeat Row
2. Fasten off at end of Row 23. [1 ch-2
sp, 2 dc, 68 V-sts]
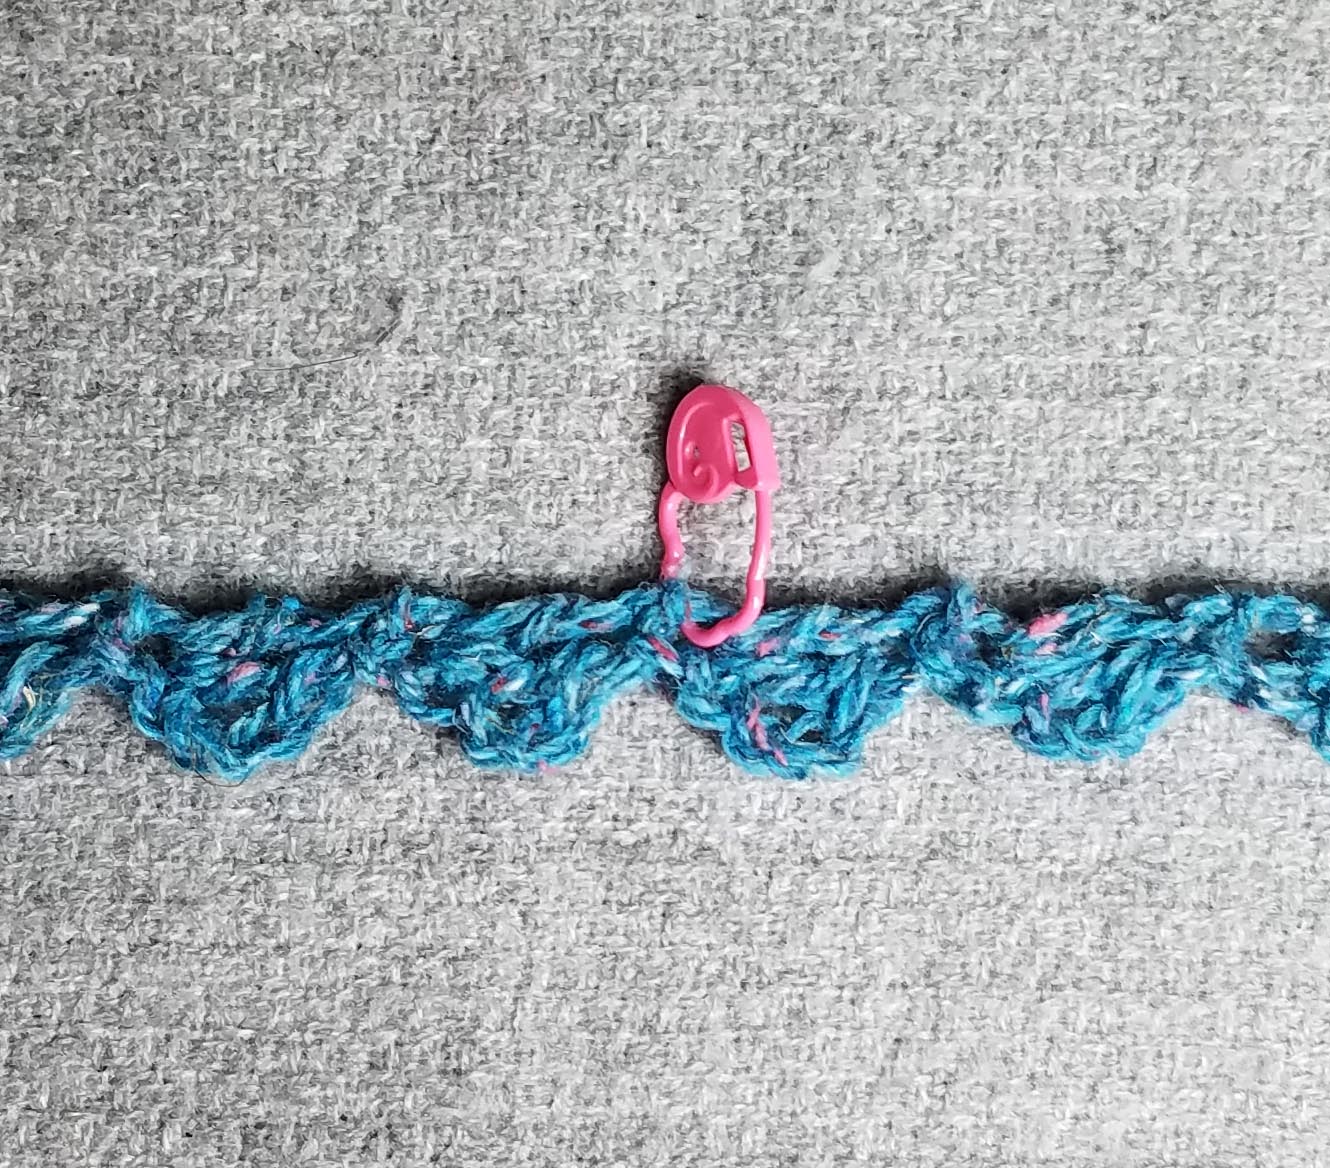
Edging: With RS of foundation facing attach yarn with slip st in ch-2 at beginning of Row 1 {indicated by pink arrow in photo above}, working along side of Shawl body Rows, (ch 2, dc) in same ch-2 sp as slip st join, [(slip st, ch 2, dc) in top of next row] 22 times, slip st in last st at top of Row 23, turn to work along top of Row 23 stitches, ch 3, dc in first dc of first V-st, skip 2 sts, *[(slip st, ch 3, dc) in first dc of next V-st, skip 2 sts]* 33 times, (slip st, ch 3, dc) in marked ch-2 sp, remove st marker, Repeat from * to * 34 times, (slip st, ch 2, dc) in last dc of Row 23, turn to work along side of Shawl Body rows at last end, [(slip st, ch 2, dc) in top of next row] 22 times, slip st in sc at end of foundation rows,Fasten off. [23 small scallops at each end, 69 scallops along top of Row 23]
Finishing
Before weaving in ends, wet block work to open lace. Once shawlette has completely dried, weave in all loose ends.
The stitch markers in my project photos above are my favorite newest Clover stitch markers. They are light weight and come in a variety of colors and sizes. If you can’t find them locally you can click on the product photo below to find them on Amazon.com. This post contains affiliate links. I may receive compensation (at no added cost to you) if you make a purchase using these links.


I hope you have a fun time crocheting this shawlette. If you make it and want to share photos with me of your finished project tag me on Instagram. You can follow me there using the icons at the top of the sidebar. Or just search for me as Andee.Graves.