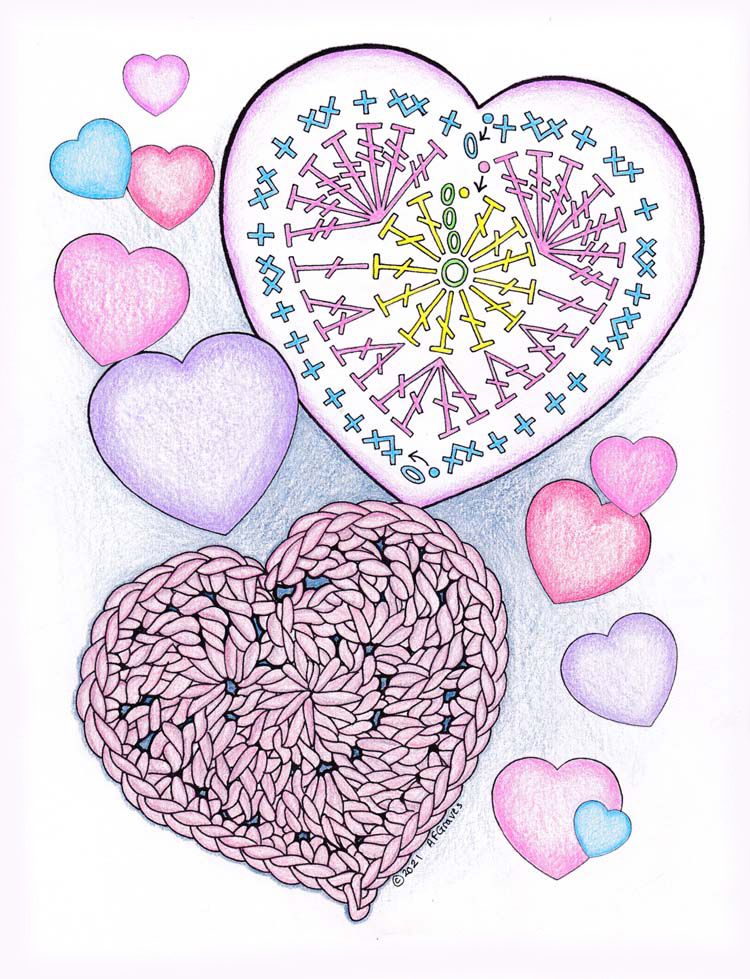
Hello dear readers, next Sunday is Valentine’s Day and I’m celebrating with a coloring page for all of you that also has a stitch chart for my favorite crocheted heart pattern. If you prefer to work from a pattern that is written out, you can find the text version of the pattern at the end of this post.
I have been super busy working on a bunch of designs that will be published later this year in a couple different magazines. Once they are published I will tell you more about those, but for now they are being kept secret. I will share that I am very happy with them and hope you’ll be just as excited to see them.
Otherwise it has been a cold and blustery winter up here on my mountain. Great for keeping the woodstove going and spending lots of time with my hooks and yarn. My design mojo is going strong and I only wish I had more hours in the day to crochet, probably best for my hands that I don’t though.
No matter where you are and what season you are contending with, I hope everyone takes a moment to celebrate love in their lives this Valentines Day.
Bordered Heart
Designed by Andee Graves
Skill level: Intermediate
Finished Size:
3.25” wide x 3” tall
Materials:
Yarn – Worsted wt (Sample uses Berroco Yarns “Ultra Wool” 100% Superwash Wool (3.5 oz/100g, 219 yd/200 m) Color #3315 Rose
Hooks – H / 5mm
Notions – Yarn/tapestry needle for weaving in ends
Gauge
Heart 3” tall and 3.25” wide
Abbreviations/Special Stitches
Joining slip st (slip st): Insert hook in indicated place, YO, pull up a loop thru place and loop on hook, continue to pull up on working loop until original loop is tight.
Picot Point st (picot): Ch 1, Insert hook in previous stitch using front loop and top side loop, YO, pull loop thru stitch and loop on hook and tighten.
Pattern Notes:
Heart starts with Adjustable slip knot, check my YouTube channel for video instructions if you don’t know how to make an adjustable slip knot.
Instructions
Rnd 1: Start with an Adjustable Slip Knot, ch 4, 12 dc in 4th ch from hook, sl st in top of ch-4.
Rnd 2: Skip 2 sts, 7 Tr in next st, dc next st, 2 dc next 2 sts, 4 dc in next st, 2 dc next 2 sts, dc next st, 7 Tr next st, sl st between last dc and join of Round 1.
Rnd 3: Ch 1, (sc in next st, 2 sc next st) 4 times, sc next 5 sts, 2 sc in next st, picot, 2 sc in next st, sc in next 5 sts, (2 sc next st, sc in next st) 4 times, sl st to first sc of Rnd, Fasten off.
Easter is next weekend and I’ve always loved it as a celebration of Spring. Even though up here on the mountain it is usually still cold and even snowy, down in town there are signs of springtime everywhere. Trees getting green buds or even leaves, tulips and daffodils popping up and showing off their colors.
We will be keeping our eyes and ears open for the arrival of the first hummingbirds as the Easter bunny comes for a visit. We have already seen a few wild bunnies in our yard as they venture out of their warm burrows on the milder days.
Meanwhile I have a new fun coloring page for my readers. This bunny is celebrating springtime with his coat of flowers and greenery. You can download the full page PDF of the coloring page using the link below.
As a special treat for those of you preparing for the upcoming holiday I also have a card version of the bunny.
This page will print out with the bunny on half of a 8.5″ x 11″ page. Color your image then fold the paper into a 5″ x 8.5″ card. You can download the card coloring page PDF using the link below.
I hope you and your family have a wonderful Easter together.
This post contains affiliate links. I may receive compensation (at no additional cost to you) if you make a purchase using these links.
I colored the images in this post using my Chameleon Color Tones pencils. They are a densely pigmented pencil so even a light touch to the paper can give you beautiful color. If you can’t find them locally they are available online at Amazon.com. Click on the photo above to go straight to them.
If you prefer to color with markers, some of my favorites are the Staedtler Triplus Fineliners. If you can’t find them locally they are available on Amazon.com. Just click on the image above to go straight to them.
Valentine’s Day is only 9 days away. So it is time for some quick crafting projects to show the special folks in our lives how much we love them.
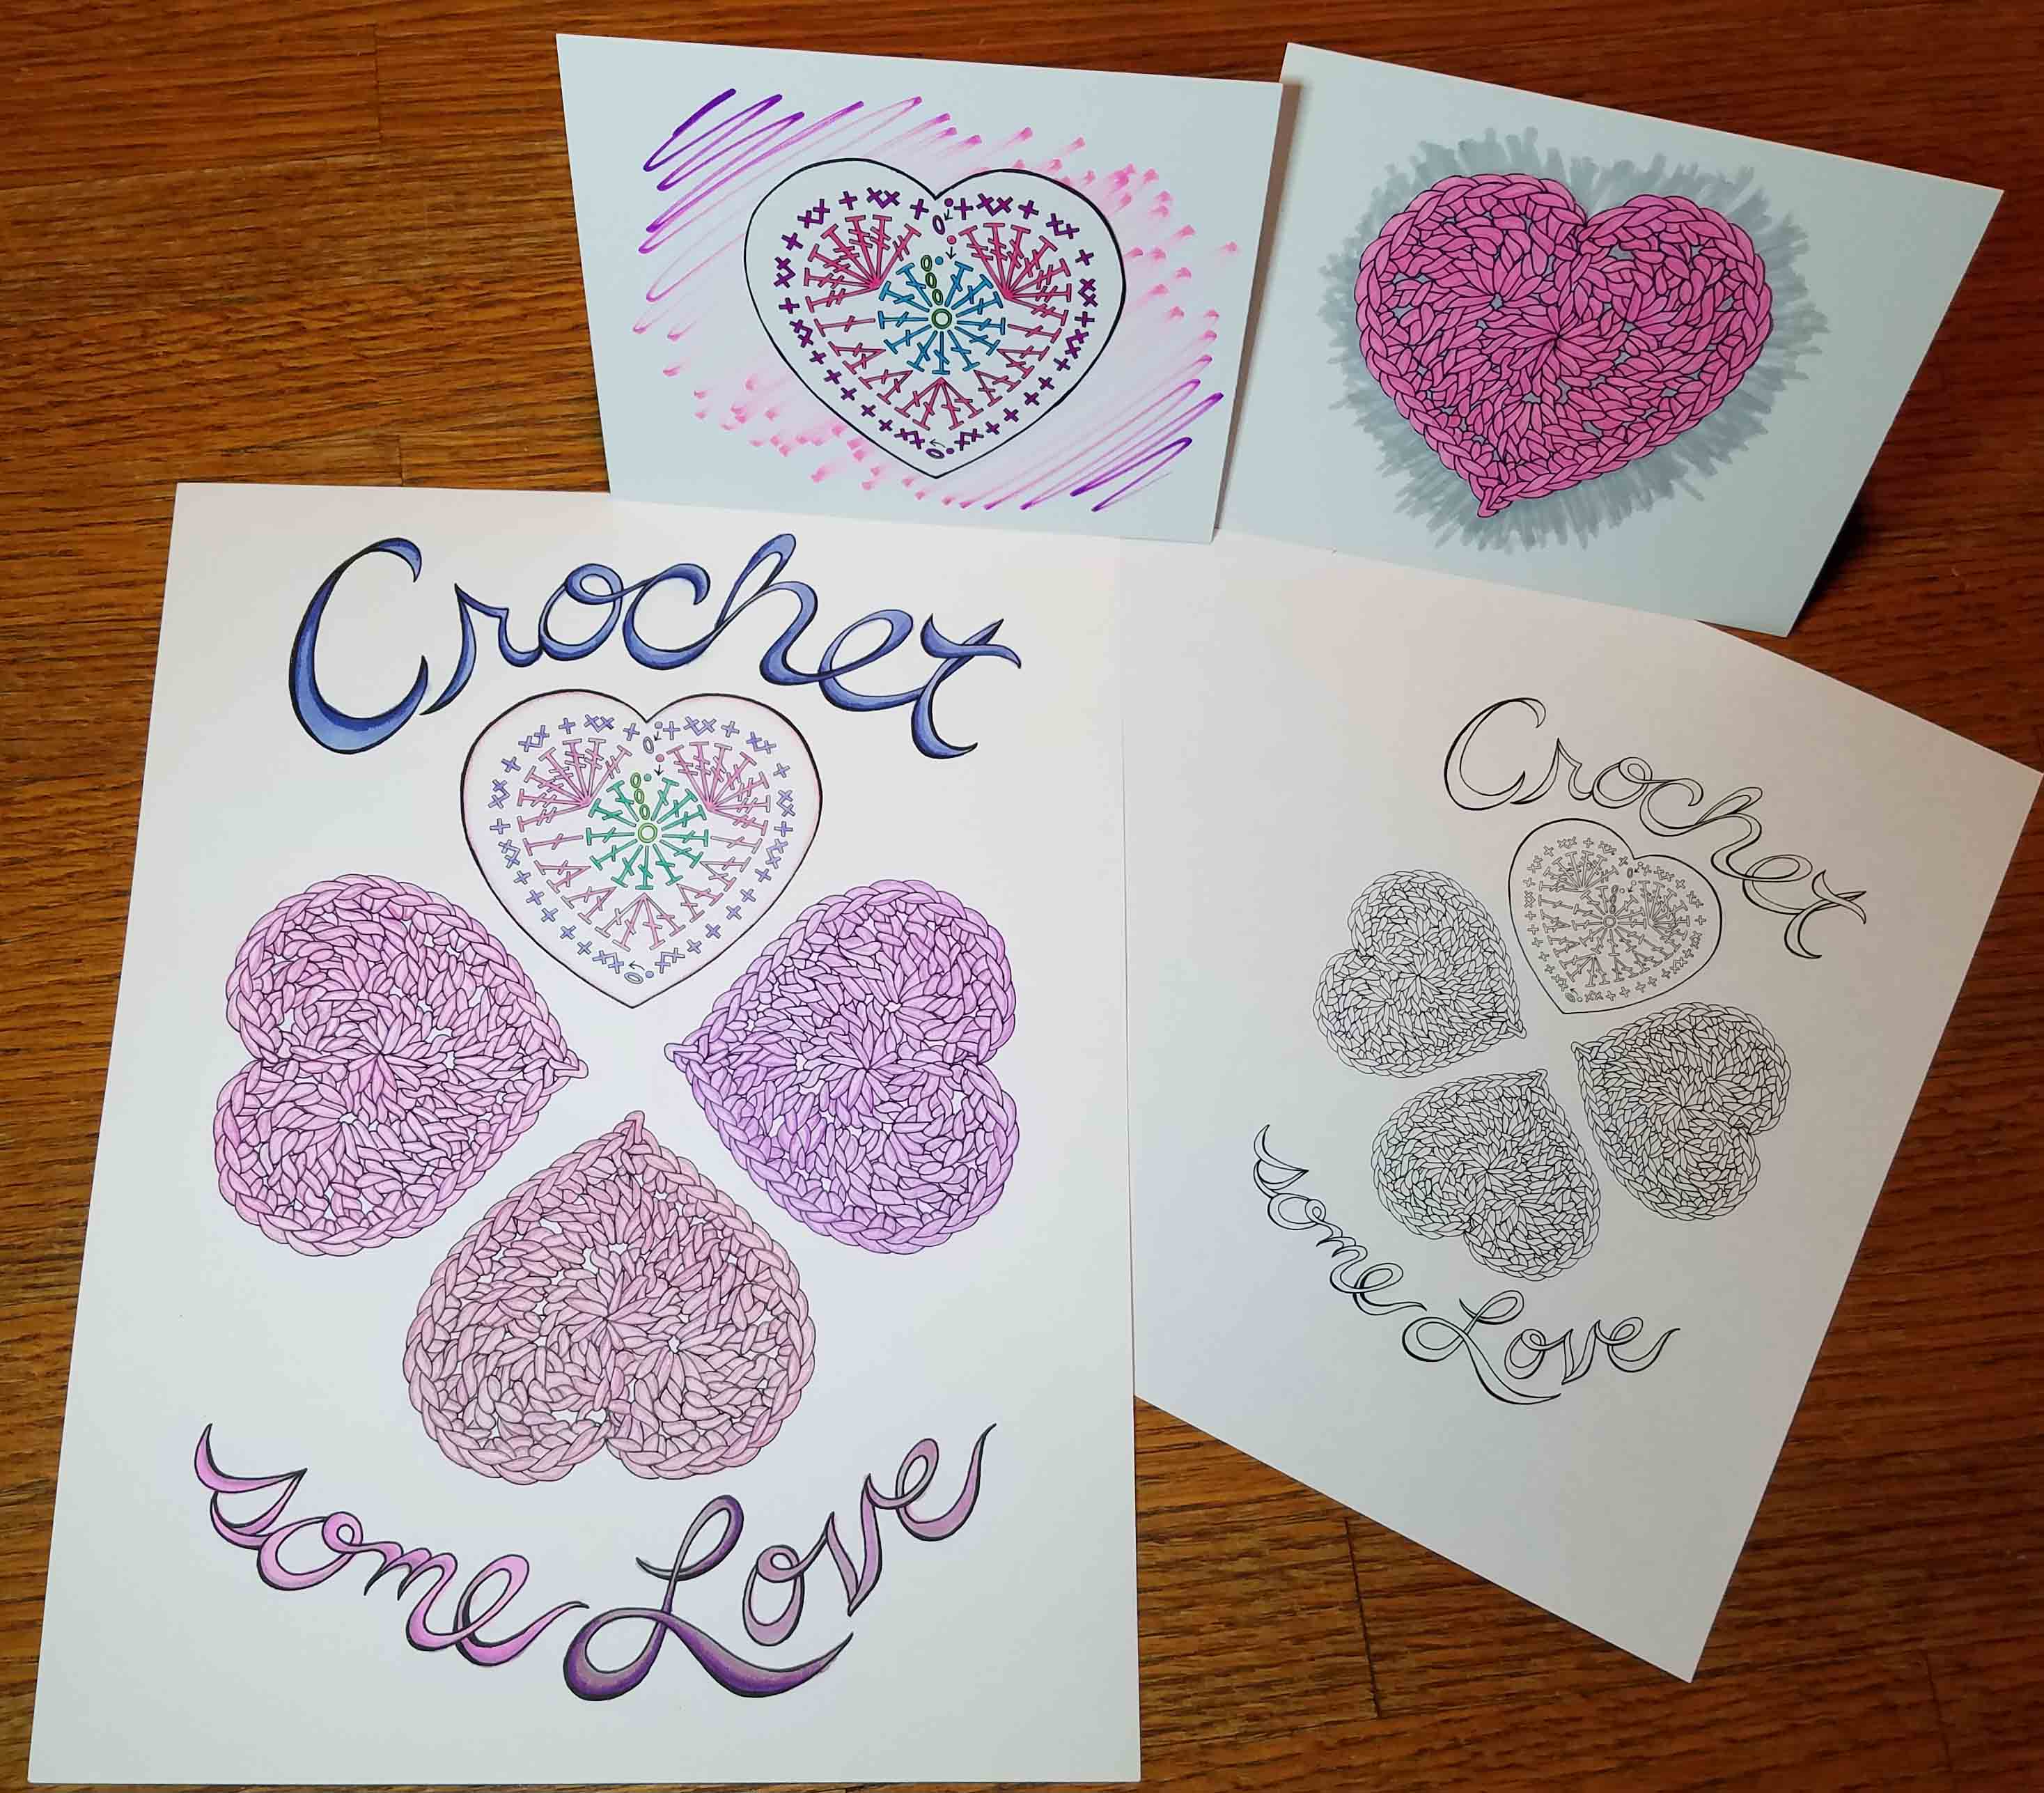
Today I’m going to be sharing ideas for crafting a bit of love for your family and friends. First off, I have a new coloring page for everyone. You can download this PDF to print and color-in however you want.
I have been enjoying coloring books and pages for some time and have decided that I really love having the option to print out the pages I want to color. I have to confess many of my physical coloring books remain uncolored because I didn’t want to “ruin” the images.
Having the option of printing out the pages I am going to color means I can color without worry that I’ll be unhappy with the outcome. It also gives me the chance to play with different coloring styles and mediums. One time I might use only color pencils, the next I’ll get out my Chameleon color-tones markers, or maybe I’ll use both.
When printing out the page from a PDF you can also play with the size of the page. For this Valentines design you can print it out smaller to make the image fit on a regular size greeting card base, or color the page and then cut out the individual elements to use on a smaller card.
The two little cards in the photograph were made using that technique, I used 3 Glue Dots to adhere each heart to a plain card that I had added color to with a marker. I really like using the Glue Dots, no mess on my table and super quick to craft with. The package in the photo was one that I got on my recent trip to the AFCI Creativation show in Phoenix a couple weeks ago.
For those of you that may not be as much into coloring as crocheting, today’s coloring page includes a stitch chart for the heart motifs that are drawn on the page. This heart may be familiar to those of you that have been visiting my blog for awhile.
It is an update of my “Crocheted Love” heart from 2013 that I revisited last year in my pattern “A Pocket Full of Love”. If you need help with the picot stitch that forms the point at the bottom of the heart you can find a tutorial on my post “The Greatest of these is Love”.
The third craft I am looking at for making fun gifts for Valentine’s Day is needle felting. I’ll be teaching a quick class this Sunday from Noon – 1:30p at the Longmont Yarn Shoppe on how to make these adorable little heart pins.
Students will be provided with a kit of materials that will include a crocheted heart and the fiber to felt a 3-D heart in a contrasting color. The handout for the class will also include the pattern to crochet your own little hearts to needle felt onto. You can visit the Longmont Yarn Shoppe’s website to enroll in the class.
Update February 8, 2019: My crochet heart coloring page is featured on FaveCrafts. If you are in search of more coloring pages check out their site, but be prepared to get lost on there in the fun of looking at everything.
Wow! Here we are again another July 4th celebration. For me this holiday has always been about family and fireworks.
This year is a big family reunion for my husband’s family on the Michigan shore of Lake Huron. We have lucked out on the weather and it is much cooler than they are accustomed to this time of year. Being mountain dwelling folks from Colorado we are loving the cooler temperatures.
His cousin arranged for the group to rent a lovely Victorian house right on the water and 2 campsites at the nearby State Park. We have all been riding bikes and hiking back and forth. Yesterday I spent some quality time with my kiddos playing in the water at the park beach
and collecting beautiful sand smoothed stones.
This pile of pebbles are very small and I am planning on doing some wire wrapping on them to turn them into jewelry.
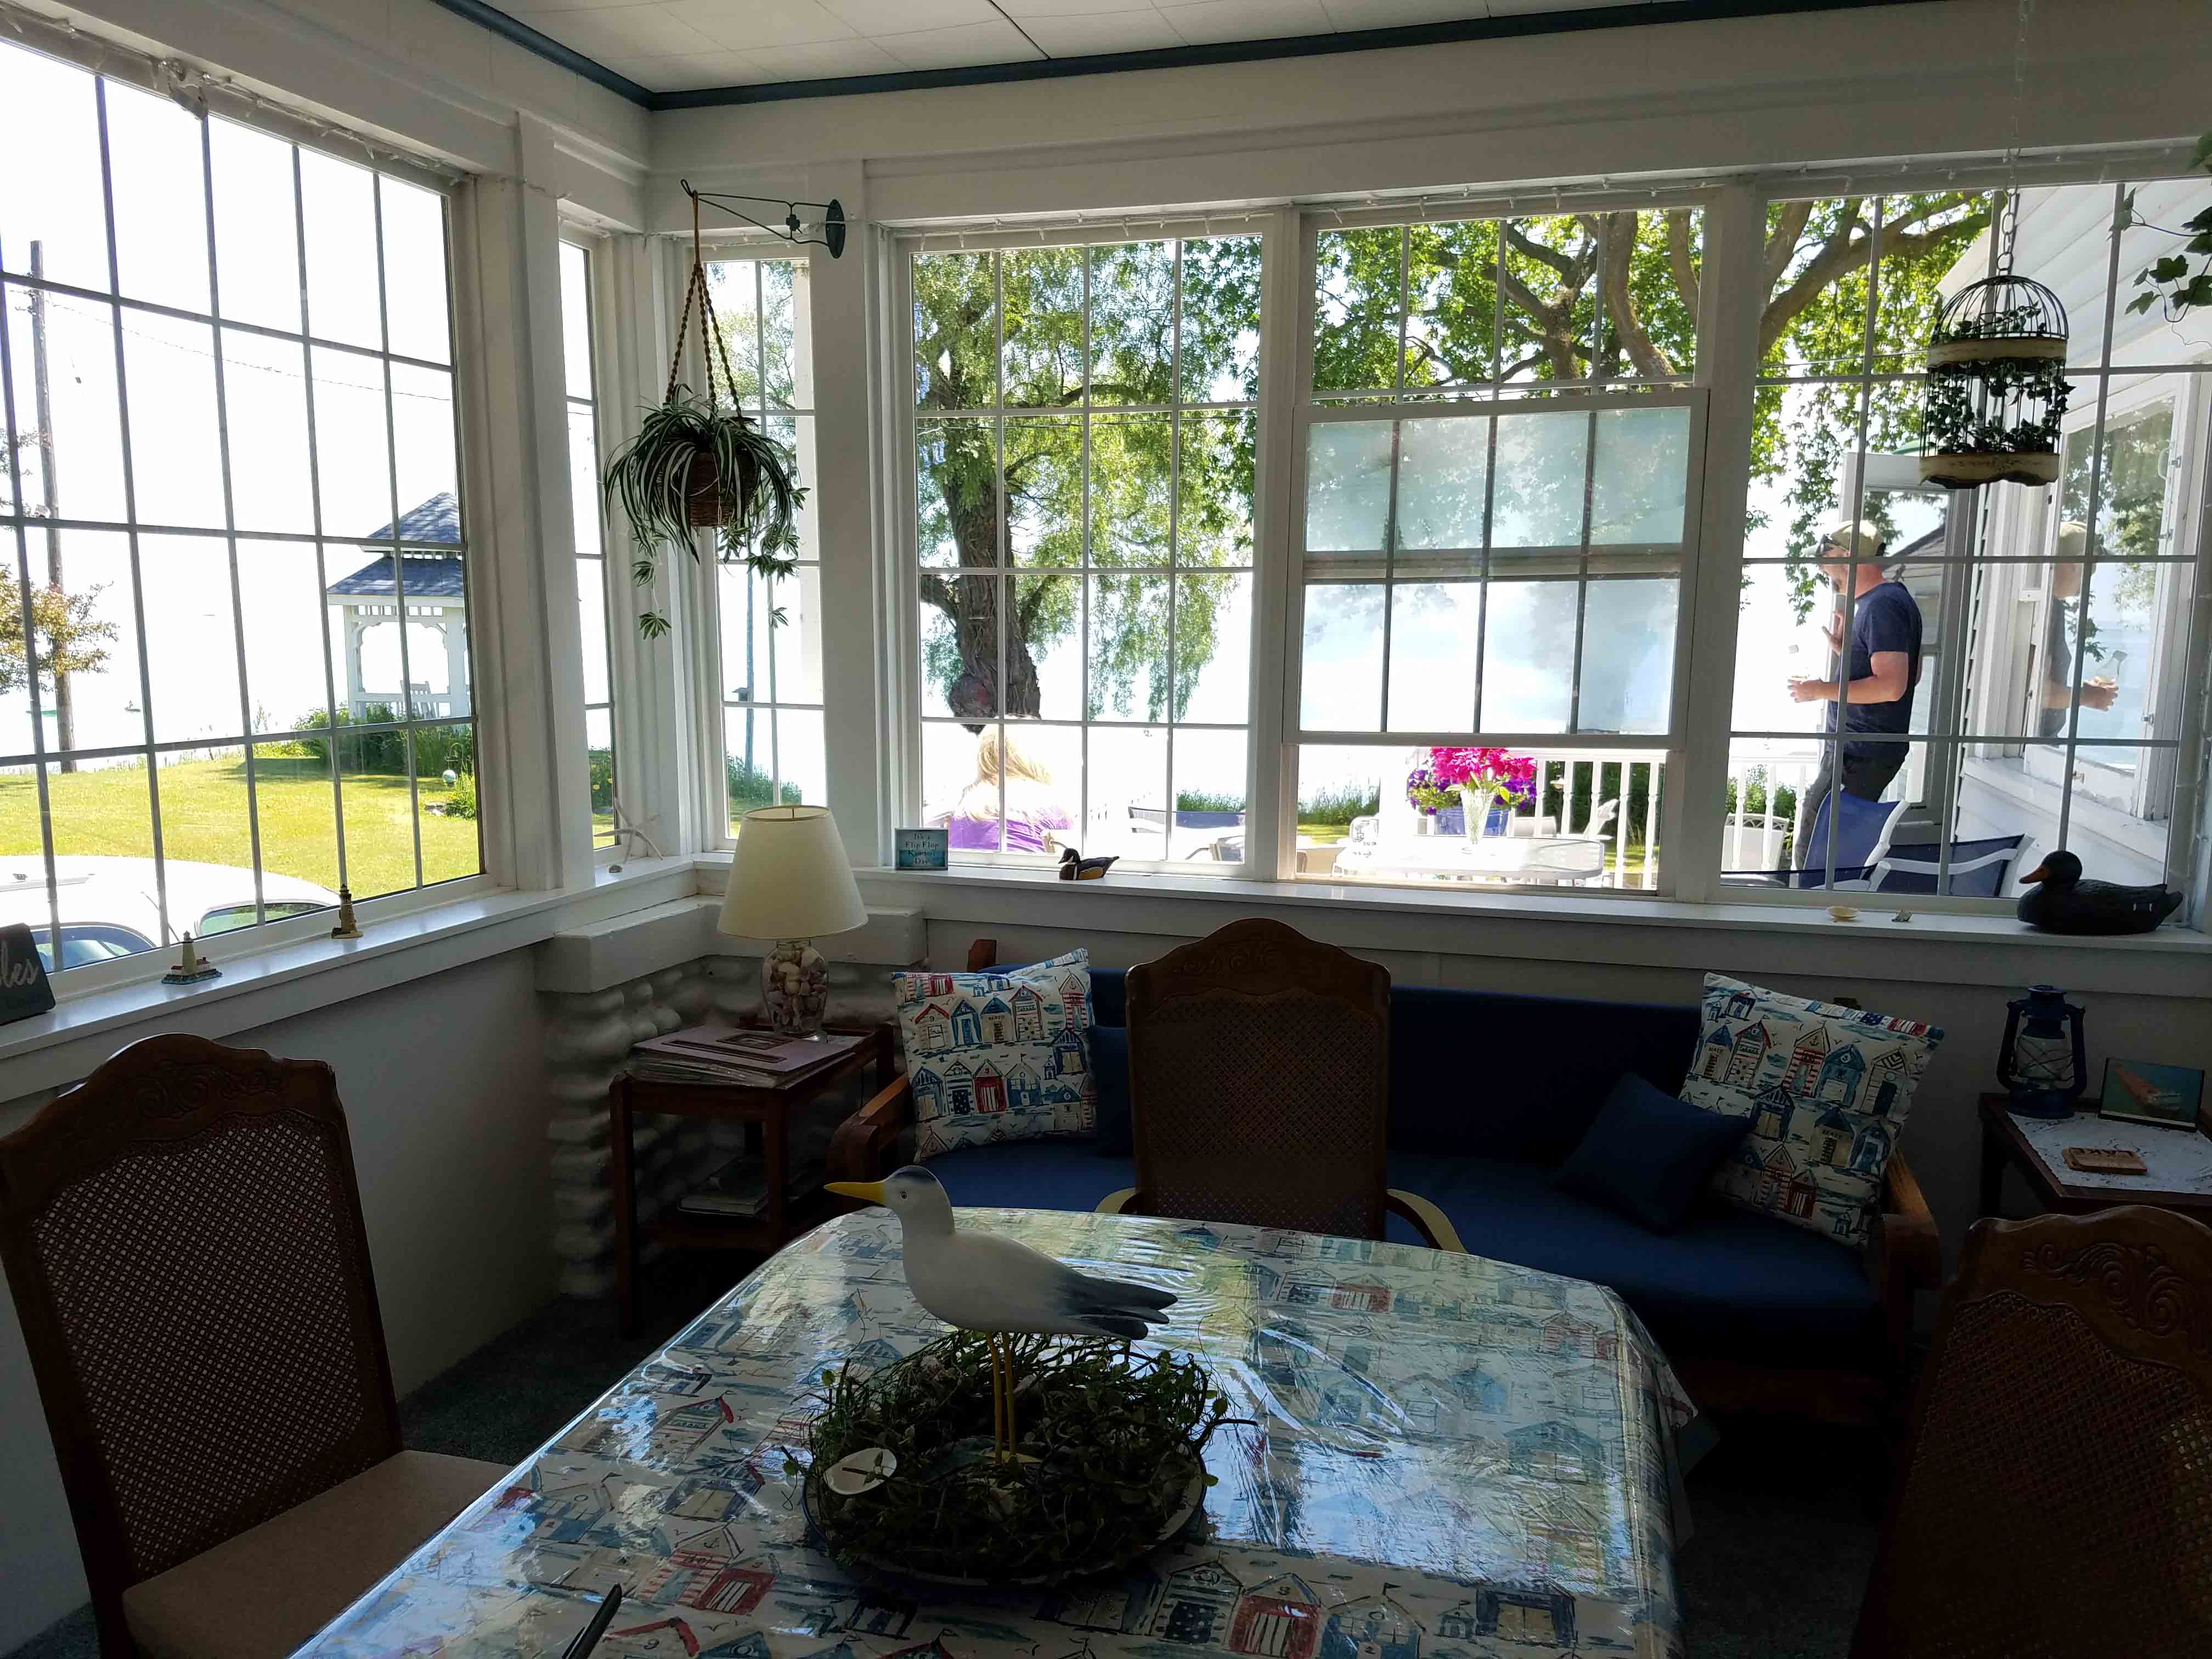
The house has a lovely dining room area that has 3 walls that are full of big glass windows with screened sections. It’s become my place to sit and do some crafting work each day. I try to stay completely out of the sun between 10 a.m. and 3 p.m., fortunately the view from this room are lovely, so I don’t feel left out.
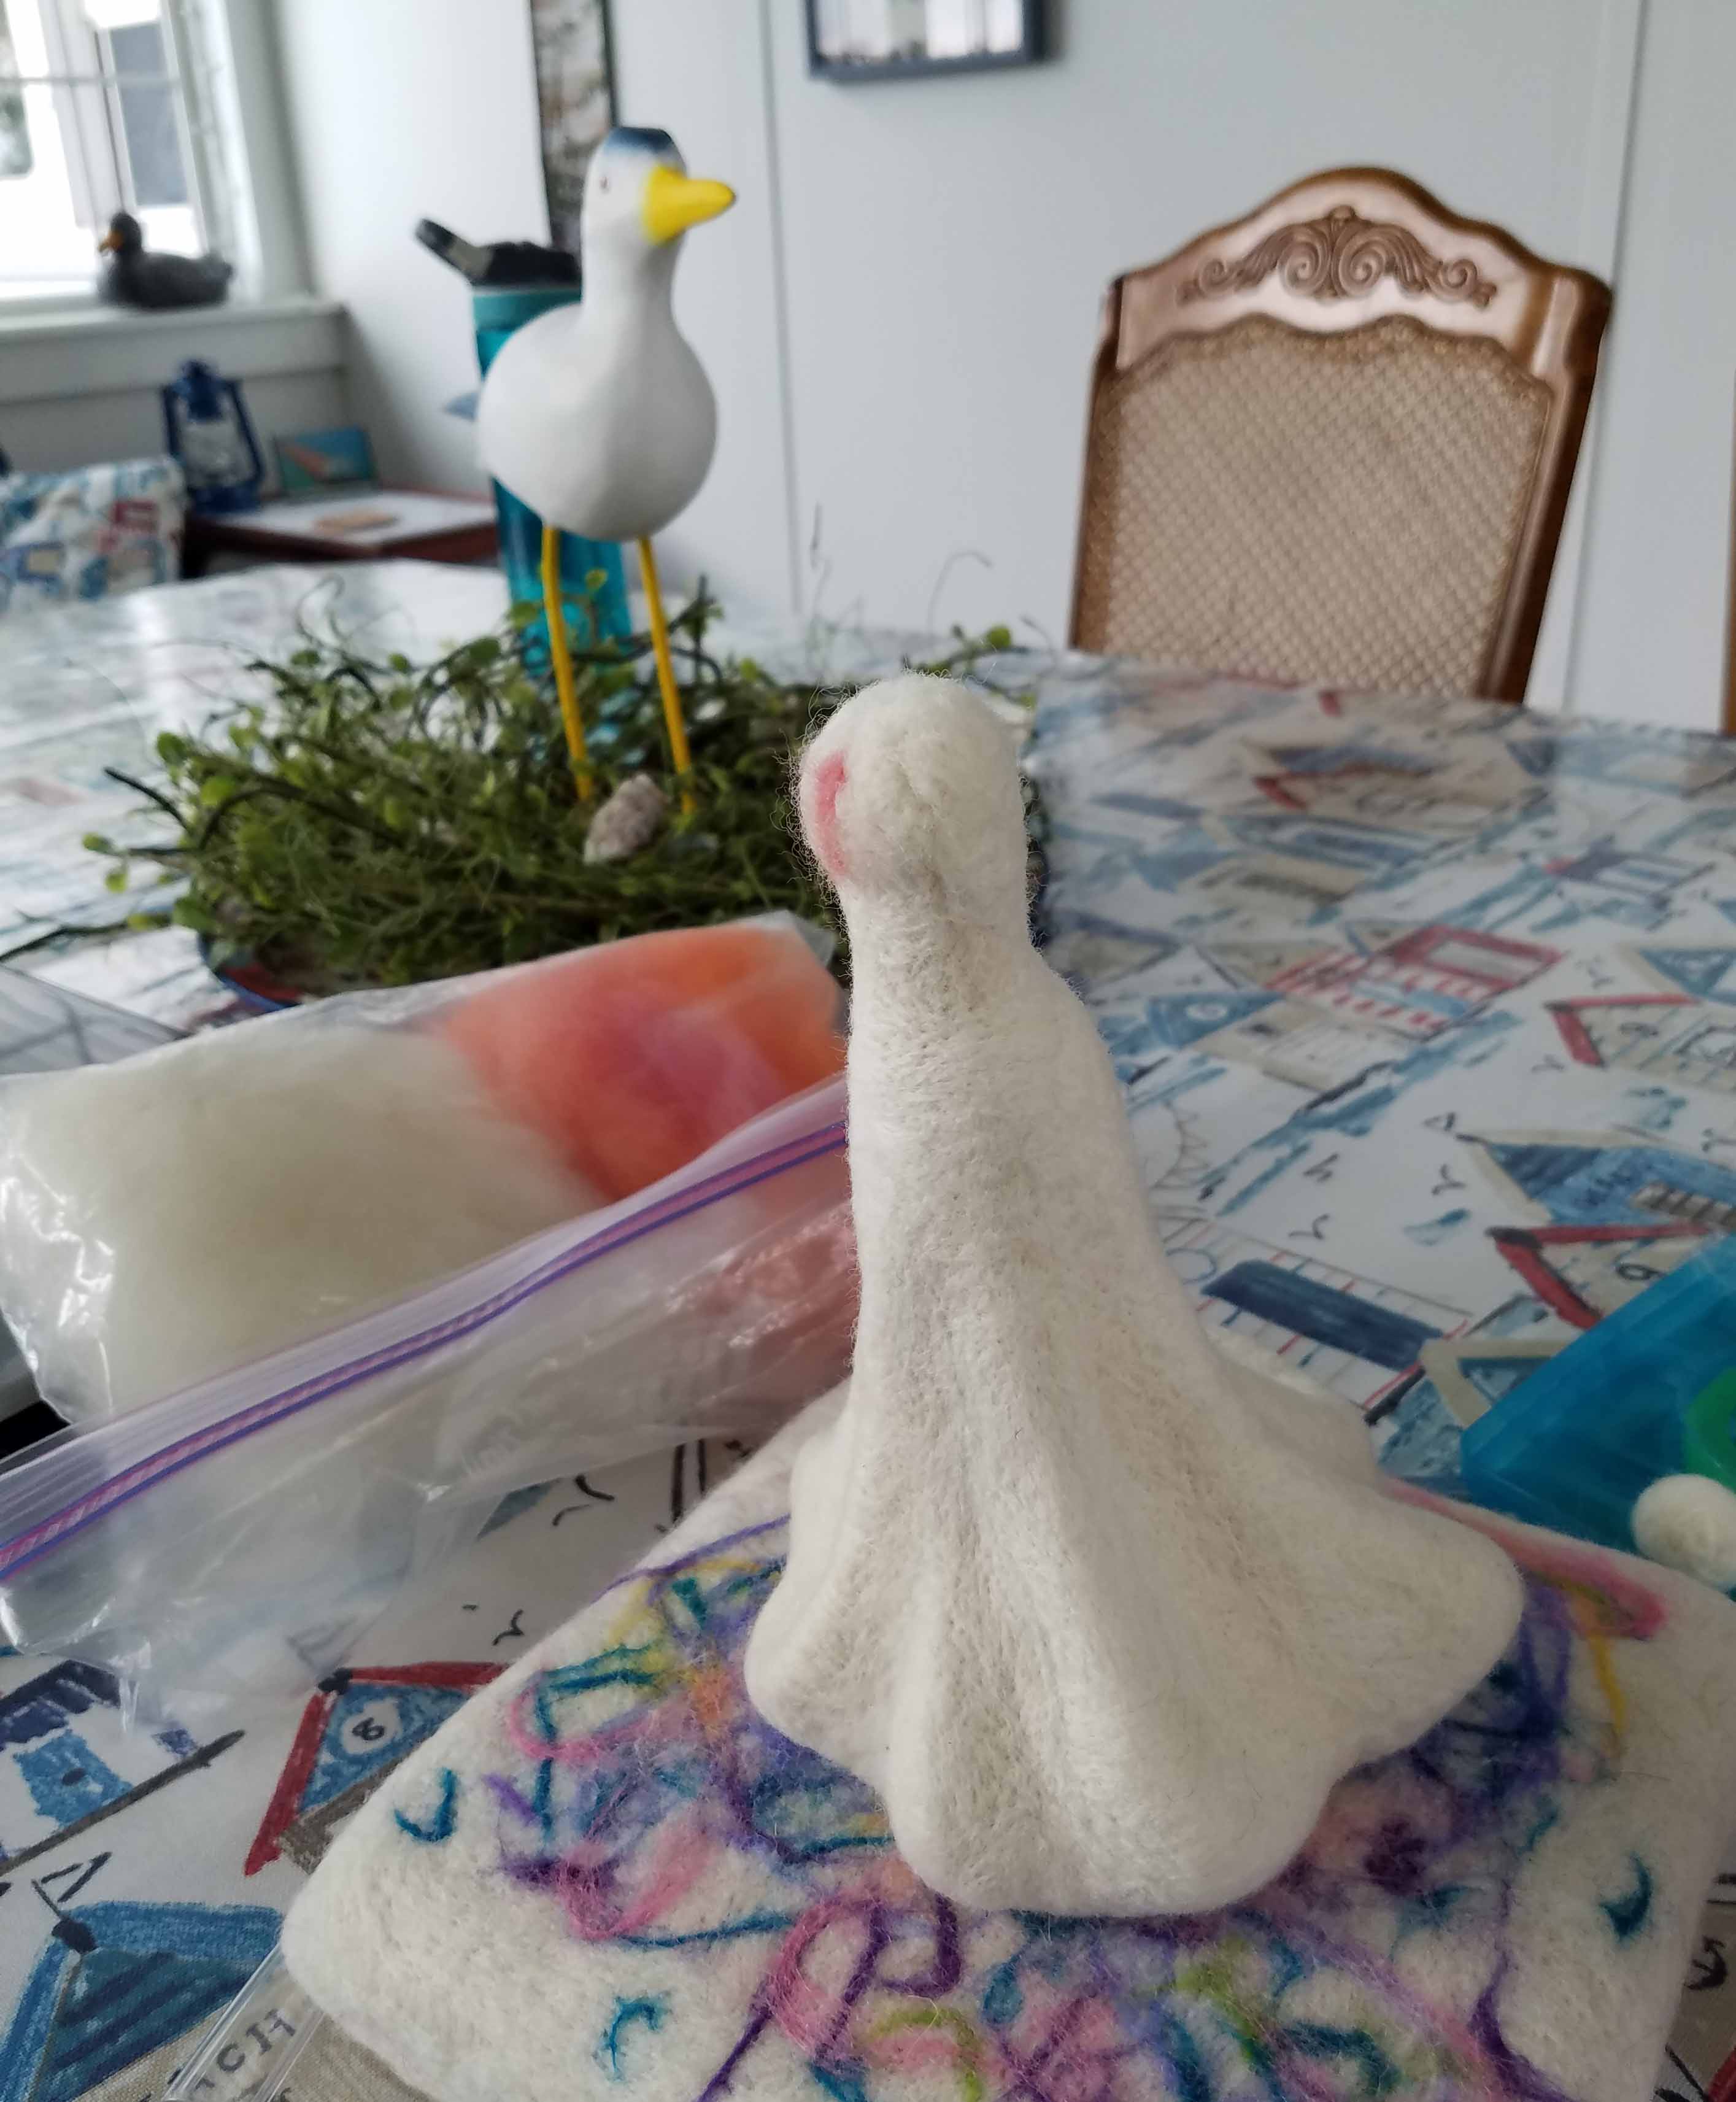
I’ve been working on this needle felted sculpture piece. Pretty awesome to sit here with birds singing, the sound of surf and a cool breeze. I’ve also packed along wire wrapping supplies, some beads, 4 crochet projects, 1 knitting project and my new Chameleon Art marker set. Hopefully I’ll get a chance to write a review on those while we are enjoying the time here.
Now I’m going to go do some more needle-felting and head to the beach for some toes in the sand time.
Along with the lettering/calligraphy practice and all the playing with yarn, I’ve been turning my hand again to illustration and drawing. When the coloring book craze first started off I kept thinking, “I could draw those.” I’ve always drawn and doodled. According to my parents, since I was old enough to hold onto anything to make marks with.
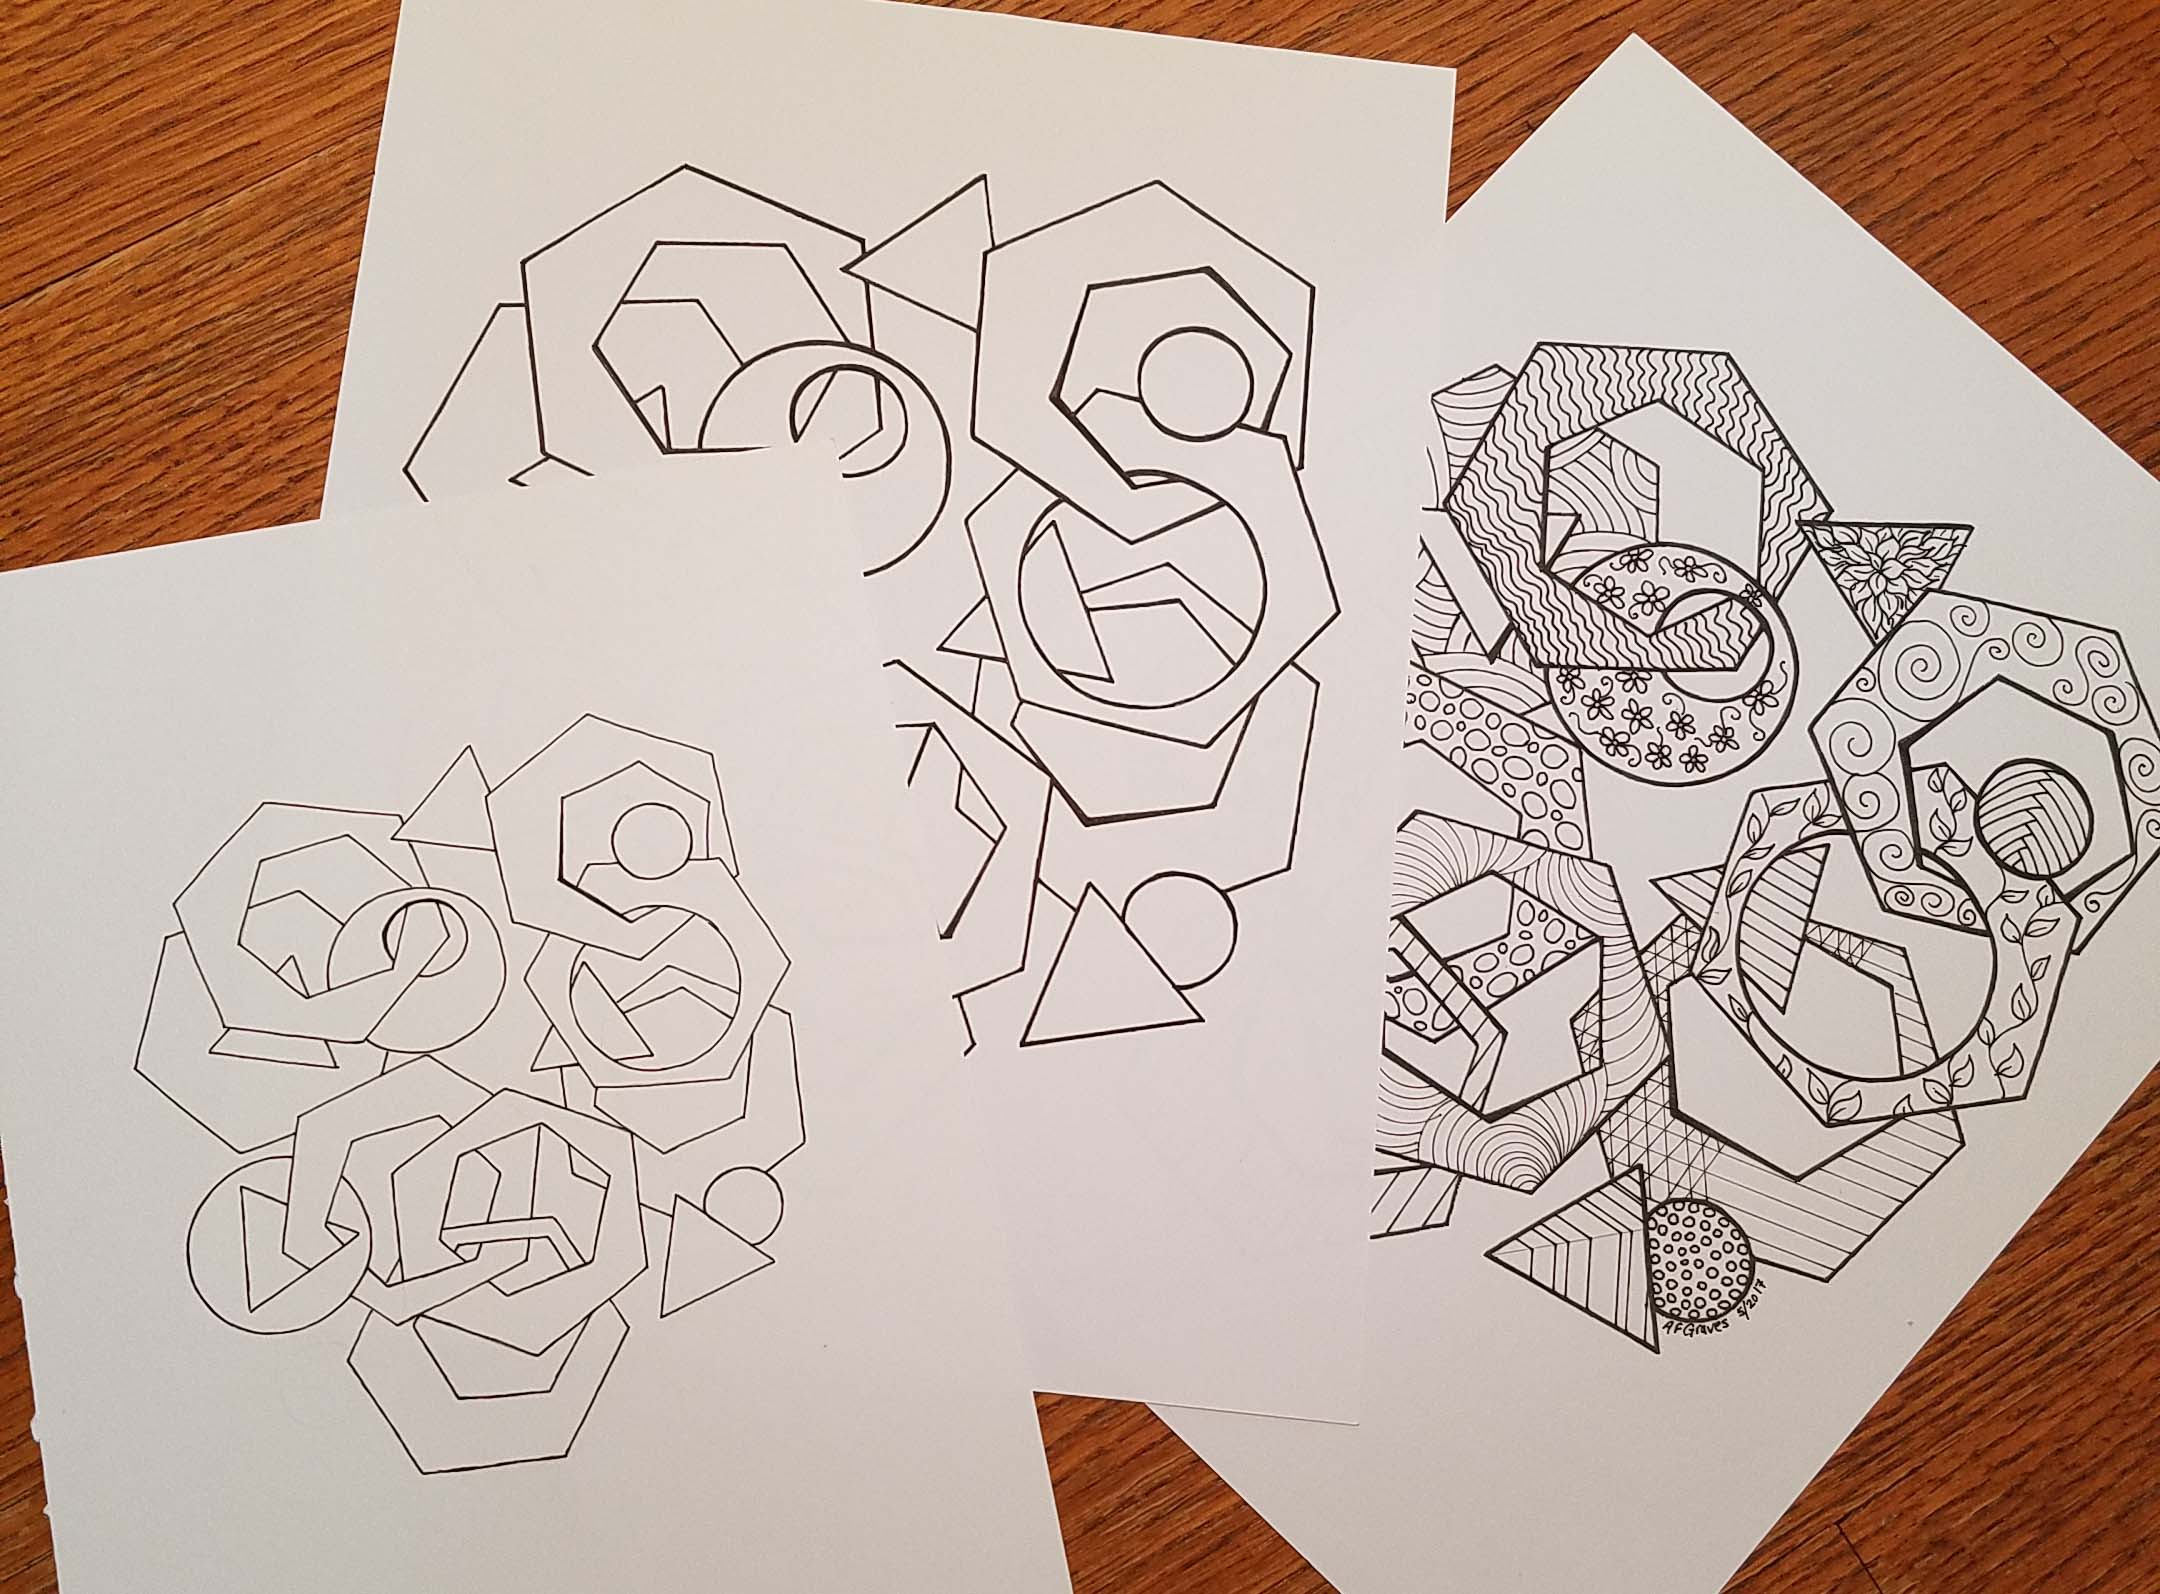
I gathered up my paper and drawing implements and began doodling some ideas. I’ve always loved using templates to create basic shapes then filling in the shapes with lines or organic shapes. I purchased many of these templates during my college days when I was taking graphic arts classes. You can find similar templates thru art and hobby supply shops.
For those of my readers that would like to try their hand at coloring my finished page I’ve attached a PDF that you can download and print out to this blog post. Geo 515 Coloring Page 2017 – Andee Graves M2H Designs
I recommend using a nice heavy weight printer paper. If you are going to be coloring with pencils, look for a paper that has a bit of “tooth” to it. I purchased this ream of Neenah “Exact Vellum Bristol” a few months back and have been very happy with it. It is great for dry media like colored pencils, crayons, pastels and ball-point pens. I haven’t tried any of my color markers with it yet.
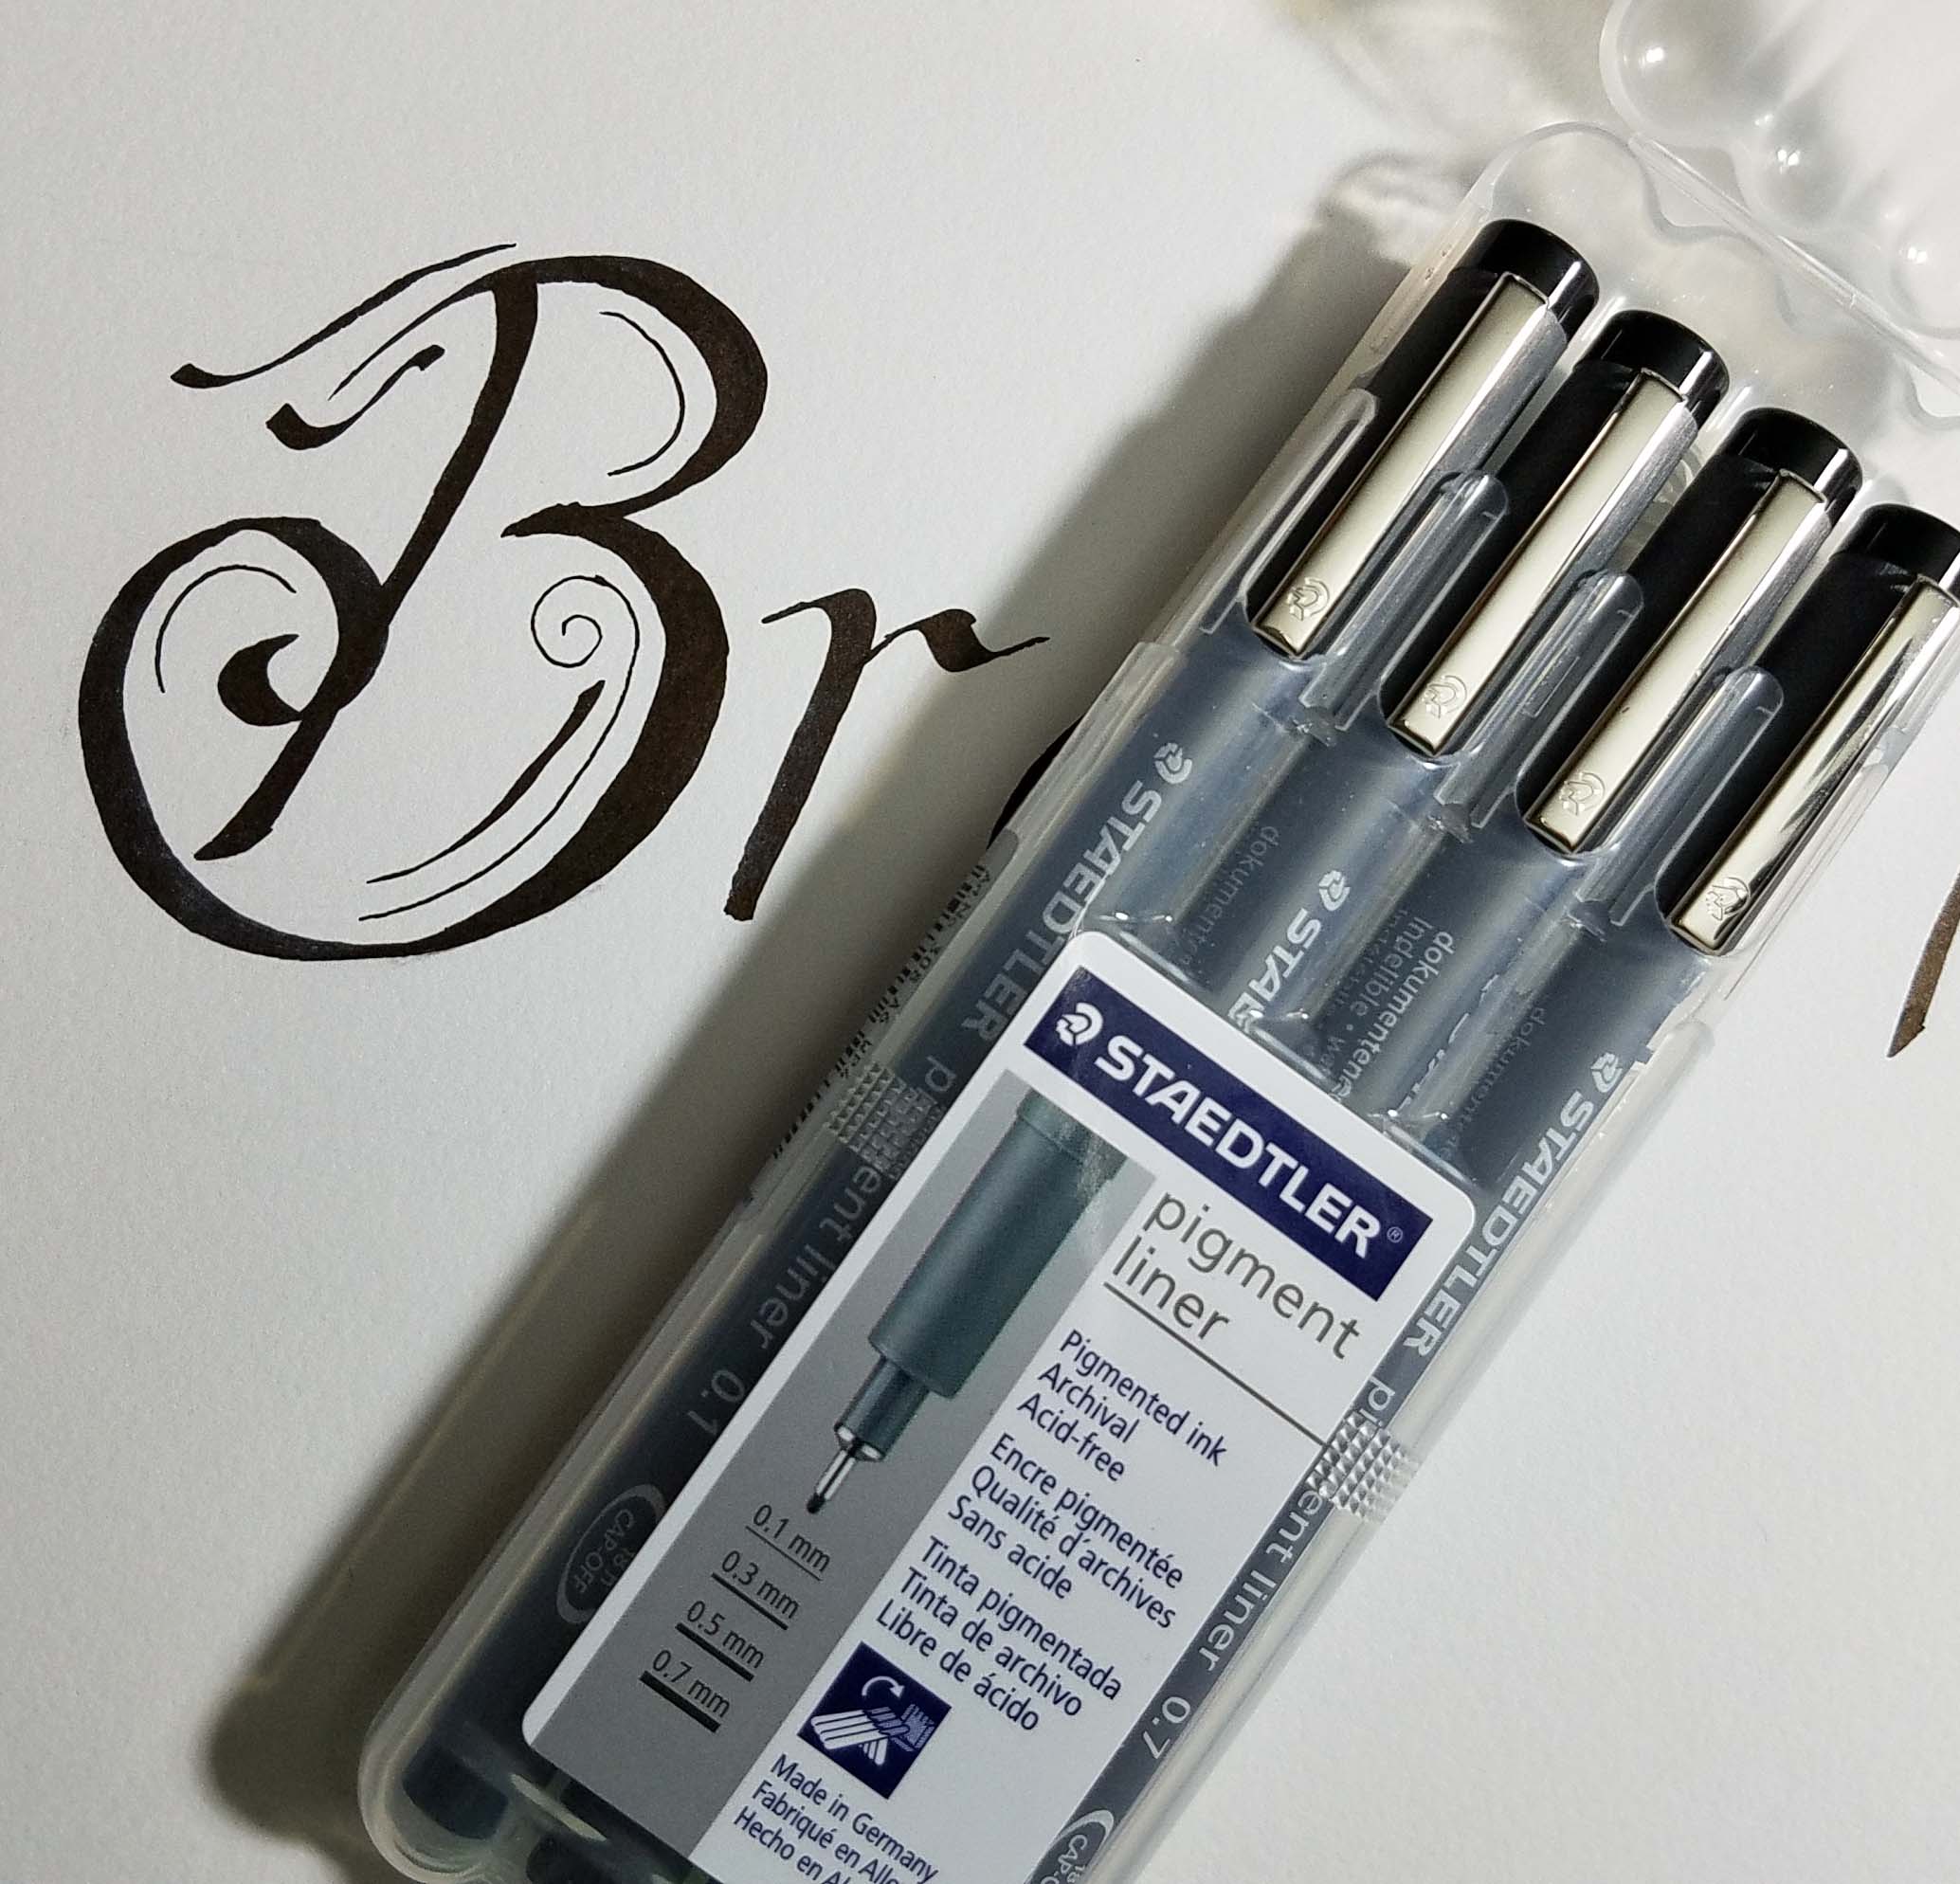
My pigment illustration pens work well with it too, as long as I don’t let the pen point sit on the paper surface too long. These pens are quickly becoming my favorites for final drawings. The variety of nib widths give me a number of options for thickness of lines and the ink supply is generous.
For this first drawing I drew a pencil sketch using my templates, then drew over the pencil drawing with my black ink freehand. A few of my lines came out a bit thicker than I wanted, but I wasn’t too concerned. I then scanned the drawing into my computer and used my graphics program to clean it up a bit. I printed it out on some of the cardstock and refined it with the pens, adding thickness to some of the other lines to balance out the original heavy lines.
I then copied this refined drawing on the heavy cardstock. I made a number of copies so I can try various “fill” drawings for the shapes. The drawing in the PDF is just my first try.
For those of my followers whose focus is on crochet and yarn crafts, don’t worry, I’m still designing and creating lots of fun crochet patterns. If all goes well the next month I’ll have a lot of exciting crochet designs and videos to show you very soon.
This weekend I’m running a bit behind. Our Friday was super busy, it was the last day of school for both the kiddos and there were ceremonies and socializing that kept us on the go all day. I was carrying around my crochet project, but only caught a few minutes here and there to work on it.
Saturday was our first “official” day of summer break, though you still couldn’t tell it by the weather. It was cold and damp all day. We even had a bit of hail, making me very glad I hadn’t purchased a hanging planter of petunias that I was looking at the other day.
Instead, we all hung out as a family watching movies on the television. Not the most exciting first day of summer break, but pretty awesome to not have to worry about the school schedule next week. I did spend some of my day inputting next Fall’s school calendar in my calendar app. I figured I would get it out of the way while I’m still in the “school” mind-set. Hopefully this means that the start of school in the Fall won’t sneak up on me.
I have my dreams (some might call them fantasies, but let’s not split hairs). It could happen, I even put in a reminder about getting school supplies before the shops are all sold out. For now I’m ready to be in summer mode with the kids.
One of my goals this summer is to practice handwriting exercises with the kids. Cursive writing and penmanship are not really taught in school these days, so I’m hoping to fill that gap with a little home education. This is also inline with my New Year’s resolution to learn how to do Calligraphy.
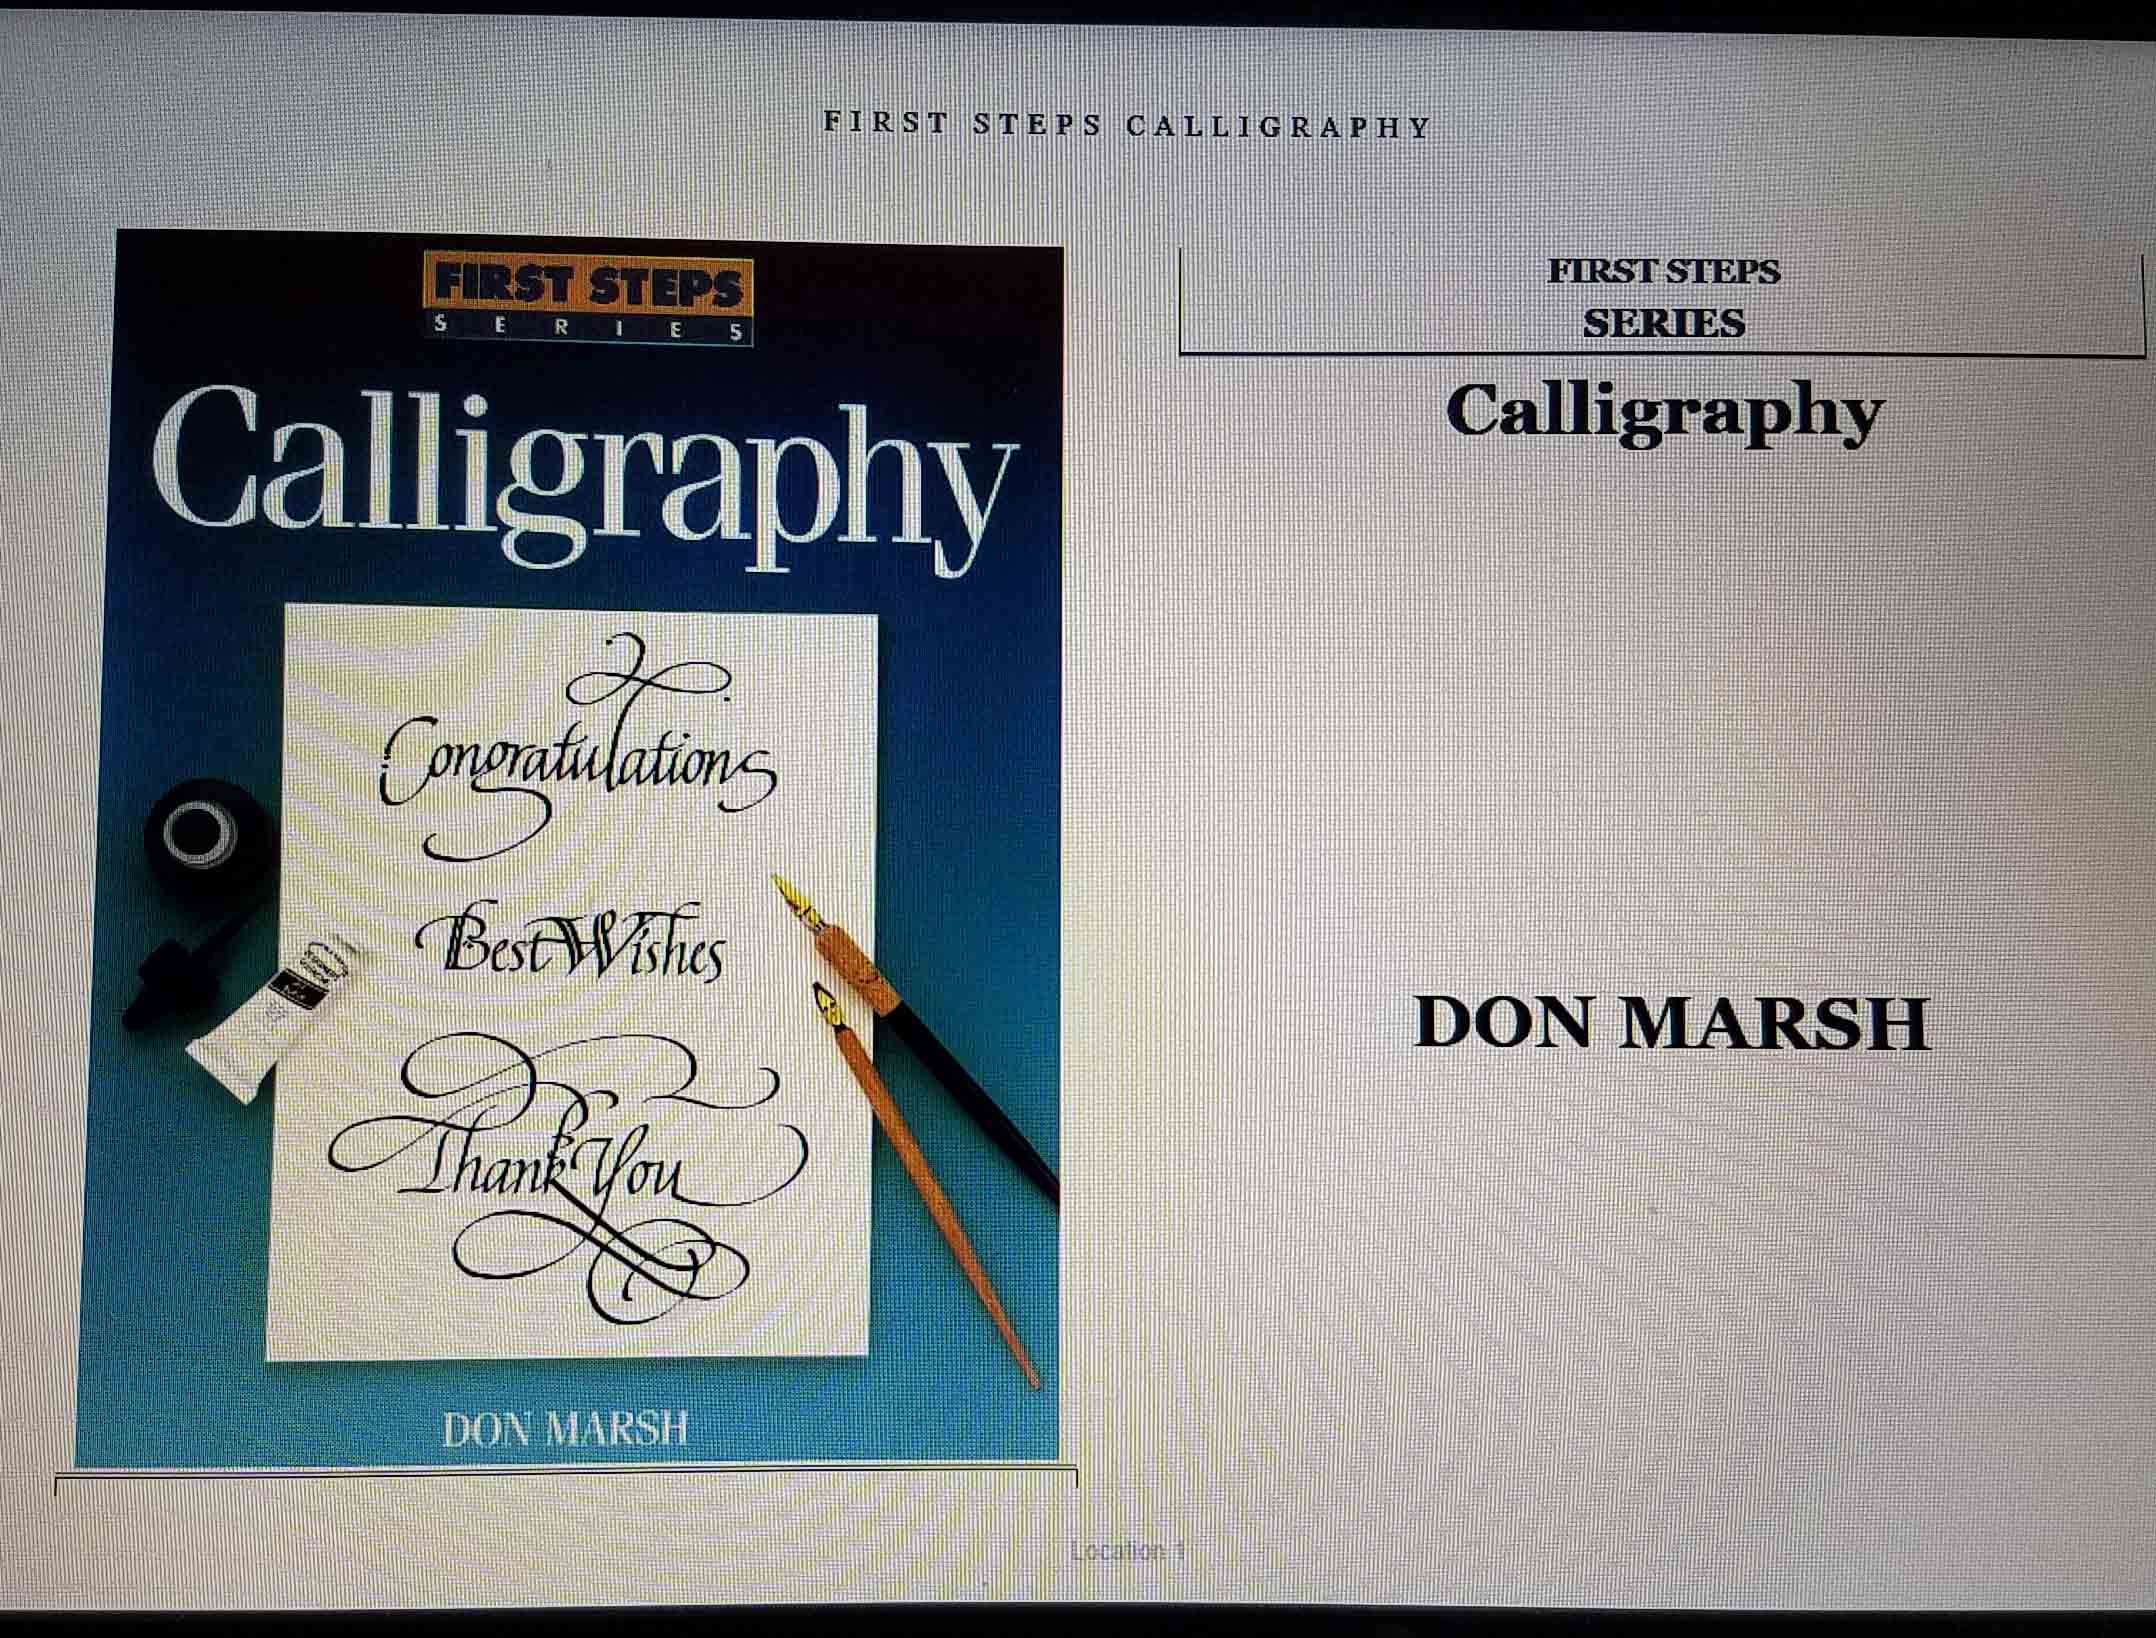
I’ve been working on that resolution. My first step when wanting to tackle something like this is to read all about. Being I’m a bit old fashioned that usually means books. I did update my way of reading the books this time. I purchased my first book as a Kindle book off Amazon, “The First Steps Series: Calligraphy” by Don Marsh; 1996, North Light Books.
This is a good “nuts and bolts” kind of book. Honestly I found it a bit of a slog initially, so I am treating it more as a reference book. When I feel the need to add to my knowledge base I go back to it. There is an amazing amount of jargon that goes along with this new art. I suppose there is also a lot of jargon in crochet and knitting, but they have been so much a part of my life for so long that it seems much more familiar.
I decided to focus more on the art of Hand Lettering, rather than the formality of Calligraphy. I was intrigued by the reviews on Amazon for the book “The Art of Whimsical Lettering” by Joanne Sharpe; 2014, Interweave Press. This is a really fun and inspiring book. Lots of samples in the book of Joanne’s work with suggestions and guidance on making your own hand-lettered work.
My favorite thing about this book is the encouraging tone of the book. Joanne starts the book off with a quote from “The Wizard of Oz” by Glinda the Good Witch, “You’ve always had the power”. A big aspect of the book is Joanne encouraging readers, that no matter how much you might hate your hand writing, it can be the basis of beautiful and artistic lettering. The book has loads of beautiful and inspiring examples of Joanne’s work. My head was buzzing with ideas once I had read thru it.
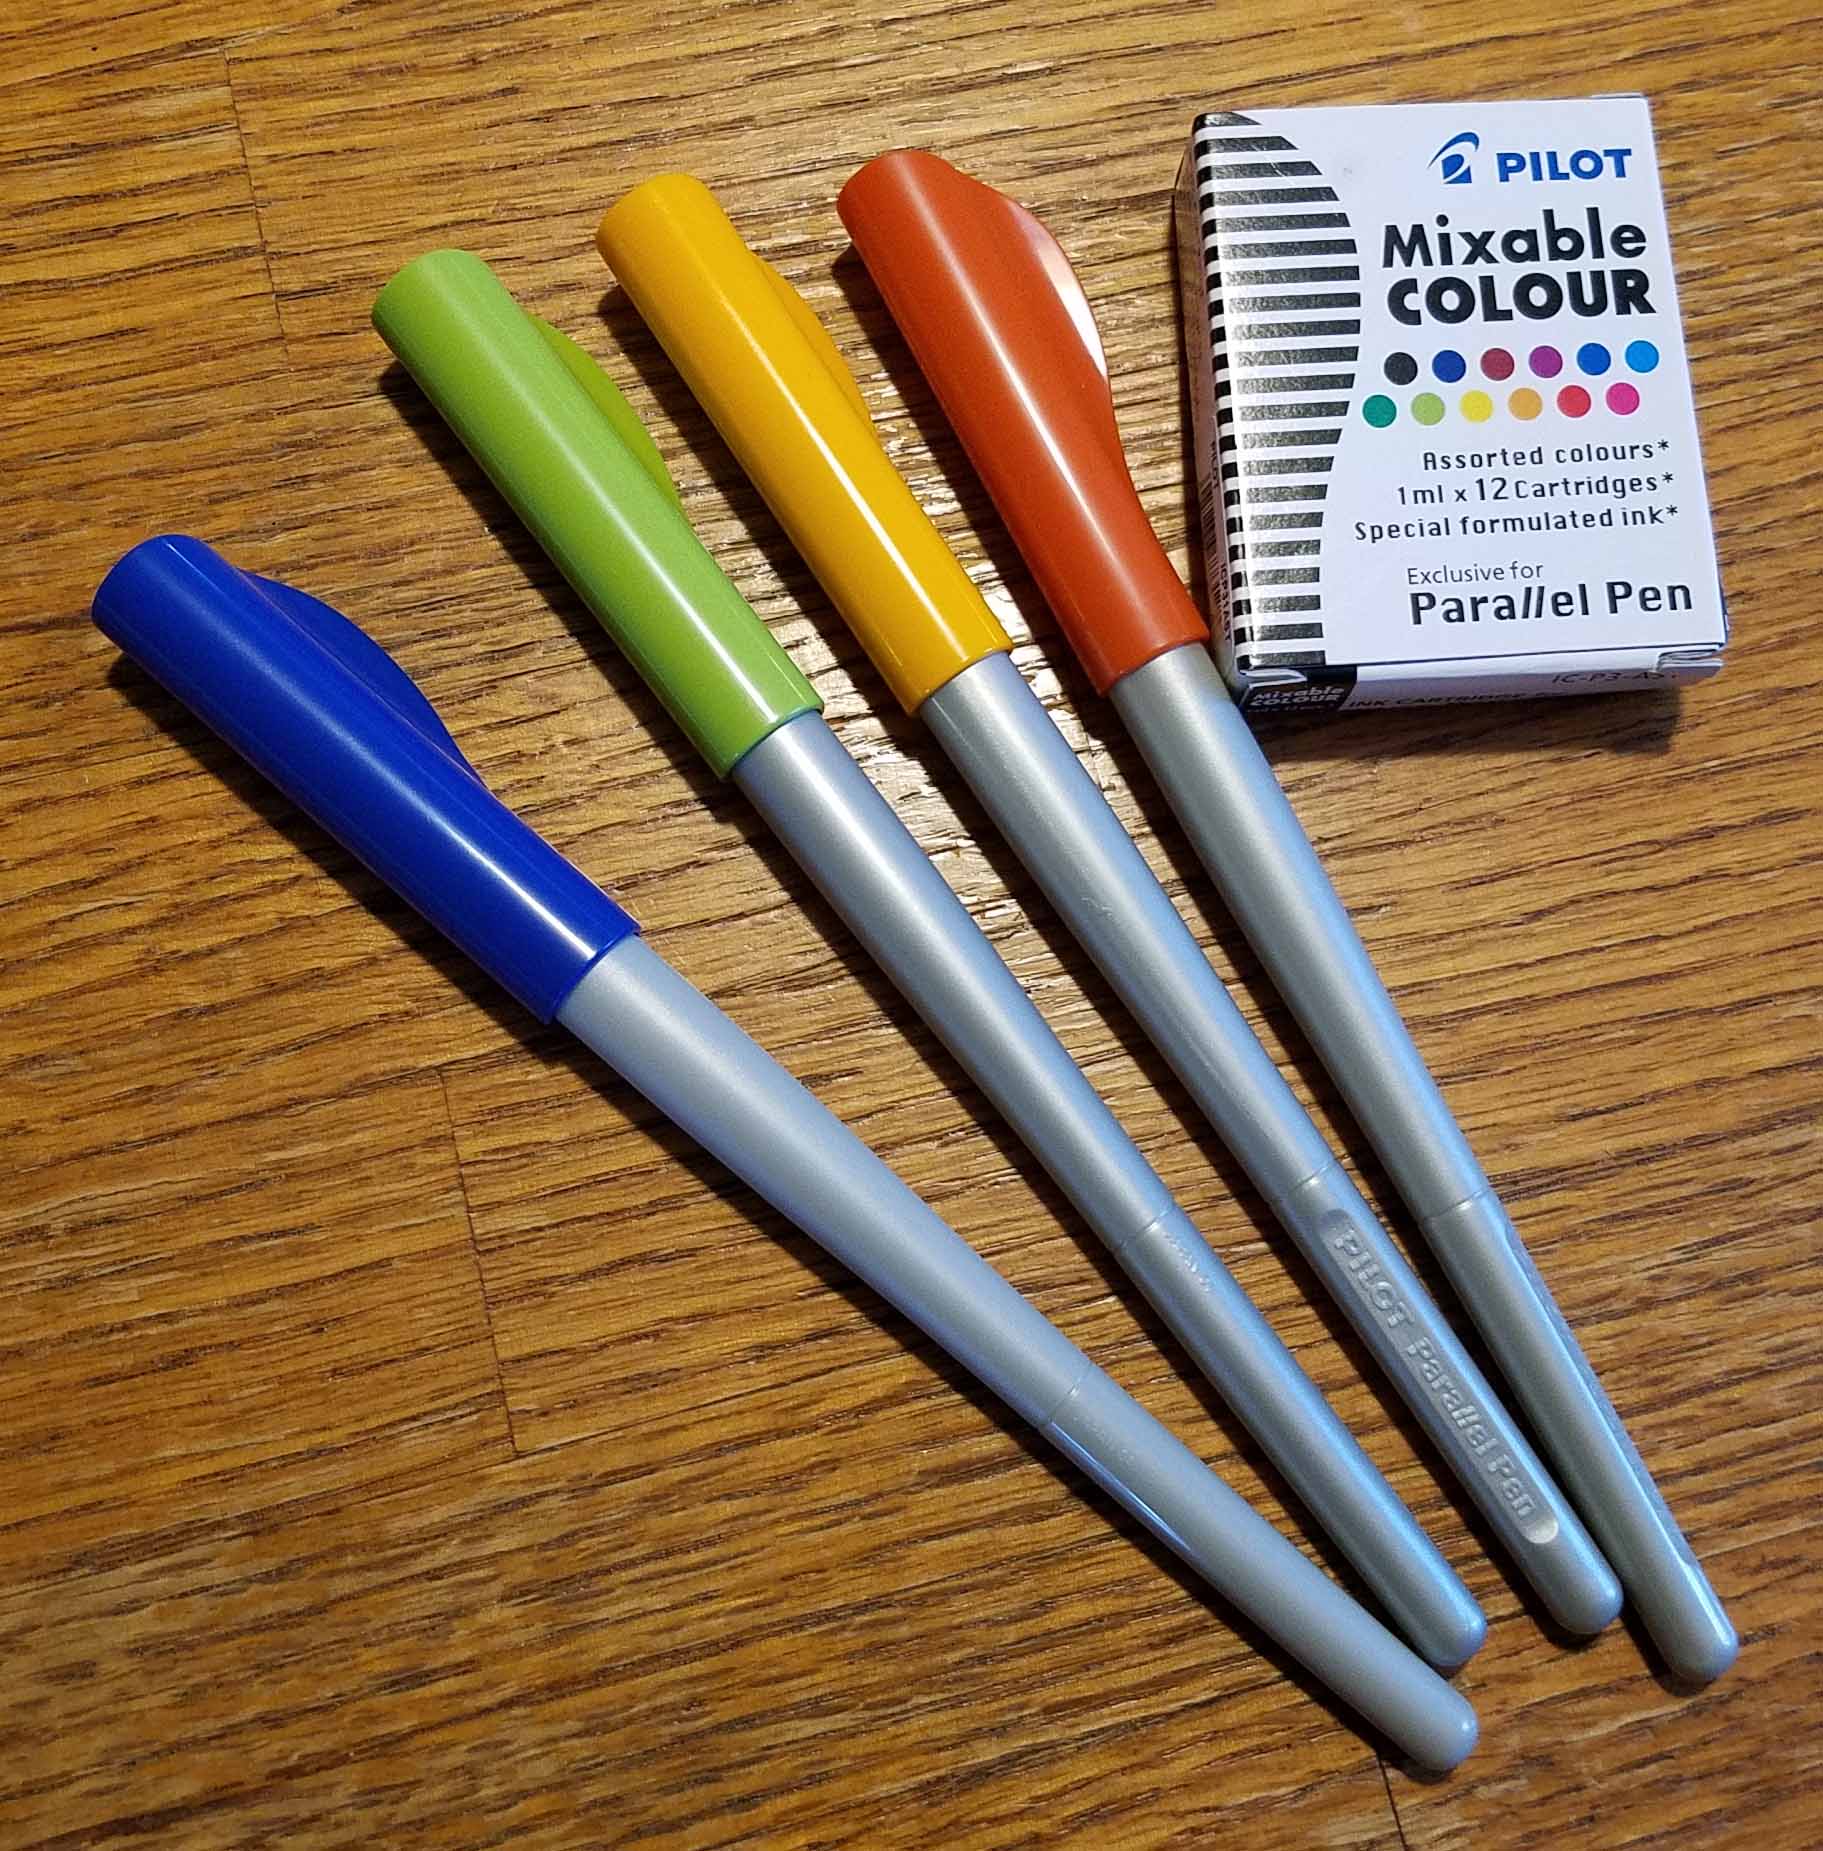
It was in this book that I read about the Pilot Parallel Pen. I purchased one and liked it so much that I purchased a set of them in 4 different sizes. They come with black and red ink cartridges and I purchased a set of 12 different colored cartridges as well. Currently 3 of the pens are filled with black ink, but I’ll be trying out the colors soon.
I had also purchased another book in print form. “Hand Lettering: An Interactive Guide to the Art of Drawing Letters”, written and illustrated by Megan Wells; 2016, Peter Pauper Press. The reviews I had read of this book made it sound like one that I should have a physical copy of. It is sort of a workbook/journal style and has lots of pages that you can use for practicing your lettering. I am still reading thru it and trying the various exercises for practicing my lettering.
My favorite bit so far has been the author’s advice to not think of hand-lettering as writing, to instead approach it as drawing your letters. Now that might sound quite simple, but it really rang a bell for me. Suddenly I didn’t feel like I was struggling so much with what I was doing. I could relax and depend upon all those years of drawing to help me create lettering that I would like.
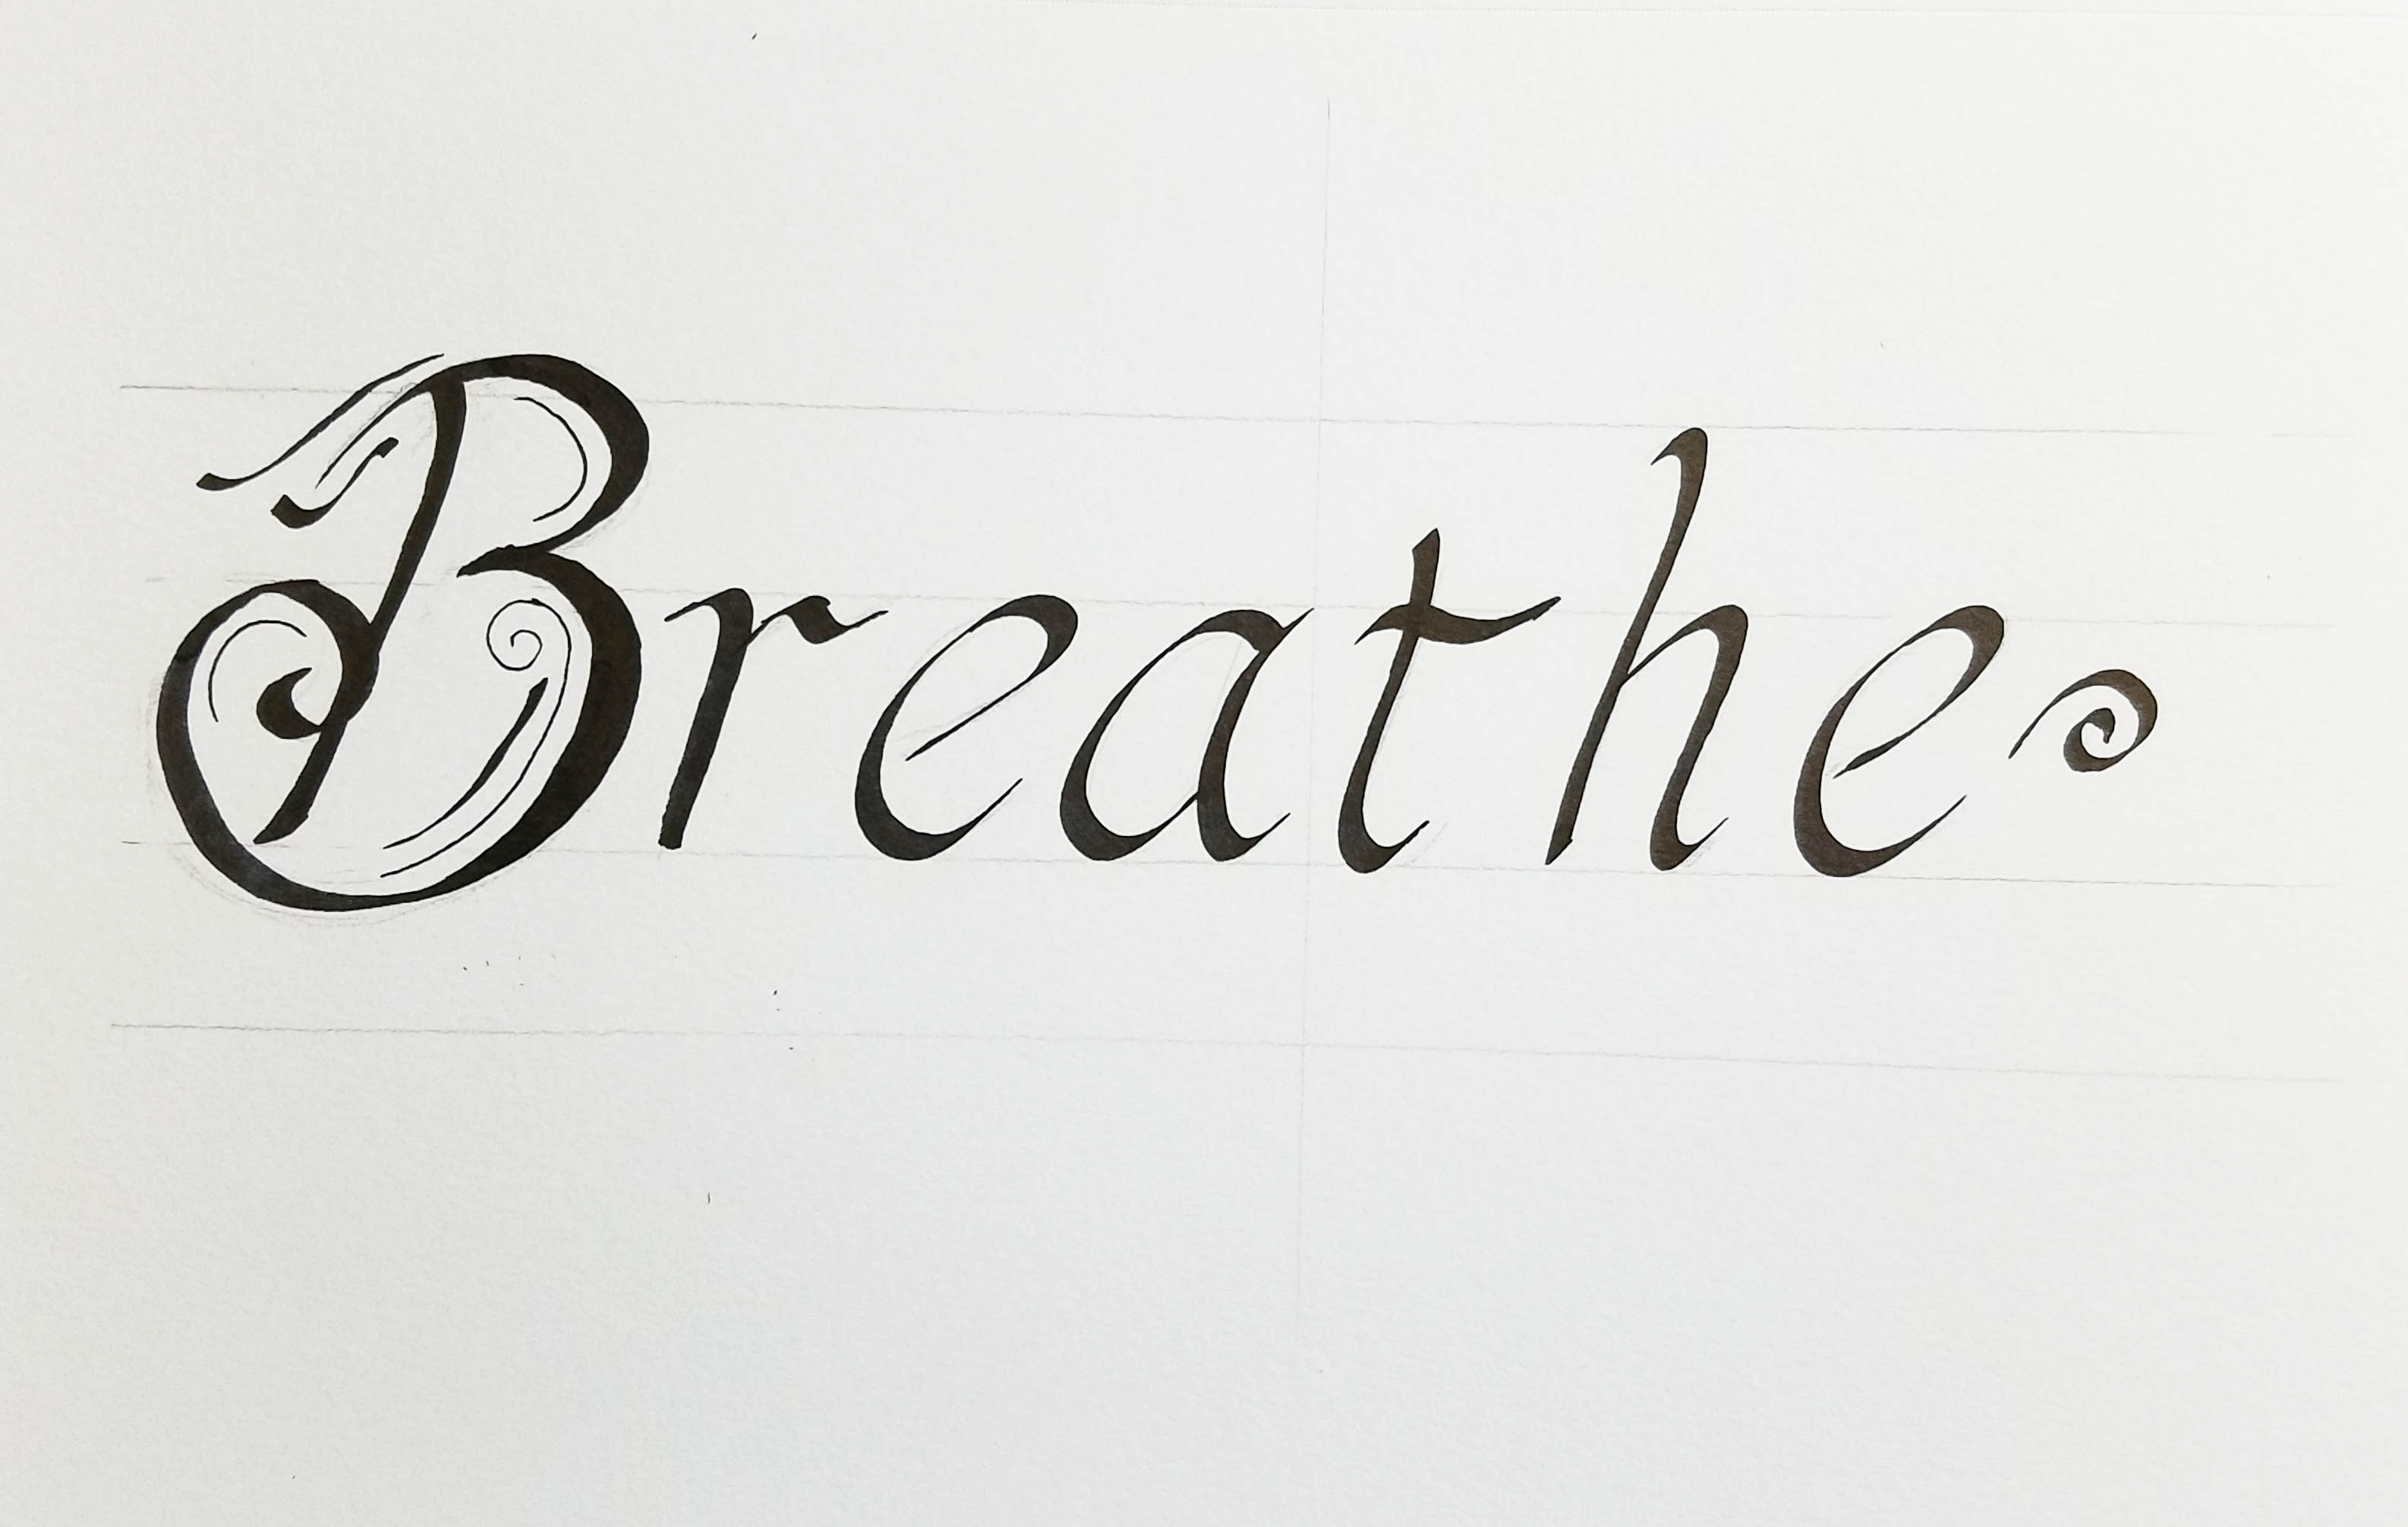
I’m still really in love with calligraphy and it will play a big part in any lettering art I create. I’ve been practicing with the parallel pens drawing various letters and words. Getting the hang of holding the pen properly is a big part of the process. I finally was ready to try to create my first real serious lettering project.
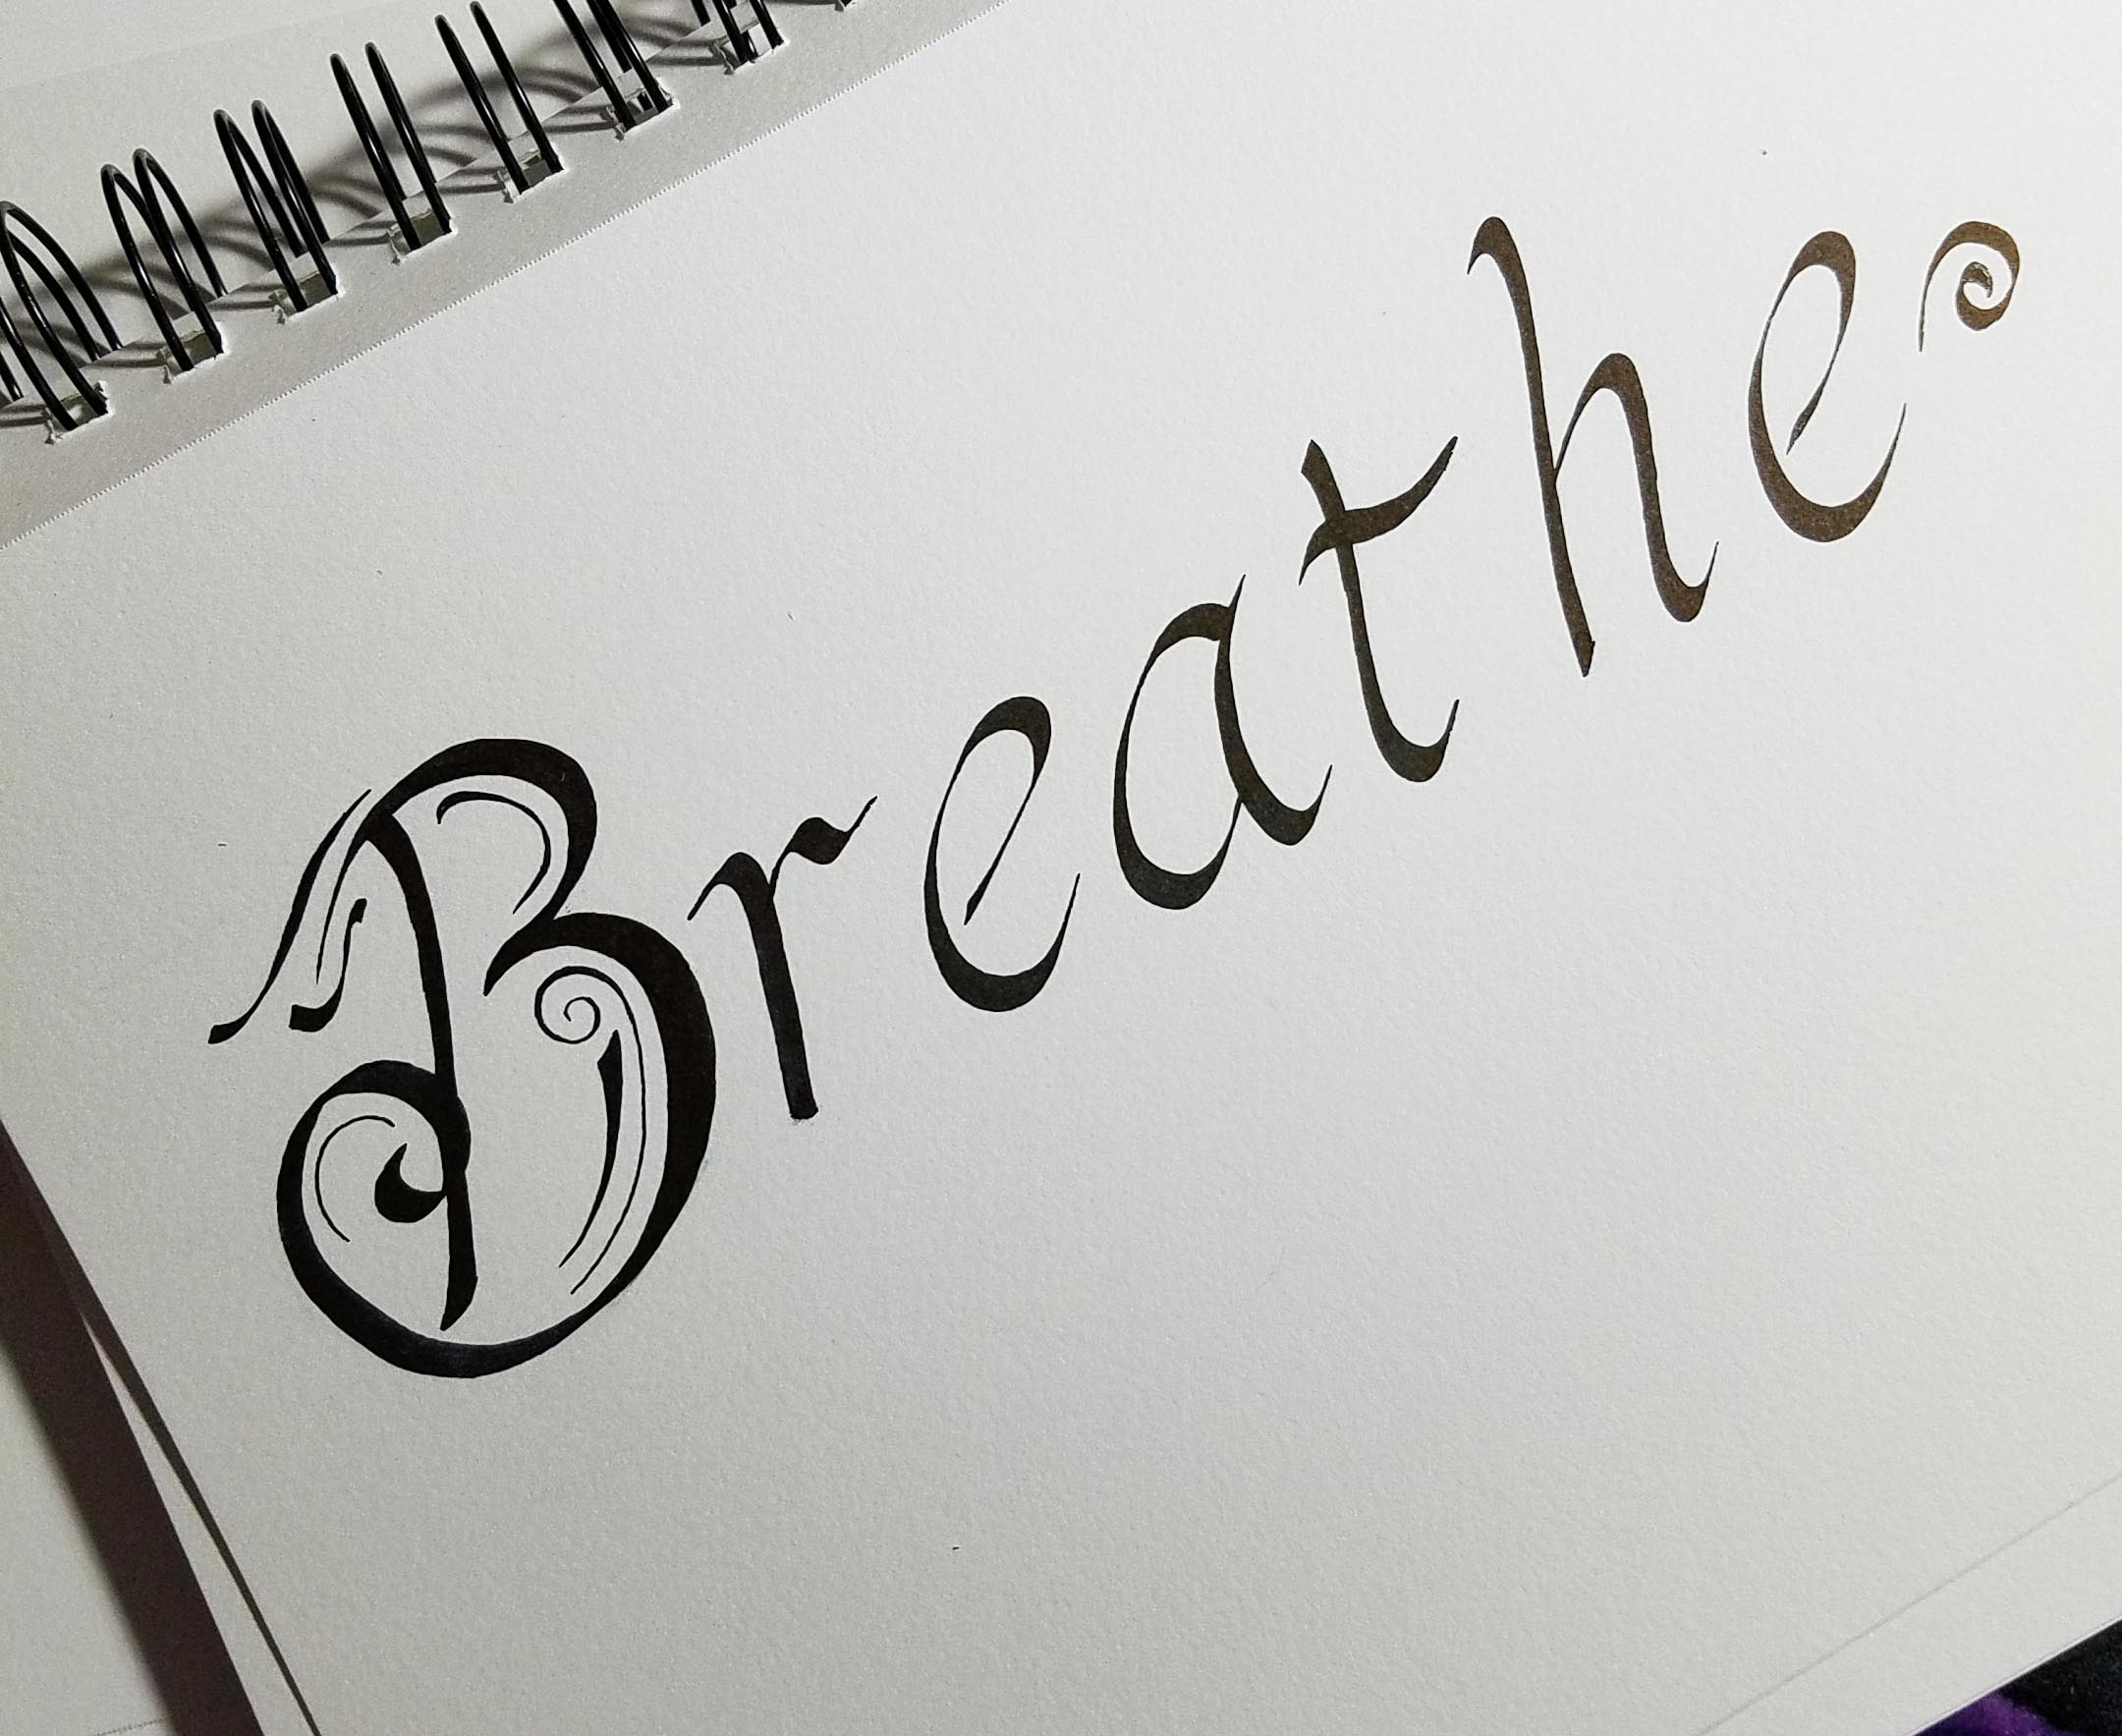
I used a pencil to create light lines on the paper to be guides for my letters. I also roughly followed the illustrations for writing italic style lettering. I picked one of my very favorite words.
I got really fancy with my letter “B”. But it still was a bit rough looking, the rest of the word needed a little cleaning up too.
I got out my new Staedler pigment pens to do the “drawing” part of my lettering to re-shape and refine the letters.
After all the tidying I was much happier with my work. I pulled the page out of my sketch book and copied it onto some heavy stock Vellum Bristol printer paper I purchased a few months back. I’m planning on playing with drawing and coloring on each of the pages to create different looks.
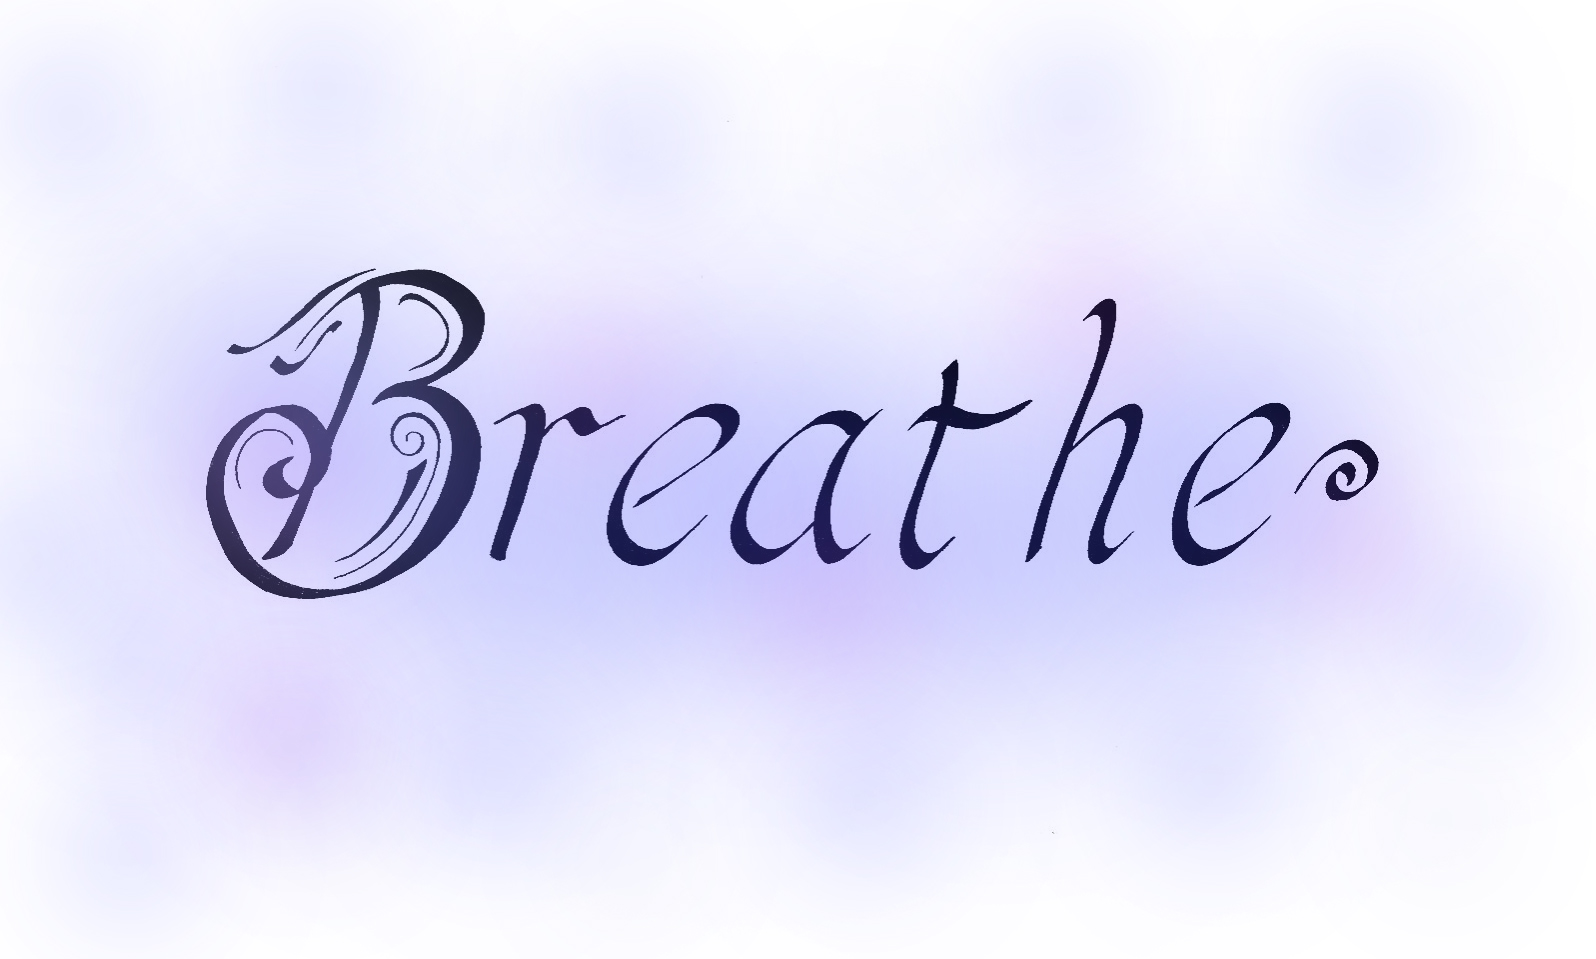
I also scanned my finished word into my computer, so I can play with it in my digital drawing program.
Like this.
I’ll hopefully have some other fun versions and more lettering to show you all soon. I’m excited about incorporating words and quotes in future art projects.
A fun exercise for you all in the meantime. Count how many words you can come up with that have “ea” in the middle and end with “e”. I’ll start you off with one of my other favorites: “Peace”.
The other day I saw a really cool video on FaceBook of rugs that looked like river rocks. I love river rocks. I have five medium sized ones that sit on top of my woodstove in our living room. They act as heat sinks as well as looking pretty. A heat sink is a solid or liquid filled object that retains heat and slowly releases it as the air around it cools. Occasionally I put one of my river rocks in a thick cotton towel to warm my feet on when the temperatures really drop up here on the mountain.
The rugs in the video were made with felted wool rocks by the artist/designer Martina Schuhmann from Vienna, Austria (you can see the video on YouTube here). I was very intrigued since I’ve been playing with needle-felting so much. I decided to find out as much as I could about felting wool rocks or “stones”. I first went to the artist’s Etsy shop to see if there was more information. You can check her shop out at: FlussDesign
In the video there is a close-up of one of her rocks being squeezed and it bounced right back. That made me wonder how she was felting her rocks, were they solid wool or was there something else? Looking at Martina’s shop got me part of the answer. She stated that her rocks were made with a foam core.
I had the video on my facebook page and stated that I was wondering how she felted her rocks. My friend Angela sent me a link to a video on YouTube where they were felting around actual rocks. That got me wandering around YouTube looking at a variety of felted rock and other wet felting videos. I decided it was time to try felting my own wool river rock.
I dug out this piece of 1 inch thick foam that I had leftover from another project. It was a little dusty, so I gave it a good wash and hung it up to dry overnight. You can see in the photo above where it was clipped to my drying line. It wasn’t a very pretty piece of foam, but it was going to be enclosed in wool anyway. I drew an ovoid shape for my rock.
Once I had cut out the foam rock I trimmed up the edges to soften them. I figured wrapping the wool fibers and felting them around it would likely soften any hard edges, but I wanted to make this first rock as easy as possible.
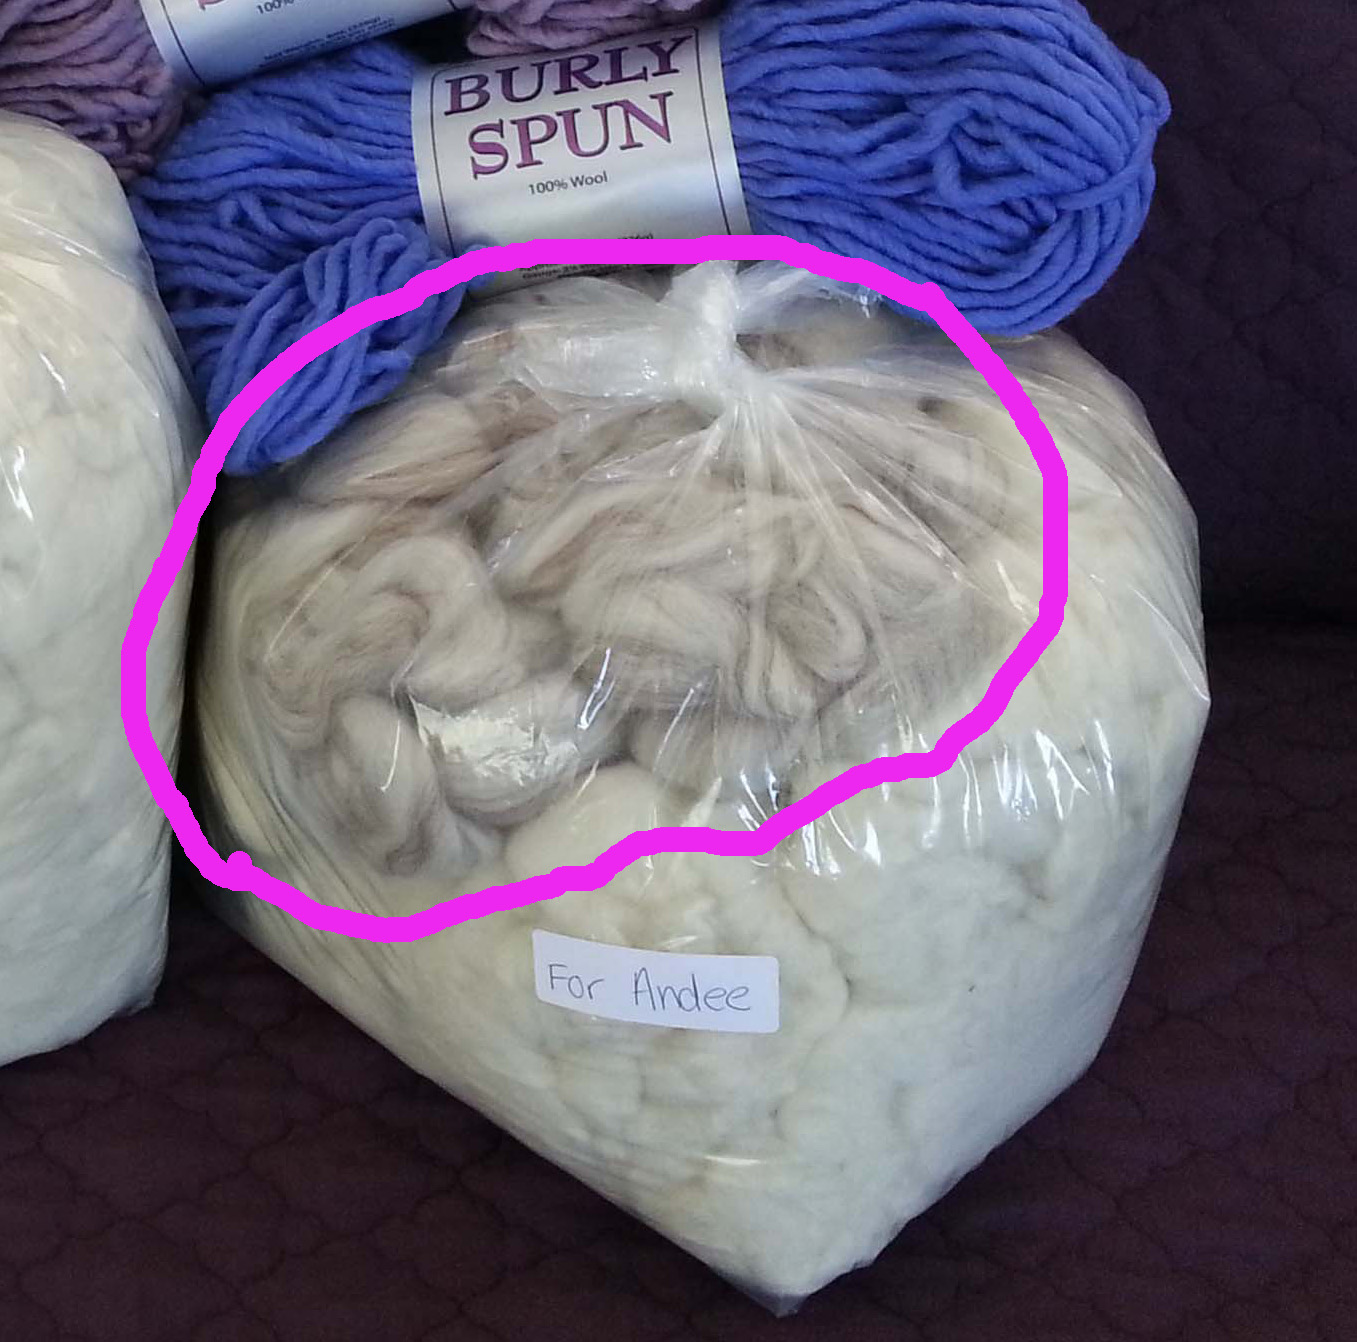
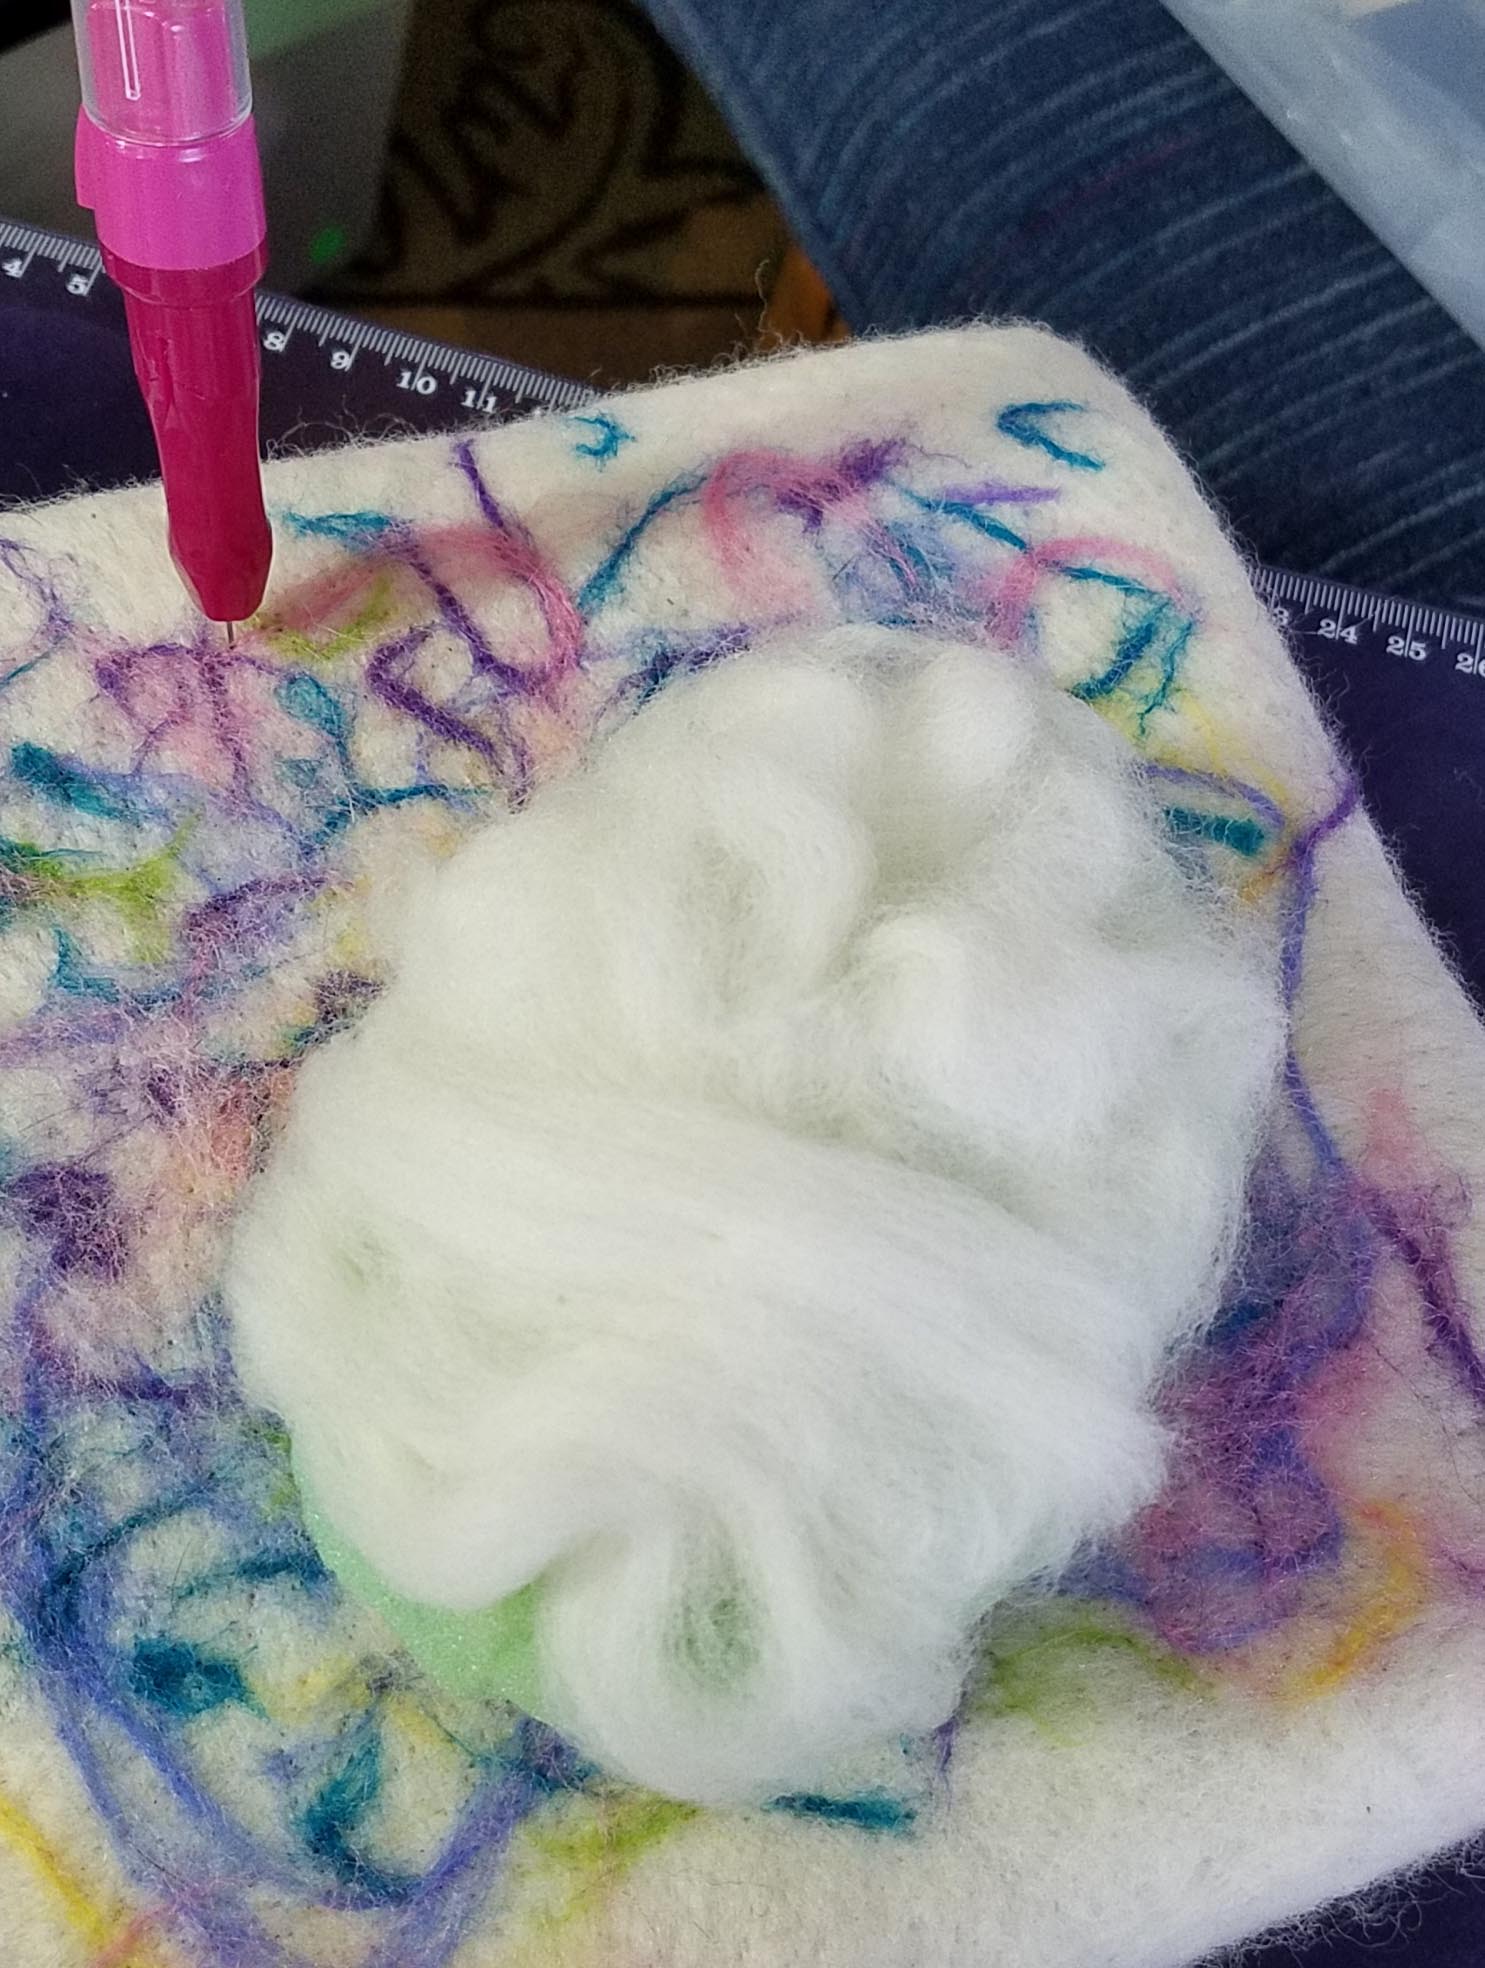
Remember when I purchased that wool fiber from the Brown Sheep Company at the Loveland Yarn Fest last April? There was some interesting striped fiber in one of the bags. I had taken it out and placed it aside in another bag because I knew it would be great for a “special” project someday. It’s day had come, I thought it would be ideal for giving some “rock” texture to my felted faux river rock.
Before I started with that fiber though, I wanted to add a bit of my plain wool to the flat sides of my foam rock. Of course, my handy felting needle came out for this part of the project. I used the felting needle to tack the wool to the foam, just enough that it wouldn’t come loose.
I then did the same to the opposite side of my foam shape.
Now I had a little wool and foam sandwich to wrap with my special fiber. I set that aside for the moment.
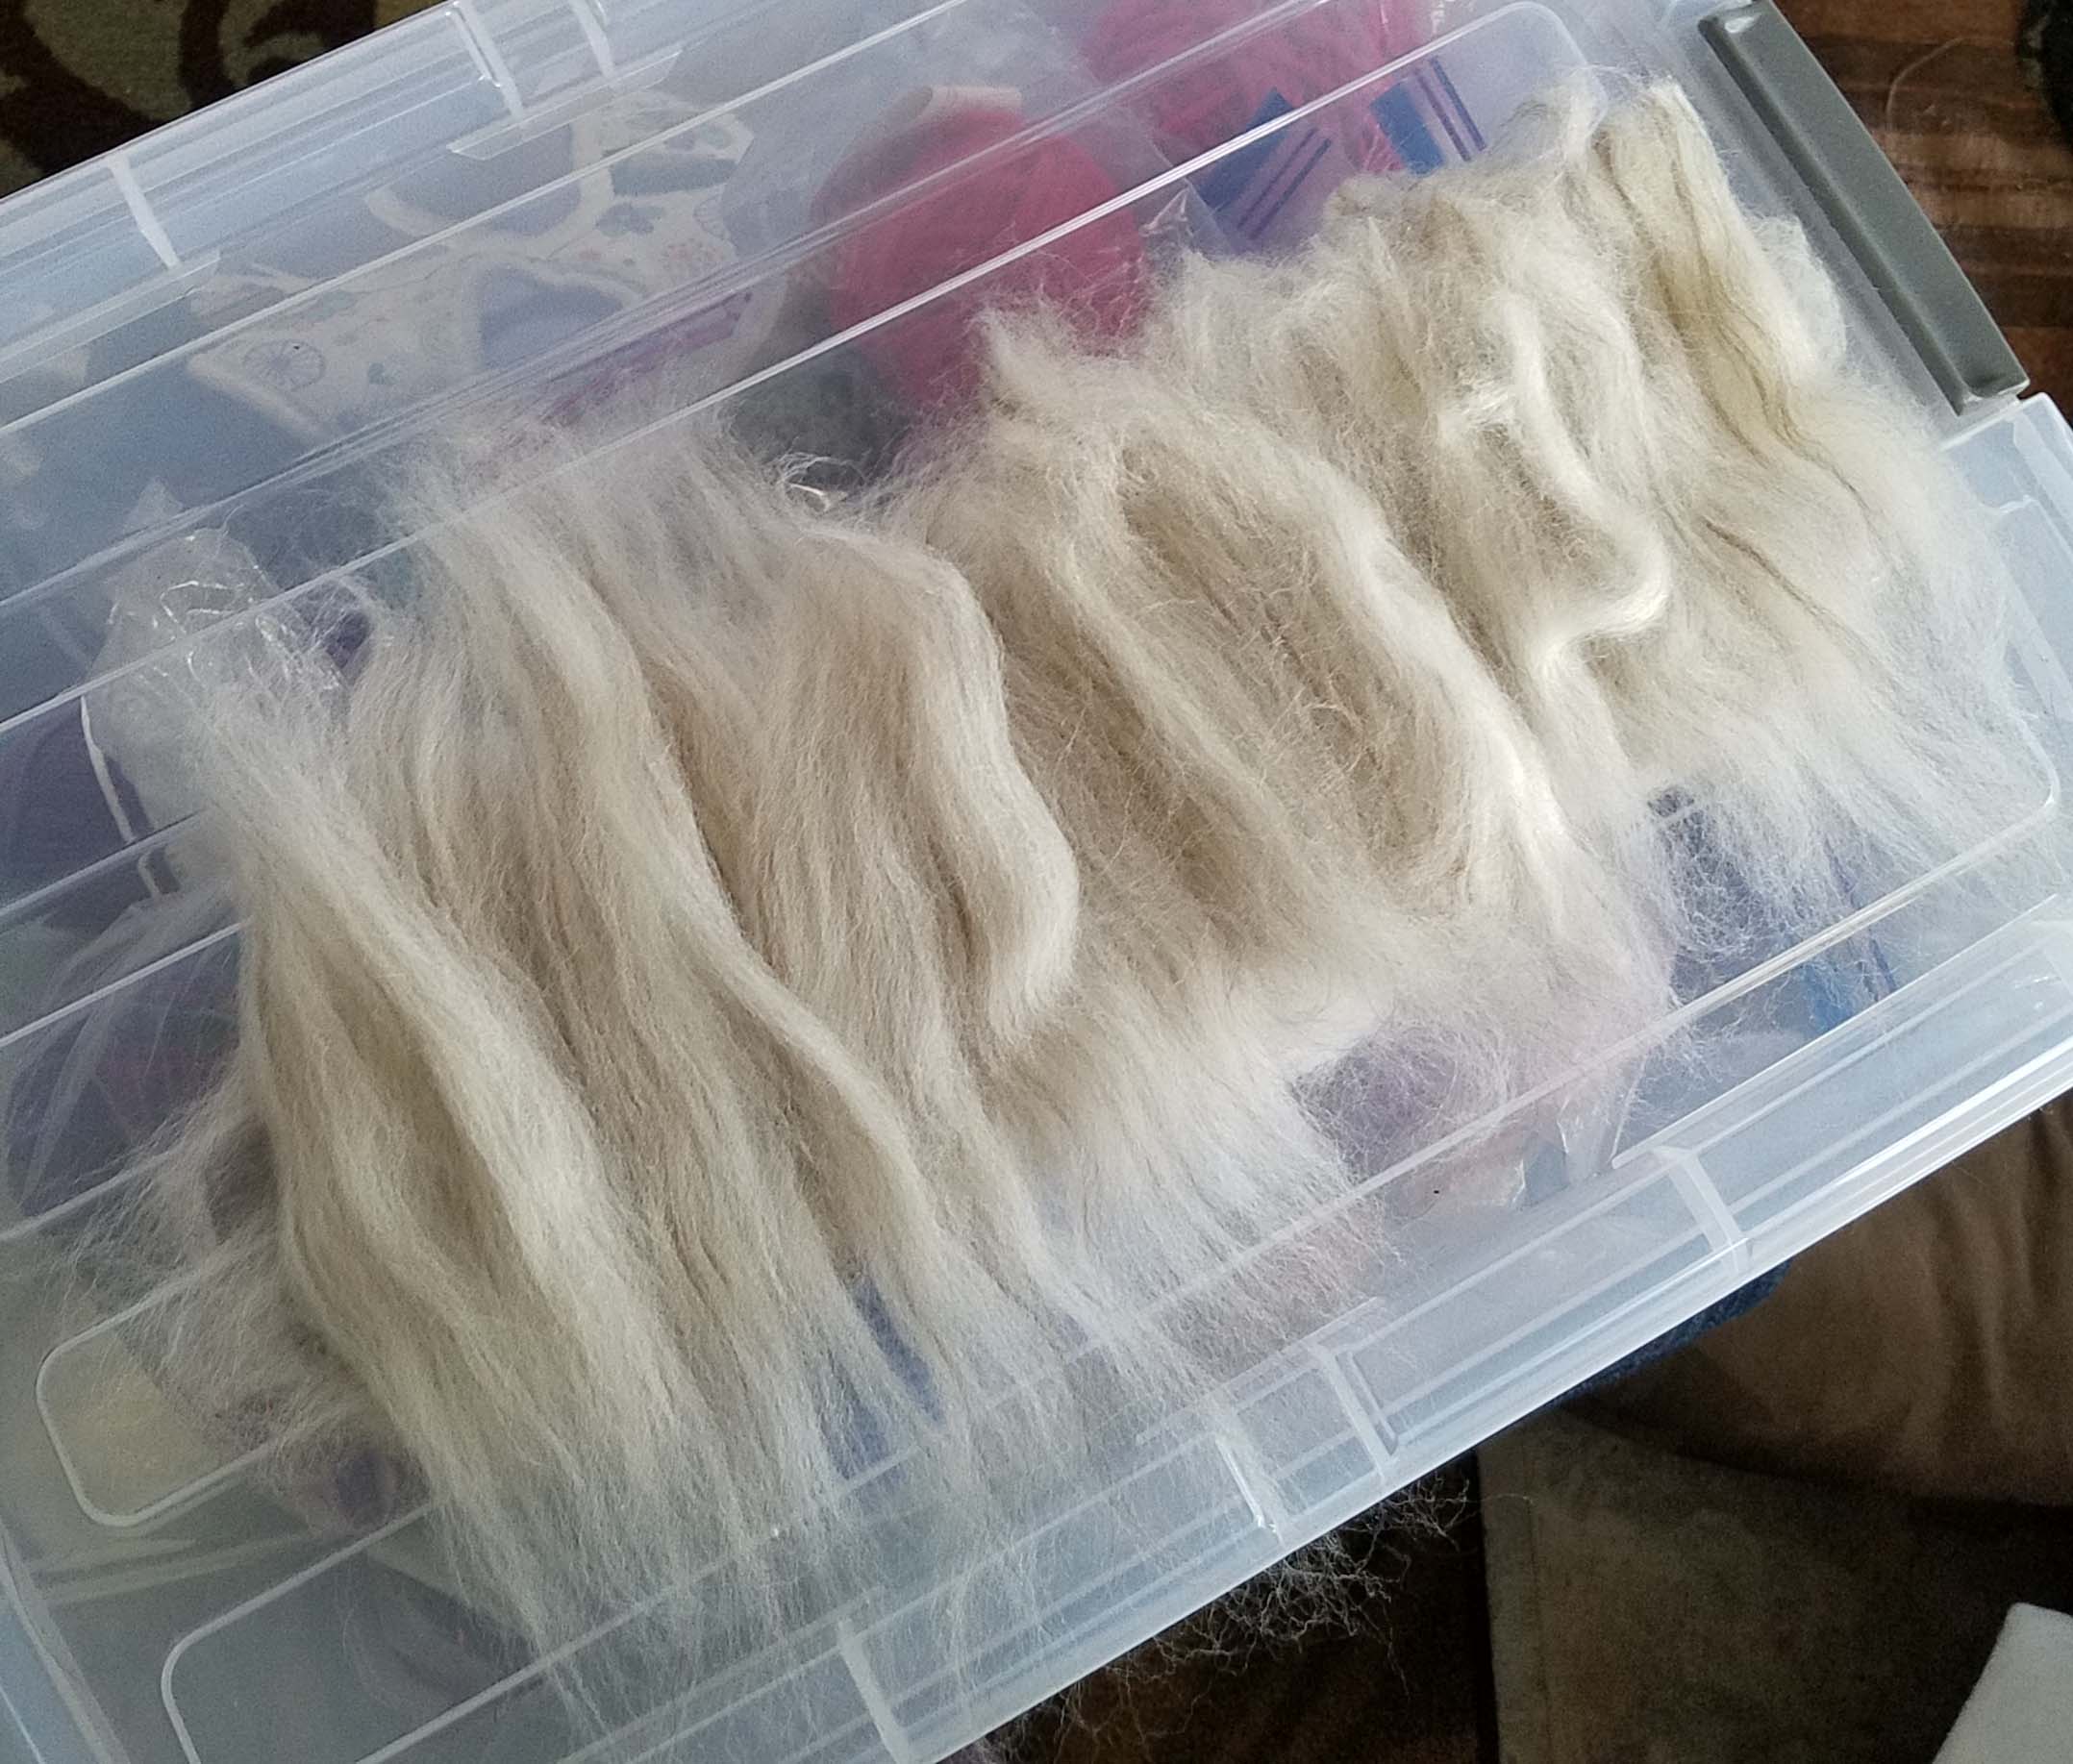
It was time to lay out my fiber that would be the outside of my rock. I first pulled out drafts of fiber laying them out lengthwise on my work surface.
Next I laid out a second layer perpendicular to the first layer.
I was ready to wrap my little foam sandwich. If I do this again I will make my strip of wool fibers wider, I ran into some small challenges getting the core wrapped well.
I rolled the core up as snugly as possible with my strip of loose fibers. Then I was ready to use my felting needle to tack the fiber down well to the core.
At this point I had covered the entire core with the fiber and secured it well using the felting needle.
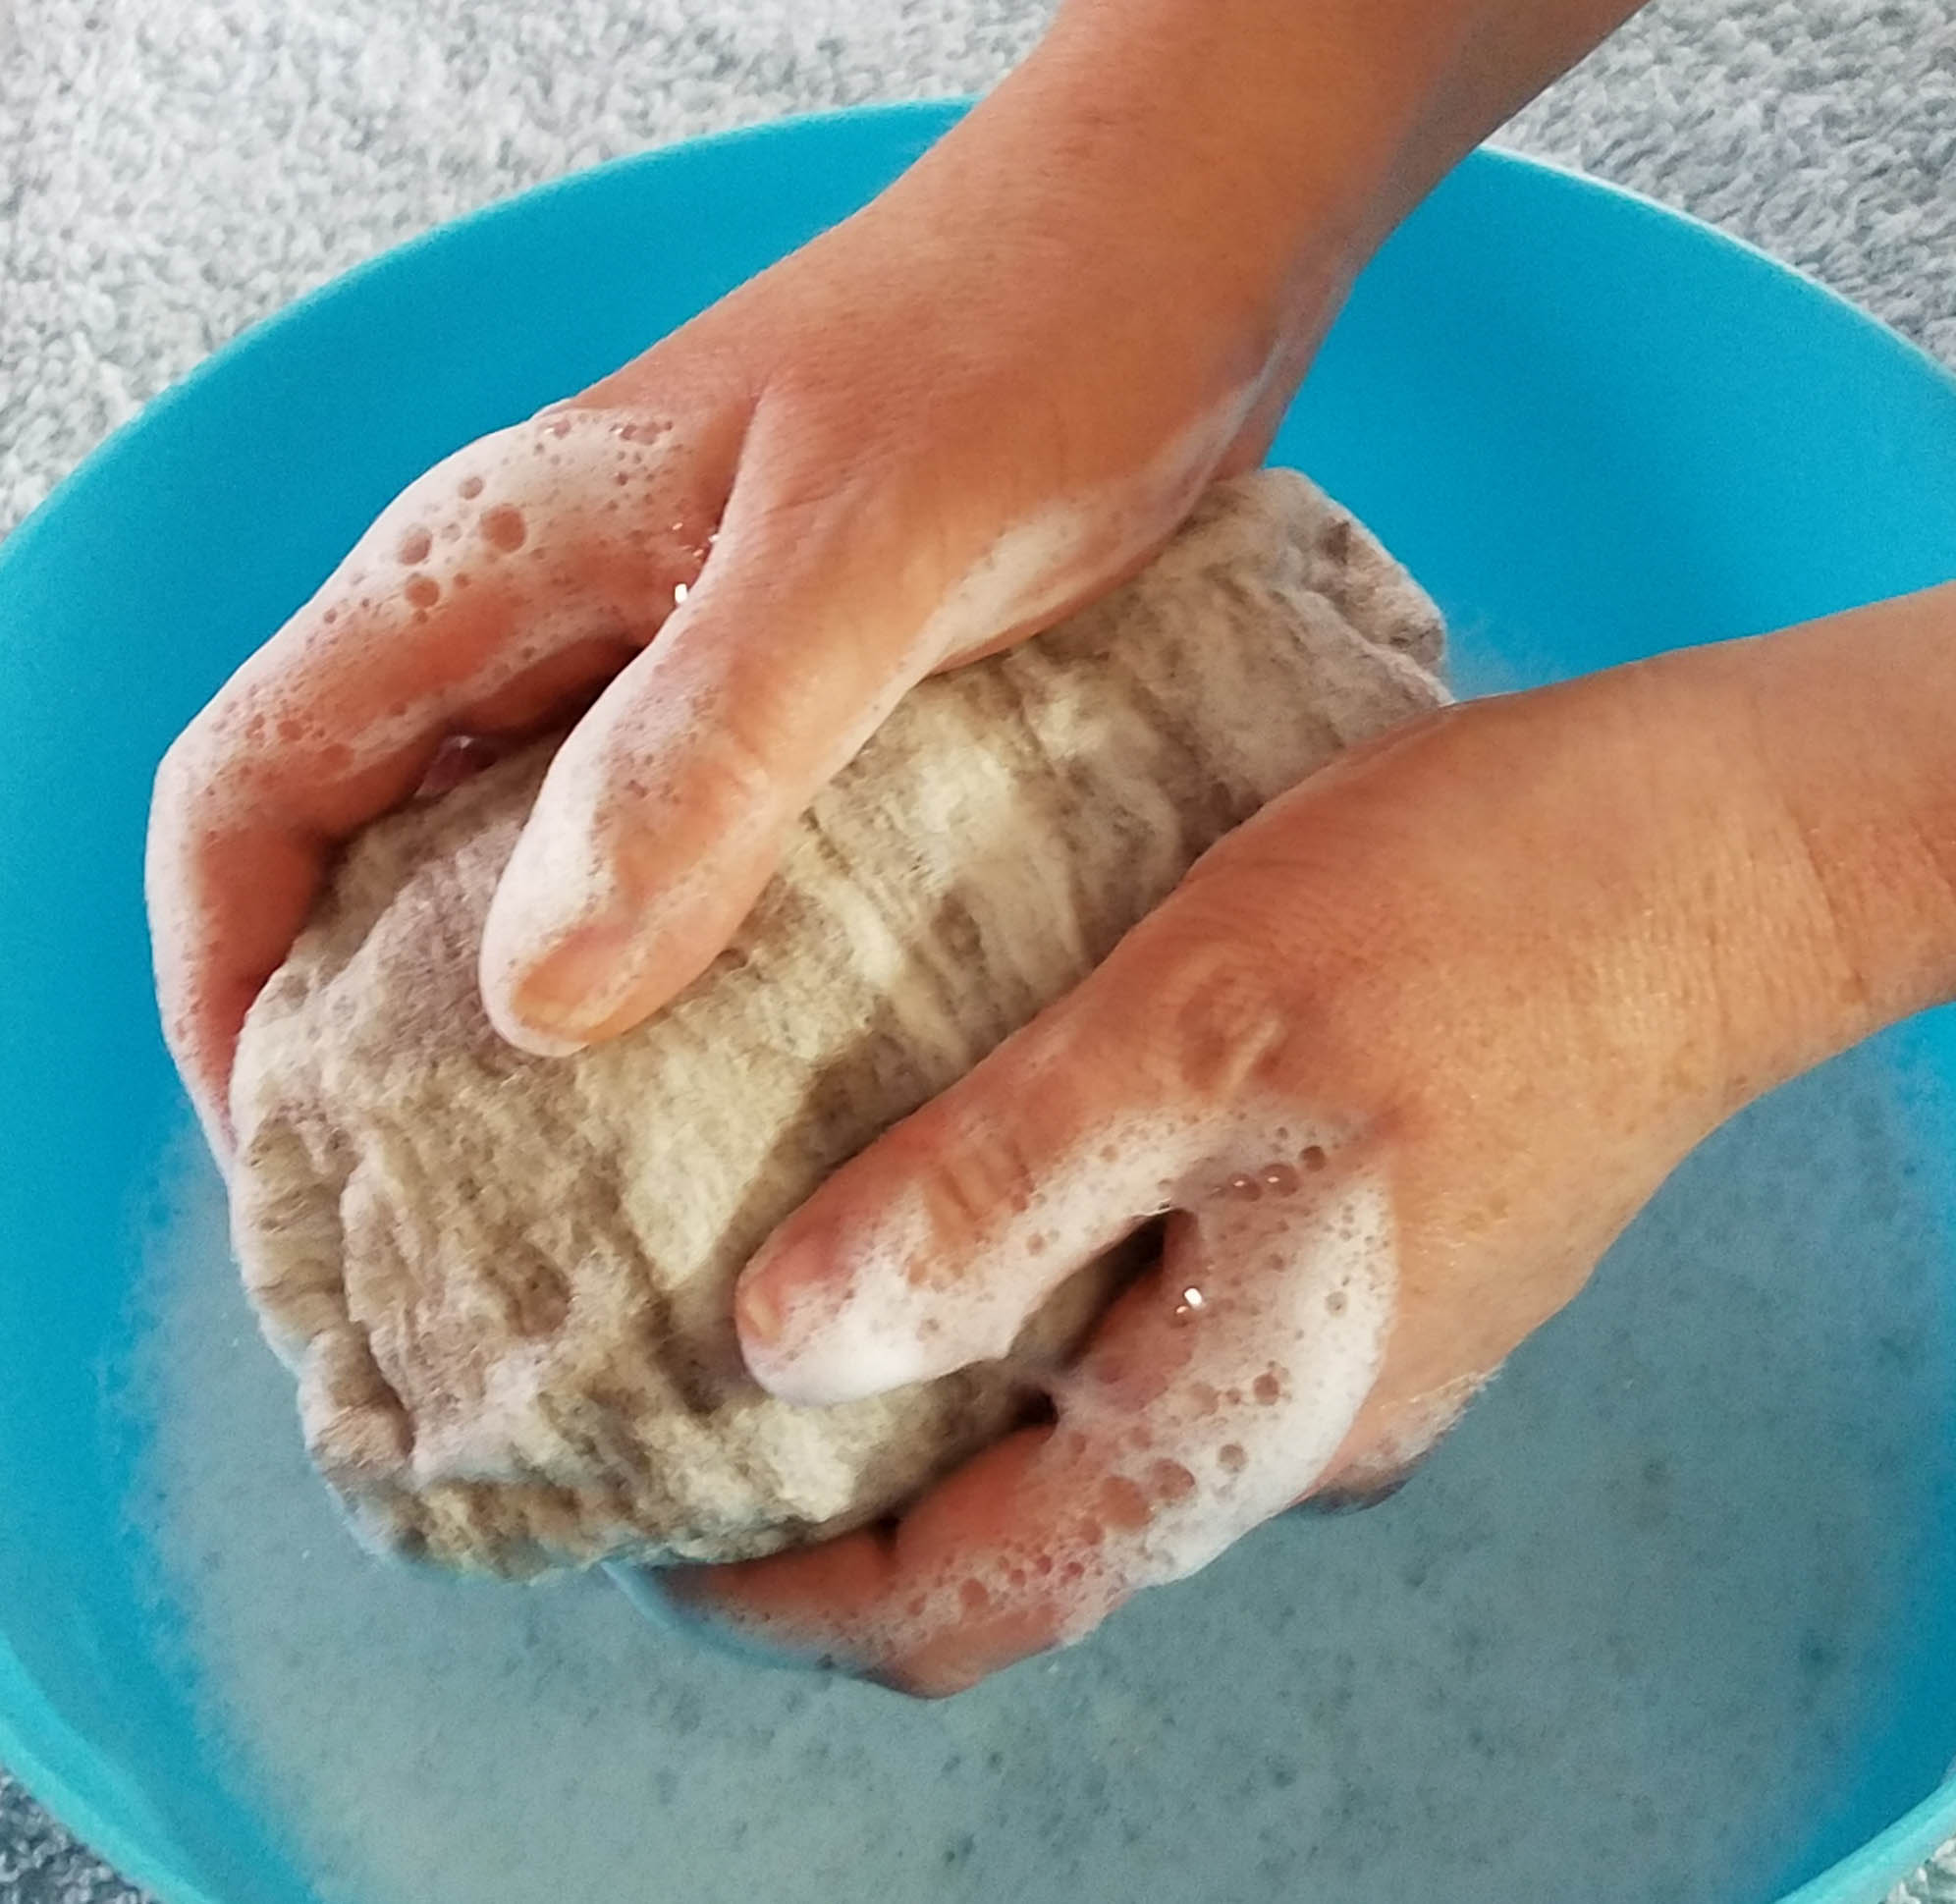
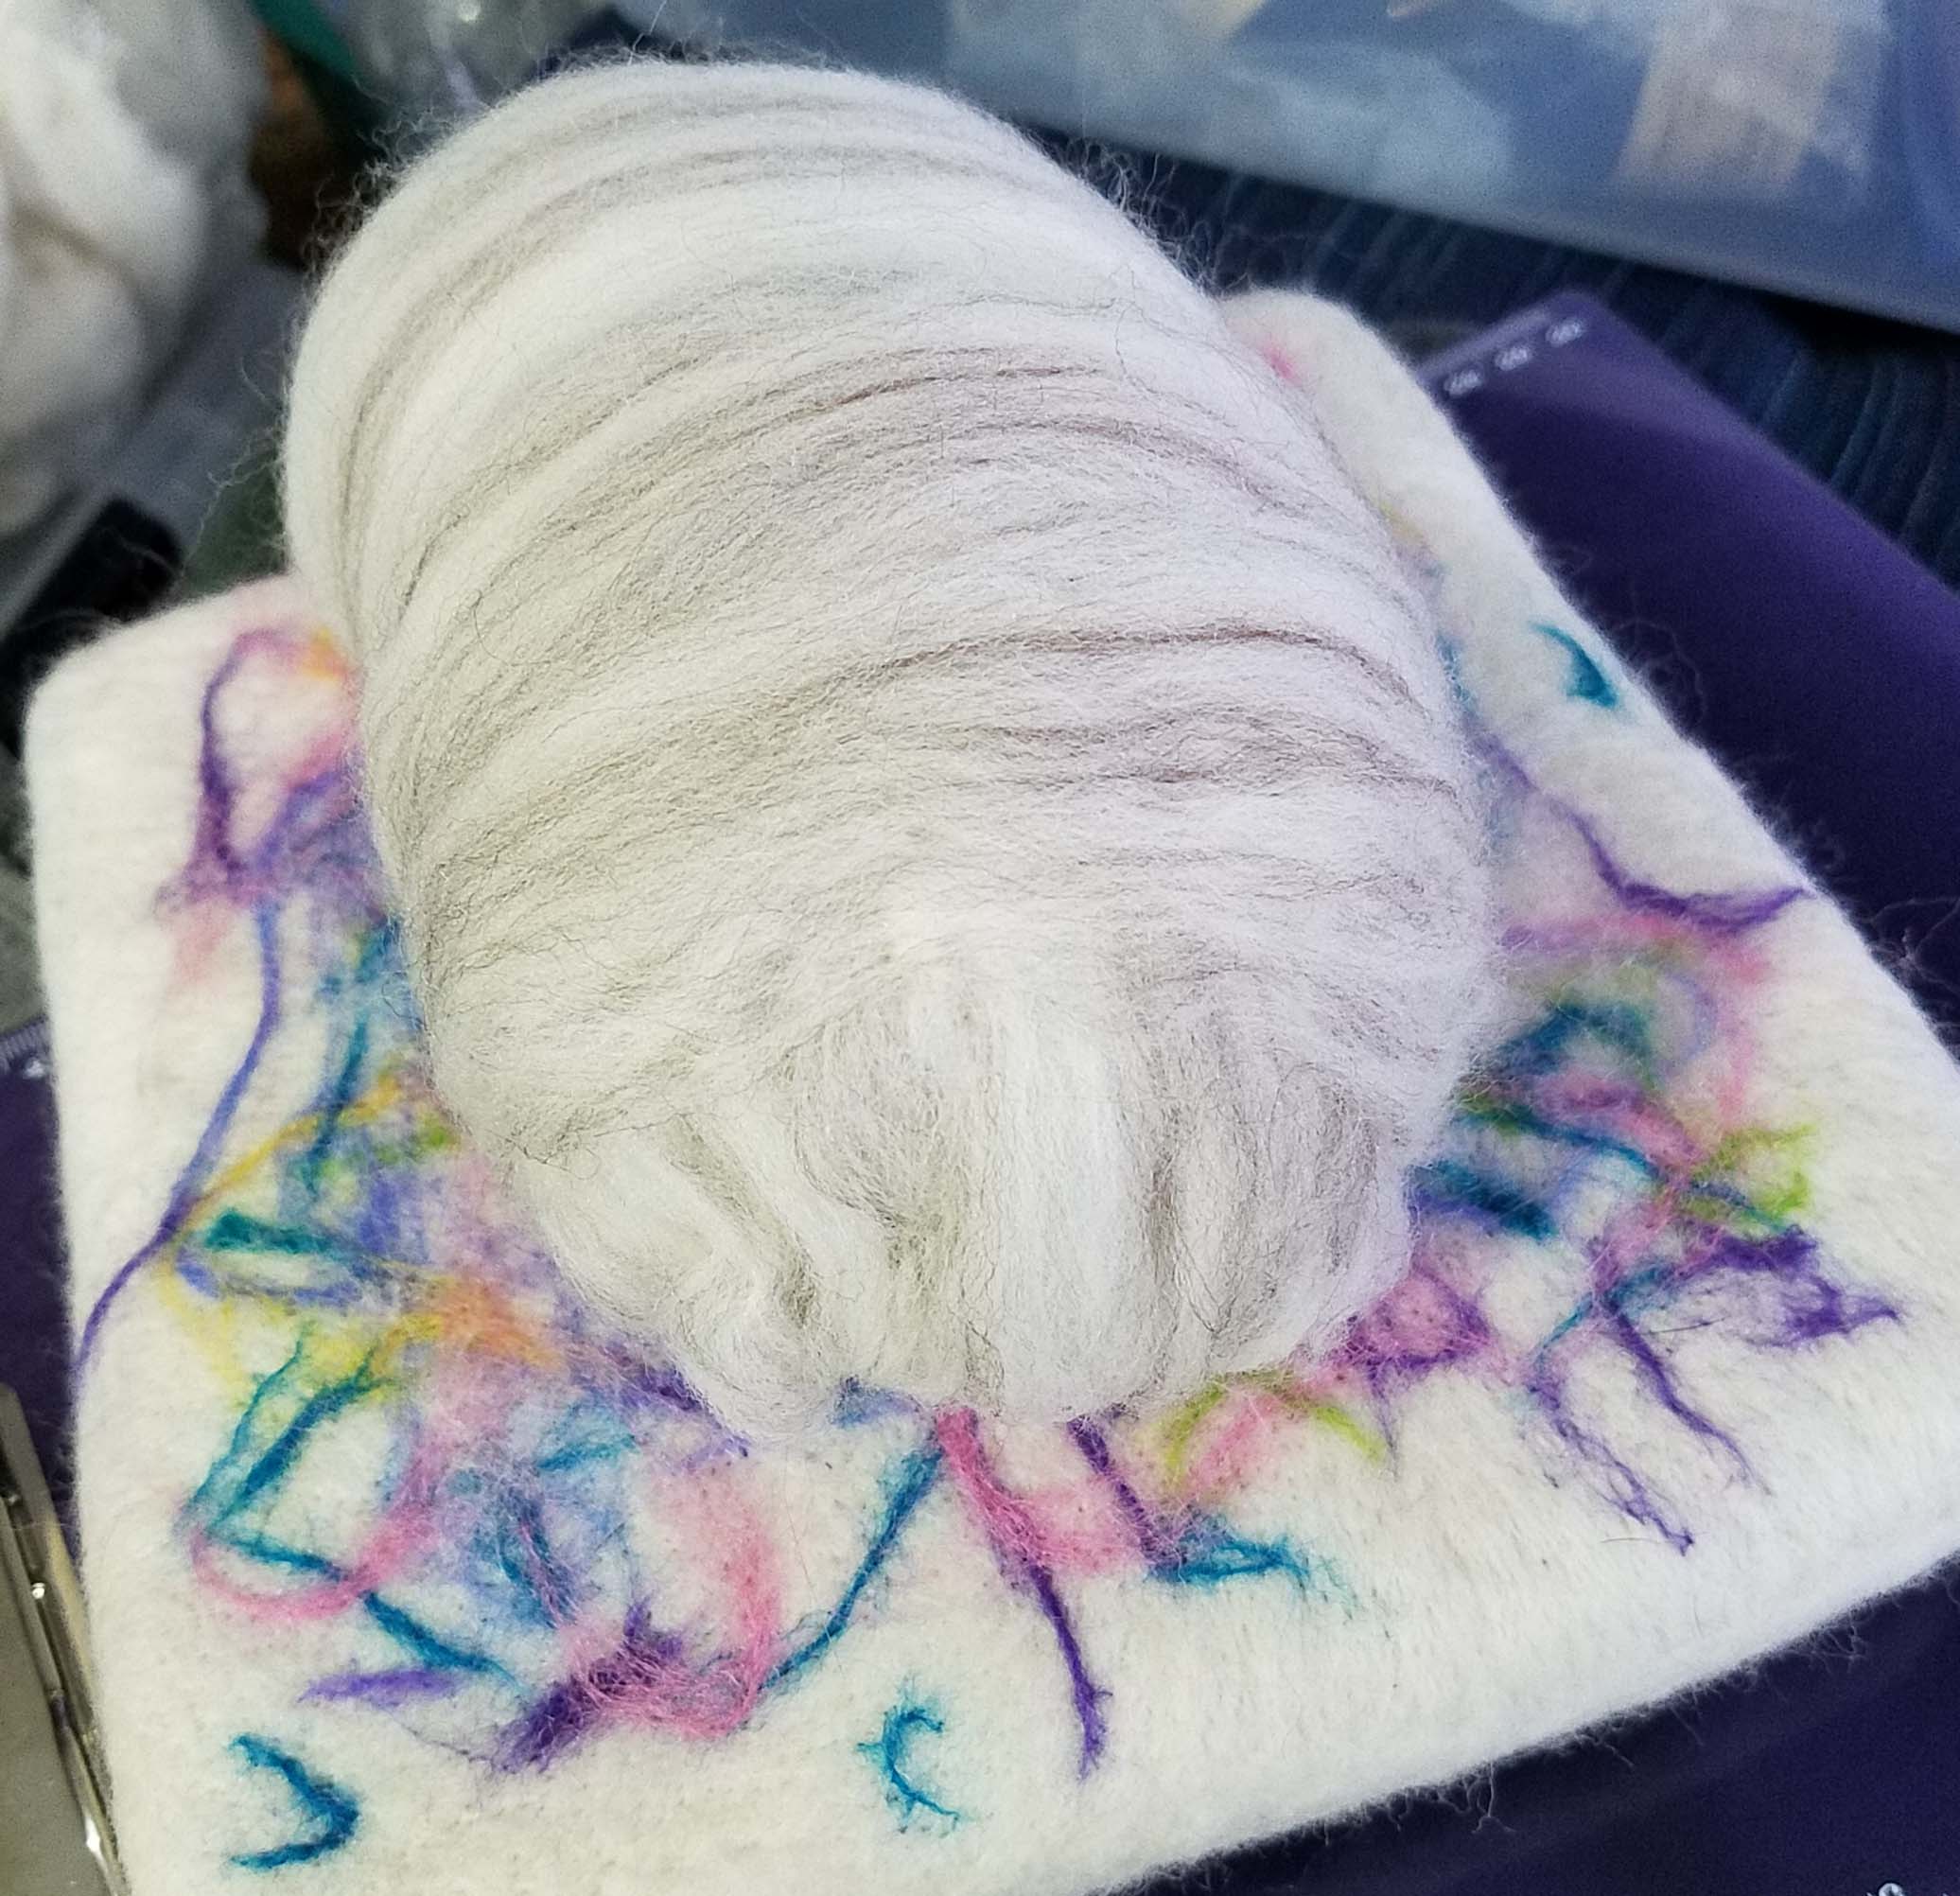
It was time to submerge the rock in my bowl of hot soapy water.
Now it was just all about working the wet felt to shrink it snugly around the foam core. This is the really wet and messy stage of this project. I also think I had a bit too much soap in my water. I alternated going to my kitchen sink and rinsing my rock with cold water to shock the fibers further, and working with the hot soapy water.
I also used my felting stone when I started getting the rock closer to the shape I wanted. The felting stone helped me smooth the surface of my “rock”.
I had finally gotten it felted well and I set it out to dry overnight. It was still a bit furry looking and had some odd shaping issues on the “bottom” side. I knew I would be doing a little “fixing” with my felting needle once it was dry again.
The next afternoon my rock was dry and I was happy with the squish factor of it. I wanted to correct some shaping issues on the bottom and ends. Especially this odd little flap that had formed at one end. Of course, real river rocks do sometimes have cracks and little protuberances, but I wanted my rock to be an “ideal” river rock.
Fortunately this was easy to fix, I just added some bits of fiber and needle felted them until they were smooth. No more flap. I continued shaping and smoothing my rock with my various needle felting tools. All of them joined the party; single, 3 and 5 needle tools. The 3 needle tool was especially useful for smoothing the surface of my rock with lots of shallow needling.
Before
After
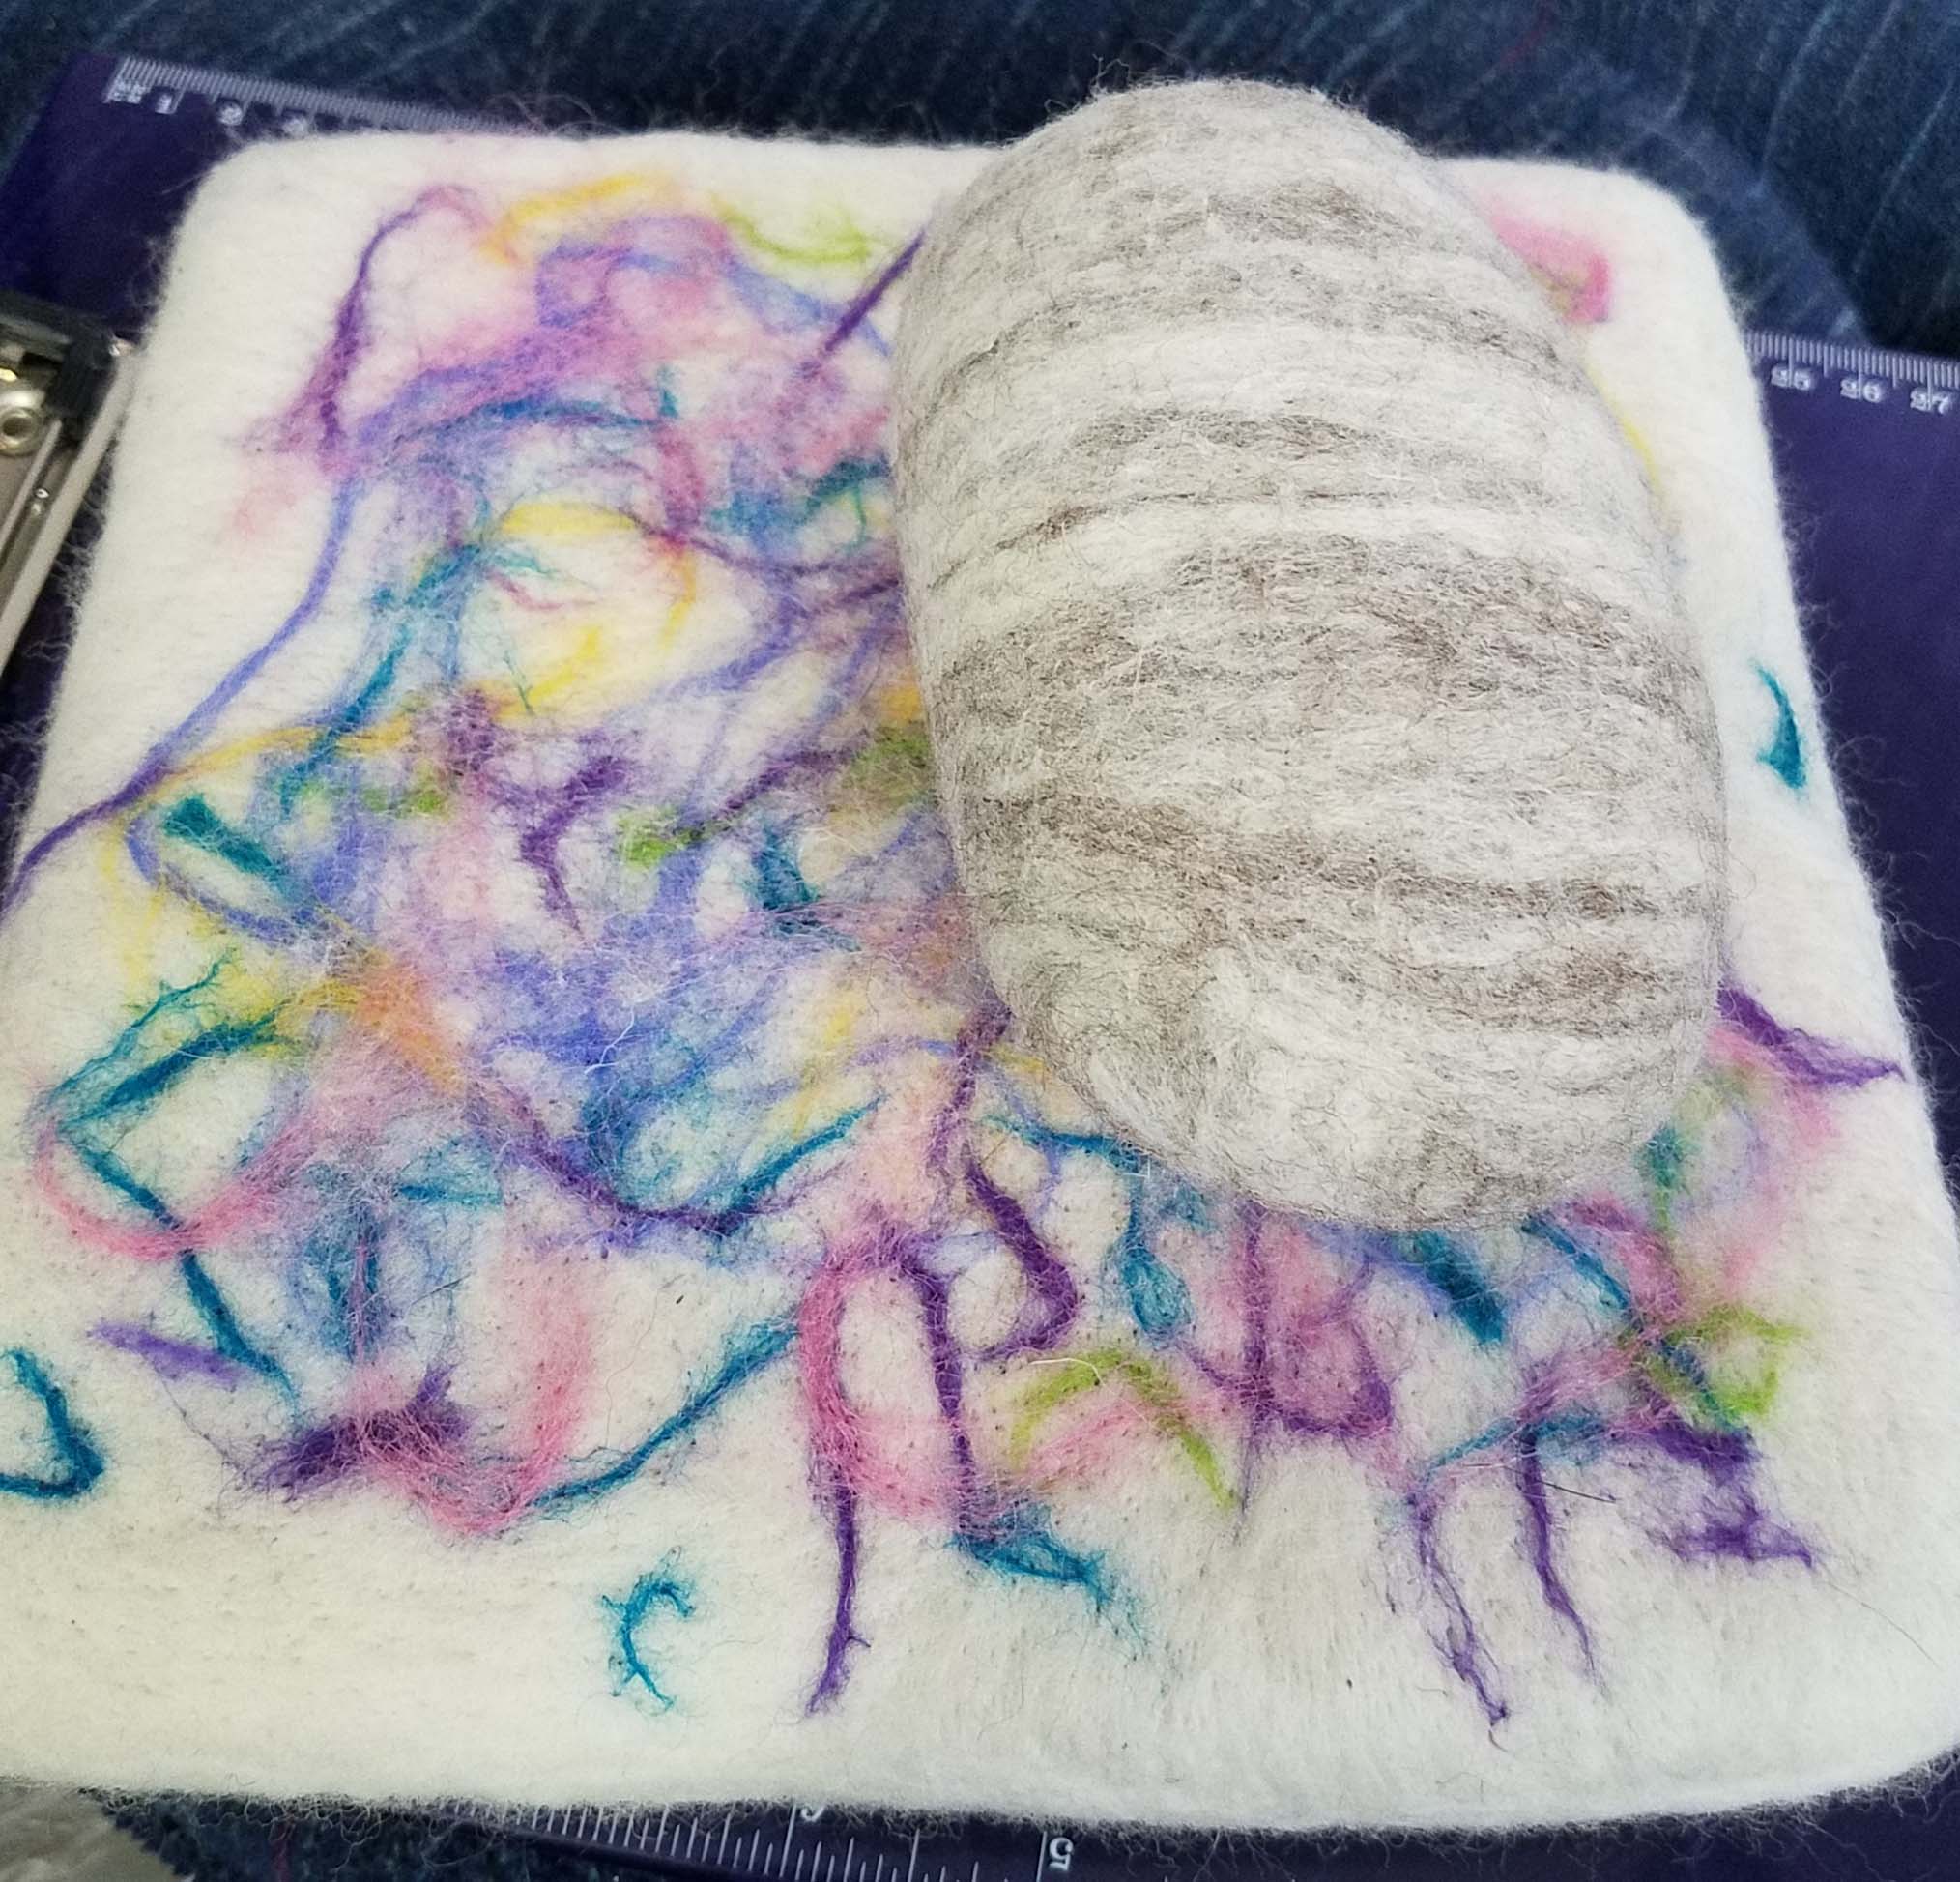
I am pretty pleased with how this rock came out. You can see how much the fiber shrank from the starting size to the finished size in the Before and After photos above.
The finished rock is only a little bit bigger than the foam core. You can get an idea of the relative sizes by looking at the shape in the remaining foam.
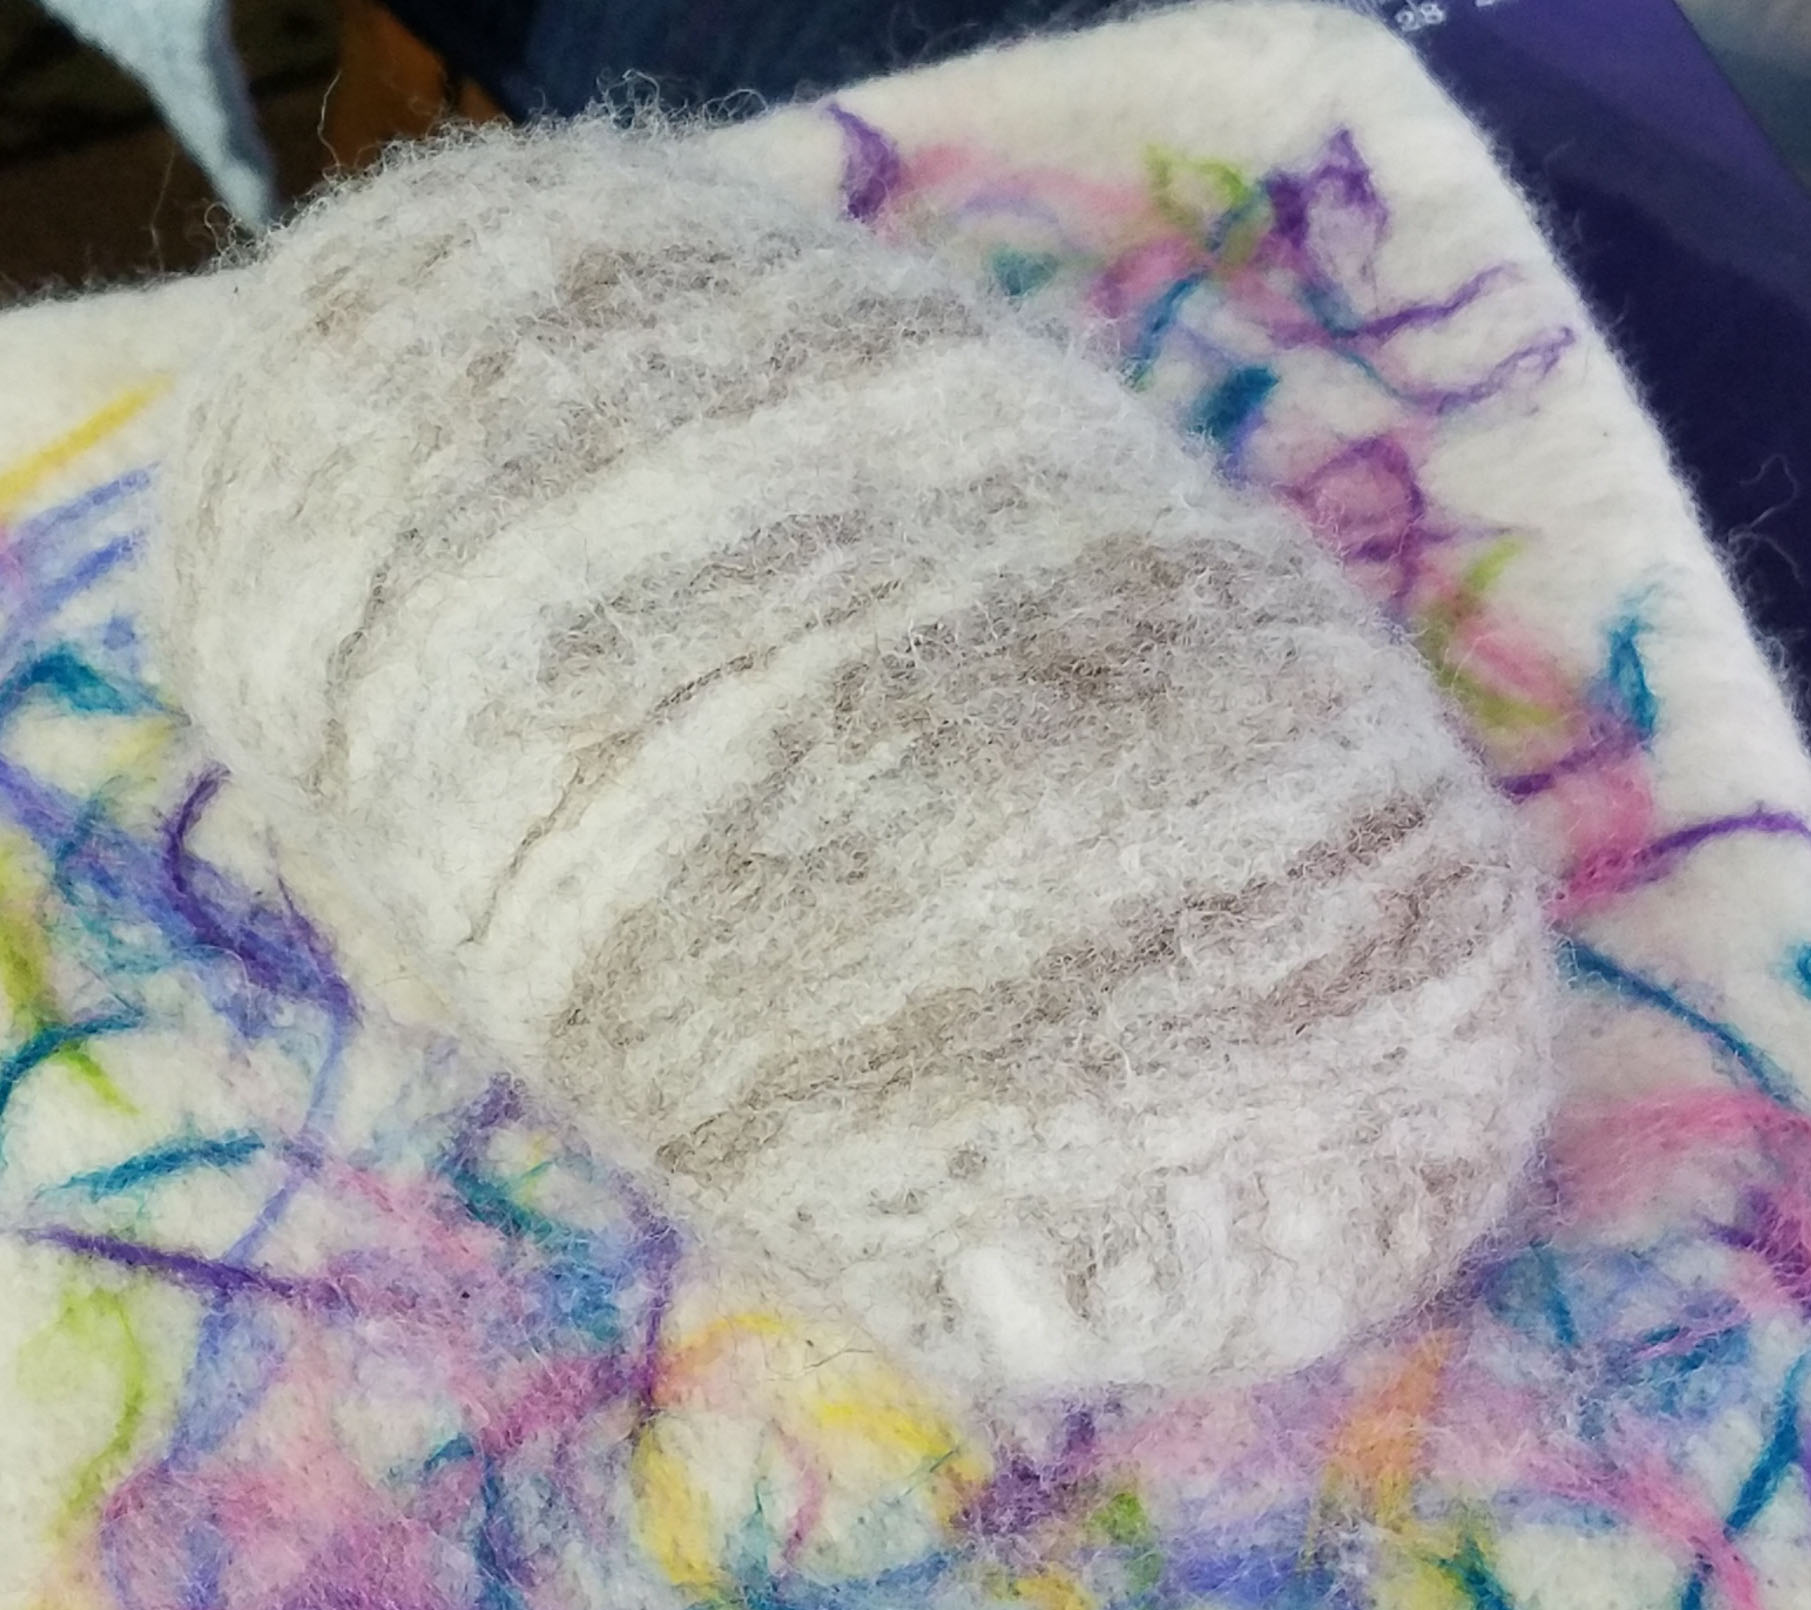
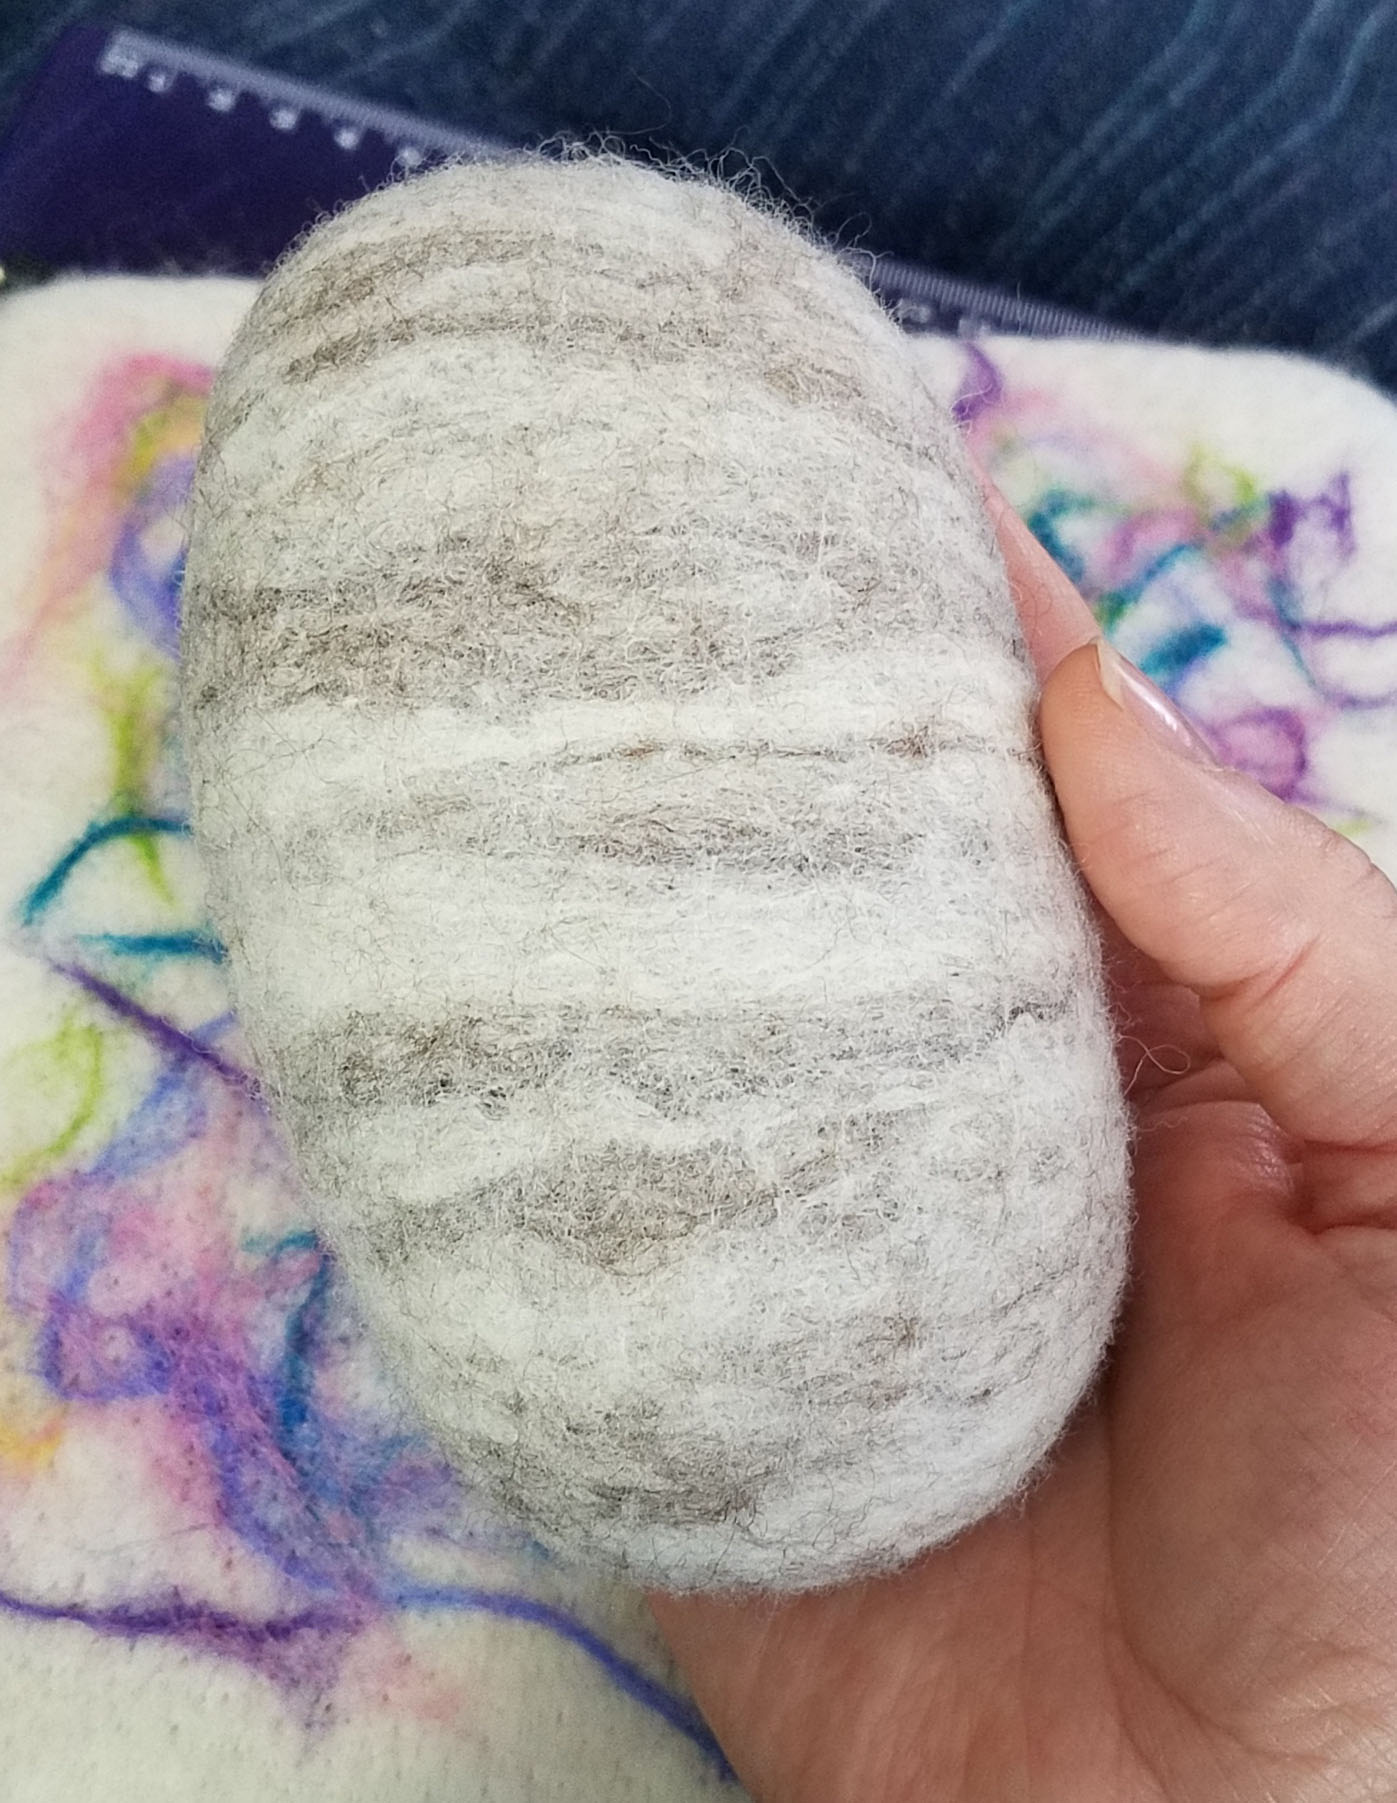
The patterning on the rock from the “special” fiber actually came out very well. I definitely have a side I consider the “top” of my rock.
This is my finished rock from the bottom.
And the side. Any way you look at it is pretty “rock like”.
I learned so much making this rock, one of the most important things was how much work it is felting a rock. I’m sure with practice I would get faster and have better results. But I would say it would be worth every penny to purchase a rug or other item from Martina. There is an incredible amount of labor in her pieces.
I may make some more rocks, but I think they will become a pillow for the sofa and not a rug. I was thinking that I could crochet the backing for the rocks to be sewn to, or I might even needle felt the rocks to my crocheted fabric. That would be the ideal marriage of both my current favorite crafts.
I’m a little proud of myself right now. Sadly, very often my New Year’s Resolutions sort of slide off into the mist of time as the year rolls along. This year I’ve already made one resolution happen and February is still nearly half a month away.
In my first post of 2017 I shared 5 resolutions. #2 was to open my Etsy Shop, and late Sunday night I made it happen. I have started with 5 listings. It all was a bit stop and go on Sunday evening, attempting to get the shop up, because our internet was being difficult (the joys of living on a mountain).
I’ve opened my shop with some jewelry listings.
When I learnt about the idea of wearing a safety pin as a symbol of solidarity I loved the concept. I wanted my safety pin to stand out a bit more and these decorated safety pins are what came from that. Each pin has beaded wire wrapping along bar opposite the “pin” part.
I experimented with the color of wire I used for the wrapping with the Rainbow colored glass beads. There is a bright silver wire (that I found out today is actually tarnish resistant silver-plating), nickel silver and bright gold.
I also experimented with using different size beads, like the seed beads on this pin.
This pin was my experiment with a subtler decoration. Still more noticeable than a plain safety pin because of the silver sparkle, but it is a coloration that can go with any outfit.
2/3 of the price for each pin sold will be donated to various organizations that support and help protect civil rights for all Americans. I’ll be adding more pins with different decoration as I develop my shop further, I also plan to have some stitch markers and shawl pins. I hope you’ll stop by and see if any of my pieces appeal to you. You can visit my Etsy Shop by clicking here: Mamas2Hands, Two Hands Arts & Crafts.
Earlier this month I shared with you my efforts to organize my bead stash. The primary motivation for that was because I am playing with designing jewelry again. Sometimes that means using beads and other jewelry components in my crochet wearables. Other times it means getting out the wire and jewelry making tools to create fun and sparkly pieces.
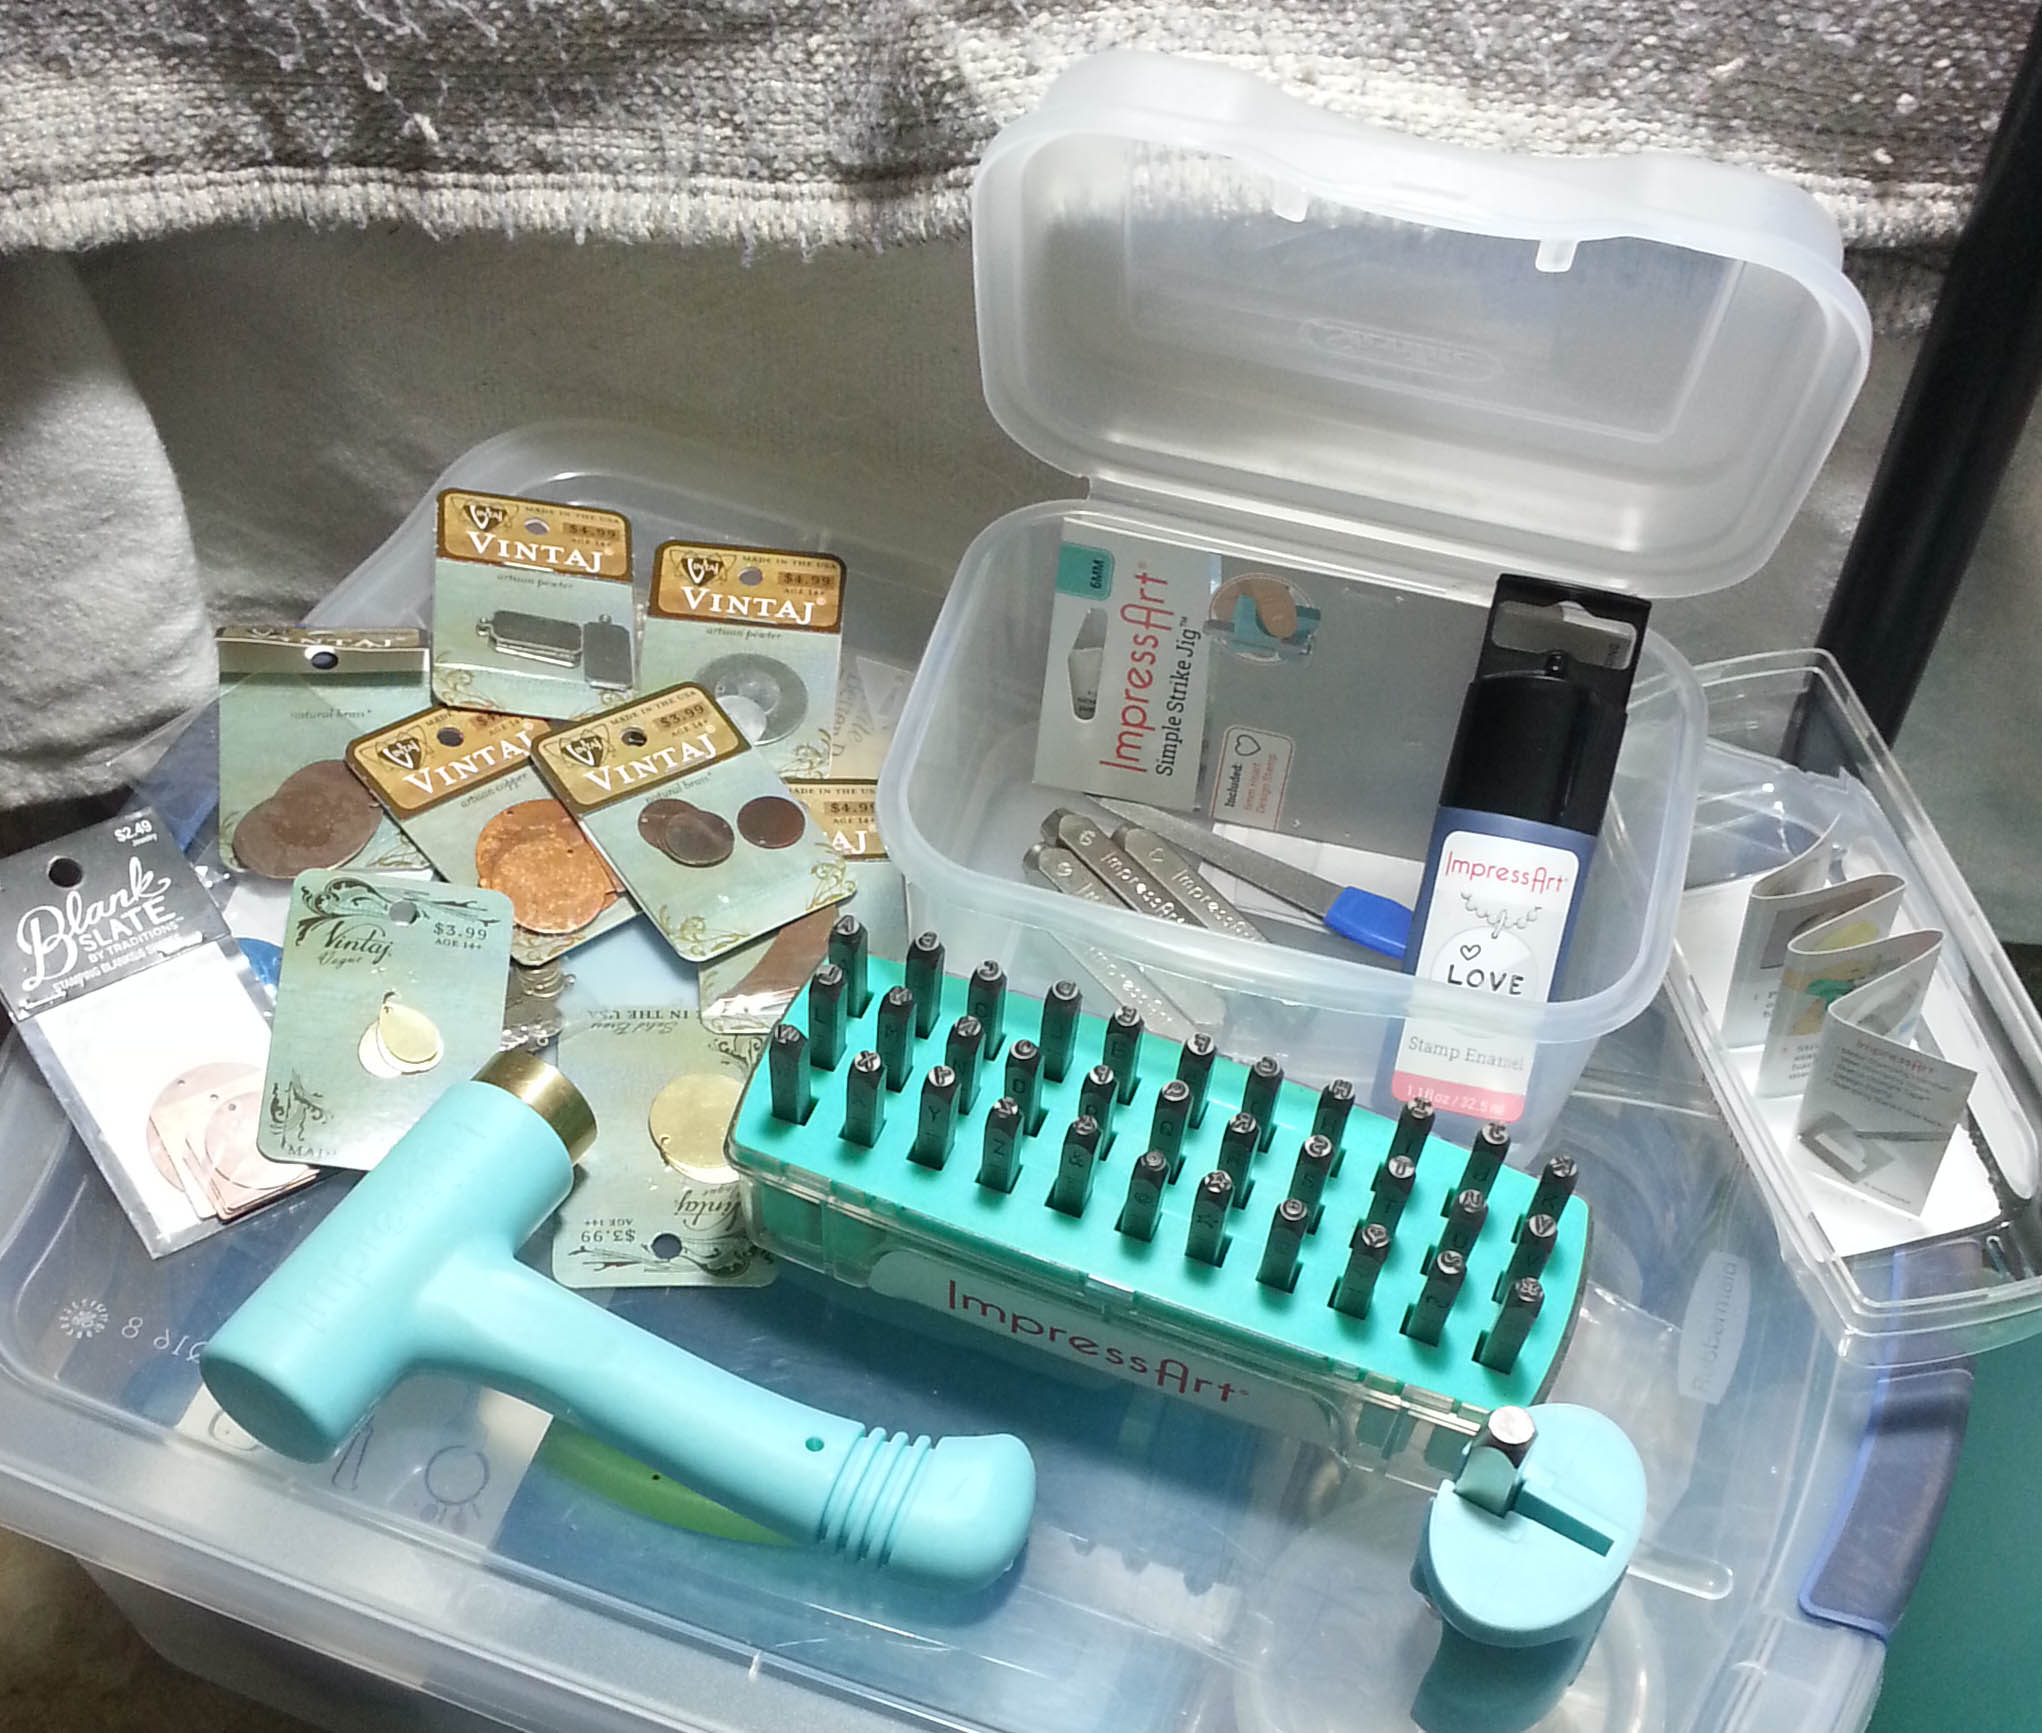
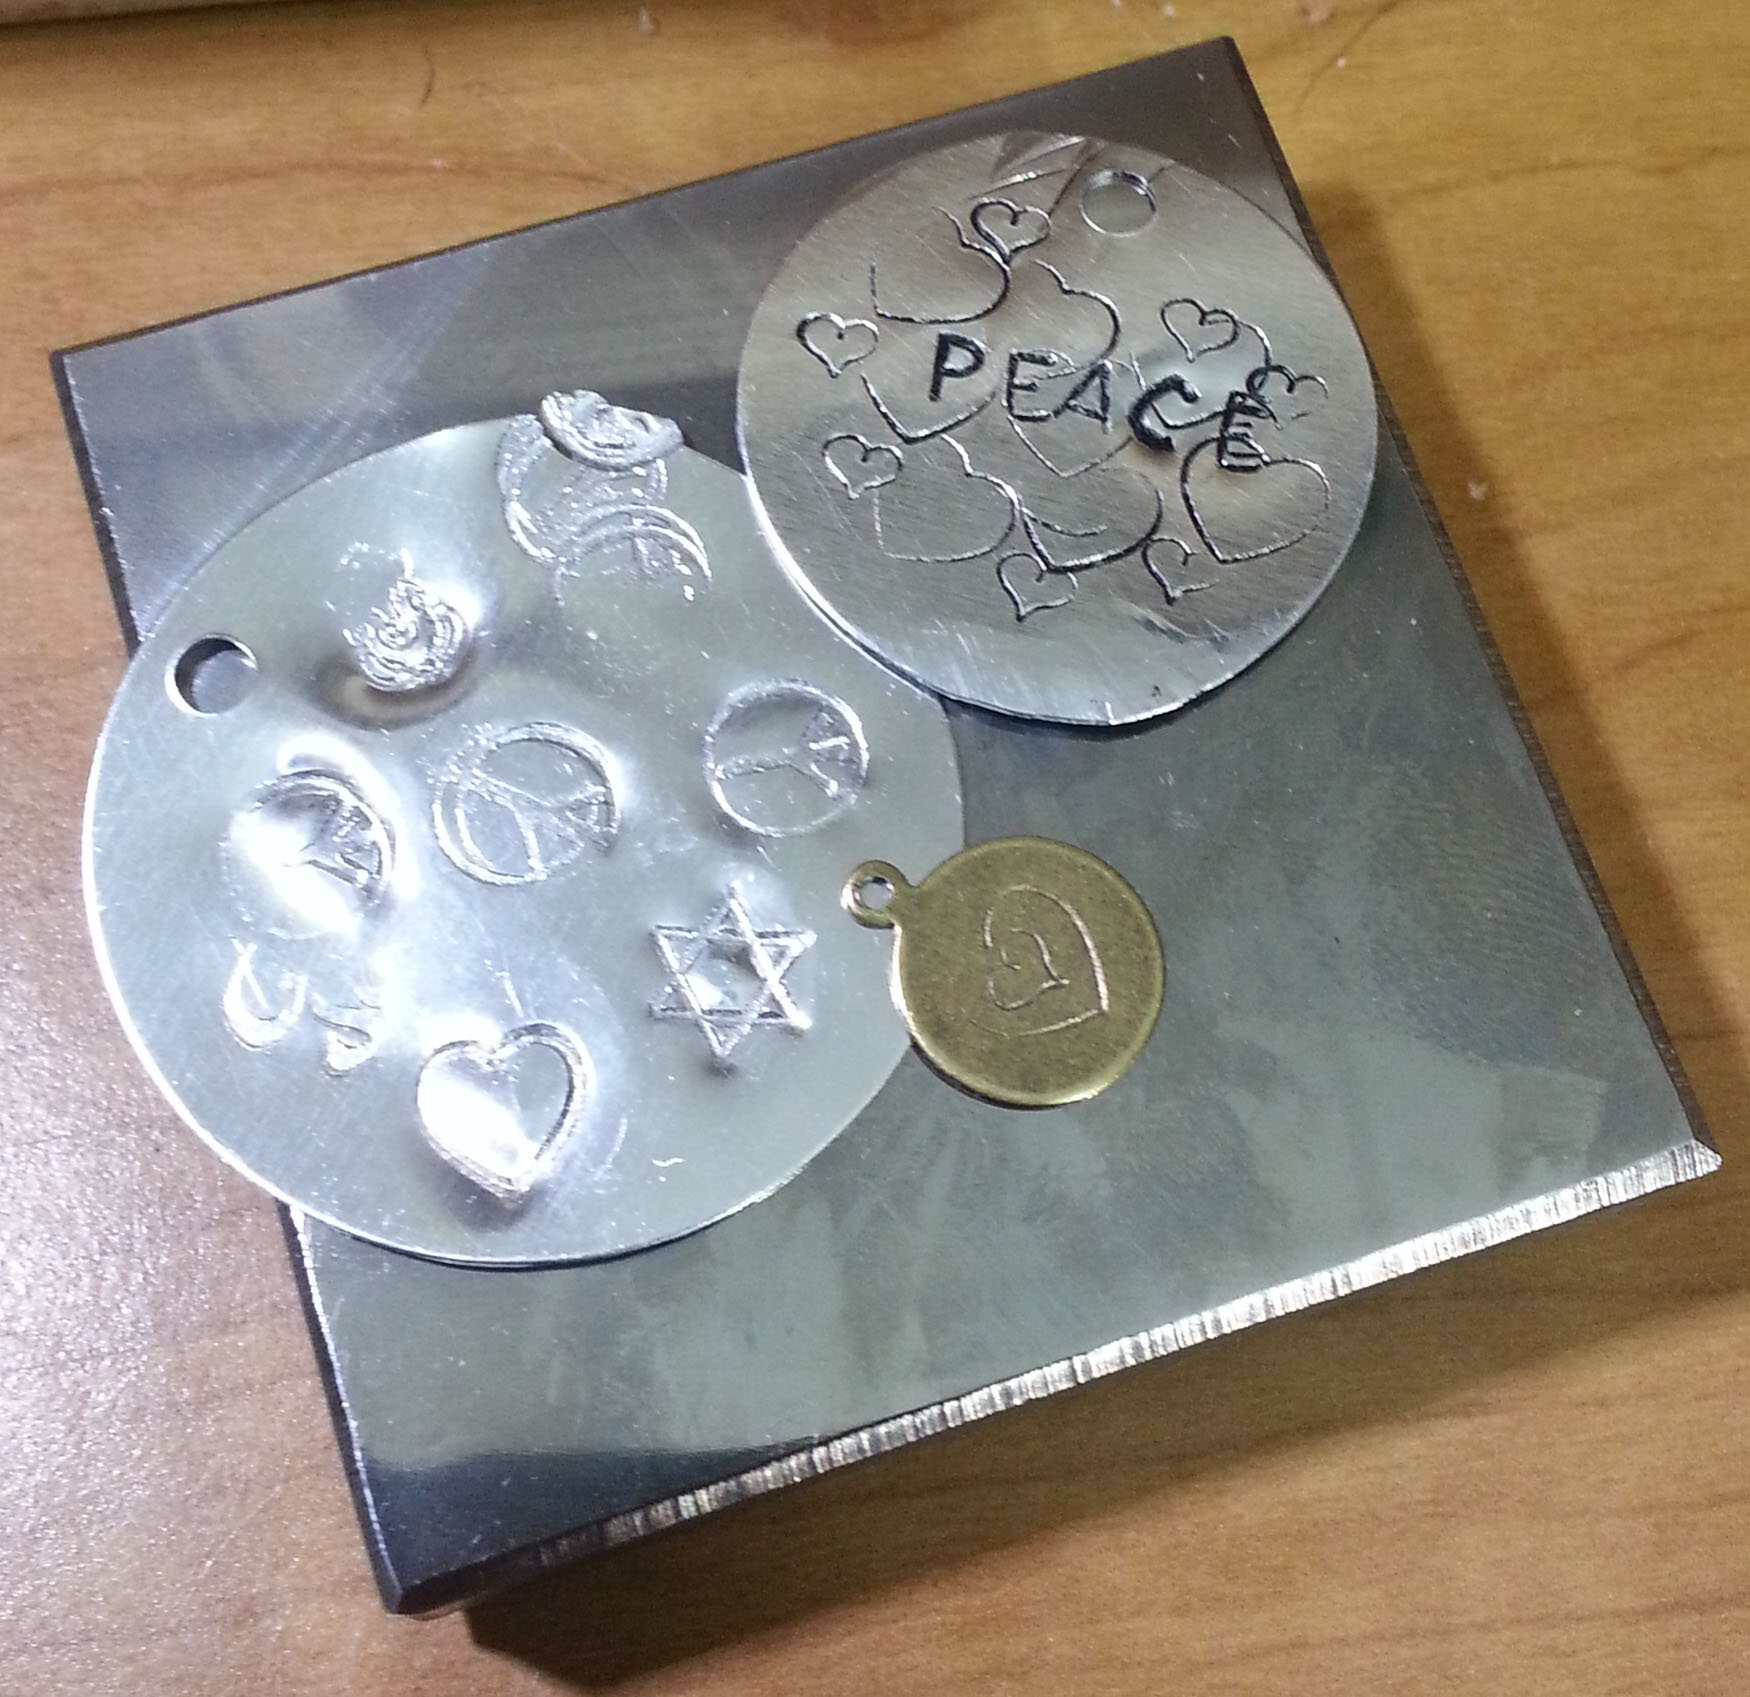
As I’ve been organizing things and working on various jewelry designs, I became interested in metal stamping. This is a great way to add words and even quotes to my jewelry pieces. Which meant acquiring some new tools and supplies.
Yesterday evening I began to experiment with metal stamping. My sons were both very interested in what I was doing. This is definitely not a quiet craft. Both boys actually gave it a try.
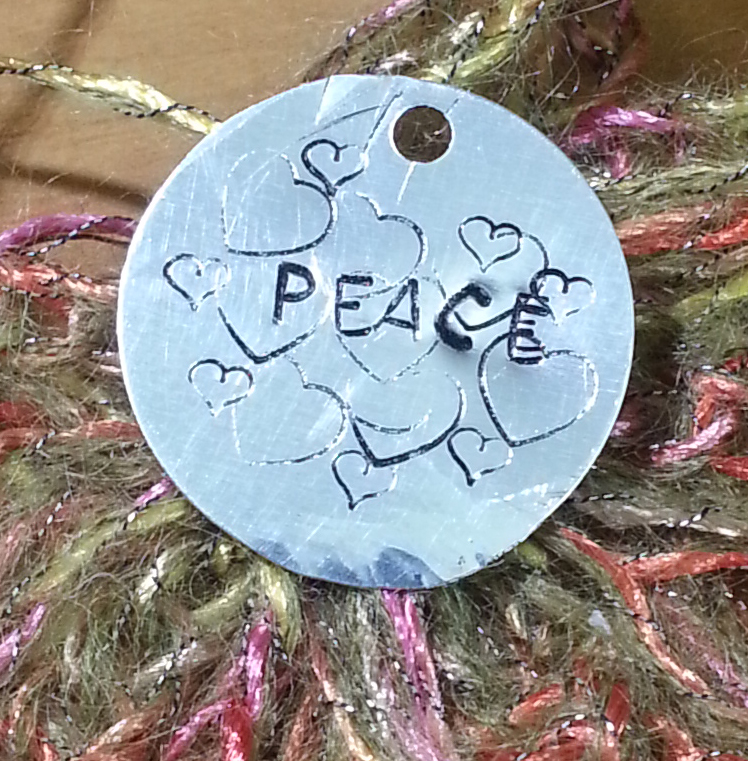
Then my oldest decided to be in charge of handing me the letter stamps I needed. This little disc of aluminum was our project we worked on together. Not too bad for a first attempt.
One of the fun things about this craft form is bashing the stamps and metal with hammers. It’s a great way to take out some controlled aggression. I was being a little timid at first, which is why that first piece had some rather faint impressions. I soon overcame my timidity though and gave the stamps a hearty whack as needed.
I made this little silvery aluminum disc next. I found I’m really not wild about aluminum, especially when it is this thin. It’s surprisingly strong, but super lightweight. I dropped this disc at one point and it practically flew away. I was hunting for it for 20 minutes. These discs would be great for earrings though, as being so lightweight they wouldn’t pull on the earlobe.
Next I played with a brass blank. These blanks were labeled “natural brass” and don’t have that gleaming yellow color that I’m used to. Brass is a harder metal than aluminum, so it took more force to create a good impression on the blank.
I am still figuring out the exact method for placing my stamps before striking them. I actually made a little mistake on this piece, but corrected it. Can you spot it? Even with the mistake I’m pretty happy with how it came out.
You may be asking, “Are you nuts taking up a new craft during the madness of Christmas?” or even, “Where are you going with this Andee?”
If you have been reading my blog for very long, you already know the answer to the first question. Yes, I’m nuts. That said, I also find learning new things to be a good way for me to manage stress. In some ways this is all an early Christmas present to me.
Where I’m going with this is yet to be seen. I am playing around with the idea of finally getting my Etsy Shop going. It’s something I’ve wanted to do for years, yet it hasn’t ever come together.
Or this could just be a stop along my art journey as I keep expanding my creativity. It may seem counter-intuitive, but I find new creative energy for my crochet work by exploring other (sometimes un-related) crafts. For the moment this new craft isn’t taking up a lot of room mentally or physically…. and I’m having a lot of fun playing with hammers.
Pile of Yarn from Scotts Bluff Valley Fiber Arts Fair
Remember all that yarn I brought back with me from the Scotts Bluff Valley Fiber Arts Fair? I’m putting some of it together with other yarn from my stash to make a free form crochet scrumble.
When I made my first free form scrumble years ago I thought it would be an easy way to use up left-over odds and ends from my stash. That was when I discovered that one of the trickiest things about free form, is picking the colors of yarn to use together. I wasn’t all that happy with my first scrumbles, but I was intrigued enough to persist.
A great short cut for choosing colors is to pick out a multi-colored yarn that appeals to you, then match it with solid yarns in the colors that are in the variegated yarn. This is exactly what I did to begin this project. I used this hand-dyed yarn as my guide for picking the other colors.
If you are like me, a large percentage of your yarn stash is dominated by a couple of colors. In my case I have lots of Purples and blues. I purchased the hand-dyed hank of yarn knowing that I would have other yarns in my stash that would work with it. If you don’t already have a variegated yarn you want to use in your free-form project, look at your stash for color inspiration before purchasing one.
In the end you want a variety of shades as well as colors for your yarn choices. I looked at lighter and darker variations of the colors in my variegated yarn. Like the very deep blue in the furry yarn, that deep color and texture will add some interesting effects to the final fabric. The bright Lime will create contrasting pops.
Hopefully I’ll have some pretty Free Form scrumbles to show you in the next couple of weeks.