For those of you that may not have heard, I will be teaching at the 2024 Estes Park Wool Market. If you have followed my blog for a while you may have seen a post or two about my visits to this fun event that is practically in my backyard. Estes Park is a 40+ minute drive from my house. It is a gorgeous drive too, especially in June.
Thursday, June 6 I’ll be teaching 2 Crochet Workshops.
Stitch Chart Bootcamp (9 a.m. – Noon): For those of you that have been stymied by stitch charts, this is the perfect workshop to help you unravel them. Once you have finished this workshop you will have the skills to tackle any stitch chart and create crochet projects from them that will please you. The handout for the workshop will include lots of fun stitch charts for you to work from while attending and afterward.
Inside Out Rectangles (1 p.m. – 4 p.m.): Working from the center out in rounds is my favorite way to create crochet projects. I especially love the way it gives a lovely edge to the finished project. Rectangles worked in square rounds are really handy. They can be placemats, towels, scarves, wraps, tablecloths, throws and blankets. But how do you know what size of a foundation to start with to get the size rectangle you want. In this workshop you will learn everything you need to know to always get the size rectangle you were aiming for, as well as some fun stitch patterns to work your rectangles in.
Friday, June 7 I’ll be teaching 1 Needle Felting Workshop.
Needle Felting in 3D (9 a.m. – Noon): Needle Felting is the perfect way to create sculptural objects. You don’t have to worry about expensive tools, materials or finding a kiln to fire your pieces. With Needle Felting you can play with shape and color easily and affordably. Make everything from toys to jewelry to art. You don’t need to be experienced with needle felting to be able to step right into this craft and begin making fun 3 dimensional shapes that you can turn into anything you want.
June is a wonderful time to visit Colorado and especially the Estes Park area. The national park is just outside of town for scenic drives and fun hiking. Downtown Estes Park is full of fun shopping and great places to eat. After the workshop days are done there is the fun exploration of the vendor marketplace and meeting all the fiber bearing critters in the barns. Come check it out!
I’ve been busy crocheting away on some designs I can’t share yet, but I wanted to be sure to let you know some other fun things coming up this Spring. I’m one of the Instructors for Interweave YarnFest in Loveland, Colorado this year!
Currently workshops are available at the Early Bird pricing through this Friday, February 10th. So hurry on over and pick your workshops now.
I’ll be teaching 4 workshops.
Stitch Chart Bootcamp – Crochet: Workshop is Thursday, April 13th, 9:00 a.m. – Noon.
Have you ever wondered exactly where the next stitch is supposed to go? You know that the stitch chart probably holds the answer to this question. You may have even referred to a chart in a crochet pattern that uses both text and chart, but are you ready to work from only the chart? A whole world of international patterns opens to you when you can decipher stitch charts, even if you don’t understand the written language that accompanies the chart. In this class, you will learn how to work solely from a stitch chart to crochet a lovely motif. You’ll learn what the symbols in the charts stand for, how they may change depending on the country of origin, and the skill to get results that please you when working from the charts alone. The class handout includes over 5 stitch chart patterns for you to practice with.
Needle Felting in 3D: Workshop is Thursday, April 13th, 1:30 p.m. – 4:30 p.m.
This is the workshop for you if you have ever wanted to learn how to create something three-dimensional out of wool! Needle felting is a great fiber art for creating sculptural pieces. It is a wonderful medium for making everything from toys to jewelry to art. The possibilities are endless. This session will be all about creating fun and engaging 3D characters and critters with confidence. Learn everything you need to use your felting needle safely and ergonomically. This class also covers the following: creating different shapes from loose fiber and joining them together to make an object that can stand up; using a “frame” to create the base of your three-dimensional pieces; making both “hard” and “soft” felt; and embellishing your sculpture with yarn, beads, and fabric. You will leave class with a full-color booklet of how-tos, your own felting needle, and a bag full of fiber. The class kit will have everything you need to practice in class. I’ll provide work surfaces for students to use during class as well.
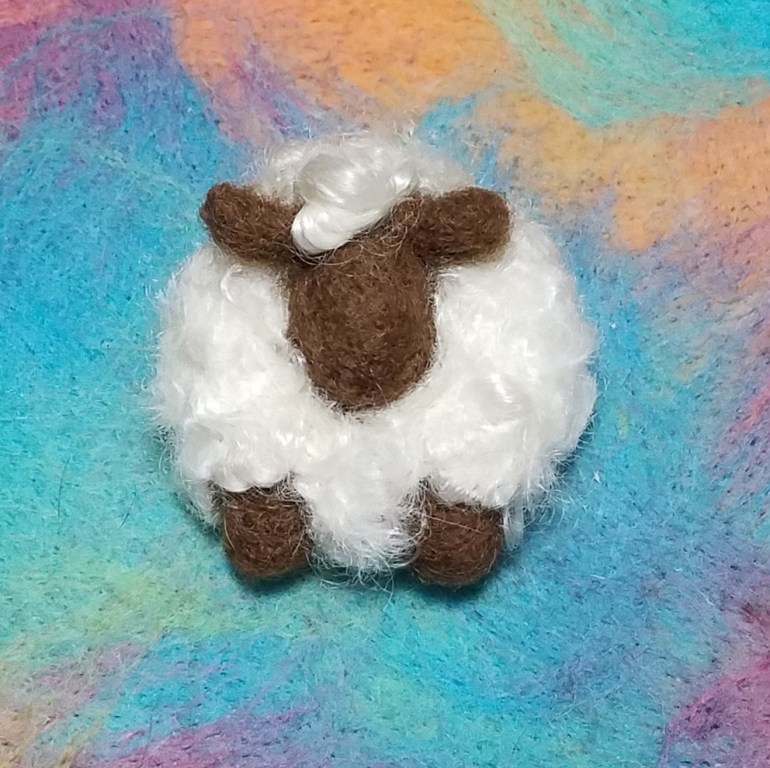
Rollie Pollie Sheep – Needlefelting: Workshop is Friday, April 14th, 9:00 a.m. – Noon.
Don’t be Baaaashful! Ewe know you want to learn how to create this adorable cuddly round sheep. This little sheep is a perfect soft toy or decoration for a fiber loving friend. I originally designed my first rollie pollie sheep for a friend’s grandchild. In this workshop, you will be confident with using a variety of needle felting sculptural techniques to create your own lovable little sheep. This project will introduce creating a sphere base form, creating three-dimensional shapes on a base form, and embellishing your sculpture with curly mohair locks. We will also discuss modifications for making your sheep more toddler or baby friendly. Class kit contains everything you need to make one cuddly sheep. I’ll provide work surfaces to use during the class.
Heart Full of Love Pin – Needlefelting: Workshop is Friday, April 14th, 1:30 p.m. to 4:30 p.m.
Have you always wanted to try needle felting but you’ve been intimidated by the needles? This class is a great introduction to needle felting! You will learn how to add sculptural needle felting to a simple crocheted base, how to work safely on small projects and create dense durable felt. At the end of the class, you will have at least one little heart pin completed. You can wear your heart on your sleeve or your jacket collar, or give it away to someone you love. The class kit comes with enough supplies to make two heart pins, including a crocheted heart and the yarn to crochet your own little heart. Class handout will include instructions to crochet your own heart. I will also cover how to crochet the heart for students who are interested.
I hope you can join me for one or more of these fun workshops in beautiful Loveland.
I’m so pleased to share that I am going to be teaching at the Interweave YarnFest this April. YarnFest runs from Wednesday April 20th – Saturday April 23rd. There are lots of exciting workshops and 3 of them will be taught by me.
You can visit the website by clicking here, once you are on the home page the Green “Register” button takes you to the pages to view all the workshops being offered. You can sort thru the offerings using the drop down menus to tailor the view to what interests you most.
You can save $20 on a workshop if you register before midnight (ET) January 31, 2022!
If you don’t live in the Colorado Front Range, this is a great way to treat yourself to a visit to the area and some fun with yarn and fiber as well. YarnFest is held in the Loveland Embassy Suites Hotel, a great place to stay to enjoy the festival and Colorado.
The workshops I will be teaching are…
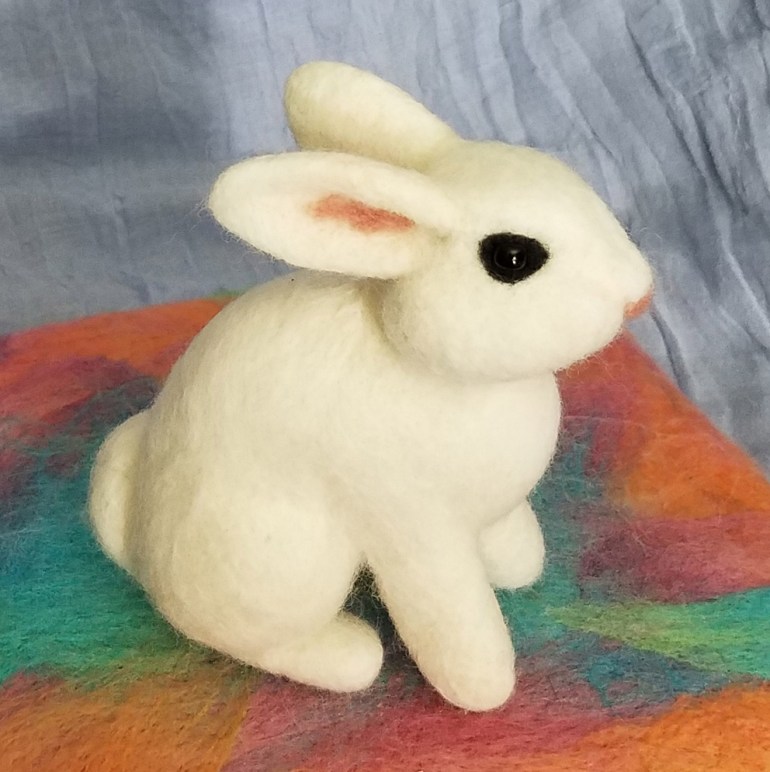
Needle Felt a Curly Sheep Pin Wednesday April 20th 9a – 12p (Mtn Time)
This workshop is a great introduction to needle-felting, especially if you haven’t ever tried it out before. You will be making a fun little project that will introduce you the basics for making a successful needle felting project. You may end up with a whole little flock of sheep.
The workshop kit includes full color handout, 1 felting needle, all the fiber you’ll need to create the class project and pin backs. I’ll be bringing surfaces for students to work on, so you will only need to bring your excitement to learn.
This workshop is especially for those that have been mystified by crochet stitch charts, or maybe you can figure them out better when they are part of a written pattern. The first time I ever encountered crochet stitch charts I was thrilled. I had struggled with written patterns for years, but stitch charts helped me bridge the gap and suddenly I was pattern following genius. Over the past 15 years I have collected an extensive library of stitch dictionaries, books and magazines that feature stitch charts. Many of these are in languages I can’t read, but the stitch charts allow me to decipher those patterns too.
Come join me in this workshop you will leave knowing exactly what the stitch charts are telling you. You will be crocheting various small projects in class working from stitch charts only as part of this “bootcamp”.
Don’t worry, I’m a really nice drill sergeant.
Needle Felting in 3D Thursday April 21st 9a – 12p (Mtn Time)
I have always loved to do sculpture. I’ve sculpted in clay, wood and stone; but needle felting is one of my very favorites. Sculpting in fiber is full of easy choices and wonderfully therapeutic.
In this workshop I’ll share all the tips and tricks for making 3D sculptures using needle felting. You will learn how to build shapes and join them together, different ways of creating underlying structures to support larger sculptures, refining your sculptures and how to embellish your sculptures with other materials.
The workshop kit includes a full-color handout, 2 different felting needles, all the fiber you’ll need to create the class projects, beads and other embellishment materials.
I’m so excited to share with all my readers that I will be teaching 4 classes during the month of July for the Crochet Guild of America’s Virtual Conference. Like many of my followers that had hoped to go to the conference in Denver this year, I will miss seeing everyone in person. The silver-lining though, for those that can not usually make it to the conference, you can still participate in the classes because I (and all the other teachers) will be presenting our classes via Zoom.
All skill levels, best if students are comfortable with making chain, sc, dc stitches.
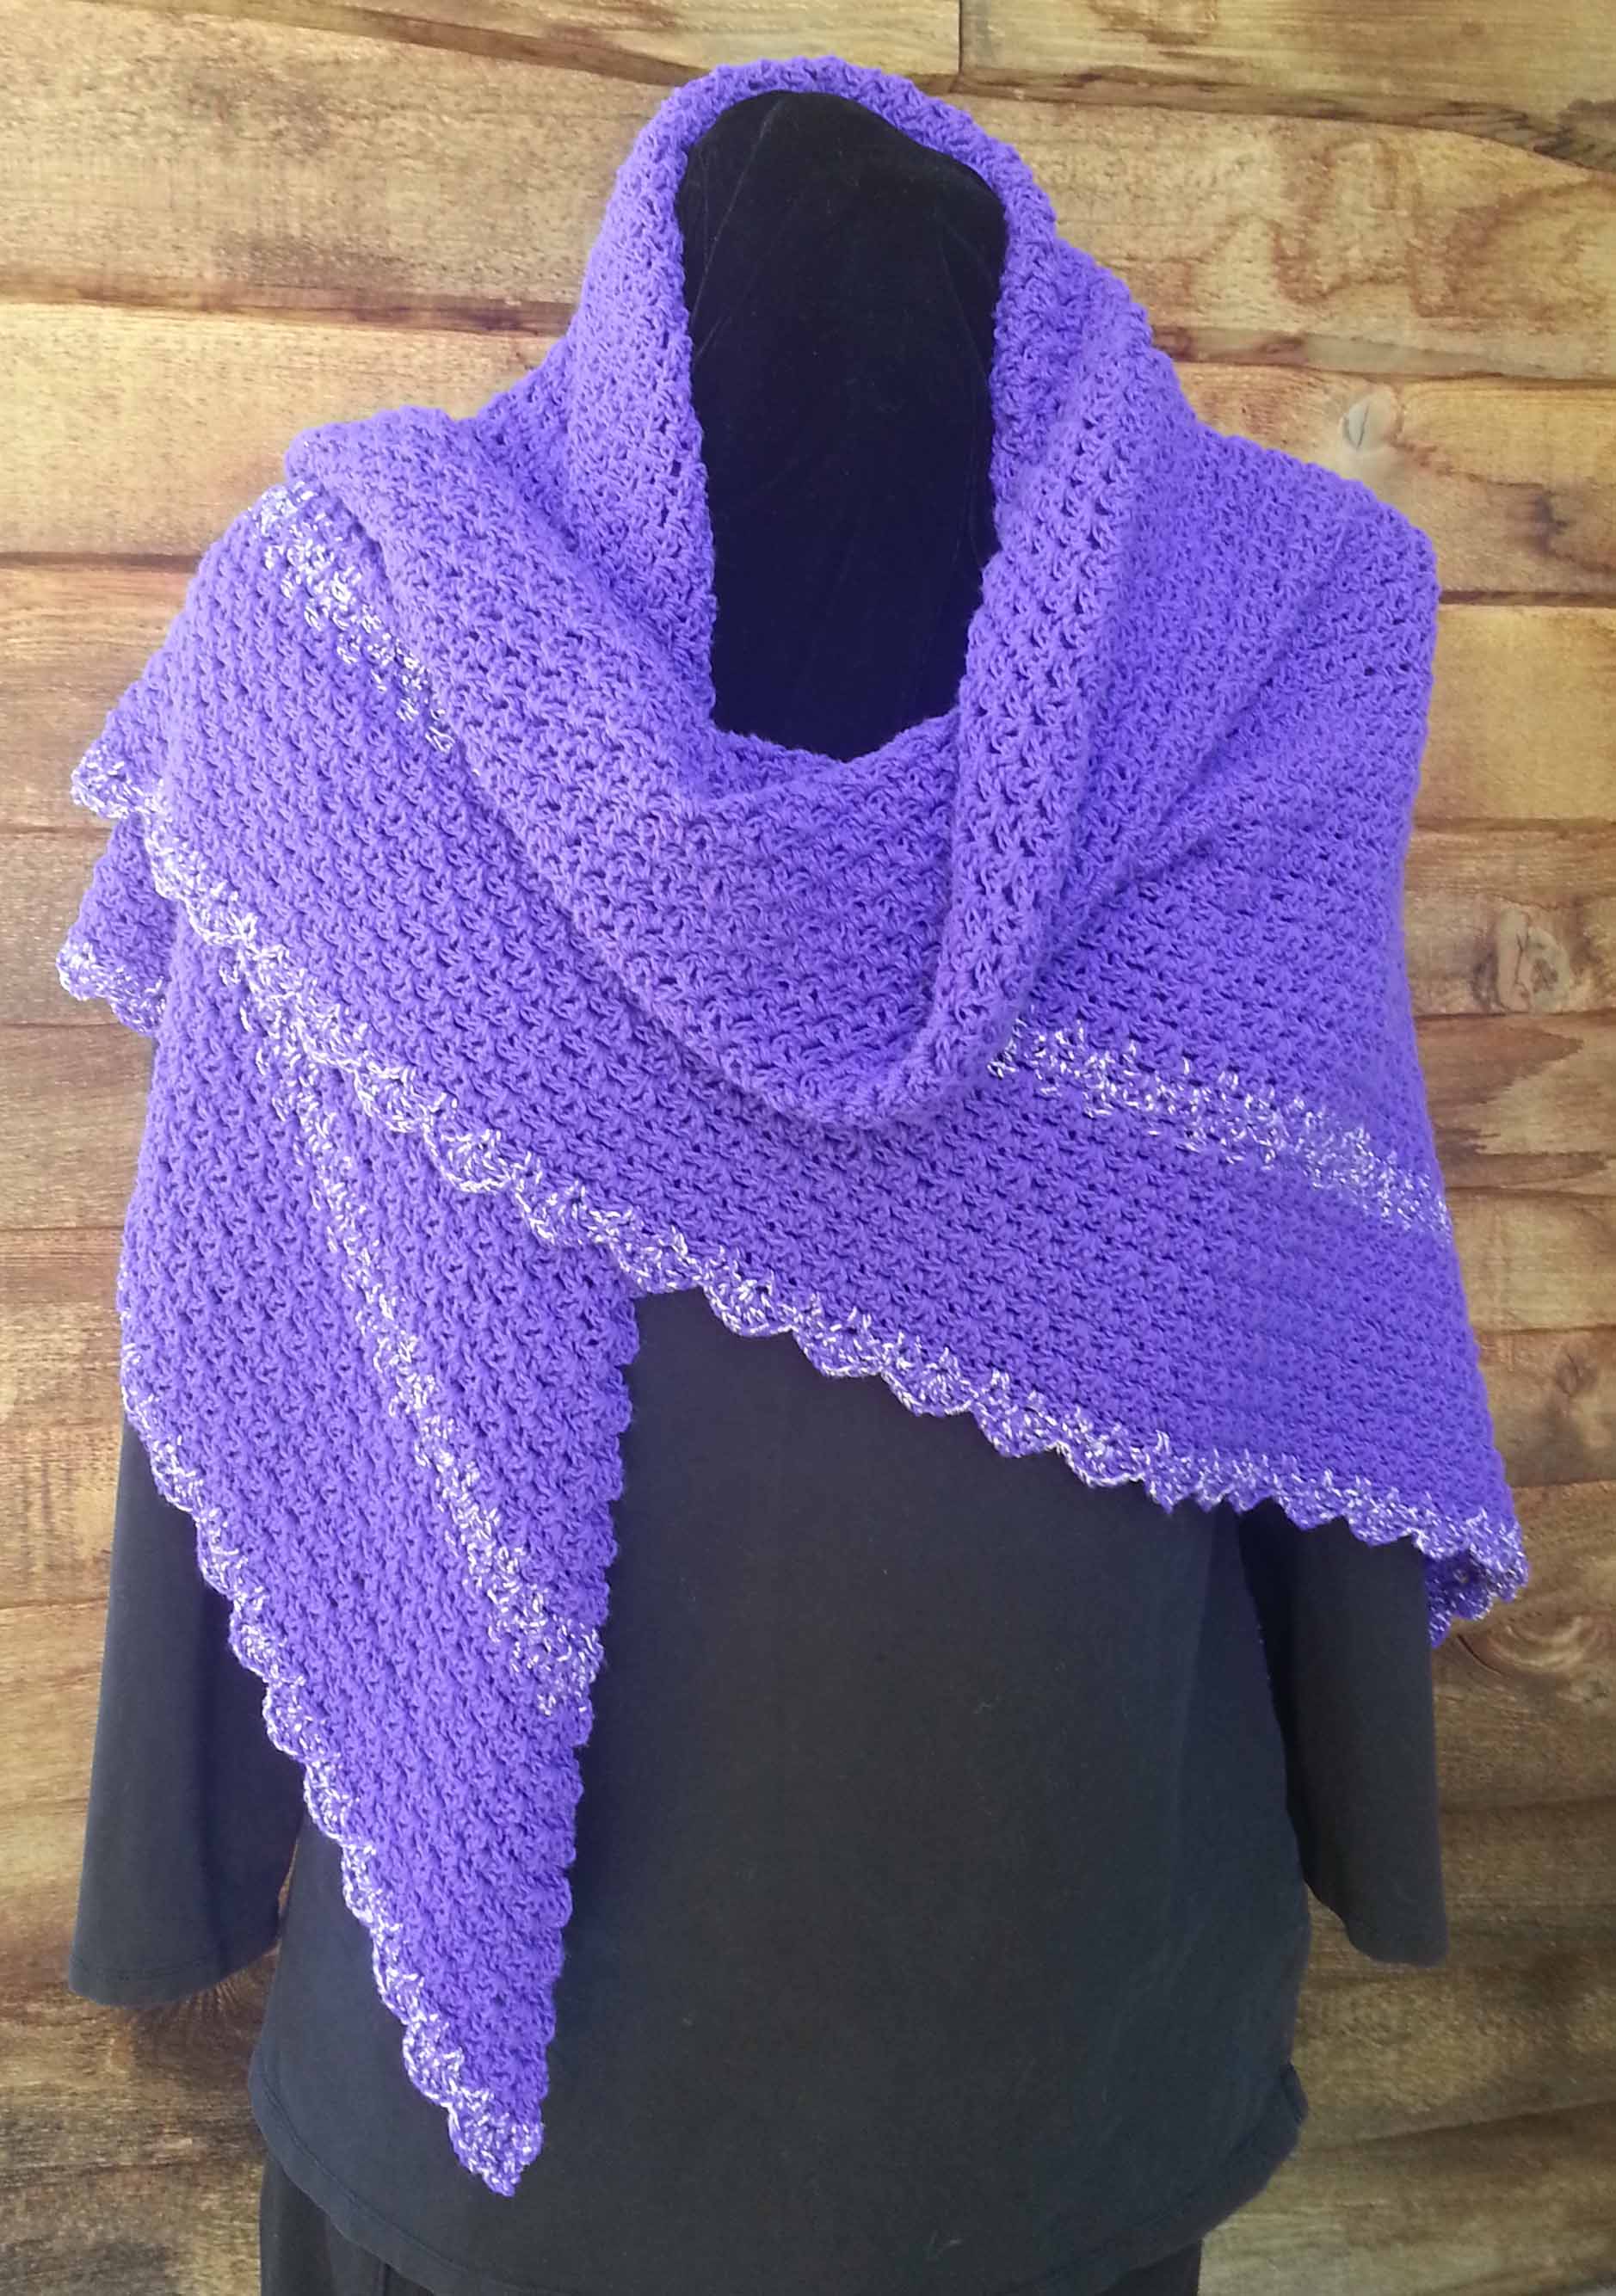
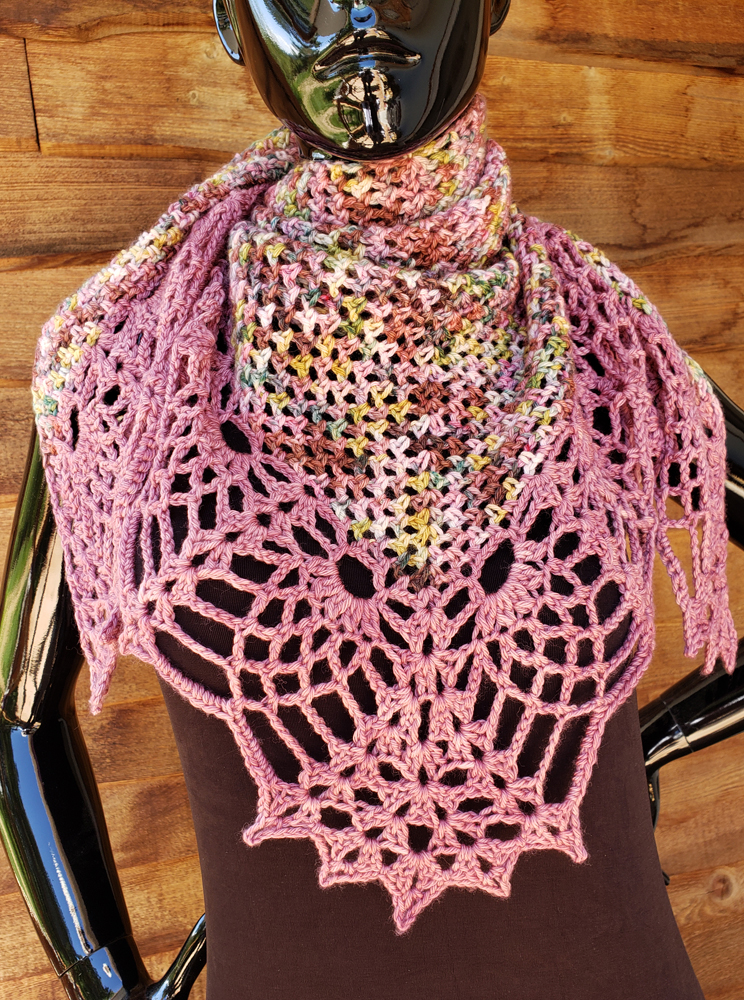
Simple and sophisticated this shawl will become a favorite project for you to work on over and over. Choose any yarn with an appropriate size hook to crochet any size shawl. Class will focus on tips and tricks for working a top-down triangle shawl from the yarn you have available. You’ll learn how to take the basic triangle shawl and change it up with a variety of stitch patterns and border options.
No Homework before class. Supplies students will need: Approximately 100+ yards smooth light colored sport or worsted weight yarn for class project, Basic Crochet Kit: Hooks Size G (4mm) thru K (6.5mm) crochet hooks, Scissors, appropriate sized yarn needles, 3 locking stitch markers, Calculator.
Intermediate skill level, best if students are proficient with making chain, sl st, sc, hdc, dc crochet stitches, reading stitches and fabric.
Hats are great gifts and fun portable projects to work on, but nothing is more frustrating that a hat that doesn’t fit. Wouldn’t you love to be able to always crochet a hat that fits and be able to use whatever weight yarn you have handy in your stash? In this technique class you will learn how to pick the right hook for your yarn, the measurements you need, plus tips and tricks for making a hat that will always be just the fit and size you want. In class you will also learn the Adjustable Slip Knot start, working tall stitches in continuous rounds, 2 different increase methods, and tips for a snug ribbed brim/cuff to finish off the hat. All these techniques will be practiced on the class project, a new born sized hat.
No Homework before class. Supplies students will need: Approximately 80+ yards smooth light colored worsted weight yarn, Size G (4mm) thru J (6mm) crochet hooks, 8 locking stitch markers (7 in one color, 1 in a different color), Scissors, appropriate sized yarn needles, Measuring tape, Calculator, a 11 or 14” baby doll (can substitute a tennis ball or softball). The doll (or ball) is to give you a small head to measure for the class project.
I have a couple of baby dolls that I use for teaching this class. A nice inexpensive one is the 14″ baby doll from Bumbleberry Babies that I found on Amazon.com. Click on the photo below to purchase yours.
Intermediate skill level, best if students are proficient with basic crochet stitches (ch, sc, hdc, slip st) and reading crochet fabric.
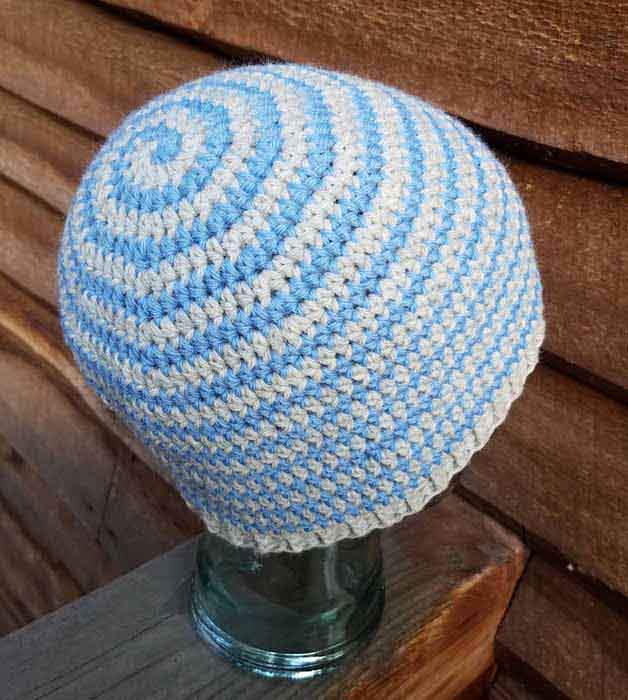
Spirals are a great way to crochet a seamless striped hat. You can use 2 contrasting colors or even mix a hand-dyed multi-color with a solid for beautiful blending. In this class you will learn the tips and tricks for working head-ache free spirals for top down hats, a fun and elastic crocheted ribbing, and how to modify the pattern to work with different weight yarns.
No Homework before class. Supplies students will need: 2 colors of smooth worsted weight yarn approximately 100 yards each, Crochet hooks – Size H (5mm) and I (5.5mm), 8 Locking Stitch markers in 2 colors (4 of each), Blunt yarn needle for weaving in ends, Measuring tape and scissors.
Stitch Chart Bootcamp
Friday, July 23, 2021 9 a.m. – Noon (Central Time)
StitchChart Bootcamp
All skill levels, best if students are comfortable with basic crochet stitches: ch, sc, hdc, dc, slip st.
You’ve seen crochet stitch charts and you may have even referred to them in a crochet pattern that uses both text and chart. But are you ready to work from only the chart? There is a whole world of international patterns open to you when you can decipher stitch charts, even if you can’t understand the written language that accompanies them. In this class you will work solely from a stitch chart to crochet a lovely motif. You’ll learn what the various symbols in the charts stand for, how they may change depending on the country of origin, and the skill to get results that please you when working from charts alone.
No Homework before class. Supplies students will need: Smooth Worsted weight yarn in light/medium colors approximately 100 yards, Range of sizes of Crochet hooks 3mm thru 6mm, Locking Stitch markers in 2 colors, Blunt yarn needle for weaving in ends.
I’m excited to announce that I will be teaching 3 crochet classes and 1 Needle-felting class via Zoom for the Longmont Yarn Shoppe this fall. I’ve been learning about teaching on Zoom and am really looking forward to this opportunity. Especially as this gives my readers that aren’t local a chance to take a class with me from the comfort of their own home. Keep in mind that I am in Colorado so the times listed below are Mountain time zone.
The 3 Crochet Classes are:
Strawberry Fields Crochet Shawlette: Class will be held in two sessions, the first will be Friday, October 2nd from 9 – 10 a.m., the second will be Friday, October 16th from 10 a.m. – 12 p.m. In the first session of class, you will learn how to work the mesh body of the shawl, then the 2nd session of class will be adding the lace border. This will include tips and tricks on how to keep track of your lace repeats, using wet blocking to really “open” the fabric of your shawlette, and tips on how to make a larger shawl if desired.You can register for this class on the Longmont Yarn Shoppe website here.
Crochet Slippers 101: Class will be held in two 1.5 hour sessions on Friday, October 23rd & 30th from 9:30 – 11 a.m. This class is project centered and uses my One Skein Joy Slippers pattern to introduce students to making crocheted slippers. In class you’ll learn the tricks for completing your slippers without tears, crocheting 2 at a time, a handy elastic crochet ribbing, and some fun tips for personalizing your slippers as well.You can register for this class on the Longmont Yarn Shoppe website here.
Crochet Slippers 102: Class will be held in two 1.5 hour sessions on Friday, November 13th & 20th from 9:30 – 11 a.m. In this class students will learn how to modify One Skeins Joy Slipper pattern to use it with any weight of yarn with an appropriate hook to make slippers that will fit every time. You can register for this class on the Longmont Yarn Shoppe website here.
Needle Felting Class
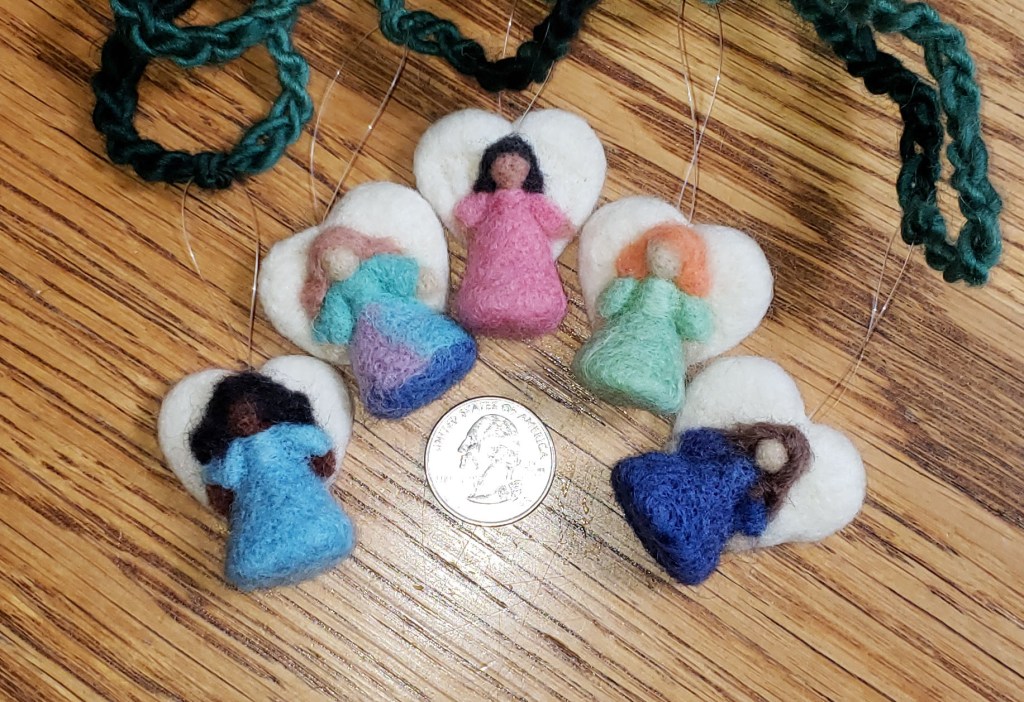
Itty Bitty Angel: Class will be held in one session on Sunday, November 15th from 10a – Noon. Come learn how to create these adorable compact angels that can be jewelry, toys or little ornaments. They are perfect for using up bits of wool yarn and loose fiber from other needle felting projects. You can register for this class on the Longmont Yarn Shoppe website here.
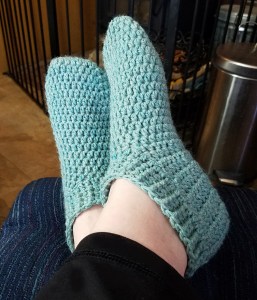
Every Christmas morning when I was a child my whole family always received hand-knitted slippers from my mom. We wore them until they were nearly tattered or we had outgrown them. In honor of that memory I designed the “One Skein Joy Slippers” in crochet. The first pair I made were a gift for my mom for Christmas 2017.
You only need one skein of Berocco Worsted Weight Ultra Wool to make a pair of slippers that fit a US Women’s size 7.5/8. They were originally published in the December 2018 issue of the online magazine “I Like Crochet”, the pattern is now available for sell in my Ravelry Shop. The PDF version of the pattern includes stitch charts and photo tutorials to help you successfully crochet up some slippers for yourself.
I will also be teaching this project as a Zoom class thru the Longmont Yarn Shoppe in late October. I’ll provide the link to class registration here as soon as it is available. The class will be taught in two 1.5 hour segments to give students time to complete work between classes and will be called “Crochet Slippers 101”. I will also be teaching a follow-up class, “Crochet Slippers 102” later in November that will expand on this pattern so you can work the slippers for various sizes of feet.
Hey all my lovely readers, Stitch Makers Live 2019 is underway on FaceBoook. Even if you haven’t purchased your ticket yet, you still can thru Saturday September 21 at 9 p.m. Eastern.
Now you might be thinking, why would I want to buy my ticket if the event is already happening? Because you will still get access to all the Live Videos to watch as many times as you want over the next year, you will get all the patterns, and you’ll be able to read the conversations and questions on the various patterns.
Of course, the sooner you purchase your tickets the more of the Live Videos you’ll be able to participate in Live. Tickets are now $80, but that is still a bargain for all the lessons and patterns. I have paid anywhere from $85 to $95 for one 3 hour class at a conference, and you will have access to 15 classes with the addition of being able to review them as often and at any time over the next year.
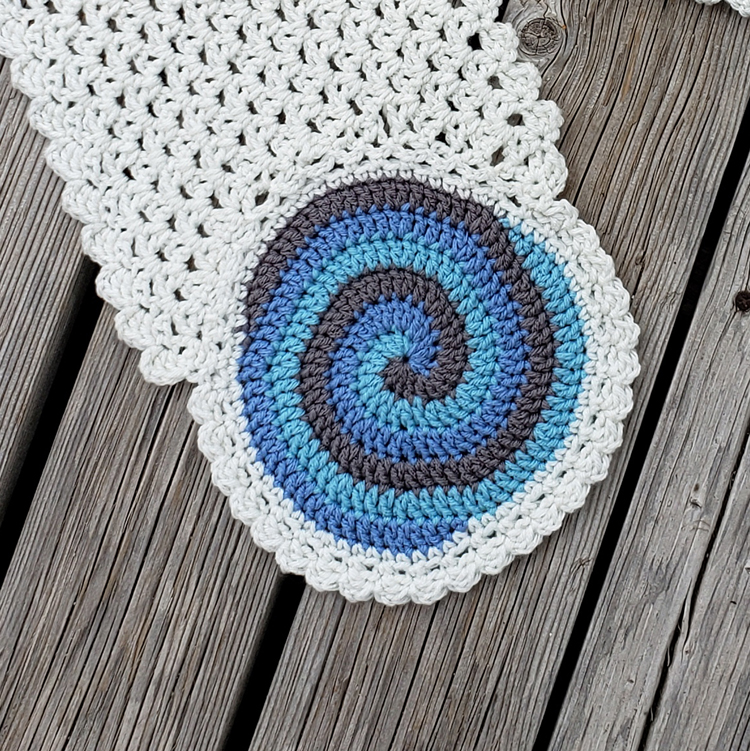
Whirling Ends Scarf – Andee Graves/M2H Designs
At $80 that comes out to approximately $2.67 per class and pattern. Plus you don’t have to get dressed up, you can join the classes and fun interaction with your fellow crocheters wearing your PJs if you want.
I’ll be teaching later today at 5 p.m. all about Mastering theTricks for Easy Perfect Crochet Spirals. Go grab your ticket now to join me, or even if you miss my class time today you can still watch the video later and learn all about crocheting spirals.
Oh my goodness, I have had a crazy busy couple of weeks. I have been preparing for teaching 2 different classes.
One is at Longmont Yarn Shoppe where I will be teaching this coming Sunday, September 15 from Noon to 3p. I’m teaching a striped hat class worked with 2 colors. You can still sign up for the class on the Longmont Yarn Shoppe website or call the shop at 303-678-8242.
It is definitely getting to be the time of year when hats will be needed again. The last couple of evenings the temperatures up here on the mountain have dropped into the low 50s and high 40s. Our days are still fairly warm, though I have to confess I am not missing the 90+ temperatures of August.
This post contains affiliate links. I may receive compensation (at no added cost to you) if you make a purchase using these links.
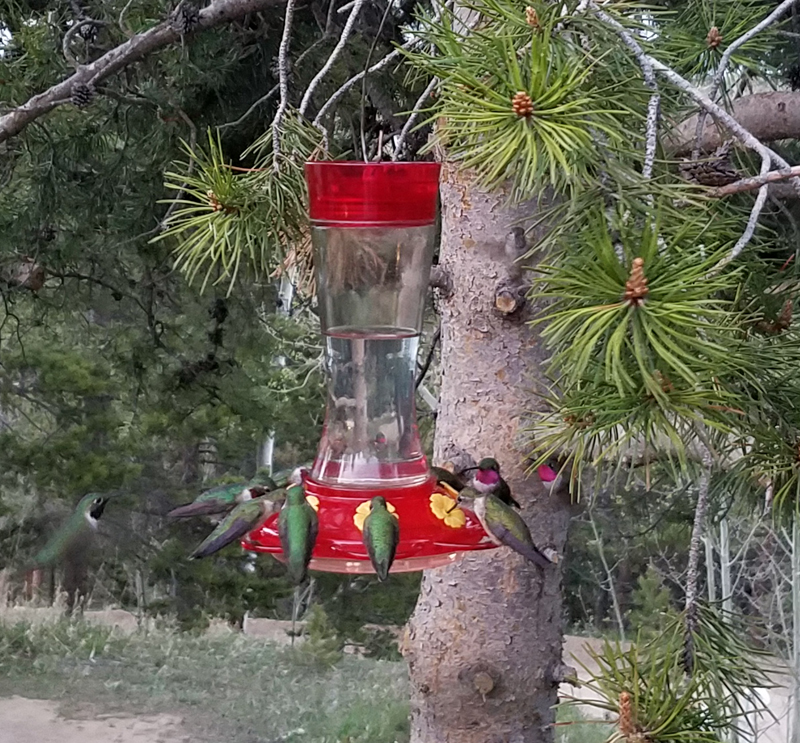
I am sad to see less hummingbirds at our feeders in the evening. The photo above was taken one evening when our flock was at it’s largest. The whirring of their wings and the cloud of them around the feeders is impossible to describe. Now most of them have headed off to warmer climates, the few we are still getting are likely just stopping for a meal on their journey.
The other class I am preparing for is my ” Master the Tricks to Create Easy Perfect Crochet Spirals” at Stitch Makers Live next week. I am really excited to be one of the teachers at this event and I hope you’ll join me.
With the one ticket you will get 15 classes, and 15 patterns. It is quite the bargain at $80. The one class I was able to squeeze in at the CGOA conference in July cost me $85, and it didn’t include a pattern.
If you missed the Early Bird Price for Stitch Makers Live, and are sad because $80 seems like more than your budget will bear don’t despair. I have a coupon code for $20 off the ticket price for Stitch Makers Live. The code is: 2019SML20off. The code is only good until Monday August 16th at 11:45 p.m. Eastern time. Click here to buy your ticket now and join me and all the other teachers for an awesome online conference.
UPDATE September 13, 2019 – If you missed the Early Bird Price and are sad because $80 seems like more than your budget will bear don’t despair. I have a coupon code for $20 off the ticket price for Stitch Makers Live. The code is: 2019SML20off. The code is only good until Monday August 16th at 11:45 p.m. Eastern time. Click here to buy your ticket now and join me and all the other teachers for an awesome online conference.
My latest finished design is the Whirling Ends Scarf and the pattern will only be available for the next year to attendees of the Stitch Markers Live 2019 online conference. The pattern contains my usual detailed photos, stitch charts and written instructions to help you successfully complete this project.
With your ticket to the conference you be able to take an online lesson with me where I demo my tricks for making spirals, including some secrets I’ve never shared before. As well as being able to ask questions and get help from me the whole 3 days of the conference.
But that is not all! You get all 15 patterns from the 11 designer/teachers and the opportunity to attend 15 different live lessons. Plus the same live access to all the teachers. You don’t have to worry about the agony of deciding between one lesson over another, because each class will be offered one at a time. You can attend each live lesson if you want, all for the single ticket price, no paying a separate fee for each lesson.
Even better, you will have 1 year access to all the lessons from the conference. Which means if you don’t get to one of the projects right away, you can have a refresher by reviewing the lessons.
This post contains affiliate links. I may receive compensation (at no added cost to you) if you make a purchase using these links.
I’m reminding you that today is the last day of Early Bird pricing for Stitch Makers Live 2019. Early Bird Tickets are $55. After midnight eastern tonight (Monday, Sept 2nd) tickets will go up $25 and will be $80. That comes down to less than $1.85 per pattern or lesson.
Don’t miss out on your chance to take classes with these marvelous teachers for such a great price!
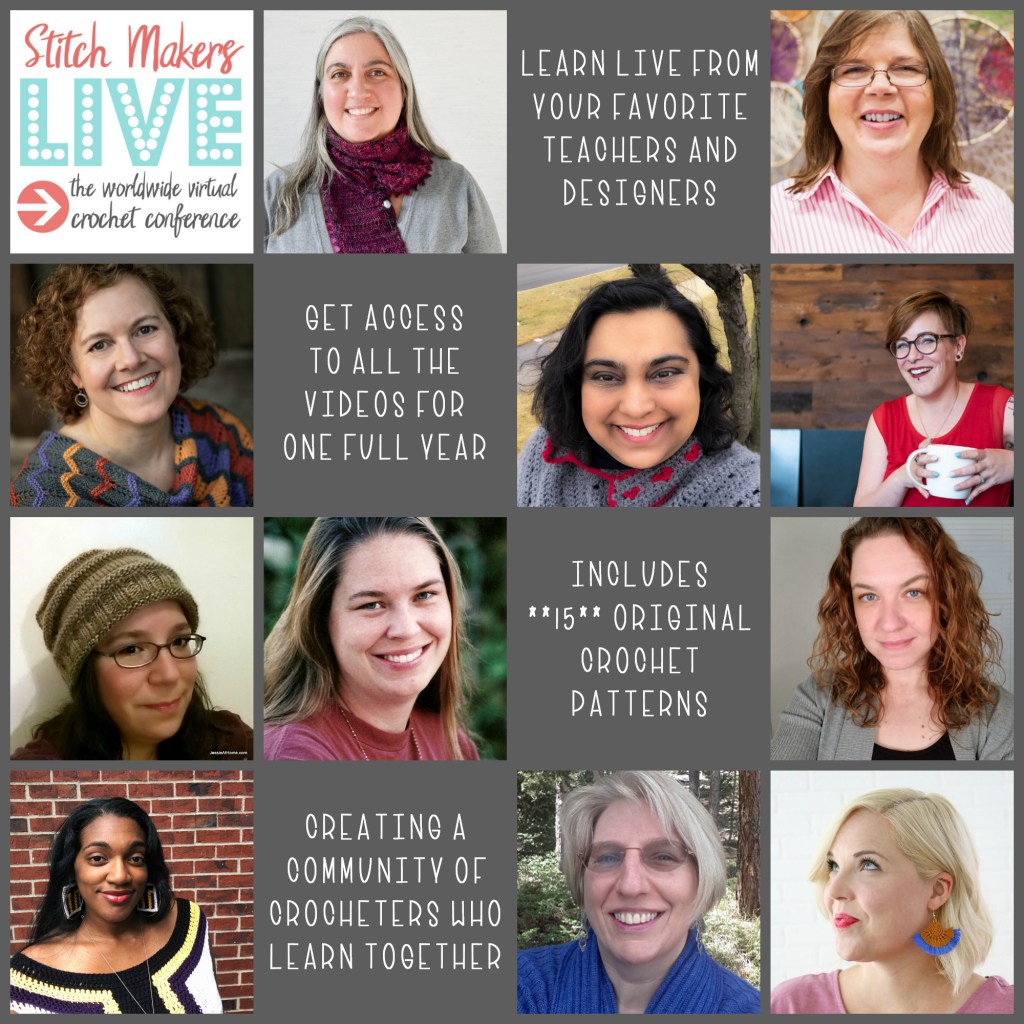
Stitch Makers Live 2019 is coming soon and I’m so excited to be a part of it!
What is Stitch Makers Live?
Stitch Makers Live is a 3-day virtual event during which over 10 crochet designers and teachers (including me) are going to spend time with you – right on Facebook. 16 crochet sessions LIVE with industry experts!
Each class comes with a BONUS crochet pattern – to help you master those skills.
This post contains affiliate links. I may receive compensation (at no added cost to you) if you make a purchase using these links.
From September 19th thru September 21st , you can participate in every one of these classes. But that’s not all!
There’s even a virtual party in the evening after the last day is over!
PLUS, you’ll get full access to the recordings in the group for ONE FULL YEAR!
These experts are passionate about crochet, and excited to share their knowledge with you. Whether your goal is to improve your skills in hat making, gather the bravery to begin your first sweater, or dive into short rows, our goal is to help you. The teachers and designers were handpicked to bring you the best instructors on a variety of crochet topics.
This is the first CROCHET ONLY online summit we know about – and we’re excited to launch it with you on board!
Take advantage of Early Bird pricing and purchase your tickets before midnight eastern on Monday, September 2nd. After that tickets will go up to full price!