Before the Instructions Begin

As my long-time readers are aware, I put a lot of work into my pattern writing. This has been amplified since I started my independent pattern line “M2H Designs”.

My goal when writing a pattern is to create a document that will be clear to follow. Many of my patterns are fairly easy by design and when I use more complex crochet techniques I try to have explanations or links to tutorials for the crocheter to use.

Some of my designs are published in magazines or at yarn company websites. In those cases I have less control over how the pattern is edited and presented. Even so, with attentive reading of the pattern most crocheters can figure out the pattern. Since I started my designing work by writing patterns for magazines I tend to follow a similar format in my indie line.

One thing to remember, all the information in the pattern is important. Sometimes you might want to skip right to the instructions to get started, but that can make completing the project much more difficult than it needs to be. The information at the beginning of the pattern isn’t there just to take up space. Reading thru it can make a big difference.

Skill Level

This is an estimate for the average crocheters skill. Keep in mind what your crochet experience is. You may have been crocheting for 30 years, but if it is the first time you’ve tackled a garment or item with shaping you might find you need to take it a bit more slowly and you might find aspects of the pattern confusing.

Finished Size

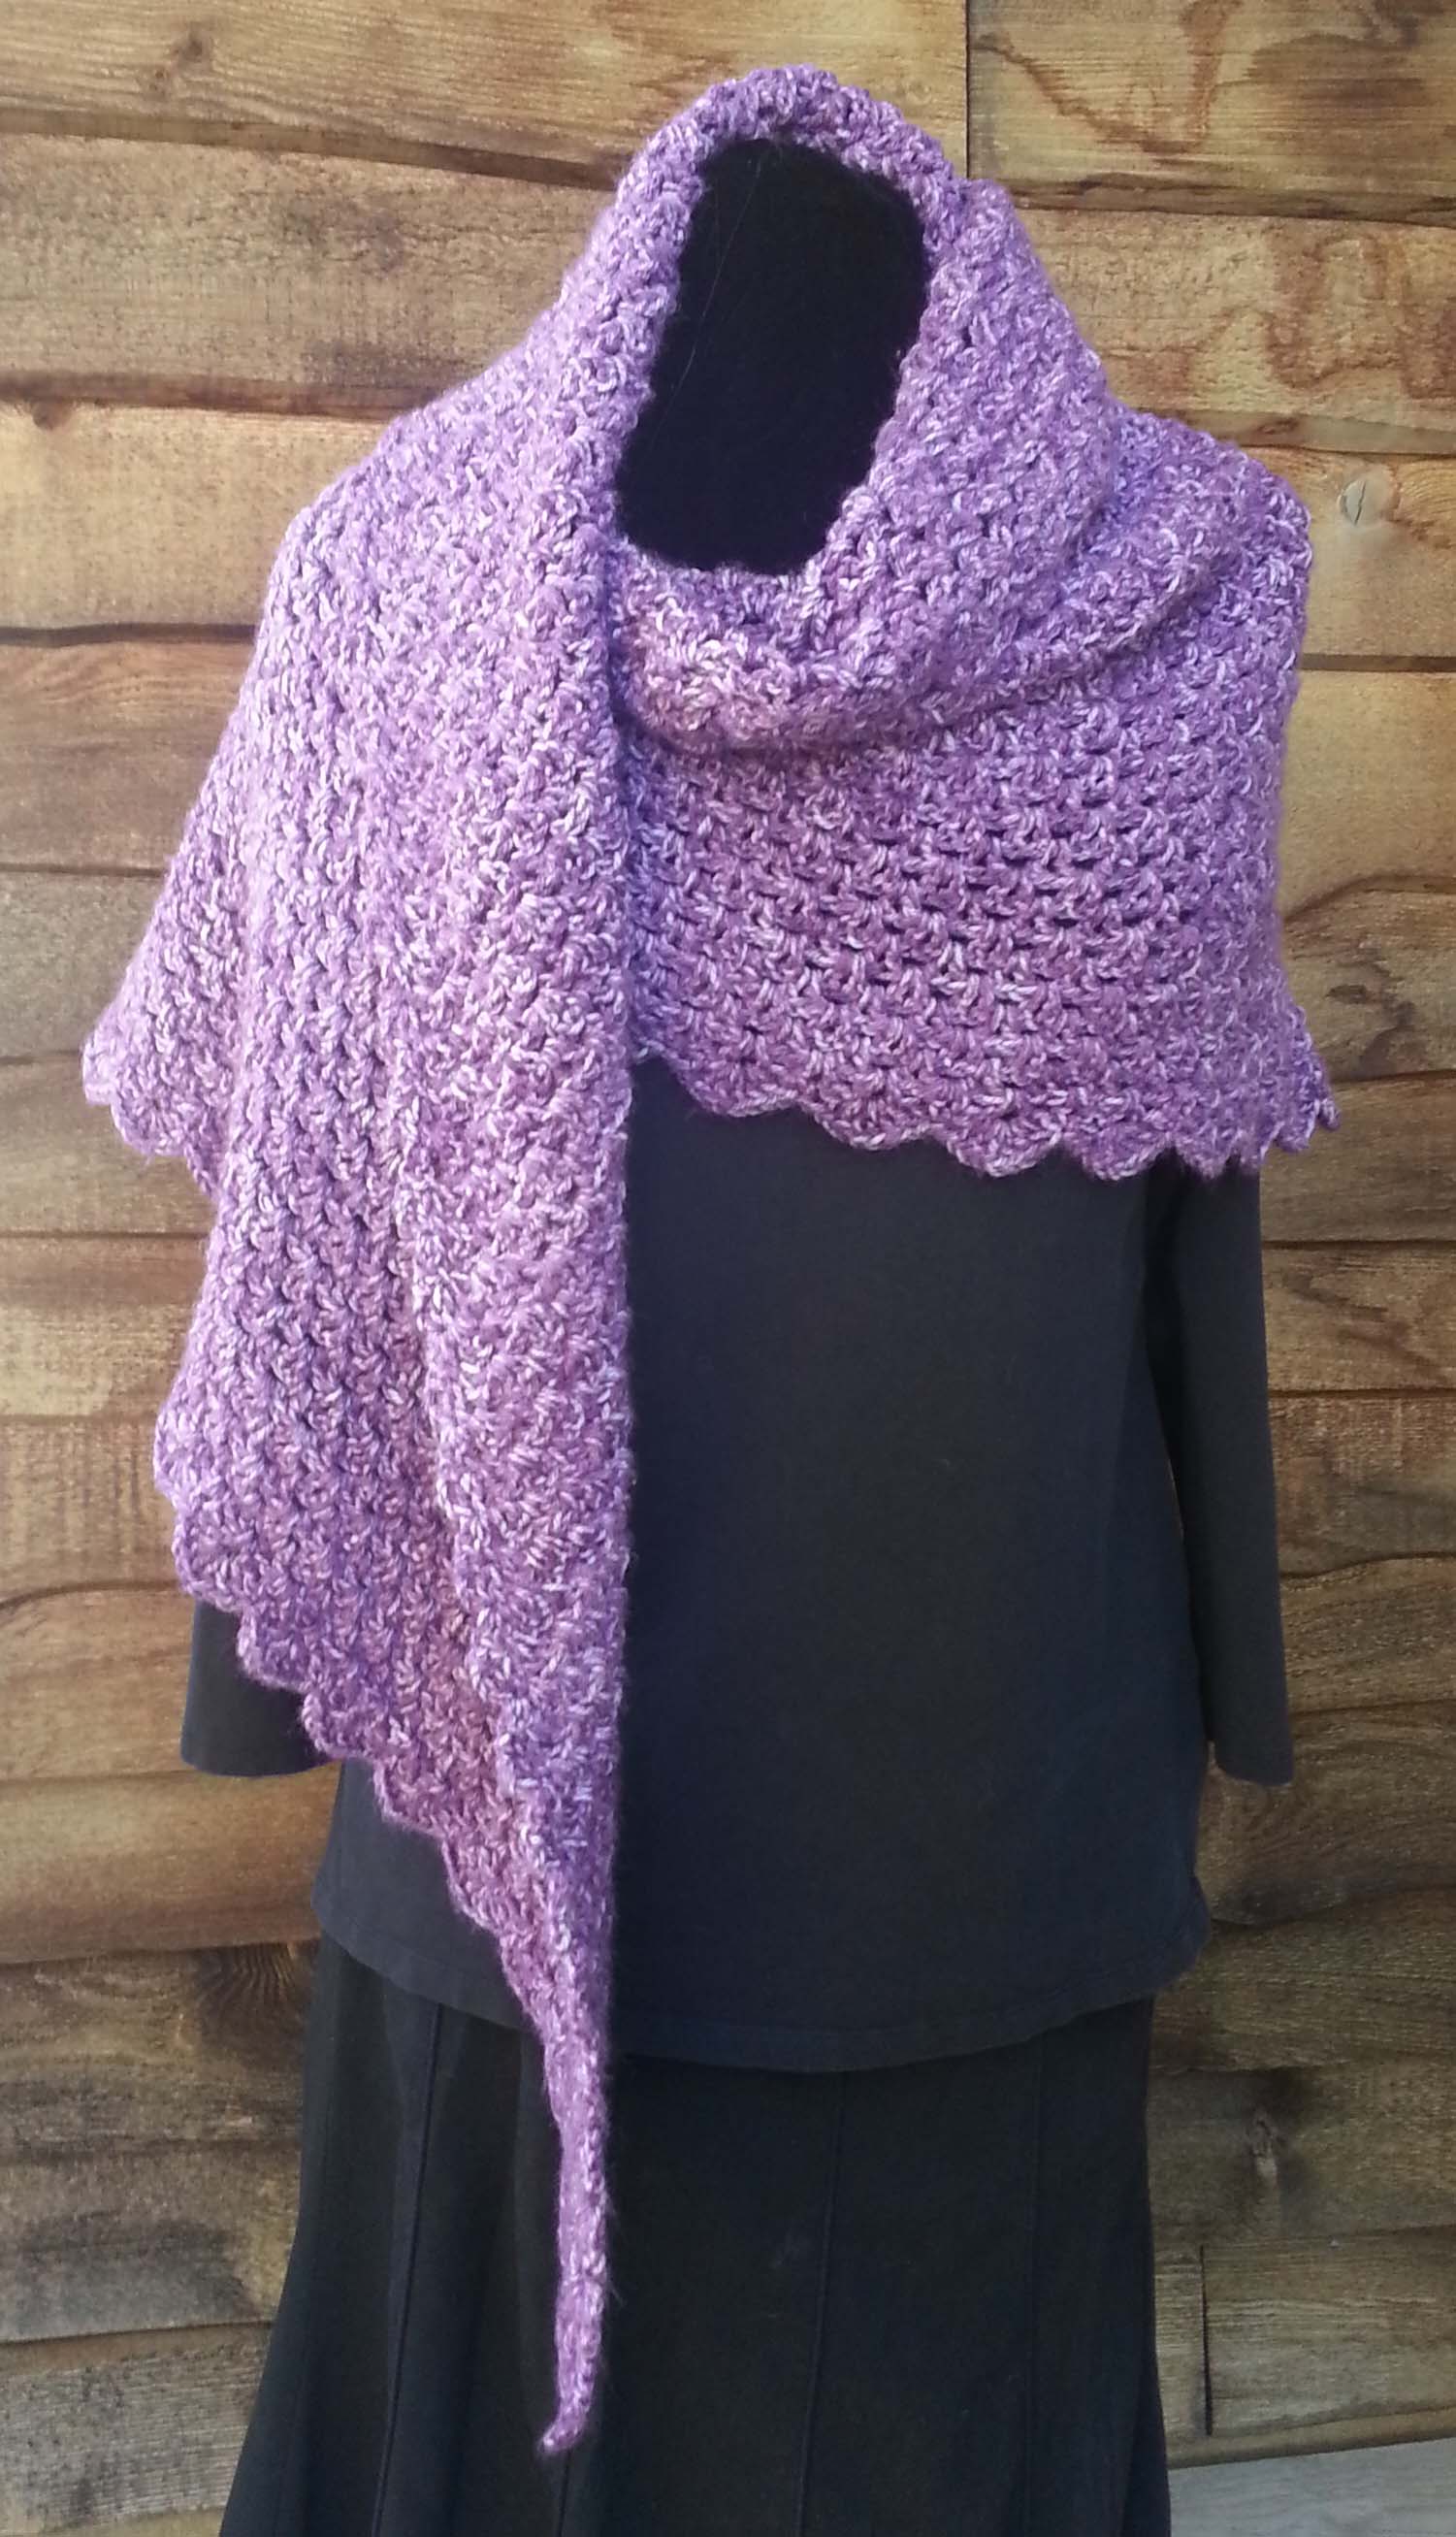
This is handy information especially if you are making a wearable item. The finished size should be the actual size of the garment, not necessarily the size you have made, ie….your bust size is 34 inches, but the finished size bust is 40 inches for the size recommended for your bust measurement. That is because the designer has created a garment that will have 6 inches of positive ease. Knowing the finished size can help you make decisions about the fit and help you estimate how the item will fit the body it is intended for.

In the case of blankets or afghans this size information can also help you decide if the finished project will be as large or small as you want. For example, if you want to make a baby blanket from a larger blanket pattern, you know that you will have to change the length of your starting foundation. Or the reverse, you want to make a larger blanket from a baby blanket pattern. You will need to purchase more yarn at the start of your project to be sure you have enough.

materials gathered

Materials

This is where the Yarn, hook and other tools needed for the project can be found. Under Yarn you will see information on the brand and name of the yarn used, the yardage needed, and the fiber content of the yarn. You will also be given the size of the hook that was used, though you may want to use a different size once you check your gauge.

Also listed in this section will be things like buttons, beads or zippers. It is a good idea to gather all these materials ahead of time.

Gauge

Ah gauge, everyone’s favorite part of yarn crafting. Not really. But it is important if you want your finished project to come out the right size. Being off in your gauge can mean that you will not have the right amount of yarn or that the finished fabric will not drape properly.

Gauge is especially important when you are making a fitted garment like a sweater or skirt. It’s a little less important for items like blankets or wraps, but being off in gauge for those items can still run you into difficulties like yardage or the quality of your finished fabric.
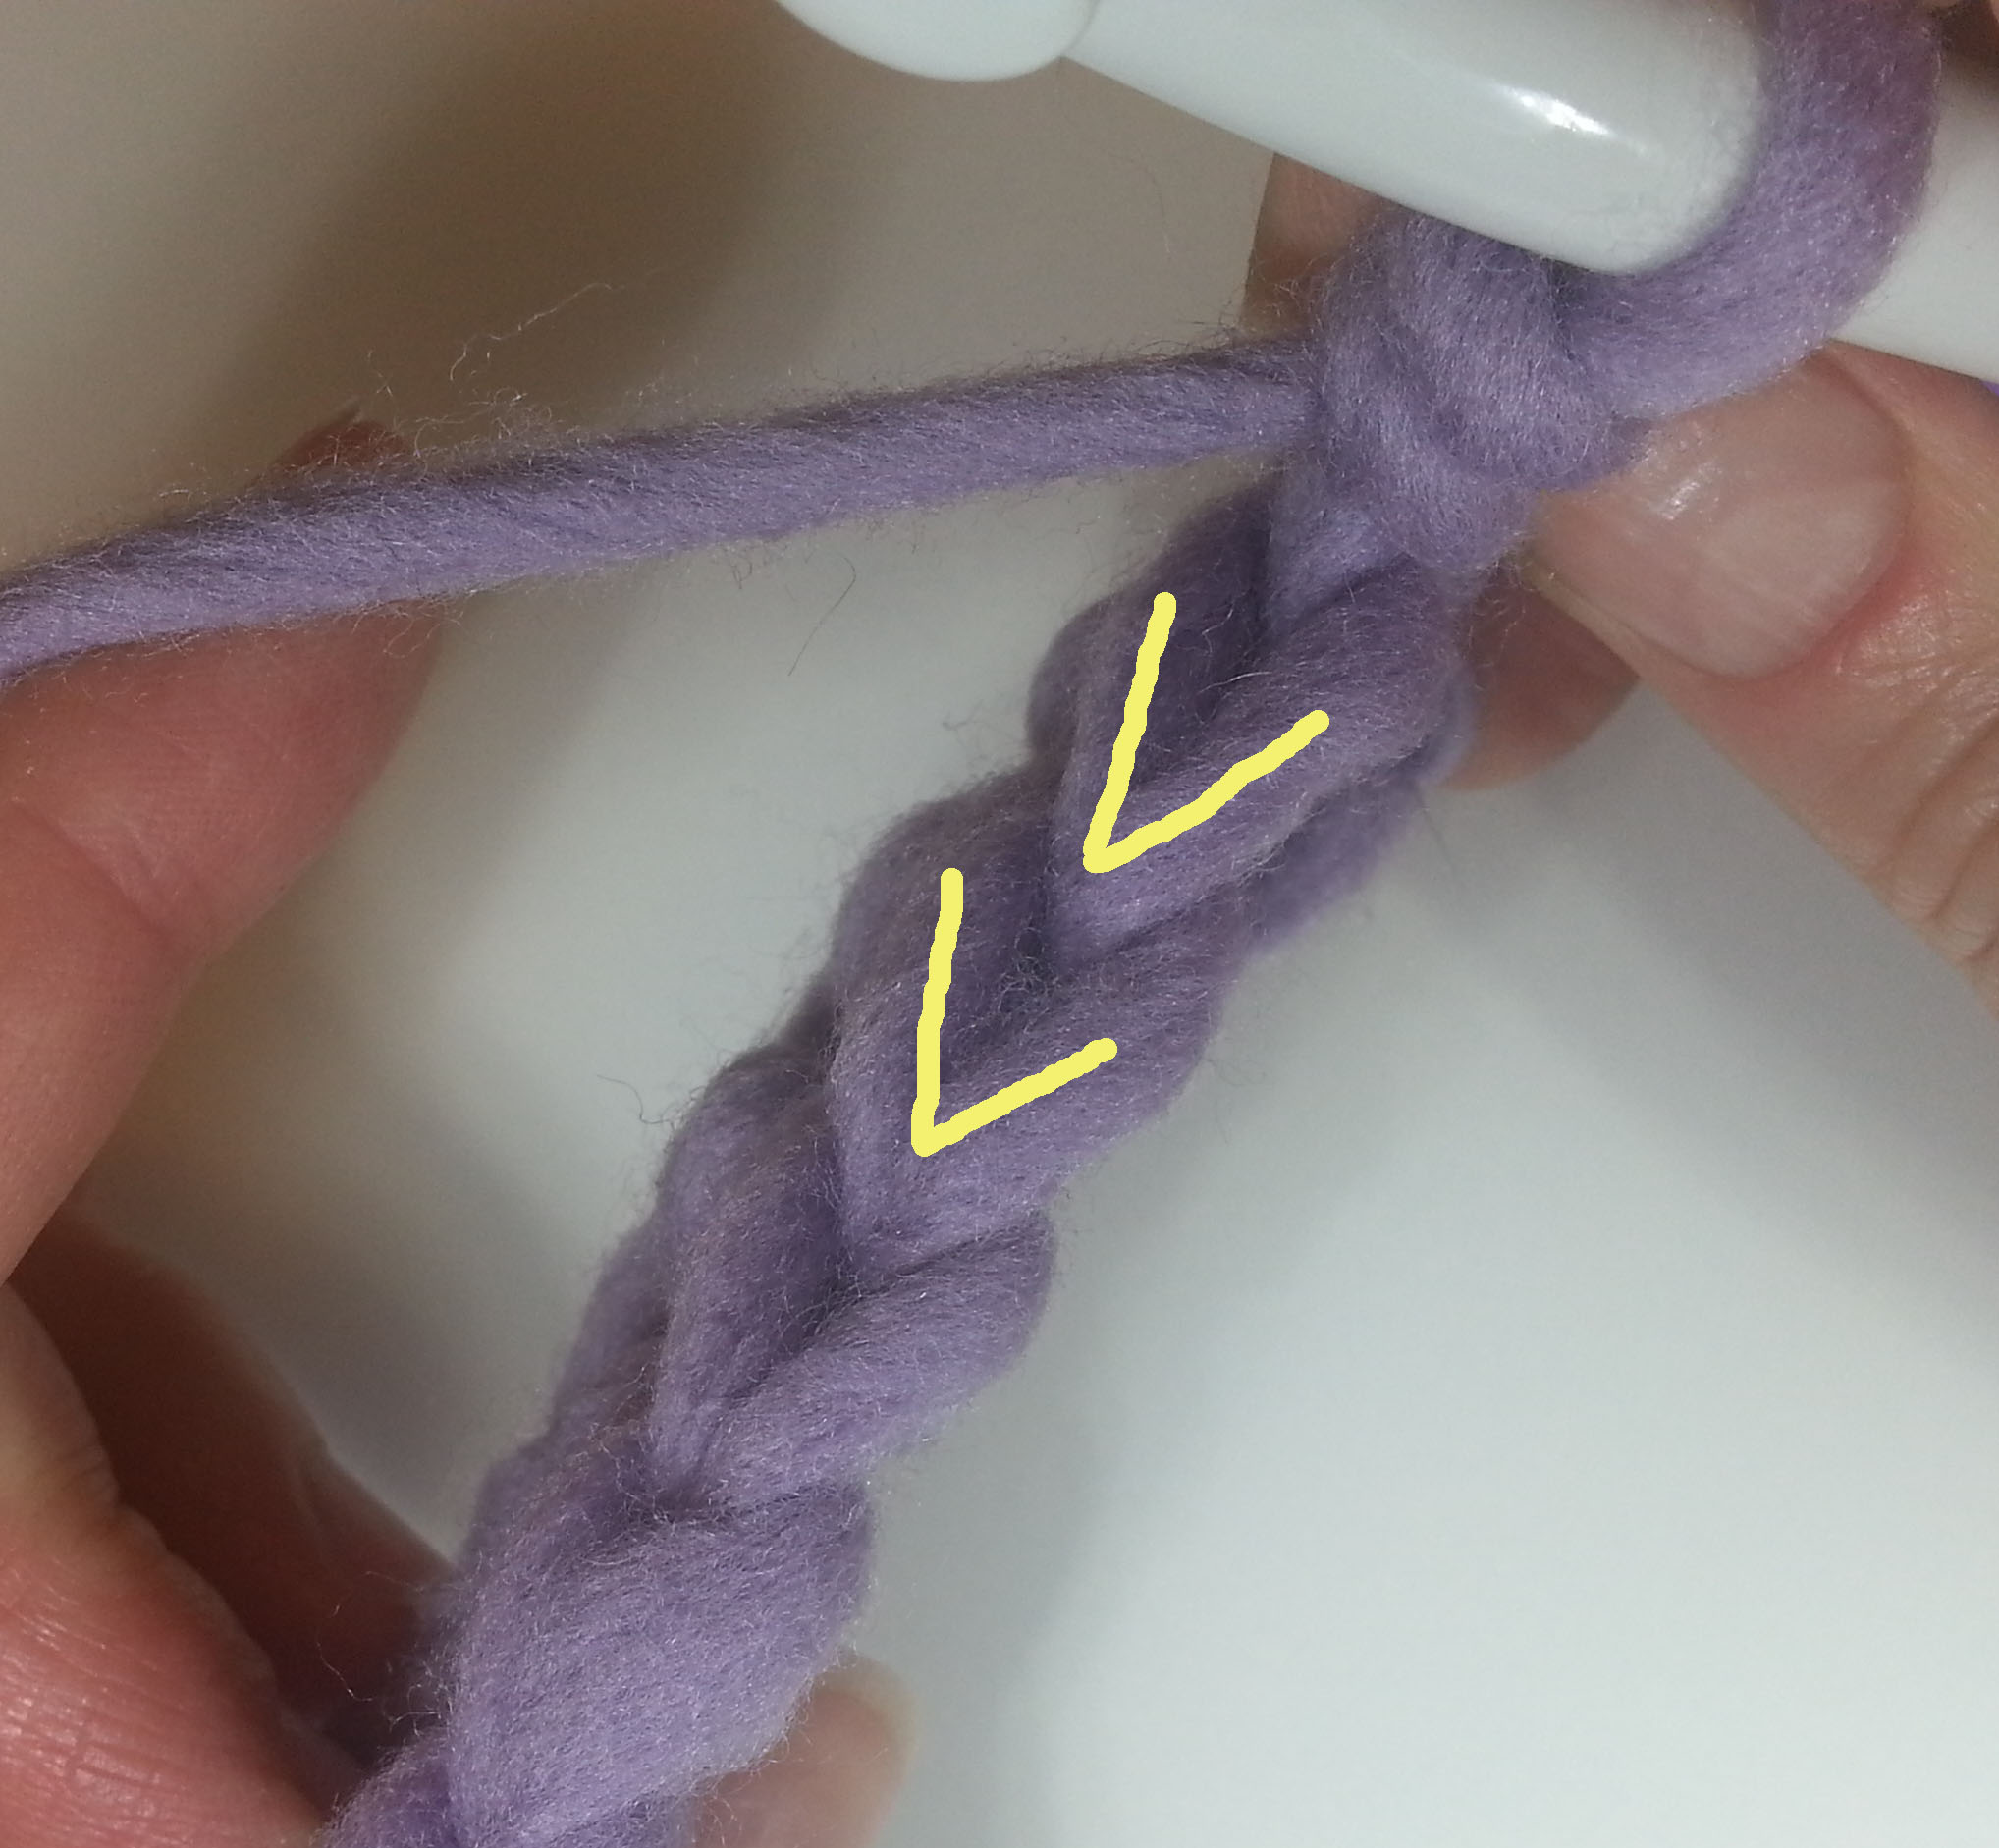
Special Stitches

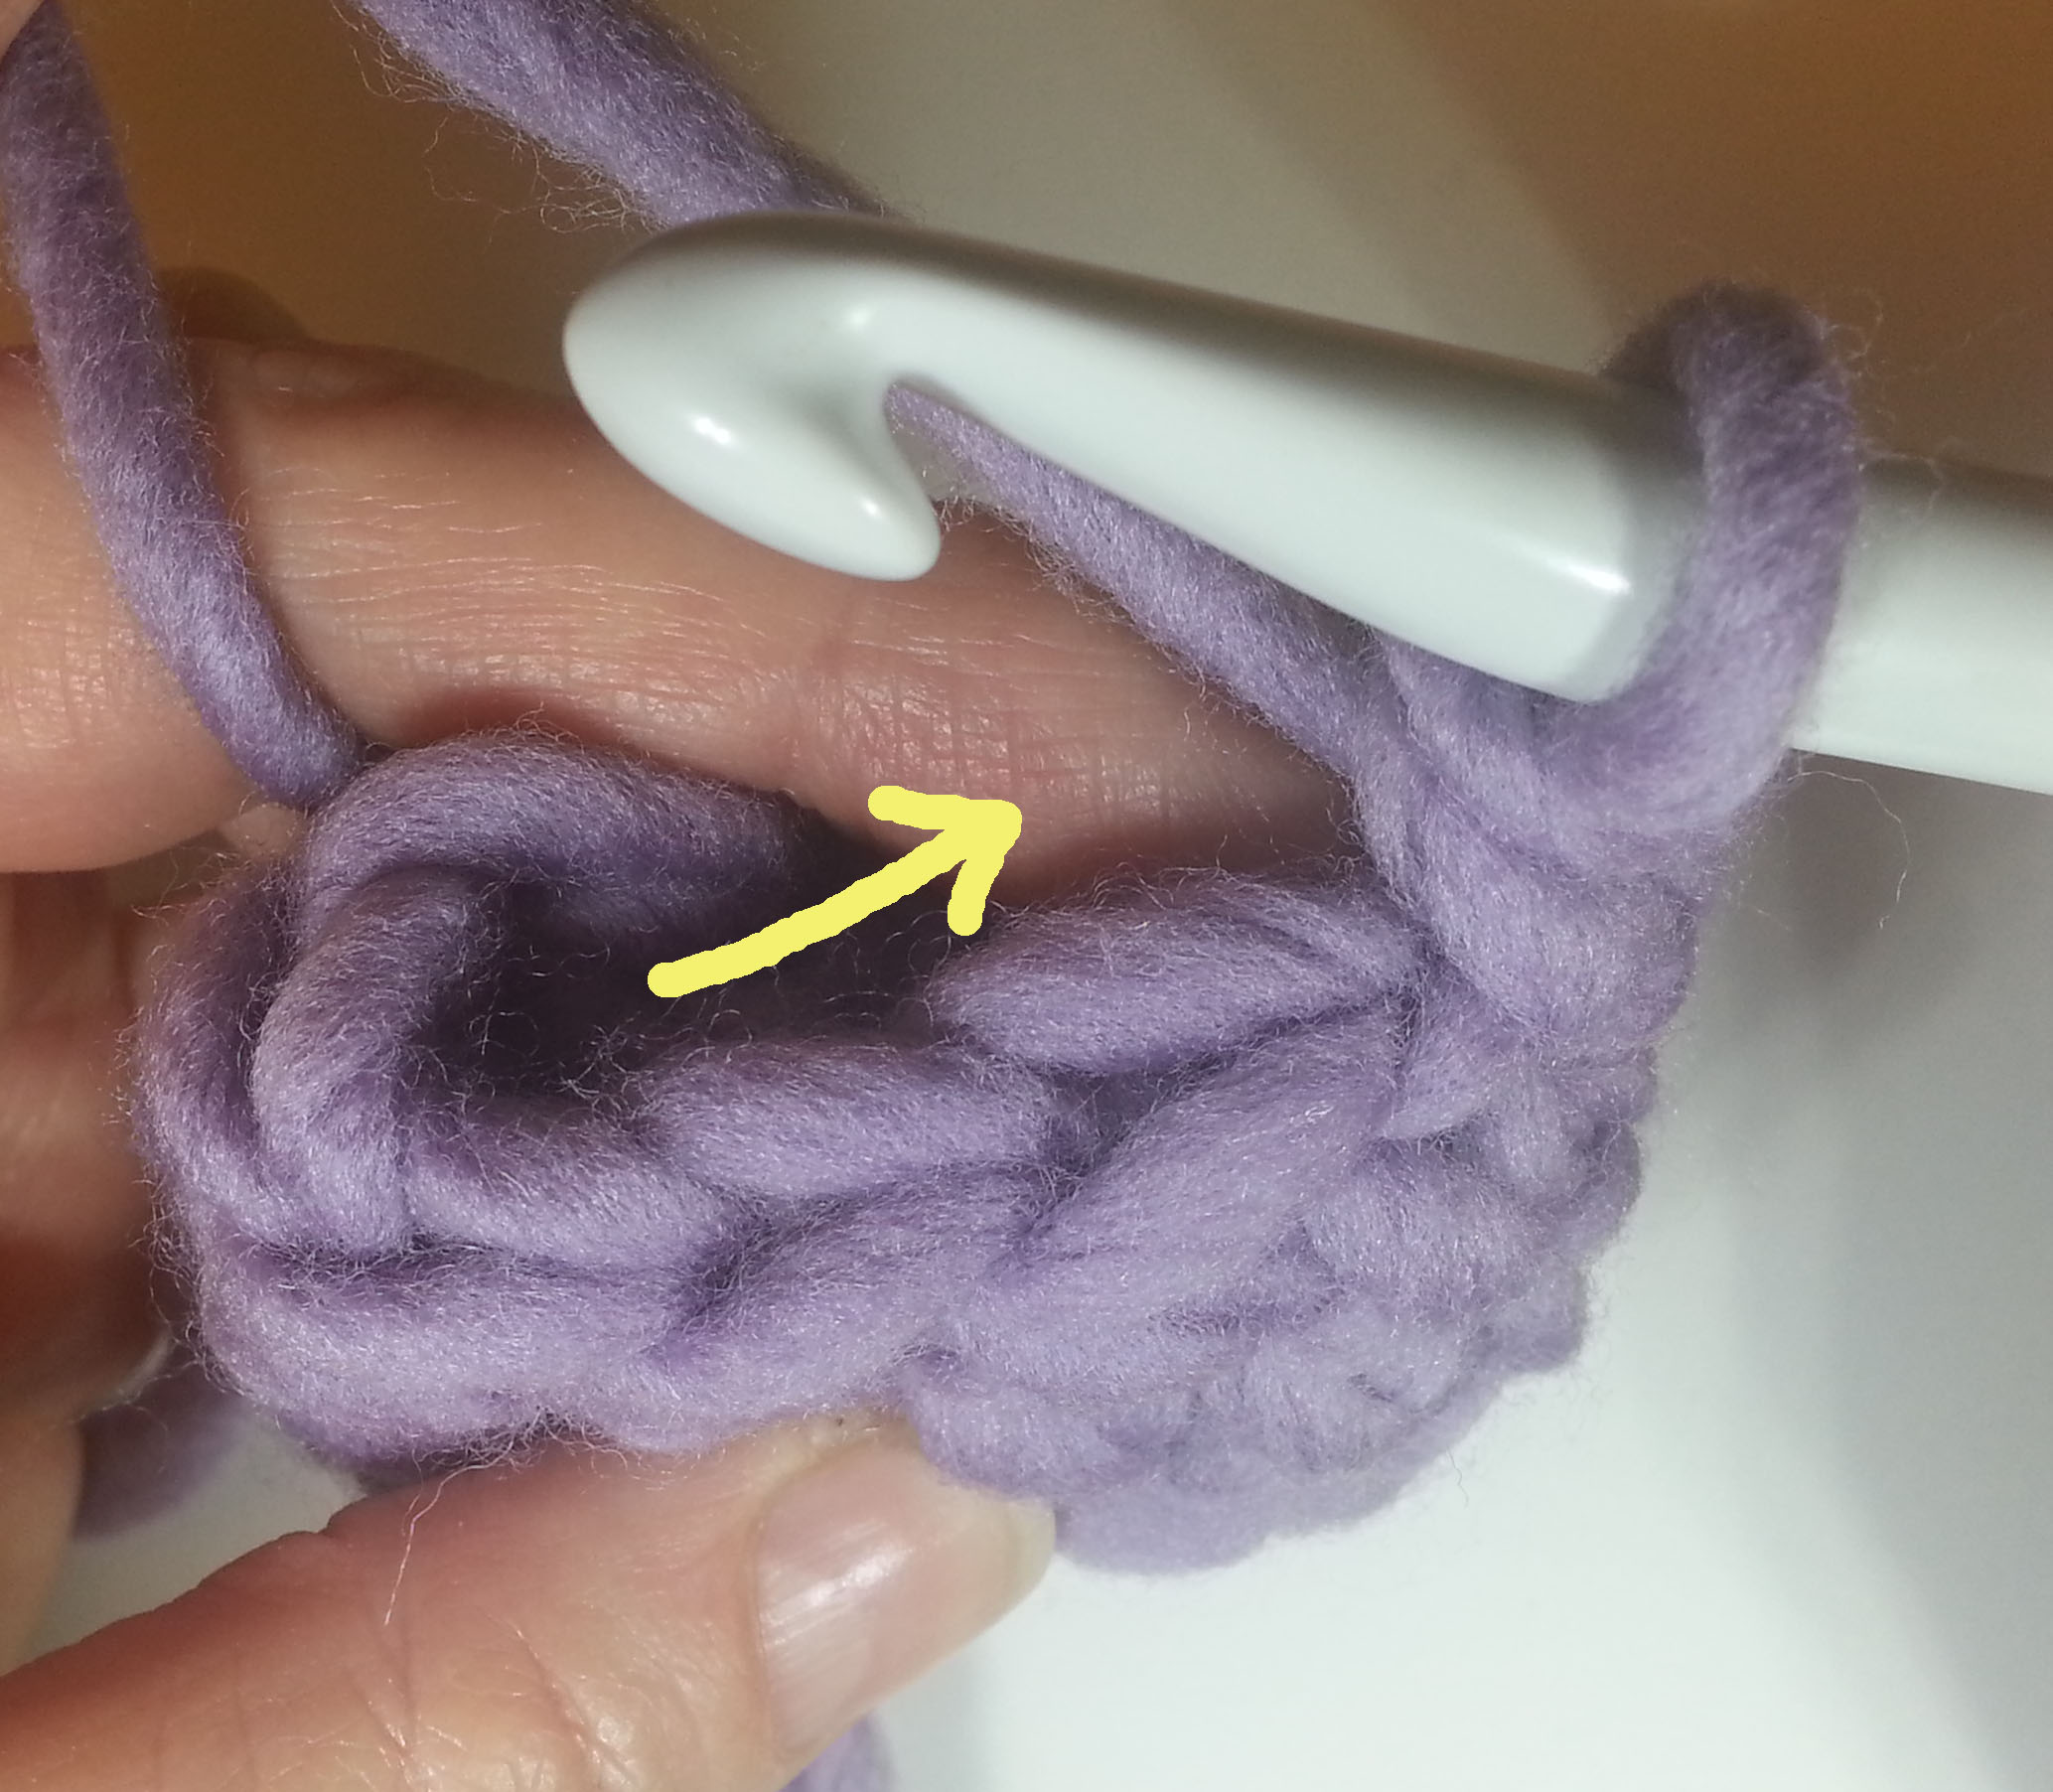
This is one of the sections most over-looked in a pattern. Lots of times folks assume they know what a listed stitch is, but there isn’t really a standardization of stitches in crochet. Checking this section over gives you a clear definition (and the abbreviation) so you can be certain what the designer means when they use a term like “V-st” in the pattern instructions.

A V-stitch could be 2 double crochet stitches worked in one stitch and separated by 1 chain stitch or 2 chain stitches, could even be 2 single crochet stitches worked in one stitch and separated by 1 chain stitch or 2 chain stitches. Reading the special stitches section beforehand and referring to it while working the pattern will keep you on track.

Pattern Notes

This section is a great place to understand the pattern better before beginning. This could be an overview of how the garment is constructed, ie…Cardigan is worked in 2 sections off top and bottom of a center back foundation row, then joined at under-arm and sleeves worked outward. Remaining fabric is worked around the body opening to create the rest of the cardigan.

Instructions

After reading thru all the previous information and preparing for the start of your project you can now concentrate on working the instructions and completing your project. It’s a good idea to read thru the instructions once before you start crocheting. They may not make complete sense to you, but if you do one read-thru before starting you may find them easier to follow when you start crocheting.

If the pattern is in a book or magazine you own it can help to highlight areas that you think will be tricky for you. If you are making a garment from a pattern that has instructions for more than 1 size, it is a good idea to highlight the instructions for the size you are making.

Highlighter Tape

If the pattern is in a publication you can’t mark up purchase some “highlight” removable tape. I found mine at my local yarn shop and it is very handy. You may be able to find it at your local office supply store or college bookstore.

Hope this all helps you the next time you are tackling a new pattern.


Pineapples and Charleston

Remember my last post? Yup, I still need a clone.

I’ve been crocheting like a wild woman on some garments that I want to wear at the Knit & Crochet Show.

Pineapples 2

The theme for the CGOA part of the show this year is Pineapples. Which is perfect for me as I adore crocheting pineapples and love the look of them. They are one of those crochet stitch patterns that look really intimidating, but are actually much easier than you would expect.

I don’t think I would start a beginning crocheter off with a project that used them. Then again that depends on how intrepid they are. It took me a long time to tackle pineapples in crochet patterns despite my love of them.

I really found my comfort level with them when I stumbled across stitch charts. Suddenly they made complete sense to me. Since then I have had a great time playing with them and have a couple of designs coming out in the next 6 months that include pineapples.

If you have been thinking about coming to the Knit & Crochet Show in Charleston you only have a few days left to do pre-registration. It closes July 1, 2016, that’s this Friday! If you miss the pre-registration you can still register for the show, you’ll just have to do it in person at the show.

Hope you can join me in Charleston. It’s going to be lots of fun.

Is it too Hot to Crochet?

Summer is truly here now. Even up on my mountain we are feeling the heat. Of course what seems “hot” to us is nothing compared to what friends and family all over the country are dealing with. This past week temperatures have been over 100F in lots of places. Making me very grateful for our easy days of 87-90F days at my house.

When I go down to town to do errands it can be significantly warmer. But at least in Colorado humidity isn’t the factor that it is for many others. I’m looking forward to seeing all my yarnie friends at the conference in a few weeks, but it will be in Charleston, South Carolina. I suspect that I may be melting in the heat and humidity that they are experiencing.

In heat like that how does one keep crocheting? My choice for travel and for hot weather crochet is to work with small projects.

If afghans are your favorite type of project this is the time of year to tackle a motif afghan that requires lots of smaller pieces to be completed before being all sewn or crocheted together. The motifs are great projects to carry along with you to the beach and outings thru the summer. Then when the cooler weather finally rolls around you can do the joining work to make them into an afghan.

My 2 squares today

If you want some fun motifs to play with try my “Annetta Square” here on the blog.

Hot Spot Square copyright 2015 M2HDesigns/Andee Graves
Hot Spot Square
copyright 2015 M2HDesigns/Andee Graves

Or my “Hot Spot Square”.

I often take advantage of the warm weather season to get ahead on my holiday gifts. I work on my cotton thread snowflakes. They are fun and relatively quick projects that don’t take up a lot of room in my project bag. I can get a nice stack of them finished up before the hot weather is over with. The stiffening stage goes faster too as they dry super fast in the warmer weather.

Light as Lace Snowflake - M2H Designs
Lacy Snowflake – M2H Designs

I’ll be making quite a few of my snowflake pattern “Lacy Snowflake” that I designed for last December. You can find the pattern here on the blog. Who knows, maybe you’ll feel cooler crocheting snowflakes.

My very favorite projects for gift-giving and small project crochet are Hats. All my boys (including Himself) love getting hats for Christmas. I made a hat for my Dad a couple of years ago for Christmas and it was well received too. I also like making hats for various charities.

I’ve taught classes on crocheting hats at my local LYS and will be teaching my “Perfect Fit Crocheted Hat” class at the Scotts Bluff Valley Fiber Arts Fair this September. I also have a couple of other hat patterns in my M2H Designs line.

Spiraling Xs Hat 3 Andee Graves

This is my “Spiraling Crosses Hat” and is made in a slightly mesh like stitch pattern that allows for a combination of breathability and warmth. You can purchase the pattern for this hat in my Ravelry shop here.

Mtn Top Beanie full view

My newest M2H Designs pattern is the “Mountain Top Beanie” in my Ravelry Shop. This hat is crocheted in a super stretchy all over stitch pattern that looks beautiful in variegated yarn or solid colors. I made this sample in Ella Rae Lace Merino Aran weight. This is a gorgeous yarn that was lovely to work with. I’m planning on taking my oldest son to the Longmont Yarn Shoppe to pick out the color he wants to make him a beanie to wear in the coming school year.

Crocheting at Reunion

This hat was one of the projects I was working on during our recent trip to Kansas for a big family reunion. The project fit entirely into one of my small project bags with room in the outside pocket for my phone. Worked great for a small crochet project to keep my hands busy while visiting with family. Most importantly it wasn’t too hot to work on as crocheting on a larger project could have been.

So to answer the question I posed in my title today. No, it isn’t too hot to crochet. You just need the right project. Air conditioning is a good idea too. Stay cool all my Northern Hemisphere friends. For those of you in the Southern Hemisphere heading into your cold season we may soon be jealous of you.

Blocking a Ruffled Edge

Most Tuesday mornings my friend Val and I get together to crochet and visit. This last Tuesday we had a project to work on together. She wanted to block a shawl that has a deep softly ruffled border.

Eleonora Shawlette - Andee Graves/M2H Designs

Last summer Val had used my Eleonora Shawlette pattern to work up a shawl in some Silk/Rayon blend yarn she had in her stash. She has been working to decrease her stash a little and had been in search for a project for that yarn for ages. Once she finished the Eleonora we gently blocked it to open up the stitches a little, though not the aggressive blocking that I usually do.

Val liked the shawl, but she still had a lot of that yarn left over. She enjoys what we refer to as “seat of the pants” designing. The two of us have experimented with various crochet projects over the years and she doesn’t have any problem pulling out her work if she isn’t happy with it. She asked me if I could figure out a way to add to the shawl to use up more of the yarn she still had left-over.

In my original Eleonora the lace border fits with just a soft bit of ruffle.  I used 2 different yarns for the sample I crocheted. Berocco “Boboli” for the body and the little finer weight “Folio” for the border. This reduced the ruffle effect.

When Val crocheted her shawl with the same weight yarn for the body and the border, the ruffle was more pronounced. She liked the ruffle and for the additional rows she wanted even more ruffling.  She also liked the openness of the lace work and I kept that in mind as I was designing the new rows. I started sketching stitch diagram ideas for how to transition from the lace border to add length to the shawl and use up more of the yarn.

When she started working the new rows we kept experimenting with how much she could add to the shawl and still have enough yarn to complete it. She finally finished it in mid-May and told me she wanted to block it. We’ve both been a little busy with the start of summer-time, so this week was the first time we finally got a chance to block the shawl.

I brought my blocking mats and T-pins, Val dug up a couple of towels and her spray bottle to use. We got everything laid out on the floor and discussed what we wanted to do with the blocking. Val felt that she didn’t really need to block the mesh body since we had done that previously, she really wanted to open up the lace border more instead.

Because the ruffled border is actually much more fabric than the length of the last row of the mesh body, there is a curve to factor in when laying it out flat for blocking. I thought about it a moment and realized the border would curve in over itself if we opened out the shawl fully. Then I recalled that I had heard of folks folding their finished project in half to block it when they had limited room to block on.

Shawl folded in half pinning started.

I folded the shawl down the center point and spread it out. The lace curve would be completely manageable and the 2 halves of lace lined up beautifully. I began with pinning the base of the lace border and then gently stretching out the points. As you can see in the photo I started in the center of the lace so I could work out evenly from there. Val and I worked together pinning all the lace.

Shawl folded in half and pinned

Once the border was fully pinned it made a nearly complete circle. Then we sprayed it with water and patted it in to be sure both layers of the border were completely wetted.

Finished Shawl folded on table

Val took out the pins and laid out the finished shawl, still folded in half, on her table the next day.

Close up of blocked lace

You can see how much the lace opened up.

Finished Shawl

It looks even prettier when worn. I think Val is going to enjoy wearing this shawl for a long time. Now we just need to figure out what she can make with the one ball that is left-over.


Playing at the Wool Market

Was a busy weekend for me. I’ve been working away on the crochet design I showed you last post, but also drove over to Estes Park for the Wool Market on Saturday. I was a little late getting out the door because my boys didn’t want me to leave. They are so funny about me taking off for the day. They basically ignore me when I am home all day, but when I leave it’s lots of hugs and worry about when I am coming home. Figures I would have goofball kids.

The drive over to Estes Park from my house is gorgeous, I was tempted to stop a couple of times to take photos. I didn’t though since I was meeting my friend Brenda there and was already late. It rained on me for part of the 40 minute drive, fortunately the rain was gone by the time I reached the fairgrounds where the Wool Market is held.

Brenda was already in the Vendor Barn, which is actually much fancier than one would normally consider a “barn” to be. I walked thru looking for her and caught up with her at the Stitchin’ Den booth. Brenda is allergic to animal fibers so she was checking out the massive display of Intrelacements Rayon yarn that the Stitchin’ Den had at their booth. The choices of colors were almost overwhelming.

Yarn from the Stitchin' Den

I fell in love with this gorgeous blue colorway called “Sturgeon Bay”. Unfortunately they didn’t have it in the large hanks, but they did have 2 of the 500 yard hanks. I’m not entirely sure what it will be when I crochet it up, but it will be a gorgeous color whatever it becomes.

Knitting Sculpture

Brenda was having too hard a time deciding on which color to purchase, so we decided to walk around and look at some of the other vendors and displays before she would pick out her yarn. We found this cool display around the corner from the Longmont Yarn Shoppe booth.

Trying on a hat

Seems like there were a lot of vendors with hats on display. I tried on this hat and Brenda took my photo so I could see what it looked like. I didn’t purchase it though since my hat collection at home is getting a bit out of hand, and I wasn’t that “in love” with it.

Bijou Basin Goodies

My friends at Bijou Basin had a booth and I stocked up on some more of their wonderful “Allure” fiber wash. Love this stuff and have just about finished the large bottle I purchased last year at the Wool Market. I also couldn’t resist this fun T-shirt, since it made me laugh when I saw it. I love fiber themed T-shirts and I purchased a large enough one that I can wear it over my yoga pants that are basically my uniform at home.

Bag - Side View

I had passed the Shuttles, Spindles and Skeins booth on my search for Brenda earlier and this bag had caught my eye. I’m a big fan of Laurel Burch’s artwork. So when Brenda and I were exploring we went by there again and I had to have a closer look at the bag. It’s a handy size and I finally succumbed to temptation and made it mine.

Bag - Zipper Pull

The bag has all kinds of fun little details, like the zipper pull for the bag is a Laurel Burch cat. The outside also has 2 pockets on the ends that are the perfect size for my phone.

Bag - Interior

I really like that the interior of the bag is mostly white and there is a generous sized zippered pocket. This bag will work well as a project bag and can do double duty as my handbag for the conference show this summer.

Ceramic Wet Felting Tool

This fun little ceramic piece is a felting tool. It acts as a mini-washboard for wet felting. I’m thinking it is going to be perfect for some of my felting projects that I will be playing with this summer. I also liked that it looked a bit like an insect.

So I didn’t get thru the Wool Market visit without spending some money, but I stayed fairly close to my budget. At least I only bought 2 hanks of yarn. Funny thing after my ode to wool last post, I didn’t purchase any wool fiber at the market this year.

Now it’s back to crocheting on my latest project and tackling some “spring” cleaning since the warm weather finally decided to show up. I spent part of today working in the backyard. There is a Juniper bush that needs to come out and I was prepping it for himself to take the chain saw to it. I suspect I will be feeling some muscles I haven’t used in awhile tomorrow.

I Love Wool!

Wool. Just the word is fun. Many of my Aussie friends refer to all yarn as wool. Though they have a wide range of yarns of various fibers available to them. It’s just what they call yarn. They have a lot of fun and sometimes confusing words for things, which gives us endless entertainment figuring out the translations. For most of us fiber arts types living in the USA though, wool is what comes off of sheep.

Margie's Herd
Margie’s Herd – Four Adults and 5 little lambs (one is hiding)

Yesterday I got a fun email from my next door neighbor Margie. She had some wool trimmings from her little herd of sheep that she wondered if I would like.

Um, YES!

A Bag of Wool

This afternoon my oldest and I walked over to her house. She had a bag of trimmings for me. I’ll likely be using them in some of my needle-felting projects. First I’ll be doing a bit of cleaning though. I love all the colors of wool that came off her adult sheep and hope that some of these trimmings will be usable as outer layers on my needle-felted critters.

New Crochet Design

The rest of my day I’ve been playing with an idea for a new crochet design. I’m working with some yarn that I purchased from Newton Yarn Country at the Knit & Crochet Show in Spring 2009. I don’t even know if they still have this yarn in stock.

My yarn stash is a bit out of control, so I’ve decided I need to work up some of it. I am hoping I have enough to  make a lovely lightweight sweater for myself. I’m experimenting with my favorite stitch the V-stitch. But this time I’m working it stacked and using different increase ratios.

Tomorrow I am headed over to Estes Park to check out the Estes Park Wool Market. I’ll be meeting my friend and fellow designer, Brenda Bourg, over there. Not sure if I’ll be taking my family with me. They generally get bored with it all long before I’m ready to call it a day. I’m telling myself that I won’t be buying yarn this time, will see if I can hold out against all the temptations though.

Tis the Season for Fiber Events

Ah summer-time! The best thing to me about summer is that there will be fiber events all over my region. This coming weekend will be the Estes Park Wool Market and September 9th & 10th is the Scotts Bluff Valley Fiber Arts Fair in Nebraska.

Scotts Bluff Fiber Arts Fair logo

I’ll be teaching 3 crochet classes and one injury prevention class at the Scotts Bluff Valley Fiber Arts Fair. Registration is now open at the event website. You can enroll in classes online or download a PDF registration form to use to enroll by mail.

Perfect Fit Crocheted Hat

Friday, September 9th I’ll be teaching “The Perfect Fit Crocheted Hat” class in the morning.

Art Science Spirals

I’ll be teaching “The Art and Science of Crochet Spirals”class Friday afternoon.

1st PWT back

Saturday, September 10th I’ll be teaching my “Playing with Triangles Shawl” class in the morning.

Dont let your Hobby Hurt

I’ll be teaching my “Don’t Let Your Hobby Hurt” class Saturday afternoon.

You can click on any of the class names above to go straight to the class information pages on the Scotts Bluff Valley Fiber Arts Fair website. Or click here to go to the home page for their website.

If you don’t live in the area you might consider coming out to this event. Scotts Bluff is a beautiful area in Nebraska and there is a lot to do at the Fiber Fair as well as opportunities to take a fun tour of the Brown Sheep Company’s Yarn Mill.

Reading your stitches – Part 1

The summer-time fun is in full force here at Casa Graves. My boys have been keeping me on the run. Which is why there is only one blog post this week. We have a lot going on, including visits with family. Loads of fun, but doesn’t leave a great deal of time for blog post creation.

Today I wanted to address some crochet basics. For some of you this is going to be review, but you may find it helpful for when you are teaching new crocheters.

One of the questions I get asked by a lot of beginning crocheters is how to tell where the top of the stitch is. Spotting the top of your stitches and being able to identify which loops to work into or under is key to mastering crochet patterns.

Where is the top of the stitch?

Stacking the Vs

The simple answer, for most stitches in crochet, is the top of the stitch looks like a V.  I often have new crocheters stop and hold their work so they can see those Vs stacked. As long as you don’t remove your hook from your working loop you can manipulate your fabric without losing any stitches.

How is the top of the stitch created?

Working loop

For me, understanding that question really helped me read my crocheted fabric. When you finish a stitch you have a working loop of yarn on your hook. That loop becomes the top of the next stitch you make.

Am I working in the right direction?

Once you can identify the top of your stitch it becomes a lot easier to tell if you are working in the right direction.

Vs pointing away

If your pattern tells you to turn at the end or beginning of a row, then the Vs of the stitch tops of the row you are working into, should be pointing away from your hook.

Working in the Round

If you are working in the round without turning at the end of each round, then the Vs of the stitch tops of the row you are working into, should be pointing at your hook.

Where do I insert my hook in the stitch?

Insert hook under 2 legs

For your typical standard crochet pattern you are going to insert your hook under the 2 legs of the V in the top of your stitch.

Gap to Insert Hook thru

To avoid splitting your yarn look for the little gap on the side of your stitch just under that V.

Some patterns will give you special instructions about where to insert your hook to create different textures in your fabric.

Back loop

If your pattern instructs you to work in the back loop of your stitch.  This is generally referring to the back leg of the Vs after you’ve turned your work to begin your new row.

Front loop

The same is true for working in the front loop or your stitch. You would be inserting your hook under the front leg of the Vs after you’ve turned your work to begin your new row.

What if I need to work more than one stitch in the same stitch?

This can be tricky when you are new to crochet. Especially once you work the first stitch your V is obscured. My favorite trick involves manipulating the fabric.

Pulling up to find stitch

If you gently pull up on the stitch just made it becomes easy to see where the base of that stitch goes into the previous row.

Next time I’ll address the Half Double Crochet stitch. One of the trickiest to read properly in your fabric.

Springtime Retreat

I’m a little tardy getting my weekend post up because I ran away from home yesterday. Well, not really. I’m writing you from lovely New Jersey at Jan’s house. Had quite the travel adventures getting here, but eventually it all worked out. Of course that means I arrived at Jan’s door at 2 a.m. today.

As you all know, Jan and I love to get together and crochet, so this is sort of our own little springtime retreat. Jan took time off from work and the 2 of us will be hanging out with hooks and yarn. We are also going to do a few fun day trips, heading into NYC to visit MoMA on Monday and maybe will get to see some of our NY friends while there.

The later part of next week is predicted to be fairly rainy, so we will be kicking back with some crochet projects and enjoying each other’s company. Of my 2 suitcases I checked, one is filled with crochet projects and yarn, so I’m all set.

Springtime Cowl 1

In the meantime, I finished my experiments with the Classic Elite Yarn’s “Santorini” yarn. It did grow up to become a cowl, but I changed the width of my fabric in order to get a bit more length from the 2 balls of yarn I had. I like the look of the finished project and it is a nice size for a little added warmth in transitional weather.

I wore it when traveling yesterday and it was handy at 1 a.m. waiting outdoors for the car service to pick me up. On the plane and in the airport I wore the cowl as an infinity scarf and when I needed warmth I doubled it.

Springtime Cowl 2

For those of you that would like to try out this design I have a pattern for you.

Springtime Cowl

Designed by Andee Graves

Skill – Beginner

Stitches you need to know: Chain (ch), Double Crochet (dc), Single Crochet (sc)

Finished size: Approximately 5” wide x 38” around

Special Stitches

Materials

Yarn: Classic Elite Yarns “Santorini”; 58% Vicose/42% Cotton, 50 grams/125 yards. (sample was made with 2 balls of color #2156)

Hook: I-9/5.5mm

4 stitch markers; 2 in each color

Blunt yarn needle

Gauge:

15 rows and 16 stitches in pattern = 4”

Pattern Notes

First row is worked in the back bump or “bar” of each chain st so that base of row will be Vs like the top of stitches.

When reach the last row fasten off with a long tail, this tail will be used to sew the final row stitches to the base of the first row of stitches.

Springtime cowl finished fabric

Twisting the strip of fabric 180 degrees turns your project into a moebius, if you want you can skip the twist and just sew the ends together to create a ring. Another option is to weave in the ends and make your strip of fabric into a short scarf.

Project used almost all the yarn in the balls, so if you don’t get gauge you may need to shorten your foundation or the number of rows you work.

Instructions

Row 1: Ch 21, working in back bumps, sc in 2nd ch from hook, (dc next st, sc next st) 9 times, dc in last ch. (10 sc, 10 dc)

Row 2: Ch 1, turn, sc in first st, (dc next st, sc next st) 9 times, dc in last st. (10 sc, 10 dc)

Rows 3 – 138: Repeat Row 2. Fasten off with long tail.

Springtime cowl fold n mark2

Lay out strip of fabric horizontally and mark top corners with one color of stitch marker, then mark bottom corners with other color of stitch marker.

Springtime cowl flipped

Fold strip so ends are close together with matching colors of stitch markers, twist top end so that stitch markers are mis-matched.

Springtime Cowl sewing

Using ending tail whip stitch tops of Row 138 stitches to bottom of Row 1.

Weave in all loose tails.

Gently block if desired.

Wishing all of you a very lovely spring weekend and a Happy Mother’s Day.

Mixing it Up

I’ve been having a lot of fun making some of my “Playing with Triangles Shawls”. So far I’ve finished two and am currently working on a third.

1st PWT

The first one I finished I used Lion Brand’s “Vanna’s Choice” 100% acrylic worsted weight yarn with a size J/6mm hook.

1st PWT back

It took almost all of 7 balls of yarn as I wanted the shawl to be very large.

2nd PWT

The second one I used Newton’s Yarn Country “Four Seasons” 100% acrylic fingering weight yarn with a size G/4mm hook. I added a carry-along thread (Kreinik “Twist”) in silver for a few rows and the border for some sparkle.

2nd PWT back

I used approximately 1,472 yards to make this shawl since I wanted a large shawl again. My finished shawl is 74 inches across the top edge and 32 inches long at the center point.

3rd PWT attempt

My third one is my WIP and I’m working it more of a shawlette size. I have 3 balls of Red Heart Boutique “Treasure” 70% acrylic/30% wool and am crocheting with a size J/6mm hook. I love the way this color changing yarn creates stripes in the shawlette.

You can find the pattern for this shawl in my blog post “Playing with Triangles” and the link to my video on YouTube is here.