
copyright 2015 M2HDesigns/Andee Graves
Last weekend I posted my Hot Spot Square pattern and I promised you some further fun with that pattern this weekend.
First a little history lesson. Many of those that have been crocheting for a long time may already know about crochet and motifs, but some of you might not.
A lot of crochet blanket projects that use motifs originally developed as a way to use up the left-over bits and bobs of yarn from other projects or from worn out clothing that had been unraveled, somewhat like the history of crazy quilts. Little bits of yarn would be wound up into small balls and stored for later use.
Some crocheters would work up parts of motifs when a little time could be found. The odds and ends of yarn would be sorted thru and the smallest ones selected to become centers of the motifs. Then more rounds would be added to these until squares of the desired size were completed. Those squares would be sewn together to make blankets.
In the late 60s and thru the 70s the Granny Square became very popular as the building block for all sorts of items; clothing as well as home décor. Color choices would sometimes still be somewhat random for the center of the squares, but often the final rounds of the squares would be a unifying color.
Over the years, the motif was modified and now you can find lots of wonderful books of crochet motif patterns. Some of those patterns are close to the traditional granny square with 3 double crochet shells separated by chain-1 spaces. Some are very far removed from that humble beginning.

My little Hot Spot Square is a nod to the Granny Square in that it is worked in concentric rounds and you can change colors at any point to give a completely different look to the square. I’ve also added a twist by having the circle-to-square thing happening.
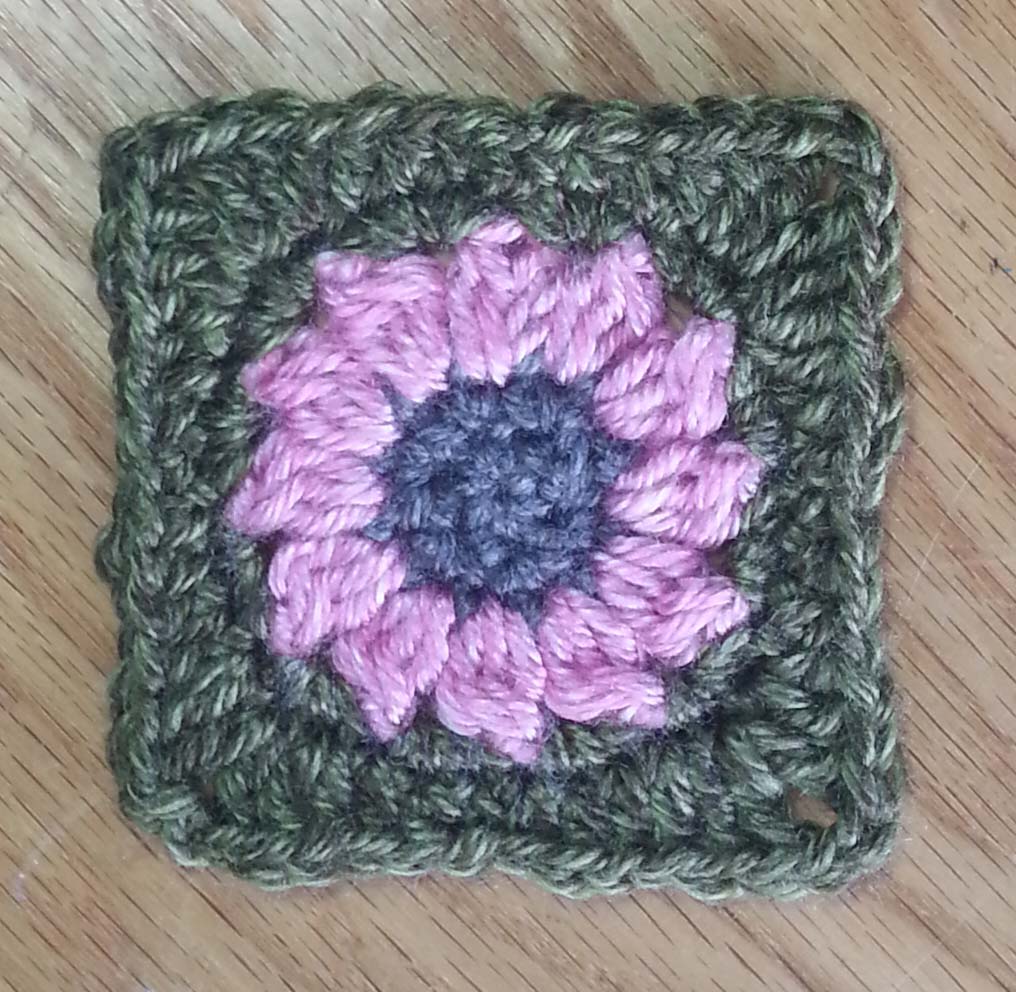
The Floating Flower
For this look you’ll need 3 colors of yarn.
Color 1 for flower’s center: Approximately 2 yards for Rounds 1-2. (Sample shown uses Lion Brand “Heartland” yarn in color #125 Mammoth Cave)
Color 2 for your flower’s petals: Approximately 3.5 yards for Round 3. (Sample shown uses Lion Brand “Heartland” yarn in color #103 Denali)
Color 3 for Square border: Approximately 9.5 yards for Rounds 4 and 5 (I usually pick a color in the green range since I consider these rounds to be the “leaves” of my flower). (Sample shown uses Lion Brand “Heartland” yarn in color #174 Joshua Tree)
If you use the same color in all your squares for Rounds 4 & 5, the effect once joined, will be that of flowers floating on the background. You can use up all your bits and bobs of left-over yarn from other projects for the flowers, then use a single color for the background. You’ll be surprised at how lovely your project will come out despite it’s rag-tag beginning.

The Graphic Circle
For this look you’ll need 3 colors again, make sure that your 1st and 3rd color contrast strongly with the 2nd color for the boldest look.
Color 1 for the center circle: Approximately 6.5 yards for Rounds 1-3. (Sample shown uses Lion Brand “Heartland” yarn in color #103 Denali)
Color 2 for the graphic border surrounding the circle: Approximately 3.5 yards for Round 4. (Sample shown uses Lion Brand “Heartland” yarn in color #153 Black Canyon)
Color 3 for the contrasting square border: Approximately 6 yards for Round 5. (Sample shown uses Lion Brand “Heartland” yarn in color #150 Mount Rainier)
This square will also work well with a single color for the square border and that border can be used for a continuous join-as-you-go for all your “spots”. I prefer to use a method like that for joining all my motifs, rather than sewing them together. I’ll have more about that next month.
Another option for joining your squares is to crochet them together.
The Zipper Join
This join uses a single crochet to join the squares together. You work a single crochet in one square, then in the other square that you are joining. You repeat alternating which square you work into. You can chose to skip stitches to allow the seam to lay flat, or can work in every stitch to get a raised decorative ridge. Either one of these methods are usually worked on the Right Side of your project as they tend to be a design feature.
The Slip Stitch Join
This join is usually worked on the Wrong Side of your project. Slip stitches used for joining need to be a bit loosier than what you would use to join rounds in your motifs. You may need to go up a couple of sizes in your hook if your slip stitch tension tends to be tight.
Hold your 2 squares you are joining Right Sides facing, then bring your hook thru the edge stitches using the back loop of the first square and front loop of the second square. Work this way across the side of the squares until reaching the end. Generally you want to work one slip stitching into the corner chain spaces.
With either of the crochet joins you can create a full strip by carefully matching your squares stitches in one direction then skipping over or working around those seams when you go in the opposite direction.

Looking forward to hearing your thoughts on jayg – I haven’t braved that yet but I love this motif and might be tempted 🙂
I’ve used the Join-As-You-go approach in a number of projects and absolutely love it. You’ll wonder why it took you so long once you try it.
I hope to put up a good tutorial here on the blog this summer, and that will be at least one of my videos when I get my YouTube channel going this summer as well.