
copyright 2015 M2HDesigns/Andee Graves
If you have worked one of my hat or motif patterns you may have seen me reference the Adjustable Slip Knot at the beginning of my pattern instructions. I’ve blogged about it before, but I wanted to review it with you today.
I first encountered this technique in a class with Dee Stanziano, but it took me awhile to really understand how I was doing it. Most of my successes came around by happy accident.
The Adjustable slip knot method allows room to work the first round of stitches and yet end up with a snug center. The most important thing to remember: when you’ve made this slip knot correctly the beginning tail tightens the loop around your hook.
Typically when we make a slip knot to start a crochet project we create the working loop (the loop on our hook when we start) from the working yarn (the yarn coming from the ball of yarn). This creates a very stable first chain loop.
An adjustable slip knot creates the working loop from the beginning tail of your yarn. This allows the size of your first chain loop to be adjusted even after working into it with subsequent stitches.

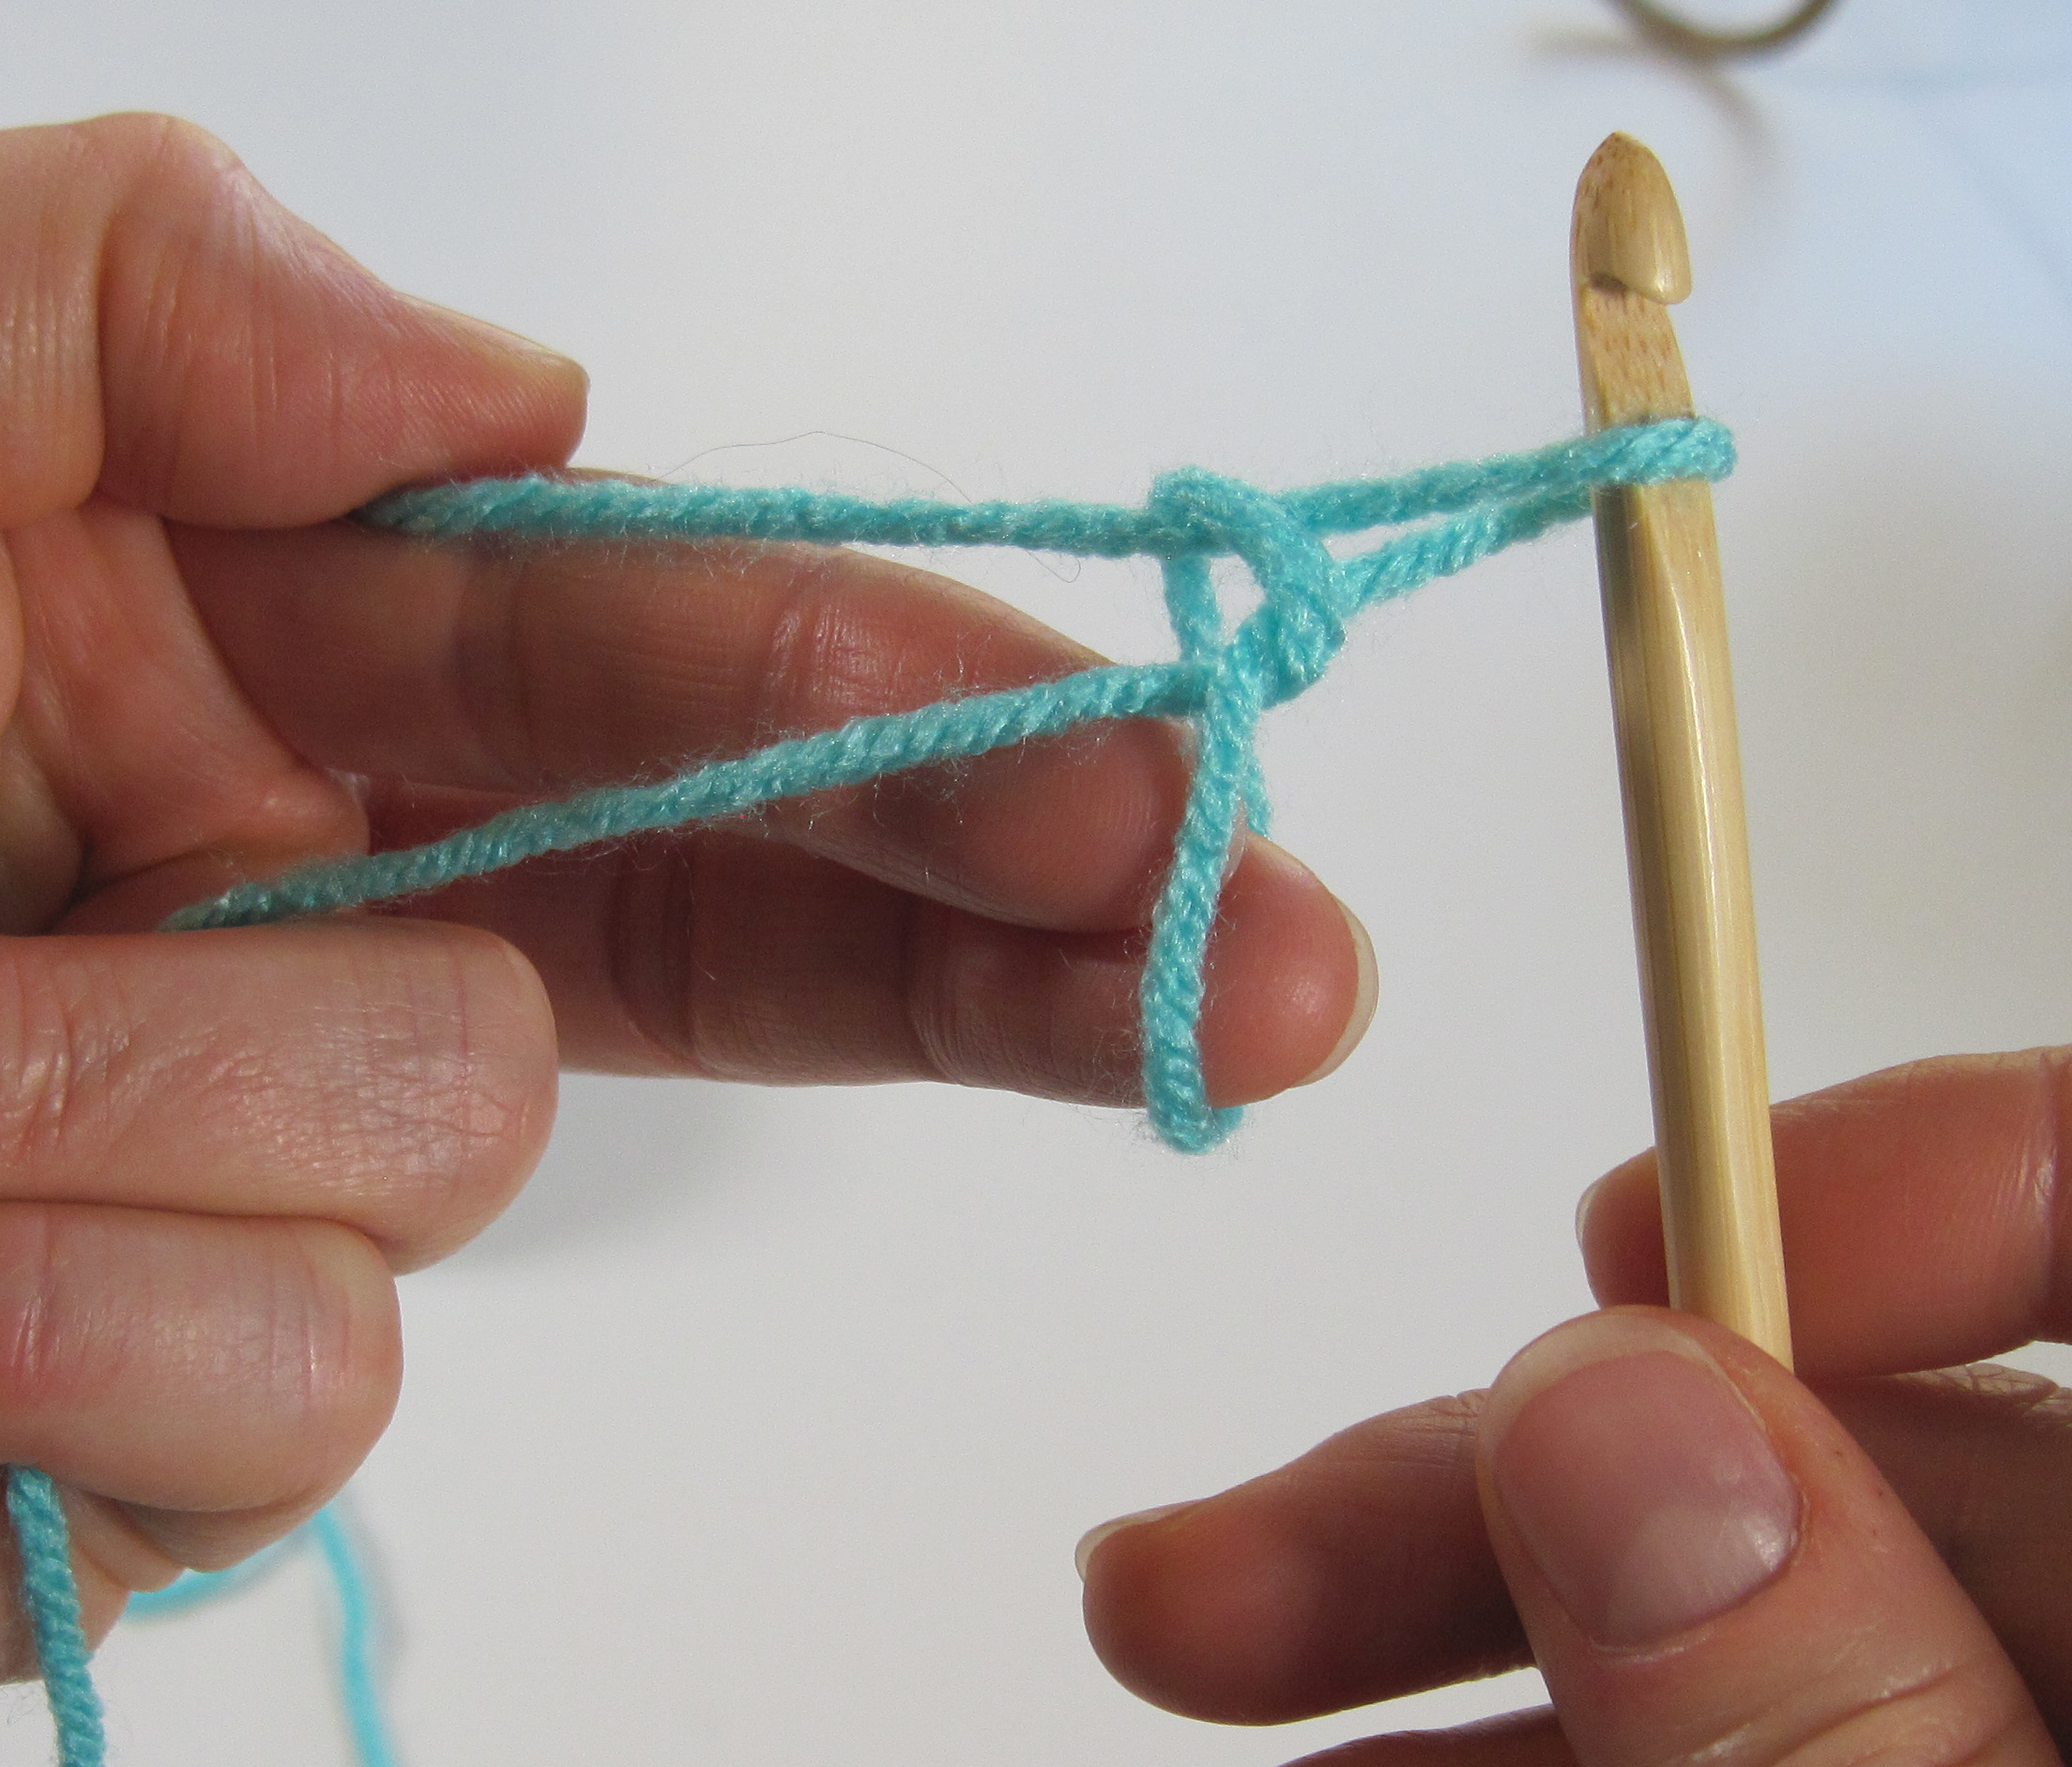
1. Hold the working yarn across your palm, wrap beginning tail around 2 fingers making an X over the top of the working yarn.

2. Insert hook under both strands of yarn and hook the beginning tail,

pull up a loop under the working yarn strand.
3. Holding the yarn strands, slide the loop off your fingers.

4. Holding the beginning tail end and working yarn continue to pull up a loop and gently snug the yarn to create the slip knot.

Begin working your first stitches according to the pattern. Tip: when working into the first chain loop, work under one of the “legs” of the V to get the best result. Leave a long enough tail for your first round to expand the slip knot.

Once you’ve finished working into the first chain, gently pull on the beginning tail to tighten the center of your round.
I’ve used this start in a number of the patterns I have here on the blog.
Sparkly Jar Cover (doesn’t specify using the Adjustable Slip Knot, but it’s a lot easier with it)
Simple Sweetheart (again doesn’t specify it in the directions, but it is how I worked that first round)
Little Snowflake Ornament (this pattern is a stitch diagram only, but that big circle in the middle is your first chain, and it’s much easier to work into if it’s an Adjustable Slip Knot)
Spiral in a Heart (doesn’t specify in the directions, but again it is how I worked that first round)
Little Bitty Noggin Cap (same as some of the others, the Adjustable Slip Knot isn’t specified, but it is how I worked it)
Pretty Petunia (as above, not specified, but much easier to work the first round using an Adjustable Slip Knot)
So try out the Adjustable Slip Knot for yourself and see how you like it. You may find it becomes your favorite start for a project.
Update: I now have a video on my YouTube channel that shows how to make this slip knot for those of you that find that an easier way to learn. Adjustable Slip Knot Video.
