This post contains affiliate links. I may receive compensation (at no added cost to you) if you make a purchase using these links.

There was a little delay getting this post finished because we were preparing for adding a new family member. The little sweetie in the photo above. We have been wanting to get a kitten for about 7 months and this week everything came together for Ms. Areya (R-ree-Yah) to join us. I confess, part of the delay is because I am having way too much fun getting kitten cuddles. This is our first baby kitten in 14 years, so we are all enjoying her tiny time, she is just 8 weeks old. You will probably see her photo-bombing the blog a bit over the next couple of months.
Now back to learning about crocheting the X-stitch…
The X-stitch is one of my second favorite stitches to use in my crochet designs. The fabric you can create with it is stretchy and has a pleasing texture. I often think that crocheting it is a little like dancing the two-step; 2 steps foward, 1 step back.
One thing I have noticed about this stitch (and a lot of crochet stitches) is that the written directions for working the stitch can sound very intimidating, when actually working the stitch is fairly easy.
Because there are not standardized terms for the name of all crochet stitches you can encounter a lot of different X-stitches. There are versions of the X-stitch out there that use taller stitches and more skipped stitches, so remember to check the stitch definitions in the pattern you are working to be sure that you know which version is being used.
My favorite version of this stitch is very simple. It is 2 double crochet stitches, worked into 2 stitches, with the second stitch worked over and around the first one. After reading that you are likely thinking I’m nuts to say it is simple.
In my Cliffhouse Cowl pattern I defined the X-stitch as: Skip 1 un-worked st forward, dc in next st, working around 1st dc, dc in skipped st.
Let’s break it down with an illustration.

Step 1: Skip 1 un-worked st forward (indicated by pink arrow),
Step 2: dc in next st (indicated by green arrow),
Step 3: working around first dc, dc in skipped st (indicated by pink arrow).
In this step you are crocheting around the post of the first stitch at the same time as you are working your double crochet in the top of the previously skipped stitch. The first stitch is surrounded by the second stitch.
Stacked or Staggered X-stitches


When you are working rows or rounds of the X-st you can stack them or stagger them. You’ll get 2 very different looks to your fabric depending on which you choose.
Andee Graves M2H Designs
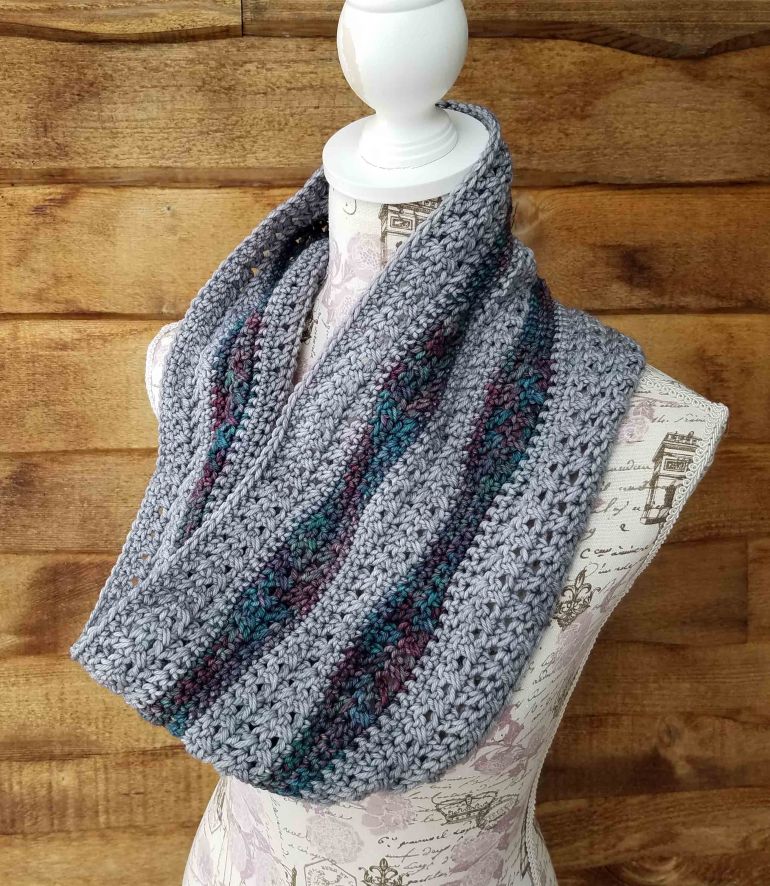
For my Cliffhouse Cowl the X-sts are stacked and worked in the round.

Andee Graves M2H Designs

Andee Graves M2H Designs
In my Spiraling Crosses Hat and Spiraling Crosses Gauntlets the X-sts are staggered and worked in the round.
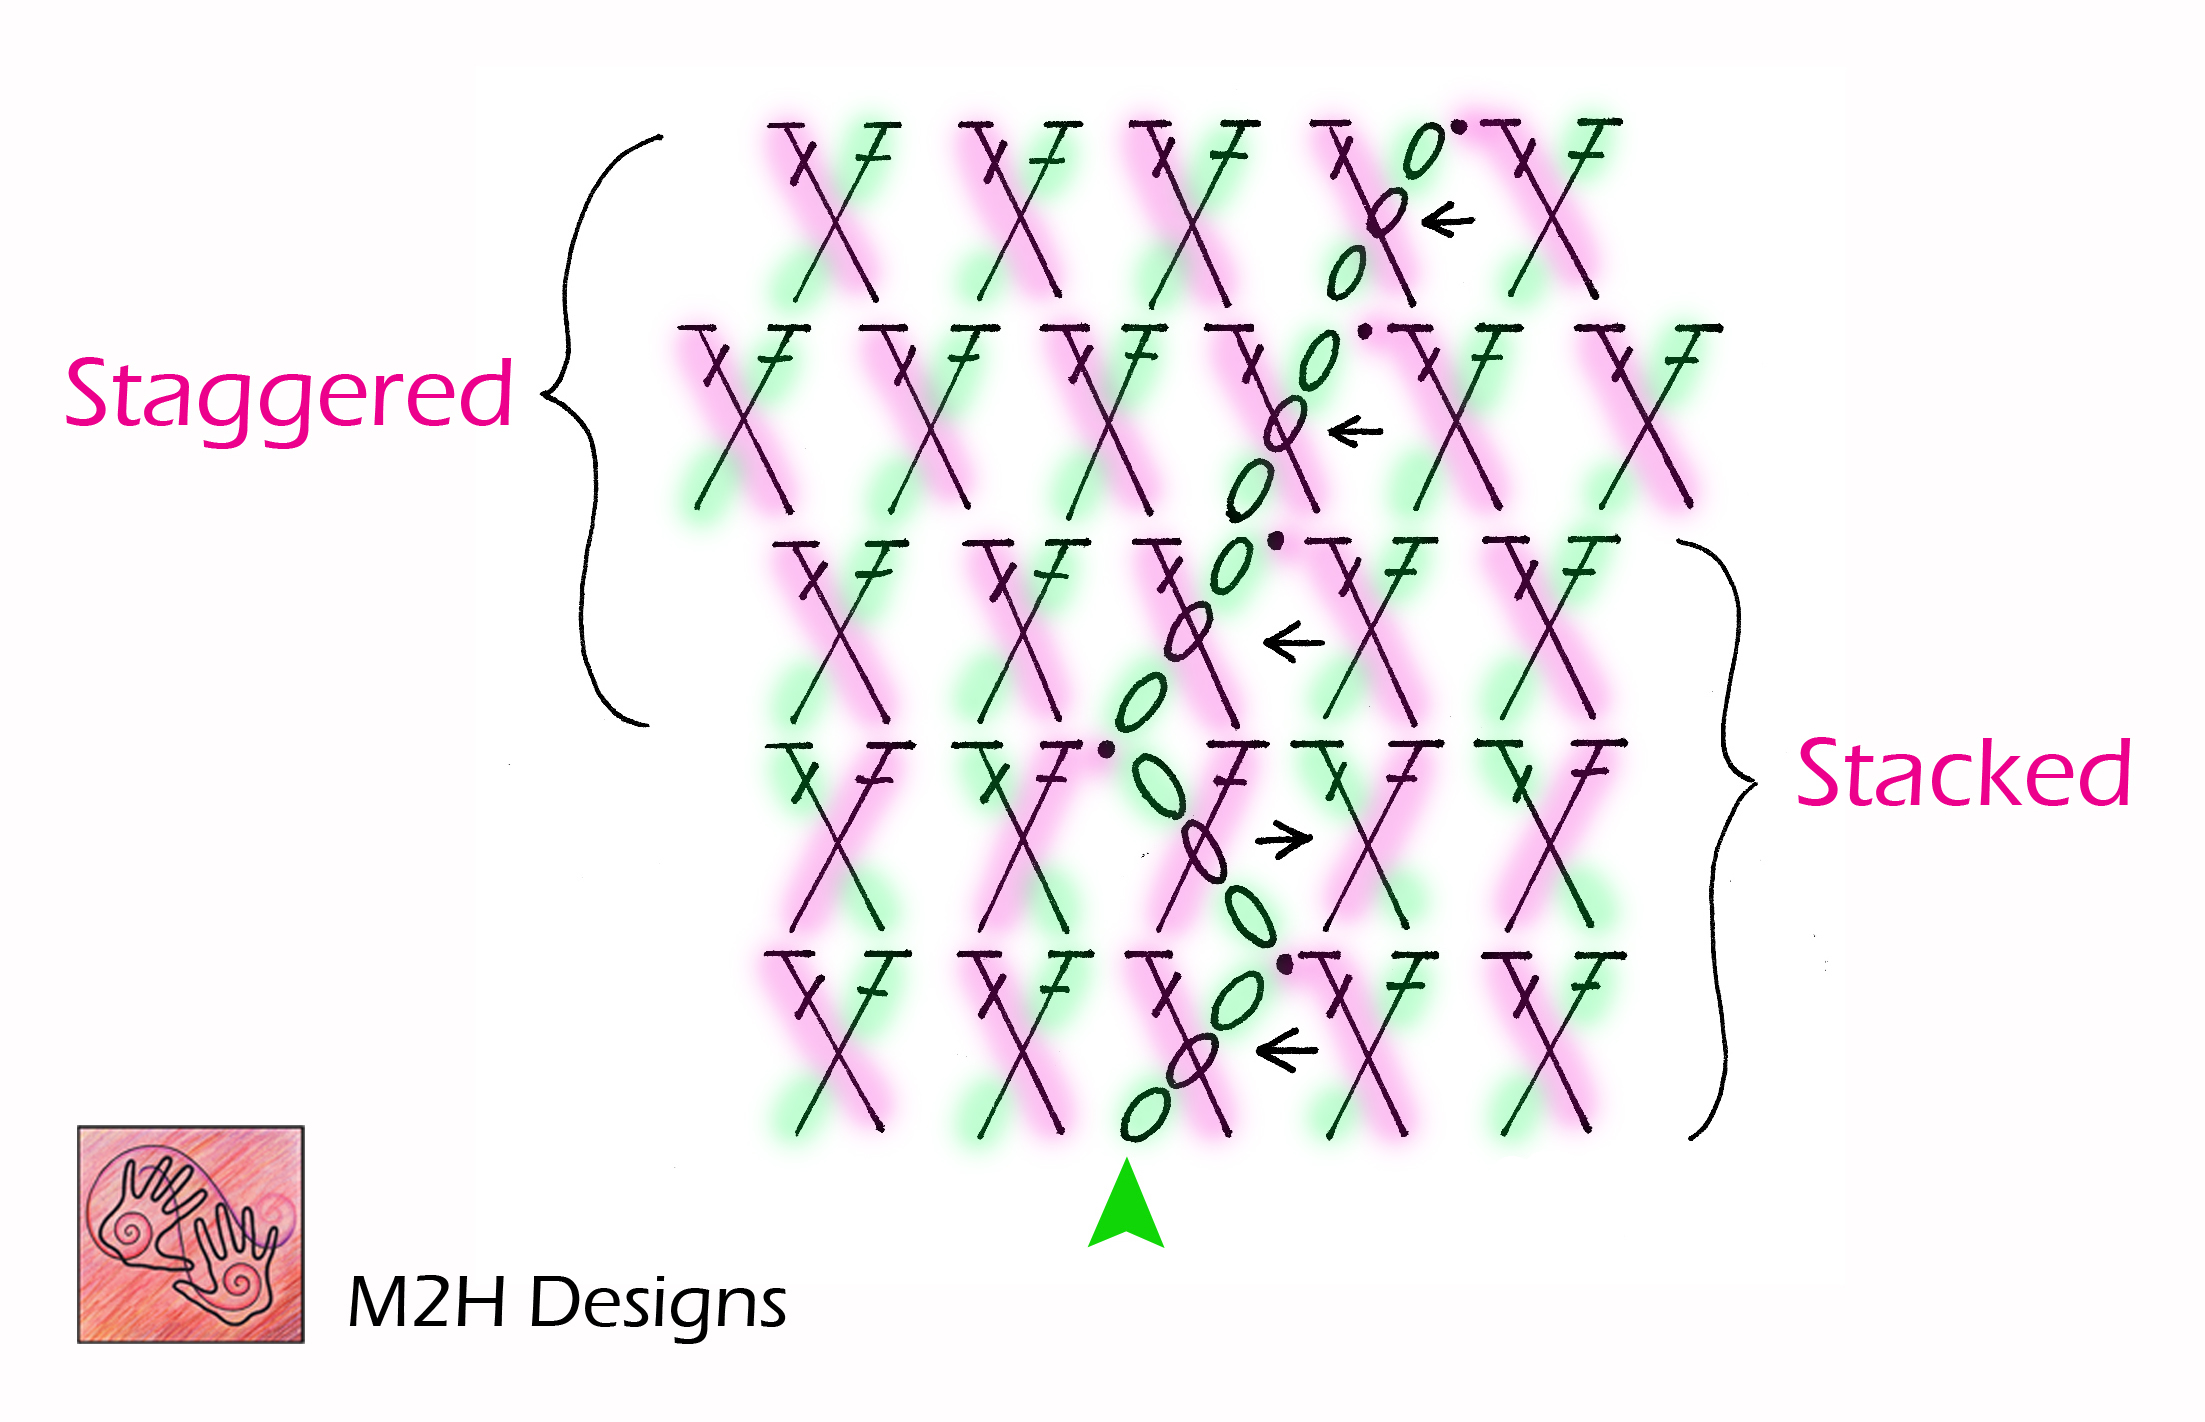
The stitch chart above shows both stacked and staggered X-sts worked in the round. The purple stitches are the 2nd dc of each X-st. When working staggered X-sts your join for each round will move to the right if you are right-handed, and to the left if you are left-handed (assuming you hold the hook in your left hand).
At the start of each X-st round the beginning chain 3 acts as your first dc of your first X-st. The lovely part of this is that your join in the finished project will not be as obvious as it can look with other stitch patterns.

It can be a little tricky to see where your next X-st should be worked after working that starting X-st in your first round. The stitch that you joined to for your foundation looks like it should be your first skipped stitch (indicated with yellow arrow – this is the stitch that the slip stitch join was worked into for the previous round or foundation), but it is the next stitch over (indicated with pink arrow) and the first dc will be worked in the next stitch (indicated with the green arrow).
When you get to the end of your round you will finish your last X-st and then slip stitch tightly in the third chain of your beginning chain 3. I find it really helps to place a locking stitch marker in that third chain at the beginning of the round, then when I get to the end of the round it’s very easy to see where to join to.

My favorite locking stitch markers are made by the Clover Company. They are flexible and durable and come in a couple of sizes, colors and styles. I have lots of the orange and green ones that I’ve added to my project bag over the years. If you can’t find them locally you can purchase them on Amazon, just click on the photo above and it will take you right to them.

The new stitch markers from Clover that I have been falling in love with are the “Quick Locking Stitch Markers”. They come in sets of 2 colors for each size, or you can get the variety pack that has a nifty carrying case with 3 different sizes. I really love these markers because they are super flexible and they are little sheep shapes. If you can’t find them locally just click on the photo above and it will take you right to them on Amazon.

Love your new kitty baby.😁❤❤❤I do networking to spread the word which kitties need adoption or saving from shelters. Thank you for the refresher in cross stitch. Wish everyone knew how to crochet.
Thanks, she has stolen our hearts indeed. Rocky Mountain Feline Rescue do a great job saving kittens and cats on the short list and finding them new homes. Cats and Crochet really go together in my book.