Find Your Tribe

We are starting into the last week of March and the end of National Crochet Month, though it’s always time to celebrate crochet for me. One of the best ways to celebrate is to find a tribe of fellow crochet and yarn enthusiasts to gather with. I spend a lot of time with my group at Longmont Yarn Shoppe “Casual Crochet”. We meet each month on the first and third Wednesday of the month (and the 5th Wednesday if the month has five).

Last week we got together and we had some fun celebrating the end of NatCroMo. We had a lovely spread of snacks and drinks. Gail, the owner of Longmont Yarn Shoppe, treated us to these goodies. The core of our group, including myself, have been gathering together to crochet and learn from each other for at least 8 years now. Might actually be longer, I’ve sort of lost track of when exactly we started getting together.

I even brought in my latest big crochet hook. This hook is 31 mm in diameter (approximately 1.22 inches) and is a bit of a workout to crochet with. The smaller hook in the photo is a Clover Amour P/Q 15mm. Big difference in size between the 2.

Karen was the only one that was game for trying it out though. We had a lot of fun crocheting and laughing.

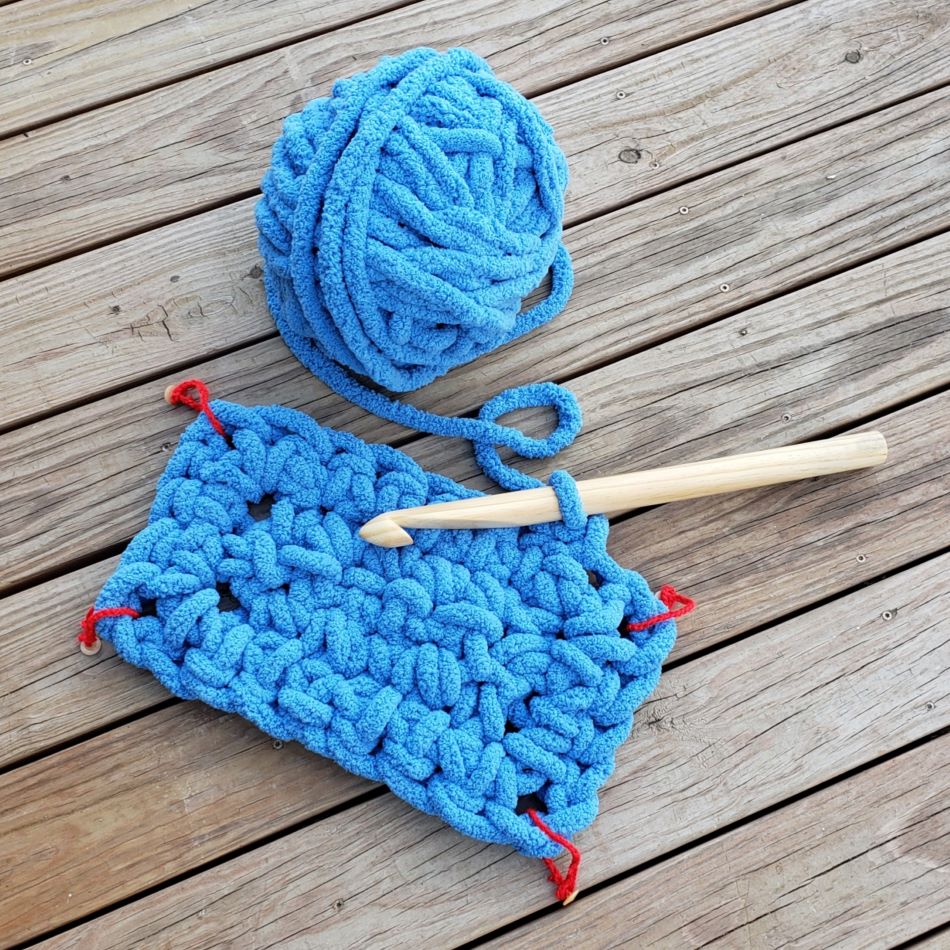
I am planning on working the 2 balls of Bernat Blanket Extra Thick I got to test out the hook into a lapghan. I picked a simple single crochet rectangle for the pattern as I plan on putting this on my lap when my cat wants to sit with me. Otherwise his claws get a bit pokey.

That was the second large hook I made this month. The first is hanging in the shop window and is even larger.

It was made from a 2 inch diameter pine dowel and was quite the workout to carve. The small hook in the picture with the dowel is the same in the photo further up with the big hook. I’ll be making a paper mache version of this giant hook after we take it out of the window. That way the shop can have one for display that isn’t quite so heavy. Seriously, this hook is like a baseball bat.

I hope you all have a great start to your last week of NatCroMo 2024. I’ll have a few more blog posts for you before April rolls around.

Happiness in a Circle

If you didn’t know, today is Pi-Day. For those of you that are new to visiting my blog I am a bit of a geek. I use geometry in my designing process all the time, but my favorite geometrical shapes are circles.

This blog post contains affiliate links, purchases through these links help support me without additional cost to you.

For those of you uncertain what Pi is and how it relates to circles…it is a mathematical constant that is the ratio of a circle’s circumference to its diameter, approximately equal to 3.14159. It also appears in many formulae across mathematics and physics. For most uses the abbreviated version of 3.14 is more than enough. March 14 is written as 3/14 for most of us here in the US, so some of us geeky souls like to refer to today as Pi-Day.

I have been playing with some circles lately, I made this fun little pouch as an experiment. It is still a work in progress, but so far I like what I’ve come up with. This was just 2 flat circles worked in 5 rounds of double crochet, I then crocheted them together and added a Romanian Cord to create a little wearable pocket for my phone and a few odds and ends when I am running around the house. The crochet hook is to give you a feel for the size of the pouch.

If you are wondering about how to get your flat circles as round as mine you can check out my post about Crocheting Really Round Circles here. I get very detailed in that post about crocheting flat circles and keeping their edges round.

If you are more interested in using Pi to crochet hats that fit the person they are made for, check out my Perfect Fit Crocheted Hat pattern. It is basically my Perfect Fit Crochet Hat class in a pattern. Everything you need to know for adjusting the size of your hat for fit and for the yarn you are using. You don’t even need to be a wizard at math, because I have some easy visual cheats included in the pattern. Once you have worked through the pattern you will understand how to adjust any crown-down constructed hat to fit your yarn and whomever you are making the hat for.

I recently purchased some 24 inch diameter floral hoops to use for creating some crochet art. The first piece I have been making is fairly free-form, so math hasn’t been as much help in this project. This is just the start of it. Once the hoop is filled in and the crochet open work is anchored to it, I’ll be adding crochet pieces to the foreground to make a fun little scene. The whole thing is currently anchored to my work surface so that I can stretch it as I go.

I do have some additional pieces planned that will involve more math as I fill in the hoop. I’ll share more images as these projects progress.

I bought my hoops on Amazon and am very happy with the quality of what I received. You can check them out by clicking here. These hoops are strong and well shaped without any distortion from shipping. They have them in variety of sizes, so I may be ordering some of the smaller ones for making framed snowflakes in the fall. The 24″ diameter ones were the largest offered on that product listing.

Quick Shamrock Pattern

Saint Patrick’s Day is this coming Sunday and I decided to make up a little clover for all my lovely readers.

This quick little shamrock can be crocheted up in just a few minutes with about 4 yards of worsted weight yarn. I used Berroco’s Ultra Wool and a 5mm hook for the shamrocks shown above. You can sew or glue your shamrock onto a pin back to create a fun brooch to wear or sew the finished shamrock unto a hat, gloves, or scarf.

I have a PDF version available through my Ravelry shop that also includes a stitch chart. The PDF version is available for free in my Ravelry shop with coupon code 2024QSSPD through 11:30 p.m. Mountain Time Saturday, March 16, 2024. Just place the pattern in your cart and when checking out put the coupon code in the code spot.

Quick Shamrock Pattern

By Andee Graves

Skill Level: Easy

Finished Size: 2.25 inches (5.7 cm) tall x 2.25 inches (5.7 cm) wide

Materials

Yarn  Berroco “Ultra Wool” Worsted Weight, 100% Superwash Wool,

3.5 oz/100 g, 219 yds/200 m (1.8 g/4 yds for 1 Shamrock)

Hook  H / 5 mm or size needed to obtain consistent fabric

Gauge is not critical to this project; fabric needs to be consistent and tight. Shamrock can be worked with different weight of yarn, just adjust the size hook so you get the desired result.

Notions  Yarn/tapestry needle, pin back if turning into brooch/pin

Special Stitches and Abbreviations

Adjustable Slip Knot: Make like a regular slip knot but use the beginning tail to form the working loop. Pulling on the beginning tail snugs the working loop on the shaft of the hook. If desired can use the magic circle method instead, just count your circle as the first chain stitch. Click here for my YouTube video if you need help with the Adjustable Slip Knot.

2 Extended Double crochet Cluster (2ExDcCL):  [Yo, insert hook into indicated stitch, yo, pull up a loop, yo, pull through 1 loop, yo, pull through 2 loops] 2 times, yo, pull through remaining 3 loops on hook.

Pattern Notes

This shamrock is worked from the center out in 2 rounds, at the end of the second round you chain a length then work back towards the body of the shamrock to create the stem.

Pattern Instructions

Rnd 1: Make an adjustable slip knot, ch 2, 6 hdc in second ch from hook, join with a slip st to first hdc of round. (6 hdc)

Rnd 2: (Ch 4, 2ExDcCL, hdc, 2ExDcCL, ch 4, slip st) in first st, [slip st loosely in next st, (slip st, ch 4, 2ExDcCL, hdc, 2ExDcCL, ch 4, slip st) in next st] 2 times, slip st loosely in next st,

{Stem} ch 6, sc in back bump of second ch from hook, slip st loosely in back bump of each of next 4 chs, slip st to join to Rnd 1 between last and first hdc. Fasten off.

(6 2ExDcCL, 3 hdc, 6 ch-4 sp, 7 loose slip sts, 1 sc)

I used Vanna’s Choice with an I hook (5.5mm) for the brighter green Shamrock shown above, you can see that it came out a bit bigger than the shamrocks made with Berroco Ultra Wool.

Happy Saint Patrick’s Day to all my Irish and Irish Heritage readers.

Yarn Bombing the Tree

2023 Yarn Bombing of Tree
at Longmont Yarn Shoppe

Last year the crochet group (Casual Crochet) at the Longmont Yarn Shoppe covered the trunk of the tree in front of the shop with a multi-textural yarn bombing. It was a big hit with the community and so yarn-bombing the tree is now becoming a regular thing for the shop. In December the machine knitting folks made a red and white striped fabric that they wrapped the tree with.

This year Gail, the shop owner, and I decided for National Crochet Month we needed a new yarn-bombing. We got going on this a little late, so we did it in stages. Yesterday we finally finished it.

The exterior of building the shop is housed in is currently undergoing some renovations, so it is harder for folks to find us at times. This means the yarn-bombing will help make our location easier to spot. I used one of the colorful shopping bags and turned it into the first stage of our yarn bombing that we put up on March 1st.

Then this past Wednesday we put up Stage 2, which is our Random Acts of Crochet Kindness (RAoCK) section. It has been really popular and the group is going to be busy keeping up supplies to re-stock it.

It was also our first Wednesday of the month gathering, and we spent a lot of our time sewing pieces to the Stage 3 piece. My friend Margie helped me a lot on this project and has really been the inspiration for lots of our RAoCK projects.

Finally yesterday, Margie and I got together for a couple hours at the shop and finished attaching all the pretties to the Stage 3 section and put it on the tree. I think it came out really well. Yesterday was pretty chilly with snow in the air, so our colorful spring and summer feeling yarn bombing was a fun way to add some warmth to the day.

Our group has more crochet activities planned for NatCroMo at the shop. Stop by again regularly this month for all the excitement.

There’s No Place like Gnome

Happy National Crochet Month my friends! March has started off with a bang for me. I”m helping out with all sorts of fun stuff at the Longmont Yarn Shoppe and will be sharing more about that. Suffice to say that I’ve been so busy that I didn’t get a chance until today to do my first post of March to celebrate NatCroMo.

3 Colorful Crocheted Gnomes on a Gray background. Front Gnome had yellow body, gray beard and orange hat with floppy brim. Middle Gnome has bright blue body, white beard and magenta hat with small brim. Last Gnome has orange body with arms up in air, cream beard and green hat with small brim.

First of all say hello to my newest design, this is my “Cute Lil Gnome” pattern. This fun amigurumi is made using small bits of worsted weight yarn. Approximate yardage for each of the 4 pieces are: body -14 yards, Hat – 8.5 yards, Nose – 2 yards, and Beard – 3.5 yards.

Gnome held in hand with gray background. Gnome body is bright blue with a white beard, taupe nose and magenta hat. Hat has small brim.

I’ve been having fun making these little gnomes from various weights of yarn. The worsted weight gnomes are worked with Berroco Ultra Wool using a H (5mm) size hook and are 4.5 inches (10.6 cm) tall.

All my current crop of gnomes were having a little party with the Luv Bug at the shop on March 1st. The majority of the gnomes were made with Berroco Ultra Wool. The tiny one was made with KFI Collections “Teenie Weenie Wool”. The big one in pastel colors was made with some discontinued Lion Brand “Jiffy” that I had in my stash.

Crocheted toys, different sizes of gnomes surrounding a large Luvbug.

The big Gnome and Luv Bug are being crochet mascots at the Longmont Yarn Shoppe, so if you are in the area stop by and get your photo taken with them. We are also looking for suggestions for a name for the Gnome. If you stop in with a finished crochet project to get your photo taken at the shop, you can get a cute little butterfly or sheep stitch marker and enter the shop drawing to win an awesome product prize at the end of NatCroMo.

I designed this project so you only have to sew one seam. The hat is worked top down with the nose and beard crocheted at the end of the hat. The body is worked bottom up with the arms crocheted along the way. You fasten off the body with a long tail and use it to sew the body to the hat/head. A couple of fancy cluster stitches make the nose and hands, post stitches create the first round of the hat brim, but the rest of the project is single crochet, slip stitches and chain stitches.

The pattern currently has written instructions with some clarifying photo tutorials and 1 stitch chart. I’ll be updating the pattern at the end of March with stitch charts for all the parts and more photo tutorials. Once it is updated the price will go up. If you purchase your pattern now at the lower price, you will get the updated version for no additional cost when it is available.

Purchase the “Cute Lil Gnome” pattern here on Ravelry.

Make sure to check back regularly this month as I reveal more new patterns and all the creative ways I will be celebrating crochet with my local crochet community.