Hi everyone. My book “Wraps for All Seasons” has been on a blog tour. We will be making 6 stops for this tour. Today is our last stop. Each of the bloggers will be giving away a copy of the book, so be sure to visit them to see what they have to share with you about my book.
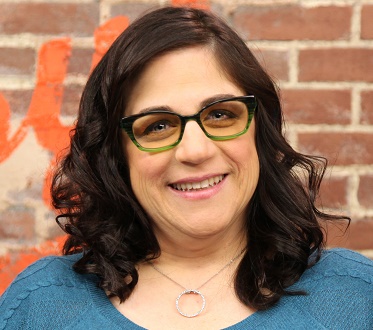
Stop #6 is with the talented Lorene Eppolite of Cre8tion Crochet. Lorene and I met in October 2013 at the Knit & Crochet Show and have stayed in touch over the years since. Last time I saw her was in Charleston this summer at the Knit & Crochet Show again. We had a lot of fun goofing off in the evenings. Lorene has a busy website where she posts lots of patterns and reviews.
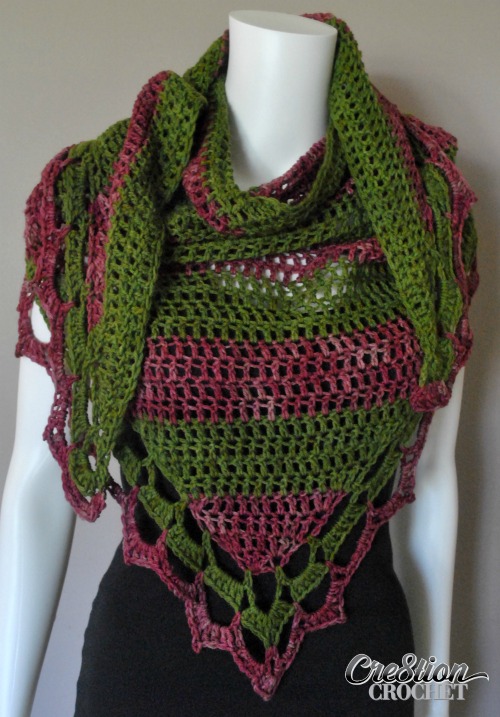
Patterns like this lovely slightly asymmetrical shawl. It is the “Napa Valley Shawl”. I really like the colors she used for her sample in the photos, but could see it made in any combination of favorite colors. Simple stitch work for the body with a lacy and intriguing border.
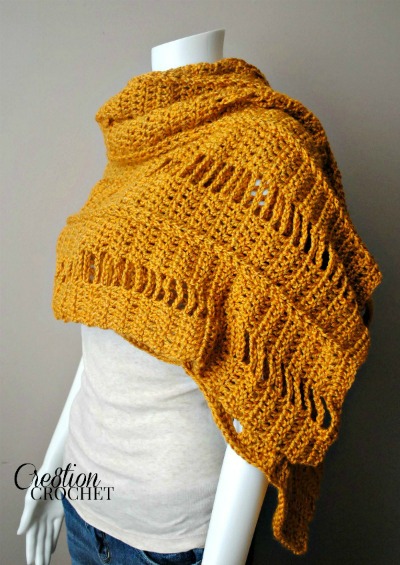
And if texture is what you love, check out the gorgeous “Braided and Broken Wrap”. Simple construction for a sophisticated look. I could see this worked up in a deep purple or silvery gray to become a staple item in my cool weather wardrobe. Hop on over to Lorene’s site to check out all her other patterns and to enter her drawing for a copy of my book.
Thanks to all my blogging friends for doing this blog tour. And for all my readers that may have missed out winning a copy of my book. You can purchase it at the Annie’s Craft Store or on Amazon.com.
Hi everyone. My book “Wraps for All Seasons” is going on a blog tour. We will be making 6 stops for this tour. Each of the bloggers will be giving away a copy of the book, so be sure to visit them to see what they have to share with you about my book.
Stop #5 is the absolutely amazing Jessie Rayot of Jessie-At-Home.com. I had the honor 3 years ago of being Jessie’s CGOA Mentor, though frankly, this talented and driven woman didn’t need much mentoring. She has amazing designs in Crochet and Knit.
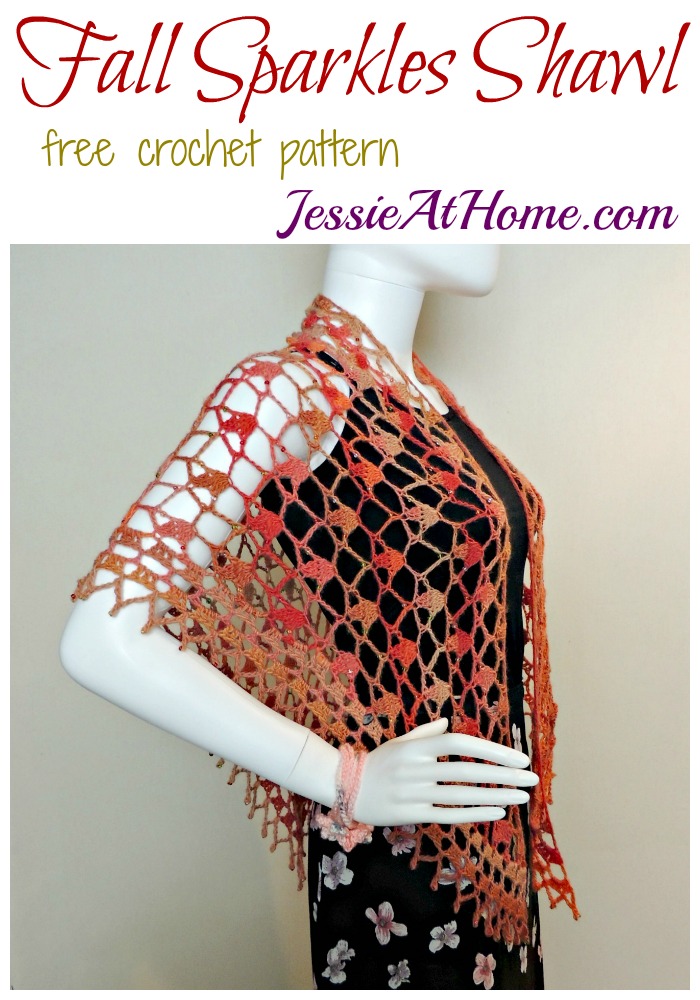
Jessie has lots of lovely patterns available on her site. Like her gorgeous “Fall Sparkles Shawl”. The shawl uses a pretty lace work pattern, simple elegant border and beads for a bit of bling. It would make a great gift for the holidays or make it for yourself to wear to a party.
Or if you are feeling the chilly weather heading into winter, the “Holiday Poncho” might be just the ticket. Snugly warm, stylish look and simple construction. What more could any crocheter ask for? Be sure to hop on over to Jessie’s site to check out these patterns and enter to win a copy of my book.
The last stop for the “Wraps for All Seasons” blog tour will be next Friday, November 18th.
Hi everyone. My book “Wraps for All Seasons” is going on a blog tour. We will be making 6 stops for this tour. Each of the bloggers will be giving away a copy of the book, so be sure to visit them to see what they have to share with you about my book.
Stop #4 is with the amazing Tamara Kelly of Mooglyblog.com. Tamara and I met for the first time in real life at the 2014 CGOA conference in Manchester, NH. Since then we have gotten to be good friends and enjoy talking crochet and kids together. Tamara is a genius at designing simple fun projects that work up quickly, check out her blog for all kinds of patterns and crochet information.
I think this Tidal Wave Shawl is so fun. It is crocheted with simple stitches and shaping that even a beginning crocheter can tackle. The added drama comes from the color changes you work in the last half of the project. Think of all the beautiful color combinations you could use! I’m thinking it could even be a great “stash buster”, since who says you need to stick to 2 colors only.
For those of you that prefer making afghans and blankets, you’ll love the Happiest Blanket Ever. This is another fun “stash buster” project that you can play with color in. Tamara has provided sizing information in the pattern, so you can make the size that is just right for you.
The next stop for the “Wraps for All Seasons” blog tour will be this Friday, November 11th.
Hi everyone. My book “Wraps for All Seasons” is going on a blog tour. We will be making 6 stops for this tour. Each of the bloggers will be giving away a copy of the book, so be sure to visit them to see what they have to share with you about my book.
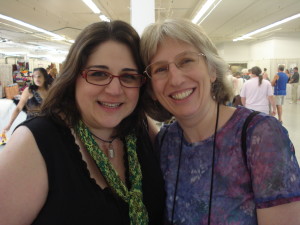
Stop #3 is with the brilliant, kind and talented Karen Whooley. As many of my long-time readers know, Karen is not only an incredible designer of both Crochet and Knit patterns, she was my CGOA mentor when I first began the journey of becoming a crochet designer myself.
This photo is the two of us in 2010 at the Manchester CGOA conference. We’ve both changed a lot in our appearance, but our friendship is still strong. She is one of the people I can really depend on in my life to tell me when an idea or design is utter garbage, so I know when she has good things to say I’ve earned it. It’s good to have folks that keep you on your toes.
Karen is a marvelous teacher and many of the books she has written over the years reflect that. She is the rock star of crocheted socks, she has all styles of sock patterns available in her shop on her website. I had a hard time picking a favorite, but I do love her “Mix and Match Toe-Up Socks” as the best pattern to purchase for the beginning of learning to crochet socks.
Check out her beautiful pattern for the “Spring Leaf Shawlette”. This shawl is worked from side to side including the lace border, so once you reach the end of the rows you are finished. Definitely a good pattern to add to your shawl pattern collection. You can purchase it over on her website.
The next stop for the “Wraps for All Seasons” blog tour will be next Tuesday, November 8th.
Hi everyone. My book “Wraps for All Seasons” is going on a blog tour. We will be making 6 stops for this tour. Each of the bloggers will be giving away a copy of the book, so be sure to visit them to see what they have to share with you about my book.
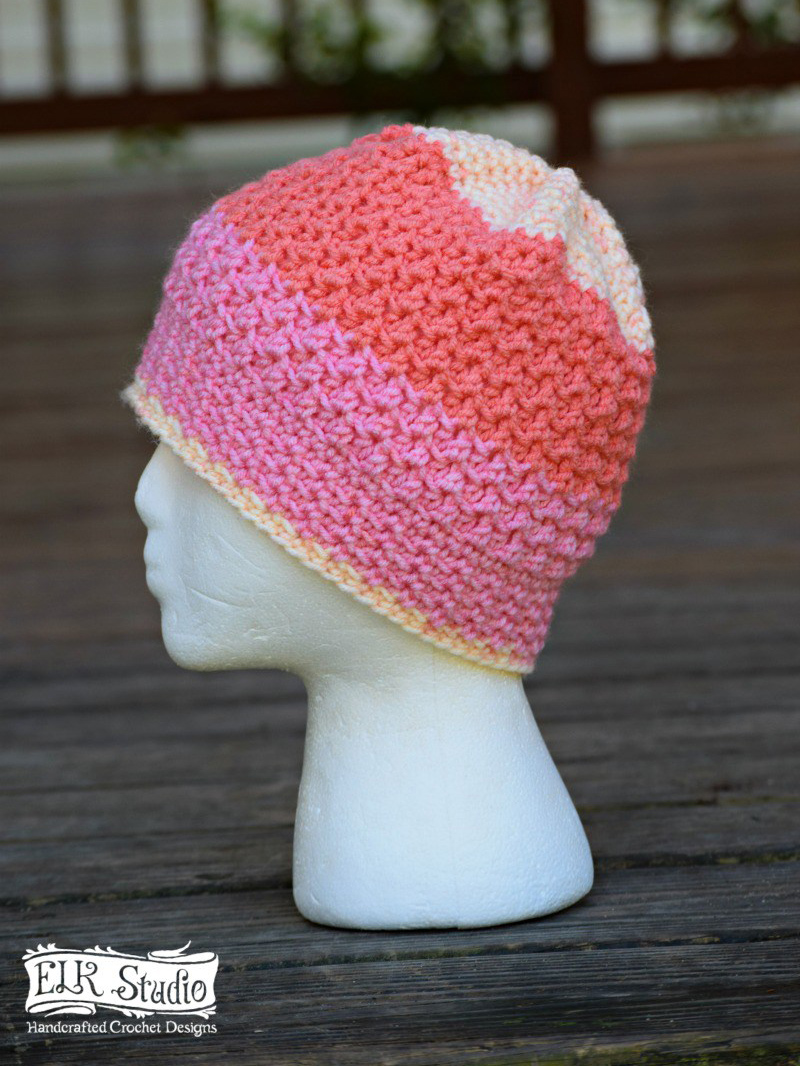
Check out Kathy’s awesome hat pattern “Swirling Pebbles”. This hat is part of her Christmas Present CAL that she has put together to help her readers get a jump on holiday gift making. A quick project with a fun yarn that does all the color changing for you.
If you’ve been wanting to try out a pattern for a super scarf you’ll love her pattern for “The Woodman Super Scarf”. This design has a load of texture worked in 3 different colors of Red Heart Soft Yarn. Kathy chose Black, Charcoal and White for her sample, but with the wide range of colors in the Soft Yarn line you’ve got all sorts of options.
The next stop for the “Wraps for All Seasons” blog tour will be next Friday, November 4th.
Hi everyone. My book “Wraps for All Seasons” is going on a blog tour. We will be making 6 stops for this tour. Each of the bloggers will be giving away a copy of the book, so be sure to visit them to see what they have to share with you about my book.
Elena is a talented designer and has lots of fun patterns available on her blog, like her “Amazing Grace Blissful Slouchy Hat”. This design is part of her Amazing Grace series and you might recognize the fancy stitch pattern from the headband I crocheted awhile back.
That was from her “Amazing Grace Headband” pattern. You can find the whole series of Amazing Grace Patterns on her blog, just look at the top of the page for the tab to take you there.
And her “Effortless Chic Poncho”. The gorgeous striping came from the yarn Elena picked, Plymouth Encore Dynamo in Color #020. Beautiful and the yarn does the heavy lifting, so you get a relaxing time crocheting.
The next stop for the “Wraps for All Seasons” blog tour will be next Friday, October 28th.
No, I haven’t turned into a bunny (or a 1950s teeny-bopper), but I am participating in a fun Flash Giveaway Blog Hop. What in the world is that? So glad you asked.
A Blog Hop is when you visit one blog site and at the end of the post is a link to the next stop. So you “hop” over to the next stop and so forth. No matter which blog you start at you’ll hop around in a circle, so you’ll get to visit each of the blogs on the tour.
The 8 designers in this hop are each giving away a free pattern. You just have to visit their site to get the coupon code or link for the pattern, but it is only good for 24 hours. This hop goes from September 1, 2015 at 1 p.m. Eastern Standard Time to 1 p.m. (EST) September 2, 2015.
Before you go clicking around this fab hop, please remember: You are very welcome and encouraged to share the link to this post with your friends on social media and message boards! But please do NOT share the coupon codes themselves. It’s the visitors to our blogs that allow us to make these patterns free today, so click, share the blog link, and enjoy!
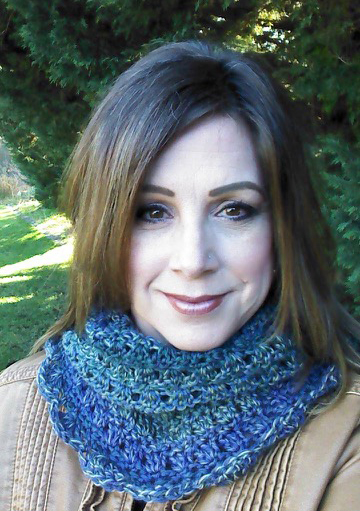
For this hop I picked my Anna Moebius Cowl pattern. I know many of you are likely feeling the pressure of picking projects to make presents for the upcoming gift-giving season, and this is a wonderful quick one that makes a lovely gift. This pattern is normally available thru my Ravelry shop for $3.99 but for the 24 hours of the Flash Giveaway Blog Hop it is FREE. Just use the coupon code FGBHAnna in my Ravelry shop between 1 p.m. (Eastern Standard Time) September 1 and 1 p.m. (EST) September 2, 2015.
If you’ve never used a coupon code on Ravelry before it’s really easy.
Go to the pattern page on Ravelry and click the “Add to Cart” button or the “Buy Now” button.
You’ll get a nifty shopping cart box.
In the new box, look for the little tag that says “use a coupon code”.
Click on that tag, you’ll get a spot to enter the coupon code.
Once you’ve entered the code the price will be adjusted to zero.
National Crochet Month is zipping by, and I am honored to be celebrating by participating again in the Crochetville NaCroMo 2015 Blog Tour. Amy Shelton and Donna Hulka are terrific supporters of the crochet community and designers.
Amy and I in Reno at the Knit & Crochet Show (yes, she is wearing a tiara)
I’ve met both of them in person thru the Crochet Guild of America (CGOA) and have spent many fun and often inspiring hours in their company.
One of my favorite things about being a member of the CGOA is how it has put me in touch with lots of other crocheters. I’ve met many wonderful crochet friends thru my involvement in CGOA, like Amy and Donna. It’s great fun to be with your “people”, folks that understand this love of playing with yarn. If you haven’t joined CGOA you may want to consider doing so, the annual conference is great fun to attend, but there is even more. Opportunities to meet up locally with other crocheters and to meet online on the CGOA website. The website is: Crochet.org.
As the owners and creators of the Crochetville community and dedicated CGOA members themselves, Amy and Donna are always aware of the importance of supporting others thru charitable work. This year’s blog tour charity project is making hats (or making a monetary donation) for Halos of Hope.
Halos of Hope is a 501(c)3 not-for-profit organization committed to providing volunteer-crafted hats to cancer centers across the country. You can make and send in hats to Crochetville in Alabama or donate money to help Halos of Hope pay for shipping hats to the centers. You can find the mailing address and read more about this project on the Crochetville blog.
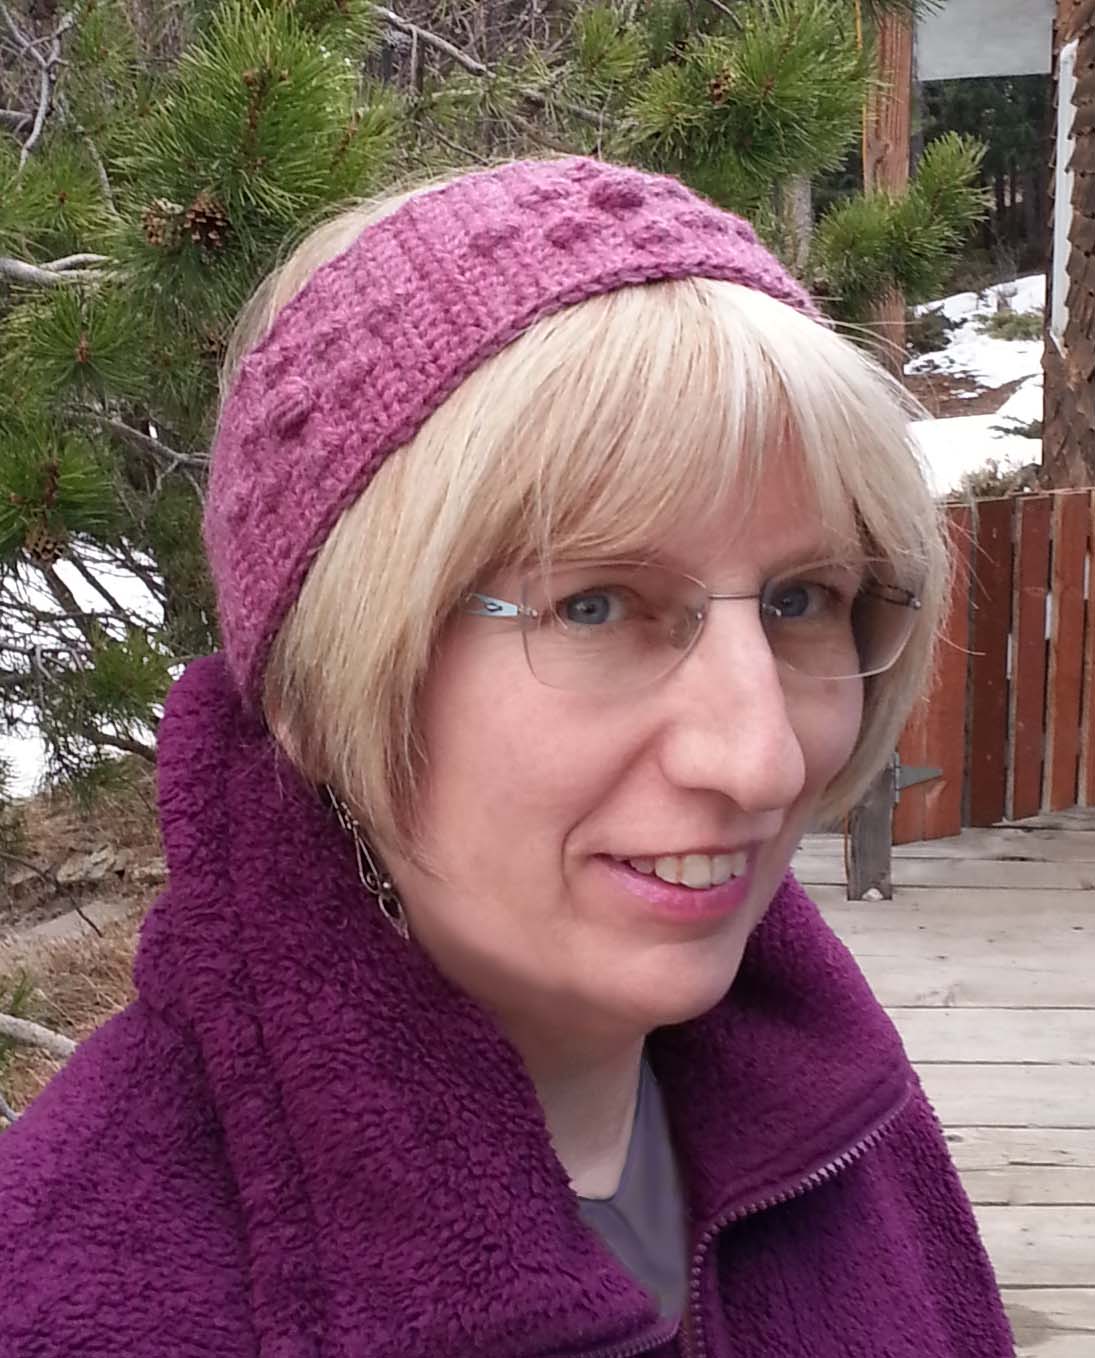
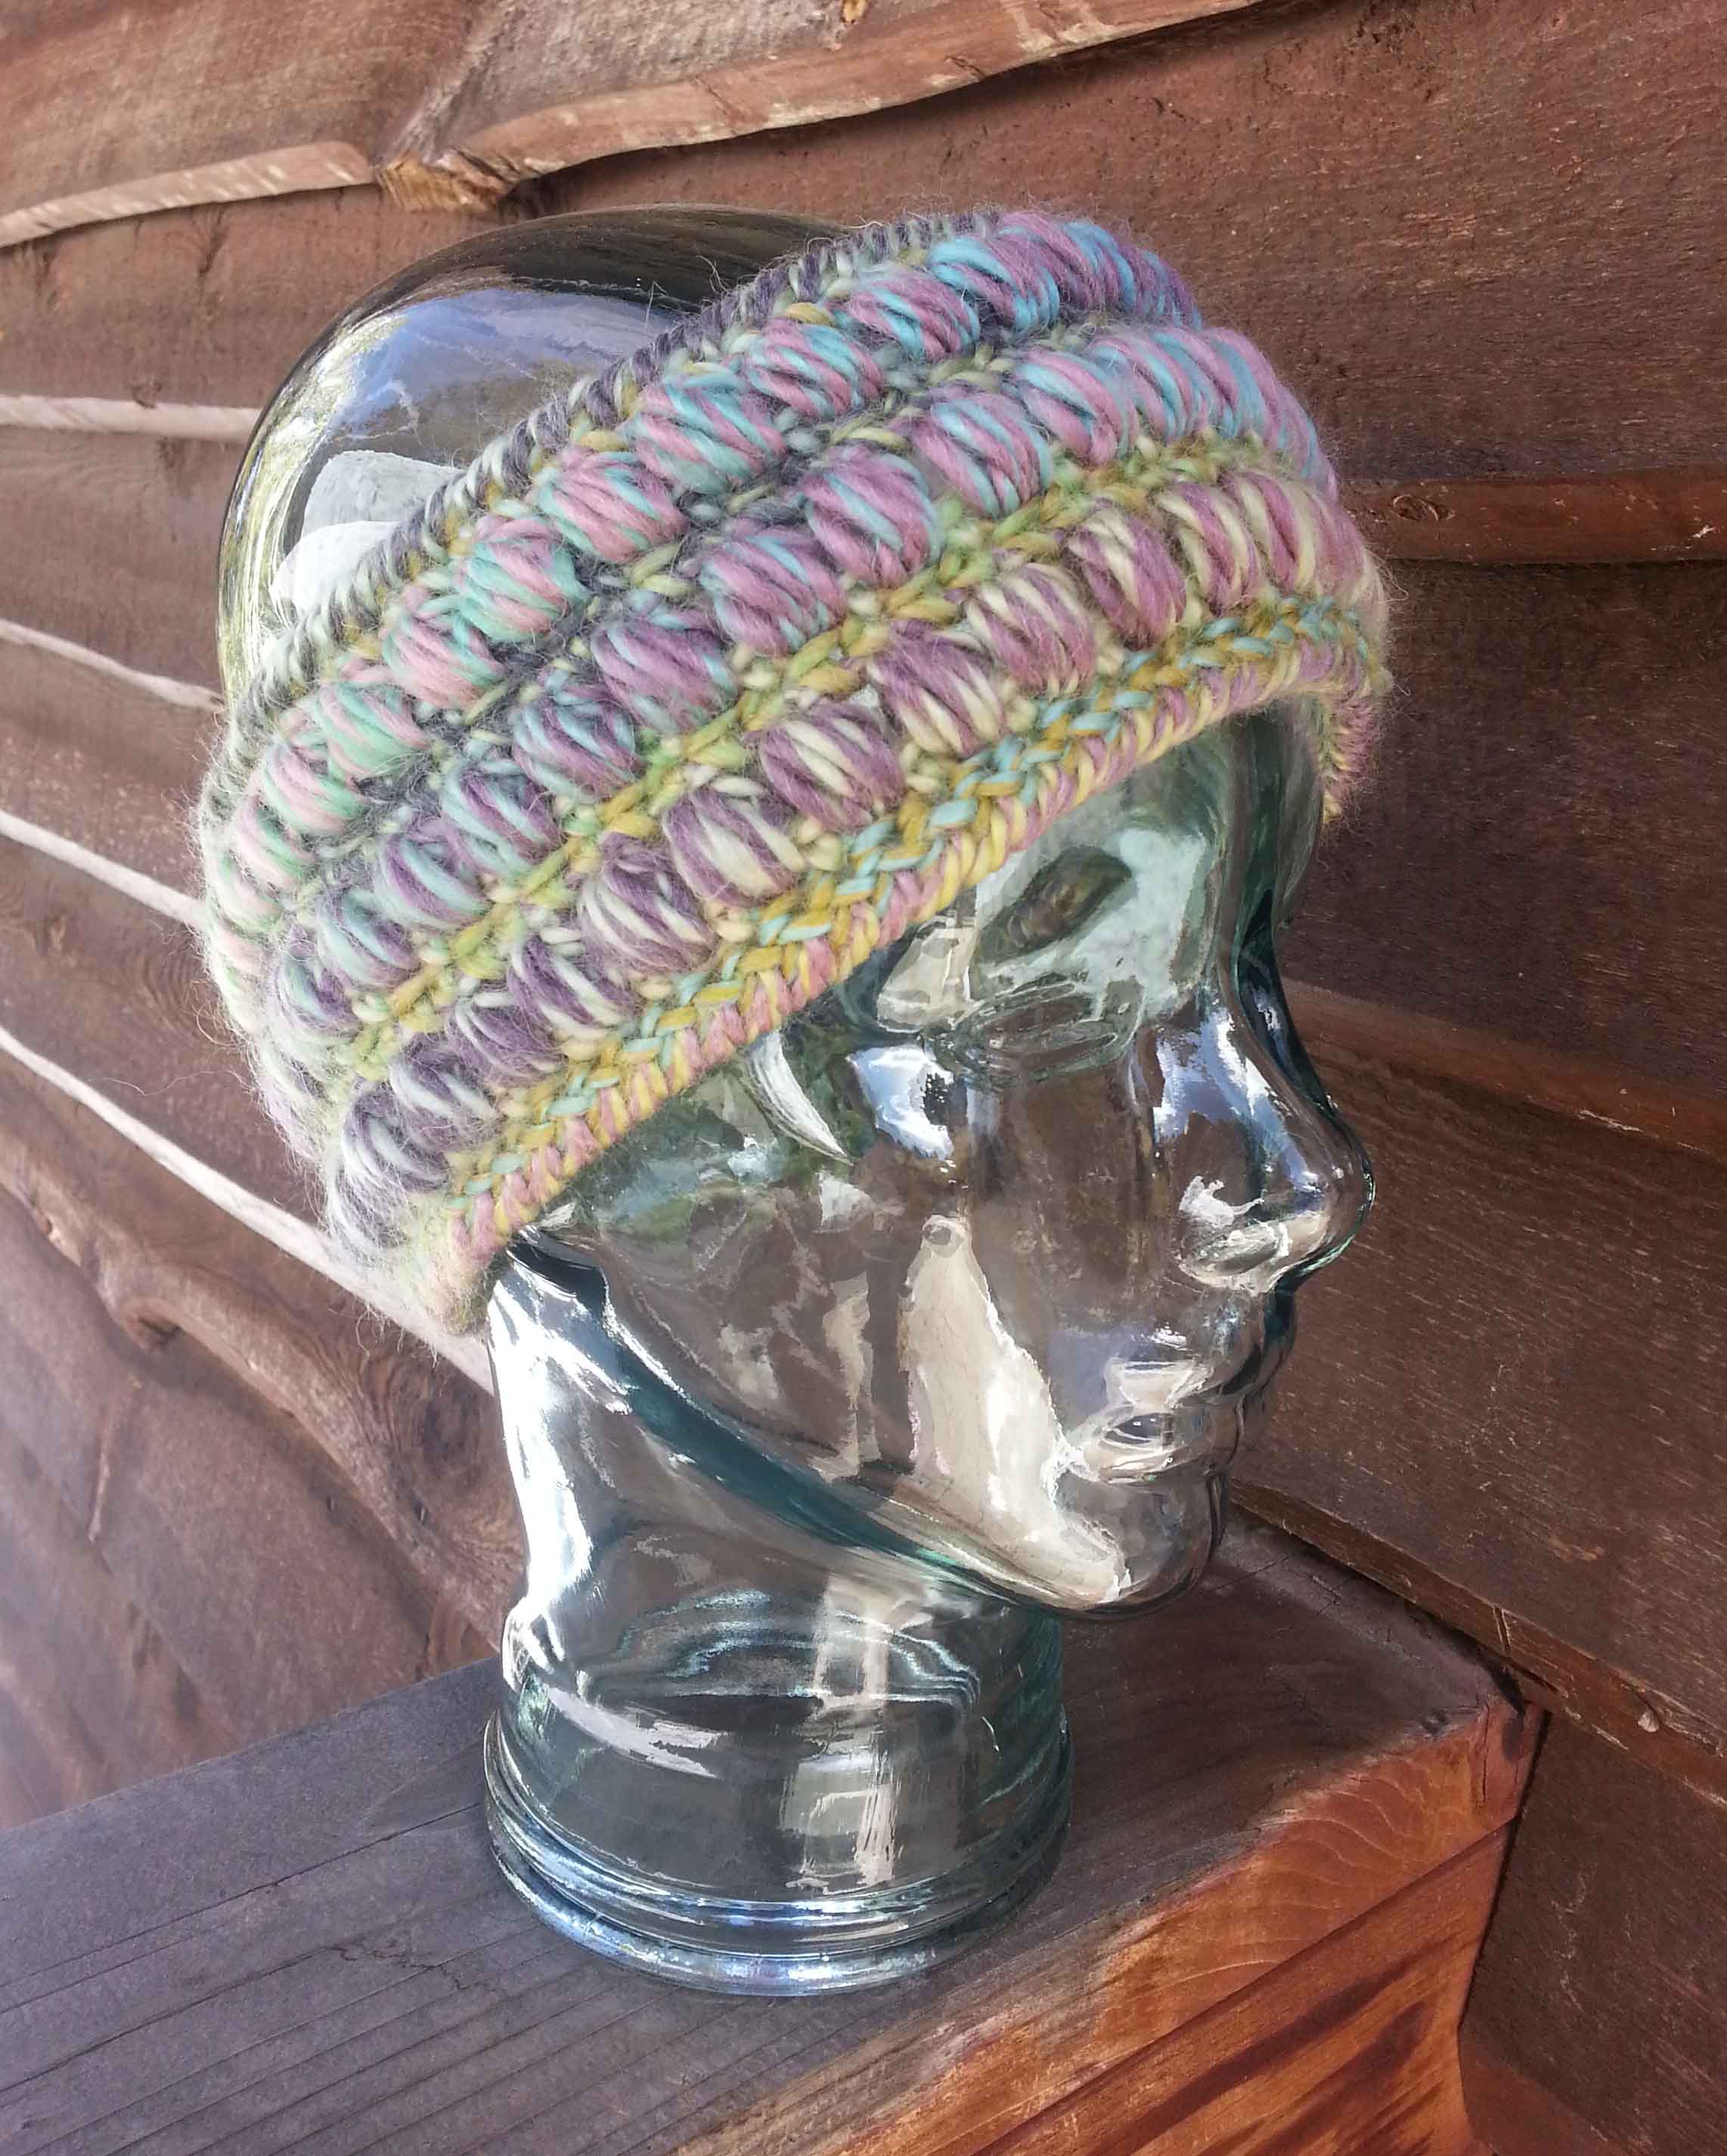
Hats are one of my favorite projects to work on but with this recent spring like weather I’m looking at transitional pieces. Headband/Headwrap/Earwarmers (I’m never 100% sure what to call them) are a great choice. I love them during the transitional seasons because they easily fit in a pocket and are a great way to keep my ears warm if the weather gets chilly. They also help keep my hair under control when the wind gets too blustery.
I tend to have light weight gloves and a headband tucked into the pockets of every jacket. Since I recently got my hair cut into a very short 1920’s style bob, headbands can also look quite stylish. In celebration of NatCroMo I’m offering this fun textured headband pattern to my visitors. I’ve used a lot of textured stitches in this project which helps make the fabric even warmer.
This is an intermediate level pattern, but it’s a great project to expand your skills with. I’m including a tutorial on making cluster and puff stitches here for those of you feeling like tackling a new crochet skill. For those of you that already have some experience with cluster and puff stitches the “Special Stitches” section in the pattern should be sufficient to get you started.
Cluster Stitch Tutorial
The cluster stitch for our headband has more texture to it because it is framed on either side by a shorter stitch, the half double crochet. If cluster stitches are worked with spaces and/or taller stitches on either side they are a bit flatter and more of a decorative grouping that doesn’t rise as far above the surface of the work.
The textured “bump” of a cluster stitch as used in this headband sits on the back side of your row, for a single sided project you want to work them only on alternate rows in the project.
In this headband project we are using a 3 dc cluster stitch to create our textured stitches. In a cluster stitch you make the base of the 3 dcs being used, then work the final dc step for all 3 in one go.
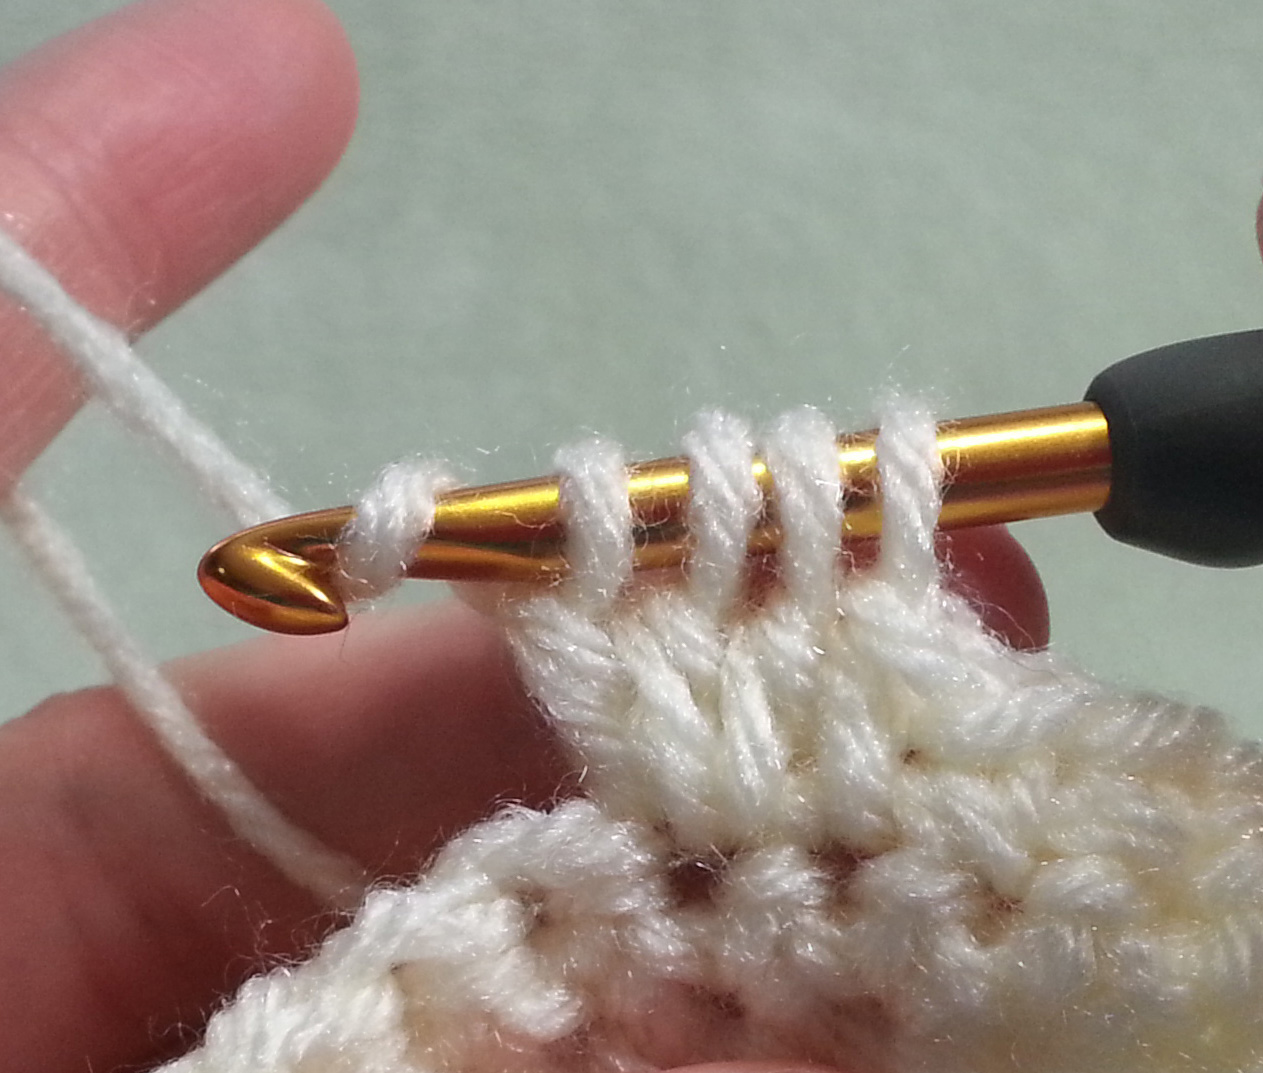
Photo A
To make a 3 dc cluster st, yarn over (yo) like making a dc and insert in st or sp, yo, pull up a loop (3 loops on hook), yo {Photo A},
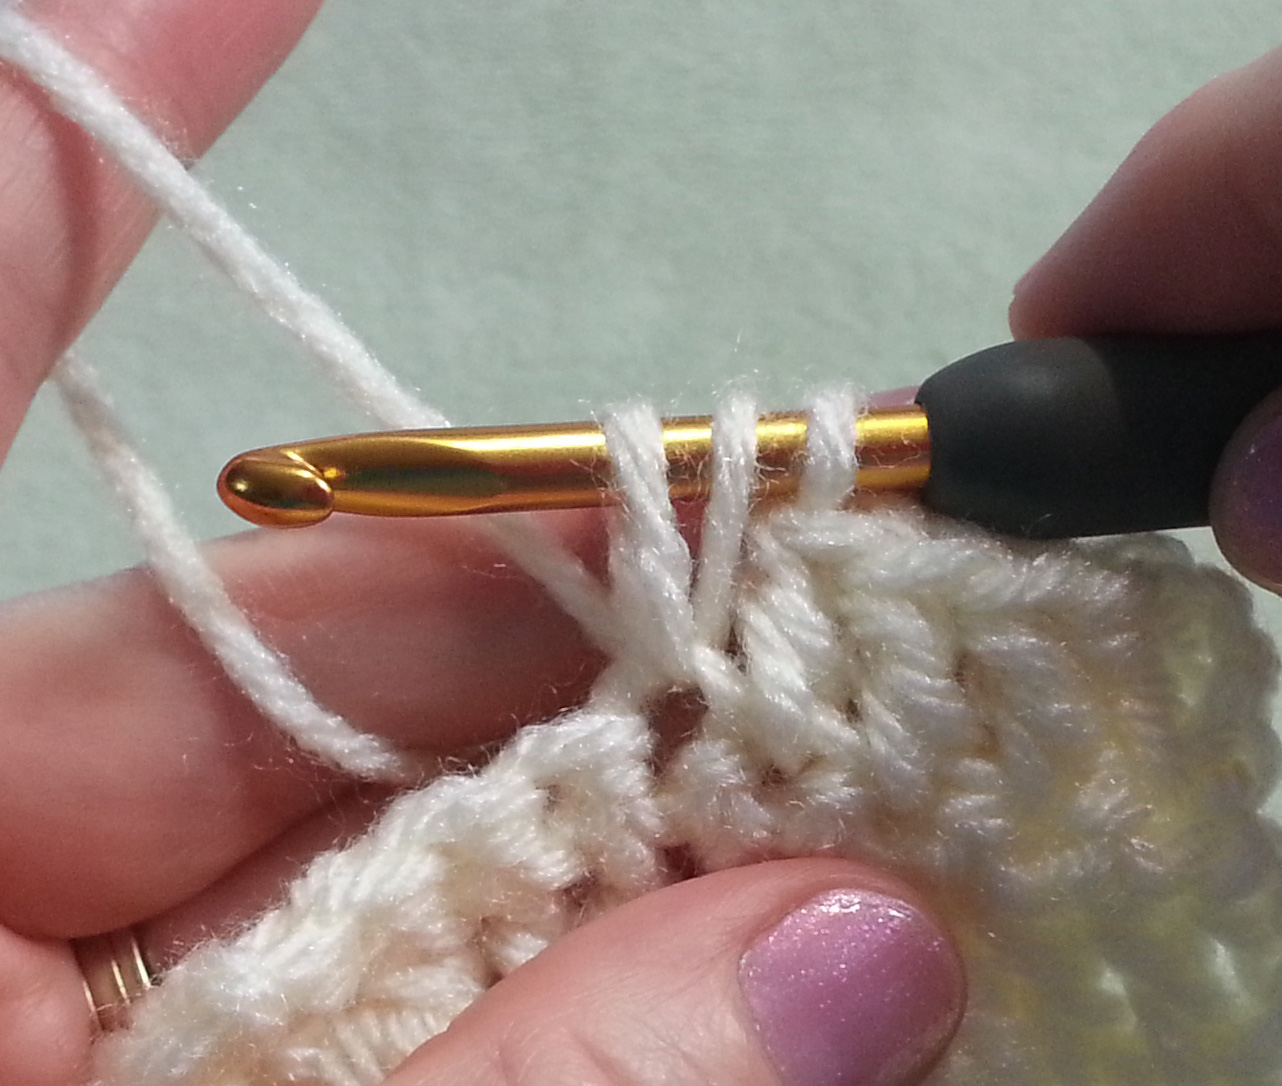
Photo B
pull thru 2 loops on hook (2 loops remaining on hook, 1st base made), yo, insert in same st or sp, yo, pull up a loop (4 loops on hook), yo {Photo B},
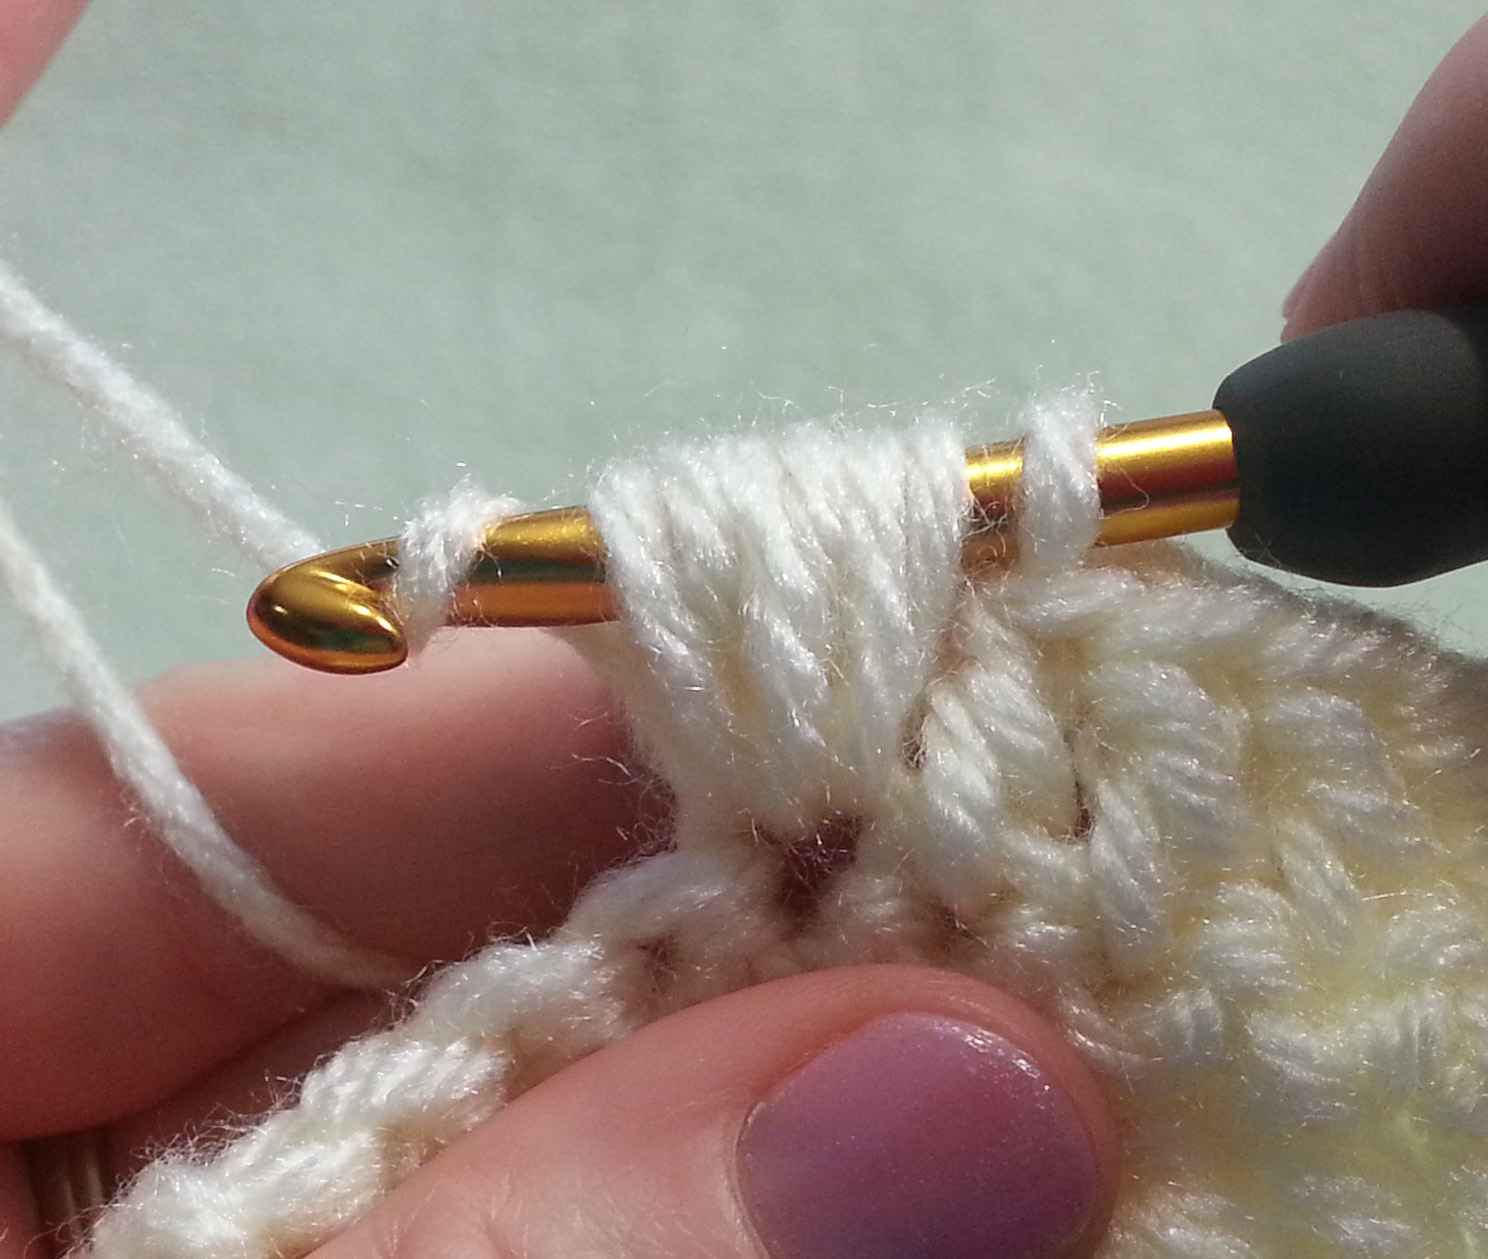
Photo C
pull thru 2 loops (3 loops remaining on hook, 2nd base made), yo, insert in same st or sp, yo, pull up a loop (5 loops on hook), yo, pull thru 2 loops (4 loops remaining on hook, 3rd base made), yo {Photo C}, pull thru all 4 loops on hook.
Puff Stitch Tutorial
This stitch is often a challenge to get right. The primary trick is getting all of your loops to the same length. That can be particularly challenging if you crochet tightly, so remember to keep your work loose.
Puff stitches tend to sit centered in the fabric, which makes them a great stitch to use in scarves, since the texture is visible on both sides of your fabric. In the case of this headband project we are framing the puff stitches with hdc stitches. Like with our cluster stitches this “framing” helps the stitch sit on the backside of the row and creates a 3D effect on the finished project.
There are a number of ways to make a puff stitch, the version I use in this project is secured at the top similar to making a single crochet (I think of these as “locked” puff stitches). For this project you will be making 5 “wraps” for the puff part. Each time you do a “wrap” you get 2 more loops on your hook.
Photo D
Yarn over (yo) and insert your hook in the indicated st or sp, yo, pull up the 2 loops to above the top of your previous st {Photo D},(yo, insert hook in the same st or sp, yo, and pull up the 2 new loops to the same height of the previous loops) 4 times.
Photo E
You will have 11 loops on your hook*, 10 tall loops for the “puff” and the original working loop. Yo {Photo E} and pull thru the 10 tall loops,
Photo F
you will have only 2 loops on your hook, yo {Photo F}, pull thru the last 2 loops, your puff stitch is complete.
* A peek into the design process: For the eagle-eyed amongst my visitors, you may have noticed in the photos for this tutorial I have only 7 loops on my hook at this point. This is because I made a change in the pattern after I shot the photos. Originally I thought I would like the 3 wraps for my puff stitches, but they weren’t dramatic enough for me in the sample. So I changed it for the final sample and pattern.
SPRINGTIME HEADBAND
designed by Andee Graves
SKILL LEVEL: Intermediate
FINISHED MEASUREMENTS
Headband is approximately 3.25”/8.125cm wide x 22”/55cm long.
#139 Dark Rose Heather sample used 31g/aprx 72 yards = approximately 2 Headbands from 1 skein
CROCHET HOOKS
Size US 7 / (4.5mm)
ADDITIONAL MATERIALS
Stitch markers
Yarn needle
GAUGE
6 rows & 9 sts in hdc = 2”
SPECIAL STITCHES
3 DC Cluster Stitch (Cl): (Yo, insert hook into indicated st or sp, yo, pull up a loop, yo, pull thru 2 loops on hook) 3 times, yo, pull thru 4 loops remaining on hook.
Puff Stitch (Puff): (Yo, insert hook into indicated st or sp, yo, pull up a loop to desired height) 5 times, 11 loops on hook, yo, pull thru 10 loops on hook, 2 loops left on hook, yo, pull thru remaining 2 loops on hook.
Half Double Crochet 2 Together (hdc2tog): Yo, insert hook into indicated st or sp, yo pull up a loop, insert hook in next st, yo pull up a loop, yo pull thru all 4 loops on hook.
NOTES
The Cluster stitches and Puff stitches in this project have more texture because they are “squished” between 2 shorter stitches. The texture is created on the back of the rows. The finished project will have the textured side as the right side of the fabric.
Once the first 65 rows of the headband are crocheted, edging is worked along one edge, then ends of headband are seamed together using slip stitches to reach 2nd side, then 2nd side edging is worked.
INSTRUCTIONS
Row 1: Ch 11, turn, working in back bumps, hdc in 3rd ch from hook and each ch back to beginning. [9 hdcc]
Row 2 (RS): Ch 2 {turning ch only, does not count as st here and thru-out the pattern}, turn, hdc in each st across. PM on front of row to mark right side. [9 dc]
Rows 3- 7: Repeat Row 2.
Row 8: Ch 2, turn, hdc next st, 2 hdc next st, hdc next 5 sts, 2 hdc next st, hdc last st. [11 hdc]
Row 9: Repeat Row 2. [11 hdc]
Row 10: Ch 2, turn, hdc next st, 2 hdc next st, hdc next 7 sts, 2 hdc next st, hdc last st. [13 hdc]
Rows 11 – 16: Repeat Row 2. [13 hdc]
Row 17: Ch 2, turn, hdc next 6 sts, Cl next st, hdc next 6 sts. [12 hdc, 1 Cl]
Row 18: Repeat Row 2.
Row 19: Ch 2, turn, hdc next 4 sts, Cl next st, hdc next 3 sts, Cl next st, hdc next 4 sts. [11 hdc, 2 Cl]
Row 20: Repeat Row 2.
Row 21: Ch 2, turn, hdc next 2 sts, Cl next st, hdc next 3 sts, Puff next st, hdc next 3 sts, Cl next st, hdc next 2 sts. [10 hdc, 2 Cl, 1 Puff]
Row 22: Repeat Row 2.
Row 23: Repeat Row 19.
Row 24: Repeat Row 2.
Row 25: Repeat Row 17.
Rows 26 – 28: Repeat Row 2.
Rows 29 – 52: Repeat Rows 17 – 28, twice.
Rows 53 – 55: Repeat Row 2.
Row 56: Ch 2, turn, hdc next st, hdc2tog next st, hdc next 7 sts, hdc2tog next st, hdc last st. [11 hdc]
Row 57: Repeat Row 2.
Row 58: Ch 2, turn, hdc next st, hdc2tog next st, hdc next 5 sts, hdc2tog next st, hdc last st. [9 hdc]
Rows 59-65: Repeat Row 2. Do not fasten off, Secure working loop so work doesn’t come unraveled.
EDGING
Side 1: Ch 1, with RS facing turn band to work along first edge, work sc in side of Row 1, then work 98 sc spaced evenly along edge in ends of rows (3 sc in the ends of the every 2 rows), sl st to first sc in round.
Align ends of band, RS together sl st loosely working thru both the top of sts in Row 65 and bottom of sts in Row 1 across to second edge.
Side 2: Turn work with RS facing and work along edge, ch 1, work 99 sc spaced evenly along edge in ends of rows, sl st to first sc in round. Fasten off.
FINISHING
Weave in ends. Block lightly, if desired.
Now you are ready to make a bunch of these headbands to be ready for those cooler spring days. Have a great time crocheting and keep celebrating crochet everyday.
For those of you that have been following my blog for a while, you have read about Karen Whooley on here before. I was very fortunate when I signed up to become a CGOA Associate Professional (in 2009) that I got Karen as my mentor. It was a somewhat random pairing that turned out to be very fortuitous. We have so much in common and get along great. I graduated from being Karen’s mentee, but she has become a good friend and colleague in the crochet business.
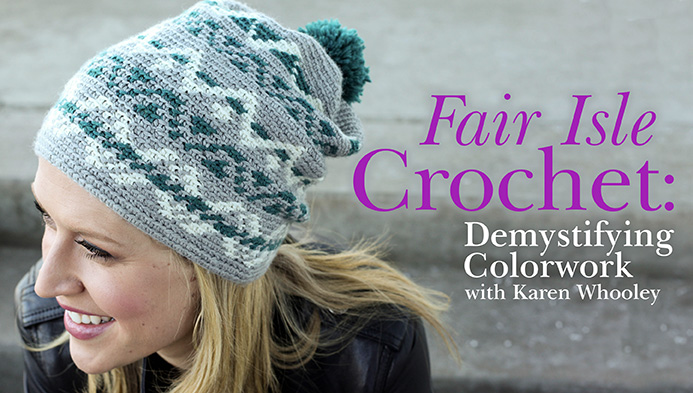
Today I’m pleased to be a part of the blog tour for Karen’s new class with Craftsy.com, Fair Isle Crochet: Demystifying Colorwork. I’ve taken classes with Karen at the Knit & Crochet Show and the Crochet at Cama Retreat. She is an amazing teacher with a comprehensive understanding of her craft and endless kindness and patience in teaching it to others.
And Karen has provided a fabulous gift for you my dear readers, you can use this link: 50% off the fee for the Fair Isle Crochet at Craftsy.com
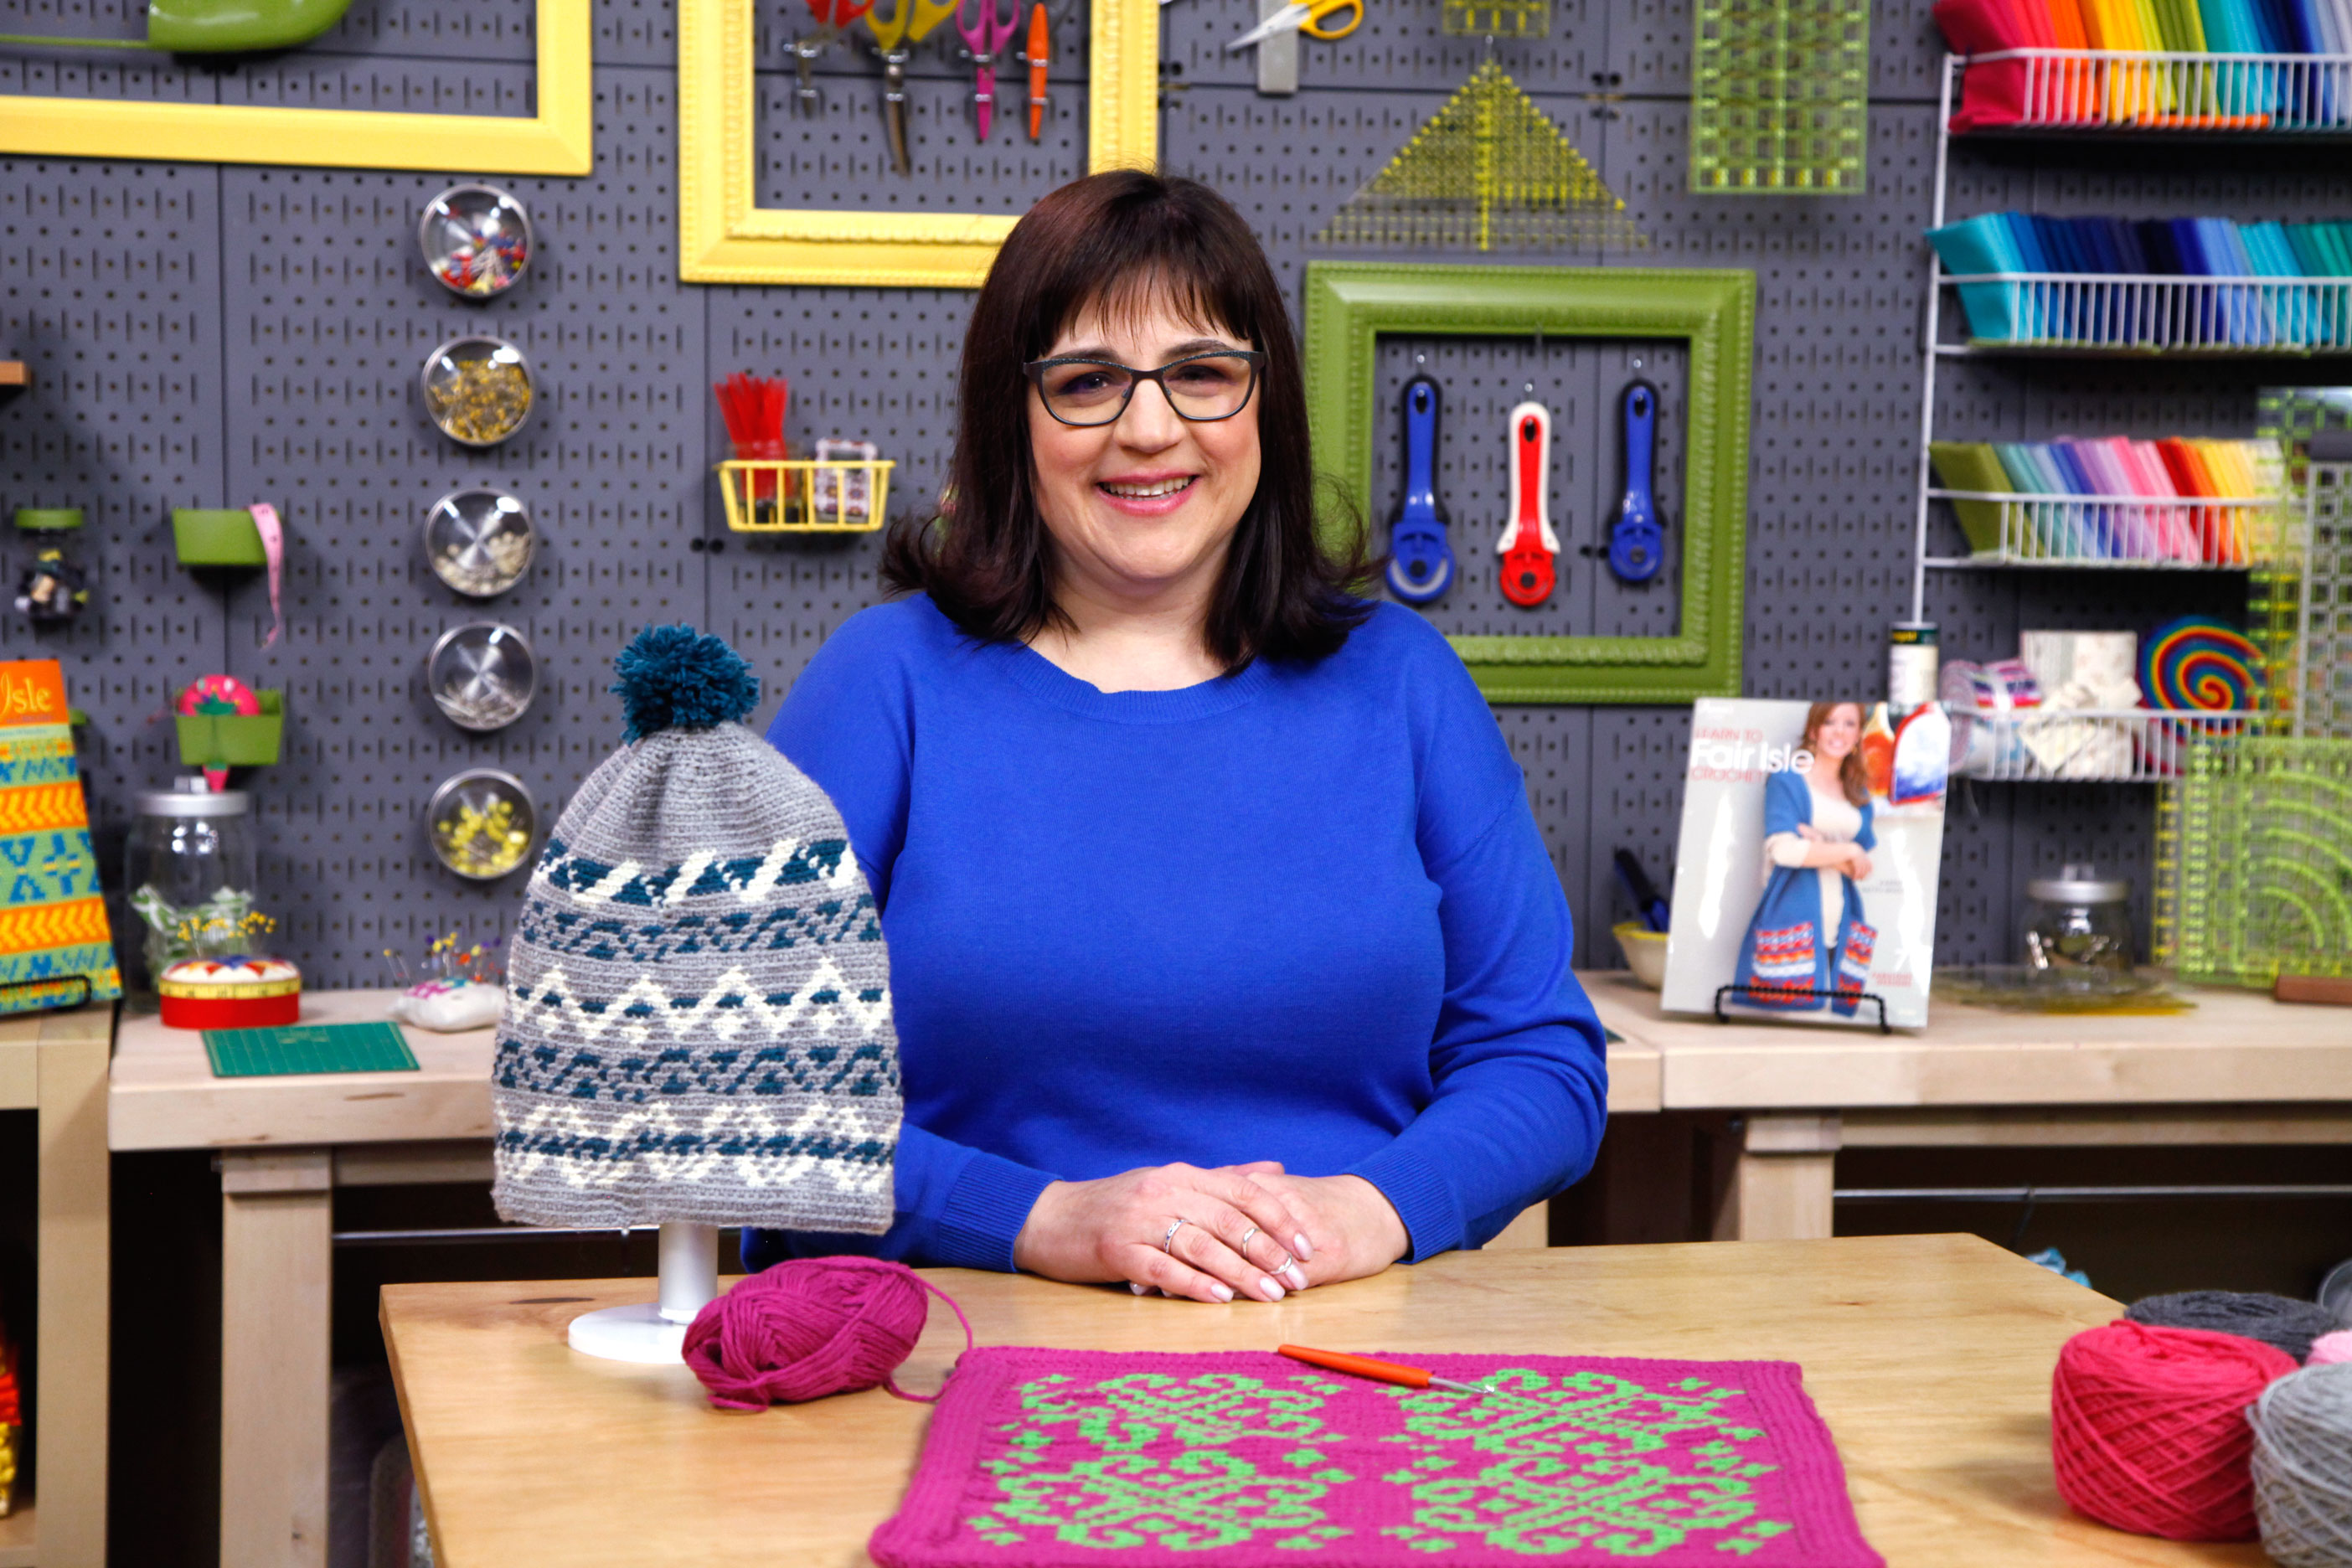
The wonderful Karen Whooley photo courtesy of Craftsy.com
I’ll definitely be taking this class at Craftsy myself very soon, but for this blog tour I wanted to interview Karen. It’s always fun to interview my friends in the industry because I learn about aspects of their crochet (or knitting) journey that I hadn’t known before. So without further fanfare, here is my interview with Karen:
When did you learn to crochet and who taught you?
I learned to crochet in 1974! My Italian Grandmother who was way ahead of her time thought my sister and I watched too much TV. I was 7 years old when she put that hook in my hand. In 2 hours I had made a covered coat hanger with the traditional colors of the 70s – greens and golds.
Are you willing to tell us how long you’ve been crocheting? And if Yes, how long has it been?
This summer it will be 40 years! ACK!
How long have you been teaching Crochet?
I’ve been actively teaching crochet since about 1998 or 1999. At first it was with smaller groups in the San Fransisco Bay area, then in 2000 my family moved to Washington state and I started teaching at local shops in 2001. I started teaching on a national level in 2004!
Who were your first students?
My first students were friends in my neighborhood in California. When I got to WA, I took over teaching at a local store called Pacific Fabrics and Crafts from a fellow Guild member and designer who decided to retire. You may have heard her name, Bev Dillon
What inspires you to teach crochet?
I grew up in a teacher’s household. My mom taught 1st grade for 9 years before I was born. Then she returned to teaching (the 3rd grade) once I got to High School. So teaching is in my blood! But I specifically teach Crochet because it is a craft I want to see go on forever!
When I learned to crochet, my grandmother and I were the only two people I knew that crocheted. In 1996, when I became a stay at home mom after the birth of my first child, I discovered the whole world of crochet out there on a Compuserve List-Serve group called Crochet Partners! (Am I dating myself?) But all those years of not knowing many people in the world that crocheted, when I was given the opportunity to teach… I did!
Did your mom give you advice on teaching when you started teaching crochet?
Mom didn’t so much give me tips as much as my watching her in action in the classroom. Though growing up, she did tell me stories about how nervous she was that first year of teaching, not so much with the students but dealing with the parents. She just pushed through and got over the stage fright.
When I was working full-time as a System Support Engineer for a Company that developed Software for Dental Offices, however, I was asked to teach classes to our field personnel on the system. I was put in a class to help me get comfortable with that.
What inspired you to explore Fair Isle techniques in Crochet?
When I was a teenager, I had this beautiful bulky knit fair isle sweater. It just fascinated me. At the time, I didn’t know how to knit, but I was dying to learn so I could make my own sweaters using the Fair Isle motifs. It wasnt until I was 37 when I learned to knit, and then a couple of years later I learned stranded knitting. It was at that point I knew I could replicate fair Isle knitting in crochet! So after lots of trial and error (which I talk about in the class with samples!) I hit upon what I felt was the best replication I could get of Fair Isle stranded Knitting in crochet.
You knit and crochet, do you find Fair Isle easier in crochet or knitting?
Well, honestly it depends. Because I have been crocheting longer than knitting, I find it easier to crochet but knitting isn’t hard. The difference for me is that in knitting I have all those live stitches with the potential of dropping one or more. In crochet that isn’t a factor. Because both charts are the same and are read the same way, either one works for me and depending on the look I am going for, I will swap out one for the other.
I love the hat in the promotional photos for the class, was there a particular inspiration for that design?
Mostly it was that I wanted something that looked like a traditional Fair Isle knit hat. After pouring through Fair Isle motif dictionaries, I put together some of my favorites. I chose traditional greens and greys of the Shetland Islands and there was my hat!
The hat looks like something that would appeal to the teenagers in your house, are there requests being put in for hats from your family?
Funny you should ask. That hat is my 15-year-old daughter’s favorite piece from the class. Teal green is her favorite color. But she doesn’t want me to make it now as summer is coming. Probably for next year!
I know you must be really excited about offering classes thru Craftsy.com, what do you like the best about this style of teaching?
I think what I like the most is that the class is there forever. Students have the class to go back to for help or just to remind them of some part of Fair Isle Crochet they may have forgotten. The Computer geek in me loves the platform. The fact that they can take notes right on the video for themselves is just amazing. And those notes are there for them to access forever too!
I also love the fact that I can reach students all over the world! I don’t have that opportunity with teaching live. Lots of times I’ve gotten emails from potential students telling me that they cannot attend an event because it is just too far or too costly. They want to know if I am ever coming to their area. That isn’t always going to happen, so this way they can actually have me teach them in their living room! Or office, or even on the couch next to them!
Do you have a preference of designing or teaching?
That is a hard question because I love them both. Because of the way I was taught to crochet, by a non-English speaking grandmother, the techie in me loves the challenge of creating something from scratch. But there is something about that light bulb moment students get that gives me great satisfaction. It’s like a visual confirmation that the craft will continue.
Do you dream about crochet? About yarn?
Oh gosh, all the time! Some of my best design concepts come from dreams! Sometimes when a particular pattern is not working out, I get the solution in a dream. I cannot tell you how often that happens. In dreams and on the treadmill walking. Those are my two go to places when I need to work out something in crochet (or knit too!).
Thank you so much for taking the time to talk with me today Karen, I was wondering if you have any final words of encouragement for those that might be intimidated by Fair Isle and this class?
Thanks Andee for having me!
For those of you who may be intimidated by colorwork, this is definitely the class for you! During the class I break down every piece of the pattern, along with having tips in there for you. I have already had students who bought my Fair Isle books, only to be intimidated by all the color changing, send me photos of their swatches from the class. They are excited about how I walked them through the process.
The cool thing about these Craftsy classes is the platform. The “Pause” and “30 second repeat” options allow you to go back and see once again what I just showed you. And you can do that as many times as you need until you get the idea down. You can also ask me a question at any time, and I will be answering! So don’t be afraid to try it! I’m there to help along the way!
Today I’m honored to be a part of the 2014 Crochetville NatCroMo Designer Blog Tour. Amy Shelton and Donna Hulke of Crochetville included me last year in their National Crochet Month tour to celebrate crochet and it was great fun. These two are the right women to lead the celebration of all things crochet, visit them at the Crochetville site or their blog and you’ll know just what I mean.
My focus this year for NatCroMo has been teaching others to crochet. It’s been very exciting that my youngest son is learning. Above is his latest effort, he wanted to make a scarf so I got him started with the first row of this little V-stitch scarf and he is amazing me at how well he is doing. It’s also a great excuse for some cuddle time as we snuggle together on the sofa and crochet.
Today I will be at the Longmont Yarn Shoppe from 12p – 1:30p with my local CGOA Chapter showing folks how to get started crocheting. We will be making quick fun little beaded bracelets that students can make and take away with them. Beaded crocheted chains are a fun easy project that give beginners the chance to make something beautiful with minimal crochet skills.
Our projects for the “Make & Take” will use plain worsted weight yarn and plastic pony beads.
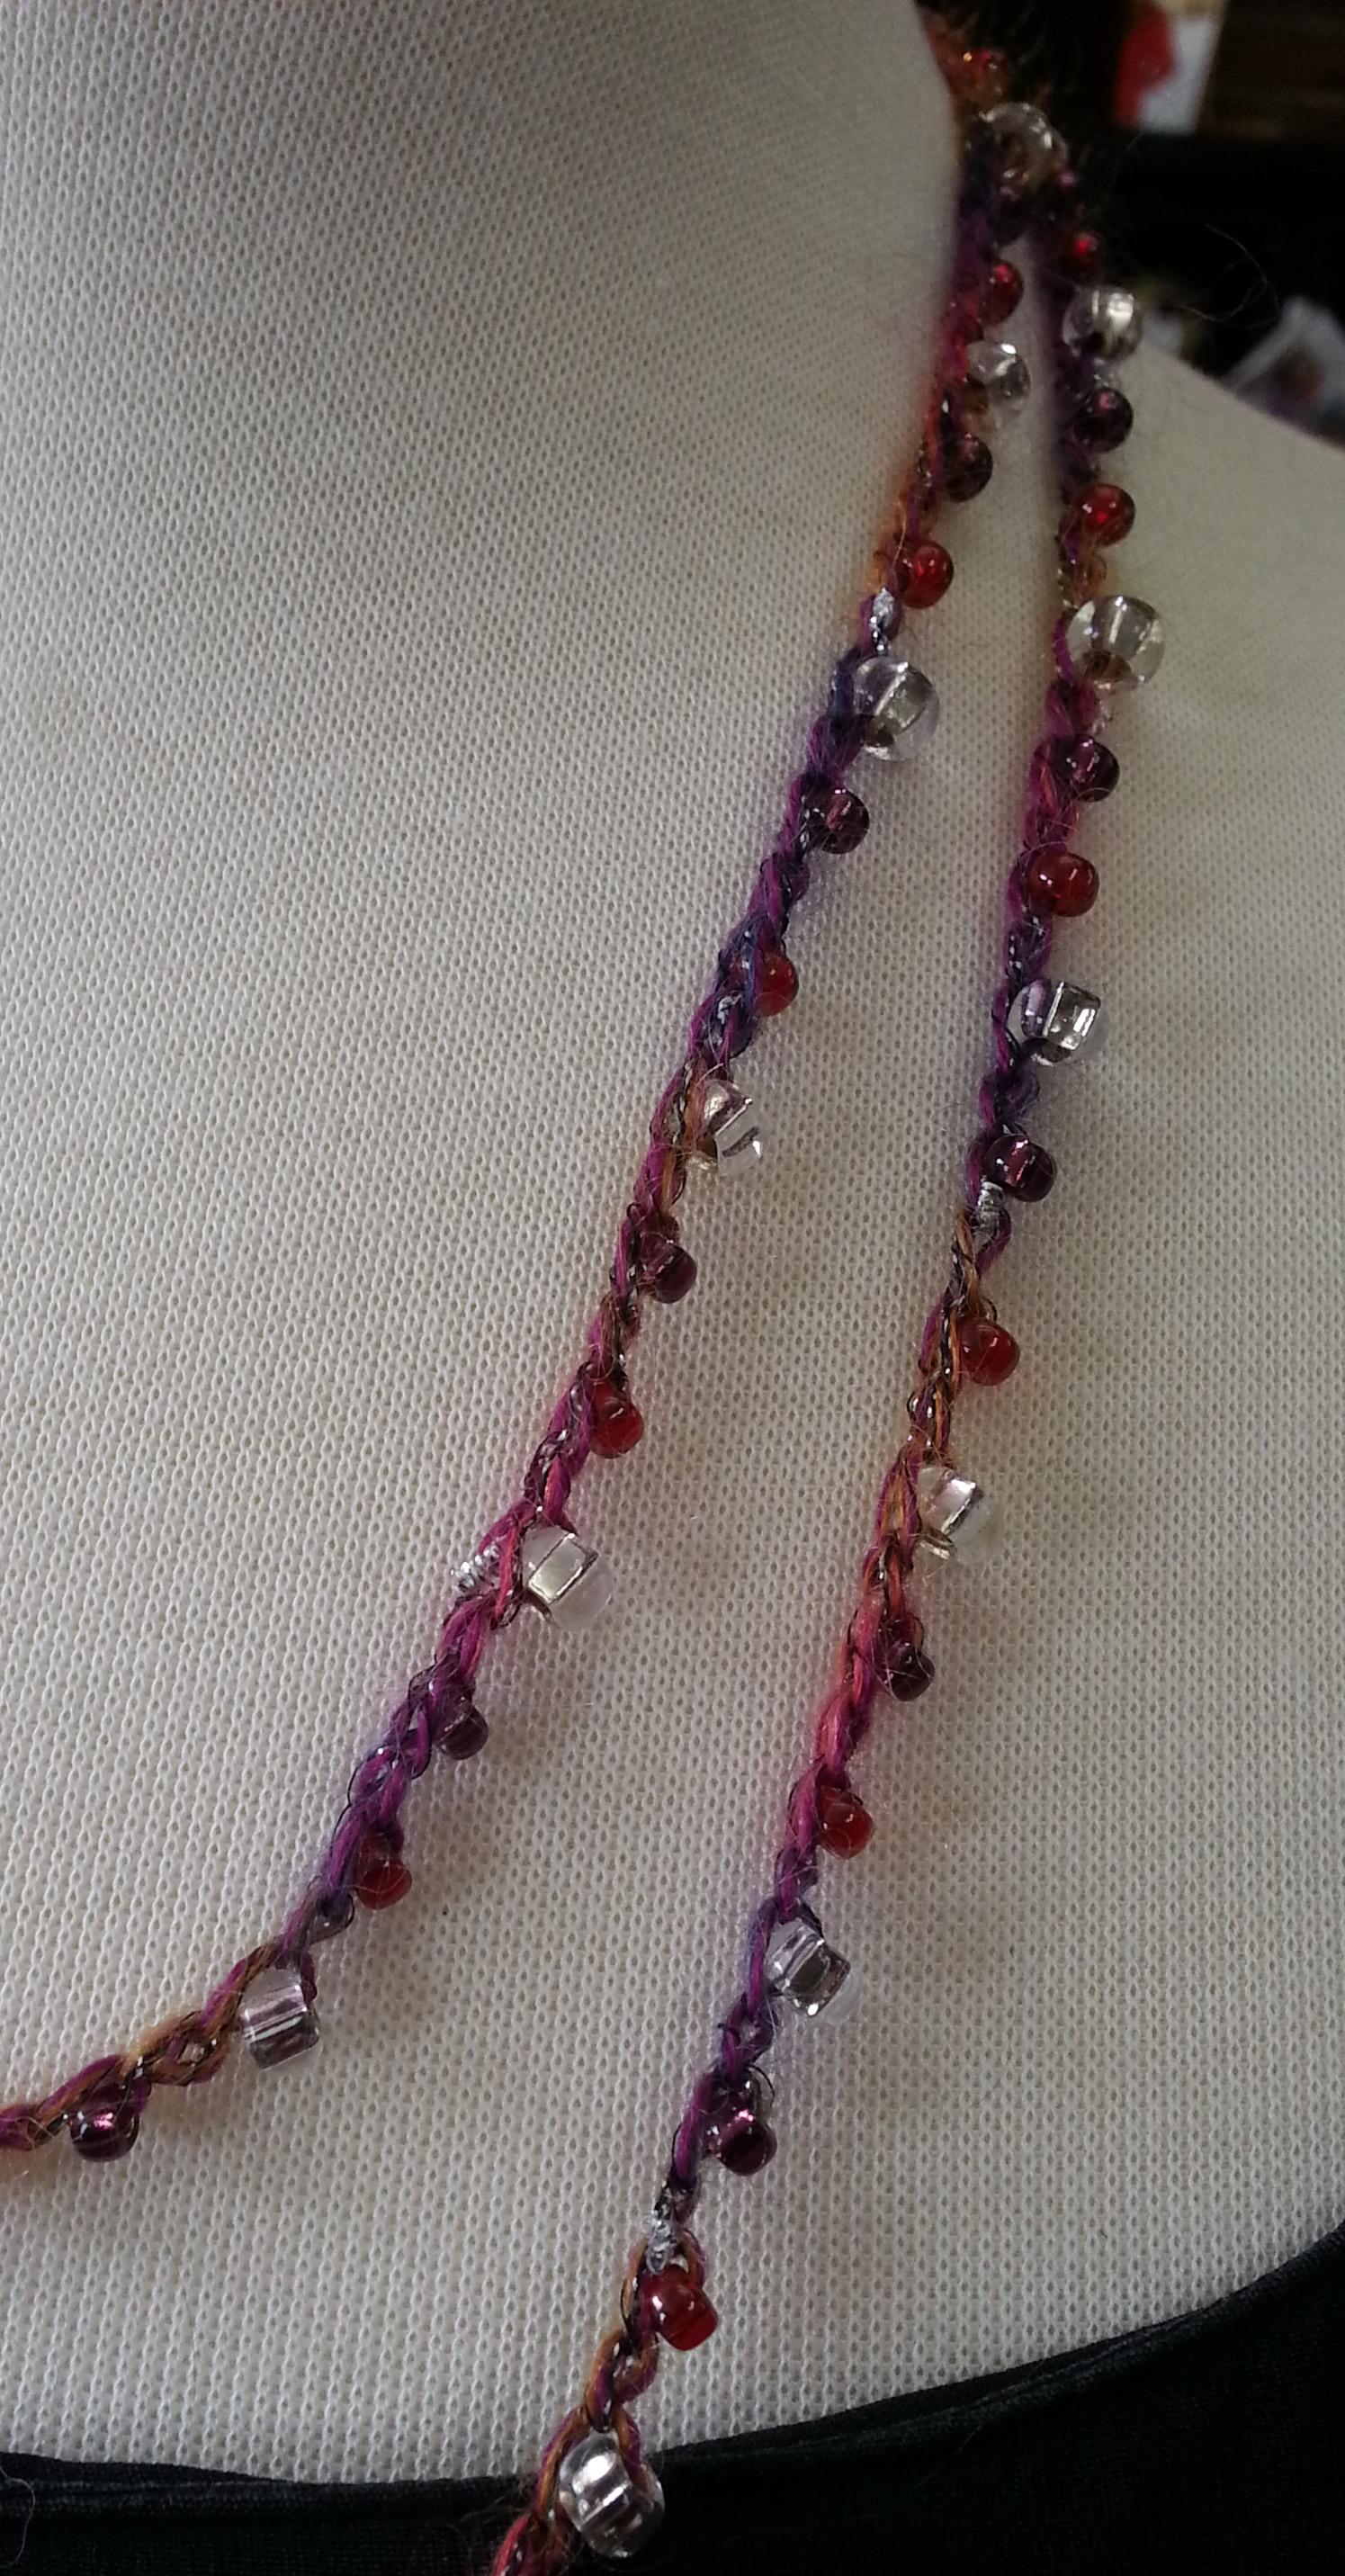
Switch out the yarn to something with silk or glimmering threads and the beads for lovely glass or semi-precious beads (just need holes big enough for the yarn to go thru), and you’ve got a beautiful piece of jewelry.
Look at the lovely necklaces we have on display at the shop, these were all made just by stringing beads on the yarn then working crocheted chains to the desired length.
For those of you that can’t be with us today I have included photos and instructions for you to practice at home. Or if you are an experienced crocheter teaching some one else how to get started, this is a great starter project as they get accustomed to working with the yarn and hook.
If you’ve never crocheted, or it’s been a long time since you crocheted, you may have forgotten how to hold your hook and yarn. These photos Show how to hold the yarn and hook if you are right-handed. For left-handed crocheters just reverse which hand holds the yarn and hook. The most important thing to remember when crocheting is to keep your hands relaxed.
Making a slip knot to place on your hook
I create a loop with the working yarn (coming from the ball of yarn) going over the top of the beginning tail, then reach thru the loop with my hook (or fingers) to pull up a loop from the working yarn, I place that loop over my hook and gently pull on the working yarn to snug the loop on my hook.
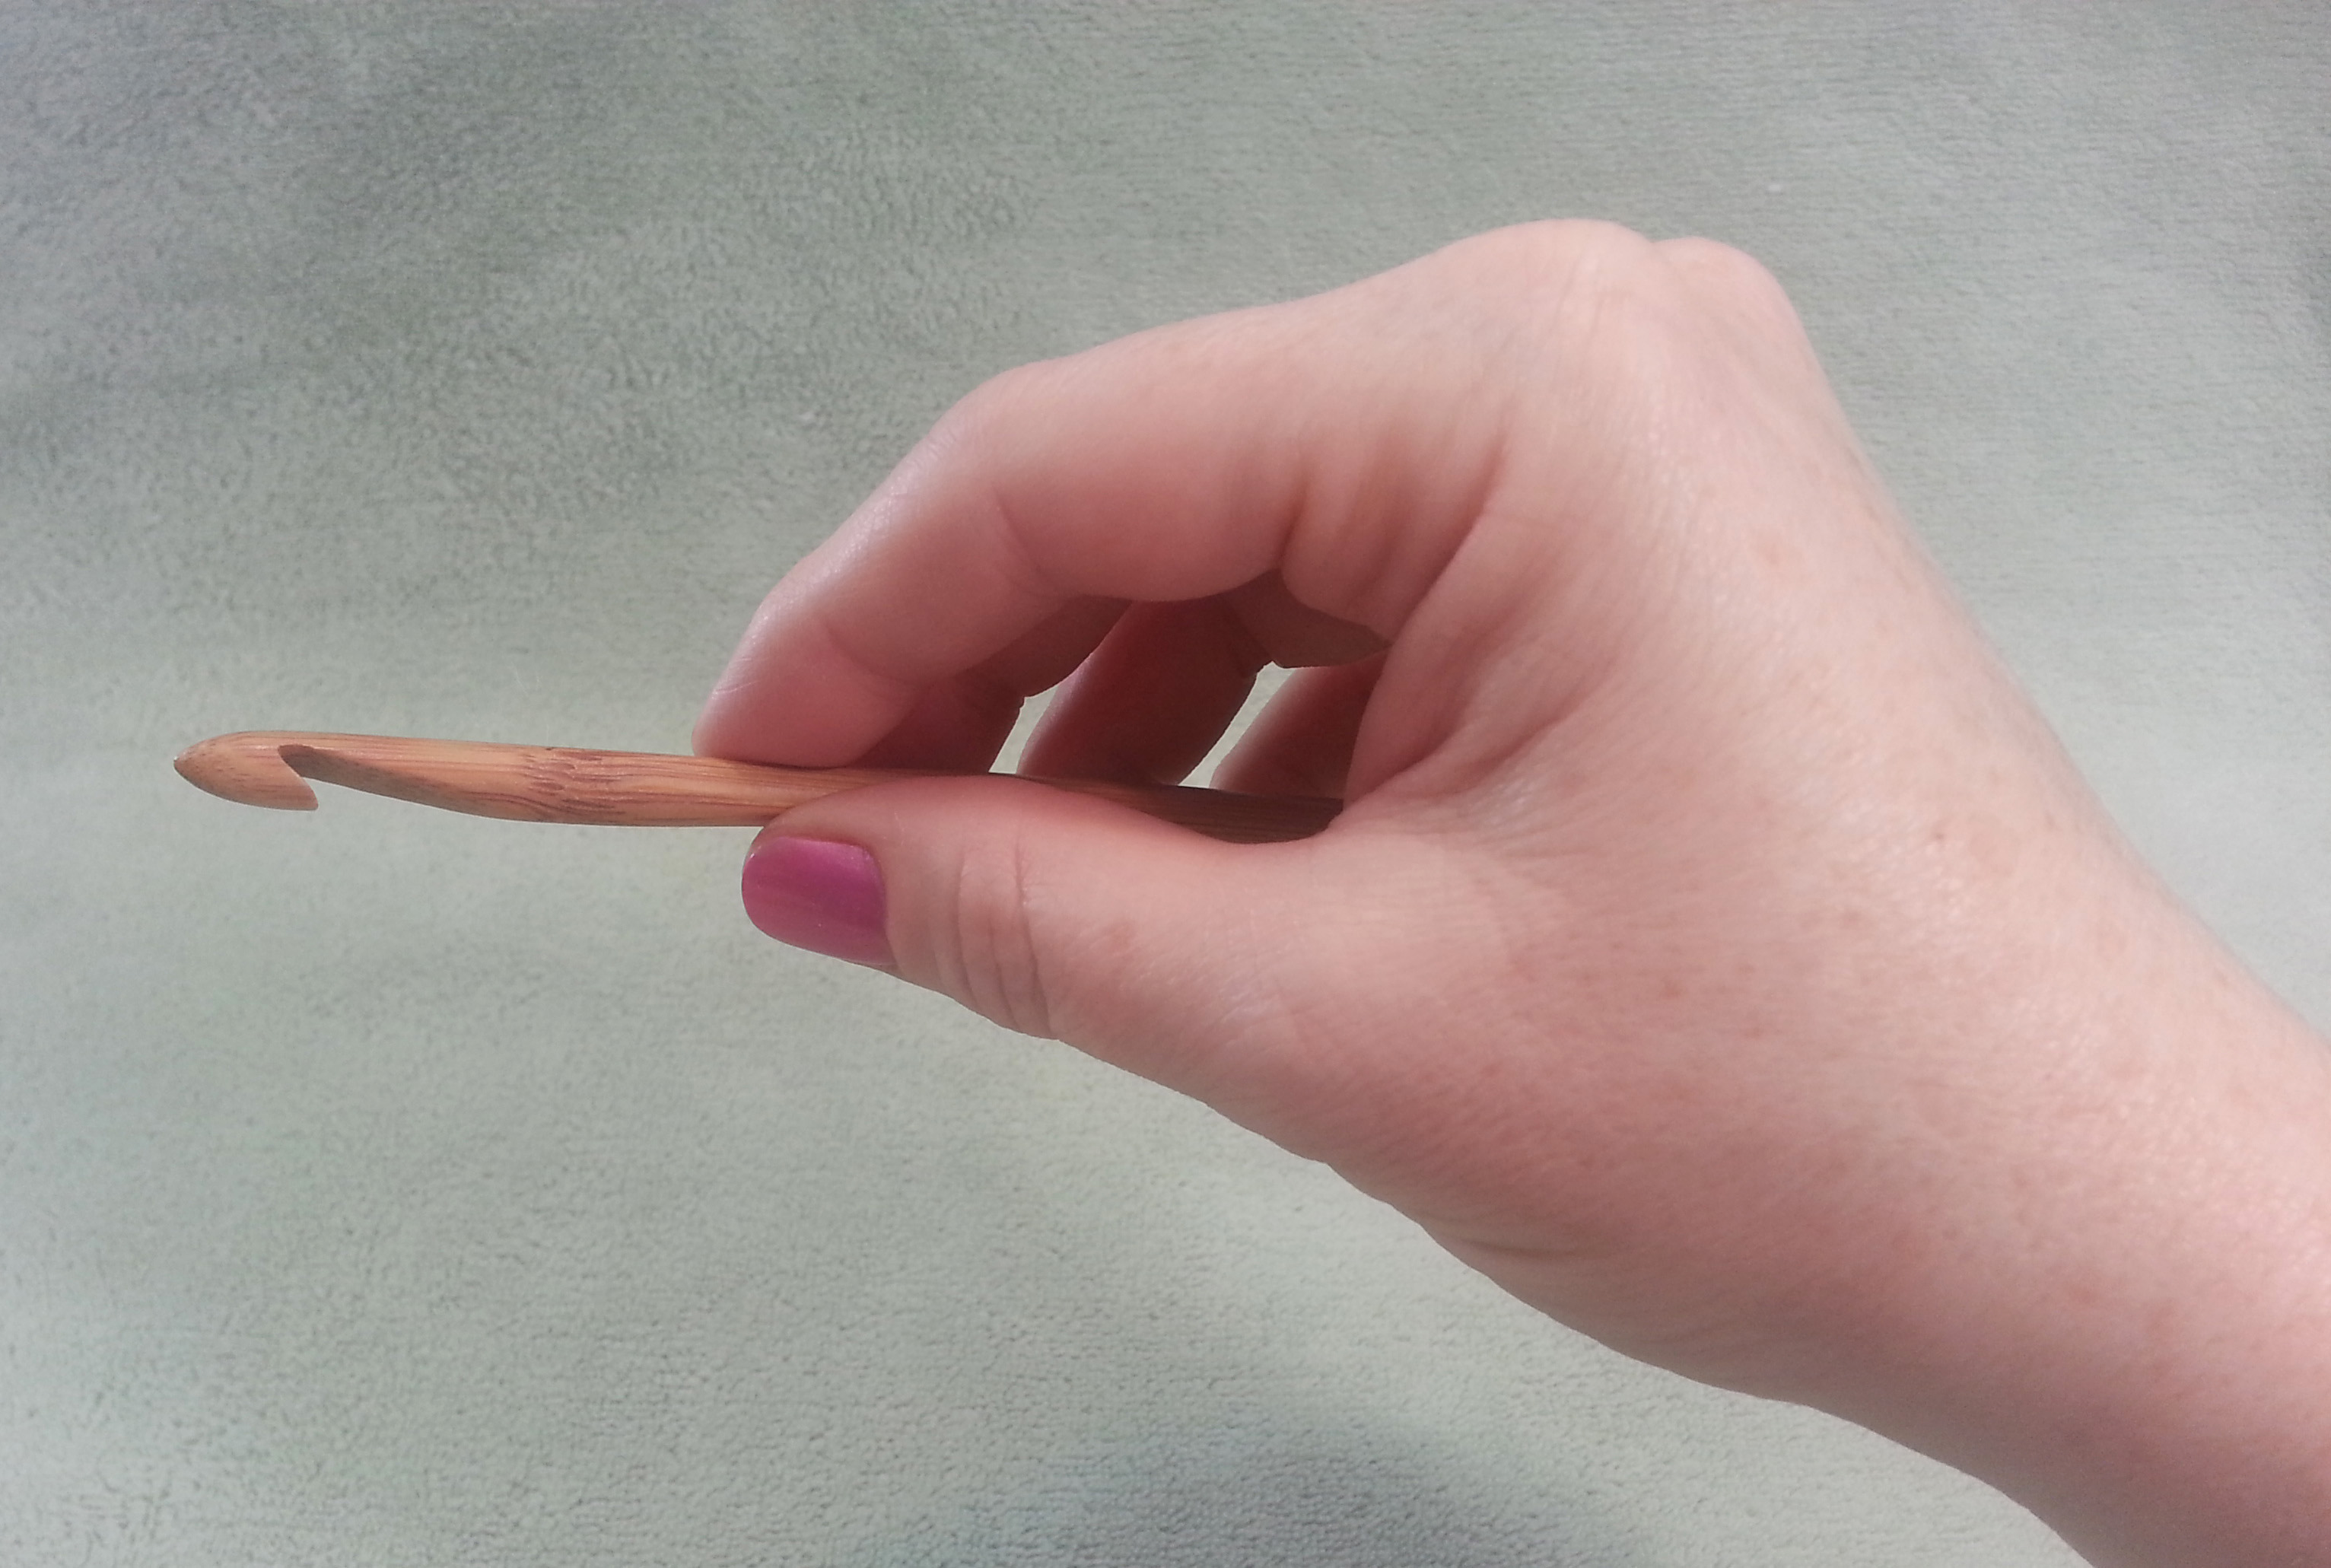
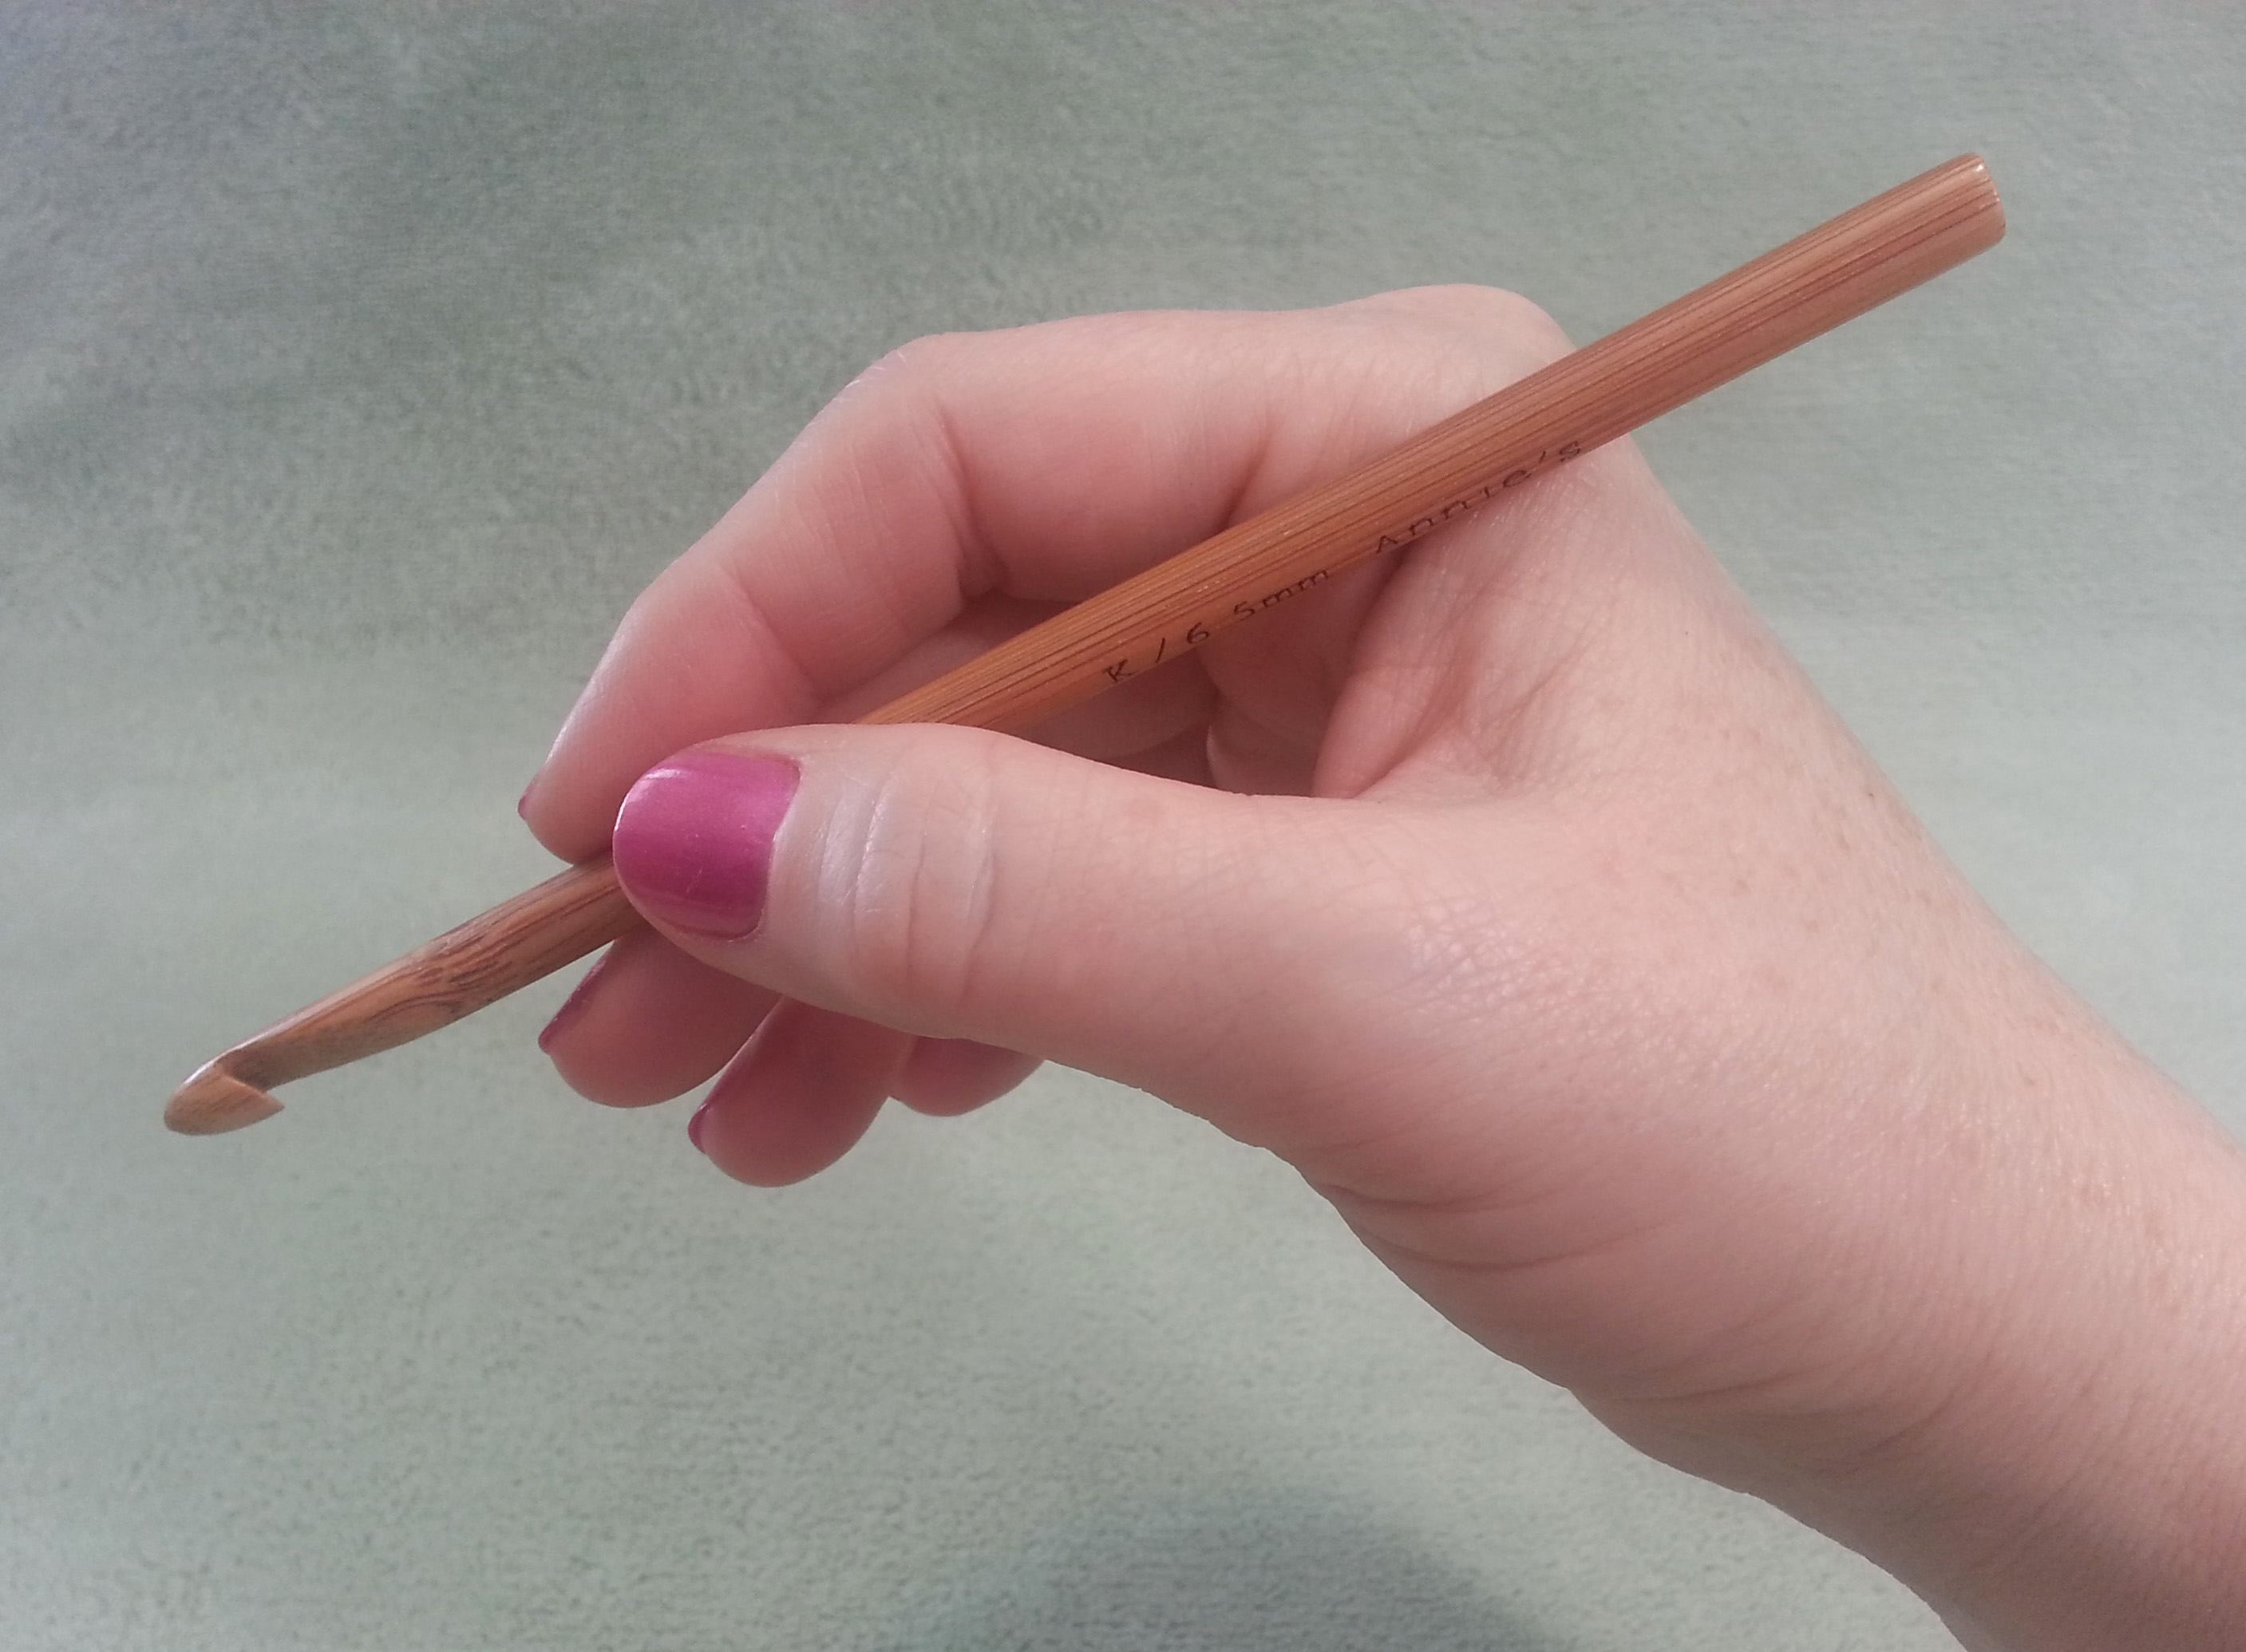
Holding your hook
There are 2 fairly common ways to hold your crochet hook…
The Knife or Toothbrush hold….
Or the Pencil hold.
Try them both out and see which is most comfortable to you.
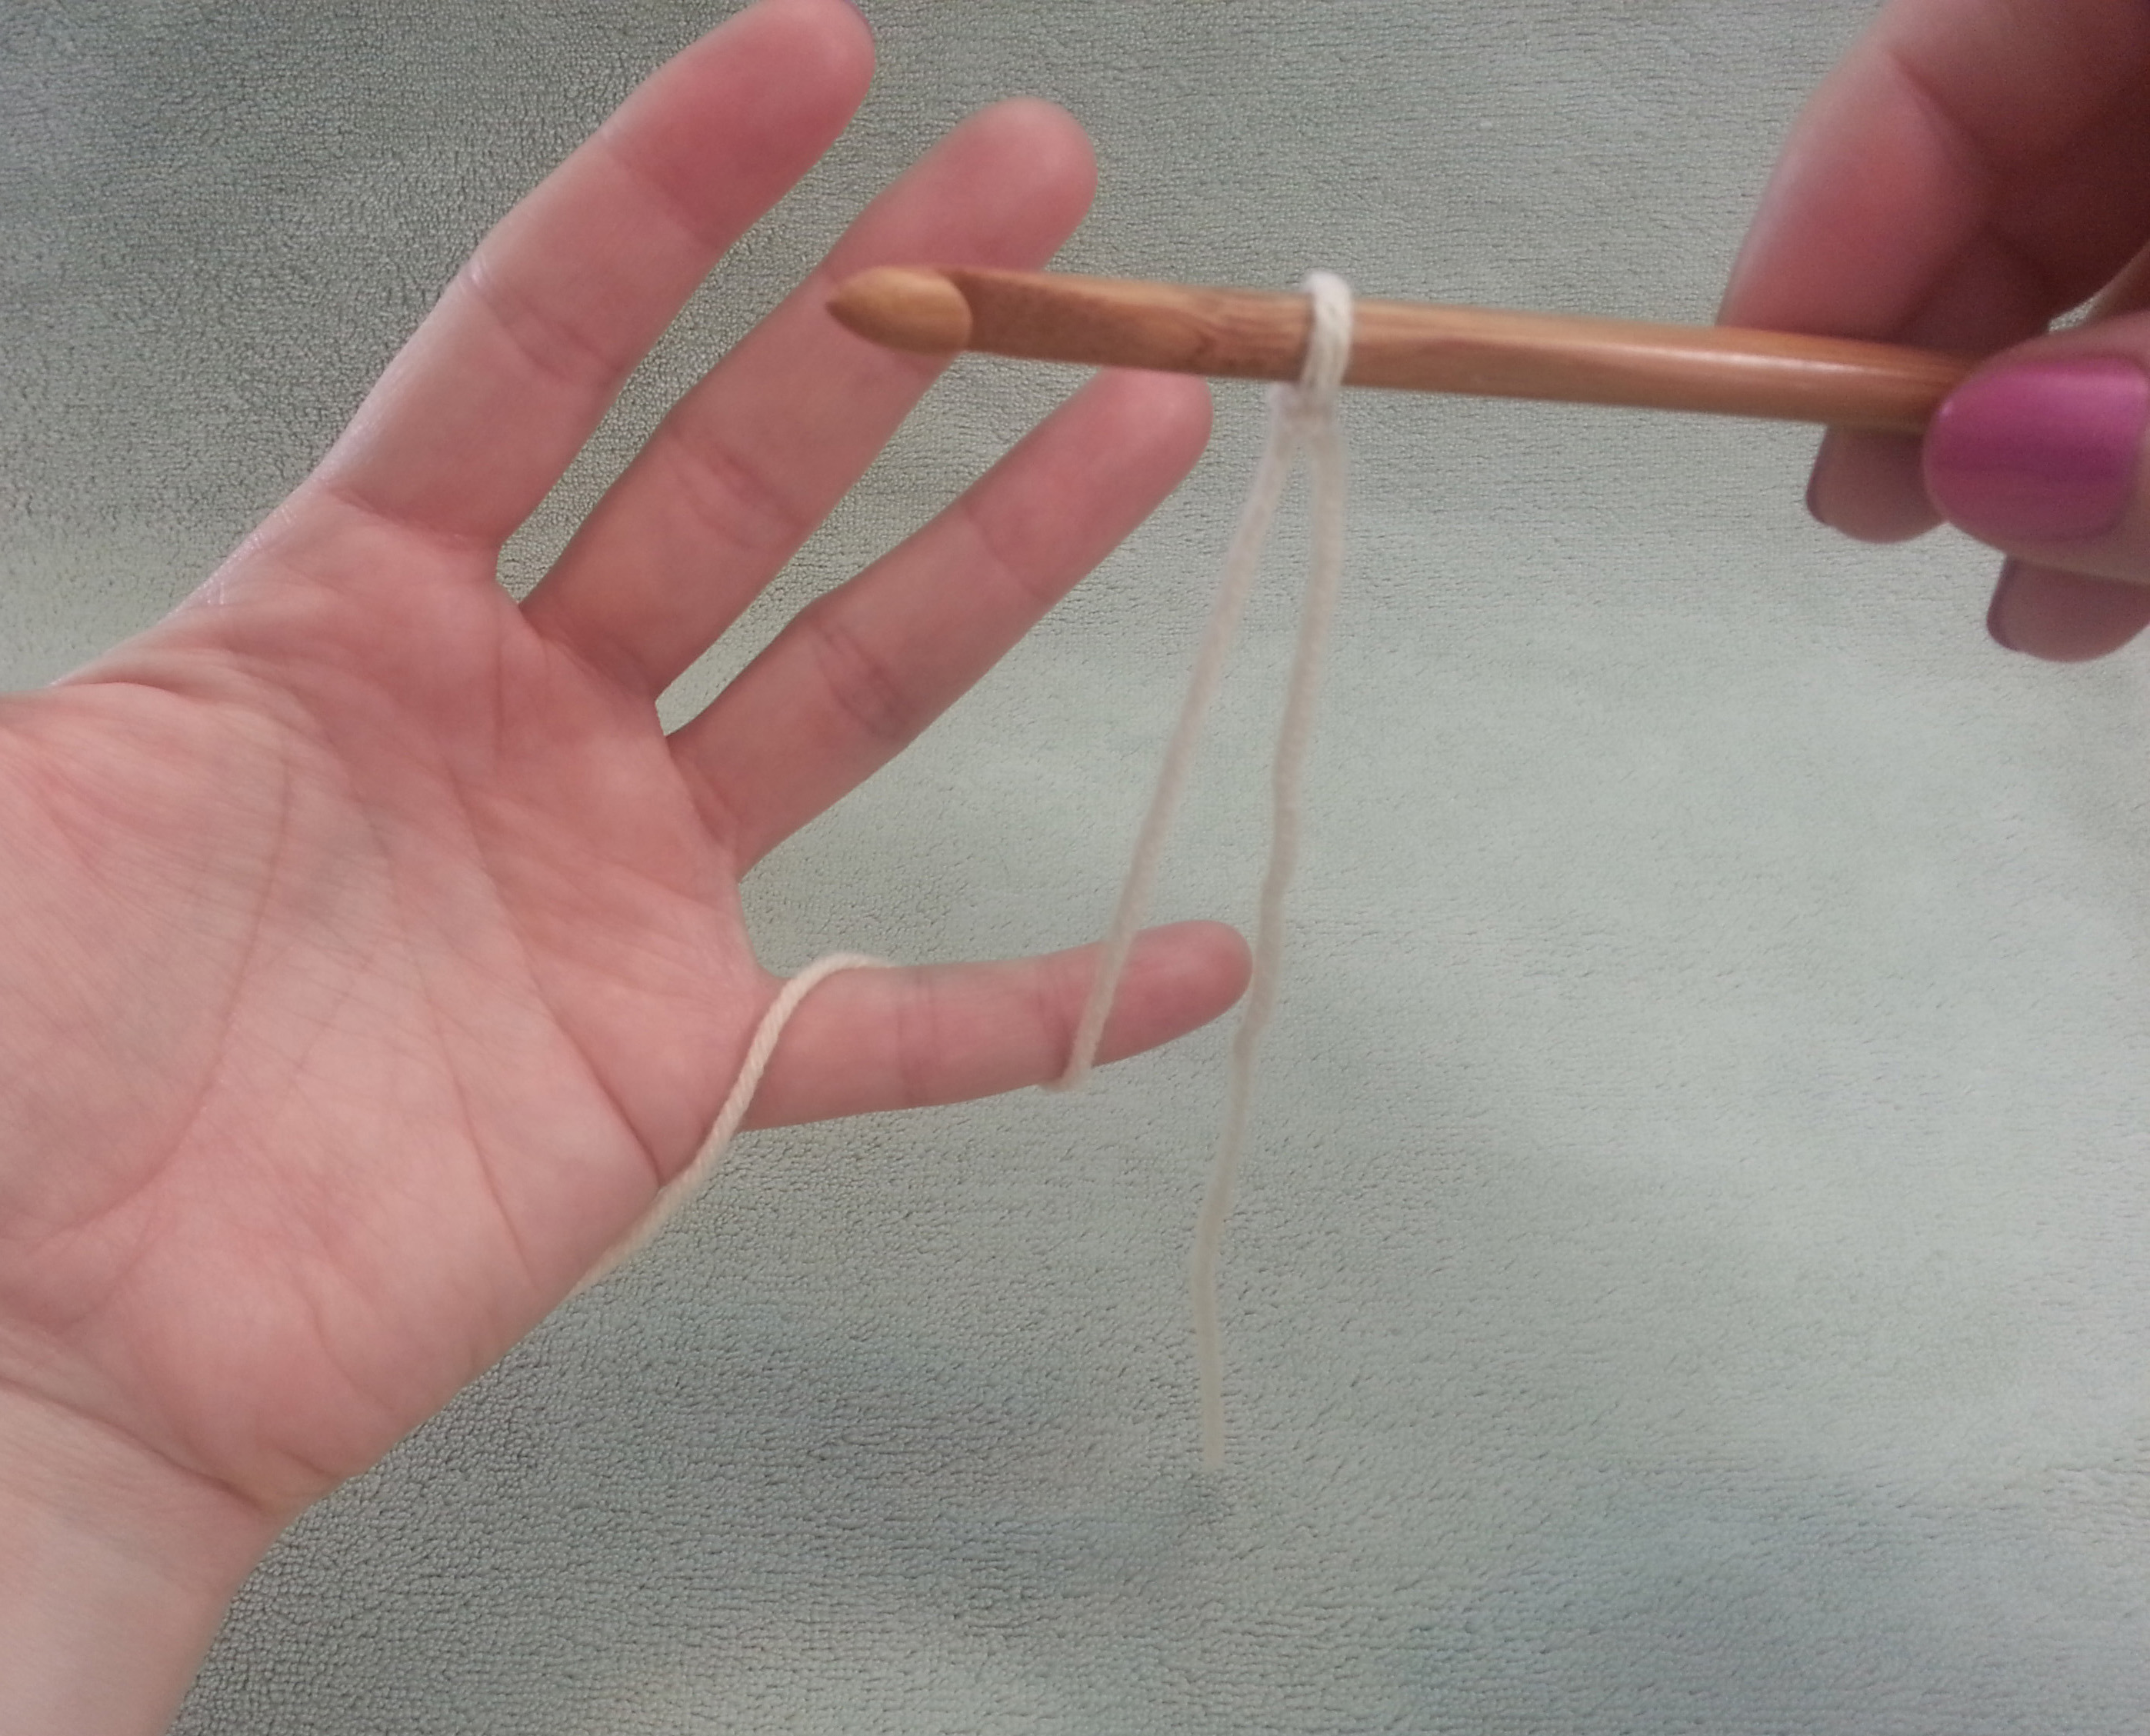
Tensioning (holding) the yarn
You may need to adjust how you hold the yarn depending on how dry your skin is and the texture of the yarn you are working with.
I loop the yarn around my left-hand pinkie…..
then weave it thru my fingers over and under so the yarn going to my hook comes over the top of my index finger.
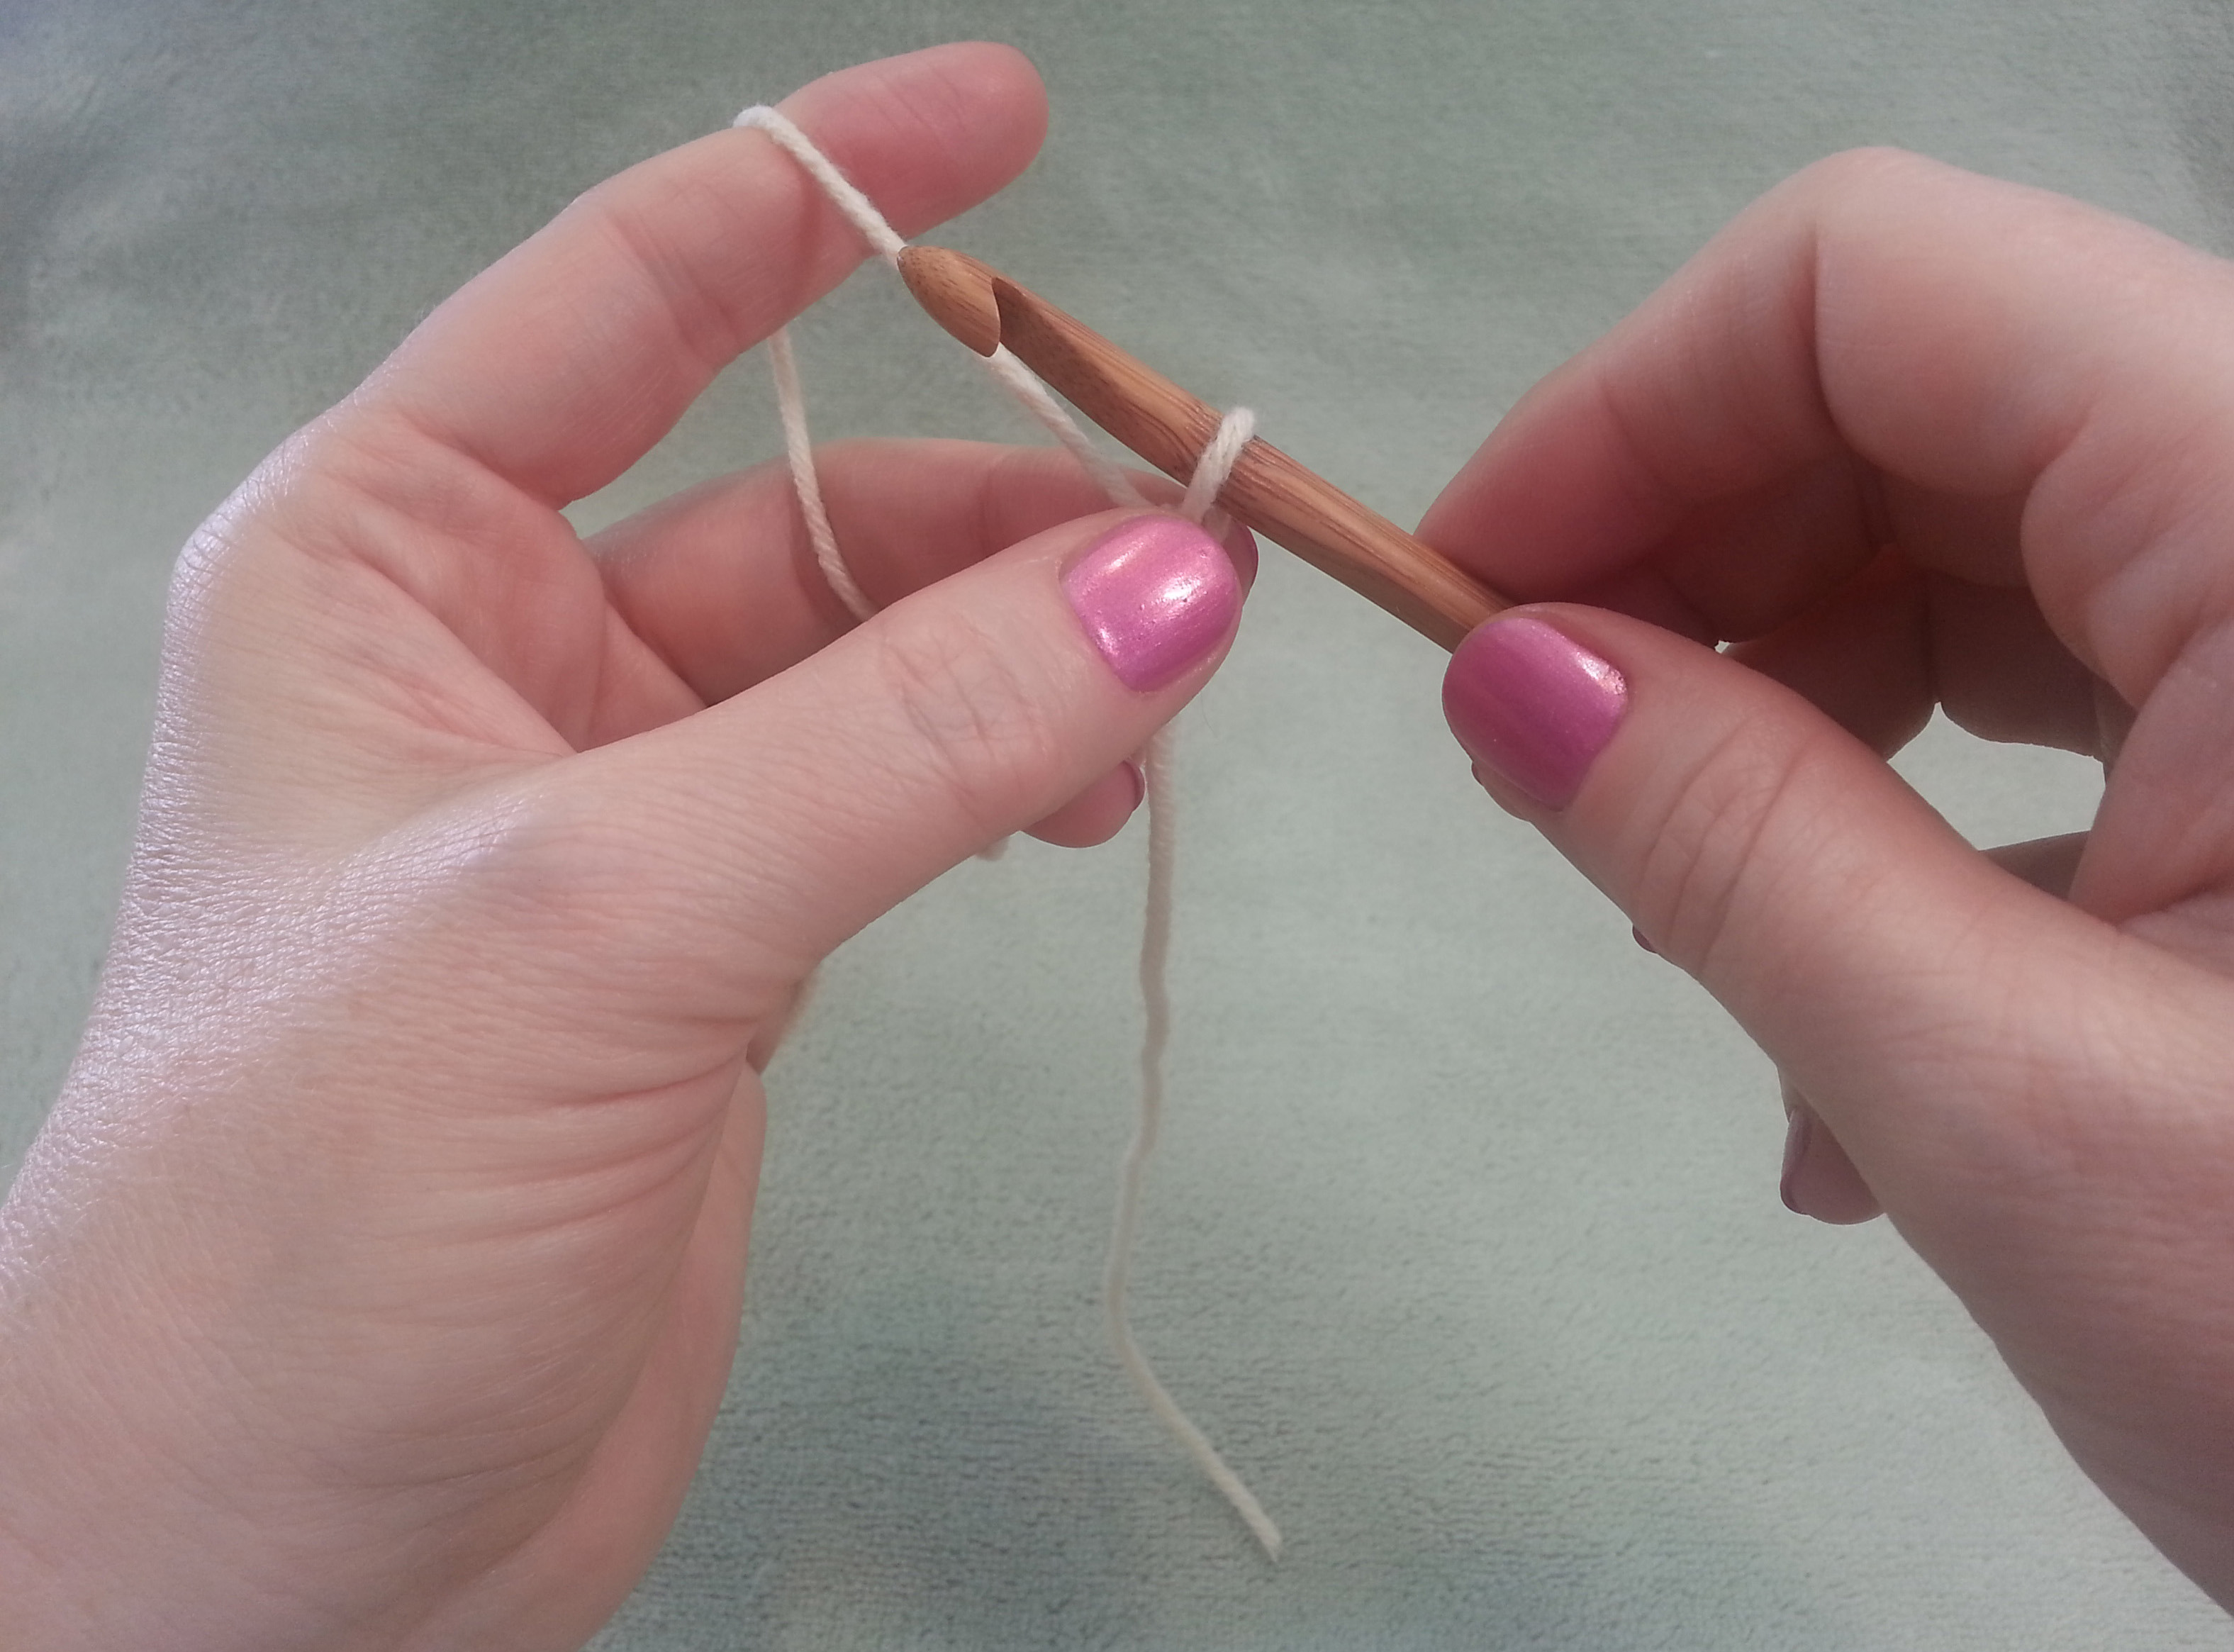
I then use the middle finger and thumb of my left hand to hold at the base of the loop on my hook. This allows my hook to move freely in the loop.
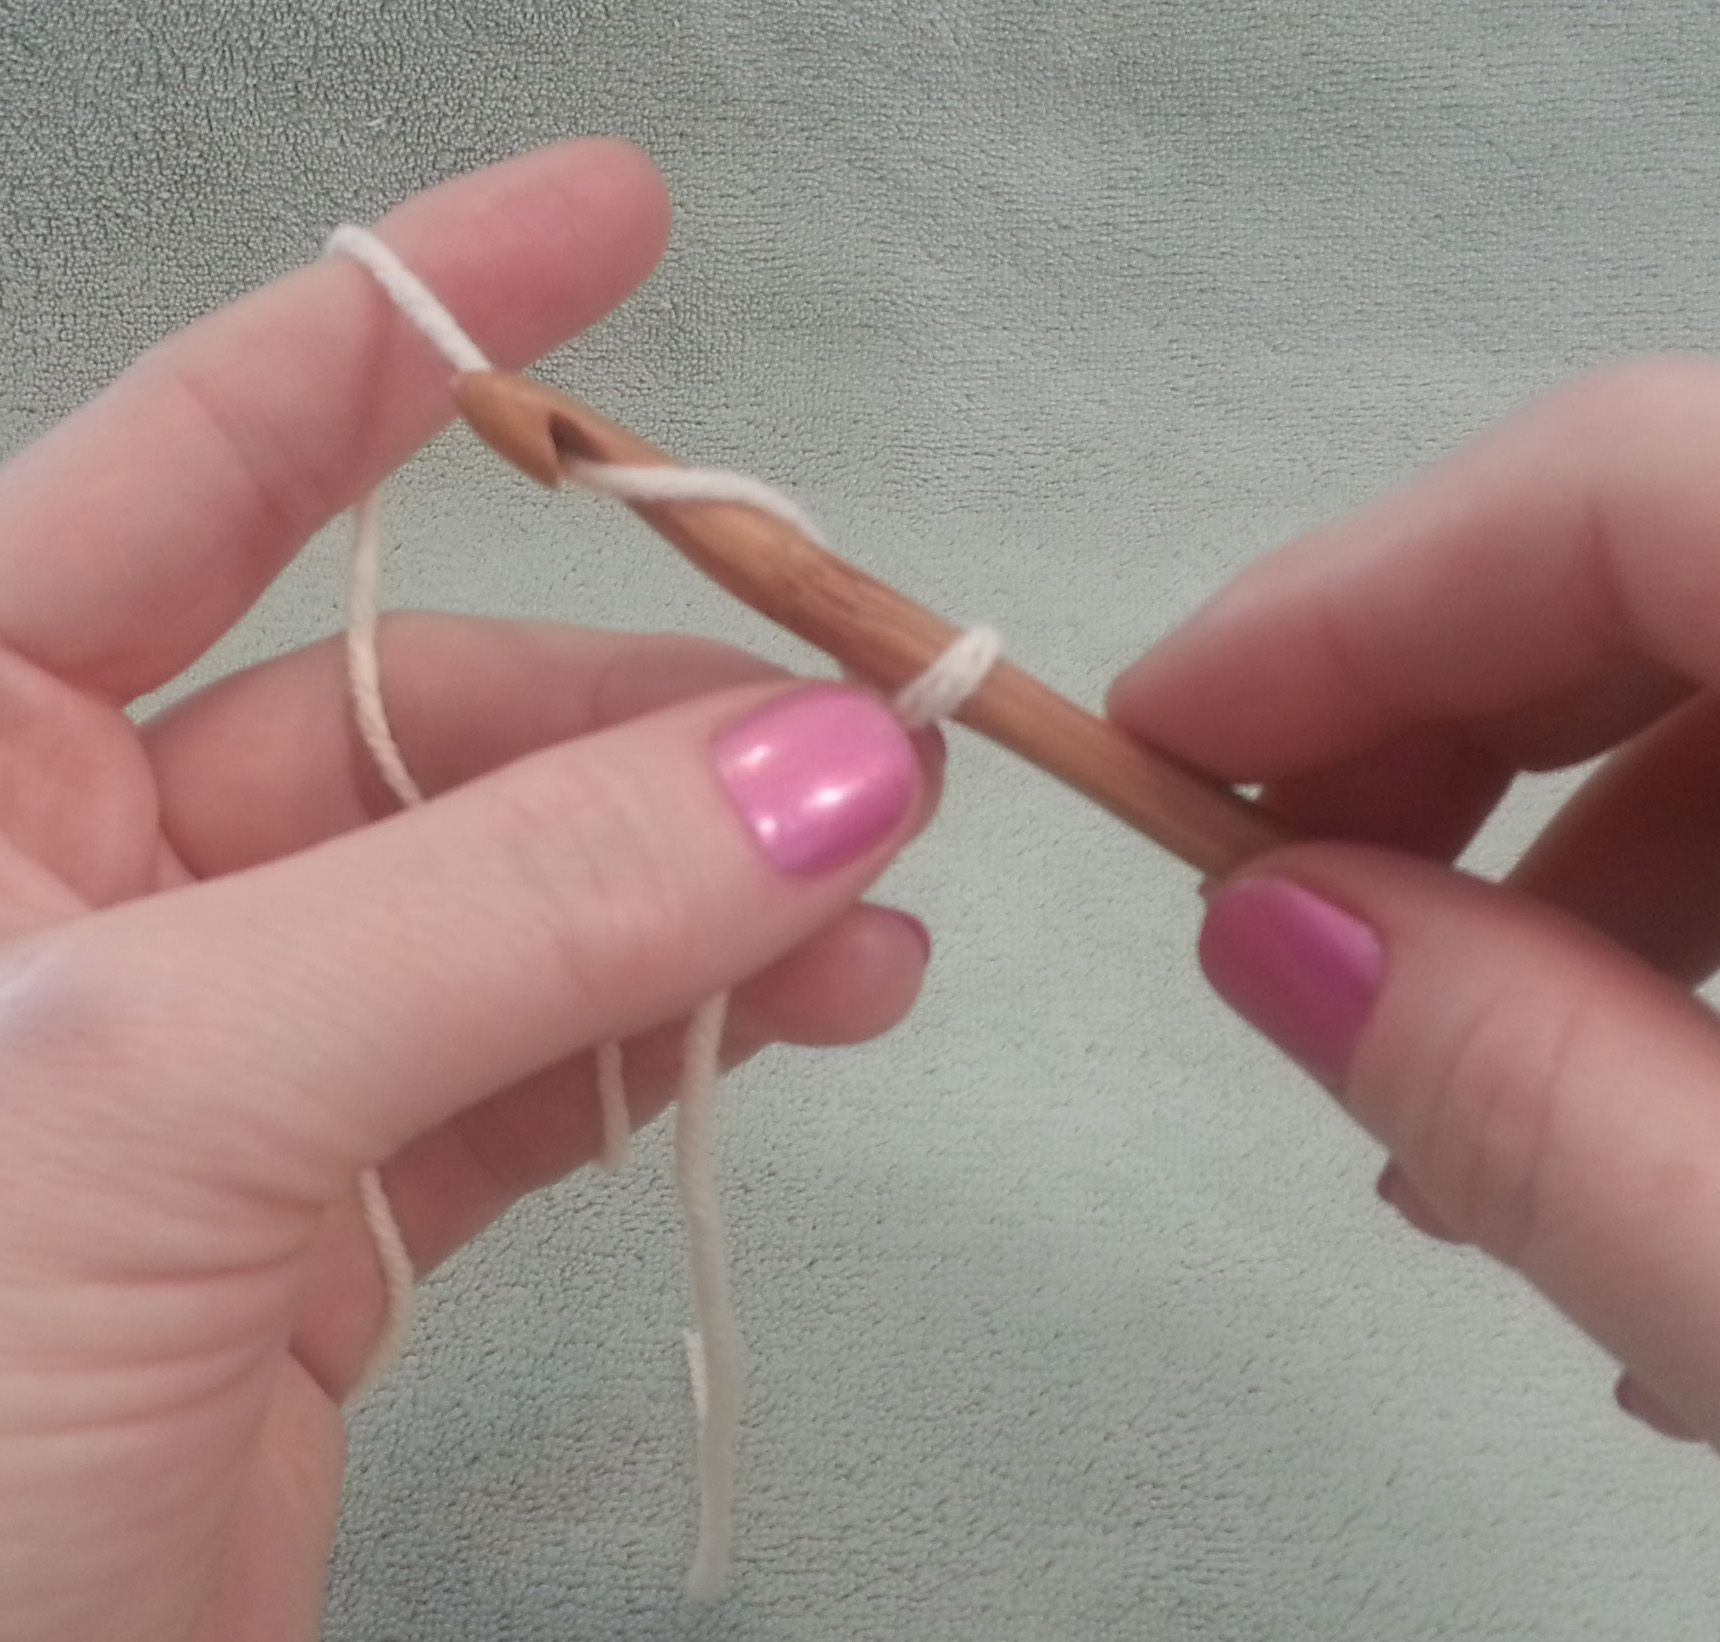
To make a chain stitch
I scoop the tip of my hook from the front to the back of the strand of yarn coming from my index finger, then “hook” the yarn and pull it thru the loop on my hook.
Now you are ready to start on your bracelet project.
Simple Beaded Chain Bracelet
Slide bead up close to hook.
Materials needed:
Worsted weight yarn
Approximately 15 “pony” beads in desired colors
Size I (5.5mm) or J (6mm) hook
Instructions:
String 15 pony beads on yarn (note you may have beads left-over once your reach your ideal bracelet length).
Chain 1 and capture bead.
Make a slip knot in yarn, ch 1, slide 1 bead up close to hook, ch 1 capturing bead, continue with alternating plain chain stitch and beaded chain st until strand measures 7 inches long (or long enough to fit loosely around wrist), finish with a final plain ch 1. Fasten off.
Tie ends together using a square knot, trim ends to 1″ long.
You can read more about my initial beaded chain projects in my post: The Beauty of Beads
Thanks again for making my blog one of your visits for our blog tour. I hope you come by to visit again soon. Meanwhile if you are a more experienced crocheter, and like to make hats, please join us during NatCroMo in crocheting (or knitting) hats to support the Halos of Hope organization. There are many patterns at the Halos of Hope website to use for this effort or you can use my “Pi Recipe” to create a simple stretchy hat that will be very appreciated.
Crochetville has received a lot of support from the crochet community over the years. They believe strongly in the importance of giving back. In 2013, Crochetville became a corporate sponsor of a wonderful organization called Halos of Hope. You can read more about Crochetville’s fundraising efforts and hat collection on the Crochetville blog.
Halos of Hope is a 501(c)3 not-for-profit organization founded by Pam Haschke, herself a survivor of inflammatory breast cancer. Halos of Hope’s mission is to provide volunteer-crafted hats to cancer centers across the country. – See more at: Halos of Hope website and the Halos of Hope Facebook Page.
As Amy said, ” Wouldn’t it be cool if we could somehow reach all of the 1.7 million crocheting households in the United States? If you’re going to dream, dream big, I say!”


![halosofhope[1]](https://mamas2hands.com/wp-content/uploads/2015/03/halosofhope1.jpg)