Spring Break this year involved a long road trip for my family and me. My favorite way to entertain myself on a road-trip is to crochet and listen to music or pod-casts. Makes the miles go along quickly between stops for food, gas and restrooms.
We drove from our home in the mountains above Boulder to just outside of Kansas City, Kansas. All together it took us about 13 hours, that included 5 stops to re-fuel the car and kids and allow everyone to stretch their legs (including the dog).
I was capping off our week in Kansas City by attending and teaching at the First Annual Fiber Arts Day that following Saturday. One of the requests for those coming to the event was to contribute at least one 6 inch granny square. So I decided it was time to re-visit this old friend.
It had been awhile since I last crocheted a granny square and I had to experiment a bit to get one the size I wanted. After I got the hang of it though, I was crocheting up 2 in no time at all.
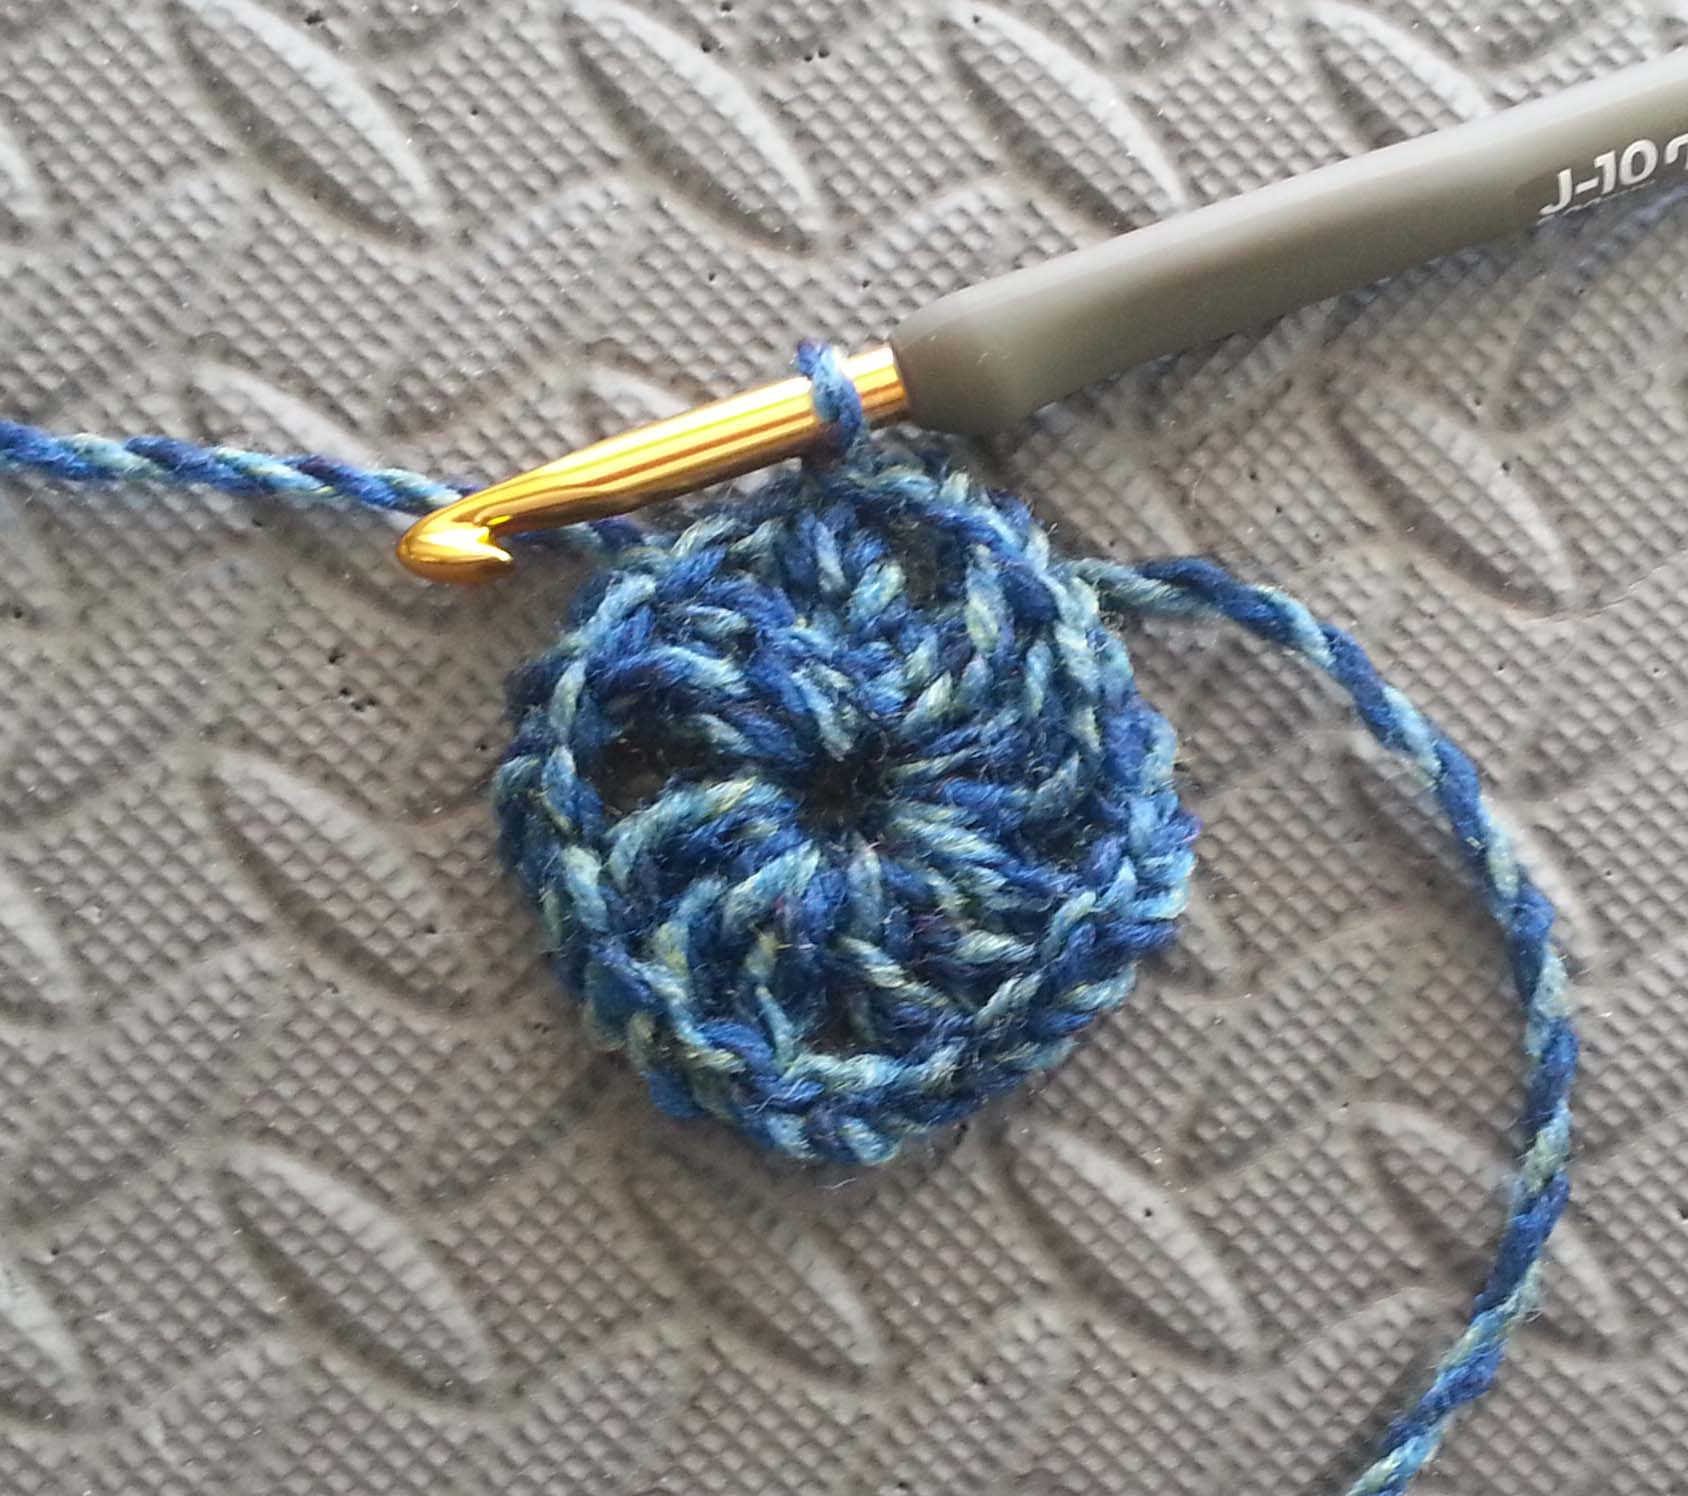
I am a big fan of letting the yarn do the heavy lifting, in this case I got the effect of a granny square worked in multiple colors without the tedium of having to weave in lots of yarn ends. As there are more and more yarns like this, with the long runs of colors changing into the next, you can find something in your nearby shops to use this way. When I use these sorts of yarn, I turn with each round since I am not changing the color, this allows me to work into the next chain space neatly.
The following is my recipe for my granny squares.
I used a size J/6 mm hook with Lion Brand Yarns “Unique” in the picture above, for my samples in the pattern I used Lion Brand Yarns “Tweed Stripes”. It didn’t take as many rounds to complete these squares because these yarns are slightly bulky, 4 rounds were a tiny bit shy of 6 inches though. I ended up putting a single crochet edging round to get the exact size. You can use a lighter weight yarn, but you will need to add rounds to the squares and you may not get a 6″ square.
Instructions:
Start with an Adjustable slip knot (I use the adjustable slip knot so that the first chain can expand as I make Rnd 1), ch 5, sl st into 5th chain from hook to make a ring.
Rnd 1: Ch 3, turn, (2 dc, ch 2, [3dc, ch 2] 3 times) into ring, sl st to 3rd ch of beginning ch-3. Pull gently on beginning tail to snug center opening.
Rnd 2: Ch 3, turn, (2 dc, ch 2, 3 dc) in next ch-2 sp, ch 1, [(3 dc, ch 2, 3 dc) in next ch-2 sp, ch 1] 3 times, sl st to 3rd ch of beginning ch-3.
Rnd 3: Ch 3, turn, 2 dc in next ch-1 sp, ch 1, [*(3 dc, ch 2, 3 dc) in next ch-2 sp, ch 1*, 3 dc in next ch-1 sp, ch 1] 3 times; Repeat from * to * once, sl st to 3rd ch of beginning ch-3.
Rnd 4: Ch 3, turn, 2 dc in next ch-1 sp, ch 1, [*3 dc in next ch-1 sp, ch 1*, repeat from * to * until reach corner ch-2 sp, (3 dc, ch 2, 3 dc) in corner ch-2 sp] 4 times, repeat from * to * until reach end of round, sl st to 3rd ch of beginning ch-3.
Rnd 5: Ch 1, turn, [sc in each st and ch-1 sp til reach corner ch-2 sp, (sc, ch 2, sc) in corner ch-2 sp] 4 times, sc in each remaining st and ch-1 sp to end of round. Sl st to first sc of round and fasten off.
If you want to make your granny square larger, just repeat Rnd 4 until you reach the size you want, then work Rnd 5 to finish.
I’ll be working on more of these fun squares during our family road trips this summer. They are a great little project to carry along when traveling because they don’t take a lot of time or yarn and they don’t take a lot of concentration either. Once you get a pile of them finished you can join them together to make a blanket, a scarf, a bag or even a jacket.
One of my favorite things about crochet is how handy it is for fixing things. Whether it be making decorative motifs to cover stains or repairs in clothing or in this case making a hat fit better.
As many of my readers know, and can guess from my logo/banner, I really like the color – hot pink. I am also extremely pale due to my Scottish, Irish and German ancestry. So I burn easily and am a big fan of sun screen and broad-brimmed sun hats.
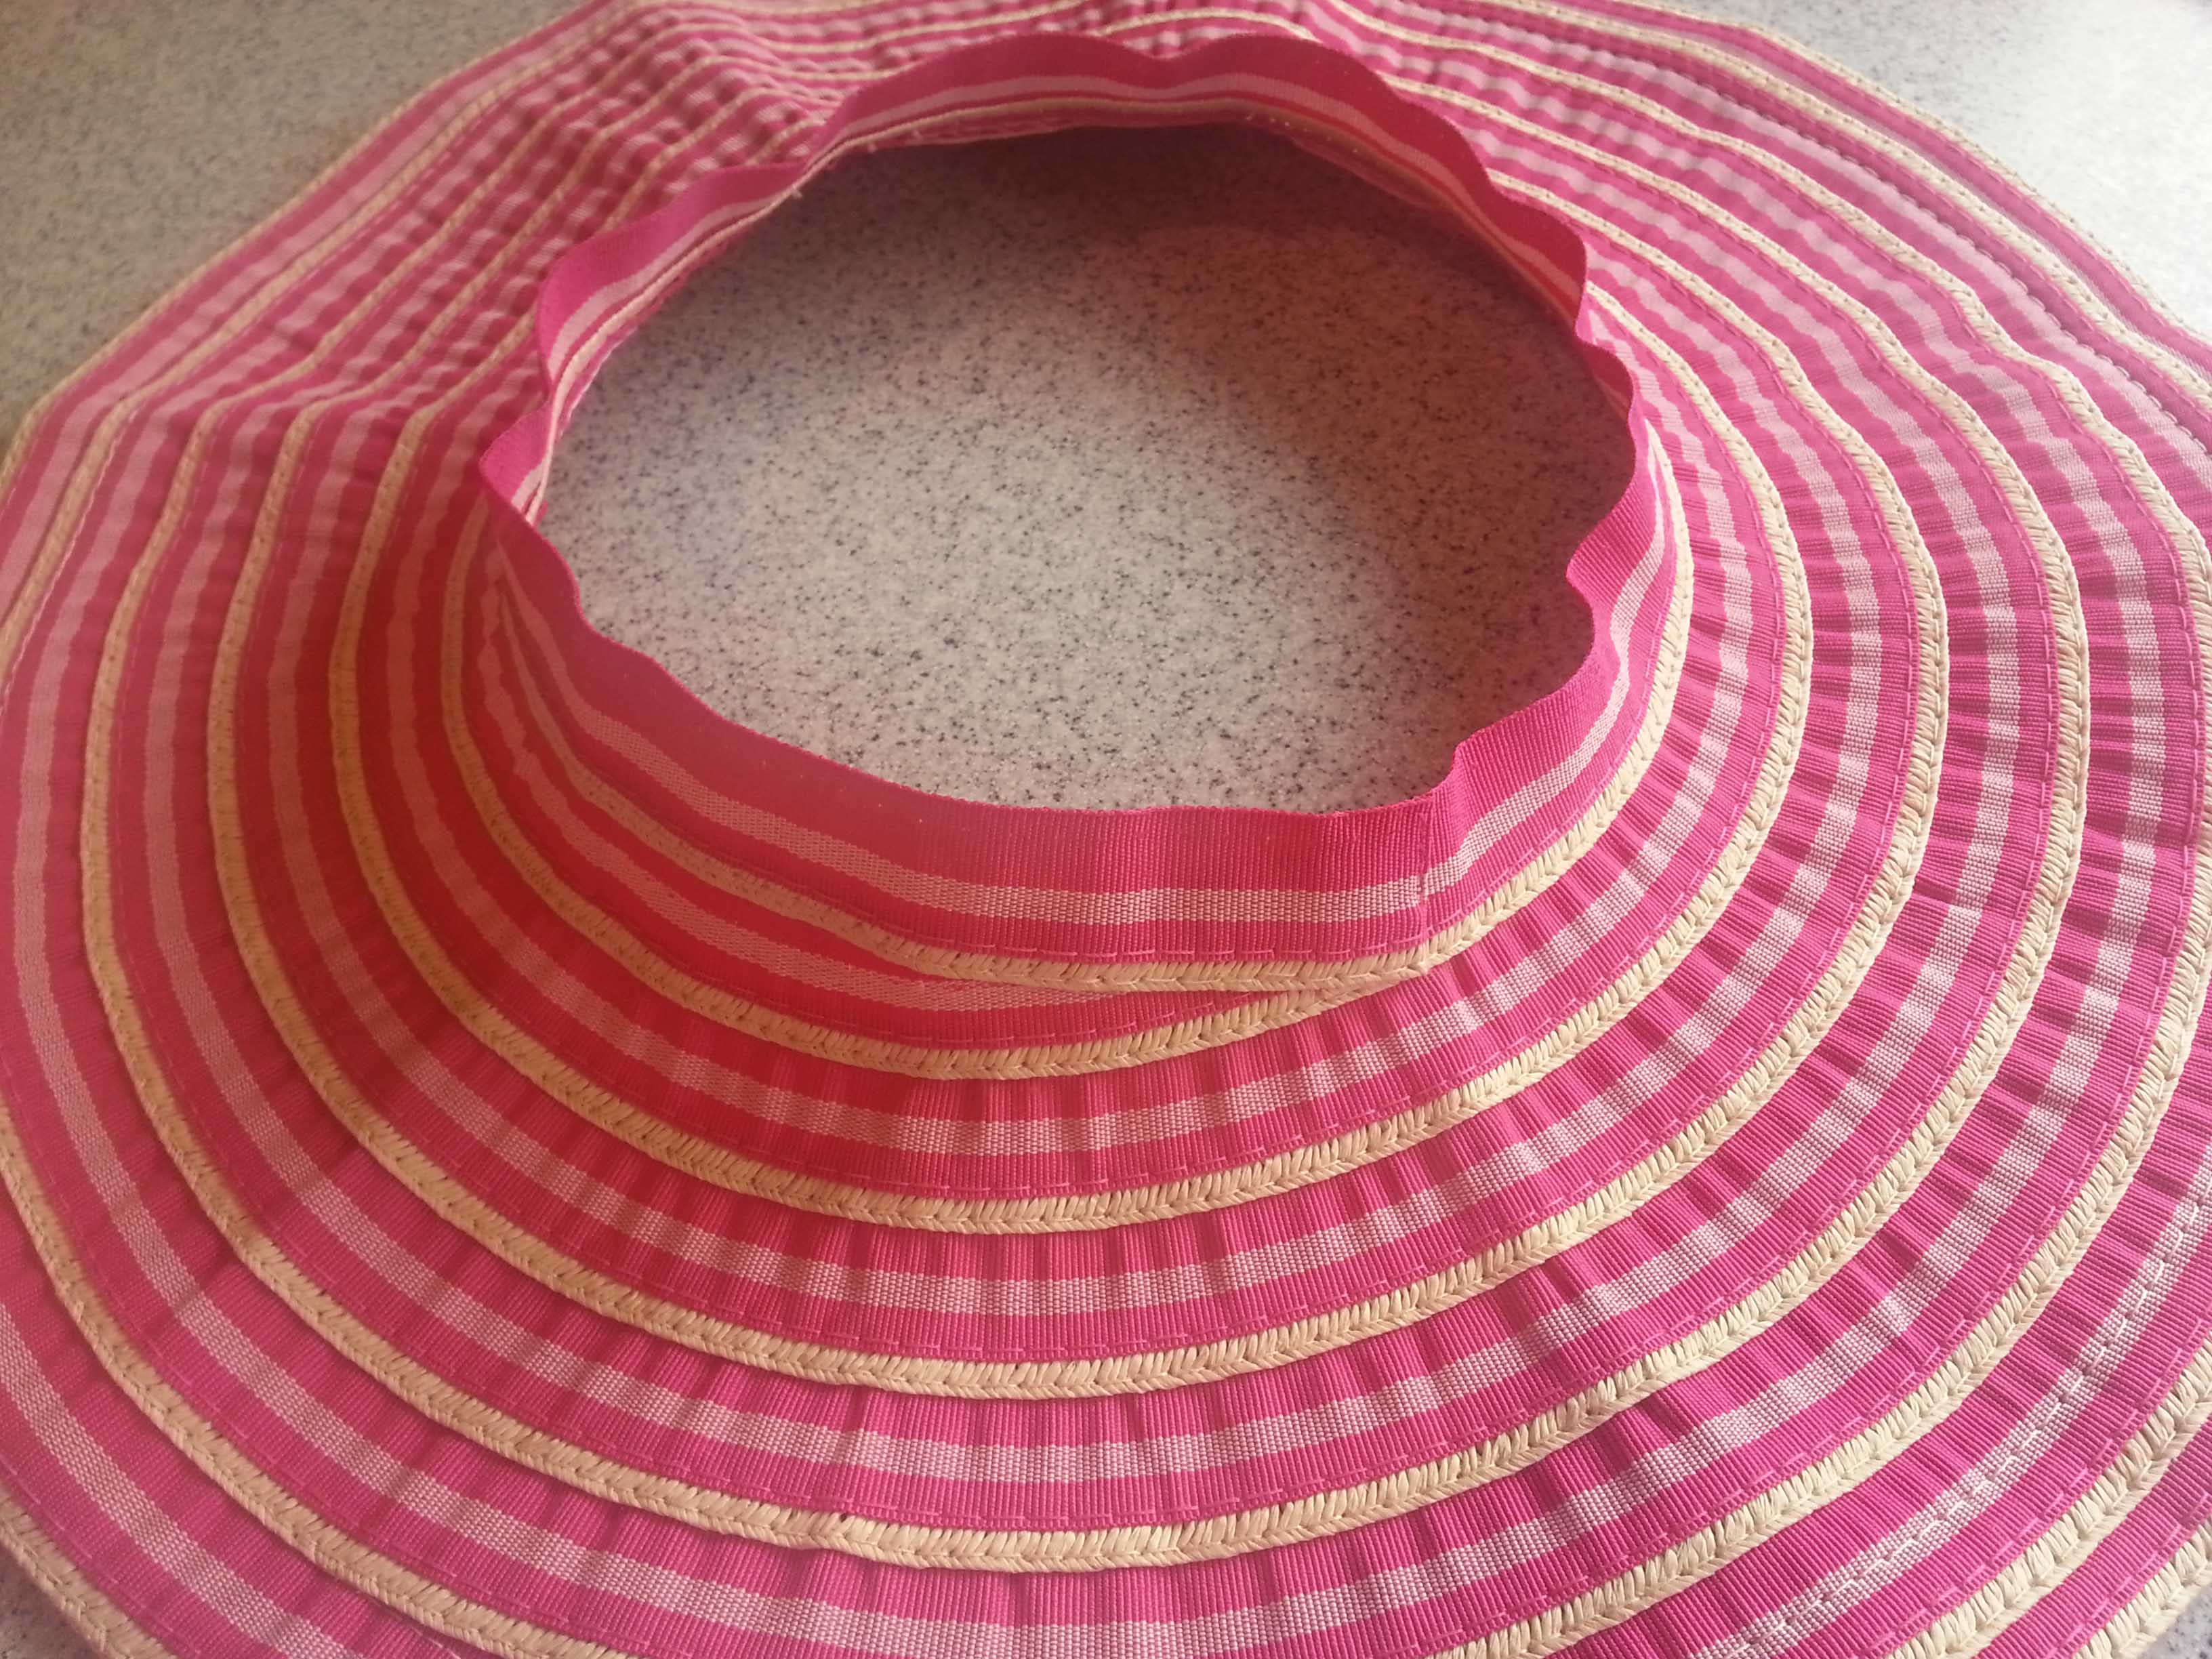
Last summer when my family and I were traveling I found an awesome Hot Pink and Buff colored ribbon sun hat at a shop along our route. I love these types of hats because they can be rolled up and stuffed into a carryall until needed. Unfortunately it turned out this one was actually a bit too tight in the crown, so I didn’t wear it much.
This past Easter weekend my family and I went to the Denver Zoo for a wonderful sunny afternoon adventure. As we headed out the door I grabbed sun hats for all of us (my boys are just as pale and easily sunburnt as their pasty parents). Not remembering the fit issues with the pink hat it ended up being the one I grabbed.
I made it work for me during the afternoon, but decided something would have to be done about this hat to make it more comfortable and usable. On the drive home that evening I gave the hat a very detailed scrutiny to determine how I could modify it. My initial thought was, remove the crown and use the brim with a crocheted crown.
This hat, and the other ribbon hats I have, are made by a spiraled ribbon that is seamed top edge to bottom edge with appropriate gathers for shaping. This particular hat also had a grosgrain ribbon sewn inside as a hat band. That was part of what was making the hat too tight.
So I started my modification with removing the hatband. Unfortunately that did not create enough ease for a comfortable fit. Next step was to unravel the stitching that held the ribbon together for the crown of the hat, and down into the brim just far enough that the brim (with an open crown) fit comfortably around my head.
I then used the loose thread to re-stitch the ribbon and finish the end cleanly.
I used the thread I had pulled off to sew the ribbon into place and secure the loose end. I now had a lovely wide-brimmed crownless hat. I was a wee bit tempted to leave it this way, but I never like the way these types of hats look on me.
Next I went digging in my cotton yarn stash for some yarn to crochet a crown from. I was very happy when I discovered I had a nearly full ball of Bernat’s Cottontots yarn in the “Strawberry” color.
Now you might be wondering why I was obsessively determined to modify this particular hat (no comments from my friends that think obsession is my middle name). It’s not just that I like the look of the color, it’s that the color is very flattering. As I said earlier I’m pale. I’m about as pale as you can get without actually being an albino. But I’m not particularly fond of wearing makeup on my skin. Big makeup for me is mascara and lipstick, most of the time I’m wearing tinted lip balm and my naked, well-moisturized face.
But a hat with a predominantly pink brim sheds very flattering color on my face. When my clothing and accessories can boost my color without me doing any thing extra it is a win. One reason why I wear a lot of pink/peach/salmon/coral colors. They give me a punch of color without having to do more than get dressed or toss on a lovely scarf or hat.
To begin my crocheted crown I measured around the circumference of the crown opening on my new brim. That gave me the measurement I would need for the completed crown. I used my favorite hat stitch: half double crochet, and worked a flat circle until it was the desired diameter (all these numbers are further explained in my post “Pi Recipe”). Once I got to my target diameter I worked evenly in a simple pattern stitch joining each round and turning to keep the pattern.
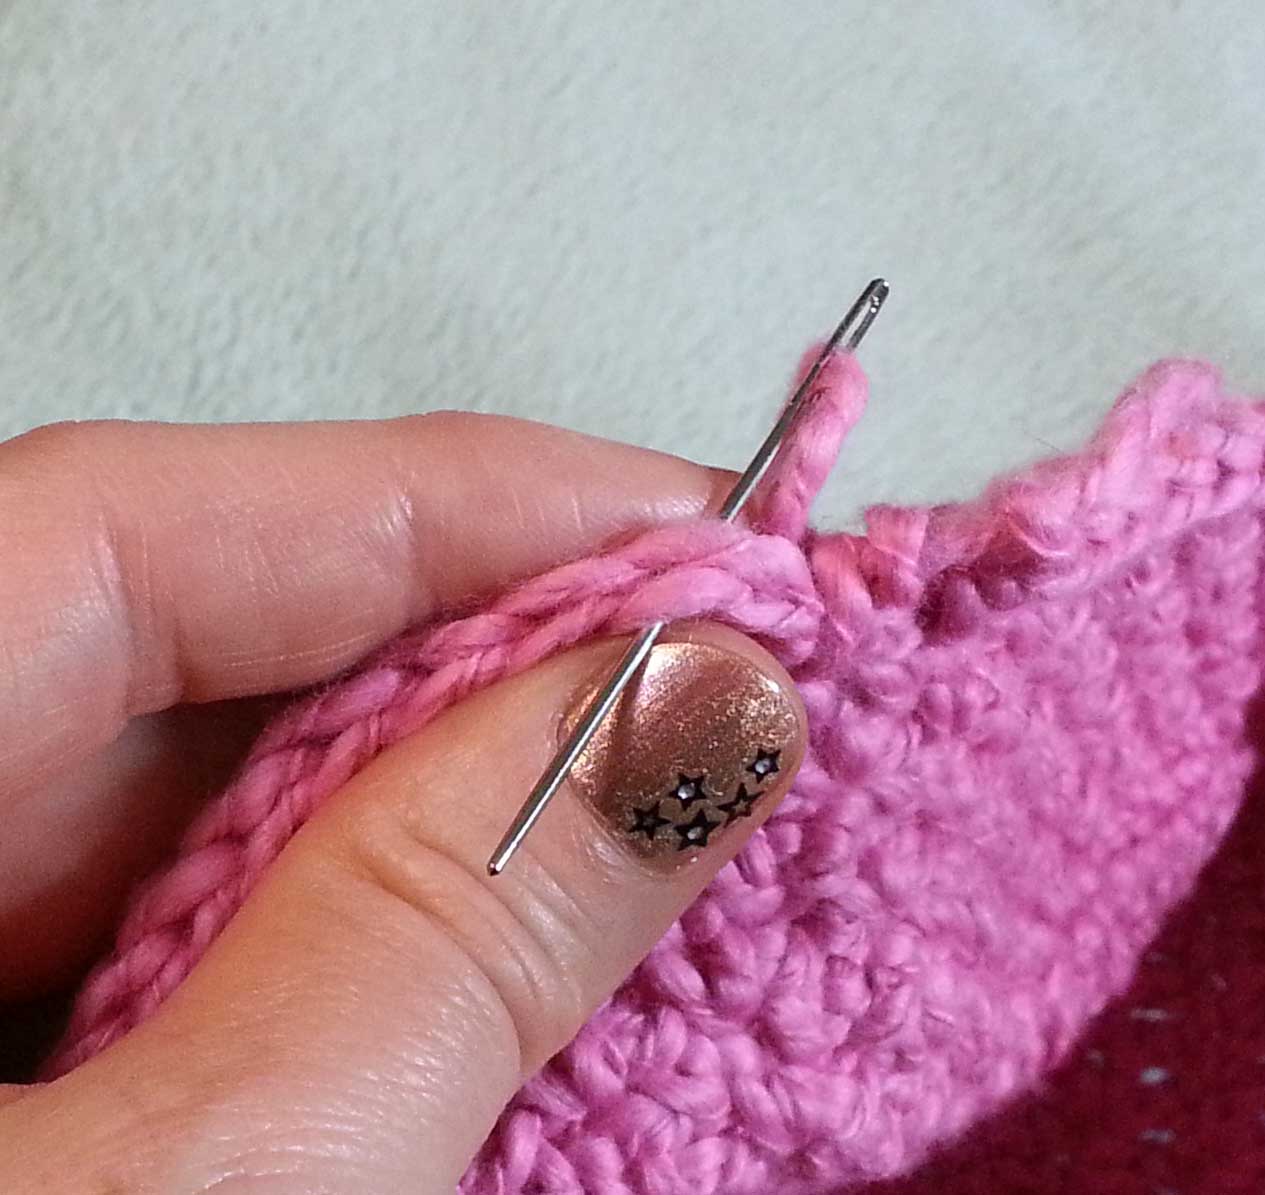
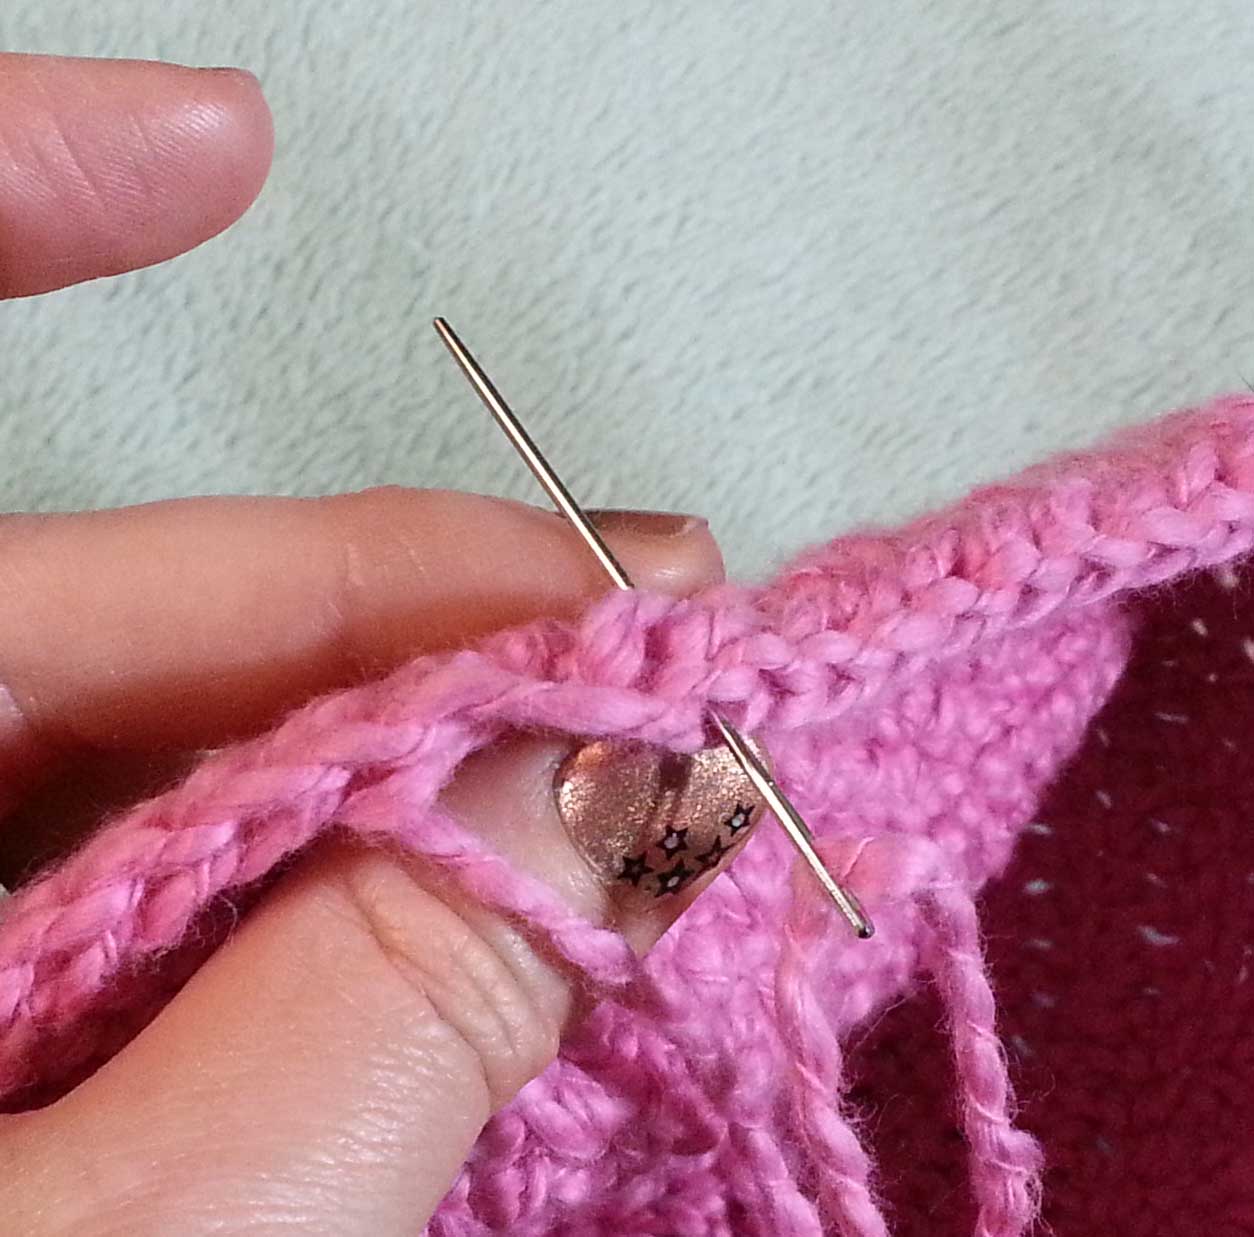
Pull the tail up thru the last st and use a needle to draw the end thru the top of the st joining to.Use the needle to draw the tail back down thru the ending st and weave into the wrong side of the fabric.
After I reached the crown depth I wanted I fastened off with an eight inch tail and used an invisible join to finish, this keeps the join from being bulky or noticeable once the crown is attached to the brim.
My crown was now ready to be attached to my hat brim. I gathered up my sewing supplies; thread, needle, and straight pins.
Openings marked for even joining.
I wanted to be sure that the crown and brim were matched well. I put a stitch marker where my join was on the crown then folded the crown opening and flattened it in half to find the point directly across from the join and marked it. I then folded the crown opening so the 2 markers met and used the same method to mark the points half way between the previous points. I continued this way until I had marked the crowning opening with 8 markers. I did the same using sewing pins for the opening on the brim.
After I pinned the crown to the brim it was a simple matter to sew them together using thread that matched my yarn. Now I have a beautiful pink hat that fits comfortably and can be rolled up into my backpack or carryall when I am out and about.
So how have you used crochet to make something you already have be more usable for you?
For those of you that have been following my blog for a while, you have read about Karen Whooley on here before. I was very fortunate when I signed up to become a CGOA Associate Professional (in 2009) that I got Karen as my mentor. It was a somewhat random pairing that turned out to be very fortuitous. We have so much in common and get along great. I graduated from being Karen’s mentee, but she has become a good friend and colleague in the crochet business.
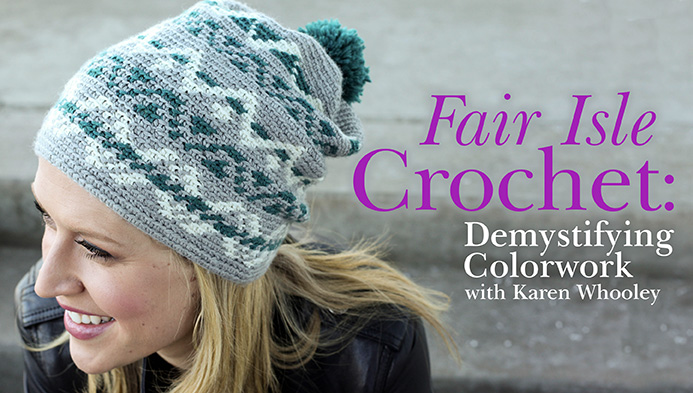
Today I’m pleased to be a part of the blog tour for Karen’s new class with Craftsy.com, Fair Isle Crochet: Demystifying Colorwork. I’ve taken classes with Karen at the Knit & Crochet Show and the Crochet at Cama Retreat. She is an amazing teacher with a comprehensive understanding of her craft and endless kindness and patience in teaching it to others.
And Karen has provided a fabulous gift for you my dear readers, you can use this link: 50% off the fee for the Fair Isle Crochet at Craftsy.com
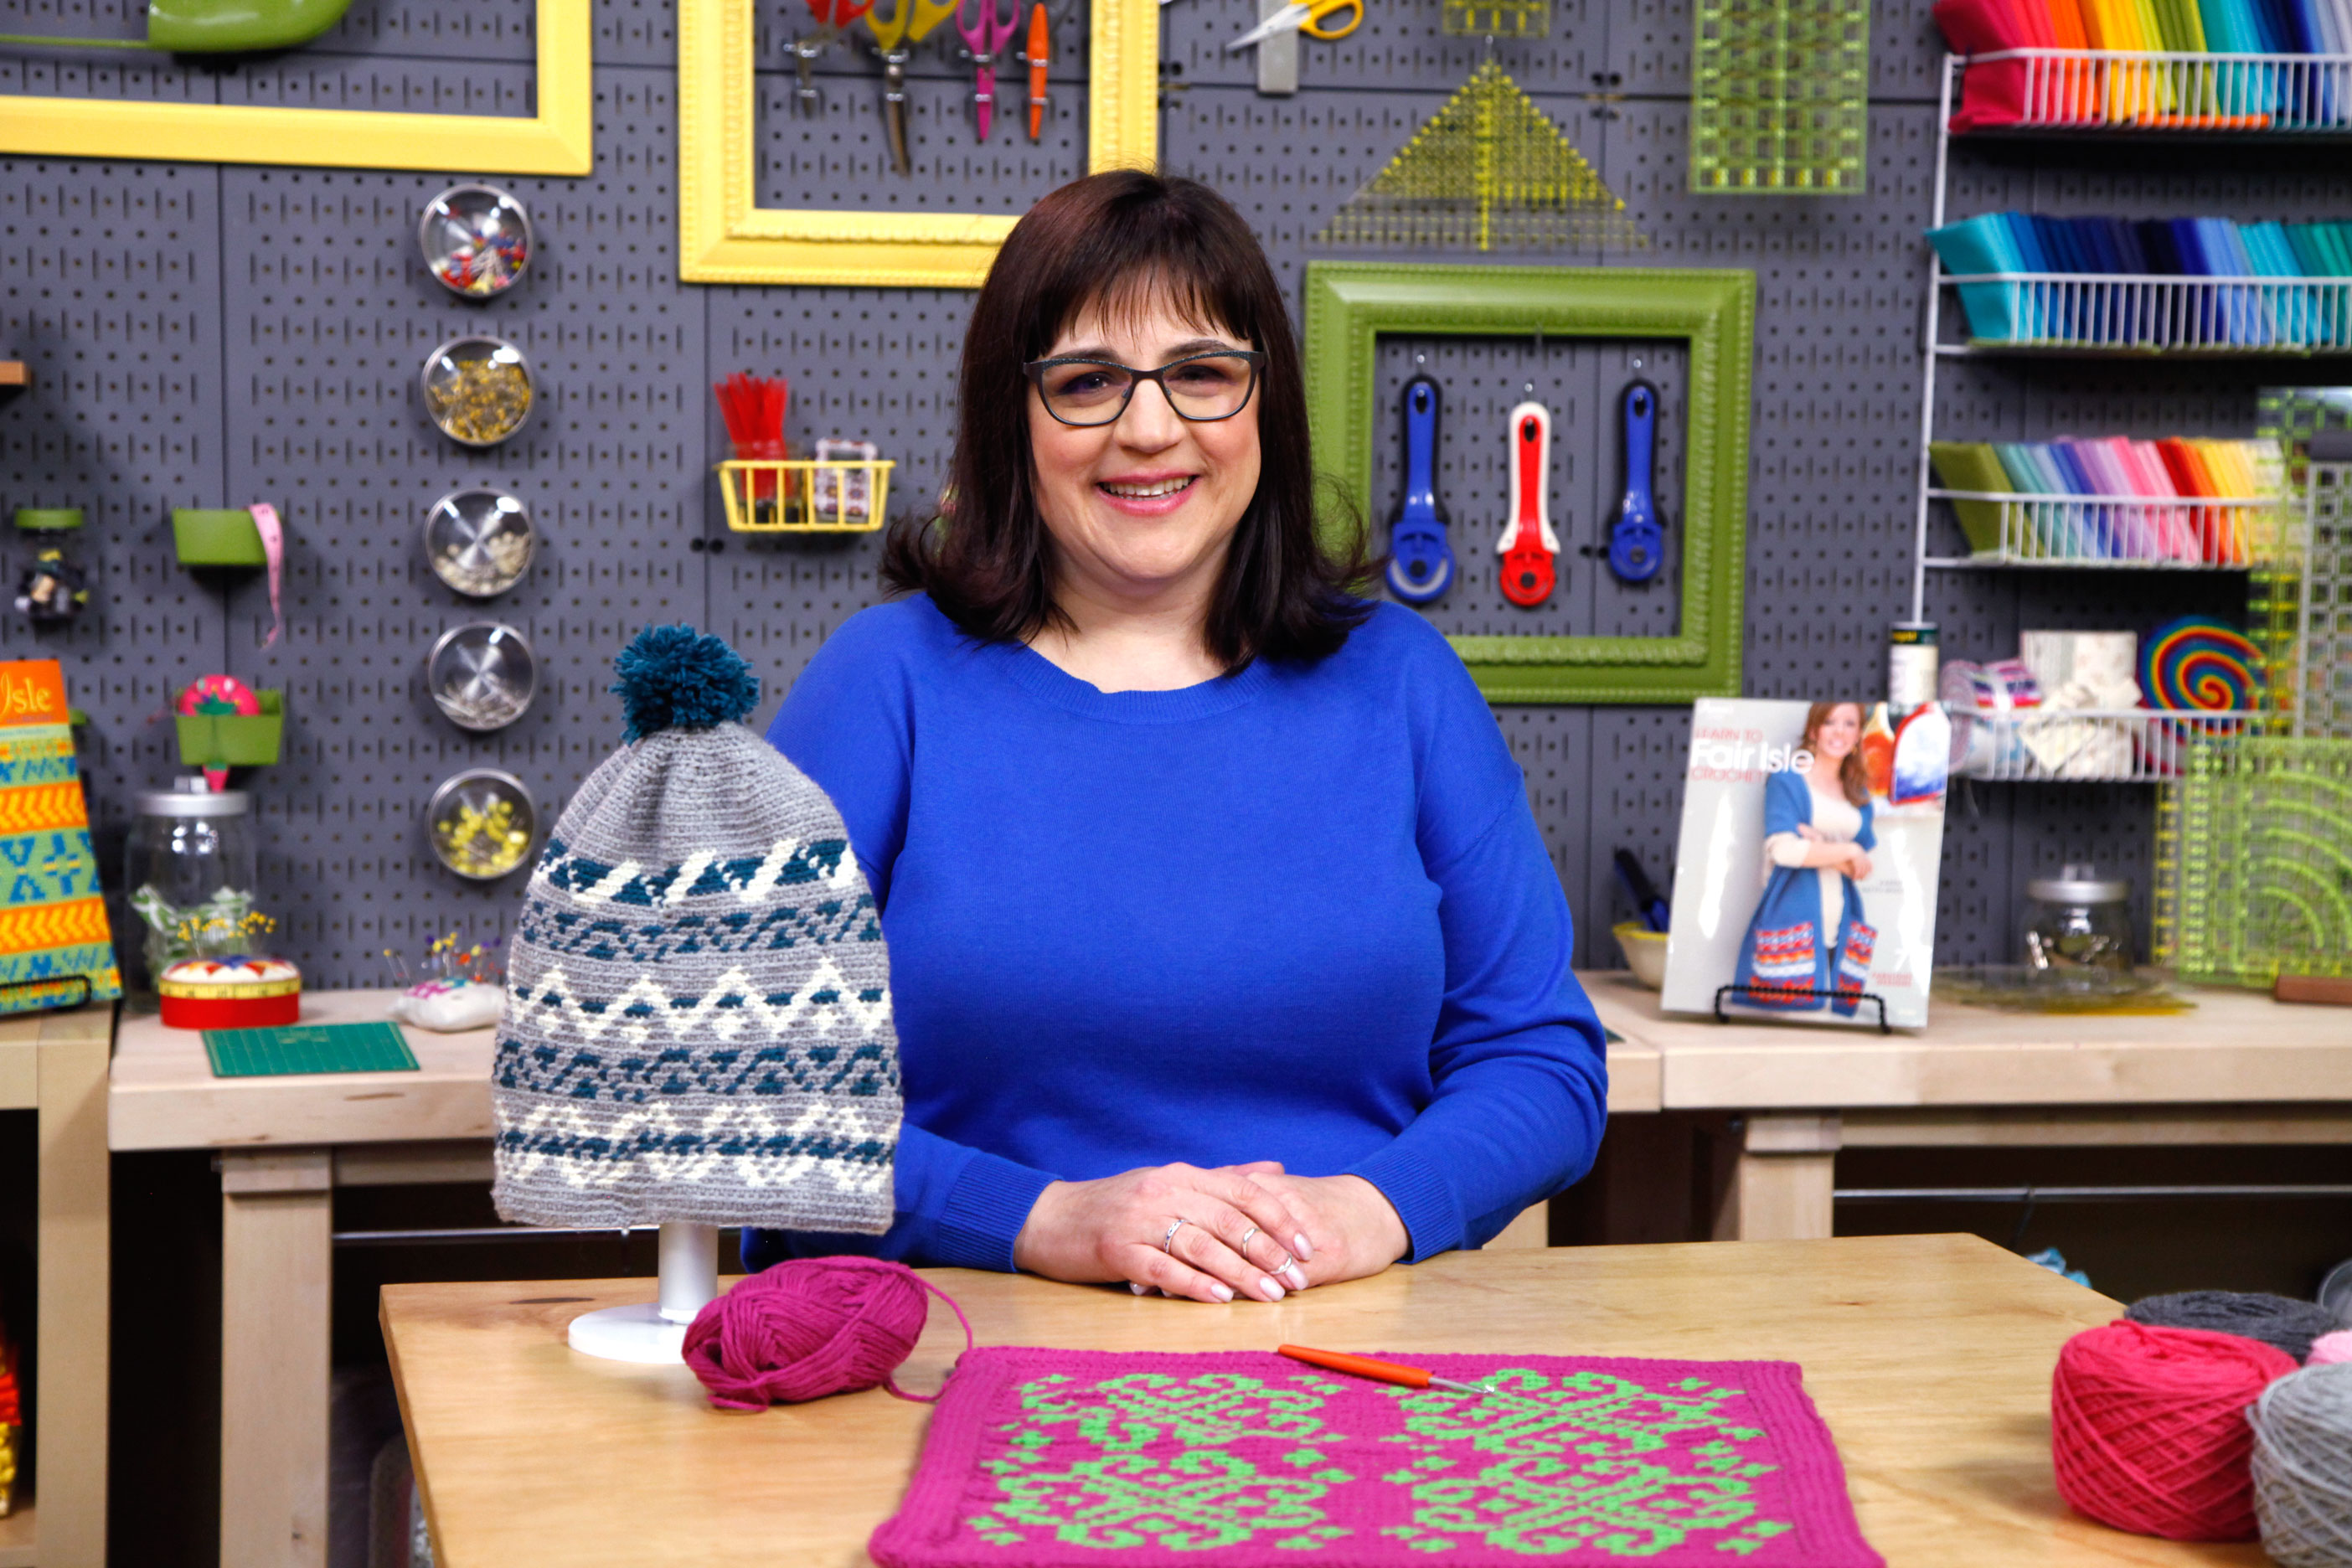
The wonderful Karen Whooley photo courtesy of Craftsy.com
I’ll definitely be taking this class at Craftsy myself very soon, but for this blog tour I wanted to interview Karen. It’s always fun to interview my friends in the industry because I learn about aspects of their crochet (or knitting) journey that I hadn’t known before. So without further fanfare, here is my interview with Karen:
When did you learn to crochet and who taught you?
I learned to crochet in 1974! My Italian Grandmother who was way ahead of her time thought my sister and I watched too much TV. I was 7 years old when she put that hook in my hand. In 2 hours I had made a covered coat hanger with the traditional colors of the 70s – greens and golds.
Are you willing to tell us how long you’ve been crocheting? And if Yes, how long has it been?
This summer it will be 40 years! ACK!
How long have you been teaching Crochet?
I’ve been actively teaching crochet since about 1998 or 1999. At first it was with smaller groups in the San Fransisco Bay area, then in 2000 my family moved to Washington state and I started teaching at local shops in 2001. I started teaching on a national level in 2004!
Who were your first students?
My first students were friends in my neighborhood in California. When I got to WA, I took over teaching at a local store called Pacific Fabrics and Crafts from a fellow Guild member and designer who decided to retire. You may have heard her name, Bev Dillon
What inspires you to teach crochet?
I grew up in a teacher’s household. My mom taught 1st grade for 9 years before I was born. Then she returned to teaching (the 3rd grade) once I got to High School. So teaching is in my blood! But I specifically teach Crochet because it is a craft I want to see go on forever!
When I learned to crochet, my grandmother and I were the only two people I knew that crocheted. In 1996, when I became a stay at home mom after the birth of my first child, I discovered the whole world of crochet out there on a Compuserve List-Serve group called Crochet Partners! (Am I dating myself?) But all those years of not knowing many people in the world that crocheted, when I was given the opportunity to teach… I did!
Did your mom give you advice on teaching when you started teaching crochet?
Mom didn’t so much give me tips as much as my watching her in action in the classroom. Though growing up, she did tell me stories about how nervous she was that first year of teaching, not so much with the students but dealing with the parents. She just pushed through and got over the stage fright.
When I was working full-time as a System Support Engineer for a Company that developed Software for Dental Offices, however, I was asked to teach classes to our field personnel on the system. I was put in a class to help me get comfortable with that.
What inspired you to explore Fair Isle techniques in Crochet?
When I was a teenager, I had this beautiful bulky knit fair isle sweater. It just fascinated me. At the time, I didn’t know how to knit, but I was dying to learn so I could make my own sweaters using the Fair Isle motifs. It wasnt until I was 37 when I learned to knit, and then a couple of years later I learned stranded knitting. It was at that point I knew I could replicate fair Isle knitting in crochet! So after lots of trial and error (which I talk about in the class with samples!) I hit upon what I felt was the best replication I could get of Fair Isle stranded Knitting in crochet.
You knit and crochet, do you find Fair Isle easier in crochet or knitting?
Well, honestly it depends. Because I have been crocheting longer than knitting, I find it easier to crochet but knitting isn’t hard. The difference for me is that in knitting I have all those live stitches with the potential of dropping one or more. In crochet that isn’t a factor. Because both charts are the same and are read the same way, either one works for me and depending on the look I am going for, I will swap out one for the other.
I love the hat in the promotional photos for the class, was there a particular inspiration for that design?
Mostly it was that I wanted something that looked like a traditional Fair Isle knit hat. After pouring through Fair Isle motif dictionaries, I put together some of my favorites. I chose traditional greens and greys of the Shetland Islands and there was my hat!
The hat looks like something that would appeal to the teenagers in your house, are there requests being put in for hats from your family?
Funny you should ask. That hat is my 15-year-old daughter’s favorite piece from the class. Teal green is her favorite color. But she doesn’t want me to make it now as summer is coming. Probably for next year!
I know you must be really excited about offering classes thru Craftsy.com, what do you like the best about this style of teaching?
I think what I like the most is that the class is there forever. Students have the class to go back to for help or just to remind them of some part of Fair Isle Crochet they may have forgotten. The Computer geek in me loves the platform. The fact that they can take notes right on the video for themselves is just amazing. And those notes are there for them to access forever too!
I also love the fact that I can reach students all over the world! I don’t have that opportunity with teaching live. Lots of times I’ve gotten emails from potential students telling me that they cannot attend an event because it is just too far or too costly. They want to know if I am ever coming to their area. That isn’t always going to happen, so this way they can actually have me teach them in their living room! Or office, or even on the couch next to them!
Do you have a preference of designing or teaching?
That is a hard question because I love them both. Because of the way I was taught to crochet, by a non-English speaking grandmother, the techie in me loves the challenge of creating something from scratch. But there is something about that light bulb moment students get that gives me great satisfaction. It’s like a visual confirmation that the craft will continue.
Do you dream about crochet? About yarn?
Oh gosh, all the time! Some of my best design concepts come from dreams! Sometimes when a particular pattern is not working out, I get the solution in a dream. I cannot tell you how often that happens. In dreams and on the treadmill walking. Those are my two go to places when I need to work out something in crochet (or knit too!).
Thank you so much for taking the time to talk with me today Karen, I was wondering if you have any final words of encouragement for those that might be intimidated by Fair Isle and this class?
Thanks Andee for having me!
For those of you who may be intimidated by colorwork, this is definitely the class for you! During the class I break down every piece of the pattern, along with having tips in there for you. I have already had students who bought my Fair Isle books, only to be intimidated by all the color changing, send me photos of their swatches from the class. They are excited about how I walked them through the process.
The cool thing about these Craftsy classes is the platform. The “Pause” and “30 second repeat” options allow you to go back and see once again what I just showed you. And you can do that as many times as you need until you get the idea down. You can also ask me a question at any time, and I will be answering! So don’t be afraid to try it! I’m there to help along the way!
No, I haven’t gone Hollywood on you. But I am doing quite a bit of video work these days.
As some of you may be aware I am writing the “Technique 1-2-3” articles for “Crochet 1-2-3” now. Issue #11 coming out this May will be my first article in my new role. As part of this assignment I needed to make videos demonstrating the techniques.
I had been wanting to do crochet videos for a long time. But being a recovering perfectionist was getting in my way. Fortunately, the job offer from “Crochet 1-2-3” forced me to finally jump in and give it a try.
At first I thought I would need a fancy digital camcorder, then Kimberly McAlindin (the editor in chief at Crochet 1-2-3) told me that she recorded her videos with her smart phone. Really? That surprised me, and got me wondering how well my smart phone would work.
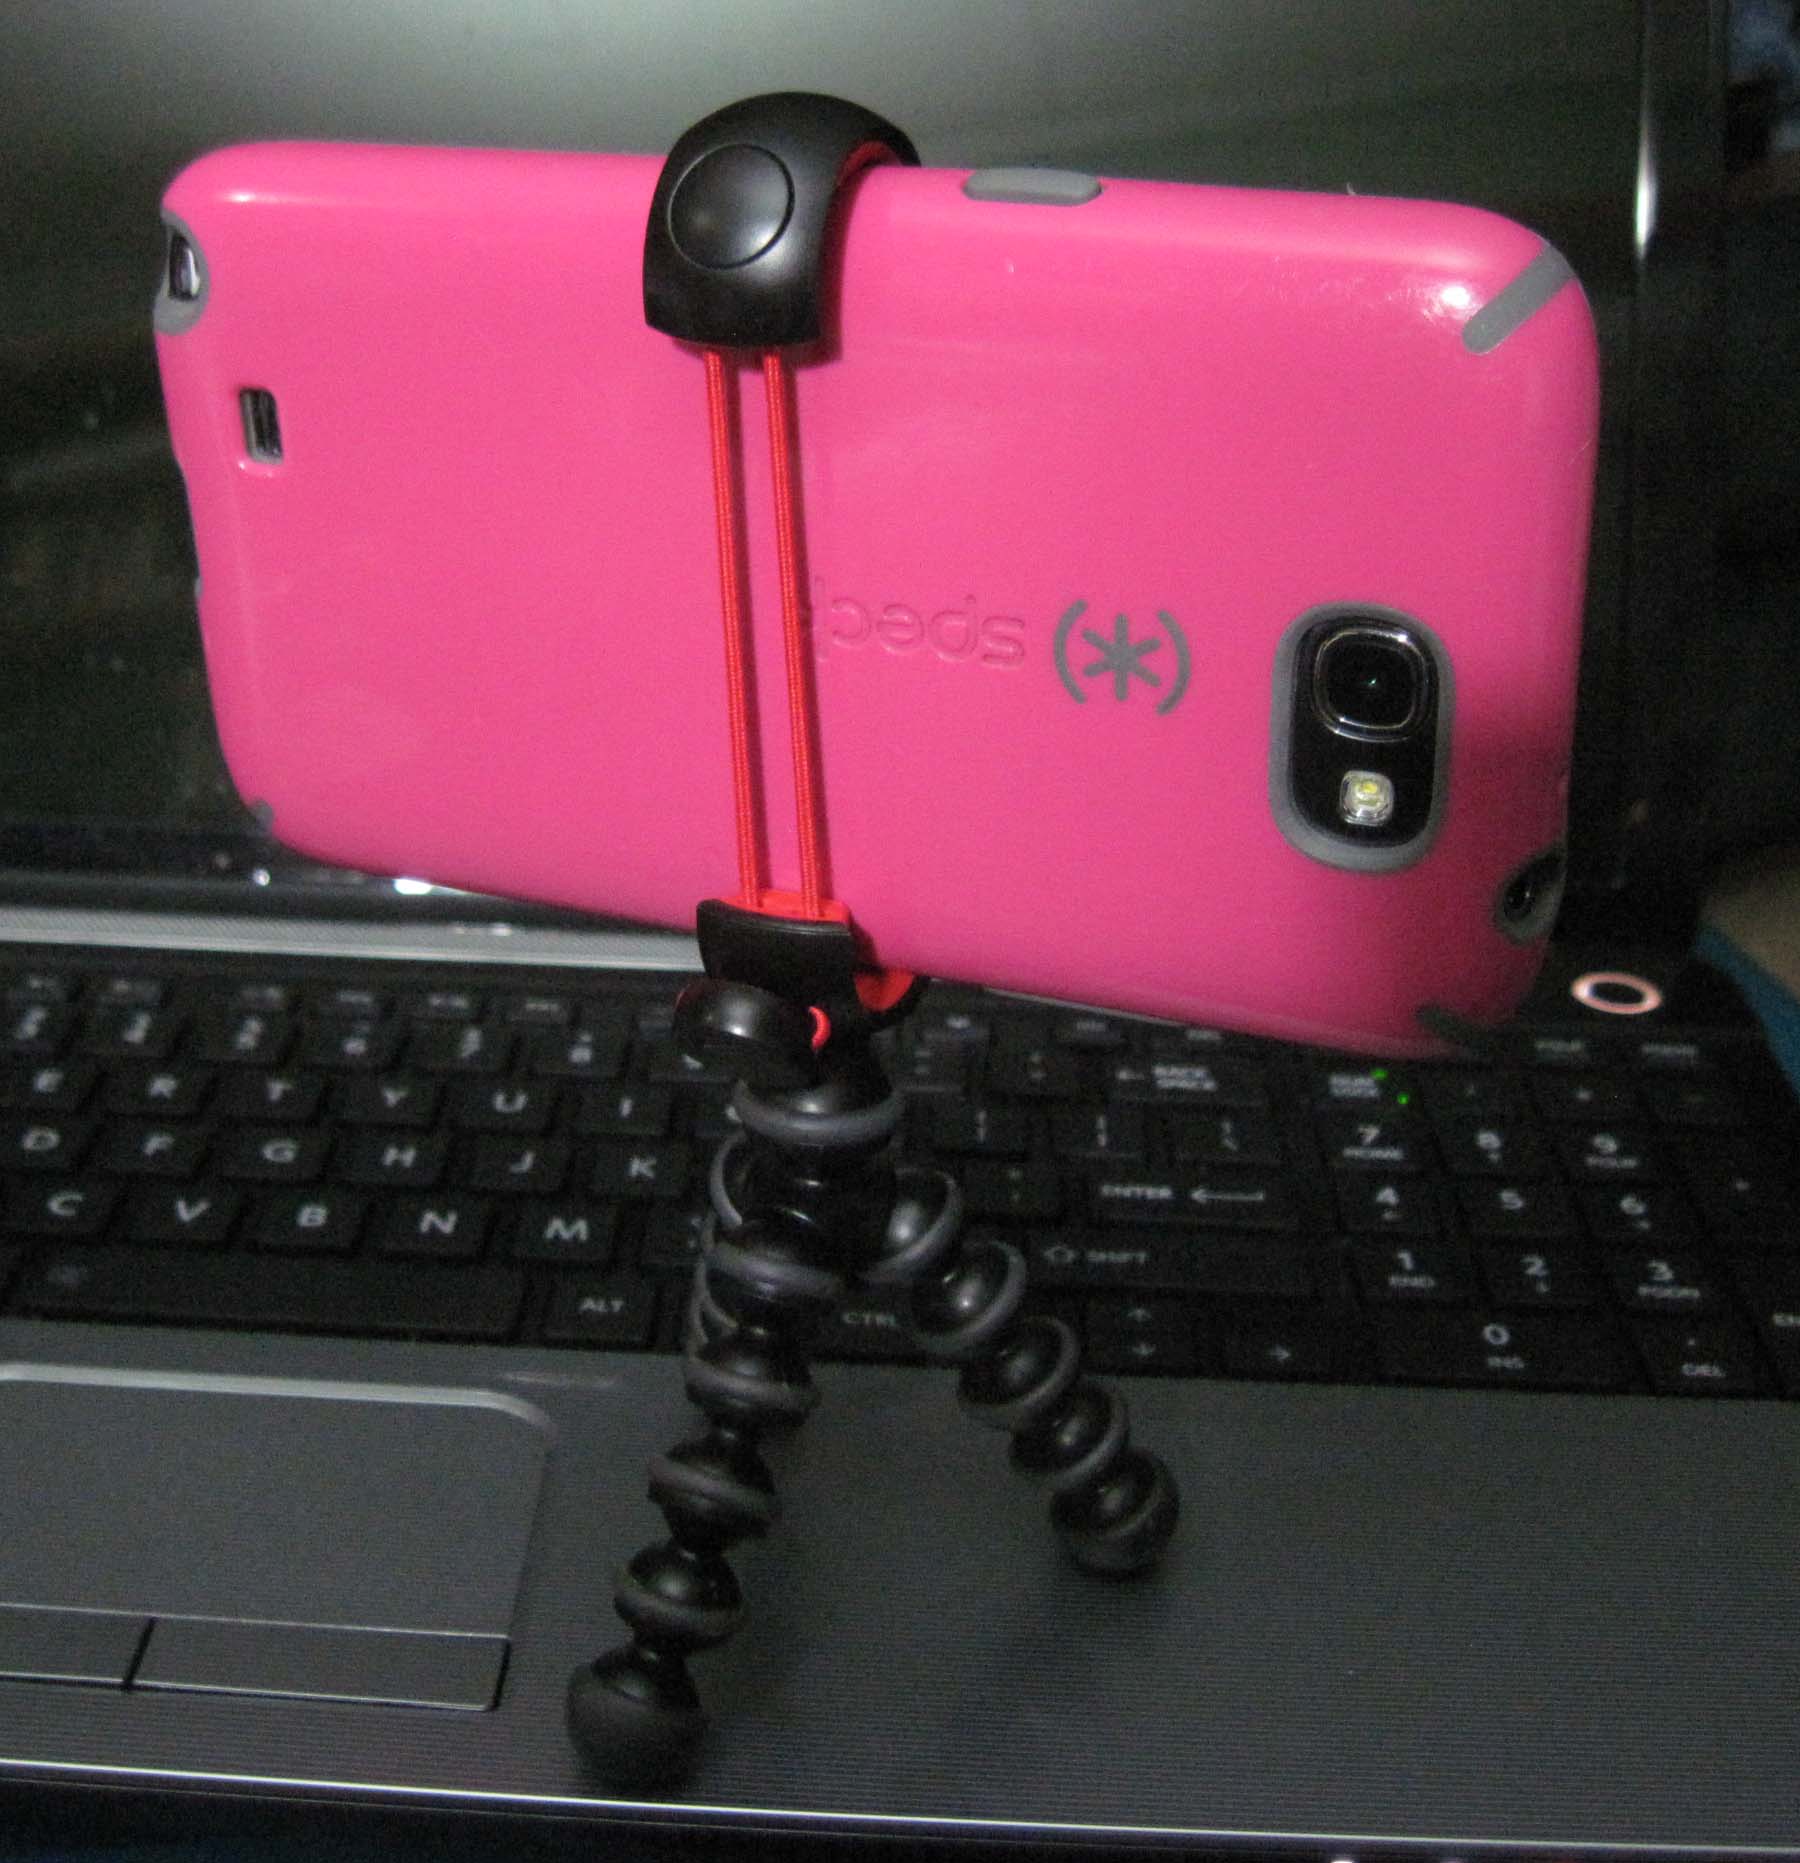
Last March I had splurged and purchased the Samsung Galaxy Note 2 phone for my business. I’m still exploring all the bells and whistles on it. I was delighted to discover that I could shoot good quality video with it. I still needed a tripod so that I could use both hands in my demonstrations. I figured the local camera shop in Boulder (Mike’s Camera) would have something that would work.
When I got to the shop I found the types of tripods I was looking for right away. There were loads of ones designed for use with the IPhone. Unfortunately the options for a phone as large as my Note were very limited. With some help from one of the camera specialist though we finally matched a tripod to my phone.
My Phone held in the tripod from the back.
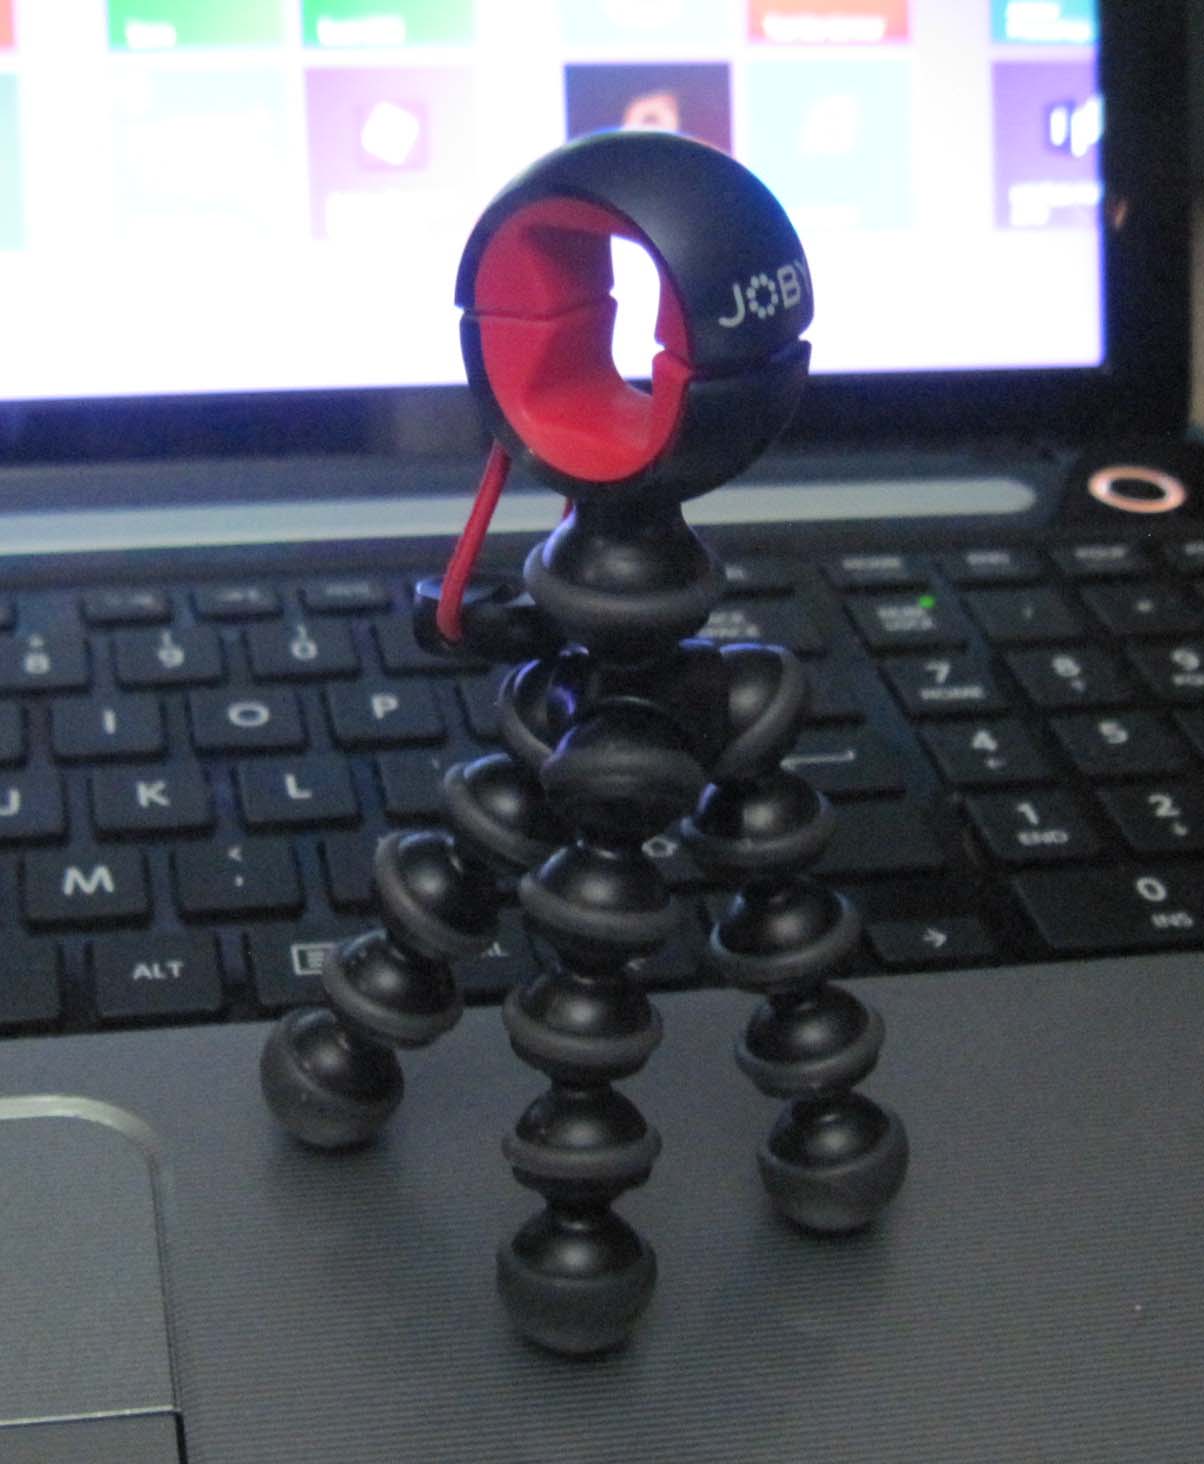
I wanted one of these with the bendable legs so that if needed I could grip it around the top of my regular camera tripod. This is the Joby Mpod Mini.
Phone in the tripod from the front.
I really liked how this tripod allowed me to see the screen of my phone without any obstructions.
When I got home I started experimenting with how to get the right angle and distance from my hands for filming. The little tripod was great, but it wasn’t high enough off the table. My regular tripod was too tall for what I wanted. I know, it all sounds a bit Goldilocks.
Then I hit upon sitting the camera on top of a little box, perfect height, but it kept wanting to tip over and was wiggly when I was filming. I needed something sturdier. So I dug out a glass jar, filled it with pennies and decorative glass marbles to give it plenty of weight. Popped the tripod on the top and squeezed the bendable legs tightly around the lid. Unfortunately, when the camera was at the proper angle the little tripod and camera wanted to topple off the top.
Never fear, there is always Duct Tape (and mine is Purple). Taped up the little tripod and suddenly every thing was perfect. Setting up the rest of my “studio” was easy after all the tripod drama.
Currently my filming studio is my dining room table, nice big window to my left lets in loads of natural light and there is room for my backdrop, additional light and the necessary project supplies. Eventually I hope to be filming in my design office or art studio. Who knows it might be both locations, depending on the craft and technique I’m showing.
Check out the Crochet 1-2-3 website in May to see my first videos. For my first foray into the waters of video work I think they came out fairly decent.
Today I’m honored to be a part of the 2014 Crochetville NatCroMo Designer Blog Tour. Amy Shelton and Donna Hulke of Crochetville included me last year in their National Crochet Month tour to celebrate crochet and it was great fun. These two are the right women to lead the celebration of all things crochet, visit them at the Crochetville site or their blog and you’ll know just what I mean.
My focus this year for NatCroMo has been teaching others to crochet. It’s been very exciting that my youngest son is learning. Above is his latest effort, he wanted to make a scarf so I got him started with the first row of this little V-stitch scarf and he is amazing me at how well he is doing. It’s also a great excuse for some cuddle time as we snuggle together on the sofa and crochet.
Today I will be at the Longmont Yarn Shoppe from 12p – 1:30p with my local CGOA Chapter showing folks how to get started crocheting. We will be making quick fun little beaded bracelets that students can make and take away with them. Beaded crocheted chains are a fun easy project that give beginners the chance to make something beautiful with minimal crochet skills.
Our projects for the “Make & Take” will use plain worsted weight yarn and plastic pony beads.
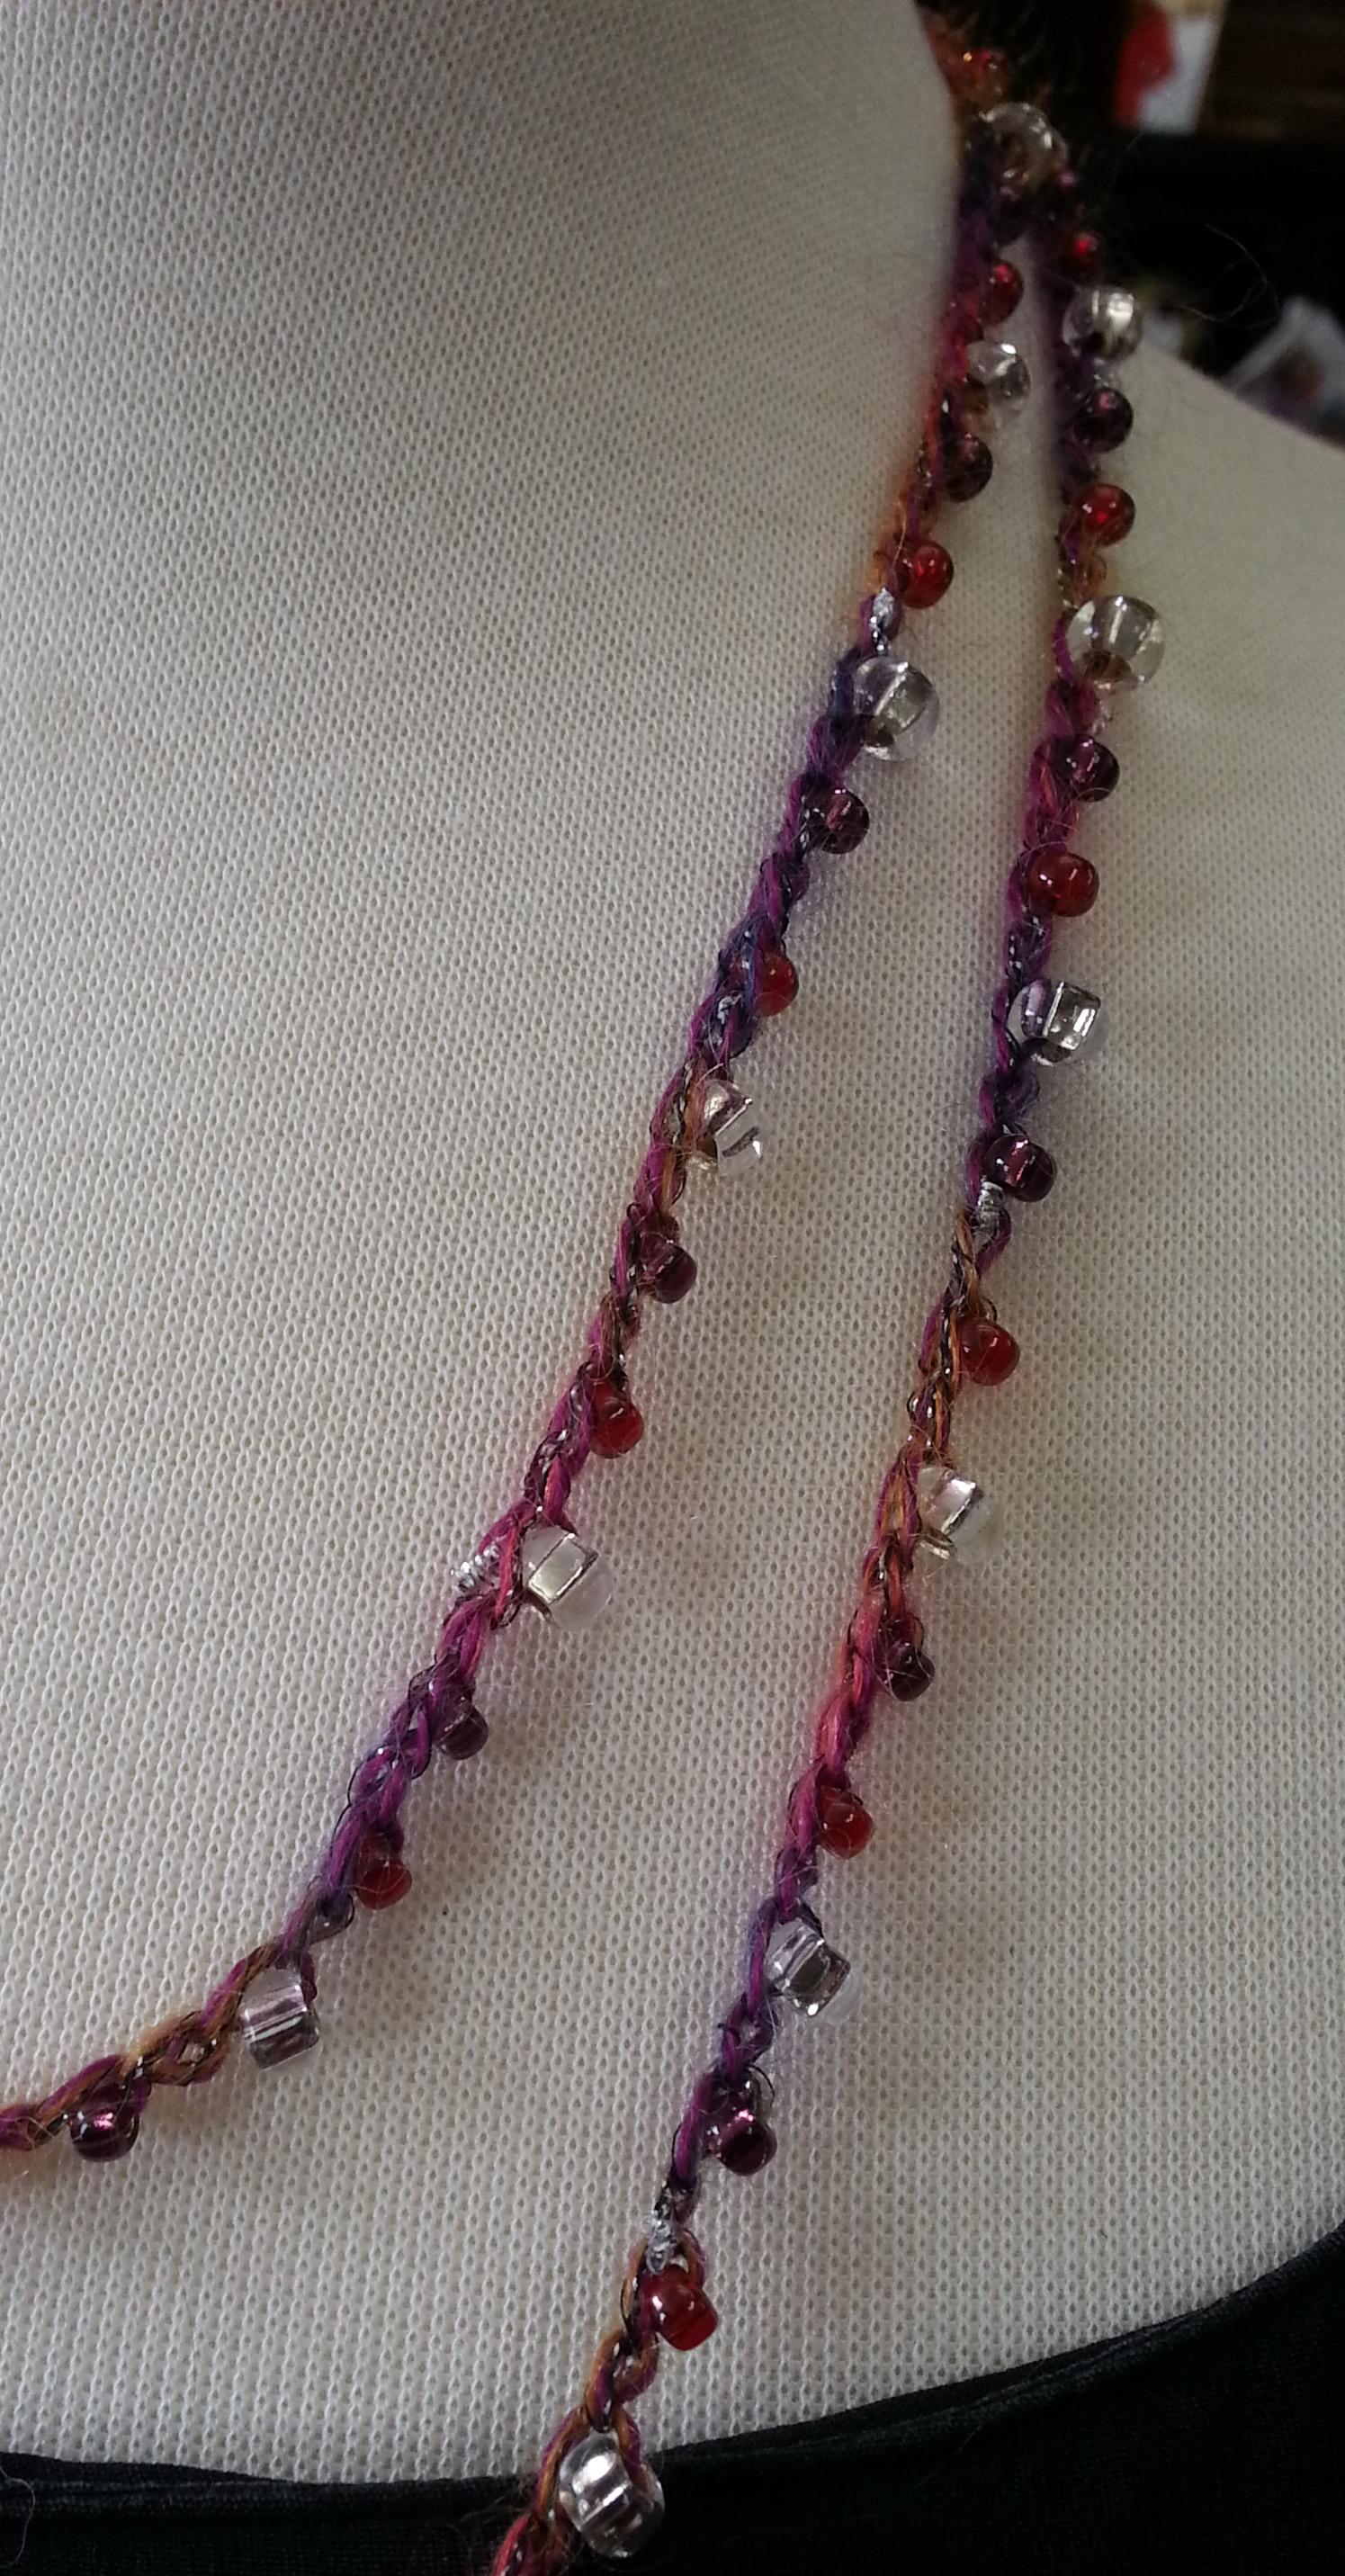
Switch out the yarn to something with silk or glimmering threads and the beads for lovely glass or semi-precious beads (just need holes big enough for the yarn to go thru), and you’ve got a beautiful piece of jewelry.
Look at the lovely necklaces we have on display at the shop, these were all made just by stringing beads on the yarn then working crocheted chains to the desired length.
For those of you that can’t be with us today I have included photos and instructions for you to practice at home. Or if you are an experienced crocheter teaching some one else how to get started, this is a great starter project as they get accustomed to working with the yarn and hook.
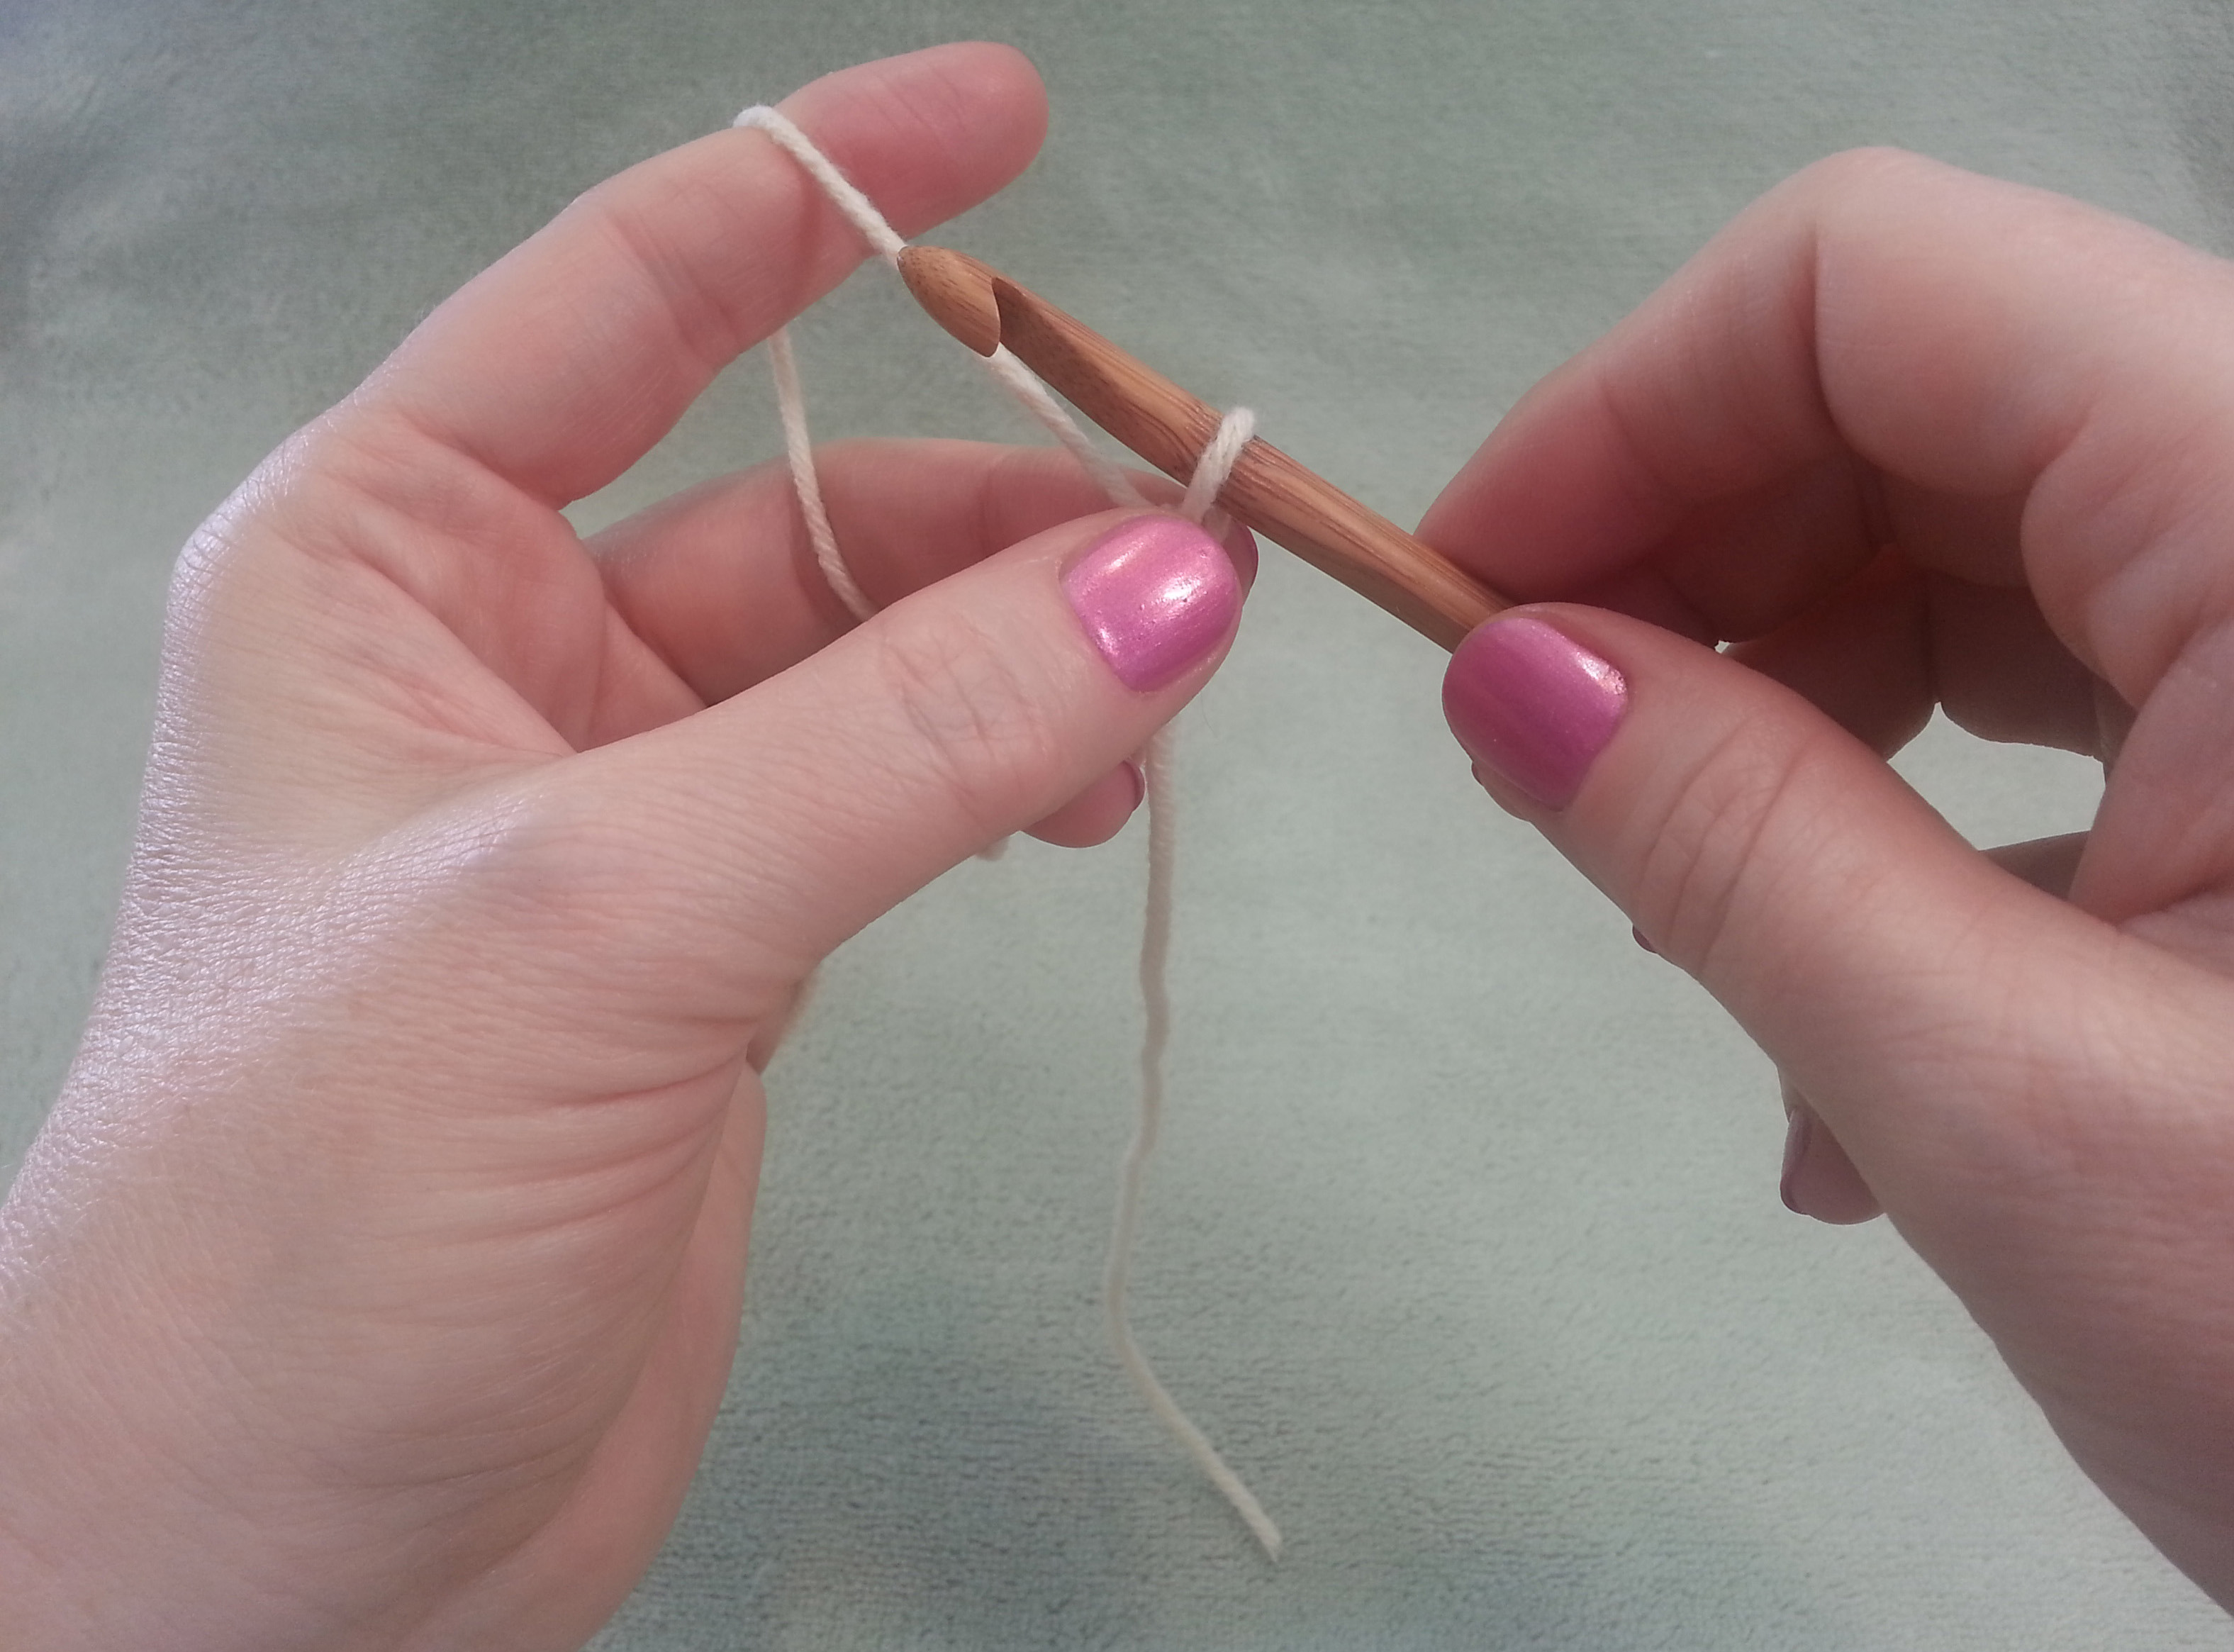
If you’ve never crocheted, or it’s been a long time since you crocheted, you may have forgotten how to hold your hook and yarn. These photos Show how to hold the yarn and hook if you are right-handed. For left-handed crocheters just reverse which hand holds the yarn and hook. The most important thing to remember when crocheting is to keep your hands relaxed.
Making a slip knot to place on your hook
I create a loop with the working yarn (coming from the ball of yarn) going over the top of the beginning tail, then reach thru the loop with my hook (or fingers) to pull up a loop from the working yarn, I place that loop over my hook and gently pull on the working yarn to snug the loop on my hook.
Holding your hook
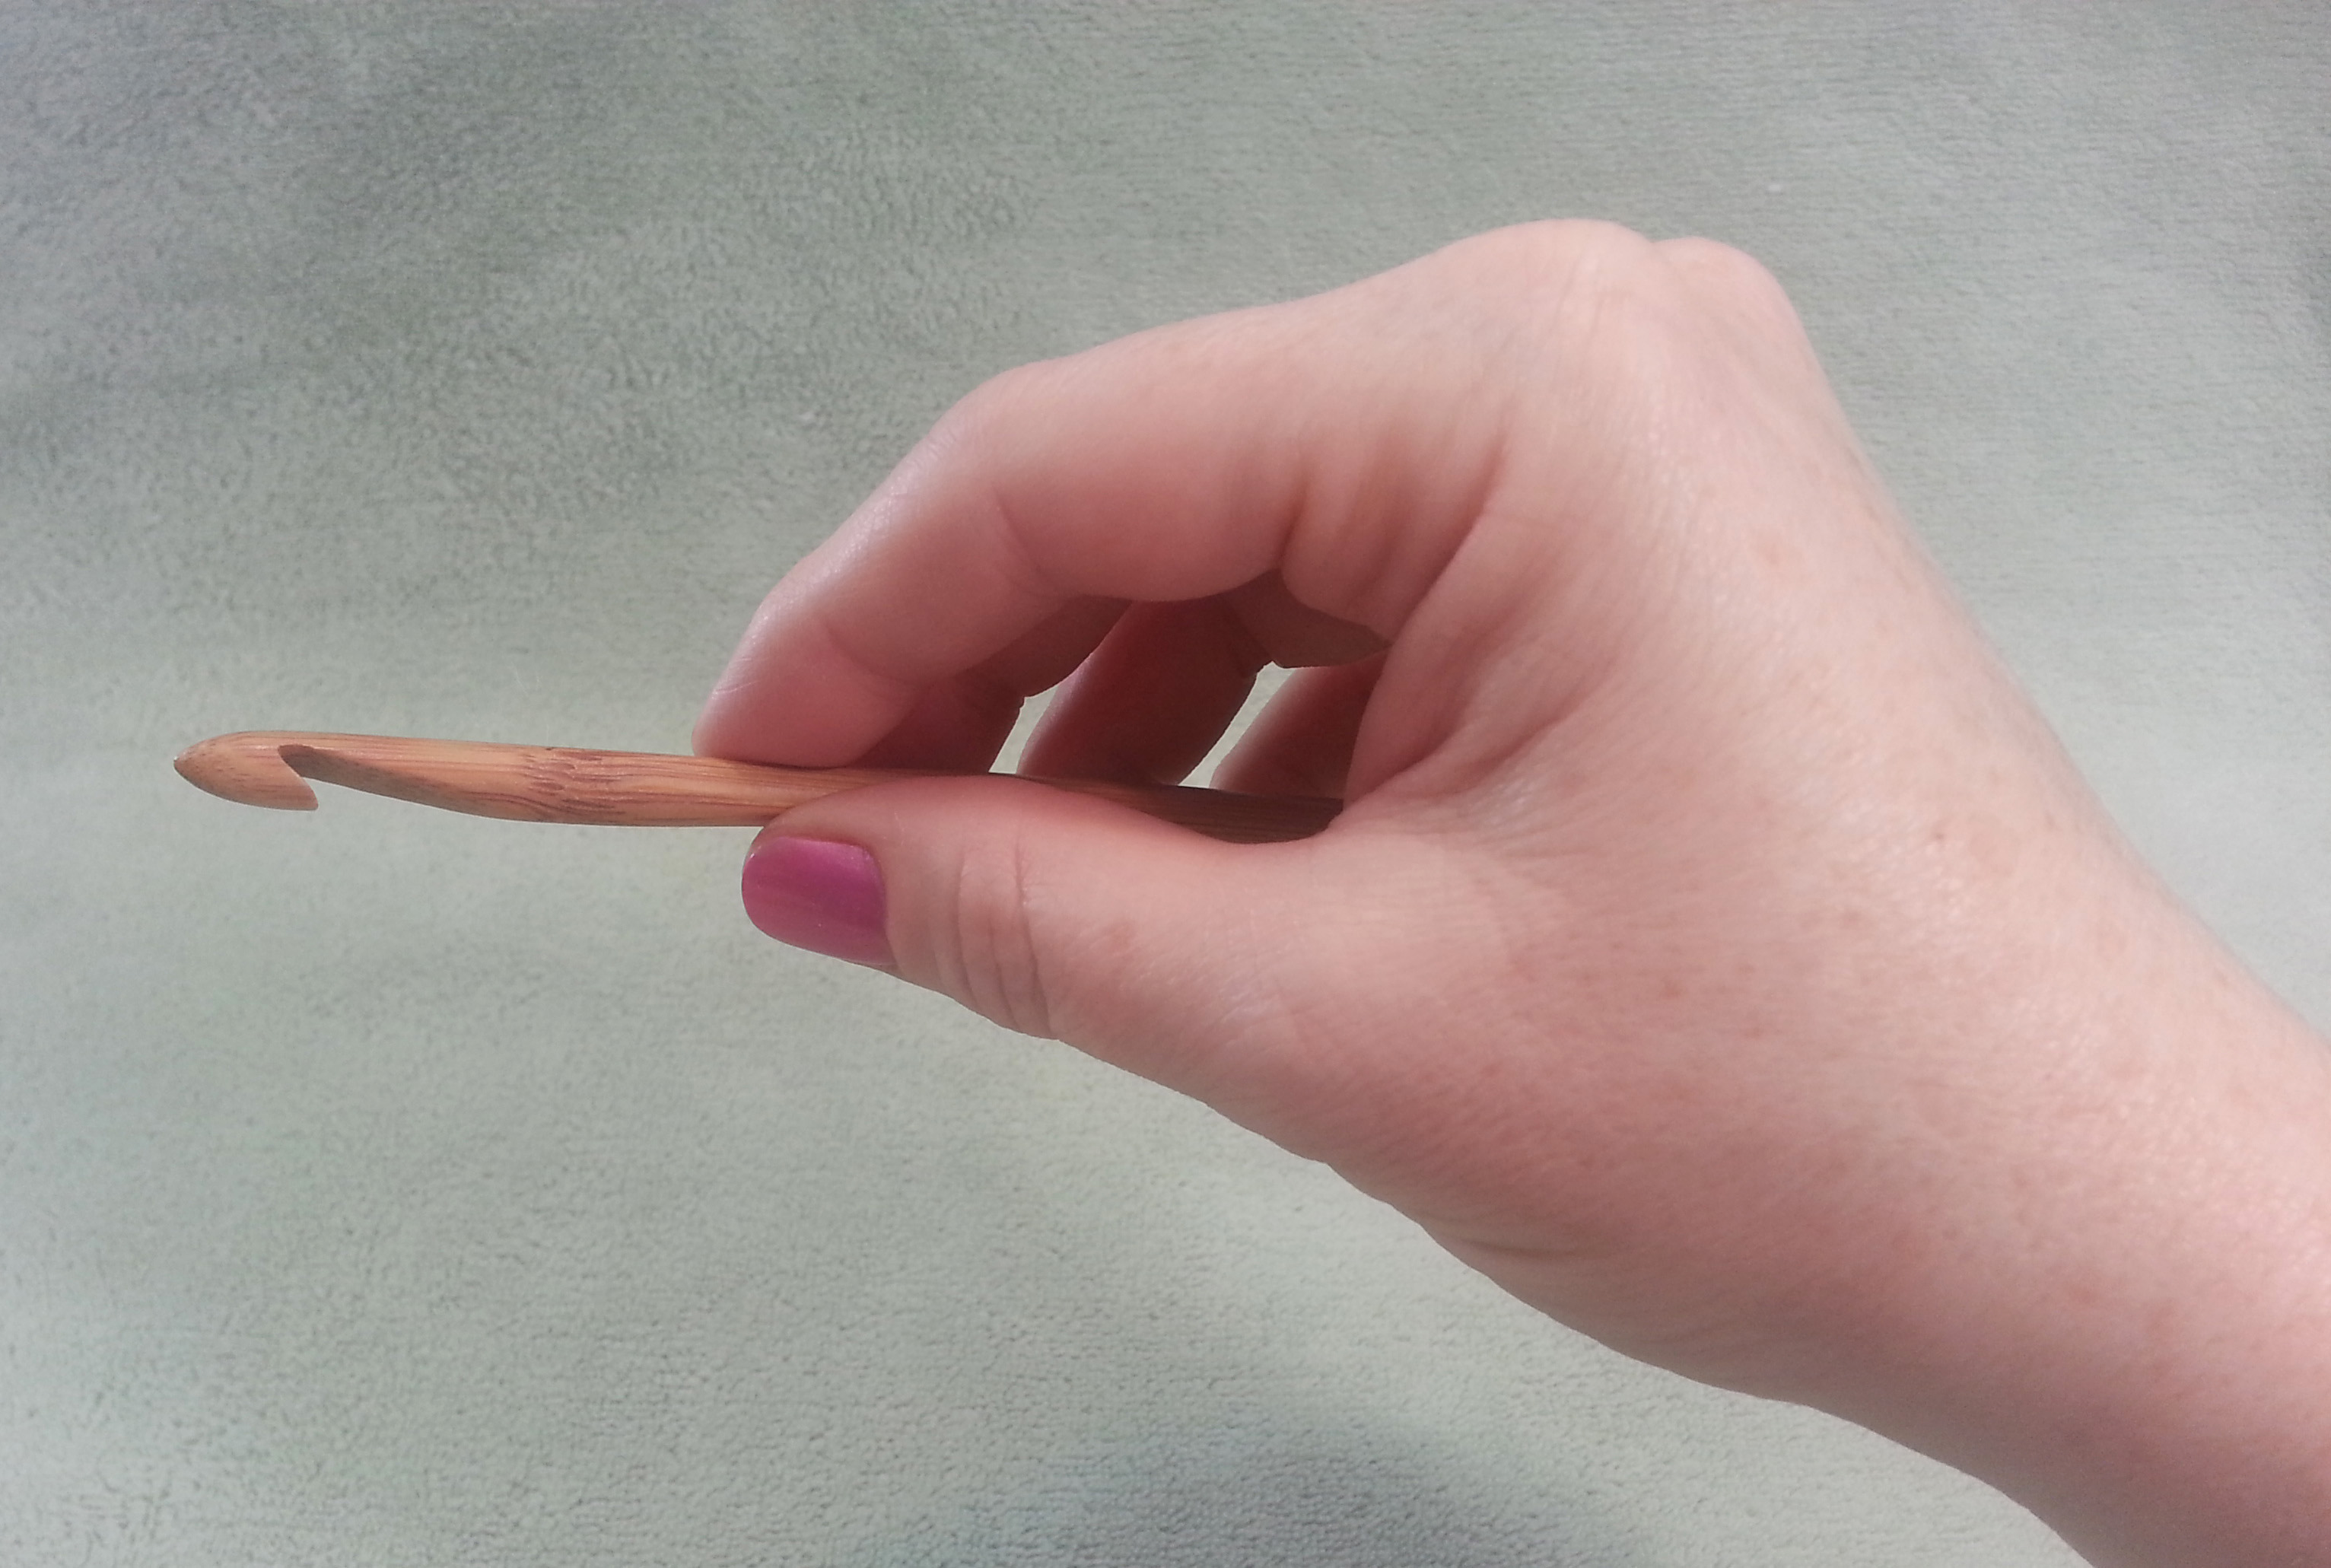
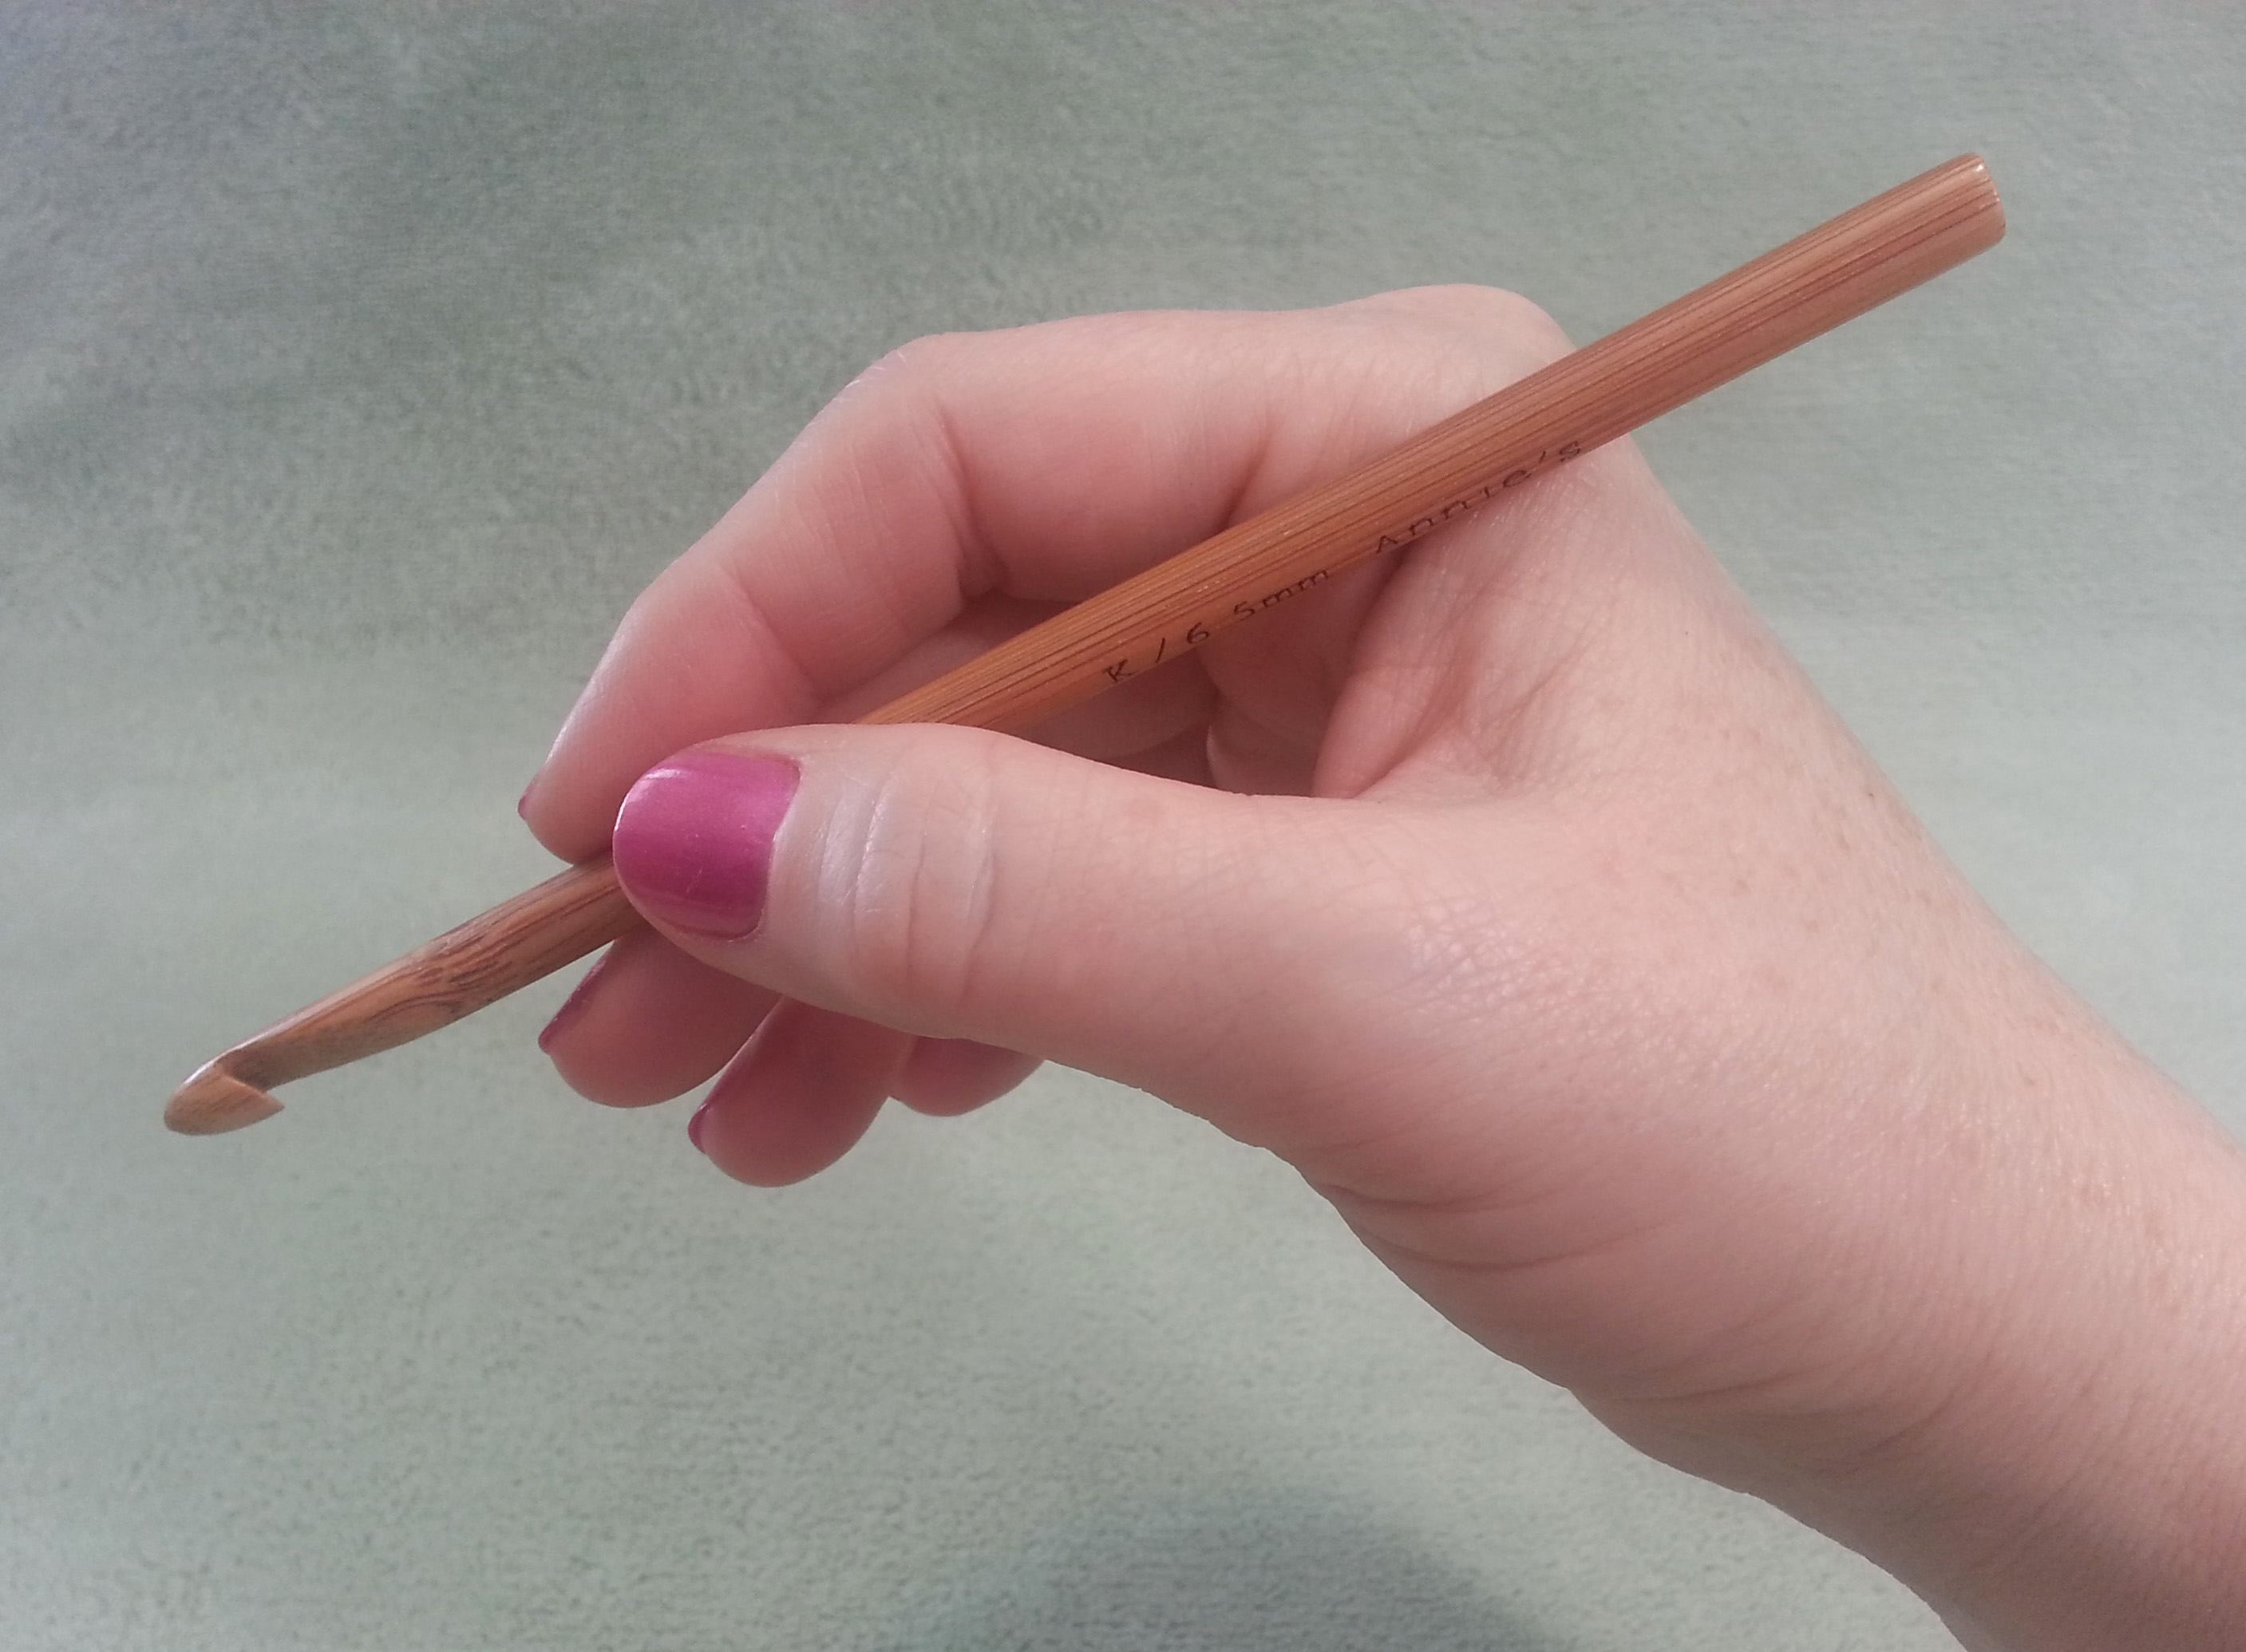
There are 2 fairly common ways to hold your crochet hook…
The Knife or Toothbrush hold….
Or the Pencil hold.
Try them both out and see which is most comfortable to you.
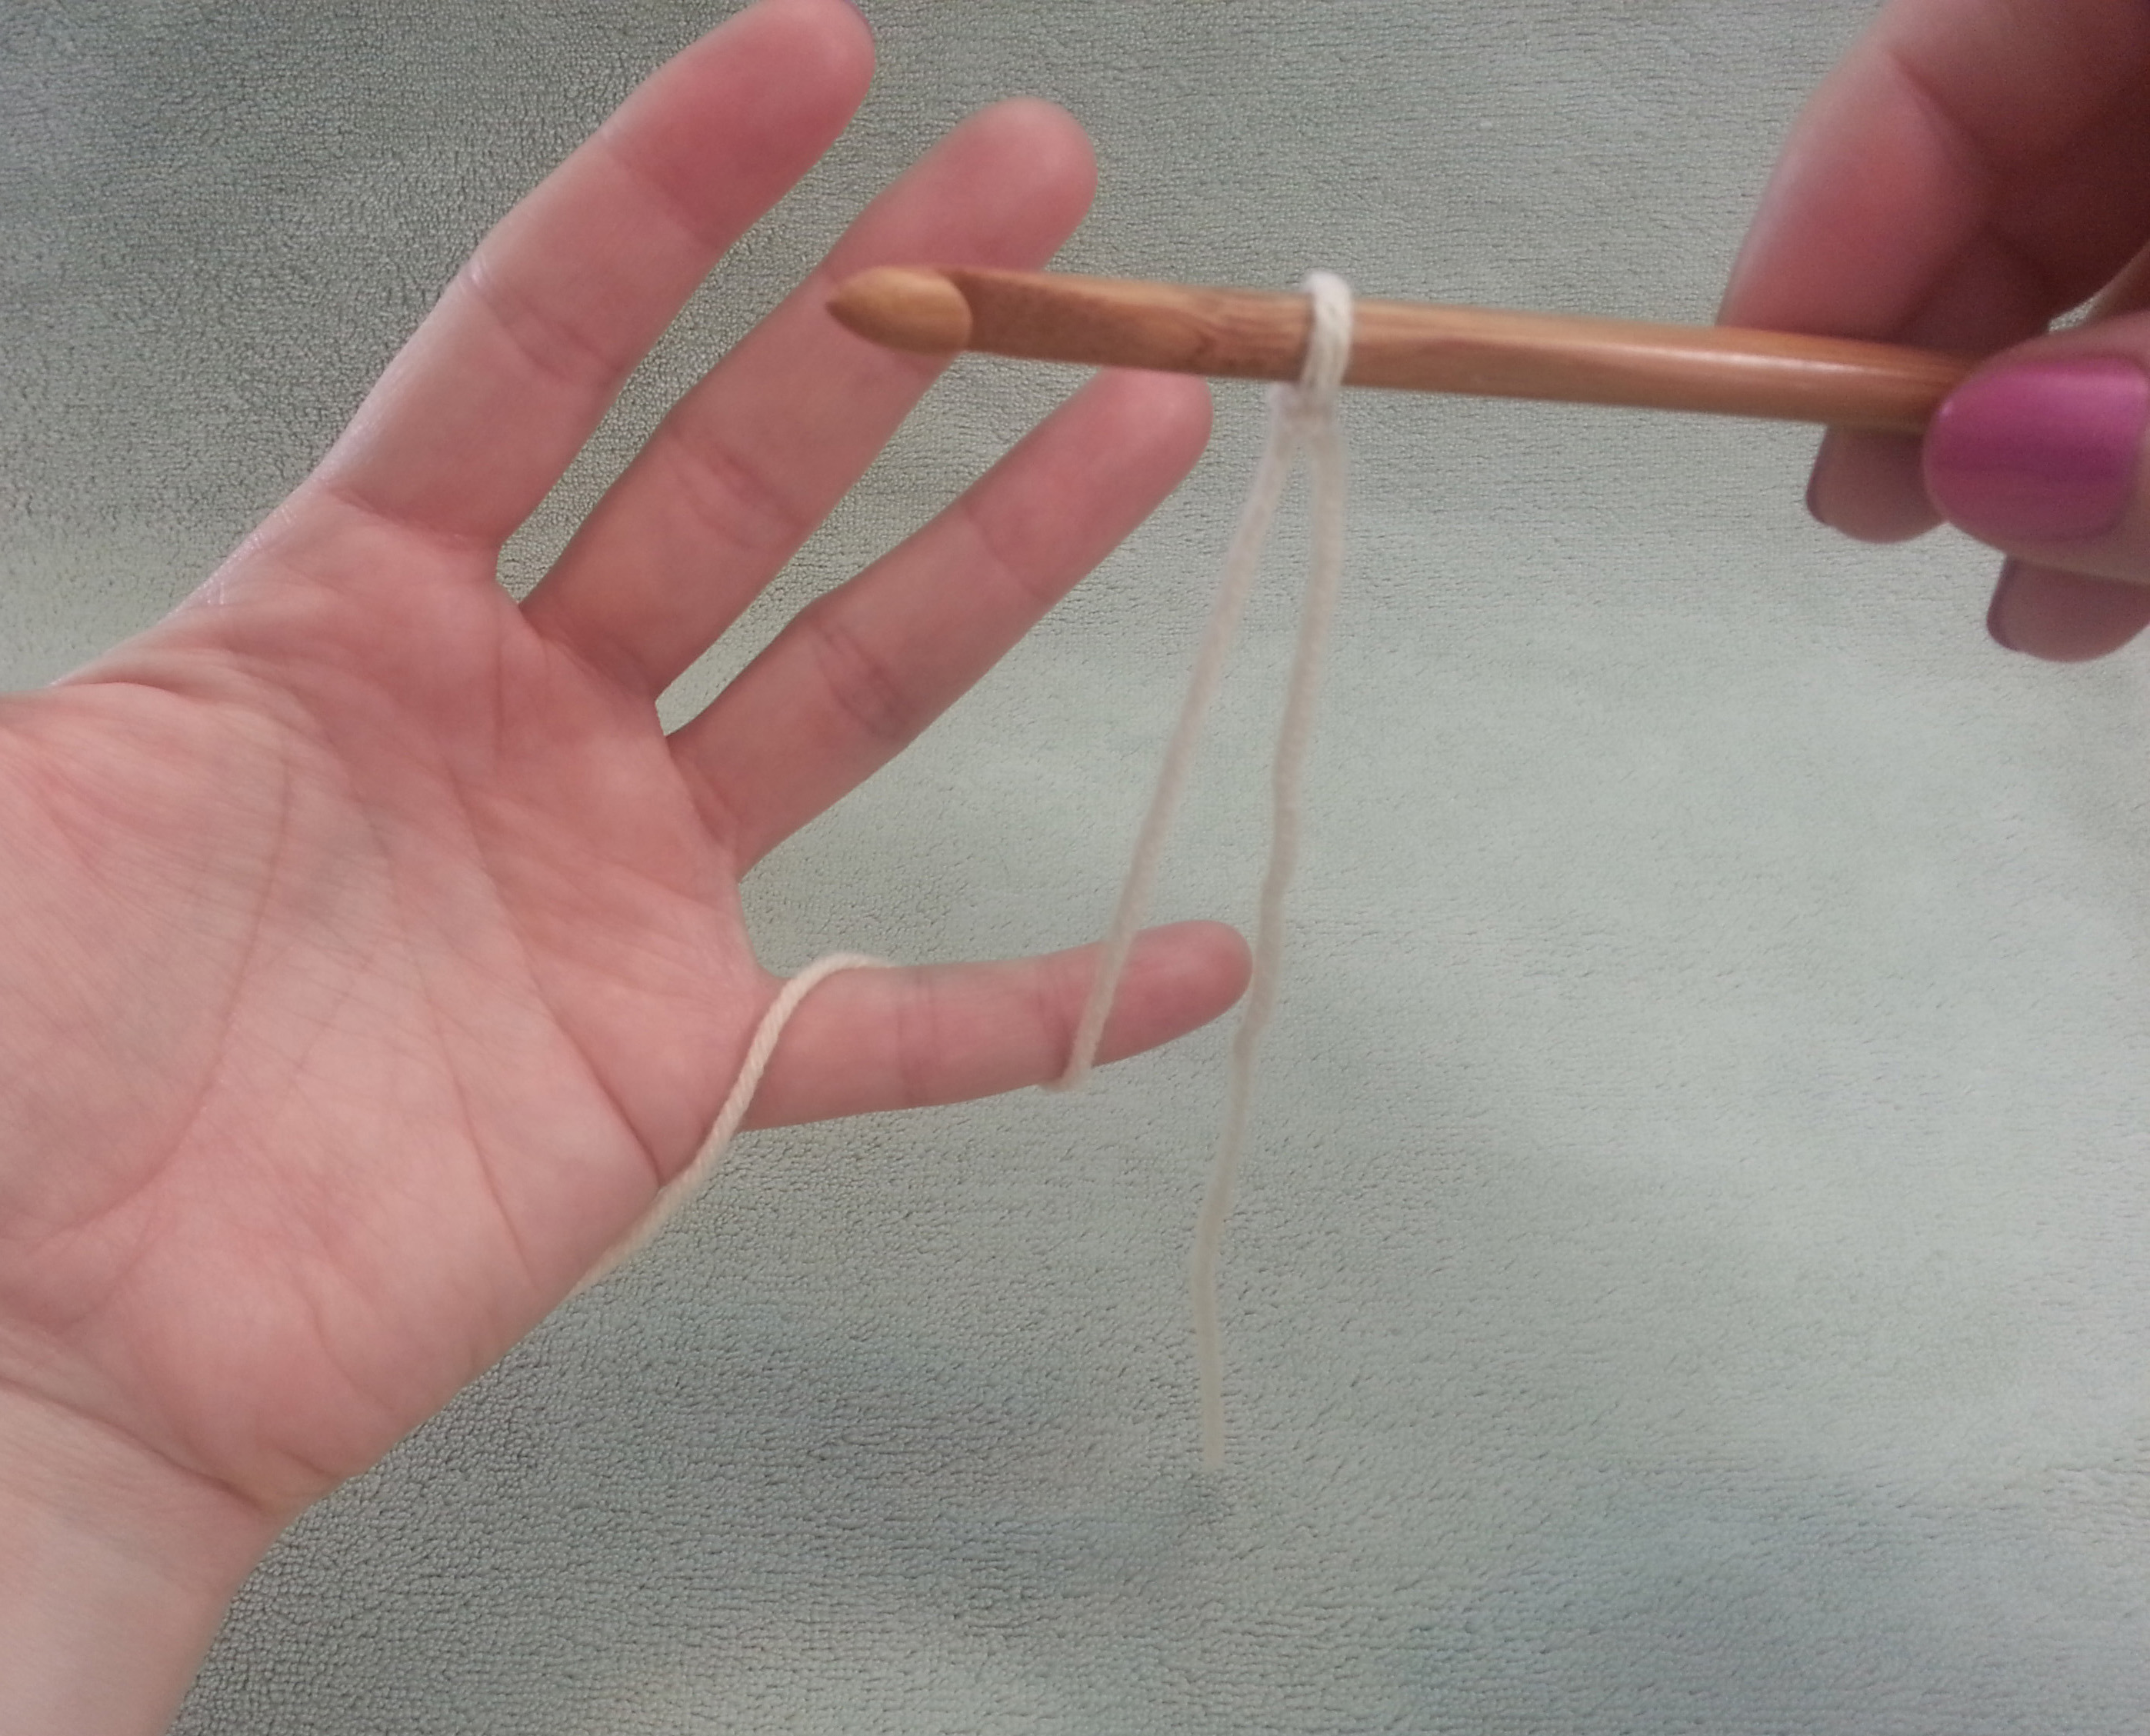
Tensioning (holding) the yarn
You may need to adjust how you hold the yarn depending on how dry your skin is and the texture of the yarn you are working with.
I loop the yarn around my left-hand pinkie…..
then weave it thru my fingers over and under so the yarn going to my hook comes over the top of my index finger.
I then use the middle finger and thumb of my left hand to hold at the base of the loop on my hook. This allows my hook to move freely in the loop.
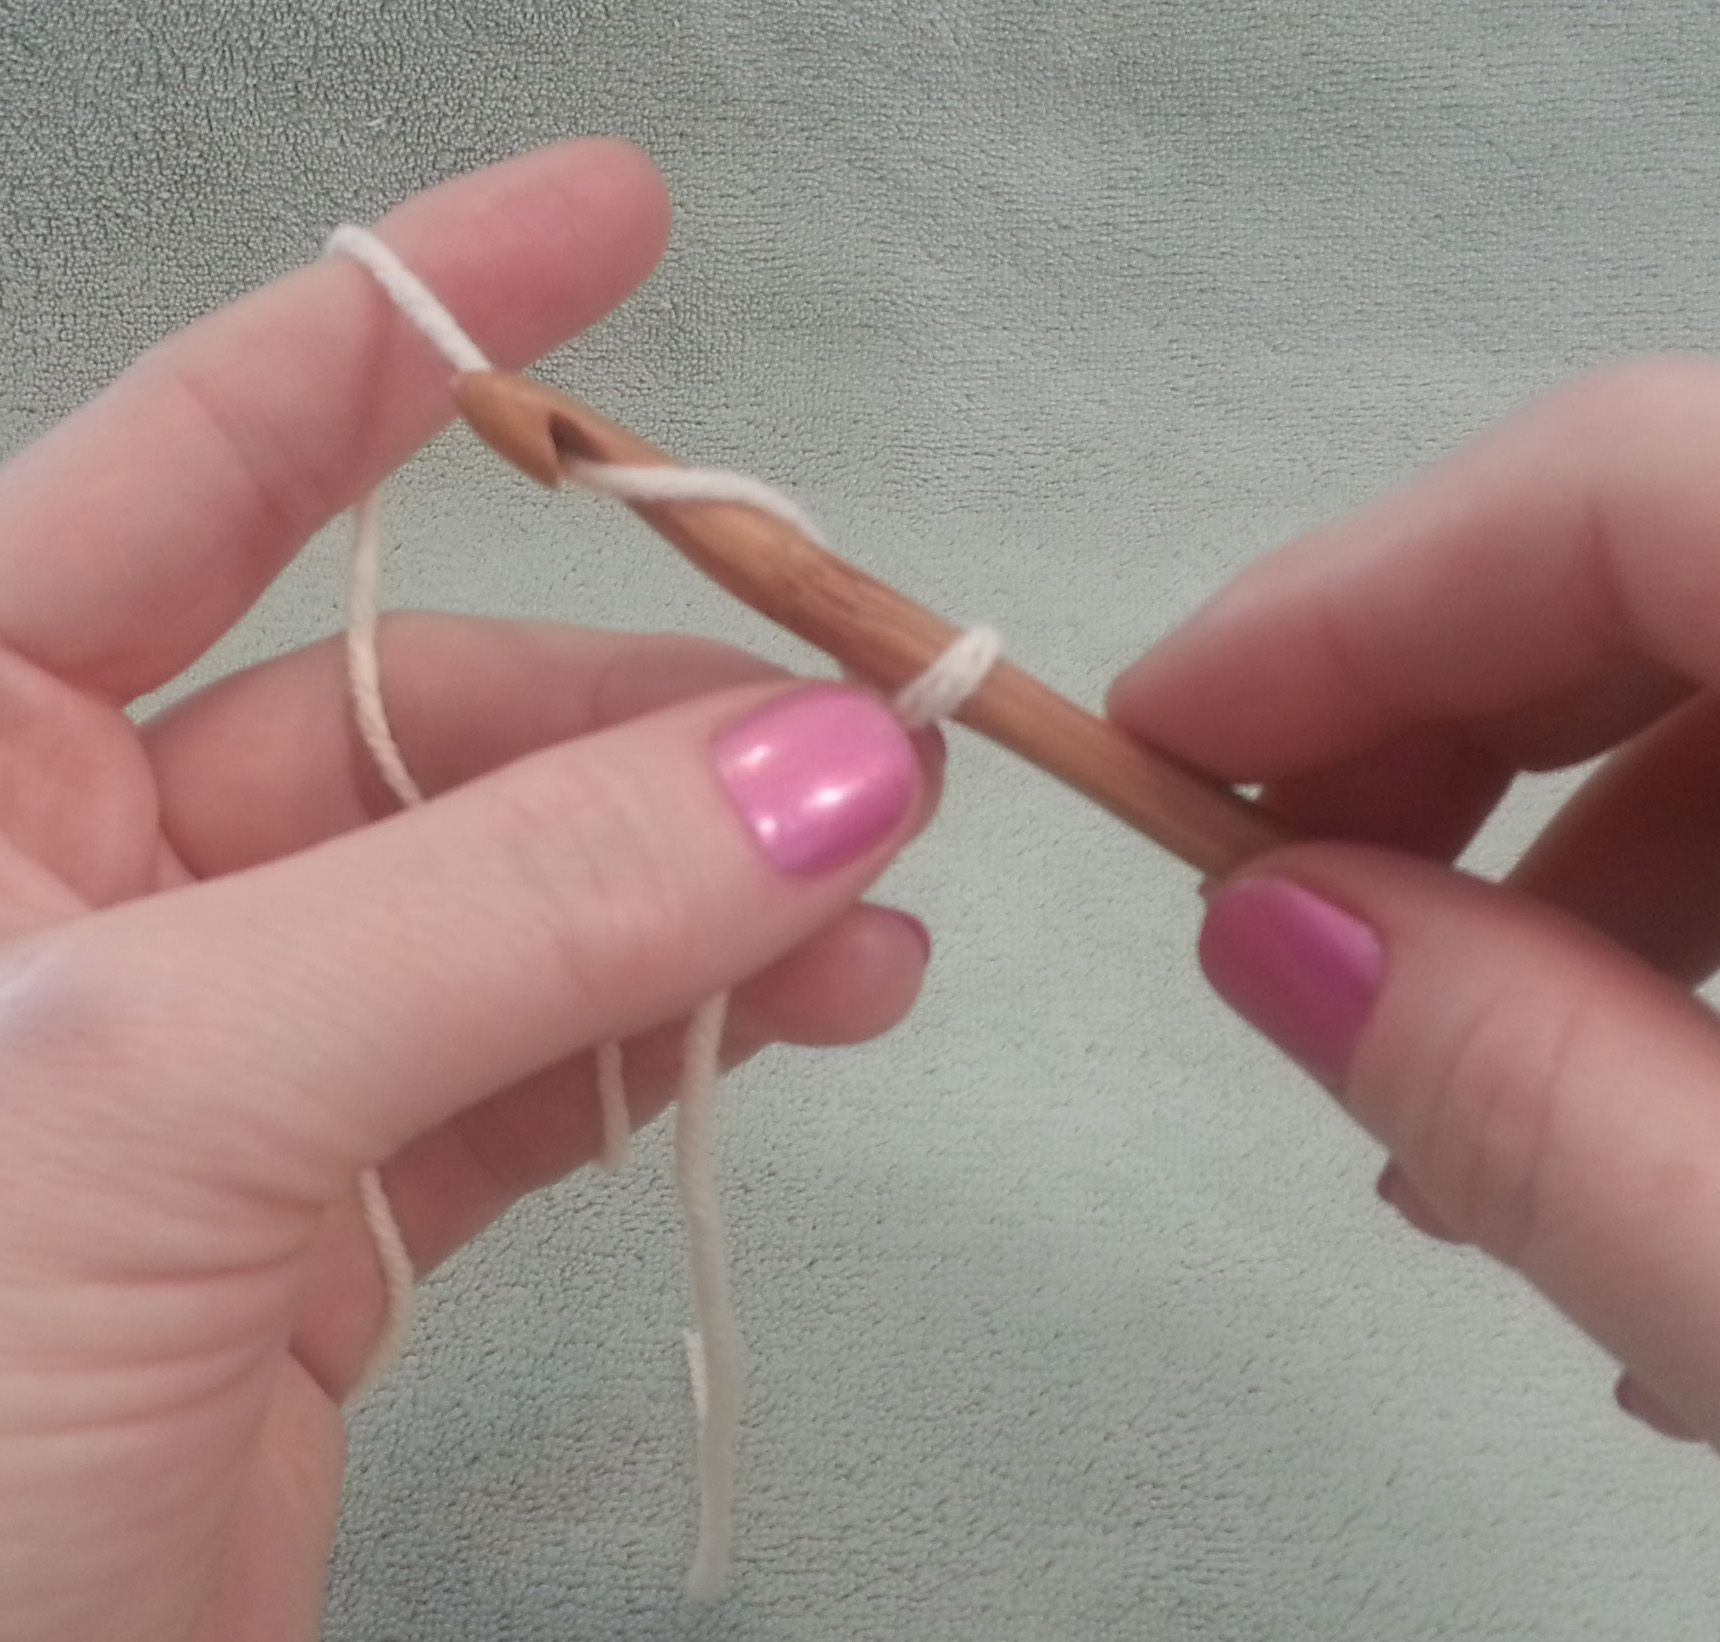
To make a chain stitch
I scoop the tip of my hook from the front to the back of the strand of yarn coming from my index finger, then “hook” the yarn and pull it thru the loop on my hook.
Now you are ready to start on your bracelet project.
Simple Beaded Chain Bracelet
Slide bead up close to hook.
Materials needed:
Worsted weight yarn
Approximately 15 “pony” beads in desired colors
Size I (5.5mm) or J (6mm) hook
Instructions:
String 15 pony beads on yarn (note you may have beads left-over once your reach your ideal bracelet length).
Chain 1 and capture bead.
Make a slip knot in yarn, ch 1, slide 1 bead up close to hook, ch 1 capturing bead, continue with alternating plain chain stitch and beaded chain st until strand measures 7 inches long (or long enough to fit loosely around wrist), finish with a final plain ch 1. Fasten off.
Tie ends together using a square knot, trim ends to 1″ long.
You can read more about my initial beaded chain projects in my post: The Beauty of Beads
Thanks again for making my blog one of your visits for our blog tour. I hope you come by to visit again soon. Meanwhile if you are a more experienced crocheter, and like to make hats, please join us during NatCroMo in crocheting (or knitting) hats to support the Halos of Hope organization. There are many patterns at the Halos of Hope website to use for this effort or you can use my “Pi Recipe” to create a simple stretchy hat that will be very appreciated.
Crochetville has received a lot of support from the crochet community over the years. They believe strongly in the importance of giving back. In 2013, Crochetville became a corporate sponsor of a wonderful organization called Halos of Hope. You can read more about Crochetville’s fundraising efforts and hat collection on the Crochetville blog.
Halos of Hope is a 501(c)3 not-for-profit organization founded by Pam Haschke, herself a survivor of inflammatory breast cancer. Halos of Hope’s mission is to provide volunteer-crafted hats to cancer centers across the country. – See more at: Halos of Hope website and the Halos of Hope Facebook Page.
As Amy said, ” Wouldn’t it be cool if we could somehow reach all of the 1.7 million crocheting households in the United States? If you’re going to dream, dream big, I say!”
I always chuckle when people tell me it’s too bad I only have boys, assuming that only girls are interested in hand crafts. I hope to teach my boys that they can do and learn anything they want to, regardless of other folk’s assumptions of gender related roles.
It is interesting how there is an assumption, in American culture at least, that only women knit, crochet or sew. Historically that hasn’t been the case.
Up to and during World War II many men knitted and sewed. Darning and knitting their own socks was a regular occupation for WWII soldiers. Before the industrial revolution most of the Knitting Guilds were male only.
And closer to home, when I taught a “Crochet Club” at our local school my star pupil was a 5th grade boy. It was so fun to see the boys (and the girls too) getting excited about crochet and building on their skills each week. The mother of my star pupil said that he and his sister won gift certificates at our local Michael’s Hobby and Craft store. When they went to use their prizes they both headed straight to the yarn section and had a wonderful time picking out yarns to purchase.
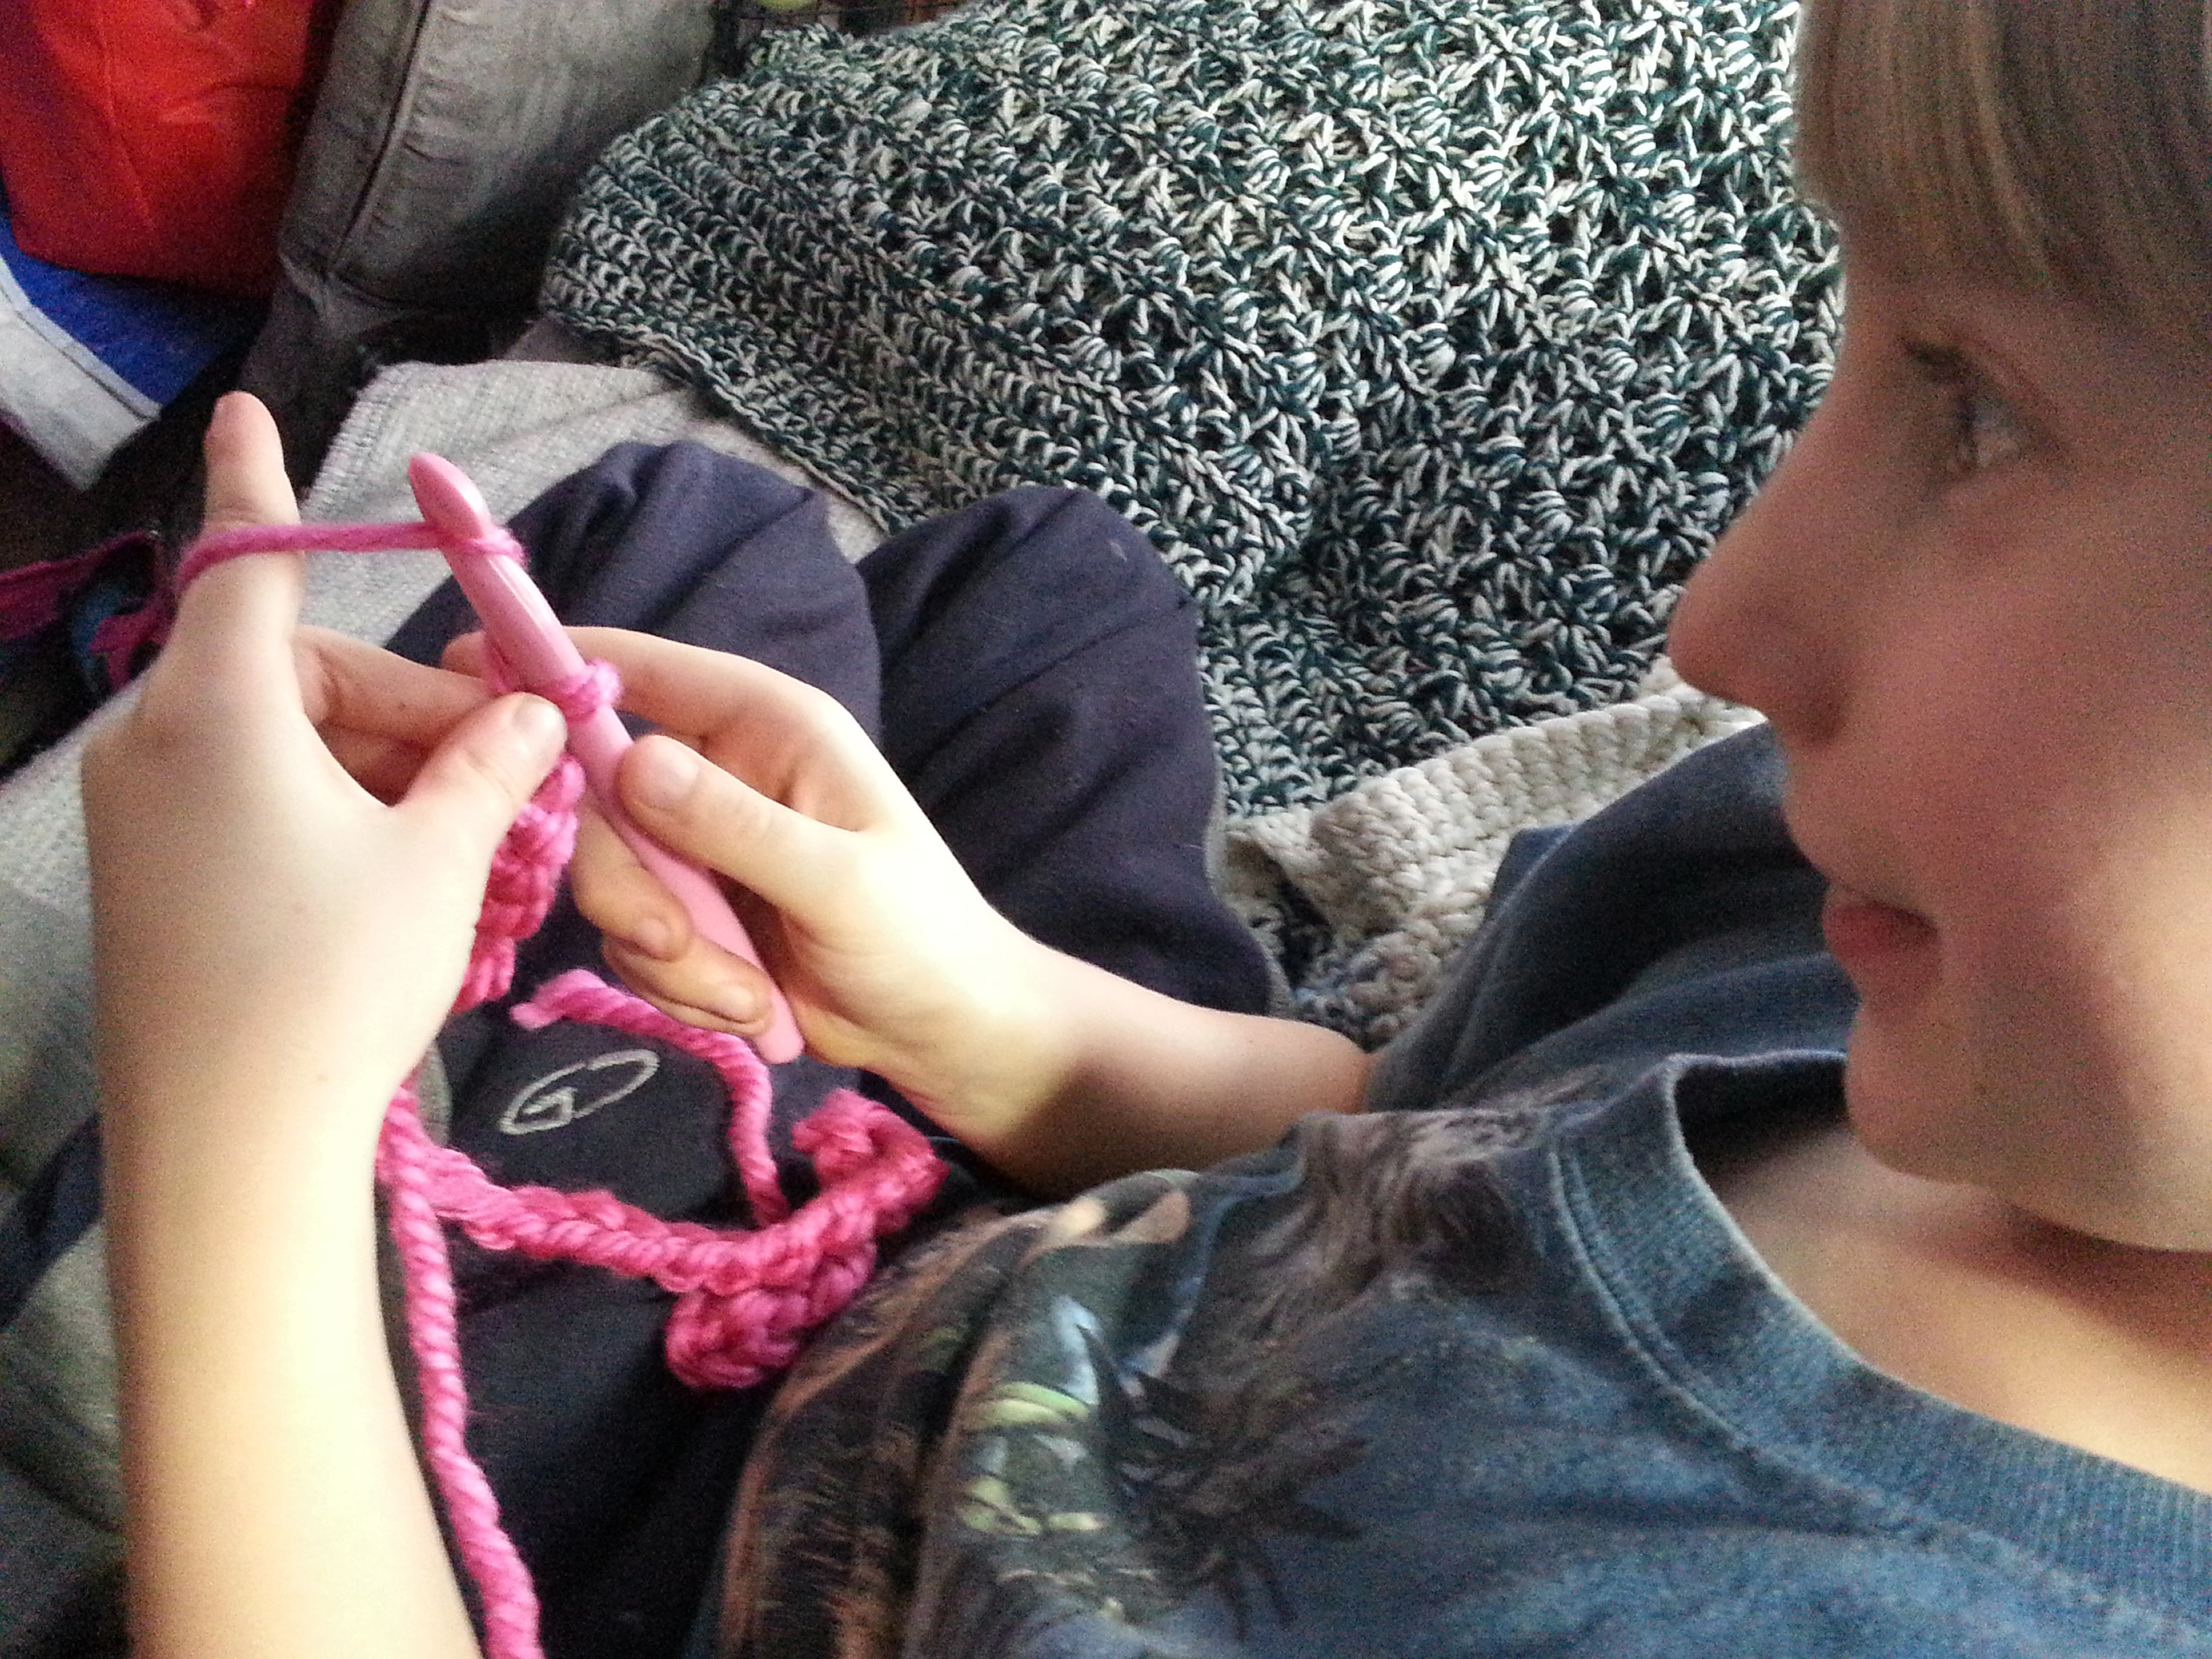
Today was a real celebration and time to bond with my youngest. He finally decided he wanted to learn to crochet. I had some of those big pink Lion Brand hooks and some nice chunky yarn that he was fascinated by. He will soon be turning 8 years old, so it’s a perfect age to learn to crochet.
Flamingo Bites the Yarn
He named his hook “Flamingo” (because it is pink and has a pointy head) and made up a whole story to remember the steps of making a chain stitch. “Flamingo goes under the yarn, then bites the yarn, puts his nose down and pulls it into his den”. He was having so much fun crocheting that he didn’t want to stop. Truly he is my son.
Is there a youngster in your life that would like to learn to crochet? A great way to celebrate National Crochet Month is helping others learn the joy of playing with yarn.
Saturday was the first day of March and the beginning of NatCroMo. An entire month to celebrate all things crochet.
I didn’t get a blog post up because I was out celebrating crochet. I was at the Longmont Yarn Shoppe to do a book signing of my “Texting Mitts” booklet and to teach an afternoon class on the Granny Fans Scarf.
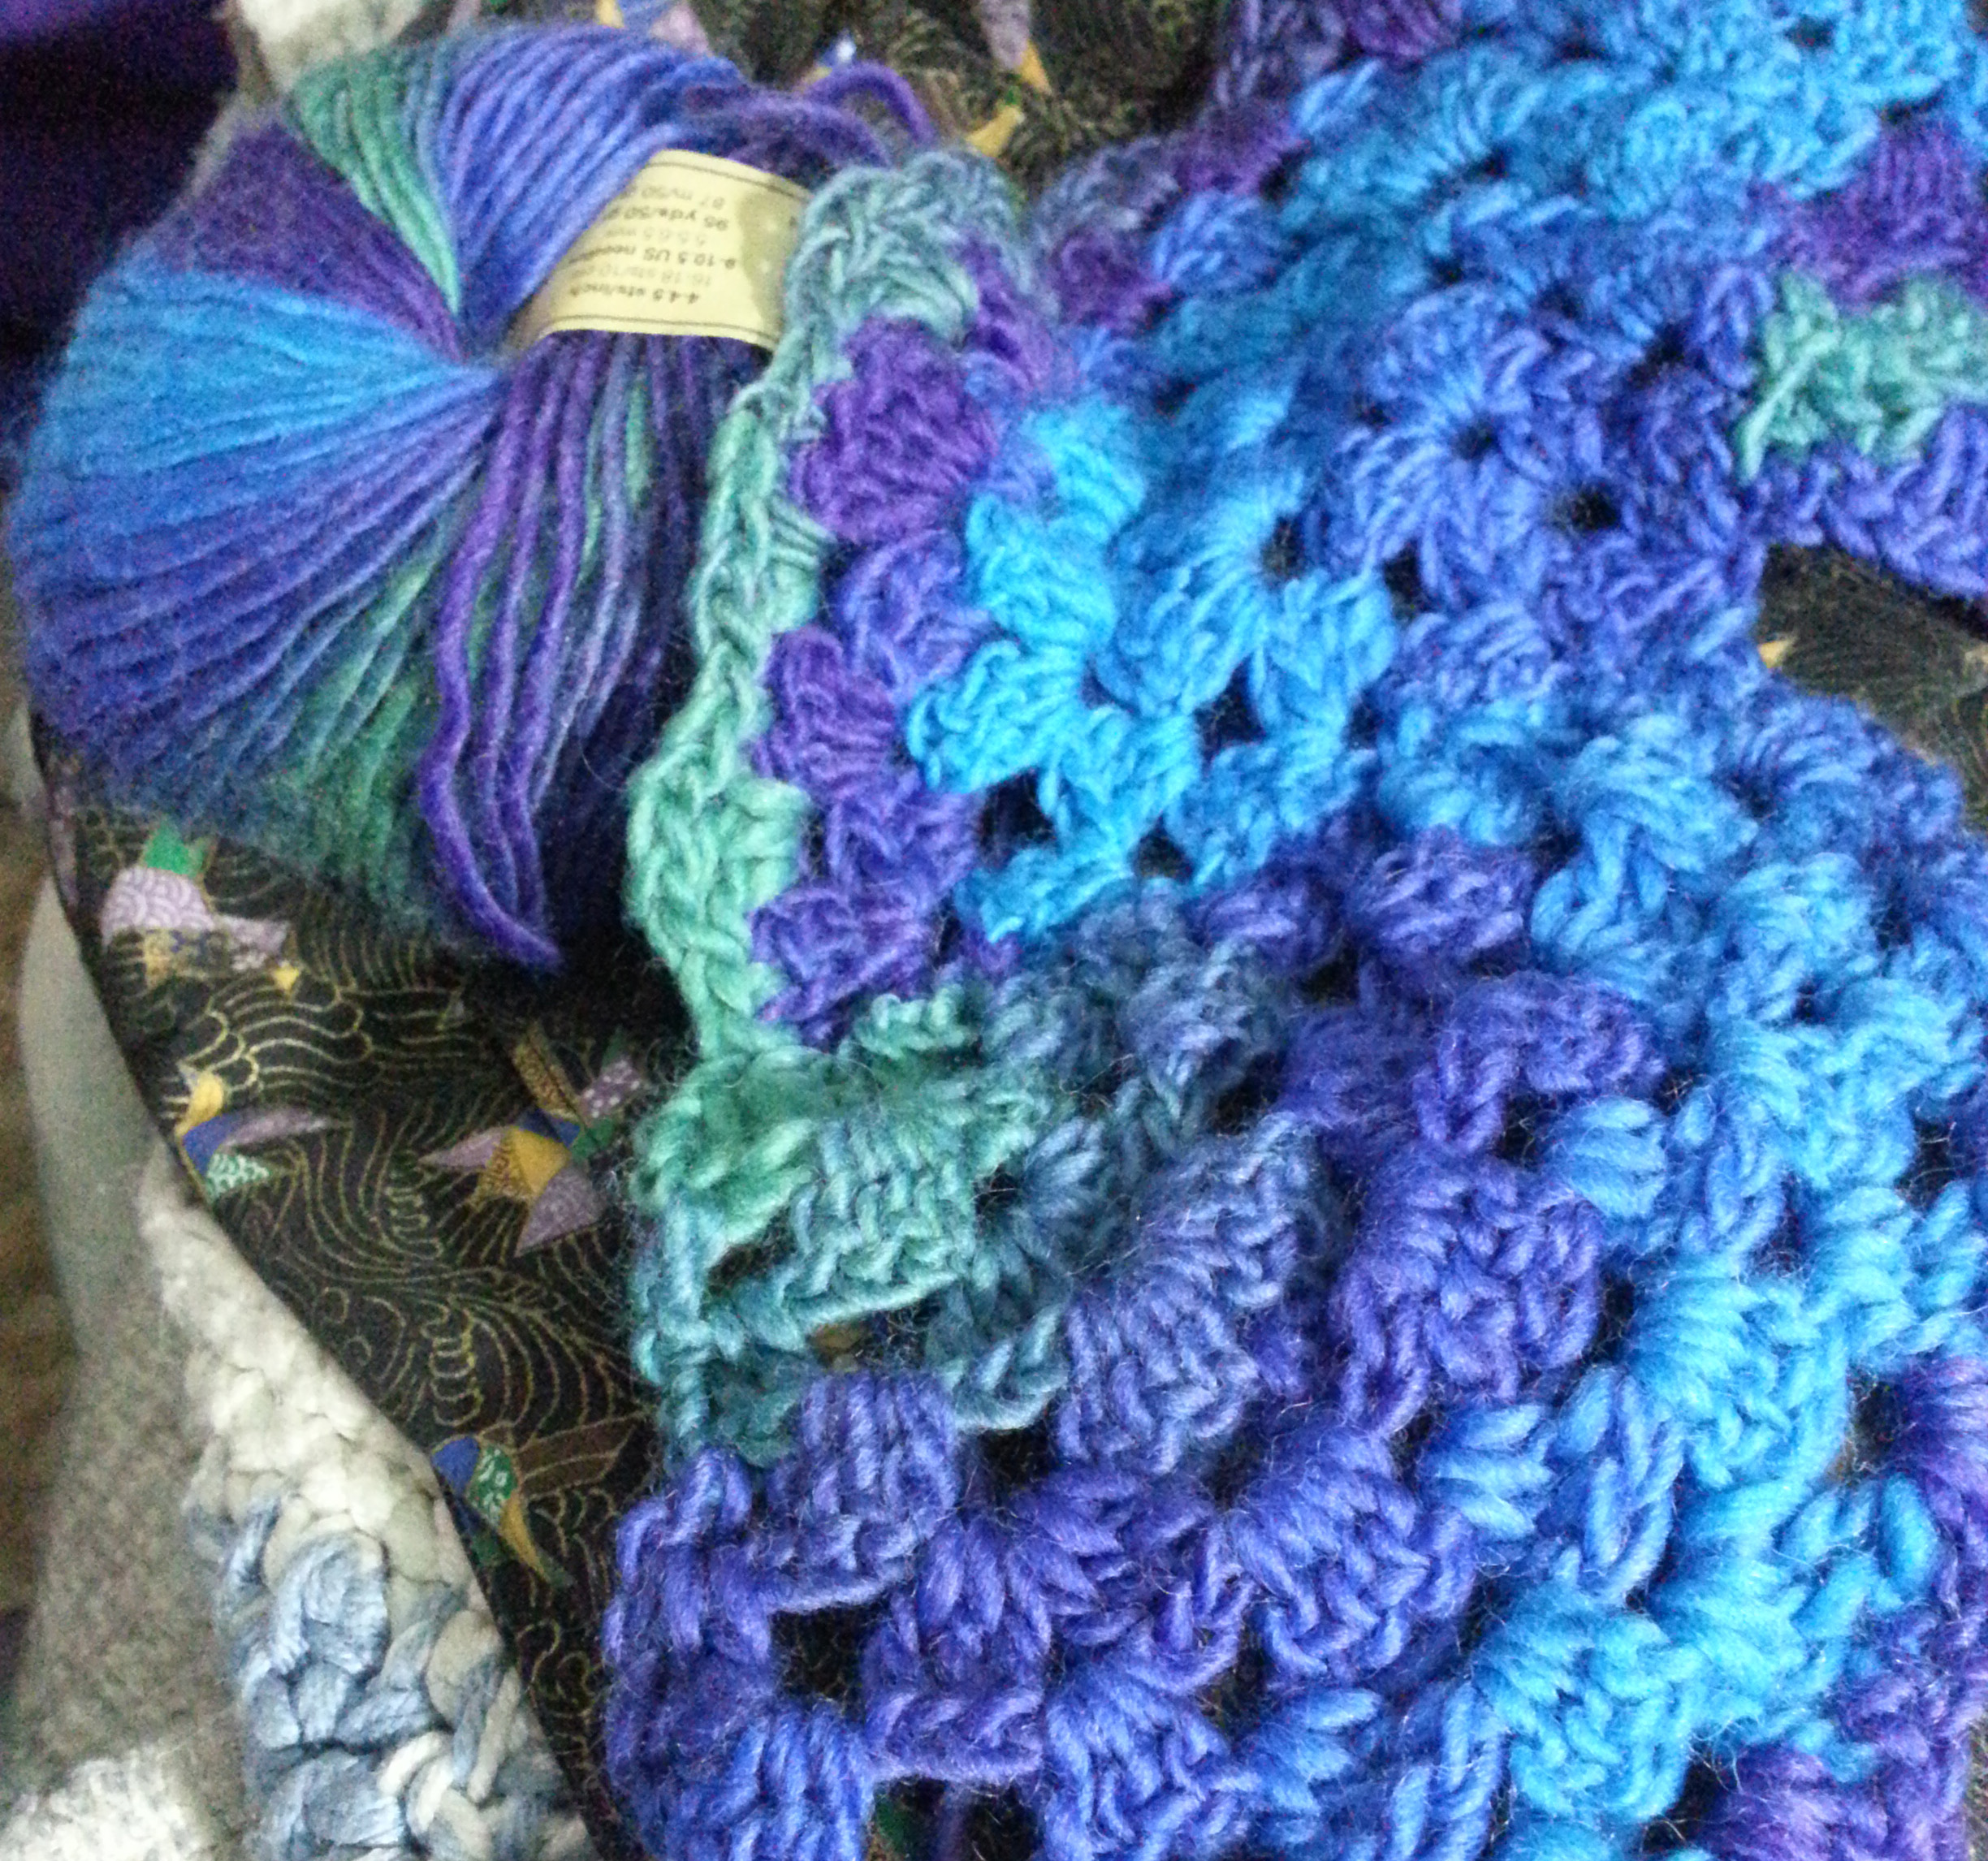
Had a really great time with my students and it’s always fun to hang out at the yarn store. I even bought a couple more balls of yarn. Both were for projects I already had in the works.
I needed an additional ball of Crystal Palace Mochi Plus in the beautiful blue/green toned colorway. I had started a short version of my Granny Fans Scarf, but one ball wasn’t quite enough. Fortunately LYS had a ball of the same colorway and dye lot that I had started my project in.
I had purchased 2 balls of Berocco Boboli Lace, but needed a third ball for the project I wanted to create. But LYS didn’t have a 3rd ball of the color I had selected so I returned the 2 balls (I hadn’t actually started crocheting with them yet) and picked out 3 balls in a different colorway. Actually it was a happy accident, because I think I like the new colorway better. It is crocheting up beautifully and I can hardly wait to show all my wonderful readers what I’ve made. That’s for later this month though.
So how are you planning on celebrating NatCroMo? Look around your area for events to crochet with others or learn to crochet if you’ve always wanted to. I’ll be at LYS quite a bit this month, as well as making a trip down to Denver to visit all my stitching friends at the LambShoppe. If you are in the Denver or Longmont area stop by and say hello. You’ll get to meet lots of people that love to play with yarn.
2014 is proving to be a very busy year for me, March (and National Crochet Month) is just around the corner. I have lots of exciting projects going on that I can’t quite reveal yet. Though I can show your my most recently published design.
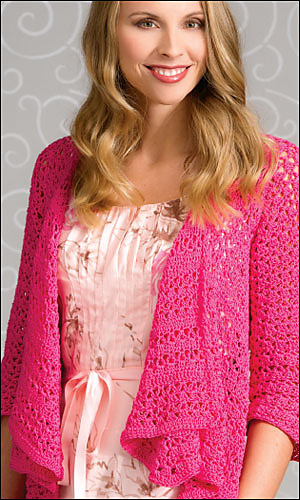
My “Convertible Cardigan” can be found in the April 2014 issue of Crochet World Magazine. This was a cardigan that I made for myself to wear last summer at the TNNA show in Columbus, Ohio.
Of course I picked a hot pink colorway, since this was for my own wardrobe. The editors liked the color so much that they used my original cardigan for the photo shoot. Worked in Tahki Cotton Classic Lite it is a great layer for wearing in air-conditioned venues, though right now on my mountain I can’t really envision a need for air-conditioning.
The sweater is back with me now and if you come to TNNA in May or the Knit & Crochet Show in July you may spot me wearing this cardigan.
Be sure to stop by again often in March. I’ll have lots of fun blog posts to share with all my wonderful readers to celebrate NatCroMo, including a post on the 15th as part of the Crochetville’s 2014 National Crochet Month Designer Blog Tour.
I’ve been told I have a big heart. I don’t know if that is always true, I do try to be a generous person and to treat folks fairly and kindly. The past couple of years I have posted a number of patterns on my blog of heart motifs. Most of them are small quick projects.
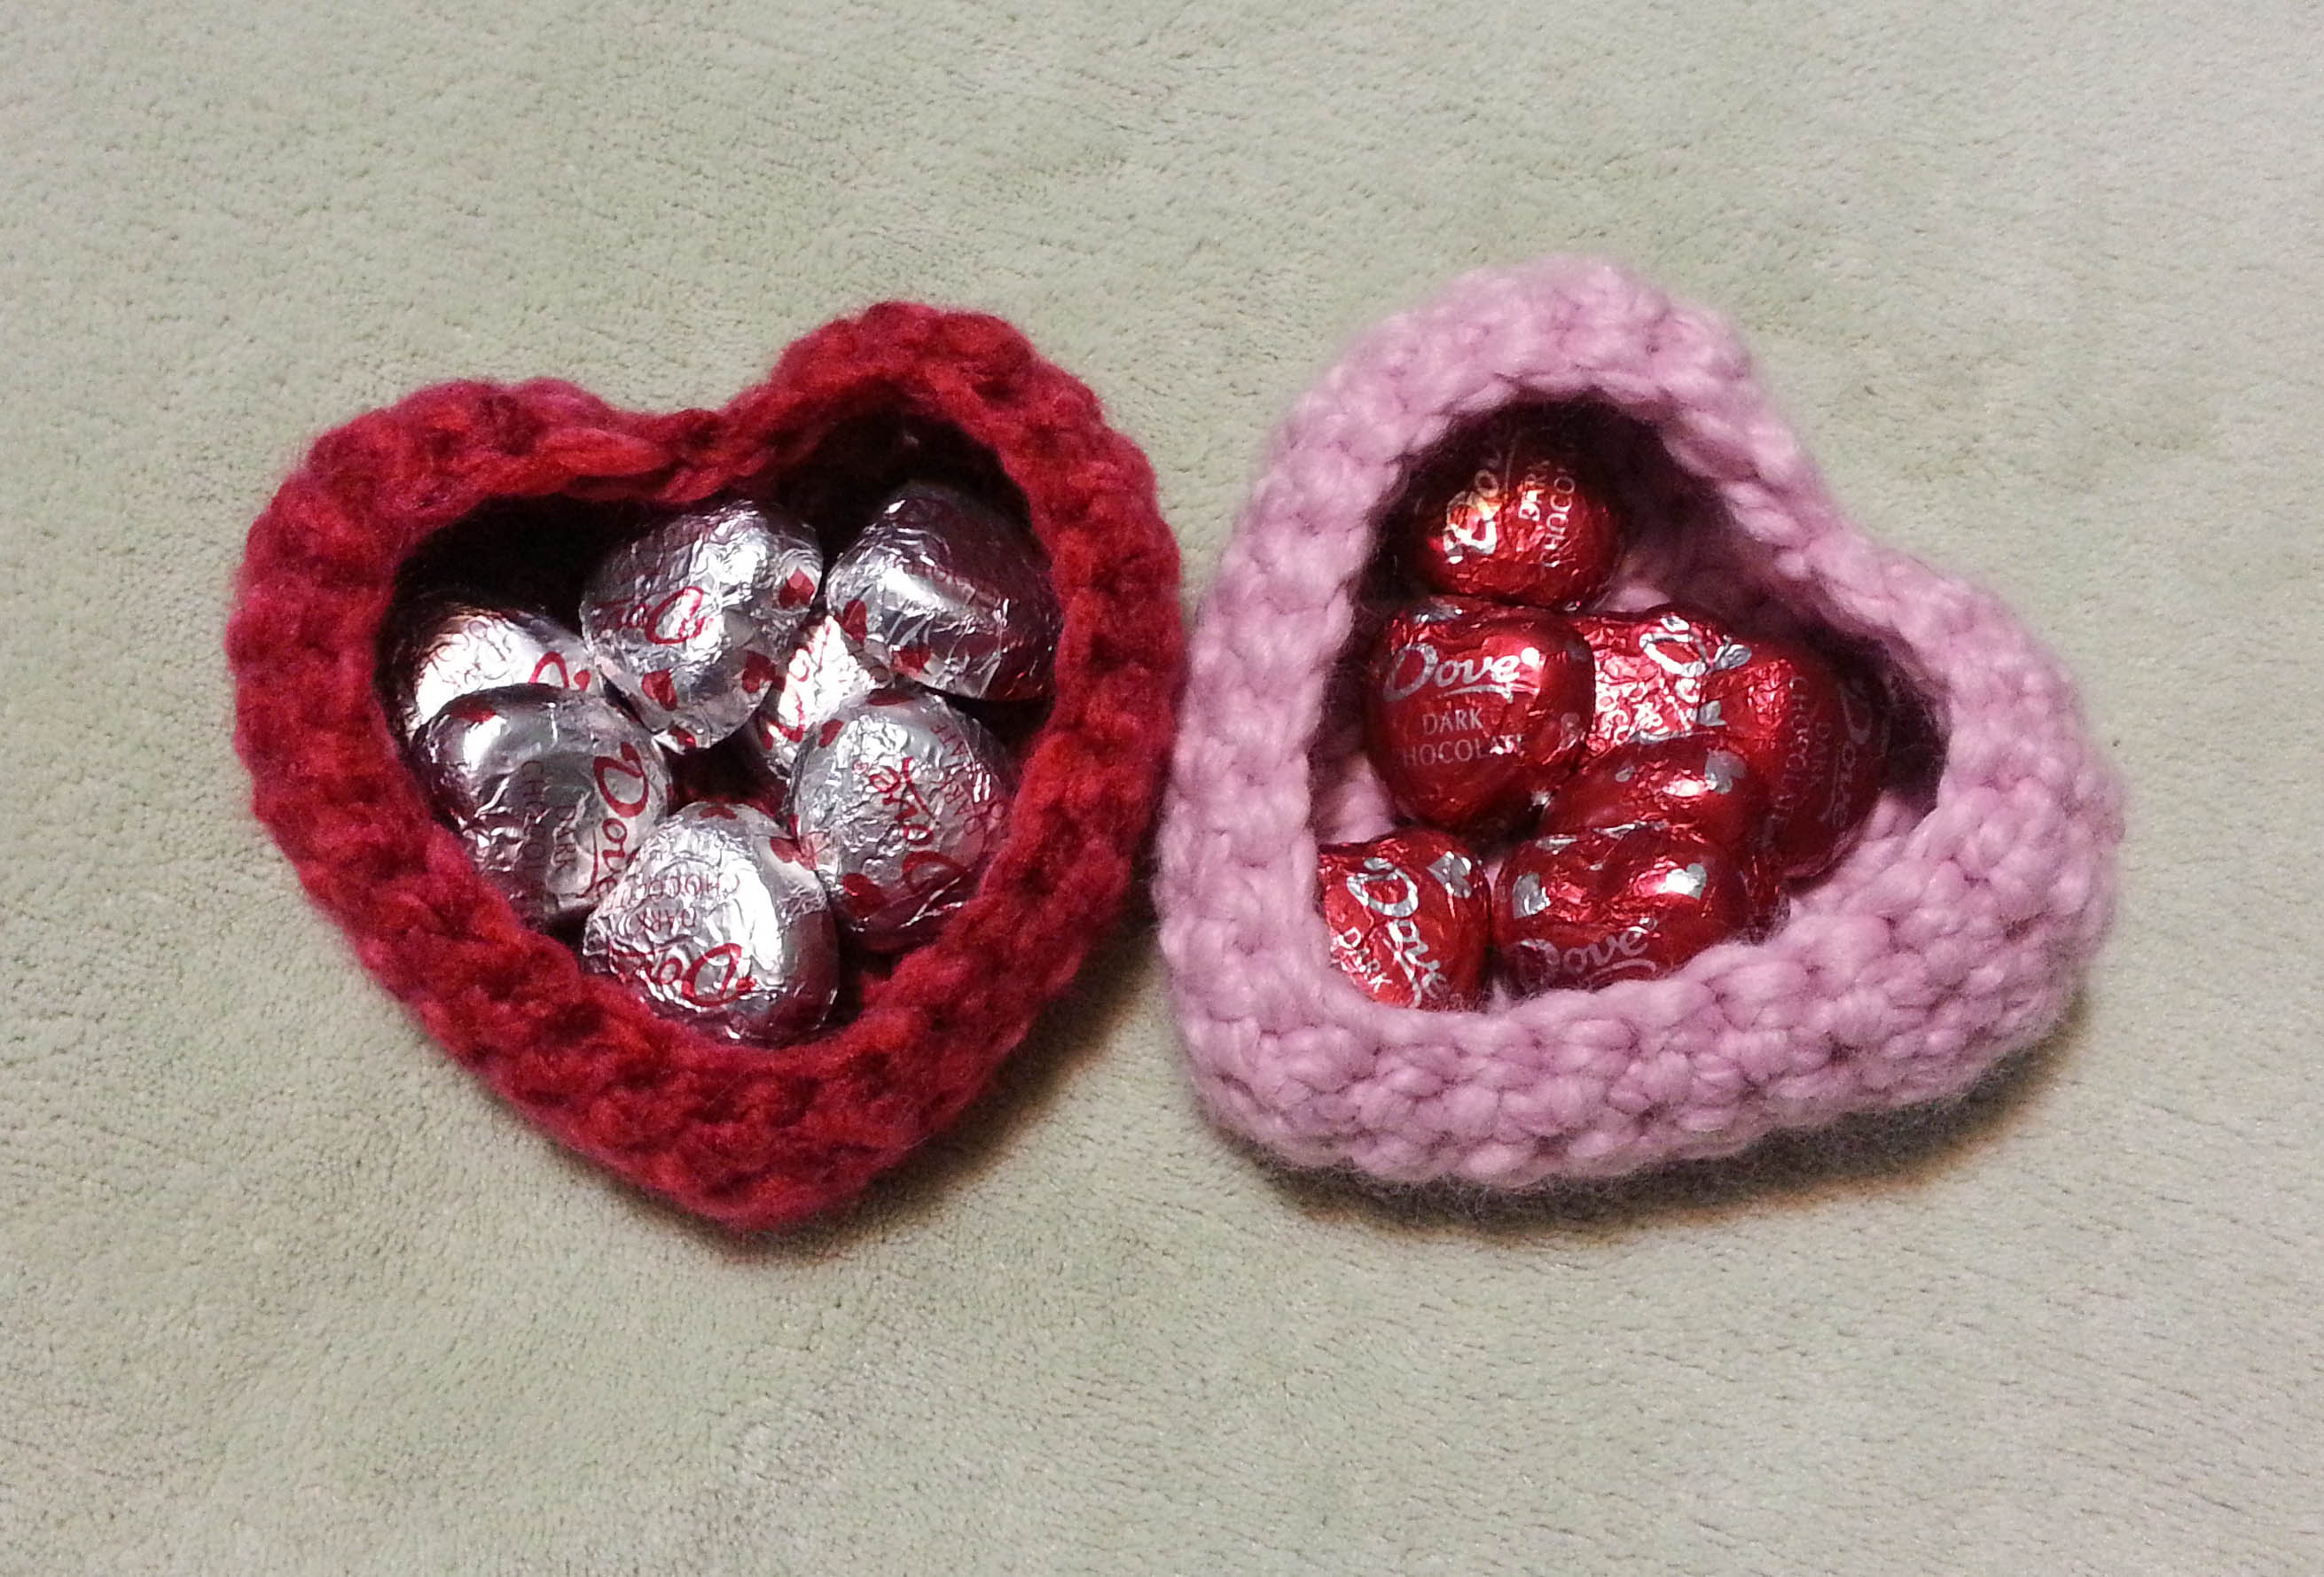
With Valentines Day only a day away, it’s good to have a quick project to crochet up. So I wanted to show you what another blogger, Cintia came up with using my “Crocheted Love” heart pattern.
These adorable baskets. The ones pictured above I made using Premier Yarns Serenity Chunky Weight with a size L (8 mm) hook, and Lion Brands Thick n Quick Super Bulky yarn with a size M (9 mm) hook.
You can find Cintia’s tutorial on making this sweet little basket at her blog My Poppet. Her idea of using a super bulky yarn got me thinking about doing that with some of my other heart patterns.
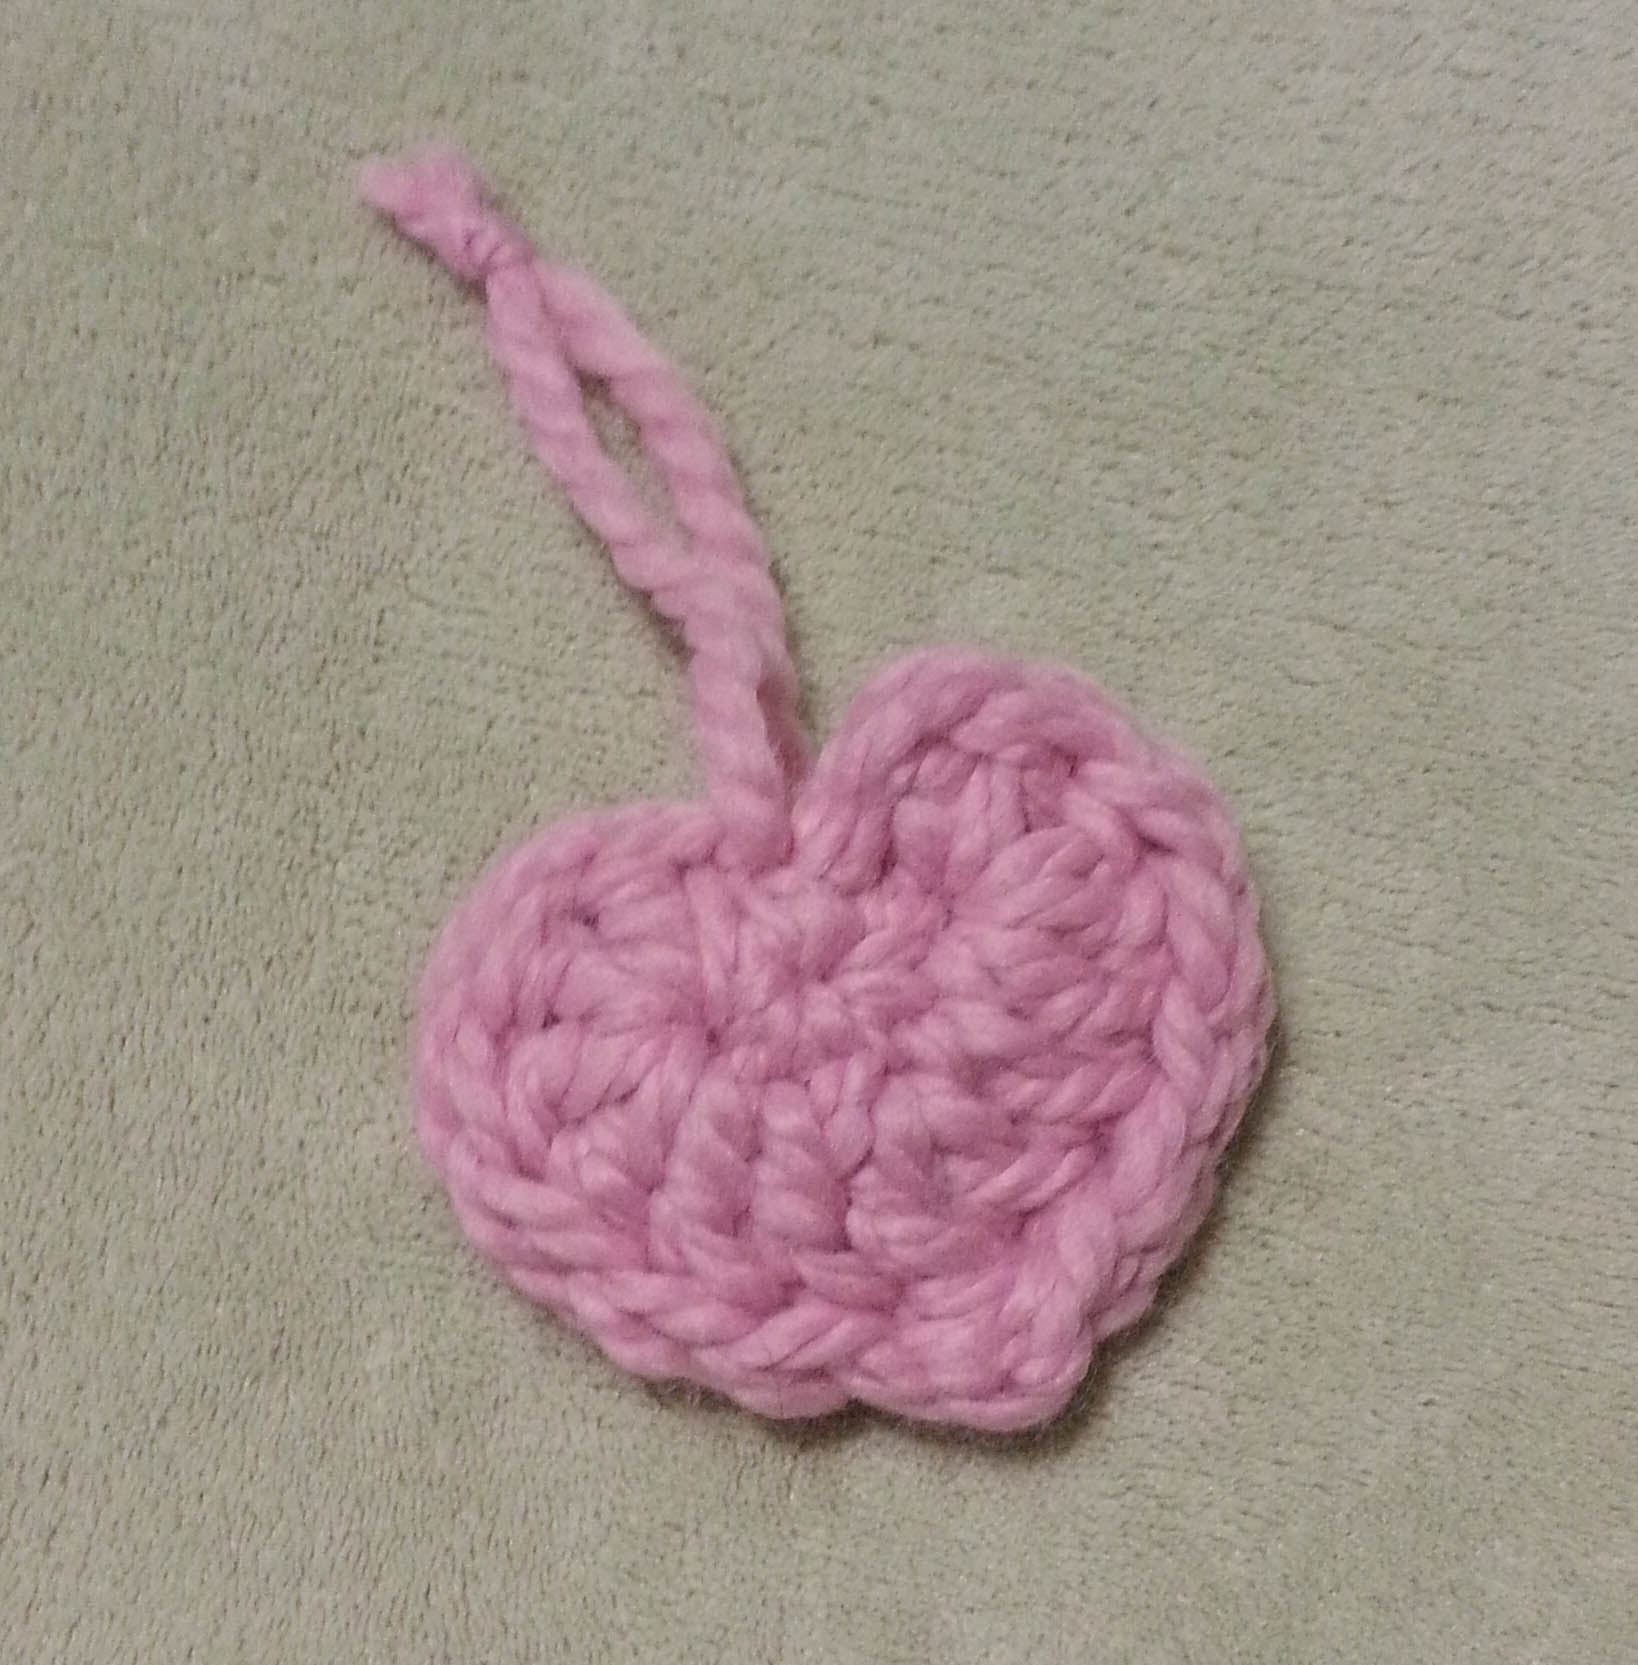
So I decided to work up 2 hearts using my “Simple Sweetheart” pattern and Lion Brands Thick n Quick Super Bulky yarn with a size M (9mm) hook.
I fastened off the 2nd heart with a long tail and wove in the center tails on both and the ending tail on the first heart. Then used the long tail to sew the 2 hearts together with a running stitch just below the tops of the stitches.
I left the stitches at the top of the hearts un-sewn to make a little pocket. There is a Dove Dark Chocolate heart in there, and would be room for a little note or card as well.
Then I used a length of yarn to make a loop to hang the heart with and knotted it together.
I made the loop just long enough that it can be moved out of the way to insert a candy and/or note. When the loop is pulled up it holds the pocket closed. You can hang it up somewhere for your Valentine to find as a sweet surprise.
I hope all my readers have a wonderful Valentine’s Day, filled with the joy and laughter of loving friendships.
A couple of weeks ago my blog was one of the stops on Kathryn White’s blog tour for her wonderful book “The Go-To Book for Irish Crochet Motifs”.
I was giving away a copy to readers that left a comment on that post. I had planned to post the winner on the 25th, but the weekend got away from me.
The lucky Winner is…. Amy!
Congratulations Amy, I know you are going to love this book. For those of you that didn’t win the book give-away on my blog or any of the others involved in the tour, be sure to grab a copy at your favorite craft bookstore. And if you are coming to the Knit & Crochet Show in Manchester this summer, bring it along to have Kathryn sign it for you.