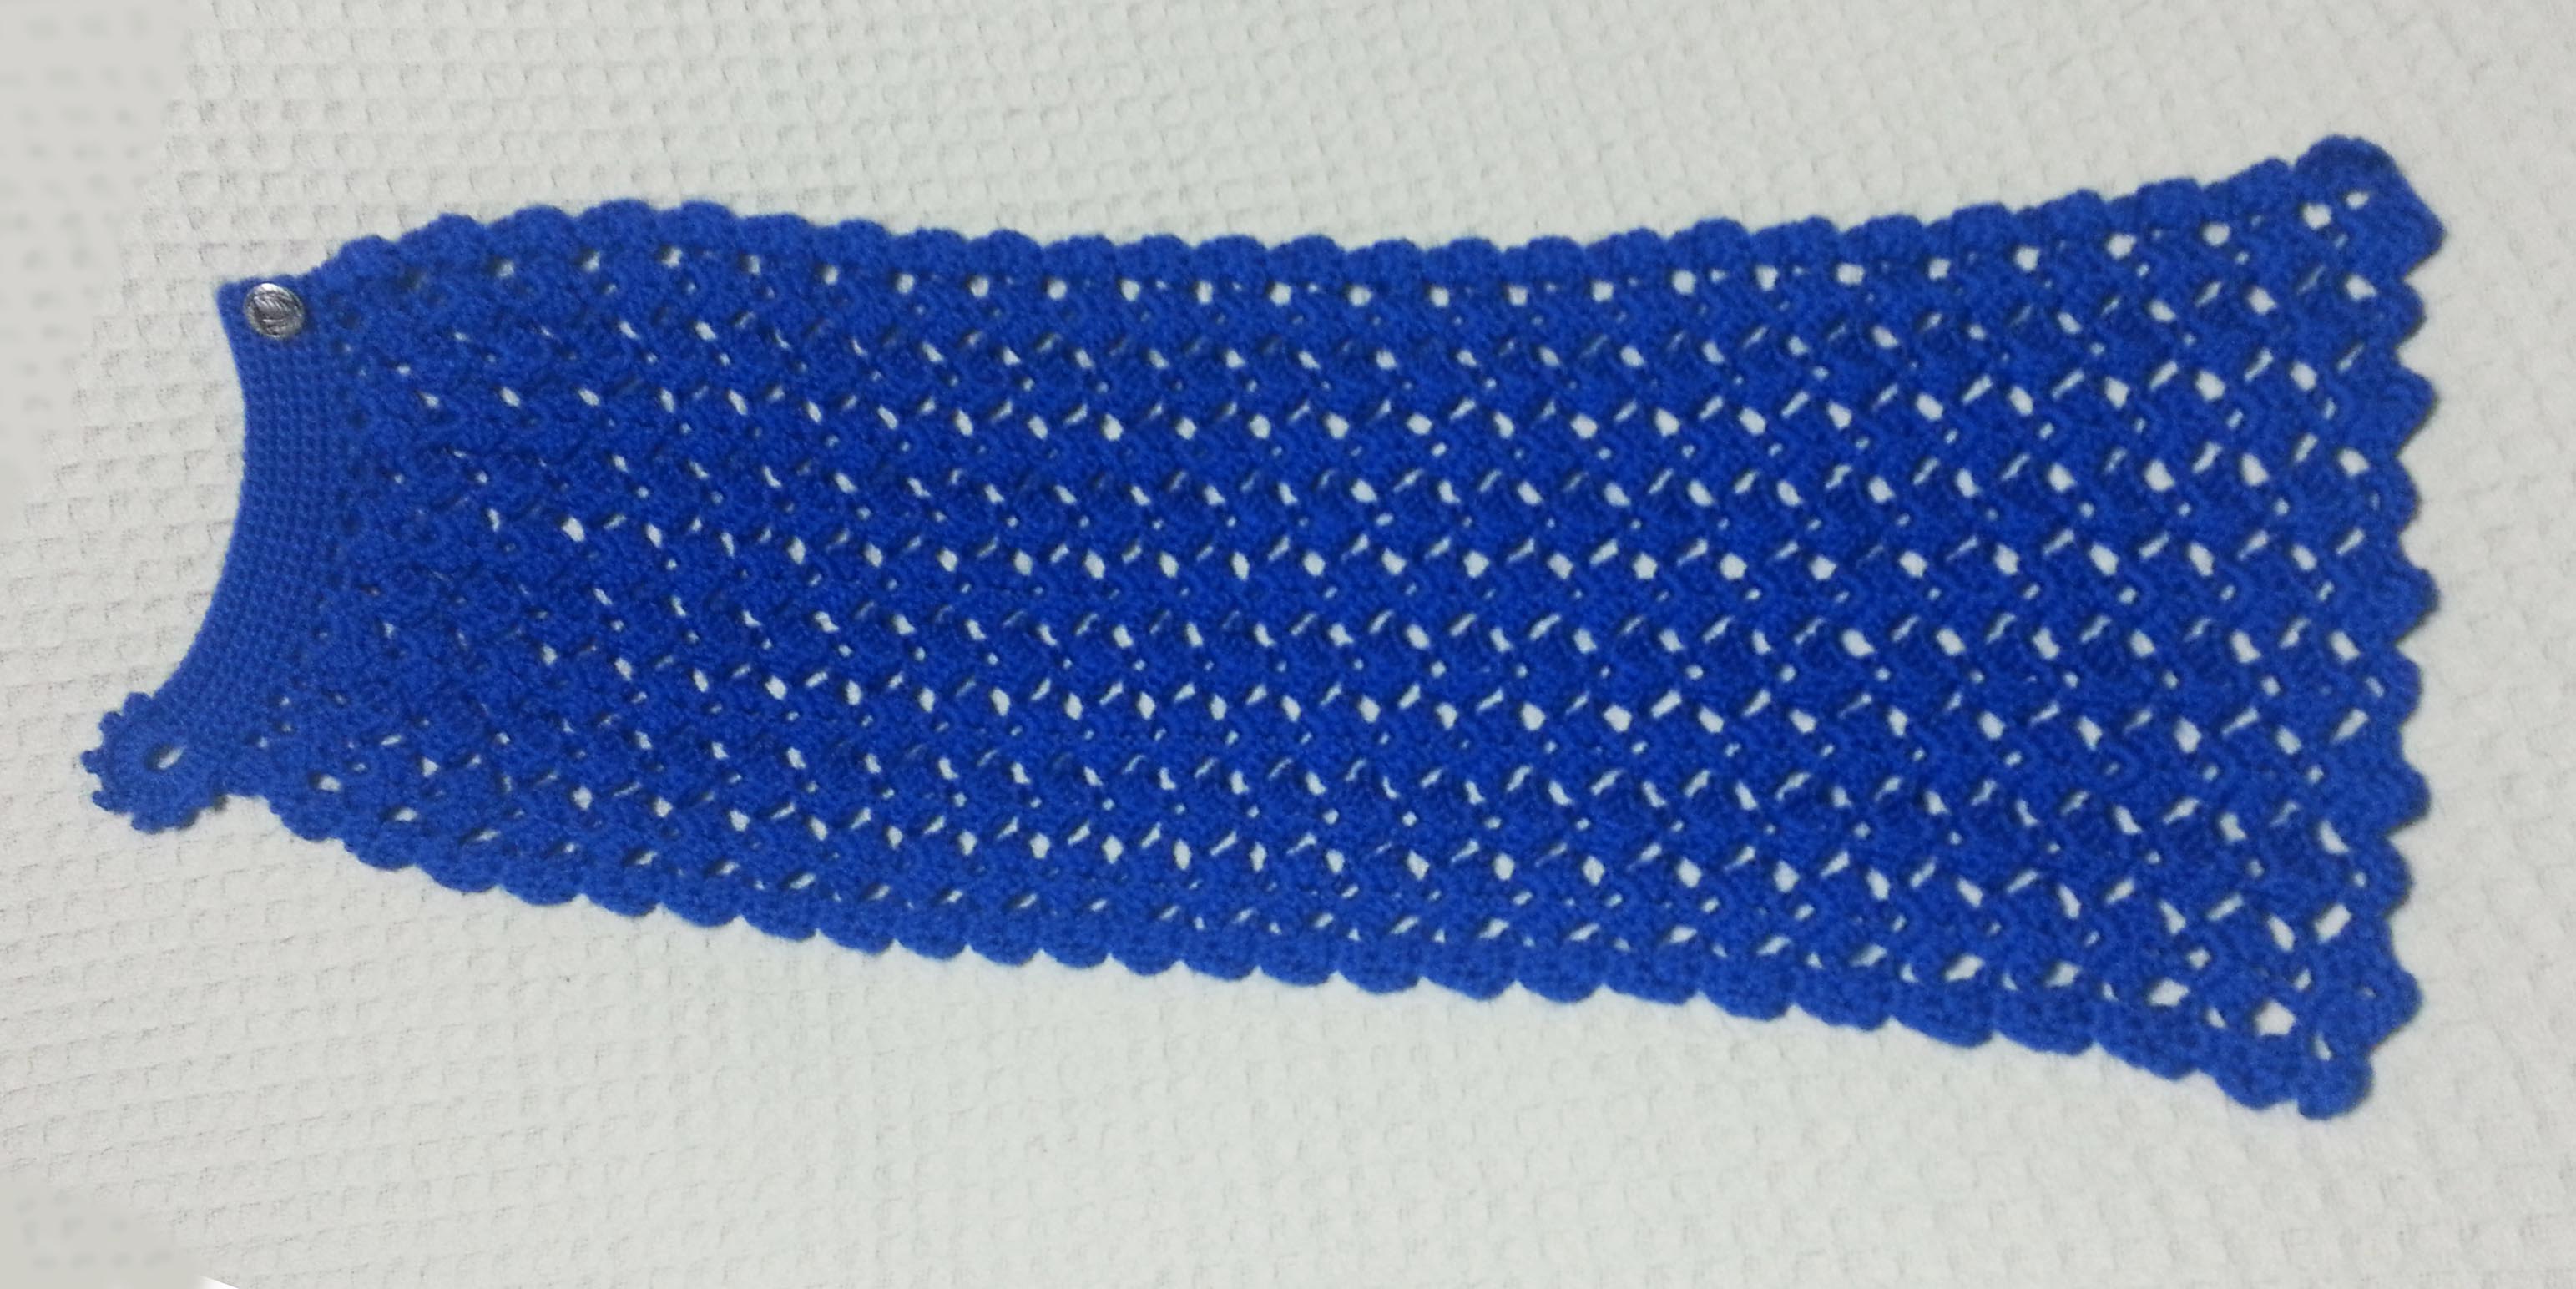
It has been so cold the last couple of weeks that I thought it was time for a warm neck cozy pattern. Because it buttons to fasten around your neck, this snuggly short scarf takes less yarn than a full size scarf. Just a little under 315 yards of worsted weight yarn. I used Caron Yarns “Simply Soft” for the sample you see.
This is all I had left of the 1 skein I used. That is a U.S. Quarter next to it to give you a frame of reference.
Here is the Pattern:
Shells on the Aegean Neck Cozy
Designed by Andee Graves
SKILL LEVEL: Intermediate
FINISHED MEASUREMENTS
Neck Cozy is 13.25”/ 33.125cm wide (lace scarf section) x 30”/ 75cm long.
#9767 Royal Blue: 1 skein sample used nearly all of skein
CROCHET HOOKS
Size US I-9 / 5.5mm
ADDITIONAL MATERIALS
Yarn needle
1 – 1” button (shank style works best)
GAUGE
5 rows & 4 sts in single crochet = 1”
SPECIAL STITCHES
Shell Stitch (Shl): (3 dc, ch 2, 3 dc) in indicated st or sp.
V-stitch (V-st): (dc, ch 2, dc) in indicated st or sp.
Picot stitch (picot): Ch 3, sl st in top of previous st. If you need help with the making the picot stitch I have a tutorial here on the blog.
Pattern Notes
This Neck Cozy is worked in 2 parts, the Button Band and the Lace Scarf.
Be sure to work the base chain loosely for ease of working into the bottom of the foundation row when crocheting the lace scarf part of project. If having problems keeping the chain loose enough, use a hook one size larger to make the chain then switch to the smaller hook for the rest of the project.
When counting stitches for skipping, chain stitches count as one stitch each.
INSTRUCTIONS
Button Band
Row 1 (RS): Ch 32, working in back bumps sc in 2nd ch from hook and each ch back to beginning. [31 sc]
Row 2: Ch 1, turn, sc in each st to end of row. [31 sc]
Row 3: Repeat Row 2.
Row 4: Ch 7 (creates button loop), turn, sc in each st to end of row. [31 sc, 1 ch-7 loop]
Rows 5 & 6: Repeat Row 2 twice.
Row 7: Ch 1, turn, sc in next 31 sts, (button loop finishing) picot, [(2 dc, picot) 6 times, 2 dc] into ch-7 loop, sl st to end of Row 1. DO NOT Fasten off.
Lace scarf
Row 1: (Working along bottom of foundation of button band Row 1) Ch 3, 3 dc in first st, ch 1 (sk 2 sts, V-st in next st) 9 times, ch 1, sk 2 sts, 3 dc in last st. [9 V-sts, 2 ch-1 sps, 6 dc]
Row 2 (RS) : Ch 3, turn, sk 1 st, 3 dc in next st, ch 1, (Shl in next ch-2 sp, V-st in next ch-2 sp) 4 times, Shl in next ch-2 sp, ch 1, sk 3 sts, 3 dc in next st. [5 Shls, 4 V-sts, 2 ch-1 sps, 6 dc]
Row 3: Ch 3, turn, sk 1 st, 3 dc in next st, (ch 1, V-st in next ch-2 sp, ch 1, Shl in next ch-2 sp) 4 times, ch 1, V-st in next ch-2 sp, ch 1, sk 5 sts, 3 dc in next st. [5 V-sts, 4 Shls, 10 ch-1 spcs, 6 dc]
Rows 4: Ch 3, turn, sk 1 st, 3 dc in next st, (ch 1, Shl in next ch-2 sp, ch 1, V-st in next ch-2 sp) 4 times, ch 1, Shl in next ch-2 sp, ch 1, sk 3 sts, 3 dc in next st. [5 Shls, 4 V-sts, 10 ch-1 sps, 6 dc]
Row 51: Ch 1, turn, sc in each of next 3 sts, (*sl st in ch-1 sp, sc next 2 sts, sk next st, 5 sc in next ch-2 sp, sk 1 st, sc in next 2 sts, sl st in ch-1 sp,* sk next st, 5 sc next ch-2 sp, sk 1 st) 4 times, repeat from * to * once, sc in each of last 3 sts. Fasten off. [71 sc, 10 sl sts]
FINISHING
Weave in ends. Block lightly, if desired.
Sew button to RS of button band on Row 4 at opposite end from button loop.
Oh yes indeed, it really is Winter now, and we have the snow to prove it. The past couple of weeks have been cold and snowy up here on the mountain. Though we have had a few odd days where it was actually warmer at my home, at 8500 feet above sea-level, then it was in the lower elevations.
In appreciation of the snow and to celebrate the holidays, I have a quick little snowflake pattern for you. With only 3 rounds to crochet you can make a whole drift worth of them in just a day.
I have always loved the beauty of snow, which is probably a good thing since I live on a mountain. My favorite snowflakes are the ones I can crochet. They last longer, they are a lot warmer, and best of all crocheted snowflakes won’t leave a puddle of water on your floors.
I hope you have a fun time with my newest snowflake.
Frozen Star Snowflake
Designed by Andee Graves
Skill level: Easy Intermediate
Finished Size:
2 3/4 inches from point to point across center
Materials:
Yarn
Size #10 Crochet Cotton Thread
Hook
1.75mm Steel Hook (or size needed for your thread or yarn)
Notions
Yarn/tapestry needle
One stitch marker
Gauge
Total snowflake (3 rounds) measured across from point to point = 2 ¾ inches
Pattern Notes:
All rounds are worked without turning, RS of fabric is always facing out.
Instructions
Rnd 1: Starting with an adjustable slip knot, ch 2, 6 sc in second ch from hook, sl st to first sc of Rnd. [6 sc]
Rnd 2: Ch 4, Tr in same st as join (counts as first Cl), (ch 5, Cl in next st). 5 times, ch 2, dc in first Tr of Rnd (counts as first ch-5 space). [6 Cl, 5 ch-5 sp, 1 ch-2, 1 dc]
Rnd 3: ch 1, sc in first ch-5 space, (*ch 1, {dc, ch 1, Tr, ch 4, slip st in top of previous Tr, Tr, ch 1, dc} in next Cl, ch 1,* sc in next ch-5 sp) 5 times; Repeat from * to * once, slip st to first sc of Rnd. Fasten off [12 sc, 12 dc, 12 Tr, 24 ch-1 sps, 6 ch-4 sps]
Finishing
Weave in all tails.
Happy Holidays to all my dear readers. Stay warm and enjoy some peaceful and joyful days no matter how you celebrate.
This post contains affiliate links. I may receive compensation (at no additional cost to you) if you make a purchase using these links.
The Stiffy Mod Podge is what I like to use to stiffen my snowflakes for hanging ornaments. If you can’t find it locally you can order it on Amazon. Just click on the photo above.
This post contains affiliate links. I may receive compensation (at no additional cost to you) if you make a purchase using these links.
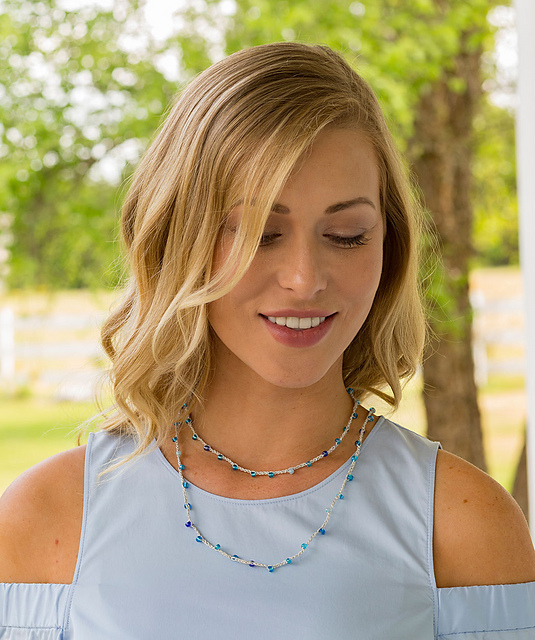
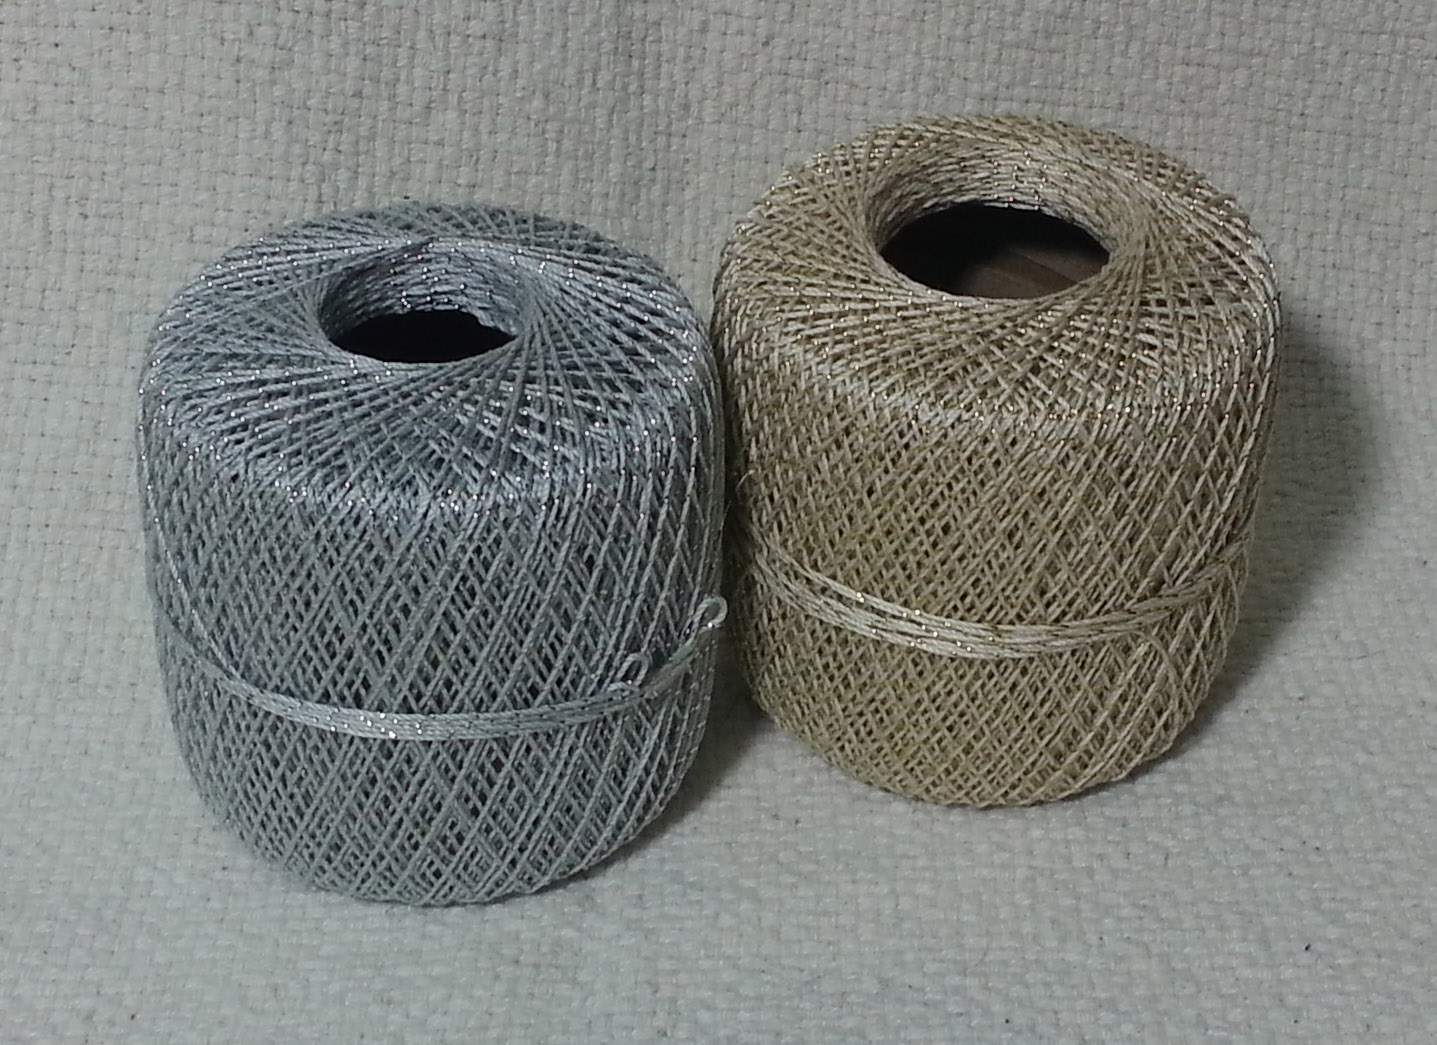
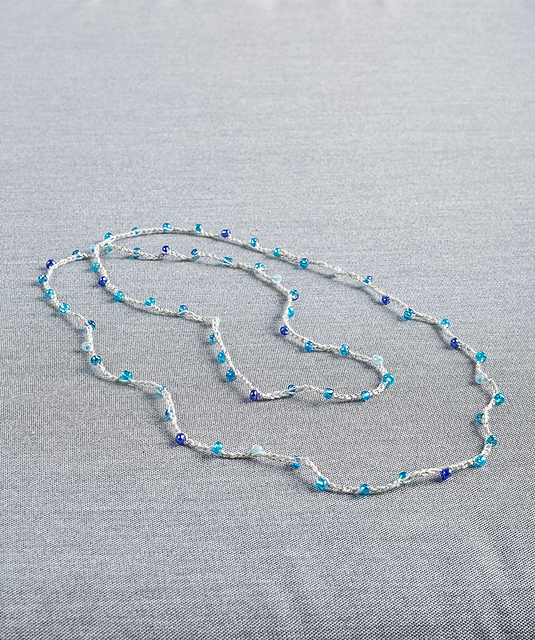
A while back the folks at Red Heart asked me to design a simple beaded necklace that beginning crocheters could manage. They asked me to crochet it in their Red Heart Metallic Crochet Thread in Size #10.
I’ve always loved this metallic crochet thread, mainly because I’m part magpie. If it has sparkle I will find it. So beads and sparkly crochet thread. I’m there!
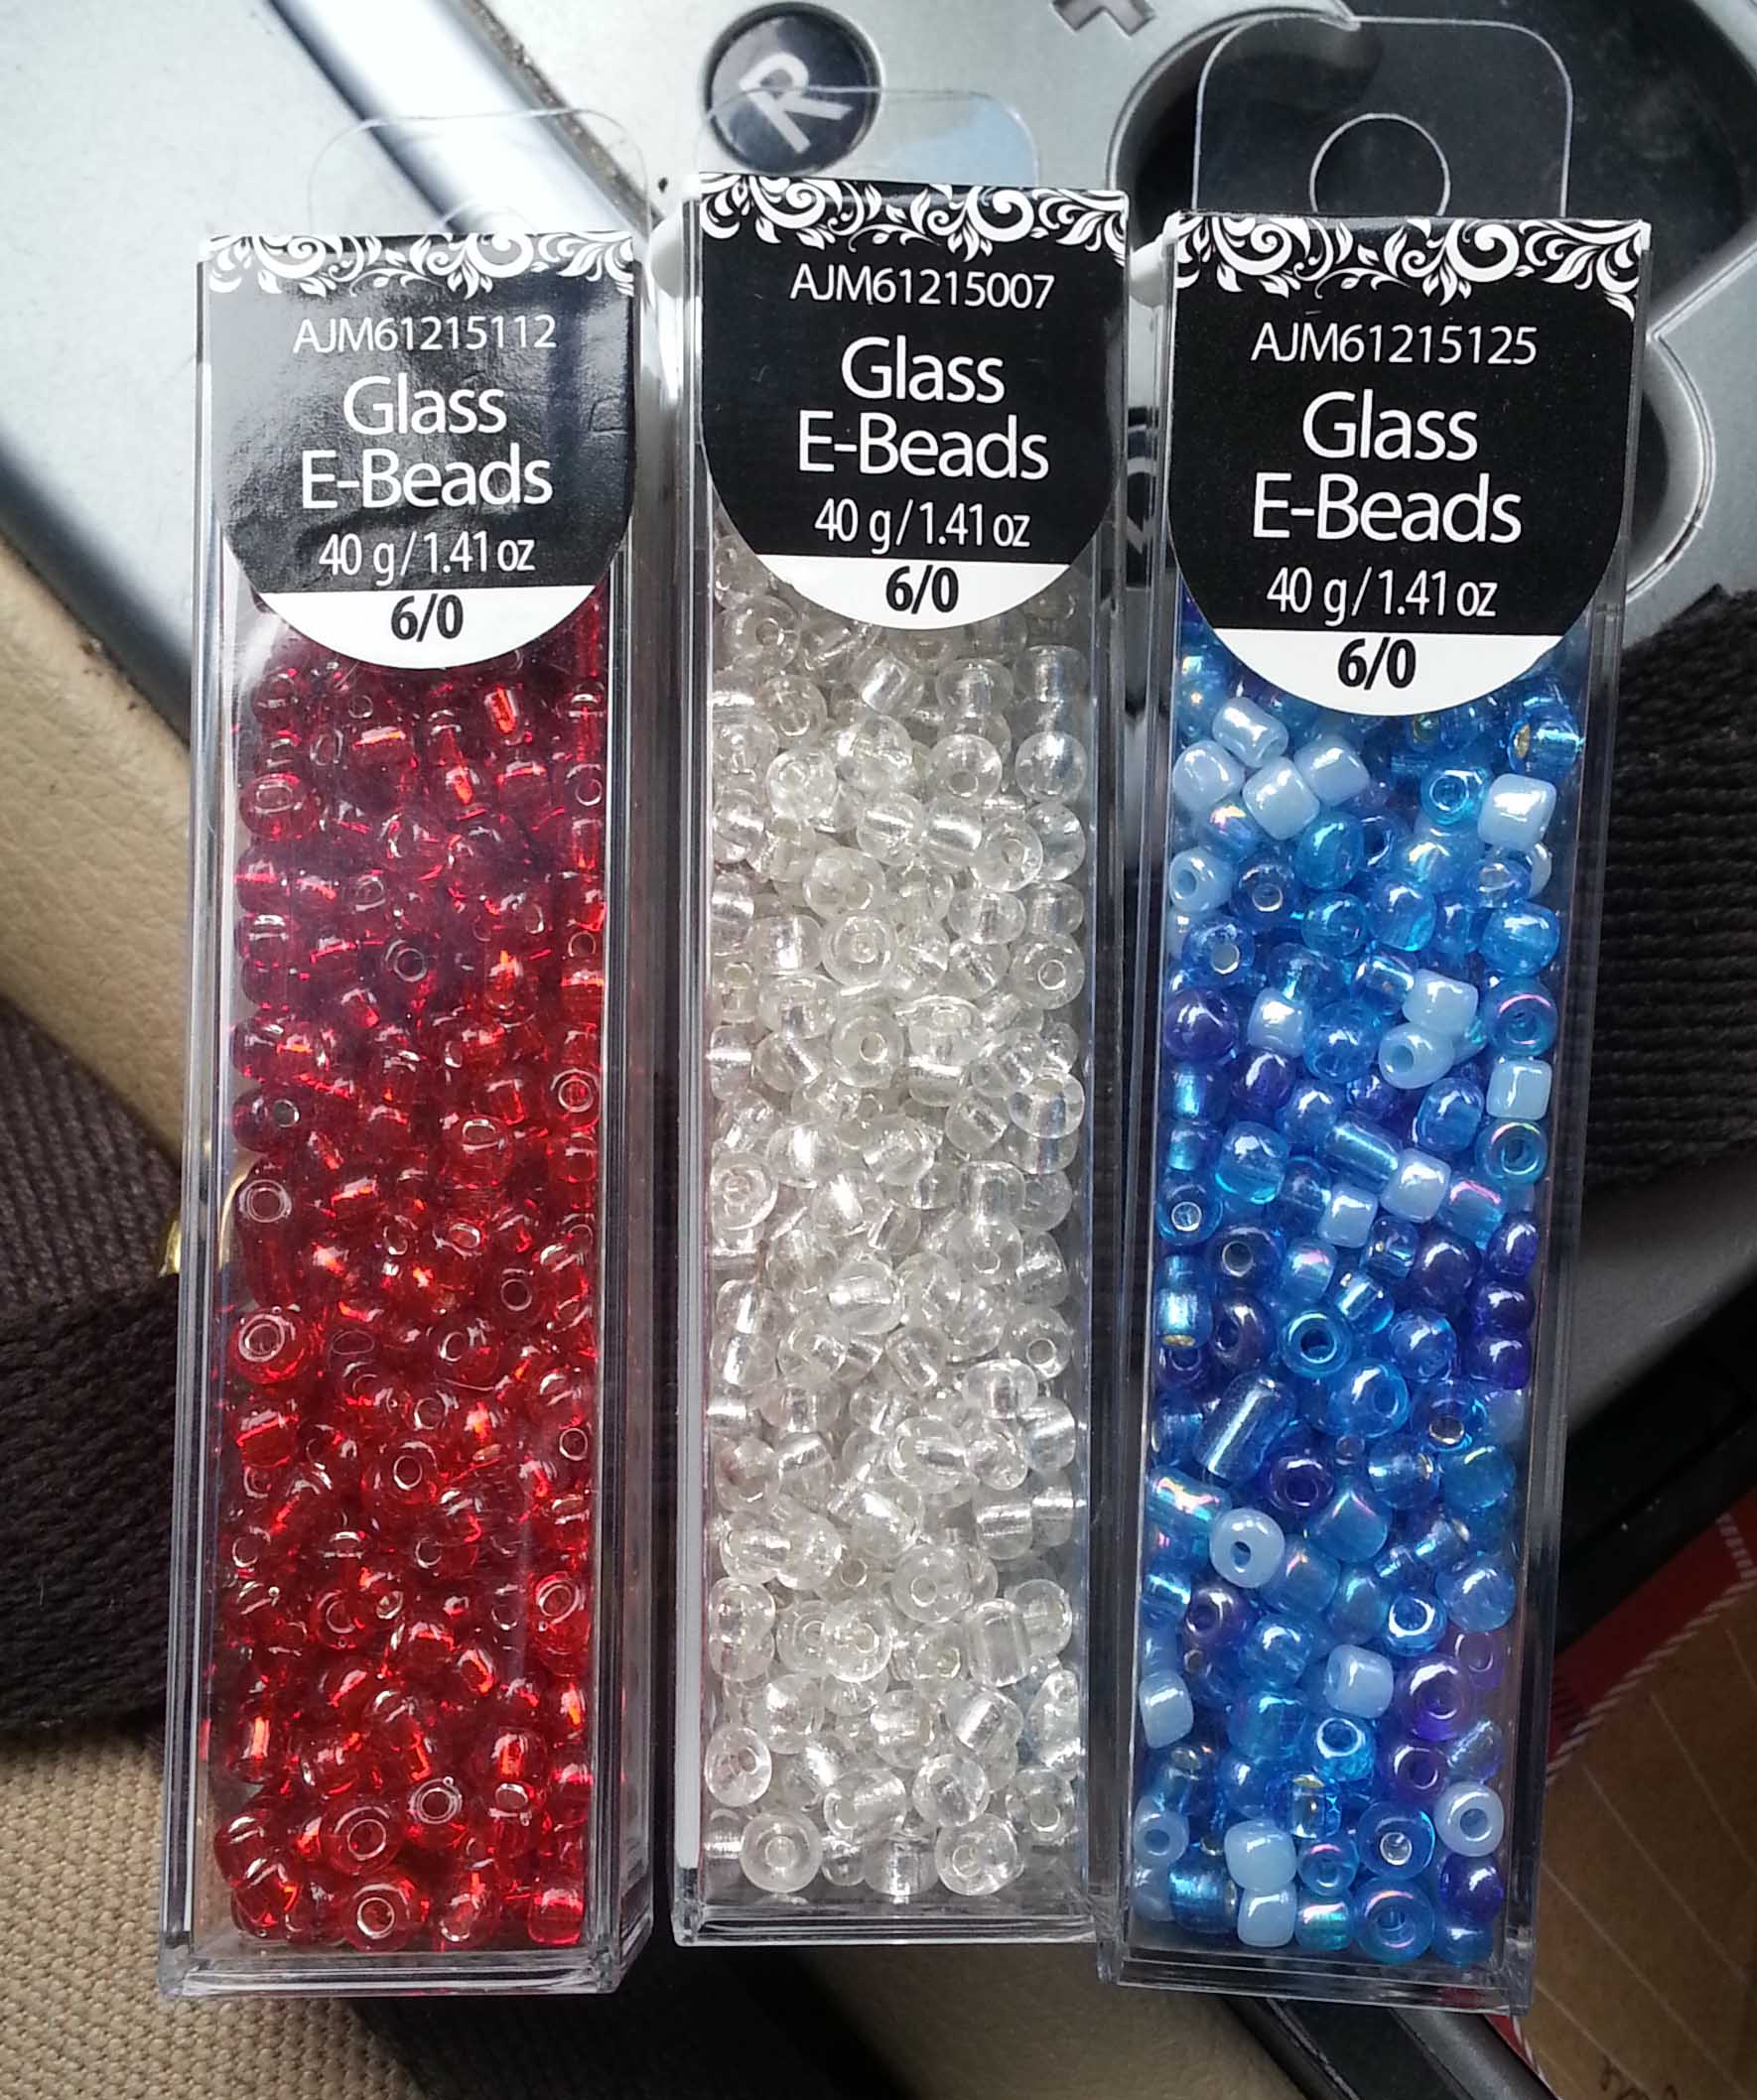
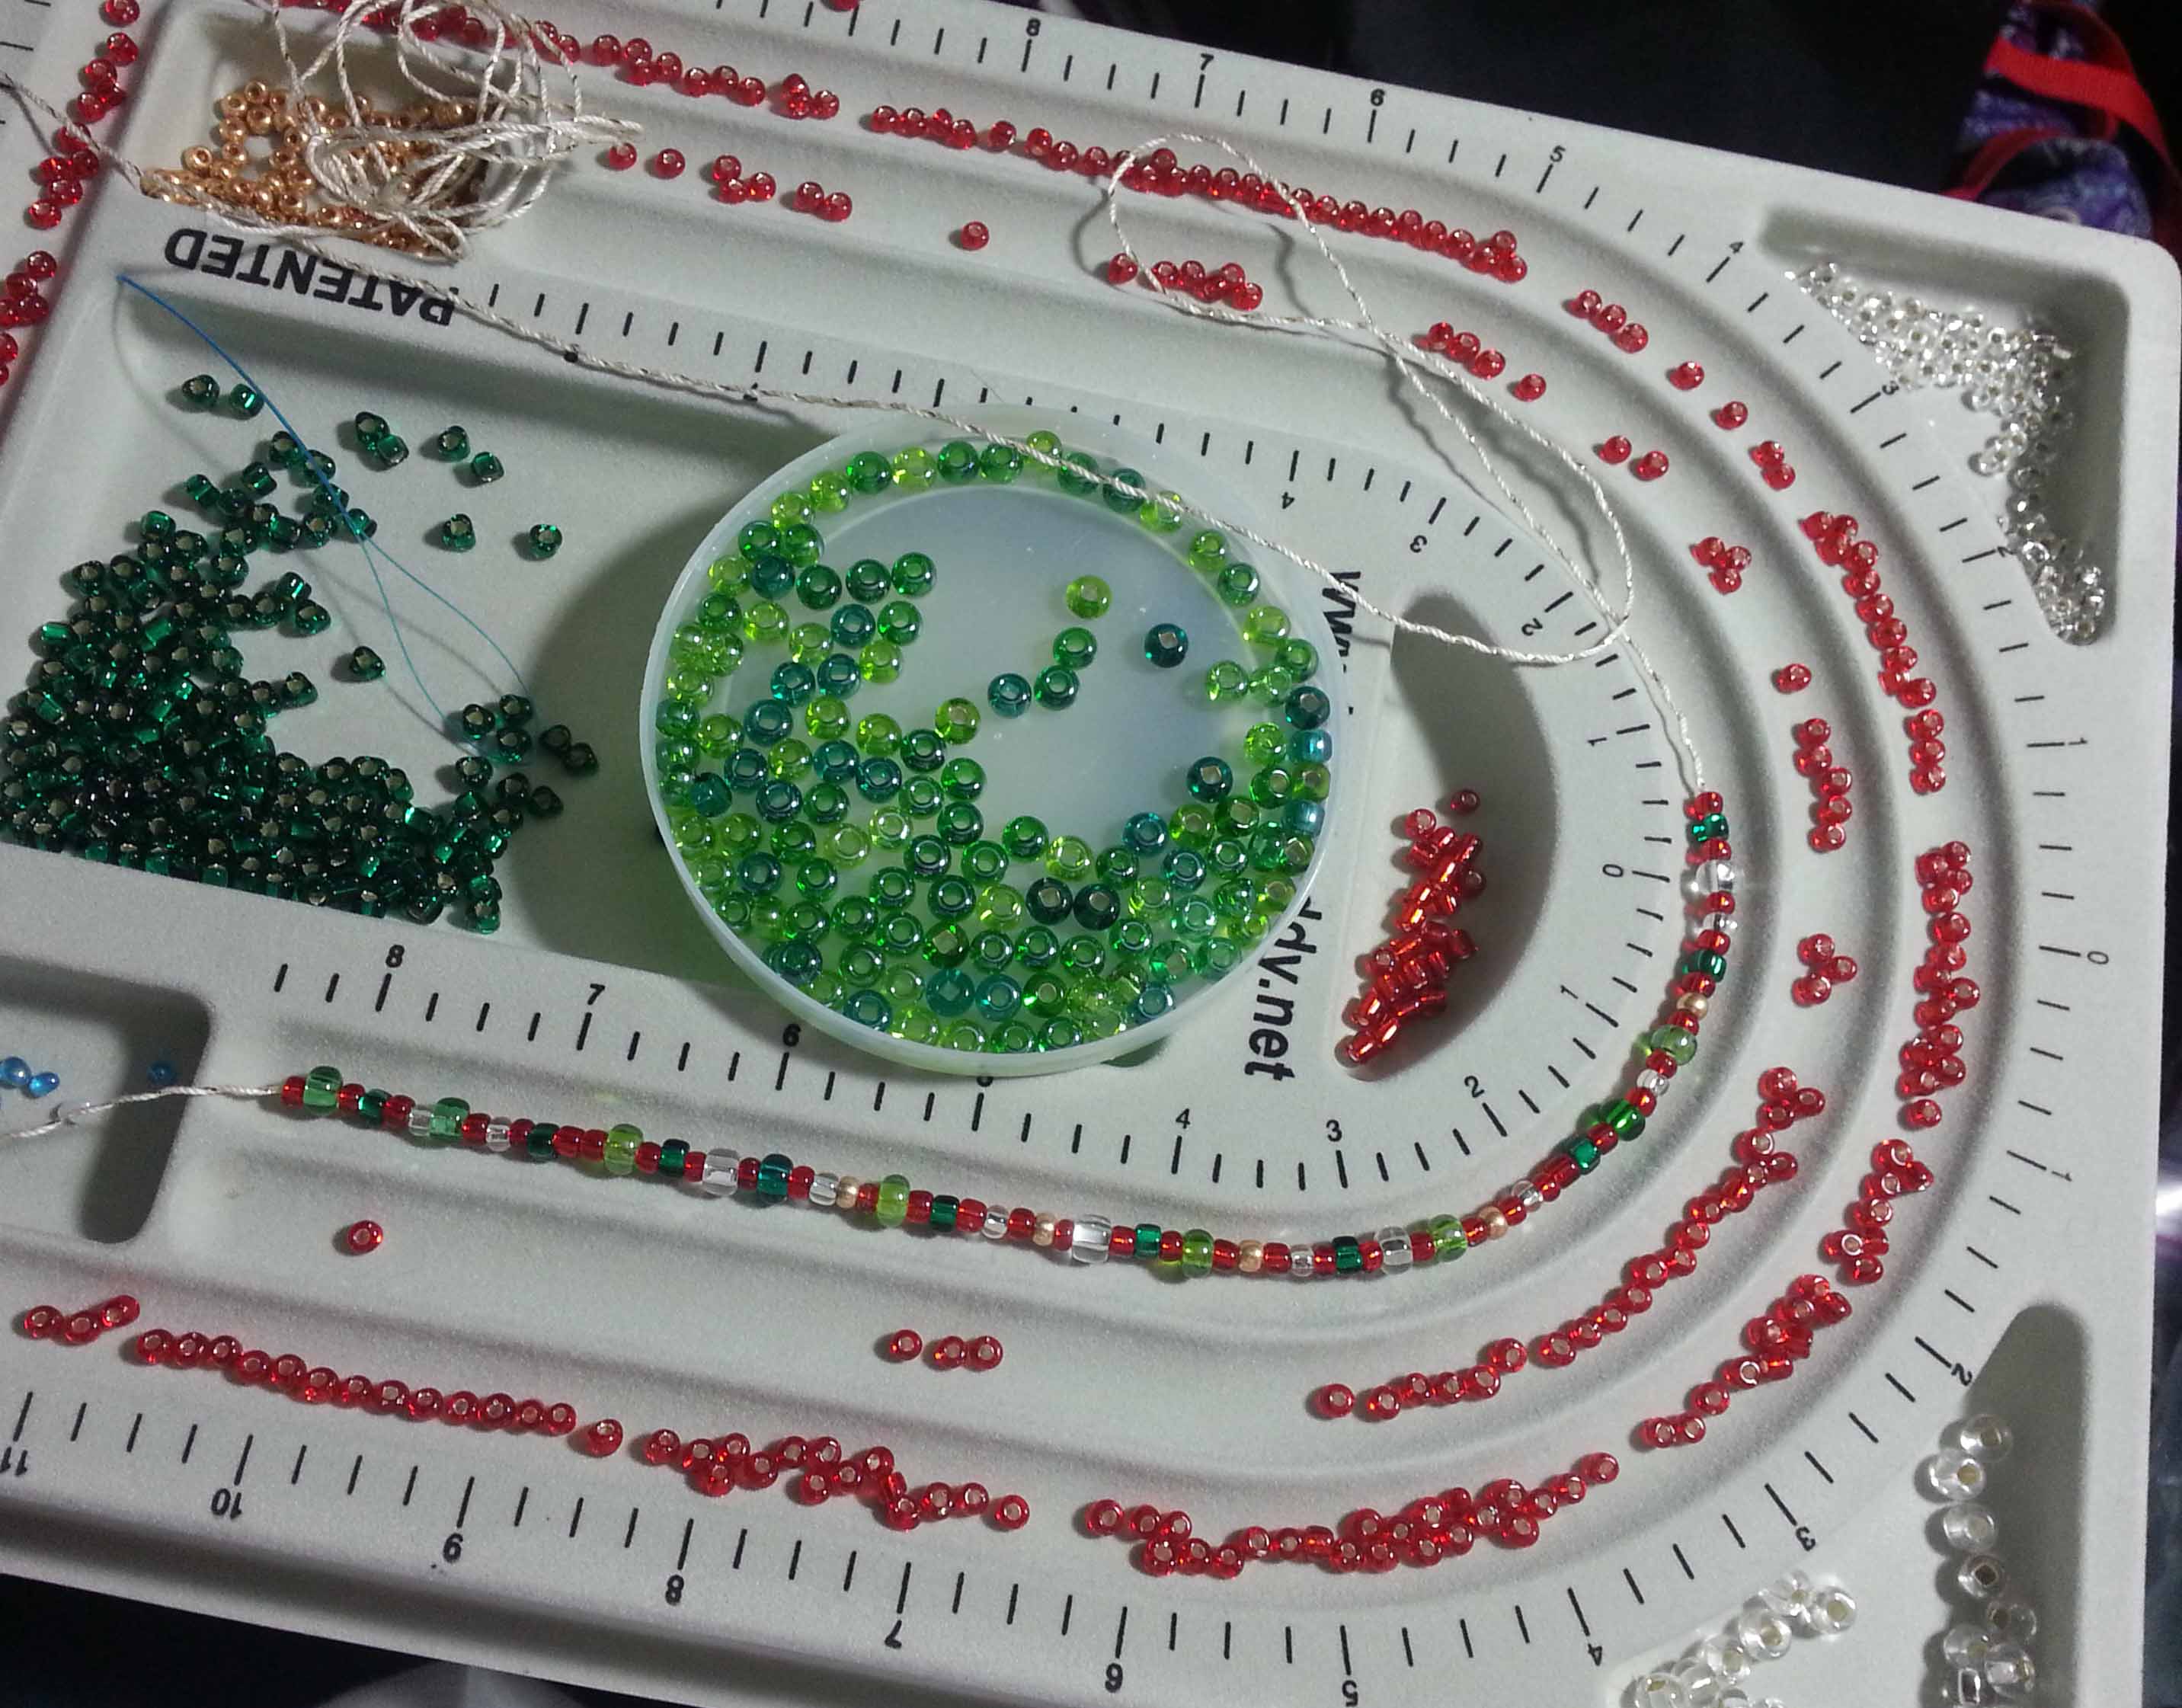
Remember these beads? They were for working out this design.
We are coming up on the holiday season. Lots of parties and packages and New Year’s Eve where sparkle is the Thing! This is a great quick crochet project to add some sparkle to your wardrobe or packages. It is even a terrific quick gift project.
The folks at Red Heart did a lovely job photographing the sample I made for them. You can find the free pattern on the Red Heart website here. The pattern even includes a photo tutorial on making the beaded chain stitch.
Of course for the holiday season I like my sparkle to really be kicked up a notch. That means I need lots of strands to my necklace.
You can also have fun with mixing up the size and shape of beads you are using.
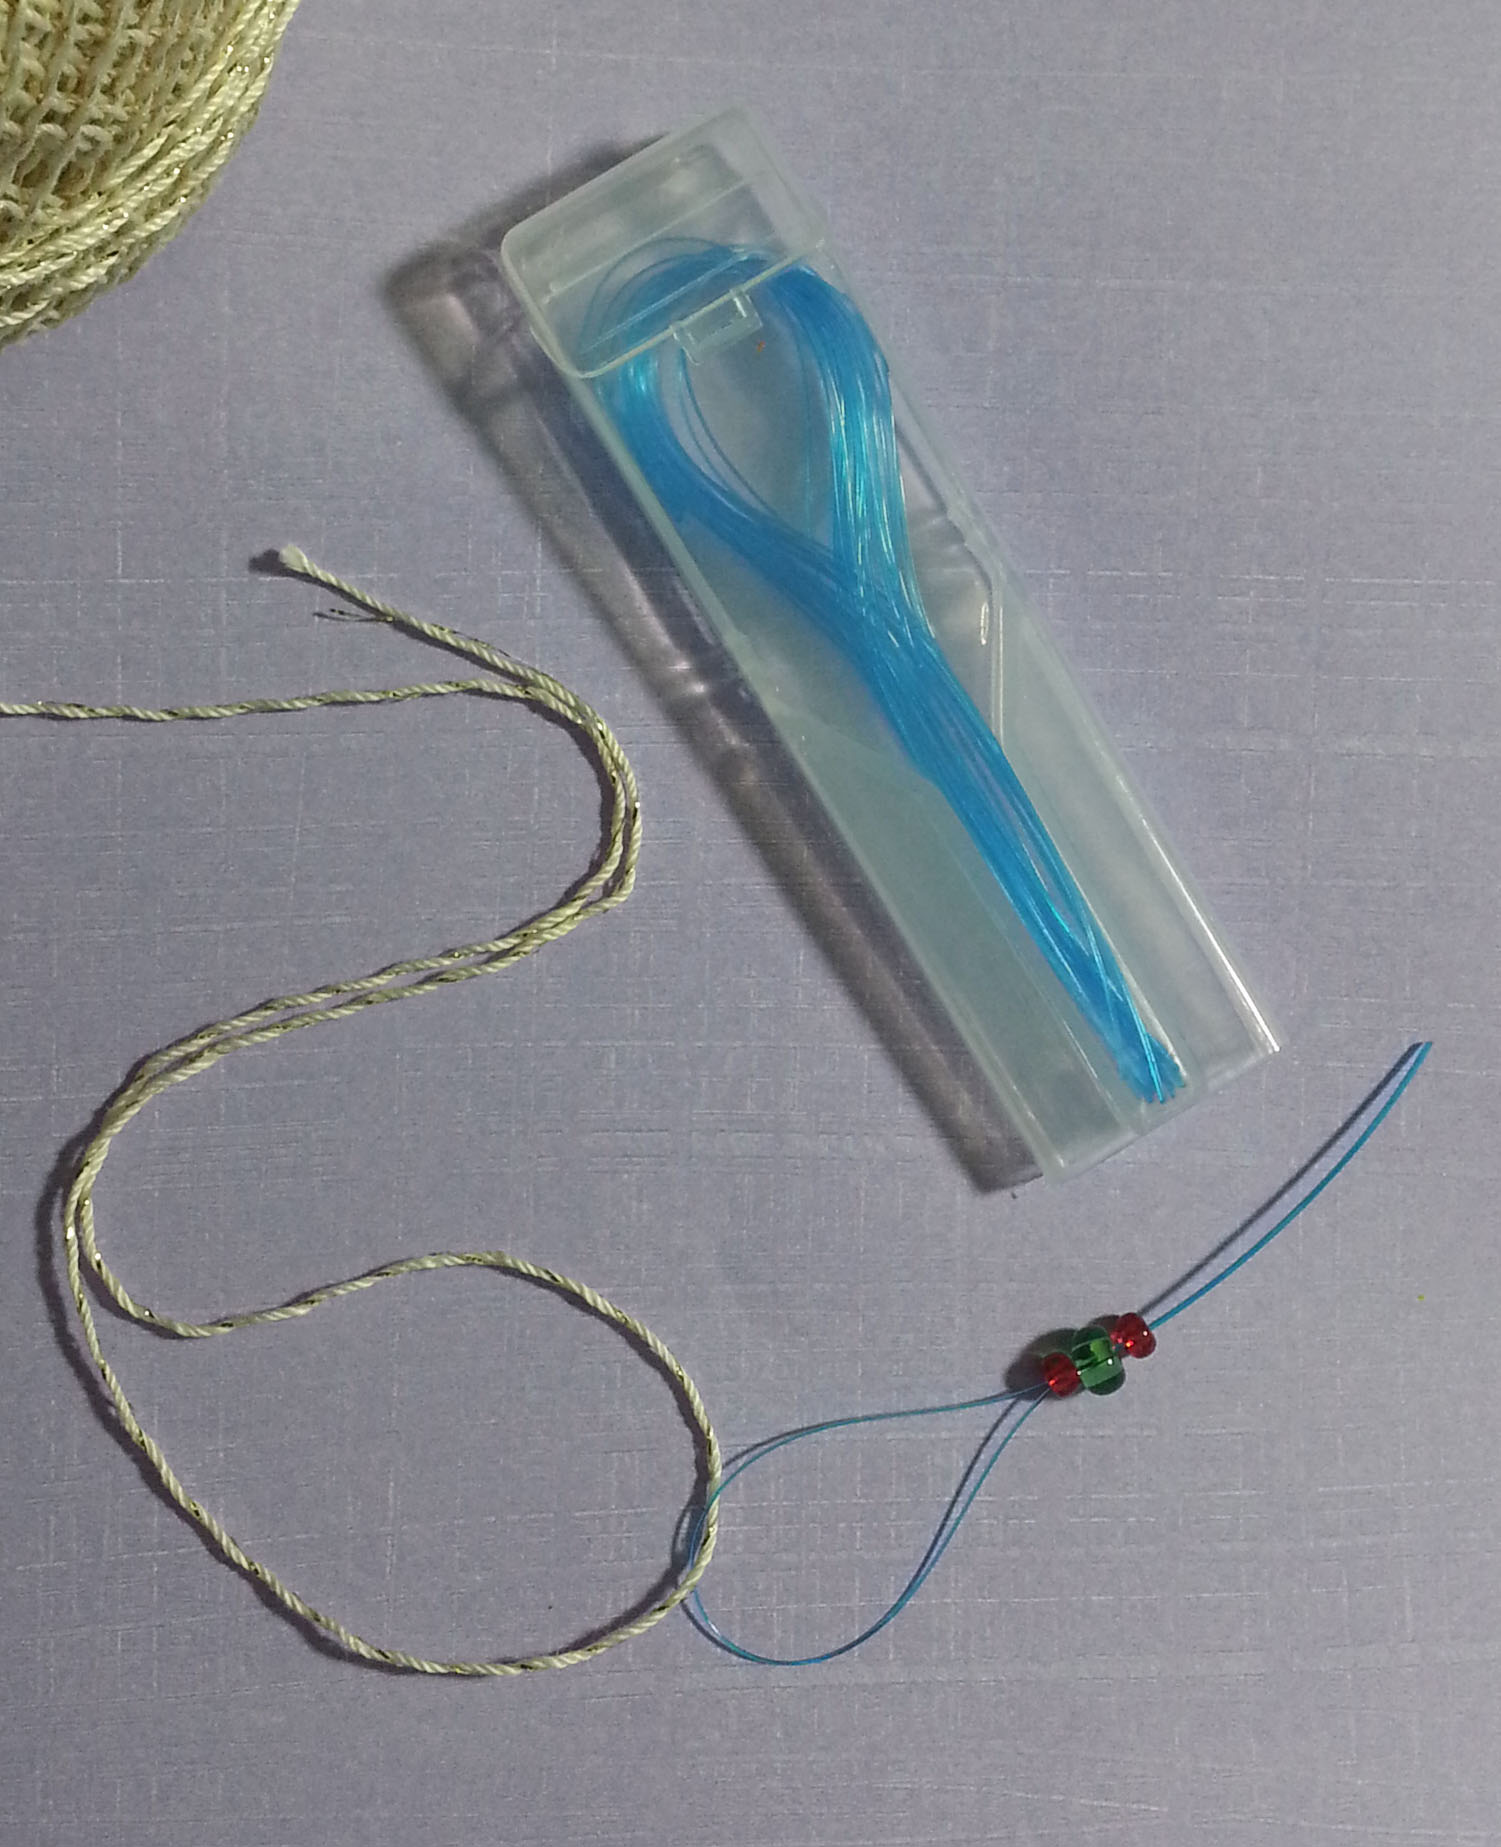
I generally go with the size 6 E beads but in this strand I added size 2 and some triangle shaped beads. Look for beads with a smooth edge around the hole. Otherwise your beads will cut your thread or abrade the metallic tape.
I prefer to use a dental floss threader to string my beads onto the crochet thread (or yarn). The flexibility of the “eye” of the floss threader compresses easily to pull thru the hole in your beads and the sturdiness of the “point” end works well for scooping up beads. You can find these in most drug stores in the dental floss area.
Now it’s your turn. Time to get out the beads and thread and make some sparkle you can wear all year long.
I hope everyone here in the USA had a great Thanksgiving Day with their friends and families. Last weekend my family and I put up our tree and decorated the house. Which means I’m now focused on what gifts I’ll be giving this year. Especially what gifts I’ll be crocheting.
My go-to projects for gift-giving are hats, they are quick and a great canvas for creating something special for my crochet-worthy family and friends. My favorite stitch for making a basic simple hat is the half double crochet. But that stitch can be a bit finicky for beginning crocheters.
So today I am posting an easy pattern for a basic hat worked in continuous rounds of double crochet stitch with 2 rounds of single crochet for the brim. You will only have to make 2 half double crochet stitches in the entire project.
This hat is slightly more “meshy” than the half double crochet because double crochet stitches have a longer “post”. The mesh like fabric lets the scalp breathe a bit more, nice for those that find some crochet hats to be too warm. This is an especially good pattern for alpaca blend yarns as they tend to make extremely warm fabric.
I chose not to use the single crochet stitch for the body of this hat because it is a tighter stitch and doesn’t have enough give or stretch for a comfortable hat fabric. The only single crochets are for the “step-up”, “step-down” and the brim finish.
For all my hats I like to start at the center of the crown, so the beginning of the pattern is like working a motif. I like my adjustable slip knot start for that (video on my YouTube channel if you need help) as it allows enough room for the first round’s stitches without leaving a gaping hole in the top of your hat.
Continuous rounds are basically a spiral. This spiral is less complex than the 4 armed spiral I used in my “Whirlwind Afghan Square” and my “Whirlwind Hat”. Just like in those patterns though, I use stitch markers to help me keep track of where the increases for my rounds are happening and the end of my round.
Simple Double Crochet Hat
Designed by Andee Graves
Skill level: Easy
Finished Size:
Head Circumference: Apprx 22”
Materials:
Yarn
Ella Rae “Cozy Soft Chunky” (25% Wool, 75% Acrylic) 3.52 oz/100g, 131 yds/120m: 1 ball
Hook
I-9 / 5.5mm or size needed to obtain gauge.
Notions
Yarn/tapestry needle
Stitch markers in 2 colors: at least 11 in one color and 1 in a different color
Gauge
3 rounds in flat circle = 3.5” diameter
Special Stitches/Abbreviations
Place Marker (PM)
Single Crochet Stitch (sc): insert hook in stitch, yarn-over, pull up a loop (2 loops on hook shaft), yarn over pull thru both loops on hook.
Half Double Crochet Stitch (hdc): yarn-over, insert hook in stitch, yarn-over, pull up a loop (3 loops on hook shaft), yarn over pull thru all 3 loops on hook.
Double Crochet Stitch (dc): yarn-over, insert hook in stitch, yarn-over, pull up a loop (3 loops on hook shaft), yarn over pull thru 2 loops on hook (2 loops remain on hook shaft), yarn over pull thru last 2 loops on hook.
Pattern Notes:
All rounds are worked without turning, RS of fabric is always facing out.
Instructions
Crown
Rnd 1: Starting with an adjustable slip knot, ch 2, (sc, hdc, 10 dc) in 2nd ch from hook,
PM in each st using different color in last dc. [1 sc, 1 hdc, 10 dc]
End of Round 2 with St Markers in place.
Rnd 2: (2 dc next st, move st marker to 2nd st made)12 times.[24 dc]
Rnd 3: (Dc next st, 2 dc in marked st, move st marker to 2nd st made)12 times. [36 dc]
Rnd 4: (Dc each un-marked st, 2 dc in marked st, move st marker to 2nd st made) 12 times. [48 dc]
Rnds 5 – 6: Repeat Round 4. Stitch count end of Round 6 [72 dc]
Starting with first st marker remove every other marker (1, 3, 5, 7, 9, 11).
Rnd 7: (1 dc in each un-marked st, 2 dc in marked st, move st marker to 2nd st made) 6 times. [78 dc]
Remove all but the last st marker.
Sides
Rnd 8: Dc in each st around, PM in last st of Rnd.
Rnds 9 – 16: Repeat Rnd 8.
Brim
Rnd 17: Hdc next st, sc next 77 sts.
Rnd 18: Sc next 77 sts, sl st next st, sl st back loop next st. Fasten off.
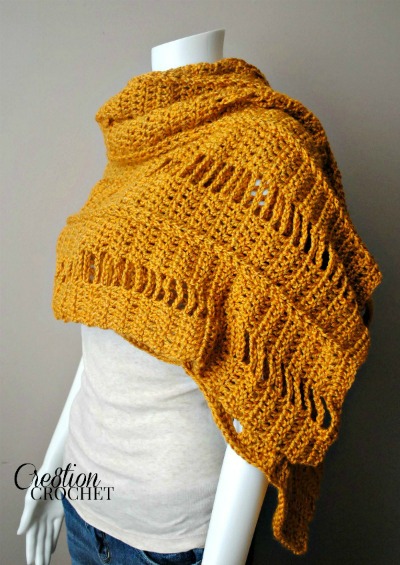
Hi everyone. My book “Wraps for All Seasons” has been on a blog tour. We will be making 6 stops for this tour. Today is our last stop. Each of the bloggers will be giving away a copy of the book, so be sure to visit them to see what they have to share with you about my book.
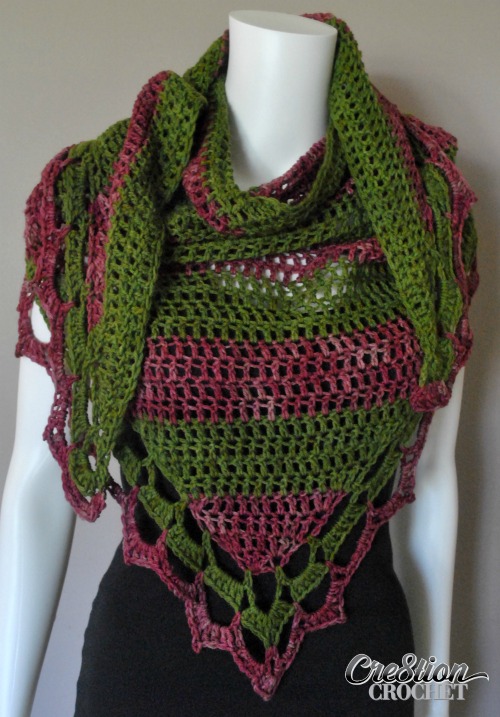
Stop #6 is with the talented Lorene Eppolite of Cre8tion Crochet. Lorene and I met in October 2013 at the Knit & Crochet Show and have stayed in touch over the years since. Last time I saw her was in Charleston this summer at the Knit & Crochet Show again. We had a lot of fun goofing off in the evenings. Lorene has a busy website where she posts lots of patterns and reviews.
Patterns like this lovely slightly asymmetrical shawl. It is the “Napa Valley Shawl”. I really like the colors she used for her sample in the photos, but could see it made in any combination of favorite colors. Simple stitch work for the body with a lacy and intriguing border.
And if texture is what you love, check out the gorgeous “Braided and Broken Wrap”. Simple construction for a sophisticated look. I could see this worked up in a deep purple or silvery gray to become a staple item in my cool weather wardrobe. Hop on over to Lorene’s site to check out all her other patterns and to enter her drawing for a copy of my book.
Thanks to all my blogging friends for doing this blog tour. And for all my readers that may have missed out winning a copy of my book. You can purchase it at the Annie’s Craft Store or on Amazon.com.
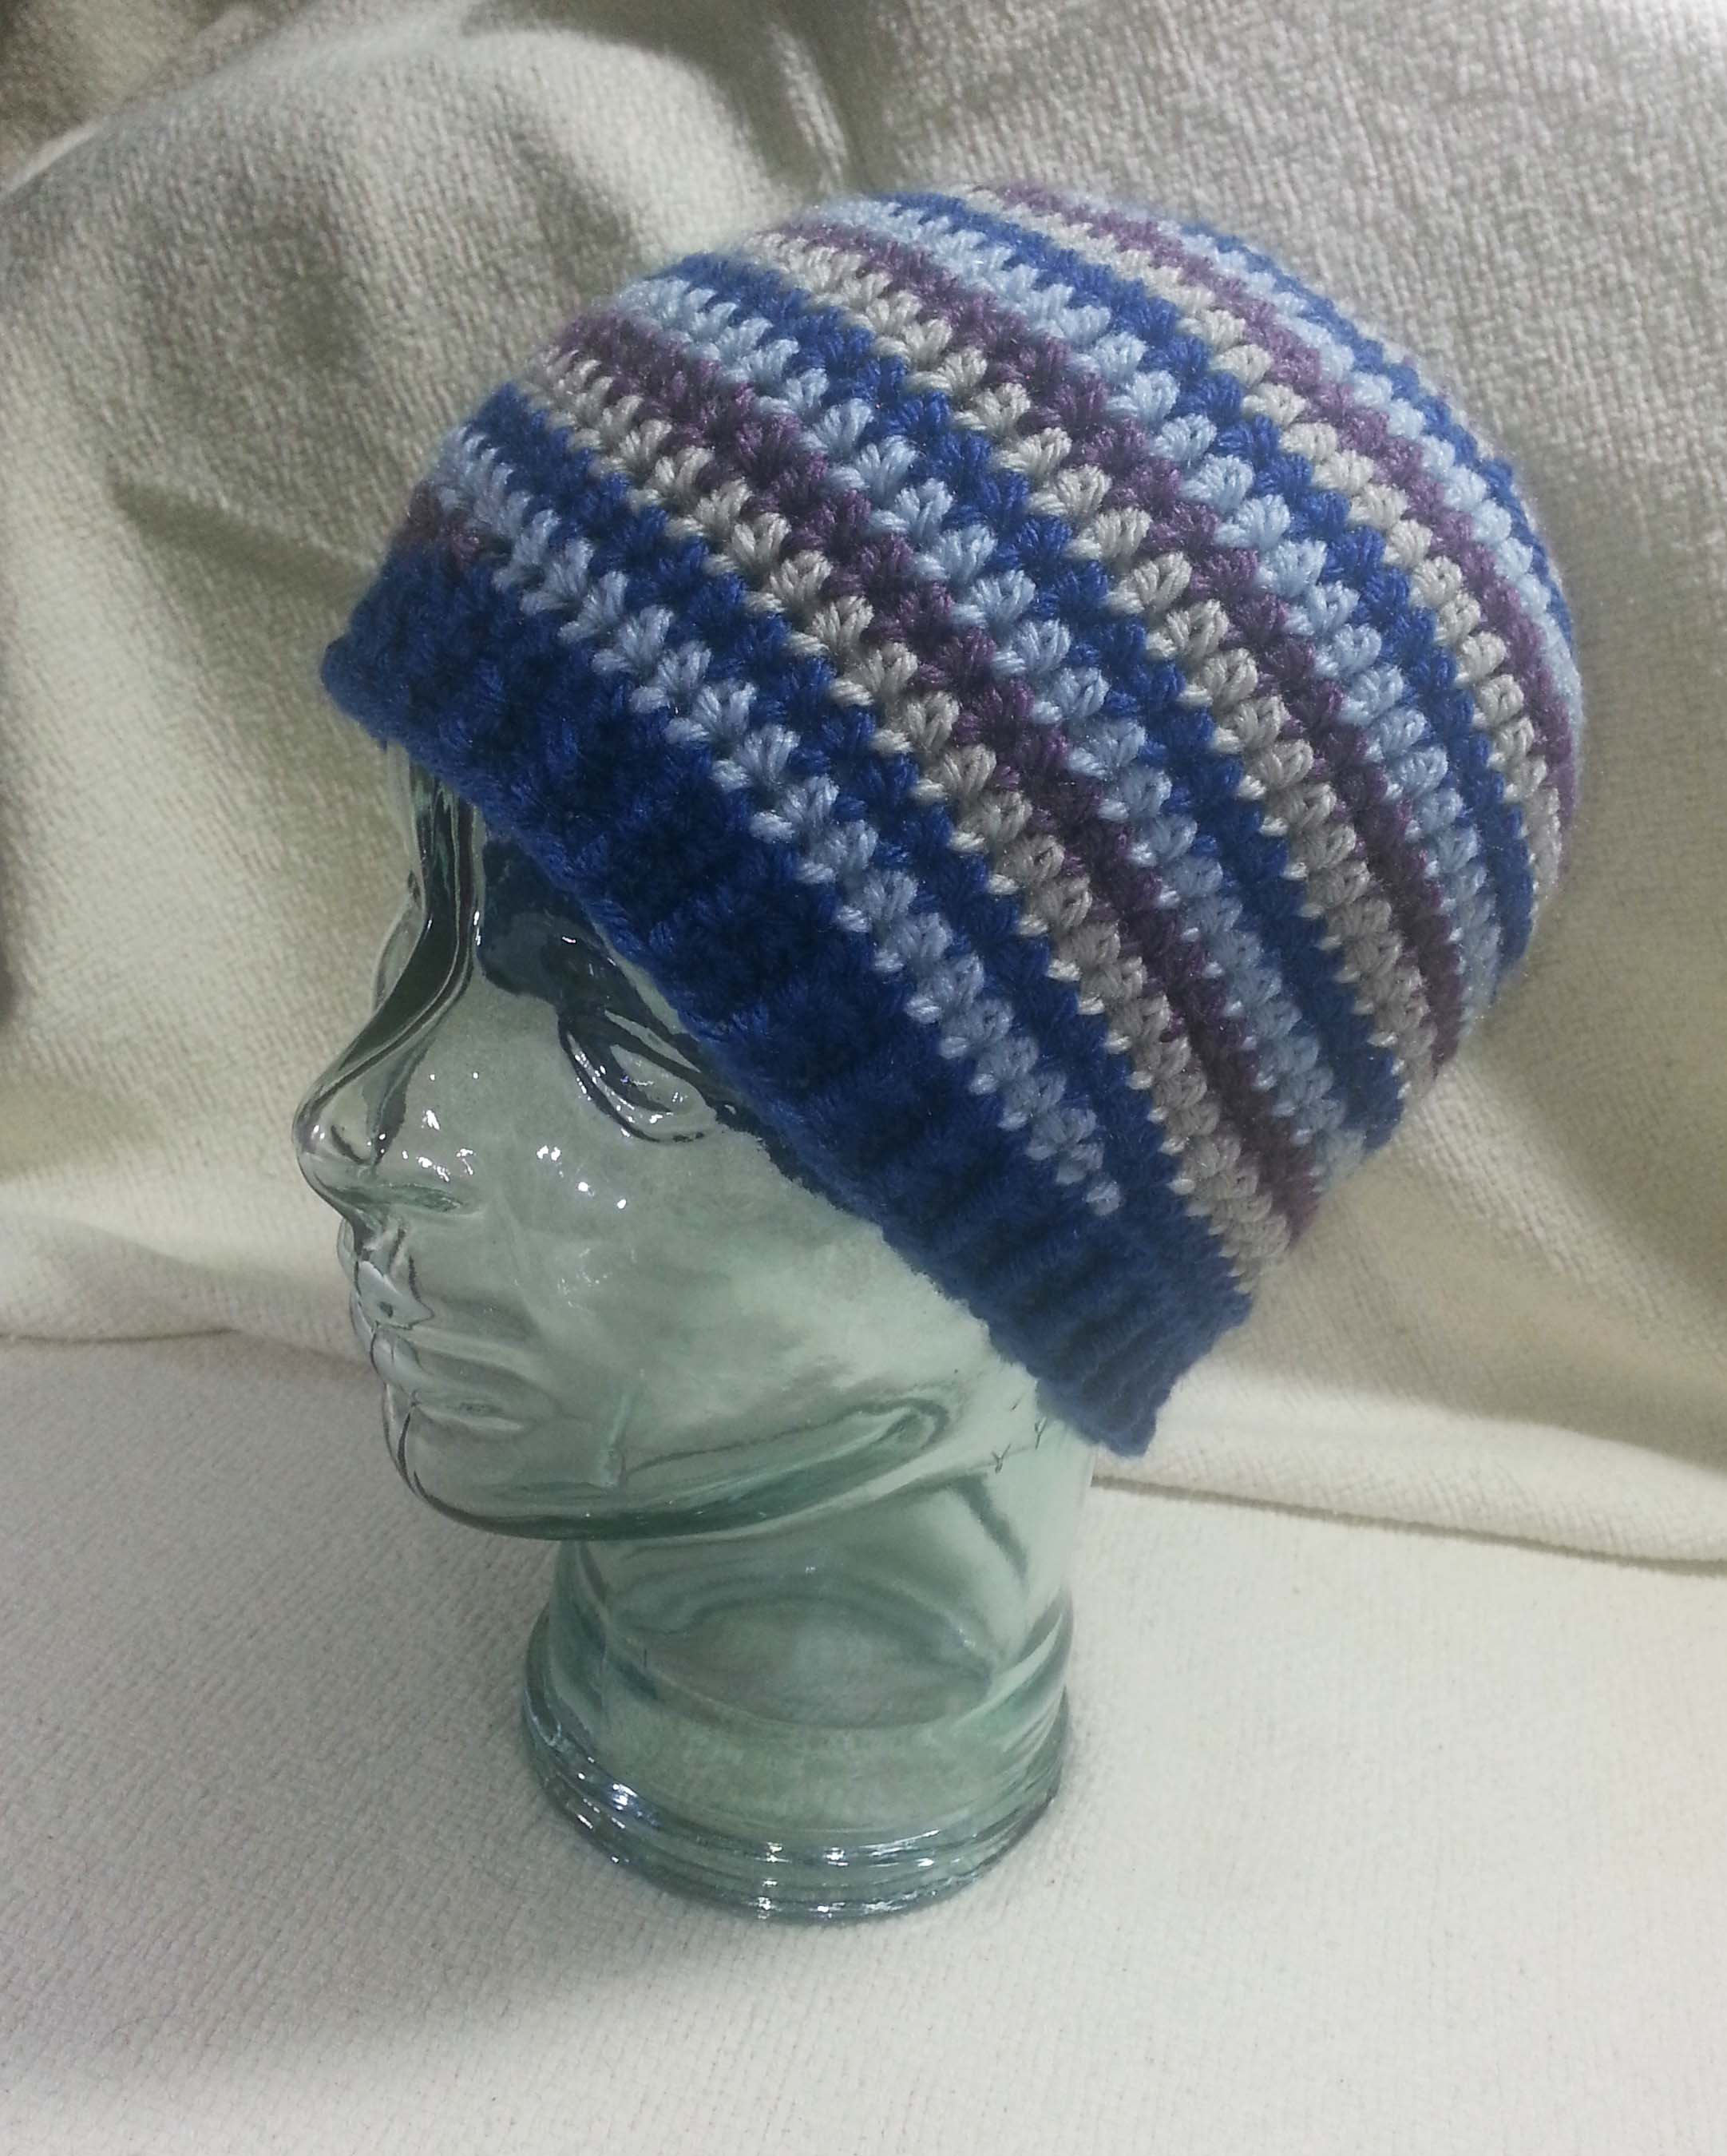
As many of my readers already know, I love to crochet hats. They are a fun quick project and a great canvas for experimenting with stitch patterns and new yarns. I seem to also make them frequently for gifts to family and friends.
My favorite construction method is working crown down in continuous rounds. Because there isn’t a join for each round the hat will come out seamless in appearance. This also creates a nice elastic fabric, a handy attribute for a project that will need to fit comfortably on your head.
But what if you want a hat with color stripes and you aren’t using one of the handy yarns with gradual color changes?
You can create stripes of color in your hats by changing the color of yarn as you work, but that can leave you with a “jog” in the fabric when you change colors. Another option in this style of color change is to “step down” your stitches in the first color, then “step up” with the new color. It will look less disruptive to the fabric colors, but it is a bit fiddly and not always ideal for the elasticity of your hat fabric.
What is a crocheter to do?
Fortunately the solution is actually quite simple. Spirals.
This method gives you not only a lovely smooth striped fabric, it also creates a visually interesting crown for your hat. You can work with anywhere from 2 to 8 “arms” in your spiral and use a different color for each arm to get the different color of stripes. Using stitch markers will make this method almost mindless as you work the hat.
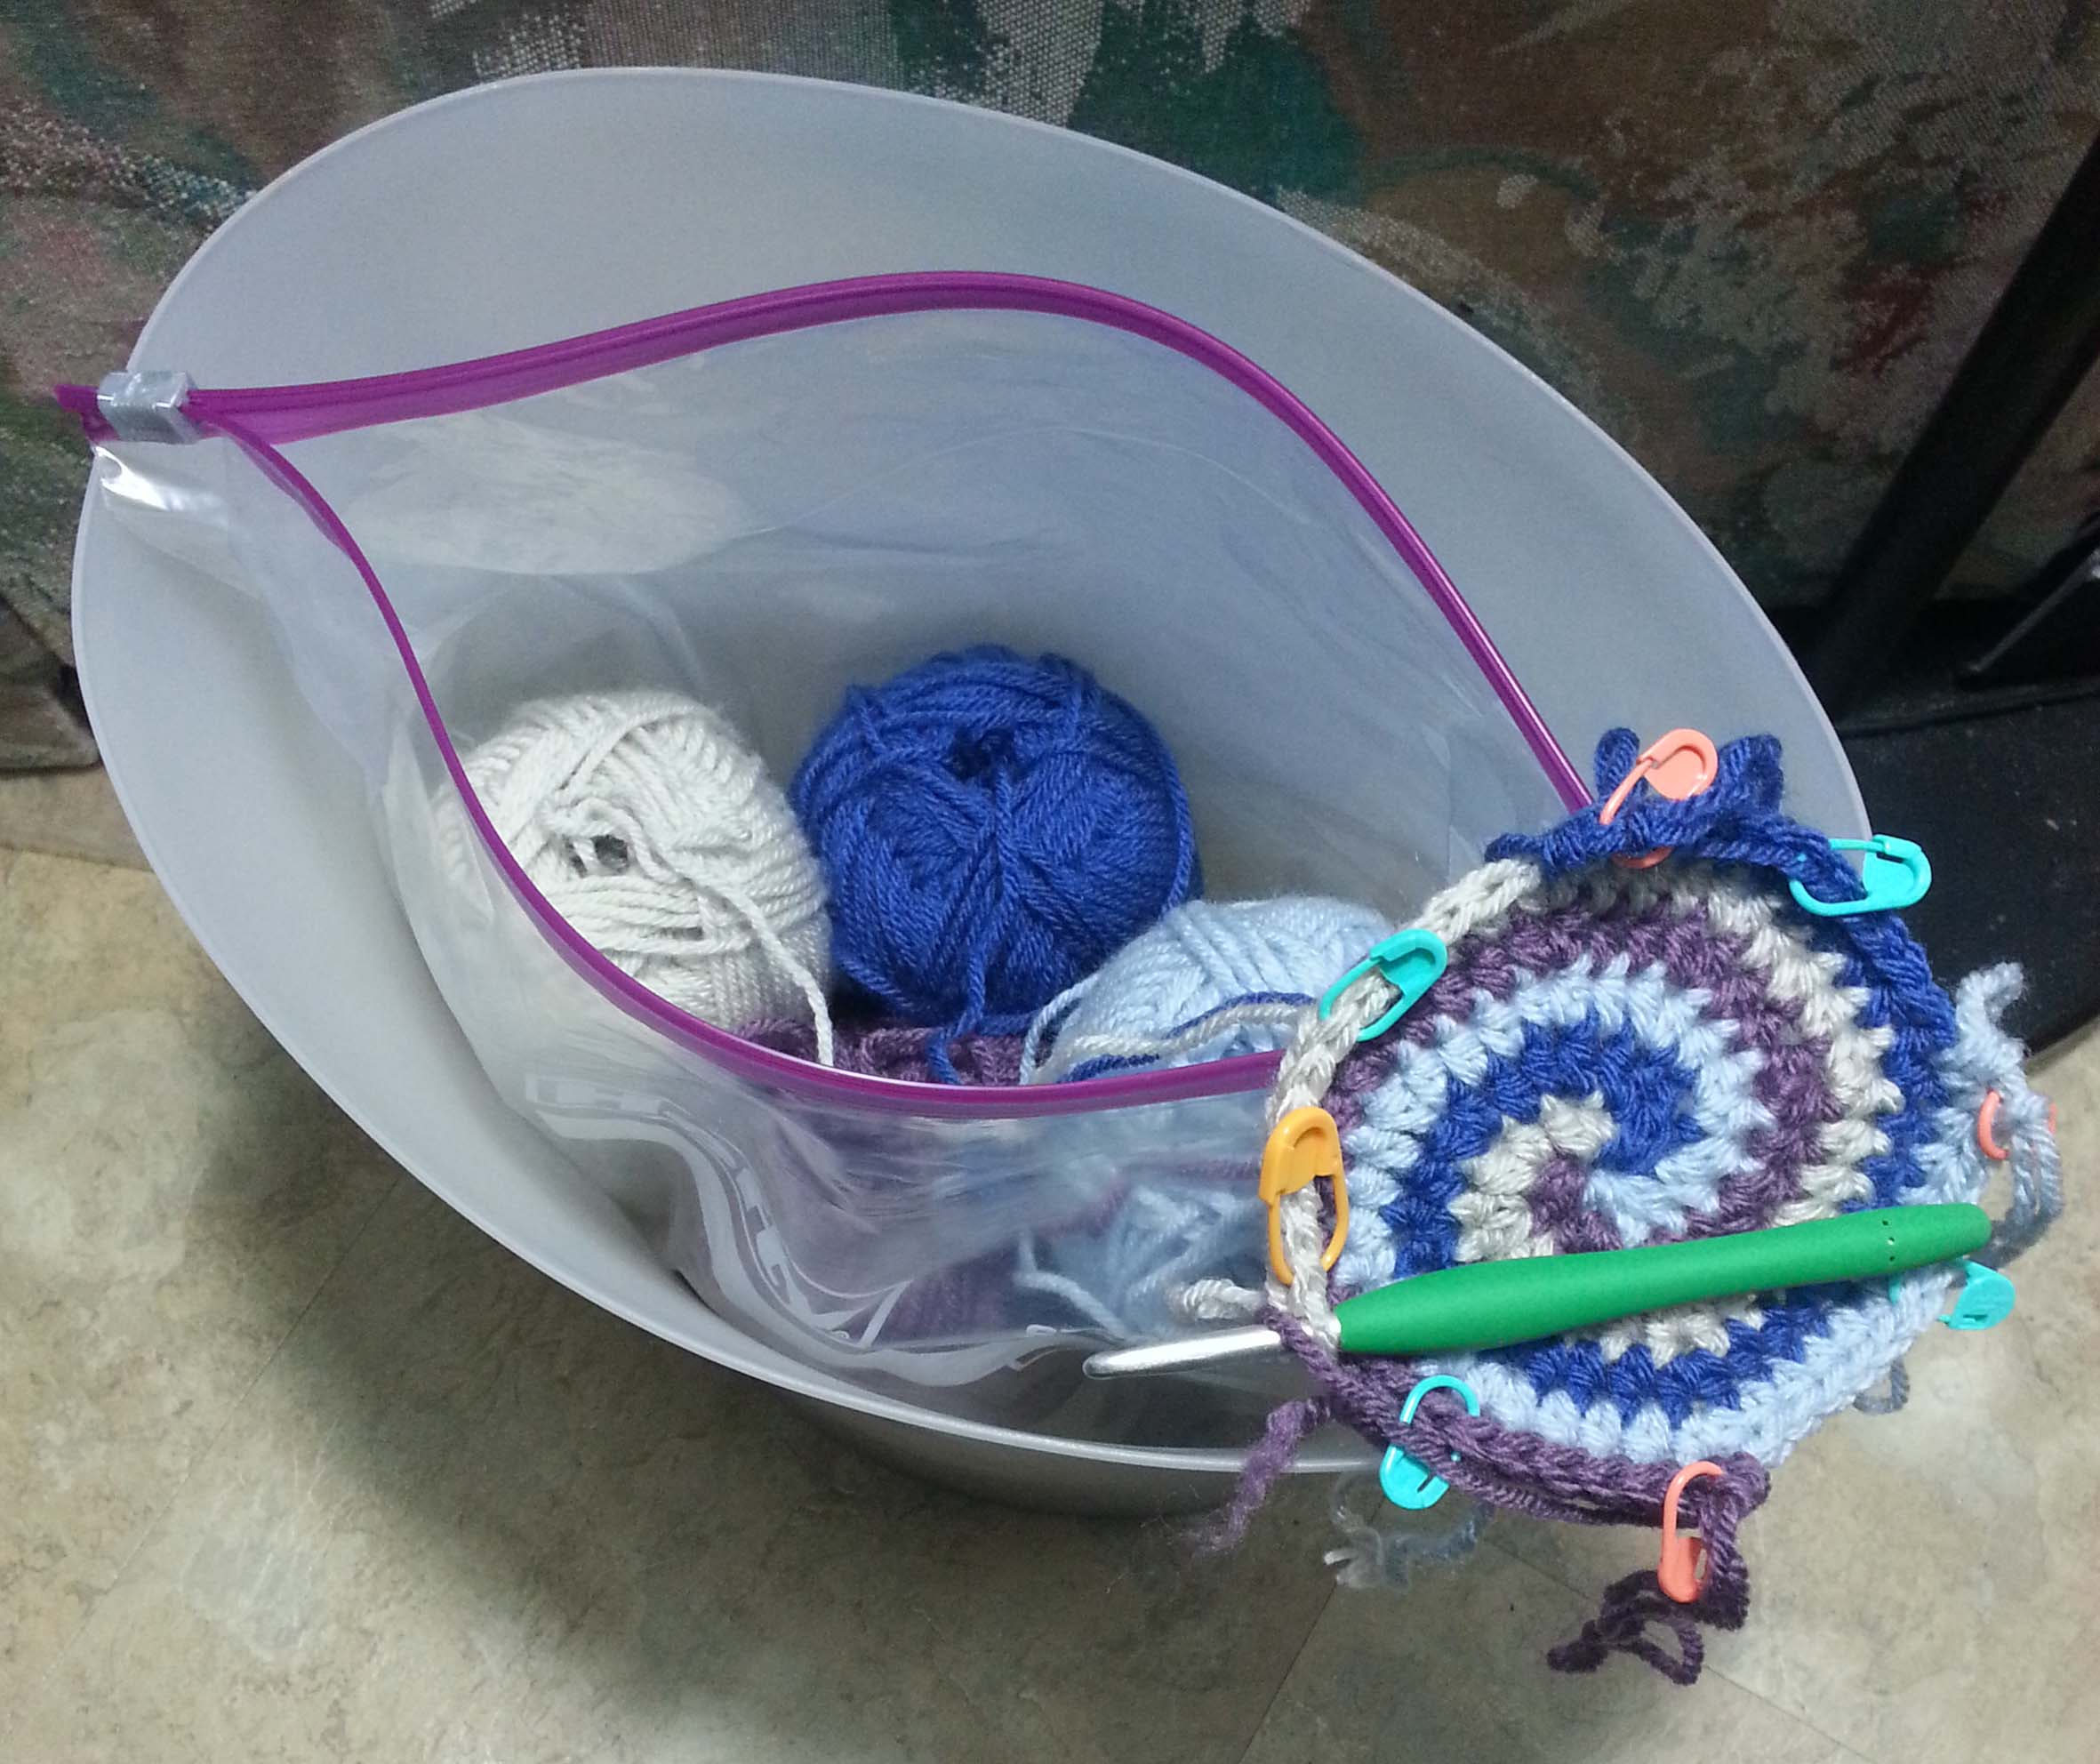
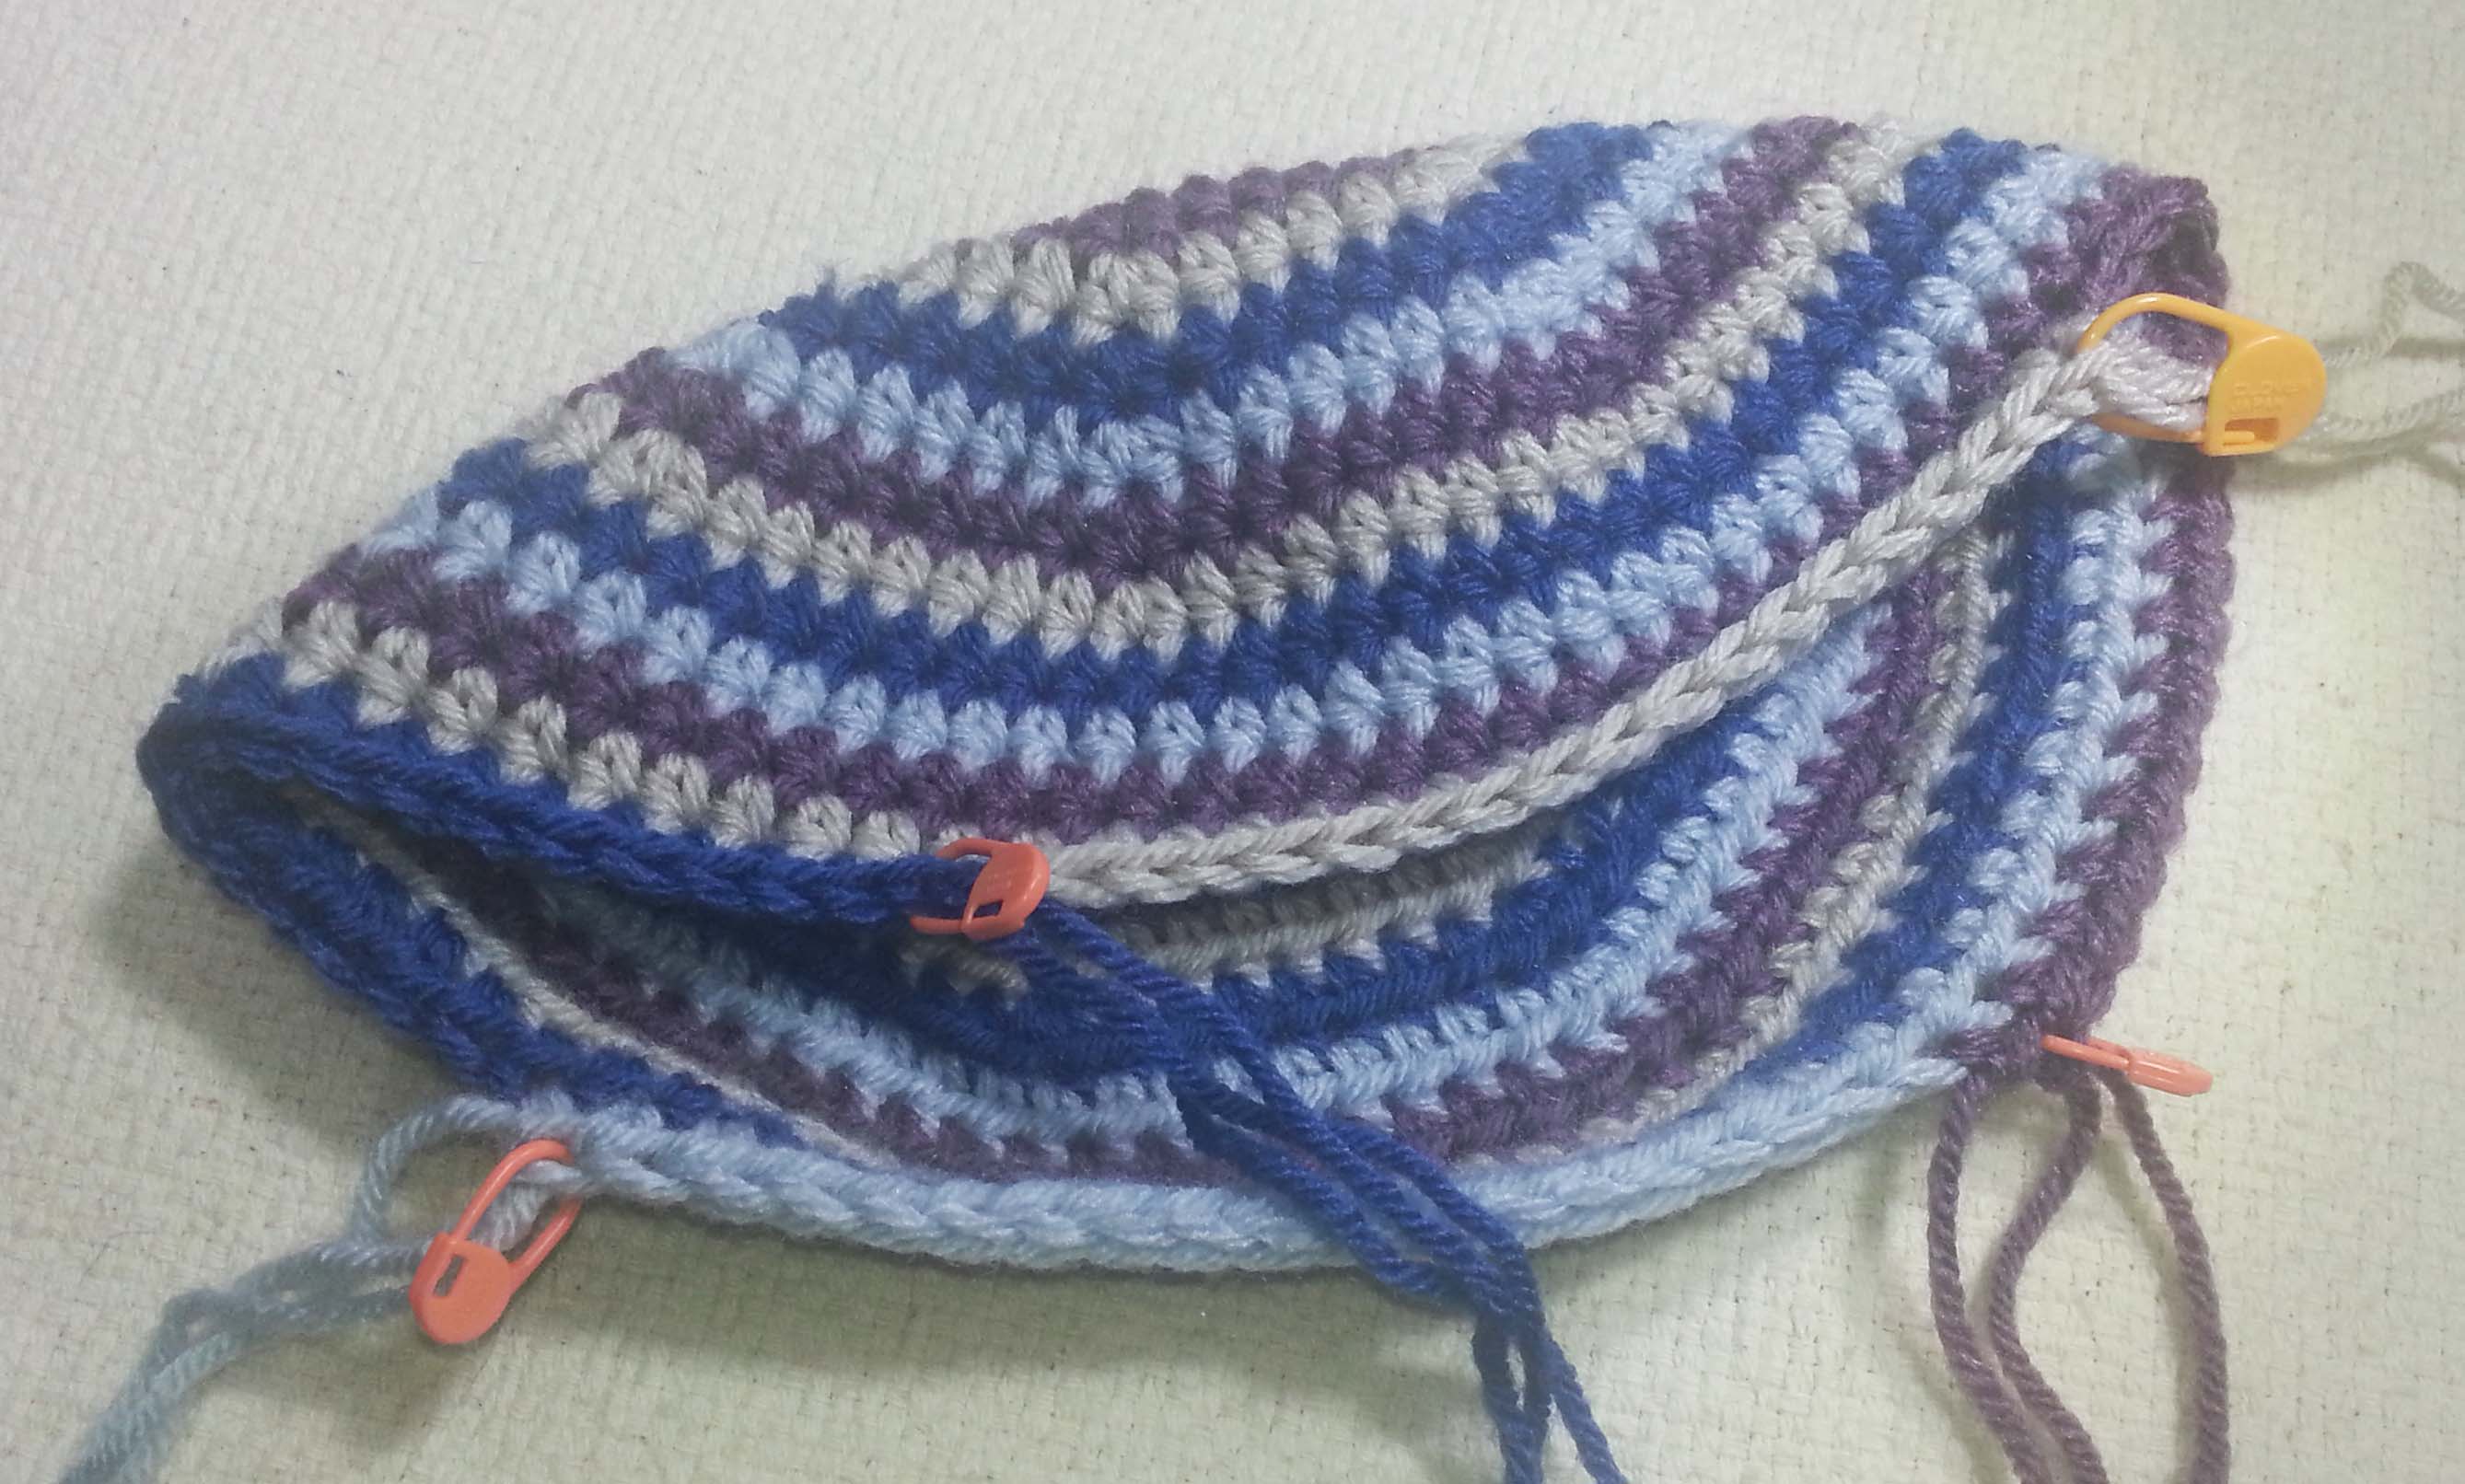
The only thing you have to contend with is how many balls of yarn you are juggling. My favorite way to keep the yarn from tangling is to have the balls snuggly secured in a container. Then I turn the container as I work each color. In the photo above I used a small clean waste bin to hold the yarn.
As you see in the photo I also have my yarn inside a large clear plastic storage bag. If needed I can toss the hat, hook and pattern into this bag and grab the whole thing to take with me to work on while I’m on the go.
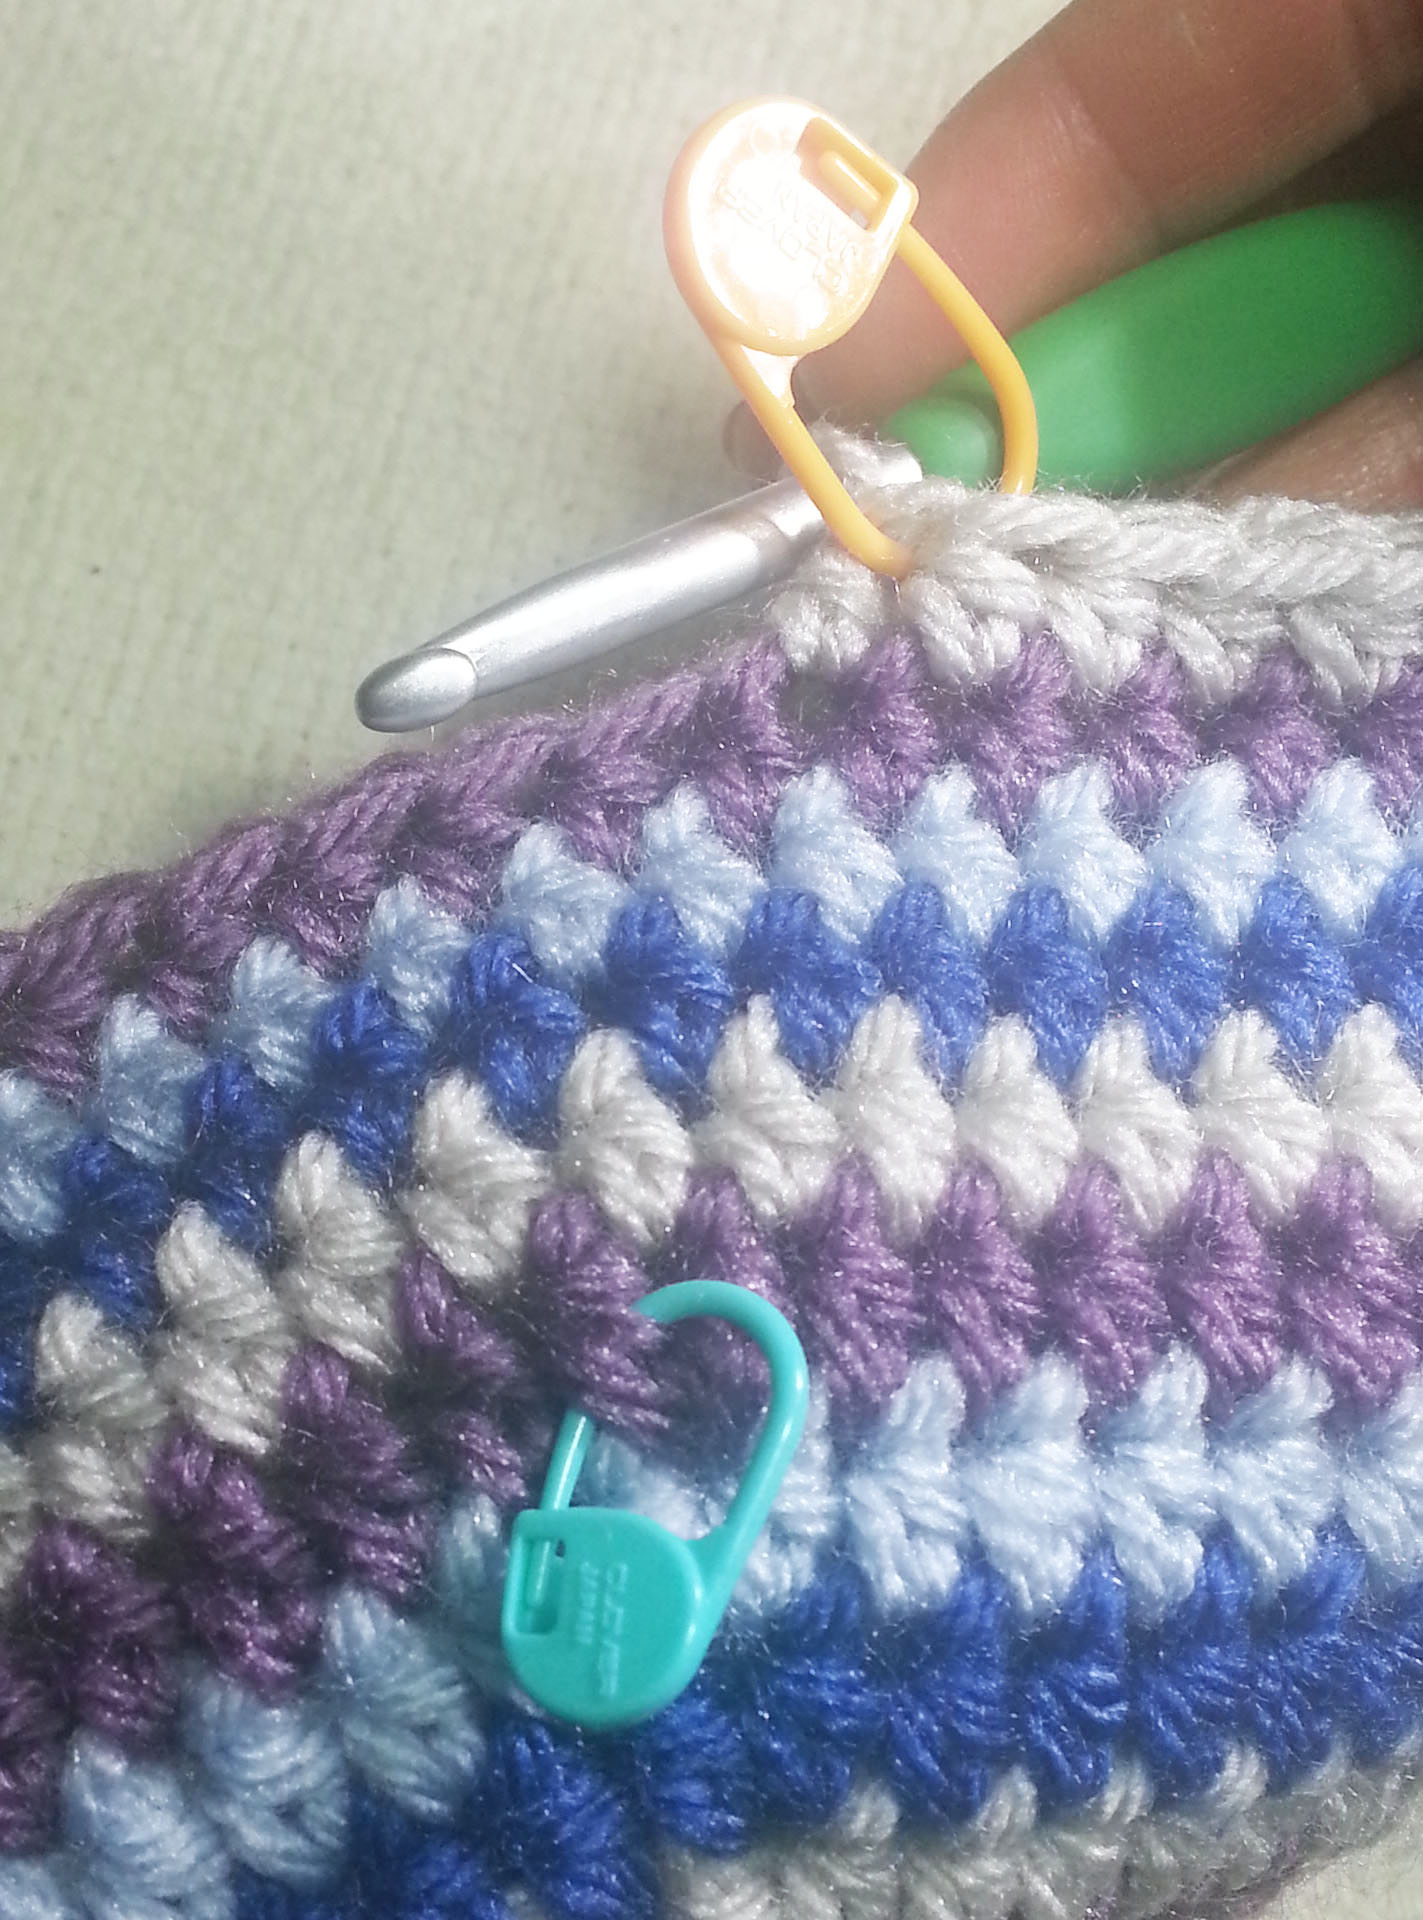
Hat uses 4 colors, follow instructions for using stitch markers so you don’t lose your place.
Color 1 of stitch markers is used to mark last stitch of entire round as well as last stitch/increase point of that color section.
Color 2 of stitch markers is used to mark the other 3 last stitch/increase point of color sections.
Color 3 of stitch markers is used to mark the first increase point in each color section.
When working the first 9 rounds move stitch markers up to 2nd stitch worked in each increase point, For Rounds 10 – 18 you will only be using the markers for the last stitch of each color section.
Instructions
CROWN
Crown at End of Round 9
Rnd 1: Starting with color A make an adjustable slip knot, ch 2, (sc, hdc) in 2nd ch from hook, pull up a long loop and remove hook, with color B *insert hook in center/first ch of round, pull up a loop on hook, ch 1, (sc, hdc) in same center/ch, pull up a long loop and remove hook,* ; Repeat from * to * with Color C and D. PM in each hdc w/end of color/round markers (placing single color marker in hdc of Color D), PM in each sc with first increase markers. [4 sc, 4 hdc]
Rnd 2: *2 hdc in next 2 sts, move st marker to 2nd st worked in each st, pull up long loop and remove hook**, insert hook in next color*; Repeat from * to * 2 times; Repeat from * to ** once. [16 hdc]
Rnd 3: *(Hdc in next st, 2 hdc in marked st, move st marker to 2nd st worked) 2 times, pull up long loop and remove hook, insert hook in next color*; Repeat from * to * 2 times; Repeat from * to ** once. [24 hdc]
Note: Measure gauge after finishing Round 5, if your gauge is small and you don’t want to start over work 10 rounds following the increase pattern, if your gauge is large only work 8 rounds following the increase pattern.
Rnds 4 – 9: *(1 hdc in each unmarked st, 2 hdc in marked st, move st marker to 2nd st worked in marked st) 2 times, pull up long loop and remove hook,** insert hook in next color*; Repeat from * to * 2 times; Repeat from * to ** once. Stitch count for end of Rnd 9 [72 hdc]
SIDES
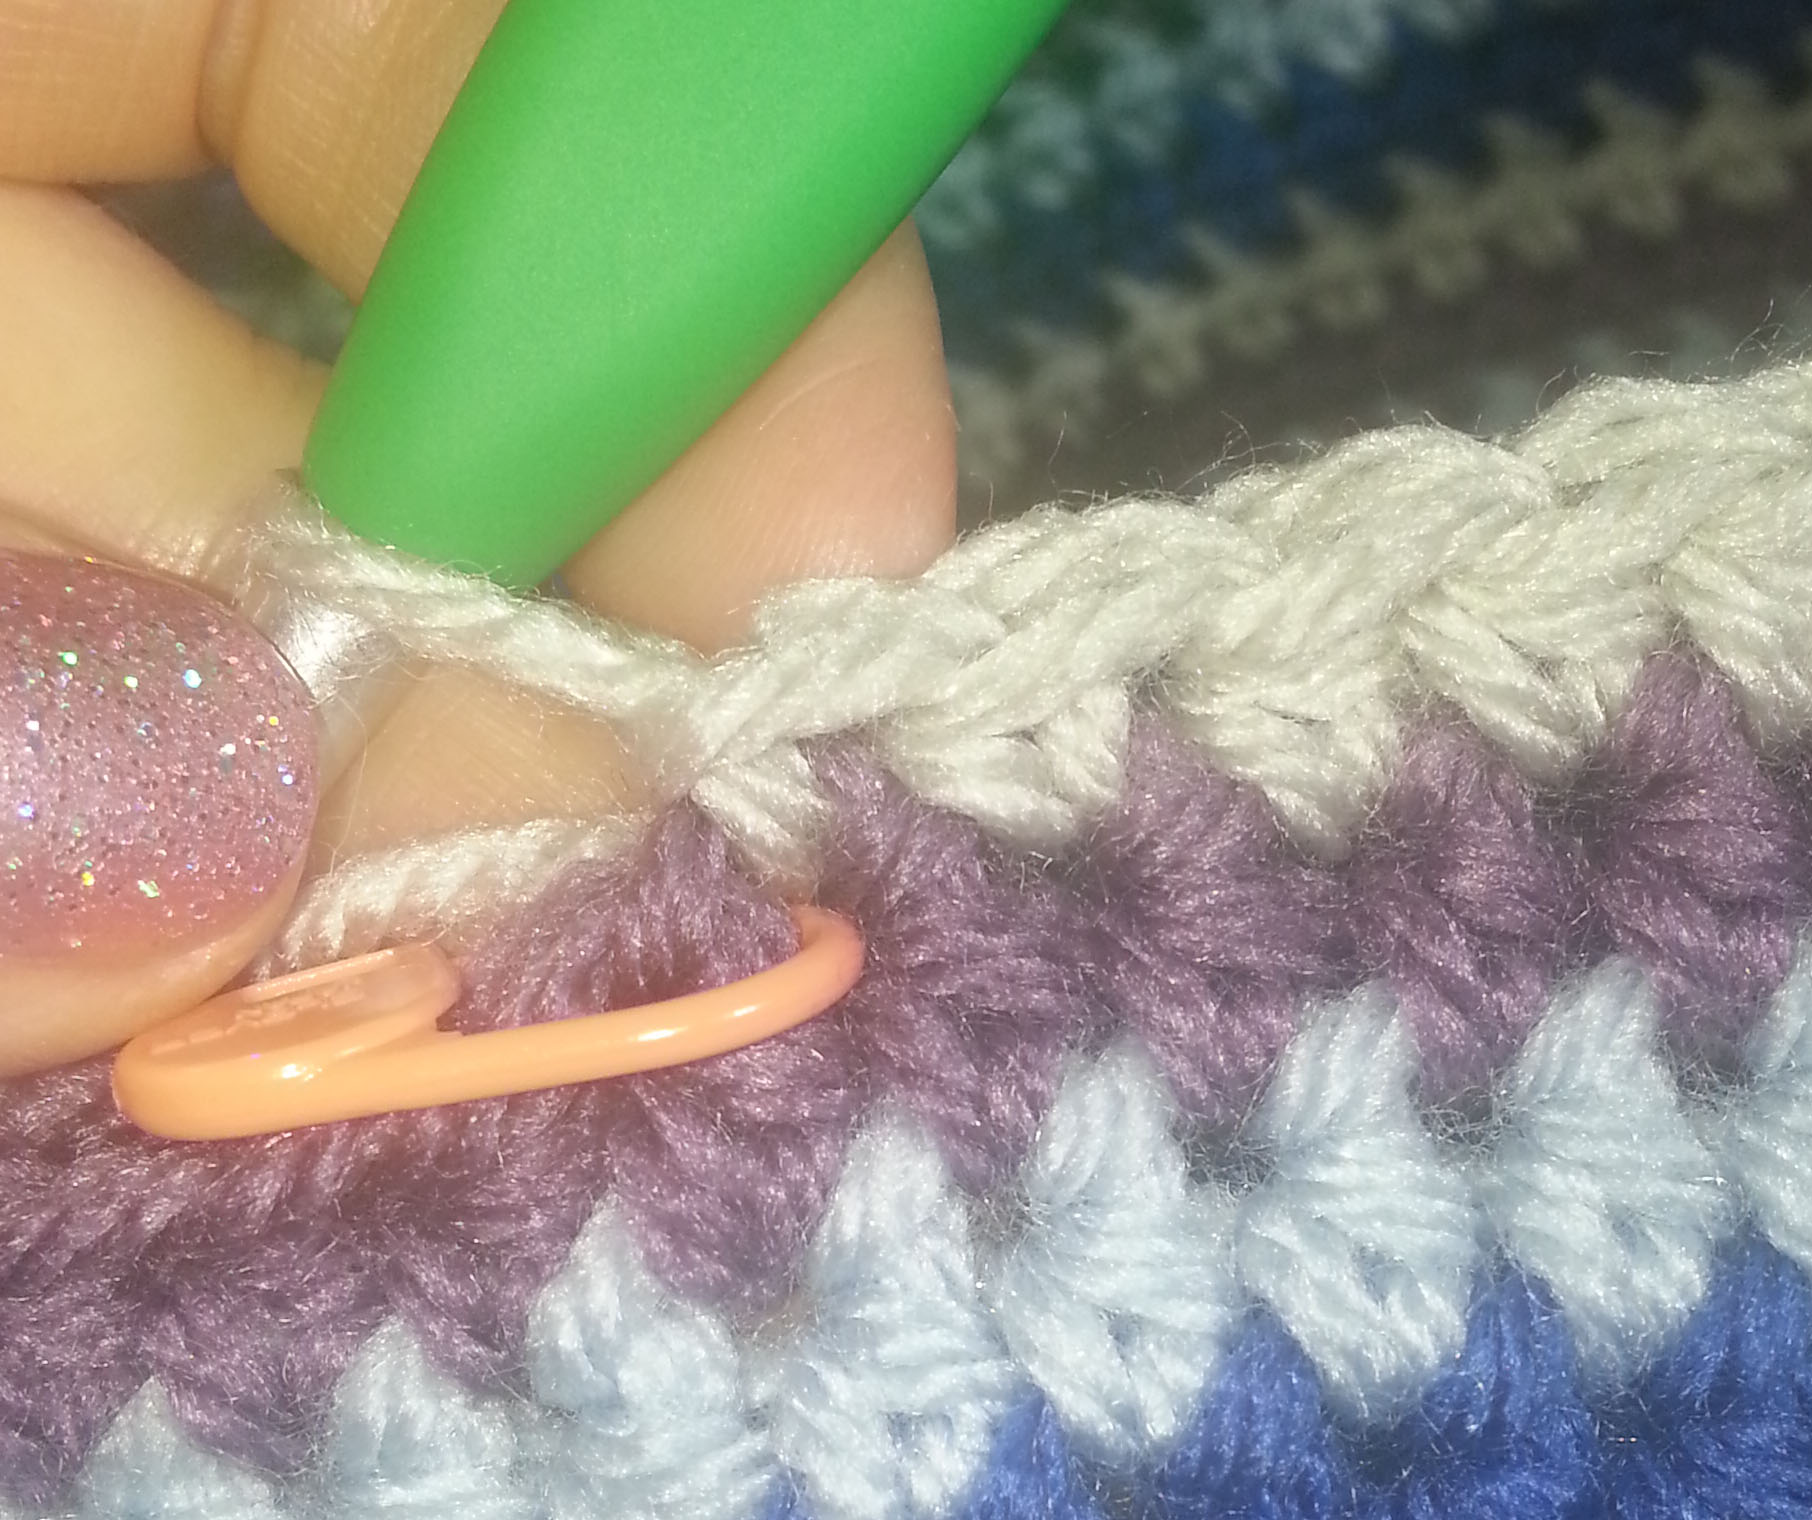
Remove the Color 3 stitch markers – you will not be increasing any further.
I put one of these stitch markers in the side of the last stitch in Round 9, this makes it easier to keep track of the number of side rounds worked.
Rnd 10: * hdc in each st until work in marked st, move marker up to st worked in marked st,** insert hook in next color*; Repeat from * to * 2 times; Repeat from * to ** once. [72 hdc]
Rnds 11 – 20: Repeat Rnd 10.
Rnd 21: Step down to one color: Decide which of your 4 colors you want to be your brim color,
then with each of the other 3 color segments: Hdc in each st until one st remains un-worked before the marked st, sc next st, slip st loosely in next st, pull up a long loop, remove st marker.
With brim color: Hdc in each st ending in the marked st, place stitch marker in last st;
Go back to other 3 colors: slip st snugly in next st, fasten off and pull end thru last slip st.
Stitch counts at end of Round 21 [66 hdc, 3 sc, 3 loose slip st]
BRIM
Rnd 1: Hdc in each st around, move st marker up to st worked in marked st. [72 hdc]
Rnd 2: (FPhdc next st, BPhdc next st) 36 times. [36 FPhdc, 36 BPhdc]
Rnd 3 (FPhdc next st, BPhdc next st) 35 times, FPhdc next st, BPsc next st, loose slip st next 2 sts, slip st snugly next st, fasten off and pull end thru last slip st. [35 BPhdc, 36 FPhdc, 1 BPsc, 2 loose slip st]
Finishing
Weave in tails.
Now have some fun making hats. Play around with the colors you use, make 2 arms of the spiral in 1 color and the other 2 arms in a contrasting color for a 2 color version. Mix it up with using a variegated yarn for one of the arms and pulling solid colors for the yarns you make the other 3 arms with.
Hi everyone. My book “Wraps for All Seasons” is going on a blog tour. We will be making 6 stops for this tour. Each of the bloggers will be giving away a copy of the book, so be sure to visit them to see what they have to share with you about my book.
Stop #5 is the absolutely amazing Jessie Rayot of Jessie-At-Home.com. I had the honor 3 years ago of being Jessie’s CGOA Mentor, though frankly, this talented and driven woman didn’t need much mentoring. She has amazing designs in Crochet and Knit.
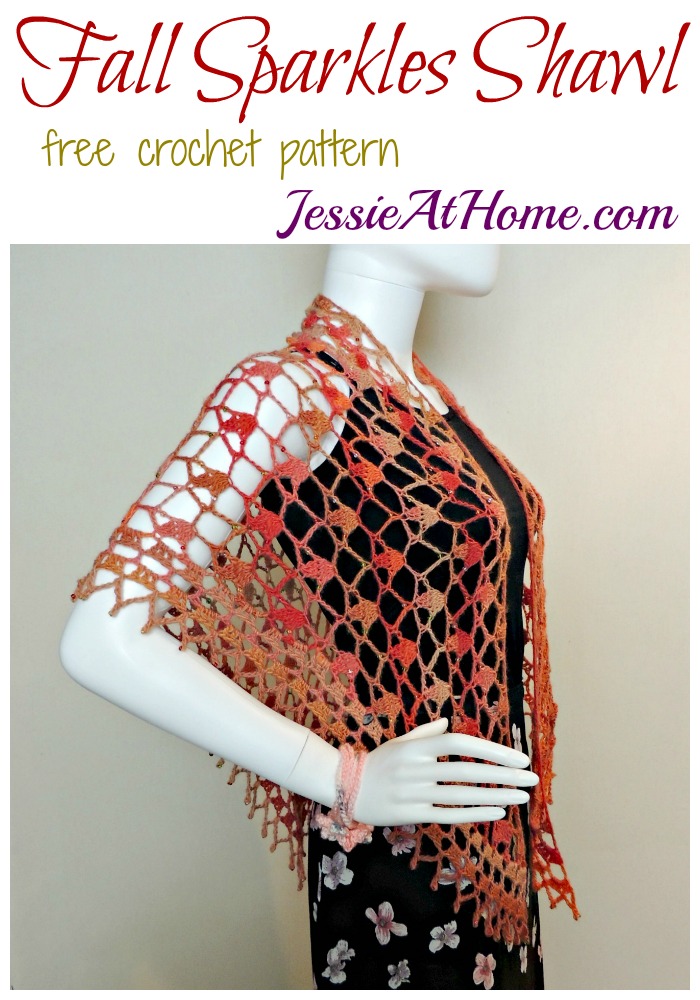
Jessie has lots of lovely patterns available on her site. Like her gorgeous “Fall Sparkles Shawl”. The shawl uses a pretty lace work pattern, simple elegant border and beads for a bit of bling. It would make a great gift for the holidays or make it for yourself to wear to a party.
Or if you are feeling the chilly weather heading into winter, the “Holiday Poncho” might be just the ticket. Snugly warm, stylish look and simple construction. What more could any crocheter ask for? Be sure to hop on over to Jessie’s site to check out these patterns and enter to win a copy of my book.
The last stop for the “Wraps for All Seasons” blog tour will be next Friday, November 18th.
Hi everyone. My book “Wraps for All Seasons” is going on a blog tour. We will be making 6 stops for this tour. Each of the bloggers will be giving away a copy of the book, so be sure to visit them to see what they have to share with you about my book.
Stop #4 is with the amazing Tamara Kelly of Mooglyblog.com. Tamara and I met for the first time in real life at the 2014 CGOA conference in Manchester, NH. Since then we have gotten to be good friends and enjoy talking crochet and kids together. Tamara is a genius at designing simple fun projects that work up quickly, check out her blog for all kinds of patterns and crochet information.
I think this Tidal Wave Shawl is so fun. It is crocheted with simple stitches and shaping that even a beginning crocheter can tackle. The added drama comes from the color changes you work in the last half of the project. Think of all the beautiful color combinations you could use! I’m thinking it could even be a great “stash buster”, since who says you need to stick to 2 colors only.
For those of you that prefer making afghans and blankets, you’ll love the Happiest Blanket Ever. This is another fun “stash buster” project that you can play with color in. Tamara has provided sizing information in the pattern, so you can make the size that is just right for you.
The next stop for the “Wraps for All Seasons” blog tour will be this Friday, November 11th.
Hi everyone. My book “Wraps for All Seasons” is going on a blog tour. We will be making 6 stops for this tour. Each of the bloggers will be giving away a copy of the book, so be sure to visit them to see what they have to share with you about my book.
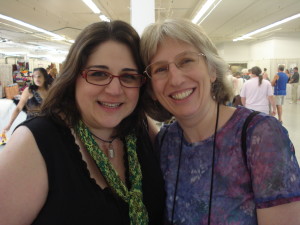
Stop #3 is with the brilliant, kind and talented Karen Whooley. As many of my long-time readers know, Karen is not only an incredible designer of both Crochet and Knit patterns, she was my CGOA mentor when I first began the journey of becoming a crochet designer myself.
This photo is the two of us in 2010 at the Manchester CGOA conference. We’ve both changed a lot in our appearance, but our friendship is still strong. She is one of the people I can really depend on in my life to tell me when an idea or design is utter garbage, so I know when she has good things to say I’ve earned it. It’s good to have folks that keep you on your toes.
Karen is a marvelous teacher and many of the books she has written over the years reflect that. She is the rock star of crocheted socks, she has all styles of sock patterns available in her shop on her website. I had a hard time picking a favorite, but I do love her “Mix and Match Toe-Up Socks” as the best pattern to purchase for the beginning of learning to crochet socks.
Check out her beautiful pattern for the “Spring Leaf Shawlette”. This shawl is worked from side to side including the lace border, so once you reach the end of the rows you are finished. Definitely a good pattern to add to your shawl pattern collection. You can purchase it over on her website.
The next stop for the “Wraps for All Seasons” blog tour will be next Tuesday, November 8th.
Hi everyone. My book “Wraps for All Seasons” is going on a blog tour. We will be making 6 stops for this tour. Each of the bloggers will be giving away a copy of the book, so be sure to visit them to see what they have to share with you about my book.
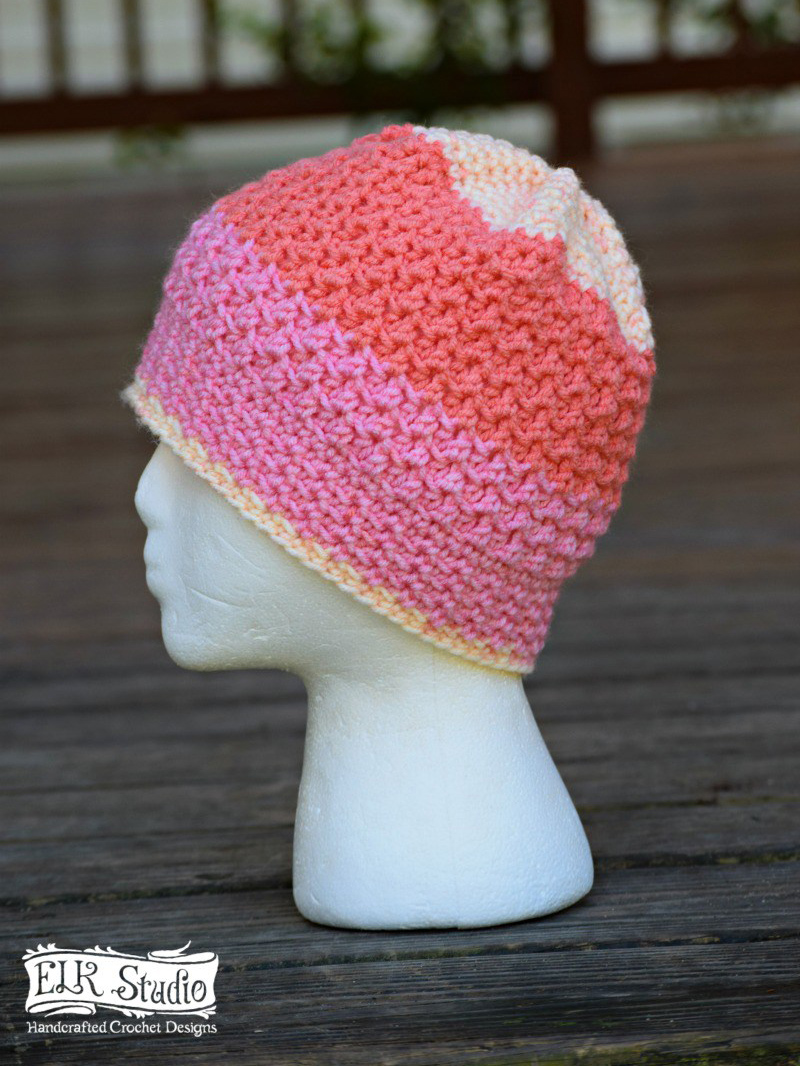
Check out Kathy’s awesome hat pattern “Swirling Pebbles”. This hat is part of her Christmas Present CAL that she has put together to help her readers get a jump on holiday gift making. A quick project with a fun yarn that does all the color changing for you.
If you’ve been wanting to try out a pattern for a super scarf you’ll love her pattern for “The Woodman Super Scarf”. This design has a load of texture worked in 3 different colors of Red Heart Soft Yarn. Kathy chose Black, Charcoal and White for her sample, but with the wide range of colors in the Soft Yarn line you’ve got all sorts of options.
The next stop for the “Wraps for All Seasons” blog tour will be next Friday, November 4th.