
Okay, I love this design, but I might love it even more because of the name Michele Maks (the owner of MainlyCrochet.com) and I came up with for it. One of the very fun things about doing design work with Michele is she has the same zany hippie-chick sensibility as me.
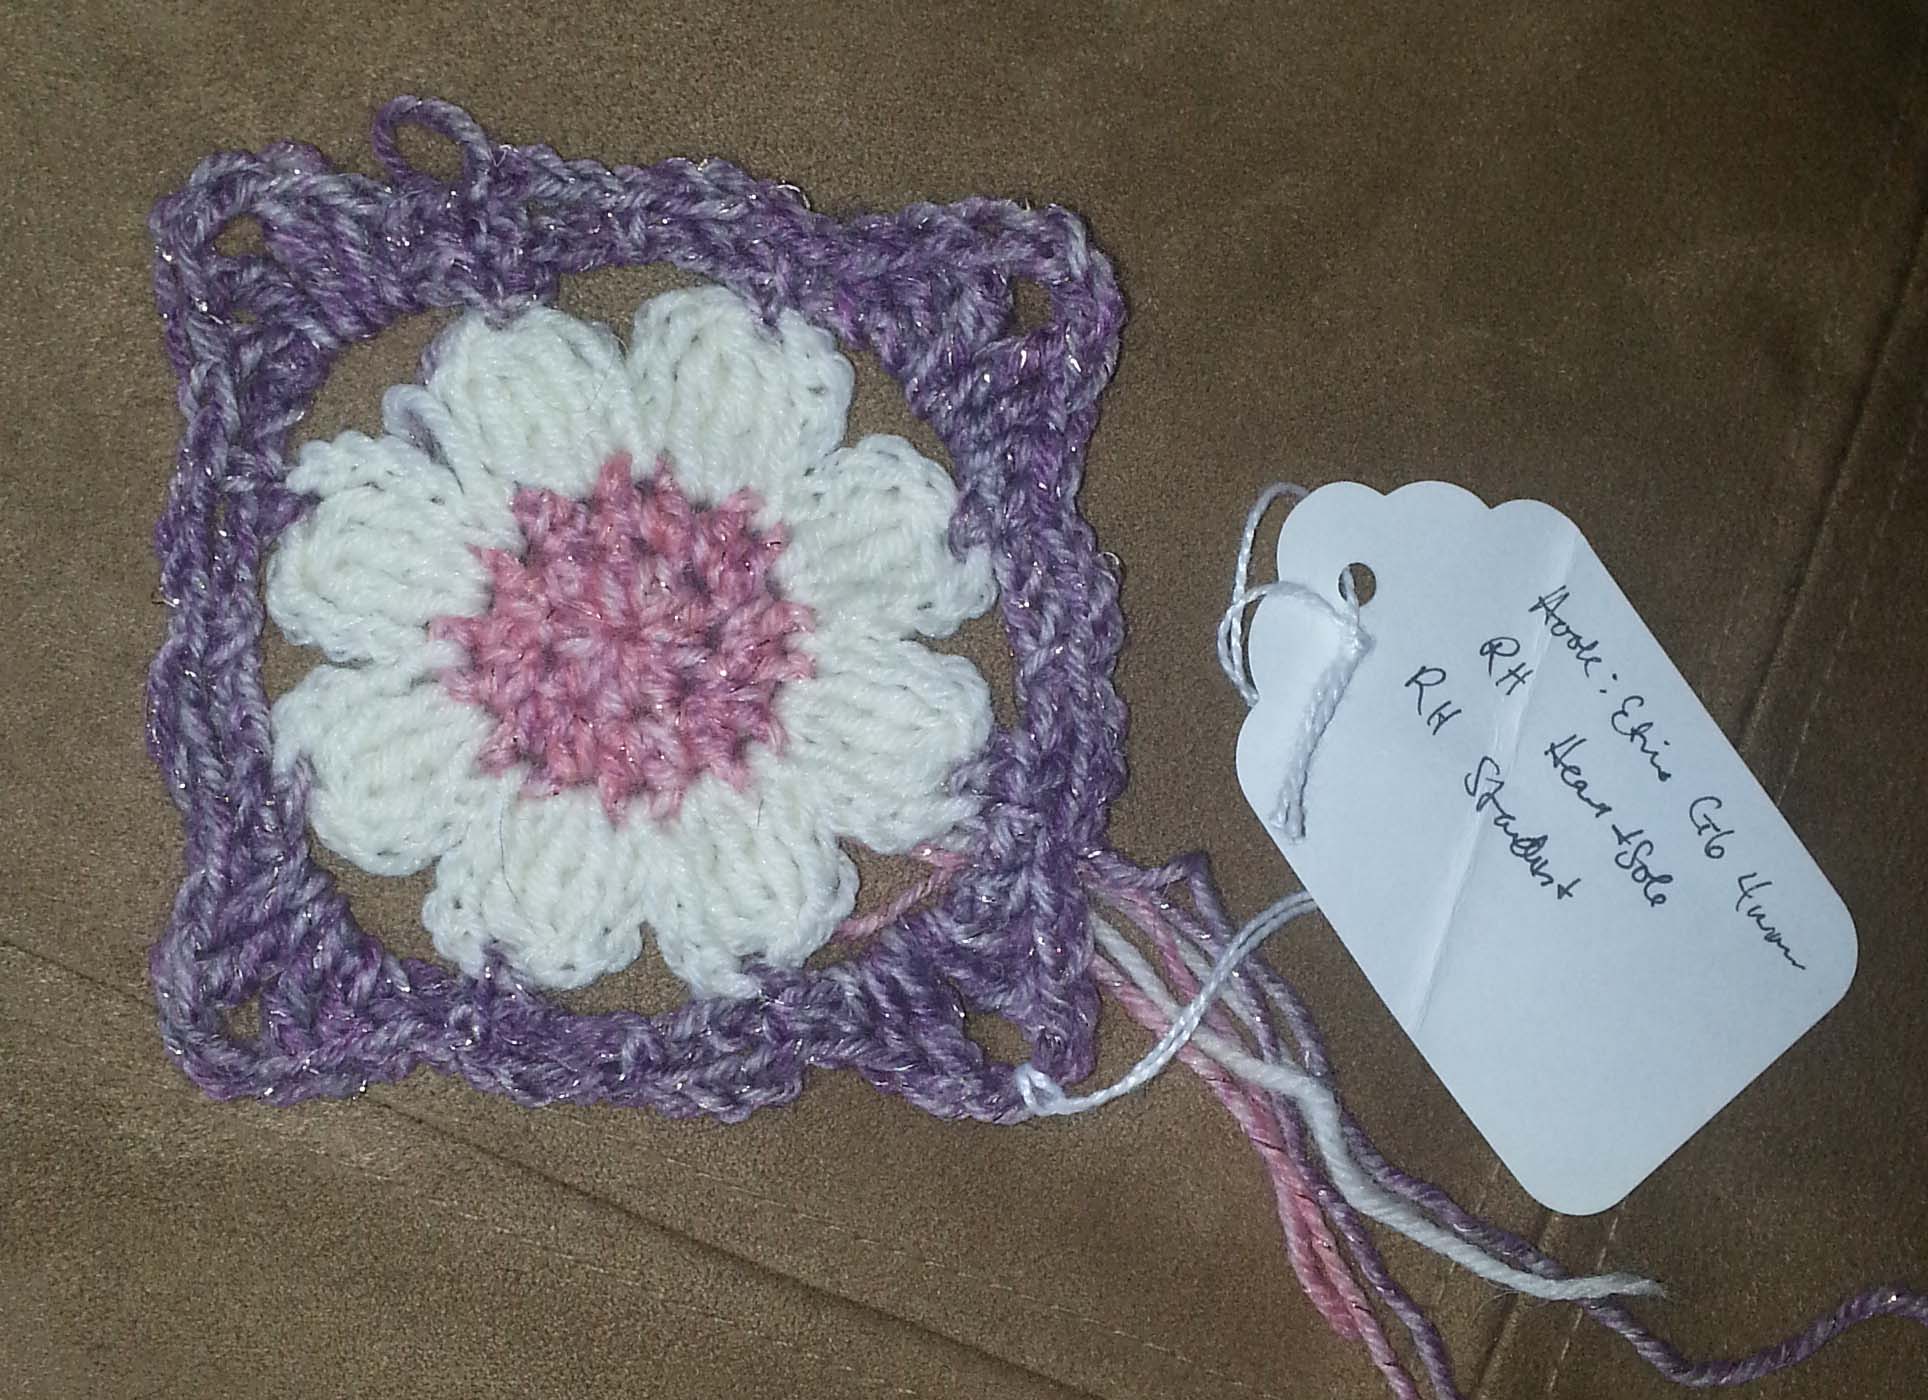
My original swatch for this design was using a combination of Red Heart’s “Heart & Sole Sock Yarn” with their “Stardust” yarn. Both yarns are light-weight “fingering/sock” type yarns, so I knew the effect would be very delicate in the finished design. And of course, Stardust has sparkle which is always a win with me. Michele wanted to use all one type of yarn, and that decided us on the Stardust, since Michele likes some sparkle in her yarn as well.

Michele picked out the colors and once the yarn arrived I began working on the piece. I played around with the color to check with Michele before I began the project in earnest. I wasn’t too sure about the 2 colors we had for the flowers, so wanted to be sure Michele was happy with the way they looked. Of course the finished design ended up looking wonderful, another lesson in trusting Michele’s color sense.
The first version of this design used 52 flower squares in 3 different colors and 36 filler motifs in the green color. What this meant was 384 ends to weave in once the crocheting was done. Yikes!
This is exactly the type of project I have always avoided, though I love the look of colorful multi-motif designs. My entire reason for avoidance was a deep dislike of end-weaving. So of course the universe was going to find a way to make me face this dreaded task and make peace with it.
Whenever I have been faced with an overwhelming task I remember my Dad’s little saying, “How do you eat an Elephant? One bite at a time.” Yes, my Dad is a very funny guy, and he was right. I needed to figure out how to break this project down into manageable bites.
I realized that one way to make the end weaving less painful would be to do it as I completed each step of the project. I decided to take an “assembly line” approach to this problem. Of course I was the only worker on this assembly line.
I organized myself with yarn, hook and plastic sealable baggies. Each of my bags was a “stage” along the line. First on the agenda was crocheting 26 centers in each of the “flower” colors. Since each center is only a couple of rounds I quickly had a pile of them finished. I put the centers with dangling tails in a quart-sized plastic baggie, then as I wove in tails I moved them to a 2nd baggie.
Once I started adding petals to the centers I would move them to a 3rd baggie where they waited to have their tails woven in, after the petal tails were woven in they were moved to their final bag. I was finding all this a bit tedious, but the baggies allowed me to hop around in the project so I didn’t get too bored with one stage of the design. As I neared the completion of all the flowers I separated them by color into 2 bags to make the next step easier.
About the time of the PJ Jam in August I had finished all the crocheting of the centers, but still had a lot of tails to weave in. This is the motif project I was referring to in my “Zen and the Art of Weaving in Tails” post back in October, 2012.
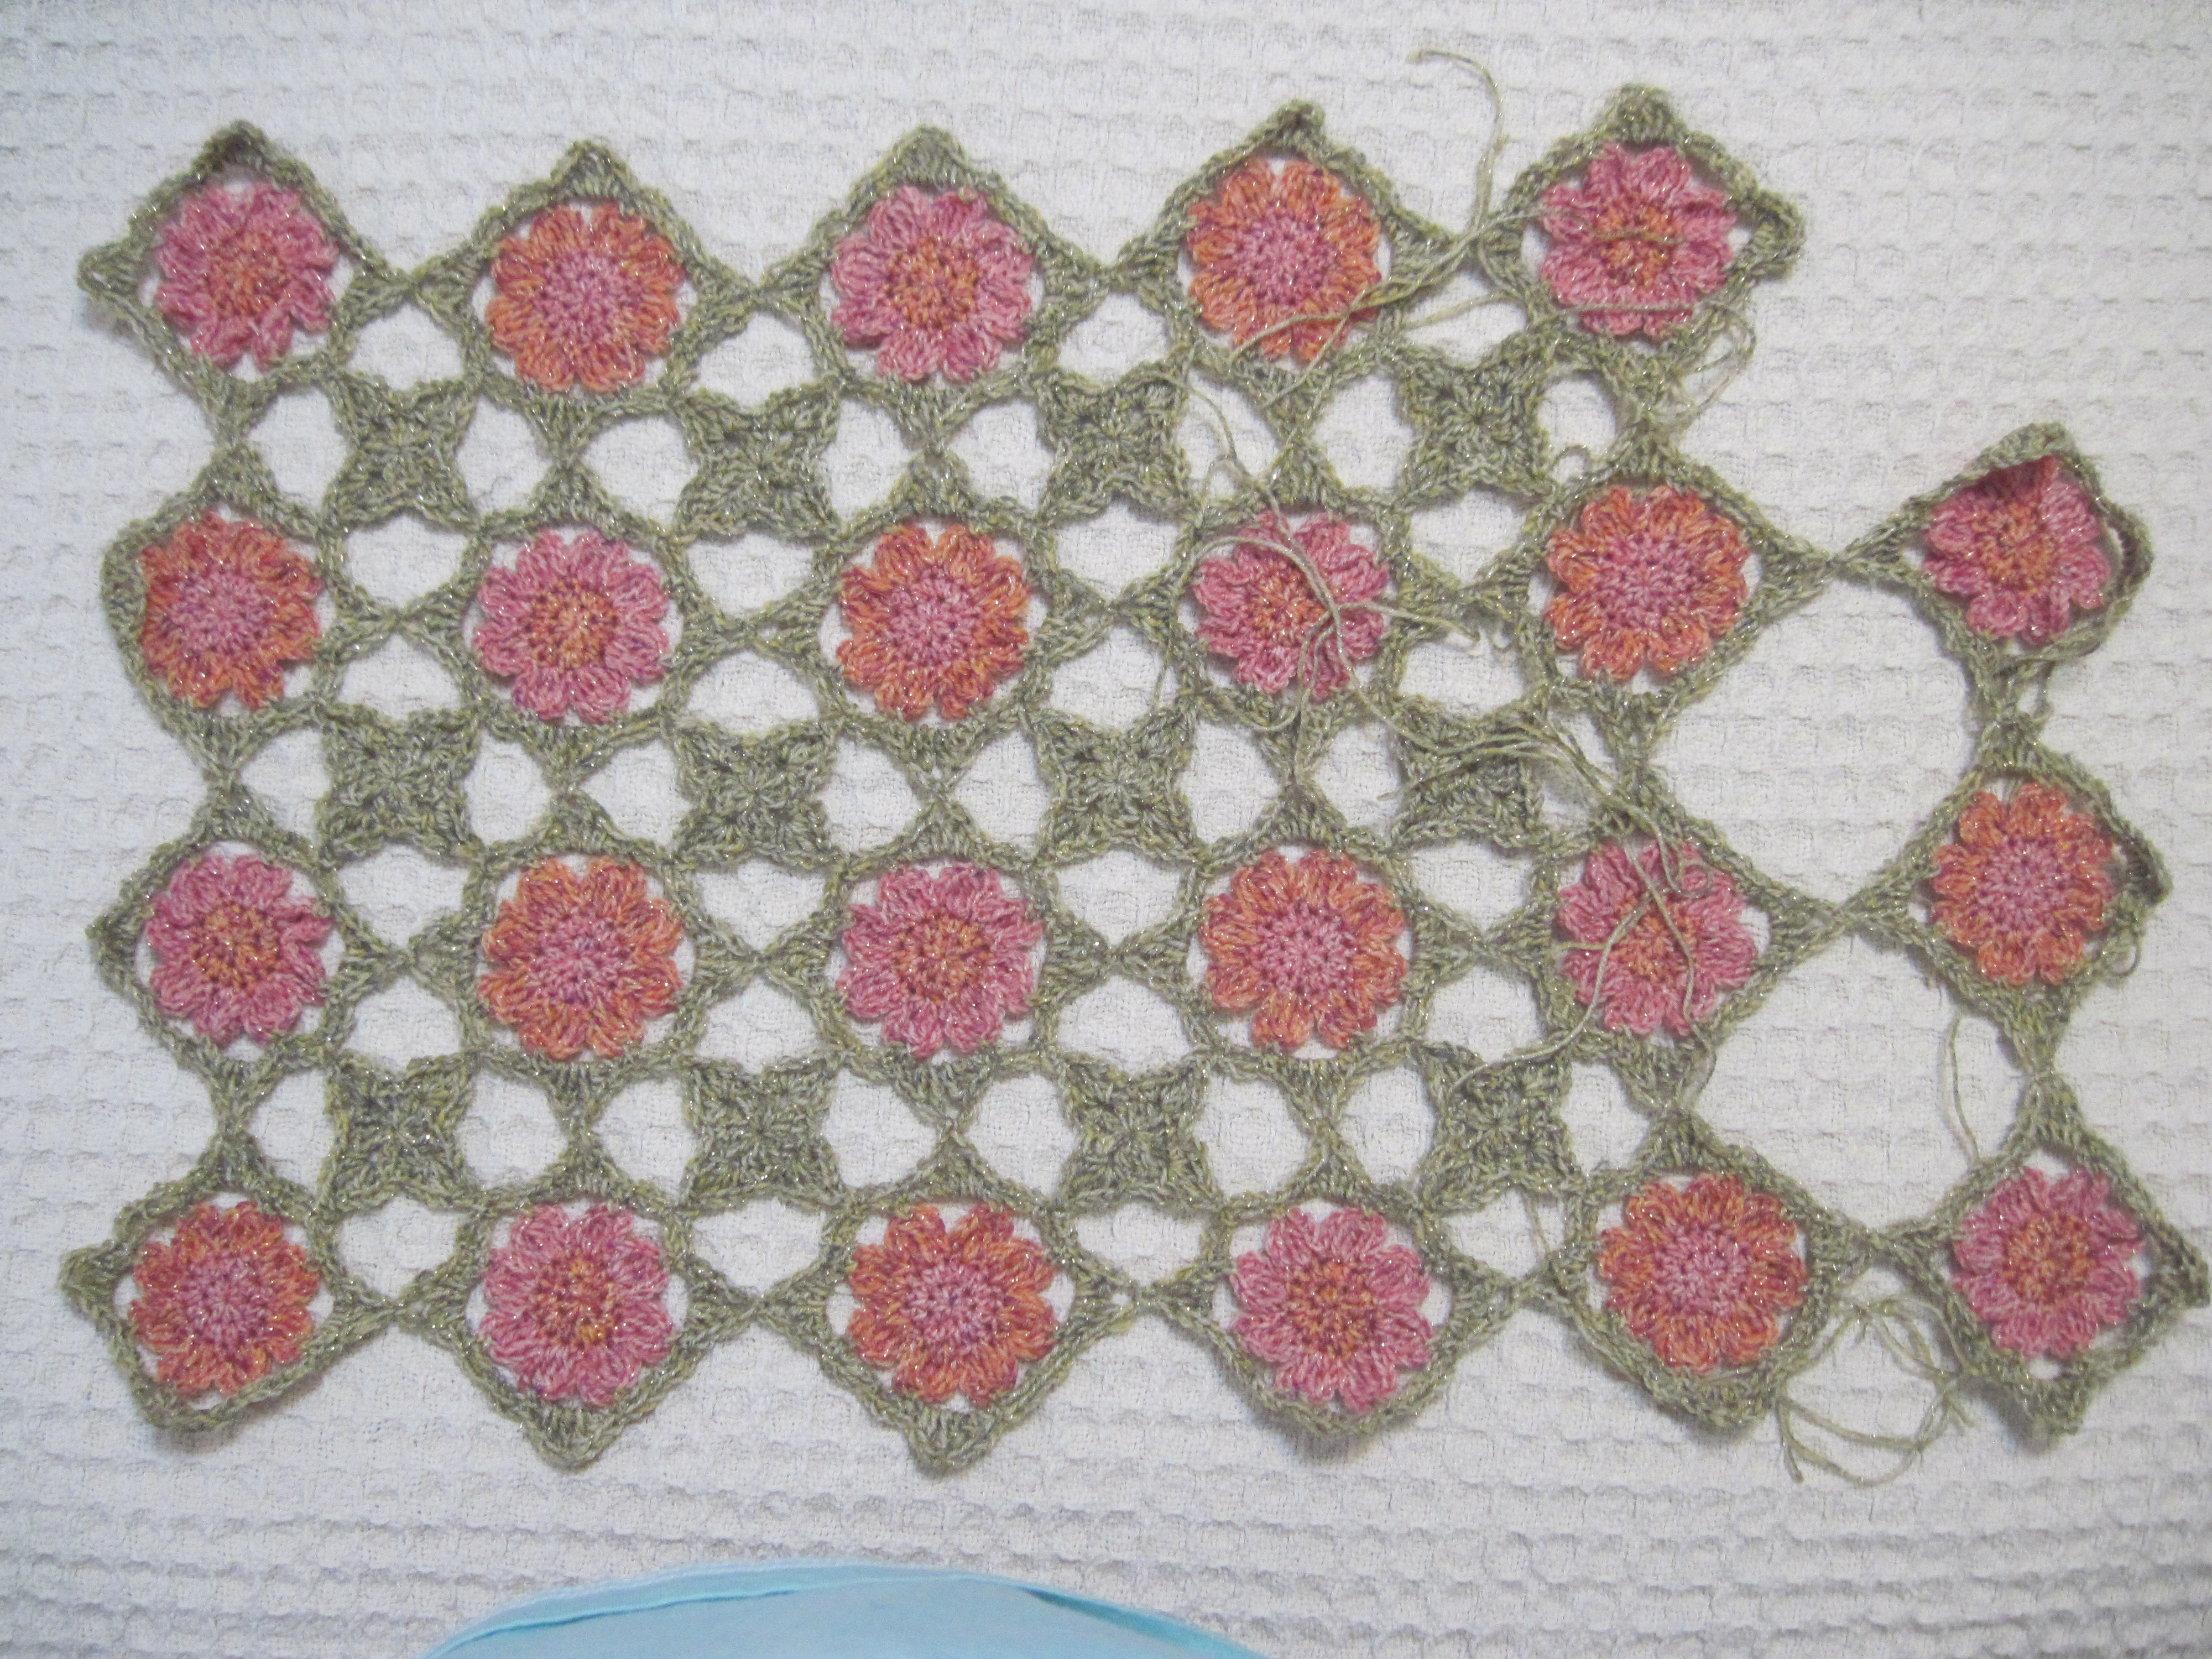
Finally all the flowers were finished and it was time to join them together using the green color. This step was a join-as-you-go method, I found it easiest to work on a flat surface. I would join together a row of flower squares, and then work the filler motifs in the open space. Every few rows I would stop and weave in the tails for the green.
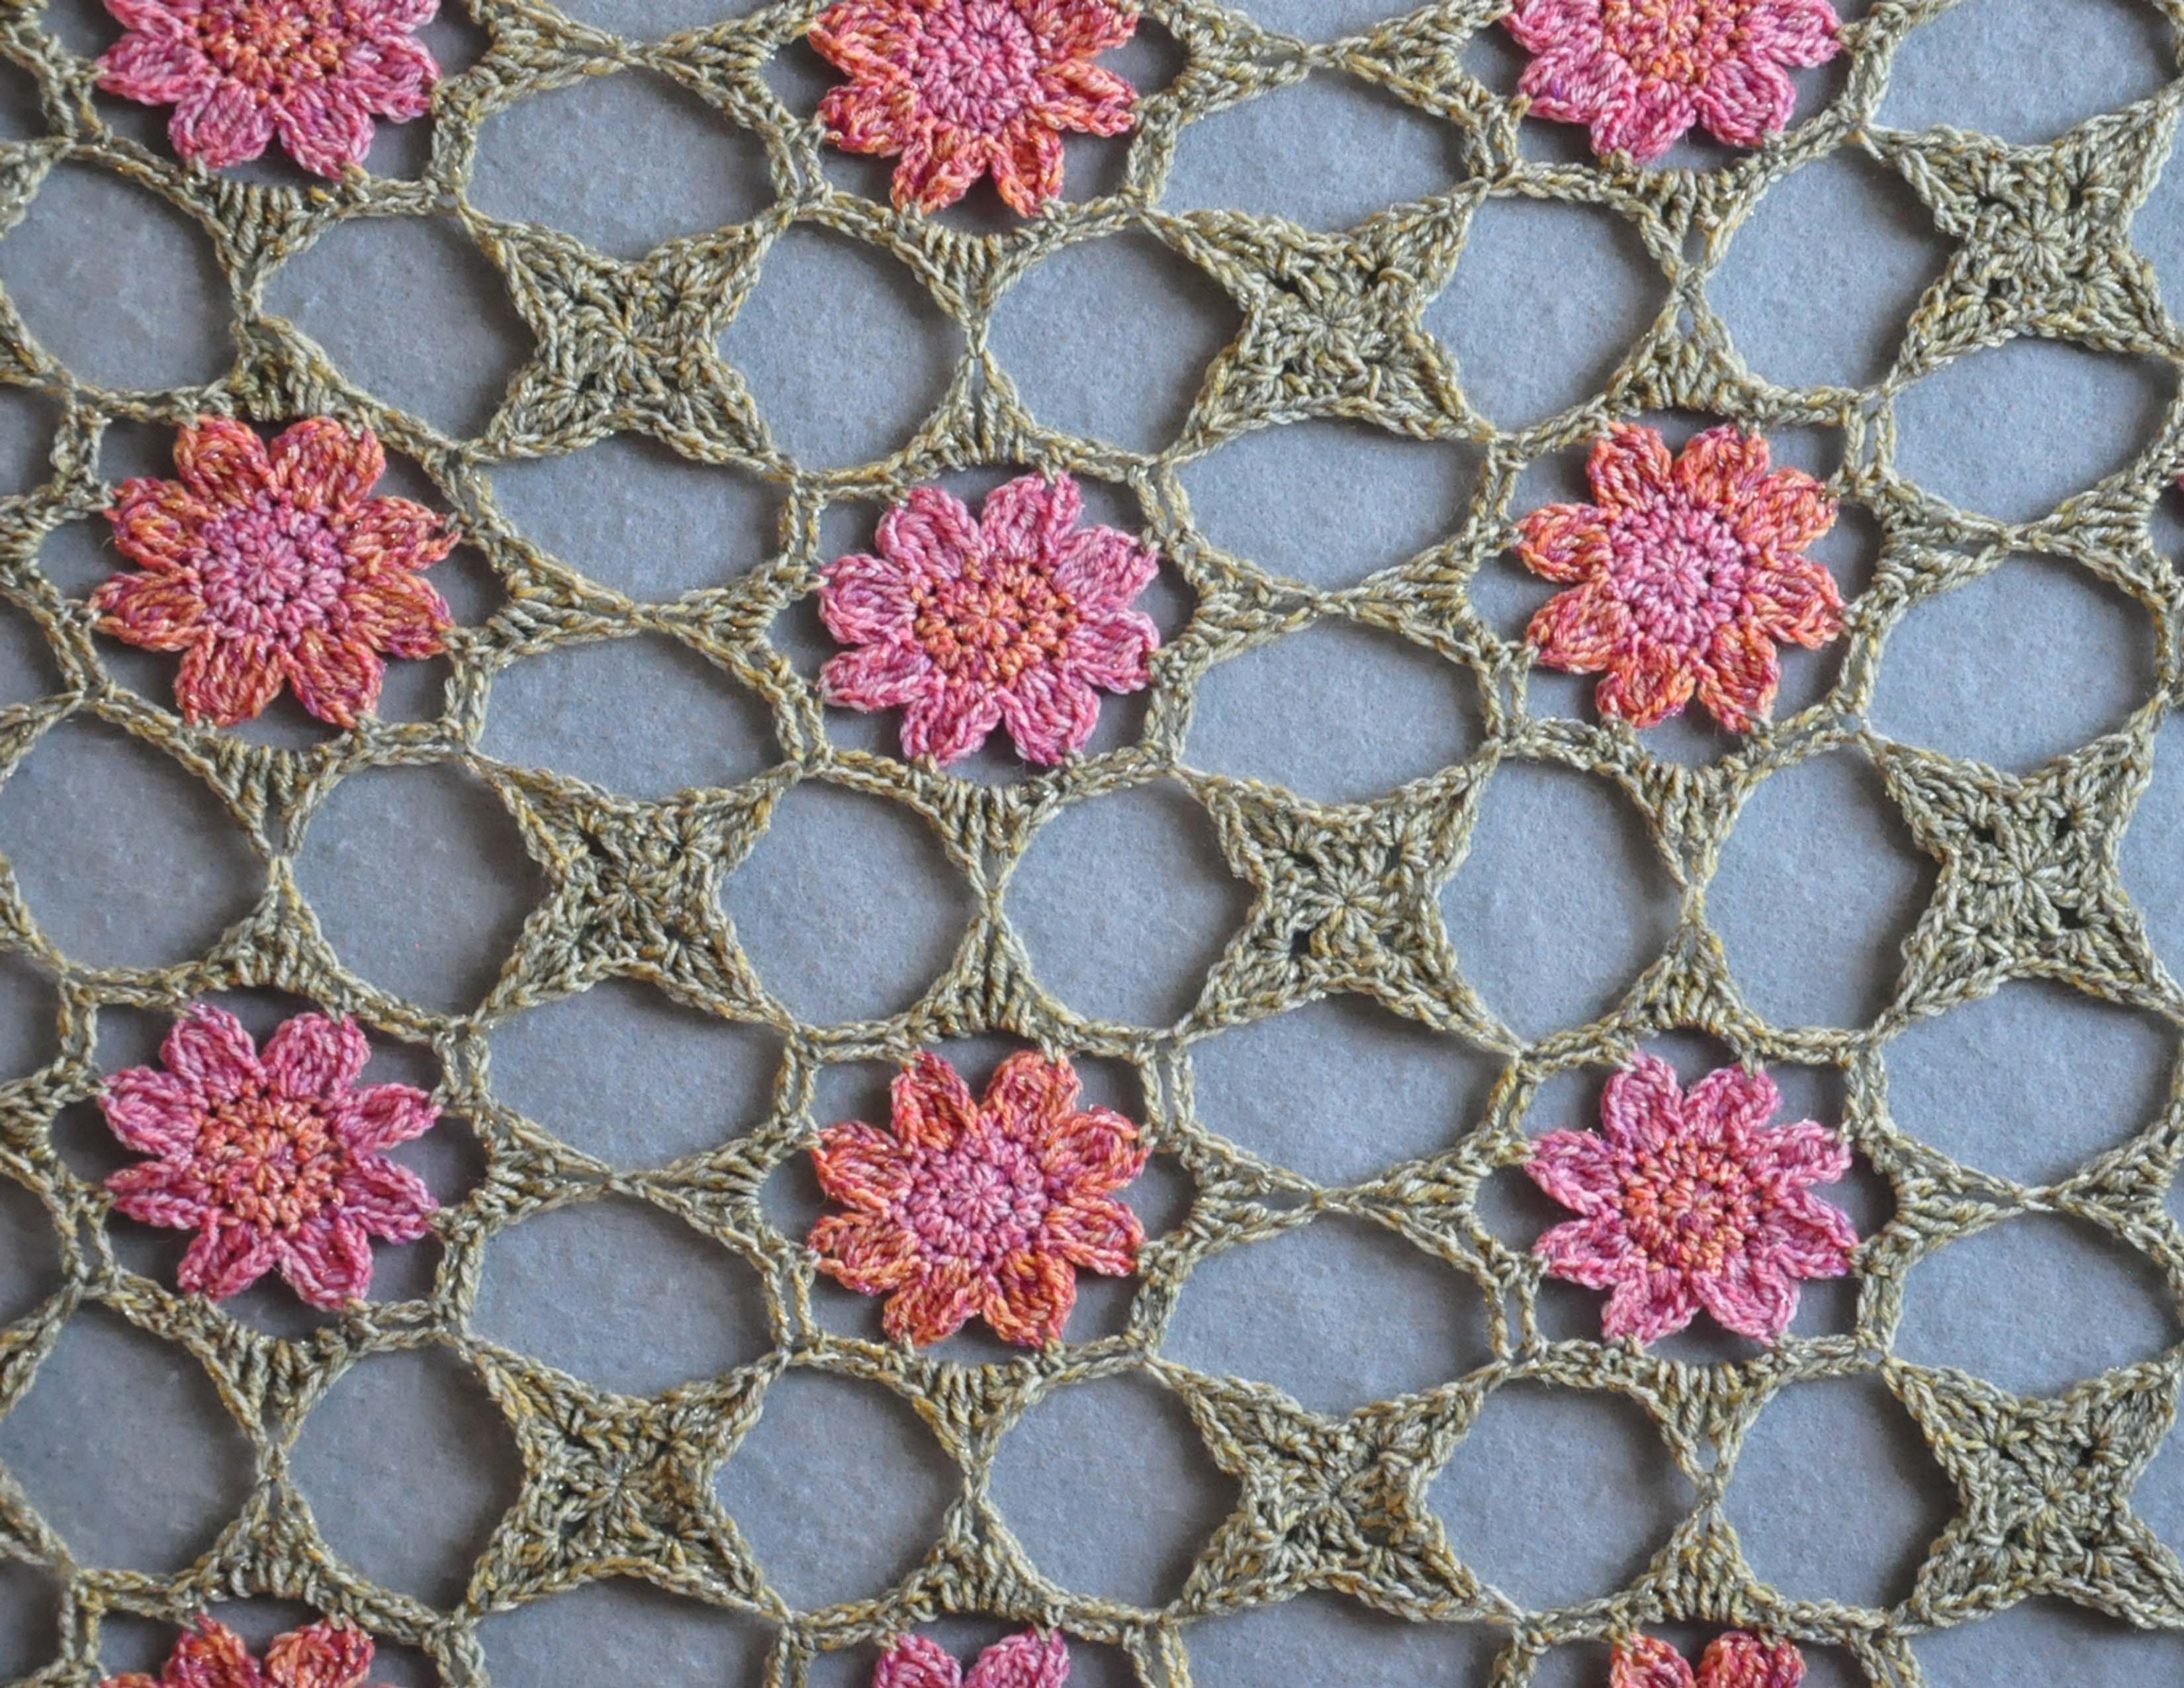
When all the motifs were completed I blocked the entire piece. You can see how it opened up nicely. I sent the project and pattern off to Michele and waited for it to be put up on the website. The plan was for a Spring release of it, this was back in Spring 2o13. Unfortunately, as can happen, the yarn we had chosen was discontinued about that time.
Michele returned the original sample to me at the show in North Carolina that Fall, but we weren’t sure what we wanted to do.
Both of us really liked the sparkly yarn for this design and it got me thinking about other yarns we could use. At first I was really stuck to the idea of using a fingering or sock weight yarn. Then I stumble upon the idea of working with a slightly heavier weight yarn. I sent off an email to Michele suggesting that we use Red Heart’s “Shimmer” yarn. The colors would be more intense, but we would still have the same sparkle.
Because the motifs would be a bit larger I had to modify the original pattern. One thing that helped was there would be fewer motifs, so fewer ends to weave in. Hooray!

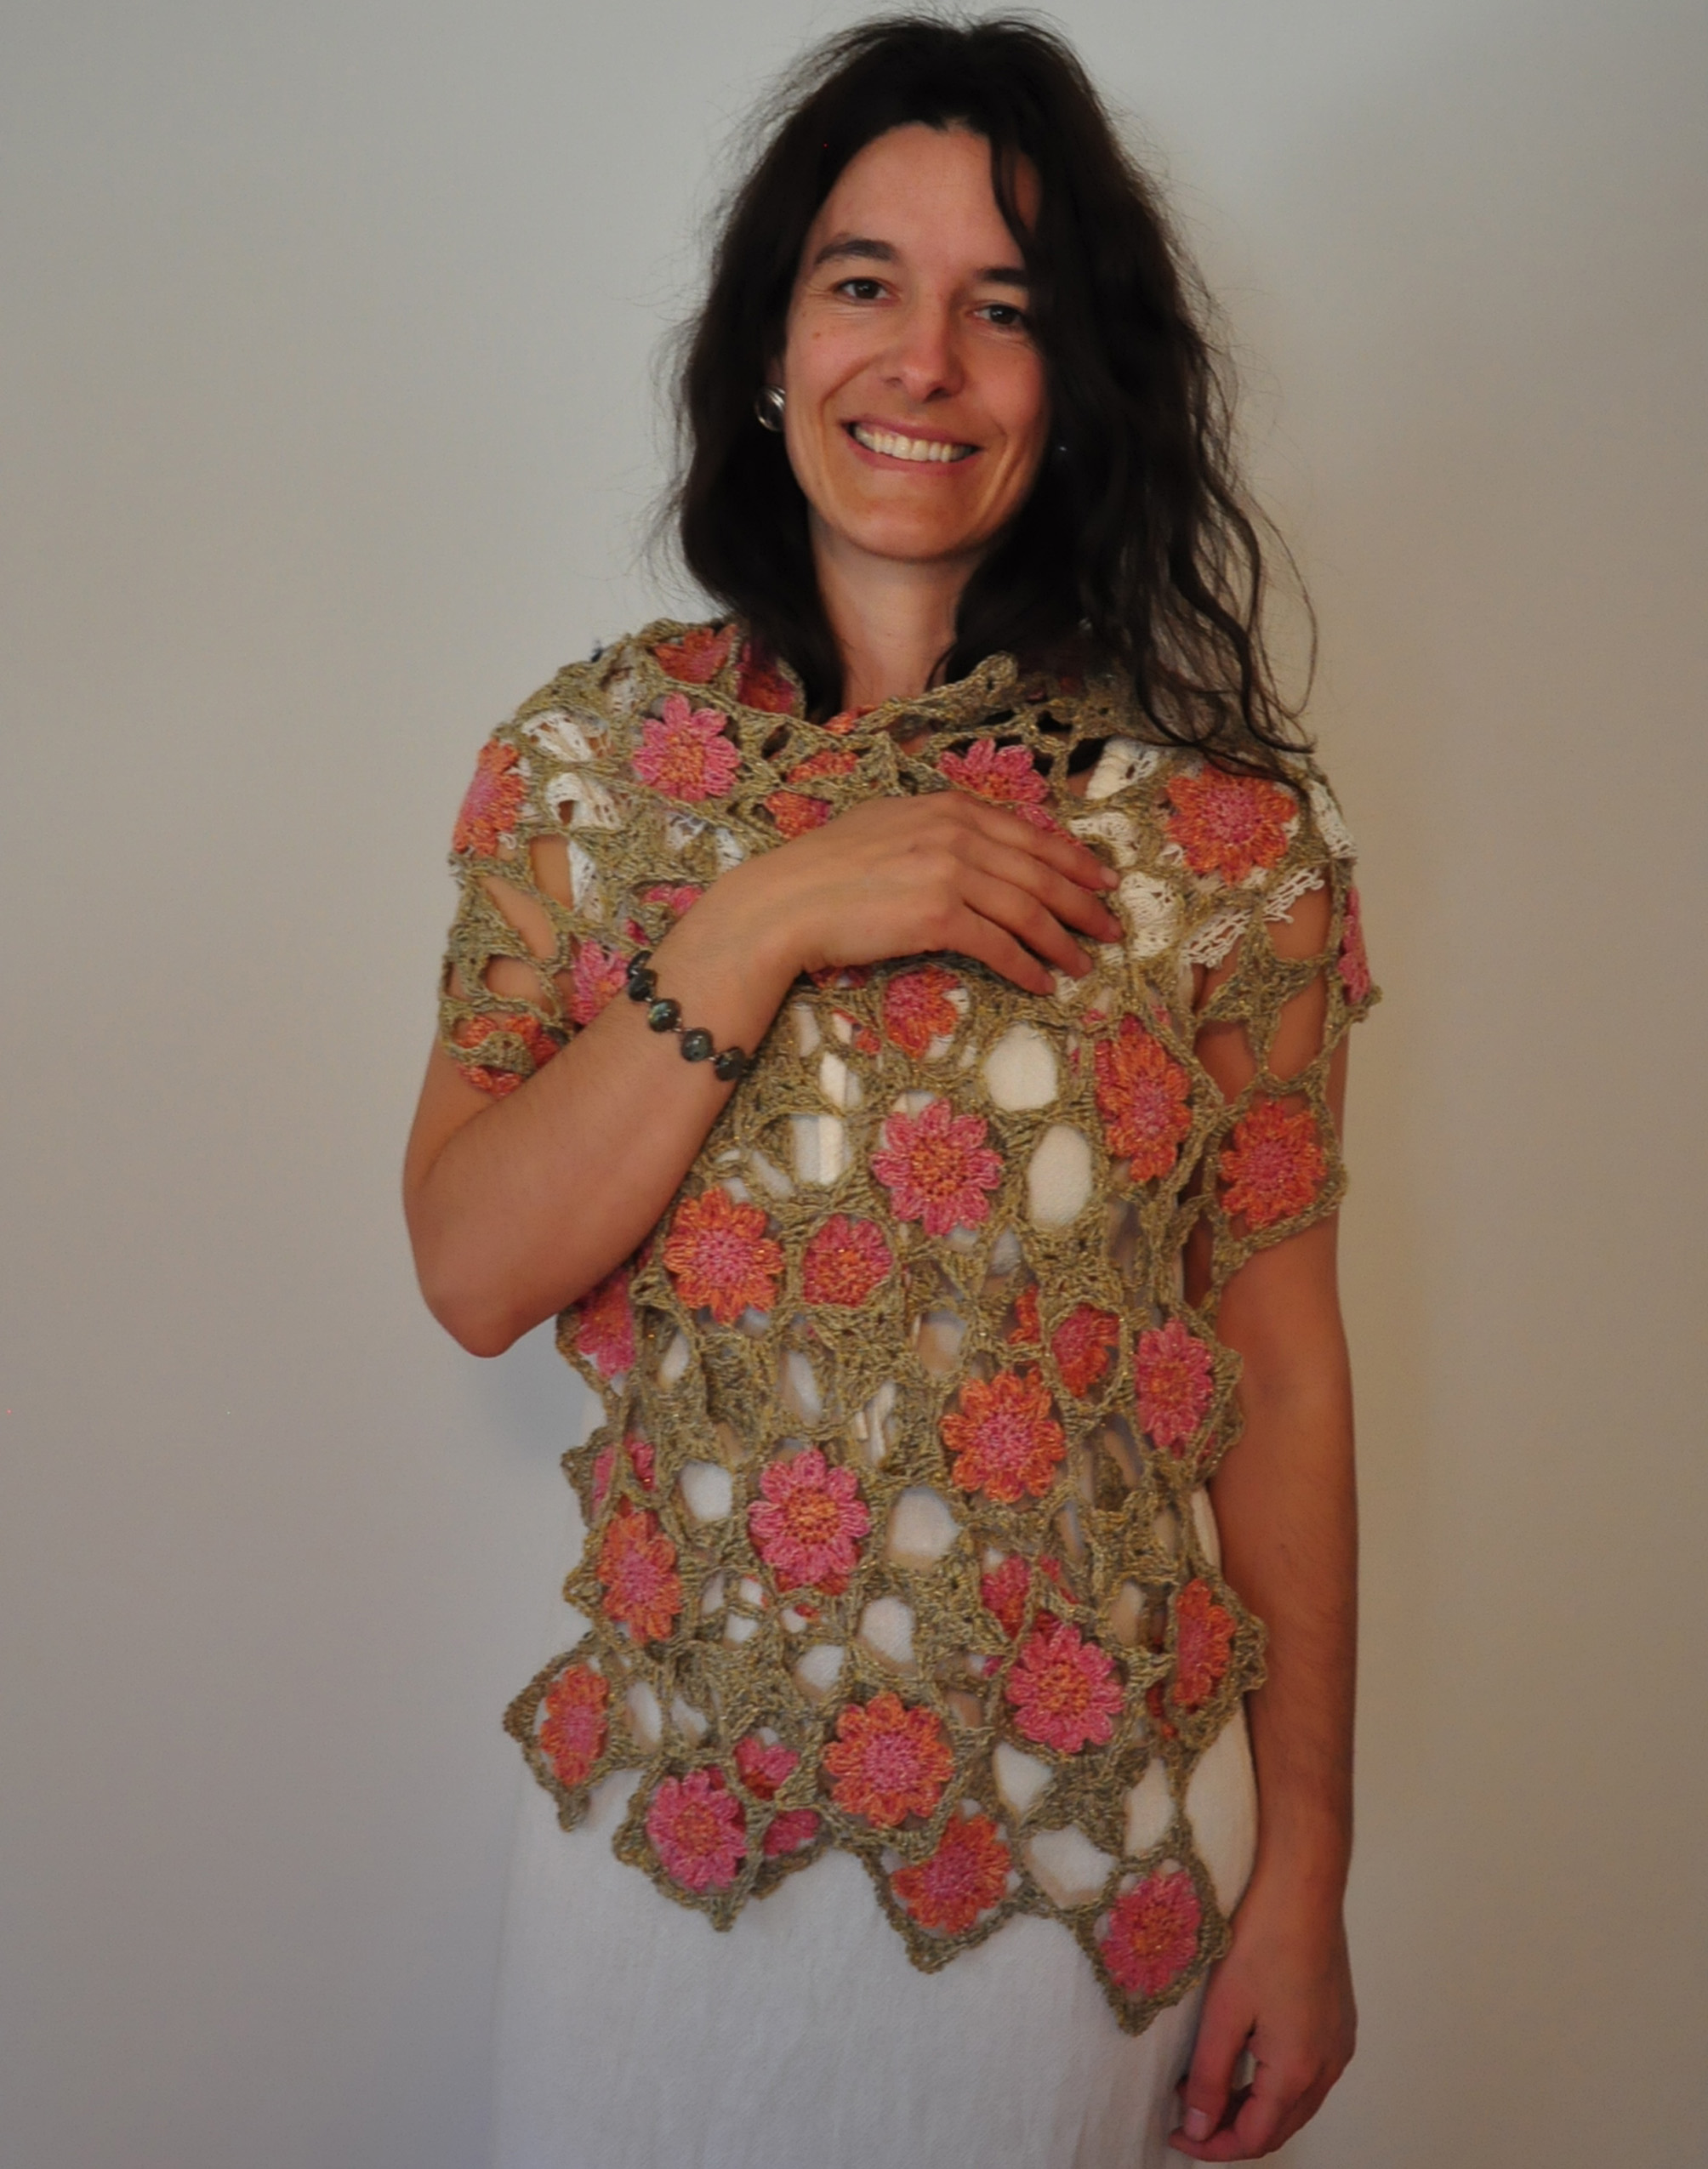
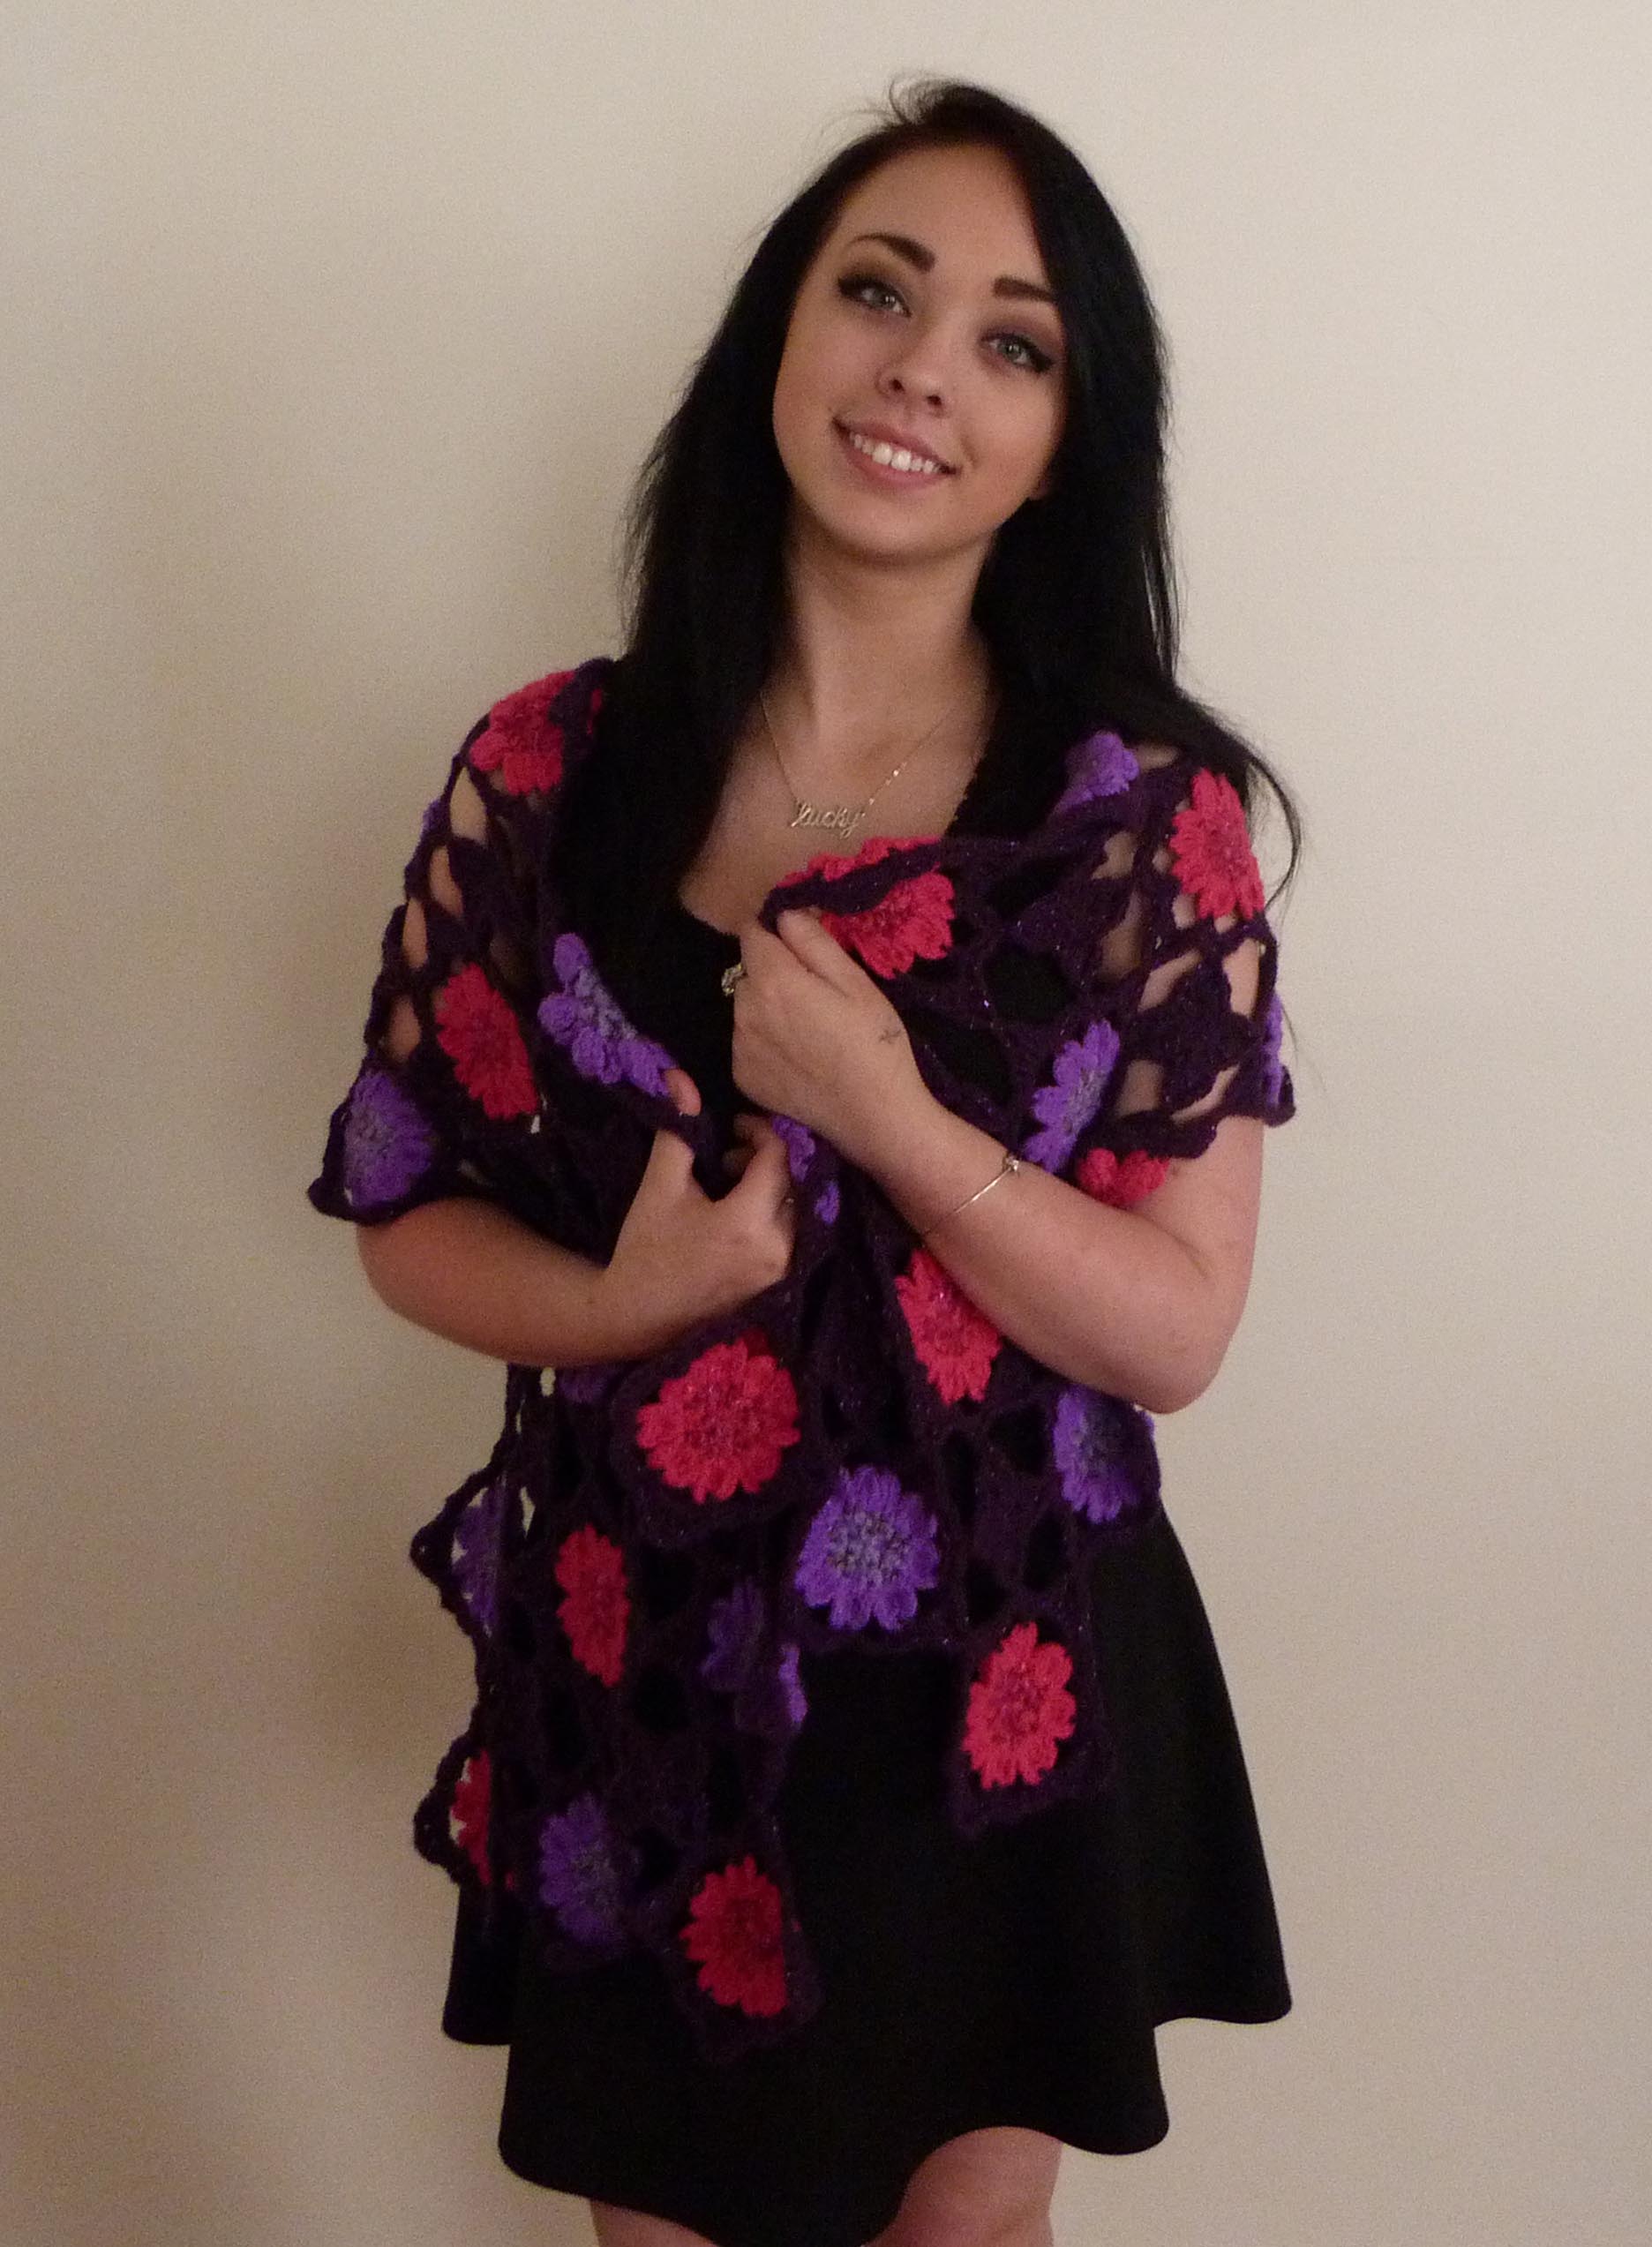
This version of the design has 33 flower motifs and 20 filler motifs, so is much quicker to crochet up. We also changed the way the colors are mixed together. The centers of the flowers are a multi-colored yarn and the petals are a solid color in the same tone. Then we picked a dark plum to frame out the flowers. I was really pleased with the way the flowers “pop” in this version.
If you are coming to the Knit and Crochet Show this week you may spot me wearing the original version of the Flower Power Stole, or you can see the “Shimmer” version at the MainlyCrochet.com Booth. Be sure to stop by and see all the wonderful projects that are on the site. If you aren’t at the show you can still go visit MainlyCrochet.com and subscribe to have access to all the lovely patterns.
I’m writing this blog post from Jan’s house in New Jersey. Tomorrow we load up the car and drive to Manchester, New Hampshire for the Knit & Crochet Show. Hope to see many of my yarnie friends there and for those that aren’t there I’ll try to have some posts about our adventures as soon as I can.

Interesting to hear how you attacked and solved a problem. But with “petal tail” being mentioned many times, the phrase began running around my head, and I soon realized that it was a tongue twister–for me at least–say it quickly five times, and see if you don’t end up with “petal tetal,” as I consistently do.
LOL! Petal Tail is only mentioned once, but I can see that it caught your attention. Happy to entertain you though Zoomie.
P.S. You could work this project in thread if you wanted and use it for a table runner (or give it to your mom as a wrap).