This past week has been a busy and fun one. My boys were on Spring Break and we made a quick trip to Kansas to visit some of my family. Got to have a good visit with my Dad and brothers, but the highlight of the trip was taking my niece and her 2 little ones to Kansas City for a fun-filled day at LEGOland, as well as an entertaining dinner at Fritz’s where toy trains deliver your food to your table.
We were supposed to head back to Colorado on Wednesday, but the weather forecast looked like we would end up stranded with highway closures. We stayed an extra day in Topeka and drove home on Thursday. Once we got to Colby, Kansas on Interstate 70 we could see that it had definitely been the right decision. Now we just need to dig out our driveway and deck from the approximately 2.5+ feet of snow that fell here on the mountain.
Our Easter bunny is going to need snow boots to deliver eggs, especially since more snow is expected thru the weekend. I may just be curling up in front of a nice fire in the wood stove and crocheting. I’ve got a couple shawl projects on the hooks and that fits with today’s post.
Recently we had a little math lesson here on the blog for figuring out the yardage for making a triangle shawl. Today I thought I would give you the tools for starting your own triangle shawl. I’m going to walk you thru this pattern, hopefully that will make it easy for even our newer-to-crochet folks to follow.
As I’ve said before, my favorite way to design is using what I call “Small Starts” for a project. To me the first 2-3 rows or rounds of a project are often the most fiddly, so I like to get them out of the way quickly so I can get to the “good” stuff. Nothing makes me happier than being able to write the beginning instructions of a pattern as “Chain 2 work in second chain from hook, . . . ”
For this simple shawl I wanted a pretty scalloped edge along the top as the rows were completed and I wanted the rows to be a simple Zen-like stitch that didn’t require a lot of thought to work on. These types of shawls are terrific relaxing projects to work on watching telly in the evening or for Prayer Shawl group meetings.
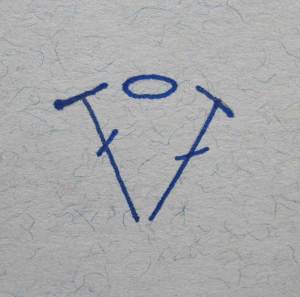
One of my favorite Zen-like stitches is the V-stitch. It is simple to make with just enough variety not to become completely boring.
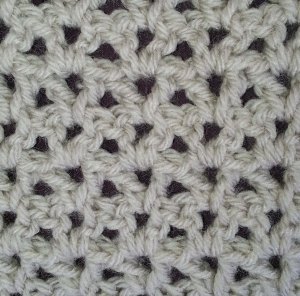
I’ve used this stitch both in stacked construction and staggered.
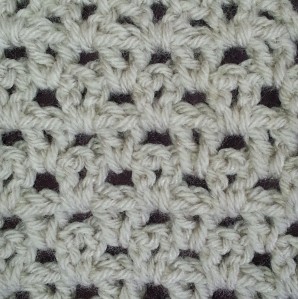
Now that I knew what stitch I wanted to use it was time to play with constructing the shawl. For my initial project I decided to use Lion Brand’s Vanna’s Choice. It’s a good sturdy acrylic worsted weight and I have it in lots of colors in my stash. I used a J (6mm) hook with this yarn as I wanted to keep my stitches loose.
You can use any weight yarn you want with the size hook that gives you a fabric you like. That might involve a bit of experimenting to decide on the right combination of yarn and hook. Because this shawl is worked from the top center with increases at the center point and at each end of the top edge you can just work as many rows as you like until you reach the size you want, or until you run out of yarn.
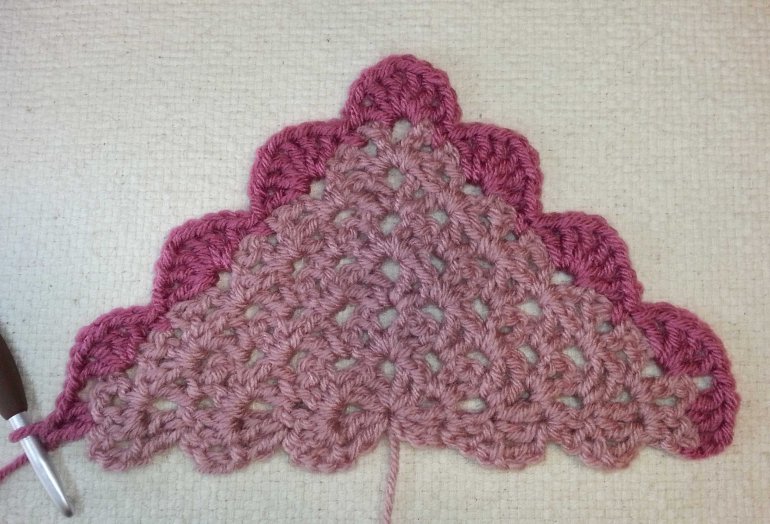
After making the swatch above I calculated for my Vanna’s Choice version of the shawl I would need approximately 6 skeins of yarn (870 yards). That would make a shawl that is 60 inches across the top and 30 inches long at the center point. I worked 6 rows of the body stitch pattern and then the border for this swatch to get my numbers.
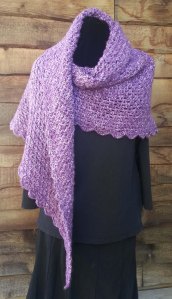
Playing with Triangles Shawl
Designed by Andee Graves
Skill – Beginner
Stitches you need to know: Chain (ch), Double Crochet (dc), Single Crochet (sc), Slip Stitch (sl st)
Special Stitches
Adjustable Slip Knot: Make your beginning slip knot so that pulling on the starting tail tightens the working loop on your hook. Need help with this technique visit my blog post “The Lovely Adjustable Slip Knot” or stop by my YouTube Channel for a helpful video.
V Stitch (V-st): (dc, ch 1, dc) in indicated place
Materials
Yarn in weight and yardage you want to use for your preferred size of Shawl.
Hook in size appropriate for the fabric you want from your yarn.
Stitch markers (at least 3)
Pattern Notes
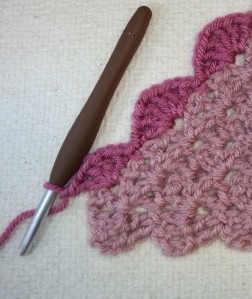
The majority of the body of this shawl is worked in staggered V-stitches. This means the 2 legs of the V-st are worked in the space between two V-stitches. Like you see in Photo B above the pattern instructions.
Each chain stitch counts as a single stitch for skipped stitches, ie… the top of a V-st would count as 3 stitches.
Instructions
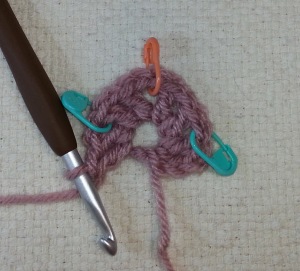
Row 1: Starting with an adjustable slip knot Ch 4 (counts as dc and center), ({dc, ch 1} 2 times, dc, ch 2, {dc, ch 1} 2 times, 2 dc) in fourth ch from hook. Place st markers in first and last ch-1 spaces, and in ch-2 sp. (4 ch-1 sp, 1 ch-2 sp, 8 dc)
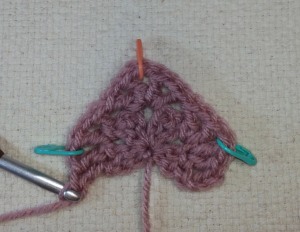
Row 2: Ch 3, turn, sk first st, 2 dc next st, ch 1, V-st in marked ch-1 sp, move st marker to first ch-1 sp just made, sk 3 sts, (V-st, ch-2, V-st) in marked ch-2 sp, move st marker to ch-2 sp just made, sk 3 sts, V-st in marked ch-1 sp, ch 1, 2 dc in next st, move st marker to second ch-1 sp just made. (4 V-st, 4 dc, 2 ch-1 sp, 1 ch-2 sp, 1 ch-3)
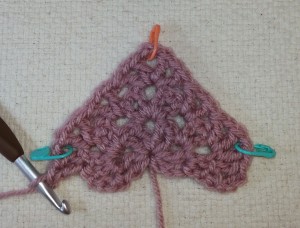
Row 3: Ch 3, turn, sk first st, 2 dc next st, ch 1, V-st in marked ch-1 sp, move st marker to first ch-1 sp just made, sk 3 sts, V-st in space before next V-st, sk 3 sts, (V-st, ch 2, V-st) in marked ch-2 sp, move st marker to ch-2 sp just made, sk 3 sts, V-st in space before next V-st, sk 3 sts, V-st in marked ch-1 sp, ch 1, 2 dc next st, move st marker to second ch-1 sp just made. (6 V-st, 4 dc, 2 ch-1 sp, 1 ch-2 sp, 1 ch-3)
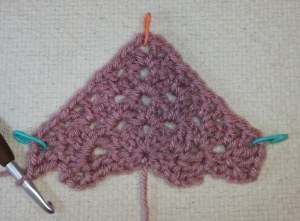
Row 4: Ch 3, turn, sk first st, 2 dc next st, ch 1, V-st in marked ch-1 sp, move st marker to first ch-1 sp just made, *sk 3 sts, V-st in space before next V-st*, repeat from * to * until reach V-st before marked ch-2 sp, (V-st, ch 2, V-st) in marked ch-2 sp, move st marker to ch-2 sp just made, repeat from * to * until reach V-st before marked ch-1 sp, V-st in marked ch-1 sp, ch 1, 2 dc in next st, move st marker to second ch-1 sp just made. (8 V-st, 4 dc, 2 ch-1 sp, 1 ch-2 sp, 1 ch-3)
Repeat Row 4 until reach the desired length, you will need to end on an even numbered row to set up for the scalloped border.
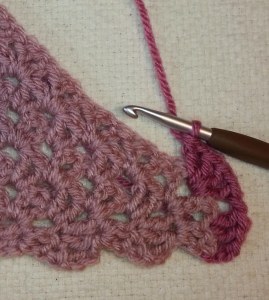
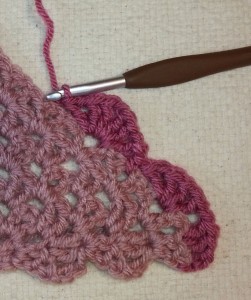
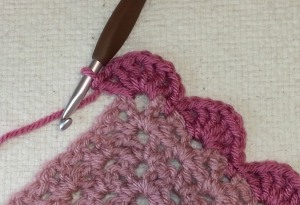
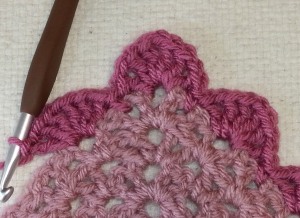
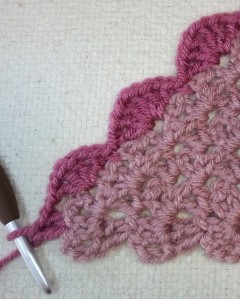
Border: I’ve shown the border worked it a different color to make it stand out clearer in the photos, you can continue in the same color as the body of the shawl or use a contrasting color.
Ch 3, turn, sk first st, 2 dc next st, ch 1, sk 2 sts, 2 V-st in next ch-1 sp,
* sk 2 sts, **sc in next ch-1 sp, sk 2 sts, 3 V-st in next ch-1 sp*,
repeat from * to * until one V-st remains un-worked before marked ch-2 sp,
sk 2 sts, sc in next ch-1 sp, sk 1 st, 3 V-st in marked ch- 2 sp, sk 1 st, repeat from ** to * once,
repeat from * to * until 2 V-st remain un-worked before marked ch-1 sp at end of row,
sk 2 sts, sc in next ch-1 sp, sk 2 sts, 2 V-st in next ch-1 sp, ch 1,
sk 2 sts, 2 dc next st.
Fasten off. Weave in tails. Gently block if desired.
I also have a video available for this pattern on my YouTube channel. Click here to see it.
For some helpful tips on working your shawl visit this blog post.
Now it’s your turn to get creative. Have fun experimenting with different textures and weights of yarn to create a shawl that is just right for you. Check thru your yarn stash and see if you have a mixture of similar weight yarn in harmonizing colors that you could combine in your shawl.
You can see some more of my PWT shawls on this blog post.

