The Joys of Designing

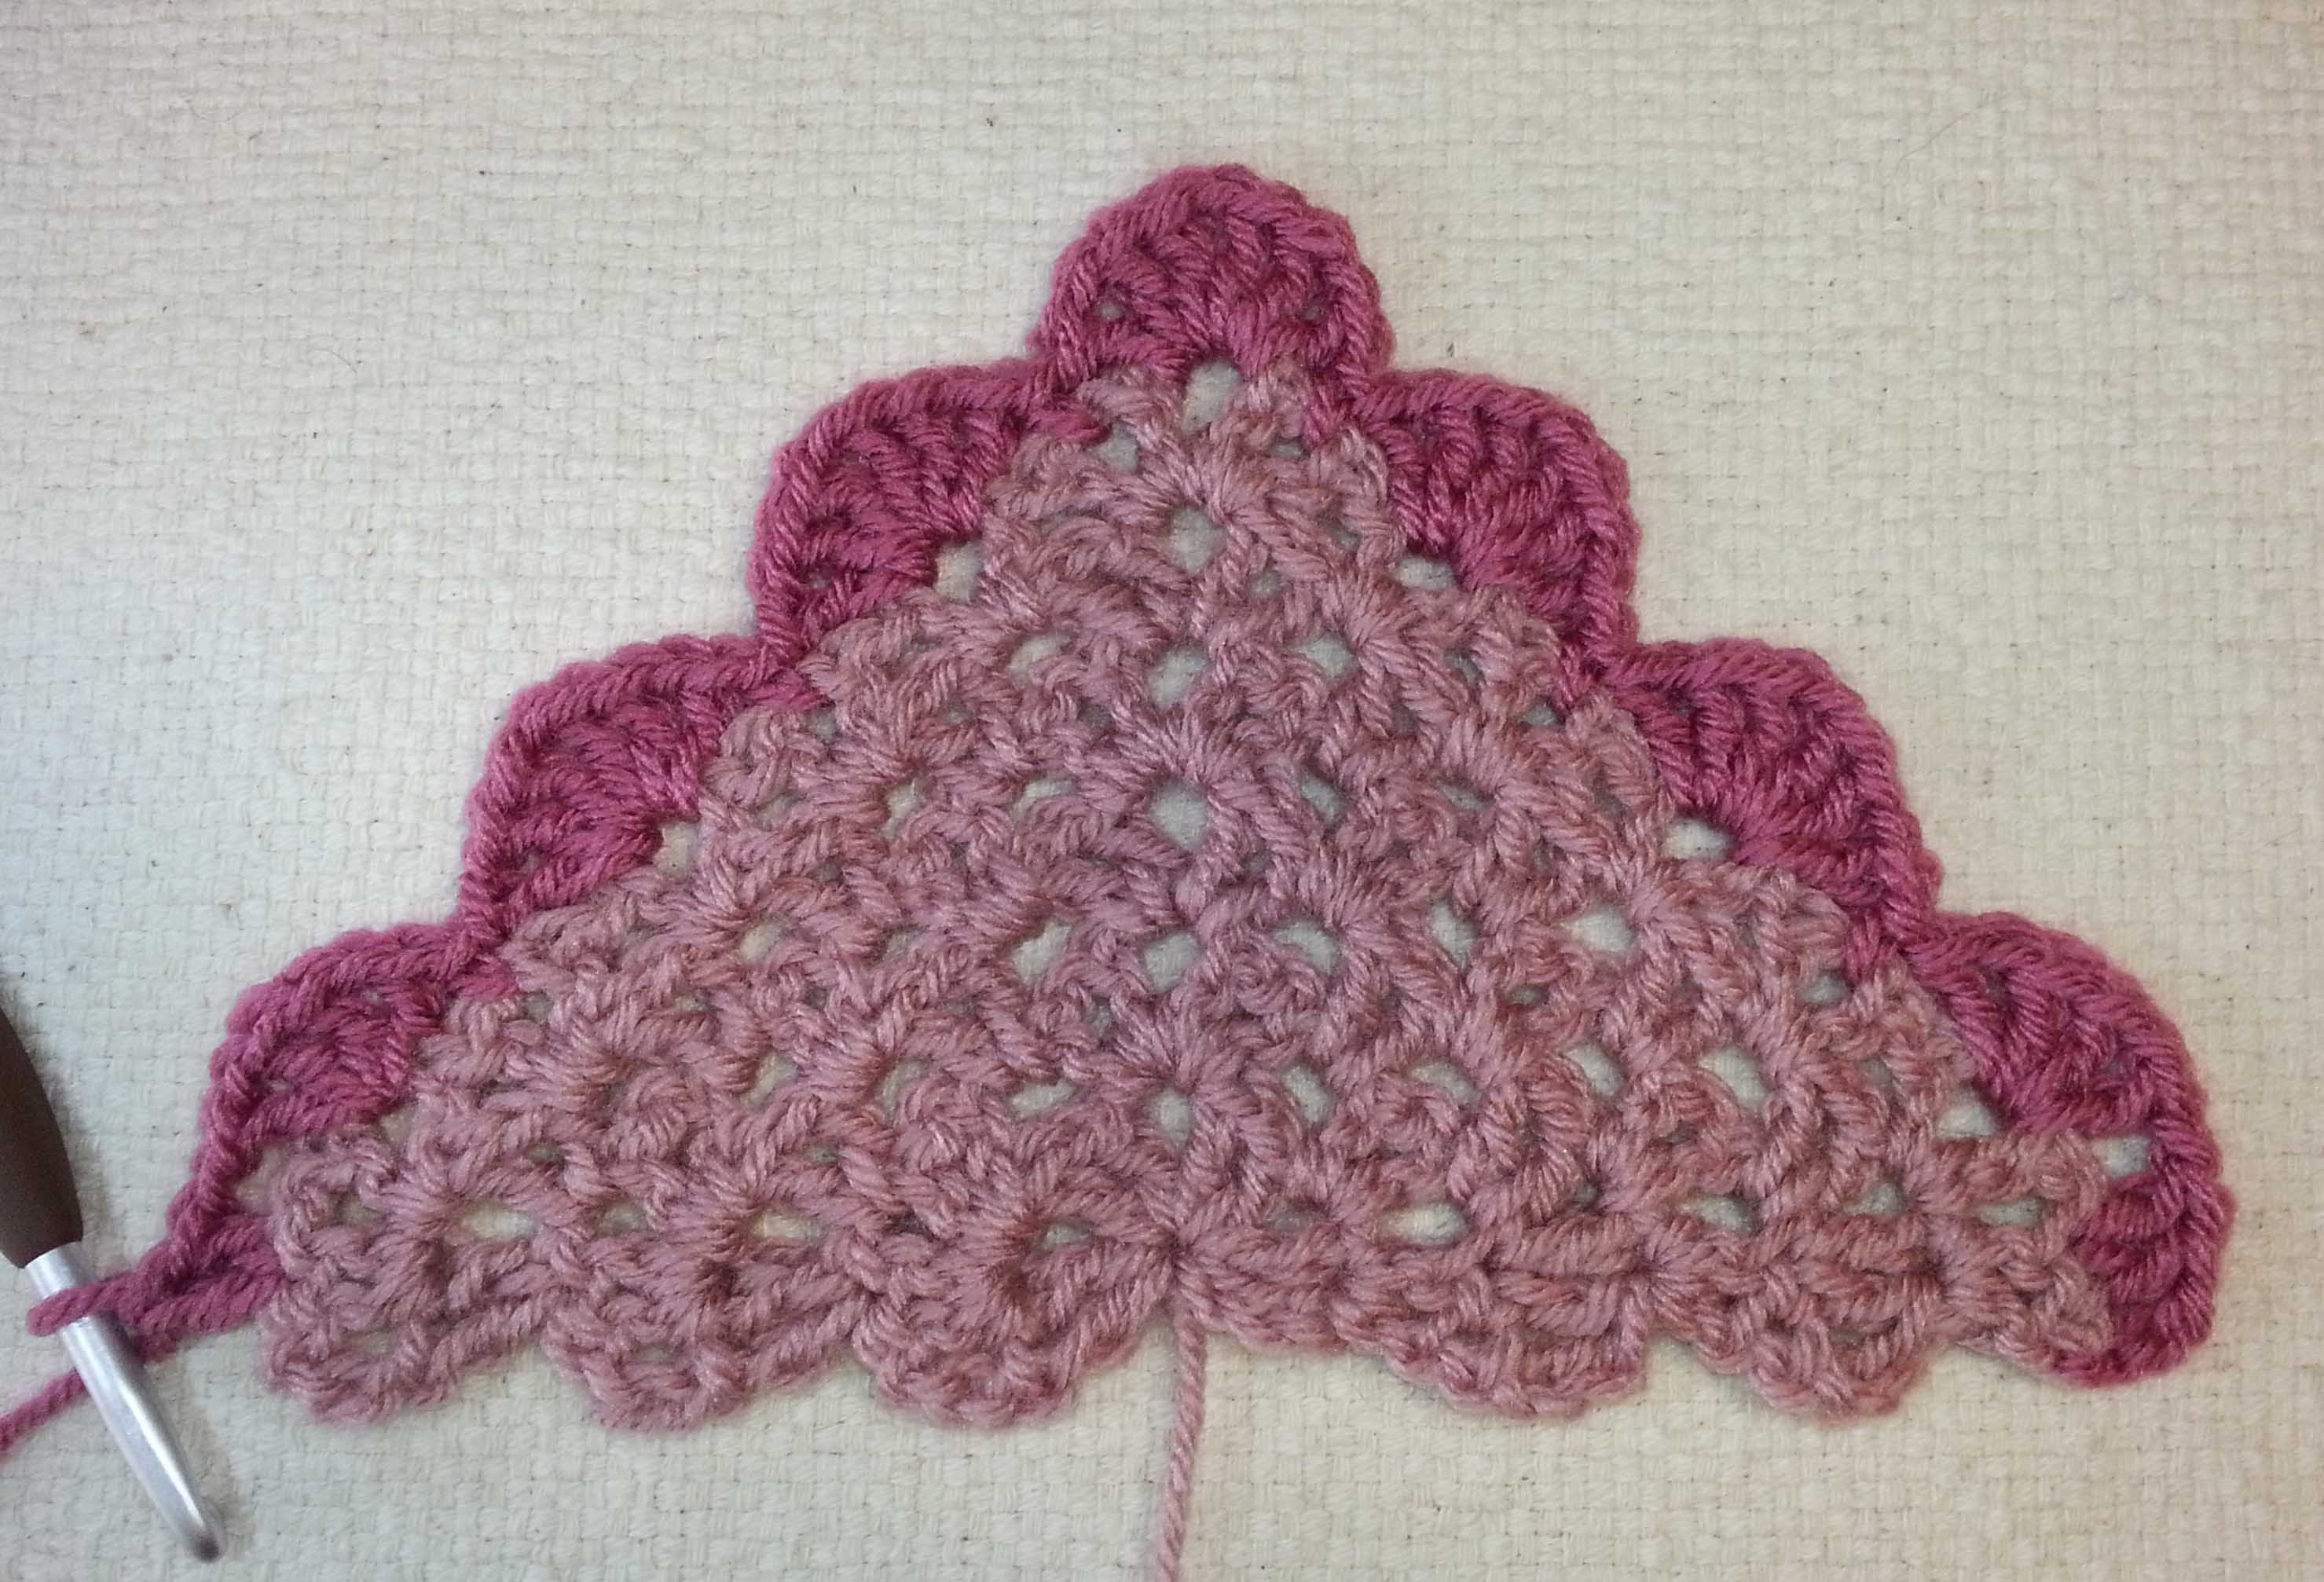
The end of this week has been a bit disappointing crochet-wise. I had hoped to have a new shawl design all worked out, but instead I ended up making 3 different swatches I was disappointed in and then ripping them out.

My usual designing method is to start with drawing out my stitch pattern and shaping ideas on paper in symbols. Then sit down with yarn and crochet to try out the idea and to determine gauge. Most of the time this works very well, though as this week proves, not always.

Friday afternoon Snow

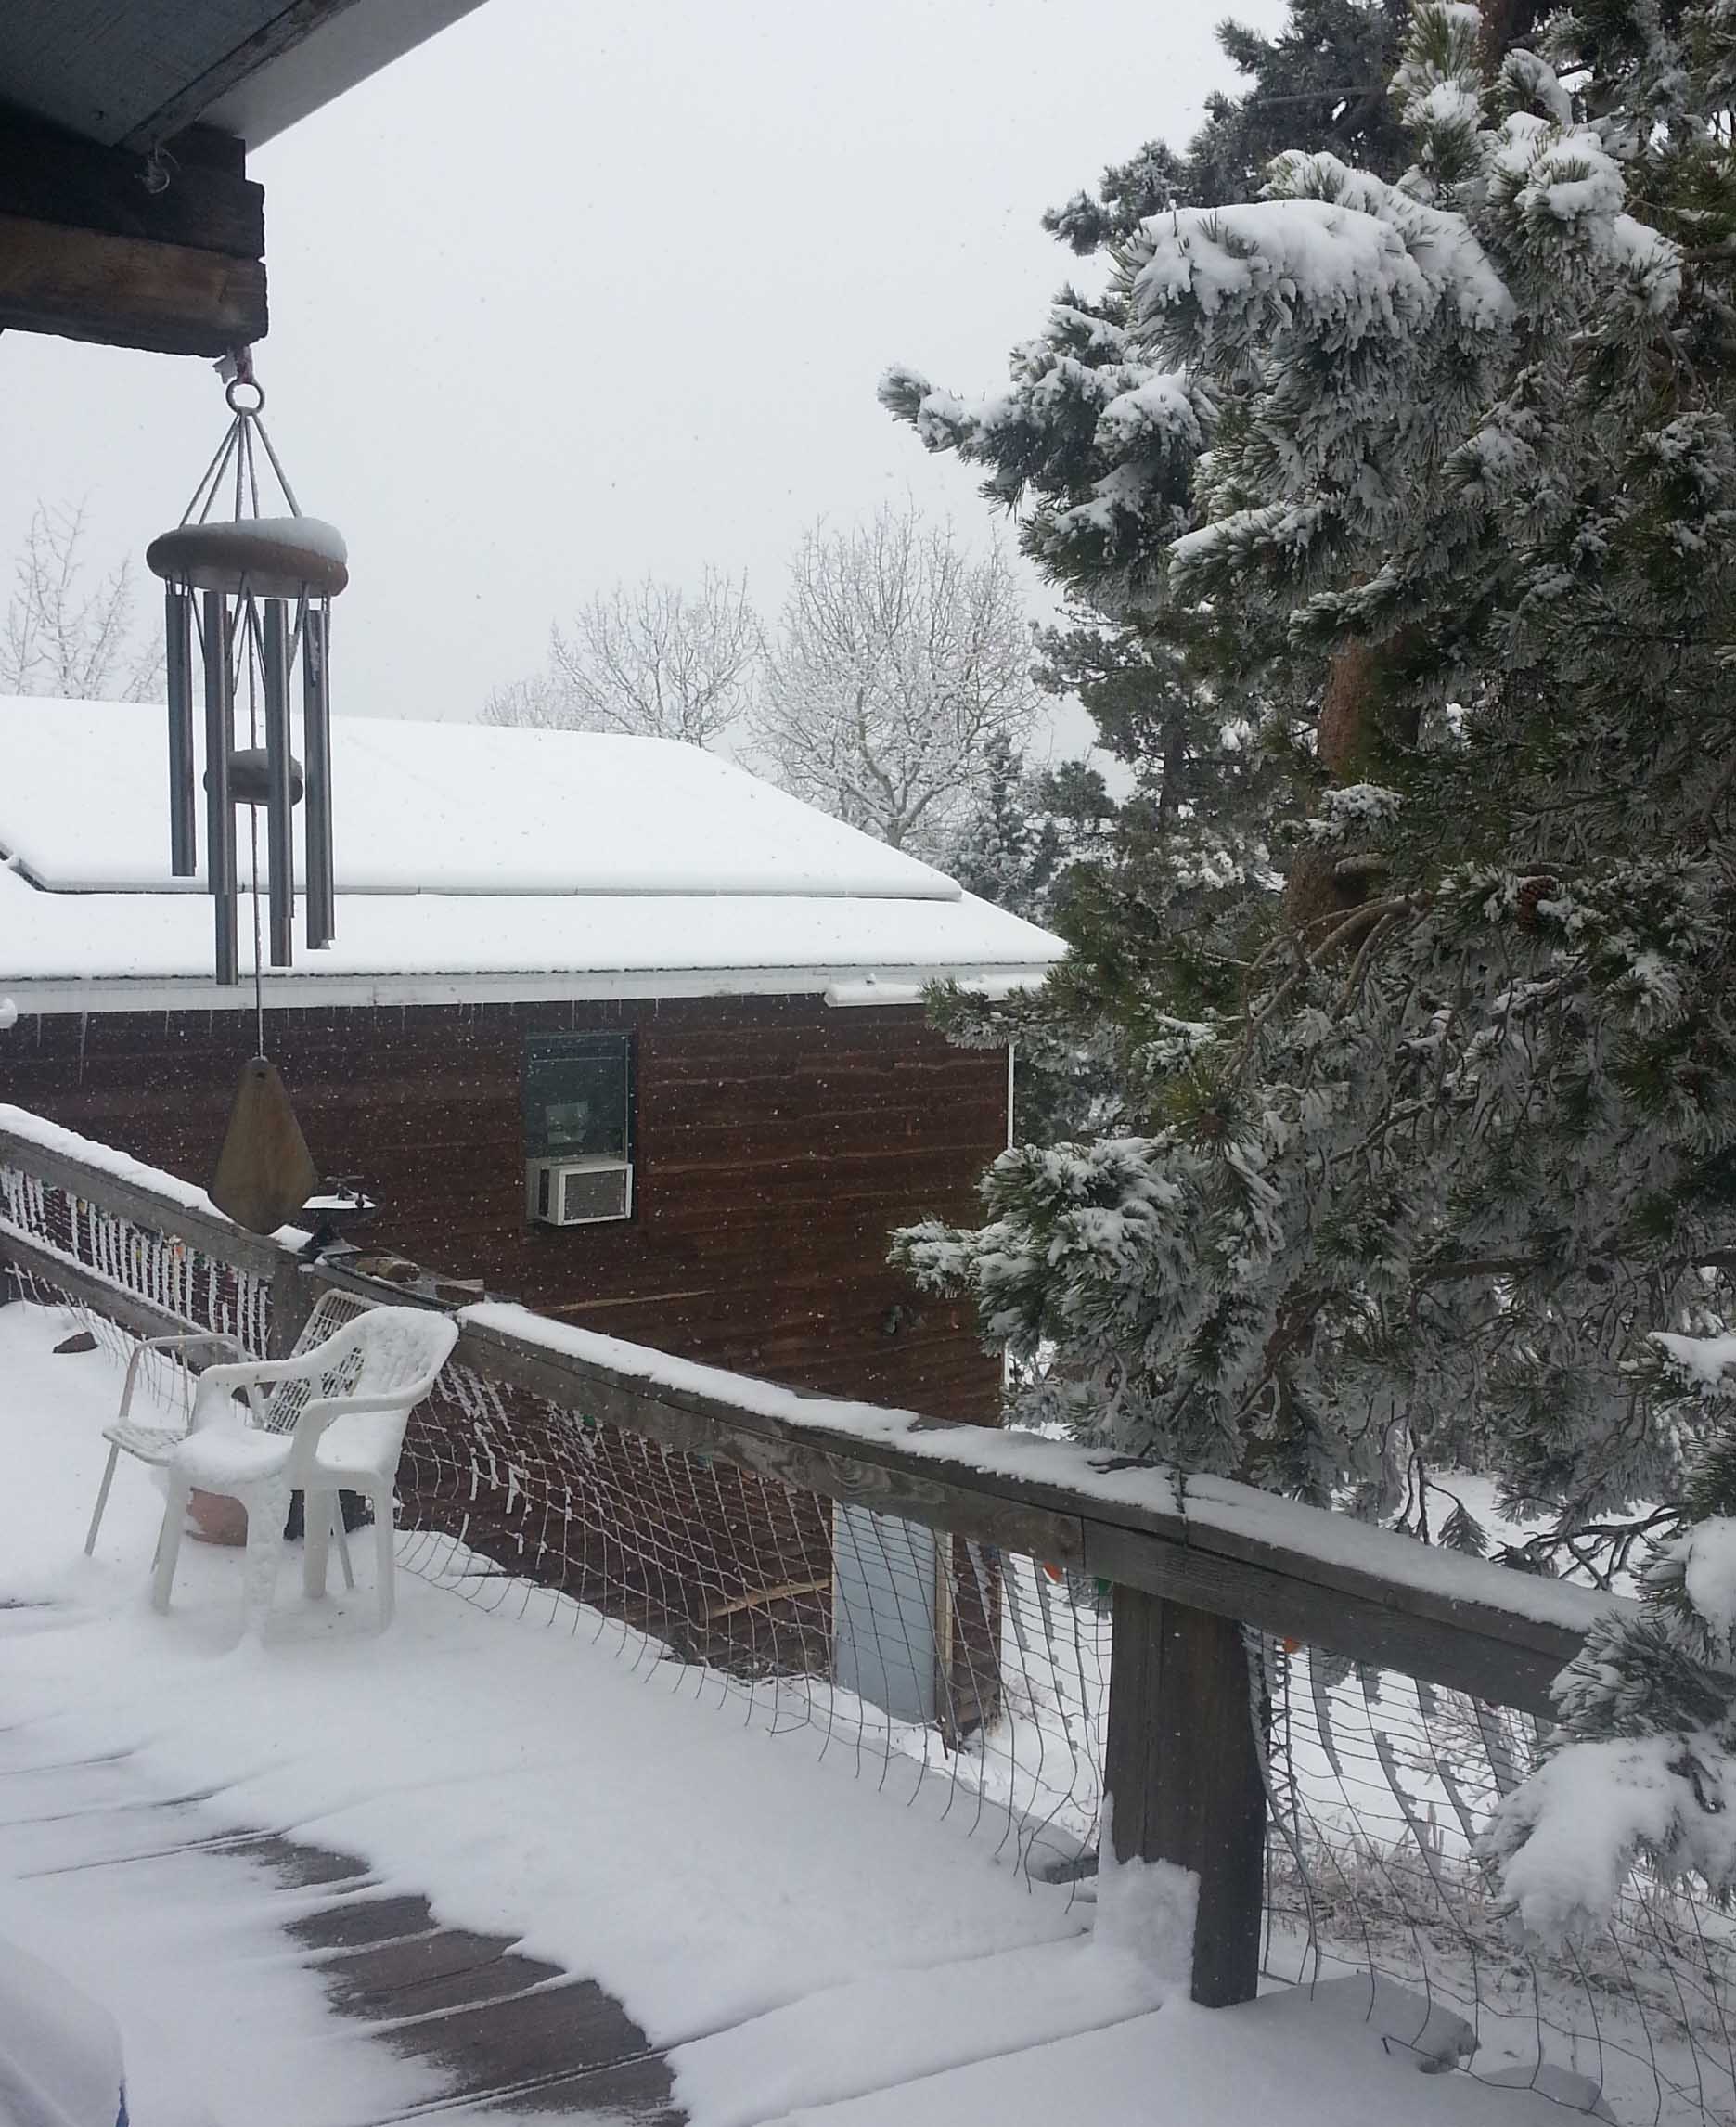
This weekend is shaping up to be another snowy one, though not as heavy as what we got 2 weeks ago. I was really wishing I had a crochet project ready to go. Unfortunately I am in one of those odd periods with my crochet work that all I had in my work bag was swatching projects.

Ball of CE Santorini

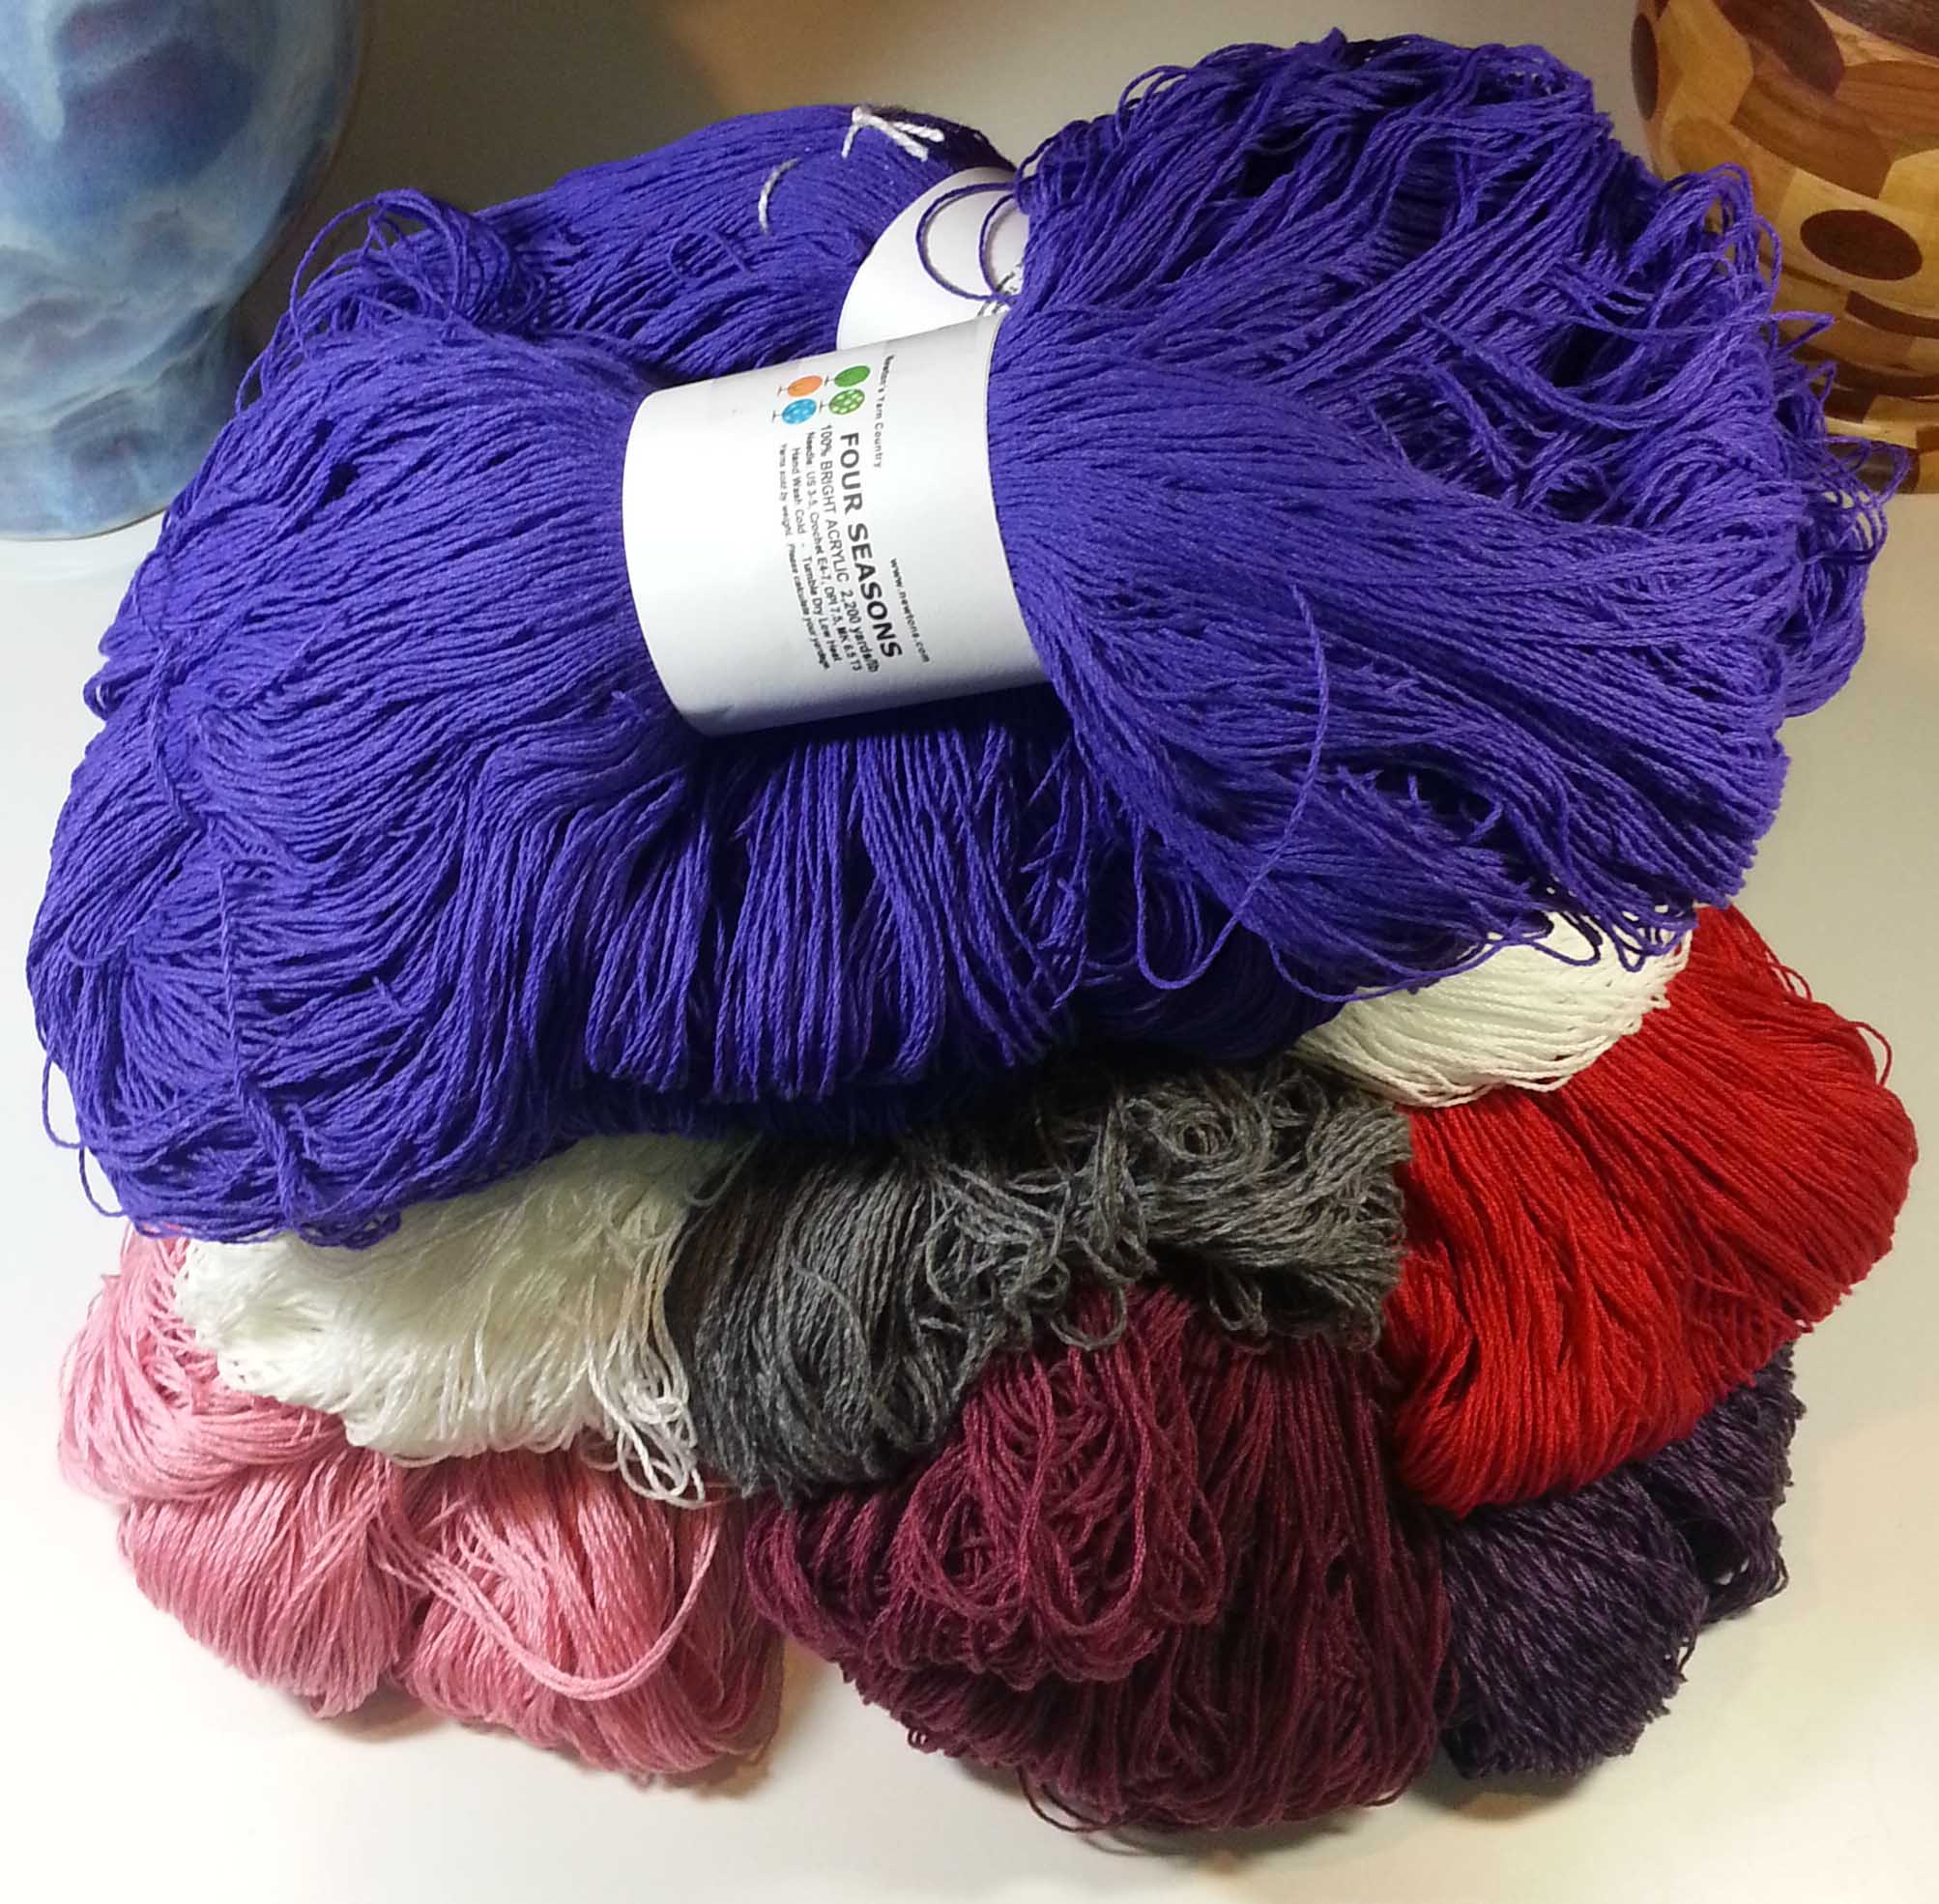
I decided that this was a good time to work with some of the neglected balls of yarn that have been sitting in my stash too long. I have 2 balls of this Classic Elite “Santorini” that I had purchased at the Longmont Yarn Shoppe last year. It’s a very interesting yarn that changes texture and color thru-out its length. Sometimes it has the body of cotton and other times the slinky fluidity of rayon.

I’ve tried a couple of stitch patterns with it in the past and realized that the yarn needs a super simple stitch pattern to really shine. The colors don’t show up with any regularity and the resulting fabric has a rather random appearance that doesn’t look good with a defined lace pattern like shells, V-stitches or pineapples.

Swatch 1

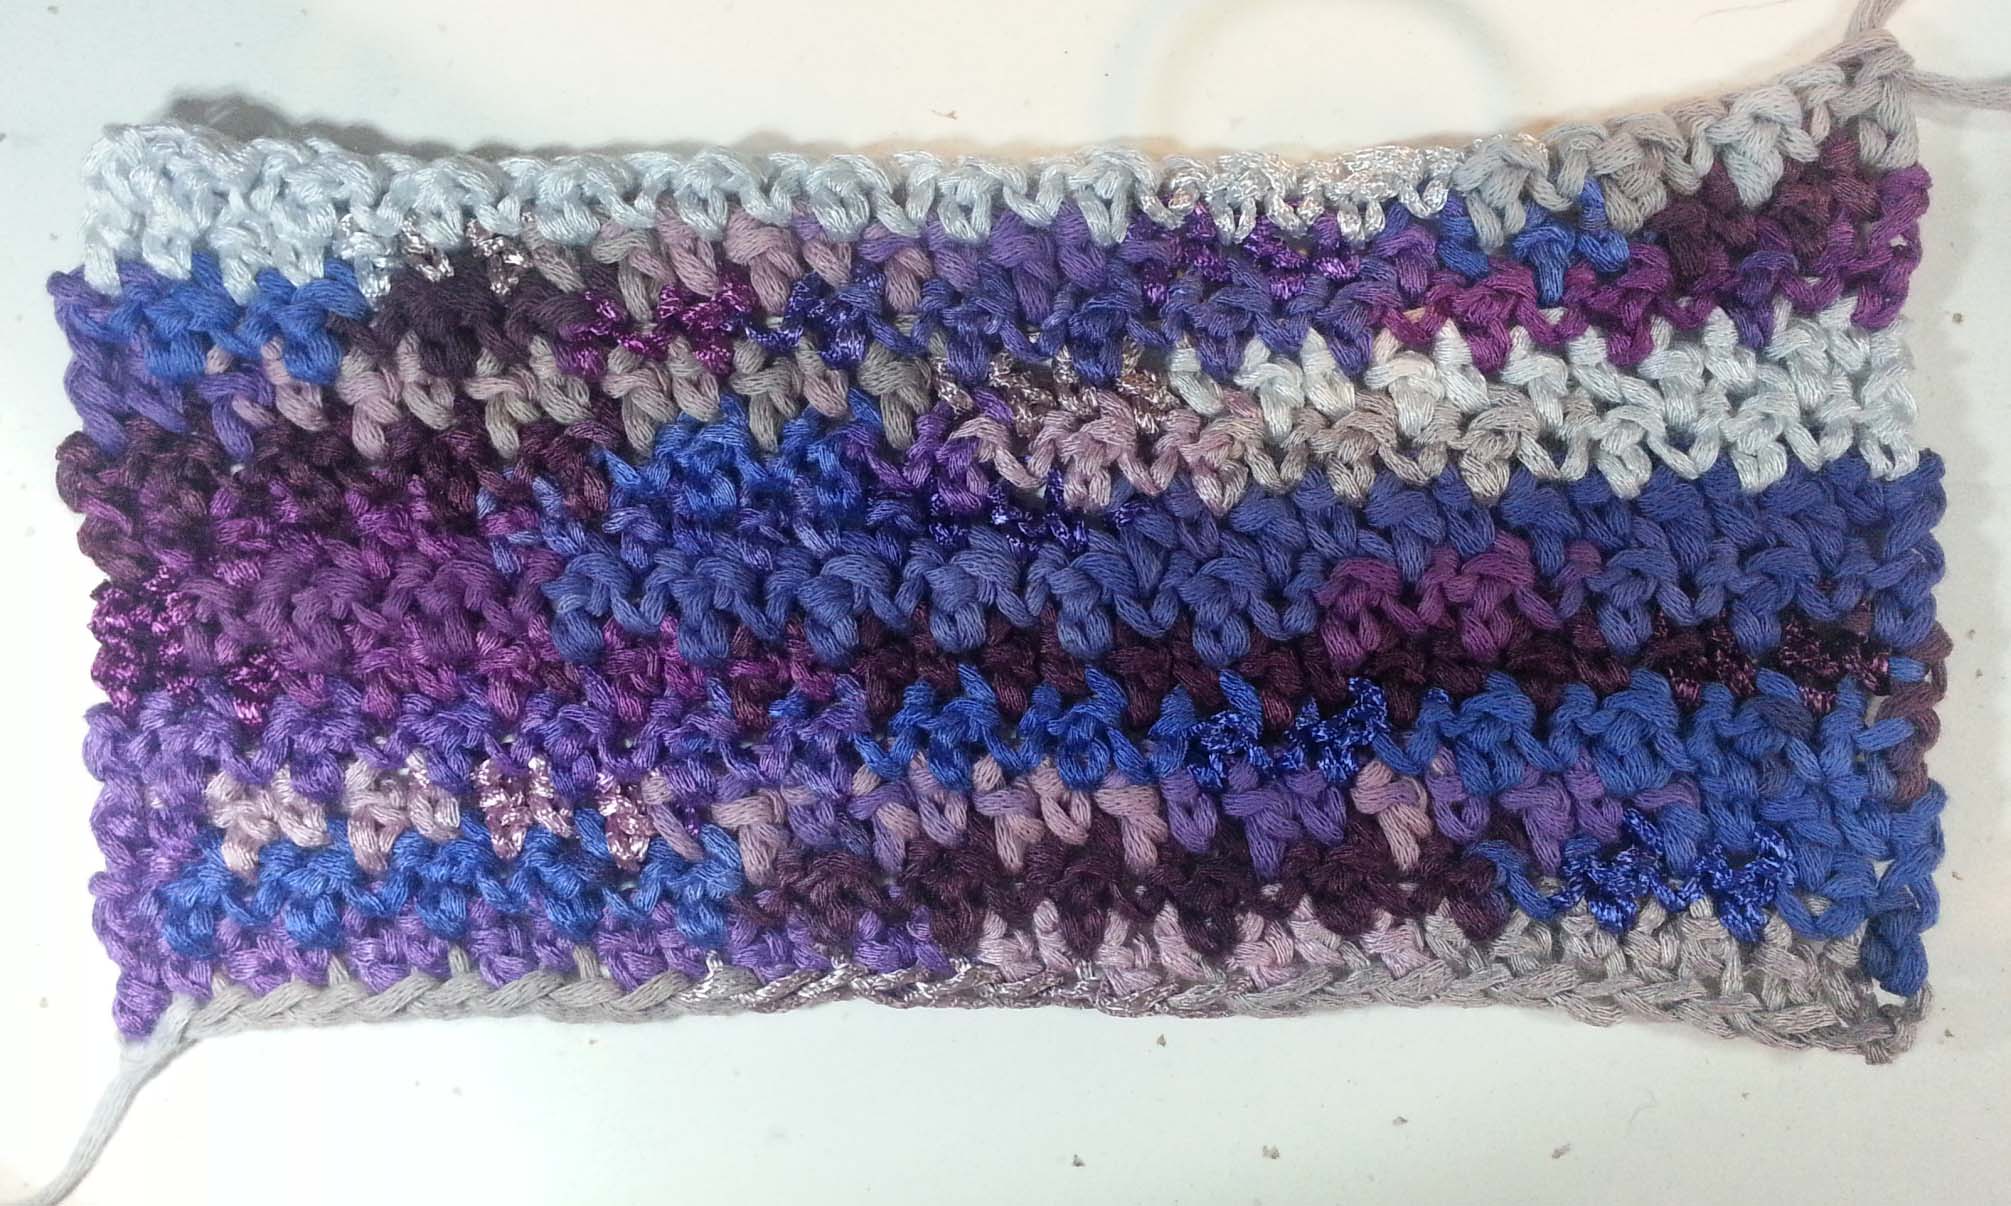
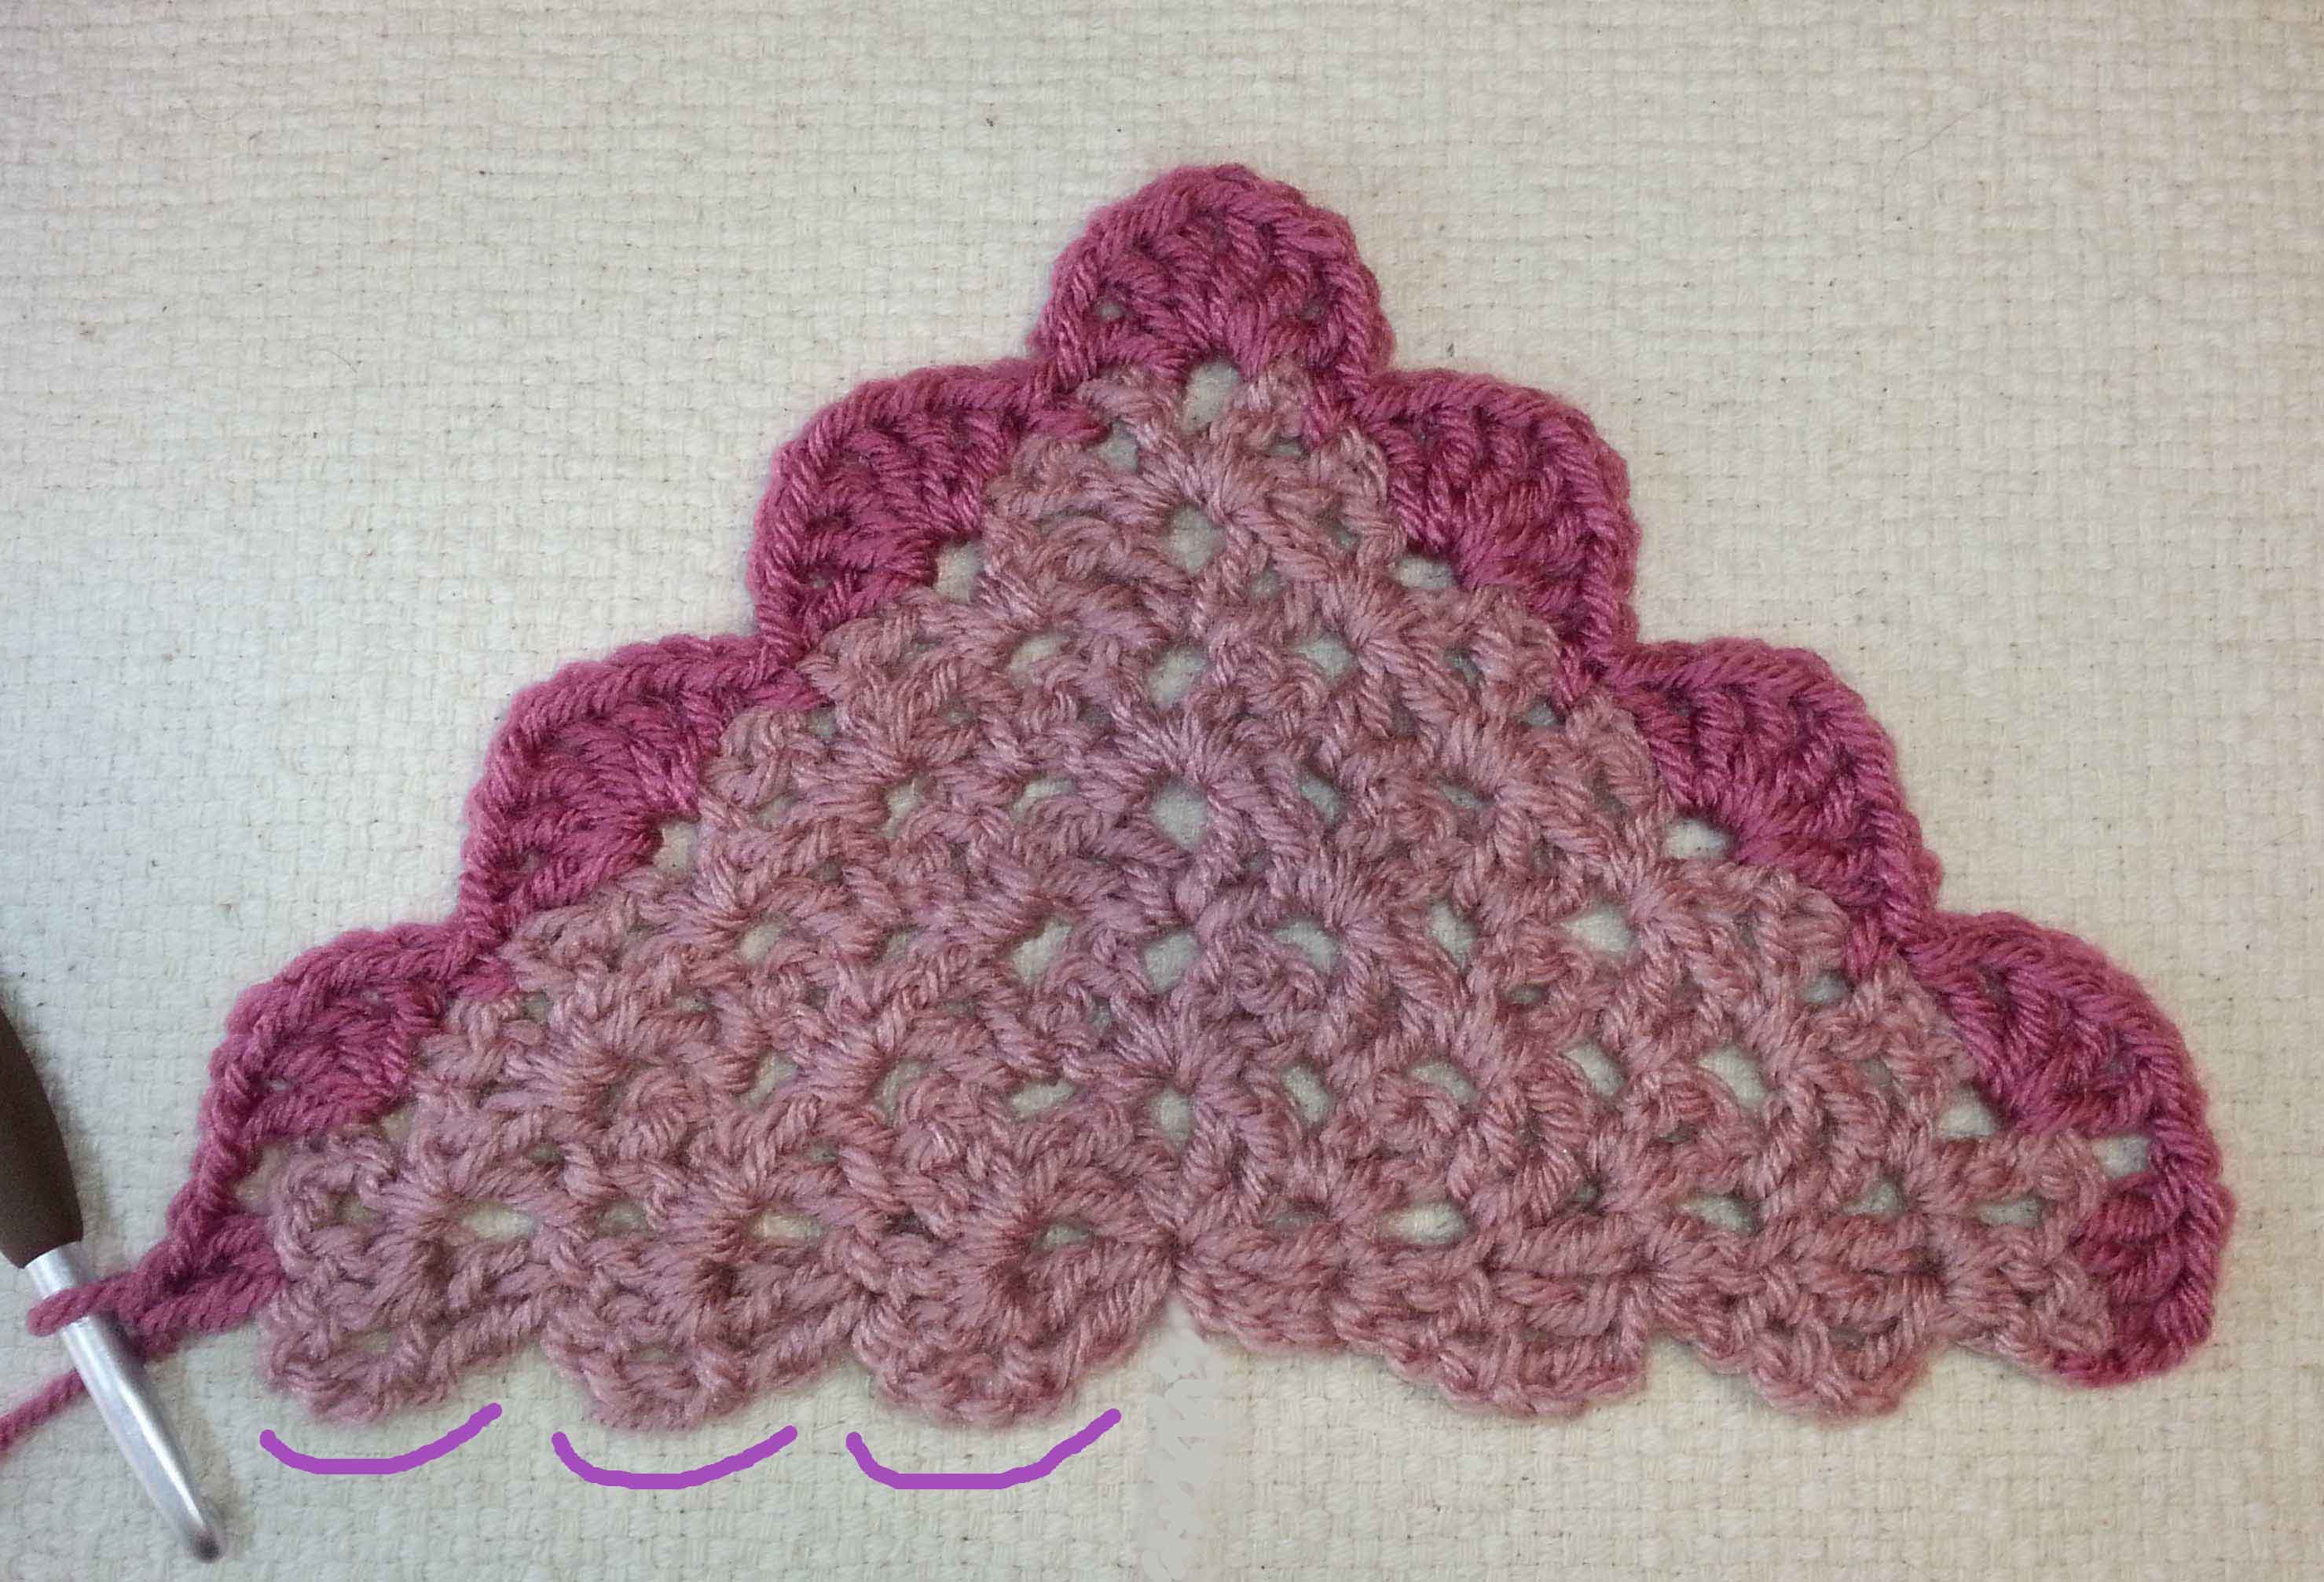
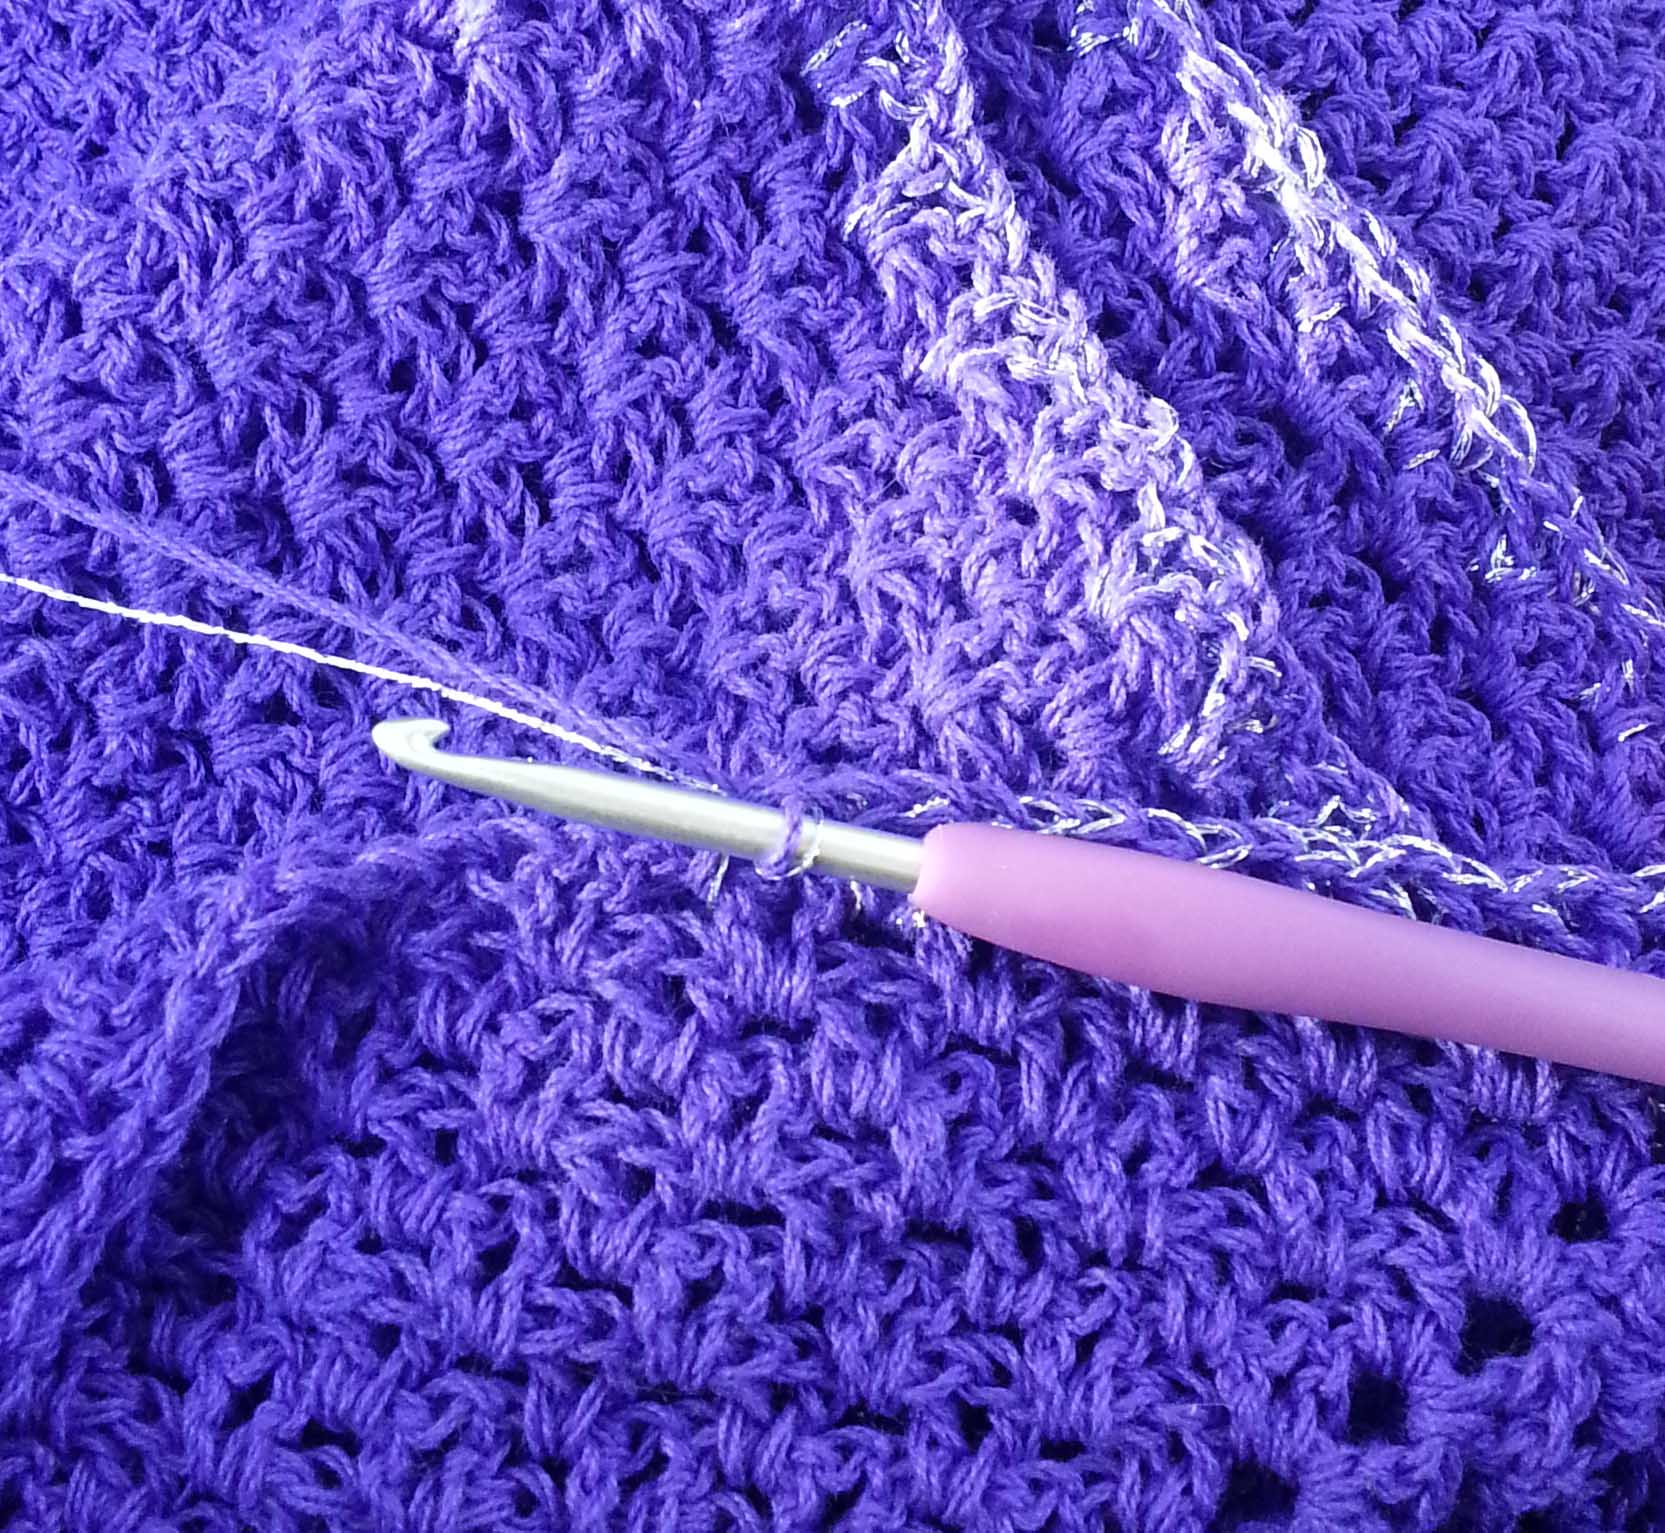
I tried rows of single crochet worked in the front loop but wasn’t pleased with it. After a little experimenting I decided on one of my other favorite stitches the “Up and Down” stitch (that’s what it is called in Betty Barnden’s “Crochet Stitch Bible”). This is alternating single and double crochets on the first row, then working doubles in the singles and singles in the doubles on the following rows. I start my rows a bit differently than Betty shows them in her book.

I like to begin each row with a single crochet and end with a double crochet. At the start of my second row (and each following row) I chain 1, turn and work a single crochet in the last double from the previous row. This creates a nice clean edge on the rows that I can crochet off of or can just leave plain.

Saturday snow
Saturday morning snow

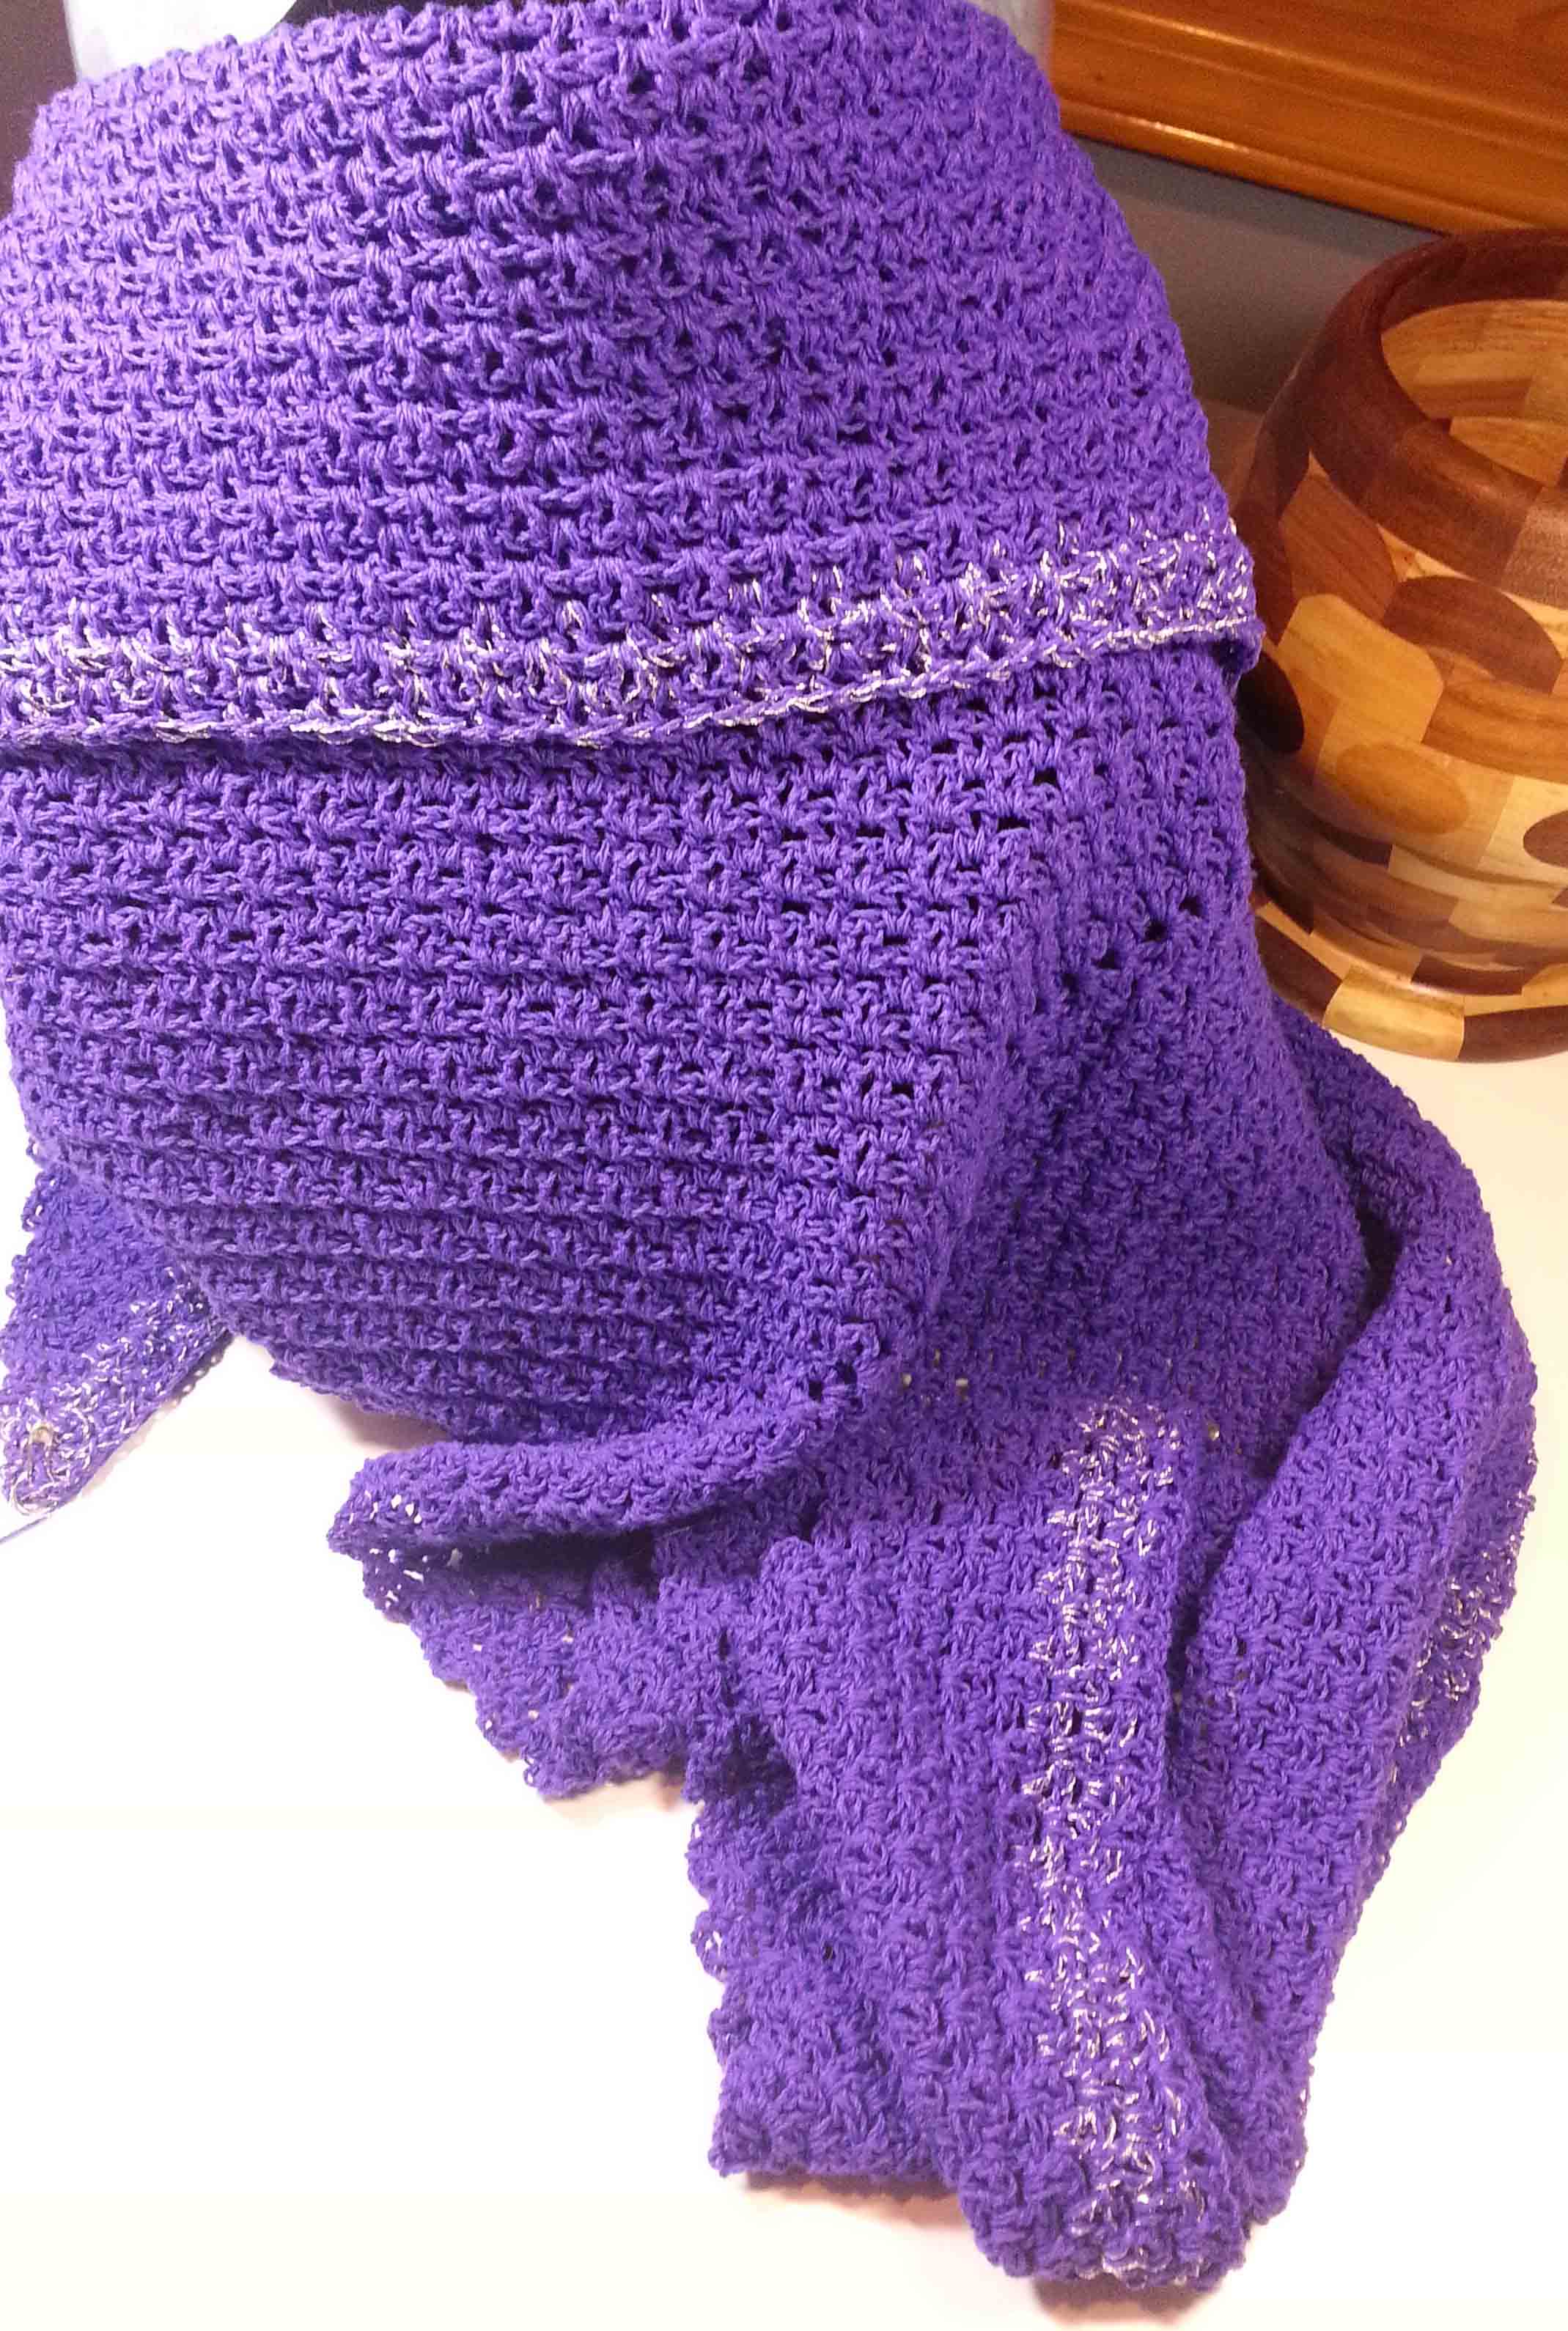
I’m going to keep going on this swatch to use up my yarn and see how much fabric I create, I’m thinking this might become a cowl.  Now I have a project to work on while it continues to snow outside.

Budding Leaves and Lilacs

It’s beginning to look like springtime finally. Off the mountain in town a lot of the trees are showing leaves and the flowers are in bloom. Up top though it’s been a slower sense of the season. Yesterday I was at my friend and neighbor V’s house for our weekly crochet and crafting visit.

V's Garden last Friday
V’s Garden last Friday

V has a lovely garden and a number of her bulbs were showing off blooms. Best of all to me though was that her lilac bushes are getting leaves and buds. I didn’t get any photos though since the weather got wet and cold. Hopefully the weather will be kind and the lilacs won’t be frozen before blooming and sharing their lovely scent.

Meanwhile we are still getting some cold days and a bit of snow up here on my mountain. We are at 8,400 feet above sea level and V’s house is around 7,000 feet.  There is a fairly big difference in the seasons between our houses, and V is a much more talented and dedicated gardener than I am.

Lilacs at Denver Zoo Spring 2012

I need to make a trip to the Denver Zoo with my family soon as the lilacs there are generally in bloom long before the ones up here on the mountain. They have a lot of lilacs on the zoo grounds and I always try to make at least one visit there while they are in bloom.

M2H Designs: Tumbling Leaves Scarf

I decided it’s time to crochet some transitional pieces to add to my wardrobe. It’s been over 4 years since I published my “Tumbling Leaves Scarf”. This is a fun project to crochet for experienced or intrepid intermediate stitchers.

Mochi Plus Scarf WIP

Originally I created this design with a bulky yarn worked with a P size hook, but I wanted to try it in a lighter weight yarn with a smaller hook for a skinny scarf to wear this spring. I picked a ball of Crystal Palace’s “Mochi Plus” that reminded me of my favorite colors of springtime and used an I (5.5mm) hook to crochet with.

Scarf SectionI love “Mochi Plus” because it comes in so many lovely color combinations. I enjoy working with and designing with yarns that have long runs of color that blend together and this yarn doesn’t disappoint. My original scarf was 6.5 inches wide and 75 inches long. Using the “Mochi Plus” and the smaller hook this scarf came out 3.5 inches wide and 41 inches long before blocking.

Because of the faux motif design of this scarf I am going to try a different blocking technique with it and will share my results with you later.

If you’d like to make a scarf like this you can purchase the pattern in my Ravelry shop by clicking here.

The pattern includes both US crochet terminology text and charted directions.


Getting Started with Crochet

Most of my reader’s are experienced crocheters, but today I wanted to address the needs of those of you that want to learn to crochet. These instructions assume that you already know how to make a slip knot and have placed your yarn on the hook shaft. If you need help with making a slip knot click here to see a post that will help you.

One of the things I like to emphasize when I am teaching new crocheters, is holding your yarn and hook so that your hands are comfortable. After all you are starting on a new crafting adventure and you don’t want it to end prematurely due to injury.

Crochet is a craft that utilizes both hands. For most folks it is easier to hold the hook with your dominant hand and the yarn is held in your non-dominant hand. The majority of crochet project samples you will see in magazines and on yarn company sites show projects worked with the hook in the right-hand. When the hook is held in the left-hand the stitches will look slightly different because they will slant in the opposite direction from stitches made with the hook in the right-hand.

Some left-handed crocheters hold their hook in the right-hand and the yarn in the left-hand. They use a crochet technique where they manipulate the yarn more than the hook when making stitches. If you are left-handed you can experiment to see which technique works best for you.

Anatomy of your Hook

Hook-Anatomy

Holding the Hook

There are 2 common ways to hold your crochet hook: Knife Hold, sometimes called the “toothbrush hold” and Pencil Hold. Either is fine depending on which is more comfortable to you. You need to grasp the hook so that the shaft, throat and head of the hook are un-obstructed.  Most important is not to hold the hook too tightly. I generally hold my hook using a Knife Hold.

Tensioning the Yarn

Begng Crochet 3R
Right-handed Tensioning of Yarn

“Tensioning the yarn” is just another way to say “holding the yarn”. You want to hold the yarn in such a way that it isn’t too tight or loose. Your “tension” makes a big difference in the uniformity of your stitches when crocheting.  The wrap of yarn shown in the above photo is my favorite method. I have very dry smooth skin, for folks with less dry skin you might want to eliminate the extra wrap about the pinky.

Left-handed Tensioning of Yarn

Making a Chain Stitch

Step One

Right-handed grasp of Working Loop

Once you have chosen your hook hold and have the yarn tensioned use your non-dominant hand to grasp the base of the loop on your hook (called the “working loop”) with your thumb and middle finger. This creates a strand of working yarn for your hook to move around freely.

Left-handed grasp of working loop
Left-handed grasp of Working Loop

Wrapping the Yarn

Step Two

Right-handed Yarn Over

You want the yarn to wrap around the shaft of your hook from back to front. So scoop the head of your hook in front of the working yarn strand and then behind it. This is called a “yarn-over” in crochet. Catch the yarn strand with the throat of your hook and let your forefinger move toward the working loop as you pull the yarn thru it.

Left-handed Yarn Over

You have now pulled up a loop and you need to slide that loop to the shaft of your hook and grasp the base of that new loop with your thumb and middle finger. Let the working yarn slide through your tensioning hand as you return your fore-finger to the original position it was in.

Continue to repeat steps 1 & 2 until you have the number of chain stitches or length of chain that you want. You can use pretty yarns to create lengths of chain to use as ties for packages or other decorative purposes. You can also add beads to your yarn and make beaded necklaces using the simple chain stitch.

Click here to visit my blog post about working beaded chain stitches and for more details on getting started crocheting.


A Finished Shawl

Finished PWT before tails woven

It took a bit longer than I had hoped, but I have finally finished my first “Playing with Triangles Shawl”. In the end I decided to make it 54 rows before putting on the border. My finished shawl is 76 inches along the top span and 36 inches long at the point.

Even Rows

One of the things I learnt working this first shawl is that I can keep track that my rows are even by keeping an eye on the scallops (highlighted with purple lines) on the “even” side of the top center.

Tail ends

I really had a lot of tails to weave in when I reached the finish. Took about an hour to weave them all in because I plan to use this shawl a lot and didn’t want them popping loose on me. I ended up with 25 tails total.

Snowy Outdoors

It was another cold snowy day up here on my mountain, so the new shawl got an immediate wearing. It’s wonderfully cozy and comfy.

Me in PWT

You can find the free pattern for this shawl on my blog post: “Playing with Triangles” . I also have a video on my YouTube channel that walks you thru the steps of working the first 4 rows and the border: Click here to see the video.

That is Why You Count

Glorious Spring Beauty

It’s been a lovely week weather wise. Down in town many of the flowering trees were in blown and lots of bulbs had made an appearance.

Spring hyacinths

Thursday was really amazing down in Boulder, it was in the high 70s for temperatures (up on the mountain it was in the 60s) and I had a lovely walk at one of my favorite parks where I took the above photos. There had been warnings all week that a big snow storm was moving in this Friday, so I wanted to enjoy as much of the gorgeous weather as possible.

I had hoped to finish my Playing with Triangles Shawl in Lion Brand Vanna’s Choice worsted yarn today. It seemed a very good idea to have a warm shawl to wrap up in as the storm is supposed to stay with us until Tuesday. Fortunately the boys have a long weekend off from school, so at least we weren’t going to be driving up and down the mountain in the snow.

Snowy Friday

Friday morning I woke up to sunshine, but it was definitely colder than it had been Thursday morning. By early evening, we had 5 inches of snow. So the boys and I spent the day staying warm inside and watching shows on Netflix. I was crocheting on my shawl.

I had decided to make this shawl as large as my yarn stash would allow. I had 7 balls of the color I had chosen and had worked the body of the shawl for 52 rows using 6 balls and starting into the 7th ball. I was so happy to start on the border because I thought I was nearly finished with the shawl.

Oh No 1

I was rocking along on the border and then I realized that I had a problem with my stitch count. According to my stitch pattern I had a single crochet stitch where the blue dot is, but my single crochet should have ended up where the first red dot is then I would have 3 V-stitches in the chain space where the red arch was with another single crochet in the next red dot.

I ended up counting my stitches and rows again to figure out if I had mis-counted my rows originally. But I had counted the rows correctly. Unfortunately I was on an even row, but I had an un-even number of V-stitches in the first side of my shawl. When working the body of this shawl each row should give you the same number of V-stitches along one side as the number of the row.  So I should have had 52 V-stitches along the side instead of the 53 I had. Somewhere I had added a stitch.

Markers every 10 rows

Now I had to find where I had messed up. I laid the shawl out on the surface of my bed and marked the center point of every 10th row. Then counted the V-stitches to either side until I found where I had messed up. Unfortunately I found it on the 21st row.

Found my goof 1

I had been crocheting along and slipped into working stacked instead of staggered V-stitches, then switched back to staggered. If I had been counting my V-stitches along the sides regularly I might have caught my mistake sooner.  I debated about if I was going to tear-out all the work I had crocheted on the shawl after the mistake. But I knew I would end up doing it.

Ready to begin again

I spent the rest of the afternoon pulling out my work and winding up the yarn. This is a photo of all the rewound yarn and what my work-in-progress looks like now. Maybe I’ll get it finished this weekend while we wait out the snow-storm. You’d better believe I’ll be counting my stitches at least every 10 rows to be sure I haven’t goofed again.

Sometimes even “expert” crocheters need a reminder that counting is important.

Adding a little Bling

As is well known to any of my readers that have been visiting me for a while, I love sparkly stuff. Glitter, beads, yarns with metallic threads; it’s all my favorite stuff. Though I do attempt to be tasteful in my use of those things in my art and crafting I often find it to be an uphill battle.

I’ve been working on some samples of my “Playing with Triangles Shawl” to show all of you. One version I am working on is using some of the gorgeous purple yarn I purchased at the Knit and Crochet Show last summer in San Diego.  I was excited to find some huge hanks of 100% acrylic light fingering weight yarn at the Newton Yarn Country booth. They always have some great deals and this yarn came in a lot of colors.

Newton YC purchases

The color I liked best though was the purple (it’s the one on top, though it looks a bit blue in the photo). It was just the right shade for my favorite baseball team: the Colorado Rockies. I also purchased some grey, white and red with the idea that I would use them in some baseball themed designs. The Rockies colors are purple and silver/gray.

Kreinik Twist label

I wanted to make a really large version of my “Playing with Triangles Shawl” using a fine weight yarn. My idea being to have a generous wrap that was light weight and not too bulky to travel with. But as I was working on it I realized I needed some “bling”. Then I recalled I had some Kreinik “Twist” carry along yarn in Silver color. Perfect!

Carrying along Twist w Yarn

This is a great product for adding some bling to a project because it doesn’t add a lot of bulk or weight to the finished item. It is listed as a “lace” Size 0 yarn on the label and comes in cones of 273 yards. I want to keep this shawl lightweight, so this is the perfect way to get the sort of sparkle I love.  You can purchase this product from the Kreinik website or ask for it at your local yarn shop.

Note though: when working with this product be attentive to your stitches. I was watching shows on Netflix when I started working with this last night and managed to make a bit of a tangle that became an interesting challenge to unravel. Once I got that worked out I made haste more slowly.

PWT Shawl WIP

I finished working 3 rows in the shawl with the silver carry-along thread today and then switched back to working the purple alone. I have this vision of working another large section of purple rows without the silver carry-along, then I’ll add in the carry-along for the last row and border. Will see how I like it when I get to that point though. That is the fun of a top-down project like this: playing with things as you go along.

Maybe bling isn’t your thing, instead you could put a stripe of a complimentary color in your shawl, or even a number of stripes to change up your shawl.

If you have scraps of yarn in the same weight that are colors that harmonize you can use them in a “Playing with Triangles Shawl”. Just alternate colors every couple of rows or start with the smallest ball of yarn and work rows until you run out, then go to the next larger ball of yarn. You may be pleasantly surprised at how your shawl comes out, and you will have put some of those odds-and-ends balls of yarn to use.

P.S. That purple color in the last photo is actually more the purple of the yarn. Still working on my photographic lighting skills. 

Playing with Sharp Objects Again

Brown Sheep Purchases

You saw those 2 big bags of fiber that I purchased from the Brown Sheep Company at the Yarn Fest last weekend. I’ve been having a lot of fun with them practicing my needle-felting skills.

When I took the class in January at TNNA with Jackie Huang he handed out thick felt pads for us to use while working on our projects. He said he had begun using those in his own work because the foam pads broke down too quickly when doing lots of needling to create flat pieces. Also the wool is better for the environment than all the plastics used to make the foam.

When I got home from that trip one of the first things I did was work on making my own felted pad. I started with some wool material that I had left over from felting old sweaters. Then I wrapped odds and ends of wool roving that I had in my stash around the square I had made. Didn’t take long before I had used up all the wool roving. That’s when I got the bright idea of asking the Brown Sheep folks to bring 4 pounds of fiber down for me to purchase at Yarn Fest.

Felted work pads

One of the first things I did when I opened the bag was begin to add to my “pad” and felt it with my Clover 5-needle tool. I’ve gotten my big pad quite firm and filled out now, so I’ve begun to make smaller ones that I can bring to share with students when eventually I start teaching.

The little pads are also great for perfecting my needle-felting techniques. I’ve learnt a lot just working on them and it gave me the courage to tackle something different.

Cookie Cutters

I had heard of using cookie cutters as “molds” for needle-felting, and I dug around in my cookie cutter supplies for a few that I could re-purpose. Every since I had to switch to a gluten-free diet I have not been making many cookies. My cookie cutters are plastic and because the needle might scratch or nick the surface of the plastic, I will not be returning these 5 cutters to my kitchen tools.

Bunny Cookie Cutter

I decided to start with the bunny cookie cutter.

Cutter filled with wool fluff


Cutter needling started

I filled it with wool fluff and using my 3-needle tool to secure it once and a while.

Cutter shaping up

Then I switched to a single needle to work more on getting some shaping in place.

Cutter removed from felt shape

Once I removed the cookie cutter you can see the shape I had.

Flat backside of bunny shape

I carefully removed the shape from my pad and you can see how flat the back is.

Bunny Cookie Cutter Reversed

I then had the brain storm of making a reverse image of the bunny so I could join the 2 pieces together to make a 3D bunny sculpture/toy. Puzzled over this for a moment then had an “Ah-ha!” moment when I realized I could use the cookie cutter from either side since I wasn’t needing to actually cut anything.

I filled and formed the other half of my bunny, then placed the two with flat sides together and carefully used my single needle to join them. I was pleased I managed that without poking myself. Things did get a little involved with adding to the bunny to fill out the shape of the body, head and legs. I also cut the ears away from the body and added some wool to soften the cut area.

Needle Felted Bunny 1

Finally I had a little natural wool bunny.

Needle Felted Bunny 2

Next I wanted to add color to my bunny. So I spread bits of colored wool roving on the surface of the bunny, then needled them to secure them. He still needed a nose and mouth.

Finished Bunny face

I added the nose and mouth, as well as a bit more shaping to his head. I also detailed his eyes more.

Fluffy Bunny bum

Last of all was adding more fluff to his cotton tail.

Though this experiment worked out, I don’t know that I would make another using this same method. But it is all a learning process. I think the cookie cutters would be really good for making 3D images on a flat surface like a pillow or bag.

I’ll keep on experimenting and learning. This is definitely getting addictive. I’ve ordered more needle-felting tools and will be sharing my thoughts on them later this Summer.

YarnFest 2016

I’m a bit late with my week-day post because I’ve been having too much fun the last couple of days. This weekend was the Interweave Yarn Fest and my friend, Mary Beth Temple, was teaching there then came to my house for a visit.  I just said good-bye to Mary Beth this morning so I’m getting caught up on my blog now.

Saturday I drove up to Loveland to check out the Yarn Fest Marketplace. Mary Beth Temple and I were getting together for dinner after the Yarn Fest was closed for the day. But before that it was time to have fun in the Marketplace.  I took this duty very seriously and got straight to work when I walked in the door.

Brown Sheep Purchases

My first stop was at the Brown Sheep Wool Company booth. I had been in touch with them earlier in the week and had asked them to bring down 4 pounds of their mill end fiber for me. I am practicing my needle-felting sculptural skills and that 4 pounds should keep me busy for a while. I also purchased a couple hanks of their super bulky Burly Spun to play with, both for needle-felting and crochet.

IWC Preview show starting

I took all those purchases out to my car and then returned to the show floor to continue my shopping adventure. My dear friend and fellow designer, Brenda Bourg, was there as well. We met-up and walked around the marketplace together. Interweave Crochet magazine was having a preview of the pieces going into the June issue, so we went to watch that.

Brenda's Shoe

Between looking at the various items being shown I notice Brenda’s gorgeous hot pink shoes. I was teasing her that I might be sneaking off with them. Just needed to find an event where she had to take off her shoes.

Meeting Lisa Souza
Lisa Souza and her lovely yarns

I was also excited to meet the talented Lisa Souza at this show. Lisa and I have been friends on the internet for some time, but had never met in person. Her booth was a glorious display of color and texture that was truly drool worthy. Despite my yarn diet I ended up adopting some hanks that were too lovely to abandon.

Lisa Souza Yarns

The 2 larger blue toned hanks will grow up to be a crocheted wrap some day, they are a yummy blend of wool and silk. I’m not sure what the  little purple hank is destined to become. It is an incredibly soft silk/cashmere blend that was really just pure indulgence on my part.

While Brenda and I were exploring we came upon a booth that wasn’t really a yarn craft, but intrigued me greatly. I love making and wearing jewelry.  I want pieces that have some durability, after all I do live on a mountain and have a very active lifestyle.  This booth was all about making jewelry pendants and charms.

Lovely Karen w my pendant

They had jewelry quality glass pieces of various shapes and sizes with trays to turn them into pendants or charms. As a demonstration you could do a make-and-take pendant. One of the ladies there, Karen, helped me turn my logo from my business card into a pendant for a necklace in less than 2 minutes.

Logo Necklace

I’ve always wanted to have a necklace with my logo on it, and now I do.

CraftFantastic Supplies

I was so excited about the products they had I purchased a number of them to make some gifts and experiment with in my art studio.  I will have to share more about my results of working with these materials in another blog post. But if you want to try them out for yourself before then you can visit their website over at: CraftFantastic.com.

Brenda and I took a break about three to sit down for crochet time and chat in some comfy chairs in the lobby. Then she needed to leave to head back home, while I went back to the marketplace. Mary Beth joined me in the marketplace after her class finished up for a few more rounds of shopping.

Recycled Lamb Silk

We stopped by “The Recycled Lamb” booth and talked to the owners. While we were standing there a glowing basket of yarn kept calling my name. I finally succumbed and ended up purchasing one skein of this teal-toned silk, I think it may become a lovely necklace/cowl with beads when I work with it.

Carp Button

The thing I tend to be looking for at events like this are buttons, and my last purchases of the day were 2 beautiful glass buttons from the very talented Jodie McDougall. This carp button is my favorite and I don’t know if I want to use it or just keep it on my desk where I can see it every day. Doesn’t he look like he is really swimming in there?

The Yarn Fest marketplace had a lot more vendors this year than last year and I bet it will be even bigger next year. So you might want to keep an eye on the Interweave website to make plans to come to Yarn Fest 2017. It’s a lot of fun, especially the shopping.

I’ll show you what I’ve been up to with some of that lovely wool fiber this weekend.

Playing with Triangles – Part 2

I am very pleased to announce that I have completed my latest video and it is available on my YouTube Channel.

Click here to go see it: “Playing with Triangles Shawl”

Swatch 1 for PWT shawl

In this video I’m using a rather primitive animation technique. I took photos of almost every stitch I made working the swatch above. Then I edited them together with music and instructional text for this 1 1/2 minute long video.

Take a look and see what you think. The text pattern with photo tutorial is in my first “Playing with Triangles” post.

I’m off tomorrow to visit the Marketplace at the Interweave YarnFest and to spend some time with friends from out of town. I’m going to try to behave myself and not purchase too much yarn. But I do know I’ll be coming home with some loose wool fiber to practice my needle-felting with.

Hope everyone has a fabulous weekend, and gets some crochet time in.