No matter what your crochet skill level it is helpful to understand the anatomy of your stitches. This is especially handy when you are weaving in tails or repairing crochet fabric. It is also very useful when teaching crochet so you can show your students what to look for while working on their projects.
The anatomy of a Chain Stitch
The first stitch most of us learn in crochet is the chain stitch, it is used in many ways in crochet patterns.
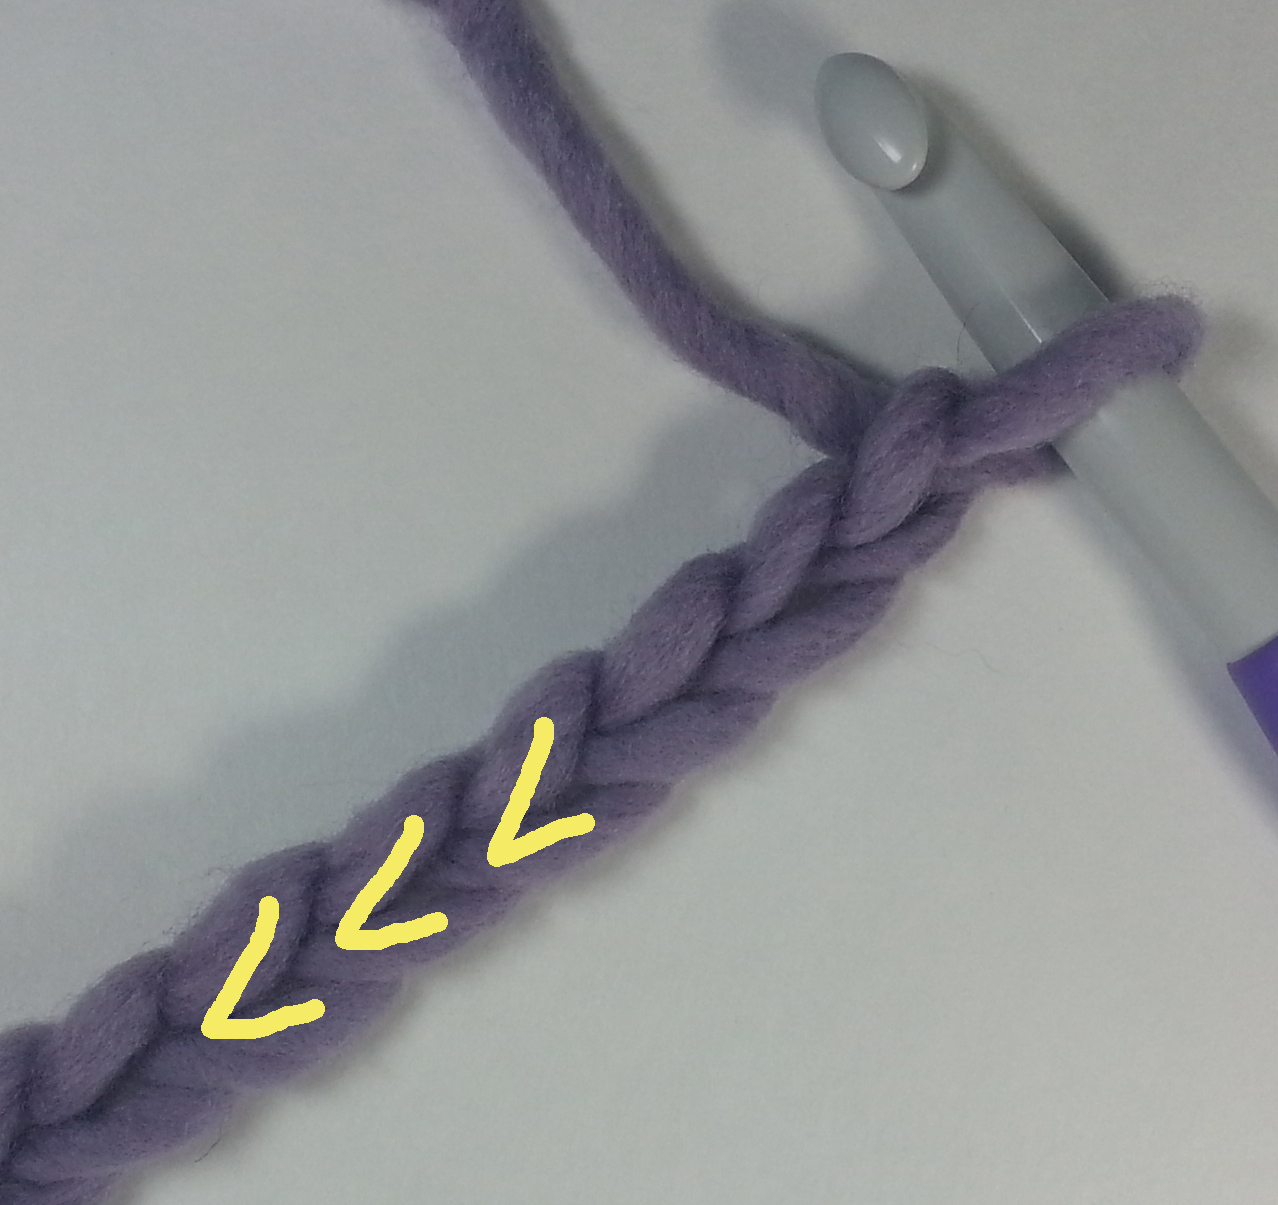
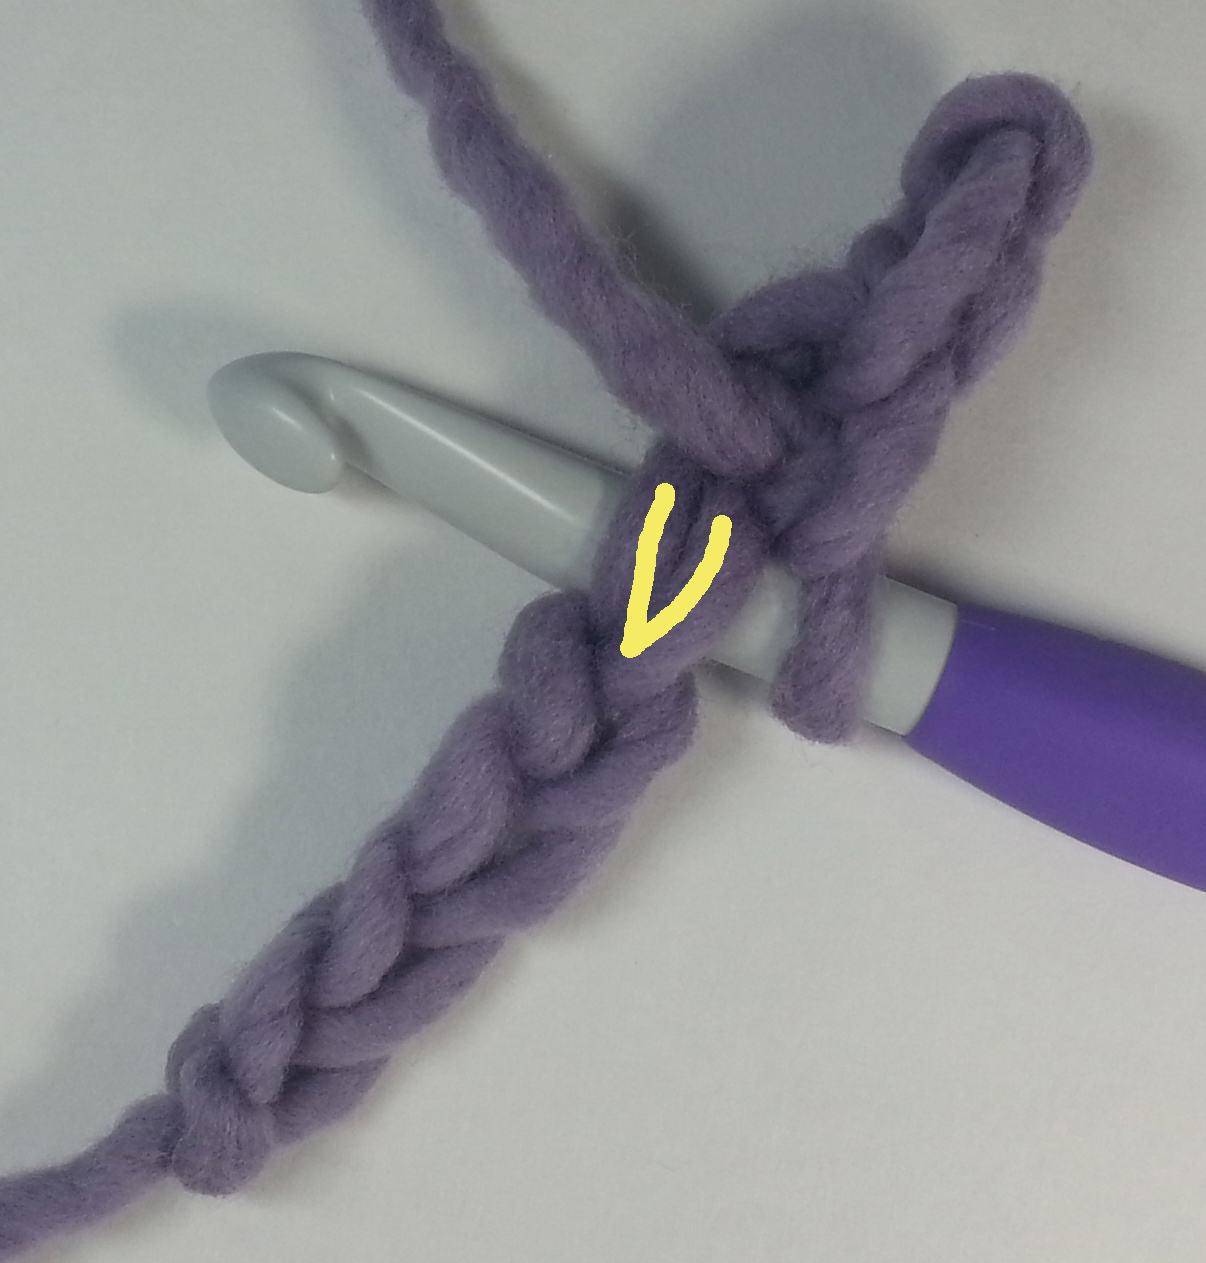
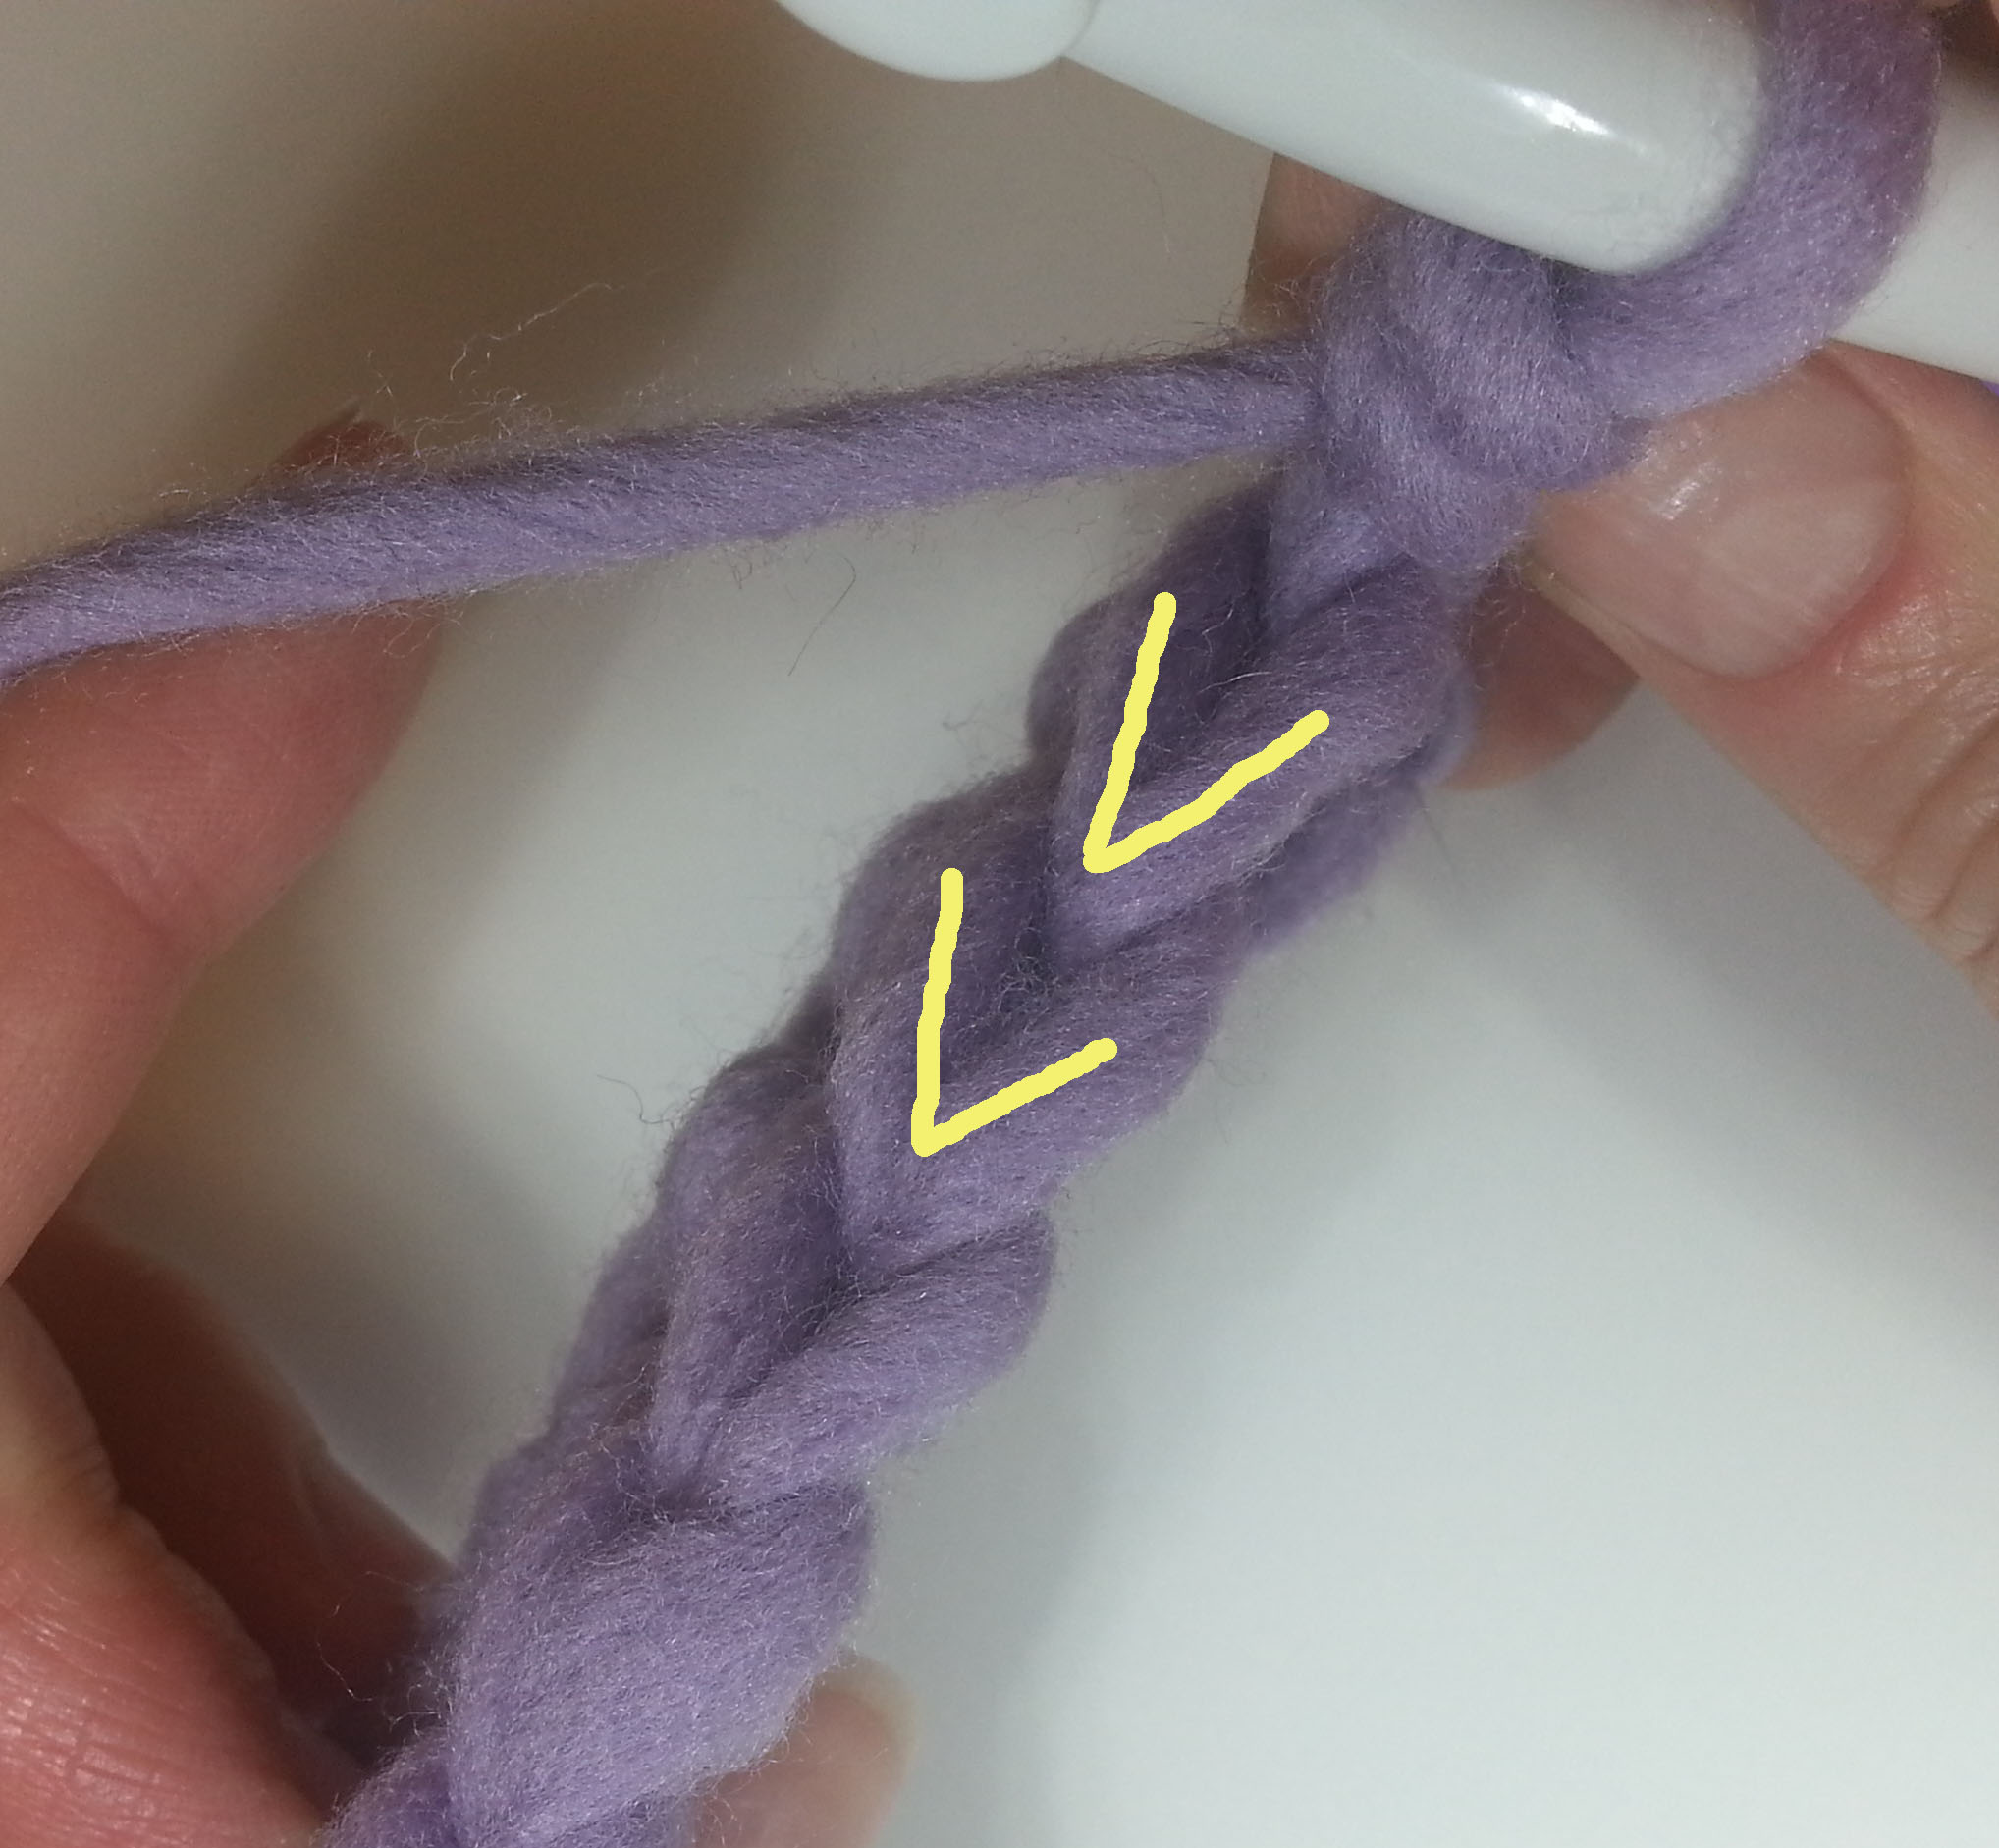
The tops of the stitches are the V that you see in the above photo. They are what the working loop on your hook becomes as you make each stitch.
The chain stitch doesn’t have a “post” or “legs”. There is simply the back “bar” or “bump”. You will see either term used in patterns. It will depend on the publication what terminology they chose. This back bump is formed by the working yarn each time you pull thru a new loop with your hook to make a chain stitch.
The anatomy of a Single Crochet Stitch
![]()
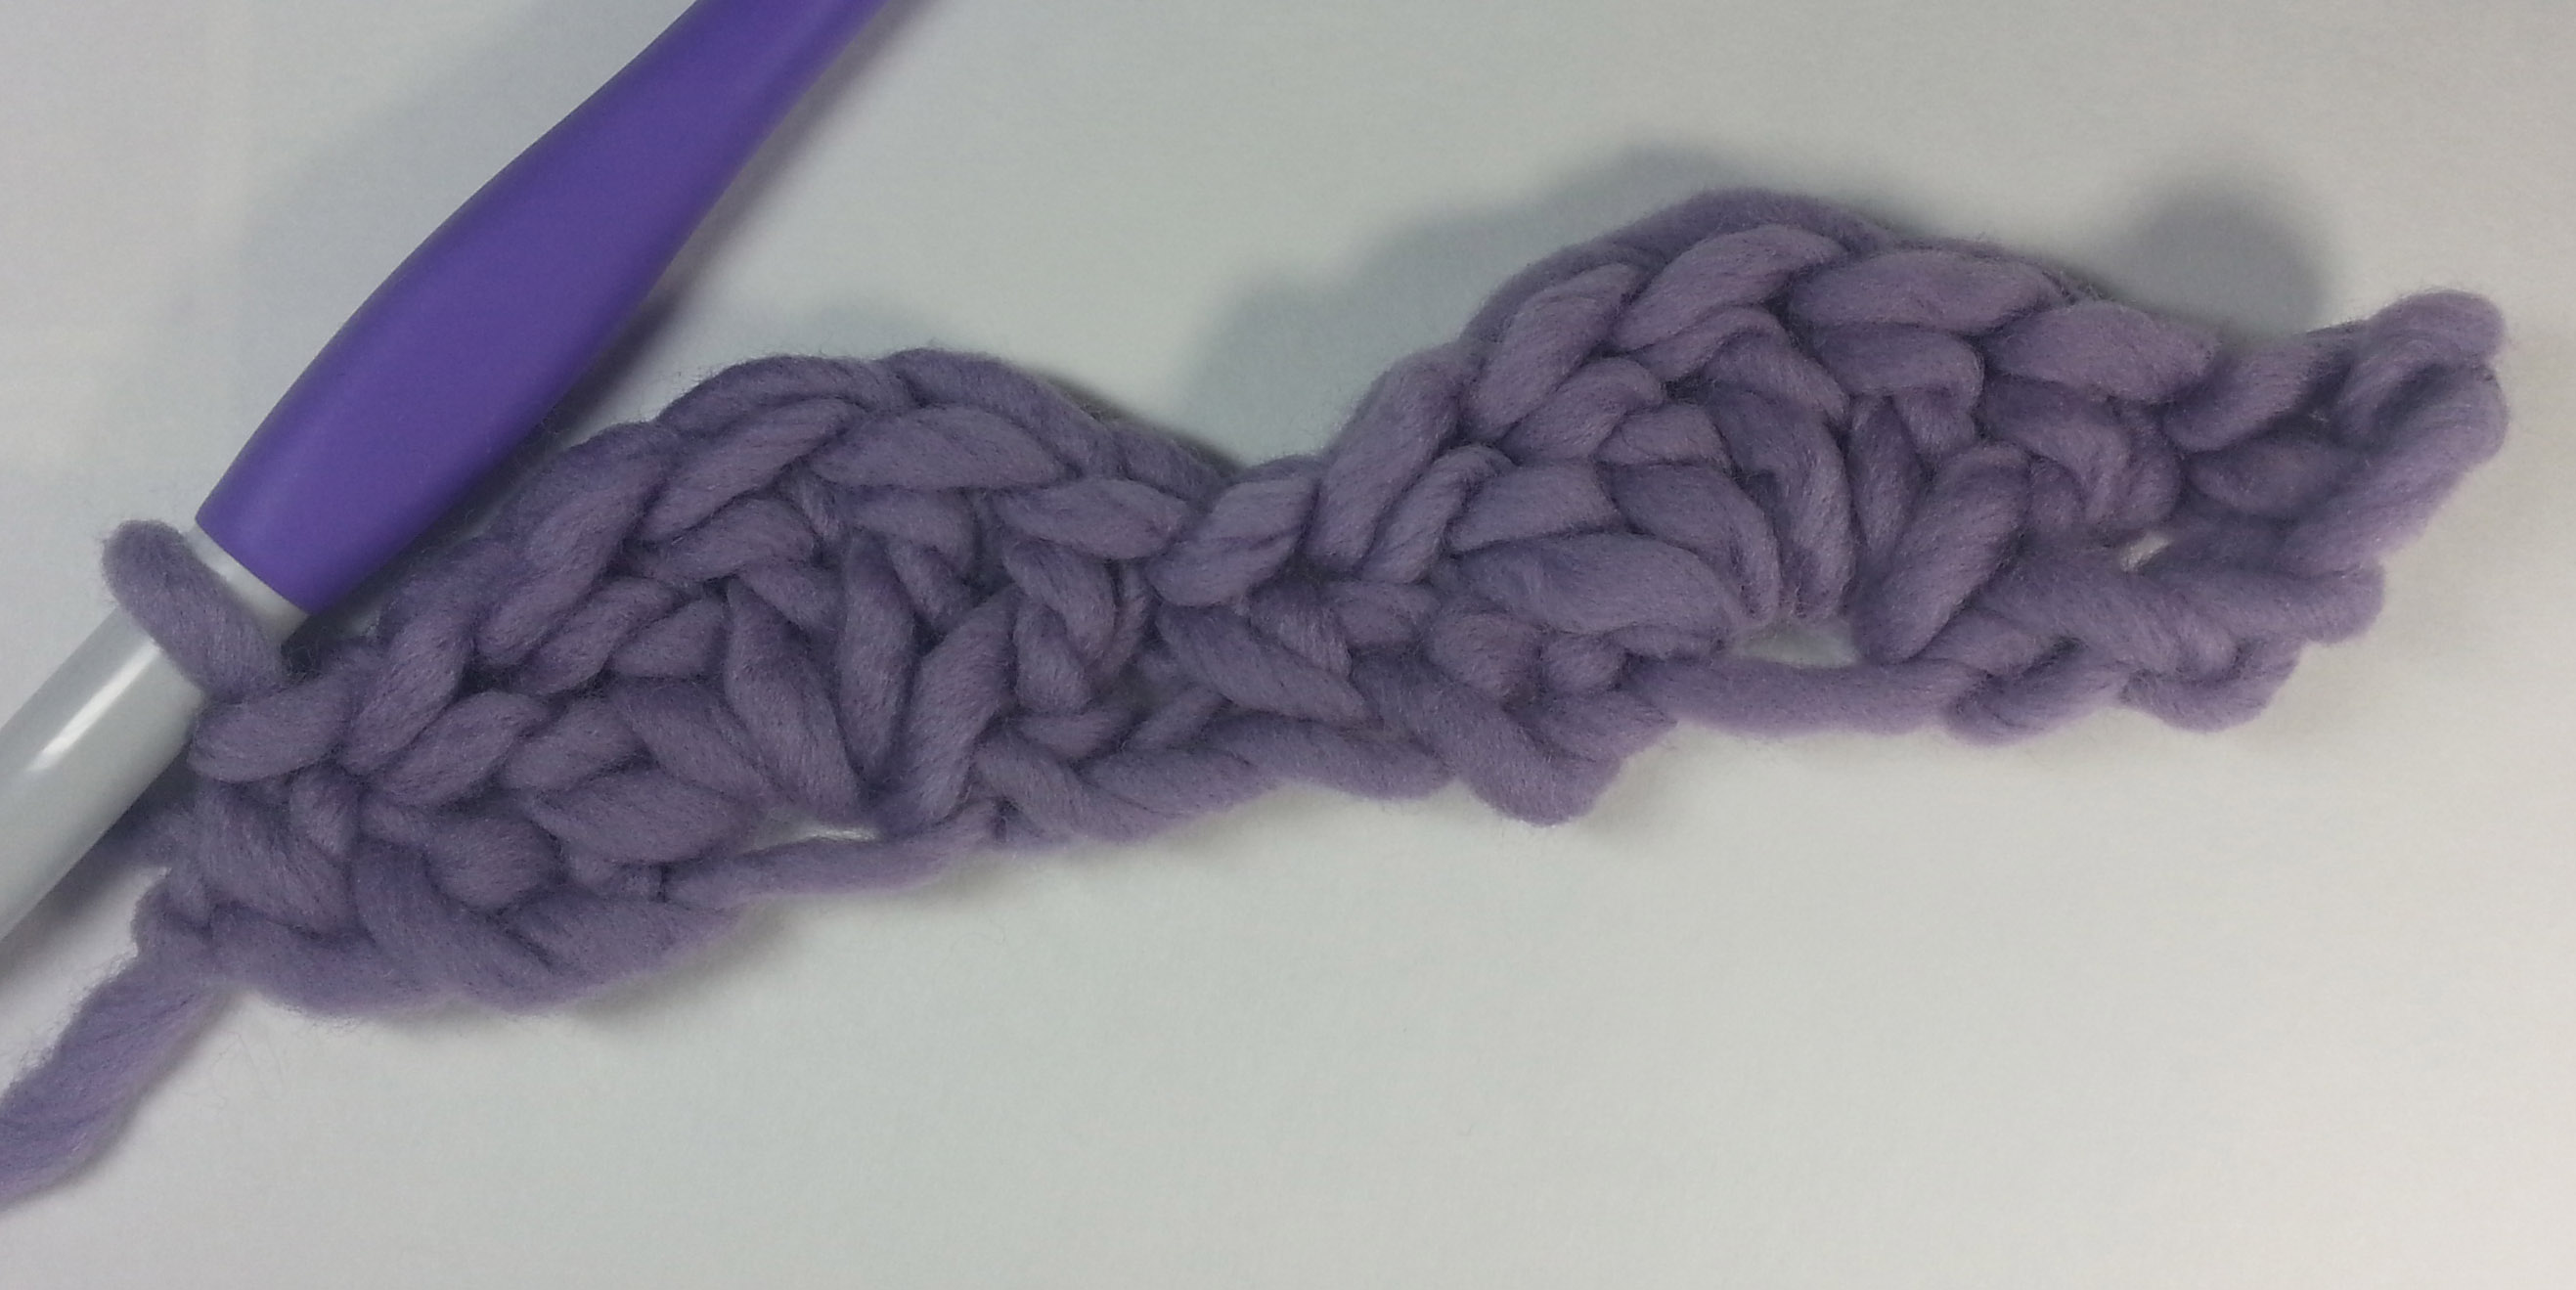
The single crochet stitch is usually the first regular crochet stitch we learn to make after the chain stitch. The instructions for this stitch are: insert hook in stitch, yarn over, pull up a loop, yarn over, pull thru both loops on hook. But where do all those various loops end up?

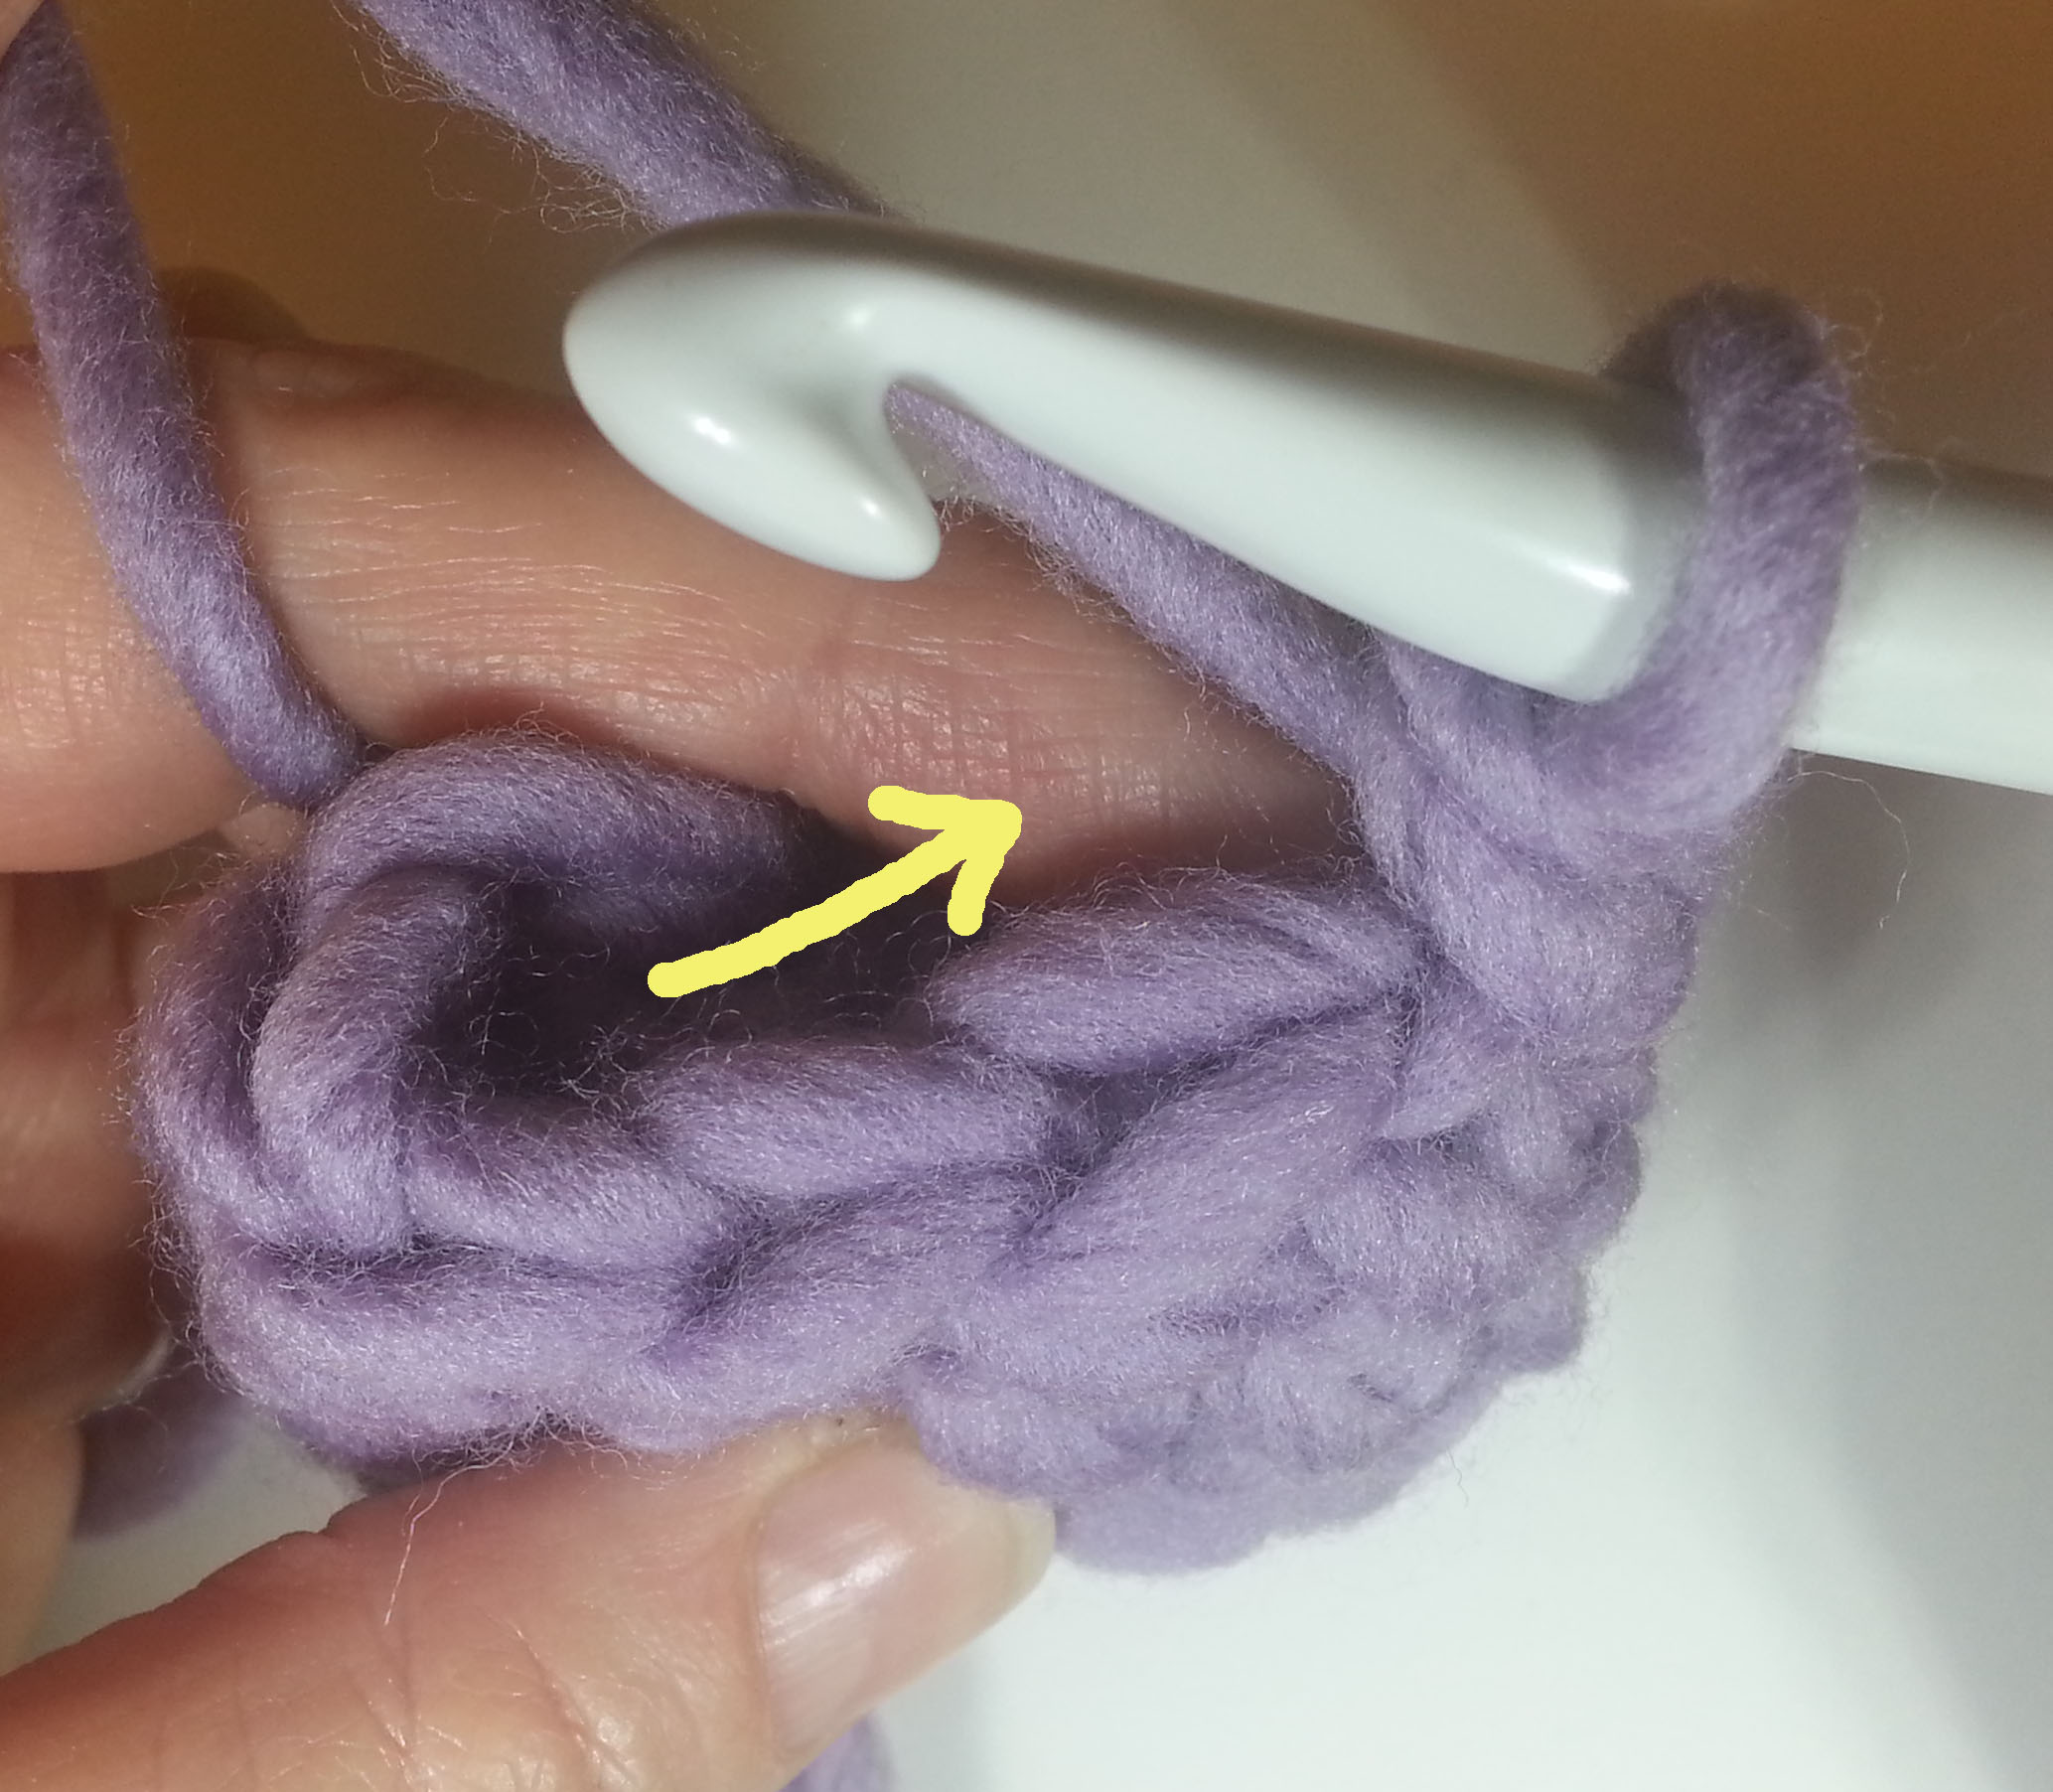
Like with the chain stitch, the working loop on your hook is key. When you finish a stitch you have a working loop of yarn on your hook (yellow arrow pointing to it in above photo). That loop becomes the top of the next stitch you make, no matter what stitch you are crocheting it will still become the top of the stitch.

When looking at your single crochet stitches as you make them (this is the Right Side row) you can see 2 “legs” (vertical yellow lines in above photo), these are the bottom of the loop you pulled up thru the stitch. Looking at the single crochet stitches from the back side (this is the Wrong Side row) you can see the top of that same loop (horizontal yellow lines in above photo) just below the top of the stitch.

If you turn your work over and look at the stitches from the back you can see the path of the working yarn coming into the stitch and out of the stitch (marked with bright pink and arrows in above photo) forming the “post” of the stitch and the new working loop (top of next stitch) on your hook. The aqua and pink line shows the top of the stitch that had been the working loop previously.

The above image shows all the parts of the stitches in 2 rows. The top row is the right-side row being worked and the next row below is the wrong-side row stitches being worked into. Agua lines highlight the tops of stitches, yellow lines show the second loop made for the single crochet stitch, pink lines and arrows show the path of the working yarn and “back legs” of your stitches. If you look closely you can see that the pink back legs are wrapped around the top of the stitches in the third row below.
How do I work into my foundation chain?
Answering and understanding this is one of the most important skills to have in your crochet tool box. The typical start for a crochet project is to chain a length and then work back into the chain. Of course this often leads to the questions about how to work into the chain. Which loop do you work under and how many of them?
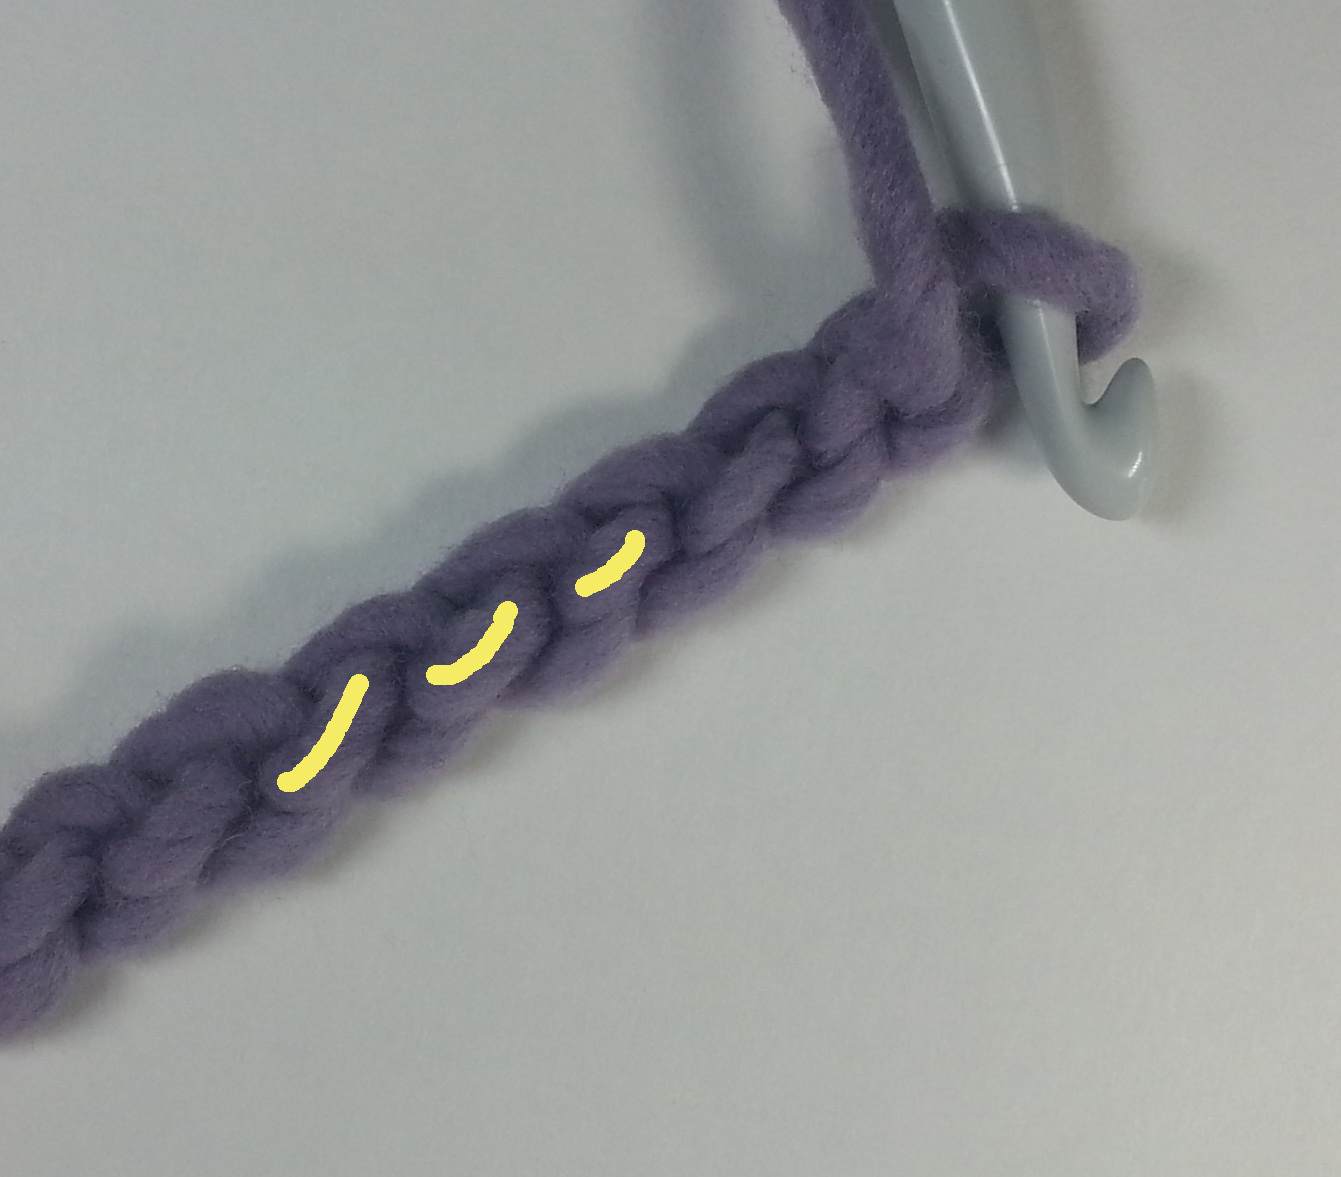
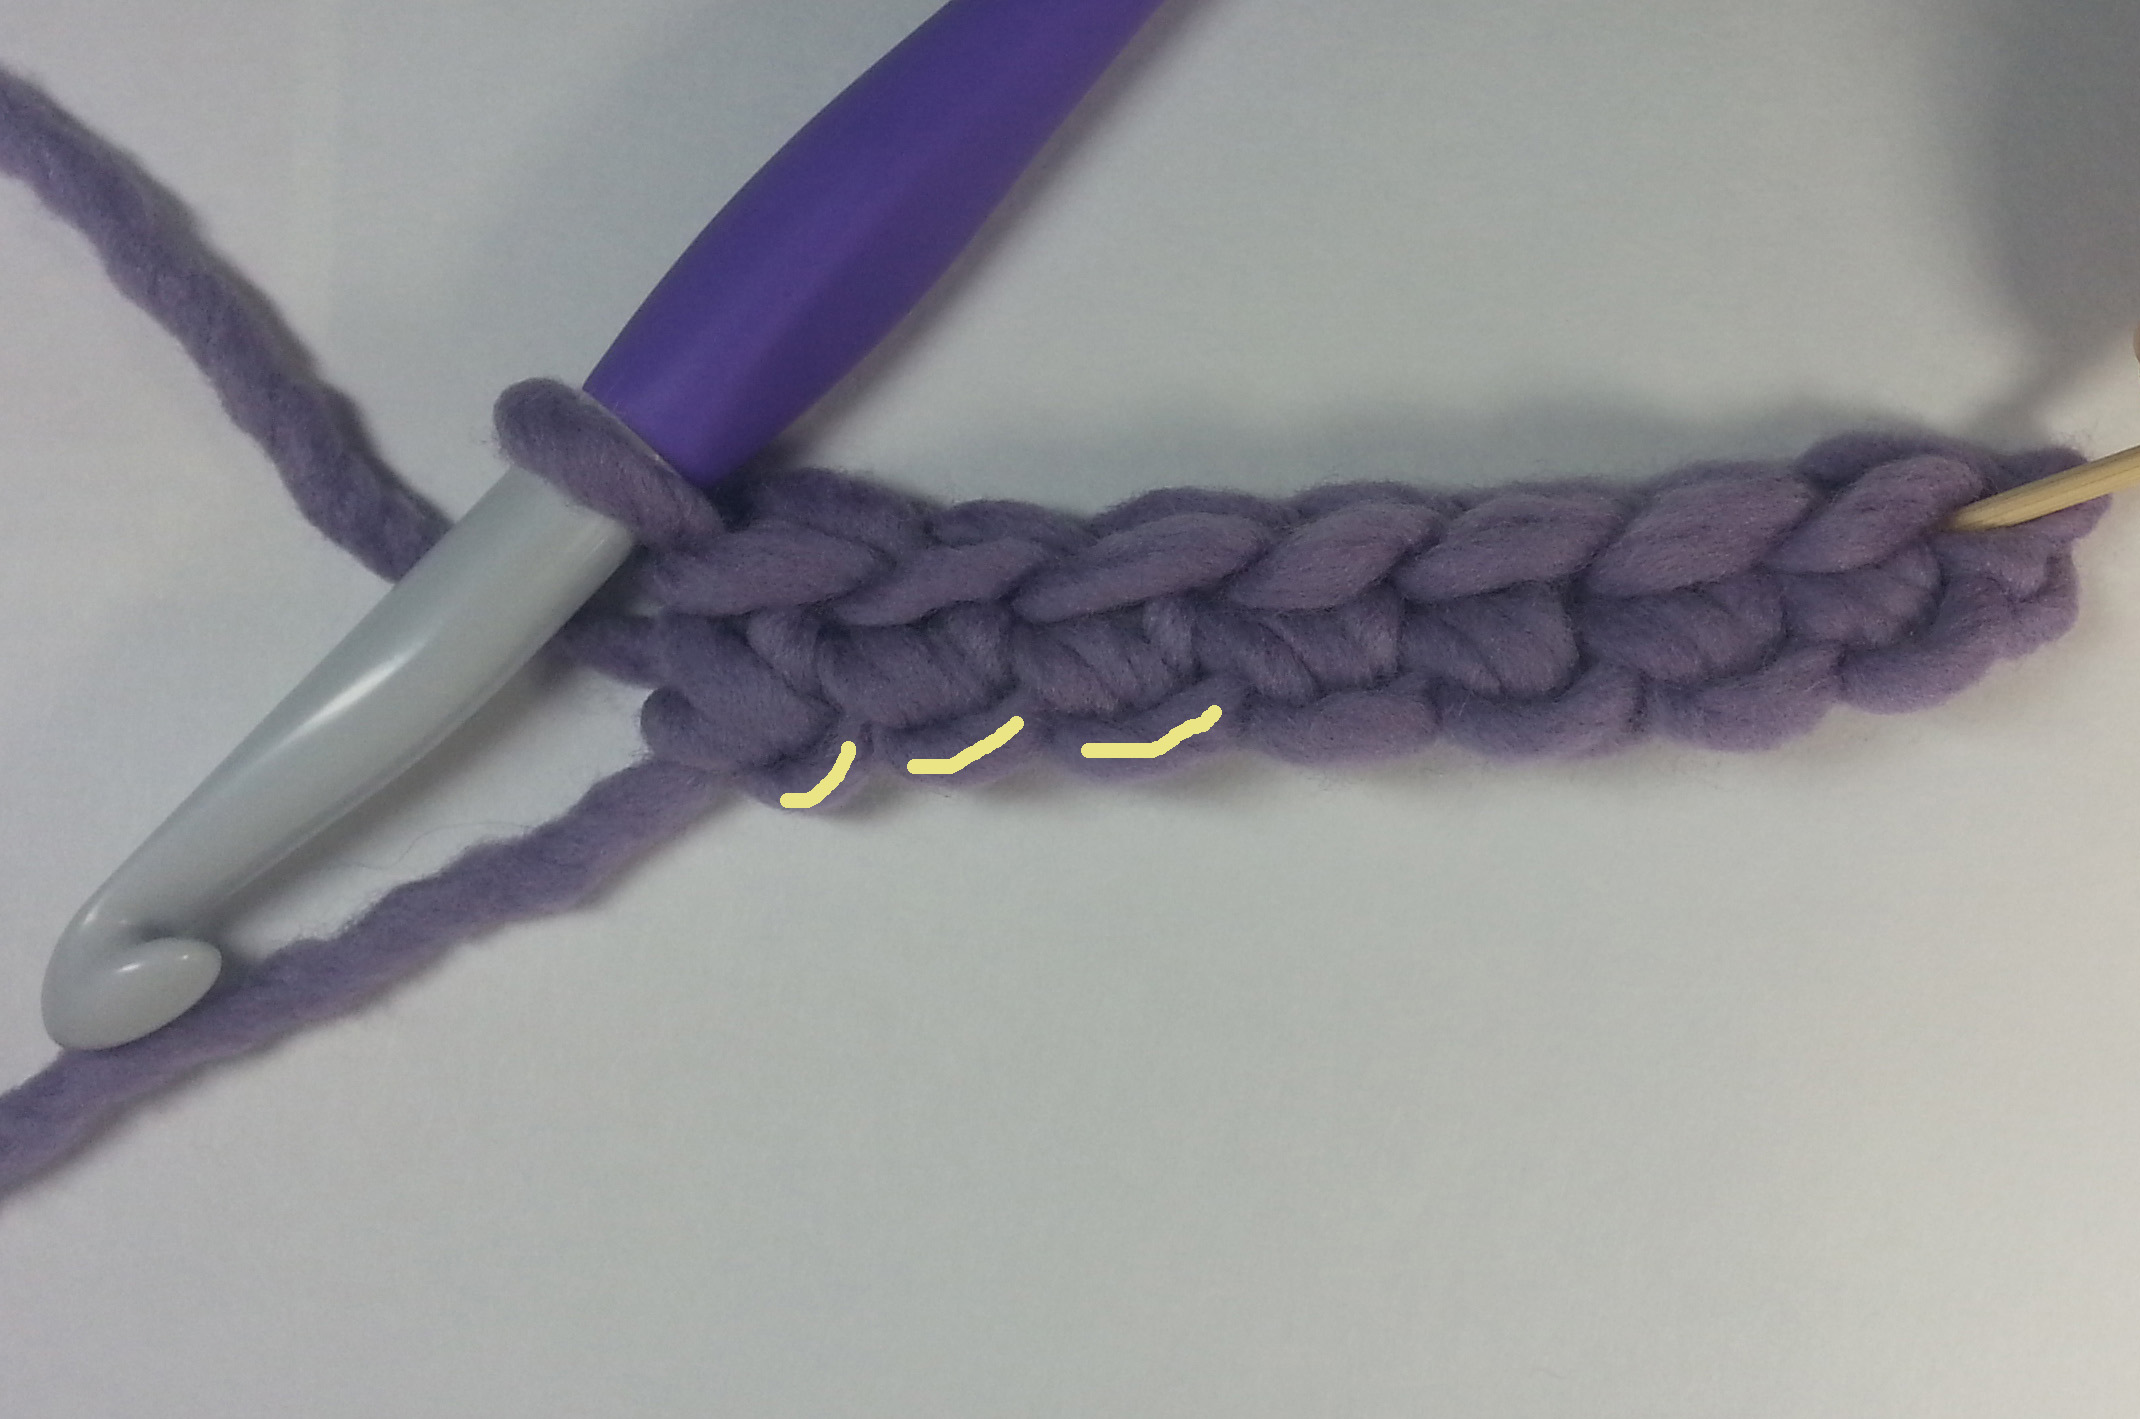
One of the first ways I learned to work into a chain was by going into the center of the V on the top of the chain and catching the back bar and top leg of the V in the stitch being made. This is the more traditional way of working into a foundation chain.
This leaves a single strand at the base of the stitches in your first row. This can work well if you are working pieces of a garment that are going to be seamed together along the base of the foundation rows.

The first row worked into the chain using the traditional method tends to have quite a bit of twist to it before you work additional rows.
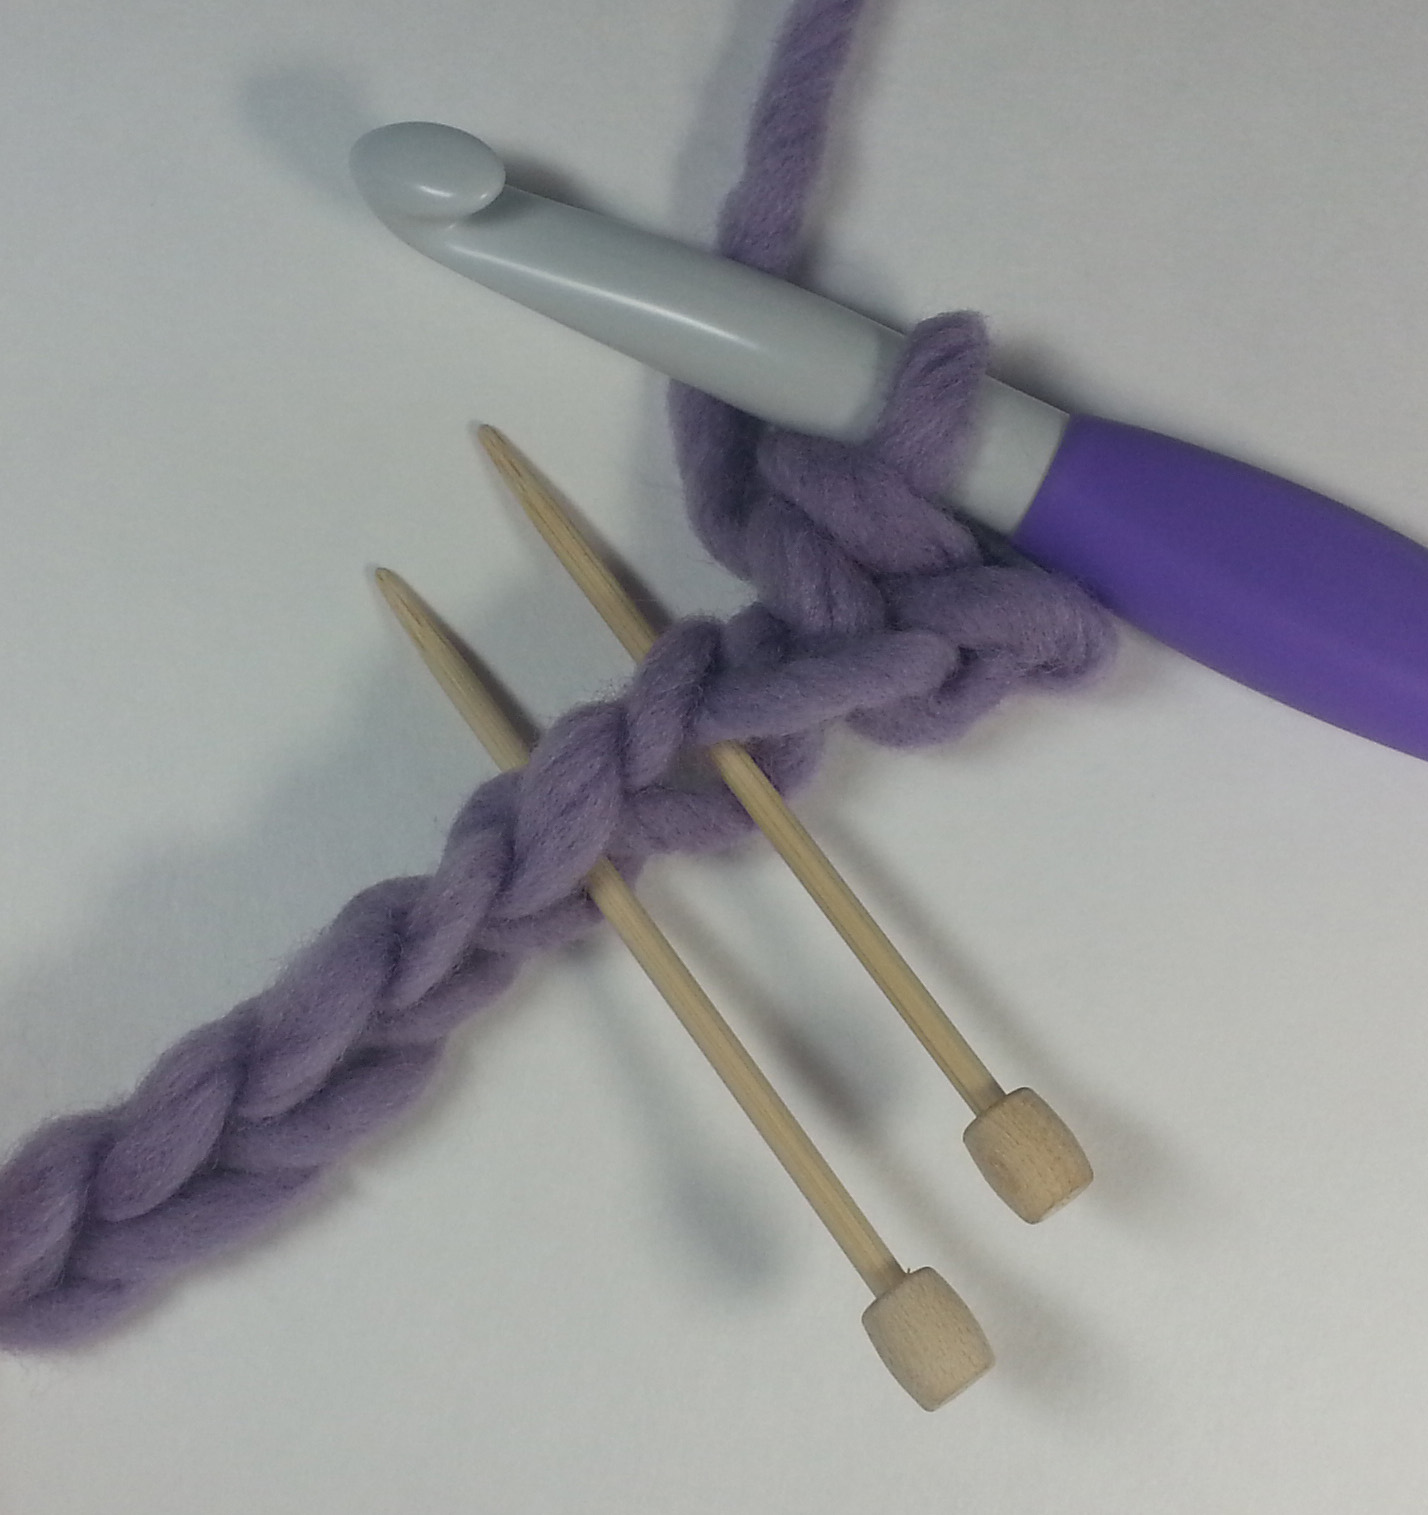
It also is more stable when you are starting a stitch pattern that requires multiple stitches worked into some of the chain stitches of your foundation. For example…shell stitches.
Another option is to work under both legs of the V on each chain stitch. I find this to be the most difficult way to work into the chain. It does give you a very stable foundation and the single strand at the base is free for seaming pieces together along the foundation. Working into a chain using this method is easier with a very loosely crocheted foundation chain.
The finished row will again have single strands at its base, but they will be a bit more centered. This row will have a lot of twist to it like the traditional method of working into a chain.

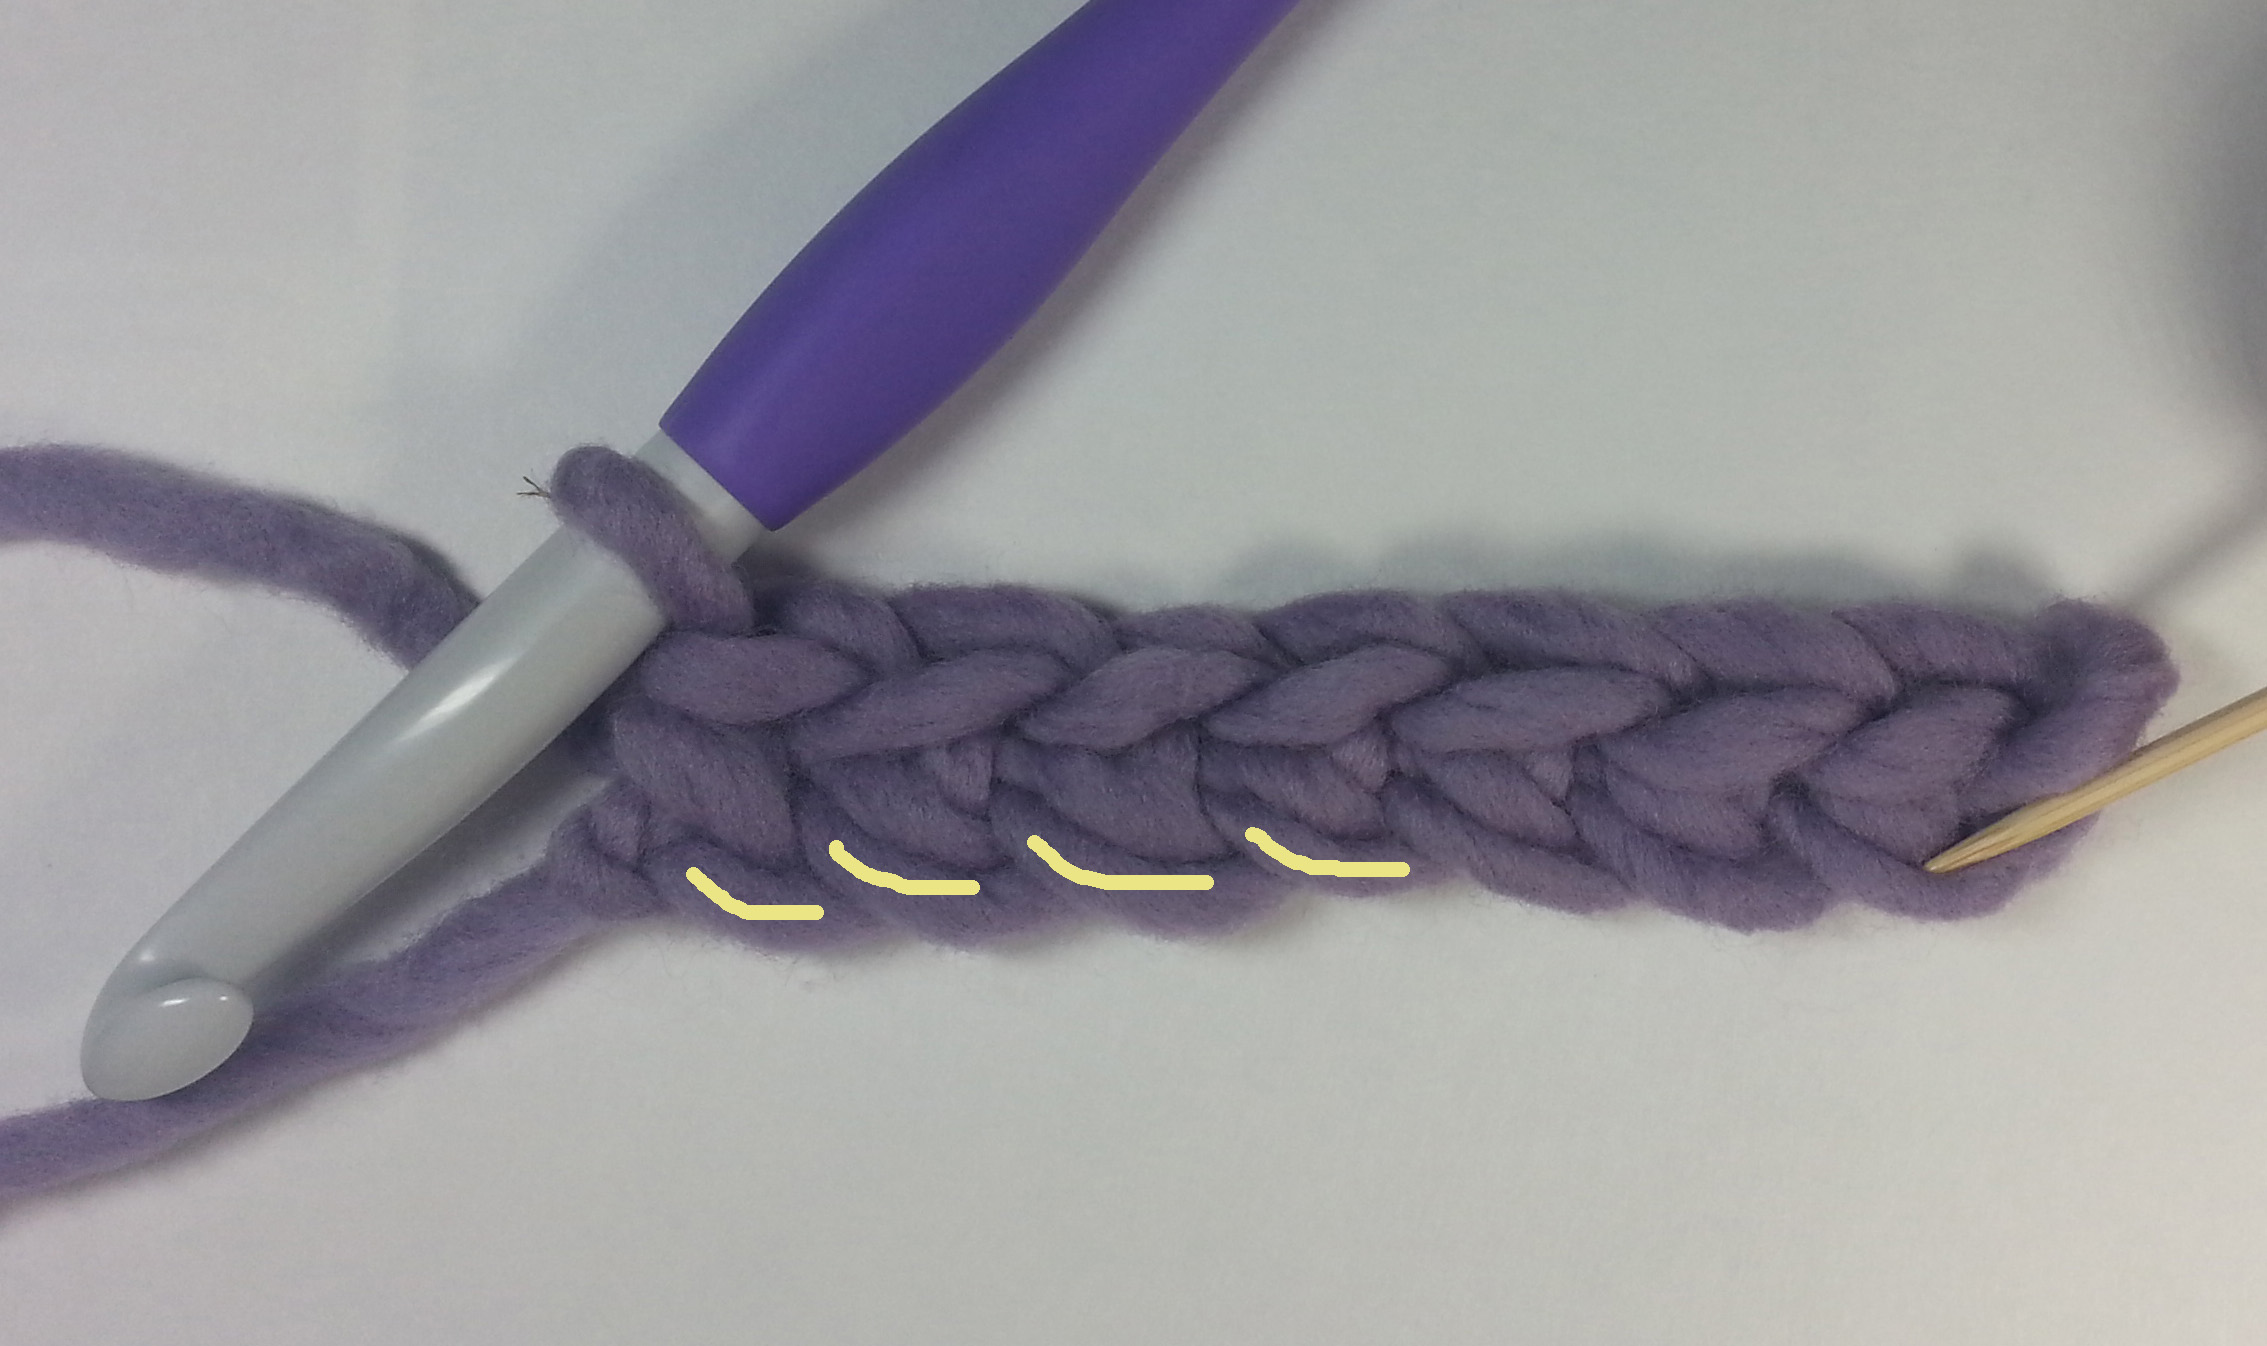
If a pattern doesn’t specify which loop of the chain to use, I tend to use the back bar (or back bump). I like the way the finished foundation looks as it echoes the top of the stitches on the last row of the project. When putting an edging all the way around the finished project I find the base of this foundation easier and neater looking to work into.
Unless a pattern specifies a particular way of working into the chain you can do whatever works best for you. You only need to be consistent for the stitches of your foundation.
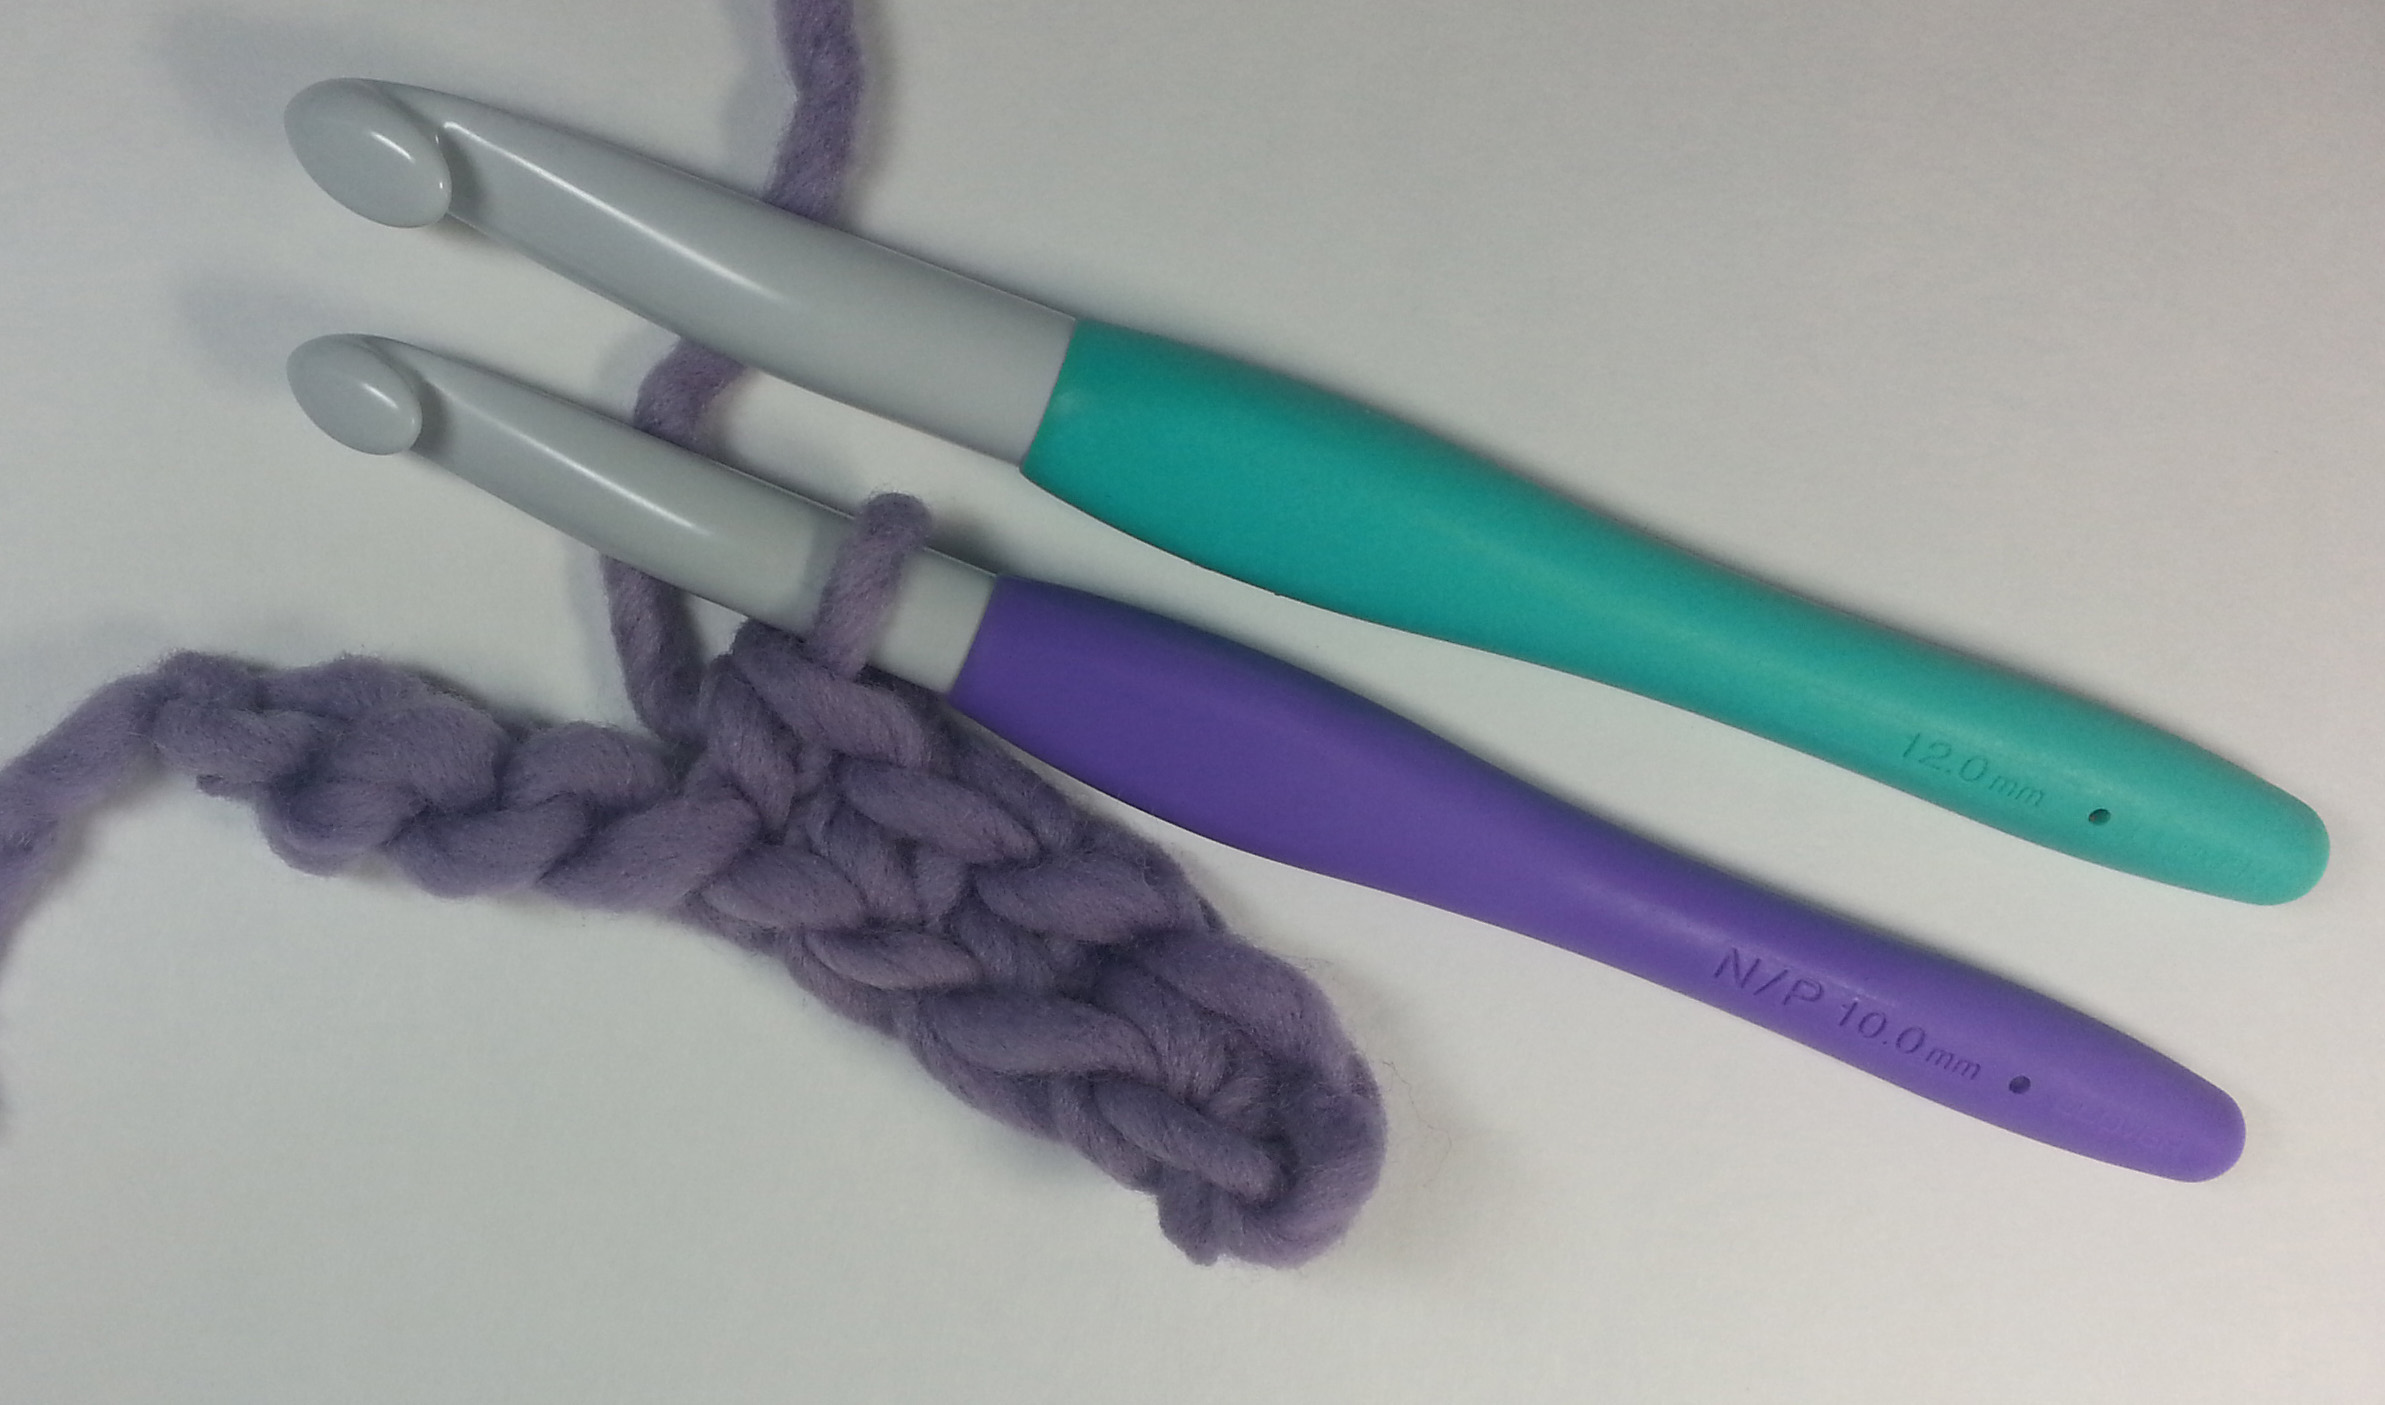
If you find that your chain foundation stitches seem to always be tighter than the rest of your crochet fabric it can help to use a hook one size larger for the foundation chain, then switch down to the next hook size when you are ready to begin your first row of stitches into the chains.
Finding the top of the stitch
Now you have an idea of where to spot the tops of your stitches in a chain, but how do you tell where the top of a regular stitch is?
The simple answer, just like for our chain stitch, the top of the stitch looks like a V. If you stop and hold your work so the Vs appear stacked they are easier to identify. As long as you don’t remove your hook from your working loop you can manipulate your fabric without losing any stitches.
Am I working in the right direction?
Once you can identify the top of your stitch it becomes a lot easier to tell if you are working in the right direction.

If your pattern tells you to turn at the end or beginning of a row, then the Vs of the stitch tops of the row you are working into, should be pointing away from your hook.
If you are working in the round without turning at the end of each round, then the Vs of the stitch tops of the round you are working into, should be pointing at your hook.
Where do I insert my hook in the stitch?

For your standard crochet pattern you are going to insert your hook under the 2 legs of the V in the top of your stitch.

To avoid splitting your yarn look for the little gap on the side of your stitch just under that V.
Some patterns will give you special instructions about where to insert your hook to create different textures in your fabric.

If your pattern instructs you to work in the back loop of your stitch. This is generally referring to the back leg of the Vs after you’ve turned your work to begin your new row.

The same is true for working in the front loop of your stitch. You would be inserting your hook under the front leg of the Vs after you’ve turned your work to begin your new row.
What if you need to work more than one stitch in the same stitch?
This can be tricky when you are new to crochet. Especially once you work the first stitch the V top of the stitch is obscured. My favorite trick involves manipulating the fabric.

If you gently pull up on the stitch just made it becomes easy to see where the base of that stitch goes into the previous row. This hole is where you will insert your hook for your next stitches if the pattern tells you to work multiple stitches into a particular stitch.
Now you have a better understanding of your stitch anatomy time to experiment with some crochet swatches.
Chain 15, then work single crochets back along the chain (using whichever method you like) starting with the second chain from the hook.
Chain 1 and turn to work back along the first row of stitches working a single crochet in each stitch to the end of the row.


If you change colors for each row of single crochet stitches you can see more clearly how the stitches fit together.

