I’m still celebrating NatCroMo, and those of you looking for something pretty to wear this spring will appreciate this little pattern.
I made these earrings over the last couple of weeks. I’ve been having a great time experimenting with Size #10 Crochet Cotton and beads worked over a split ring armature.
As you can see, it’s possible to get really different looks just by altering the size and colors of beads used. Both of the above earrings used the same metallic gold/cream thread, the only change was the beads I’ve chosen. It’s endlessly entertaining making these with the various beads in my stash.
I like the Ball Hook Earwires because I can make a variety of earrings, and use the same wires by interchanging the crocheted part. I purchased these at my local JoAnns Craft and Hobby shop.
Simple Victorian Drop Earrings
Designed by Andee Graves
Stitch Chart for Simple Victorian Drop Earrings
Materials
#10 Crochet Cotton Thread
Hook 1.75 mm & .90mm steel
2 – 20mm Split Rings
10 – glass beads with large enough holes for thread to fit thru doubled
Gauge:
29 single crochet with a chain-2 space should cover the ring fully without being too crowded.
Special Stitches
Beaded Chain Stitch (bdch): Remove hook from working loop, place bead on smaller hook and insert in working loop, slide bead onto working loop, remove smaller hook and replace larger hook in working loop, YO and make chain stitch. Need help with this step check out my blog post “Making a Pendant”
Instructions
Begin by fastening your thread around the ring and placing working loop on larger hook. Need help with this step check out my blog post “Getting Started on a Thread Earring”
Round 1: Ch 1, 23 sc working into the ring, ch 2, 6 sc working into the ring, sl st to first sc of Rnd. (29 sc, 1 ch-2 sp)
Round 2: Ch 1, sk 1 st, sc next 2 sts, *ch 1, bdch, ch 1, sk 2 sts,* sc next st, Repeat from * to *, (dc, ch 1, bdch, ch 1, dc) next st, Repeat from * to *, sc next 2 sts, ch 1, sl st next st.
This coming Monday is March 14th, and you know what that means? Pi Day!
Okay, for those of you that somehow have managed to be reading this blog and have missed it…
I’m a Geek!
I love math and science, plus all the other wonderfully related things. There have been rumors that I am a nerd, but I’m not paying them any notice. My favorite math, and one that I use frequently in my design work, is Geometry. That takes us back to Pi.
Pi = 3.14 and that makes March 14, a date that can be written 3.14, Pi Day. See, you knew I’d get to the point eventually.
Pi in lay terms is the number that allows us to compute the circumference of a circle. Actually it is much more than that, but that gets you in the general vicinity. It is a handy concept to understand, especially if you are making hats.
Perfect Fit Crocheted Hat
I’ve talked a lot about using Pi in sizing hats, in fact my “Perfect Fit Crocheted Hat” pattern/lesson has a lot of information about using Pi to determine the size of hat you can make. The sizing in that pattern is very flexible because once you master the method, you can use any size yarn with the appropriately matching hook to create a hat that fits perfectly.
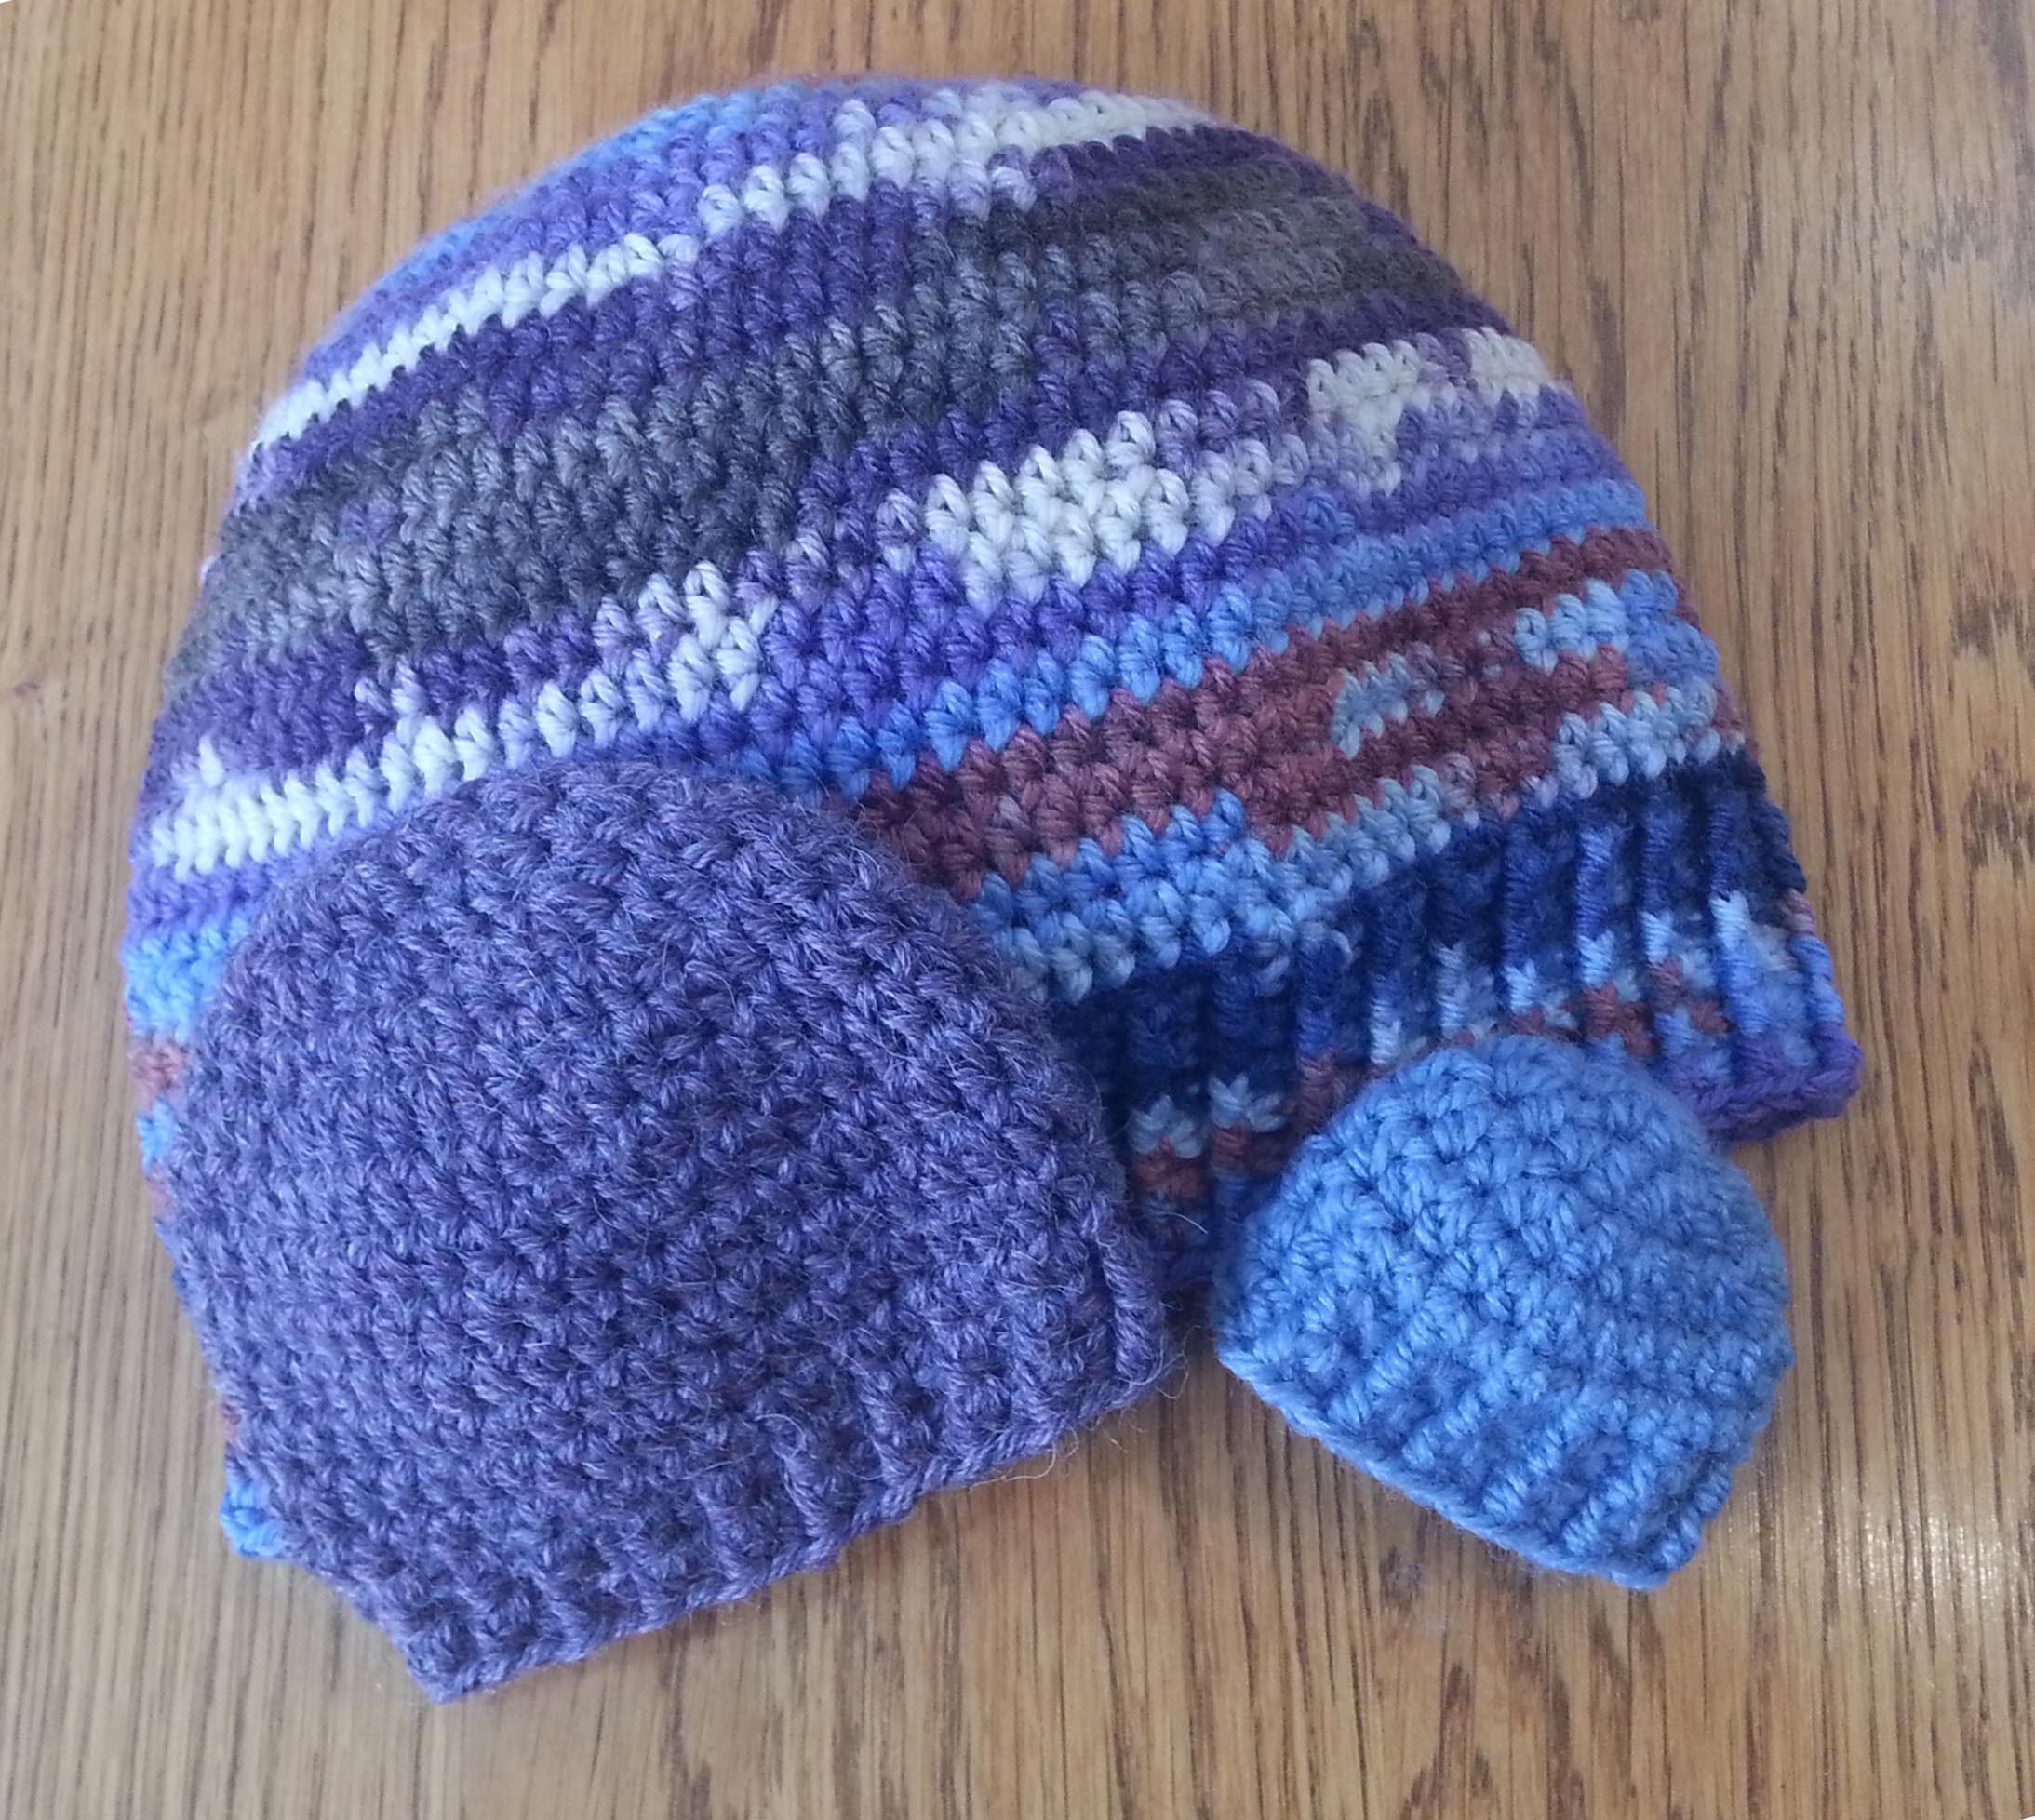
Of course, since I’m in a mood for celebrating Pi, it seems only appropriate to introduce you all to my latest hat pattern: “Spiraling Crosses Hat”. I designed it in Tahki Stacy Charles “Mesa” yarn, a lovely squishy thick/thin aran-weight superwash wool that is dyed in long gradual color changes. This hat design is perfect for spring-time transitional weather. The stitch pattern has a bit of laciness to it and lots of stretch. The warmth of the wool is there to chase off a chill and the laciness allows your scalp to breathe.
As part of my celebration of Pi-Day this hat pattern is available to you dear readers at a 10% discount until almost Midnight (11:59 p.m. Mountain Time) Monday, March 14, 2016. Just use the coupon code PiDayHat16 when purchasing it in my Ravelry Shop.
Speaking of Ravelry, have you joined the fun at the month long party for crochet? Check out the forum for celebrating NatCroMo. You can even join in the Hat CAL with any hat pattern you so desire. Like maybe a Perfect Fit or Spiraling Crosses Hat?
“Time is the raw material of creation. Wipe away the magic and myth of creating and all that remains is work: the work of becoming expert through study and practice, the work of finding solutions to problems and problems with those solutions, the work of trial and error, the work of thinking and perfecting, the work of creating.”
In many ways time is what you are paying for when you purchase a crochet (or knit) pattern from a designer. Not just the time that the designer put into that particular design, but the hours and days of experimenting and perfecting their craft so they could create a pattern that would be clear and concise.
I crochet a lot. I have my crochet with me wherever I can take it, and if I don’t have my crochet with me, I have a notebook that I write down ideas for crochet designs in. A lot of my crochet time is experimenting with ideas in how to make an increase or decrease in a specific stitch pattern, or how to construct a garment that takes advantage of the nature of crochet fabric and stitches.
This means that I also spend a great deal of that time frogging my work or making notes on why something didn’t work. It can be quite surprising the things that work in ways that I hadn’t expected. I’m reminded of how some drug companies research for a medication to treat one condition, but then discover that it is great for treating some other condition.
Ruffled Wedding Bag photo courtesy Red Heart North America
One of the ideas I had a few years back was for an embellishment on a sweater. The fabric was too dense and fussy for me though. Instead it morphed into a design idea for a bag that I sold to Red Heart. Ruffled Wedding Bag, you can get the pattern for free at the Red Heart Website.
This turned out to be one of my favorite designs so far that I’ve created using Red Heart’s “Sassy Lace“. They also have a “Sassy Fabric” yarn that comes in a variety of colors and prints giving you loads of options for making this little bag. I’m thinking that a fun version could be made in the Teal Chevron “Sassy Fabric” with either Iced Aqua or White “With Love” as the bag color. Would make a great gift bag for mother’s day.
I had planned on this post being something different. But time got away from me this past week. My entire family came down with a stomach bug. I was so ill on Sunday that I couldn’t do anything but read online and sleep. Of course, that is how I came across the article I quoted above. So there is always a silver lining.
Everyone is on the mend now and I hope to have a new pattern (maybe more than one) to show you this weekend.
One of the things that I have always felt challenged by when crocheting is adding in new yarn when I reach the end of my working ball of yarn. After years of fiddling with it I have picked my favorite way to join new yarn, and I’m going to show it to you today.
Many folks will tell you to only join yarn at the end or beginning of a row of stitches. That is great advice and often times you can get it to work out. But if you are frugal like myself, you want to use every inch of yarn you can in the project and having excessively long tails left over can be frustrating. Not to mention that you can end up running short of yarn at the end of your project.
The method of joining I like does take a little finessing. My mom would say, “You have to hold your mouth just right.” Basically I join the yarn thru a stitch.
This works especially well if you are joining the same color yarn in the middle of a row. I generally want to pick a stitch that has a regular stitch before and after it, instead of a chain stitch. This gives me a good spot to weave in the tails afterward. Of course sometimes you don’t have that that option because your stitch pattern is lacy with a lot of chain spaces. If that is the case try to pick a spot that has a good place to weave in ends. You want to approach the problem a bit strategically.
When I am looking at how I’ll weave in my ends I think about how I want my fabric to move. If I’m making a bag or sculptural piece with solid dense stitches, fabric movement isn’t all that vital. But if I am making a hat or fingerless mitts I don’t want to restrict the stretch of my fabric. For garments I think about how the fabric will move with the body.
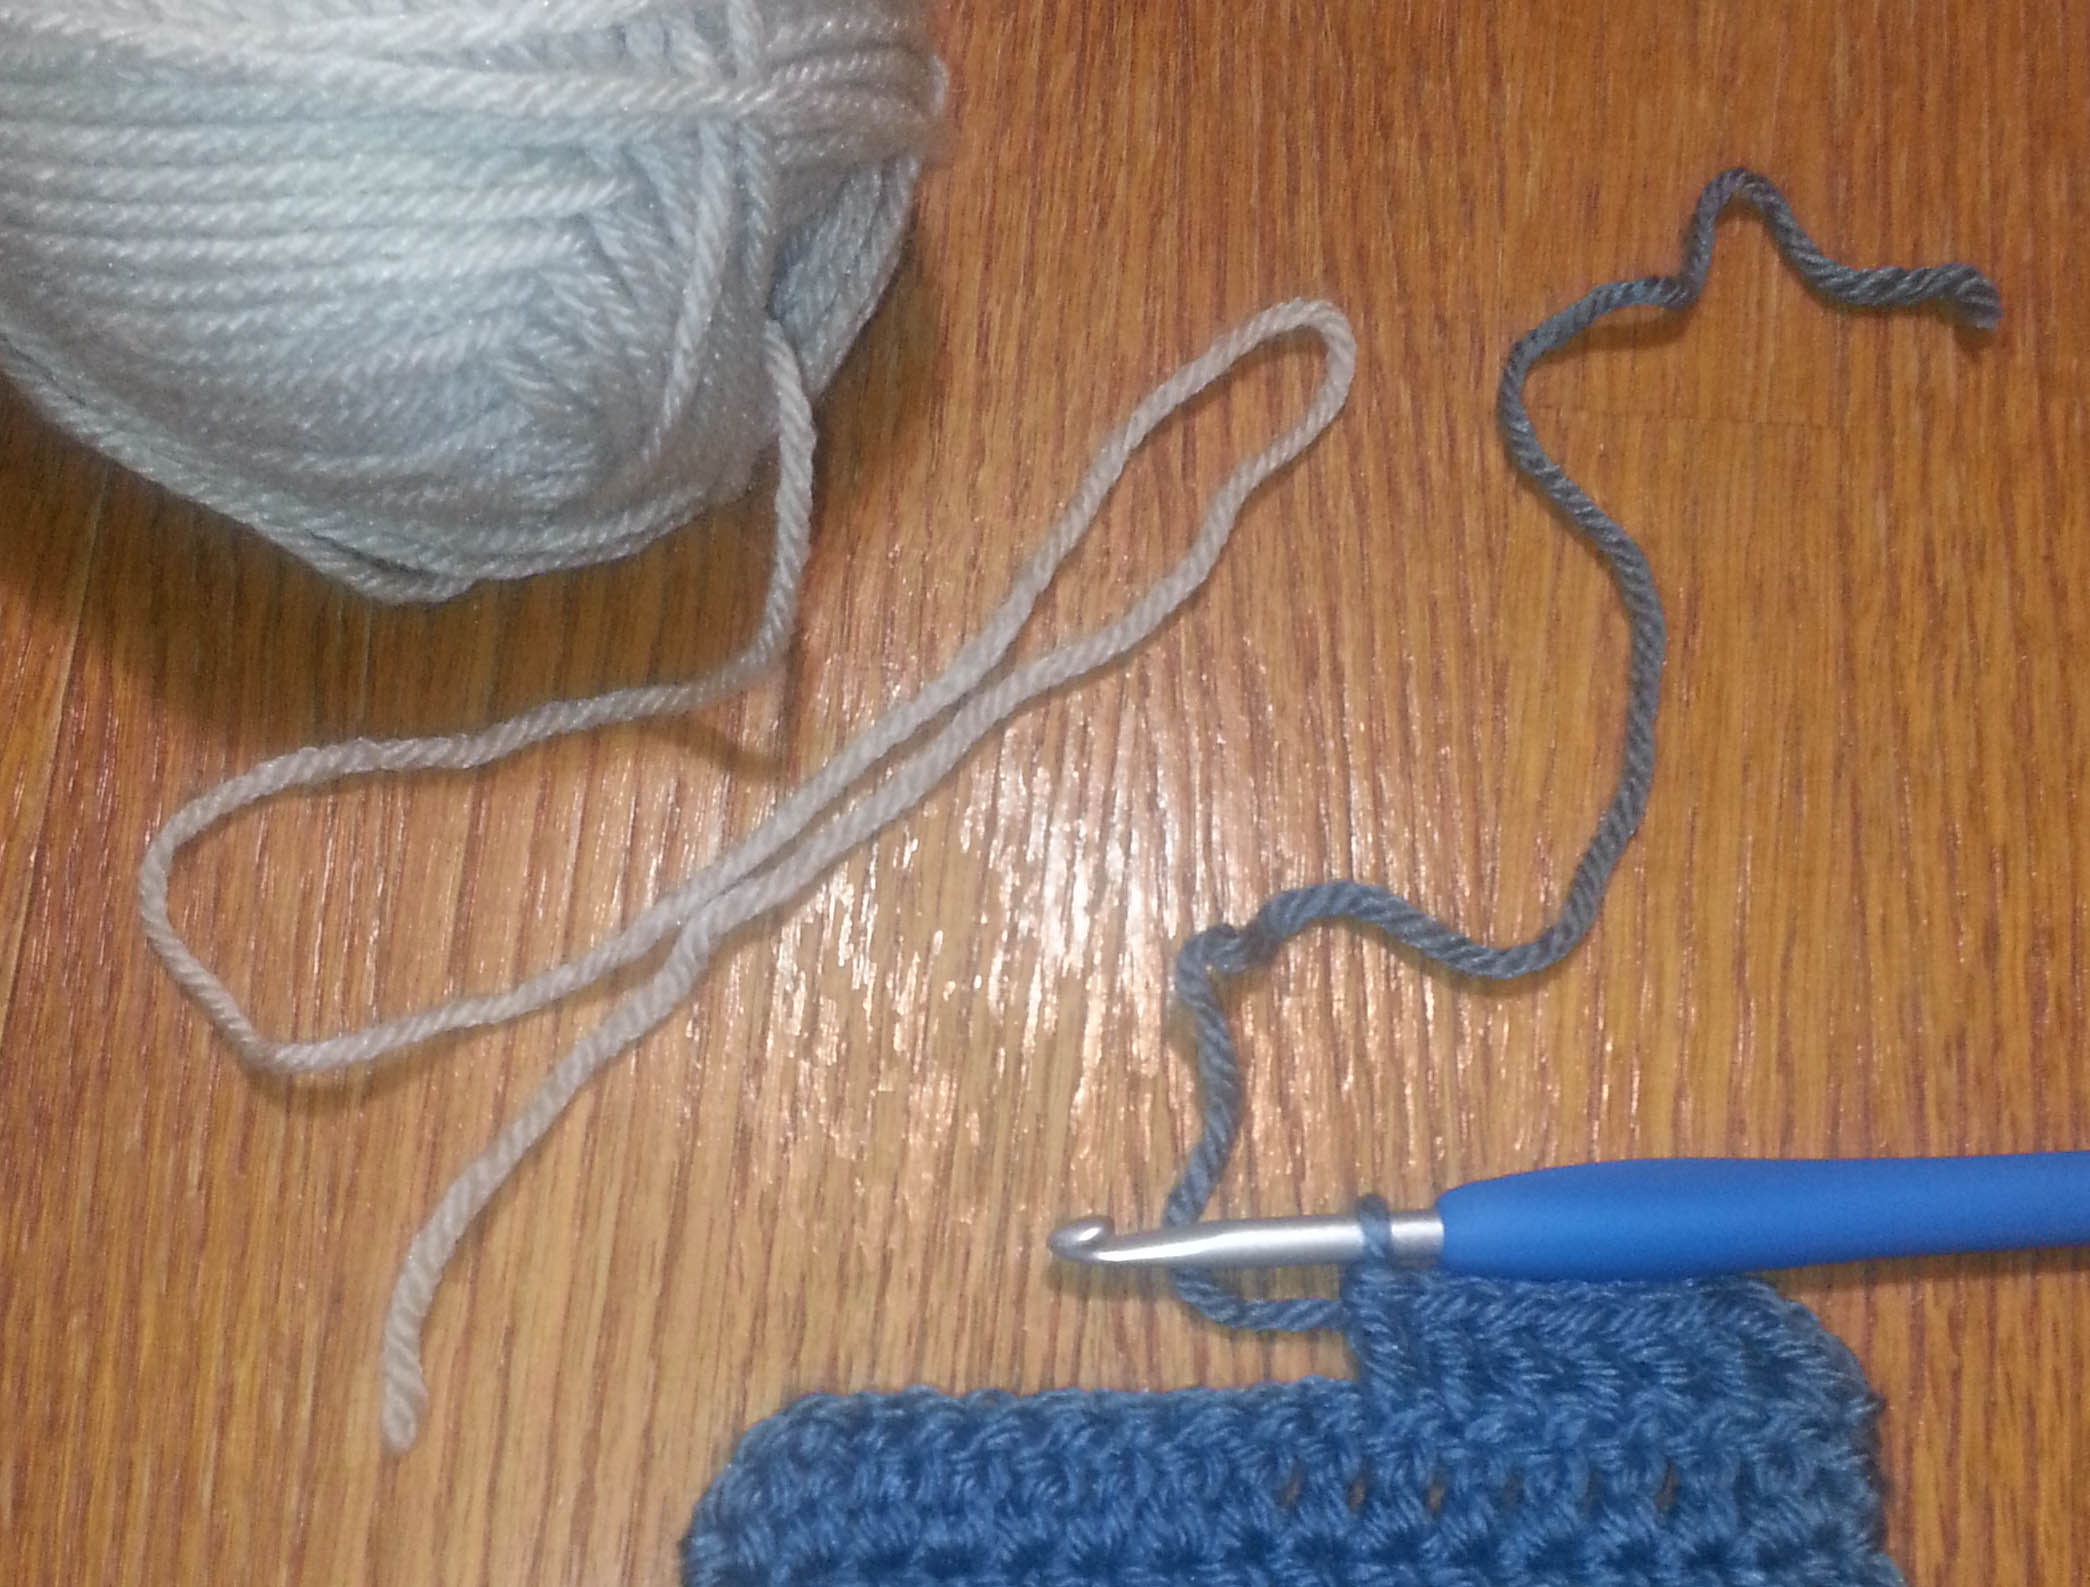
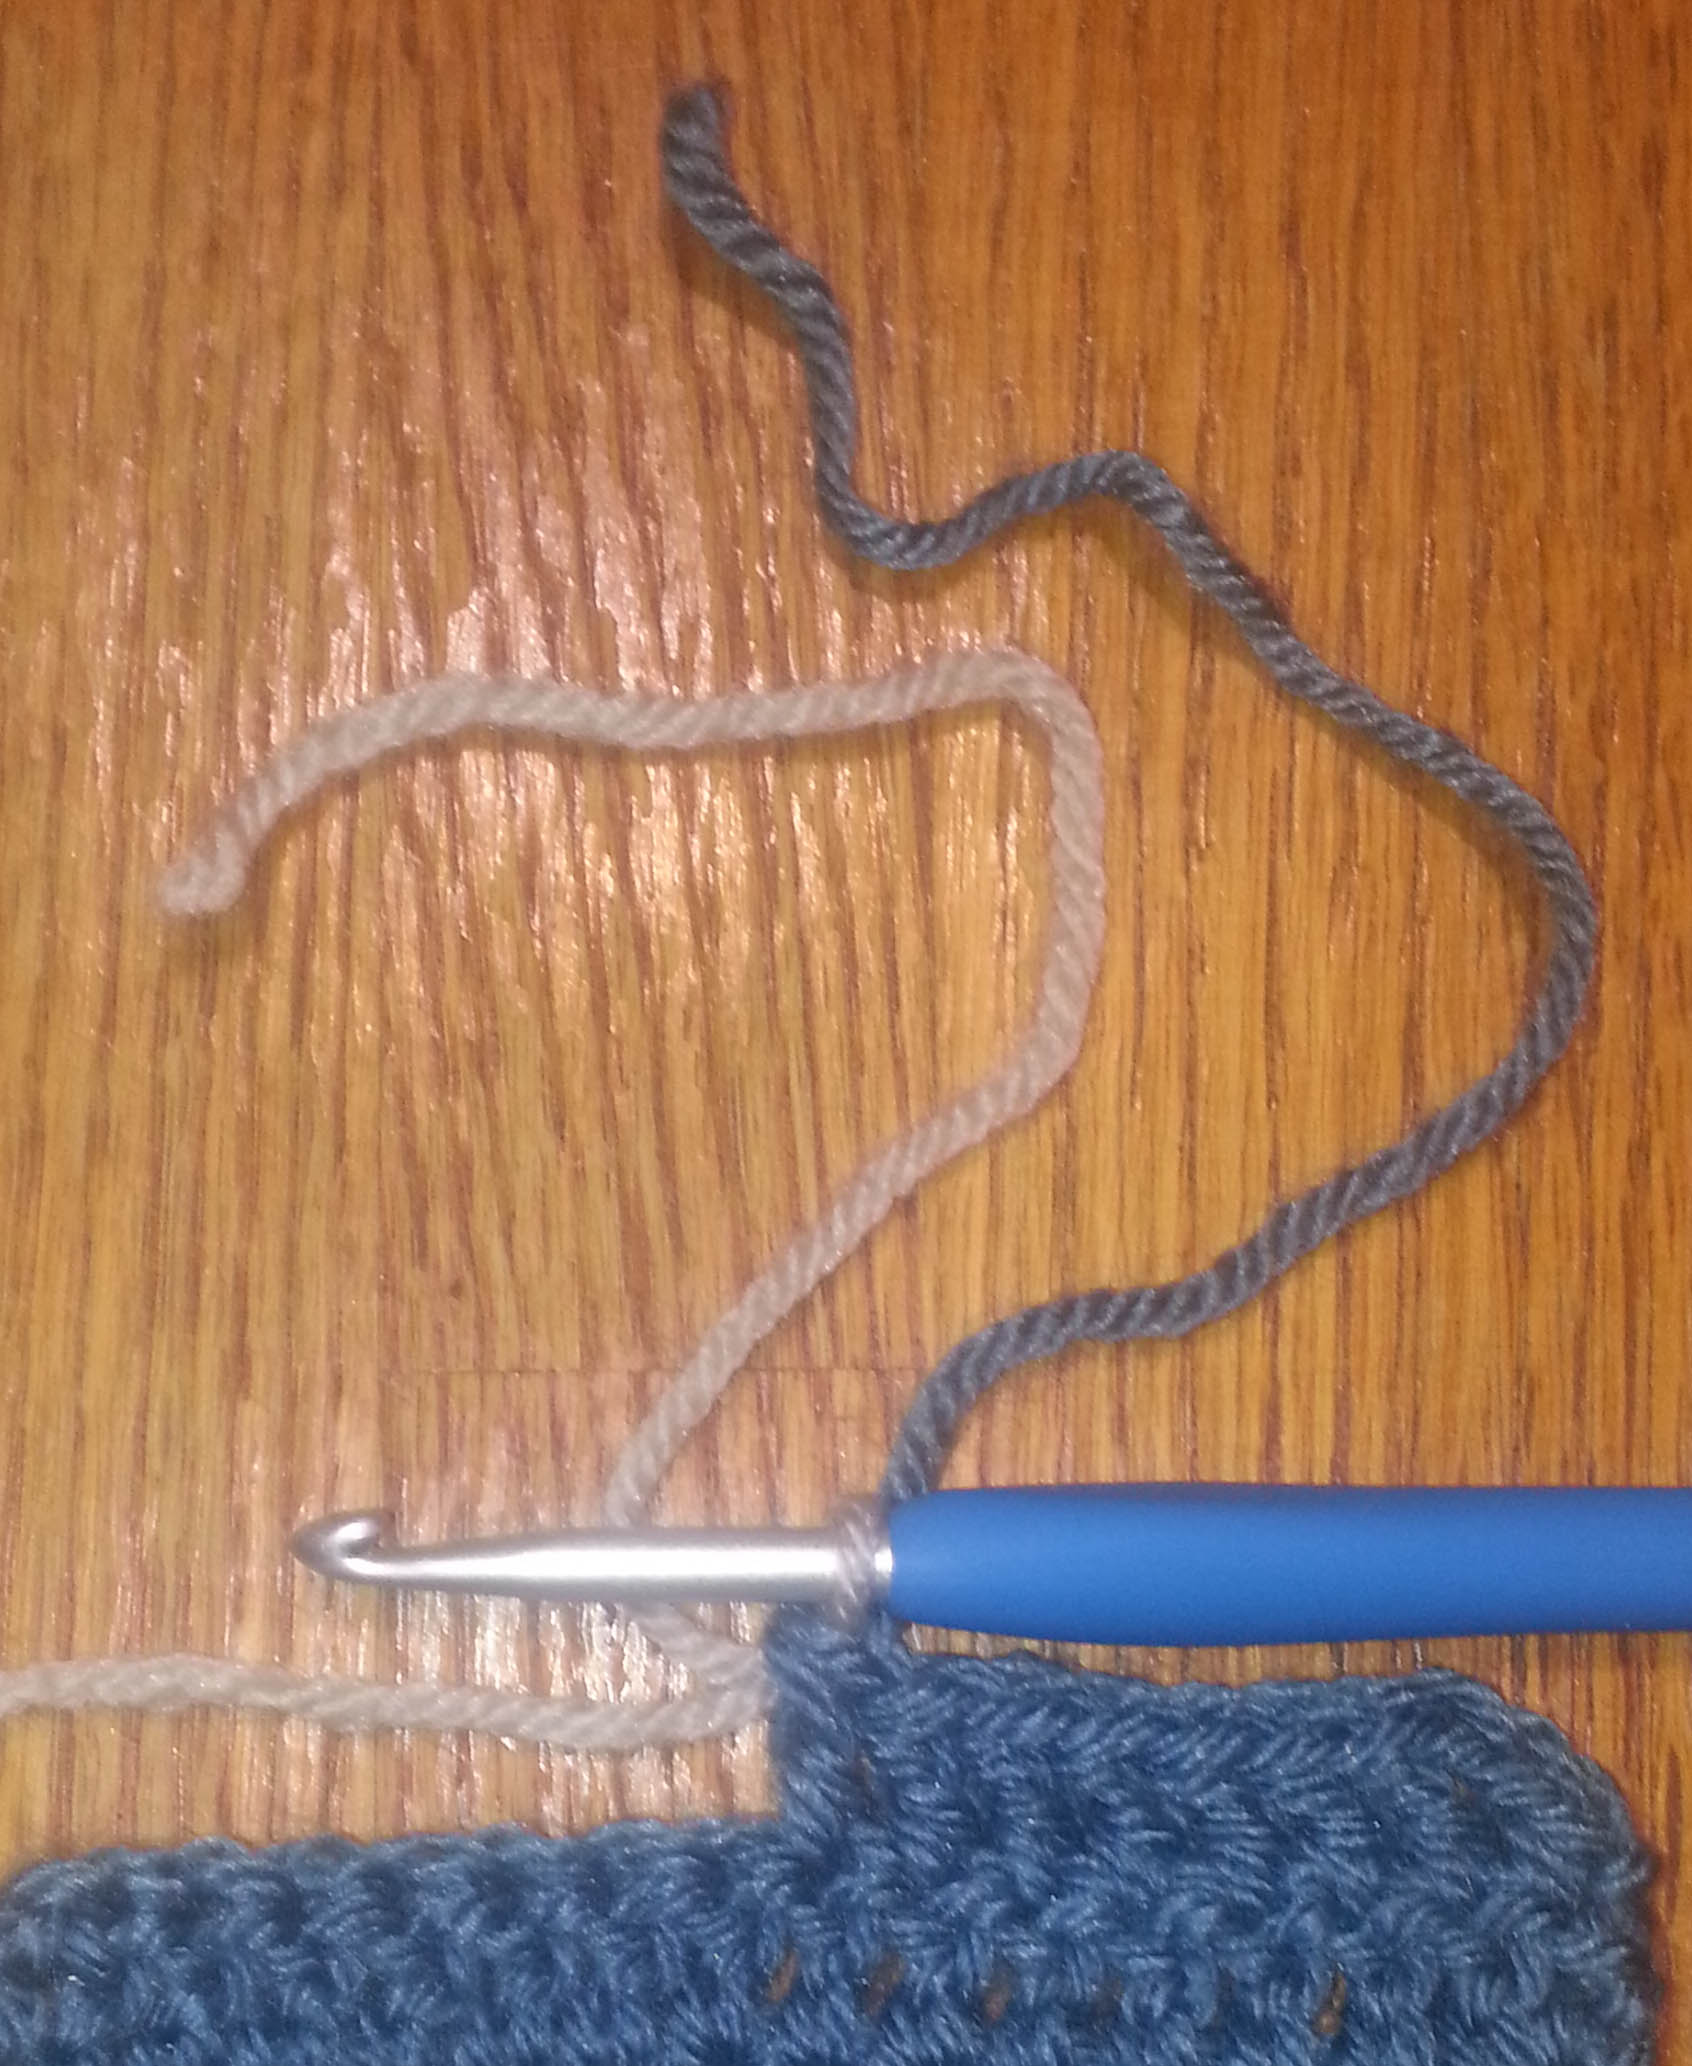
So now we’ve figured out where we want to place our join in our stitch pattern. It’s time to learn this join. I’m using 2 colors for these photos to make it easier to see the join. If you prefer seeing this demonstrated in a video check my “Joining New Yarn” on my YouTube Channel. In the photo above I’ve crocheted into my row of double crochet stitches until I have about 8-10 inches of yarn left.
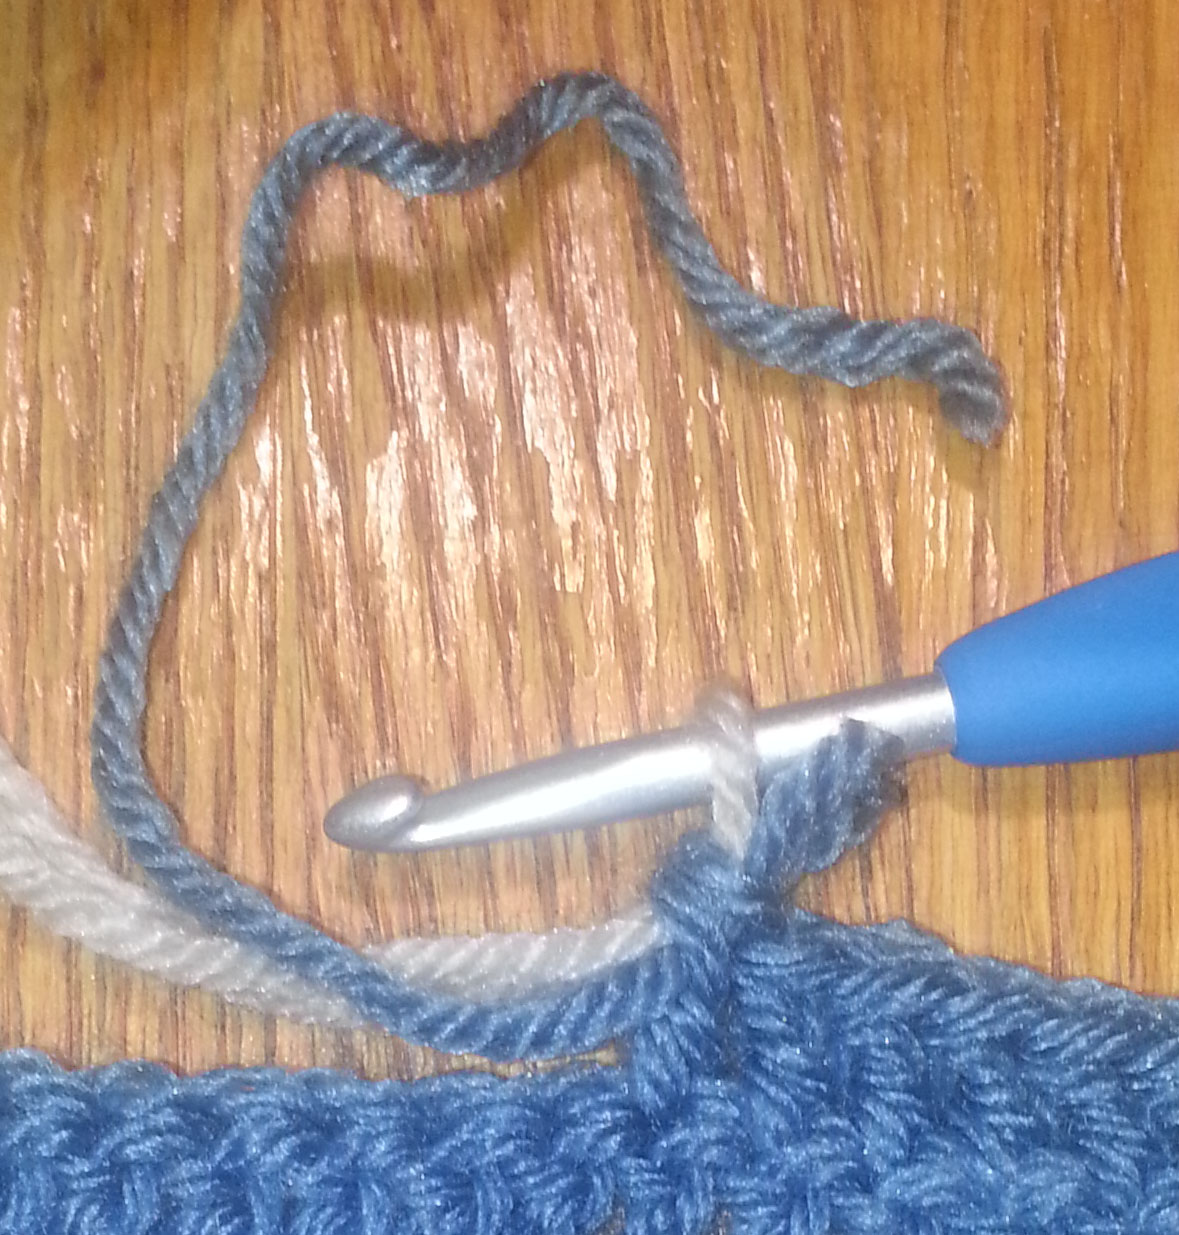
I have 2 options of how to complete this join. Both ways involve the same start. Fold the end of your new yarn so that there is a 6 inch tail before the fold. Six inches is my standard tail length I leave, that gives me enough to weave in without fuss, yet short enough I don’t have a lot of waste.
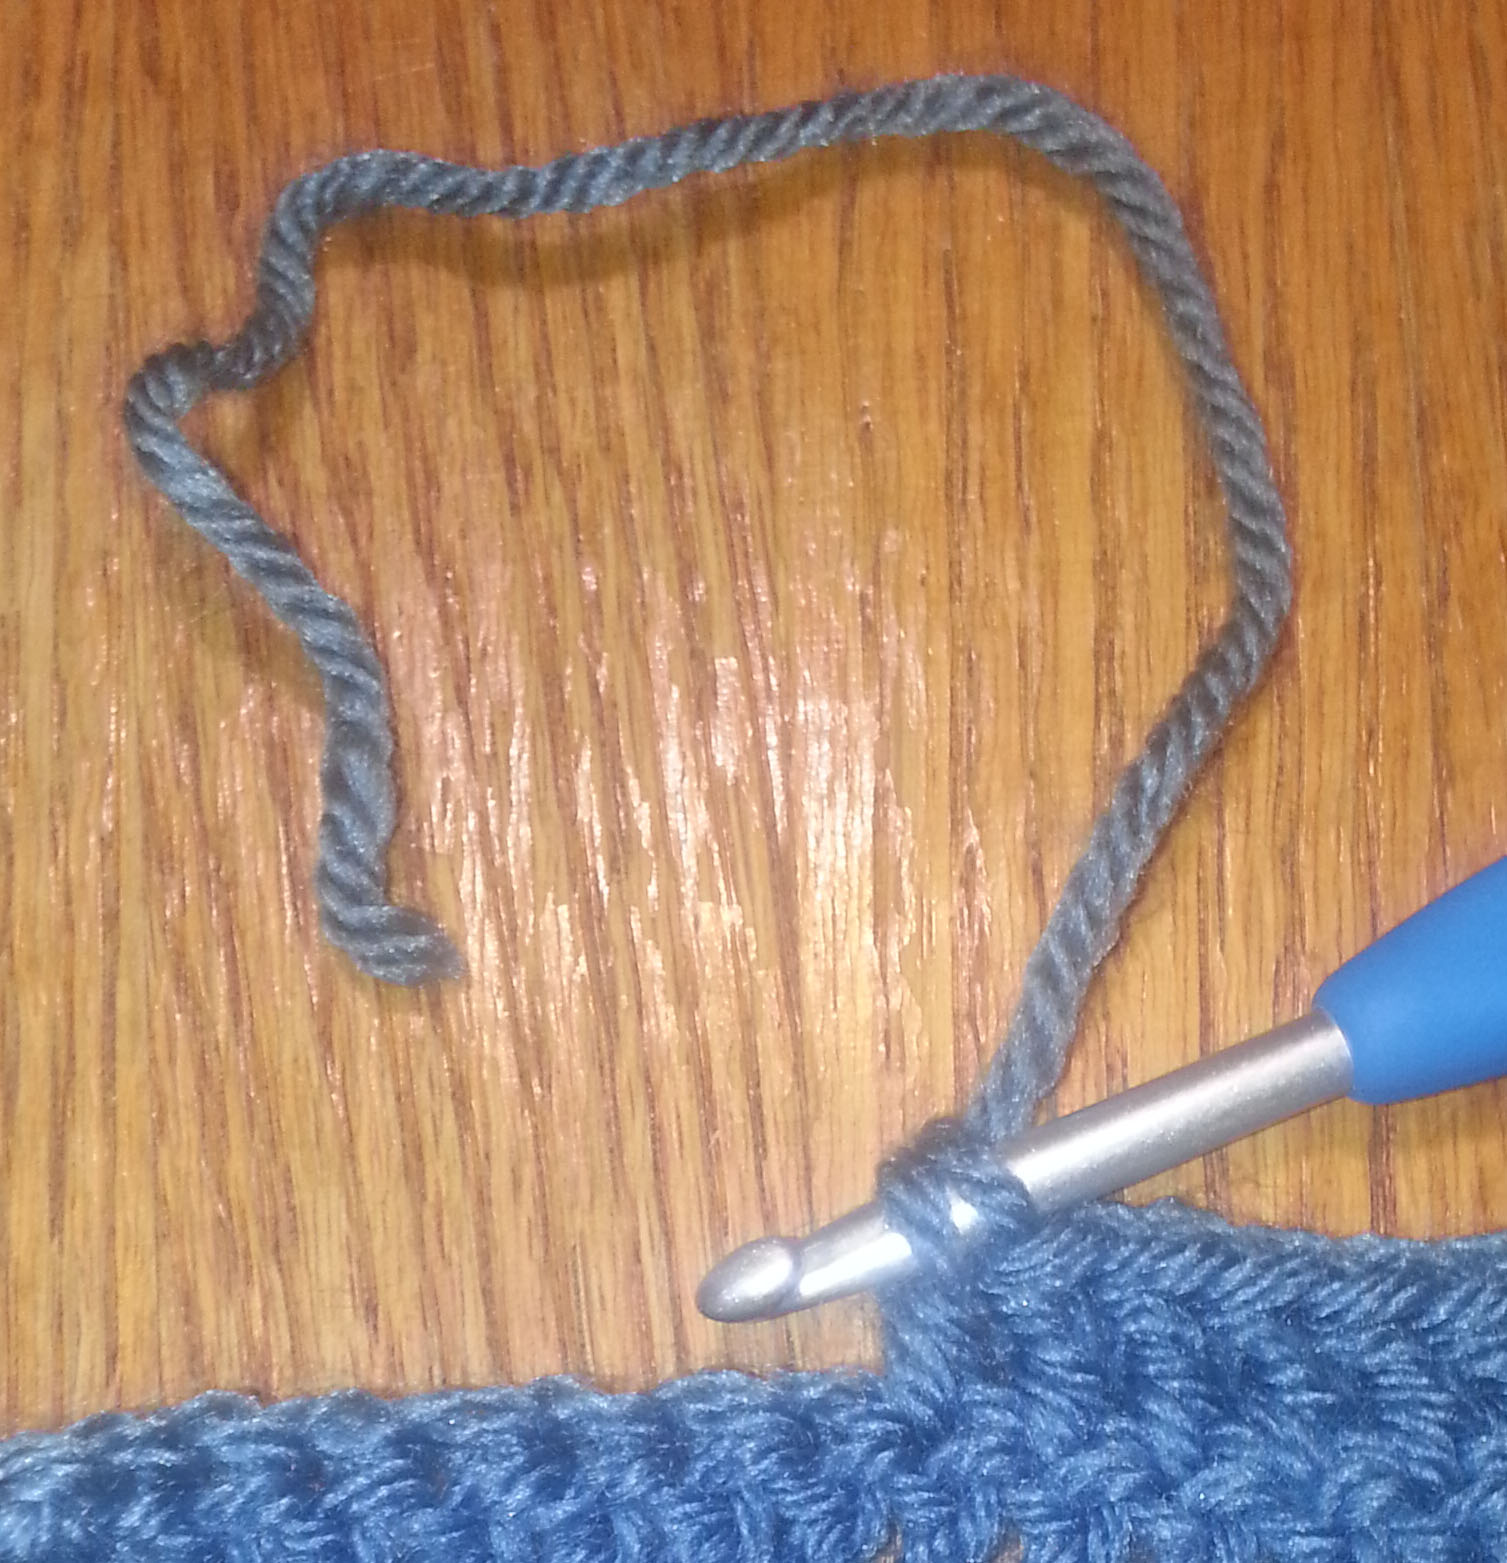
I start my next double crochet stitch with my ending tail. Yarn over, insert in next stitch, Yarn over, pull up a loop, yarn over, pull thru 2 loops on hook, yarn over, (here’s where the fun starts) lay the fold in the end of your new yarn over the hook behind the loop nearest the throat of your hook,
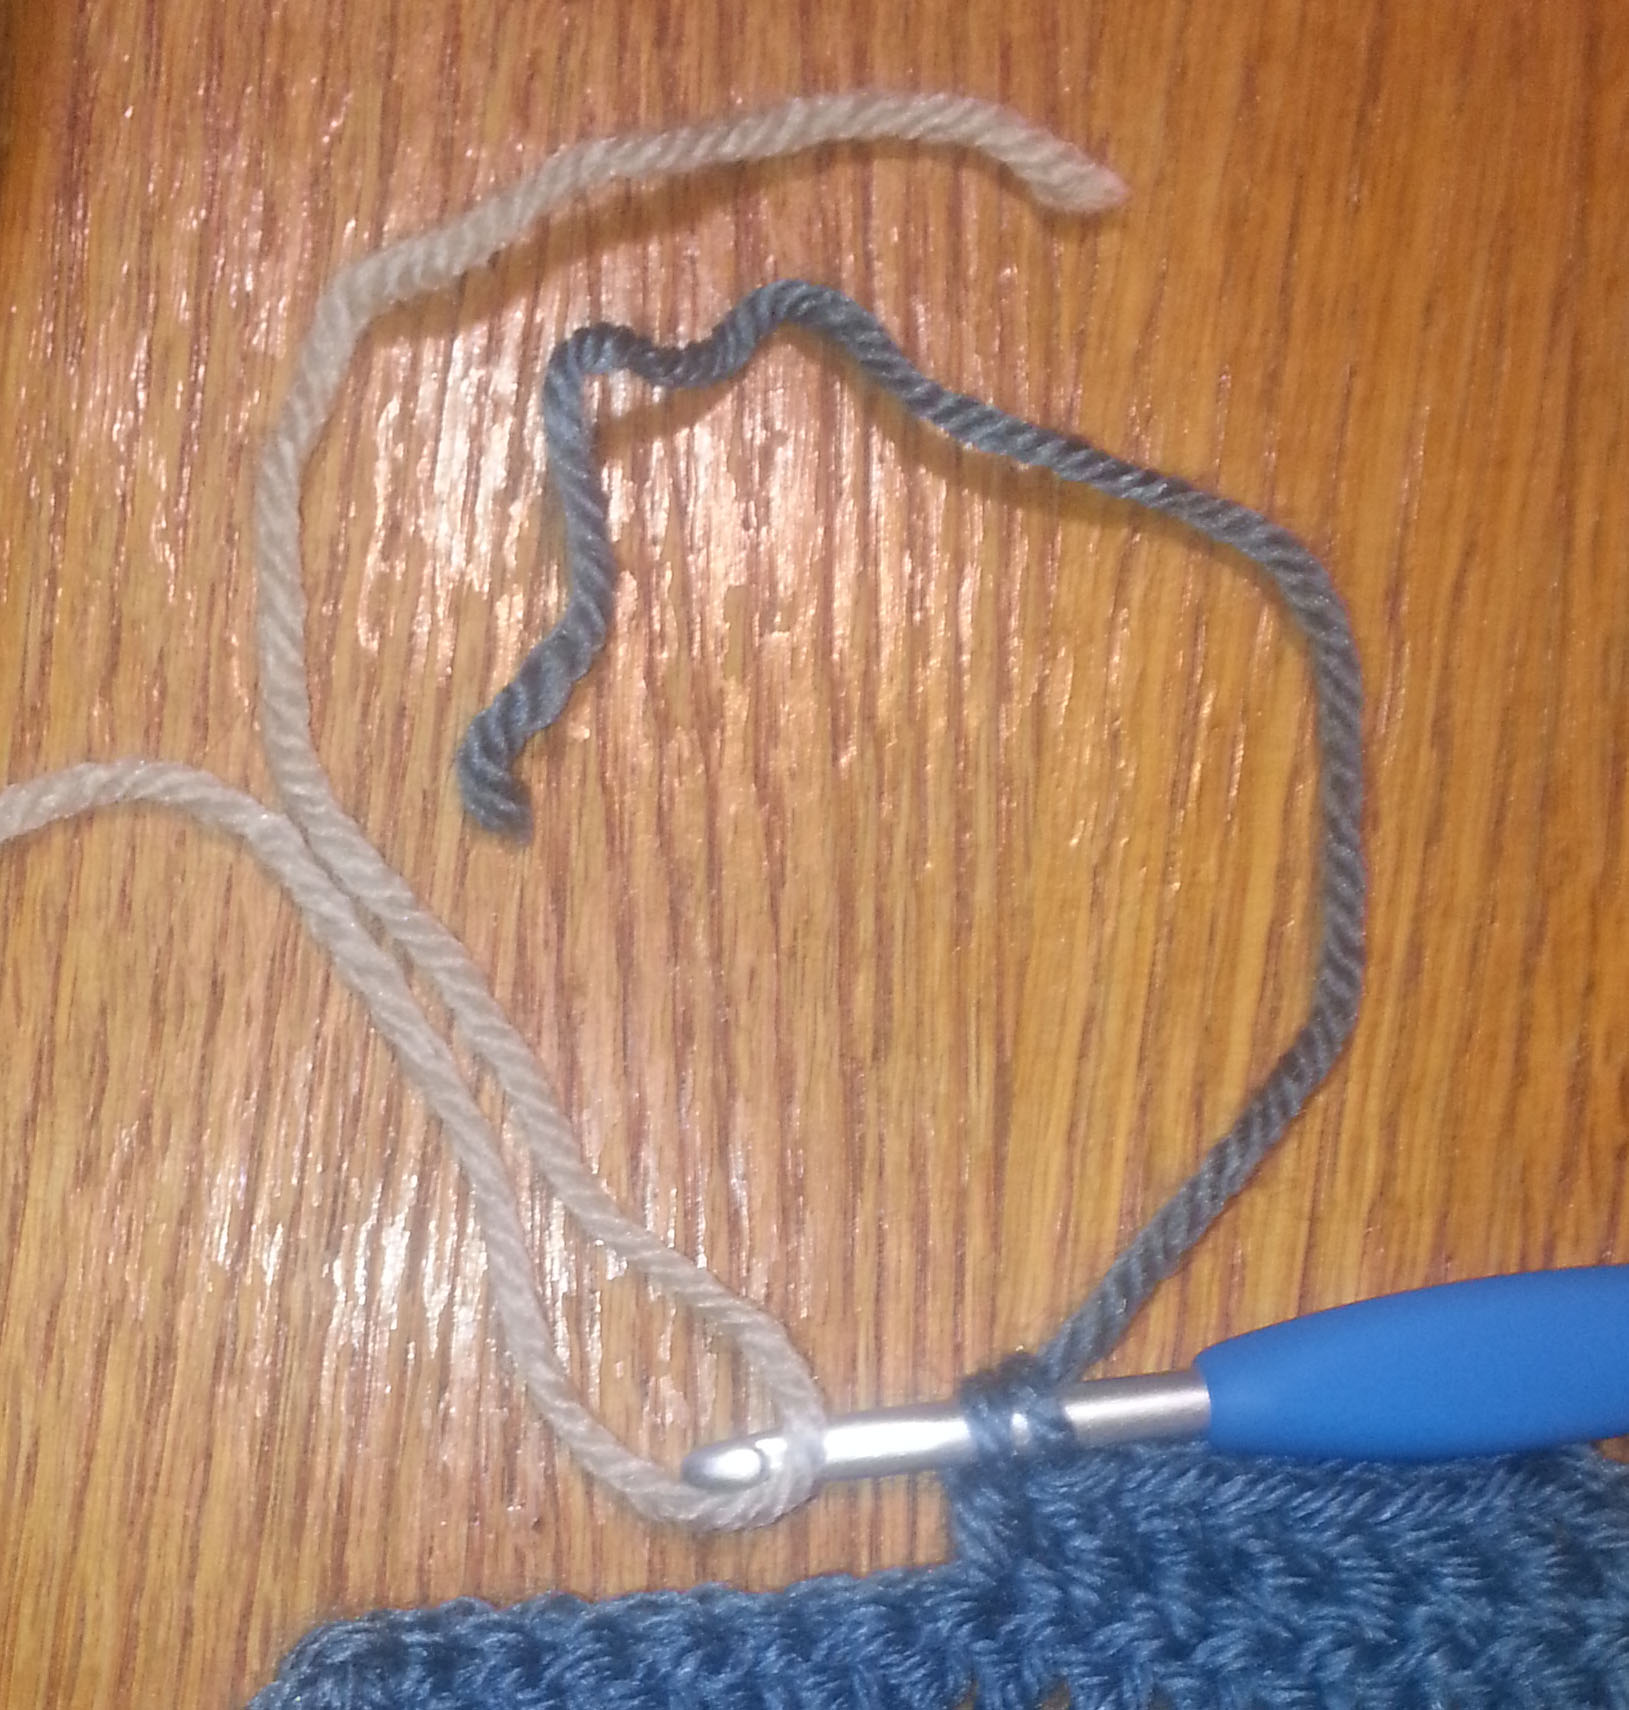
Pull your last yarn-over and the new yarn thru the final 2 loops on your hook, this is the part where you have to hold your mouth just right. You’ll have 2 loops on your hook once the double crochet stitch is completed. If you’ve pulled the yarn thru right the back loop is your old yarn and the front loop is the new yarn.
Extend the loops and remove hook
Replace hook in new yarn loop and
Pull up old yarn loop until end comes thru top of stitch.
Move the old yarn tail to the back of your work and gently pull the new yarn tail to snug the loop on the hook.
Hold the new yarn tail and the old yarn tail out of your way as you begin crocheting with the working yarn from the new ball of yarn. I hold the tails with my hook hand to keep even tension on the yarn as I work.
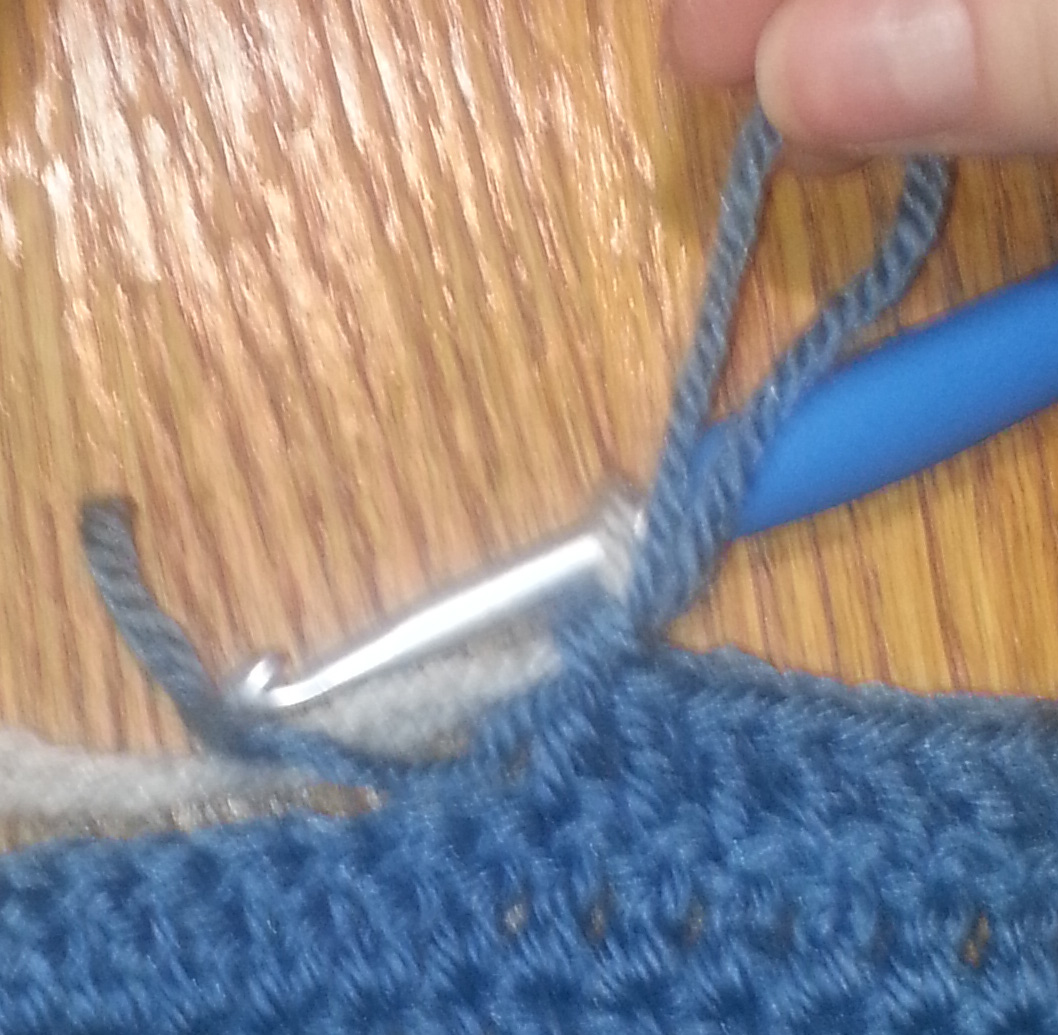
A modification of this join is to re-insert you hook into the top of the stitch you are joining thru. First complete the last stitch in the old yarn, pulling the last yarn over thru the last 2 loops on your hook and continue pulling that loop until the tail comes out the top of the stitch. Re-insert your hook thru those last 2 loops again.
Then place the new yarn on the hook and pull thru a loop. Move the tails to your hook hand and you are ready to crochet with the new yarn.
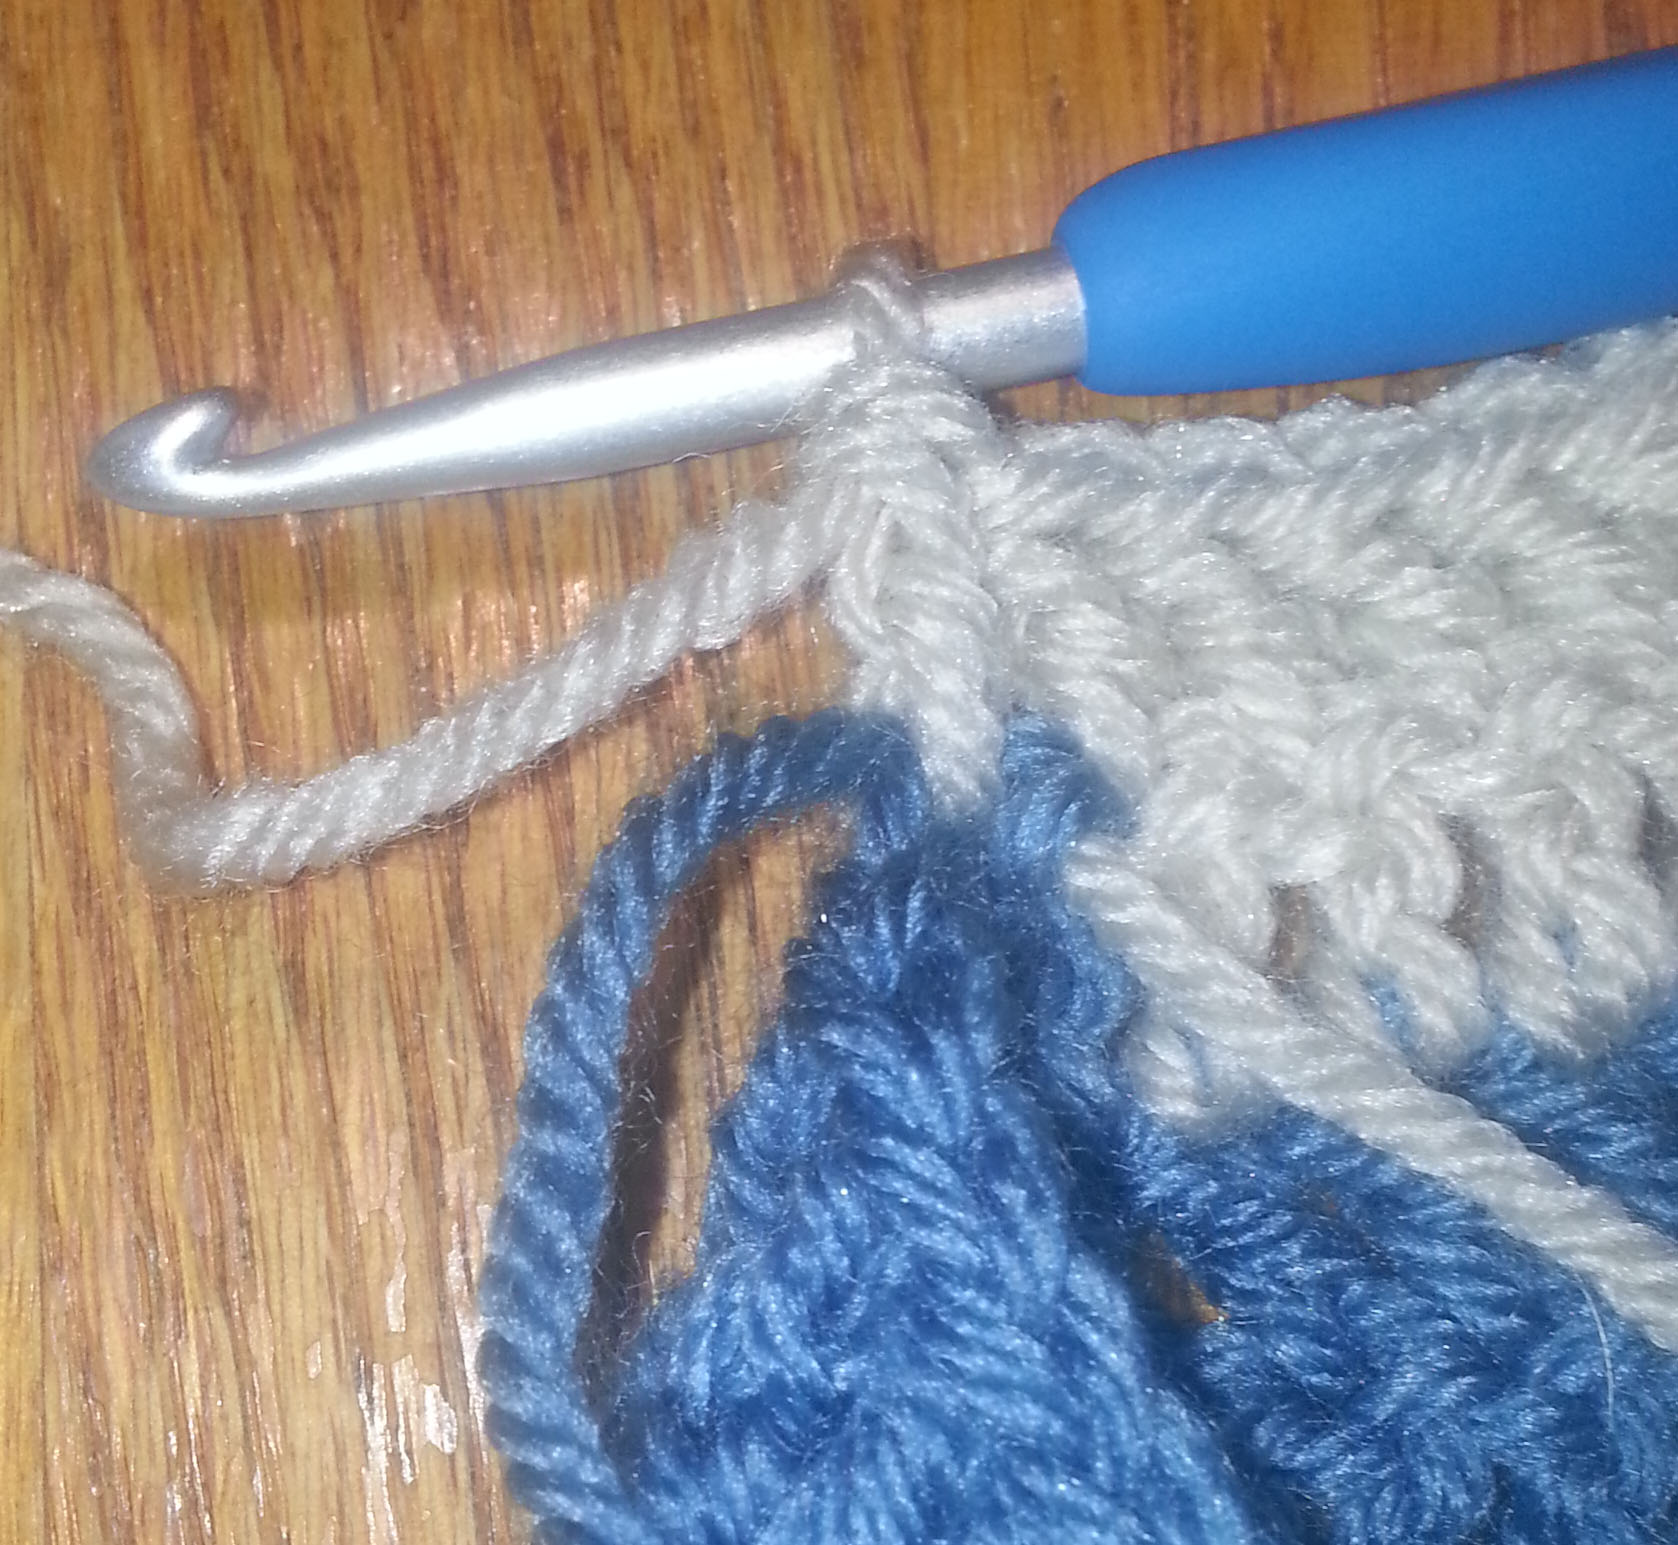
Once I have crocheted back to where I joined the new yarn I like to catch the old yarn tail with the stitch worked into the joining stitch.
I lay the old yarn tail across the top of the stitch and work into the top of the stitch and over the tail. If my fabric doesn’t need to be very flexible I may work a couple of stitches over the tail.
Typically though, I only work one stitch and then weave the tail up the next stitch (A) when I weave my tails. I weave the new yarn tail up thru the stitch before (B) my “catching” stitch.
That is my favorite joining method when adding new yarn of the same color to a project. I’m sure I didn’t invent this join and some of my readers may have come across it before. There are many ways to join yarn in a project, this one just works best for me. Give it a try and see what you think.
Can you believe it’s National Crochet Month again? Seems like the last year went by in a blur. We are going to start off our Month of Crochet celebration this March with the Crochet Guild of America.
As many of my readers know, I have been a member of the CGOA since 2008. My membership with CGOA has been a big part of my journey as a crochet designer and teacher. It also has been the way that I have met so many of my wonderful crocheting friends.
This year’s CGOA conference will be in Charleston, South Carolina July 13- 16, 2016. I’ll be going and hope to see lots of you there.
One of the fun events at the conference will be the unveiling of the entries for the 2016 CGOA Design Competition. The competition is judged at the conference and winners are announced there. It’s lots of fun to see what folks have come up with each year. There will be cash prizes for the different categories as well as for some of the special awards.
The 7 judging categories (plus a bonus category) are:
1. Fashion: garments (not accessories), including sweaters, tops, jackets, vests, skirts and dresses.
2. Accessories: including wraps, scarves, cowls, socks, mittens, hats, bags, belts and jewelry.
3. Home Décor and Afghans: items primarily for the home, including afghans and throws, baby blankets.
4. Thread Crochet: anything made in crochet thread or fine/lace weight yarn (CYC category #0/Lace); this category may overlap other categories, and includes doilies, garments, baby clothes, accessories.
5. Artistic Expression: items more artistic in nature, including free-form and mixed media pieces, wall hangings, wearable art.
6. Young Designer: anything designed with yarn and/or crochet thread by members 25 years old and younger. Designer may turn 26 in the year of the competition. As long as sometime during the year 2015 he or she was 25.
7. First Time Entrant/Non-Professional: anything designed with yarn and/or crochet thread by someone who has never entered the design competition before and is not a crochet professional. Non-professionals have not had any of their crochet designs published in print or PDF format.
Bonus Category – Pineapples: This year’s conference theme is pineapples! If your entry contains pineapples there will be a box you can check on the entry form to indicate this so your entry can also be judged in this category as well.
Remember, to be eligible to enter the Design Competition you need to be a current member of CGOA. Deadline for entries to be submitted is June 15, 2016.
You can learn more about the rules and about CGOA by visiting the website at Crochet.org or click on the Design Competition image above to go directly to the announcement page (you can see this page even if you aren’t currently a CGOA member).
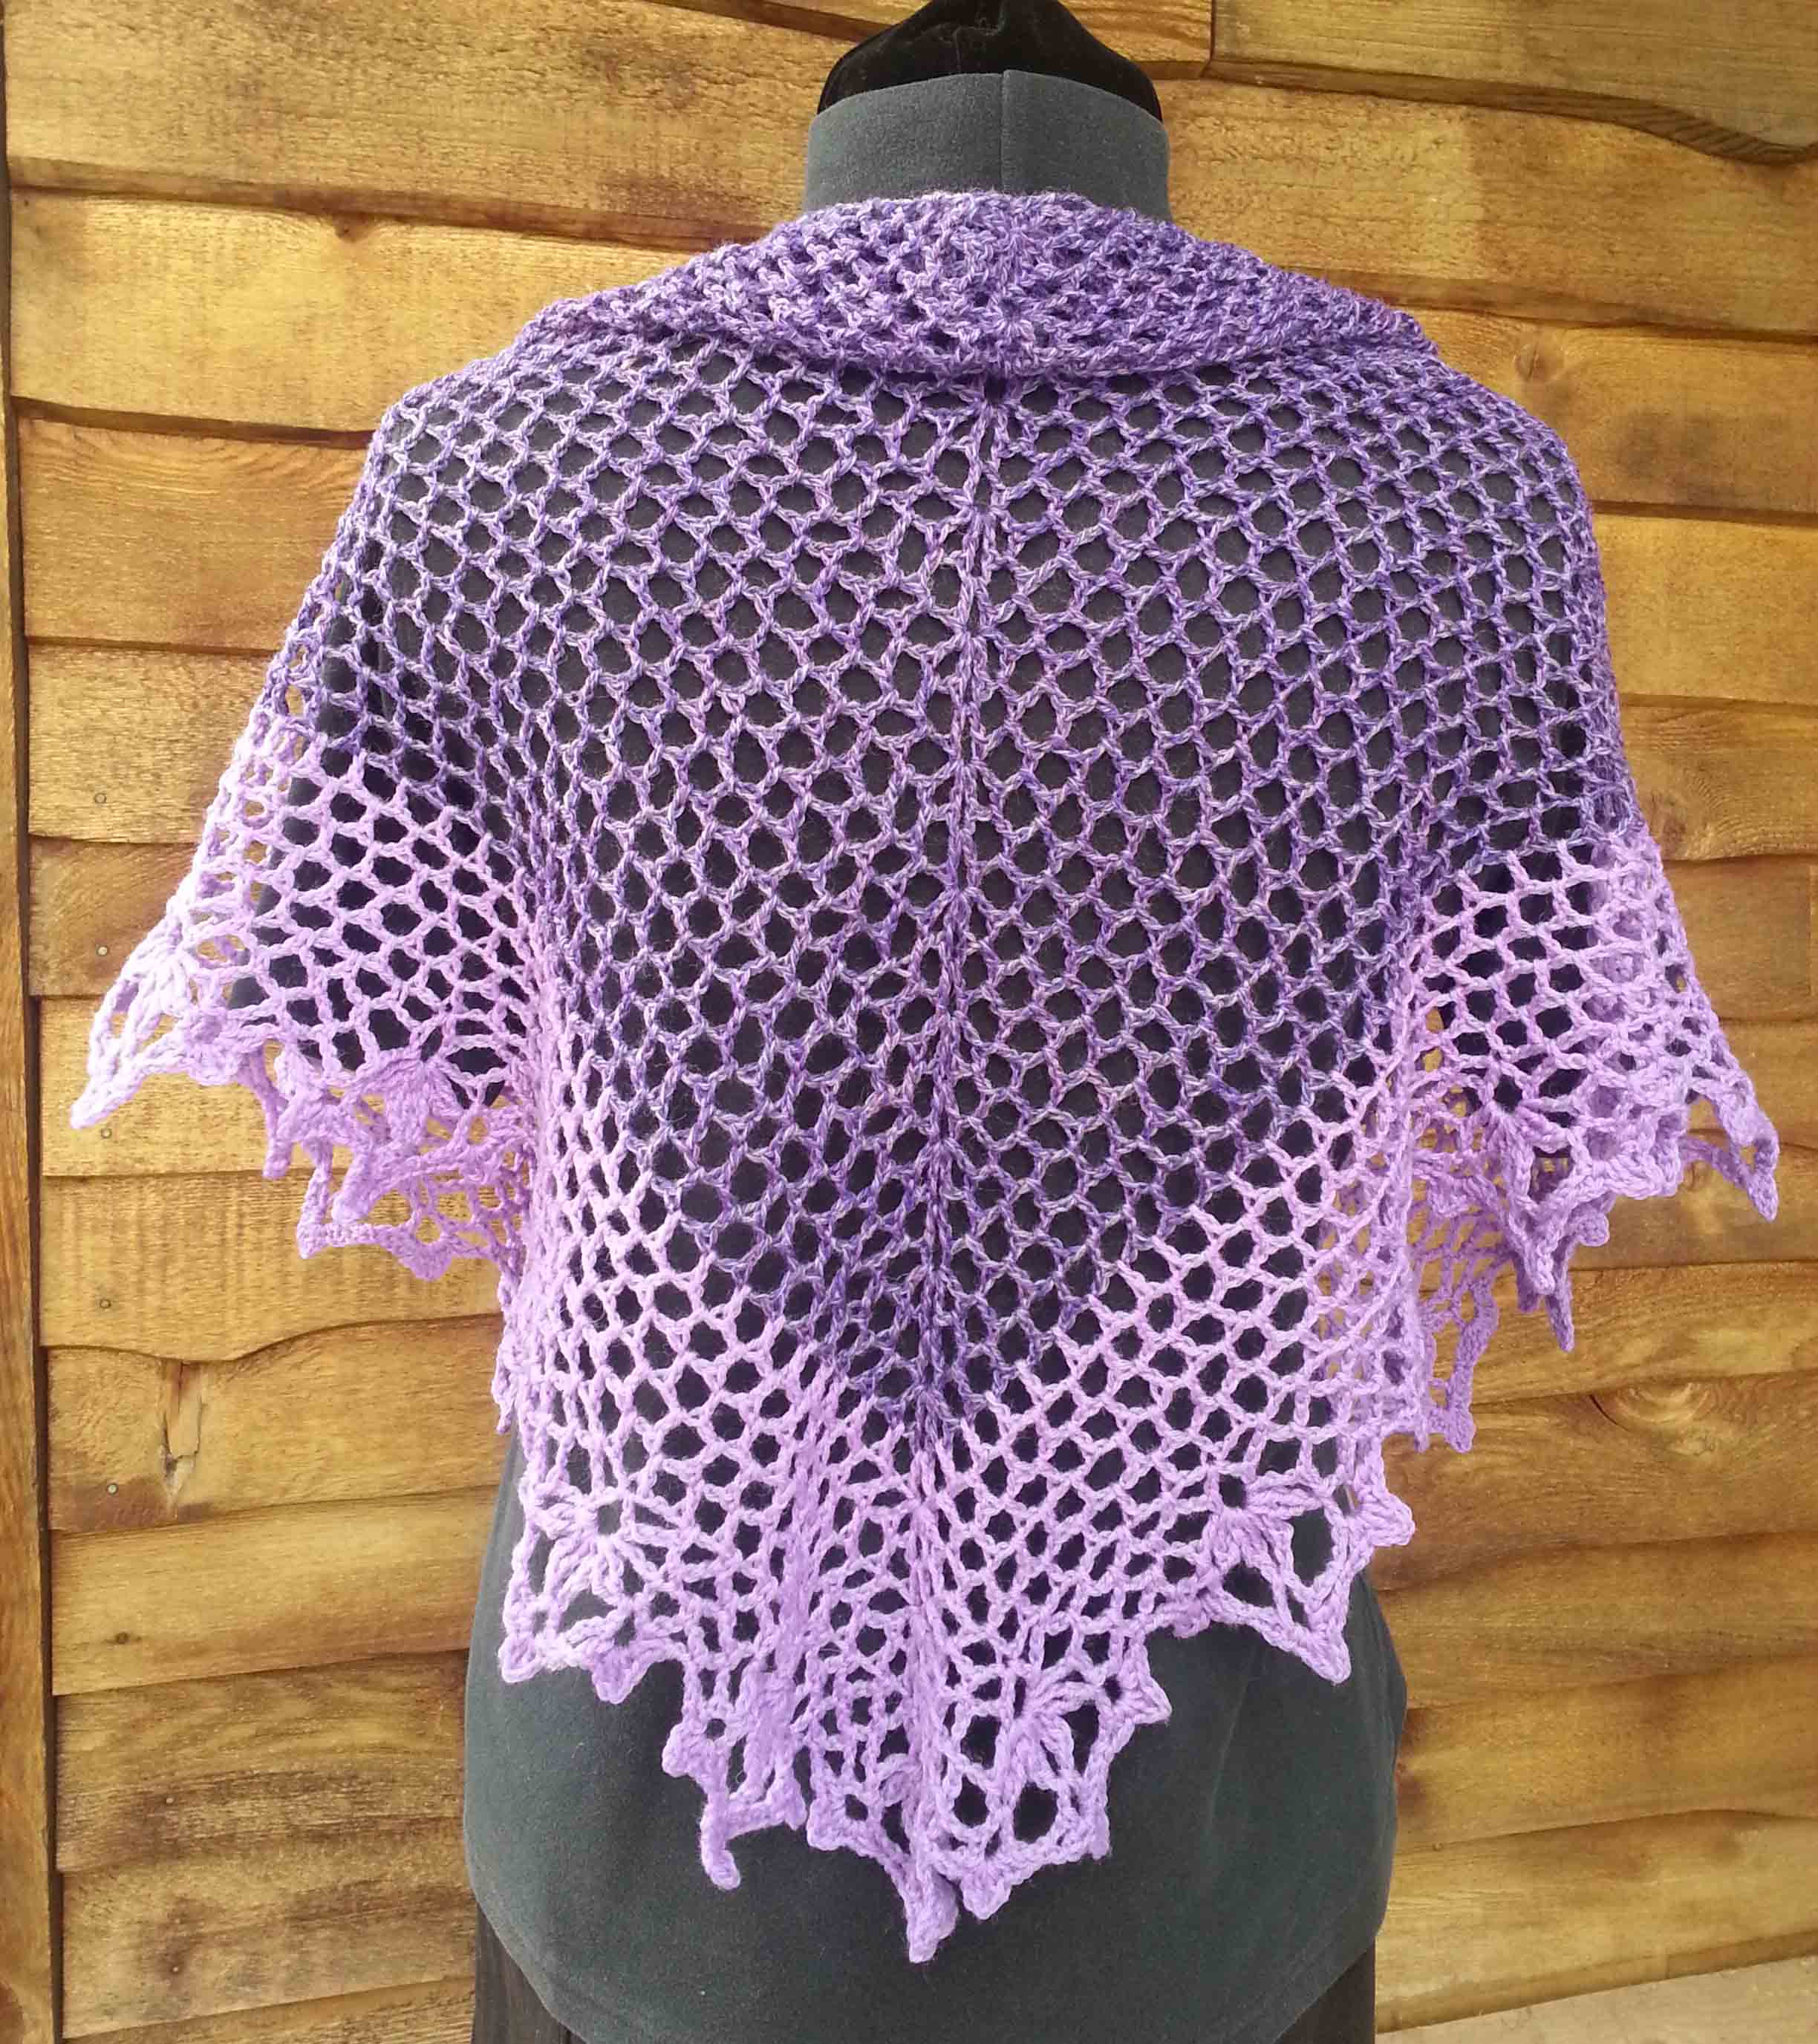
For some yarn crafters the world of designing seems mysterious, so I thought I’d give you a peek behind the scenes when I am designing. In particular some of the math that I use when designing a triangle-shaped top-down shawl.
Triangles are popular for shawls because they can be worked top-down either with decreases on the ends or increases at the ends and center. There are triangle-shaped shawl patterns out there that are created from the bottom point upward. I don’t like to work that way so haven’t ever designed a shawl using that method.
Eleonora Shawlette / M2H Designs
My “Eleonora Shawlette” is an example of a triangle shape worked top down with 3 increase points.
The great thing about a triangle shape is that it is relatively easy to figure out the amount of yarn needed for the shawl (or shawlette). The same math can be used to figure out how big a shawl you could make from the yardage you have on hand.
First decide on the dimensions for the shawl you want to make. I’m using an isosceles triangle for this shawl and the center point (pink line) is half the length of the base (blue line). Now it is time to work a swatch.
Usually I make a miniature version of the shawl. This works very well as I can also use that swatch as the beginning of my shawl if I want. I want my swatch to be at least 6 inches long at the center point. I let the swatch rest for a while, at least 2 hours if not over-night. If I plan to aggressively block my finished shawl and I’m using a fiber that will change a lot with the blocking, I will block my swatch over-night instead of letting it rest.
The next morning I measure and weigh my swatch. I take the same measurement lines that I had marked out for my shawl dimensions. The broad base (blue line) of the triangle and the length of the center point (pink line). I’ll use these measurements to figure out the square inches of my swatch.
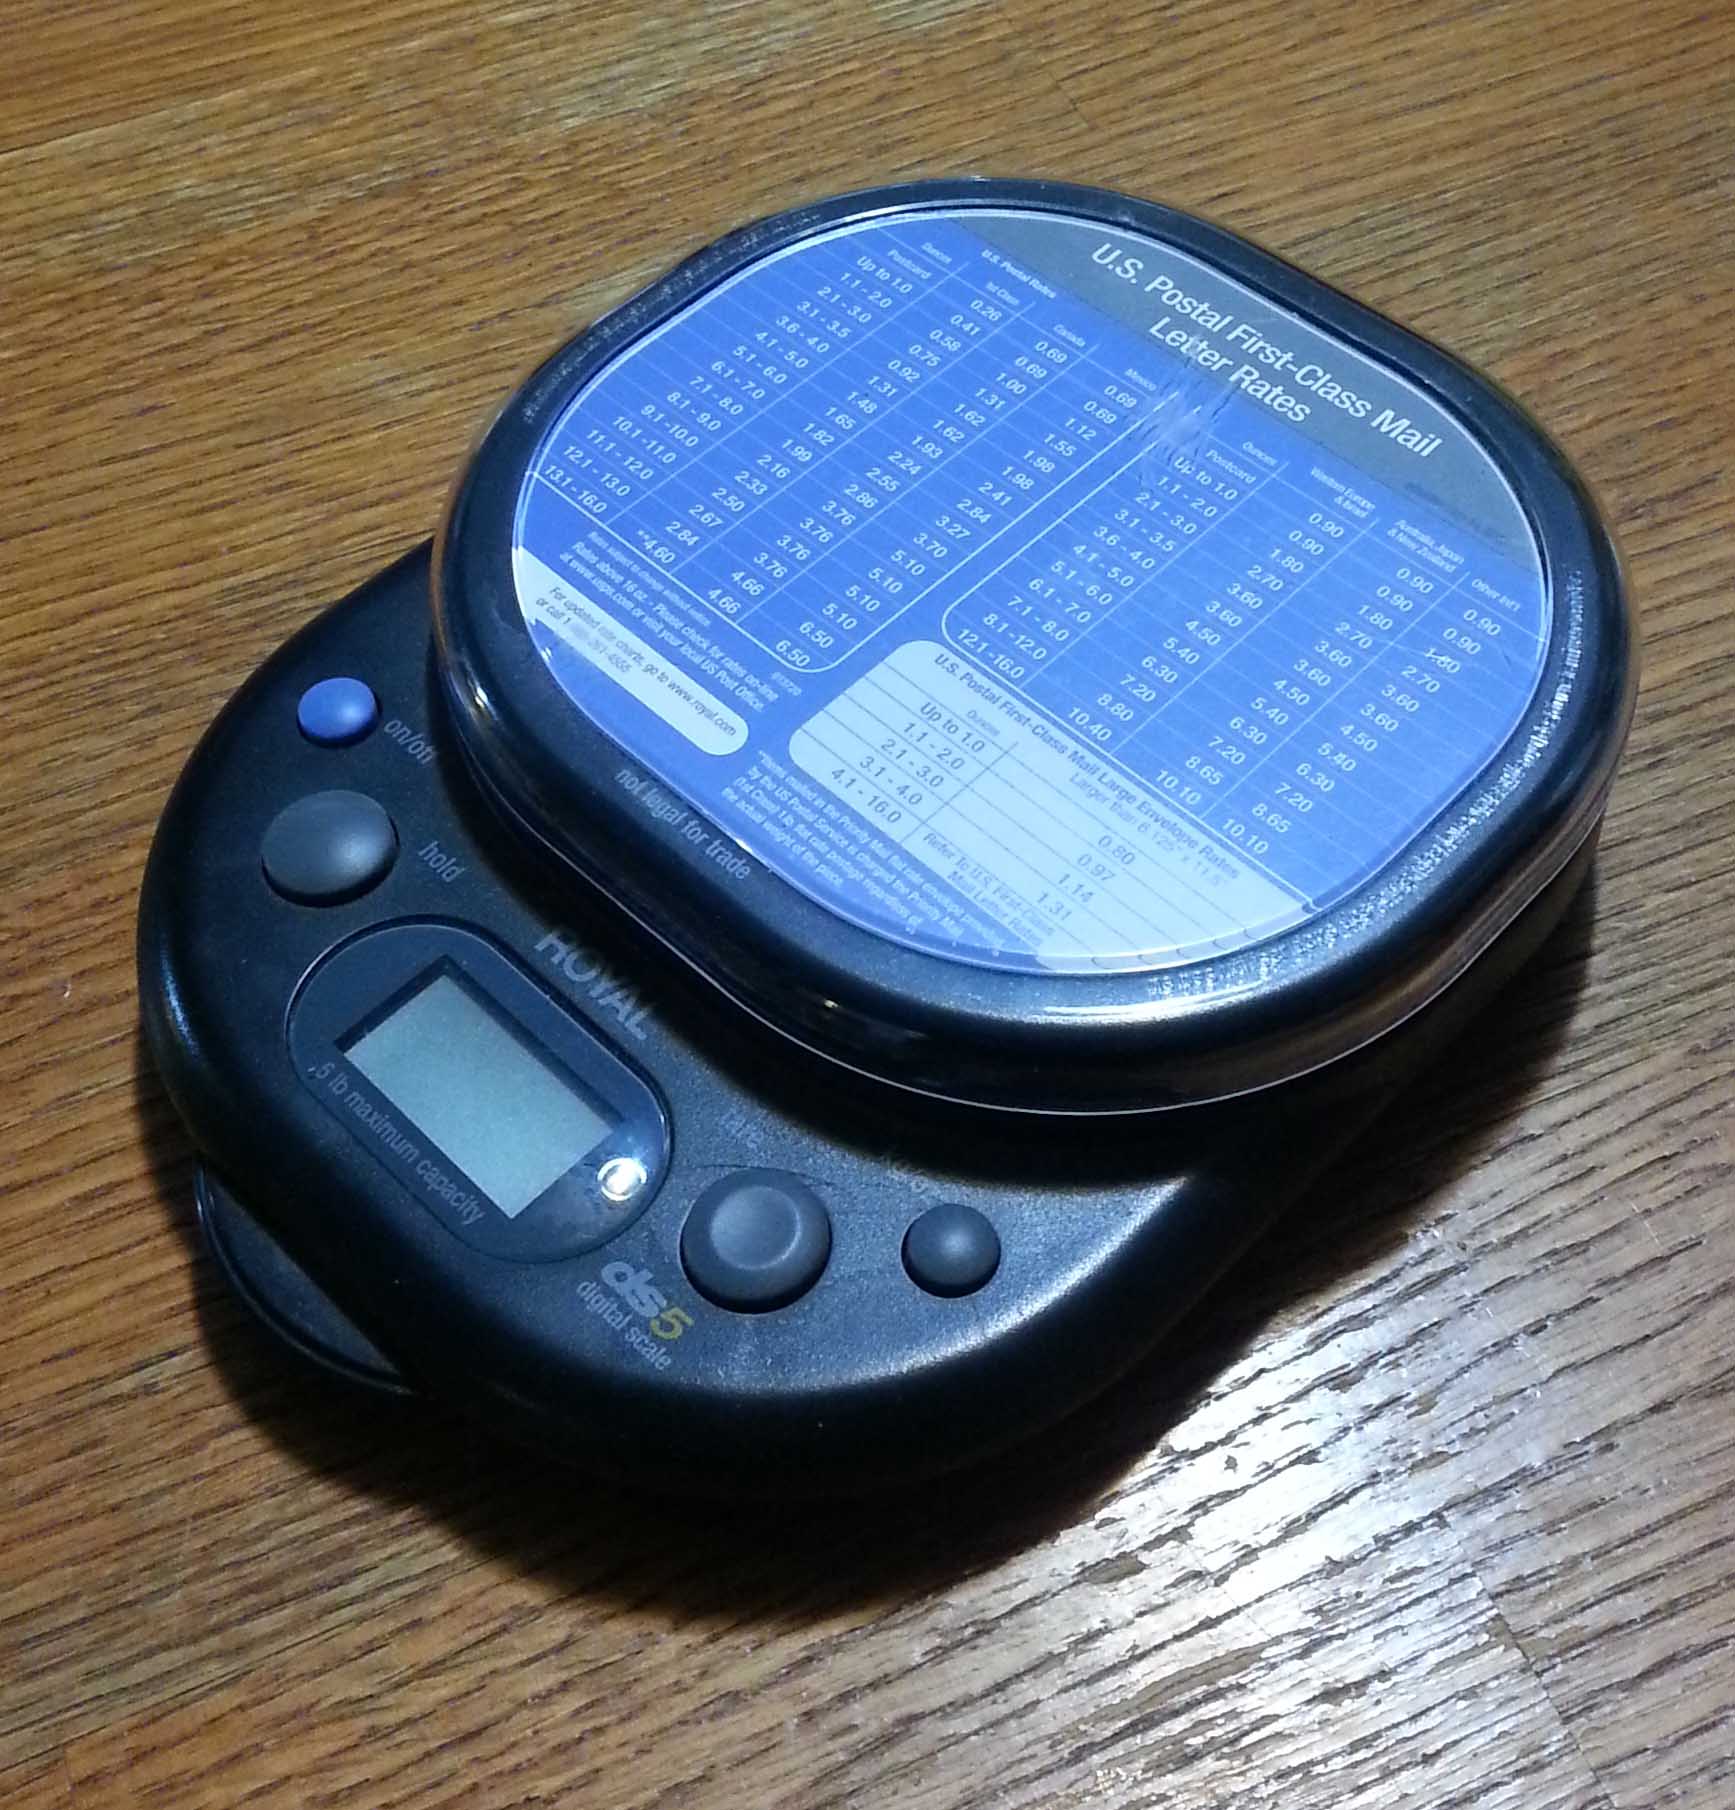
I have a handy digital scale that I use to weigh my swatches and projects. It can measure in ounces or grams. I prefer to use grams as they are a smaller unit of measurement and that helps me with accuracy. It also helps when using yarns from companies that do not list the weight in ounces.
Most ball bands will tell you the weight and yardage contained in the ball/skein/hank. Here’s where the math starts. Take the number of yards and divide it by the number of grams on the ball band. This gives you the number of yards per gram.
For example, this ball of “Mochi Plus” has 95 yards in a 50 gram ball.
95 divided by 50 = 1.9 yards per gram.
If my swatch weighed 10 grams, then I know that it took 19 yards.
Now it is time to figure out the square inches in my swatch and the square inches for my planned dimensions of the shawl. This is actually not that hard. As my geometry teacher taught us in high-school, all triangles are half of a rectangle. This gives me 2 ways to find the square inches of my swatch and shawl.
Either take the measurement from the base and multiple it by the measurement from the center point, then divide that number in half.
Or my favorite way: Divide the base in half, then multiple by the measurement from the center point.
For some of you it might be easier to visualize this as changing your 1 triangle into 2 triangles.
Then moving one of the triangles to make a rectangle (or in this case a square). A square is always a rectangle but a rectangle isn’t always a square. In this case my planned shawl will be 1,225 square inches (35 x 35).
I can use the same equations to figure out the square inches of my swatch. Let’s say in this case that my swatch was 12″ at the base and 6″ at the center point. That works out to 36 square inches for my swatch.
Now I divide the square inches for my planned shawl by the square inches of my swatch.
1,225 divided by 36 = 34.0277777778 times that my swatch will fit into my planned shawl.
Obviously I don’t want to be fighting with such a long decimal in my figures, so I will round up to the next whole number. I always round up, because I don’t want to run out of yarn when I am working on my project.
Now we have to figure out what this means for yardage needed. Remember earlier I said that my swatch weighed 10 grams and used 19 yards of yarn? It’s time to plug that number into our equation.
35 x 19 = 665 yards needed to make my shawl.
So how many balls of “Mochi Plus” do I need for this shawl?
665 divided by 95 = 7 balls.
When I purchase my yarn for a project I usually purchase 1 extra ball to be on the safe side. It’s really a bummer when you run out of yarn just short of completing your project.
Now if all this math scares you a little, the good news is that most patterns are going to have the yardage information you need. Because the designer already did all the math for you.
These equations are handy though if you aren’t meeting the gauge or are substituting a different yarn. Sometimes it is fun to see what you can come up with making a few changes.
This week I’m finishing up a big project that is still in the super secret phase. But I managed to squeeze in some time playing with a few small thread design ideas.
I love Size #10 Crochet Cotton Thread for making small sculptural pieces. Especially jewelry. So I dug out a ball of Aunt Lydia’s metallic thread that I had in the stash for this earring idea.
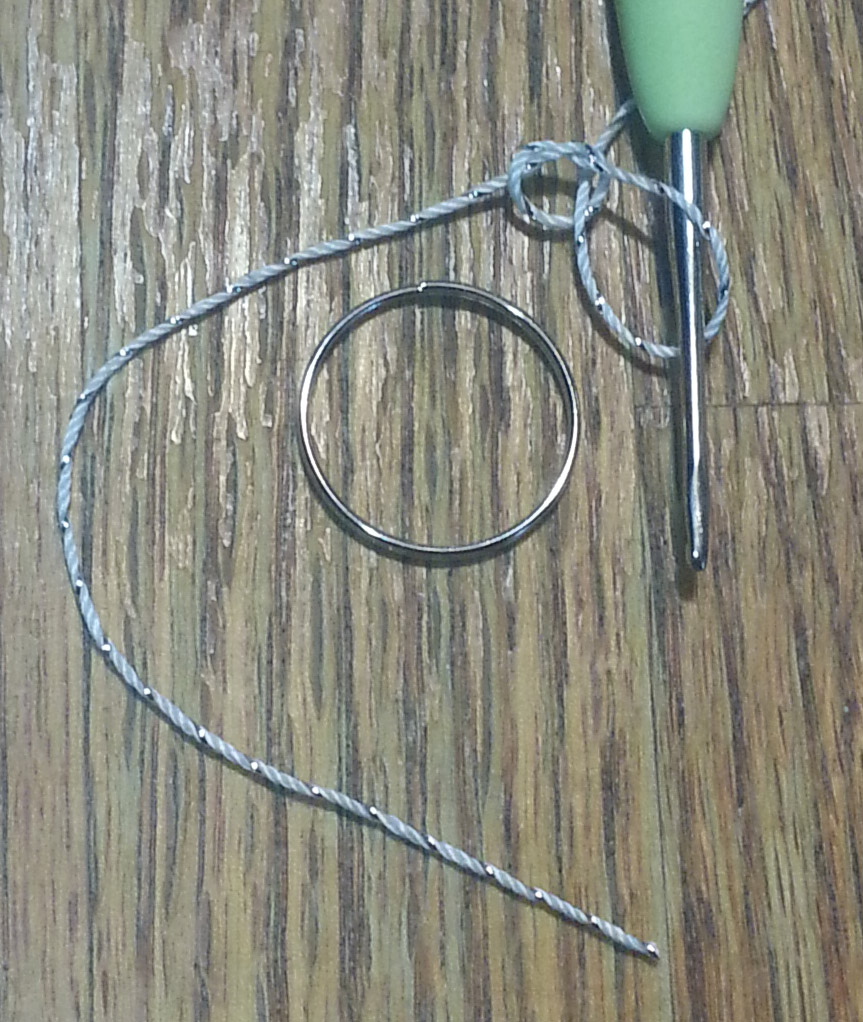
I had acquired these split rings at my local hobby/craft store a while back. I like using a light weight ring to crochet around to lend a bit of stability to my earrings. These rings are 20mm, which is sort of a Goldilocks range in diameter size for jewelry.
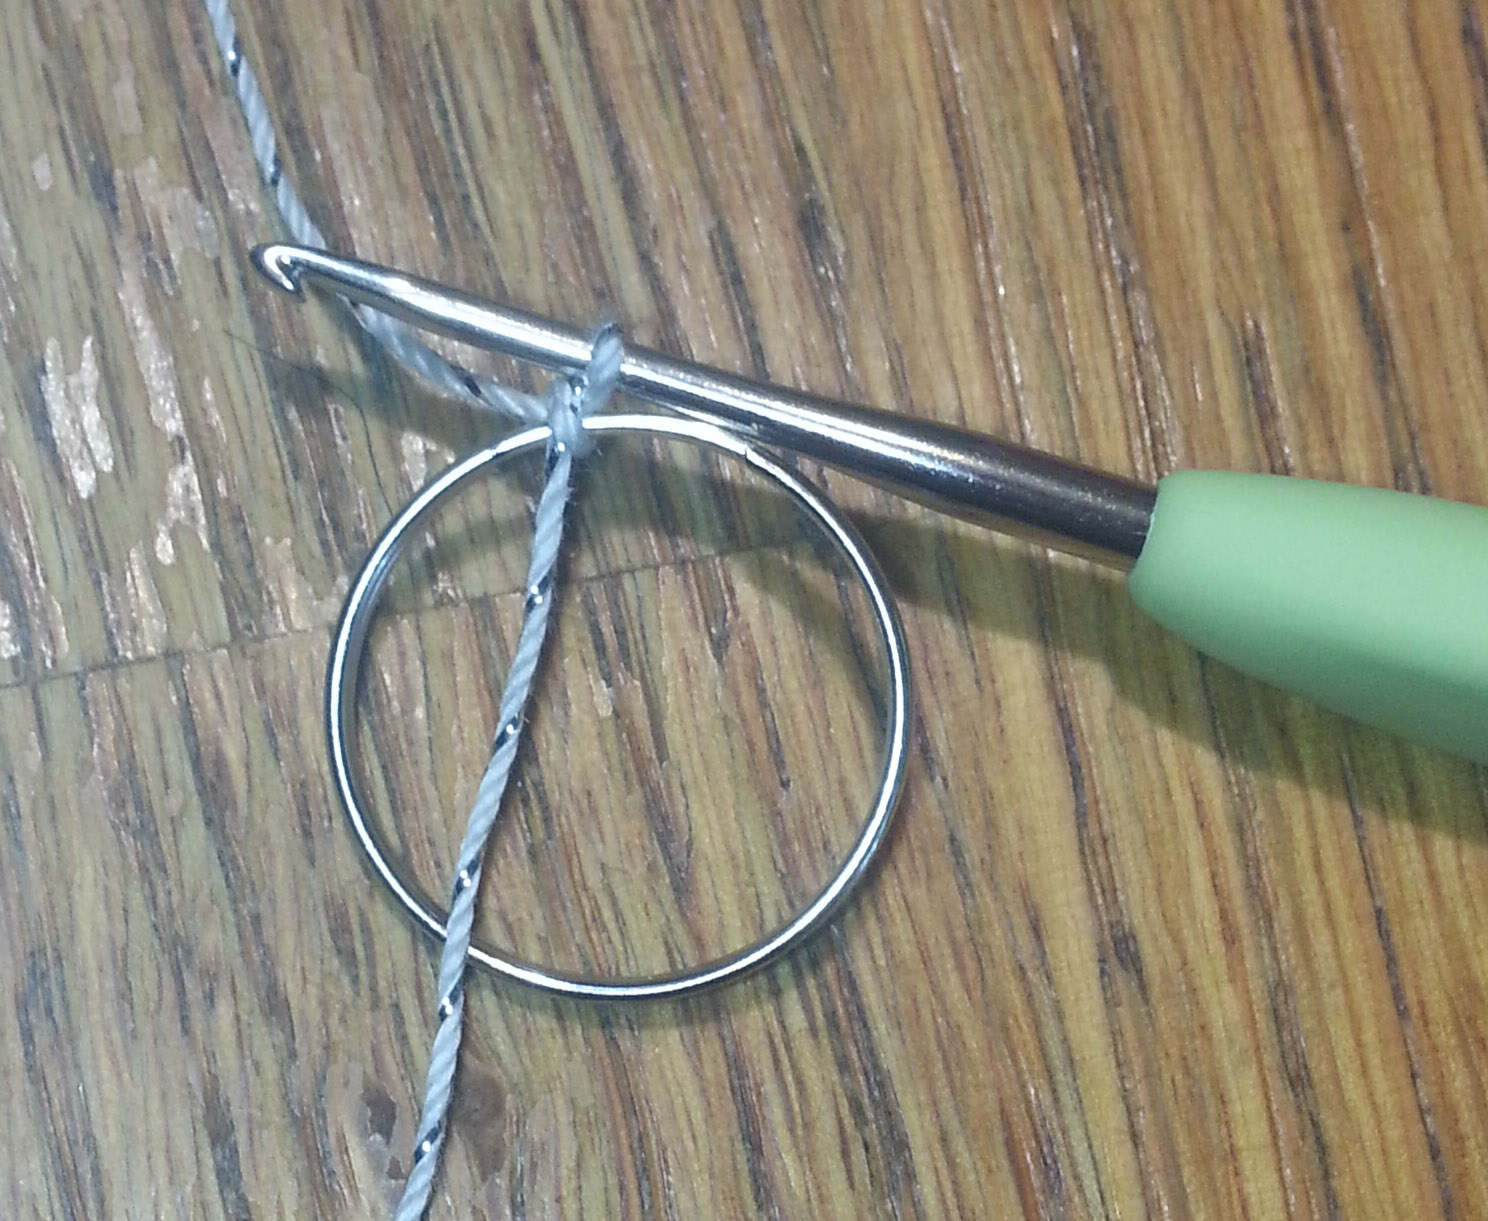
I’ve experimented with a variety of ways to attach the thread to my rings over the years and my favorite method is to capture the ring in the beginning slip knot. If you are using a split ring this is super easy.
Start your slip knot by forming your “knot” loop and pulling thru your first working loop, but don’t tighten up the “knot” loop completely.
Slide the opening of the “knot” loop unto your split ring and
keep sliding it until it is around all the wire of your ring.
Tighten up the “knot” loop, and snug the working loop on the shaft of your hook, you are ready to start your project.
Next Tuesday is the start of National Crochet Month and we are going to be having a really fun month all about crochet, including a couple of new patterns on the blog and in my Ravelry shop. Starting with the pattern for these earrings.
The double crochet stitch (or treble if you are using UK terminology) is a very useful stitch. Once you have gotten comfortable with this stitch you can make a lot of the more advanced stitch patterns in crochet. The double crochet stitch is usually the 3rd stitch most of us learn when we learn to crochet.
For those of you who haven’t tackled this stitch yet or who might need a refresher, I’ve made a photo tutorial of crocheting the Double Crochet stitch.
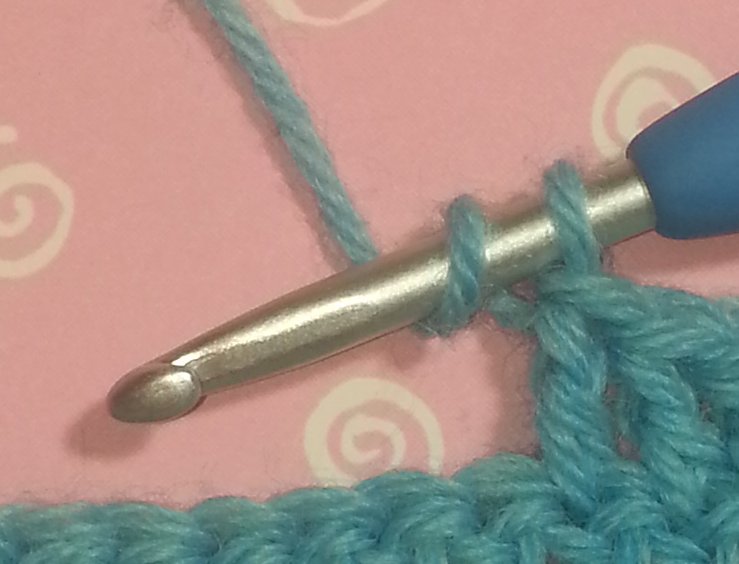
To start a double crochet you wrap the yarn over the hook once, creating 2 loops on the shaft of your hook: The working loop and the wrap.
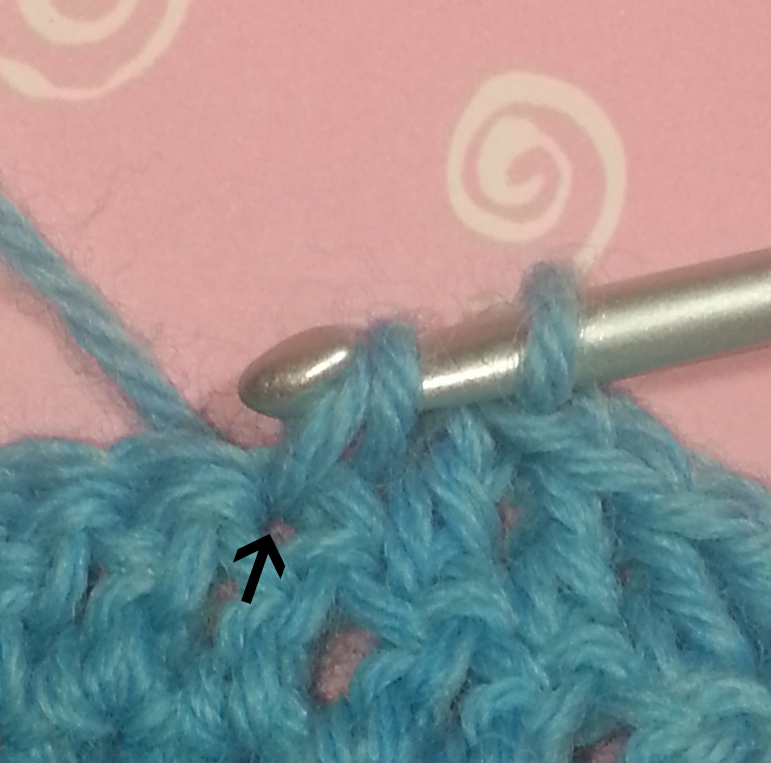
Next insert your hook into the space or stitch indicated by your pattern.
Wrap the yarn over the hook again
and pull that loop thru the stitch or space you inserted your hook into.
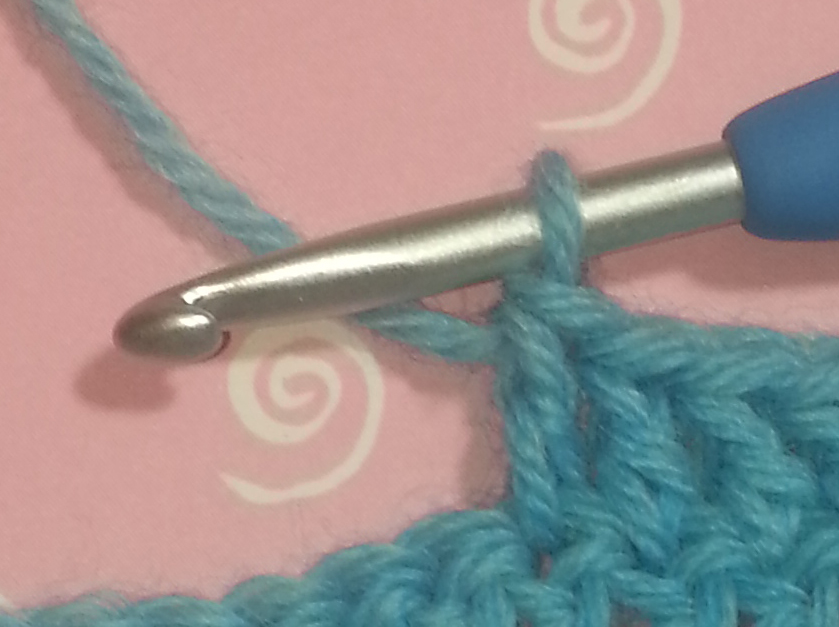
Now you have 3 loops of yarn on the shaft of your hook.
Wrap the yarn over the hook and pull that loop thru 2 of the loops on the shaft of your hook.
That loop you pulled thru is now on the shaft of your hook, which give you 2 loops on the shaft.
Wrap the yarn over the hook once more and pull thru the remaining 2 loops on your hook.
You’ve completed your double crochet stitch and the loop remaining on your hook is your “working loop”.
Once you have the chain, slip stitch, single and double crochet stitches in your skill set there is a whole wide crochet world open to you. If you add the foundation single crochet and the half double crochet to that list there isn’t much that can stop you.
If you would like to practice your Double Crochet stitch you can make a scarf from my “Warming up Winter Simple DC Scarf” pattern available here on my blog. All the stitches you need for this scarf project are Chain, Single and Double Crochet.
The weather is warming up a little up here on the mountain. But with my new short hairstyle my ears can get quite chilly when I am out for walks with my dog.
Photo courtesy of Beatrice Ryan Designs
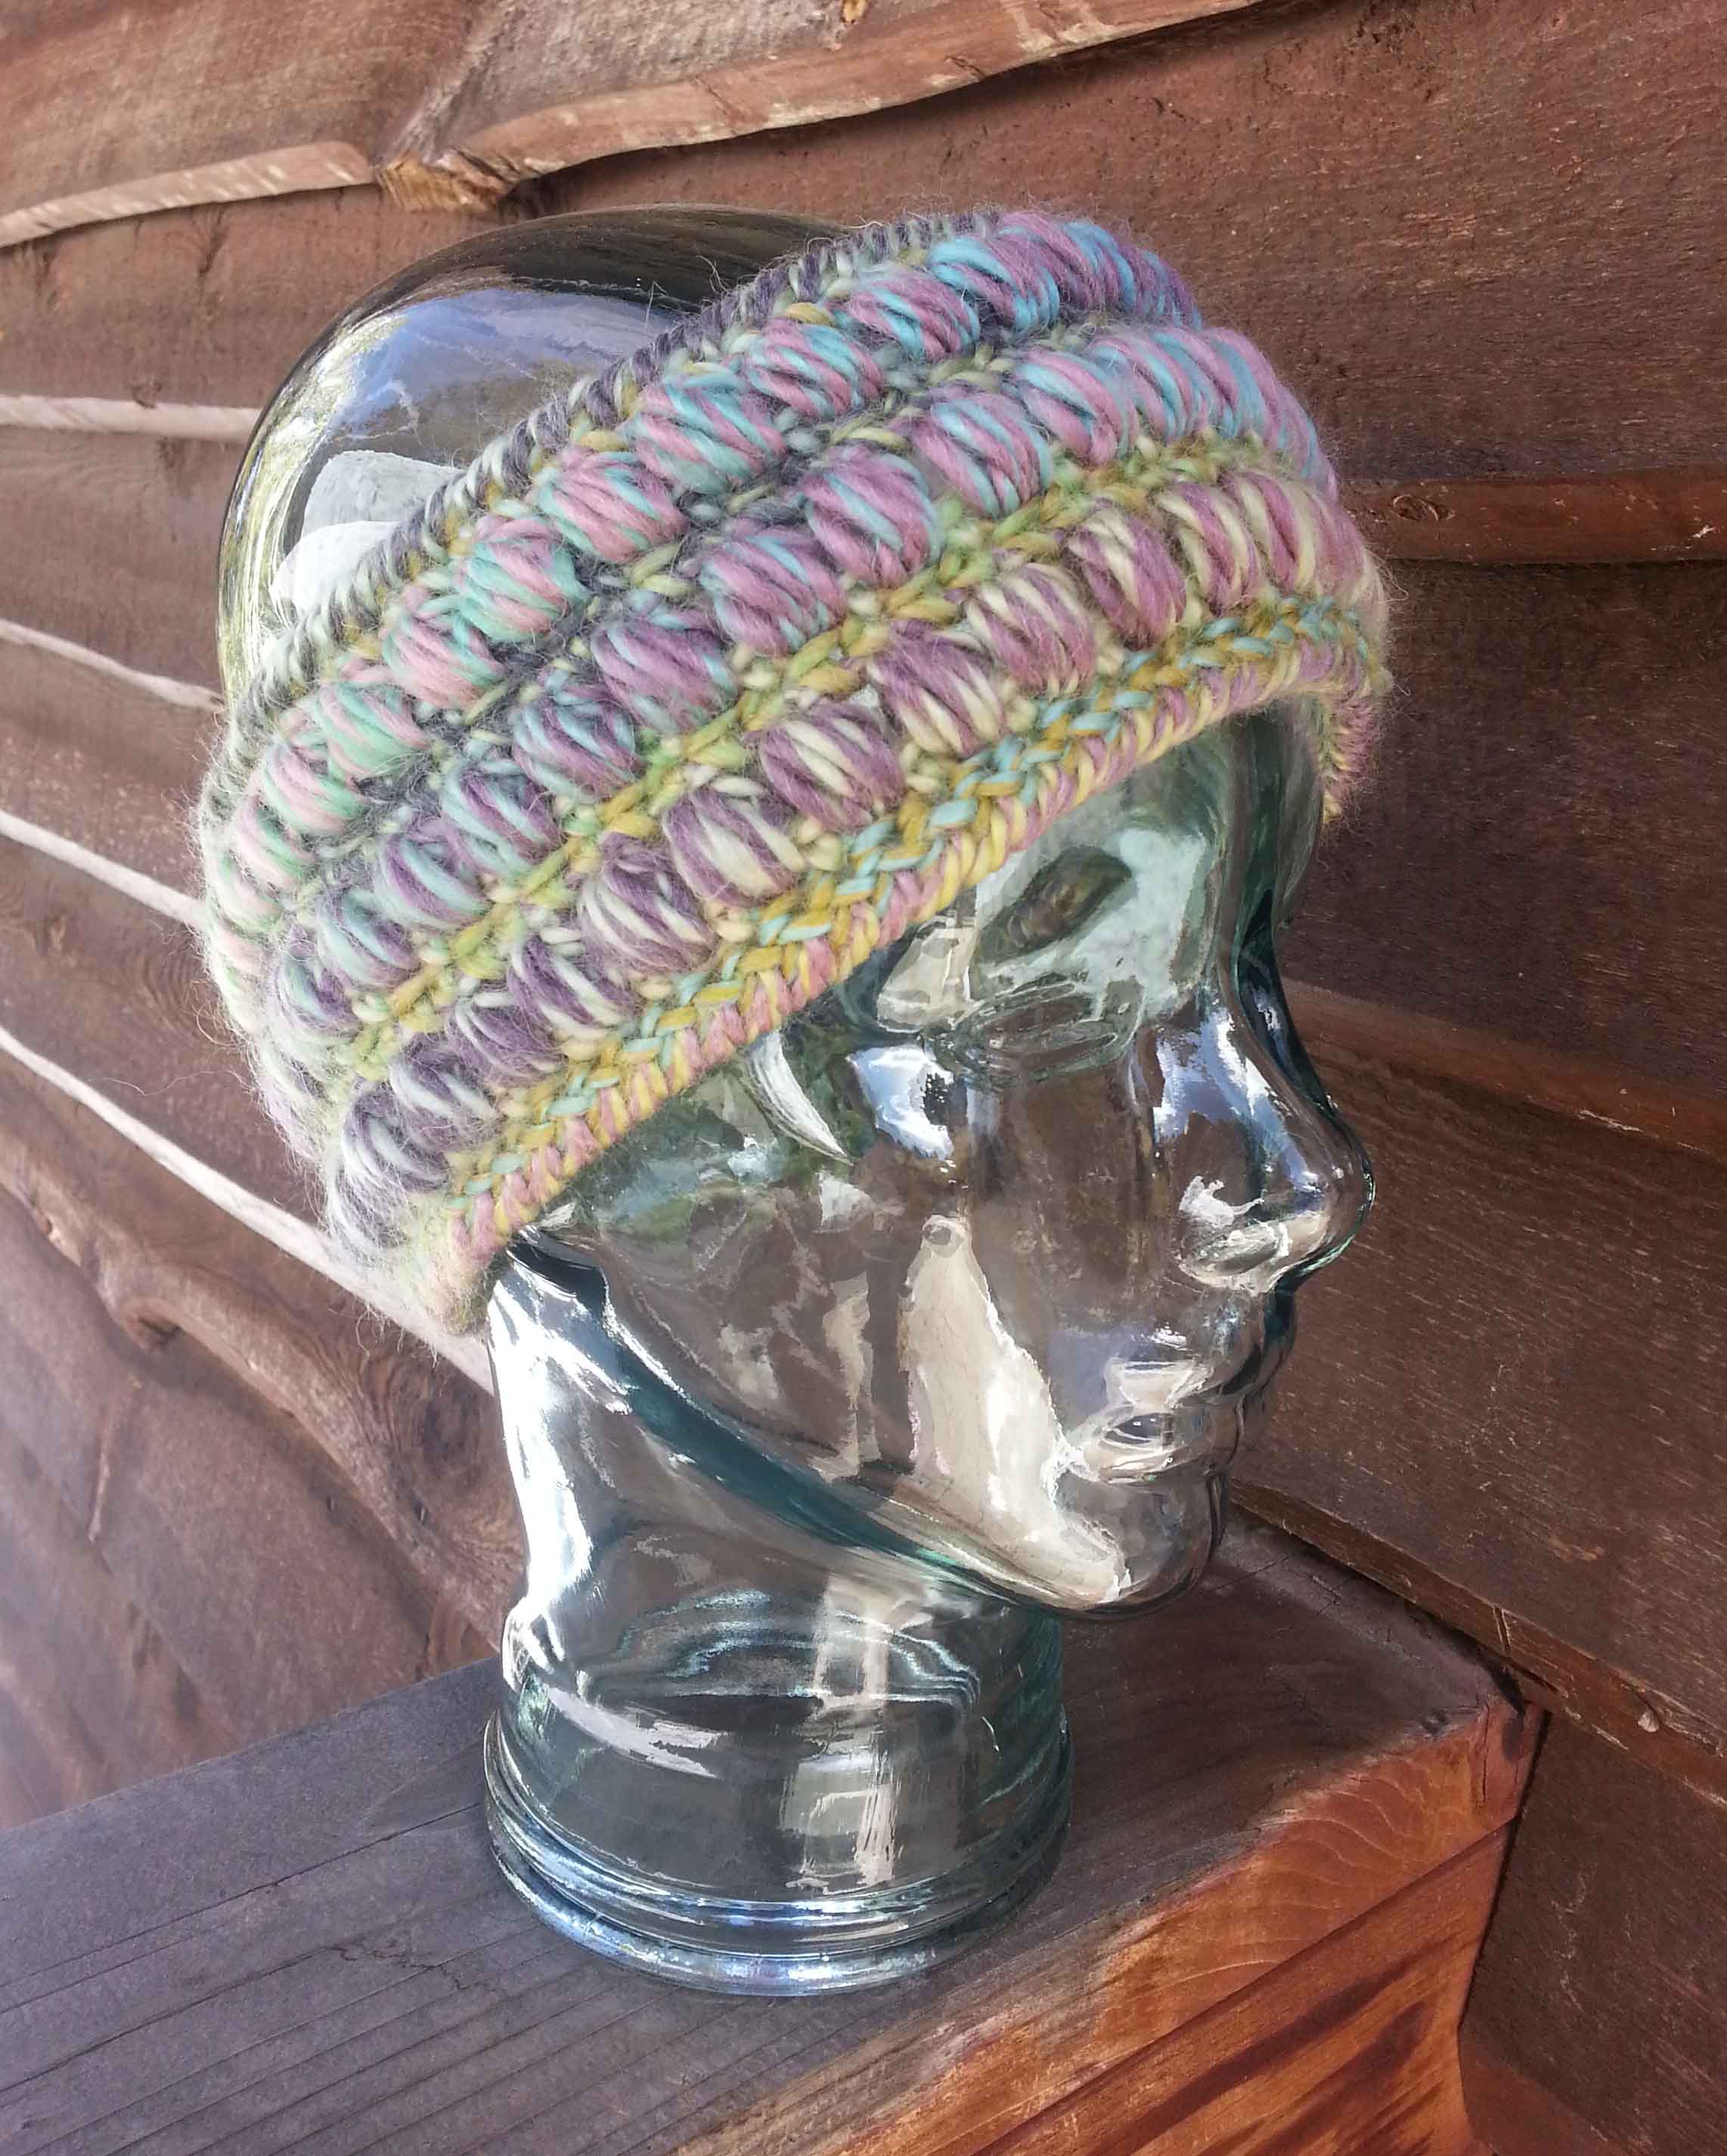
So I decided it was time to try this fun headband pattern designed by my friend Elena at Beatrice Ryan Designs. You can find the pattern over on her blog “Whimsical Warmth Headband”.
I thought it would look really nice in a yarn with long gradual color changes so I decided to use Red Heart’s Boutique “Treasures” in the Watercolors colorway.
I made a few changes when working this pattern. I used a foundation single crochet for the foundation instead of working a chain and then working into the chain.
I also didn’t want to cut the yarn and re-attach to the bottom of the foundation. Instead I used chain and slip stitches to work down along the inside seam of the headband after I completed the reverse single crochet edge on the top edge of the headband. Then I completed the reverse single crochet edging along the base of the foundation.
I really like the way this headband came out, and it’s going to be my favorite to wear on my walks this spring.
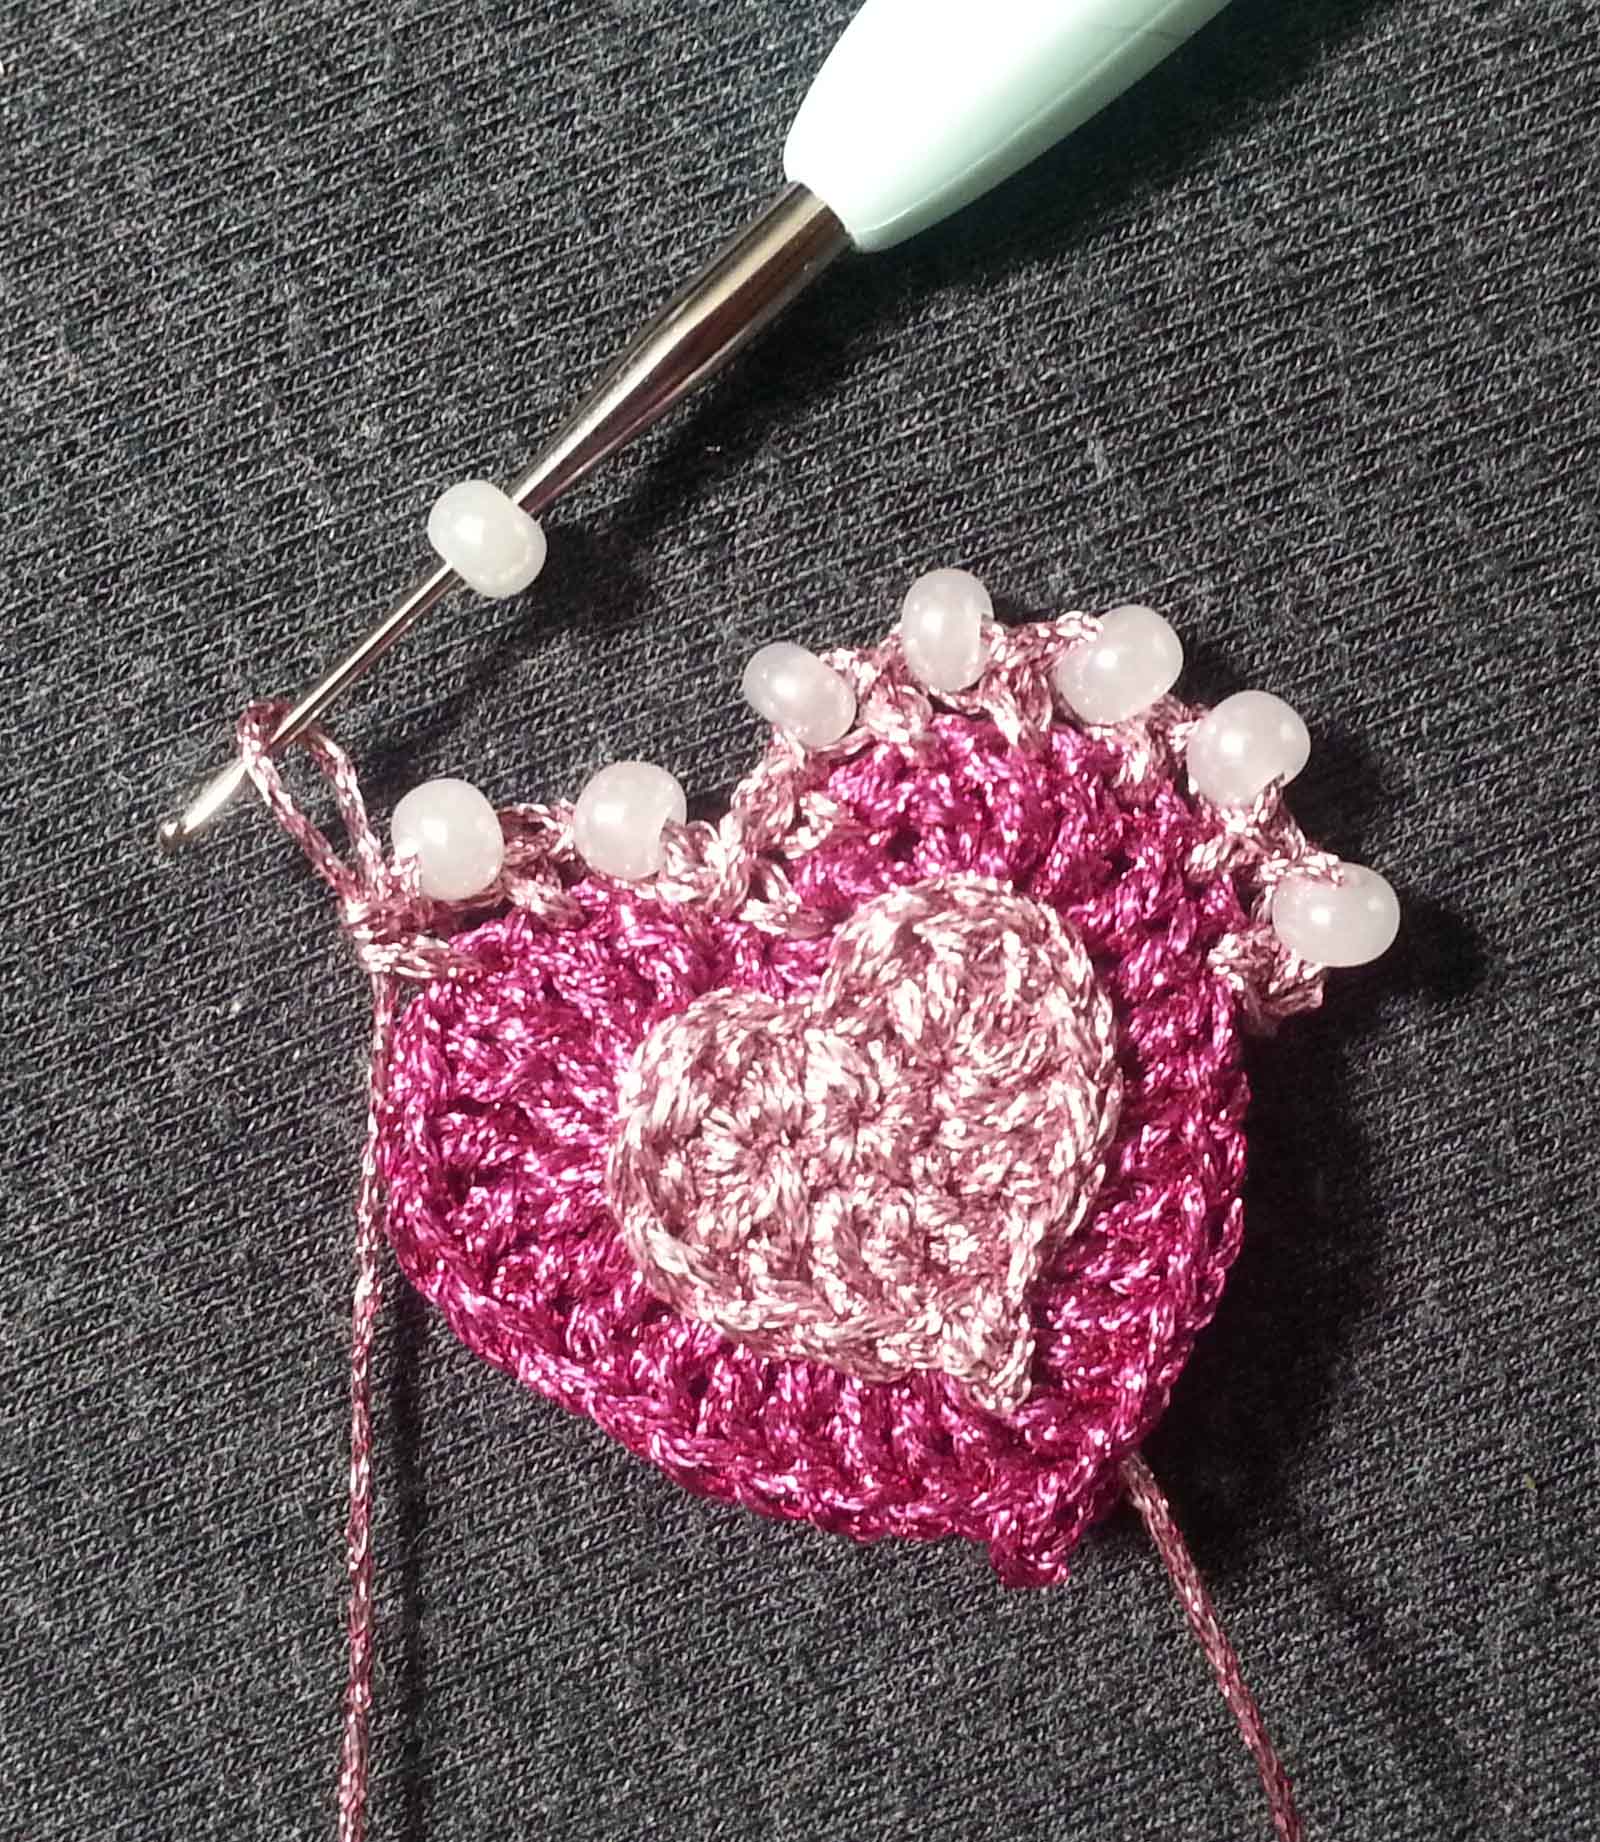
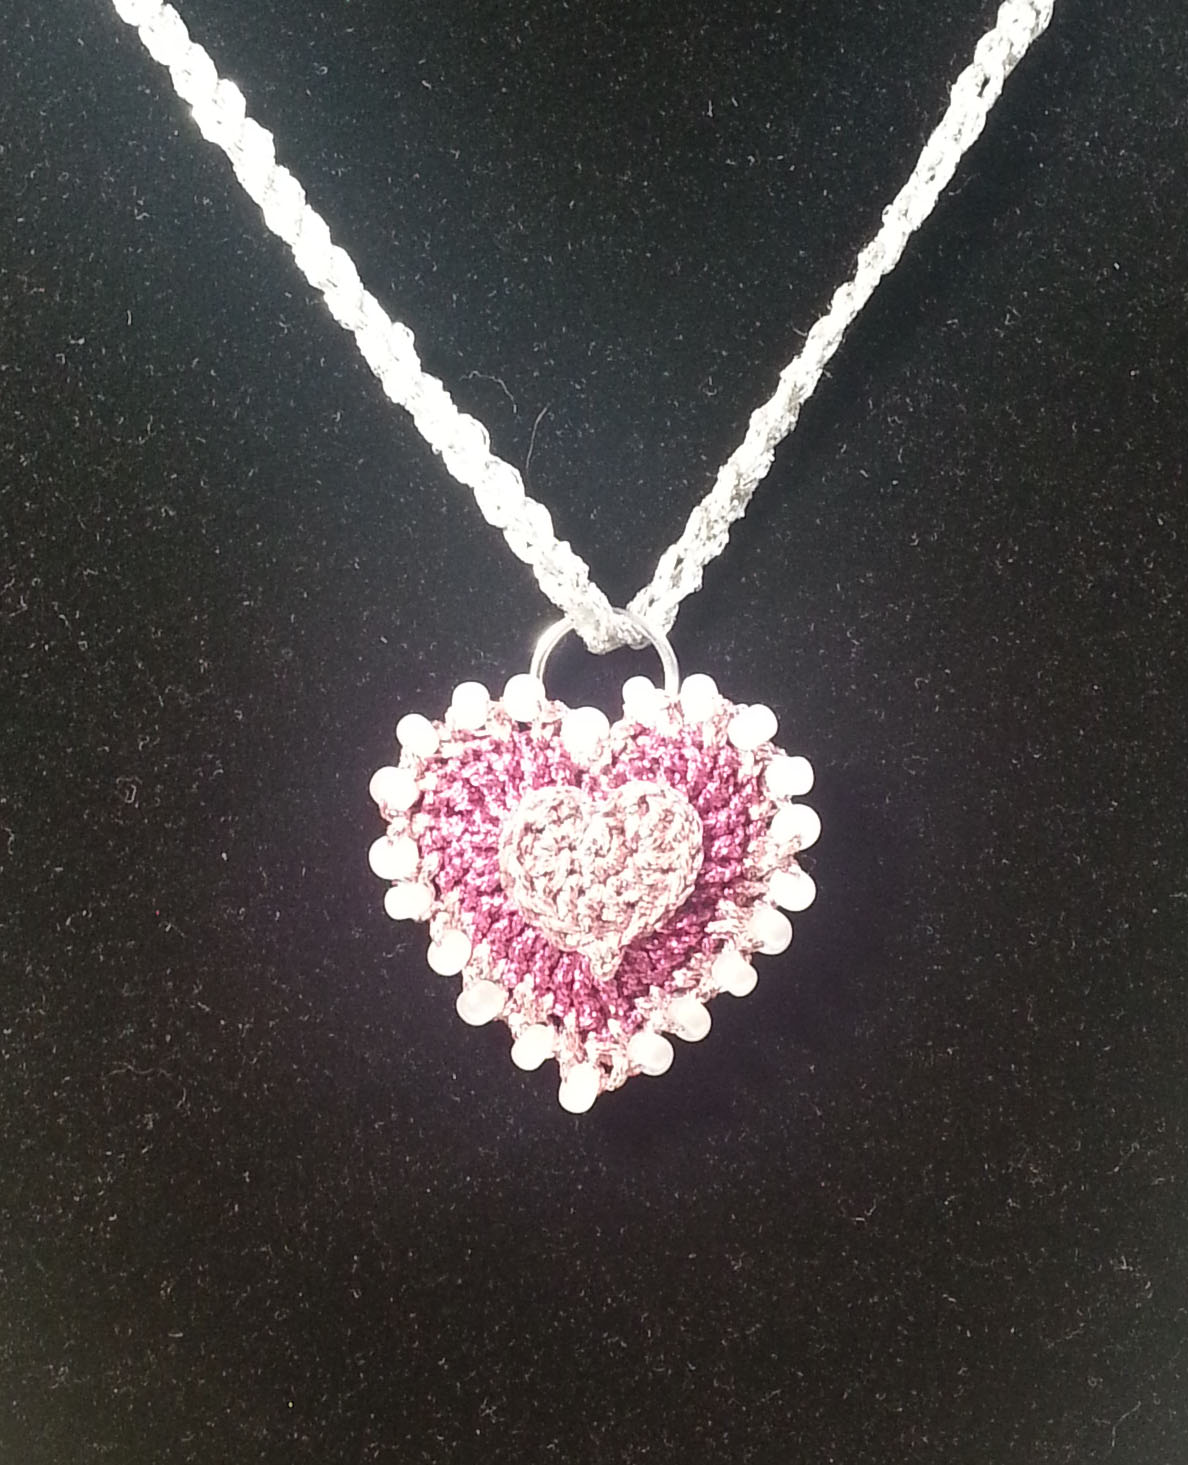
My weekend post was about Valentines Hearts, but I’m not finished yet. This pendant is a bit more complex than the projects I showed you in my last post, so I’m going to walk you thru how I made it.
I used Kreinik #12 metallic with a 1.75mm steel hook. I made 2 “Crocheted Love” hearts, and 1 “Simple Sweetheart” heart. I attached the Simple Sweetheart to the front of one of the larger hearts.
I crocheted my larger hearts together with single crochet stitch border and used a “hoist-on” method to place beads along the border.
For the “hoist-on” method I worked the last stitch before the stitch I want to place my bead on. Then extend the working loop and remove my hook from the loop. I then use a smaller steel hook to pick up a bead and insert that hook into the working loop.
I slide the bead from the shaft of the hook onto the working loop.
Then re-insert my hook that I was crocheting with to complete my stitch. This leaves the bead sitting on the top of the stitch.
Along the curve at the top of the heart I made 1 single crochet stitch working thru the tops of the stitches on both hearts, then placed a bead and chained 1 before making a single crochet in the next stitch. This created enough ease to curve around the curved section of the heart without causing the fabric to cup.
When I reached the straight edges of the heart I made my beaded chain 1, then sc2tog to keep the border from becoming ruffled.
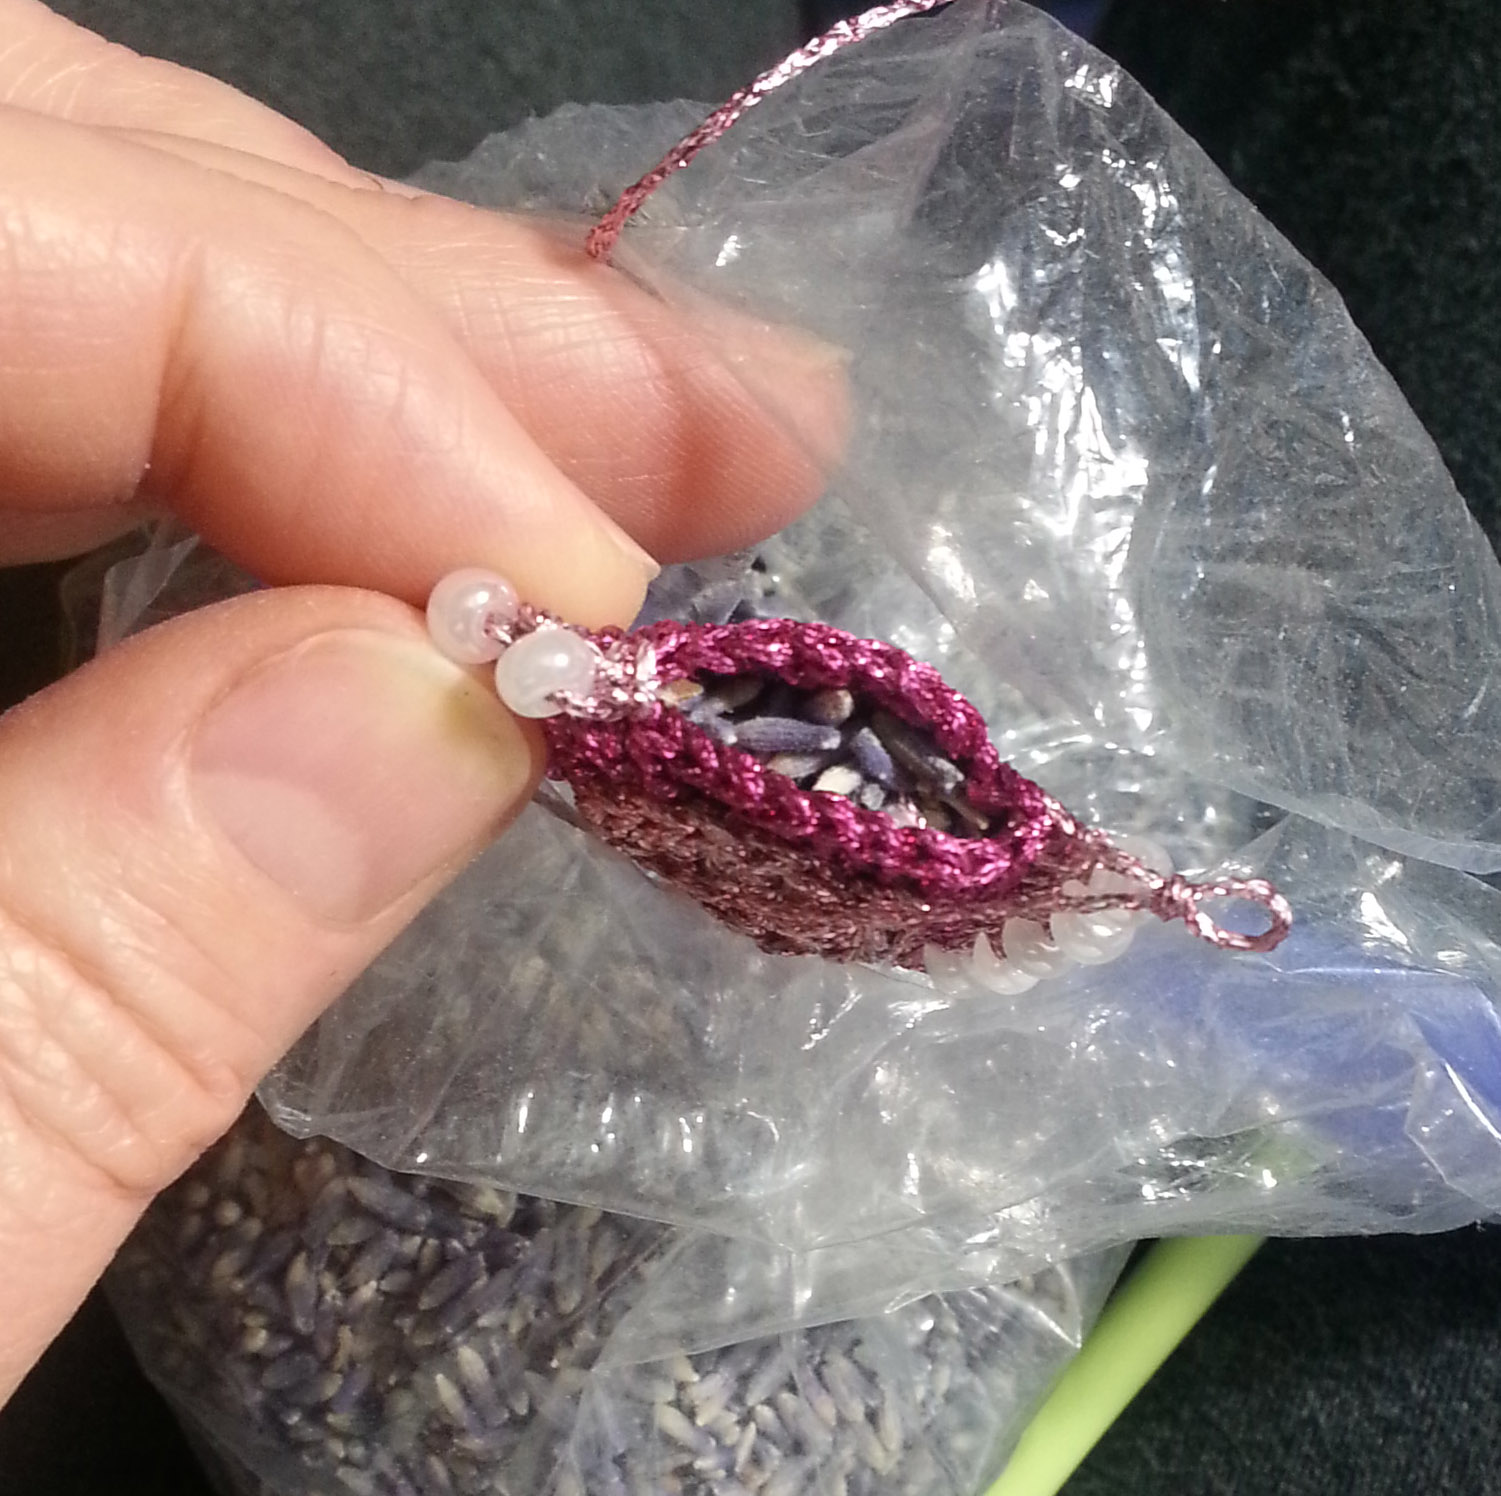
Before completing the sc border I poured some dried lavender buds inside the 2 large hearts. When worn the warmth from the body will release the fragrance of the lavender.
I left long enough tails to weave them back up to the top of the heart. Then I used the tails to sew a split ring to the back of the heart to string it on a necklace.
This survey is part of a major study of U.S. knitters, crocheters, needlepointers, cross-stitchers, weavers, and spinners. The survey will only take about 10 minutes to complete, and the more folks that complete it the better we designers and other yarn industry folks can understand your needs.
By taking this survey you will…
– Help fiber arts organizations and businesses serve you better
– Tell retailers and brands what you want
– Explore your fiber arts life
– Get the chance to win one of five $100 fiber arts store gift cards