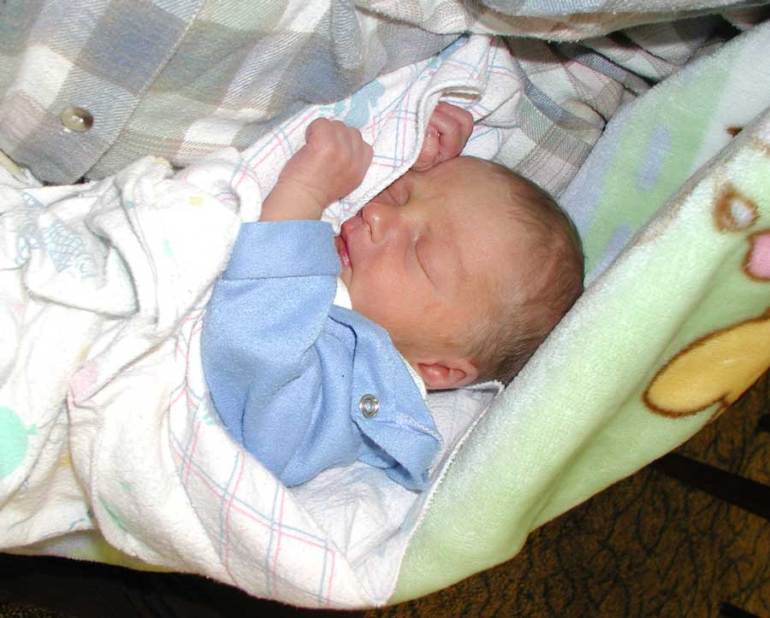
When my first child was born she was in a bit of a hurry and arrived 4 weeks before her due date. She was a tiny little one at first, weighing in at only 5 pounds. She measured a mere 12 inches around her little noggin.
My hands are not very big, but I could cup the entire back of her head in my palm. I remember being amazed that such a tiny fragile being could be as alive and robust as she was. She is now grown to be a busy, healthy and energetic young girl.
Many full-term newborns in impoverished nations around the world are no bigger than my child was, and some are much tinier and far less robust. There are multiple challenges facing these babies and their mothers.
I wanted to design a special hat pattern to support the efforts for the Save the Children Caps for Good campaign. This is a program to provide hats for newborns in many countries where keeping a tiny head covered can make a real difference. A baby that isn’t using energy to stay warm can use that energy instead to grow and gain critical survival weight.
The only payment I ask for the use of this pattern is that you donate at least 2 caps to the Save the Children program or, after February 28, 2011, to a similar program that you know of in your community to help newborns. Thank you for helping to warm up some babies.
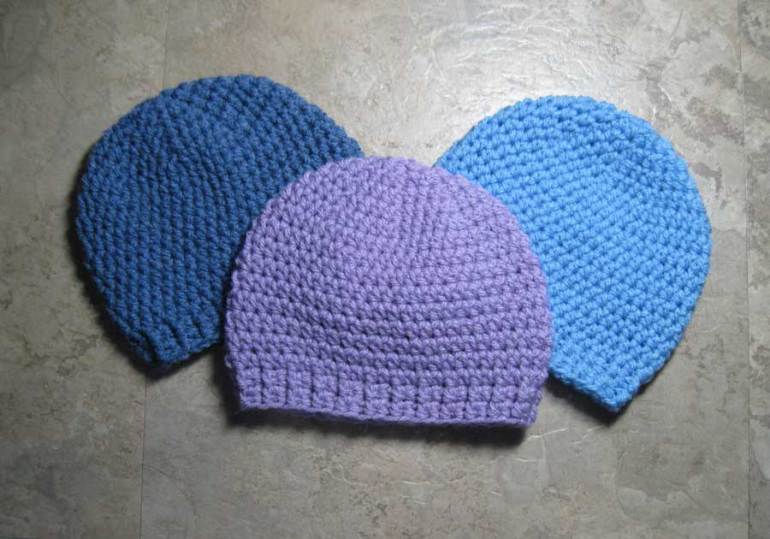
Little Bitty Noggin Cap by Andee Graves
Materials: Yarn – Any Sport or Light worsted weight yarn can be used. Samples used approximately .6 oz (56 yards) of Red Heart Designer Sport, CYCA #3 weight, 100% acrylic. Colors used are Iced Violet (discontinued), Sky (discontinued) and #3820 Denim. Hook size H-8 (5 mm).
Gauge: First 6 rounds should be 4 inches in diameter.
Stitches used: Chain (ch), slip stitch (sl st), single crochet (sc), half double crochet (hdc), front post half double crochet (fphdc), and back post half double crochet (bphdc).
Special Stitches: Increase (Inc) – hdc thru both loops of next st, hdc in back loop of same st.
Notes: Cap is worked from the center crown down to brim. Rnds 1 thru 15 are worked spirally. Use a stitch marker in the last st of each rnd and move up as rnds are completed.
Instructions:
Rnd 1: Ch 2, sc and 7 hdc in 2nd ch from hook.
Rnd 2: (Hdc in next st, hdc in bk lp of same st) 8 times [16 hdc]
Rnd 3: (Hdc in next st, Inc in next st) 8 times [24 hdc]
Rnd 4: (Hdc in next 2 sts, Inc in next st) 8 times [32 hdc]
Rnd 5: (Hdc in next 3 sts, Inc in next st) 8 times [40 hdc]
Rnd 6: (Hdc in next 4 sts, Inc in next st) 8 times [48 hdc]
Rnd 7: Hdc in each st of round [48 hdc]
Rnd 8 – 14: Repeat Rnd 7
Rnd 15: Repeat Rnd 7, sc next st, sl st next st
Rnd 16: Ch 2,( fphdc next st, bphdc next st) 24 times, sl st to 2nd ch of beg ch 2. [48 hdc]
Rnd 17 : Repeat Rnd 16, fasten off
Weave in ends.


Lovely idea with these hats for babies in need.
Thanks for the patter, I will definitely try it.
Wow Andee! Thanks for this beautiful pattern. My knitting group has been knitting and crocheting preemie caps for a home here in Denver and I am sure they will love making this sweet, sweet pattern!
Hi,
I’m working on some caps for Caps for Good and I’m working on the Little Bitty Noggin Cap now.
I’m a little lost on Row 15 though, If I repeat Row 7, then it’s just HDC around, where am I supposed to SC and Sl St? Are those the last two stitches of the row(#47 & #48)?
Thanks for your help, and for the great pattern! 🙂
For Round 15 you do the exact same thing as Round 7 then work the instructions for the next 2 stitches. All this does is step down from the hdc so that your ribbing rounds work out more neatly.
You can work the SC and Sl St as stitches #47 and #48 of that round, it won’t make a huge difference either way as you are not increasing or decreasing. HTH
I love making hats for our local children’s hospital as well as cancer center so this lovely pattern will come to good use. Thanks!
I am so sad that I missed out on this wonderful charity opportunity. I crochet chemo caps for Knots of Love and I have SO MANY balls of happy colored soft yarn left over. It’s Caron Simply Soft so would be perfect for babies. If this charity starts accepting caps again could you let me know?
Kathy, You might want to check with your local hospital. Oftentimes they need warm hats for premies and newborns too. Save the Children tends to do this program or a version of it very other year. I’ll definitely be announcing it when they do it again.
Thanks for the great pattern and the kick in the pants to do a little charity crocheting. I haven’t made any beanies to donate yet, but I made one for a friend recently and it turned out great. I am sure there is some kind of local charity I can find around her to donate too. Especially because it is about to get really cold here soon.
Thanks again!
Thanks for this pattern. I’m going to a knit/crochet even this weekend where we’ll be making caps for the Western NC Community Health Center families. I’ll be making this pattern:)
This is a fabulous pattern! I found it with the intention of making a hat for my newborn neighbor, but I had to make 2 for charity first. Well that “2” turned into 12 donated to Direct Relief International. Many others in our knitting/crochet group are using the pattern for DRI. Your gift is spreading across the world!
So glad the pattern is useful to you and your group.
Is there a chance that you could do a video with this hat?
I will very likely do a video on this hat someday. But it won’t be very soon. If you are having a hard time with it check out my “Perfect Fit Crocheted Hat” pattern on Ravelry.
I just finished one of these adorable caps! The measurements are what they are supposed to be but the cap just looks huge to me.. lol. Also, the rim is the same width as the rest of the hat, in your pictures, the rim looks a bit smaller. Should I have gone down a couple hook sizes?
The ribbing should cinch up the opening of the cap a bit. You might want to adjust what size hook you are using with the yarn you are using. I generally use a Size H – 5mm hook with the typical worsted weight yarn. If I am using a thinner yarn I go down in hook size accordingly. I like my hats to have a fairly snug stitch tension (and looser for lacy things, like shawls), you just don’t want the fabric to be so tight that the hat stands up on it’s own.
If you want your hat size to come out smaller, leave out one of the increase rounds and work even to the length you want before adding the ribbing. Hope that helps.