Playing with Triangles

This past week has been a busy and fun one. My boys were on Spring Break and we made a quick trip to Kansas to visit some of my family. Got to have a good visit with my Dad and brothers, but the highlight of the trip was taking my niece and her 2 little ones to Kansas City for a fun-filled day at LEGOland, as well as an entertaining dinner at Fritz’s where toy trains deliver your food to your table.

We were supposed to head back to Colorado on Wednesday, but the weather forecast looked like we would end up stranded with highway closures. We stayed an extra day in Topeka and drove home on Thursday. Once we got to Colby, Kansas on Interstate 70 we could see that it had definitely been the right decision. Now we just need to dig out our driveway and deck from the approximately 2.5+ feet of snow that fell here on the mountain.

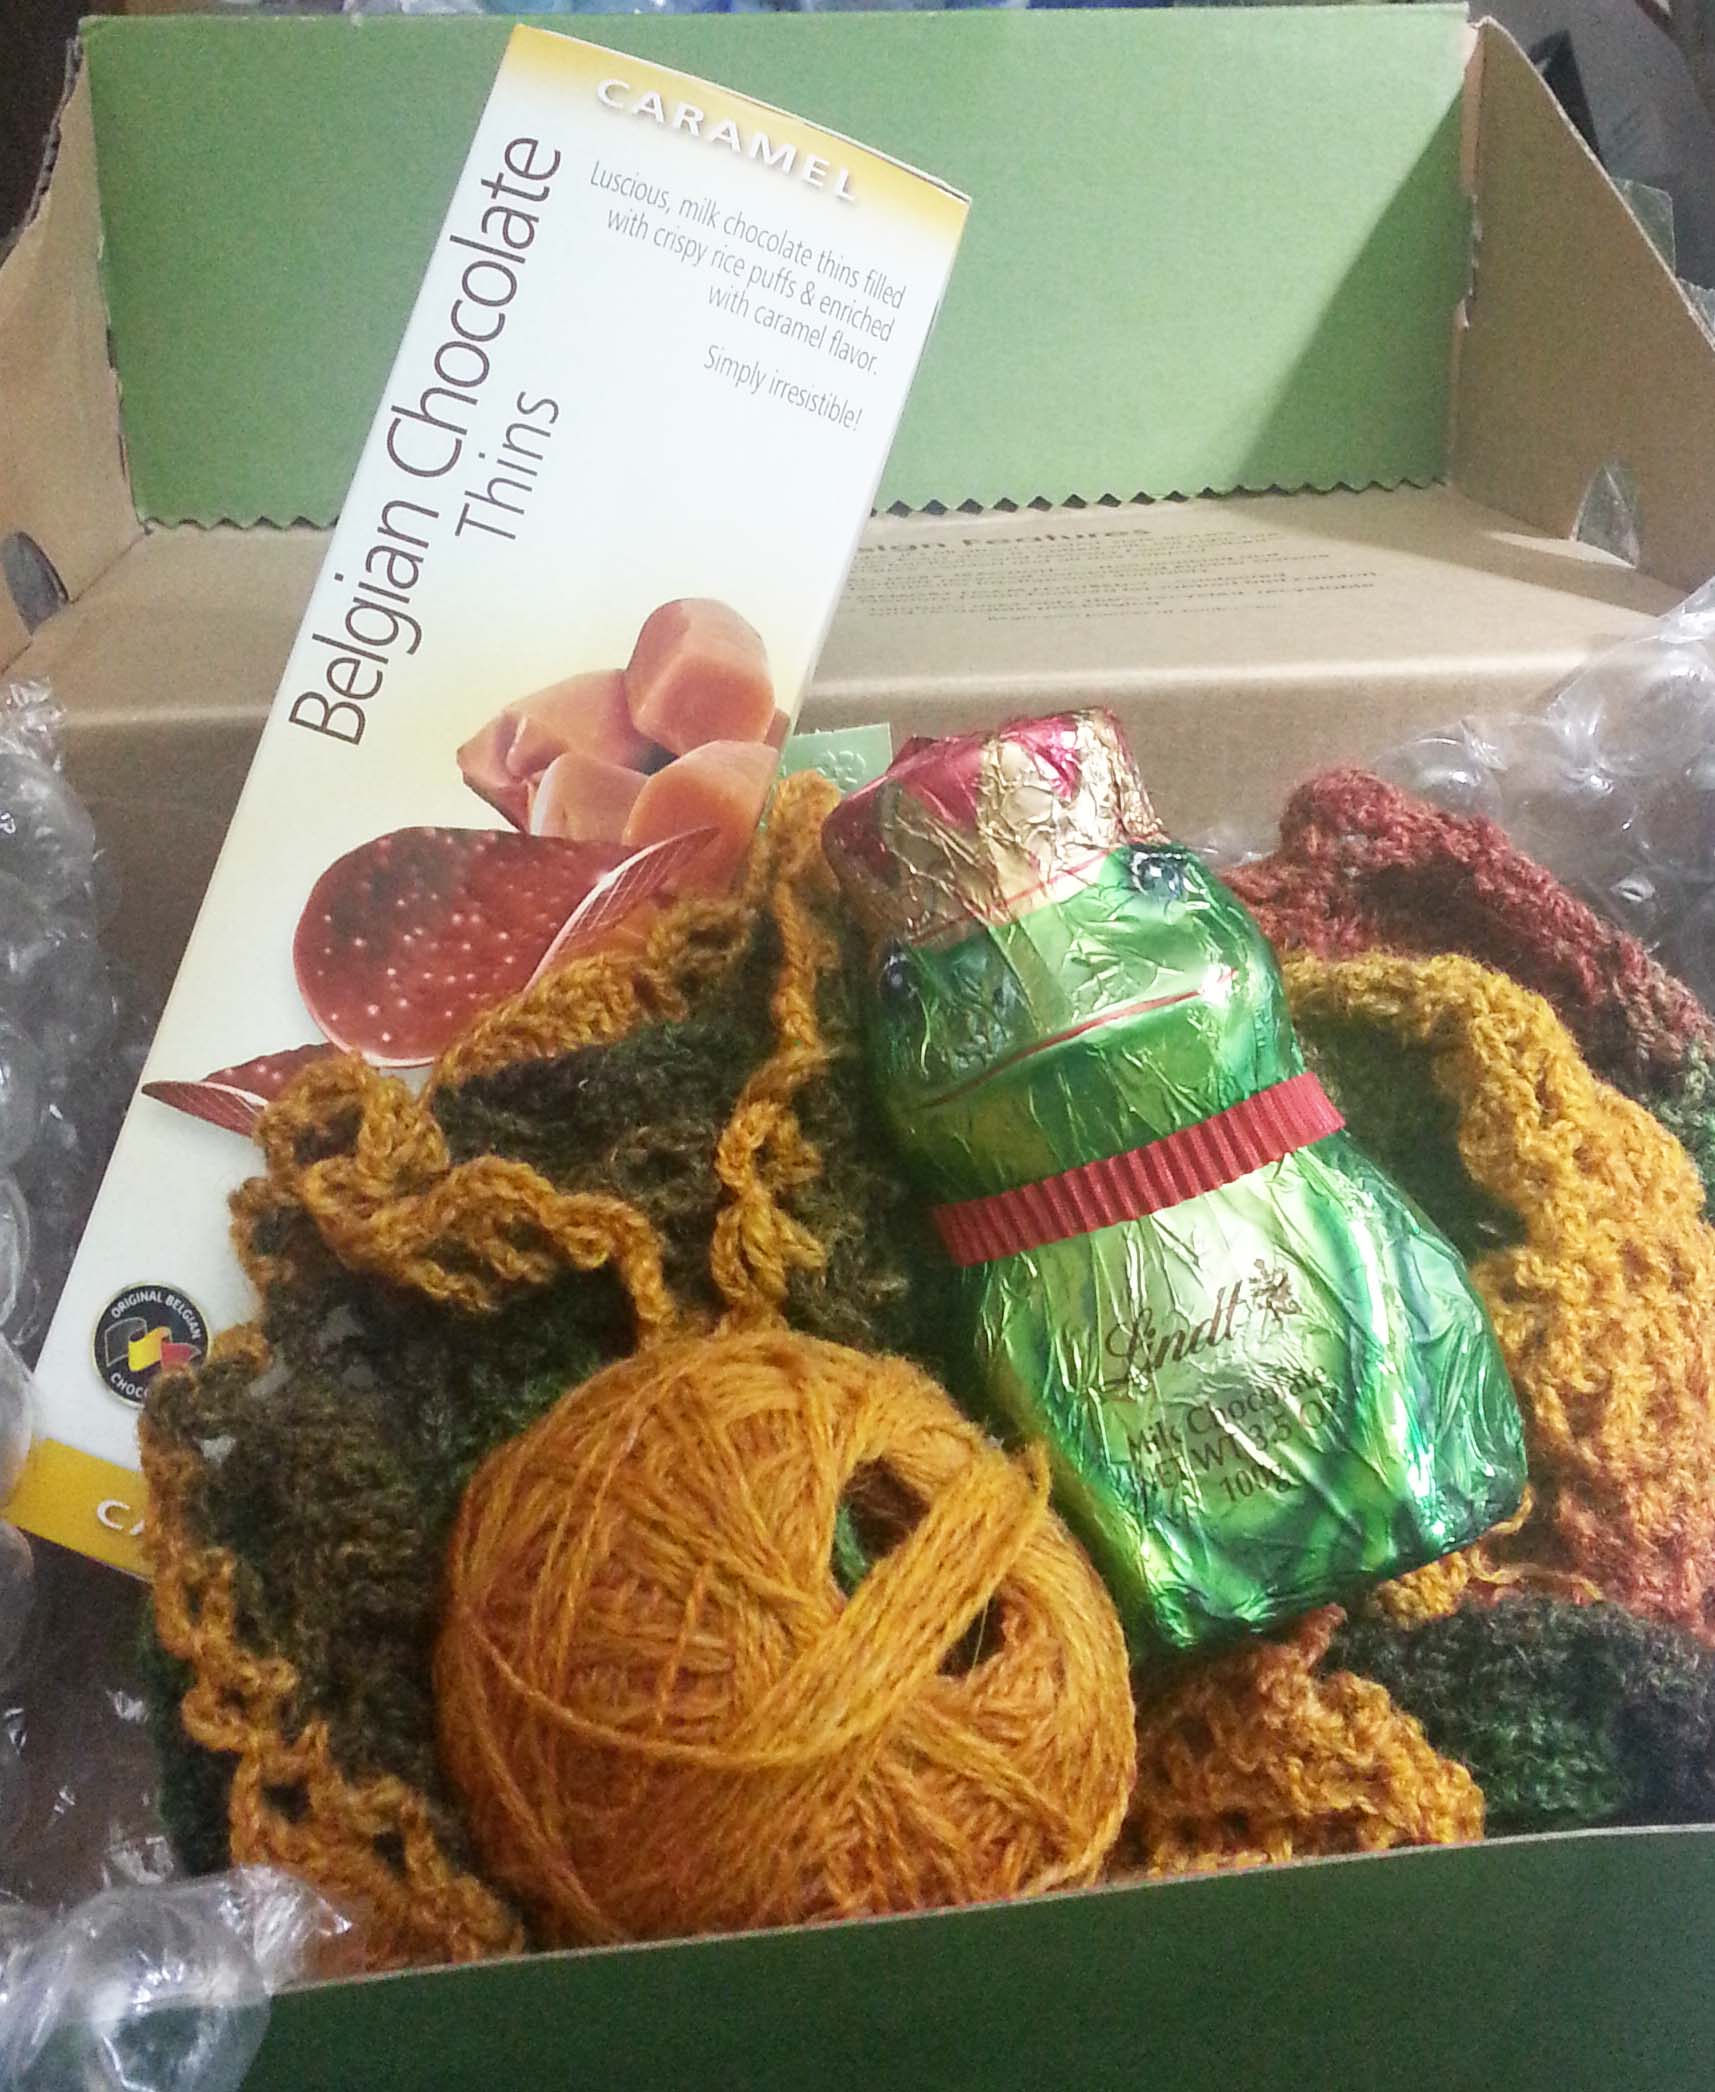
Our Easter bunny is going to need snow boots to deliver eggs, especially since more snow is expected thru the weekend. I may just be curling up in front of a nice fire in the wood stove and crocheting. I’ve got a couple shawl projects on the hooks and that fits with today’s post.

Recently we had a little math lesson here on the blog for figuring out the yardage for making a triangle shawl.  Today I thought I would give you the tools for starting your own triangle shawl. I’m going to walk you thru this pattern, hopefully that will make it easy for even our newer-to-crochet folks to follow.

As I’ve said before, my favorite way to design is using what I call “Small Starts” for a project. To me the first 2-3 rows or rounds of a project are often the most fiddly, so I like to get them out of the way quickly so I can get to the “good” stuff. Nothing makes me happier than being able to write the beginning instructions of a pattern as “Chain 2 work in second chain from hook, . . . ”

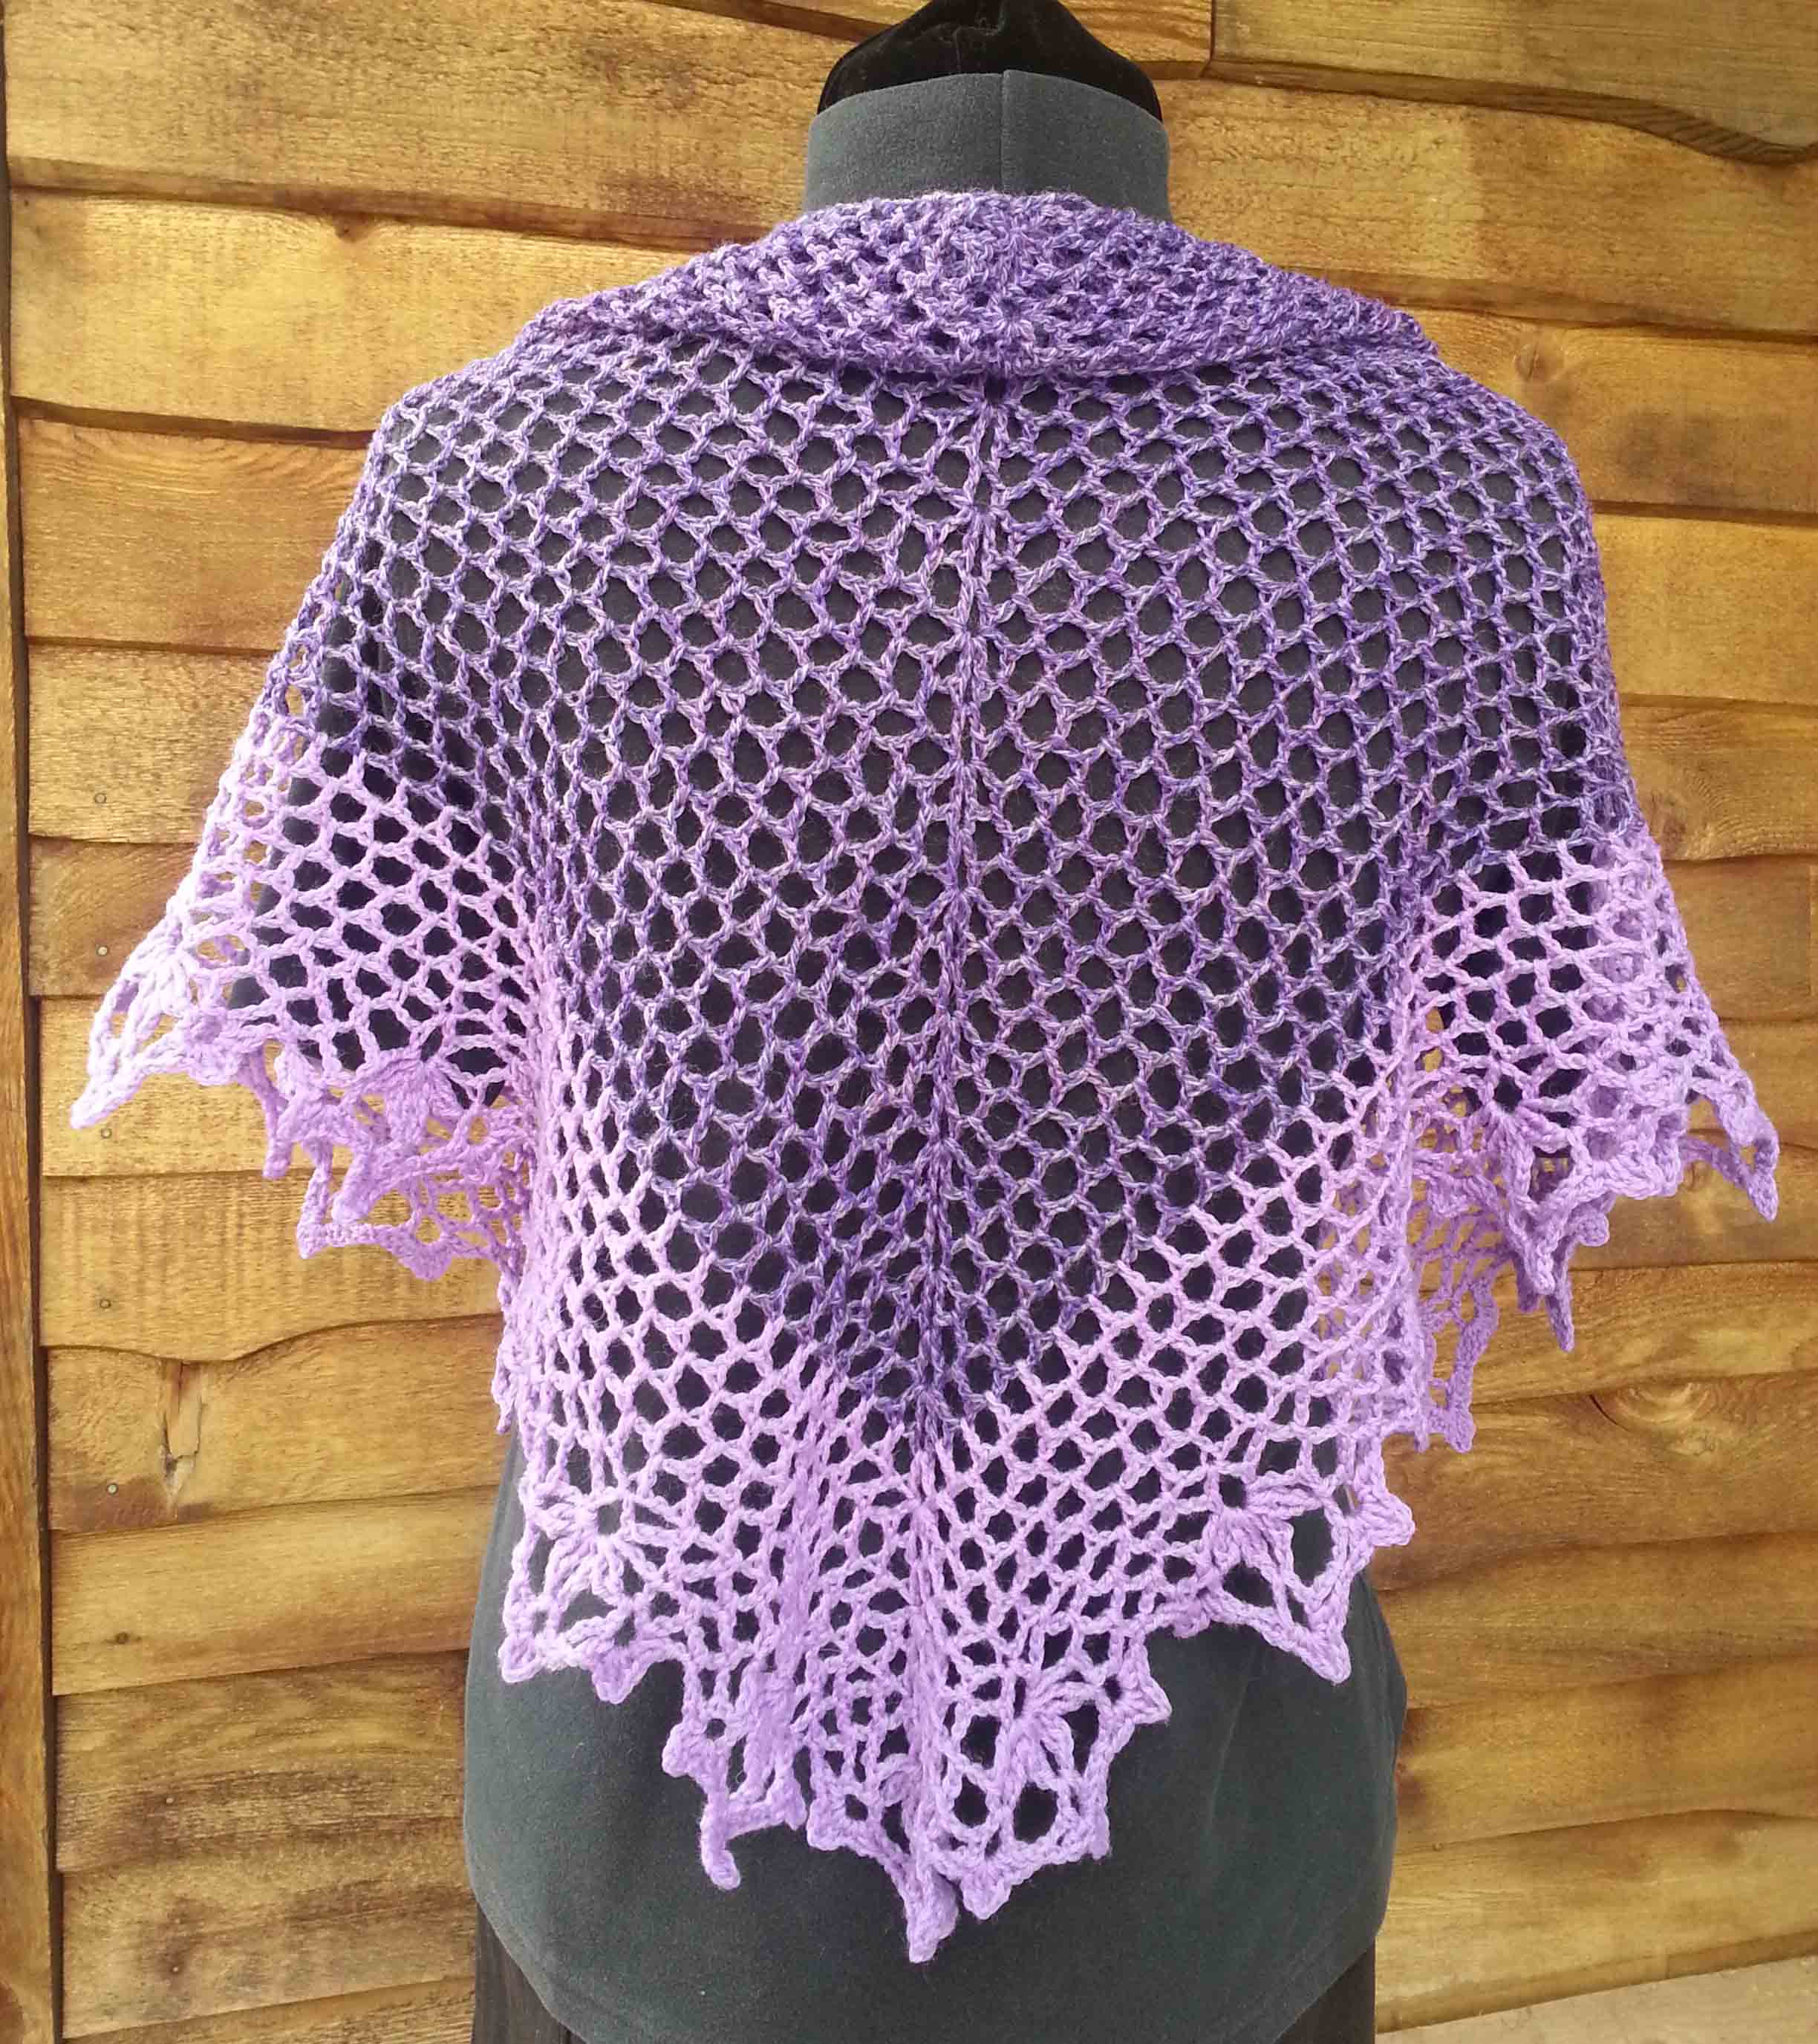
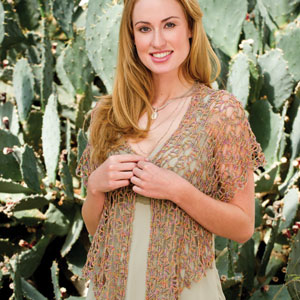
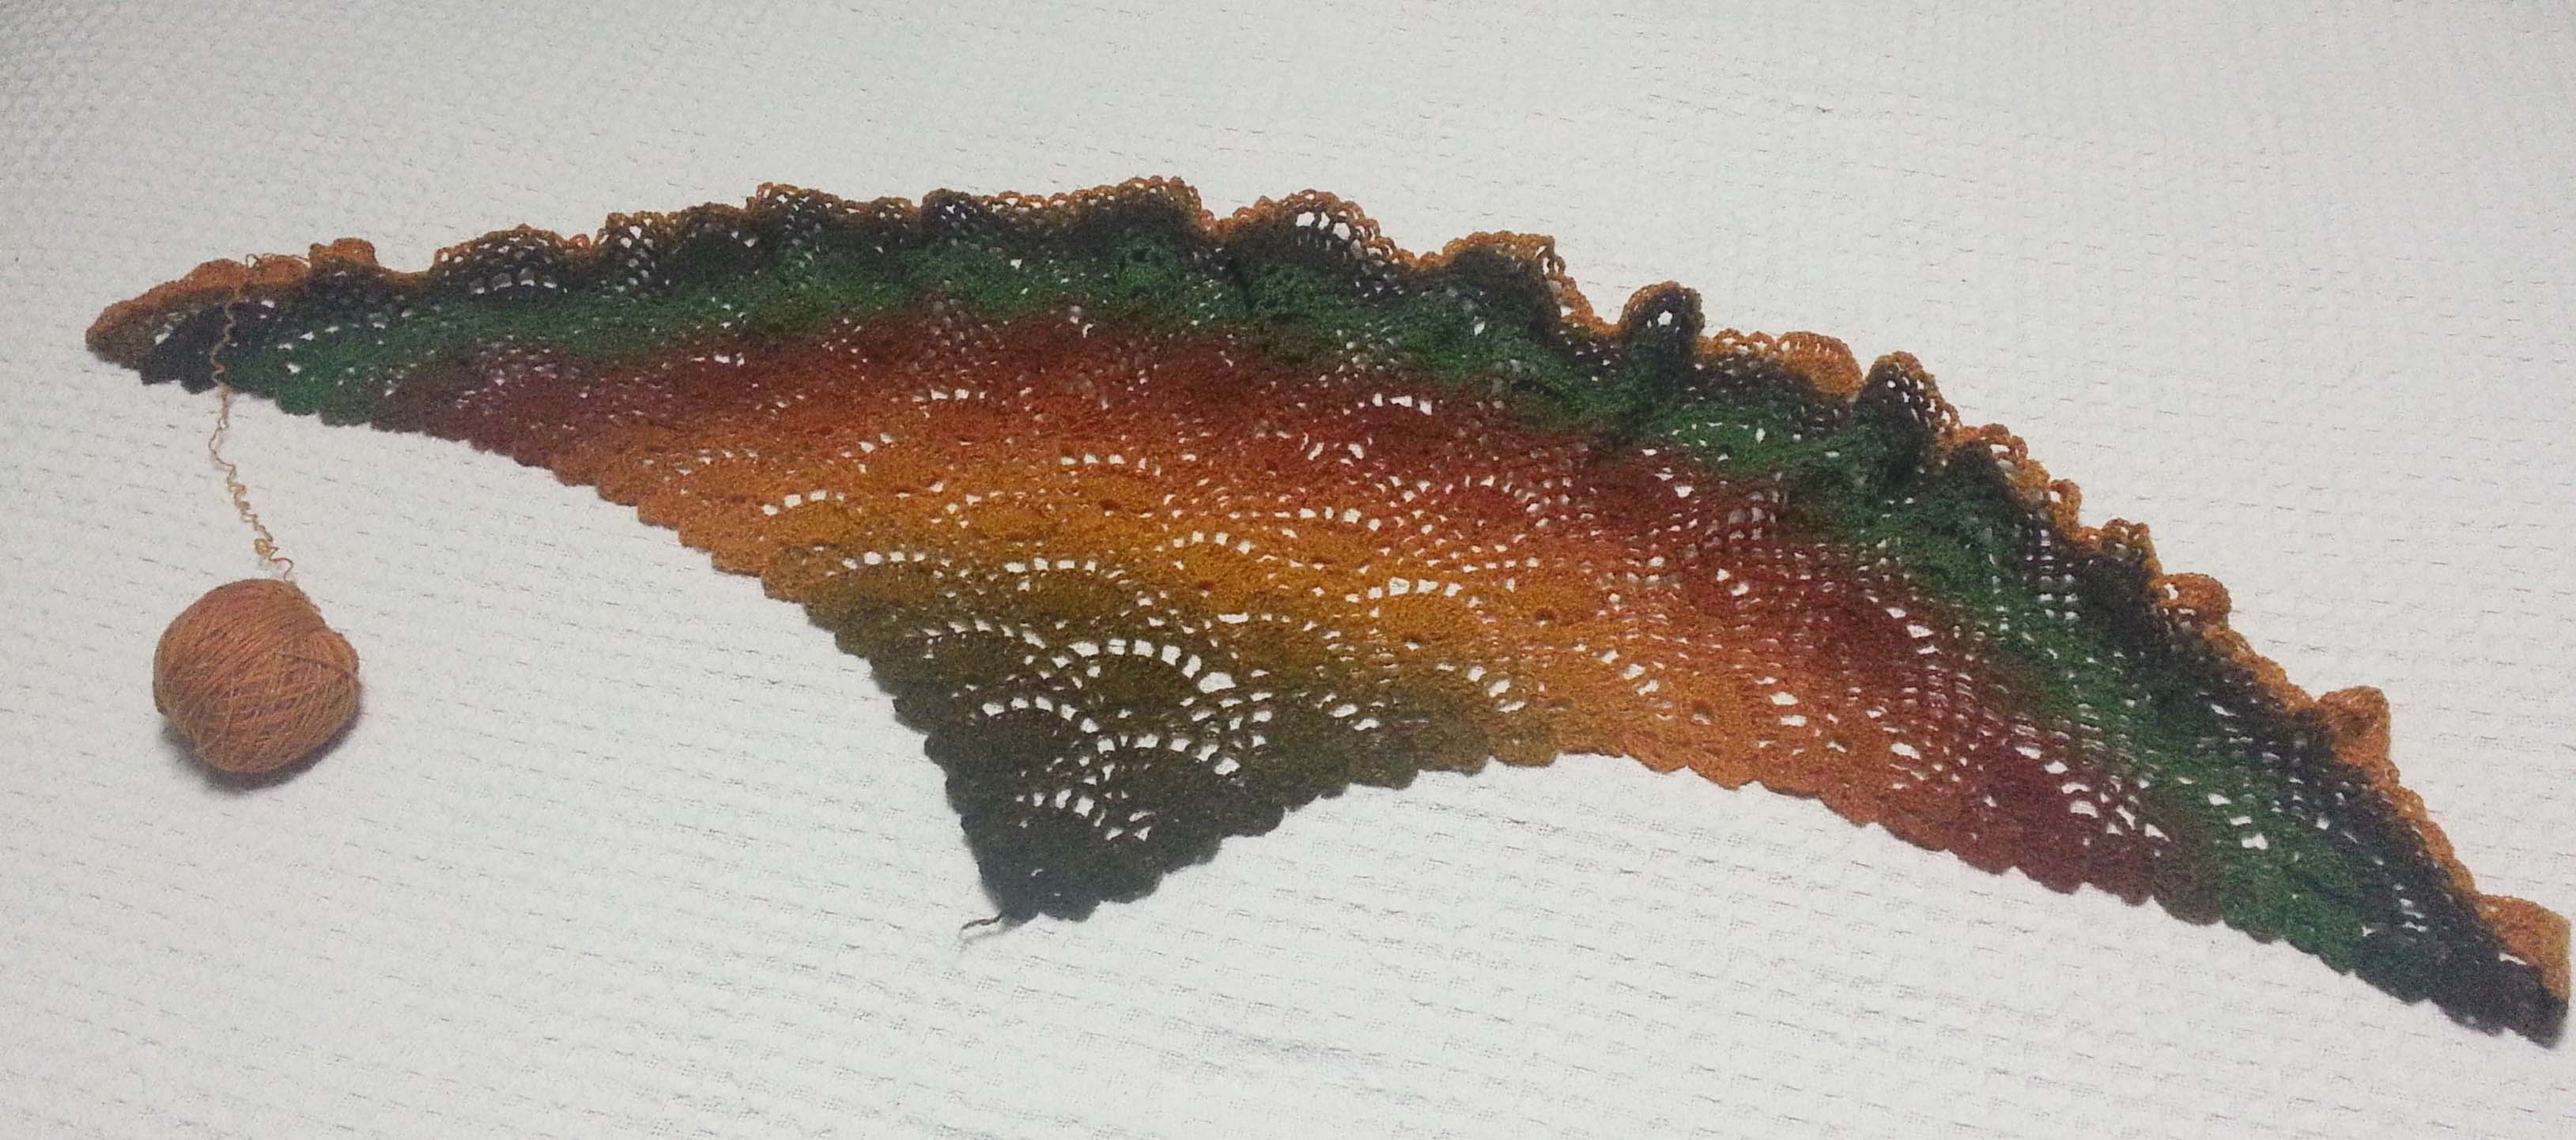
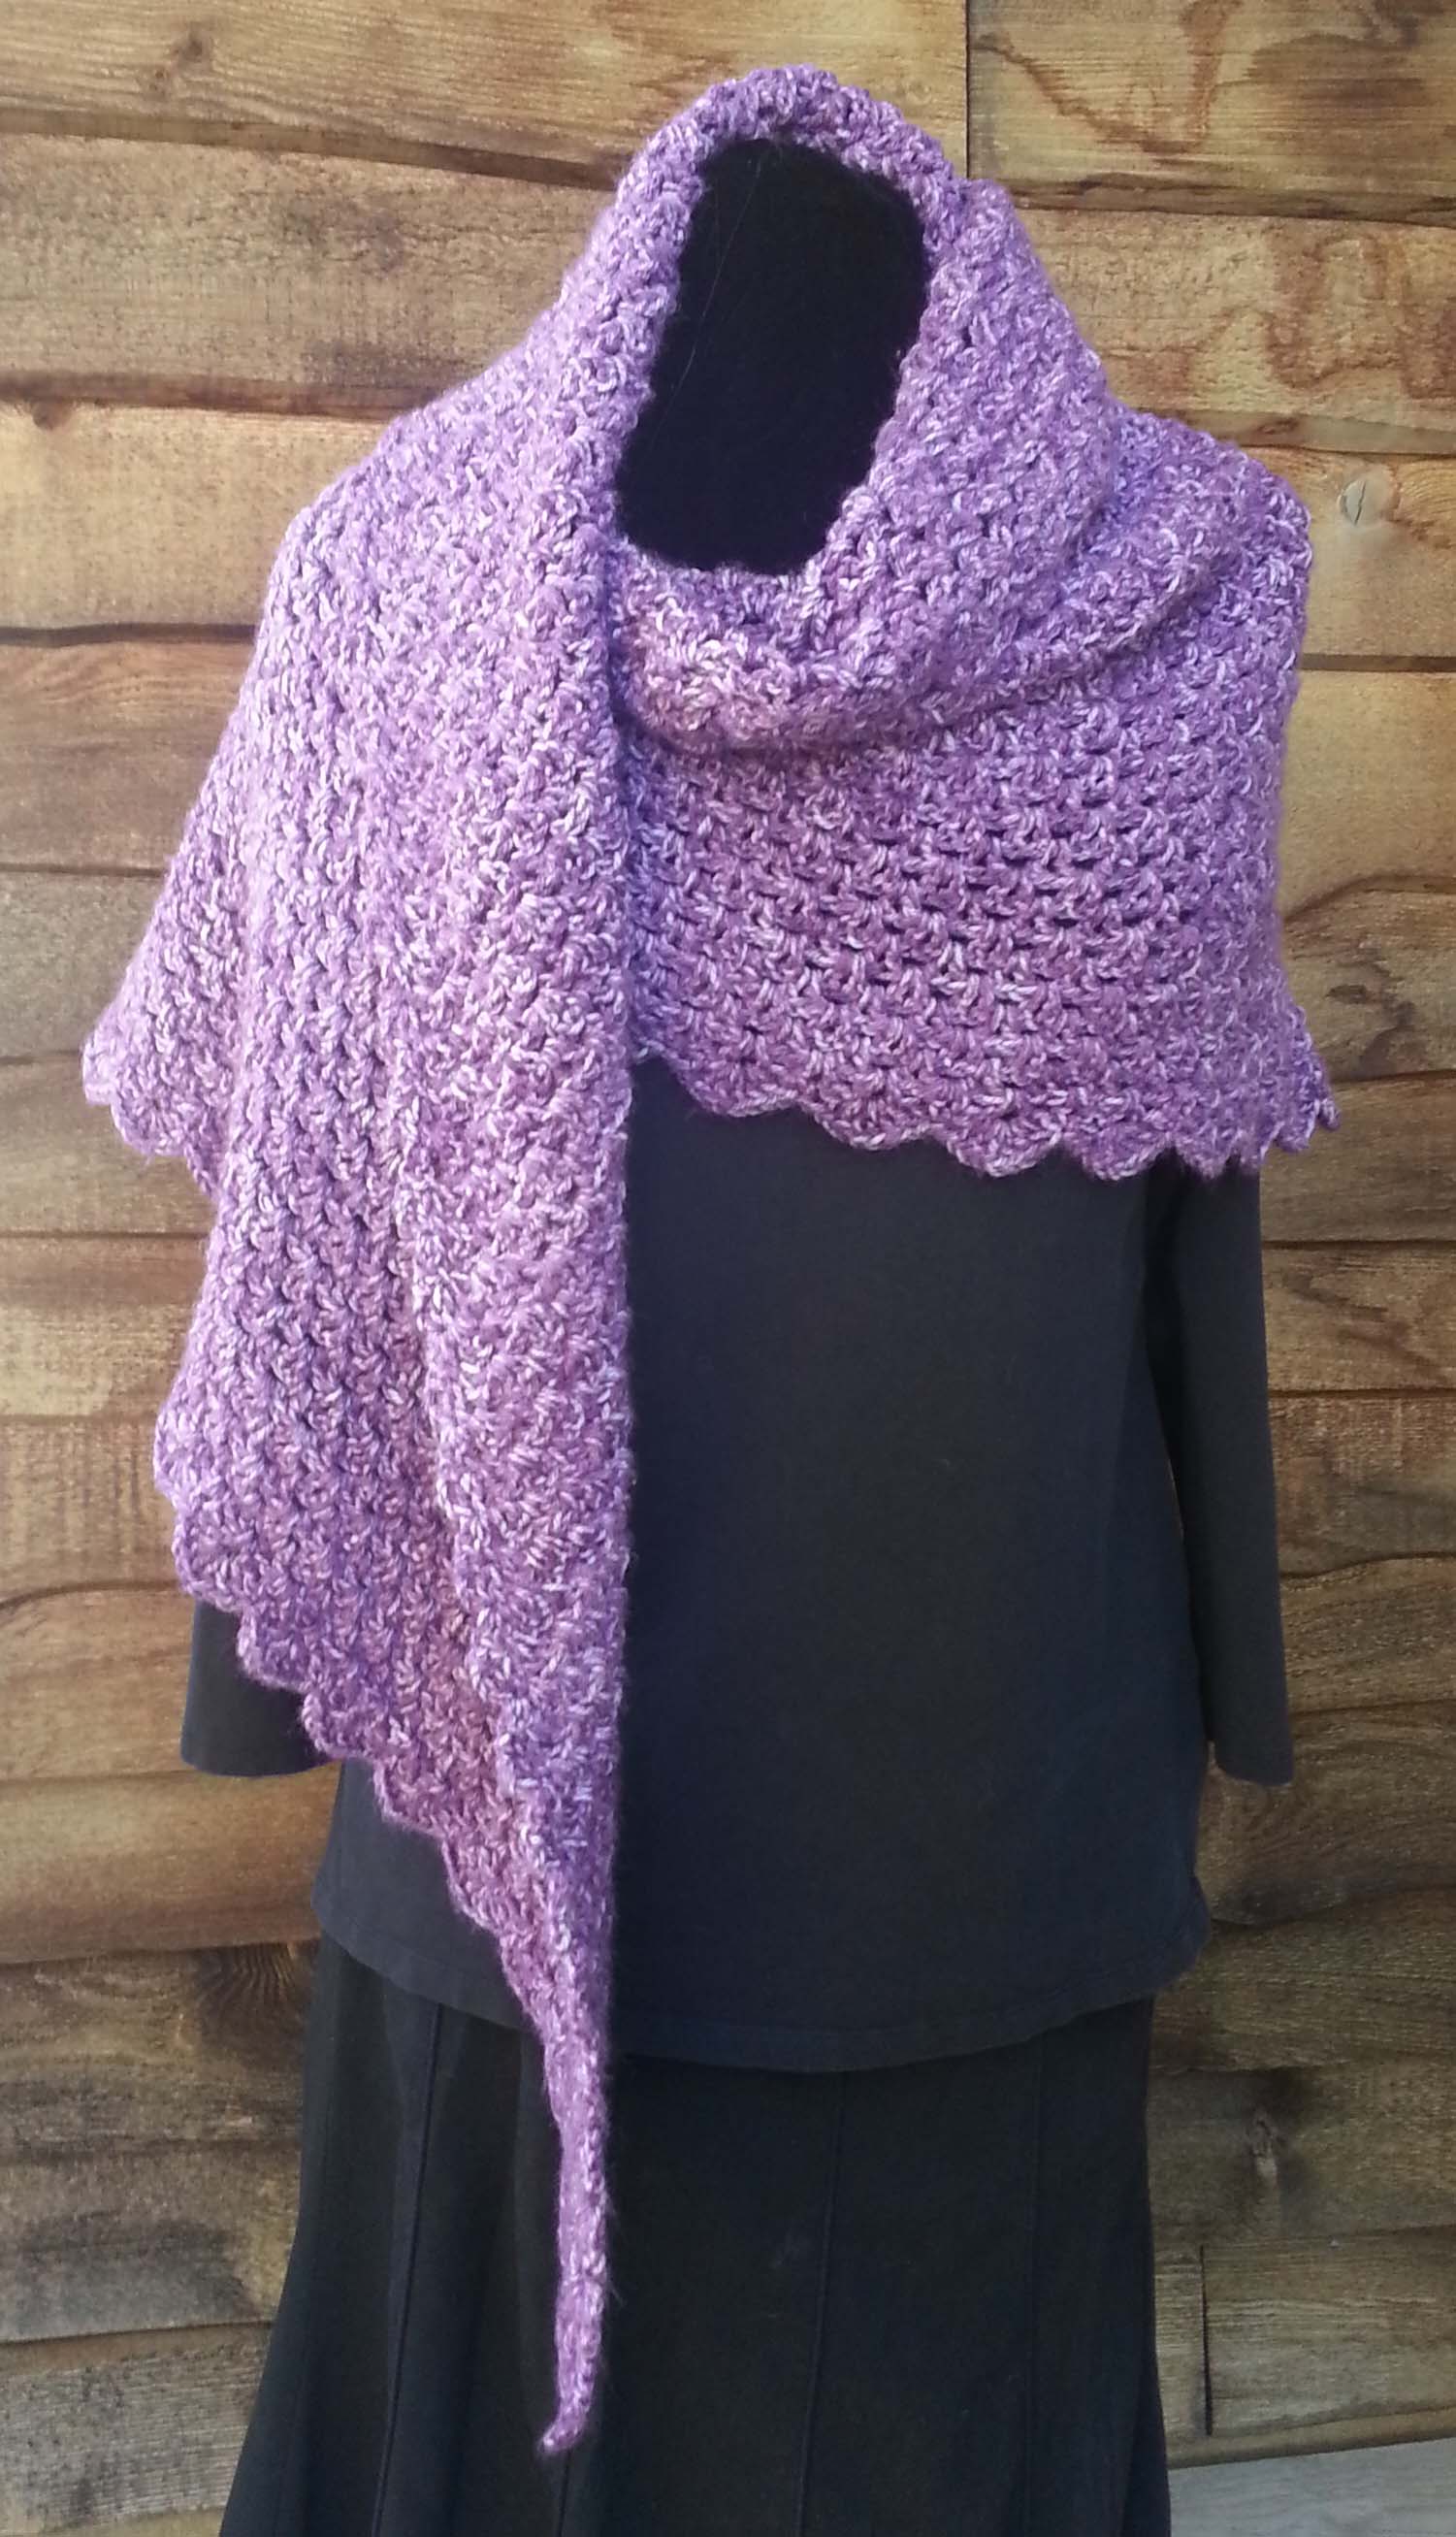
For this simple shawl I wanted a pretty scalloped edge along the top as the rows were completed and I wanted the rows to be a simple Zen-like stitch that didn’t require a lot of thought to work on. These types of shawls are terrific relaxing projects to work on watching telly in the evening or for Prayer Shawl group meetings.

Vst-Chart

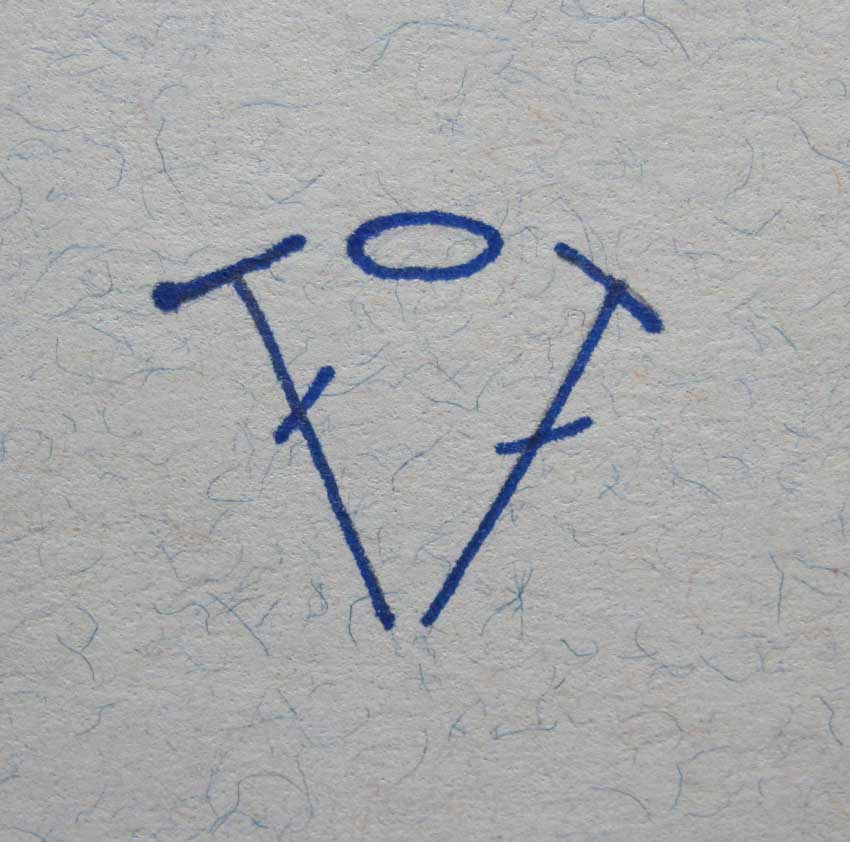
One of my favorite Zen-like stitches is the V-stitch. It is simple to make with just enough variety not to become completely boring.

Stacked V-Stitches
Photo A: Stacked V-Stitches

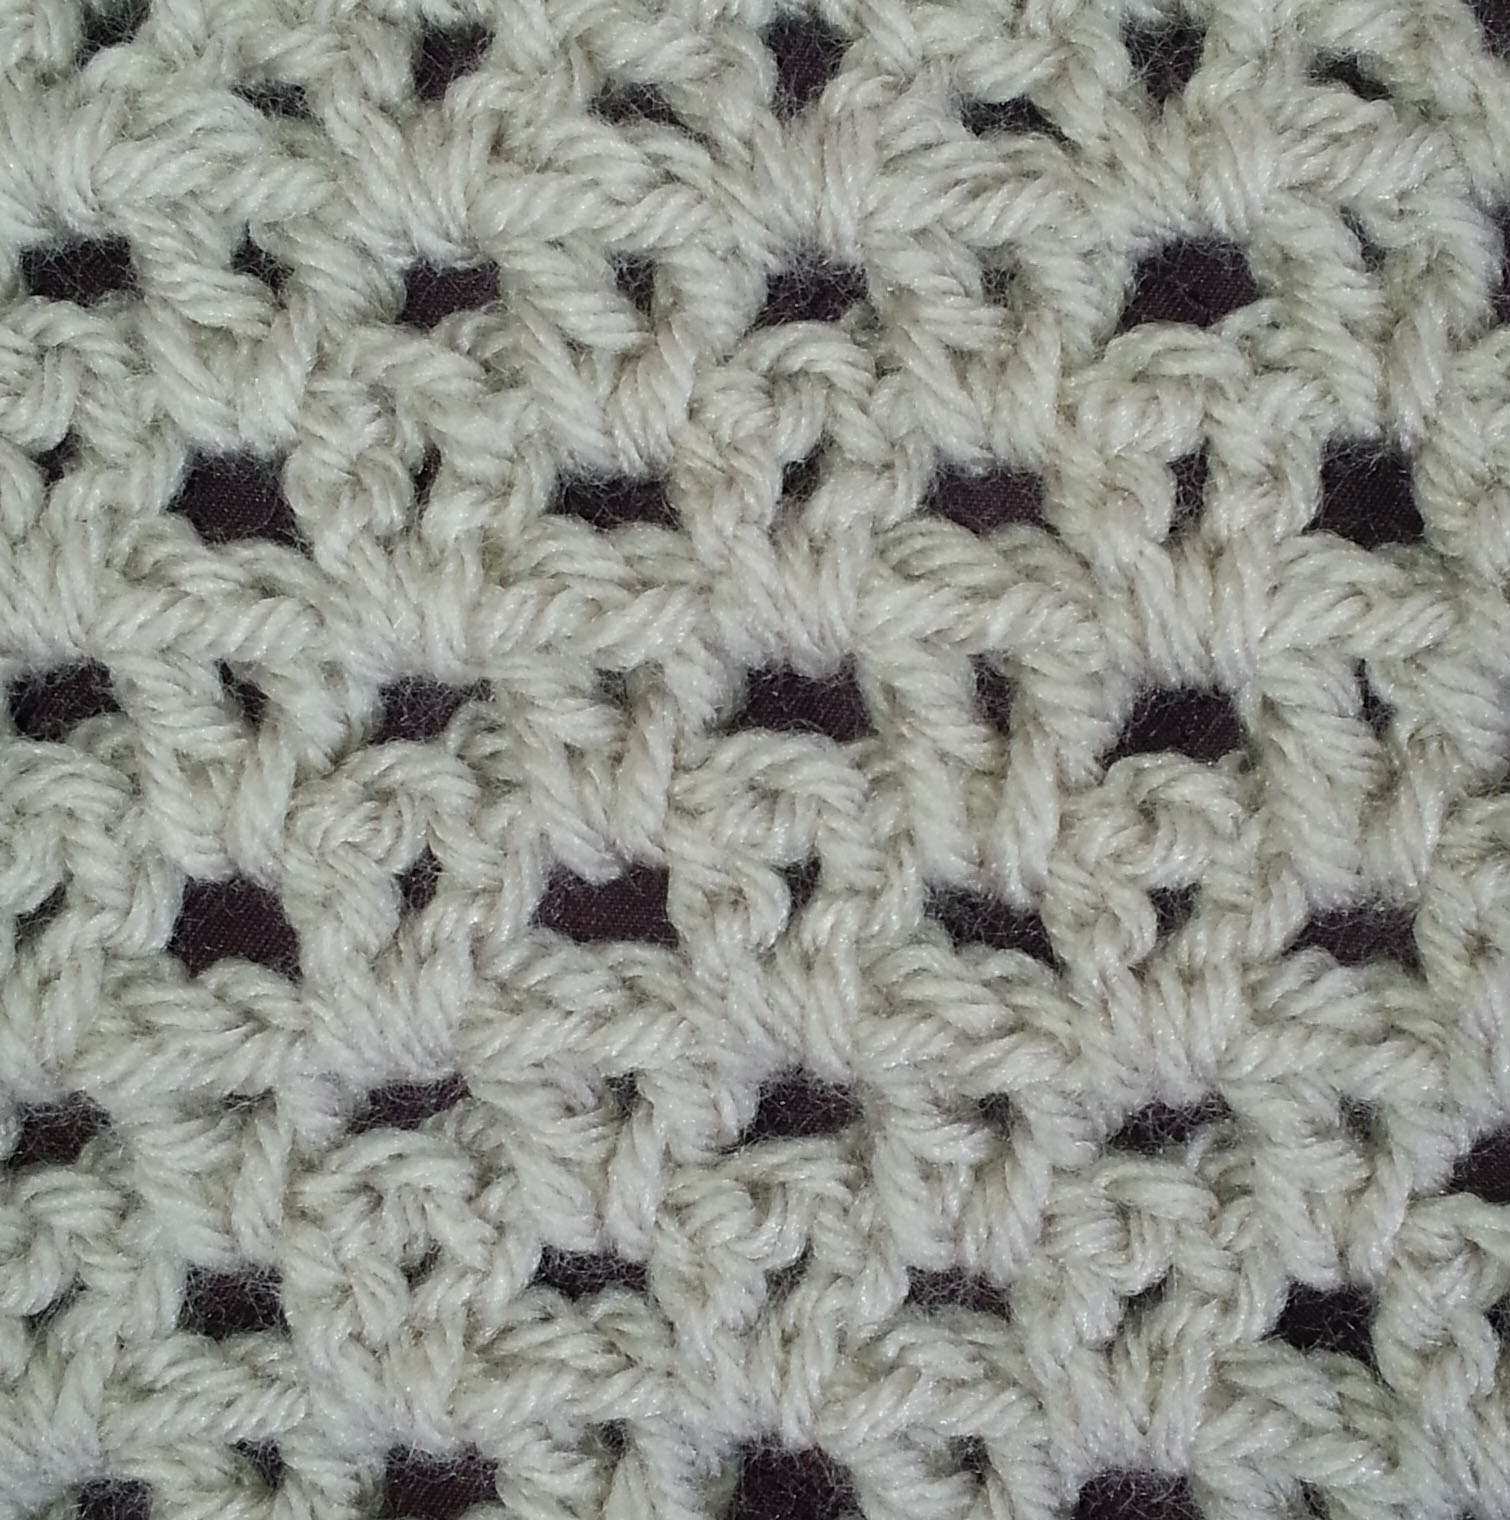
I’ve used this stitch both in stacked construction and staggered.

Photo B: Staggered V-Stitches

Now that I knew what stitch I wanted to use it was time to play with constructing the shawl. For my initial project I decided to use Lion Brand’s Vanna’s Choice. It’s a good sturdy acrylic worsted weight and I have it in lots of colors in my stash. I used a J (6mm) hook with this yarn as I wanted to keep my stitches loose.

You can use any weight yarn you want with the size hook that gives you a fabric you like. That might involve a bit of experimenting to decide on the right combination of yarn and hook. Because this shawl is worked from the top center with increases at the center point and at each end of the top edge you can just work as many rows as you like until you reach the size you want, or until you run out of yarn.

Swatch 1 for PWT shawl

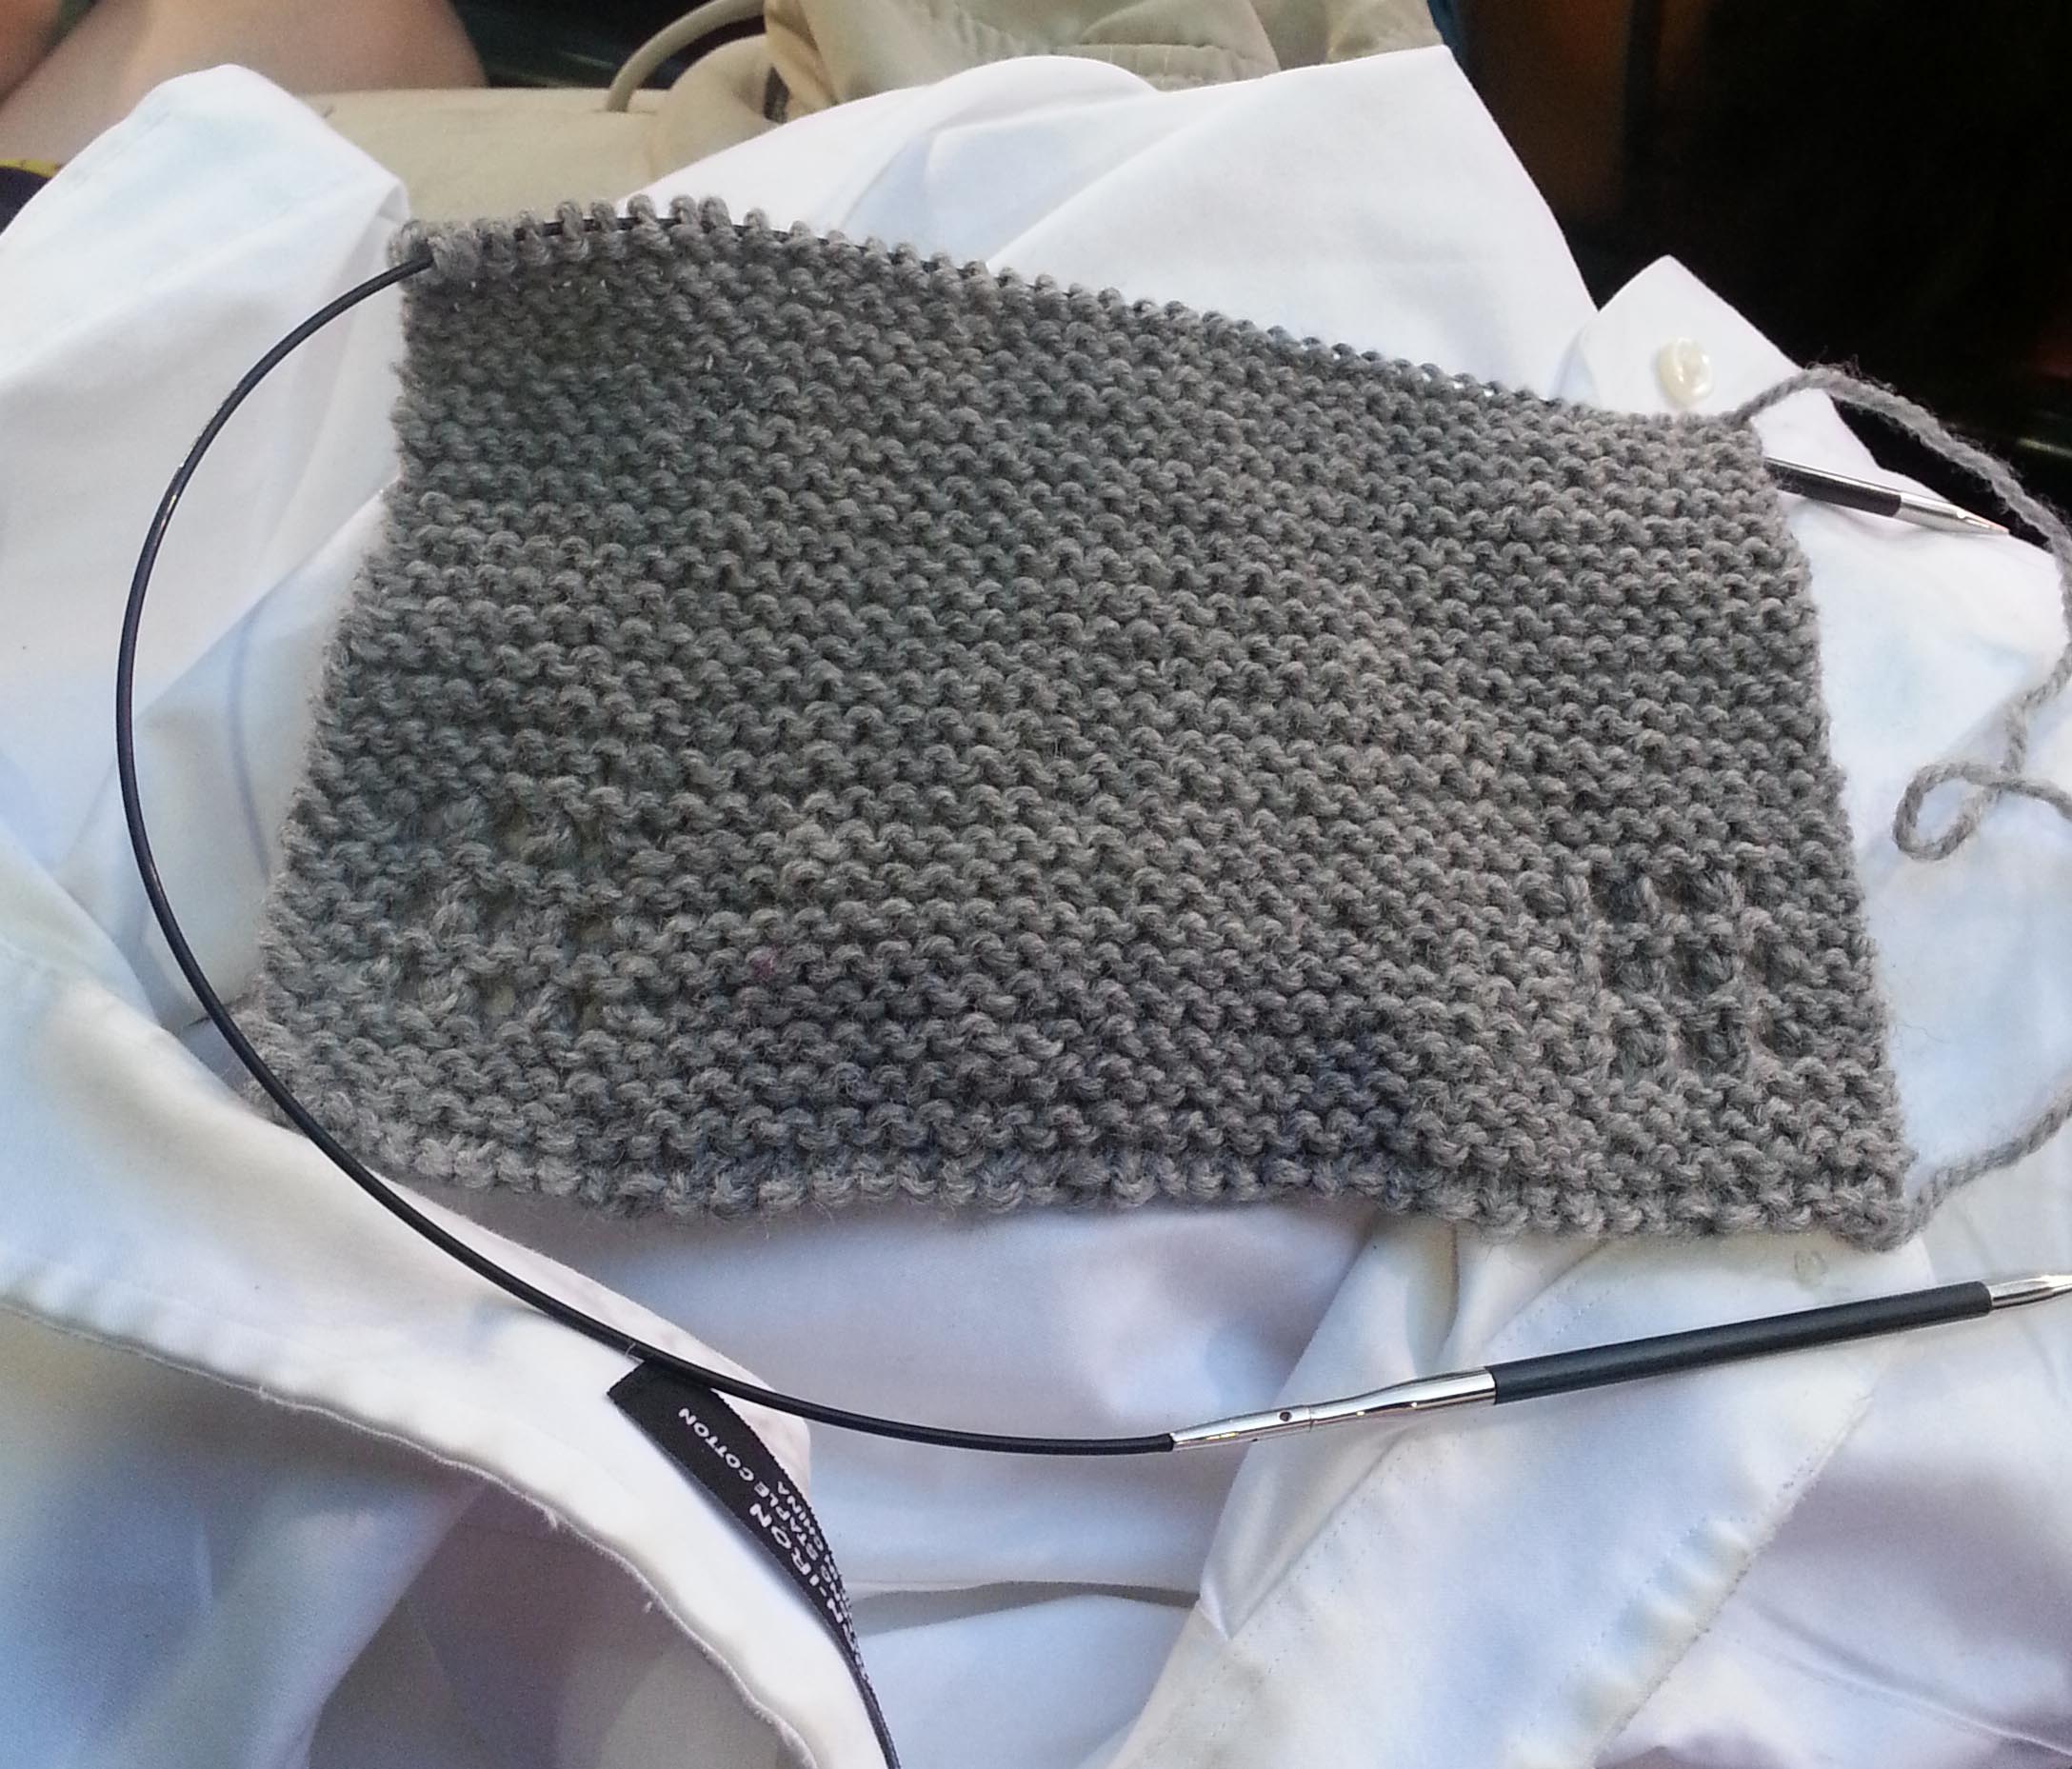
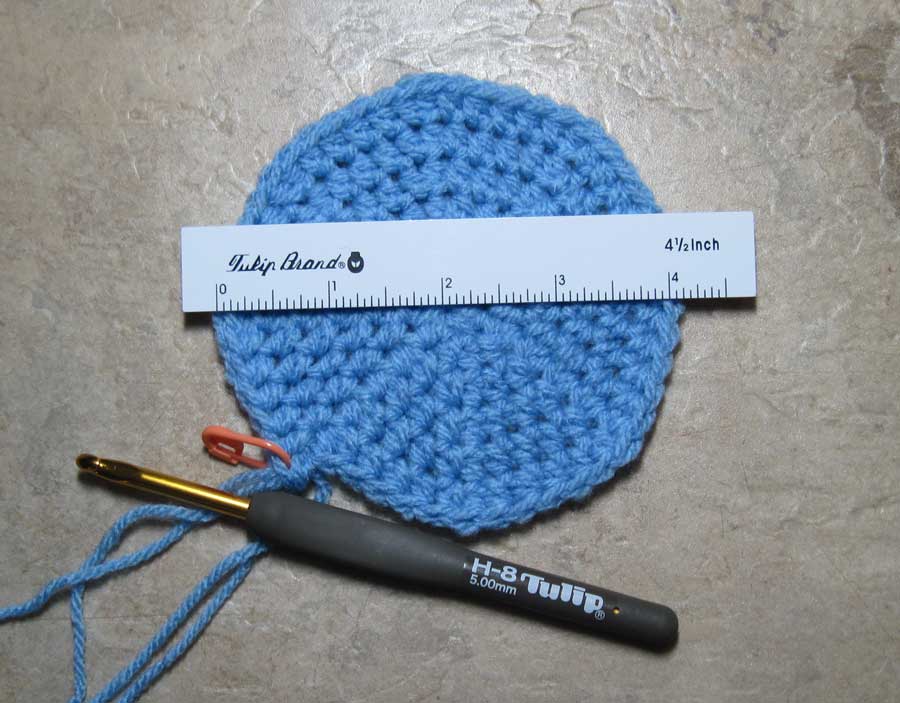
After making the swatch above I calculated for my Vanna’s Choice version of the shawl I would need approximately 6 skeins of yarn (870 yards). That would make a shawl that is 60 inches across the top and 30 inches long at the center point. I worked 6 rows of the body stitch pattern and then the border for this swatch to get my numbers.

My first finished Playing with Triangles Shawl.

Playing with Triangles Shawl

Designed by Andee Graves

Skill – Beginner

Stitches you need to know: Chain (ch), Double Crochet (dc), Single Crochet (sc), Slip Stitch (sl st)

Special Stitches

Adjustable Slip Knot: Make your beginning slip knot so that pulling on the starting tail tightens the working loop on your hook. Need help with this technique visit my blog post “The Lovely Adjustable Slip Knot” or stop by my YouTube Channel for a helpful video.

V Stitch (V-st): (dc, ch 1, dc) in indicated place

Materials

Yarn in weight and yardage you want to use for your preferred size of Shawl.

Hook in size appropriate for the fabric you want from your yarn.

Stitch markers (at least 3)

Pattern Notes

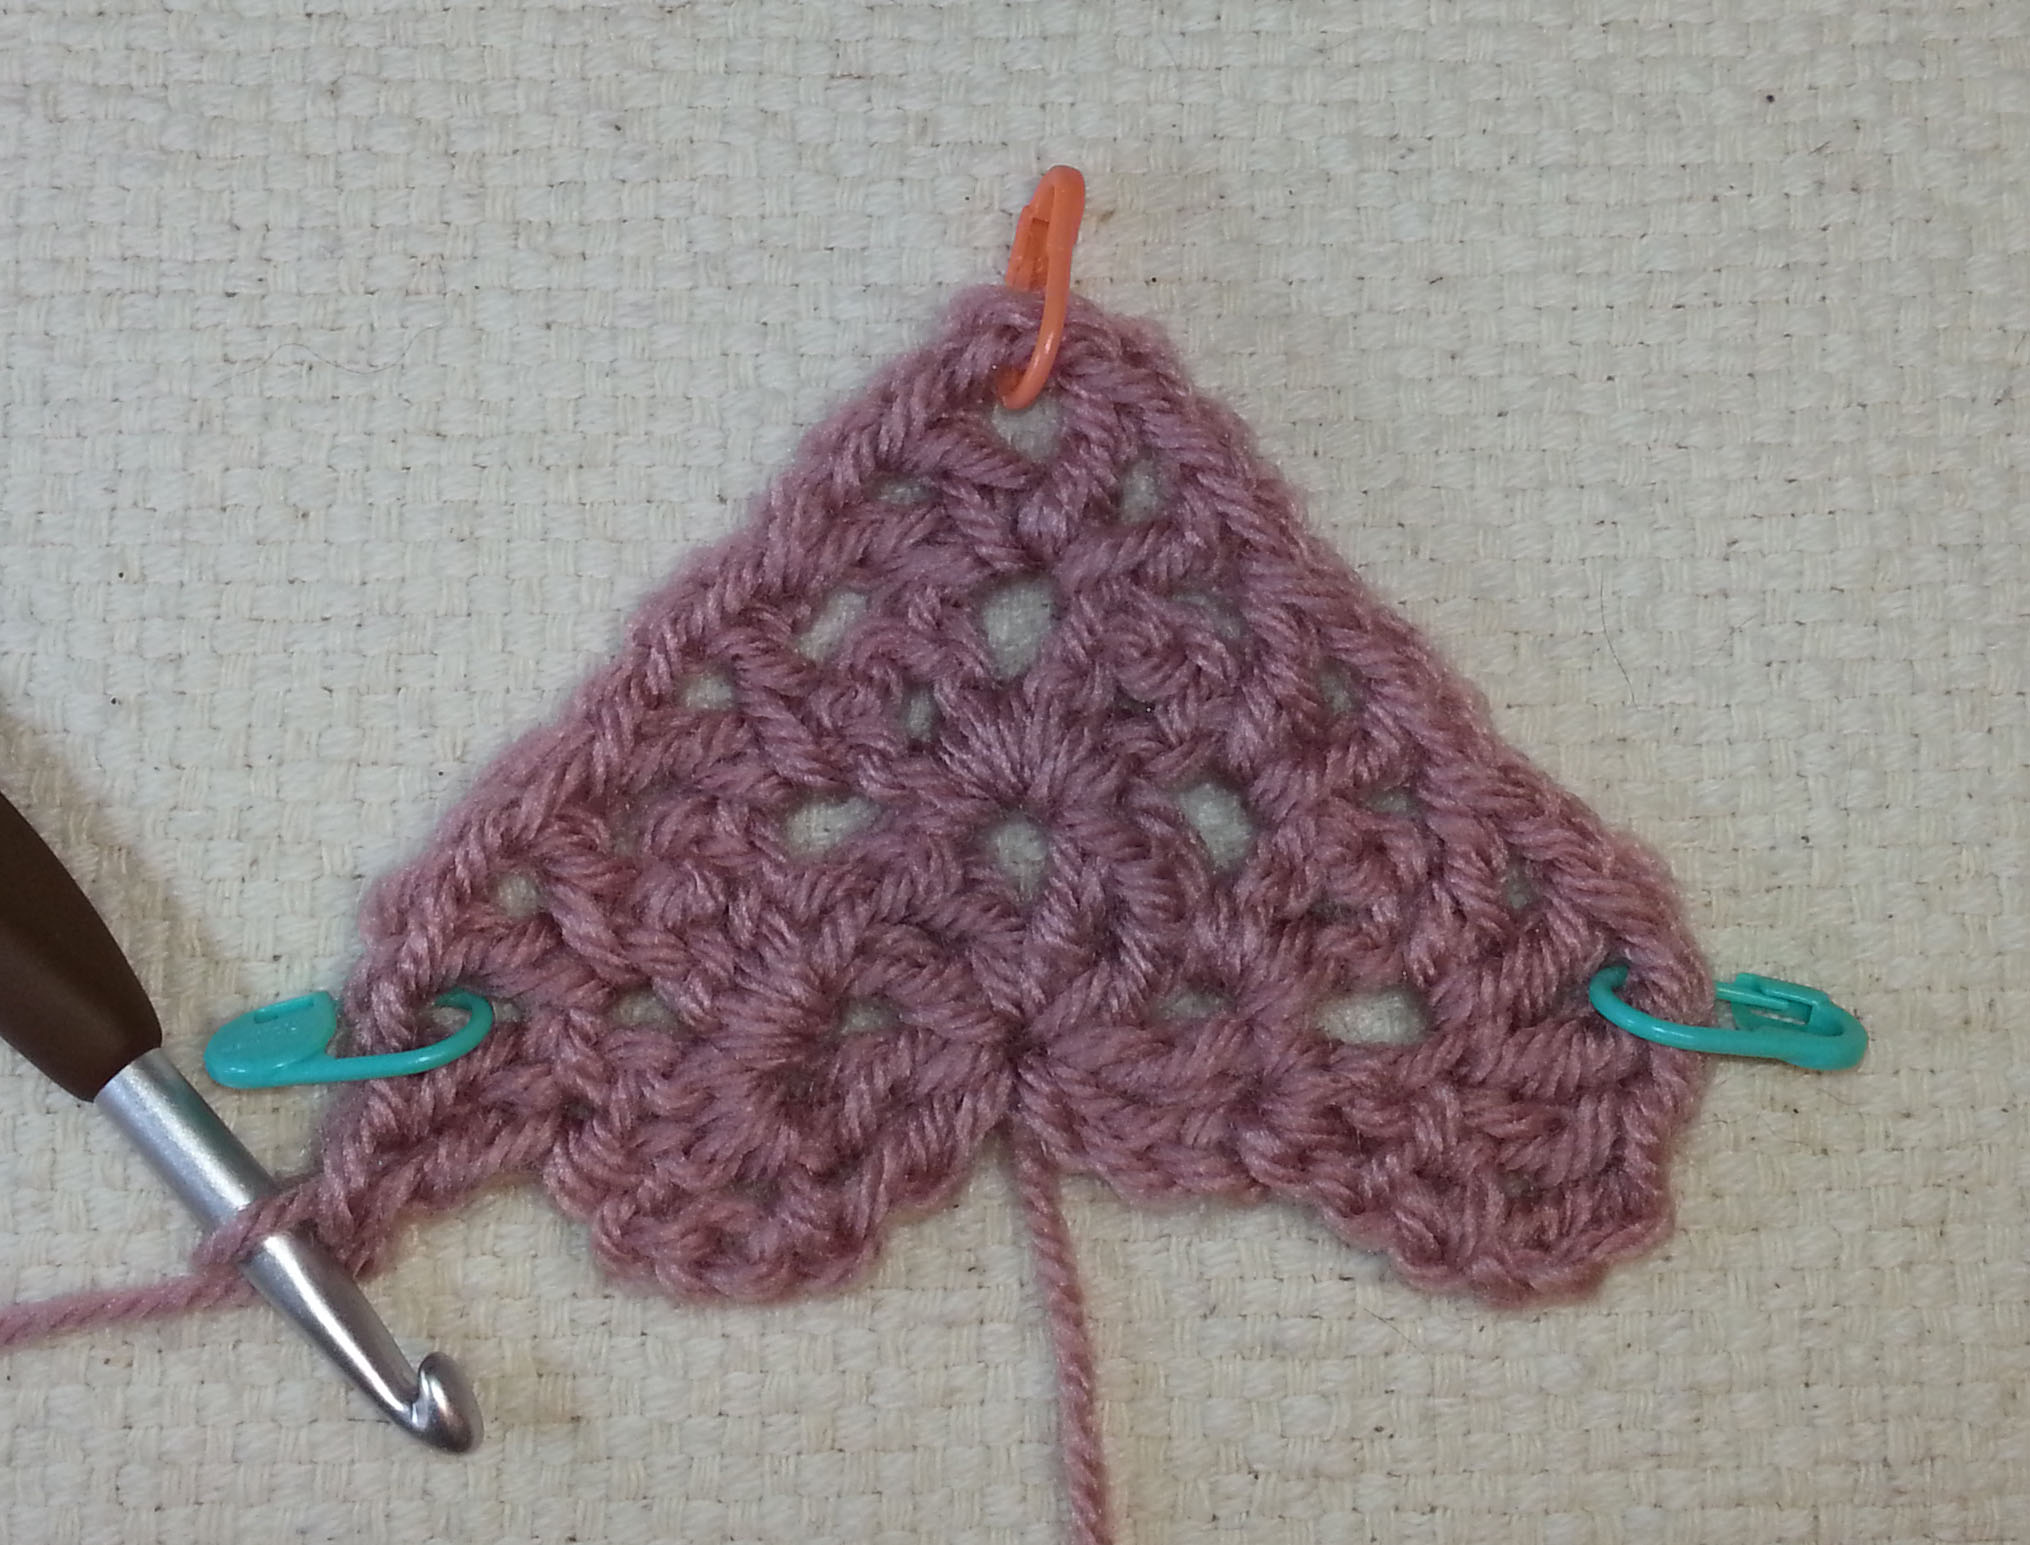
The majority of the body of this shawl is worked in staggered V-stitches. This means the 2 legs of the V-st are worked in the space between two V-stitches. Like you see in Photo B above the pattern instructions.

Each chain stitch counts as a single stitch for skipped stitches, ie… the top of a V-st would count as 3 stitches.

Instructions

PWT Row 1
Row 1 completed

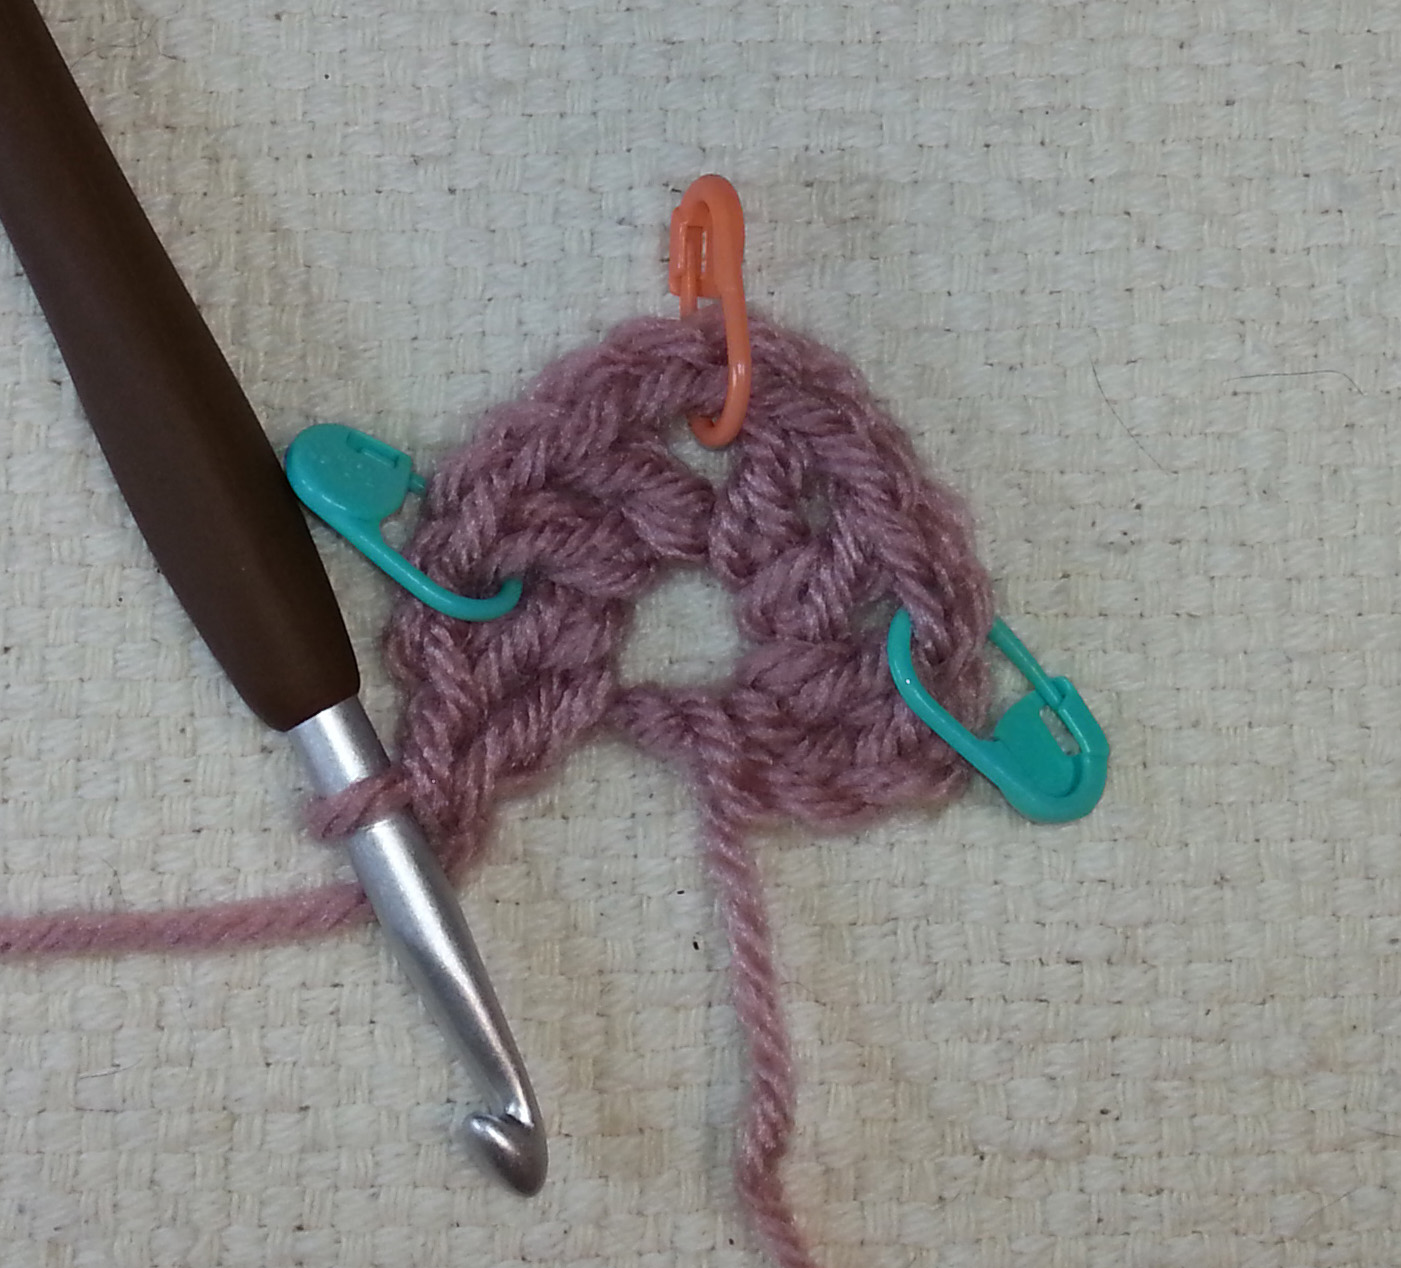
Row 1: Starting with an adjustable slip knot Ch 4 (counts as dc and center), ({dc, ch 1} 2 times, dc, ch 2, {dc, ch 1} 2 times, 2 dc) in fourth ch from hook. Place st markers in first and last ch-1 spaces, and in ch-2 sp. (4 ch-1 sp, 1 ch-2 sp, 8 dc)

Row 2 completed
Row 2 completed

Row 2: Ch 3, turn, sk first st, 2 dc next st, ch 1, V-st in marked ch-1 sp, move st marker to first ch-1 sp just made, sk 3 sts, (V-st, ch-2, V-st) in marked ch-2 sp, move st marker to ch-2 sp just made, sk 3 sts, V-st in marked ch-1 sp,  ch 1, 2 dc in next st, move st marker to second ch-1 sp just made. (4 V-st, 4 dc, 2 ch-1 sp, 1 ch-2 sp, 1 ch-3)

Row 3 completed
Row 3 completed

Row 3: Ch 3, turn, sk first st, 2 dc next st, ch 1, V-st in marked ch-1 sp, move st marker to first ch-1 sp just made, sk 3 sts, V-st in space before next V-st, sk 3 sts, (V-st, ch 2, V-st) in marked ch-2 sp, move st marker to ch-2 sp just made, sk 3 sts, V-st in space before next V-st, sk 3 sts, V-st in marked ch-1 sp, ch 1, 2 dc next st, move st marker to second ch-1 sp just made. (6 V-st, 4 dc, 2 ch-1 sp, 1 ch-2 sp, 1 ch-3)

Row 4 completed
Row 4 completed

Row 4: Ch 3, turn, sk first st, 2 dc next st, ch 1, V-st in marked ch-1 sp, move st marker to first ch-1 sp just made, *sk 3 sts, V-st in space before next V-st*, repeat from * to * until reach V-st before marked ch-2 sp, (V-st, ch 2, V-st) in marked ch-2 sp, move st marker to ch-2 sp just made, repeat from * to * until reach V-st before marked ch-1 sp, V-st in marked ch-1 sp, ch 1, 2 dc in next st, move st marker to second ch-1 sp just made. (8 V-st, 4 dc, 2 ch-1 sp, 1 ch-2 sp, 1 ch-3)

Repeat Row 4 until reach the desired length, you will need to end on an even numbered row to set up for the scalloped border.

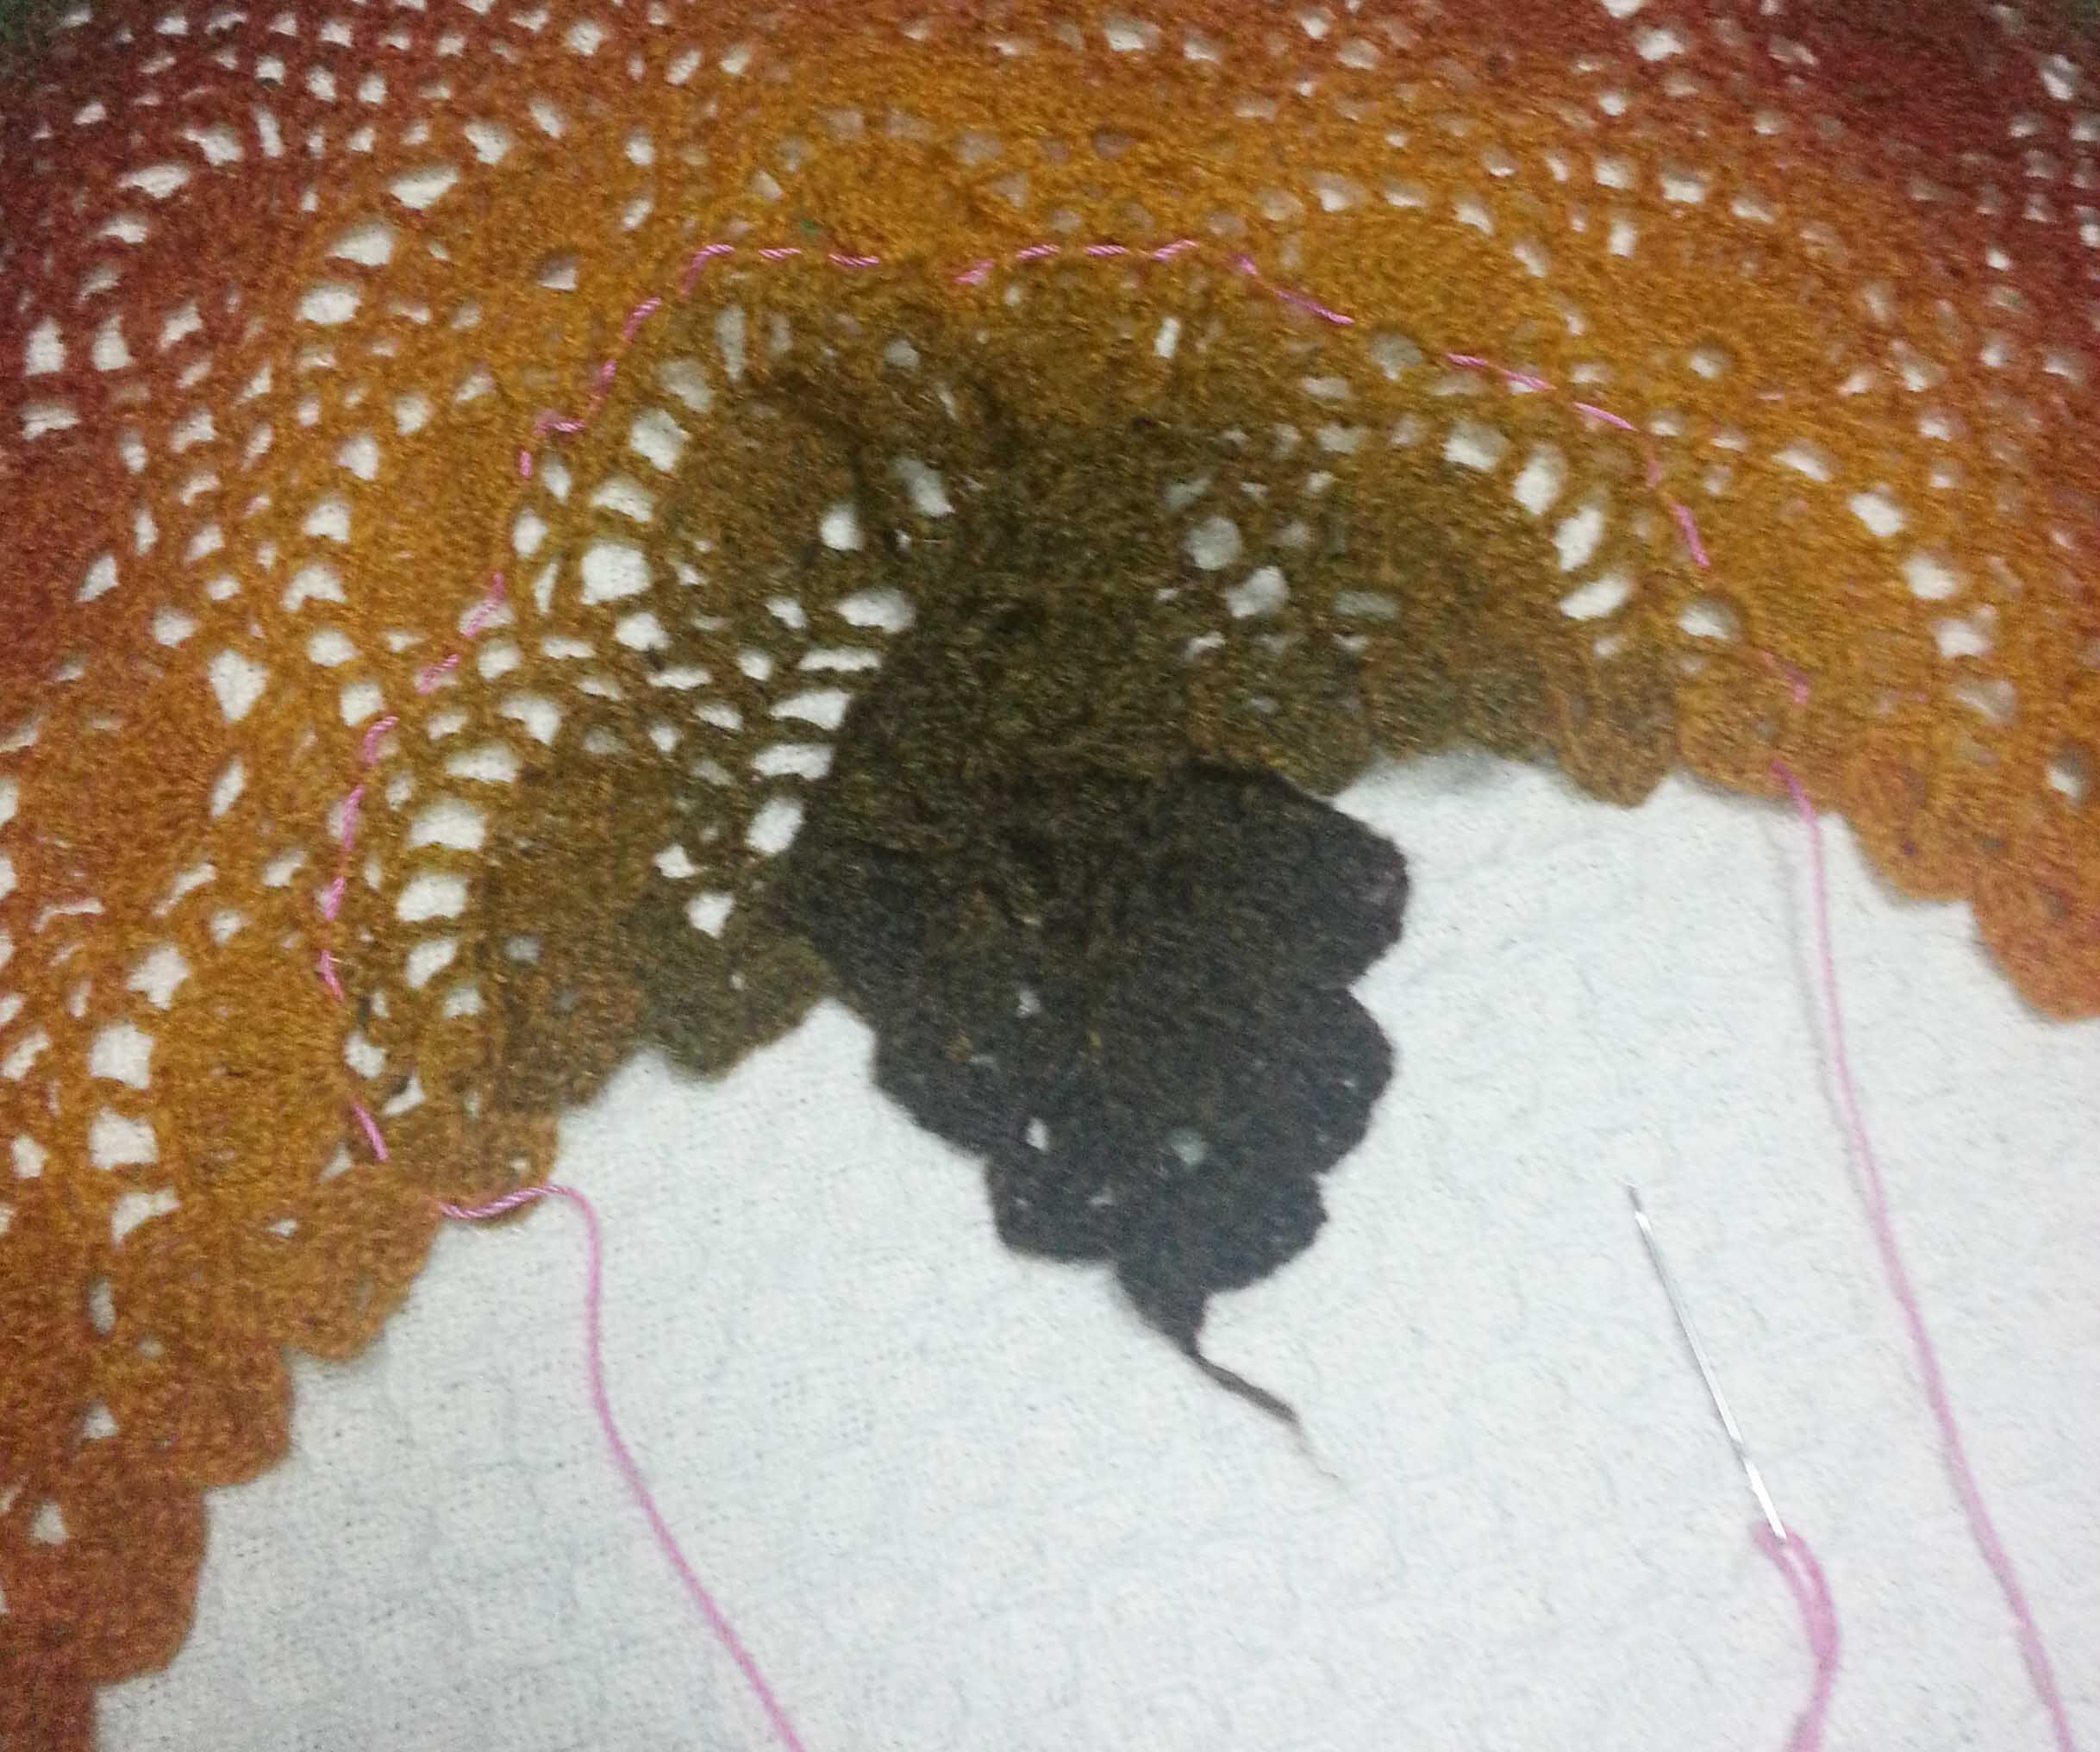
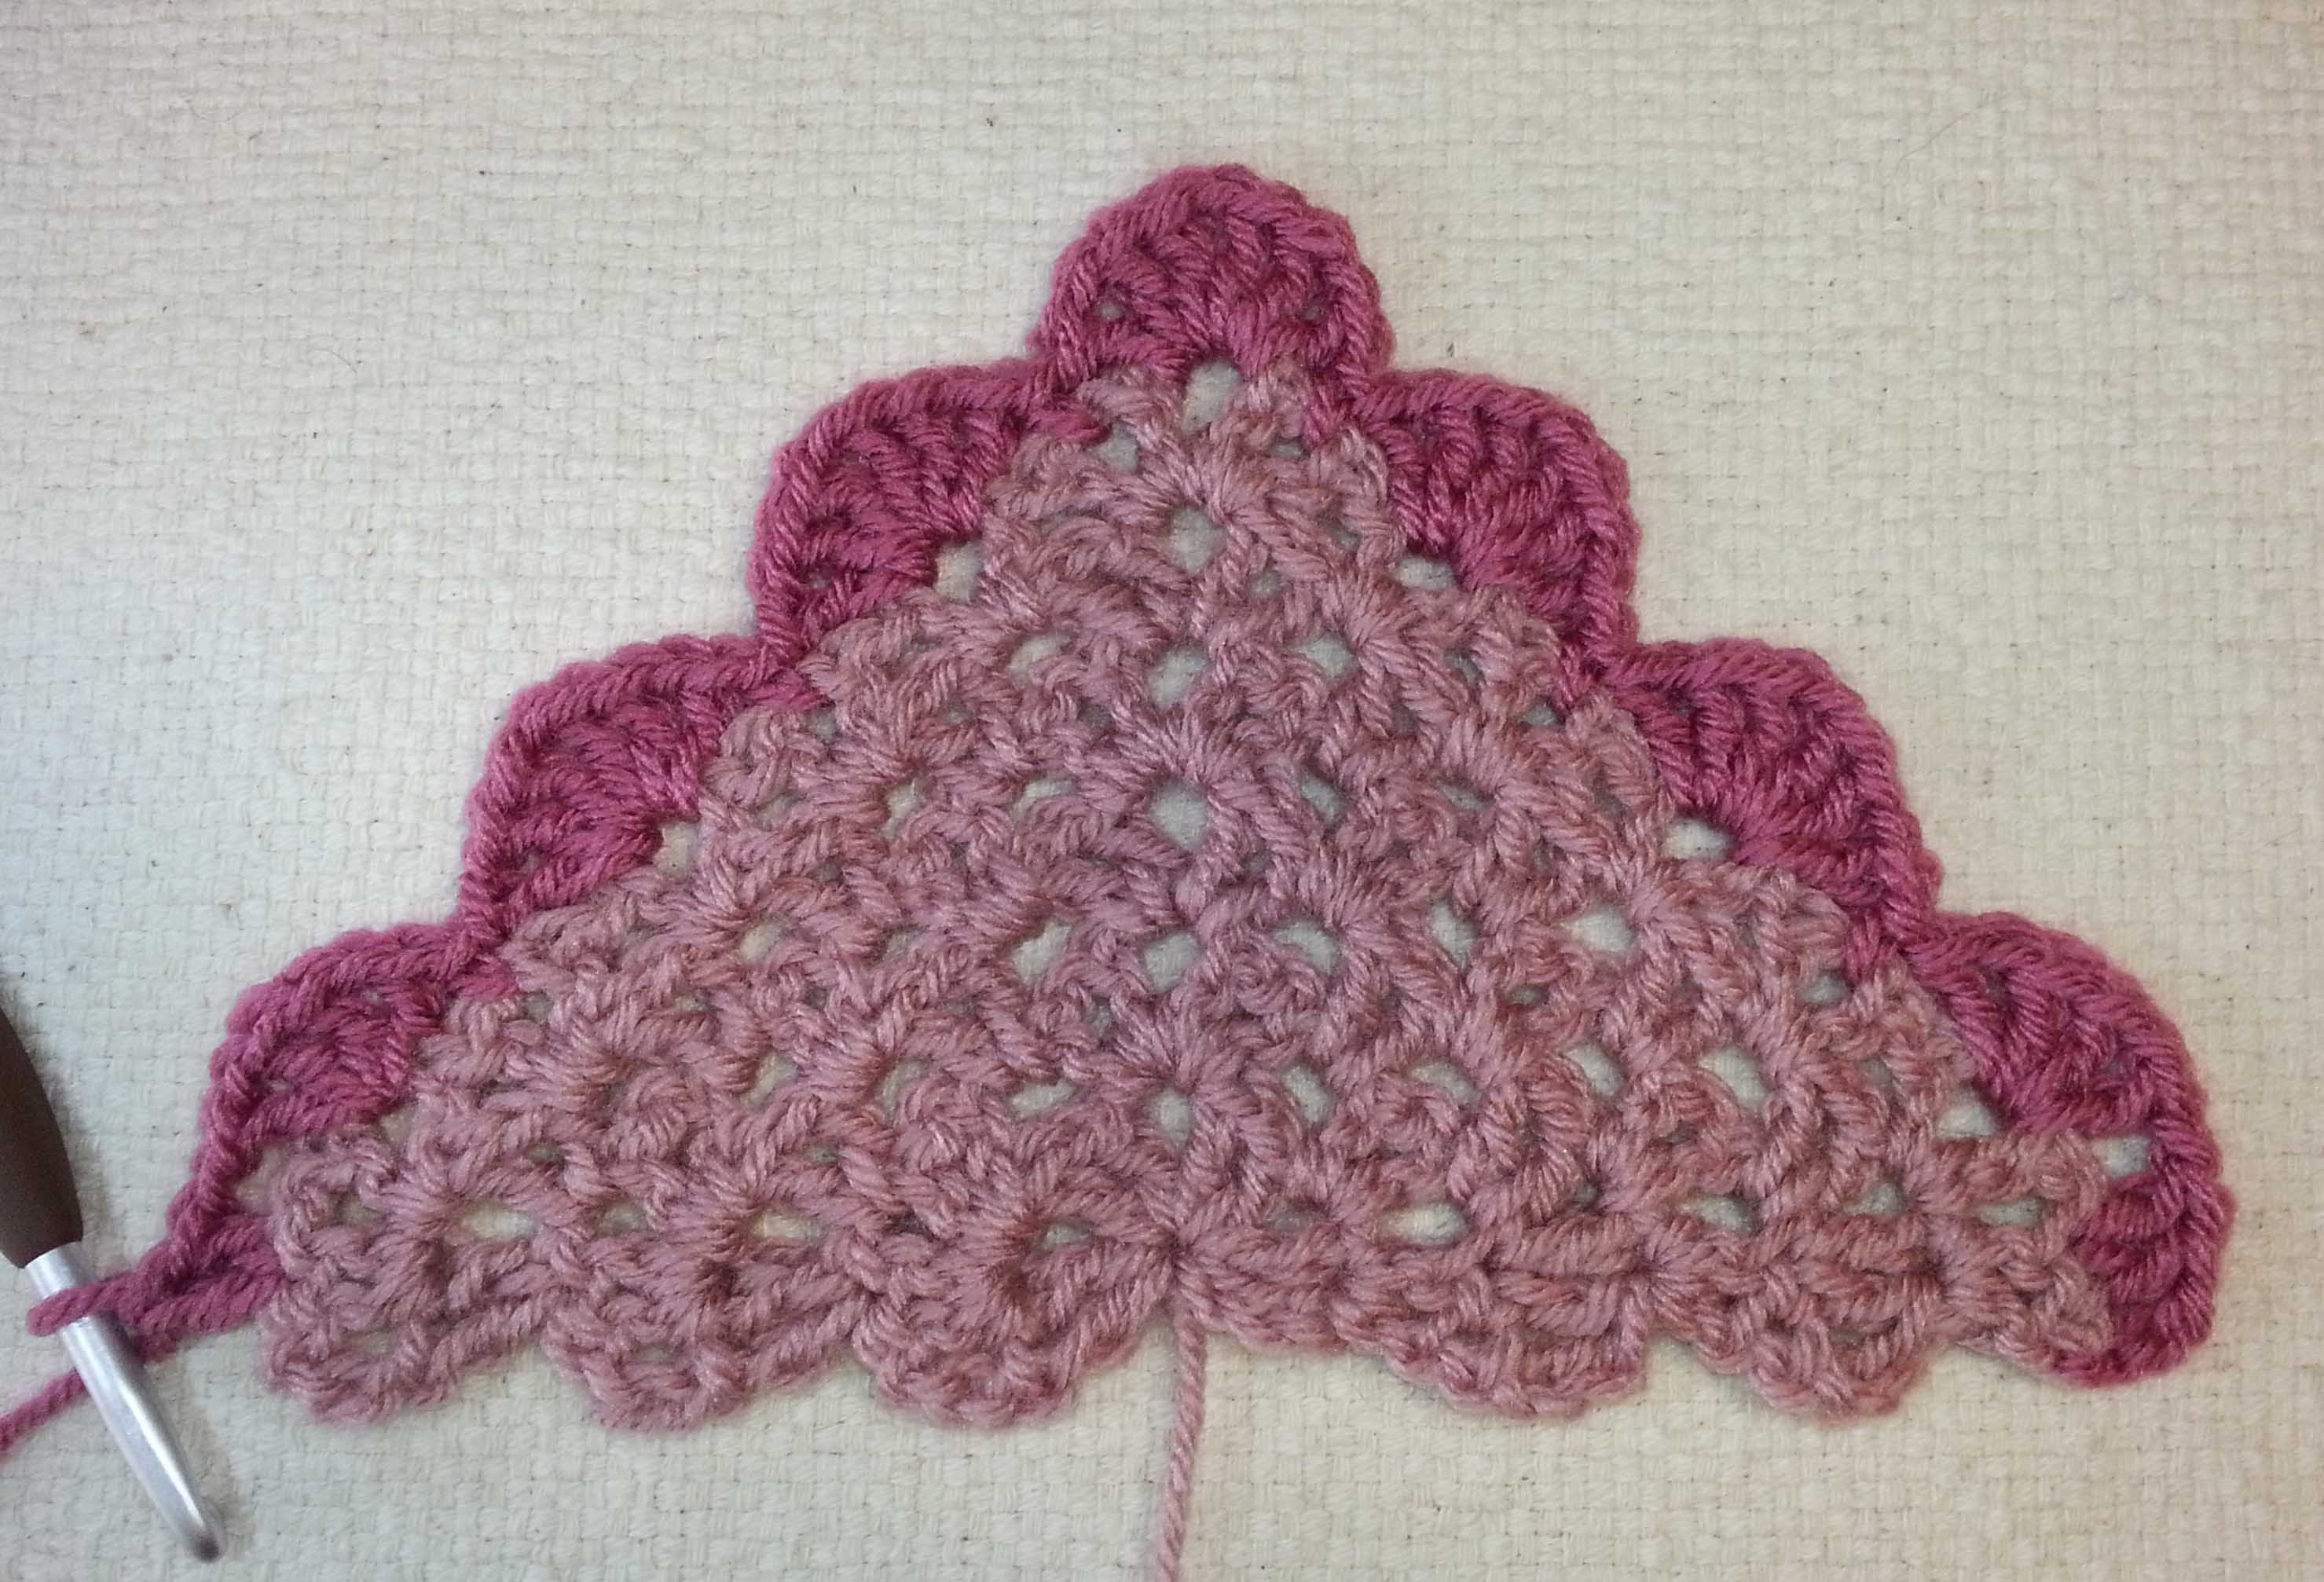
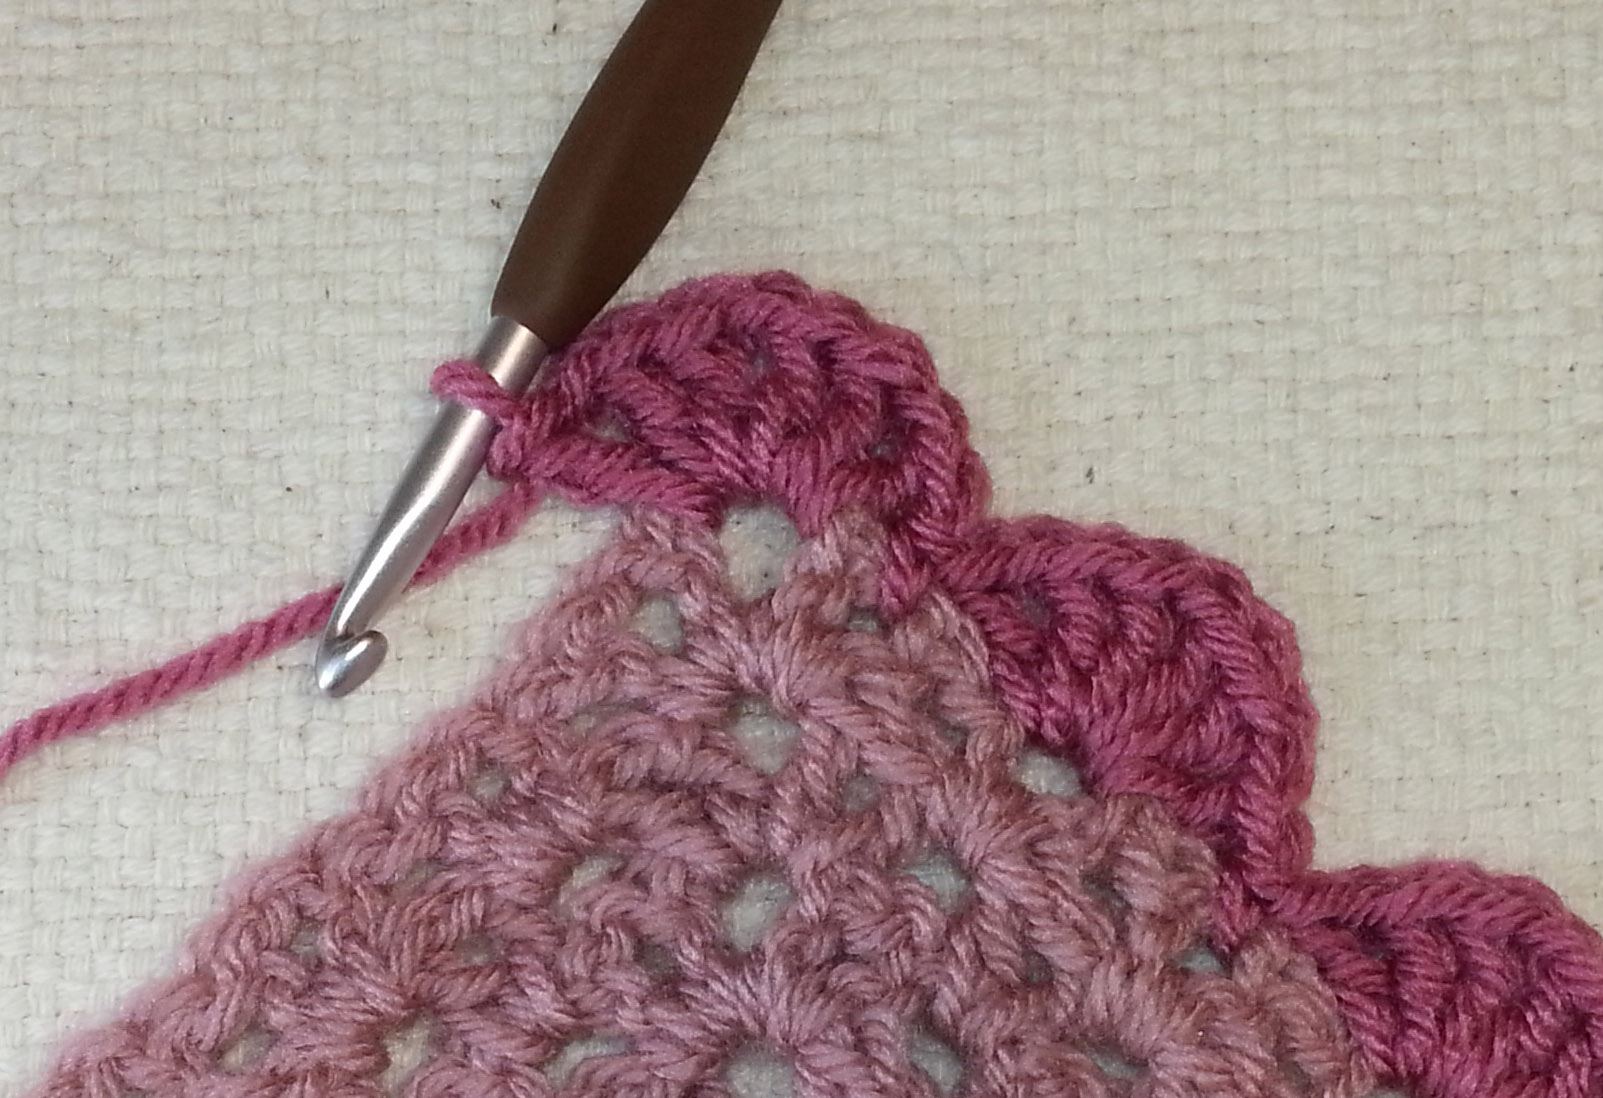
Border: I’ve shown the border worked it a different color to make it stand out clearer in the photos, you can continue in the same color as the body of the shawl or use a contrasting color.

Border 2 Vst

Ch 3, turn, sk first st, 2 dc next st, ch 1, sk 2 sts, 2 V-st in next ch-1 sp,

Border 3 Vst

* sk 2 sts, **sc in next ch-1 sp, sk 2 sts, 3 V-st in next ch-1 sp*,

repeat from * to * until one V-st remains un-worked before marked ch-2 sp,

Border turning corner

sk 2 sts, sc in next ch-1 sp, sk 1 st, 3 V-st in marked ch- 2 sp, sk 1 st, repeat from ** to * once,

Border turning corner 2


repeat from * to * until 2 V-st remain un-worked before marked ch-1 sp at end of row,

Border end of row

sk 2 sts, sc in next ch-1 sp, sk 2 sts, 2 V-st in next ch-1 sp, ch 1,

Border finish end of row

sk 2 sts, 2 dc next st.

Fasten off. Weave in tails. Gently block if desired.

I also have a video available for this pattern on my YouTube channel. Click here to see it.

For some helpful tips on working your shawl visit this blog post.

Now it’s your turn to get creative. Have fun experimenting with different textures and weights of yarn to create a shawl that is just right for you. Check thru your yarn stash and see if you have a mixture of similar weight yarn in harmonizing colors that you could combine in your shawl.

You can see some more of my PWT shawls on this blog post.

The Other Yarnie Craft

I know it is still National Crochet Month, though according to some folks it is National Crafting Month. I thought it would be fun to talk about that other popular yarn craft: Knitting.

My swatches from my 2011 knitting experiment.

The funny thing is I was wondering this week what I was blogging about 5 years ago in March. Turns out I was experimenting with knitting. I hadn’t really gotten the hang of continental style knitting and I was a very slow knitter. Not to mention easily frustrated with my knitting.

Amazingly enough I have actually gotten a lot better at knitting the past 5 years. I have to say that taking a class with Galina Khmeleva at the 2014 Knit and Crochet Show was a definite turning point for my knitting. It even made me bold enough to take a lace knitting class at my local yarn shop: Longmont Yarn Shoppe.

SR My Show & Tell

I made this pretty scarf. It’s not perfect, but I learnt so much working thru it. Reading back over those 5 year old posts, one of the things I remembered was how stressful it was for me trying to understand the stitches. Now I can finally really see the stitches and I know when they are on my needle correctly and even better I know how to fix them when they aren’t.

Beginning of my son's Christmas Scarf.
Beginning of my son’s Christmas Scarf.

I knit a scarf for my oldest son for this past Christmas. Unfortunately I didn’t get a photo of it when it was finished because of the usual mayhem at Christmas-time around our house. He has worn it almost every single day this winter, so I think he likes it. Unfortunately it is beginning to show that it well loved. A bit like the Velveteen Rabbit.

I’ve been thinking about attempting to design a pattern using simple knitting and elaborate crochet, but it keeps slipping down my list of projects. Will have to see if I can get on it later this year.

I still don’t knit all that much and crochet is my first passion when it comes to playing with yarn, but I am glad that I understand how to knit. If nothing else going thru the pain of learning and being in that beginner’s mind again has made me an even more compassionate teacher.

This weekend begins Spring Break for my boys, so I may be a bit quieter than usual. I hope to have something exciting for all of you next week, though it may be next weekend.


Celebrating Circles

This coming Monday is March 14th, and you know what that means? Pi Day!

Okay, for those of you that somehow have managed to be reading this blog and have missed it…

I’m a Geek!

I love math and science, plus all the other wonderfully related things. There have been rumors that I am a nerd, but I’m not paying them any notice. My favorite math, and one that I use frequently in my design work, is Geometry. That takes us back to Pi.

Pi = 3.14 and that makes March 14, a date that can be written 3.14, Pi Day. See, you knew I’d get to the point eventually.

Pi in lay terms is the number that allows us to compute the circumference of a circle. Actually it is much more than that, but that gets you in the general vicinity. It is a handy concept to understand, especially if you are making hats.

Perfect Fit Crocheted Hat

I’ve talked a lot about using Pi in sizing hats, in fact my “Perfect Fit Crocheted Hat” pattern/lesson has a lot of information about using Pi to determine the size of hat you can make. The sizing in that pattern is very flexible because once you master the method, you can use any size yarn with the appropriately matching hook to create a hat that fits perfectly.

Spiraling Xs Hat 3 Andee Graves

Of course, since I’m in a mood for celebrating Pi, it seems only appropriate to introduce you all to my latest hat pattern: “Spiraling Crosses Hat”. I designed it in Tahki Stacy Charles “Mesa” yarn, a lovely squishy thick/thin aran-weight superwash wool that is dyed in long gradual color changes. This hat design is perfect for spring-time transitional weather. The stitch pattern has a bit of laciness to it and lots of stretch. The warmth of the wool is there to chase off a chill and the laciness allows your scalp to breathe.

As part of my celebration of Pi-Day this hat pattern is available to you dear readers at a 10% discount until almost Midnight (11:59 p.m. Mountain Time) Monday, March 14, 2016. Just use the coupon code PiDayHat16 when purchasing it in my Ravelry Shop.

Speaking of Ravelry, have you joined the fun at the month long party for crochet? Check out the forum for celebrating NatCroMo. You can even join in the Hat CAL with any hat pattern you so desire. Like maybe a Perfect Fit or Spiraling Crosses Hat?


Another Peek Behind the Curtain: It’s all about the Work

This past Sunday I came across this article in the Business Insider – The Most Successful Creative People Constantly Say “No”.   The paragraph that jumped out at me was this one:

“Time is the raw material of creation. Wipe away the magic and myth of creating and all that remains is work: the work of becoming expert through study and practice, the work of finding solutions to problems and problems with those solutions, the work of trial and error, the work of thinking and perfecting, the work of creating.”

Crochet Time

In many ways time is what you are paying for when you purchase a crochet (or knit) pattern from a designer.  Not just the time that the designer put into that particular design, but the hours and days of experimenting and perfecting their craft so they could create a pattern that would be clear and concise.

I crochet a lot. I have my crochet with me wherever I can take it, and if I don’t have my crochet with me, I have a notebook that I write down ideas for crochet designs in. A lot of my crochet time is experimenting with ideas in how to make an increase or decrease in a specific stitch pattern, or how to construct a garment that takes advantage of the nature of crochet fabric and stitches.

This means that I also spend a great deal of that time frogging my work or making notes on why something didn’t work. It can be quite surprising the things that work in ways that I hadn’t expected. I’m reminded of how some drug companies research for a medication to treat one condition, but then discover that it is great for treating some other condition.

Ruffled Wedding Bag photo courtesy Red Heart North America

One of the ideas I had a few years back was for an embellishment on a sweater. The fabric was too dense and fussy for me though. Instead it morphed into a design idea for a bag that I sold to Red Heart. Ruffled Wedding Bag, you can get the pattern for free at the Red Heart Website.

This turned out to be one of my favorite designs so far that I’ve created using Red Heart’s “Sassy Lace“. They also have a “Sassy Fabric” yarn that comes in a variety of colors and prints giving you loads of options for making this little bag. I’m thinking that a fun version could be made in the Teal Chevron “Sassy Fabric” with either Iced Aqua or White “With Love” as the bag color. Would make a great gift bag for mother’s day.

I had planned on this post being something different. But time got away from me this past week. My entire family came down with a stomach bug. I was so ill on Sunday that I couldn’t do anything but read online and sleep. Of course, that is how I came across the article I quoted above. So there is always a silver lining.

Everyone is on the mend now and I hope to have a new pattern (maybe more than one) to show you this weekend.

Behind the Curtain

For some yarn crafters the world of designing seems mysterious, so I thought I’d give you a peek behind the scenes when I am designing. In particular some of the math that I use when designing a triangle-shaped top-down shawl.

Triangles are popular for shawls because they can be worked top-down either with decreases on the ends or increases at the ends and center. There are triangle-shaped shawl patterns out there that are created from the bottom point upward. I don’t like to work that way so haven’t ever designed a shawl using that method.

Eleonora Shawlette / M2H Designs

My “Eleonora Shawlette” is an example of a triangle shape worked top down with 3 increase points.

Mountain Whisper Shawl / M2H Designs

So is my “Mountain Whisper Shawl”.

The great thing about a triangle shape is that it is relatively easy to figure out the amount of yarn needed for the shawl (or shawlette). The same math can be used to figure out how big a shawl you could make from the yardage you have on hand.

Deciding dimensions

First decide on the dimensions for the shawl you want to make. I’m using an isosceles triangle for this shawl and the center point (pink line) is half the length of the base (blue line). Now it is time to work a swatch.

Usually I make a miniature version of the shawl. This works very well as I can also use that swatch as the beginning of my shawl if I want. I want my swatch to be at least 6 inches long at the center point. I let the swatch rest for a while, at least 2 hours if not over-night. If I plan to aggressively block my finished shawl and I’m using a fiber that will change a lot with the blocking, I will block my swatch over-night instead of letting it rest.

Measuring swatch

The next morning I measure and weigh my swatch.  I take the same measurement lines that I had marked out for my shawl dimensions. The broad base (blue line) of the triangle  and the length of the center point (pink line). I’ll use these measurements to figure out the square inches of my swatch.

Digital Postage Scale

I have a handy digital scale that I use to weigh my swatches and projects. It can measure in ounces or grams. I prefer to use grams as they are a smaller unit of measurement and that helps me with accuracy. It also helps when using yarns from companies that do not list the weight in ounces.

Most ball bands will tell you the weight and yardage contained in the ball/skein/hank. Here’s where the math starts.  Take the number of yards and divide it by the number of grams on the ball band. This gives you the number of yards per gram.

Ball Band info

For example, this ball of “Mochi Plus” has 95 yards in a 50 gram ball.

95 divided by 50 = 1.9 yards per gram.

If my swatch weighed 10 grams, then I know that it took 19 yards.

Now it is time to figure out the square inches in my swatch and the square inches for my planned dimensions of the shawl. This is actually not that hard. As my geometry teacher taught us in high-school, all triangles are half of a rectangle. This gives me 2 ways to find the square inches of my swatch and shawl.

Either take the measurement from the base and multiple it by the measurement from the center point, then divide that number in half.

Or my favorite way: Divide the base in half, then multiple by the measurement from the center point.

Turning 1 Tri into 2

For some of you it might be easier to visualize this as changing your 1 triangle into 2 triangles.

2 Triangles 1 square

Then moving one of the triangles to make a rectangle (or in this case a square). A square is always a rectangle but a rectangle isn’t always a square.  In this case my planned shawl will be 1,225 square inches (35 x 35).

I can use the same equations to figure out the square inches of my swatch. Let’s say in this case that my swatch was 12″ at the base and 6″ at the center point. That works out to 36 square inches for my swatch.

Now I divide the square inches for my planned shawl by the square inches of my swatch.

1,225 divided by 36 = 34.0277777778 times that my swatch will fit into my planned shawl.

Obviously I don’t want to be fighting with such a long decimal in my figures, so I will round up to the next whole number. I always round up, because I don’t want to run out of yarn when I am working on my project.

Now we have to figure out what this means for yardage needed. Remember earlier I said that my swatch weighed 10 grams and used 19 yards of yarn? It’s time to plug that number into our equation.

35 x 19 = 665 yards needed to make my shawl.

So how many balls of “Mochi Plus” do I need for this shawl?

665 divided by 95 = 7 balls.

When I purchase my yarn for a project I usually purchase 1 extra ball to be on the safe side. It’s really a bummer when you run out of yarn just short of completing your project.

Now if all this math scares you a little, the good news is that most patterns are going to have the yardage information you need. Because the designer already did all the math for you.

These equations are handy though if you aren’t meeting the gauge or are substituting a different yarn. Sometimes it is fun to see what you can come up with making a few changes.


Playing with Sharp Objects

At the TNNA Winter Trade Show last week I took a couple of classes. I enjoyed them both, but the one that was most closely related to playing with fiber was the Needle Felting class I took.

Owl I made in the "Needle Felting Owl with Woolbuddy" class.
Owl I made in the “Needle Felting Owl with Woolbuddy” class.

I have played with needle felting over the years. But I hadn’t really tried to do the sculptural stuff. One reason was I was a little scared of the super sharp needles one uses to create the project. At least with 2 dimensional needle felting I was a little more certain of keeping my fingers out of the way of the needle.

But I love sculptural work and knew it was finally time to take a class on it. My hopes were that I would learn the correct way of approaching the process and possibly shed less blood that way. Mostly that was what happened. I did manage to poke myself a couple of times, but it wasn’t when I was actually felting. I learnt that one should put the needle down safely when reaching for more fiber for the project.

Initially I had not signed up for this class when I registered. I decided I would see if there were any slots available for the class on Saturday afternoon if I was still interested. The class was taught by Jackie Huang of Woolbuddy and they also had a booth on the show floor.

The Woolbuddy folks

When I meet him and his wife at their booth and saw all the adorable and fun products I decided I had to take the class. My friend Tamara (MooglyBlog.com) signed up too. Look at the amazing full size dinosaur in their booth. Jackie said it took them 6 months to make it. You can read more about their company and even order online from them at their website: woolbuddy.com

Woolbuddy kit and my owl

In the 2 hour class we each made an adorable little owl starting with a handful of loose fiber. I had a great time making my owl and am looking forward to making more needle felted creations. I purchased one of their “Sea Turtle” kits the last day of the show.  The kits are packaged in a sturdy little box with 2 needles, all the fiber you need and a step-by-step photo tutorial to make the character.

Little Sheep

I haven’t tackled the kit yet. Instead, I have a bit of wool roving of various colors at home, so I have been practicing on it since my return. I made this fun little sheep that is going to become a pin. She is only about an 1 1/2 inches wide and a tiny bit taller (cause you know, Legs).  I love all things sheep since they are a great symbol for me of the fiber crafts that hold a large place in my heart.

I’m hoping to teach my boys how to needle felt too. The boys need to make their own owls, since they keep attempting to “borrow” mine.  It is definitely a craft that you have to pay attention to, yet you can see results fairly quickly when doing it. There might be a few injuries, but I’ll have the bandages handy if needed.


Time flies

My little man on his first Birthday.
My little J’s first Birthday.

Today is my oldest’s 13th birthday. Really not sure how that went by so fast. I took a walk down memory lane looking at photos of both my kiddos as babies.

Babies are so much fun, especially when they belong to friends and extended family.  I really like crocheting wearable gifts for them because they are quick to make. It’s that nearly instant gratification aspect.

If you don’t have a baby to crochet for check with your local hospital to see if they have a program for accepting donated hats for little noggins.

Finished Little Noggin Cap - M2H Designs
Finished Little Noggin Cap – M2H Designs

I was asked by my friends at the Longmont Yarn Shoppe to crochet a baby hat for a sample recently and this is the little hat I made. I used my Little Bitty Noggin Cap pattern from my November 2010 blog post. I actually had enough yarn left over that I could have made some booties to go along with it. It took less than 1/2 a 50g ball of yarn.

Yarn for Hat

The yarn I used was Plymouth Yarns “Dreambaby DK; Paintpot”. I started with a G (4mm) hook, but felt the fabric was coming out too stiff, so I pulled it all out and switched to my 7 (4.5mm) hook. The fabric still came out solid, but had a bit more stretch to it and a softer feel.

Finished Hat - Crown View

I made this hat a little bigger than the hat in my “Little Noggins” blog post. But essentially I used the same instructions. I made the flat circle for the crown larger by repeating the increase instructions for 8 rounds (instead of 6), I worked 10 more rounds without increases and then 2 rounds of ribbing.  I wanted this hat to be ideal for a brand new baby, which is typically 14 – 15 inch head circumference.

The half double crochet stitch has nice stretch to it and babies tend to have silky hair, so I made this hat to be a little snug by aiming for a circumference in the 13.5 inch range.

Measuring across the diameter of your crown. This was the original Little Noggin Cap.

If you would rather have a hat that is bigger, work your increase rounds until your crown diameter is just over 5 inches. That will give a hat that is a tad large for most newborns, but they grow very fast and will likely fit it in just a few short weeks.

I also changed how I work the ribbing at the brim for my hats. In the original pattern I had you step down the continuous spiral and then work the brim in joined rounds. I’ve since discovered that I can go right into the back post/front post ribbing without stepping down and it isn’t really all that obvious. Then I work the step down at the end of the ribbing rounds. Much easier that way.

I hope you have fun making some hats for the little noggins in your life.

I’m off to San Diego for the TNNA Winter Show. Hope to have some fun new yarns and products to show you all when I get back. My next post may not happen until Wednesday morning. So thanks for your patience.

Changing Colors

One of the most interesting things about being a designer is working with a variety of colors in designs.

Sometimes the color of yarn chosen for a design is up to me, other times it is decided by the editor. There have been a few times when I wasn’t too sure about the color picked. It was a color or combination of colors that I don’t normally like together.

Or an editor might have decided that a design I like in a solid color would be better in a multi-colored yarn.

Right Angle Wrap Photo courtesy of Annie's Publishing/Crochet! Magazine
Right Angle Wrap
Photo courtesy of Annie’s Publishing/Crochet! Magazine

A prime example of that is my “Right Angle Wrap” that was in “Crochet !” magazine. I had originally envisioned that design as a single color. But the editor decided to go with a multi-color in the yarn.

Me wearing the "Right Angle Wrap"
Me wearing the “Right Angle Wrap”

In the years since I created that design I’ve actually grown very fond of the colorful version. I’m wearing it in the photo above.

The best part of crocheting though is you have the choice of making a project in any color that pleases you. Many times I’ve seen a photo of a design in the magazine and thought, “If I made that I think I would use a different color”. Often I have a yarn in my stash that I know will work up well in a design and I don’t even worry about color (most of my personal stash yarn has already been chosen for color). I’ve even re-worked some of my published designs in a different color just to see how they would look.

Photo Courtesy of Annies

I made a “Winged Columns Wrap” for my mother one year in the silver grey color of that yarn. Unfortunately I didn’t take a photo of it before sending off the gift to her.

Whirlwind Square - M2H Designs

An example of some of my readers changing colors are all the gorgeous “Whirlwind Afghan Block” projects folks made for the Moogly 2015 CAL. Some folks even changed the number of colors they used in the block adding to or subtracting from the original 5 colors in the pattern. I love to see that kind of creativity.

So the next time you are looking at patterns for a project, remember the color choices are all up to you.

Crochet Surgery or Not

One of the things I have celebrated on my blog are the number of good friends I’ve made over the years of being online. Most of these friends are fellow crochet enthusiasts. One of my online friends is “Maven”, we met thru a group on Ravelry back in 2008 and have continued to stay in touch thru Ravelry, Facebook and Twitter over the intervening years.

We have even met in real life. It was a couple years ago, when I took my trip to NJ and NYC to visit Jan. It was far too short  a visit, but really fun to finally have a face to go with the name.

Maven likes to collect yarn when she travels and she purchased some yarn in Tallinin, Estonia on her trip there in May 2012. In May 2014  she decided to crochet a shawl with it while traveling in London and Paris.  She picked the “Festival Shawl” pattern designed by Lyn Robinson. This is a pretty point-up triangle shawl.

Unfortunately it was not coming out the way she wanted, but it turned out the yarn was really difficult to frog. It is a rather toothy wool that likes to grab onto itself. She decided to put it in time-out for awhile in June 2014.

Maven had posted photos of her project and we had talked about how to fix it. I had suggested doing some surgery on the original UFO, then finishing the shawl with how-ever much yarn she had left.  Or she could try using hair conditioner on the project and seeing if she could gently un-ravel the project that way.

She wasn’t sure she was up to either of those fixes and jokingly suggested that she should send it to me to mess with. Of course, I thought that was a great idea, Blog Post!

1 - Box of Goodies and WIP

This joke kept getting tossed back and forth between us, finally she decided to take me up on the offer for real. Tuesday of this week I got the box in the mail. There was the expected project, but Maven also included some interesting chocolate goodies. She knows what a chocolate fiend I am. I am not planning on sharing any of these.

Triangle Shawl

Initial look at the project made me think that crochet surgery could work quite well. But I wanted to get a really good look at the project in the light of day before making my final assessment.

2 - Looking at options 1

I could see changing the direction of wear and loping off the original bottom point might work. That would mean the shawl would be more of a crescent shape than a triangle. But would Maven like it, and want to wear it?

3 - Materials for Surgery

4 - Looking at route for Safety line

I even went so far as to begin the set-up for crochet surgery. In this case I used some size 3 crochet cotton thread and a blunt yarn needle.

5 - Running safety line thru sts

I carefully wove the thread into the base of each stitch of my chosen row. The idea being once I had secured that row I could then cut the yarn on the previous row and un-ravel it or otherwise remove it.

If you decide to do surgery on your crochet this is the basic approach. If I had continued along this line with this project I would have left a lengthy tail at both ends of my secured row when removing the previous row.

Then I would have used some of the yarn in the remaining ball of yarn to crochet a chain that captured the base of each of my secured stitches and created bridges between them where needed. After that it is just a matter of treating that chain like a normal crochet foundation and crocheting any additional stitches off of it for the neckline of the shawl.

6 - Safety line in place

Once I had the thread in place though I kept looking at the project and was concerned that the finished object would not work for Maven. I wanted her to be happy with whatever I came up with and it really didn’t look like this would fit the bill.

7 - Partial Row

What about frogging it?  The last row on the project was un-finished, so I looked at it to see how difficult it would be to un-ravel. It came apart easier than I had expected. I realized that frogging the project and returning the yarn to Maven was a real possibility.

I hadn’t even tried the conditioner or de-tangling spray yet. So I began to very carefully pull the stitches apart and wind up the yarn as I went.

8 - Broken Yarn and crochet hook

Yarn wrap for broken ends

Early on there was a break in the yarn, so I folded the ends together and used a long slip knot to secure them. That way when Maven goes to work with the yarn again the color gradients won’t be interrupted.

One of the tricks when un-raveling a fussy yarn like this: take it slowly, one stitch at a time. I occasionally used a small crochet hook to hold the top of a stitch open as I gently persuaded the yarn to release. Other times I pinched the base of that top loop between my thumb nail and fore finger.

9 - Almost done Frogging

Whenever I ran into a spot that wouldn’t come free I would gently tease the fibers loose. Yes, this takes a bit more time. So only work on frogging a project like this in bits and pieces so that you don’t get impatient.

Now, some of you may be wondering why I could frog this and Maven can’t. I think 2 factors were in play here. Lack of humidity and very cold temperatures. I live on a cold dry mountain, Maven lives at sea-level on the East Coast. It was really cold the day the package arrived, 27F in fact.

If you are trying to un-ravel a project and are having difficulties with the fiber grabbing onto itself, try popping it in your freezer for a bit. A de-humidifier can be helpful too.

10 - Final Ball of Yarn

Now I have turned this project into a big ball of yarn. It’s ready to go back to Maven for her to crochet it into something new.

Happy Halloween!

It’s looking to be another cold Halloween up here on the mountain. We’ve had frost and snow the last couple of mornings, but nothing too dreadful yet.

Pumpkins

I didn’t bother with purchasing a pumpkin to carve this year as they always freeze and become a gross soggy mess on our front deck before we really get to enjoy them. I did get a photo of the big pile of pumpkins in front of our favorite grocery store though.

Supplies for Crafting

Thursday evening was my exciting Halloween Costume crafting evening. Seems we do this every year. There is always a last minute item needed for a costume and it’s the evening before the Halloween celebration at school.

Beginning Goggle Project

My oldest is planning on being a Steam-Punk Tech Pirate. Fairly simple costume involving Goggles and fingerless gloves with black and white theme in the rest of his attire. The goggles we had ordered off Amazon for him, but they were a bit un-comfortable and he wanted me to add some padding to the edges.

Goggles re-assembled

Goggles ready to wear

I found myself very grateful for adhesive backed crafting foam. After a bit of experimenting I had cobbled together a pretty decent solution. He picked the white color to go along with his black and white theme in the rest of the costume.

The next project was a bit more challenging, mainly because it was time consuming. My youngest had decided to be Ironman from the Marvel comics. We had found a pretty awesome costume at Costco earlier this Fall, but it was only a bodysuit with the armor created with padding and printing on the fabric and a plastic mask.

Apparently you need “repulsor gauntlets” to be Ironman. So it was up to me to create some. I thought this was going to be an easy project to tackle. Get red stretchy gloves, create a white circle on the palm all good.

Except, I couldn’t find red stretchy gloves that fit my little guy. There were stretchy gloves in Black, Grey and Navy…but no red. I found red stretchy gloves but they were too long in the fingers and pretty baggy in the palm. They were not going to meet the requirements.

Next I tried ordering some online, they were only available as a package of 12. Feeling a bit desperate I decided to order them knowing that in my family we could put 12 pairs of gloves to good use. Unfortunately when the gloves arrived on this past Wednesday there were not any red ones in the package. Pretty much every other color, but not red. To further discourage us, the gloves were all too big.

Pair of Grey Gloves

Now we were starting to get a little worried. Fortunately being a crafty mom I knew this could be fixed. I asked my son how he would feel about me painting the gray gloves with red paint to make them look like Ironman’s gauntlets. After looking at the costume for a little while he agreed to that plan.

Beginning to Paint Gloves

Which brings us to Thursday night, a handful of fabric paints and a pair of grey stretchy gloves. At about 7:15 p.m. I began painting the gloves. While I had been working on the goggles for my other son, the youngest had traced the gloves onto some light cardstock. I cut out the hand shapes and inserted them into the gloves.

Back of gloves red progressing

The black marks you see on the gloves were to help me know where my son’s knuckles were so that I could leave some blank fabric for ease of movement. The fabric paint tends to stiffen the fabric, which would be a bit of a problem for wearing.

Finished Gauntlets

I was getting pretty tired, but I finally finished painting at 11 p.m. The gauntlets came out pretty good, best of all my son was very happy with them. Which made the short night’s sleep worth it.

Halloween Boys

I’ll add Here’s a picture of the boys once they are all costumed up in preparation for Trick or Treating.

I hope you and your family have a fun and safe Halloween.