2 Needles instead of 1 Hook

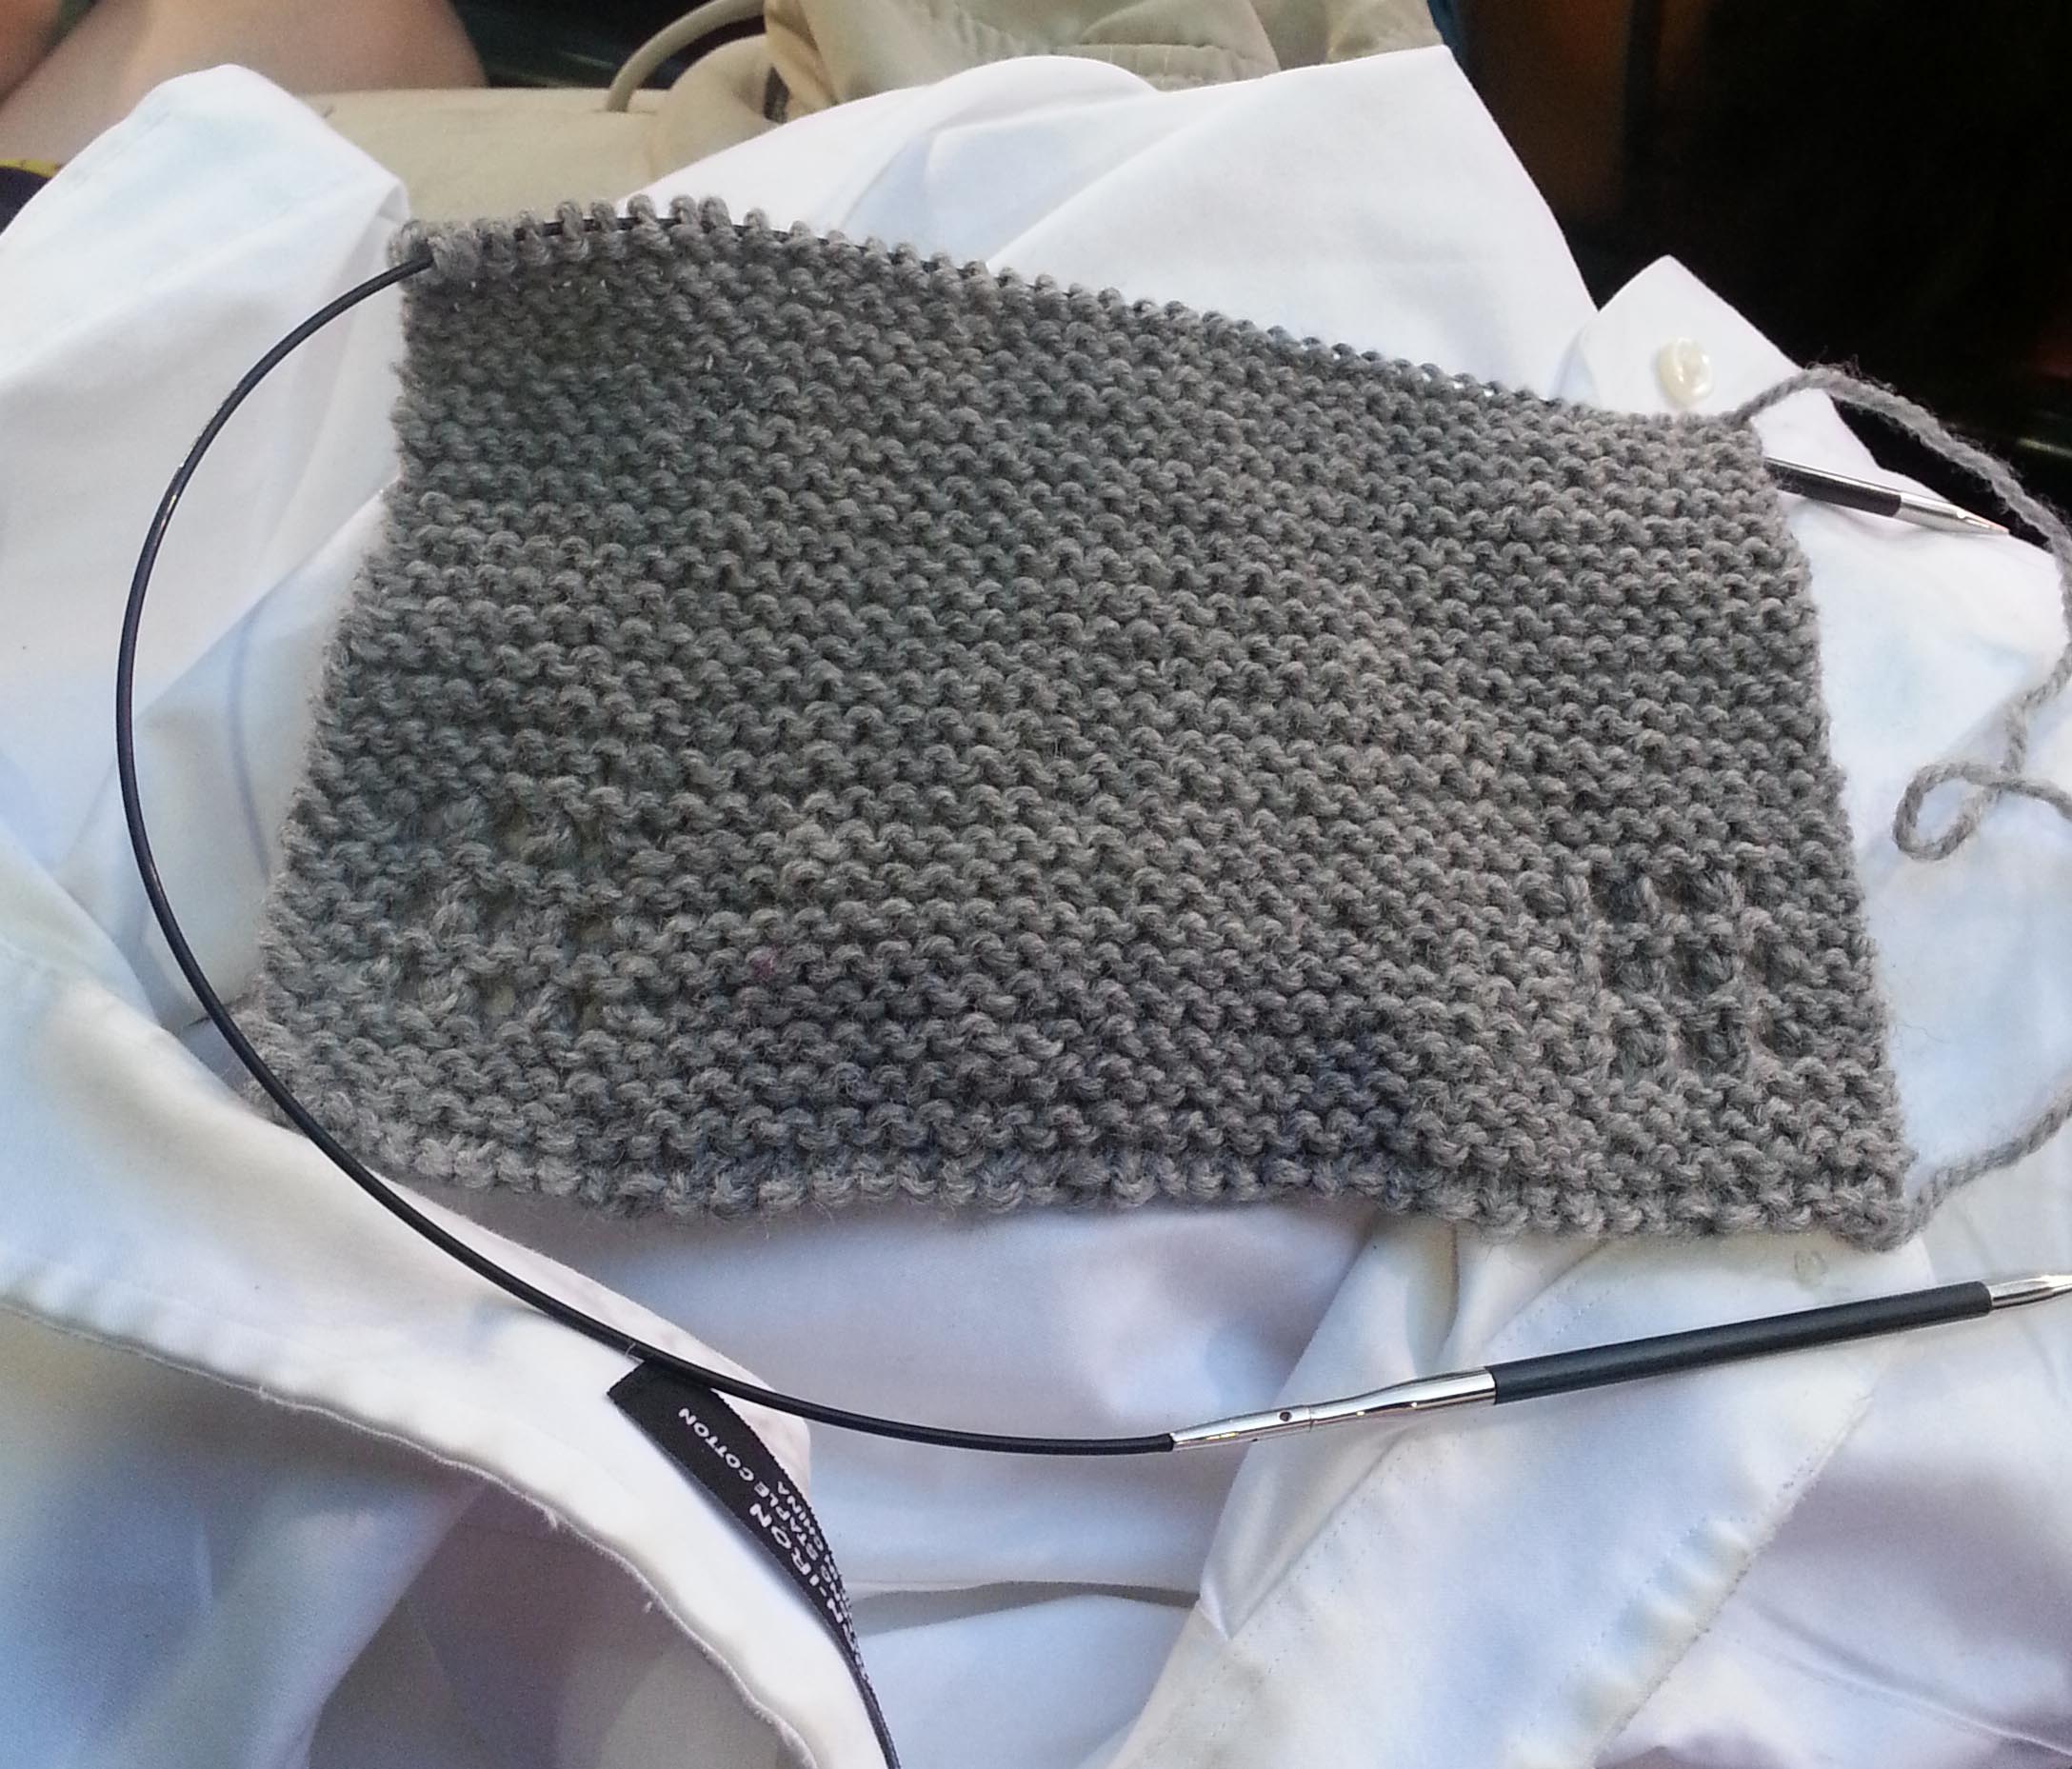
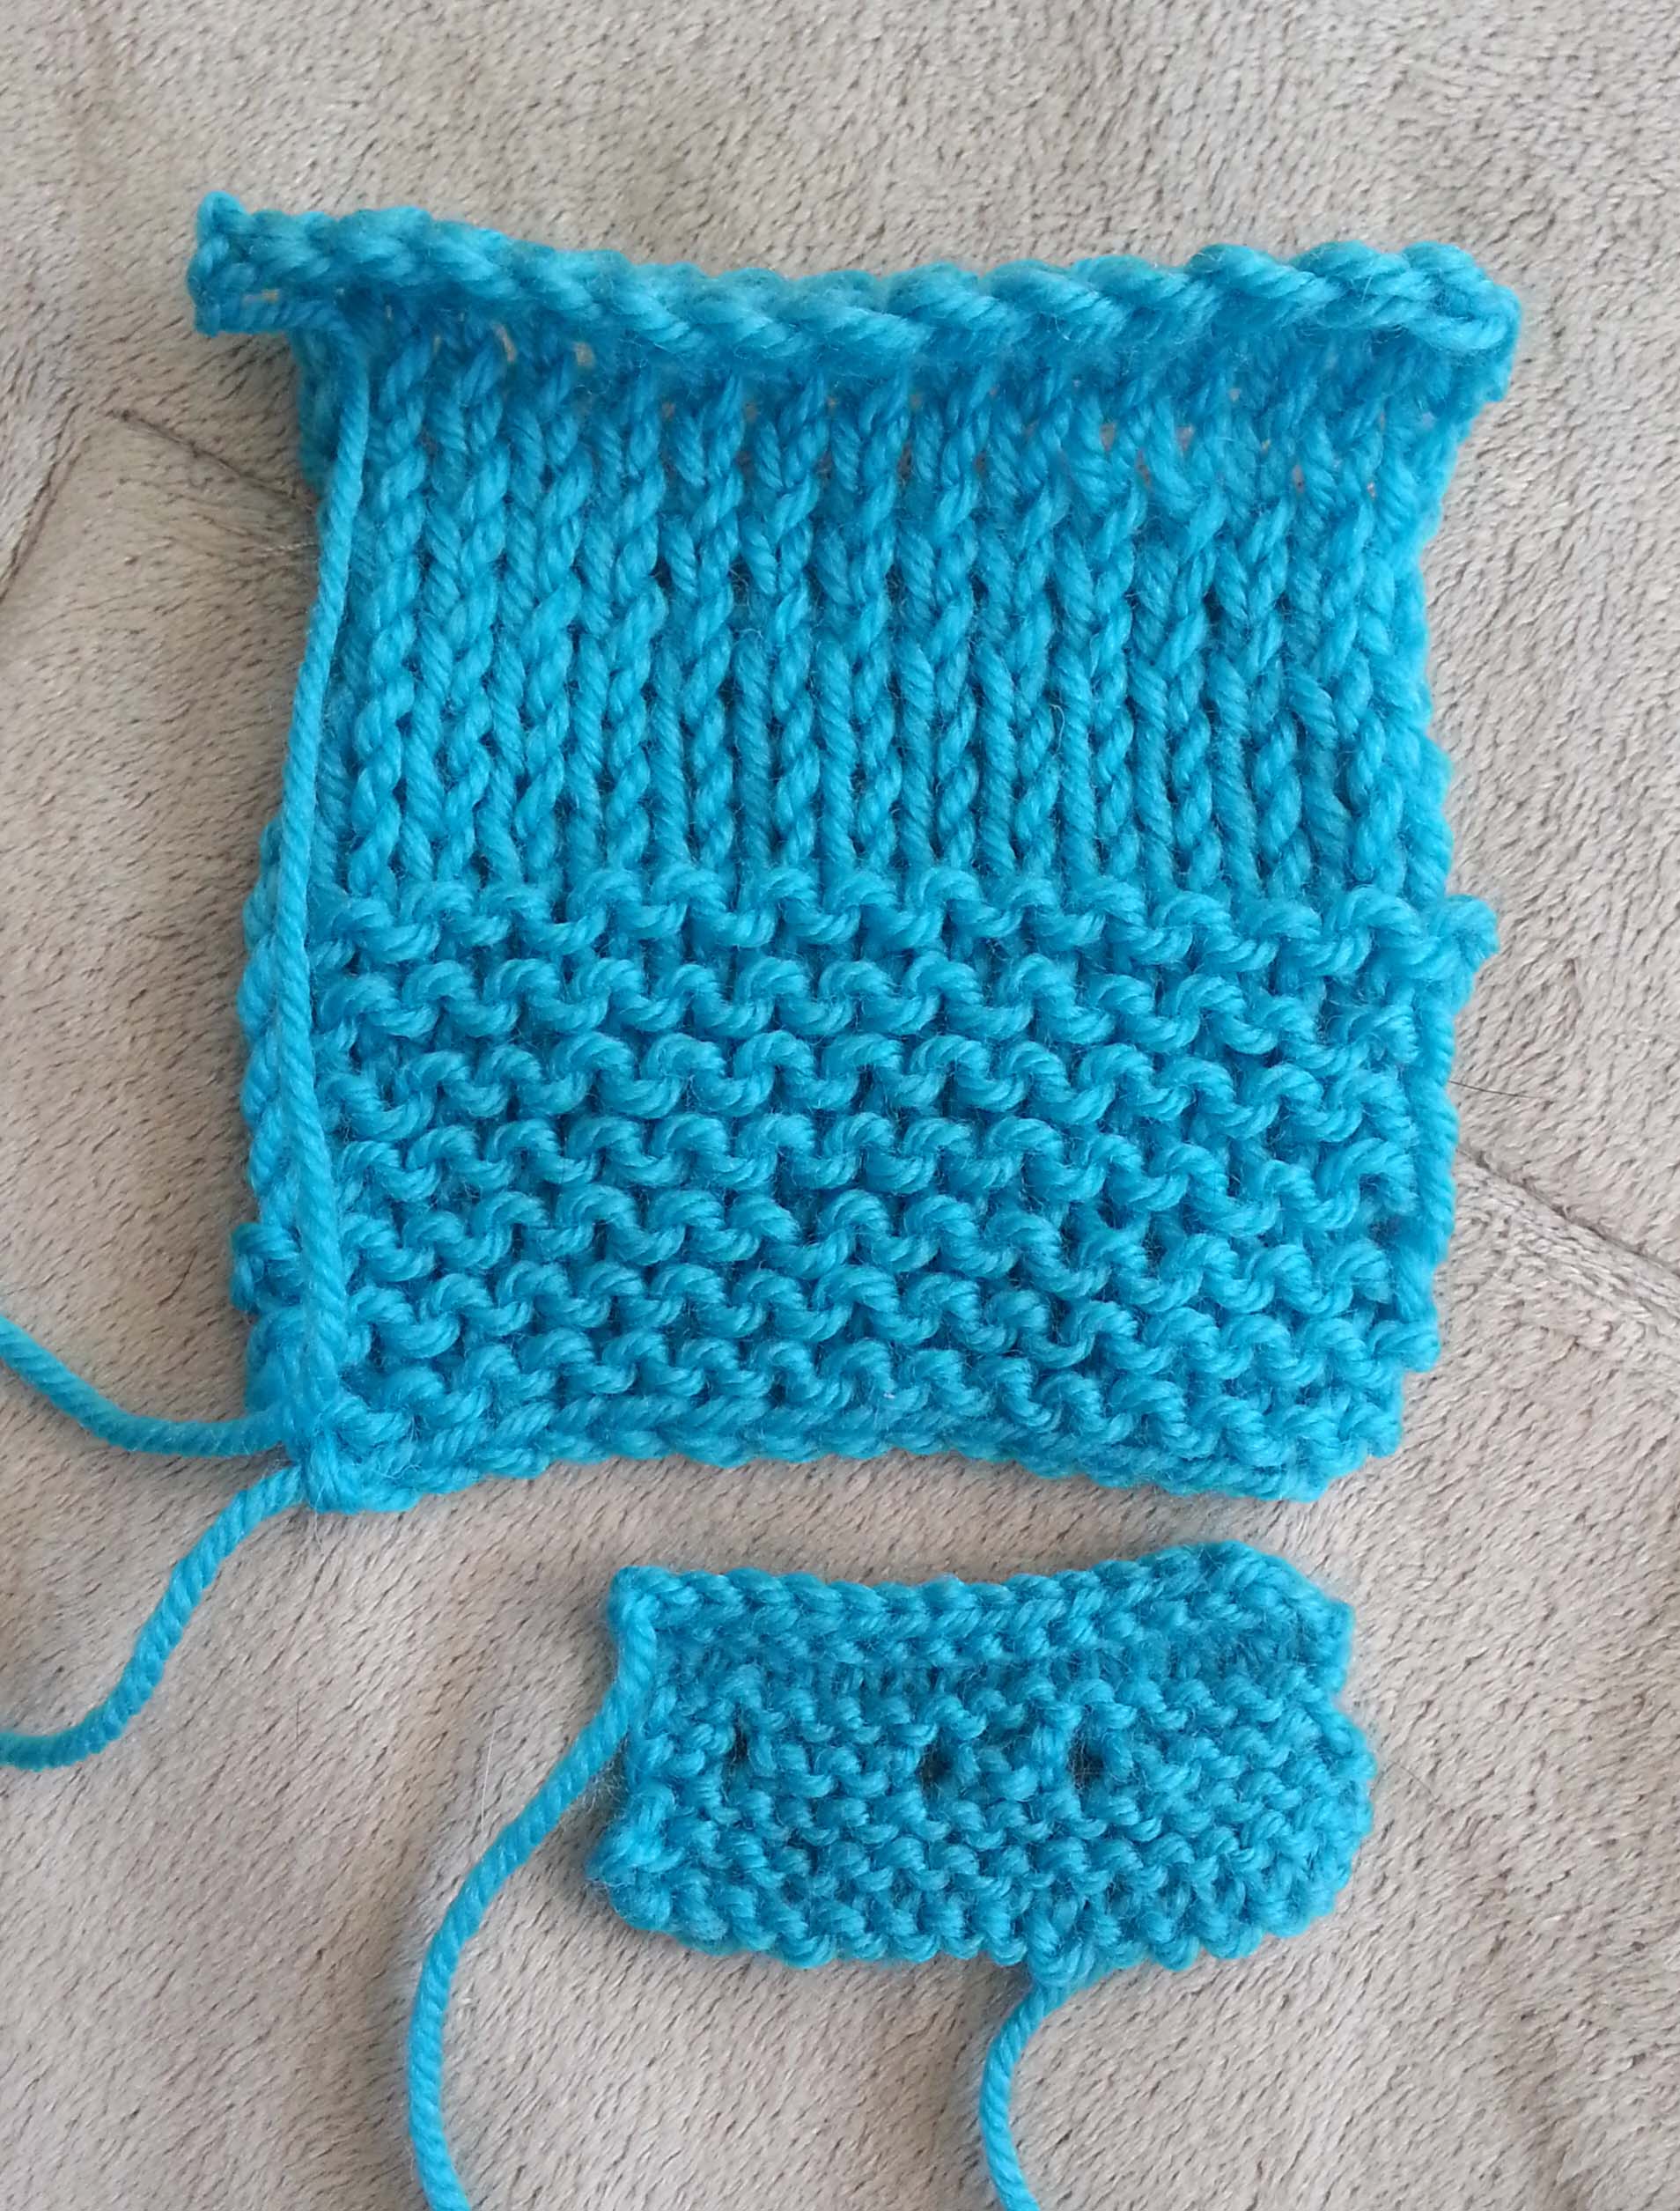
The last month or so I’ve had a “hobby” project I have been playing with. I actually can’t recall exactly when I started this project. I had a smallish ball of bright blue yarn that I decided would be good for practicing knitting. I’m really not all that great at knitting, though I can knit a pretty decent garter stitch scarf. I cast on 15 stitches with the idea being to knit a few rows whenever I felt I had a little time and wanted a little knitting practice.

Sometimes the project got stuck in the bottom of my project bag for weeks at a time. Then I would take it out and knit a few rows. About a month ago I decided to finally finish up the blue yarn. My tension wasn’t always great, but I made fairly quick progress towards finishing it and I began to think about what I wanted to do with it next. I knew it wasn’t going to be very long, so wouldn’t really work as a skinny scarf.

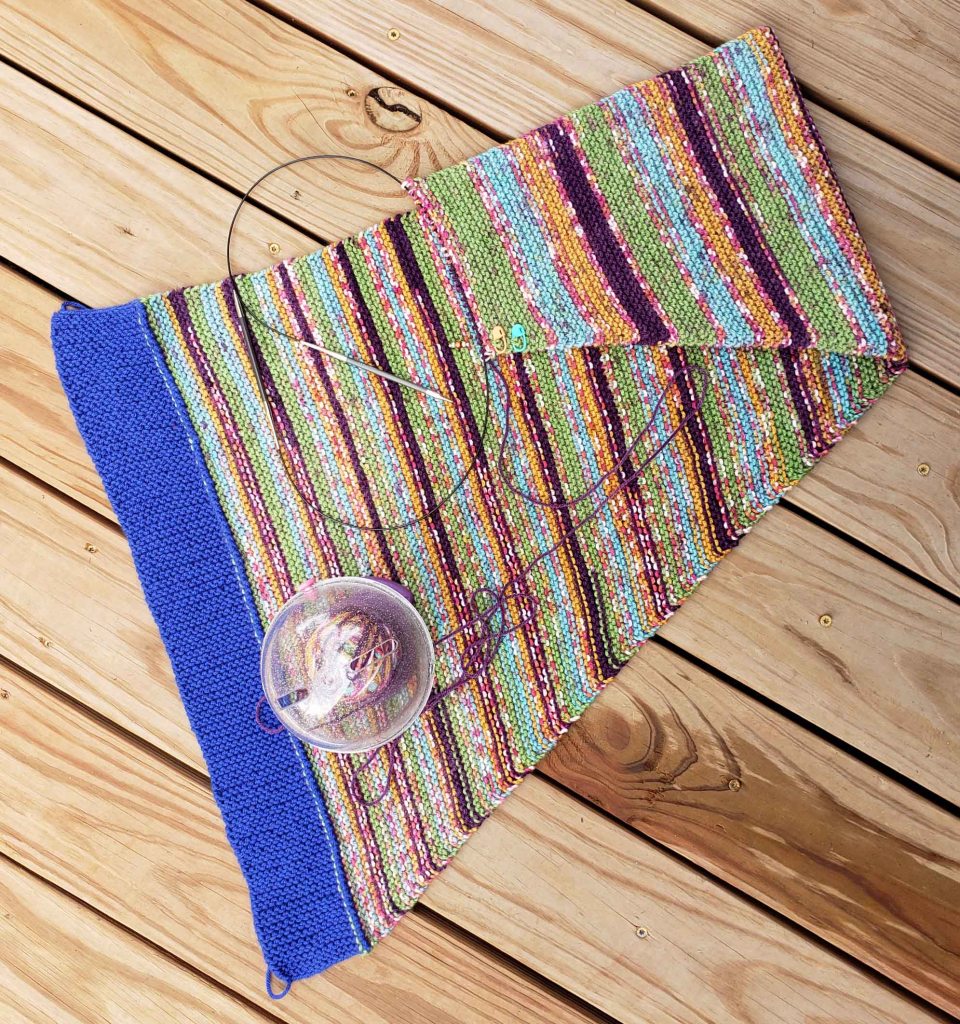
Instead I decided to use some colorful variegated yarn to pick up stitches along the length of the blue piece. I had in mind the idea of creating a cuddly garter stitch wrap for wearing when the cooler weather arrives here on my mountain. It would also give me a chance to practice decreasing in knitting.

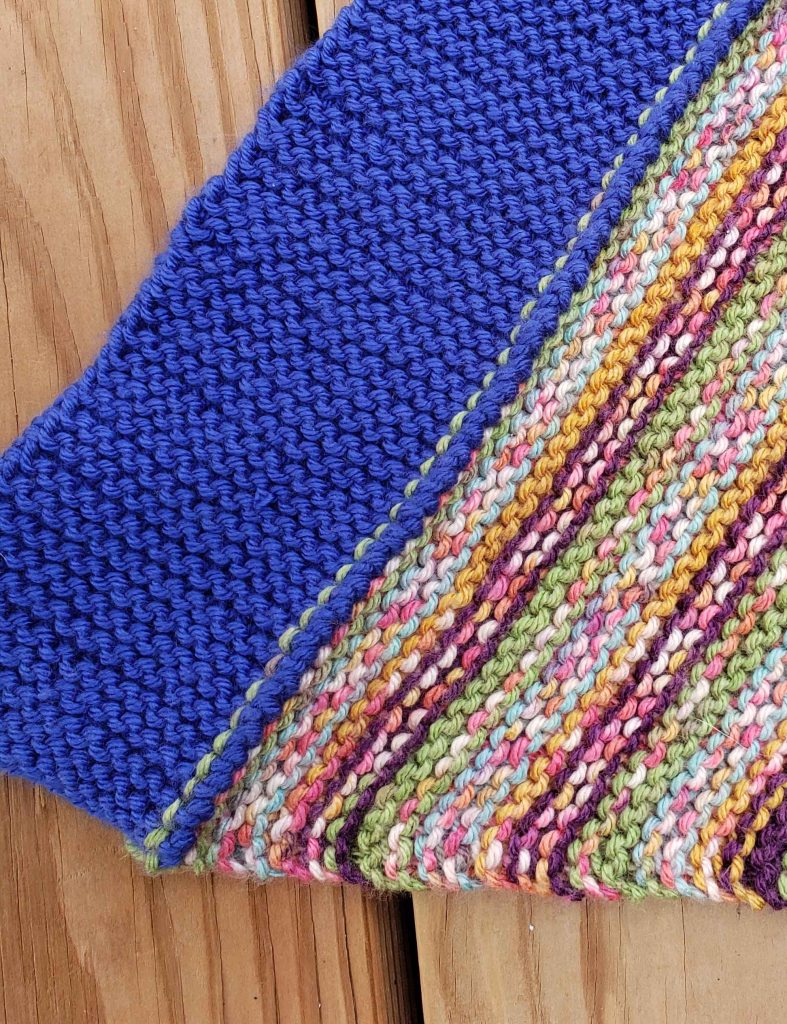
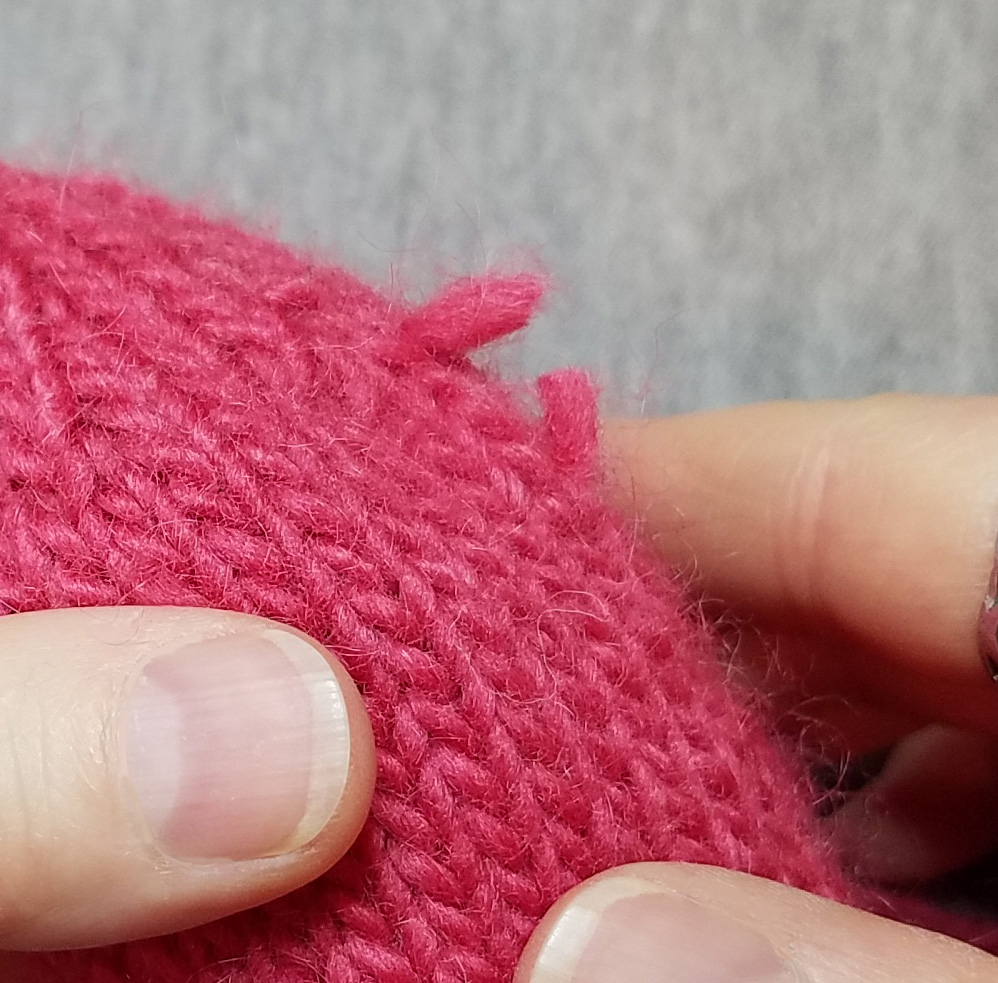
I really like the way the picked up stitches created a ridge on the side of the blue piece that reminds me of crocheted “crab stitch” or reverse single crochet

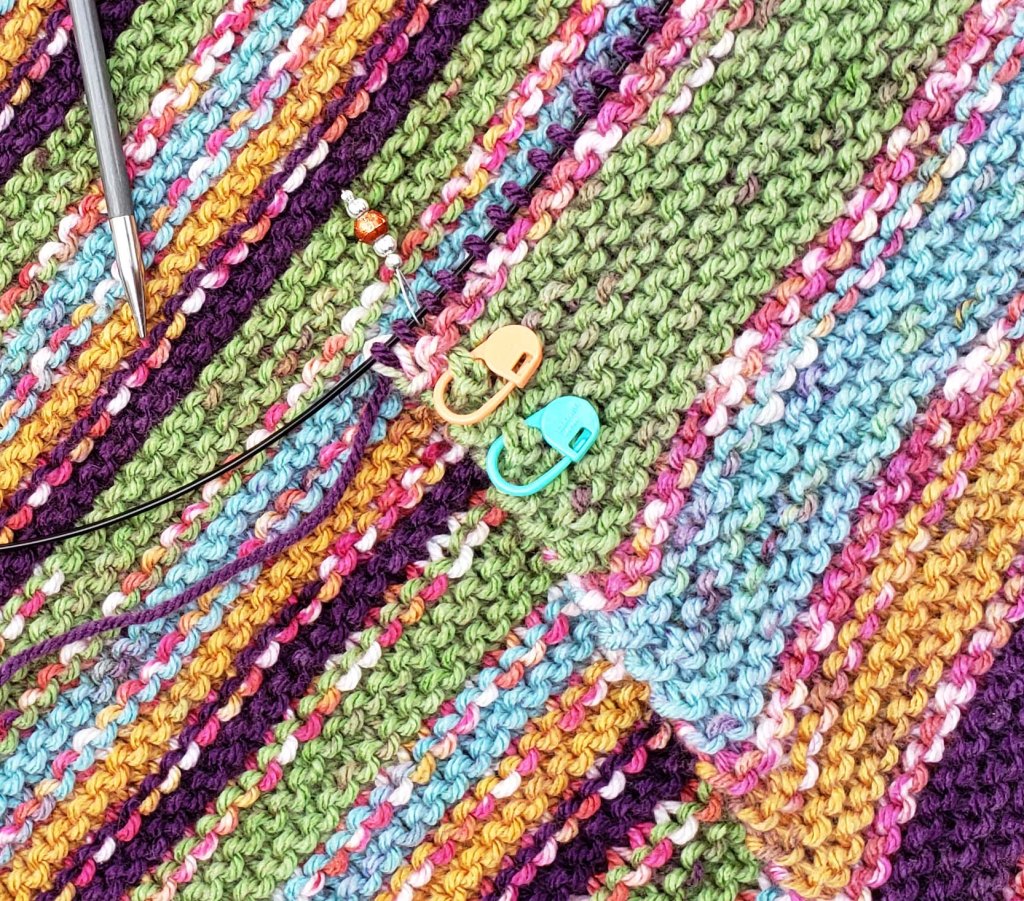
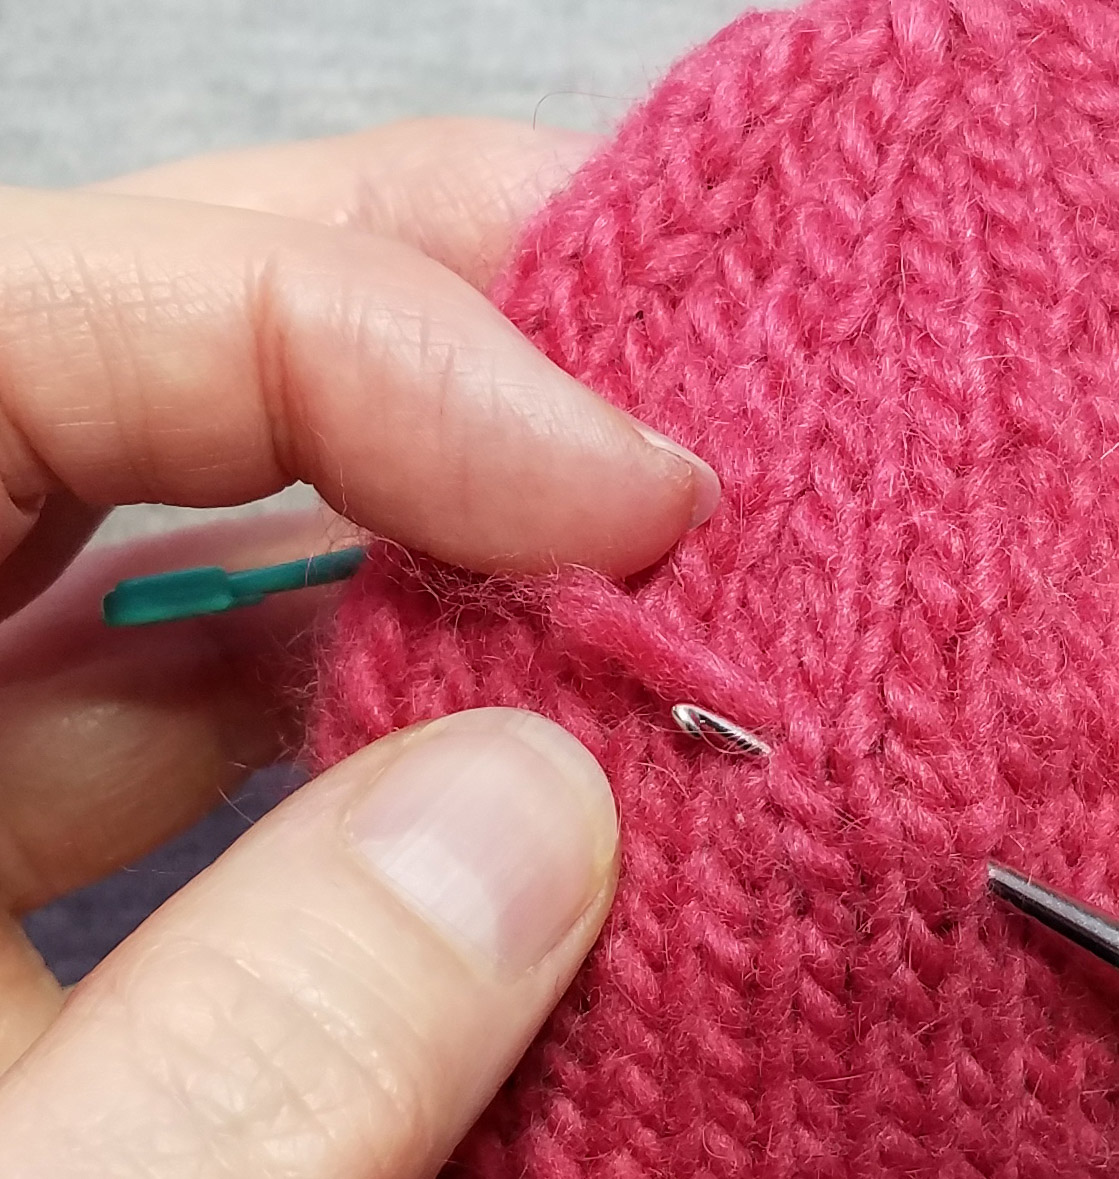
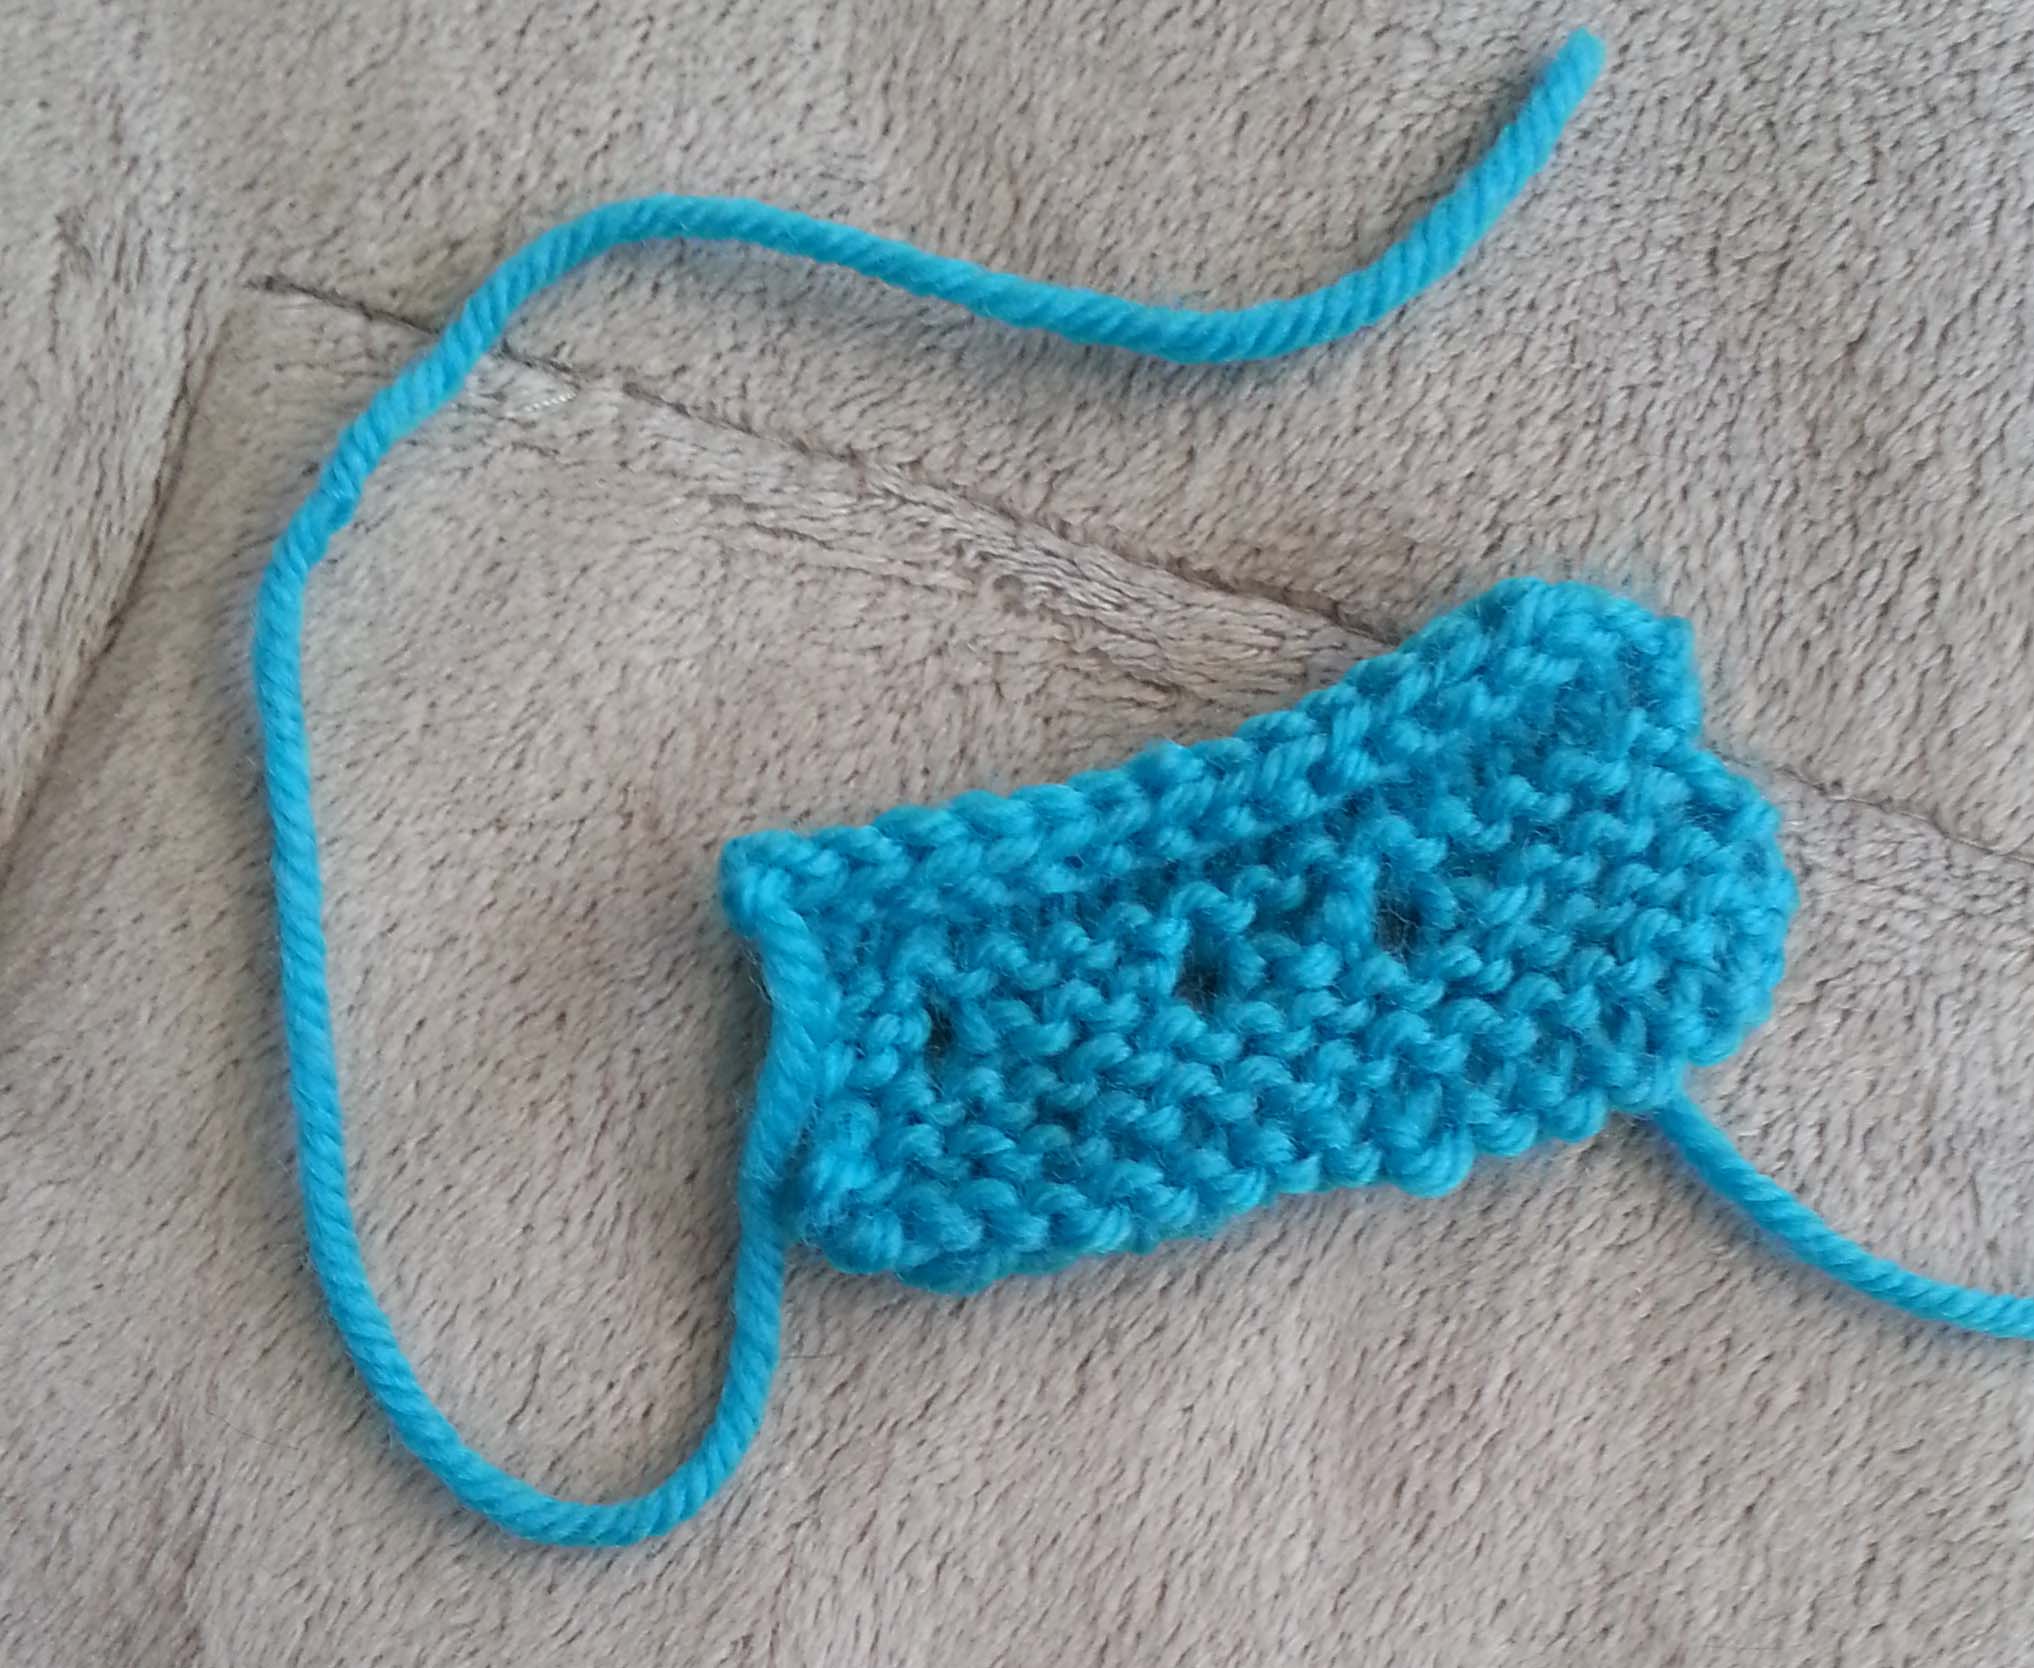
I had a lot of fun knitting this section of the wrap. The colorful changes as each row was completed kept me quite entertained. I decided to decrease on just one edge every 4th row. After a few times of missing my decrease row I added some of my locking stitch markers to help me keep track better.

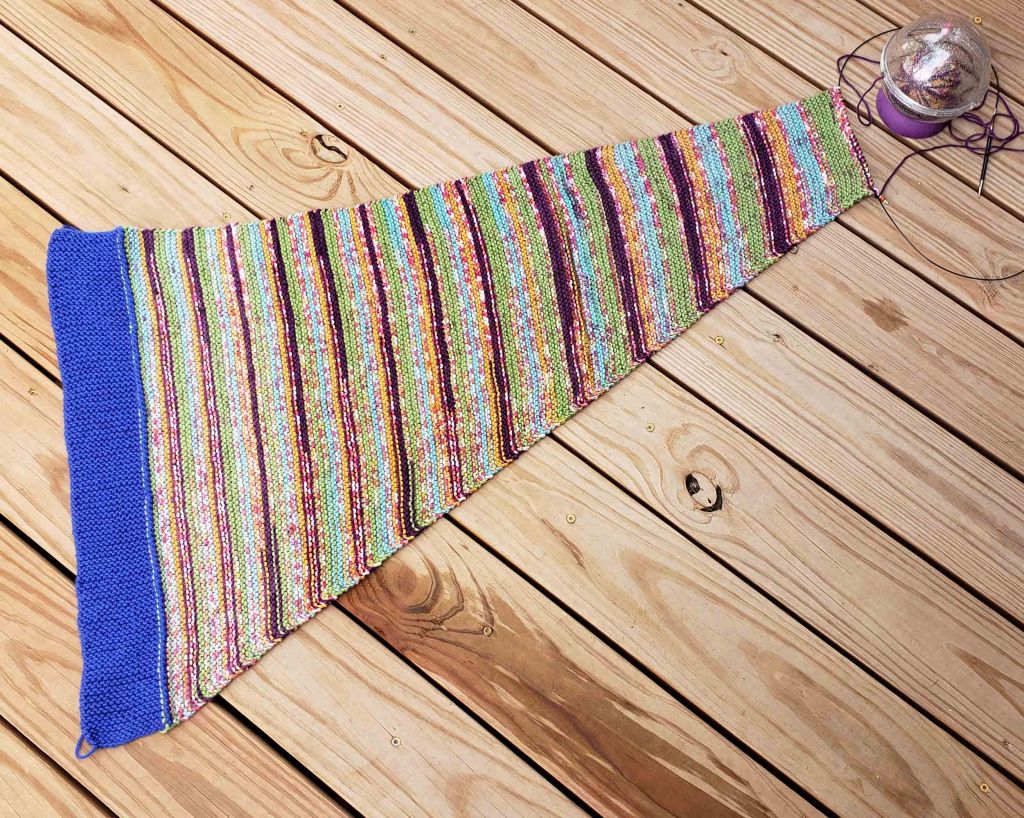
Now I’m trying to decide if I want to add more to this wrap and play with another knitting technique like short rows, or maybe I will decrease every other row to make a sharper angle? Or I could just call it finished. This has been a great practice piece so far. I am actually happier with my weaving in of tails where I added a new ball of yarn. I always feel like I ruin my knitting when I weave in my tails, so it’s nice to be happy with that aspect finally.

Now I just need to work on my skills doing the purl stitch and increasing in knitting. In the meantime there are lots of crochet designs on my work table that I am hoping to share with you the next couple of months.

Needle Felting for Repairs

One of my least favorite things in crochet or knitting is dealing with the loose ends once a project is finished. Needle felting can be a big help in securing those ends though, especially if your project is worked using a wool blend yarn.

Recently one of my friends had an issue with some mittens she had knit. When weaving in ends she had some extra strands on the outside of her fabric. We looked at the mittens trying to figure out how she could weave in the ends. They were going to be super short and there was a good chance they would pop loose.

Needle-felting to the rescue! I grabbed my size 40 felting needle, my “egg” felting surface, and a small steel crochet hook (not shown).

I cut the strand in the center, and had 2 short ends.

I then pulled the 2 loose ends to the wrong side of the fabric by inserting a small crochet hook in from the side.

I turned the mitten inside out and gently pulled on the ends to be sure I didn’t have any excess yarn on outside of mitten. I inserted my felting surface behind the fabric and snugged the fabric where I would be needling tight to the surface.

I then gently needled the ends close to where they came thru the fabric. I checked the outside (right-side) of the fabric regularly to make sure my work wasn’t visible. I wanted to secure the ends but not decrease the stretch of the fabric. Once I was sure the ends were well secured I trimmed off any excess yarn.

You can use this same method with any knit or crochet project. Especially if the project is worked in a wool or other animal fiber yarn. Needle felting can secure other types of fiber, but you may want to test it out before relying on it for your final project.

Needle felting can even be a great way to secure the cut end of longer tails that have been woven in. Especially helpful on items that get a lot of use like hats, mittens, scarves and blankets.

For longer tails, weave in like you usually do, but before cutting the yarn use your felting needle to secure the end. Then cut close to the needle felted spot to remove excess yarn.

This post contains affiliate links. I may receive compensation (at no additional cost to you) if you make a purchase using these links.

One of my favorite tools is Clover’s Single Needle Felting Tool. It is much easier on my hand than just holding the plain needle. The ergonomic shaping also allows for more control of the needle while working.
If you can’t find this tool locally it is available online at Amazon.com. Click on the photo below to go straight to it.

The Other Yarnie Craft

I know it is still National Crochet Month, though according to some folks it is National Crafting Month. I thought it would be fun to talk about that other popular yarn craft: Knitting.

My swatches from my 2011 knitting experiment.

The funny thing is I was wondering this week what I was blogging about 5 years ago in March. Turns out I was experimenting with knitting. I hadn’t really gotten the hang of continental style knitting and I was a very slow knitter. Not to mention easily frustrated with my knitting.

Amazingly enough I have actually gotten a lot better at knitting the past 5 years. I have to say that taking a class with Galina Khmeleva at the 2014 Knit and Crochet Show was a definite turning point for my knitting. It even made me bold enough to take a lace knitting class at my local yarn shop: Longmont Yarn Shoppe.

SR My Show & Tell

I made this pretty scarf. It’s not perfect, but I learnt so much working thru it. Reading back over those 5 year old posts, one of the things I remembered was how stressful it was for me trying to understand the stitches. Now I can finally really see the stitches and I know when they are on my needle correctly and even better I know how to fix them when they aren’t.

Beginning of my son's Christmas Scarf.
Beginning of my son’s Christmas Scarf.

I knit a scarf for my oldest son for this past Christmas. Unfortunately I didn’t get a photo of it when it was finished because of the usual mayhem at Christmas-time around our house. He has worn it almost every single day this winter, so I think he likes it. Unfortunately it is beginning to show that it well loved. A bit like the Velveteen Rabbit.

I’ve been thinking about attempting to design a pattern using simple knitting and elaborate crochet, but it keeps slipping down my list of projects. Will have to see if I can get on it later this year.

I still don’t knit all that much and crochet is my first passion when it comes to playing with yarn, but I am glad that I understand how to knit. If nothing else going thru the pain of learning and being in that beginner’s mind again has made me an even more compassionate teacher.

This weekend begins Spring Break for my boys, so I may be a bit quieter than usual. I hope to have something exciting for all of you next week, though it may be next weekend.


Knooking is Cool!

Karen and I in a "selfie" during the banquet.
Karen and I in a “selfie” during the banquet.

I decided to take this class with Karen Whooley on a bit of a lark. I was curious about knooking and I love taking classes with Karen. As a teacher myself, observing other teachers’ class room styles is very educational to me…and Karen is a fabulous teacher. But this class turned out to be so much more for me than I had expected.

My issue with knitting has always been that I feel like the needle in my right hand is lacking something. That’s right, it needs a hook! So this knooking thing was way cool for me. Finally, everything I understood about knitting could be applied to a craft that used a hook. The fabric created with knooking is true “knit” fabric, the tools to create it are just a little different.

Knooking Kit

Leisure Arts very kindly supplied the kits for all the students in Karen’s class. So that made it easy for us all to get started. The kits held 3 hooks of different sizes, 3 satin cords and a handy sized booklet with everything you needed to know to begin knooking.  Having taken my knitting class the day before also helped me. I was rocking along very quickly with my knooking and having a great time.

Different Sized Swatches

I got a lot further along with my swatch in this class than I had in my knitting class.

Curly Knook Swatch

Didn’t bind off very well though, the top of my swatch had a serious curling problem.

One thing I’ve always struggled with in my knitting is twisting stitches and if I pull out a needle accidentally I often put the stitches back on the needle wrong. What I was really enjoying about knooking was I wasn’t struggling to keep stitches from slipping off the needles when making them and could focus more on what was happening with them.

Karen Teaching

I think knooking is going to be the “doorway” craft for me to improve my knitting skills. In fact Karen said that lots of folks that take to knooking eventually end up feeling more comfortable knitting with 2 needles. She helped me see how the way I was wrapping my yarn would make a difference in my knit stitches and whether they would “twist”.

As you work each row in knooking the cord holding the previous row of stitches allows you to correct the new row (if needed) without making a mess of the previous row. Somewhat like using “life lines” in lace knitting. I think it is easiest to knook with a hook that has a fairly pointed hook end, especially since you are working into stitches that also have a cord in them. I actually have some wooden hooks that have very pointed tops I’m considering modifying so I can knook with them. Just need to make the tail-end of the hook a little flatter and put a hole in it.

KW Knooking book cover

Karen has also published a book with Leisure Arts called “Easy Knit Projects”. It’s geared toward kids, but is really great for crocheters that don’t knit and want to try out knooking. In the back of the book are 8 pages that have illustrations and information reviewing the basics of knooking. It contains 9 fun projects to try out once you have the hang of knooking.

After taking this class I can highly recommend it to anyone that has ever wanted to learn to knit, but found 2 pointy sticks to be too intimidating.

Russian Coninental Knitting

This year at the Knit and Crochet Show I was stretching my yarn crafting skills, so I decided to take a knitting class. Not only did I take a knitting class, but a knitting class with Galina Khmeleva.

Galina Khlmeleva

I was feeling a bit intimidated before heading to the class, a couple of my non-knitting crochet friends were saying “Whoa, your first knitting class and you are taking it with Galina?! You believe in jumping in the deep-end.” This did not help my nerves.

When I got to the class I was comforted to see that I wasn’t the only crocheter that had ventured into a knitting class. My friends Amy D. and Susan Lowman were there as well as Haley Zimmerman and 2 other crocheters. It was a well-filled class.

Galina started off the class introducing herself and her background with the needle-arts. I could tell that I was going to love the class, even if I didn’t remember anything. Galina had a warm and humorous approach to her subject and students that I found immediately engaging and re-assuring.

I had been concerned that I hadn’t even cast-on to knit for months. Fortunately Galina started us off with teaching her favorite cast on method. The hand-out for this was illustrations from the book she learnt from in Russian. The captions on the illustrations were in Russian. I can’t read them, but it is rather amusing to look at them.  Except for the very beginning of the cast-on, which created the slip knot, this method was very similar to the method I have learnt called the “sling-shot cast-on”.

Once we all had 15 stitches cast on, Galina walked us thru the steps of how to wrap the yarn on our left hand and hold the left needle (for all us righties in the room, I don’t know if we had any lefties as I was very focused on my knitting). Then she showed us how to knit the working yarn.

I swear it was like magic. For the very first time in my experience of knitting my hands didn’t begin to ache. No. Pain. At. All. I was thrilled. This method encourages one to keep the hands completely relaxed. I have always had difficulty with pain when knitting, and knew there had to be a way to do it that wouldn’t hurt.

Biggest problem all of us crocheters were having was that our left pointer finger kept wanting to creep up off the needle.  Galina would walk around the inside of the U-shape table and to almost every one of the crocheters she would say, “Finger down”.

Swatch from Galinas Class

I don’t have much to show for my tiny little swatch I made in the class. But I was very pleased with my progress. It will take many more hours of practice to develop any real proficiency with this method of knitting. Since my hands don’t hurt when I am knitting this way I might actually be able to put in the hours to improve.

My new Knitting Project

I’ve cast on 20 stitches and have been knitting a few rows each day. I’m still really pleased with this method of knitting. Best of all I now have a method of knitting I can recommend to knitters that are have hand-pain or problems when knitting.

I’m very glad I had the courage to take this class, and would highly recommend taking a class with Galina, especially to my knitting friends that are more skilled than I am. If you want to take a class with Galina and are too impatient to wait til next summer’s Knit & Crochet Show, you can check out her DVD “Orenberg Knitting: Knitting Gossamer Webs” available thru Interweave. Or visit her website: Skaska.com to find out her teaching schedule.

Knitting a Hat

Okay, I know you are surprised to read that title in my blog, being as I am a crochet designer.

But I actually did design a knit hat recently. My younger brother Cy and his girlfriend, K, were here at Casa Graves the weekend before Thanksgiving for an early celebration. We did this early because K owns a retail shop and couldn’t be away during the actual Thanksgiving weekend.

While they were here I was teaching her to crochet and re-teaching Cy to crochet.  After awhile though K decided she would rather knit. She has been knitting since she was very young. But she has only knit rectangles. She said she primarily knits scarves.

So I grabbed a ball of yarn for her and she cast-on and began knitting away.

Meanwhile, Cy and I were crocheting hats and I was teaching him some of the more advanced crochet tricks I’ve acquired over the years.

When I finally started paying attention to what K was making I realized she wasn’t going to have enough yarn to make much of a scarf, but she did have enough stitches that she could make a knitted hat.  I asked her if she would like to have a hat from what she was knitting.

She was thrilled with the idea. So I told her to keep knitting until she had a long enough length to go around her head. Once she got to that length she was to bind-off and I would show her how to turn the length of fabric she had created into a lovely hat.

K was on a mission from that point onward. They were planning on leaving early Monday morning, so she wanted to finish before they left. By Sunday, after we had dinner, she had finished her knitting and was ready to bind-off.  She said it had been awhile since she had knit and she wasn’t sure if she remembered how to bind-off, could I help.

Yikes! Well, with the warning that this could be the blind leading the blind, I was game for it. Amazingly I actually remembered how to bind off. Soon her knitted fabric was ready to be transformed into a hat.

Now, she had been knitting pretty fast and her stitch count on every row wasn’t always the same, but I told her not to worry. This would become a “design element” in the finished hat.  We looked at the fabric and decided one edge was a bit straighter than the other, so it would become the “brim” edge of the hat.

I next set her the task to whipstitch the cast-on and bind-off edges to make a tube, lining up the “brim” edge so it matched on the seam line. Since her fabric was all knit stitches, ie…Garter stitch, there wasn’t really a right-side or wrong-side of the fabric to worry about.

Once that was done I had her take a doubled length of yarn (about 10″/25 cm)  and sew a running stitch on the “right-side” of the hat an inch down from the lowest point of the top edge.  We then pulled the yarn tight and closed the crown of the hat. The resulting gathering of the top edge created a sort of rosette on the crown.  I had her knot the yarn then tie a pretty bow and trim up the ends.

A-Knit-Hat

Of course, we were having so much fun with all the knitting and crocheting I didn’t even think to take photos of any of it.  So this is a picture Cy took for me after they got home.

I got the biggest kick out of how happy she was to have made a hat. I suspect there will be more hats in her future. And that is my story of how I, the crochet designer, designed a knitted hat.

Funny thing is, I have an idea for another simple knitted hat, so I may have to find time to pick up my needles very soon and work it out.

End of the Love Experiment

Well, my experiment with knitting half an hour everyday for a month was over yesterday.

I made one more little swatch, that took me a bit over an hour to make. There was a near miss there, when I had 3 stitches pop off the end of my needle. I did manage to get them back on without losing any though. So that is an improvement in my skills.

I do feel more comfortable with the needles than I have in the past. Casting-on and binding-off are easier. I even found myself knitting “Continental” style a few times. 

I can’t say that this experiment went as hoped. For one thing, I didn’t knit everyday. My knitting ineptitude doesn’t seem much reduced, I still haven’t figured out how to increase and the “Moss” stitch seems to be completely baffling me (sad this, as I have done it before).

I have decided that I will have at least one knitting project going for the next couple of months. Something easy, like a scarf in garter stitch.  Maybe eventually I will attempt a scarf in Moss stitch.

The simple fact remains, I am devoted to my crochet hooks. I love the flow of crochet, and how easy it is for me to change direction or stitch up just about any thing I can visualize.  That ease with knitting is many years into the future, if ever, and that’s okay.

Knitting Love Day 25

Another hour of knitting today.  I was actually able to tink some of my stitches to correct a mistake, and I felt like I got the knack of controlling the consistency of my stitches better as well.oot

I seem to be falling into a bizarre approach of holding the working yarn with my right hand when I knit, and with my left hand when I purl. Not problematic when I’m doing straight rows of one or the other, but I imagine it might not work so well if I am switching between the two stitches in a single row.

As I am nearing the end of my month of knitting love, I have to confess that it may be a very long time before I truly love knitting. Crochet just seems to fit me better.

Knitting Neglect

Darn! I was almost caught up on my Knitting Love time commitment, and now (due to neglect) I am behind again.

Swatches So Far

I think it was that horrible FAIL on day 15 that did it. Was far too similar to the ratty mess I used to create years ago when my Mom attempted to teach me to knit.

I’m knitting along and somehow manage to pull the needle completely out of my stitches. And no matter how I try, I never manage to get all the stitches back on the needle sitting right.

I have often thought during my knitting forays and failures that if I was better at fixing my mistakes I might actually learn to love knitting.  It’s a bit of a “chicken/egg” sort of conundrum though.

I would likely get better at fixing my mistakes (and understanding what the heck I’m needing to do) if I knitted more. But, because I am garbage at fixing my mistakes and reading the fabric, I don’t like knitting all that much and usually give up in frustration. Certainly not conducive to improving my knitting skill set.

In an effort to get back on track, I’ve decided to stick to smaller swatches. 12 stitches or less for the cast-on.

Of course that may have to wait a bit again. As my beautiful children have brought home yet another bug to share with mommy.