When a Motif isn’t a Motif

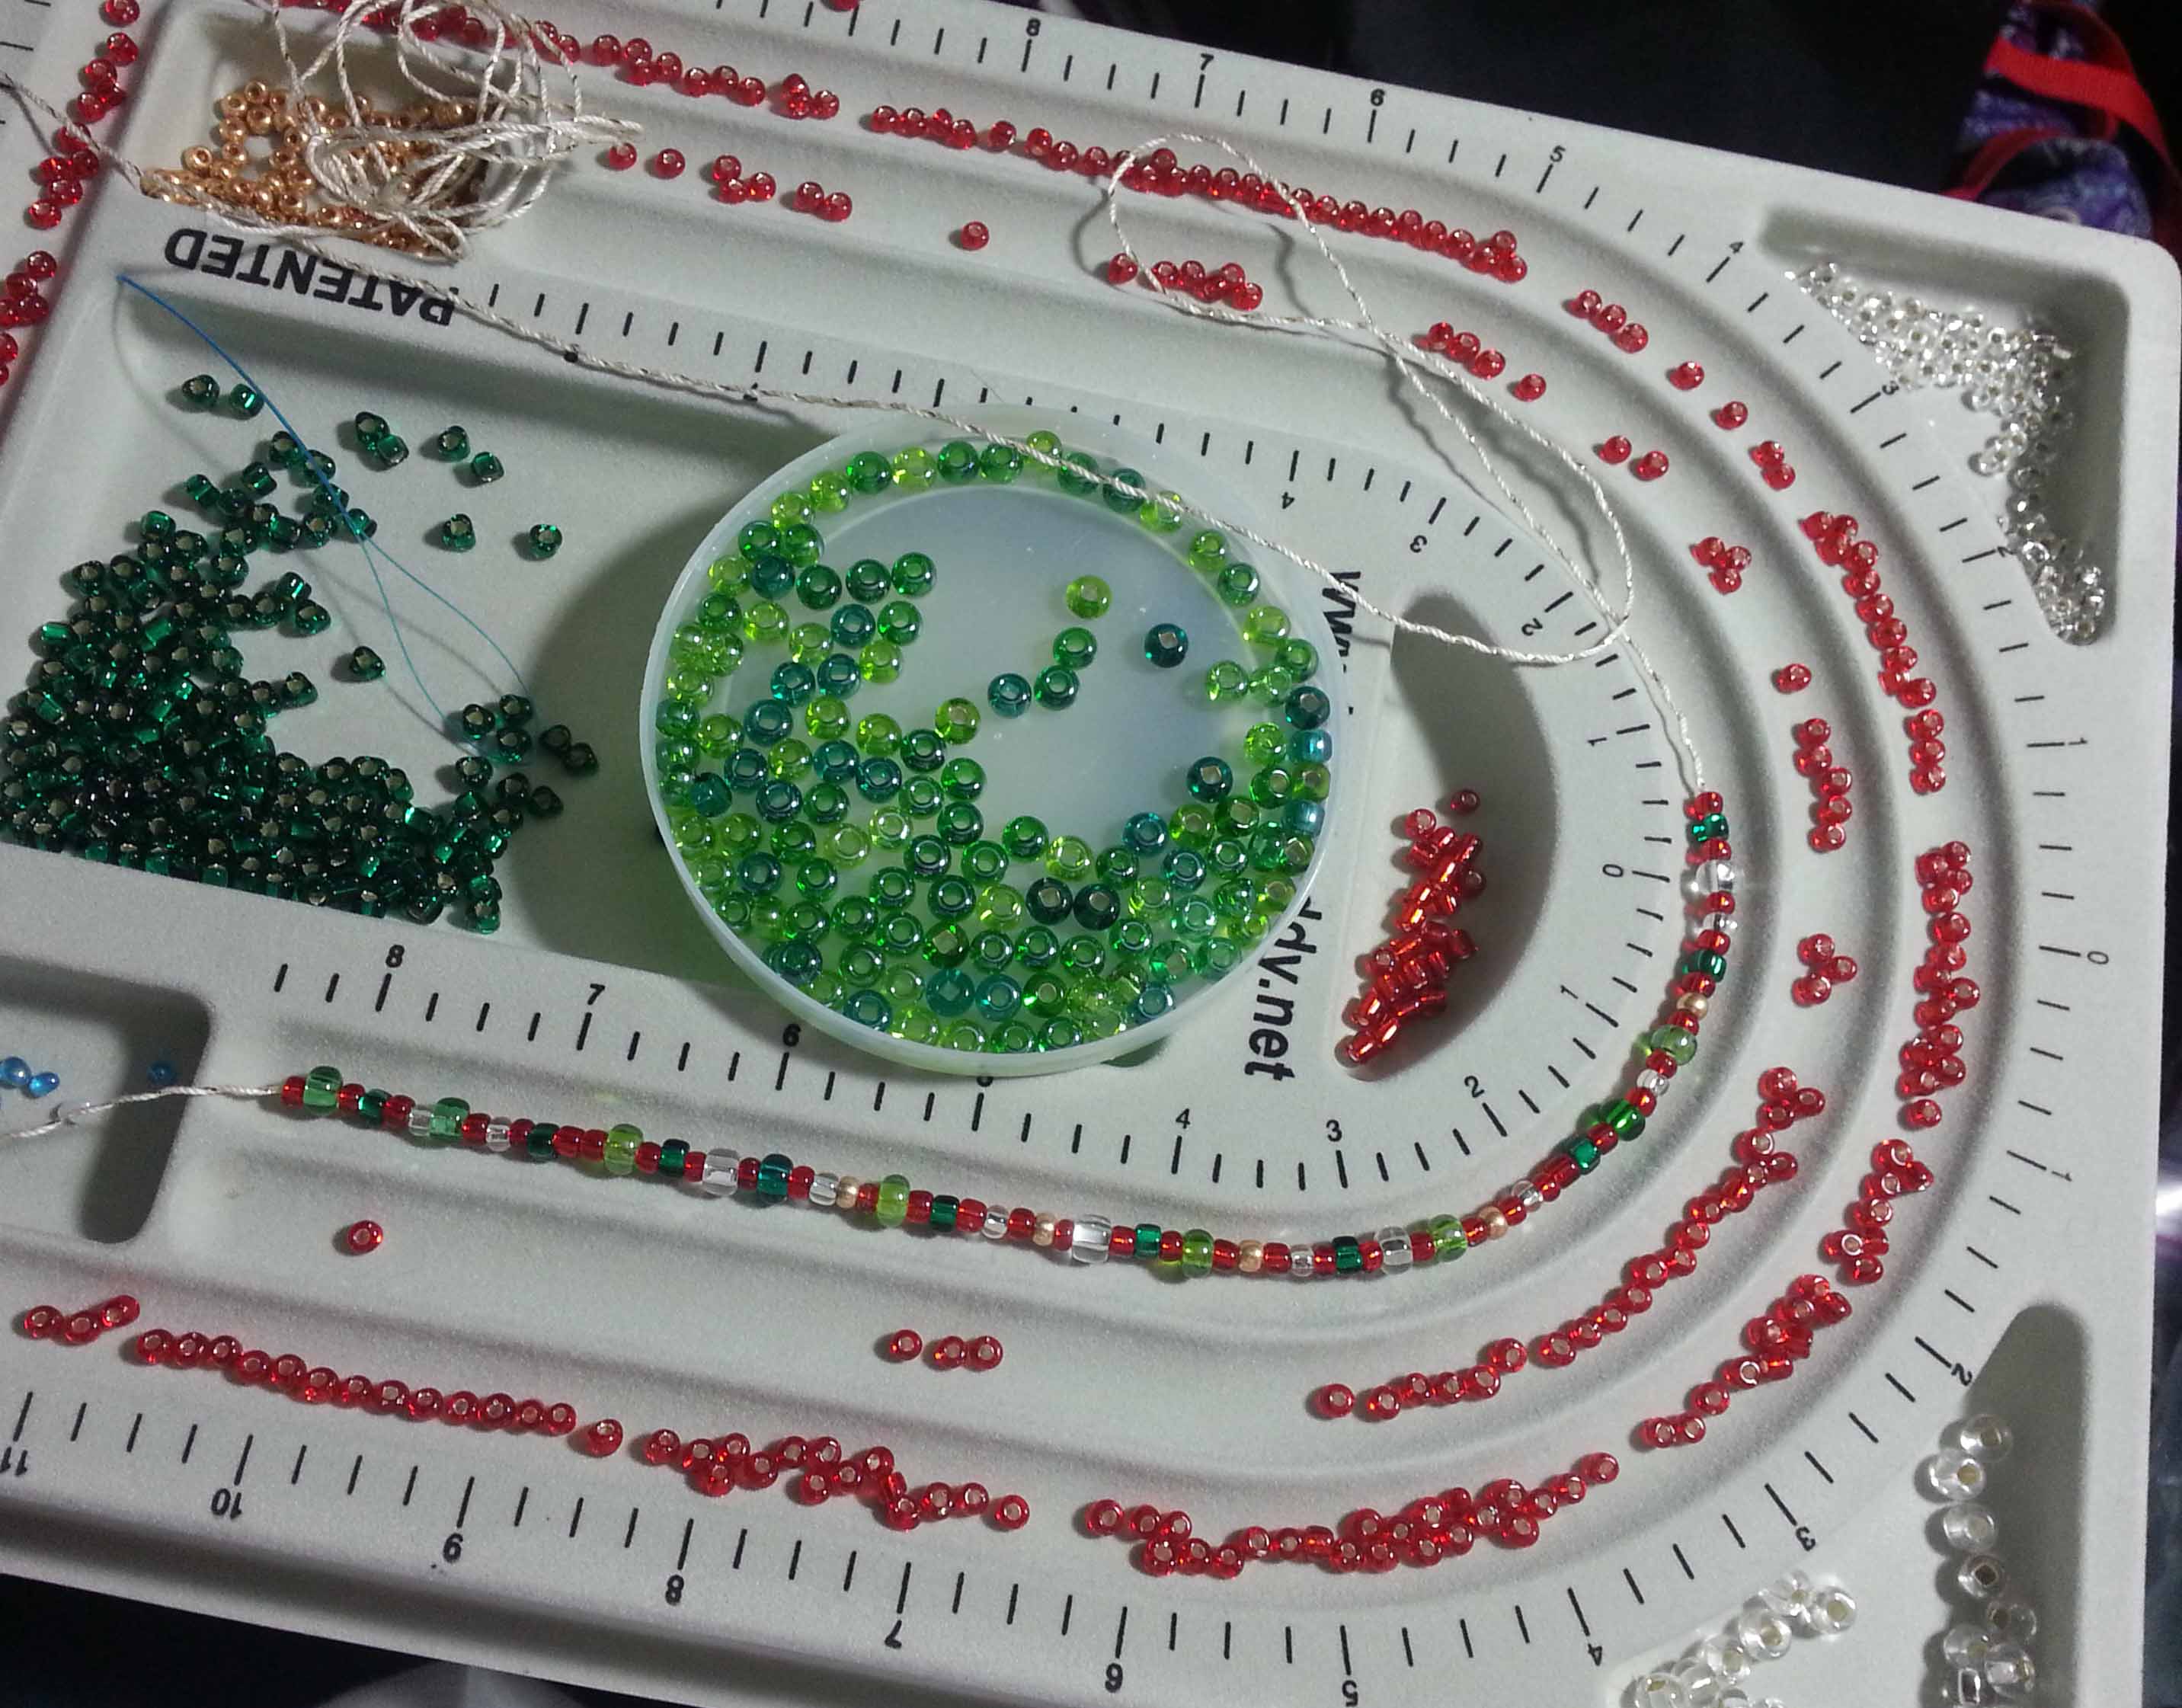
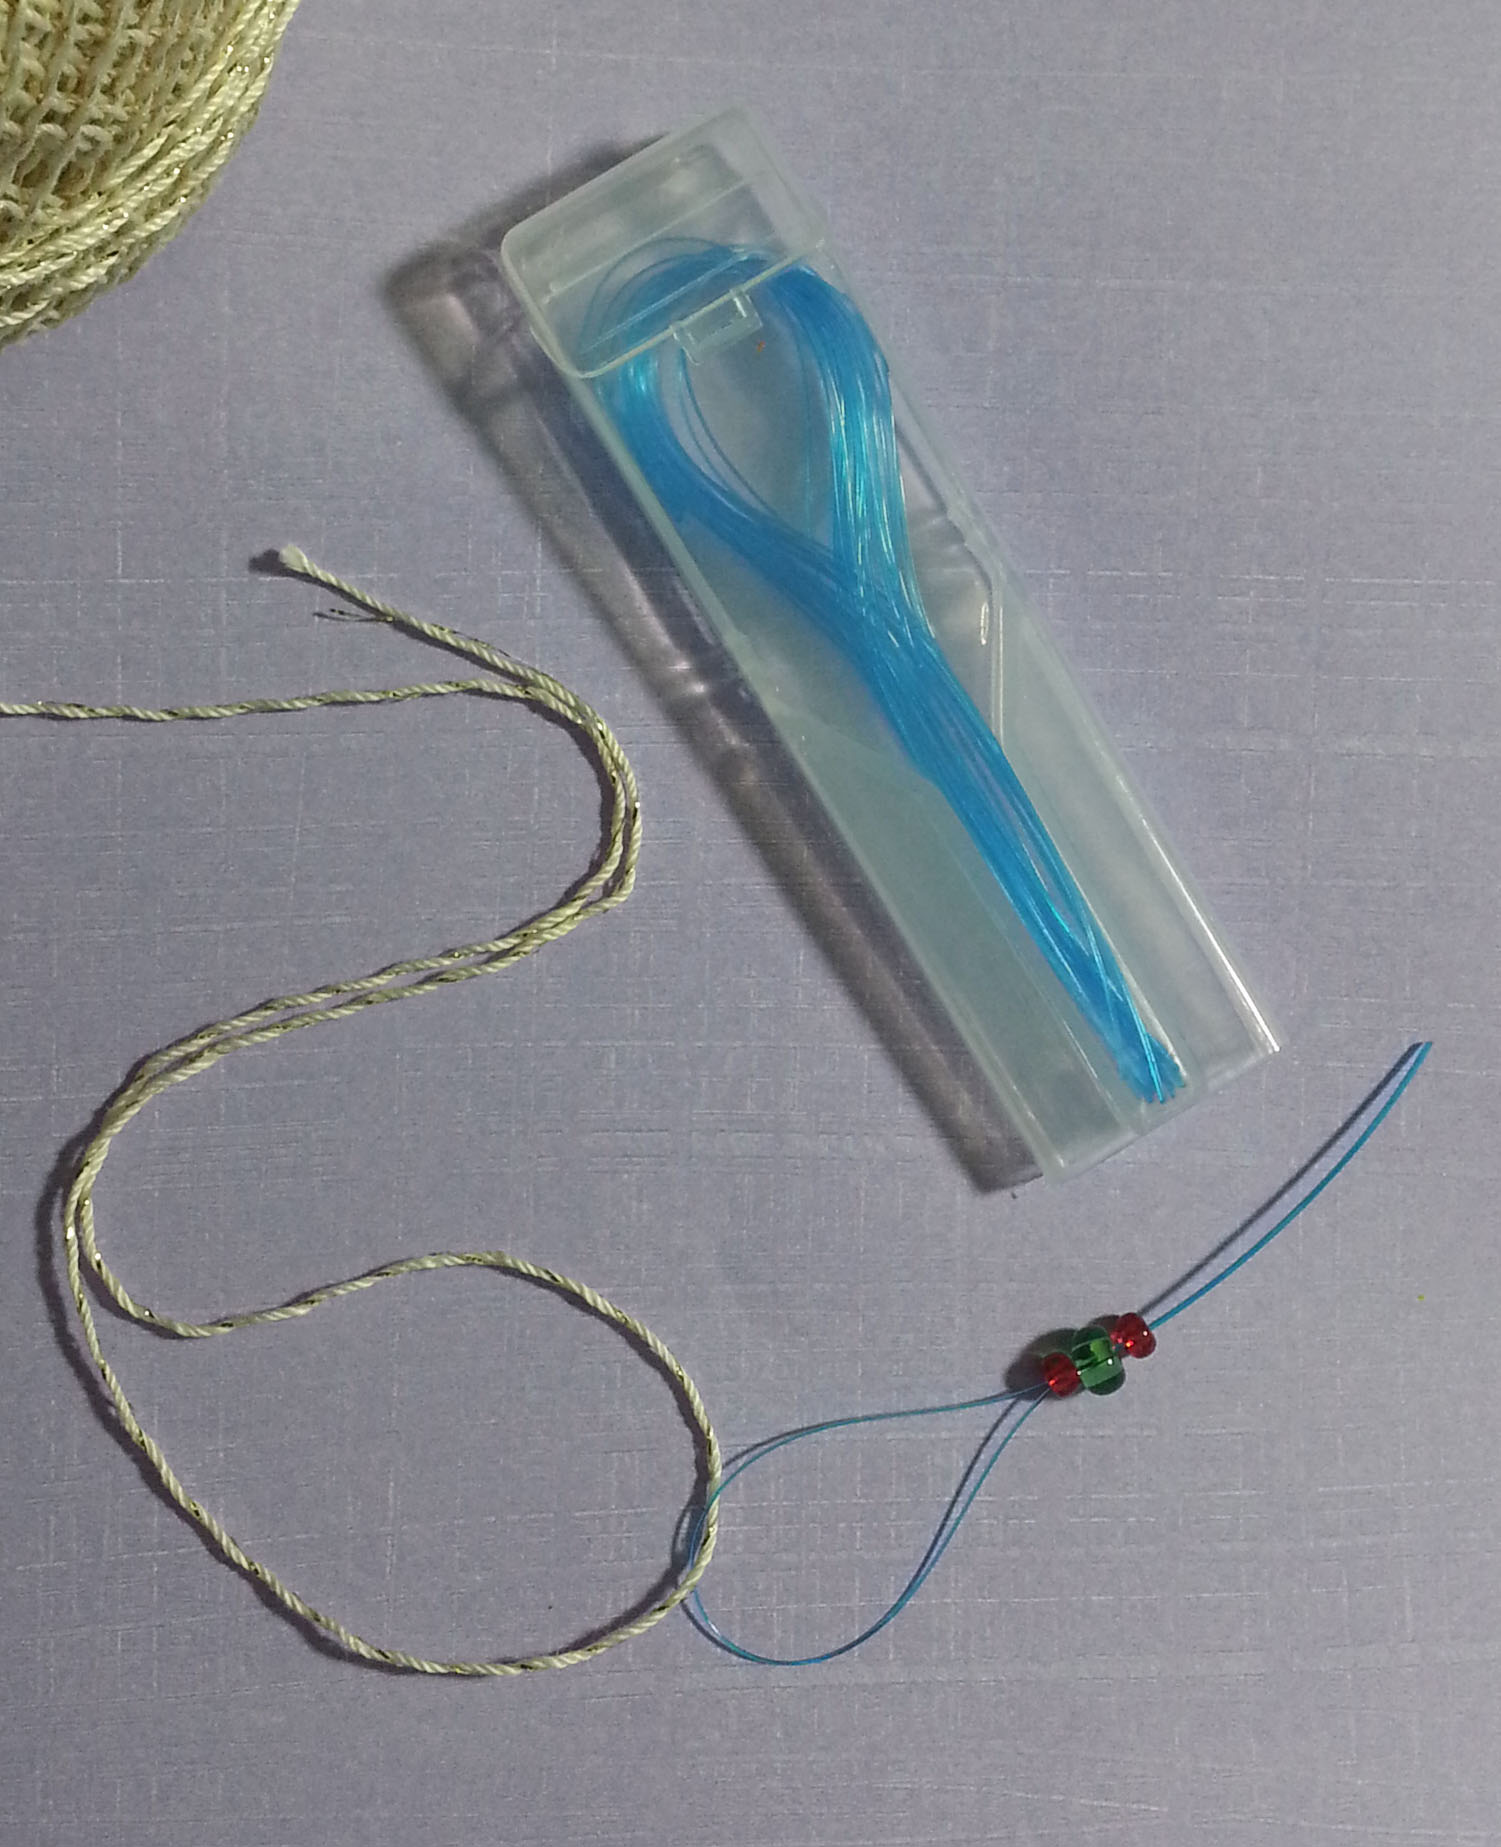
This past week has been another whirlwind as I was preparing for the Scottsbluff Fiber Arts Fair. Today was all about Needle Felting, I taught 2 classes on the subject.

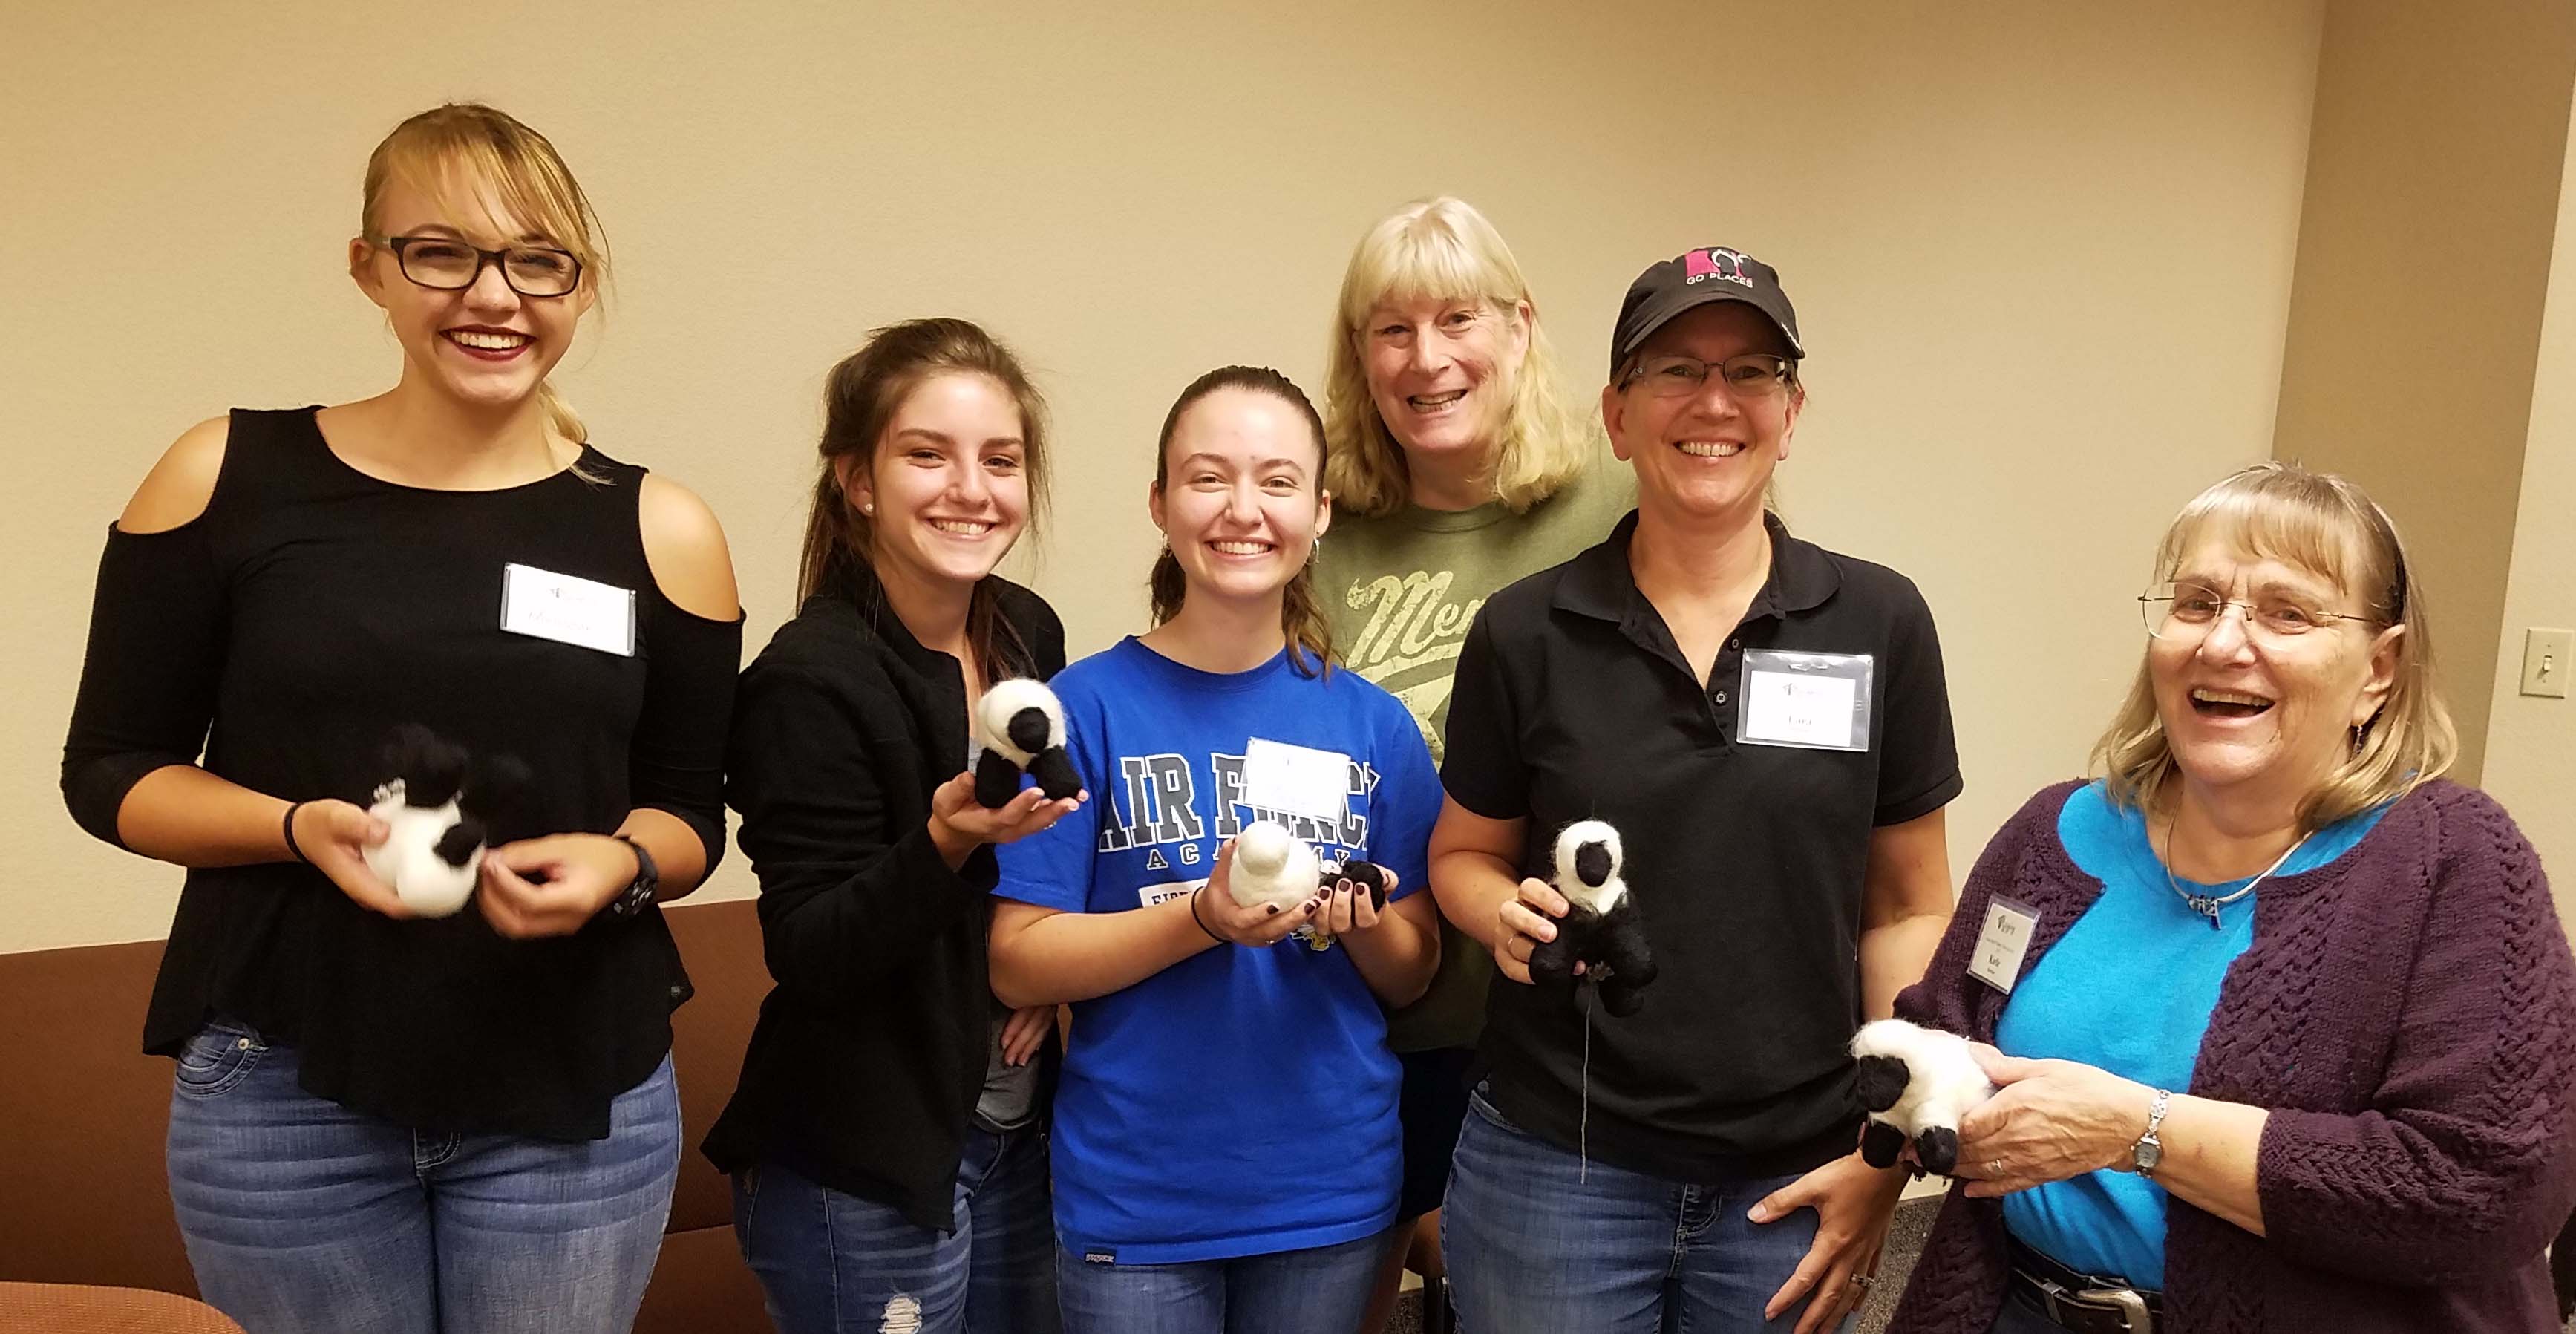
The morning class was “Needle Felting in 3D” and my afternoon class was “Sweet Sheep Toy: Needle Felting”. Both classes were well attended and I had such a great time with my students.

The sheep class students really applied themselves to the project, and everyone left with a new appreciation for how to create needle felt toys.  Tomorrow I’ll be teaching a Learn to Crochet class for Knitters “The Crocheted Edge”. This was a fun class I originally developed for teaching at the Longmont Yarn Shoppe. I’m looking forward to helping my fellow yarn crafters add crochet to their skills.

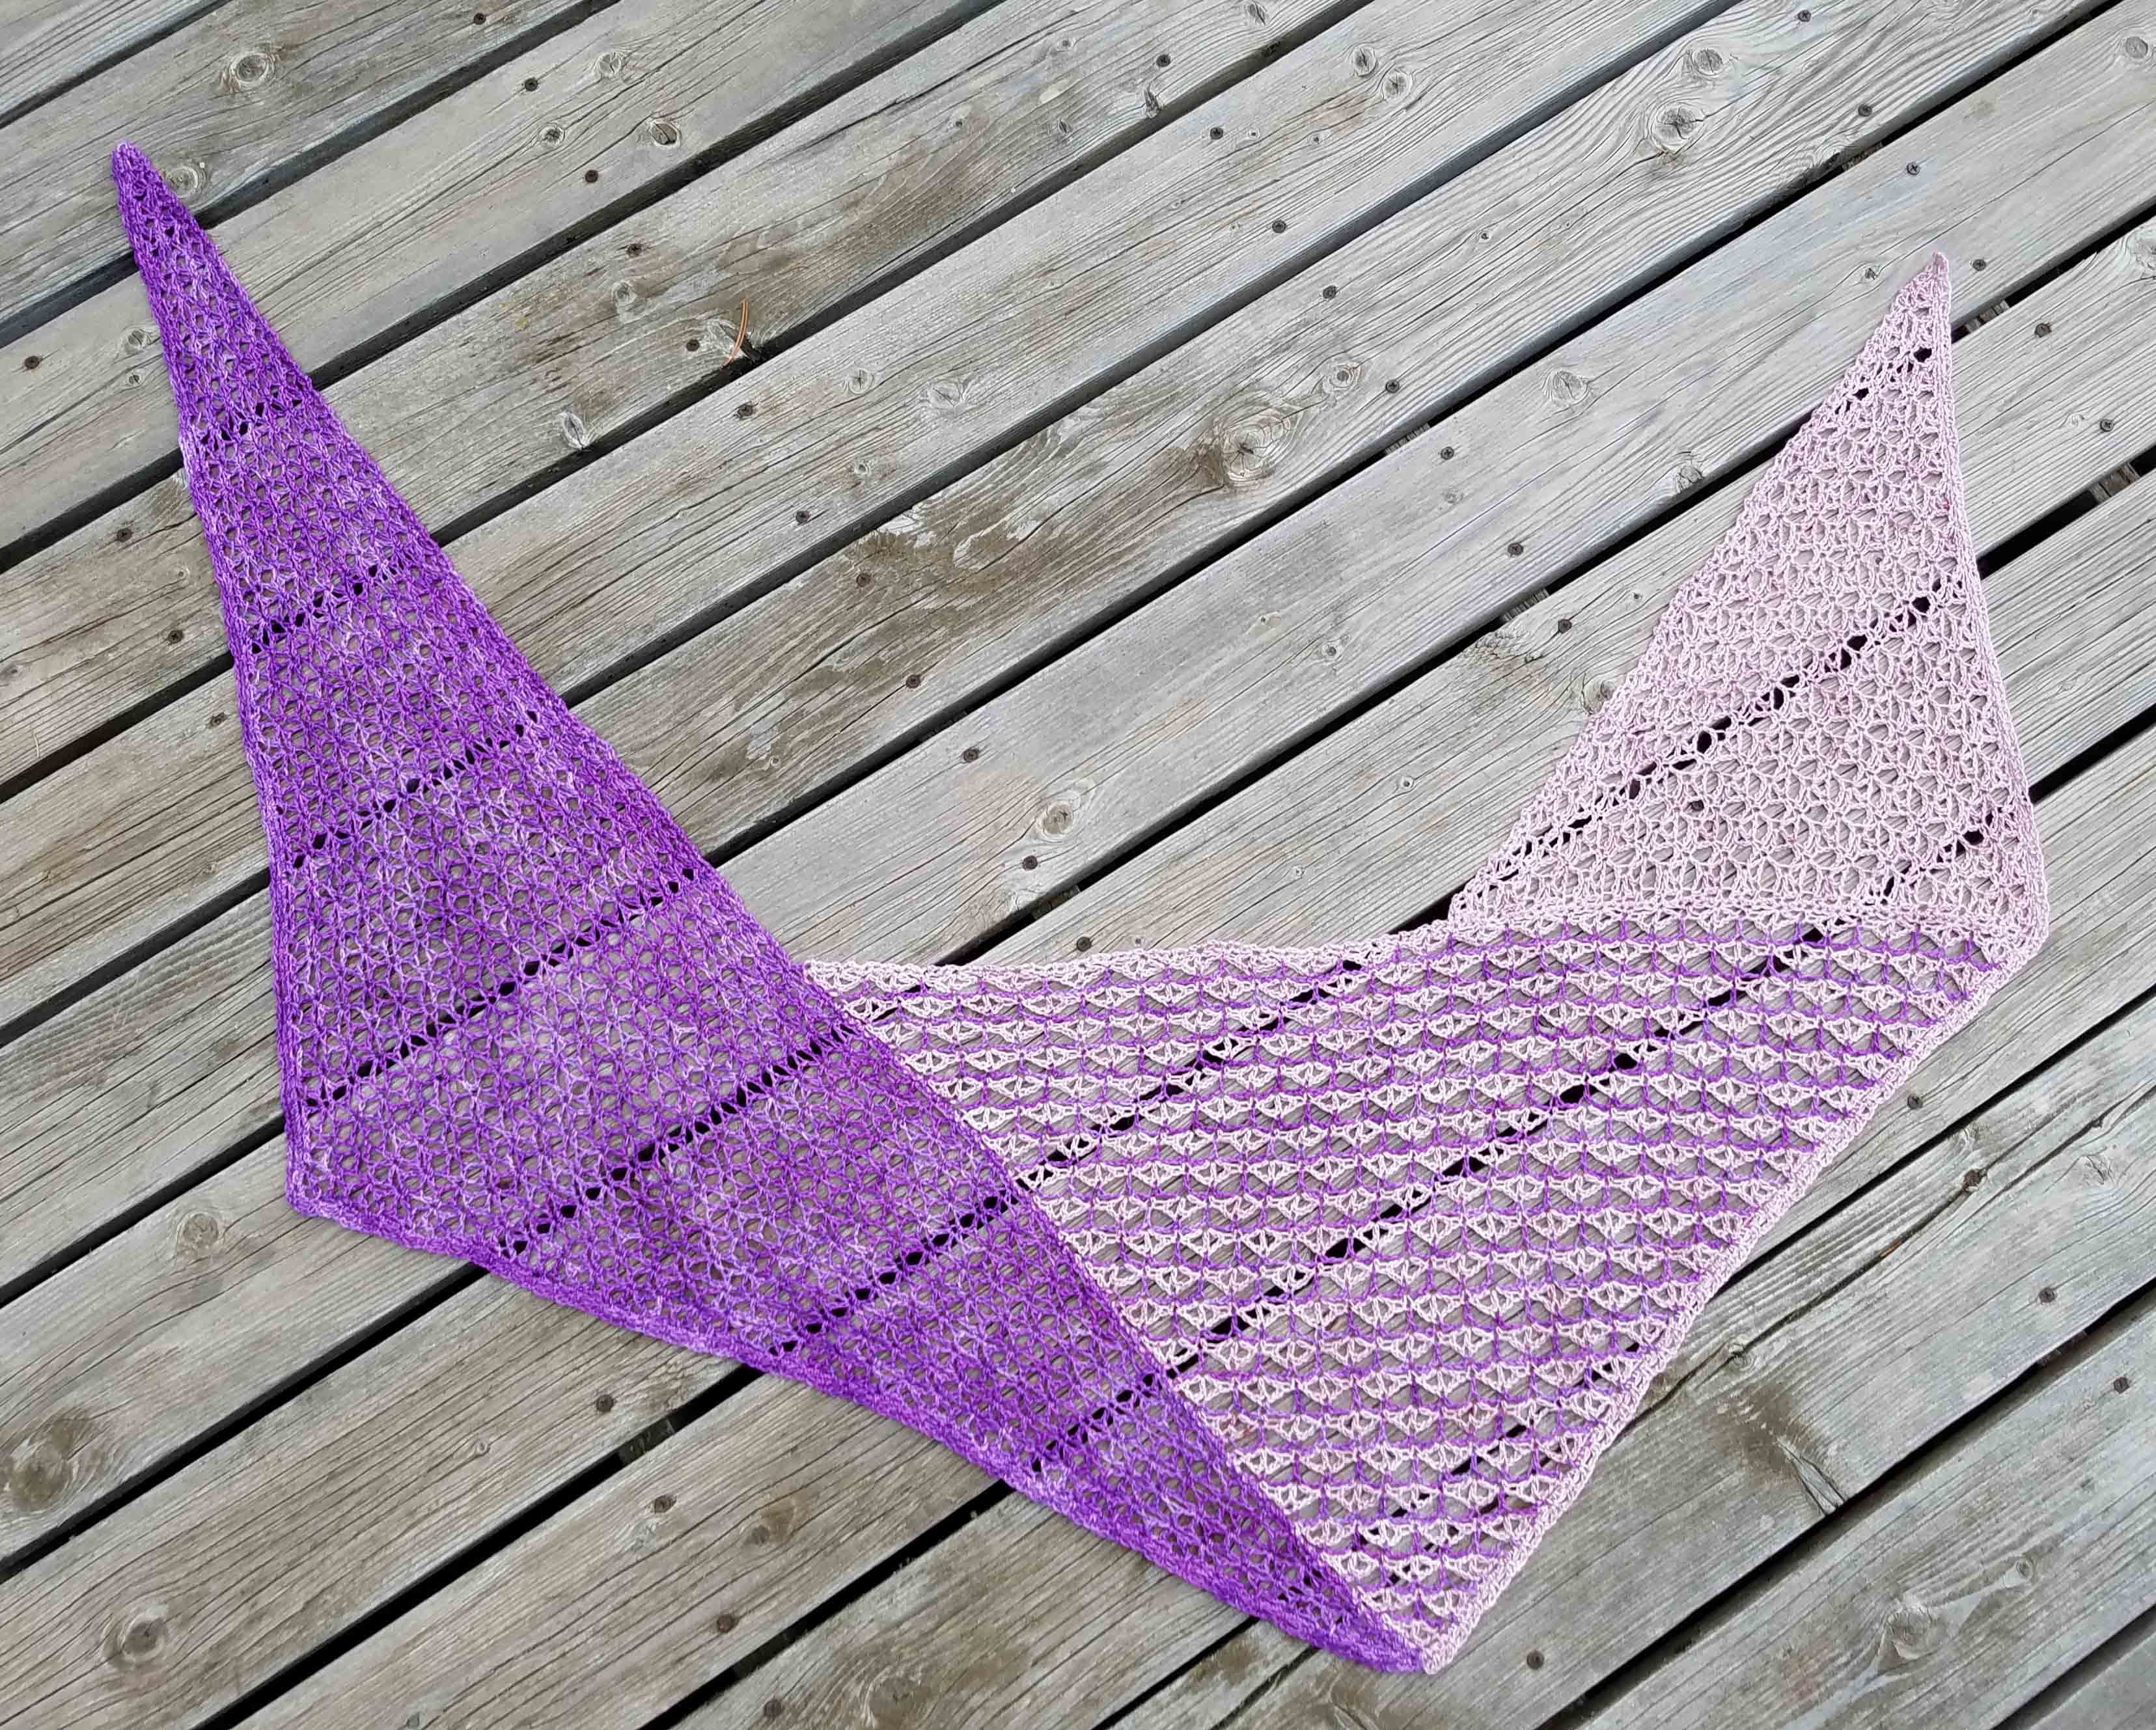
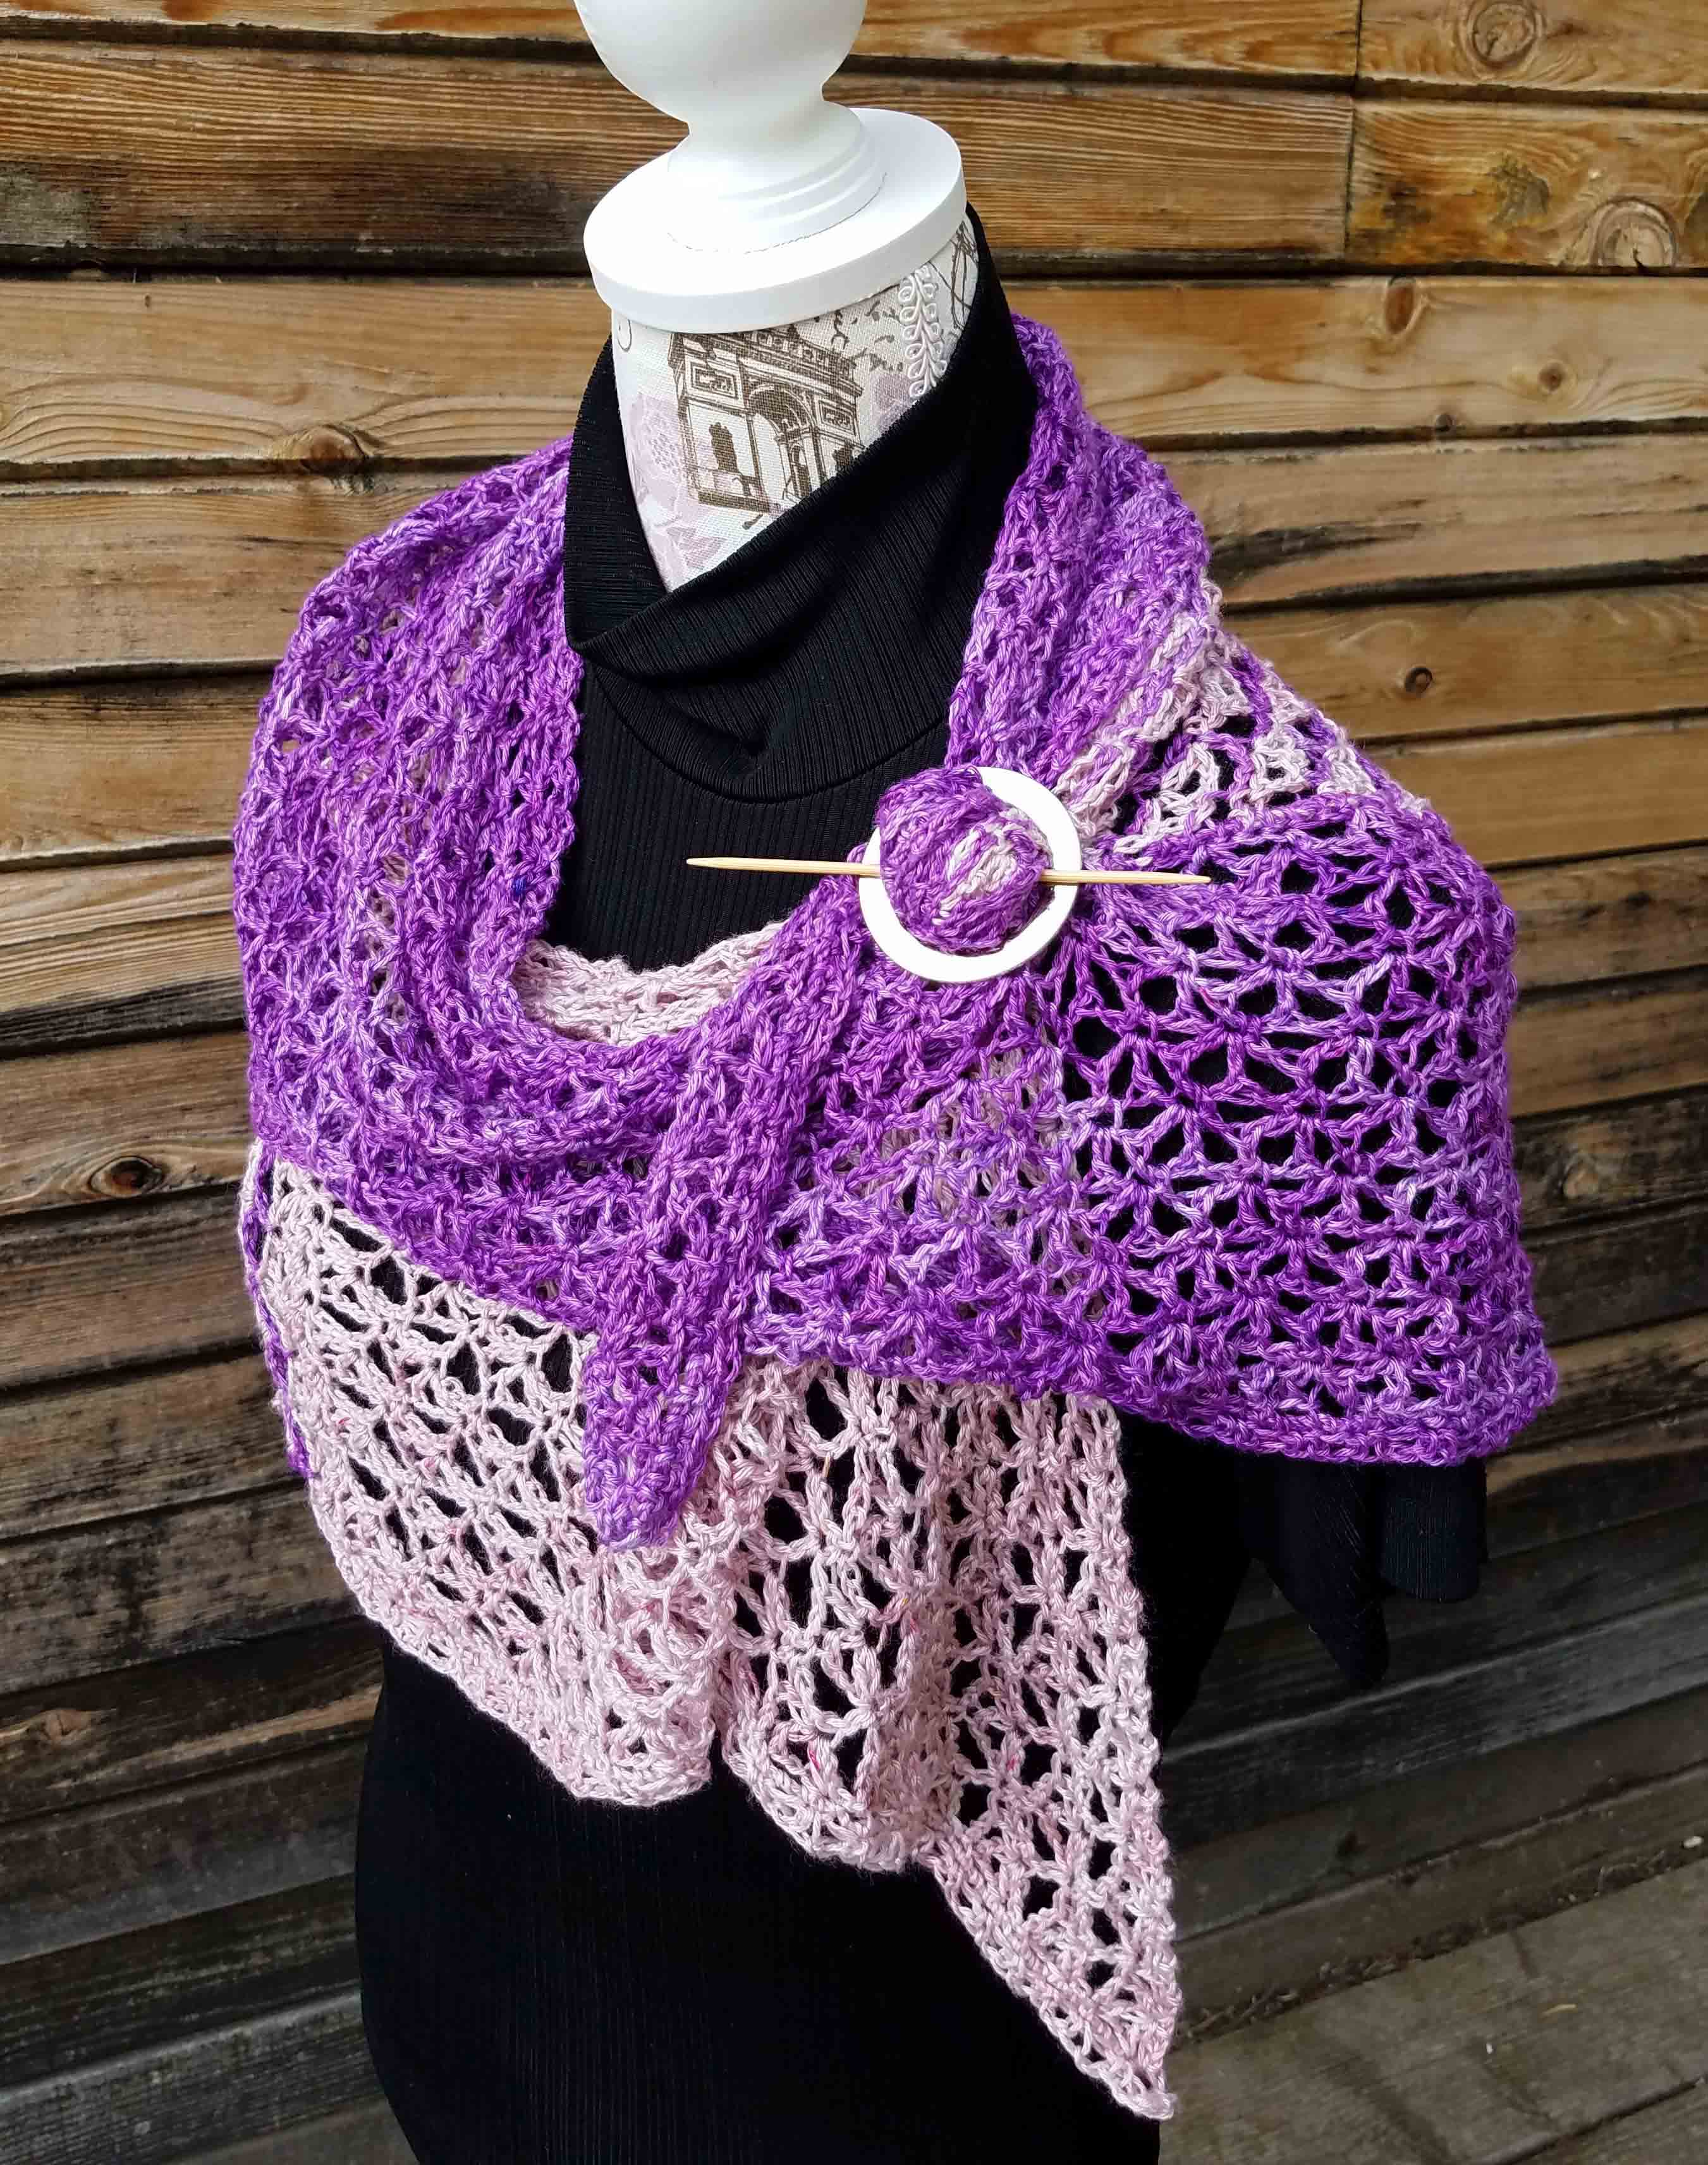
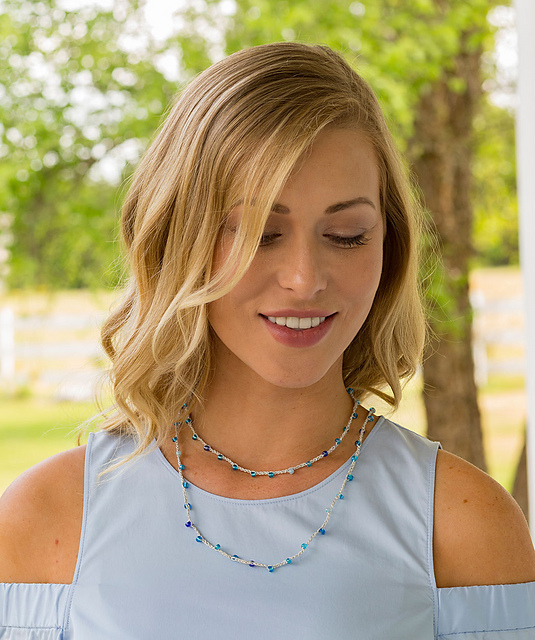
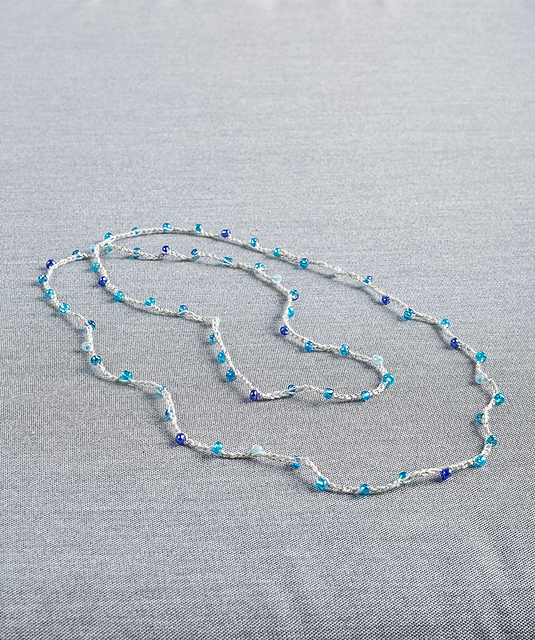
Speaking of crochet. I’m so excited to show you my 2 latest designs to be published in the October issue of the online magazine “I Like Crochet”.  Both of these designs were inspired by the idea of working fabric that has the appearance of little motifs without all the joining and tail weaving usually involved in that type of fabric. Instead the look of motifs is created by working continuous rows and using spike stitches gather the rows together. The edging and finish for each project is also worked continuously , so when you are finished with the crocheting, all you have left is weaving in a few ends and blocking

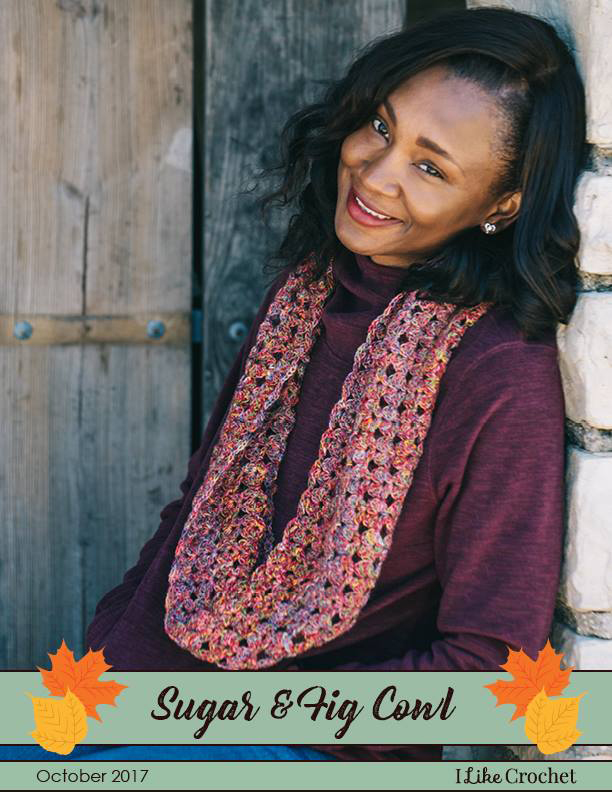
The “Sugar & Fig Cowl” is made in Berroco Yarns “Boboli Lace”, this is a colorful yarn with a lovely subtle sheen. The “motifs” are created in a 2 row repeat that is easy to memorize so you’ll have your cowl finished before you know it.

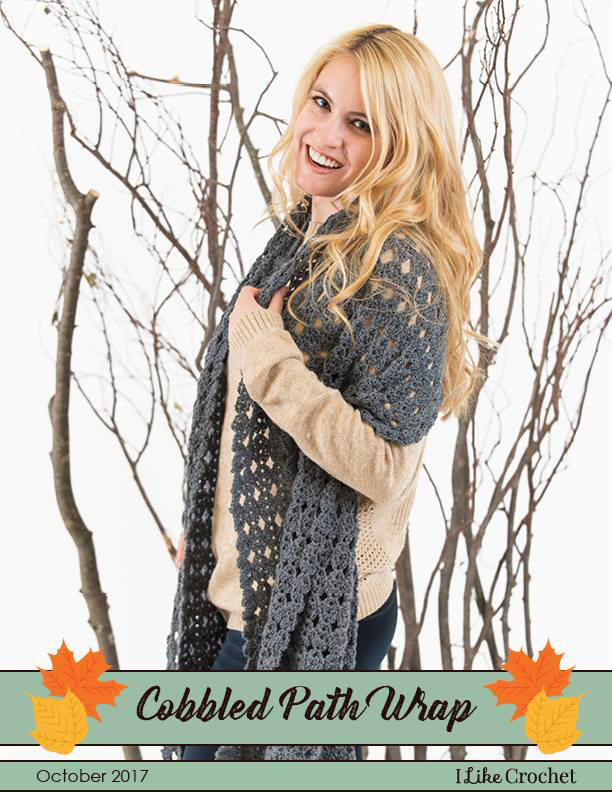
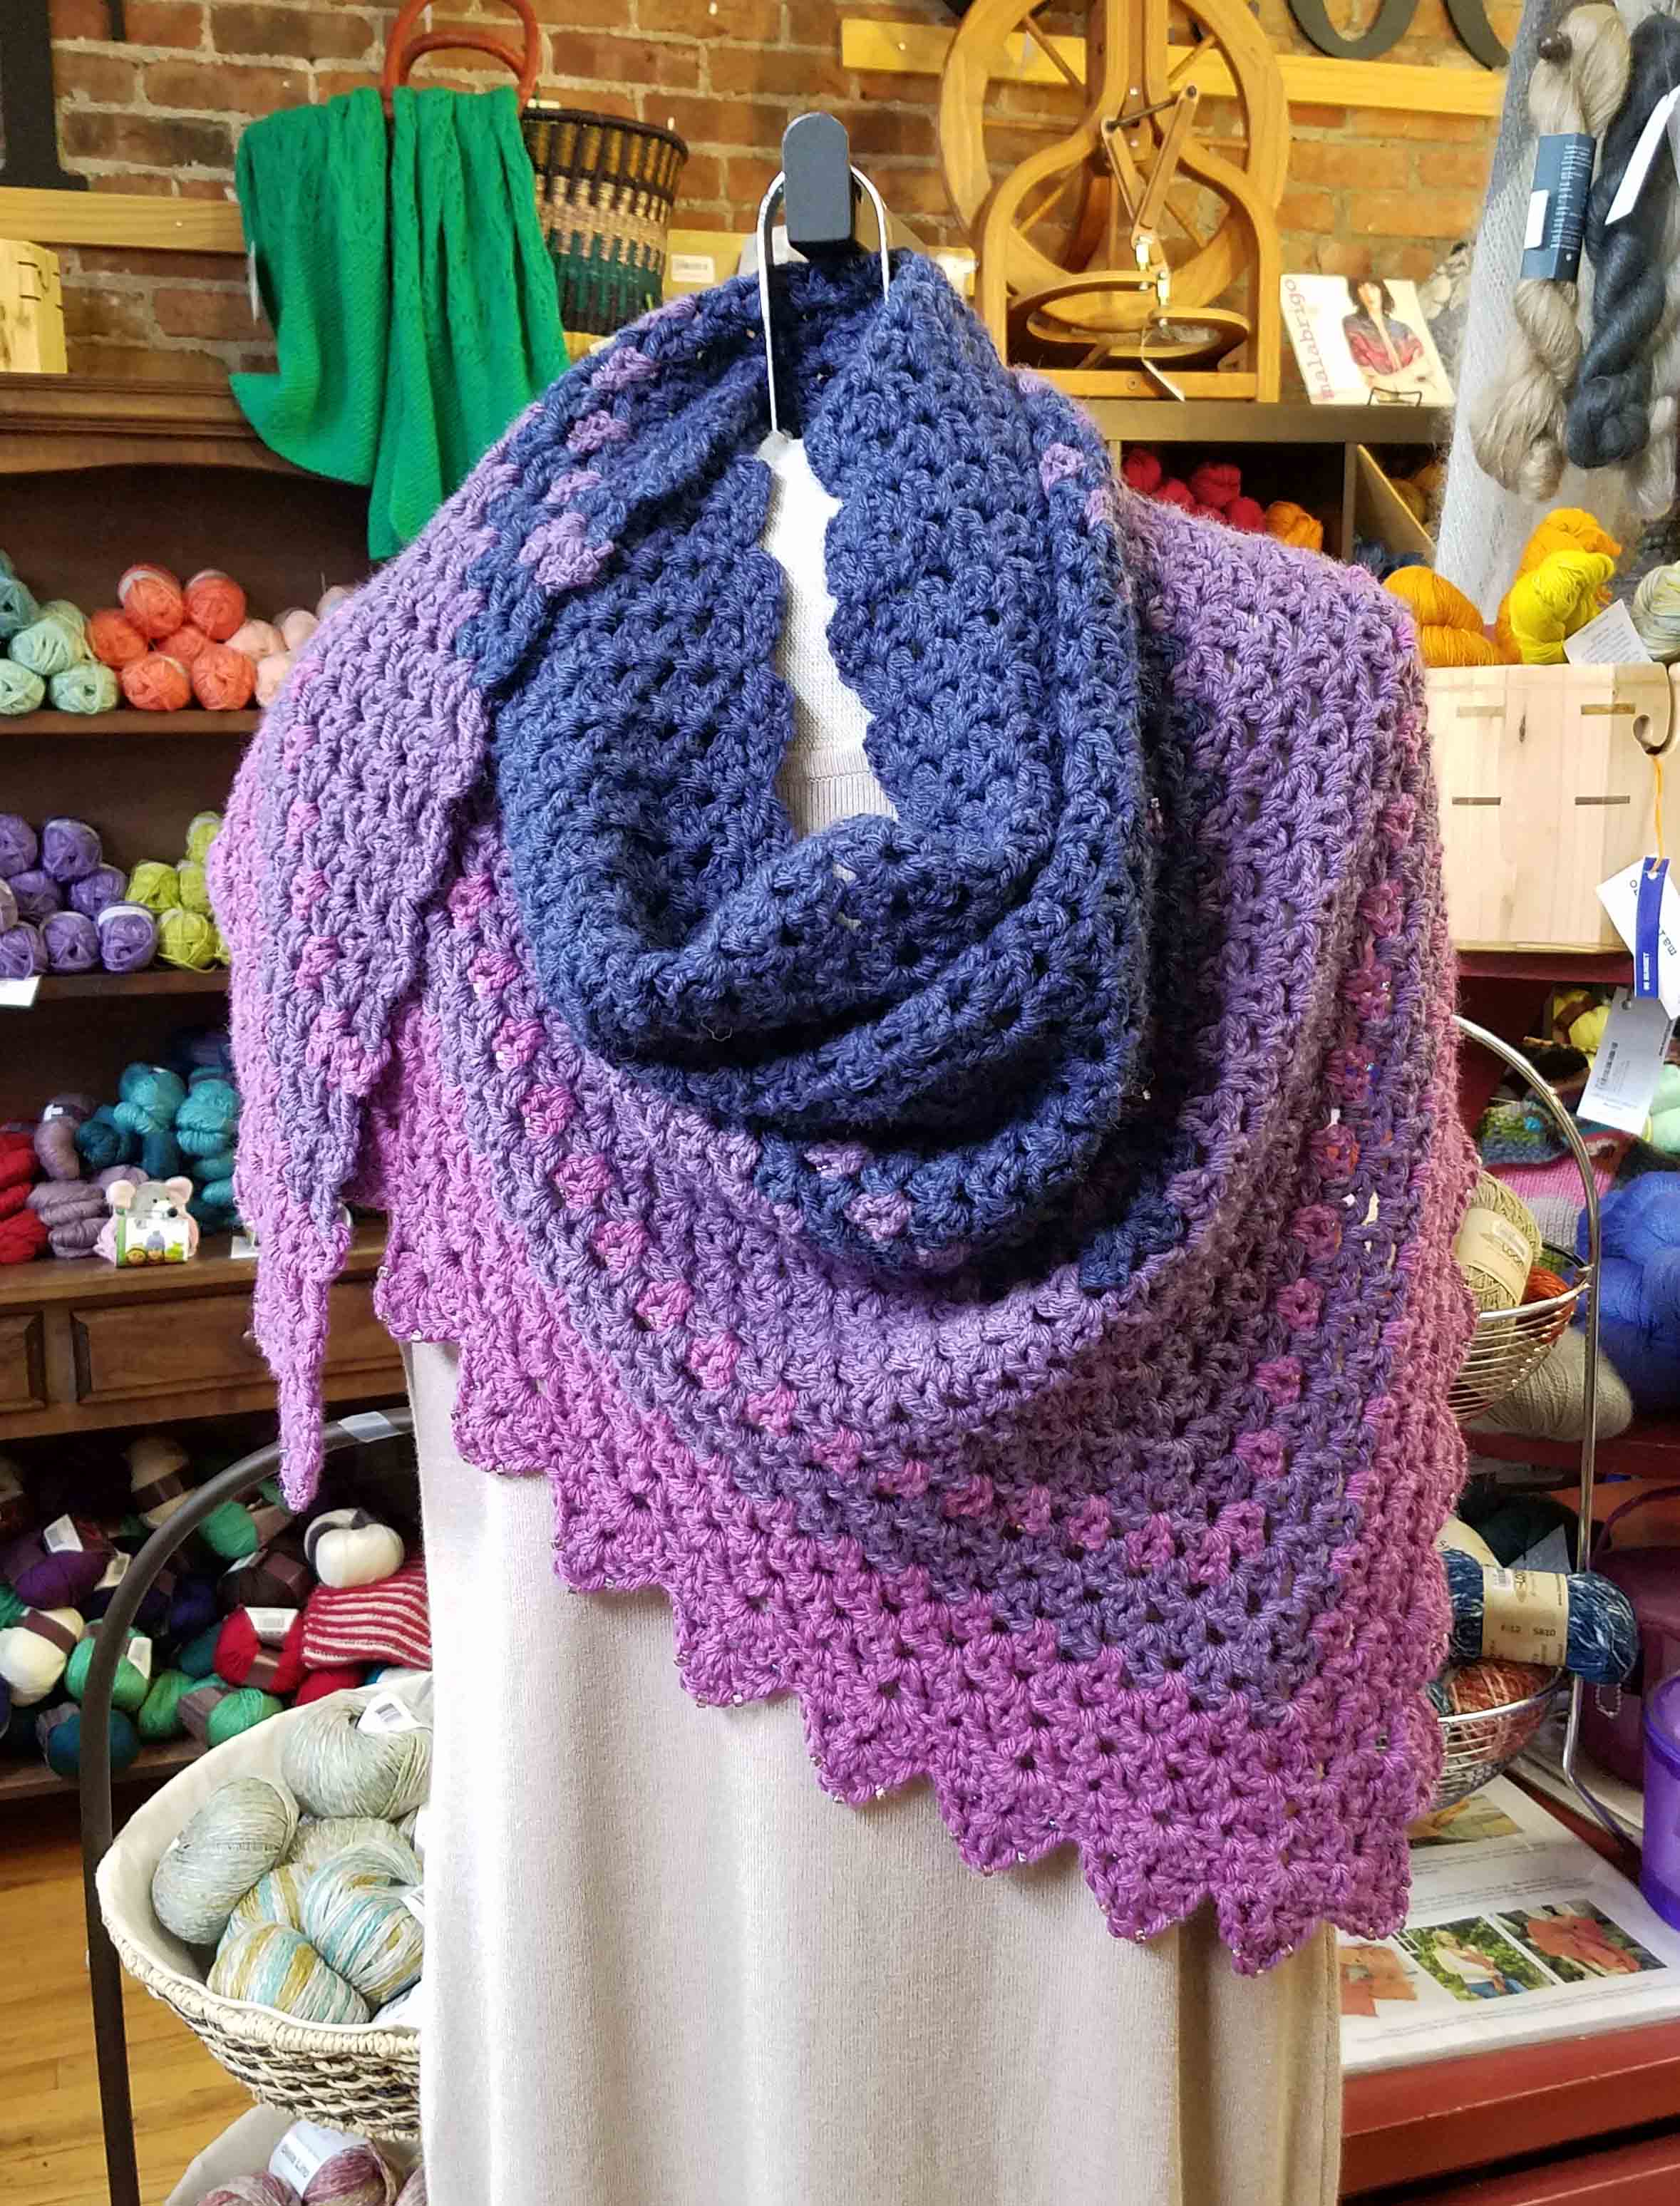
The “Cobbled Path Wrap” is a rectangular stole crocheted in Premier Yarns’ Deborah Norville “Serenity Sock”. The motif look in this design is worked in a 3 row repeat giving the look of ovals. This repeat is a tiny bit more challenging, but with the length of the wrap you will get into the swing of it pretty easily.

Both designs were worked in fingering weight yarns with lots of fluidity for finished projects with lovely drape and wearability.

If you don’t have a subscription to “I Like Crochet” then now is a great time to get one. This issue is filled with a number of lovely projects that can help you celebrate the fall season and that would make great gifts for the holidays.

Flatirons Shawl

The Flatirons Shawl is my latest independent published design. This was what I was working on during our Mount Rushmore/Eclipse road trip. It is made with Theodora’s Pearls “Auxanometer” hand-dyed yarn, dyed in Longmont. This is a lovely rayon yarn that has beautiful sheen and drape in the finished project. Each hank contains approximately 400 yards of fingering weight yarn.

It is constructed of 3 triangles crocheted continuously from one triangle to the next, creating an asymmetrical wrap that has only 4 tails to weave in at the finish. There are 2 different lace patterns used to create the triangles and 2 colors of yarn to add textural interest. The triangles inspired the name “Flatirons” because of the dramatic rock formations bordering the Boulder Valley.

Back view of Kerchief wrap

Between the yarn and the shape this is an extremely wearable shawl. I tried styling it a number of ways on Collette.

Pinned Ends Cowl style

For this wearing option I pinned the two tips of the shawl at the back of the neck and made a doubled circle across the shoulders to create a cowl look.

Fastened with Shawl Pin

Then there is always the useful shawl pin option. This style really shows off the drape of the fabric and gives great coverage of the shoulders.

The pattern is an advanced intermediate level, so a definite skill builder. It involves working 4 row repeating lace patterns, decreases, color work, and changing direction of stitches. The pattern contains stitch charts for the lace pattern in each triangle as well as a detailed schematic for the edging directions.

Foothills Sunrise
Chautauqua Moonlight
Boulder Canyon
St. Vrain Trail

Today is the launch of this project at the Longmont Yarn Shoppe.  As part of their 5th year anniversary celebration the shop is doing kits of the above 4 different color combinations for $62 each. The pre-order of the kits starts today, September 5th thru September 17th. If you pre-order the yarn during this time the shop will provide a complimentary copy of the pattern. The yarn will be delivered to customers the week of the 25th.

Then I’ll be hosting the CAL starter party Saturday, September 30th from 2p – 4p at the shop. We will also have a thread in the Longmont Yarn Shoppe Ravelry group. So even if you live far from Longmont, Colorado you will be able to participate in the CAL and the pre-order of the yarn. Just call the shop to order your kit at 303-678-8242.

The color kits will still be available after the 17th, but will not include the complimentary pattern.  You will be able to purchase the pattern thru my Ravelry shop at any time.


2 by 2 Cowl Pattern

Hello my dear readers. May has been zipping by and I can’t believe there are only 2 weeks left of the school year for my kiddos. This summer is already beginning to look very busy. Between fiber arts conferences and family trips I’ll be on the go pretty much non-stop.

This is my newest design the “2 by 2 Cowl”.  I wanted to start the summer off with a fun pattern for everyone that doesn’t take a lot of yarn and is relatively small to have in your hands or lap when the temperatures start to rise. It uses only 1 skein of Lion Brand’s “Heartland” yarn with a size J hook.

This was all that was left of my skein of yarn when I finished the sample, just 5 grams or a little under 9 yards.

I start this cowl with my favorite foundation: Stacked Rows. If you need a little help with understanding how to work a stacked rows foundation I created a video to help you. You can find it here on my YouTube Channel. For those of you that are ready, let’s jump right into the pattern.

2 by 2 Cowl

Designed by Andee Graves

Skill – Easy

Stitches you need to know: Chain (ch), Double Crochet (dc), Single Crochet (sc), slip stitch (slip st)

Finished size: Approximately 14” wide x 34” around (35cm x 85cm)

Materials

Yarn: Lion Brand Yarns “Heartland”; 100% Acrylic, 142 grams/5 oz, 230m/251 yards. (sample was made with 1 ball of color #147 Hot Springs)

Hook: J-10/6mm, or size needed to obtain gauge

Blunt yarn needle

Gauge:

6 rows and 16 stitches in pattern = 4” (10cm)

Pattern Notes

Foundation is worked in stacked rows to create a scalloped and elastic circle that the rest of the cowl is built off of.

Body of the cowl is worked in joined rounds off the straight side of the stacked row foundation. Look for the hole at the base of the double crochet rows to find the single crochet row to work into when crocheting Round 1.

Instructions

Foundation:

Row 1: Ch 2, sc in 2nd ch from hook.

Row 2: Ch 3, turn, 2 dc in sc.

Row 3: Ch 1, turn, sc in first dc.

Rows 4 – 65: Alternate repeating Row 2 and Row 3

Row 66: Repeat Row 2, join strip of rows into a circle without twisting, slip st to base of Row 1. {33 Scallops, 33 sc rows}

Body of Cowl:

Rnd 1: Turn to work along straight side of foundation rows, ch 3 {counts as dc here and thru-out pattern}, dc in side of first sc row, *skip next dc row, ch 2, 2 dc in side of next sc row; repeat from * until work in last sc row of foundation, ch 2, slip st to top of beginning ch-3. [66 dc, 66 ch-2 sp]

Rnd 2: Turn, (loosely slip st, ch 3, dc) in first ch-2 sp, skip 2 dc sts, ch 2, 2 dc in next ch-2 sp; repeat from * until work in last ch-2 sp of previous row, ch 2, slip st to top of beginning ch-3. [66 dc, 66 ch-2 sp]

Rnds 3 – 21: Repeat Row 2.

Rnd 22: Do Not Turn, ch 1, *sc in first dc, ch 2, 2 dc next dc, skip next ch-2 sp; repeat from * until work in last dc of Rnd 21, slip st to top of first sc of Rnd. Fasten off

Weave in all loose tails. Gently block if desired.

Whispering Wind Cowl

I enjoy creating moebius style cowls but decided to challenge myself with designing a simple tube style cowl with this design. I wanted to create a crocheted cowl that would have a very graceful drape and would be a lovely accent piece to wear indoors, but could also serve nicely as a warm layer under a coat or jacket.

First order of business was chosing a yarn, I picked Berroco’s “Folio” yarn. This luxurious yarn is an Alpaca/Rayon blend that feels like cashmere, with marvelous drape and warmth. I paired the yarn with a simple mesh stitch pattern to allow the yarn to really shine.

Collette’s first modeling gig

Next I gave some serious thought to how I wanted to work the foundation and how to finish the opposite end of the tube to compliment the foundation. I usually like everything to be very precisely matched. It’s probably the math part of my brain dictating terms. I decided to give myself permission to have the finishing edge be different from the foundation.

Freedom!

Funnily enough, the 2 edges don’t look all that different. But never fear, I will be playing with this some more and there will be some very different edges in the future. I just wanted to get my toe wet this time around.  I have definitely found a new fascination. Throwing out the idea of precise matching has stirred up all sorts of creativity in my brain.

I used my stacked row foundation to start this cowl, then the rounds of mesh stitch are worked off one side to the desired length. In this pattern I have written the instructions, and worked the sample to be 31 inches around and 13 inches wide from foundation to finished edging. I’ve also included instructions on how to modify the pattern to make a wider cowl (deep enough to be pulled up as a hood), or a longer cowl that makes it more like an infinity scarf.

You can purchase the pattern in my Ravelry Shop for $4.99.

You can use a different yarn than I chose for the sample, but I would strongly recommend a yarn with a large percentage of fine alpaca fiber or rayon. You want the yarn to be very fluid to get the fantastic drape you see in the photos.


The Luck of the Irish

Today is Saint Patrick’s Day, and my family has a little Irish heritage (we are a classic American family with a big mixture of ancestry from all over Northern Europe and the British Isles), so I thought I would come up with a fun little crochet pattern for making a lucky 4 leaf clover.

Funny enough, none of us have much in the way of green clothing, every year I think that I really should at least get the kiddos some green clothing. That thought has not translated to my shopping brain yet. I tend to purchase whichever shirts are on sale, since both of my kids are a bit rough on their clothes.  Instead I crocheted up lucky clovers and made them into pins they could wear.

For those of you that are wondering about Shamrocks versus 4 Leaf Clover. The typical Irish symbol is the 3 lobed clover and is called a shamrock. 4 lobed clovers are much rarer and are not “officially” considered a symbol of Ireland or Saint Patricks day. The shamrock with it’s 3 lobes is said to have been used by St. Patrick to demonstrate the holy trinity of Christian faith. The 4 Leaf Clover is said to symbolize luck because they are so rare.

I had a lot of fun playing with a way to create a 4 Leaf Clover that could be worked in just 2 rounds. This project is rated at the intermediate level, because I used some more advanced techniques like Clusters and working in the back bump of chains.  If you need help with working clusters I have a photo tutorial in the Special Stitches section of the pattern.

Luck of the Irish Clover

Design by Andee Graves

Skill level: Intermediate

Materials:

Yarn – Lion Brand “Vanna’s Choice”, 100% Acrylic (3.5 oz/100g, 170 yds/156m) Color #171 Fern

Hook – I/9 – 5mm hook

Pin back or safety pin to attach to back of clover.

Special Stitches

3 DC Cluster (Cl):

Photo A

To make a 3 dc cluster st, yarn over (yo) like making a dc and insert in st or sp, yo, pull up a loop (3 loops on hook), yo {Photo A},

Photo B

pull thru 2 loops on hook (2 loops remaining on hook, 1st base made), yo, insert in same st or sp, yo, pull up a loop (4 loops on hook), yo {Photo B},

Photo C

pull thru 2 loops (3 loops remaining on hook, 2nd base made), yo, insert in same st or sp, yo, pull up a loop (5 loops on hook), yo, pull thru 2 loops (4 loops remaining on hook, 3rd base made), yo {Photo C}, pull thru all 4 loops on hook.

Instructions:

Round 1: Start with an Adjustable slip knot, ch 3, 7 hdc in 3 ch from hook, gently pull beginning tail to close center,

slip st under 2 loops (the “V” front of the ch st) at top of beginning ch-3 to join the round.

Round 2: {Thanks to Edith for the correction.}  Ch 3, *(Cl, ch 3 and slip st) in next st,** (slip st, ch 3) in next st*;

Repeat from * to * 2 times, Repeat from * to ** once,

Stem: Ch 6, working in back bumps, sc in 2nd ch from hook and in next 3 ch sts, slip st in last ch, cut yarn with 4-5 inches of tail. Stem will curl, it is supposed to.

Weave ending tail toward center, use tails to sew on a pin backing.

I hope you have a very lucky Saint Patrick’s Day, and some fun wearing a 4 Leaf Clover.

Vivianne Shawl

vivianne-shawl-andee-graves-m2h-designs-a2

This is my newest M2H Designs pattern the Vivianne Shawl. The name Vivianne means “full of life” and the colorful striping and sparkly beads make this a very lively shawl.

yarn-for-new-pwt-shawl

I used only 3 hanks of Berocco’s “Vintage” worsted weight yarn in different colors to create the uneven color changes. Originally I thought I would use 2 hanks of the dark blue, but I decided I wanted to have approximately the same amount of yarn in each color. Because the shawl is worked top down the rows get longer and the sections of color play out in pleasing proportions. I also mixed things up a little by working a stripe of the next color before ending the preceding color. This stripe has beads added using the “hoist-on” method for a bit more bling and liveliness.

Vivianne Shawl 3 - Andee Graves/M2H Designs

The final 2 border rows are continued in the last color and feature beads added to the stitches to create sparkly drape along the bottom edge of the shawl.

This pattern is available for purchase in my Ravelry Shop for $4.99. In addition to concise text instructions, the pattern contains stitch charts for the body of the shawl and the border, plus photo tutorials for adding the beads.

Shells on the Aegean Neck Cozy

shells-on-the-aegean-neck-cozy-andee-graves-m2h-designs

It has been so cold the last couple of weeks that I thought it was time for a warm neck cozy pattern. Because it buttons to fasten around your neck, this snuggly short scarf takes less yarn than a full size scarf.  Just a little under 315 yards of worsted weight yarn. I used Caron Yarns “Simply Soft” for the sample you see.

remaining-yarn

This is all I had left of the 1 skein I used. That is a U.S. Quarter next to it to give you a frame of reference.

Here is the Pattern:

Shells on the Aegean Neck Cozy

Designed by Andee Graves

SKILL LEVEL: Intermediate

FINISHED MEASUREMENTS

Neck Cozy is 13.25”/ 33.125cm wide (lace scarf section) x 30”/ 75cm long.

YARN

Caron Simply Soft (100% Acrylic; 315 yds/288m = 6 ounces/170.1g)

#9767 Royal Blue: 1 skein sample used nearly all of skein

CROCHET HOOKS

Size US I-9 / 5.5mm

ADDITIONAL MATERIALS

Yarn needle

1 – 1” button (shank style works best)

GAUGE

5 rows & 4 sts in single crochet = 1”

SPECIAL STITCHES

Shell Stitch (Shl): (3 dc, ch 2, 3 dc) in indicated st or sp.

V-stitch (V-st): (dc, ch 2, dc) in indicated st or sp. 

Picot stitch (picot): Ch 3, sl st in top of previous st. If you need help with the making the picot stitch I have a tutorial here on the blog.

flat-view-shells-on-the-aegean-andee-graves-m2h-designs 

Pattern Notes

This Neck Cozy is worked in 2 parts, the Button Band and the Lace Scarf.

Be sure to work the base chain loosely for ease of working into the bottom of the foundation row when crocheting the lace scarf part of project. If having problems keeping the chain loose enough, use a hook one size larger to make the chain then switch to the smaller hook for the rest of the project.

When counting stitches for skipping, chain stitches count as one stitch each.

INSTRUCTIONS 

Button Band

Row 1 (RS): Ch 32, working in back bumps sc in 2nd ch from hook and each ch back to beginning. [31 sc]

Row 2: Ch 1, turn, sc in each st to end of row. [31 sc]

Row 3: Repeat Row 2.

Row 4: Ch 7 (creates button loop), turn, sc in each st to end of row. [31 sc, 1 ch-7 loop]

Rows 5 & 6: Repeat Row 2 twice.

Row 7: Ch 1, turn, sc in next 31 sts, (button loop finishing) picot, [(2 dc, picot) 6 times, 2 dc] into ch-7 loop, sl st to end of Row 1. DO NOT Fasten off.

Lace scarf

Row 1: (Working along bottom of foundation of button band Row 1) Ch 3, 3 dc in first st, ch 1 (sk 2 sts, V-st in next st) 9 times, ch 1, sk 2 sts, 3 dc in last st. [9 V-sts, 2 ch-1 sps, 6 dc]

Row 2 (RS) : Ch 3, turn, sk 1 st, 3 dc in next st, ch 1, (Shl in next ch-2 sp, V-st in next ch-2 sp) 4 times, Shl in next ch-2 sp, ch 1, sk 3 sts, 3 dc in next st. [5 Shls, 4 V-sts, 2 ch-1 sps, 6 dc]

Row 3: Ch 3, turn, sk 1 st, 3 dc in next st, (ch 1, V-st in next ch-2 sp, ch 1, Shl in next ch-2 sp) 4 times, ch 1, V-st in next ch-2 sp, ch 1, sk 5 sts, 3 dc in next st. [5 V-sts, 4 Shls, 10 ch-1 spcs, 6 dc]

Rows 4: Ch 3, turn, sk 1 st, 3 dc in next st, (ch 1, Shl in next ch-2 sp, ch 1, V-st in next ch-2 sp) 4 times, ch 1, Shl in next ch-2 sp, ch 1, sk 3 sts, 3 dc in next st. [5 Shls, 4 V-sts, 10 ch-1 sps, 6 dc]

Rows 5 – 50: Alternate repeating Rows 3 & 4, 22 times.

Row 51: Ch 1, turn, sc in each of next 3 sts, (*sl st in ch-1 sp, sc next 2 sts, sk next st, 5 sc in next ch-2 sp, sk 1 st, sc in next 2 sts, sl st in ch-1 sp,* sk next st, 5 sc next ch-2 sp, sk 1 st) 4 times, repeat from * to * once, sc in each of last 3 sts. Fasten off. [71 sc, 10 sl sts]

FINISHING

Weave in ends. Block lightly, if desired.

Sew button to RS of button band on Row 4 at opposite end from button loop.

A Winter Wonderland

Oh yes indeed, it really is Winter now, and we have the snow to prove it. The past couple of weeks have been cold and snowy up here on the mountain. Though we have had a few odd days where it was actually warmer at my home, at 8500 feet above sea-level, then it was in the lower elevations.

frozen-star-ag-m2h-designs

In appreciation of the snow and to celebrate the holidays, I have a quick little snowflake pattern for you. With only 3 rounds to crochet you can make a whole drift worth of them in just a day.

I have always loved the beauty of snow, which is probably a good thing since I live on a mountain. My favorite snowflakes are the ones I can crochet. They last longer, they are a lot warmer, and best of all crocheted  snowflakes won’t leave a puddle of water on your floors.

I hope you have a fun time with my newest snowflake.

frozen-star-d-ag-m2h-designs

Frozen Star Snowflake

Designed by Andee Graves

Skill level: Easy Intermediate

Finished Size:

2 3/4 inches from point to point across center

Materials:

Yarn

Size #10 Crochet Cotton Thread

Hook

1.75mm Steel Hook (or size needed for your thread or yarn)

Notions

Yarn/tapestry needle

One stitch marker

Gauge

Total snowflake (3 rounds) measured across from point to point = 2 ¾ inches

Pattern Notes:

All rounds are worked without turning, RS of fabric is always facing out.

Instructions

Rnd 1: Starting with an adjustable slip knot, ch 2, 6 sc in second ch from hook, sl st to first sc of Rnd. [6 sc]

Rnd 2: Ch 4, Tr in same st as join (counts as first Cl), (ch 5, Cl in next st). 5 times, ch 2, dc in first Tr of Rnd (counts as first ch-5 space). [6 Cl, 5 ch-5 sp, 1 ch-2, 1 dc]

Rnd 3: ch 1, sc in first ch-5 space, (*ch 1, {dc, ch 1, Tr, ch 4, slip st in top of previous Tr, Tr, ch 1, dc} in next Cl, ch 1,* sc in next ch-5 sp) 5 times; Repeat from * to * once, slip st to first sc of Rnd. Fasten off [12 sc, 12 dc, 12 Tr, 24 ch-1 sps, 6 ch-4 sps]

Finishing

Weave in all tails.

andee-photo-aug-2016

Happy Holidays to all my dear readers.  Stay warm and enjoy some peaceful and joyful days no matter how you celebrate.

This post contains affiliate links. I may receive compensation (at no additional cost to you) if you make a purchase using these links.


The Stiffy Mod Podge is what I like to use to stiffen my snowflakes for hanging ornaments. If you can’t find it locally you can order it on Amazon. Just click on the photo above.

This post contains affiliate links. I may receive compensation (at no additional cost to you) if you make a purchase using these links.

My newest pattern at Red Heart.com

Photo courtesy of Red Heart

A while back the folks at Red Heart asked me to design a simple beaded necklace that beginning crocheters could manage. They asked me to crochet it in their Red Heart Metallic Crochet Thread in Size #10.

crochet-thread

I’ve always loved this metallic crochet thread, mainly because I’m part magpie. If it has sparkle I will find it. So beads and sparkly crochet thread. I’m there!

beads

Remember these beads? They were for working out this design.

We are coming up on the holiday season. Lots of parties and packages and New Year’s Eve where sparkle is the Thing! This is a great quick crochet project to add some sparkle to your wardrobe or packages. It is even a terrific quick gift project.

lc5292inset2_medium2

The folks at Red Heart did a lovely job photographing the sample I made for them. You can find the free pattern on the Red Heart website here.  The pattern even includes a photo tutorial on making the beaded chain stitch.

multiple-strands

Of course for the holiday season I like my sparkle to really be kicked up a notch. That means I need lots of strands to my necklace.

Maybe sparkly thread isn’t really your thing? Take a look at all the other wonderful colors of Size #10 thread that Red Heart has available.

variety-of-beads-close

You can also have fun with mixing up the size and shape of beads you are using.

stringing-beads

I generally go with the size 6 E beads but in this strand I added size 2 and some triangle shaped beads. Look for beads with a smooth edge around the hole. Otherwise your beads will cut your thread or abrade the metallic tape.

floss-threader

I prefer to use a dental floss threader to string my beads onto the crochet thread (or yarn). The flexibility of the “eye” of the floss threader compresses easily to pull thru the hole in your beads and the sturdiness of the “point” end works well for scooping up beads. You can find these in most drug stores in the dental floss area.

Now it’s your turn. Time to get out the beads and thread and make some sparkle you can wear all year long.

Simple Double Crochet Hat

2016-tree-close-up

I hope everyone here in the USA had a great Thanksgiving Day with their friends and families. Last weekend my family and I put up our tree and decorated the house. Which means I’m now focused on what gifts I’ll be giving this year. Especially what gifts I’ll be crocheting.

My go-to projects for gift-giving are hats, they are quick and a great canvas for creating something special for my crochet-worthy family and friends. My favorite stitch for making a basic simple hat is the half double crochet. But that stitch can be a bit finicky for beginning crocheters.

simple-dc-hat-andeegraves-m2h-designs

So today I am posting an easy pattern for a basic hat worked in continuous rounds of double crochet stitch with 2 rounds of single crochet for the brim. You will only have to make 2 half double crochet stitches in the entire project.

This hat is slightly more “meshy” than the half double crochet because double crochet stitches have a longer “post”. The mesh like fabric lets the scalp breathe a bit more, nice for those that find some crochet hats to be too warm. This is an especially good pattern for alpaca blend yarns as they tend to make extremely warm fabric.

I chose not to use the single crochet stitch for the body of this hat because it is a tighter stitch and doesn’t have enough give or stretch for a comfortable hat fabric.  The only single crochets are for the “step-up”, “step-down” and the brim finish.

For all my hats I like to start at the center of the crown, so the beginning of the pattern is like working a motif. I like my adjustable slip knot start for that (video on my YouTube channel if you need help) as it allows enough room for the first round’s stitches without leaving a gaping hole in the top of your hat.

stitch-markers

Continuous rounds are basically a spiral. This spiral is less complex than the 4 armed spiral I used in my “Whirlwind Afghan Square” and my “Whirlwind Hat”. Just like in those patterns though, I use stitch markers to help me keep track of where the increases for my rounds are happening and the end of my round.

Simple Double Crochet Hat

Designed by Andee Graves

Skill level: Easy

Finished Size:

Head Circumference: Apprx 22”

Materials:

Yarn

Ella Rae “Cozy Soft Chunky” (25% Wool, 75% Acrylic) 3.52 oz/100g, 131 yds/120m: 1 ball

Hook

I-9 / 5.5mm or size needed to obtain gauge.

Notions

Yarn/tapestry needle

Stitch markers in 2 colors: at least 11 in one color and 1 in a different color

Gauge

3 rounds in flat circle = 3.5” diameter

Special Stitches/Abbreviations

Place Marker (PM)

Single Crochet Stitch (sc): insert hook in stitch, yarn-over, pull up a loop (2 loops on hook shaft), yarn over pull thru both loops on hook.

Half Double Crochet Stitch (hdc): yarn-over, insert hook in stitch, yarn-over, pull up a loop (3 loops on hook shaft), yarn over pull thru all 3 loops on hook.

Double Crochet Stitch (dc): yarn-over, insert hook in stitch, yarn-over, pull up a loop (3 loops on hook shaft), yarn over pull thru 2 loops on hook (2 loops remain on hook shaft), yarn over pull thru last 2 loops on hook.

Pattern Notes:

All rounds are worked without turning, RS of fabric is always facing out.

Instructions

Crown

Rnd 1: Starting with an adjustable slip knot, ch 2, (sc, hdc, 10 dc) in 2nd ch from hook,

PM in each st using different color in last dc.  [1 sc, 1 hdc, 10 dc]

End of Round 2 with St Markers in place.

Rnd 2: (2 dc next st, move st marker to 2nd st made)12 times.[24 dc]

Rnd 3: (Dc next st, 2 dc in marked st, move st marker to 2nd st made)12 times. [36 dc]

Rnd 4: (Dc each un-marked st, 2 dc in marked st, move st marker to 2nd st made) 12 times. [48 dc]

Rnds 5 – 6: Repeat Round 4. Stitch count end of Round 6 [72 dc]

Starting with first st marker remove every other marker (1, 3, 5, 7, 9, 11).

Rnd 7: (1 dc in each un-marked st, 2 dc in marked st, move st marker to 2nd st made) 6 times. [78 dc]

Remove all but the last st marker.

Sides

Rnd 8: Dc in each st around, PM in last st of Rnd.

Rnds 9 – 16: Repeat Rnd 8.

Brim

Rnd 17: Hdc next st, sc next 77 sts.

Rnd 18: Sc next 77 sts, sl st next st, sl st back loop next st. Fasten off.

Finishing

Weave in all tails.