Celebrating Circles

This coming Monday is March 14th, and you know what that means? Pi Day!

Okay, for those of you that somehow have managed to be reading this blog and have missed it…

I’m a Geek!

I love math and science, plus all the other wonderfully related things. There have been rumors that I am a nerd, but I’m not paying them any notice. My favorite math, and one that I use frequently in my design work, is Geometry. That takes us back to Pi.

Pi = 3.14 and that makes March 14, a date that can be written 3.14, Pi Day. See, you knew I’d get to the point eventually.

Pi in lay terms is the number that allows us to compute the circumference of a circle. Actually it is much more than that, but that gets you in the general vicinity. It is a handy concept to understand, especially if you are making hats.

Perfect Fit Crocheted Hat

I’ve talked a lot about using Pi in sizing hats, in fact my “Perfect Fit Crocheted Hat” pattern/lesson has a lot of information about using Pi to determine the size of hat you can make. The sizing in that pattern is very flexible because once you master the method, you can use any size yarn with the appropriately matching hook to create a hat that fits perfectly.

Spiraling Xs Hat 3 Andee Graves

Of course, since I’m in a mood for celebrating Pi, it seems only appropriate to introduce you all to my latest hat pattern: “Spiraling Crosses Hat”. I designed it in Tahki Stacy Charles “Mesa” yarn, a lovely squishy thick/thin aran-weight superwash wool that is dyed in long gradual color changes. This hat design is perfect for spring-time transitional weather. The stitch pattern has a bit of laciness to it and lots of stretch. The warmth of the wool is there to chase off a chill and the laciness allows your scalp to breathe.

As part of my celebration of Pi-Day this hat pattern is available to you dear readers at a 10% discount until almost Midnight (11:59 p.m. Mountain Time) Monday, March 14, 2016. Just use the coupon code PiDayHat16 when purchasing it in my Ravelry Shop.

Speaking of Ravelry, have you joined the fun at the month long party for crochet? Check out the forum for celebrating NatCroMo. You can even join in the Hat CAL with any hat pattern you so desire. Like maybe a Perfect Fit or Spiraling Crosses Hat?


Sophisticated Simplicity

Sophisticated Simplicity Necklace - Andee Graves/M2H Designs

I am really happy to share my latest beaded chain pattern with all my readers. This was an idea that has been bumping around in my brain for a while. It’s a very simple project to crochet, but does take a bit of coordination.

You’ll need to be comfortable with working chain stitches [ch], beaded chain stitches [bdch] and single crochet stitches [sc]. I have a tutorial on crocheting beaded chain stitches here on my blog (scroll down to the bottom half of the post) for those of you needing a refresher on that stitch.

Sophisticated Simplicity Necklace - Andee Graves/M2H Designs 2

Sophisticated Simplicity Necklace

Designed by Andee Graves

Skill level: Easy

Materials

Thread/Yarn:  Sample was made with Kreinik’s Ombre Twist thread, took approximately 45 yards (3 yds per strand), you can get approximately 6 necklaces out of one cone depending on how many strands you decide to have in your necklace.

Hook: Size B/2.25mm

265 glass  beads: Sample was made with Twisted Sistah’s 4mm Cube Transparent Sapphire with AB finish.

2 metal split rings (I used rings that were 1/2″ in diameter) and a large lobster clasp necklace fastener.

Gauge:

15 chain stitches = 2″

Instructions:

Before you begin crocheting, string all the beads you want to use onto the thread (I always add in a few extra when stringing my beads just to be on the safe side). Also work the ring of the lobster clasp onto one of your split rings.

Leaving about 6 inches of thread for your beginning tail make a slip knot and place loop on your hook. Slip st into one ring, chain 1 and single crochet into the ring to secure the end of your first strand.

You will work the necklace by working chained strands in 3 different styles:

Bead interval for Style 1 & 2
Bead interval for Styles 1 & 2

Style 1: Ch 24, (bdch, ch 7) 12 times, bdch, ch 24, sc to opposite ring. [132 ch, 13 bdch, 1 sc]

Style 2: Ch 21, (bdch, ch 7) 13 times, bdch, ch 21, sc to opposite ring. [133 ch, 14 bdch, 1 sc]

Bead interval for Style 3

Style 3: Ch 19, (bdch, ch 3) 25 times, bdch, ch 19, sc to opposite ring. [113 ch, 26 bdch, 1 sc]

Completed Necklace
Completed Necklace

I alternated working the various styles of strands until I had completed 15 strands (5 strands of each style). You could do more or less, you’ll just want to adjust the number of beads you string before starting your project.

Once you have crocheted all your chain strands and have made the final sc in the ring, fasten off with a six-inch long tail. Weave the ending and beginning tails in and trim off excess thread. If you need to you can secure the tails further with a drop of cyanoacrylate glue (sometimes known as “Super Glue”).

Tips and Tricks for Success

When I was working on my sample in the photos I kept getting carried away with crocheting the beaded chain intervals. About half way thru I discovered a little trick that really sped things up and saved me some frogging and frustration.

Tip for keeping track of beads.

Start the next strand by crocheting the chain stitches before the first beaded chain. Bring the number of beads for the strand you are working close to your hook, and push the remaining beads further down your thread so you have plenty of thread to work with while crocheting the strand. Make a slip knot in the thread right before your extra beads and put a locking stitch marker in the loop.

Now work your strand of chains and beaded chains, when you run out of beads you know it is time to finish that strand and connect it to the opposite ring with a single crochet. If you use up the thread you had pulled up, just move the extra beads further down the thread, undo your slip knot and create another slip knot down the thread. Replace your stitch marker and finish your strand.

Rings and Clasp

Note about the rings you use for the ends: I choose split rings because there is not an opening that the thread can slip thru causing your strands to drop off. If you prefer to use regular jump rings make sure that the opening in the ring is tightly closed.

I would also recommend placing a drop of thin cyanoacrylate glue over the join and let it dry completely before proceeding with your project. You want the thin runny type of glue that can penetrate the tight space between the 2 ends of your jump ring, not the thicker “gel” formulas that are also available.  Obviously you want to have your lobster claw fastener placed on the jump ring before you seal it with the glue.

Now it’s your turn dear readers. Find some beads that appeal to you and crochet a Sophisticated Simplicity Necklace that will turn heads. No one needs to know how easy it was to make.

A Lovely Lacy Snowflake

Snow is a reality where I live, sometimes I love it, other days it makes me cross to deal with it. But no matter what, I always find freshly fallen snow to be beautiful.  Crocheted snowflakes are one of my very favorite Christmas decorations (and my favorite way to enjoy snow).

There are many ways to incorporate snowflakes into your holiday themed projects. They are great for using as embellishments on cards or gifts and you can stiffen them with a glue solution to hang them on your tree or in the window as ornaments. Sprinkle some glitter over them before the glue dries, to add a little sparkle.

This post contains affiliate links. I may receive compensation (at no additional cost to you) if you make a purchase using these links.

As my holiday gift to all my lovely readers here is my newest snowflake pattern. For those of you that prefer stitch charts to work from, or just want a nice PDF of the pattern, this pattern is available in my Ravelry Shop.

Lacy Snowflakes M2H Designs

LACY SNOWFLAKES

designed by Andee Graves/M2H Designs

SKILL LEVEL: Intermediate


FINISHED SIZE: 4″ (10cm) diameter at widest point

THREAD: Red Heart Aunt Lydia’s Size #10 Crochet Cotton, (100% Cotton) white

CROCHET HOOK: US Steel #2 (1.5 mm) or size needed to obtain gauge.

GAUGE: First 4 rounds = 2” in diameter at widest point


FINISHED SIZE: 5 1/8″ (13cm) diameter at widest point

THREAD: Red Heart Aunt Lydia’s Size #3 Crochet Cotton, (100% Cotton) blue

CROCHET HOOK: US B (2.5 mm) or size needed to obtain gauge.

GAUGE: First 4 rounds = 2 3/4” in diameter at widest point


ADDITIONAL MATERIALS: Yarn needle, Stitch markers 

SPECIAL STITCHES

Open Shell (Shl): (dc, ch 2, dc, ch 3, dc, ch 2, dc) in indicated st or sp.


INSTRUCTIONS

Start with an adjustable slip knot. Click here to see my video on this technique.

Rnd 1: Ch 6, (dc, ch 2) 5 times in 6th ch from hook, sl st to 3rd ch of beginning ch-6.

Rnd 2: Turn (Sl st, ch 1, sc) in next ch-2 sp, (ch 4, sk next st, sc in next ch-2 sp) 5 times, ch 4, sl st to first sc of round.

Rnd 3: Ch 1, [(3 sc, ch 3, 3 sc) in next ch-4 sp] 6 times, sl st to first sc of round.

Rnd 4: Sl st in next 2 scs, sl st in next ch-3 sp, ch 5, (dc, ch 3, dc, ch 2, dc) in next ch-3 sp, (ch 2, Shl in next ch-3 sp) 5 times, ch 2, sl st in 3rd ch of beginning ch 5.

Rnd 5: Ch 1, turn, (sc in next ch-2 sp, ch 2, sk 4 sts, Shl in next ch-3 sp, ch 2, sk 4 sts) 6 times, sl st to first sc of round.

Rnd 6: Ch 5, turn, (*sk 3 sts, sc in next ch-2 sp, ch 2, sk next st, Shl in next ch-3 sp, ch 2, sk next st, sc in next ch-2 sp, ch 2, sk 3 sts,* dc in next sc, ch 2) 5 times; Repeat from * to * once, sl st in 3rd ch of beg ch-5.

Rnd 7: Ch 1, 2 sc next ch-2 sp, [*(sk next st, 3 sc in next ch-2 sp) twice, sk next st, (2 sc, ch 3, 2 sc) in next ch-3 sp, (sk next st, 3 sc in next ch-2 sp) twice,* (sk next st, 2 sc in next ch-2 sp) twice] 5 times, Repeat from * to * once, 2 sc next ch-2 sp, sl st to first sc of round.


FINISHING

Weave in all ends. If you want to stiffen your snowflakes for hanging ornaments the Stiffy Mod Podge product shown below is what I use.

If you can’t find it locally you can purchase it on Amazon. Click on the photo below to go right to Amazon.

This post contains affiliate links. I may receive compensation (at no additional cost to you) if you make a purchase using these links.

Spirals and Squares

Fire Pit

************

October 29, 2015: Hello dear readers and new visitors just a little update to this post.

My Whirlwind Afghan Square is block #22 in the 2015 Moogly Afghan CAL.

If you hadn’t heard about the Moogly Afghan CAL it’s not too late to join the fun. You can hop on over to Mooglyblog.com to get all the details and see Tamara’s interpretation of my Whirlwind.

Thank you so much to Elke Wellens for providing a Dutch Translation of this pattern on her blog you can find her blog here.

Het Nederlandse patroon, vertaald door HET HAAKBEEST, kun je hier vinden. 

Check back on the blog next Tuesday, November 3, 2015. I’ll have the link to my YouTube video that will demonstrate how to crochet the first 12 rounds of this square.

************

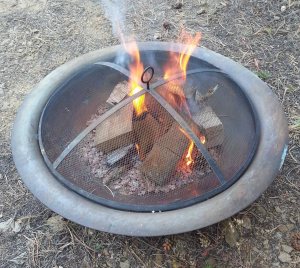
Yesterday was my 52nd birthday and I celebrated by spending most of my day goofing off, especially in the evening with my boys.  We built a fire in our outdoor fire pit and roasted hotdogs and marshmallows like we were camping out. Then I opened my cards and presents by firelight.

Today I’m continuing the celebration by sharing a new design here on the blog for all my lovely readers. This one is a little more complex than I usually share. In fact, one might call it a skill building pattern.

After all, we are celebrating my birthday so this pattern is going to be about many of the things I love in crochet. It uses a center-out construction, one of my favorite styles of design as the outside edges are all the tops of your stitches. It is also constructed round-to-square, which I find visually interesting. And of course, Spirals.

2 hands logo small

I love Spirals. You might be able to tell that just looking at my logo. I find them fun and intriguing. When I was in massage school I was very happy when I learnt that spirals are an common symbol for healing. Which is why I choose to use them in my logo.

Back in 2008, when I first became interested in free form crochet, I started exploring creating spirals in my crochet. Suddenly I was seeing spirals in so many of the crochet designs being published at that time.

Some of the instructions I found for working spirals were a bit wishy washy, which is more than fine for freeform work, but not so great for writing a pattern that others would want to replicate and get the same result. Thus my mathematical brain decided to enter the party.

Spirals are related to circles and circular geometries are always fun for me. Fortunately for those of you that might be a little math-adverse, you don’t have to understand all the numbers behind this design in order to crochet it.

One of the things I wanted to do was come up with a way to make working spirals easy for anyone to do. Especially when you are working with multi-arm spirals. For this pattern I started with a 4 armed spiral in the center this creates that round-to-square progression that I also like. I used the half-double crochet (hdc) stitch for my spirals because it takes 8 hdc to create a flat full circle which helps me take the circular spiral to a 4 cornered square.

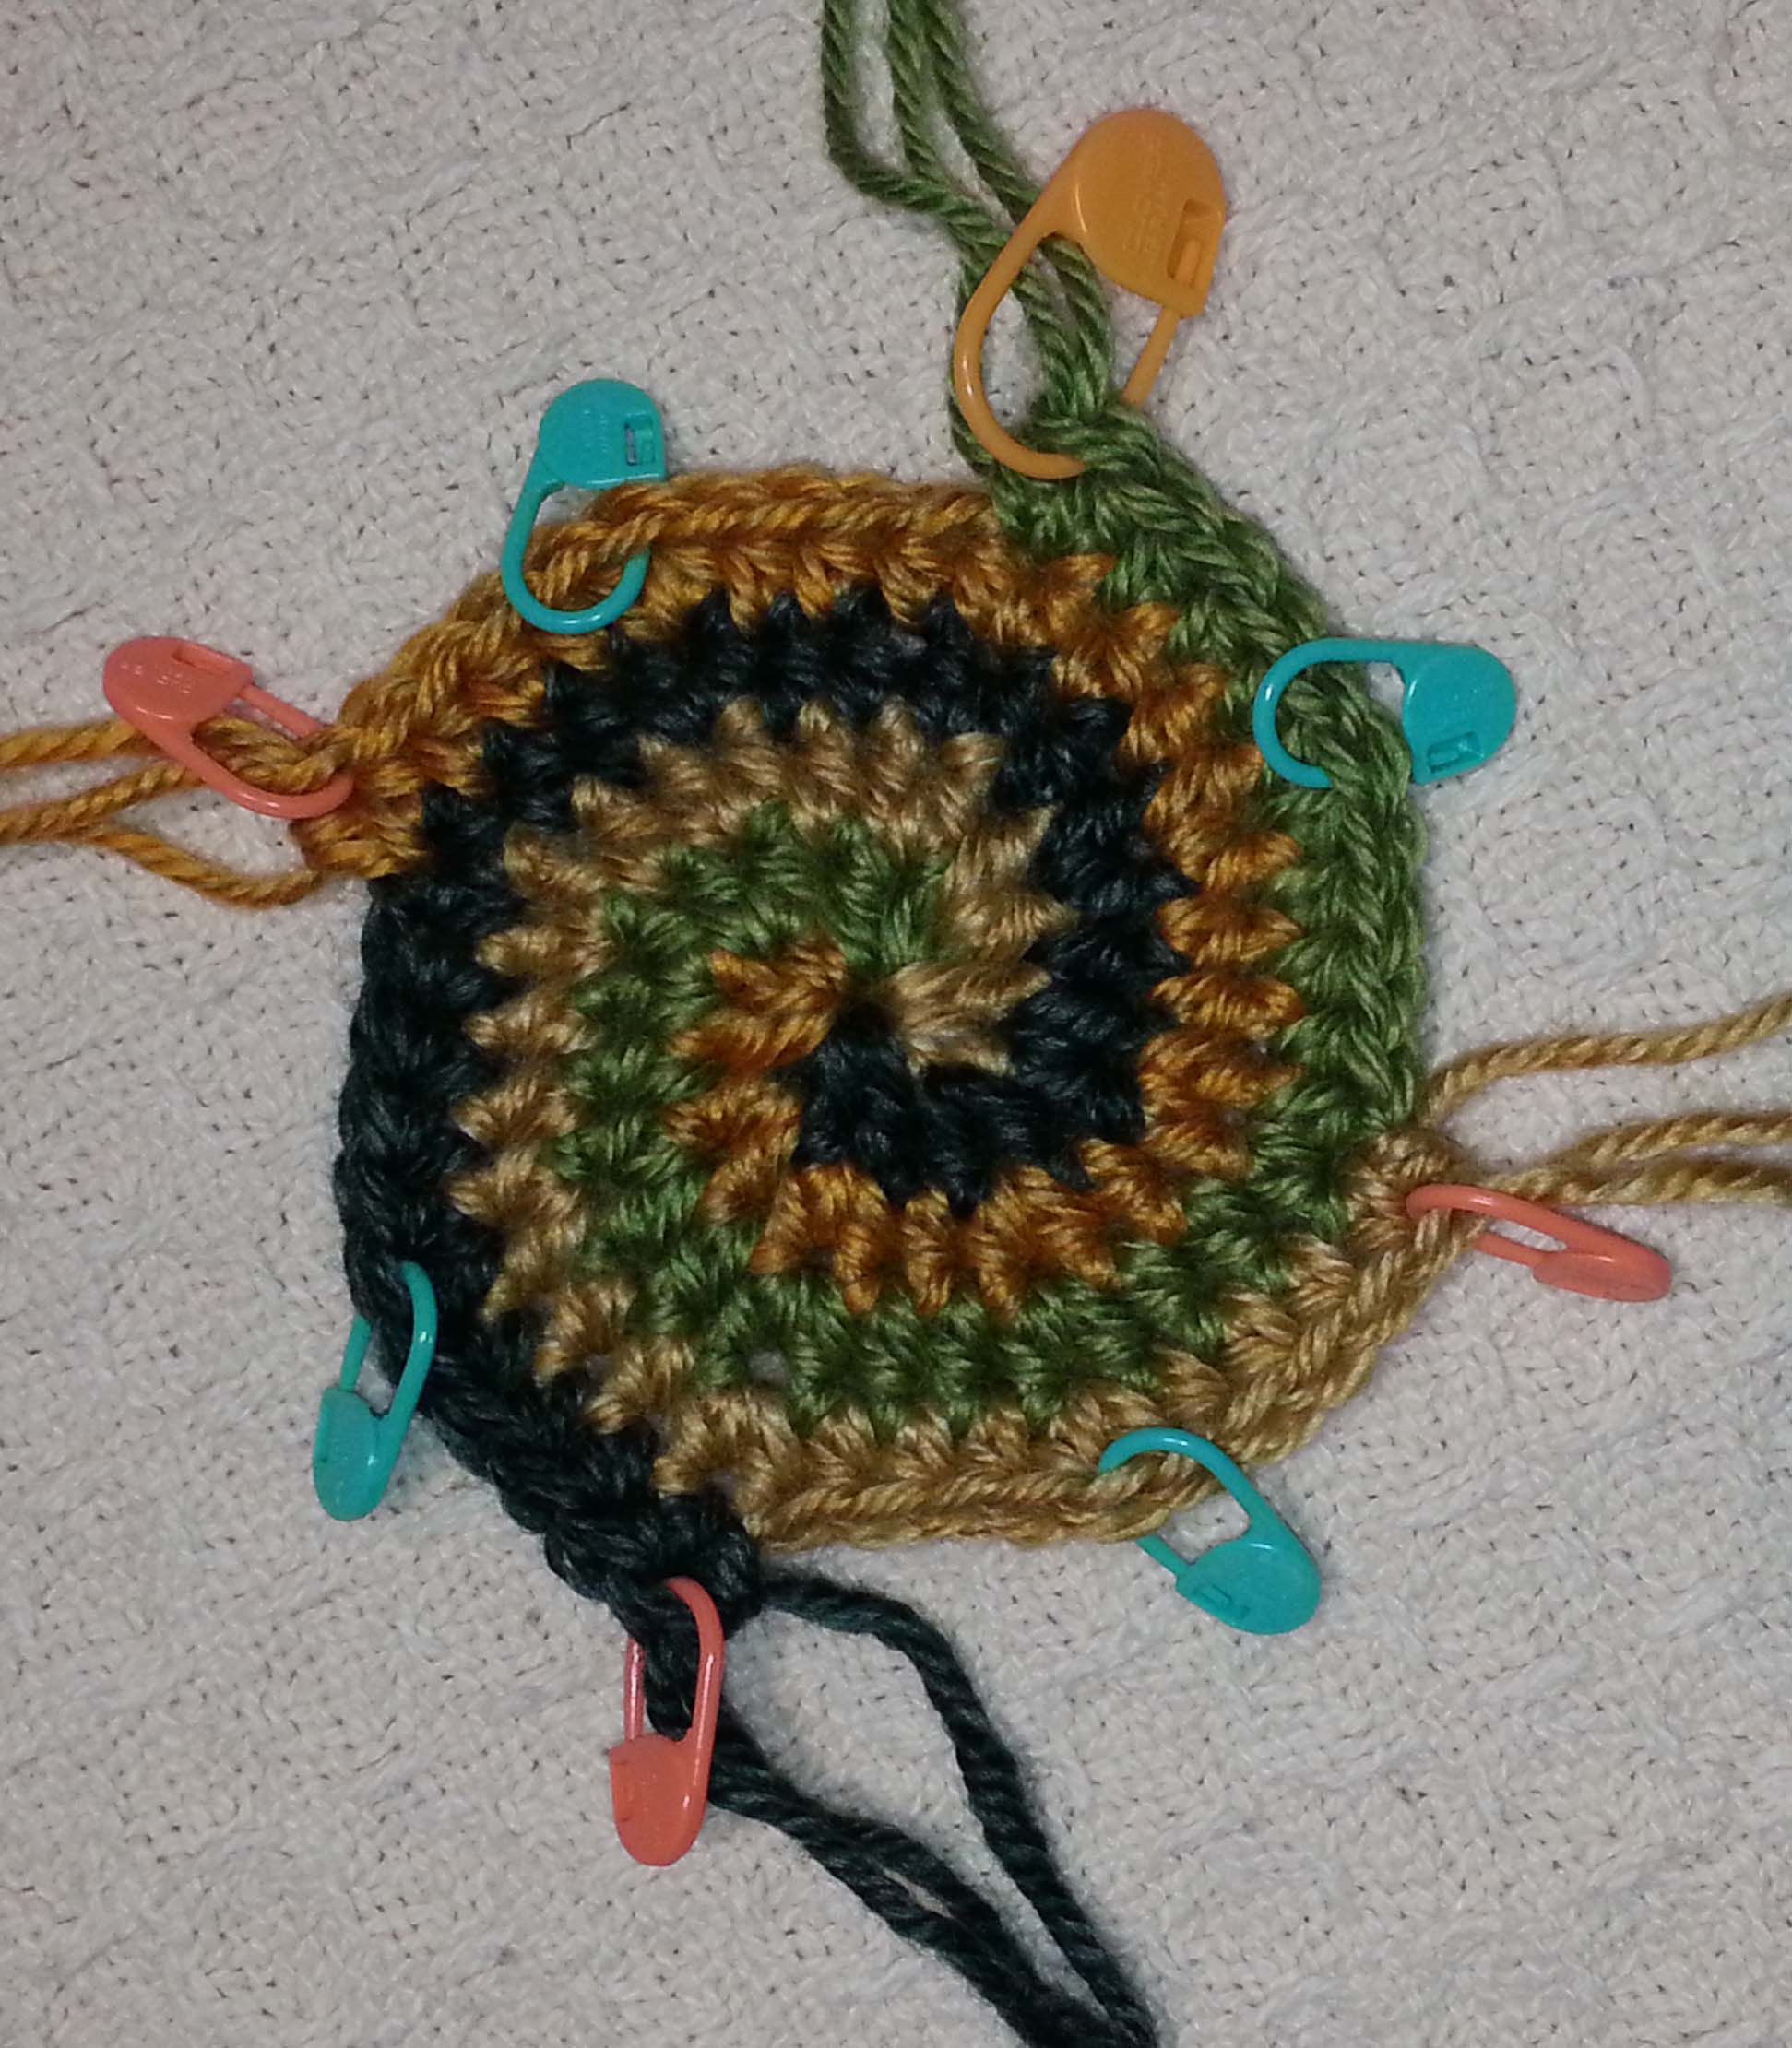
When working spirals you need to work in continuous rounds.  This is generally the method of construction used for amigurumi and hats because it allows for a seamless appearance. That does mean that it can be easy to lose track of which round you are working on and if you have reached the end of your round. The solution for this is to use stitch markers.

8 Stitch markers

For the construction of the first 8 rounds of this design I used 8 stitch markers. Having the 3 colors is really helpful. I love my Clover Locking Stitch Markers, but if you don’t happen to have any like that on hand you can use paper clips or coil less safety pins. Some folks like to use a spare bit of yarn for a stitch marker, but I find those tend to get pulled out of my work too easily.

First 5 rounds w Markers

This photo shows the first 5 rounds of my square completed and the placement of the stitch markers. The large yellow marker is marking the last stitch of the full round, as well as the last stitch of that section of color and the increase point. The other orange markers are marking the last stitch of that section of color and the increase point. The green markers are marking the first increase point in the various color sections. Whatever type of stitch markers you use you need ones that allow you to distinguish between the end of round/increase (1), end of color section/increase (3) and the first increase in each color section(4).

Whirlwind Square - M2H Designs

Whirlwind Afghan Square

Designed by Andee Graves

Skill level:     Intermediate

Finished Size:

12” square

Materials:

Yarn

Worsted wt (Sample uses Lion Brand Yarns “Heartland” 100% Acrylic (5 oz/142g, 251 yd/230 m)

I picked the colors of October up here on my mountain, but you can choose any 5 colors that you like together. Alternating light and dark will make the spiral in the center stand out more.

Color A: #169 Shenandoah (sample used approximately 8 yards)

Color B: #180 Kings Canyon (sample used approximately 12 yards)

Color C: #158 Yellowstone (sample used approximately 10 yards)

Color D: #173 Everglades (sample used approximately 10 yards)

Color E: #124 Big Bend (sample used approximately 9 yards)

Hook

I / 5.5mm

Notions

Yarn/tapestry needle

8 Stitch markers in 3 colors (1 in first color, 3 in next color, 4 in last color)

Gauge

First 5 rounds of pattern = 4” in diameter

Abbreviations/Special Stitches

PM – Place stitch marker

Standing Single Crochet – make slip knot in yarn and place loop snugly on shaft of hook, insert hook into indicated st, yo, pull up a loop, yo, pull thru both loops on hook.

Standing Double Crochet – make slip knot in yarn and place loop snugly on shaft of hook, yo and insert hook into indicated st, yo, pull up a loop, (yo, pull thru 2 loops on hook) twice.

Pattern Notes:

Start square with an adjustable slip knot. Beginning tail tightens the loop on the hook. If you don’t know how to do an adjustable slip knot you can see a tutorial on my blog here, or watch this video on my YouTube channel.

First 9 rounds use 4 colors. Each color is 1/4 of the total stitches in the round, you will need to insert your hook back into the dropped loop as you come to the new color, snug that loop up to the shaft of your hook and begin working the stitches as instructed in the new color. Follow instructions for using stitch markers so you don’t lose your place.

Color 1 of stitch markers is used to mark last stitch of entire round as well as last stitch/increase point of that color section.

Color 2 of stitch markers is used to mark the other 3 last stitch/increase point of color sections.

Color 3 of stitch markers is used to mark the first increase point in each color section.

When working the first 9 rounds move stitch markers up to 2nd stitch worked in each increase point.

When ending Round 9, the 2nd sl st is a tight one for final “step-down” of spirals, you will not be working into this stitch in Round 10.

For concentric rounds where changing colors attach yarn with a standing stitch.

If you have an easier time understanding a video then reading a pattern, visit my YouTube Channel to watch:

Whirlwind How-to Part 1 and Whirlwind How-to Part 2

Instructions

Rnd 1: Starting with color A make an adjustable slip knot, ch 2, (sc, hdc) in 2nd ch from hook, pull up a long loop and remove hook, with color B *insert hook in center/first ch of round, pull up a loop on hook, ch 1, (sc, hdc) in same center/ch, pull up a long loop and remove hook,* ; Repeat from * to * with Color C and D. PM in each hdc w/end of color/round markers (placing single color marker in hdc of Color D), PM in each sc with first increase markers. [4 sc, 4 hdc]

Rnd 2: *2 hdc in next 2 sts, move st marker to 2nd st worked in each st, pull up long loop and remove hook**, insert hook in next color*; Repeat from * to * 2 times; Repeat from * to ** once. [16 hdc]

Rnd 3: *(Hdc in next st, 2 hdc in marked st, move st marker to 2nd st worked) 2 times, pull up long loop and remove hook, insert hook in next color*; Repeat from * to * 2 times; Repeat from * to ** once. [24 hdc]

Rnds 4 – 8: *(1 hdc in each unmarked st, 2 hdc in marked st, move st marker to 2nd st worked in marked st) 2 times, pull up long loop and remove hook,** insert hook in next color*; Repeat from * to * 2 times; Repeat from * to ** once. Stitch count for end of Rnd 8 [64 hdc]

Rnd 9: *hdc in next 7 sts, 2 hdc in next marked st, move st marker to 2nd st worked in marked st, hdc next 6 sts, sc next st, sl st next st, ** insert hook in next color*; Repeat from * to * 2 times; Repeat from * to ** once. Make 1 additional sl st in next st for each color, fasten off yarn, remove end of round markers. [8 sl st, 4 sc, 60 hdc]

End of Rnd 9

Rnd 10: Attach color E with a standing sc along any side in same st as the second slip st of any color section from Rnd 9, sc next st, *Hdc next 3 sts, dc next 2 sts, 2 dc next st, (Tr, ch 1, Tr) in marked st, 2 dc next st, dc next 2 sts, hdc next 3 sts**, sc next 4 sts*; Repeat from * to * 2 times; Repeat from * to ** once, sc next 2 sts, sl st to first sc of round. Fasten off current color. Move increase st markers to ch-1 sp. [16 sc, 24 hdc, 32 dc, 8 tr, 4 ch-1 sps]

Rnd 11: Attach new color along any side in 11th st from marked ch-1 sp in direction of work, with a standing sc, sc next 2 sts,*hdc next 3 sts, dc next 3 sts, 2 dc next st, (Tr, ch 2, Tr) in marked ch-1 sp, 2 dc next st, dc next 3 sts, hdc next 3 sts**, sc next 6 sts*; Repeat from * to * 2 times; Repeat from * to ** once, sc next 3 sts, sl st to first sc of round. Fasten off current color. Move up increase st markers to ch-2 sps at corners. [24 sc, 24 hdc, 40 dc, 8 tr, 4 ch-2 sps]

Rnd 12: Attach new color along any side in 11th st from marked ch-2 sp in direction of work, with a standing dc, *dc in each st until reach next marked ch-2 sp, (2 dc, ch 2, 2 dc) in marked ch-2 sp*; Repeat from * to * 3 times, dc in each st until reach beginning of Round, sl st to first dc. Fasten off current color. Move increase st markers to ch-2 sps at corners. [112 dc, 4 ch-2 sps]

Rnds 13 – 16: Repeat instructions from Rnd 12. Fasten off. Stitch count at end of Rnd 16 [176 dc, 4 ch-2 sps]

Finishing

Weave in tails and block.

A big Thank You to the folks at Lion Brand Yarn for supplying the yarn for this design. I really love the colors that their Heartland yarn comes in. Hop on over to their website to check it our for yourself.

The Name is…

Thank you to all my readers that voted on the name for my newest Shawl. The name that got the most votes was…

Mountain Whisper Shawl

Mtn Whisper Shawl - M2H Designs

I didn’t want to make you wait to find out the name, but due to having a few unexpected complications this week with family and work schedules the pattern won’t be available on Ravelry until tomorrow at Noon (USA Mountain Time). I’ll put the link in this post once it is available.

For those of you that voted on the name, you can use your coupon code starting at Noon Saturday, September 26 to get 15% off if you purchase the pattern before 10 p.m. Sunday, October 18. That’s midnight Eastern time.

The pattern for the Mountain Whisper Shawl will be available in my Ravelry shop for $5.99. Here is the link to add it to your shopping cart on Ravelry.

This pattern includes written instructions in U.S. crochet terminology, a photo tutorial on aggressively blocking the shawl, stitch diagrams for the body of the shawl and for the lace border, and instructions on how to make the shawl larger.

Edited: September 26, 2015  – The pattern is now available on Ravelry and the link above should work. Please let me know if you run into difficulty with purchasing or with the pattern.

What’s in a Name?

Scotts Bluff National Monument 4web
Scotts Bluff National Monument

Last weekend was lots of fun. I was teaching at the Scotts Bluff Valley Fiber Arts Fair in Scottsbluff, Nebraska. I hope to be teaching there again in 2016 and will let you all know as those dates and classes are decided on. Hopefully more of you can join me there.

Brown Sheep Sign on Building

One of the major sponsors for the event was the Brown Sheep Company. I have used Brown Sheep yarns for years in my felting projects. My favorite thing about their “Lambspride” yarn is the color doesn’t fade away with heat felting, which means I can depend on my finished project having the same colors as the yarns I picked out. And I love that they are a “Made in the USA” product.

Andrew Wells
Andrew Wells

At the fair this weekend attendees could sign up for a tour of the Mill where the lovely yarns are created. Brown Sheep is a family owned business and our tour guide, Andrew, is the most recent generation working there. You can learn more about their company history by visiting their website here: BrownSheep.com.

“Bumps” of clean wool fiber ready to start thier journey to being made into yarn.

Fluffy wool fiber ready to be spun.

It was really fun to see all the stages the fiber goes thru from clean fiber in “bumps” to the almost rope like fluffy roving that goes into the spinning machines. A lot of us on the tour found the rope like look of the fiber ready to be fed into the machines very beautiful.

Now, of course there was yarn, and being I was at a Fiber Arts  event some yarn had to come home with me.

ShelleyLyn Designs Handspun

While at the fairgrounds I met one of the vendors that is actually from my neck of the woods. ShelleyLyn Designs. She hails from the Longmont area and had some lovely knit products as well as patterns. Of course I was drawn to her beautiful hand-spun yarn and had to adopt 2 hanks of this gorgeous pink and black yarn. I’m thinking I’ll be coming up with a lovely hat or headband to wear this winter when the cold-weather “blahs” are making me wish for summer again.

At the end of the tour at the Brown Sheep Company there were mill-ends of yarn and fiber that could be purchased. A few balls of yarn needed to come home with me again.

Brown Sheep Lambs Pride Superwash Sport - Green Envy

When I initially spotted this ball I thought the color was a gray. Then I got a closer look and realized it had a wonderful combination of lavender and 2 different greens called “Green Envy”.

Lambs Pride Superwash Sport - Finches

I got these 3 balls with something pretty for the Fall season in mind. I’m often drawn to the warm fall colors, though I don’t wear them as frequently as I used to.

Navy Brown Sheep LanaLoft Sport

These 2 balls of Navy yarn are either going to be a hat or slippers for my youngest son this Christmas. He isn’t quite as avid about hats as his Dad and older brother, so I am waffling on what I’ll pick for his Christmas gift.

Shawl as neck wrap

Meanwhile, one of the projects I was working away on before leaving for the fair, is this lovely new Shawl design. I made this shawl with Brown Sheep’s  “Wildfoote” luxury sock yarn. It was a perfect choice for a lace construction that I wanted to aggressively block.

Shawl from Back

Peggy of Brown Sheep was delighted to see the shawl when we got together at the fair on Friday. She was threatening to take it away with her, but I did persuade her to let me hold on to it so I can get the pattern published first. This pattern is going to be available the 25th of September.  But it needs a name and I am stuck on 3 different ones.

Fleur de Lis Shawl

Royal Veil Shawl

Mountain Whisper Shawl

I thought it would be fun for all my readers to help choose which one of the 3 I will use. So I’ve set up a little survey for you to vote on. Everyone that votes will get a coupon code to use for 15% off the pattern the first 3 weeks it is available. Voting will start today at Noon thru 10 p.m. September 22nd.

Update: Well the survey site I chose isn’t working properly.  So change of plans, vote in the comments below: Tell me which name you like best (can only pick one) and I’ll send you the coupon code thru your email (codes will be sent next week after the voting ends). Please don’t share the coupon code with others.

I’ll post the winning shawl name and the link to the pattern in my Ravelry shop on Friday, September 25th.  No matter which name wins, all who vote will be a winner. Just be sure you go to the survey site to vote to get the coupon code.

I’ll leave you with a bit of poetry from William Shakespeare, who had Juliet speak some thoughts about names in “Romeo and Juliet”:

“What’s in a name? that which we call a rose by any other name would smell as sweet; So Romeo would, were he not Romeo call’d, retain that dear perfection for which he owes without that title. Romeo, doff thy name, and for that name which is no part of thee take all myself.”

Granny Fans Redux

Photo of Granny Fans Scarf

This design is one of my favorites. Originally I created it for Michele Mak’s online subscription site, MainlyCrochet.com, back in October 2012 and it was published on there in the Fall of 2013.

Of course, after I send in a pattern and the sample, my brain keeps coming up with new ideas to expand on the original.

Granny Fans Redux - M2H Designs

When the rights for this pattern came back to me I knew I needed to re-visit those notes. Which is why this pattern in my Ravelry Shop: M2H Designs is called “Redux”.  I’ve re-done the design added in and sometimes subtracting things.

The new pattern is really more like getting 4 patterns in one.  There are lots of stitch diagrams for those (like me) that prefer those, as well as clear text instructions to help you make a Neck Cozy, Scarf, Tube Cowl or Moebius Cowl.

You can find the pattern in my shop on Ravelry by following this link: Granny Fans Redux

Tomorrow is “International Crochet Day” so I hope you get some crochet into your Saturday. I’ll be teaching at the Scotts Bluff Valley Fiber Arts Fair and touring the Brown Sheep Wool Company’s Mill. Going to be a day about fiber as well as crochet for me.

Hopefully I’ll have some photos of adorable fiber critters to share with you when I get back.

Just a Smidgen Left

This past Wednesday I was at the Longmont Yarn Shoppe. I facilitate our 2 hour “Causal Crochet” get together on the third Wednesday of each month at 10:30 a.m. In the afternoon I work at the shop as their “crochet help” person. I answer questions for our crochet customers helping them if they are stuck with a project or needing to find the right yarn for a new project. When there aren’t customers for me to help I crochet up swatches in the yarns so folks can see how they look in crochet as well as knit.

Ball of Gusto yarn and starting chain

This time Jane and Gail asked me to swatch in Berroco’s new yarn “Gusto”. This is a colorful Thick and Thin yarn constructed from 45% wool, 45% Acrylic and 10% Vicose. My initial chain to begin a swatch really charmed me. A chain alone could make a fun “crafty” necklace and would be really pretty with some beads added using the “hoist-on” method.

First Swatch and 3 buttons

I had decided to use the “seed stitch” (sometimes called “Linen stitch”) with this yarn since it would allow the changes of weight in the yarn to breathe. As I began to work my swatch I wondered how much fabric I could create from the one ball and spoke to Gail and Jane about what a cute neck cozy it would make. I pulled out some buttons from the shelf that I thought would look nice with the yarn.

As I got closer to the end of the ball of yarn I realized I was going to run out of yarn before I had enough length to the fabric. So I tried decreasing along one edge to taper the end and squeeze out a bit more length. It was still too short. After a consultation with Gail and Jane, I decided I needed to pull it all out and start over again.

Gusto yarn - loose bits

With this yarn you want to pull-out the stitches a bit carefully or you will damage the yarn. In a few spots I had to tease the stitch loose. If the thick part of the yarn gets frazzled like above, just wrap the loose bits gently around the yarn and continue crocheting. The stitches will secure the “fluff”.

Finished fabric and new button

The next 2 hours were a few fits and starts, but finally I had settled on a width that worked. Jane and I decided that we liked a more asymmetrical look to the cozy so we picked out a single button that could be a feature on the finished project.

Smidgen Cowl flat view

I’m really happy with how this cozy finally came out. It is a quick project to crochet up (when you aren’t designing it). For less than $20 and 2 hours of your time you can whip up one of these neck warmers for someone special on your gifting list. The yarn comes in a wide range of colors, so you are sure to find one that is perfect for your giftee.

The Smidgen left over

Since I only had a “smidgen” of yarn left after I had woven in the tails I named this design the “Smidgen Cozy”.  The pattern instructions follow, I hope you enjoy making this cozy.

Smidgen Cowl - M2H Designs

SMIDGEN COZY

Designed by Andee Graves

Skill Level: Easy

Finished Size: 21″ (52.5cm) long x 7″ (17.5cm) wide

Materials

Yarn: Berroco “Gusto” (45% Wool/45% Acrylic/10% Vicose; 70 yds) 1 skein in color #1935 Jasper

Crochet Hook: US N (10 mm) or size needed to obtain gauge.

Additional Materials:

Button ¾” diameter or size to fit thru ch-1 sp,

Yard of lighter weight smooth yarn to sew button on with,

Yarn needles (big one for weaving in ends, small one for sewing on button),

Stitch markers

Gauge: 4 stitches and 9 rows = 4″ (10 cm)

Pattern Notes

Because this is a thick-n-thin yarn it is a good idea to count your stitches each row to be sure you haven’t missed or added one.

Sample used up almost every smidgen of the ball of yarn, be sure to leave only 6” of tail at the beginning.

Row 1 is worked into the back bump (or bar) of the foundation chain to create a finished look to the starting edge.

Instructions

Row 1: Ch 17, sc in 2nd ch from hook, (ch 1, sk 1 ch, sc next ch) 7 times, sc last ch. [7 ch-1 sp, 9 sc]

Row 2: Ch 1, turn, sc first st, (ch 1, sk 1 st, sc next ch-1 sp) 7 times, sc last st.

Rows 3 – 37: Repeat Row 2. Place stitch marker at beginning of Row 37 leave in place until completed crocheting, marked side is decrease edge for next 9 rows.

Row 38: Ch 1, turn, sc first st, (ch 1, sk 1 st, sc next ch-1 sp) 7 times. [7 ch-1 sp, 8 sc]

Row 39: Ch 1, turn, sk first st, sc next ch-1 sp, (ch 1, sk next st, sc next ch-1 sp) 6 times, sc last st. [6 ch-1 sp, 8 sc]

Row 40: Ch 1, turn, sc first st, (ch 1, sk 1 st, sc next ch-1 sp) 6 times. [6 ch-1 sp, 7 sc]

Row 41: Ch 1, turn, sk first st, sc next ch-1 sp, (ch 1, sk next st, sc next ch-1 sp) 5 times, sc last st. [5 ch-1 sp, 7 sc]

Row 42: Ch 1, turn sc first st, (ch 1, sk 1 st, sc next ch-1 sp) 5 times. [5 ch-1 sp, 6 sc]

Row 43: Ch 1, turn, sk first st, sc next ch-1 sp, (ch 1, sk next st, sc next ch-1 sp) 4 times, sc last st. [4 ch-1 sp, 6 sc]

Row 44: Ch 1, turn sc first st, (ch 1, sk 1 st, sc next ch-1 sp) 4 times. [4 ch-1 sp, 5 sc]

Row 45: Ch 1, turn, sk first st, sc next ch-1 sp, (ch 1, sk next st, sc next ch-1 sp) 3 times, sc last st. [3 ch-1 sp, 5 sc]

Row 46: Ch 1, turn sc first st, (ch 1, sk 1 st, sc next ch-1 sp) 3 times. [3 ch-1 sp, 4 sc]

Finishing

Weave in tails securely. Use lighter weight yarn to sew button on Row 3 an inch in from the longest edge. Use a ch-1 sp on Row 43 or 42 as your button-hole.

Great Minds

Those of you that have been following my blog for a while have heard me mention my good friend and mentor, Karen Ratto Whooley. Karen was my official CGOA mentor when I signed up to be an Associate Professional member of CGOA. Even though I officially graduated to Professional status some time back, we are still good friends and remain in regular contact.

Karen and I

I got to see Karen again, albeit briefly at the Knit & Crochet Show in San Diego a couple of weeks ago. We even managed to get a photo of the 2 of us.  We chuckled afterward because we were each wearing the other’s “colors” in this photo. Karen in her hot pink blouse and me with a blue-green scarf.

Ebb & Flow Scarf worn Jabot style
Ebb & Flow Scarf / M2H Designs

That scarf was actually part of our hilarity. Not because of the color but because it is one of my designs from my summer collection: “Ebb & Flow Scarf”.

The week before I left for the show I got Karen’s newsletter in my email and it was about her design, “Undulating Shells Shawl”.  I just about choked because I had used the same stitch pattern for my scarf. A definite case of great minds having the same idea or in this case, very similar ideas.

One of the wonderful things about being a designer is seeing all the different ways my fellow designers and I can interpret stitch patterns to create wearable and decorative objects in crochet. I thought it would be fun for you, my readers to get a glimpse into some of those differences.

Ebb & Flow Scarf / M2H Designs

I created this scarf from some lovely fingering weight yarn hand-dyed by the talented Riin of “Happy Fuzzy Yarns” (don’t you love the name). This is blend of merino and tencel making for super soft fabric with a gorgeous drape.

I created my scarf by working off a center foundation, with half the scarf growing from the “top” of the foundation coming to an end that is an exaggeration of the shell pattern in the length of the scarf. The second side of the scarf is a repeat of the first side worked off the “bottom” of the center foundation. The side edging is worked with each row of shells creating a simple scalloped appearance along the long sides of the scarf.

Undulating Shells Shawl / KRW Knitwear Studio

I took a closer look at Karen’s shawl on Ravelry. I determined that though the body of the fabric was made with the same stitch pattern, we had both taken very different approaches to how we designed our projects.

KRWs ending edging of shawlKaren’s shawl is worked in laceweight bamboo yarn off a foundation in one direction, ending with a row of stitches that match the foundation row then a lovely stacked shell ending edge. That same edging is also worked off the base of the foundation row. Her side edging is the simple line of the undulating shells.Back of KRWs Shawl


You can purchase both of these patterns on Ravelry:

Undulating Shells Shawl / KRW Knitwear Studio  $7.50

Ebb & Flow Scarf / M2H Designs   $4.99


I Love Paris


Tour de Effiel

Paris, France is one of my favorite cities. I dreamt of visiting it for many years before I finally got to see it for real. When I went there for the very first time it was April.

Garden in Paris

The gardens were just beginning to show color, but the weather was occasionally rainy and gray. The colors of the gardens would be muted by the subdued light yet it was magical and wonderful for me.

Place de Concorde

It’s been years since I last visited, that is a very young me at the fountain in the Place de Concorde. This scarf design was inspired by the gardens of Paris and reminds of my happy visit there.

Paris Garden Scarf2 - M2H Designs

Paris Garden Scarf.  My sample is worked using one ball of Classic Elite’s lovely Alpaca Sox. This is a 60% Alpaca/20% Wool/ 20% Nylon yarn that works up as a light fingering weight. The Nylon will help this scarf hold up to a lot of wear. I designed this to be crocheted with a larger than usual hook size to show off the soft halo of the yarn.

Paris Garden Scarf3 - M2H Designs

This pattern is available in my Ravelry Shop for $3.99. Click here to buy it now.

Paris Garden Scarf - M2H Designs

My original proto-type was made working with 2 strands of yarn at the same time. I used 1 ball of Classic Elite’s Silky Alpaca Lace (70% Alpaca/30% Silk) and 2 balls of Pirouette (67% Mohair/25% Bamboo/8% Nylon). Unfortunately the Pirouette yarn was discontinued. But I’m still very happy to wear my original scarf.

This is a great take-along project for more experienced crocheters, the stitches aren’t complicated, but they are interesting enough to keep you entertained.  I found the second scarf took me only about 8 hours to work up.

If you are looking for a lovely lacy and warm scarf for a gift this one would be a good match. All 5 of my patterns released the past month were designed with gift-giving in mind. This is a great time of year to get started on those holiday gifts.