Hello my friends, I have another fun afghan square for you. I have been traveling and having all sorts of adventures with my family this summer. Early in June I went to Ireland with the Craft Tours trip hosted by Tamara Kelly of Moogly Blog. Appropriately this square pattern is Block #18 for the Moogly 2023 Afghan CAL and was inspired by the beautiful gardens we saw on the Ireland trip. You can find out more about the Moogly 2023 Afghan CAL and how Tamara adapted her colors for my design here.

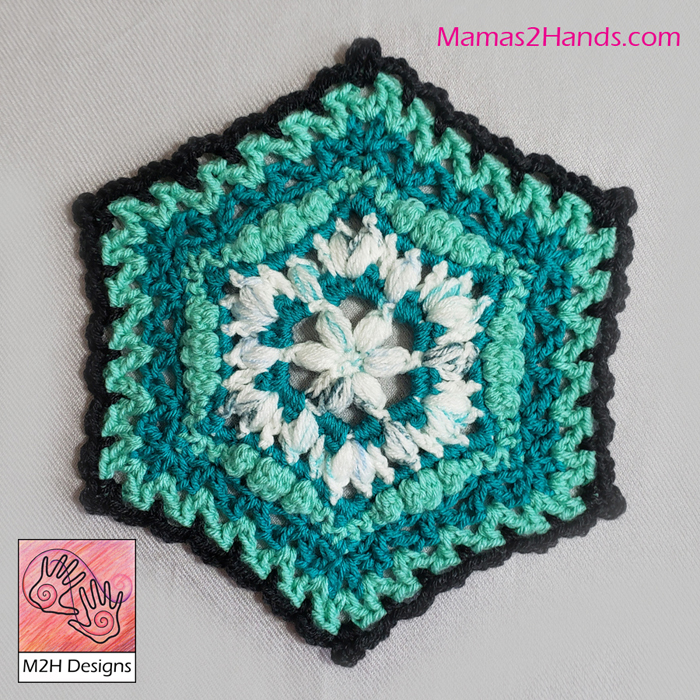
Clematis Garden Afghan Square
Designed by Andee Graves
Skill level: Intermediate
Finished Size: 12” square
Materials:
Yarn
Worsted wt (Sample uses Red Heart “With Love” 100% Acrylic (7 oz/198 g, 370 yd/338 m)
Color A: Daffodil (sample used approximately 2 yards/ 1.1 gram) Rnds 1-2
Color B: Oxford (sample used approximately 70 yards/ 37.6 grams) Rnds 3-4: 3.8 g, Rnds 9-13: 33.5 g
Color C: Lilac (sample used approximately 6.5 yards/ 3.5 grams) Rnd 5
Color D: Jade (sample used approximately 22.5 yards/ 12.1 grams) Rnds 6-8
Hook J / 6mm
Notions Yarn/tapestry needle, Stitch markers
Gauge First 4 rounds of pattern = 4” across square

Special Stitches and Abbreviations:
Place stitch marker (PM)
Standing Double Crochet (Standing dc): Make slip knot and place loop snugly on shaft of hook, yo and insert hook into indicated place, yo, pull up a loop, (yo, pull through 2 loops on hook) twice.
4 dc Shell Stitch (Shl): (2 dc, ch 1, 2 dc) in indicated place.
Single crochet spike stitch (scSpike): Insert hook in indicated place, YO, pull up a loop back to original round/row, 2 loops on hook, YO, pull thru both loops on hook to complete single crochet.
Extended Double Crochet stitch (ExtDC): YO, insert hook in indicated place, YO, pull up a loop, YO, pull through 1 loop on hook, (YO, pull through 2 loops on hook) 2 times.
V-stitch (V-st): (Dc, ch 1, dc) in indicated place.
Granny Shell Stitch (GrShl): 3 dc in indicated place.
3 dc Cluster Stitch (CL): (YO, insert hook in indicated place, YO, pull up a loop, YO, pull thru 2 loops) 3 times, YO pull through remaining 4 loops on hook.
Pattern Notes:
Square is worked center out. Attach yarn using a slip stitch unless otherwise stated. Keep tails to wrong side of fabric and weave in as work progresses. Ch 3 at beginning of rounds counts as a double crochet stitch unless otherwise stated. Be sure to pay close attention if a round is Right Side (RS) or Wrong Side (WS).
Instructions
Rnd 1 (WS): With Color A begin with adjustable slip knot, ch 2, (sc, ch 2) 4 times in second ch from hook, sl st to first sc, gently tighten center of square, PM in ch-2 sps to mark corners. (4 sc, 4 ch- 2 spcs)
Rnd 2 (WS): Ch 1, sc in same st as join, [*(sc, ch 2, sc) in next marked ch-2 sp, move up st marker to ch-2 sp just made*, sc in next st] 3 times, Repeat from * to * once, sl st to first sc.
Fasten off Color A. (12 sc, 4 ch- 2 spcs)

Rnd 3 (RS): With back side of Rnd 2 facing attach Color B with standing dc in middle sc of any side, dc in same st as join, [*sk next st, (dc, ch 2, dc) in next marked ch-2 sp, move st marker up to ch-2 sp just made, sk next st,* Shl in next st]3 times, repeat from * to * once, 2 dc in same st as join, ch 1, sl st to first dc of Rnd {completes first Shl of Rnd}. (4 Shl, 4 ch- 2 spcs)

Rnd 4 (RS): Ch 3, dc in same ch-sp as join, [ch 1, sk next 3 sts, Shl in next ch-sp] 7 times, move st markers up to ch-1 sp of Shls worked in marked ch-2 sps, ch 1, sk next 3 sts, 2 dc in same ch-sp as join, ch 1, sl st to 3rd ch of beginning ch-3 {completes first Shl of Rnd}.
Fasten off Color B. (8 Shls, 8 ch-1 sp)
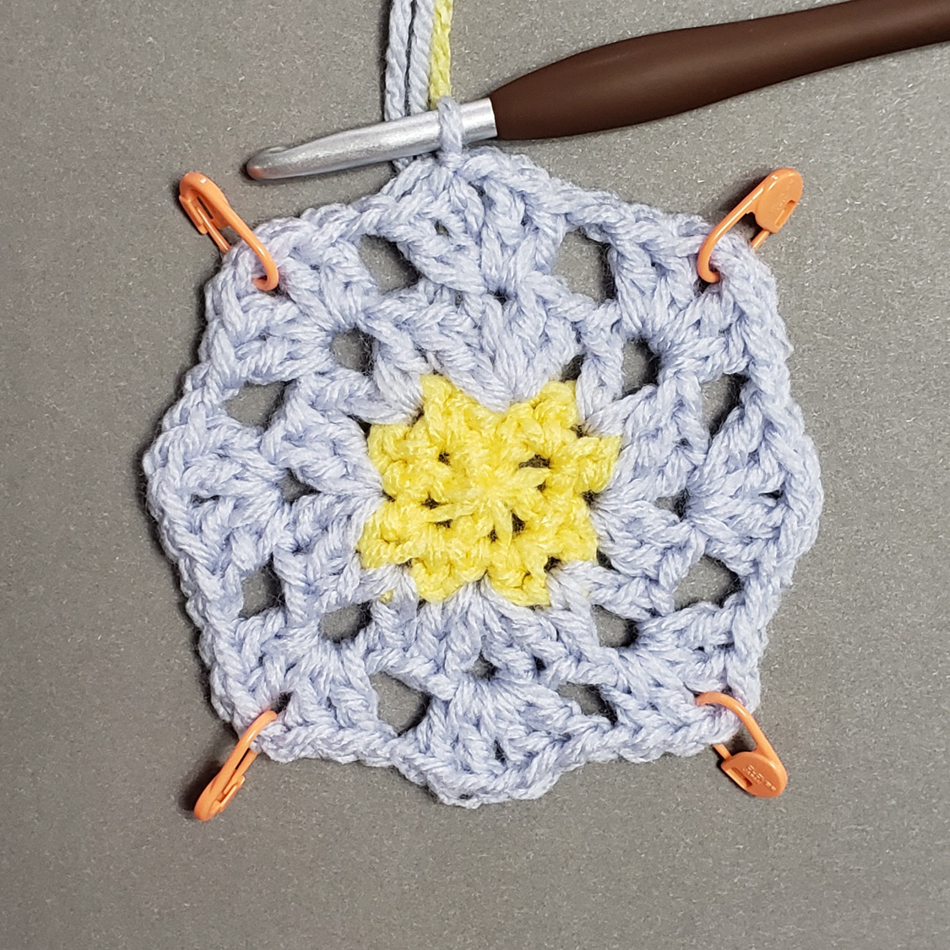
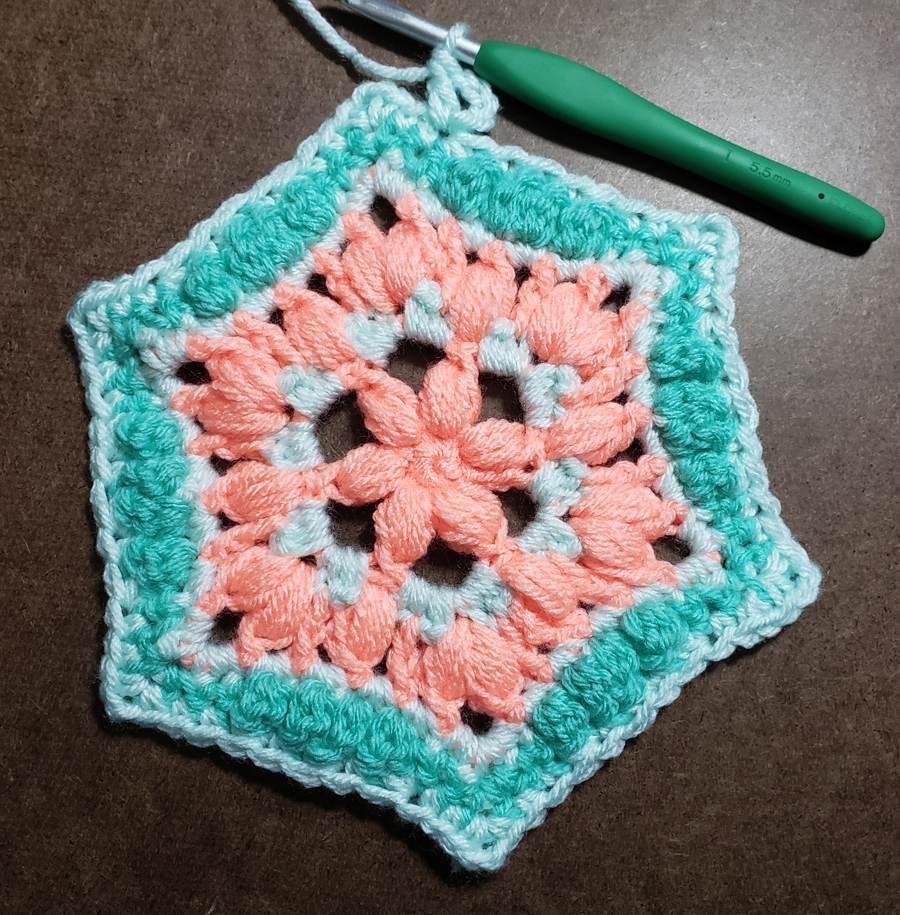
Rnd 5 (RS): With front side of Rnd 4 facing, attach Color C in ch-1 sp of side Shl with standing dc, dc in same ch-sp as join, [*ch 2, sk 2 sts, scSpike in corresponding sp between Shl and corner dc of Rnd 3, ch 2, sk 2 sts, Shl in marked ch-1 sp of next Shl, move st marker up to ch-1 sp of Shl just made, ch 2, sk 2 sts, scSpike in next corresponding sp between corner dc and next Shl of Rnd 3, ch 2, sk 2 sts,* Shl in ch-1 sp of next Shl] 3 times, Rep from * to * once, 2 dc in same ch-sp as join, ch 1, sl st to 3rd ch of beginning ch-3, {completes first Shl of Rnd}.
Fasten off Color C. (8 Shls, 16 ch-2 sps, 8 scSpike)

Rnd 6 (RS) Squaring up: With front side of Rnd 5 facing, attach Color D to ch-1 sp of side Shl, ch 1, sc in same sp as join, [*ch 1, sk 2 sts and ch-sp, (2 Tr, ExtDC) in next st, ch 2, sk ch-sp and 2 sts, (2 dc, ch 2, 2 dc) in marked ch-1 sp, move st marker up to ch-2 sp just made, ch 2, sk 2 sts and ch-sp, (2 Tr, ExtDC) in next st, ch 1, sk ch-sp and 2 sts,* sc in ch-1 sp of next Shl] 3 times, Repeat from * to * once, sl st to first sc of Rnd.
(4 sc, 8 ch-1 sp, 16 Tr, 8 ExtDC, 12 ch-2 sp, 16 dc {17 sts each side between corner ch-2 sps})

Rnd 7 (WS): Ch 1, turn, sc in first ch-1 sp, [*sc in each of next 3 sts, 2 sc in next ch-2 sp, sc in each of next 2 sts, (sc, ch 2, sc) in marked ch-2 sp, move st marker up to ch-2 space just made, sc in each of next 2 sts, 2 sc in next ch-2 sp, sc in each of next 3 sts, sc in next ch-1 sp, sc in next st,* sc in next ch-1 sp] 3 times, Repeat from * to * once, sl st to first sc of Rnd.
(76 sc, 4 ch-2 sp {19 sc each side between corner ch-2 sps})
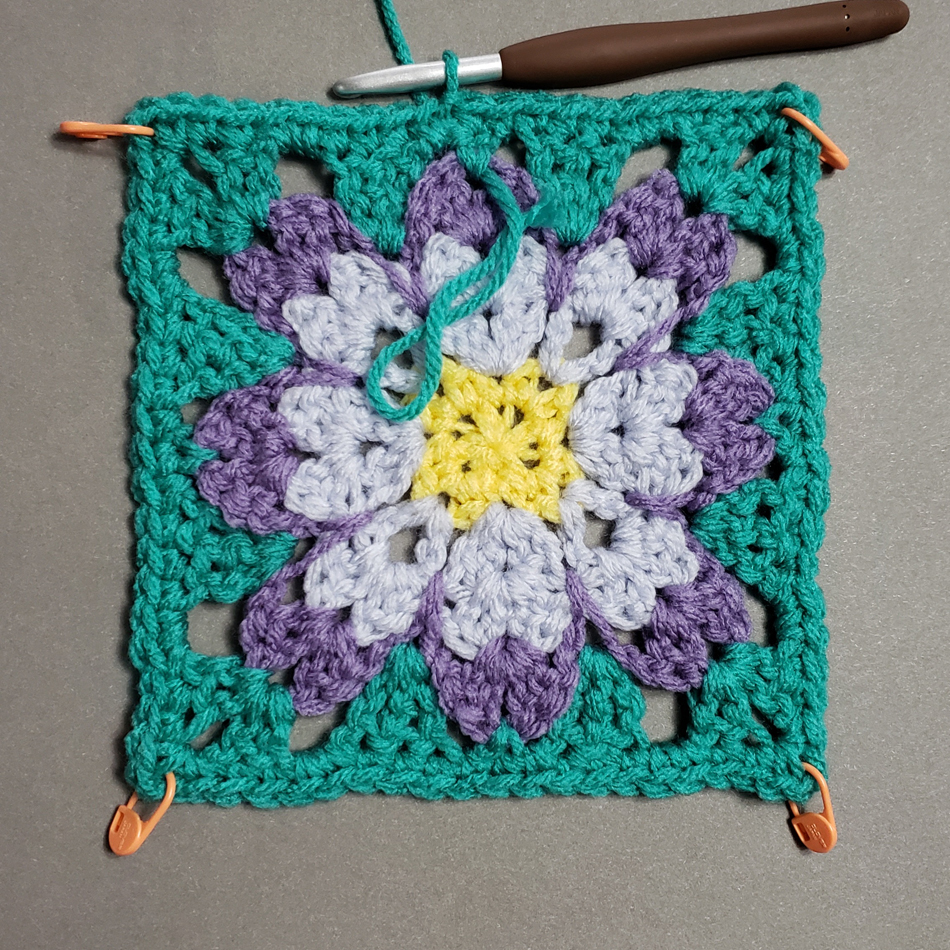

Rnd 8 (RS) V-sts: Ch 4, turn, dc in next st {counts as first V-st of Rnd}, (sk 2 sts, V-st in next st) 3 times, [*(dc, ch-2, dc) in marked ch-sp, move st marker up to ch-2 sp just made, V-st in next st,* (sk 2 sts, V-st in next st) 6 times] 3 times, Repeat from * to * once, (sk 2 sts, V-st in next st) 2 times, sk 2 sts, sl st to 3rd ch of beginning ch 4 to join.
Fasten off Color D. (28 V-sts, 8 dc, 4 ch-2 sp)

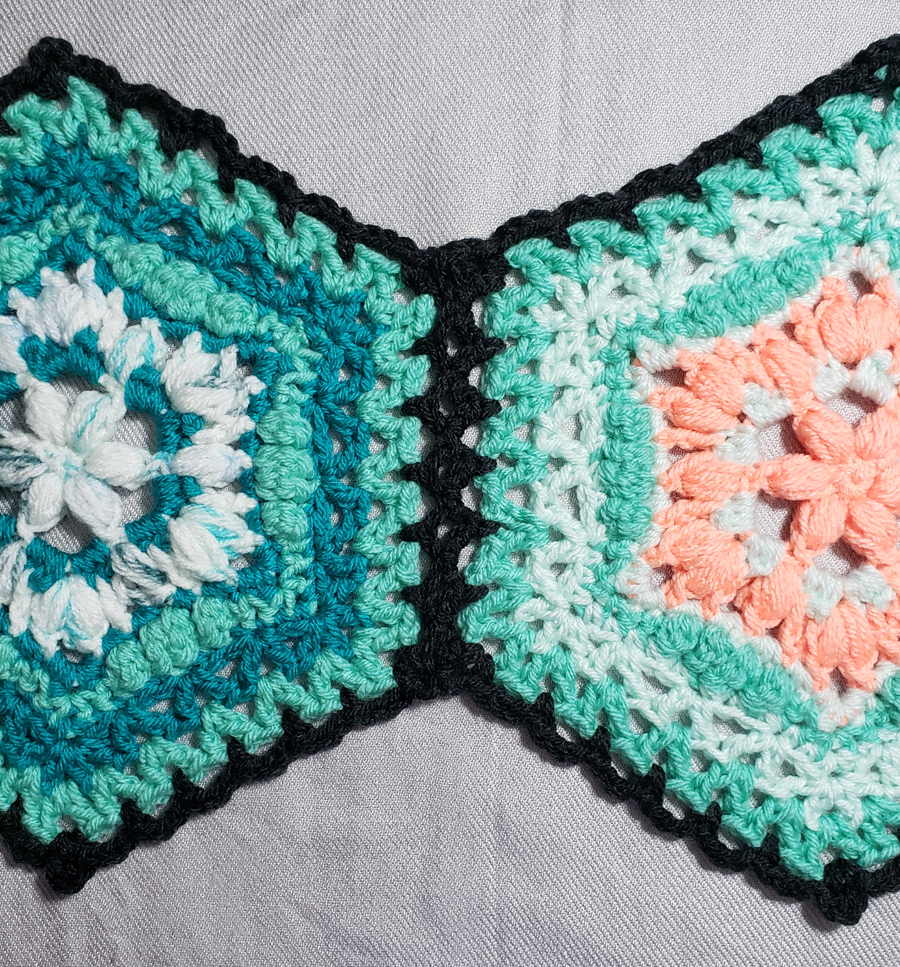
Rnd 9 (RS) Granny Shls: With front side of Rnd 8 facing, attach Color B with standing dc in ch-1 sp of any V-st along a side, 2 dc in same ch-sp as join {counts as first GrShl}, *sk 2 sts, GrShl in ch-1 sp of next V-st,* Repeat from * to * until reach marked ch-2 sp, sk 2 sts, (2 dc, ch 2, 2 dc) in marked ch-2 sp, move st marker up to ch-2 sp just made] 4 times, Repeat from * to * until reach end of Rnd, sl st to first dc of first GrShl to join.
(28 GrnShl, 16 dc, 4 ch-2 sp {25 sts each side between corner ch-2 sps})

Rnd 10 (WS) Bobbles: Ch 1, turn, sc in next st, (CL in next st, sc in each of next 2 sts) 4 times, CL in next st, [*(sc, ch 2, sc) in marked ch-2 sp, move st marker up to ch-2 sp just made, CL in next st,* (sc in each of next 2 sts, CL in next st) 8 times] 3 times, Repeat from * to * once, (sc in each of next 2 sts, CL in next st) 3 times, sc in next st, sl st to first sc of Rnd.
(36 CL, 72 sc, 4 ch-2 sp {27 sts each side between ch-2 sp corners})


Rnd 11 (RS): Turn, sc, ch 2 {counts as first dc}, [dc in each st until reach marked ch-2 sp, (2 dc, ch 2, 2 dc) in marked ch-2 sp, move st marker up to ch-2 sp just made] 4 times, dc in each st until reach beginning of Rnd, sl st to join to 2nd ch of first ch-2.
(124 dc, 4 ch-2 sp {31 dc each side between ch-2 sp corners})

Rnd 12 (WS): Repeat Rnd 11. (140 dc, 4 ch-2 sp {35 dc each side between ch-2 sp corners})

Rnd 13 (RS): Ch 1, turn, [sc in each st until reach marked ch-2 sp, (sc, ch 2, sc) in marked ch-2 sp, move stitch marker up to ch-2 sp just made] 4 times, sc in each st until reach beginning of Rnd, sl st to first sc to join.
Fasten off Color B. (148 sc, 4 ch-2 sp {37 sc each side between ch-2 sp corners})

Finishing Weave in tails. Gently block.
If you would like an Ad-Free PDF version of this pattern that includes stitch charts you can purchase it in my Ravelry Shop here.