I’ve made some progress on the page I was coloring in Franklin’s “I Dream of Yarn” book. For those of you that have asked, you can purchase this wonderful coloring book online or in some brick-n-mortar stores. When I Googled: “Franklin Habit, I Dream of Yarn” I found it available thru Target, Barnes and Noble, Amazon and Knitpicks. You also might want to check your local yarn shop to see if they are carrying it.
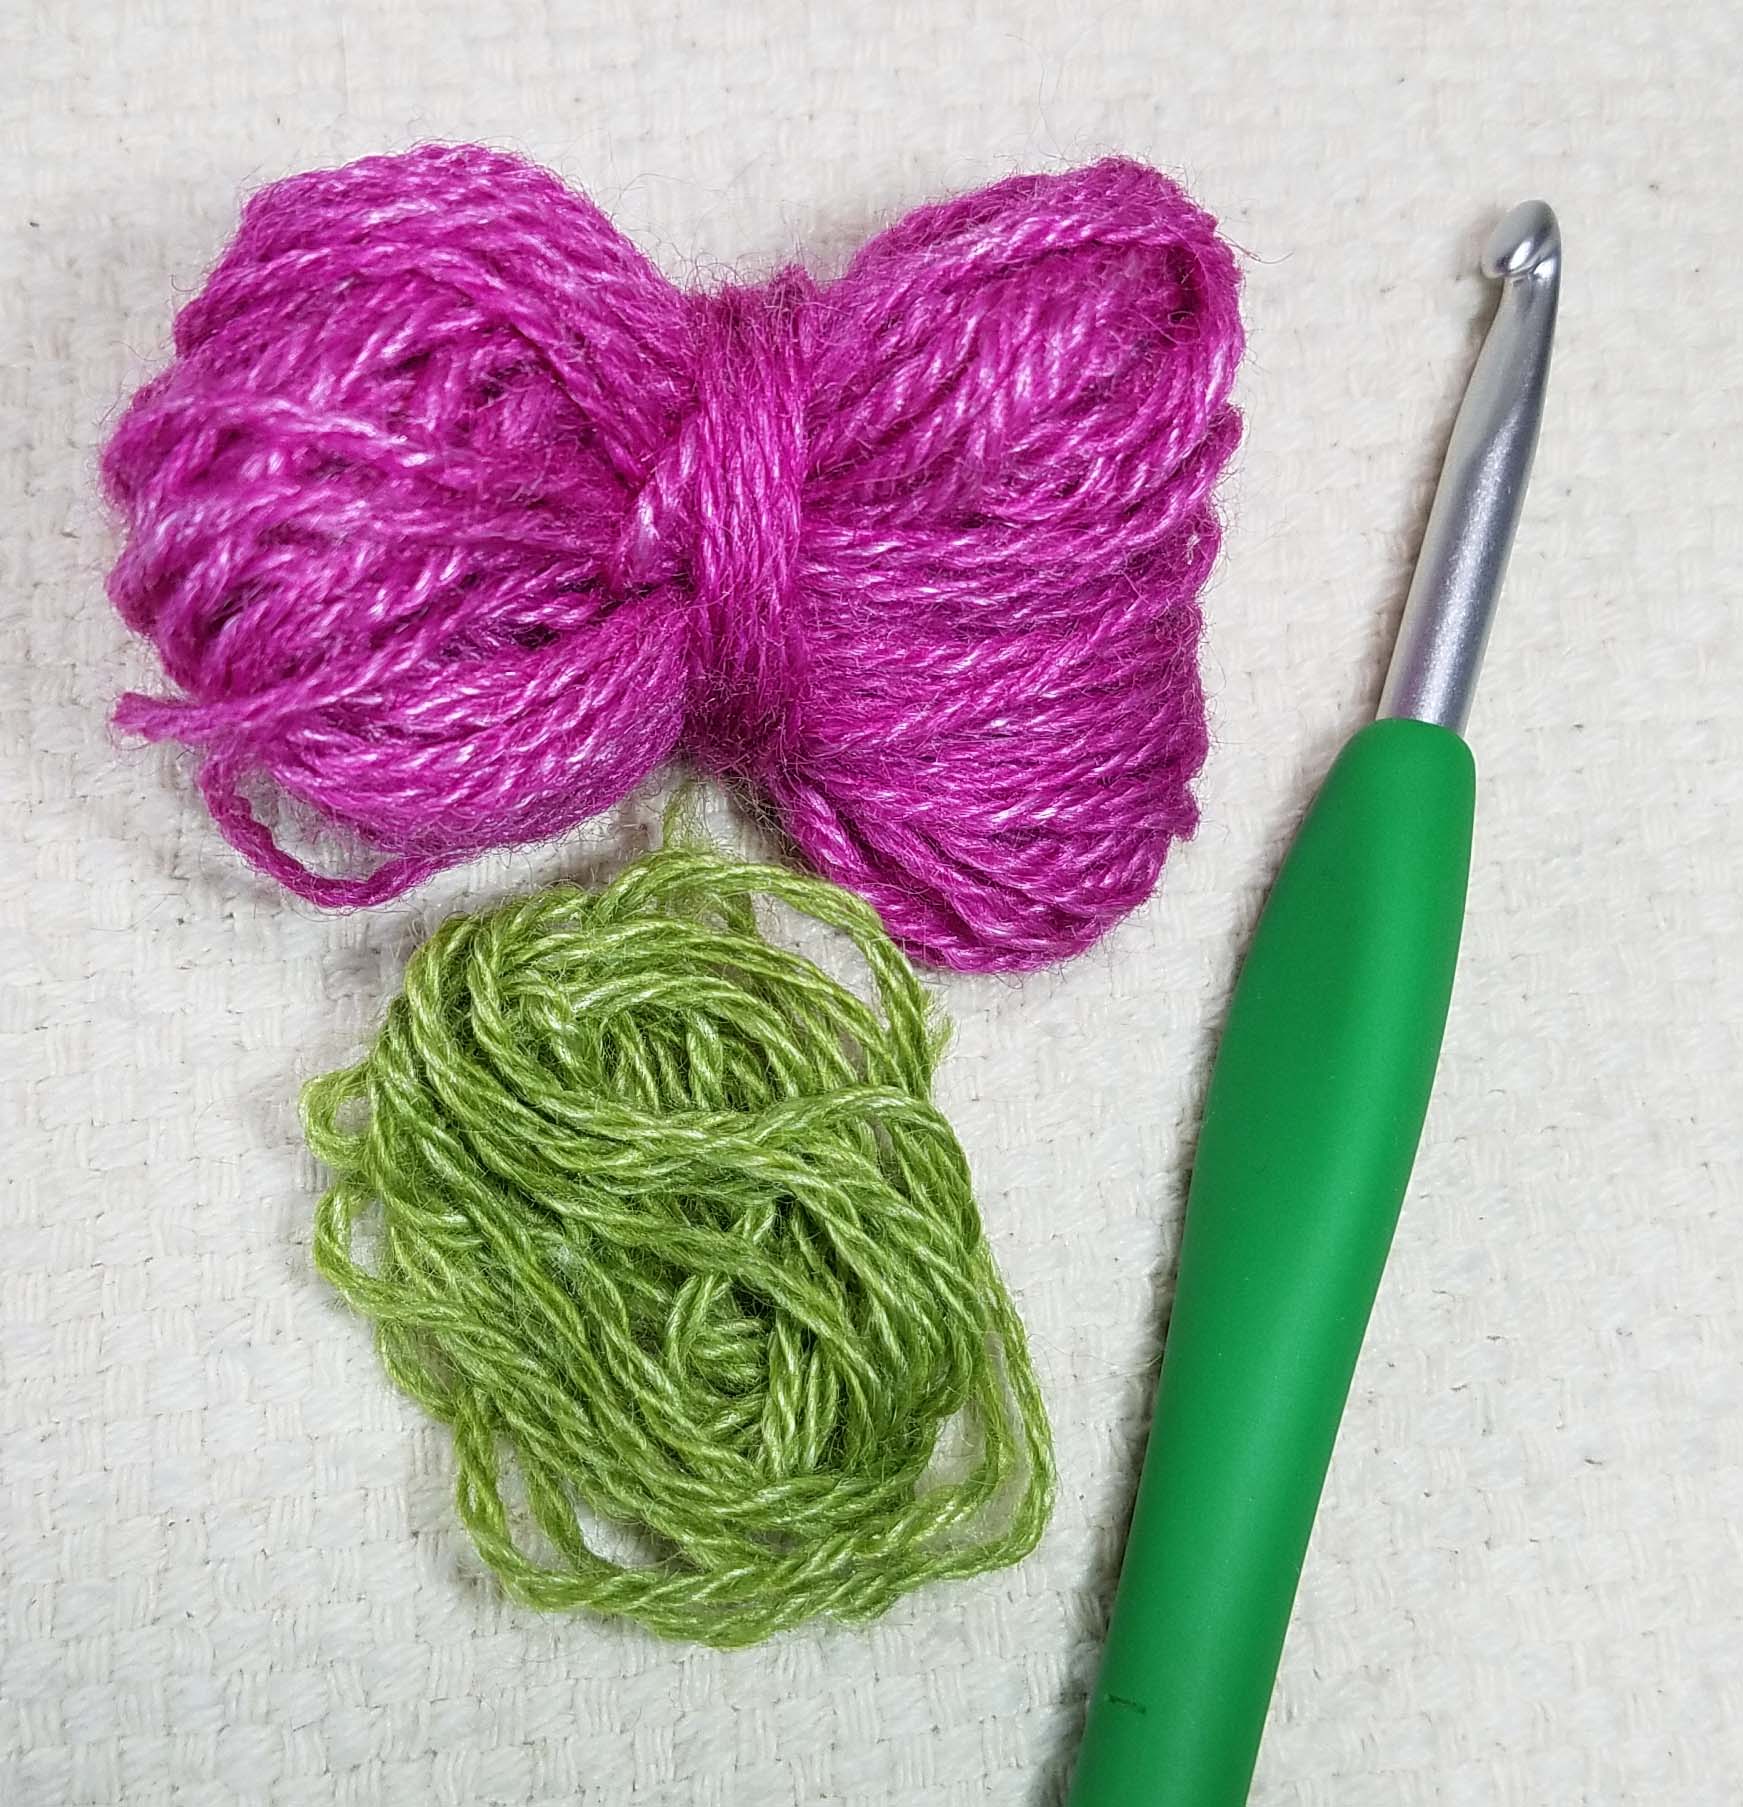
I’ve also been doing a little coloring with yarn this week. I’ve been playing with some Free Form crochet. Some of these are going to a new home with a yarnie friend, once I figure out which ones make the cut. The others will become a pillow for my big comfy papasen chair in my design office. A few of you may recognize the yarn from my post about picking colors for Free Form.
Tomorrow I’ll show you what I do about the mess of tails that is part of the Free Form creative process.
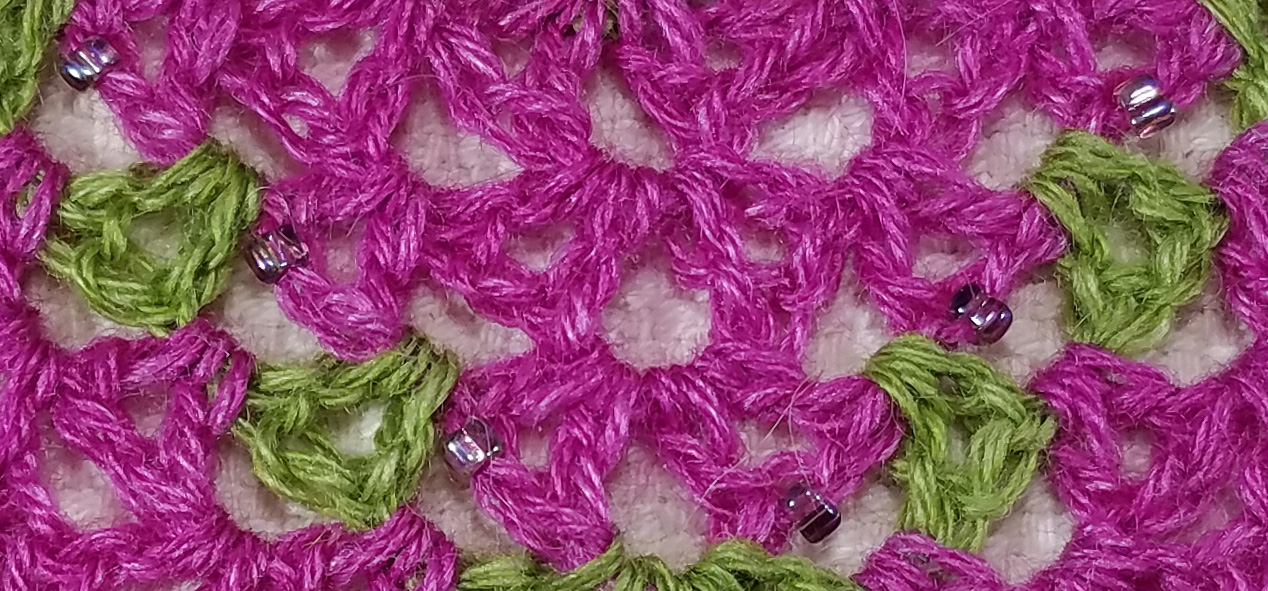
I love adding beads to my crochet projects, both large and small. They add wonderful sparkle and give the fabric a lovely fluid drape.
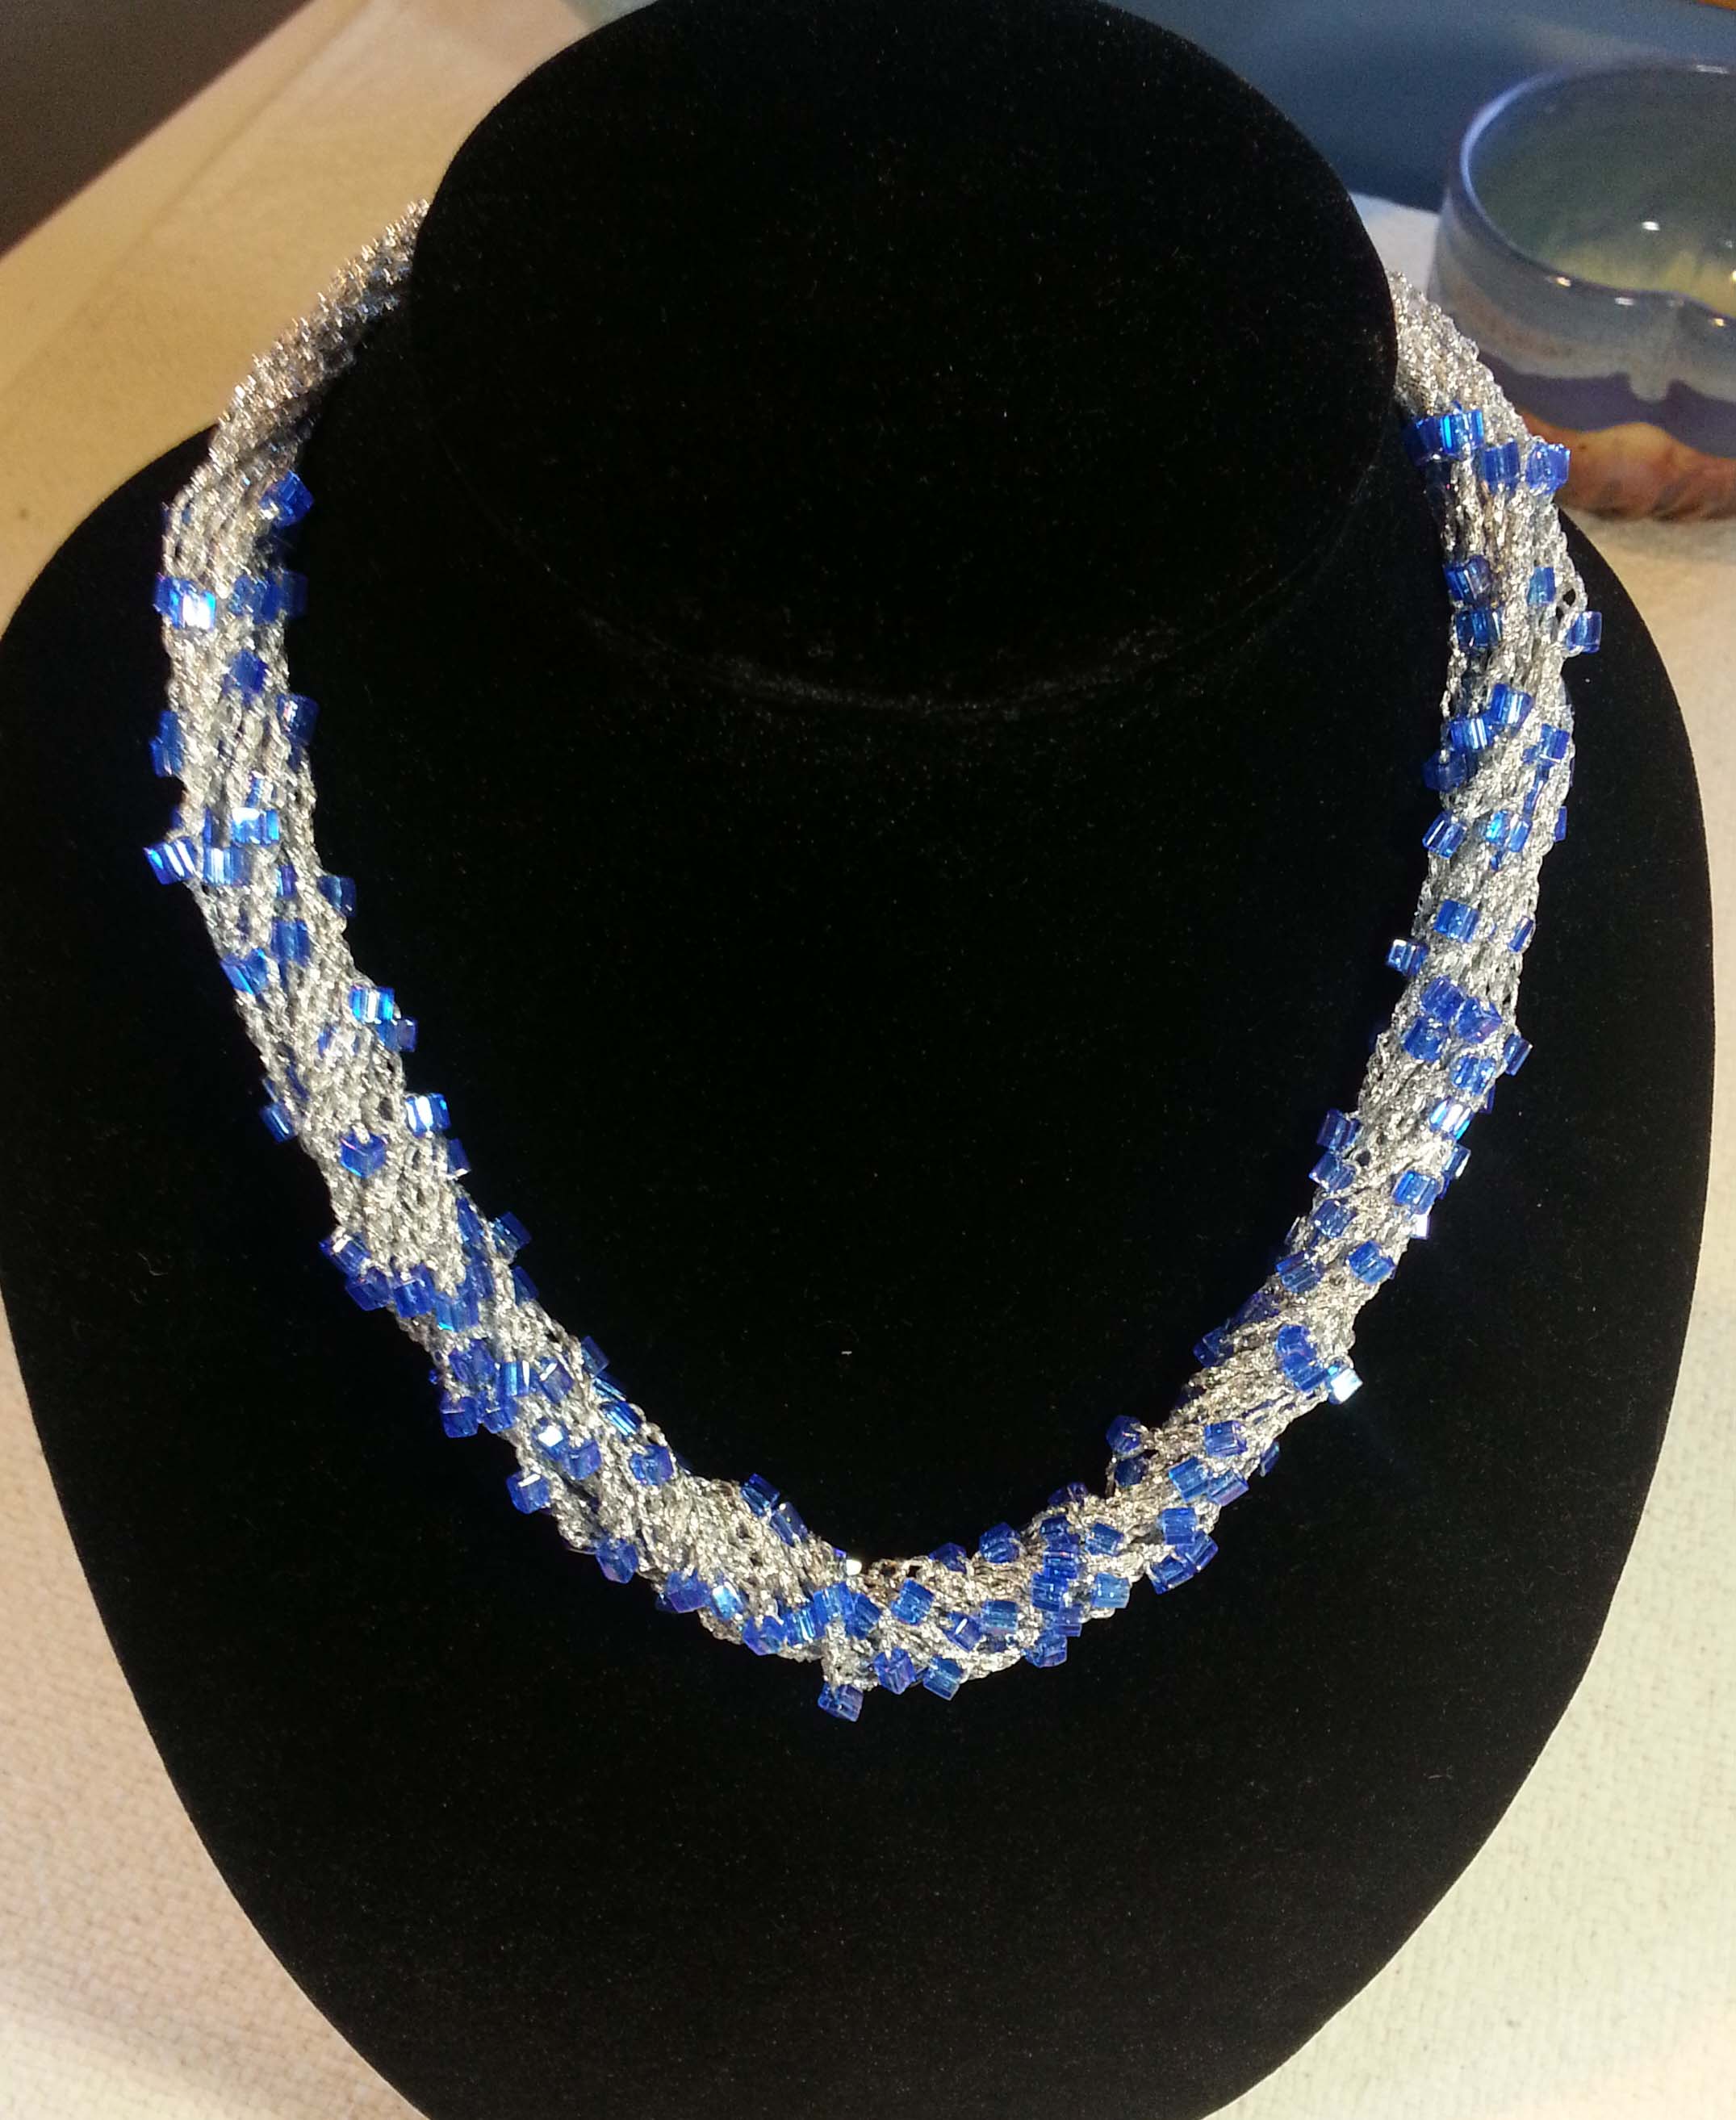
Sophisticated Simplicity Necklace
Here on the blog, I’ve shown you beads strung on your yarn (or thread) then crocheted;
I’ve shown you beads “hoisted on” to embellish the edging of an earring, headband or shawl;
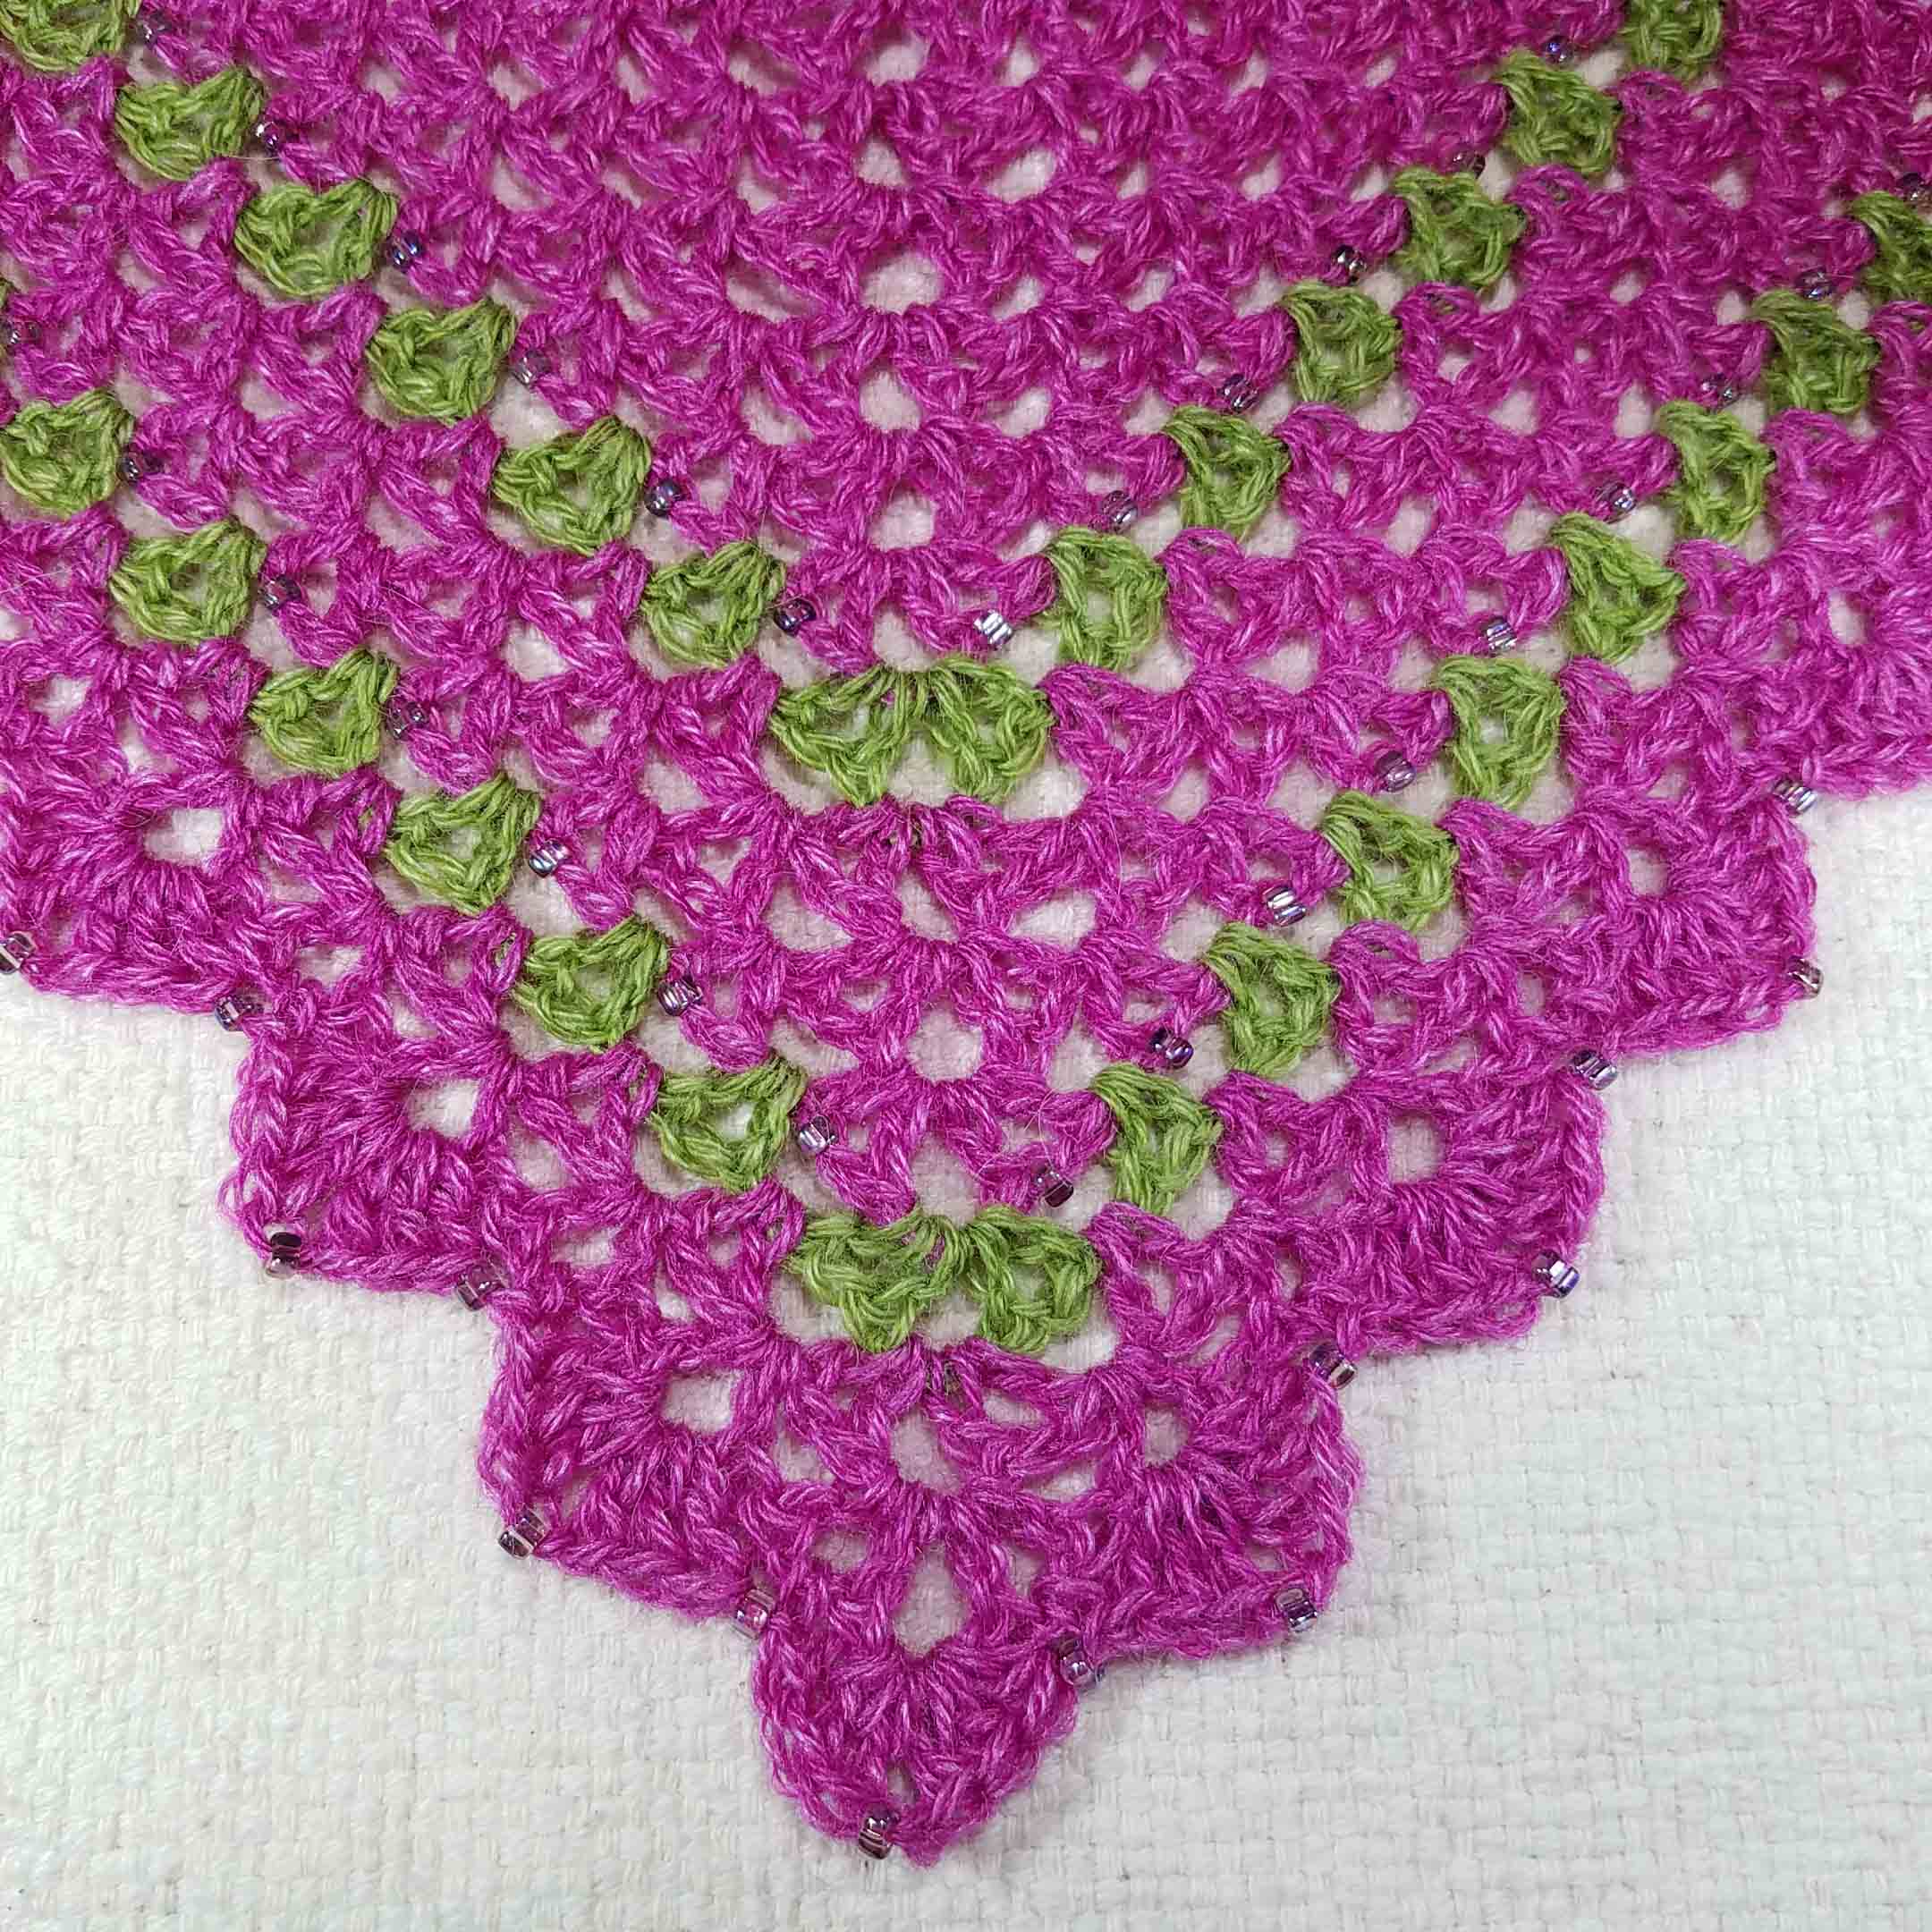
Springtime Cowl – Small PWT Shawl
Most recently I have shown you beads “hoisted on” within the fabric of a shawl, as well as on the edging.
When deciding on bead placement into the body of your fabric, think about where your next row (or round) of stitches will connect with the beaded row. You don’t want the bead to be covered or obscured by another stitch.
You also want to consider if the bead will be visible from both sides of the fabric. I like to place my beads in the fabric so they are framed in an opening in the stitch pattern. This helps make them show up no matter which side of the fabric is worn as the “right-side”.
In my latest project, the little PWT Shawl that I’m calling Springtime Cowl, I made sure that all my beads were on an even number row. Crochet stitches bias slightly, this isn’t as noticeable when working in rows, but it makes a difference in how the bead sits on the top of the stitches. By adding my beads to the even numbered rows I was specifying those as the “right” side of my fabric.
You can add beads to any crochet project, it’s up to you to decide which will be the “right” side of your project for showing off your beading. If you are adding beads to a pattern that didn’t include them, you will want to be sure that the beads are added to rows that correspond with the “right” side of the fabric as written in the pattern.
I hope this inspires you to try adding beads to some of your crochet projects. If you need help with the “hoist-on” method of adding beads hop on over to my blog post: “Making a Pendant” for a photo tutorial on using the “hoist-on” method.
Today was a very busy day. Sadly there was not much crochet in it. There was yarn, the sorting of and moving of, but no yarn with hook action. Sometimes in the life of a crochet designer and busy mom, the background grunt-work has to take over a day. Even if that day is during National Crochet Month.
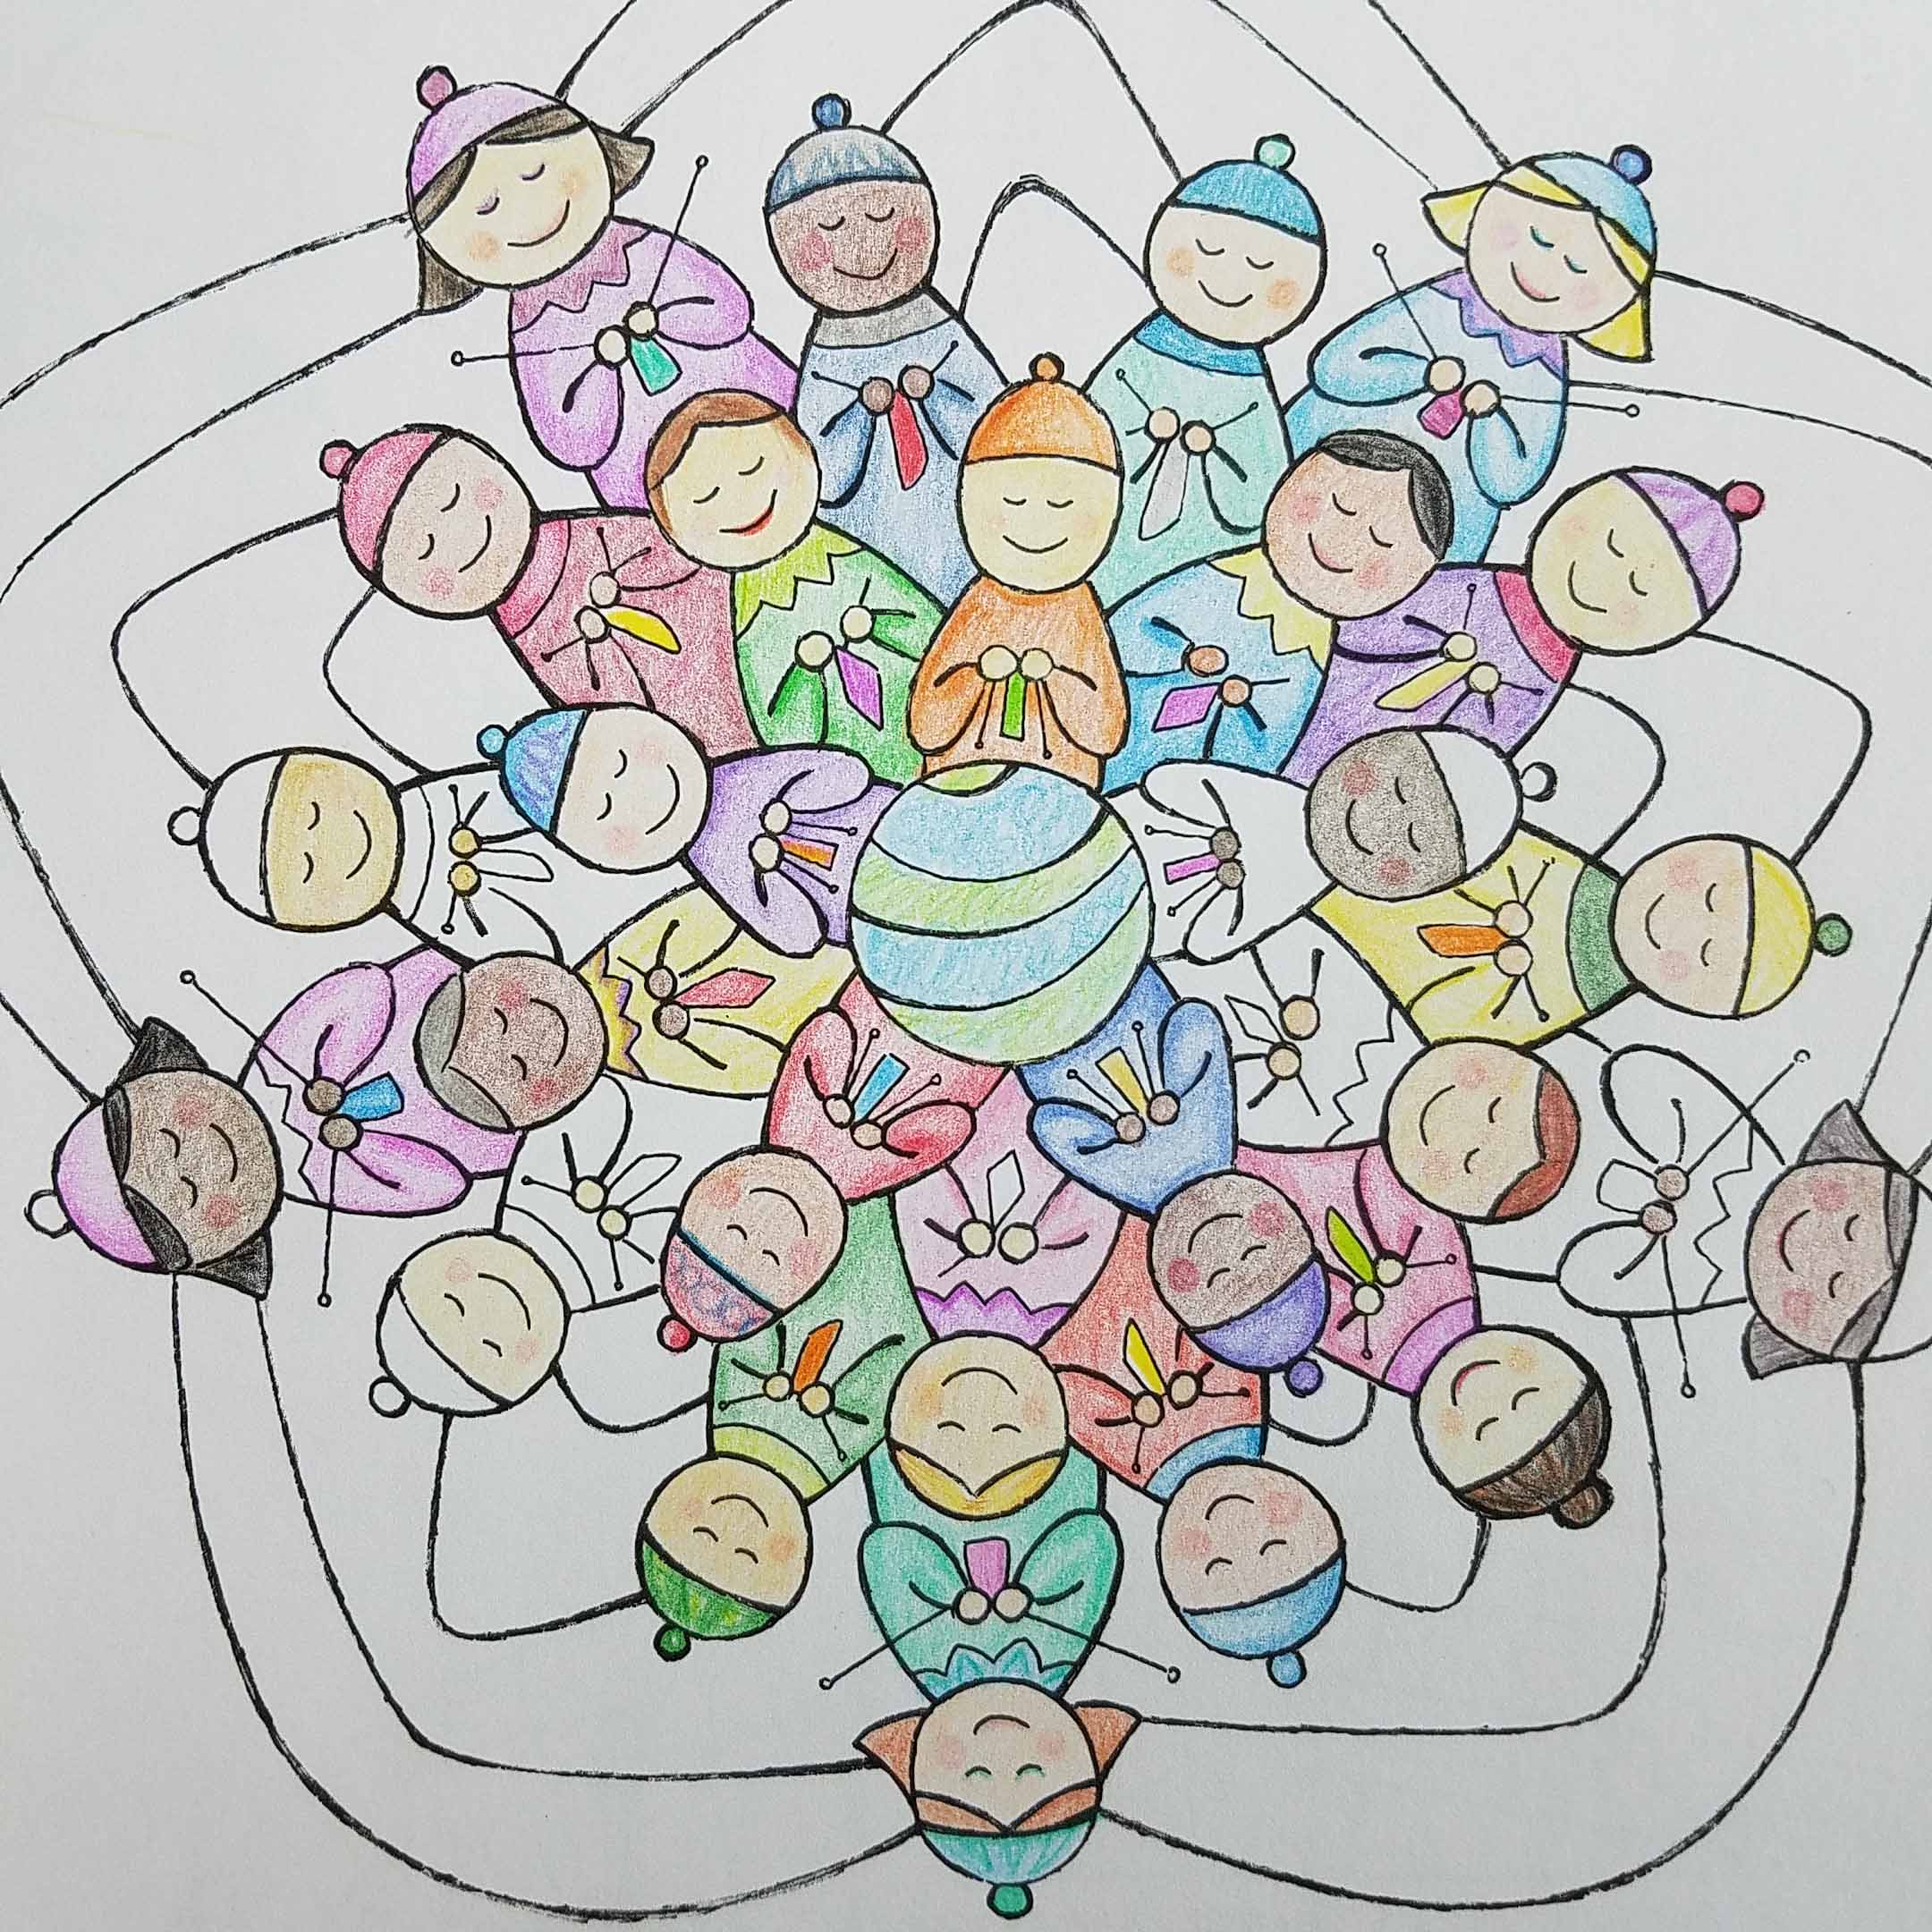
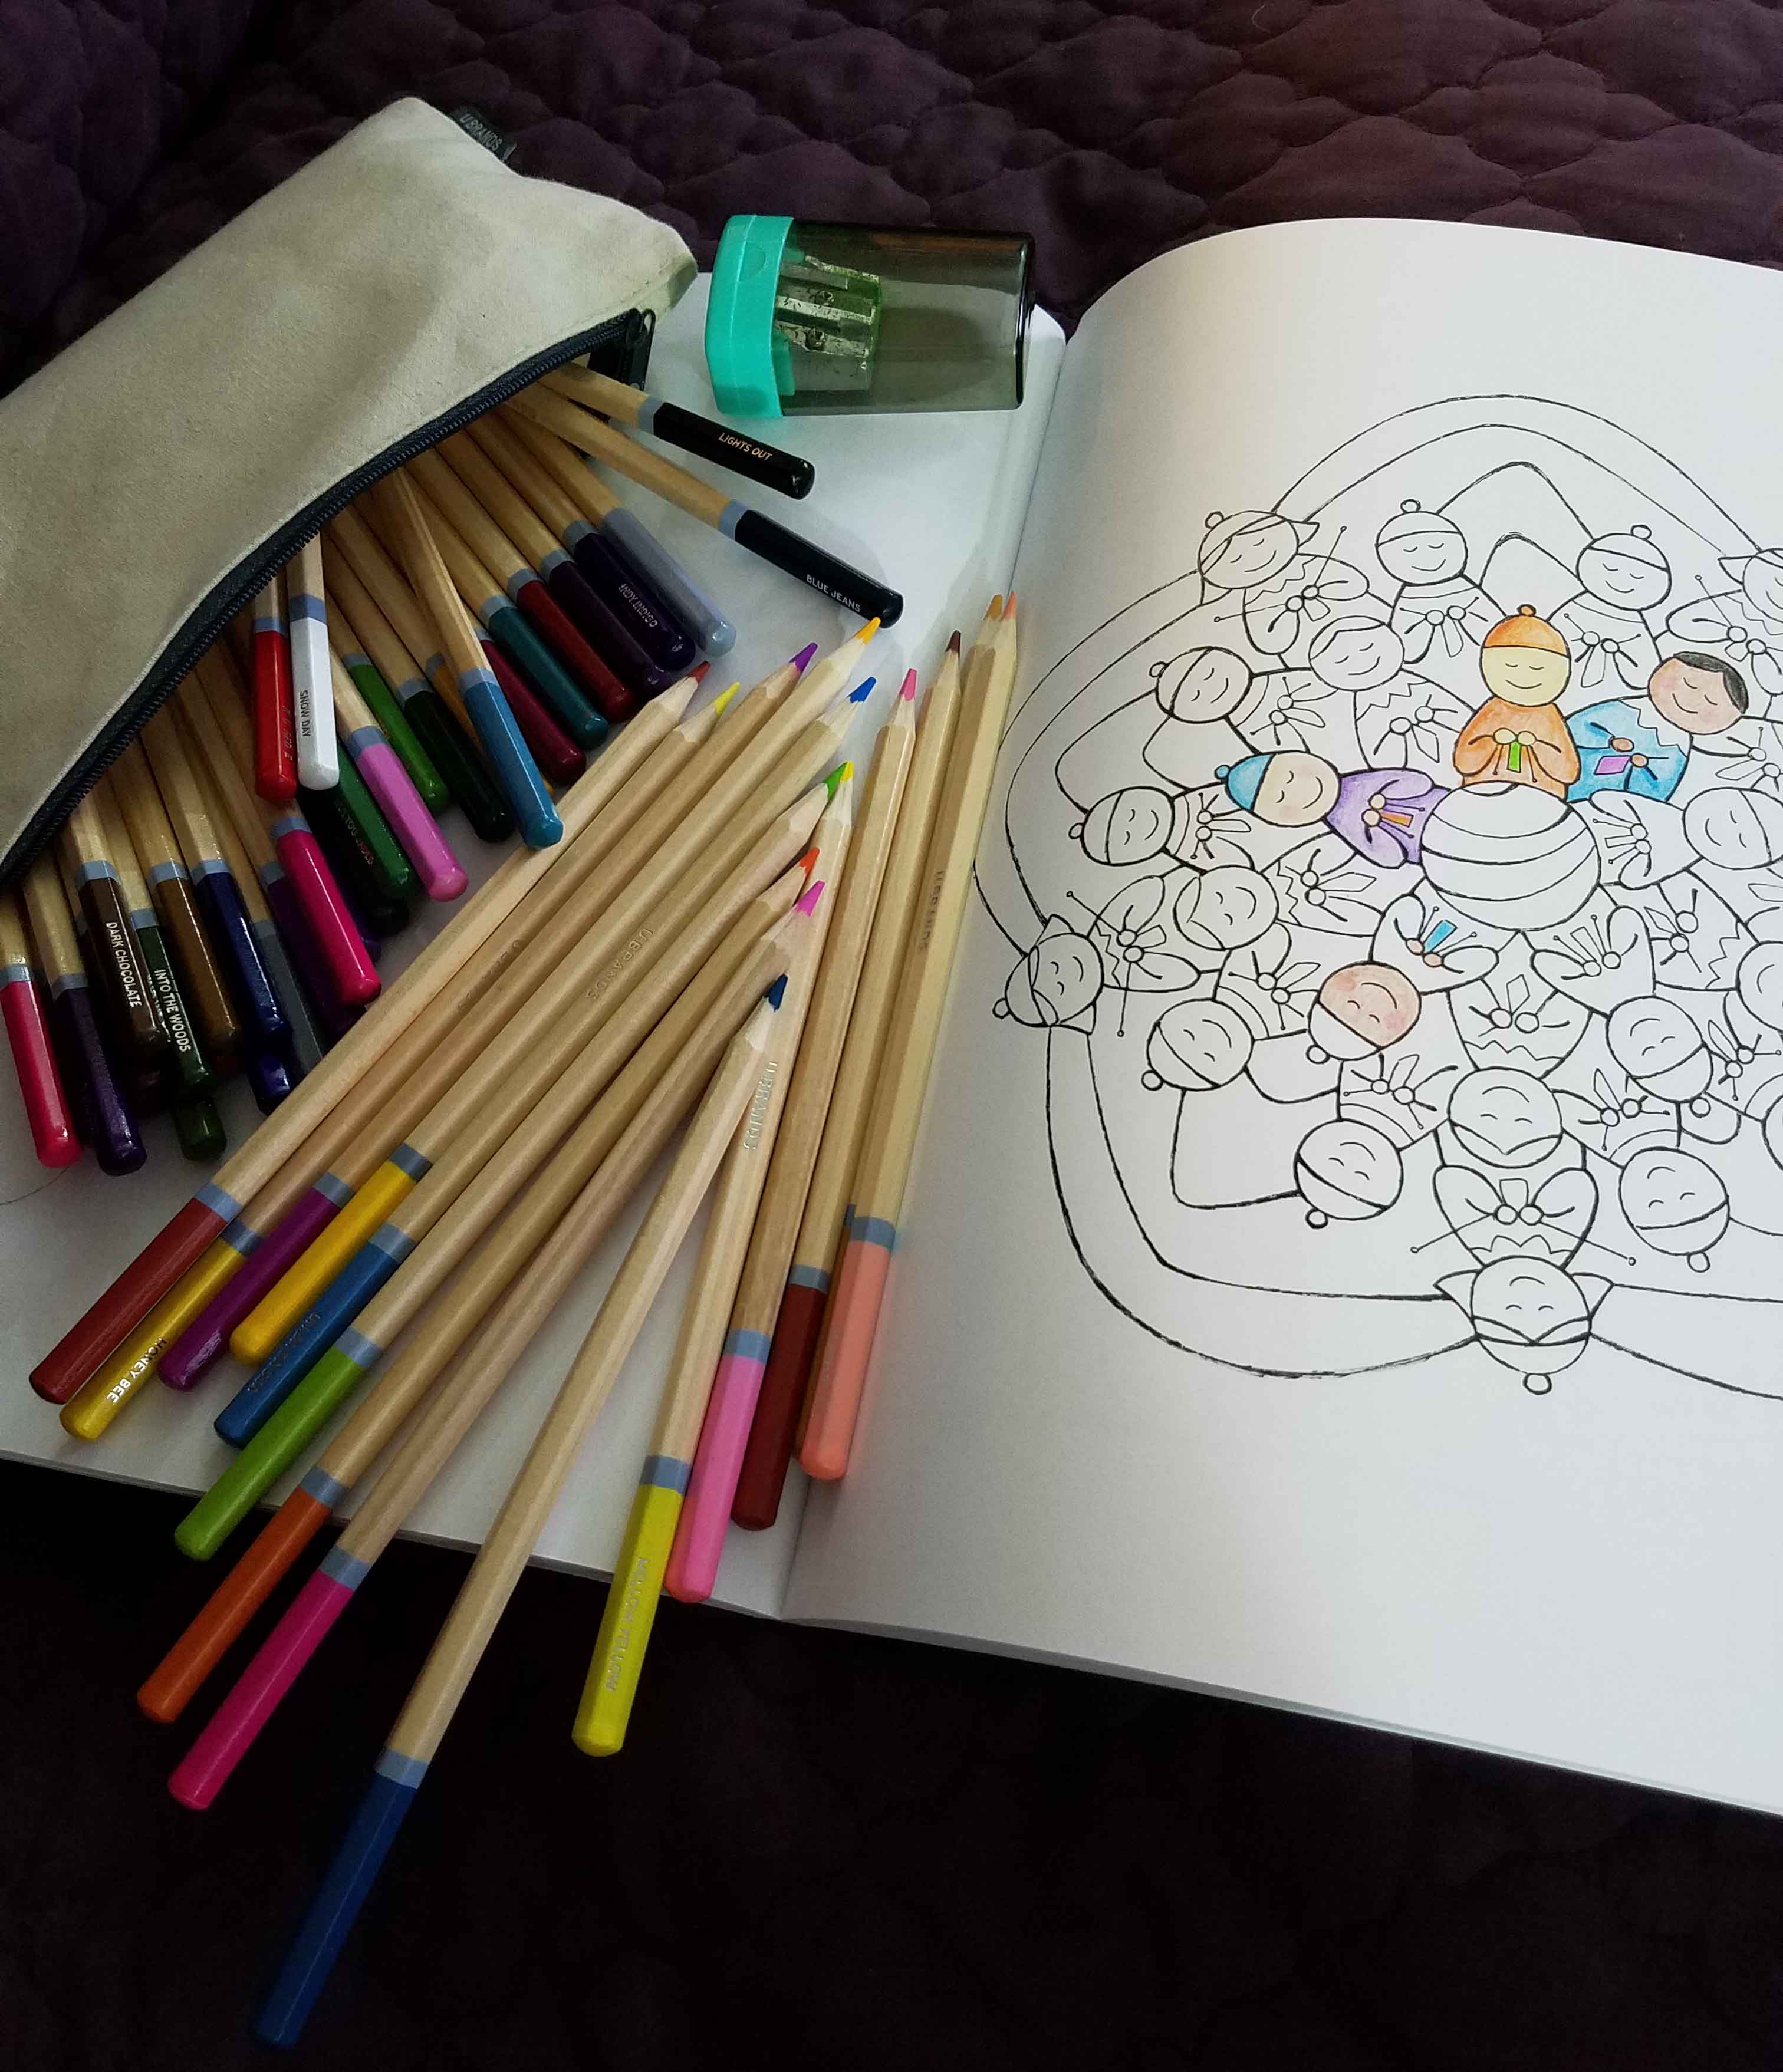
I took a little time to relax this evening though and play. Instead of hook and yarn I decided to play with color pencils and my lovely Franklin Habit book “I Dream of Yarn”. This was my first time actually coloring in it. I’ve sat down with it numerous times since acquiring it, just looking at all the lovely drawings has been happy making for me.
But to be honest I have been a bit afraid to put color to them because then they would be done. Or, gasp, I might “ruin” them. Yup, even I have that nasty little voice sometimes that beats me up and tells me I’ll do it “wrong”. Today I told the little voice to pack her bags and go on a long trip. With everything that has been going on for me and my family the past month I needed some soothing coloring time with my buddy Franklin.
I decided to start with this wonderful drawing of lots of people knitting and crocheting. It reminded me a bit of crochet motifs with just the shaping of it, and the wonderful support I have from other yarnie friends from all around the world.
I think this picture will end up being extremely colorful, I want to make each of the little people have different color garments and projects.
If you haven’t gotten into the whole adult coloring book scene I understand. I haven’t been doing a lot of it, I usually want to draw my own pictures to color. But there is something very relaxing about taking a half hour to color a picture that is already there. I enjoy making color choices and playing with how I will texture and shade my colors.
Of course, when the drawings are fun fantastical versions of Franklin’s dreams of yarn (that really could be mine as well, though mine would have loads more crochet hooks) it is even more fun. Afterall, yarn is our common thread.
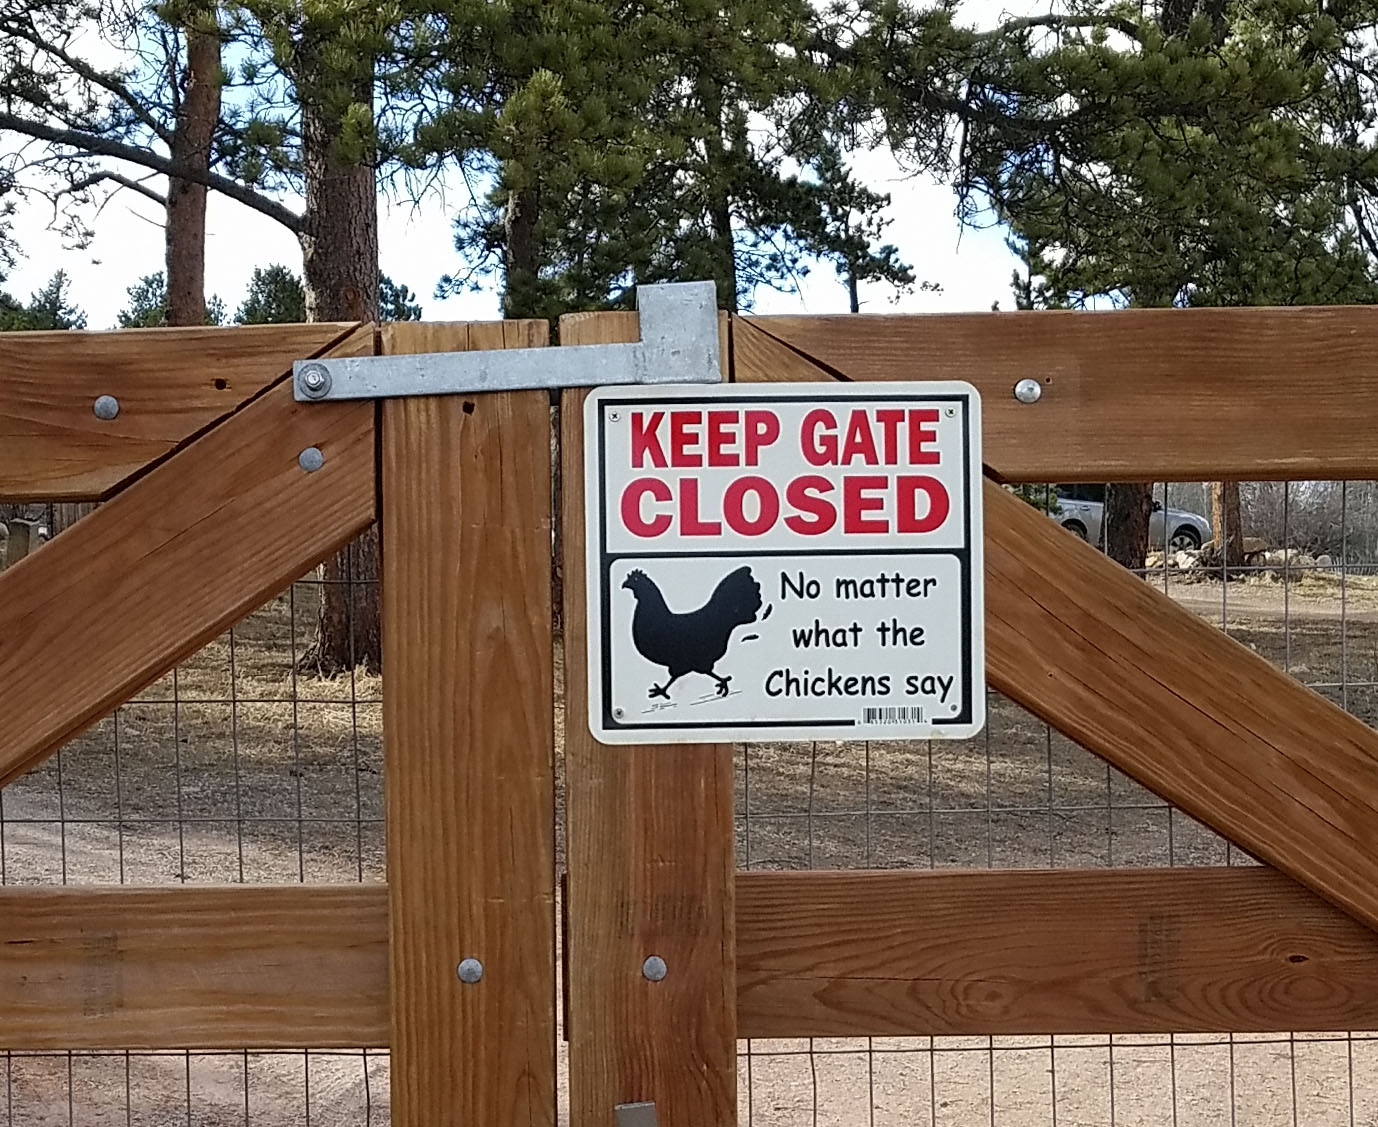
I had meant to get a blog post up yesterday but I was enjoying the day with my kids. We had a nice hike in our neighborhood that included a good chuckle at our neighbors sign on their gate. We had noticed all their chickens running around in the yard first, so the sign was particularly funny to us.
Copyright Karen Whooley – Photo by Anne Podlesak
Sunday evening I pulled all the names for the entries into the drawing for an Ebook copy of Karen Whooley’s beautiful new shawl book “A Garden of Shawls”.
The winner is Judy L. She said she has just started crocheting shawls, so this book will be a great start to her shawl pattern library. Congratulations Judy!
This is Collette. I actually purchased her awhile back, but our weather had been so cold and snowy I couldn’t get outside to photograph her. After the past weeks 60-70F temperatures I finally got outside and did a photo shoot with her. She is going to be my model for a number of my M2H Designs patterns, so you will be seeing her a lot.
This is just a quick post today. But I wanted to remind you that you have until 8 p.m. Mountain Time (Denver, Colorado) to enter the drawing to win an E-book version of Karen Whooley’s new shawl book, “A Garden of Shawls”. Hop on over to my review of the book and comment to get your name in the drawing, I’ll be announcing the winner on my Monday March 20th post.
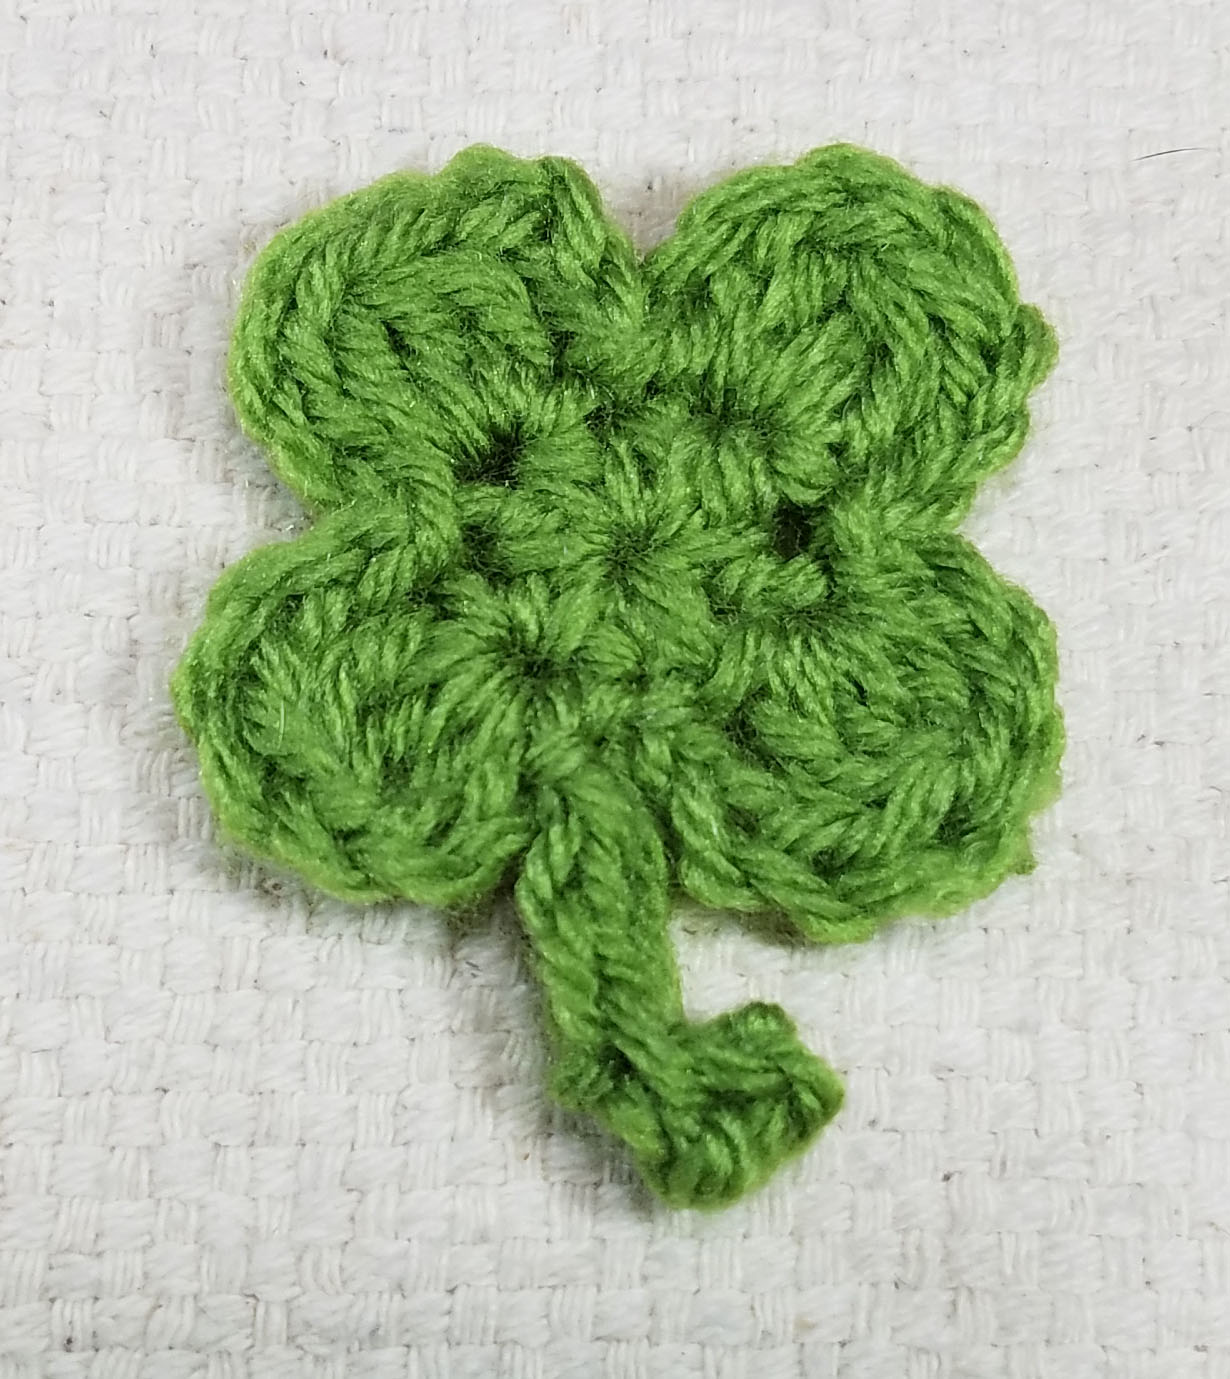
Today is Saint Patrick’s Day, and my family has a little Irish heritage (we are a classic American family with a big mixture of ancestry from all over Northern Europe and the British Isles), so I thought I would come up with a fun little crochet pattern for making a lucky 4 leaf clover.
Funny enough, none of us have much in the way of green clothing, every year I think that I really should at least get the kiddos some green clothing. That thought has not translated to my shopping brain yet. I tend to purchase whichever shirts are on sale, since both of my kids are a bit rough on their clothes. Instead I crocheted up lucky clovers and made them into pins they could wear.
For those of you that are wondering about Shamrocks versus 4 Leaf Clover. The typical Irish symbol is the 3 lobed clover and is called a shamrock. 4 lobed clovers are much rarer and are not “officially” considered a symbol of Ireland or Saint Patricks day. The shamrock with it’s 3 lobes is said to have been used by St. Patrick to demonstrate the holy trinity of Christian faith. The 4 Leaf Clover is said to symbolize luck because they are so rare.
I had a lot of fun playing with a way to create a 4 Leaf Clover that could be worked in just 2 rounds. This project is rated at the intermediate level, because I used some more advanced techniques like Clusters and working in the back bump of chains. If you need help with working clusters I have a photo tutorial in the Special Stitches section of the pattern.
Pin back or safety pin to attach to back of clover.
Special Stitches
3 DC Cluster (Cl):
Photo A
To make a 3 dc cluster st, yarn over (yo) like making a dc and insert in st or sp, yo, pull up a loop (3 loops on hook), yo {Photo A},
Photo B
pull thru 2 loops on hook (2 loops remaining on hook, 1st base made), yo, insert in same st or sp, yo, pull up a loop (4 loops on hook), yo {Photo B},
Photo C
pull thru 2 loops (3 loops remaining on hook, 2nd base made), yo, insert in same st or sp, yo, pull up a loop (5 loops on hook), yo, pull thru 2 loops (4 loops remaining on hook, 3rd base made), yo {Photo C}, pull thru all 4 loops on hook.
Instructions:
Round 1: Start with an Adjustable slip knot, ch 3, 7 hdc in 3 ch from hook, gently pull beginning tail to close center,
slip st under 2 loops (the “V” front of the ch st) at top of beginning ch-3 to join the round.
Round 2:{Thanks to Edith for the correction.} Ch 3, *(Cl, ch 3 and slip st) in next st,** (slip st, ch 3) in next st*;
Repeat from * to * 2 times, Repeat from * to ** once,
Stem: Ch 6, working in back bumps, sc in 2nd ch from hook and in next 3 ch sts, slip st in last ch, cut yarn with 4-5 inches of tail. Stem will curl, it is supposed to.
Weave ending tail toward center, use tails to sew on a pin backing.
I hope you have a very lucky Saint Patrick’s Day, and some fun wearing a 4 Leaf Clover.
A warm thank you to all my friends and readers that have sent my family and I well wishes and prayers. It has been a hard week, but today Baba passed peacefully from life. My husband, sister-in-law, and mother-in-law were all with him.
Baba as Best Man with Linc and his Groomsmen
I have spent a little time each day this week looking at photos from over the years and remembering what a blessing Baba was to my life and that of my children. I thought I would share a few of them with you. The photo above was taken at Linc and I’s wedding in June 1998. Baba was Linc’s Best Man, though I was still calling him “Bob” at that time.
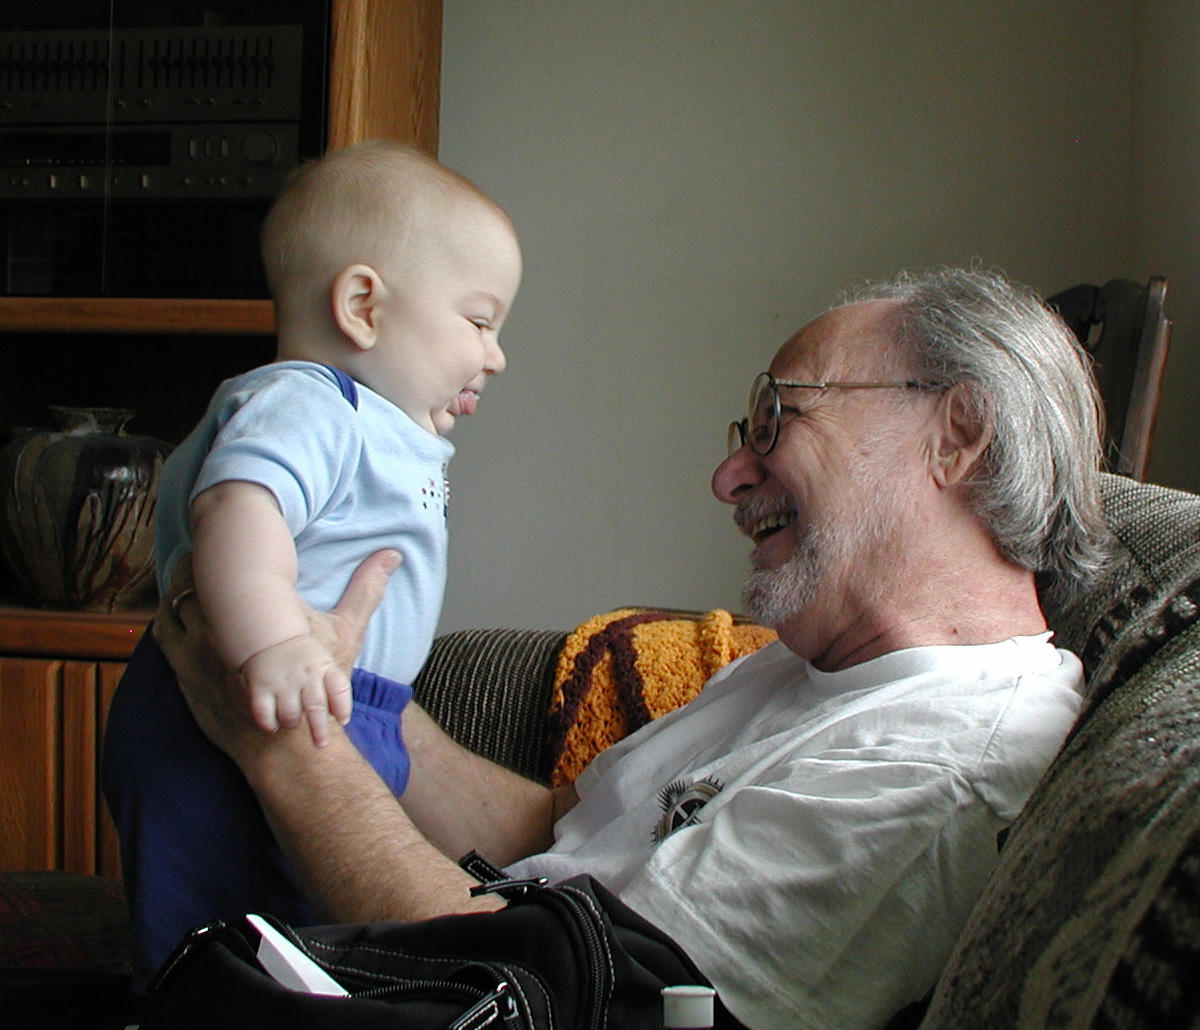
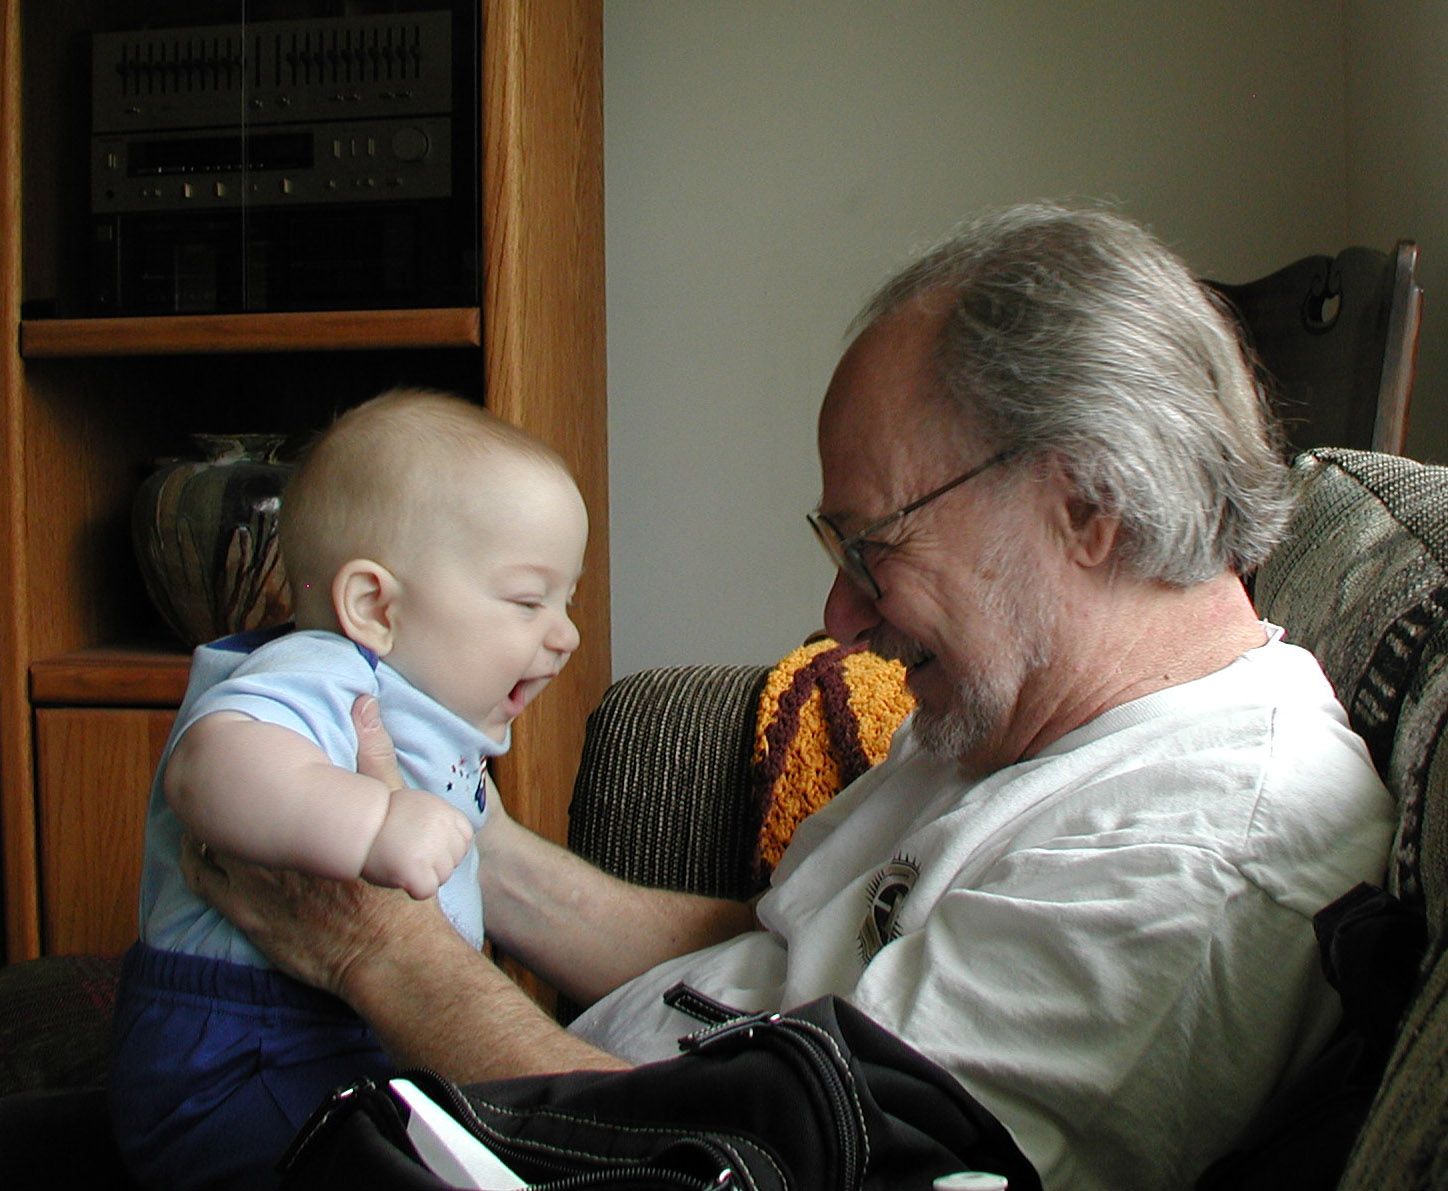
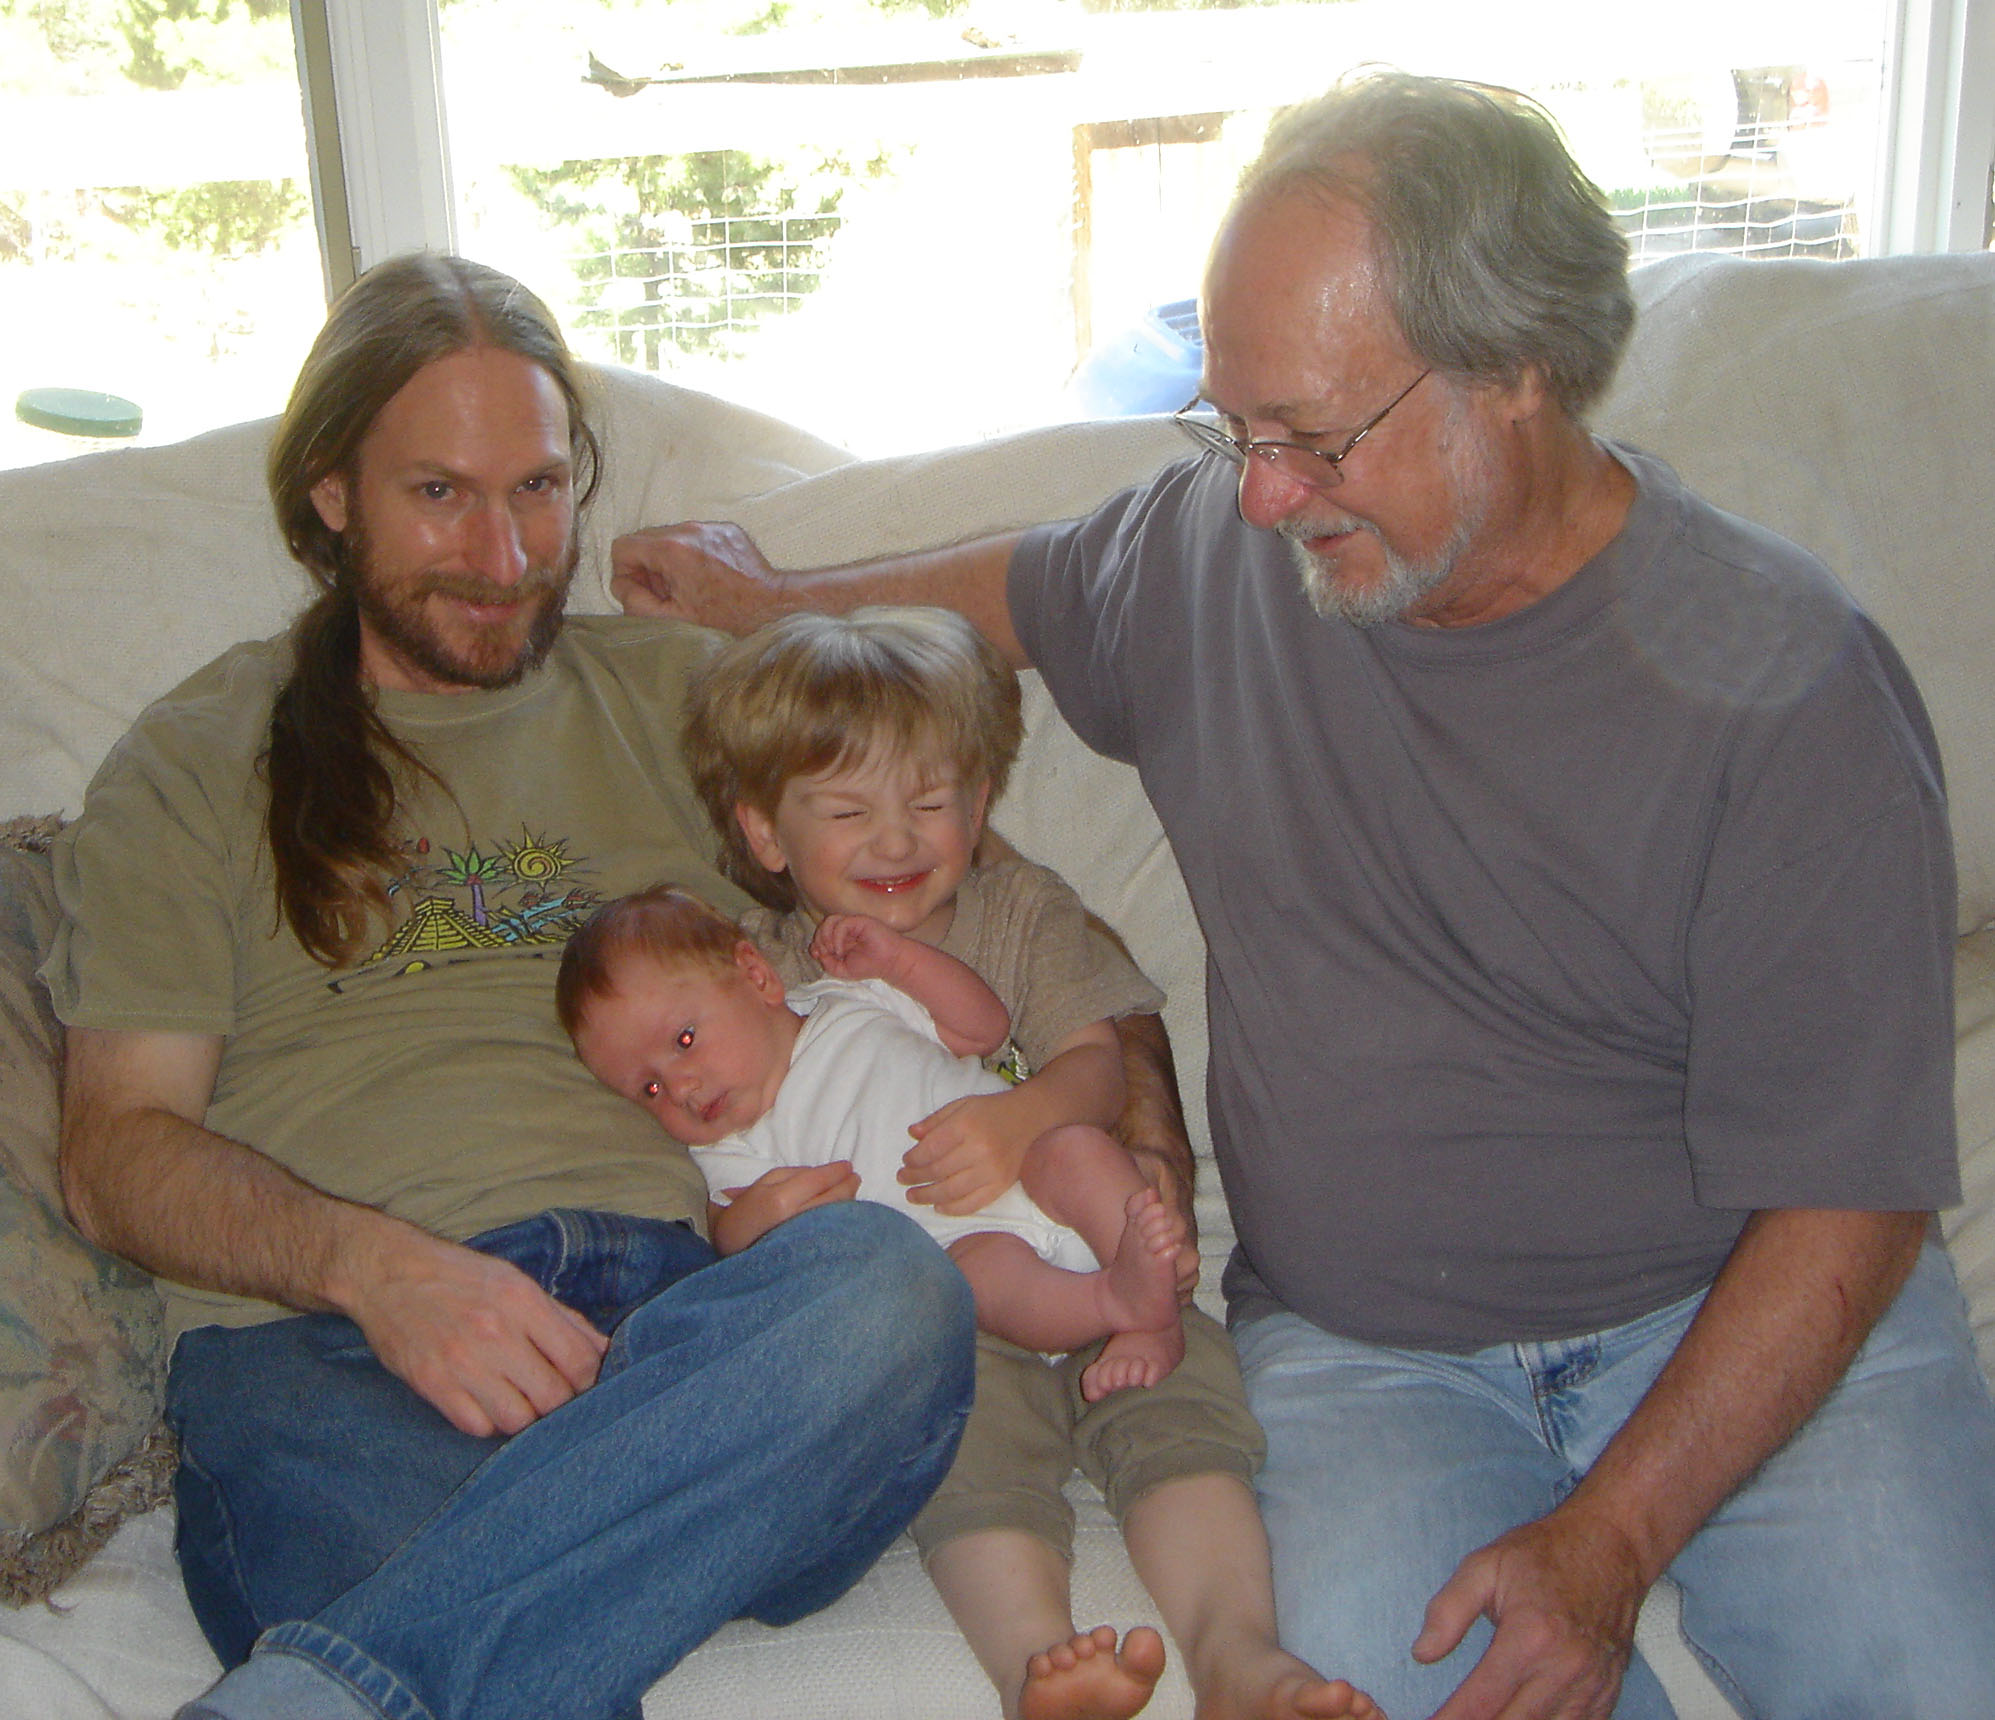
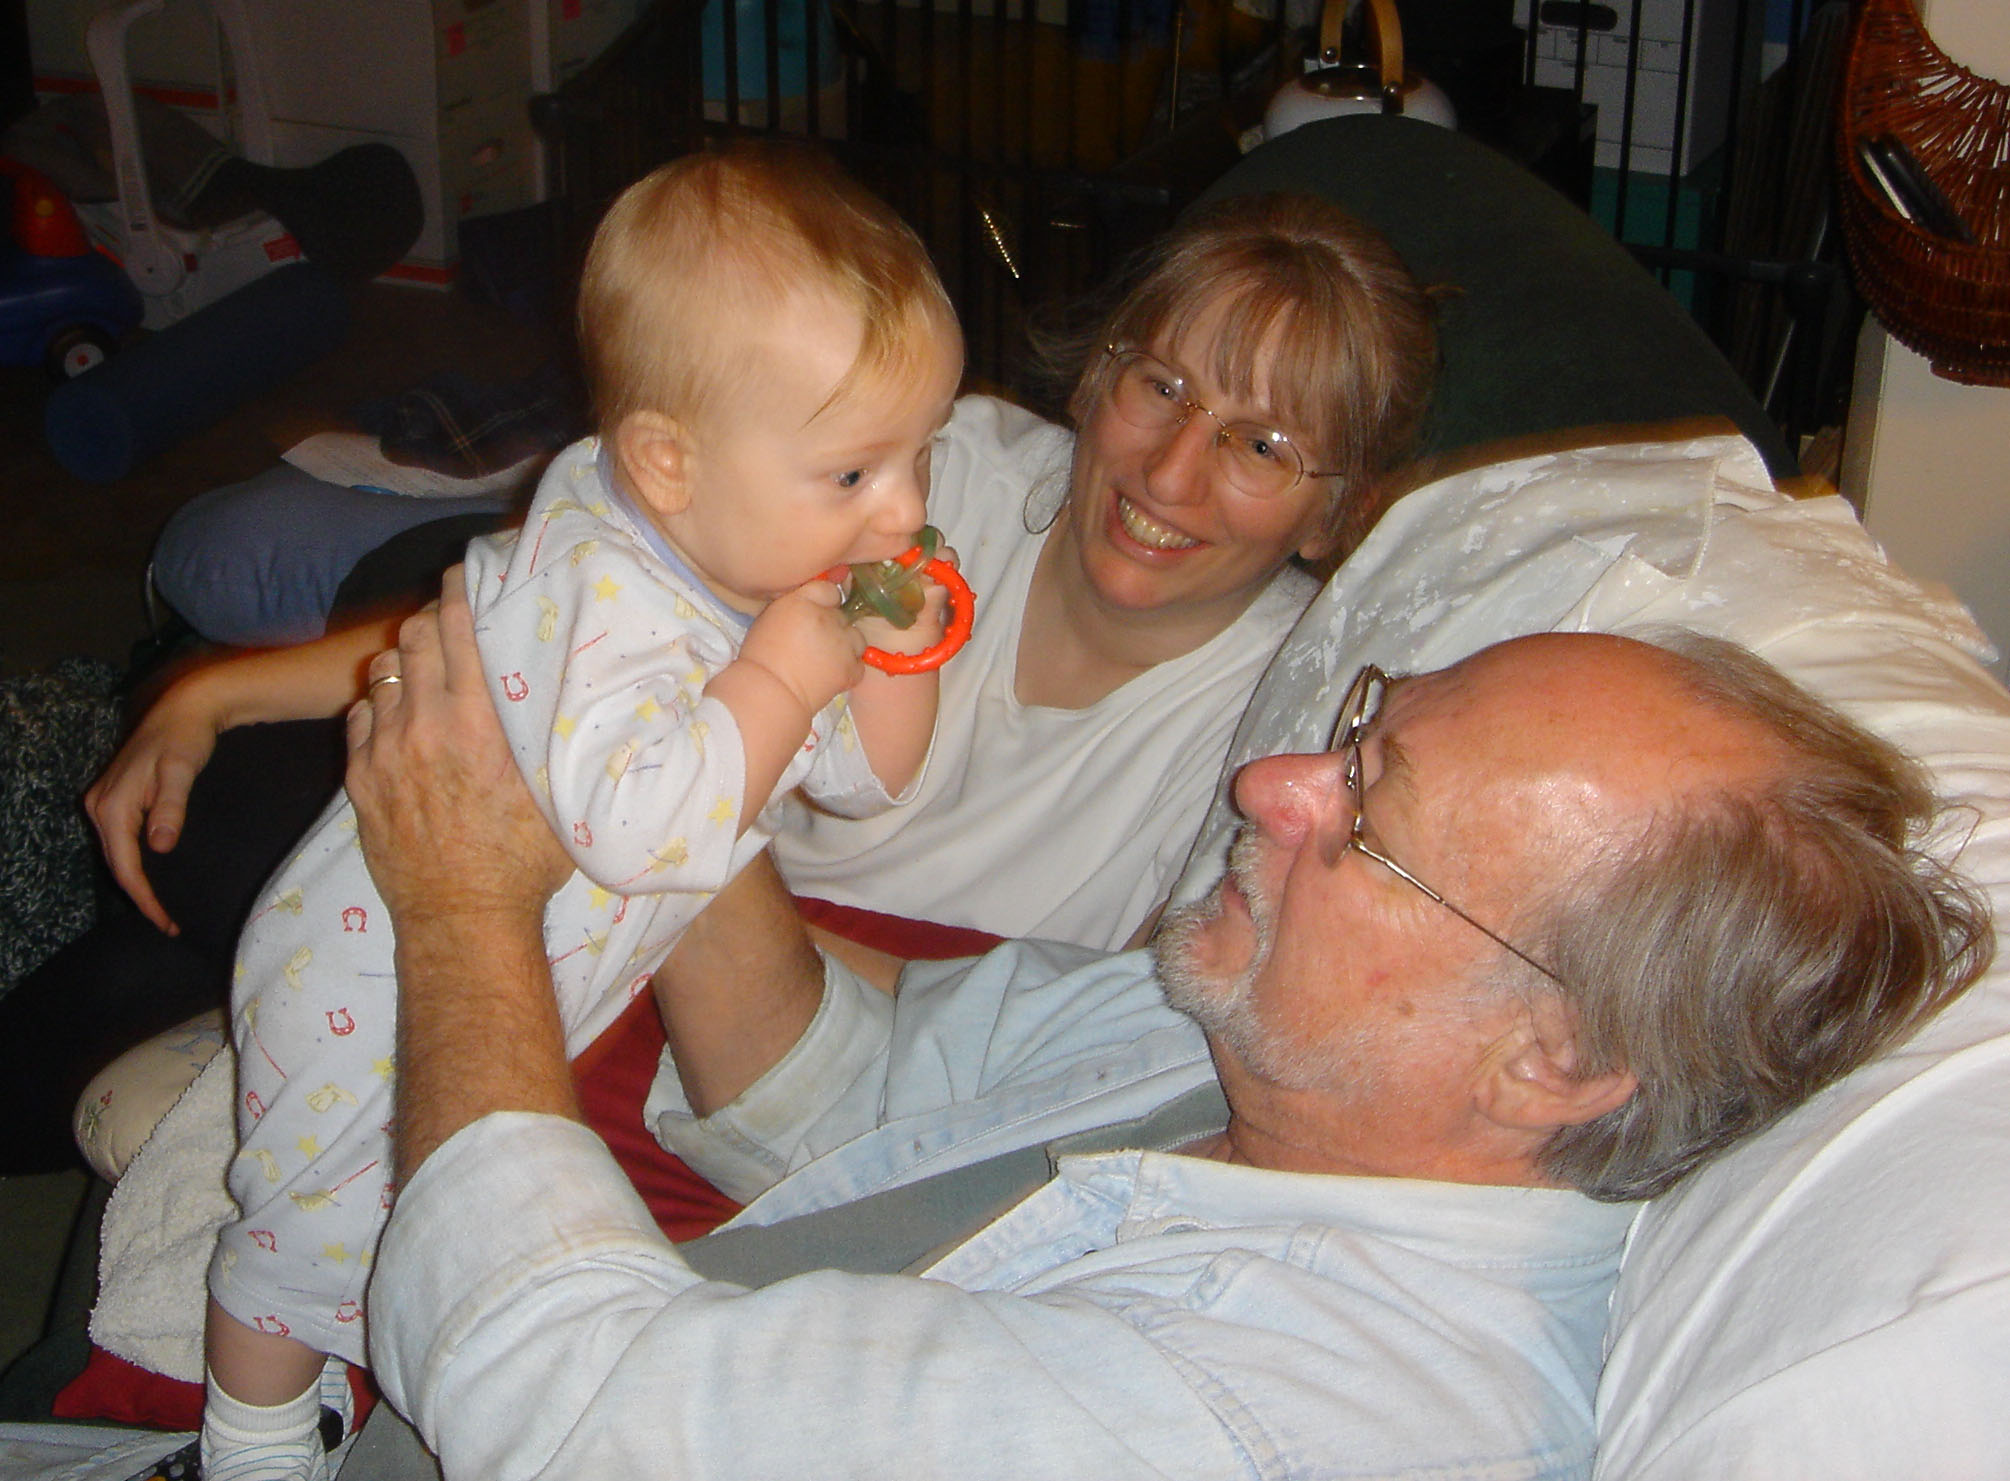
Baba and J playingBaba and J laughing3 generationsBaba, me and BeanBaba and Bean talkingBean inspecting Baba’s Beard
Bob loved being a grandfather. I’m so happy I caught some of the funny and sweet moments of him with the kids when they were tiny. They don’t remember these moments, but they love the photos too.
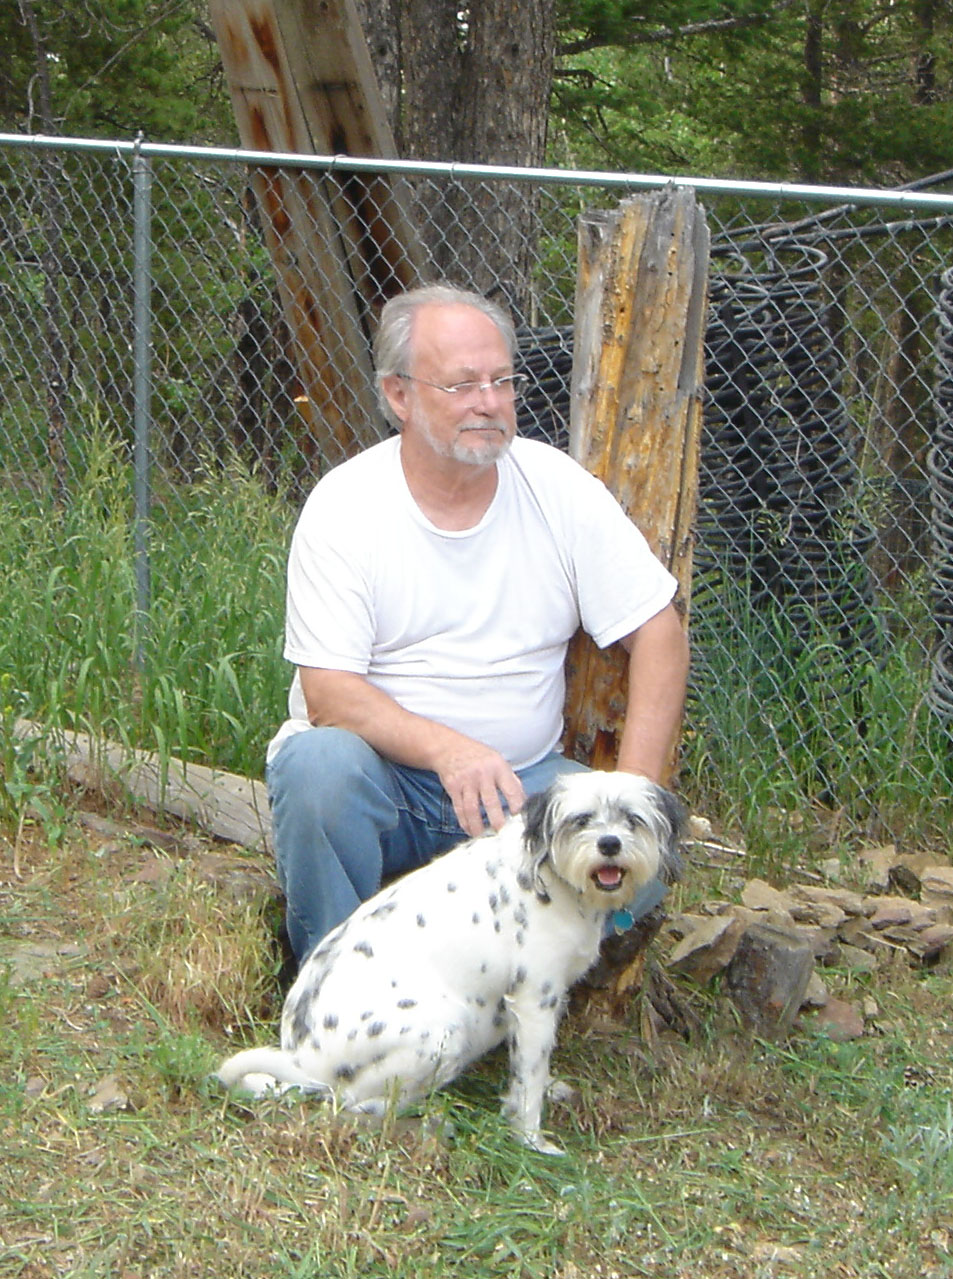
Baba and Cindy dog
This was a photo of Bob with his dog, Cindy. She was a stray that went thru quite a tough time before she found Bob and my mother-in-law.
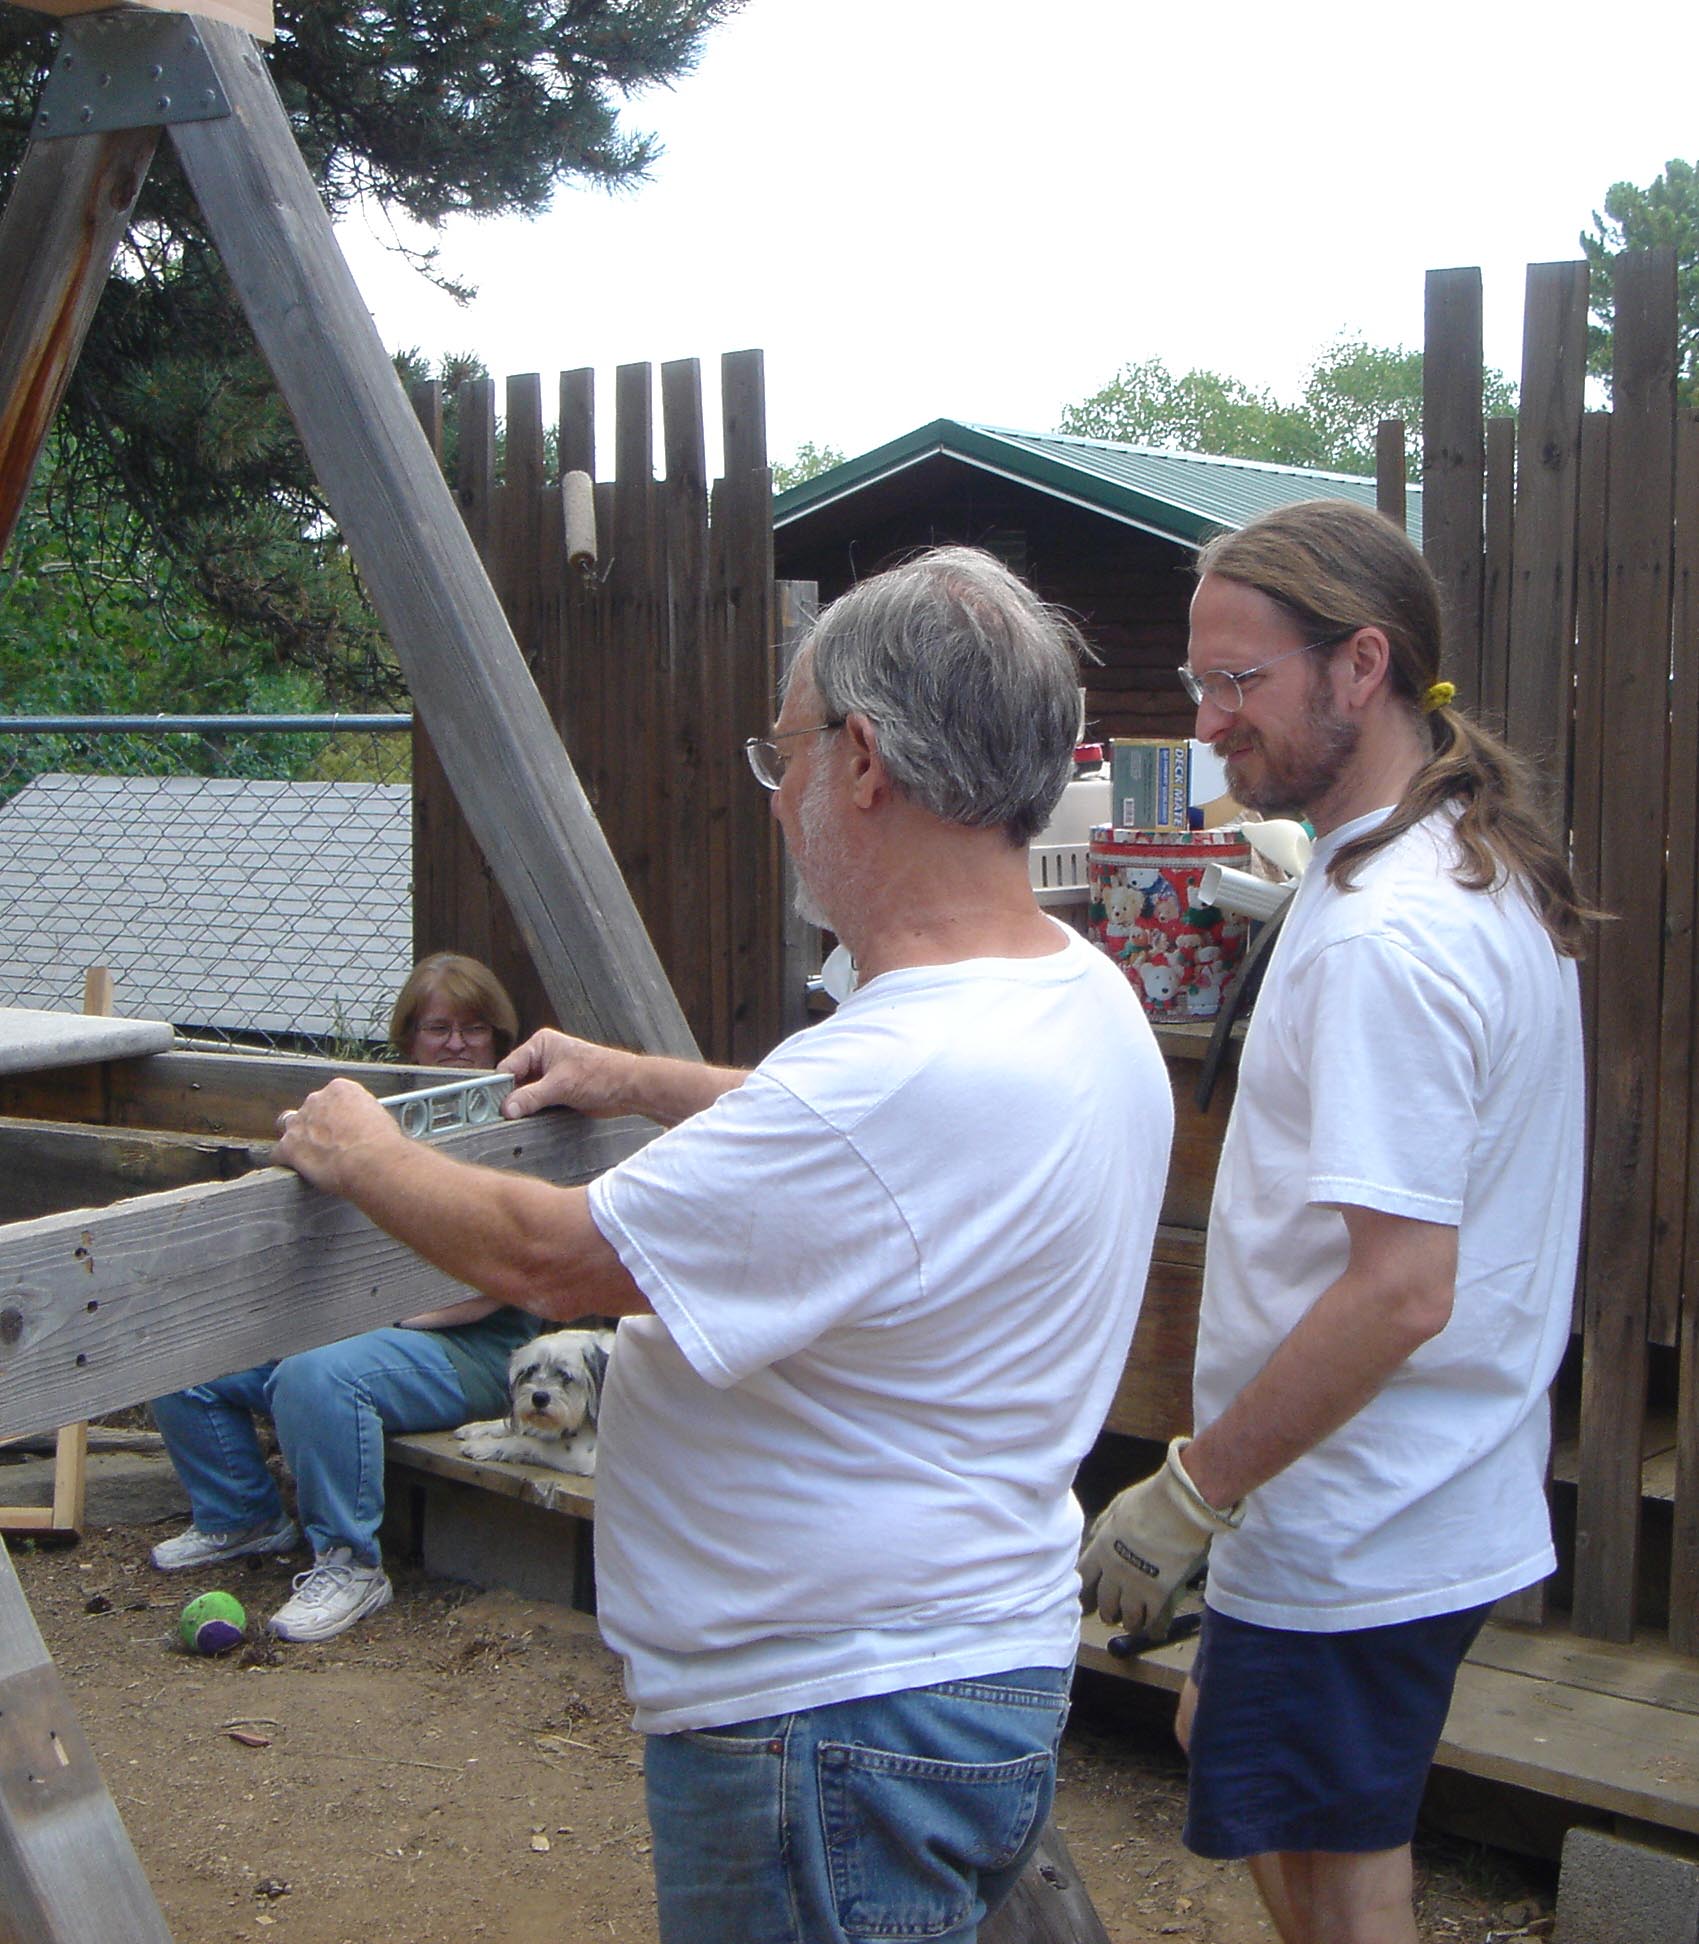
Building the Play-set
This photo was taken the same day as the one with Cindy. We were all in our backyard building a play-set for the kids. This was the day that Bob became Baba. My oldest named him Baba that day and Bob liked it so much that from that day onward he was Baba for his grandkids.
Funny thing is, many months later, we found out that “Baba” is the word for father or grandfather in Turkey. My mother-in-law was Nana from the moment the first baby arrived, but Bob had just been “grandpa” until then. From that point onward they were Nana & Baba and the 2 of the most important people in my children’s lives.
Thank you Baba for all the wonderful memories and all your love. We love you and will miss you.
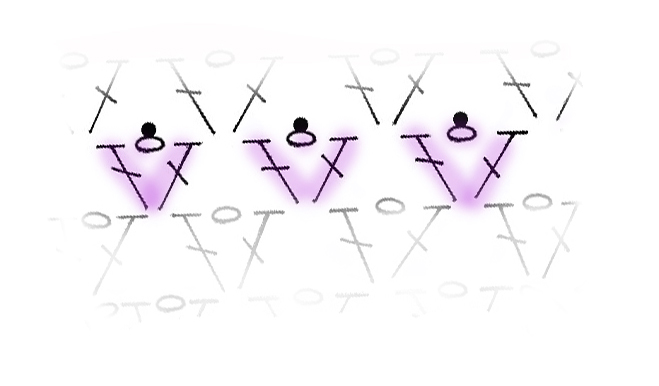
It is always so exciting to finish a project, even when it is a small one. This is how my newest little Playing With Triangles shawlette worked out. I’m very happy with it. It is 34 inches wide across the top and 17 inches long at the point. I haven’t blocked it yet, and may only do a very gentle blocking, since this yarn is largely alpaca fiber it may grown quite a bit if I block it aggressively.
This is all I have left of the yarn I started with for this project. I did some careful calculations to use up as much yarn and get the largest triangle possible. You can look at my original post “Some Pretty Crochet”, to see how much yarn I started out with for this project.
I also used 145 beads in this project. The arrows in the photo above point to some of the beads on the first row I beaded.
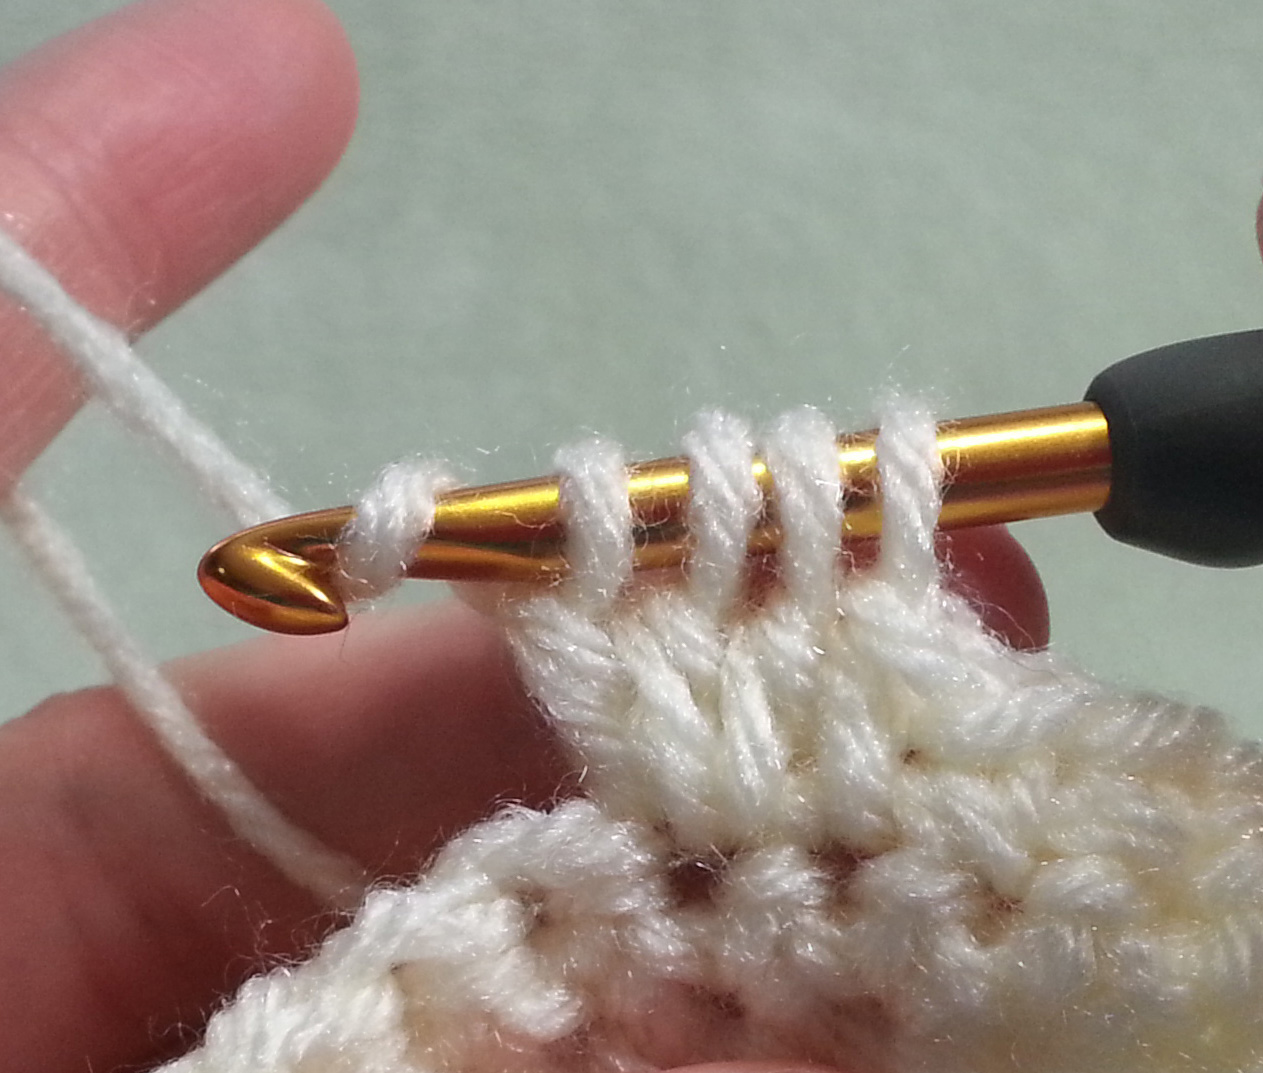
When I added the beads I used my handy new tool, the Fleegle Beader, to do the “hoist-on” method. I purchased this tool at the Longmont Yarn Shoppe. It works the same as the tiny crochet hook, the difference is that you can fill the whole shaft of the beading tool with beads, so you don’t have to have an open container of beads while working. In my small house, where there is lots of activity (busy kids, crazy cat and ditzy dog), an open container of beads can be a disaster waiting to happen.
I also really liked that I could load the tool up with beads, cap it with the red stopper, pop it in the tube and bring it along in my project bag when I am on the go. Then, each time I want to add a bead to my project it is ready, without the usual juggling act.
The little notch at the end of the tool (close-up inset in photo) acts like the hook on a tiny crochet hook for holding your yarn while sliding the bead from the tool onto the working loop. The creator of this tool doesn’t recommend it for thicker than “heavy fingering weight” yarn. But I am going to experiment with some heavier yarns and see if it will work for me. Since I have used the same size steel crochet hook for putting beads on a variety of weights of yarn (including a heavy worsted) I think it may work fine.
Though as my mom would say, “You have to hold your mouth just right.” That’s a family saying for the funny faces most of us seem to make when learning something new or tackling a finicky task.
This morning was my Casual Crochet group at Longmont Yarn Shoppe, and I only had a little bit of crocheting left to do on this shawlette. I finished the crocheting, got all my tails woven in and added a pretty mother-of-pearl button to one end for lots of styling options. Even had my picture taken for the shop’s Facebook page. That was a busy 2 hours.
Wow! It’s Pi Day again already. Today is March 14 or 3/14 as we Americans like to write it. Pi is 3.14, so some clever mathy person decided that March 14 should be celebrated as Pi day. Being that I am a math geek I’m totally into that.
I use Pi to figure out the geometry for a lot of my design work, especially when I am designing hats and determining how (or IF) my gauge is going to get me the size hat I want. This particularly applies to working crown down hats that involve creating a flat circle to start.
Today I thought we should take a look at crocheting circles. No Pi calculations needed, though you can if you really want.
I don’t recall when I first learnt about the “rules” for getting circles to come out flat in crochet. But I have used those as a guideline in much of my design work over the past 10 years, even before I was designing professionally. Here are the “rules” with some additional thoughts.
To create a circle, especially when worked into an adjustable slip knot (or magic circle if you prefer), you need to consider the height of your stitches. You also need to consider your stitch tension and consistency. Working circles is one technique that will really show you if you are deforming your stitches. Either making them too tall, too short, too wide or too thin, you are looking for the ultimate “Goldie Locks” zone of your stitch tension to get your circles to come out Just Right.
I’m demonstrating today using the 4 most common stitches in traditional crochet: Single, Half-Double, Double and Treble.
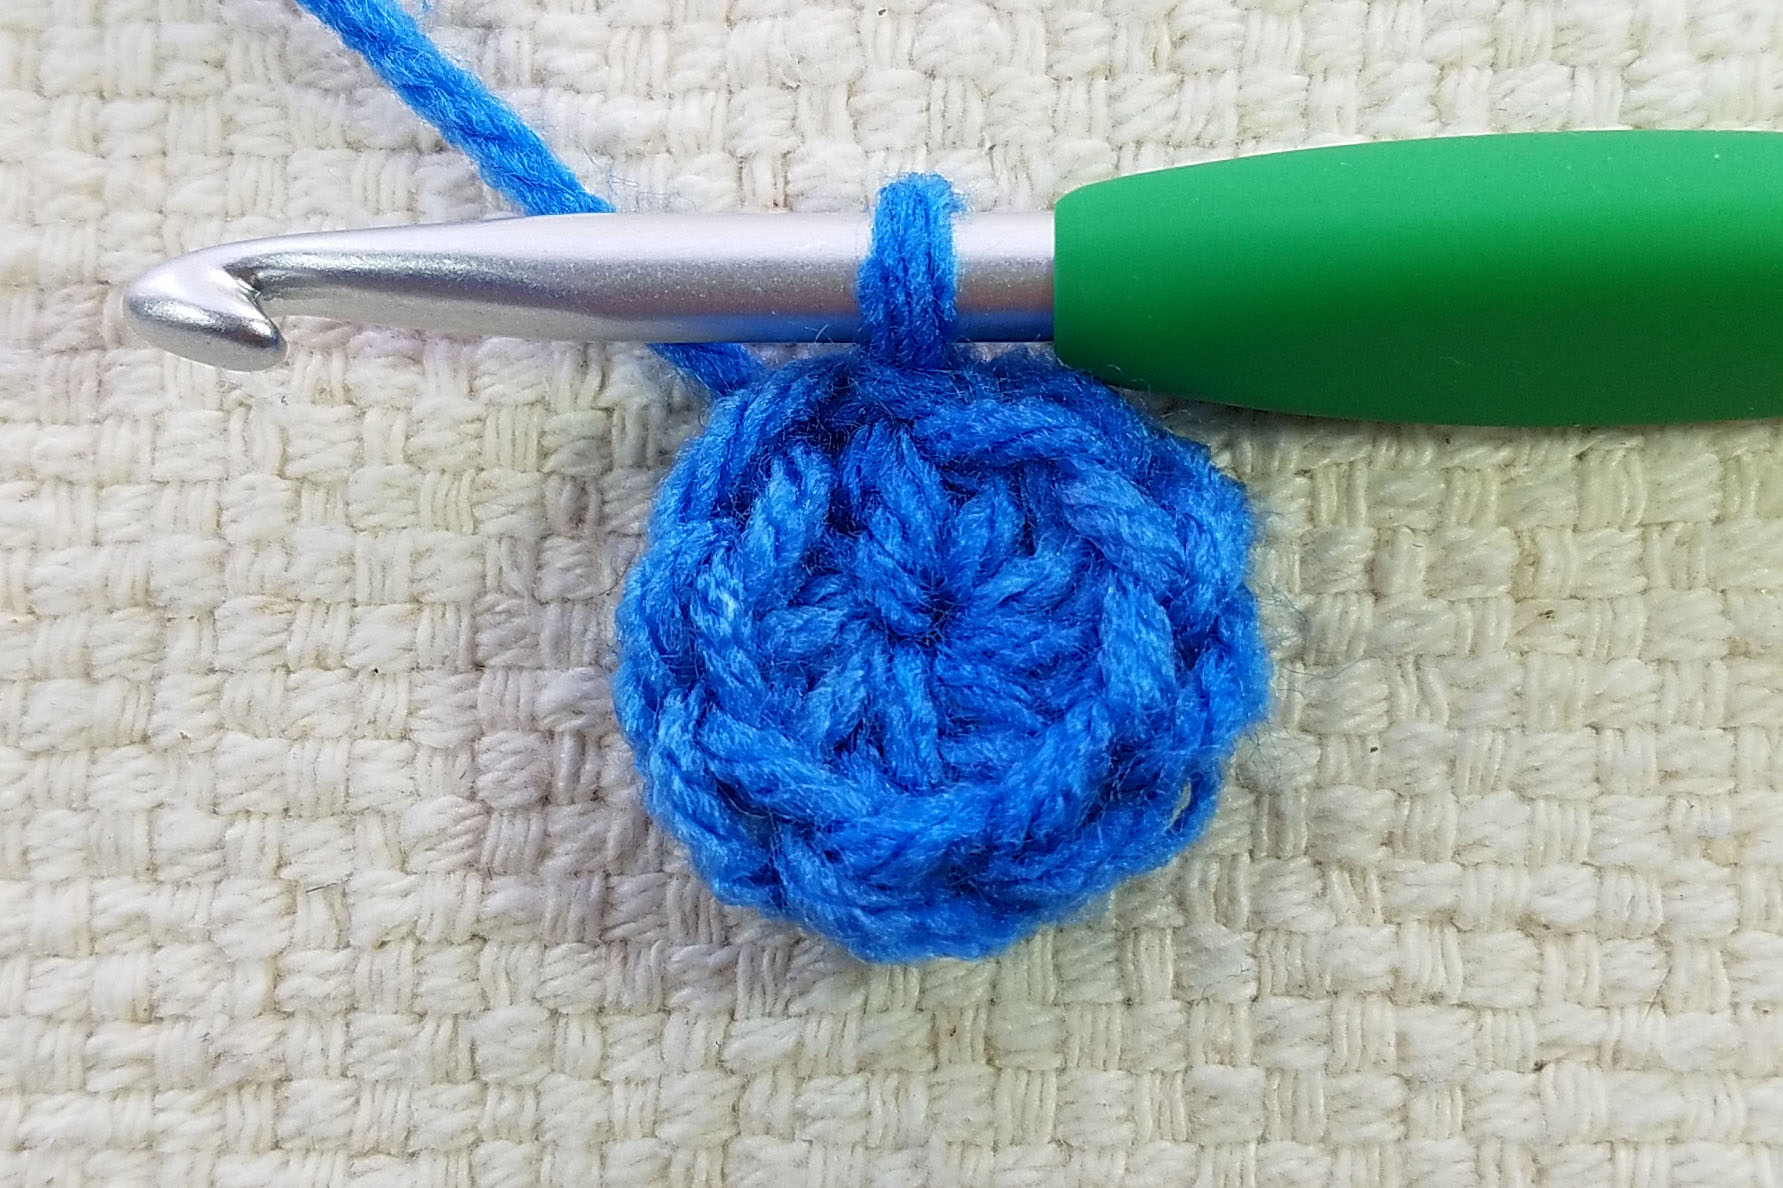
Making a circle using Single Crochet stitches: The magic number is 6, you want to have 6 sc stitches in your first round and you will add 6 stitches to each consecutive round. Round 2 will have 12 stitches, Round 3 will have 18 stitches, Round 4 will have 24 stitches.
Making a circle using Half-Double Crochet stitches: The magic number is 8, you will have 7 hdc and a ch-2 (that counts as a hdc) in your first round and you will add 8 stitches to each consecutive round. You will start each round with a ch-2 that will be counted as a hdc stitch for your end of round counts. Round 2 will have 16 stitches, Round 3 will have 24 stitches, Round 4 will have 32 stitches.
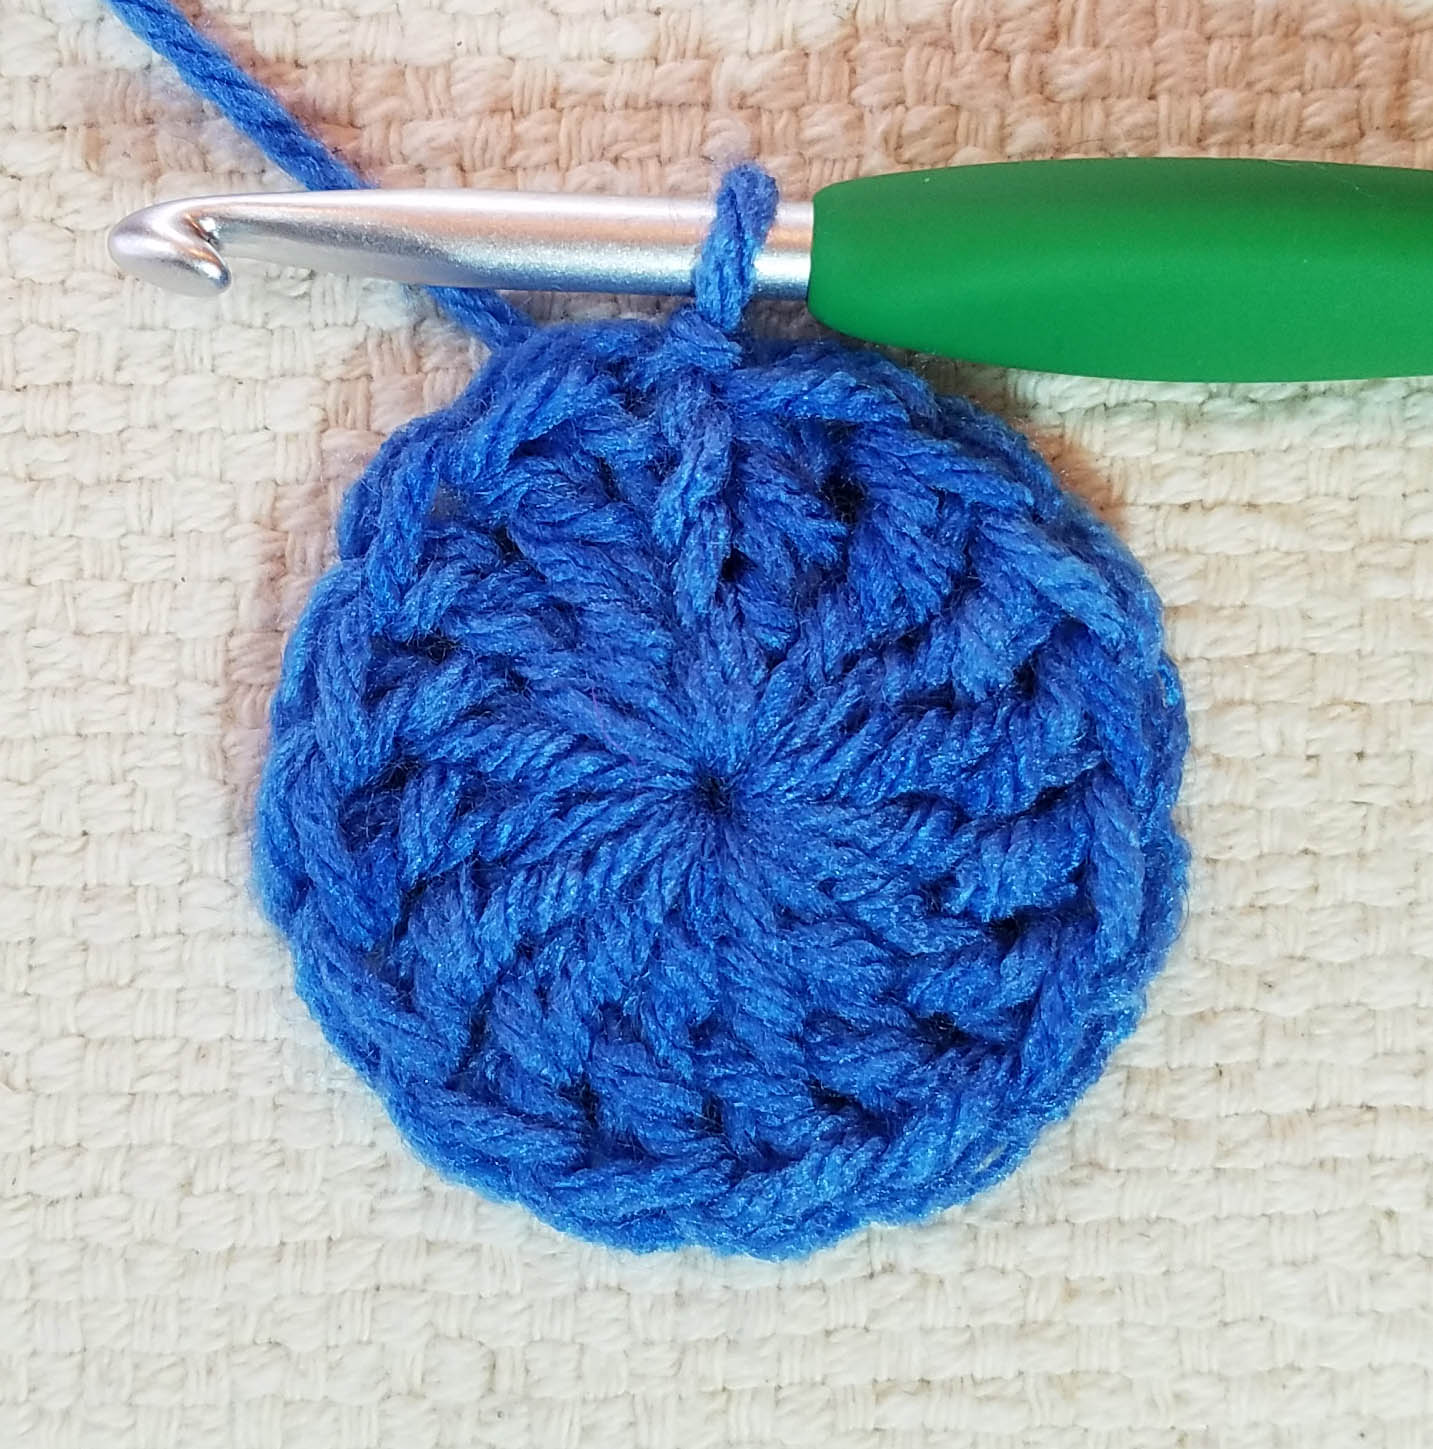
Making a circle using Double Crochet stitches: The magic number is 12, you will have 11 dc and a ch-3 (that counts as a dc) in your first round and you will add 12 stitches to each consecutive round. You will start each round with a ch-3 that will be counted as a dc stitch for your end of round counts. Round 2 will have 24 stitches, Round 3 will have 36 stitches, Round 4 will have 48 stitches.
Making a circle using Treble Crochet stitches: The magic number is 16, you will have 15 Tr and a ch-4 (that counts as a Tr) in your first round and you will add 16 stitches to each consecutive round. You will start each round with a ch-4 that will be counted as a Tr stitch for your end of round counts. Round 2 will have 32 stitches, Round 3 will have 48 stitches, Round 4 will have 64 stitches.
I hope these rules will help you with crocheting circles and that you have a great Pi Day. Maybe celebrate with some crocheted circles and some Pie.
Today I’m excited to share a review of a fabulous new book from my friend and colleague, Karen Whooley. As many of my long time visitors know, Karen was my mentor when I got started as a designer 8 years ago. The photo above was one of our first attempts at a “selfie” back at the 2014 CGOA conference in Manchester.
Copyright Karen Whooley – Photo by Anne Podlesak
Karen and I have always shared a love of designing wearables, especially wraps. In her new book “Garden of Shawls” Karen has created 12 beautiful wrap designs worked in lightweight yarns. She has a great eye for creating fun balances of lace work and solid fabric that will have you grabbing your hooks and yarn to get started on these shawls.
I love the lay-out of this book. Each project has stitch charts and super clear schematics as well as concise written instructions. This means you can have a very clear picture from the start of your project to the end about how your shawl should work out.
If you are like me, you likely have been to a fiber festival where you just couldn’t resist purchasing a couple of gorgeous hanks of lace or fingering weight yarn. Karen has designed most of these shawls using 1 or 2 hanks of yarn so you can finally take those lovely hanks out of your stash and turn them into a beautiful wrap that you will wear for years.
I had a hard time deciding which of the 12 Shawls in the book were my favorites. Currently I’m voting for these four…
Photo taken by Anne Podlesak
Breeze – This shawl is the style I associate with Karen the most. She has a knack for end to end construction that creates a lovely border on the one side of each row. You reach the end of the rows and your shawl has a gorgeous border all done. So clever! Many of the wraps in the book use this technique.
Photo taken by Anne Podlesak
Solar – This shawl just struck me with its happy color choices, but even in another color series it would be lovely. The radiating spokes of the top-down construction combined with the eyelets that showcase the “ripple” style patterning are eye-catching and entertaining to crochet.
Photo taken by Anne Podlesak
Drift – Another top-down shawl that uses gradient changing colors for a dramatic border. I love the textural interest Karen created in this shawl by including post stitches.
Photo taken by Anne Podlesak
Ecliptic – a more traditional top-down Triangle shaped shawl with graceful columns of shells ending in a soft scalloped border.
Print copies of this book will become available in Apirl, but you can pre-order your copy. She has a couple of ordering options, you can get an Ebook version only or a print version + a free Ebook. You can place you order here on her website.
Best of all, if you live in the USA and place an order during the month of March you will be entered into a drawing to win one of these awesome Goodie Bags from Karen. You can find out more about those by clicking here to visit her blog.
I hope you get a chance to check out Karen’s book and that you decide to add it to your library. It is definitely a good investment. If you would like an opportunity to win a complimentary Ebook copy of the book leave your name in the comments on this blog post by Sunday March 19, 8 p.m. Mountain Time and I’ll announce the winner on March 20th here on the blog.