I know I’m really ready for the warmer season to be here. But what does that mean for crocheting?
Definitely isn’t the time for crocheting big afghans, fortunately the June 2021 issue of Crochet World Magazine has some great ideas for summer crocheting.
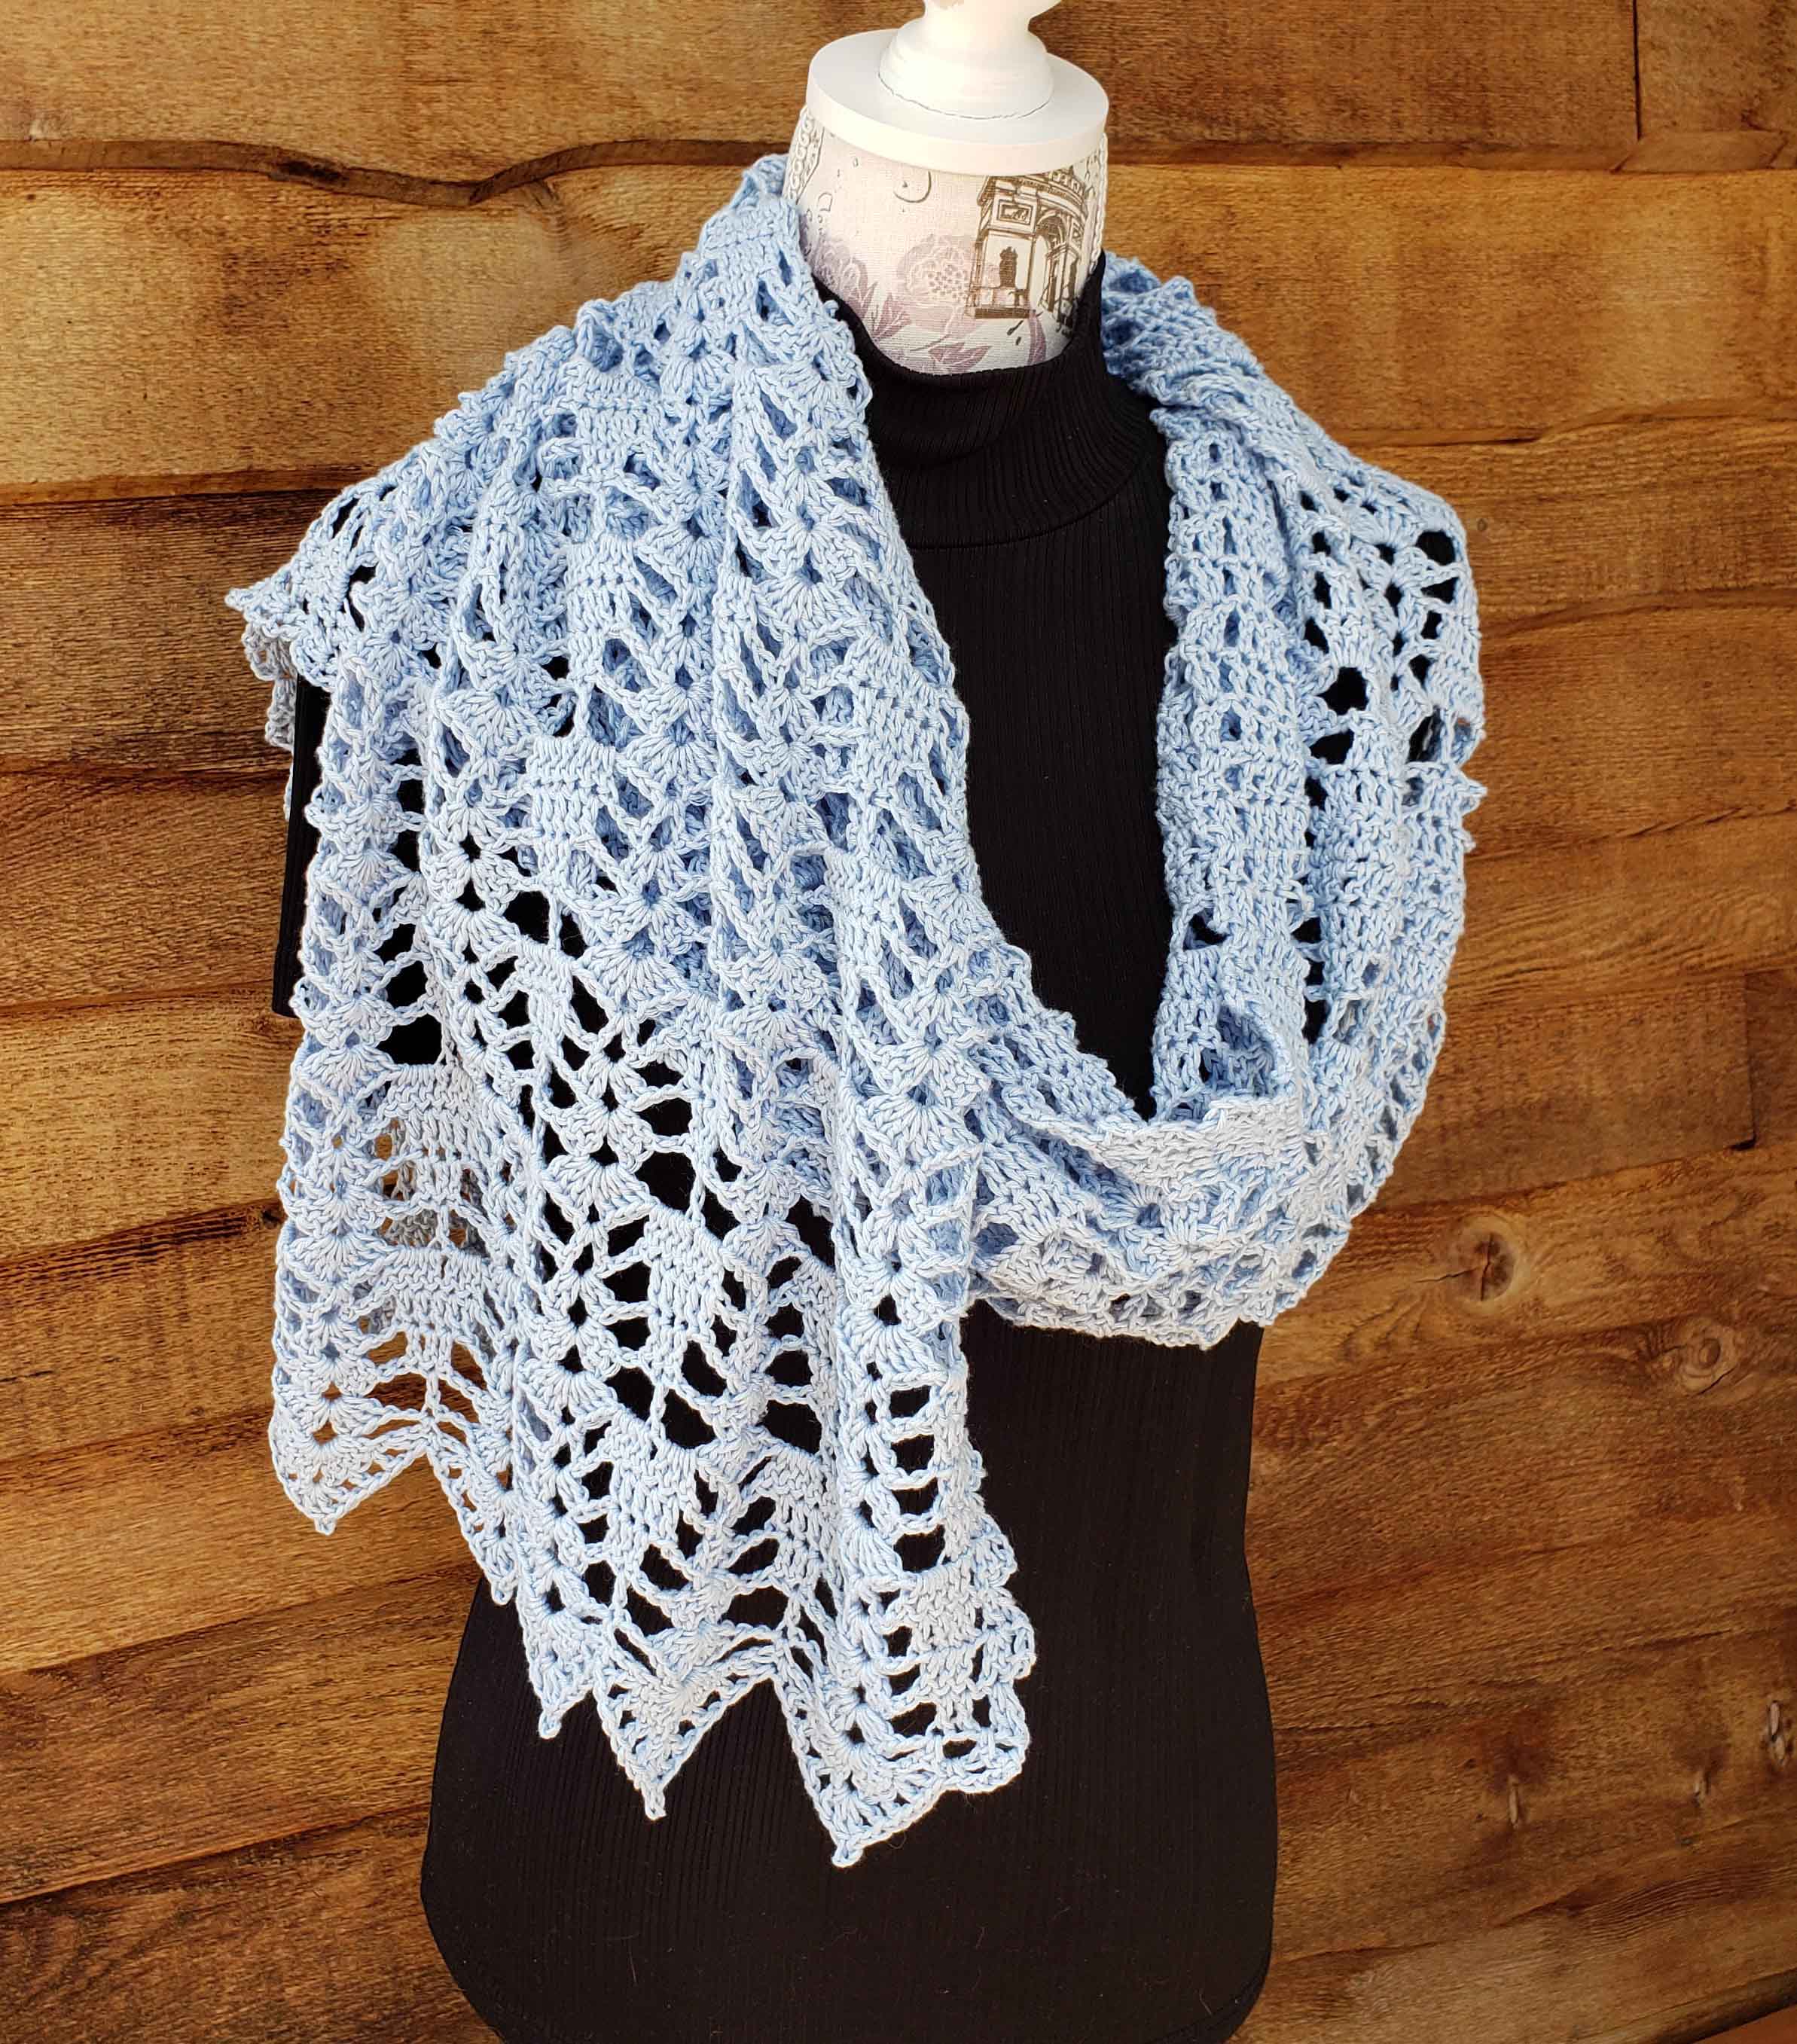
Included in this issue is my “Shells by the Sea Wrap” design. This design uses solid and lacy shell stitches to create a fun wrap that can be tied around your hips as a swimsuit cover-up, or wrapped around your shoulders when the air-conditioning is a little too chilly.
I love Universal Yarns “Bamboo Pop” for this wrap. It is a great weight yarn that combines bamboo rayon and cotton for terrific stitch definition and breathable drape. The contrast between the 2 fibers gives a lovely subtle light play between the matte and shiny.
Update May 7, 2021: I discovered there was a misprint in the magazine in Row 1 of the Body of the Wrap. The instructions for the row say: “Row 1: Turn to back of work along flat side of Foundation Strip,” It should say: “Row 1: Turn to work back along flat side of Foundation Strip,”
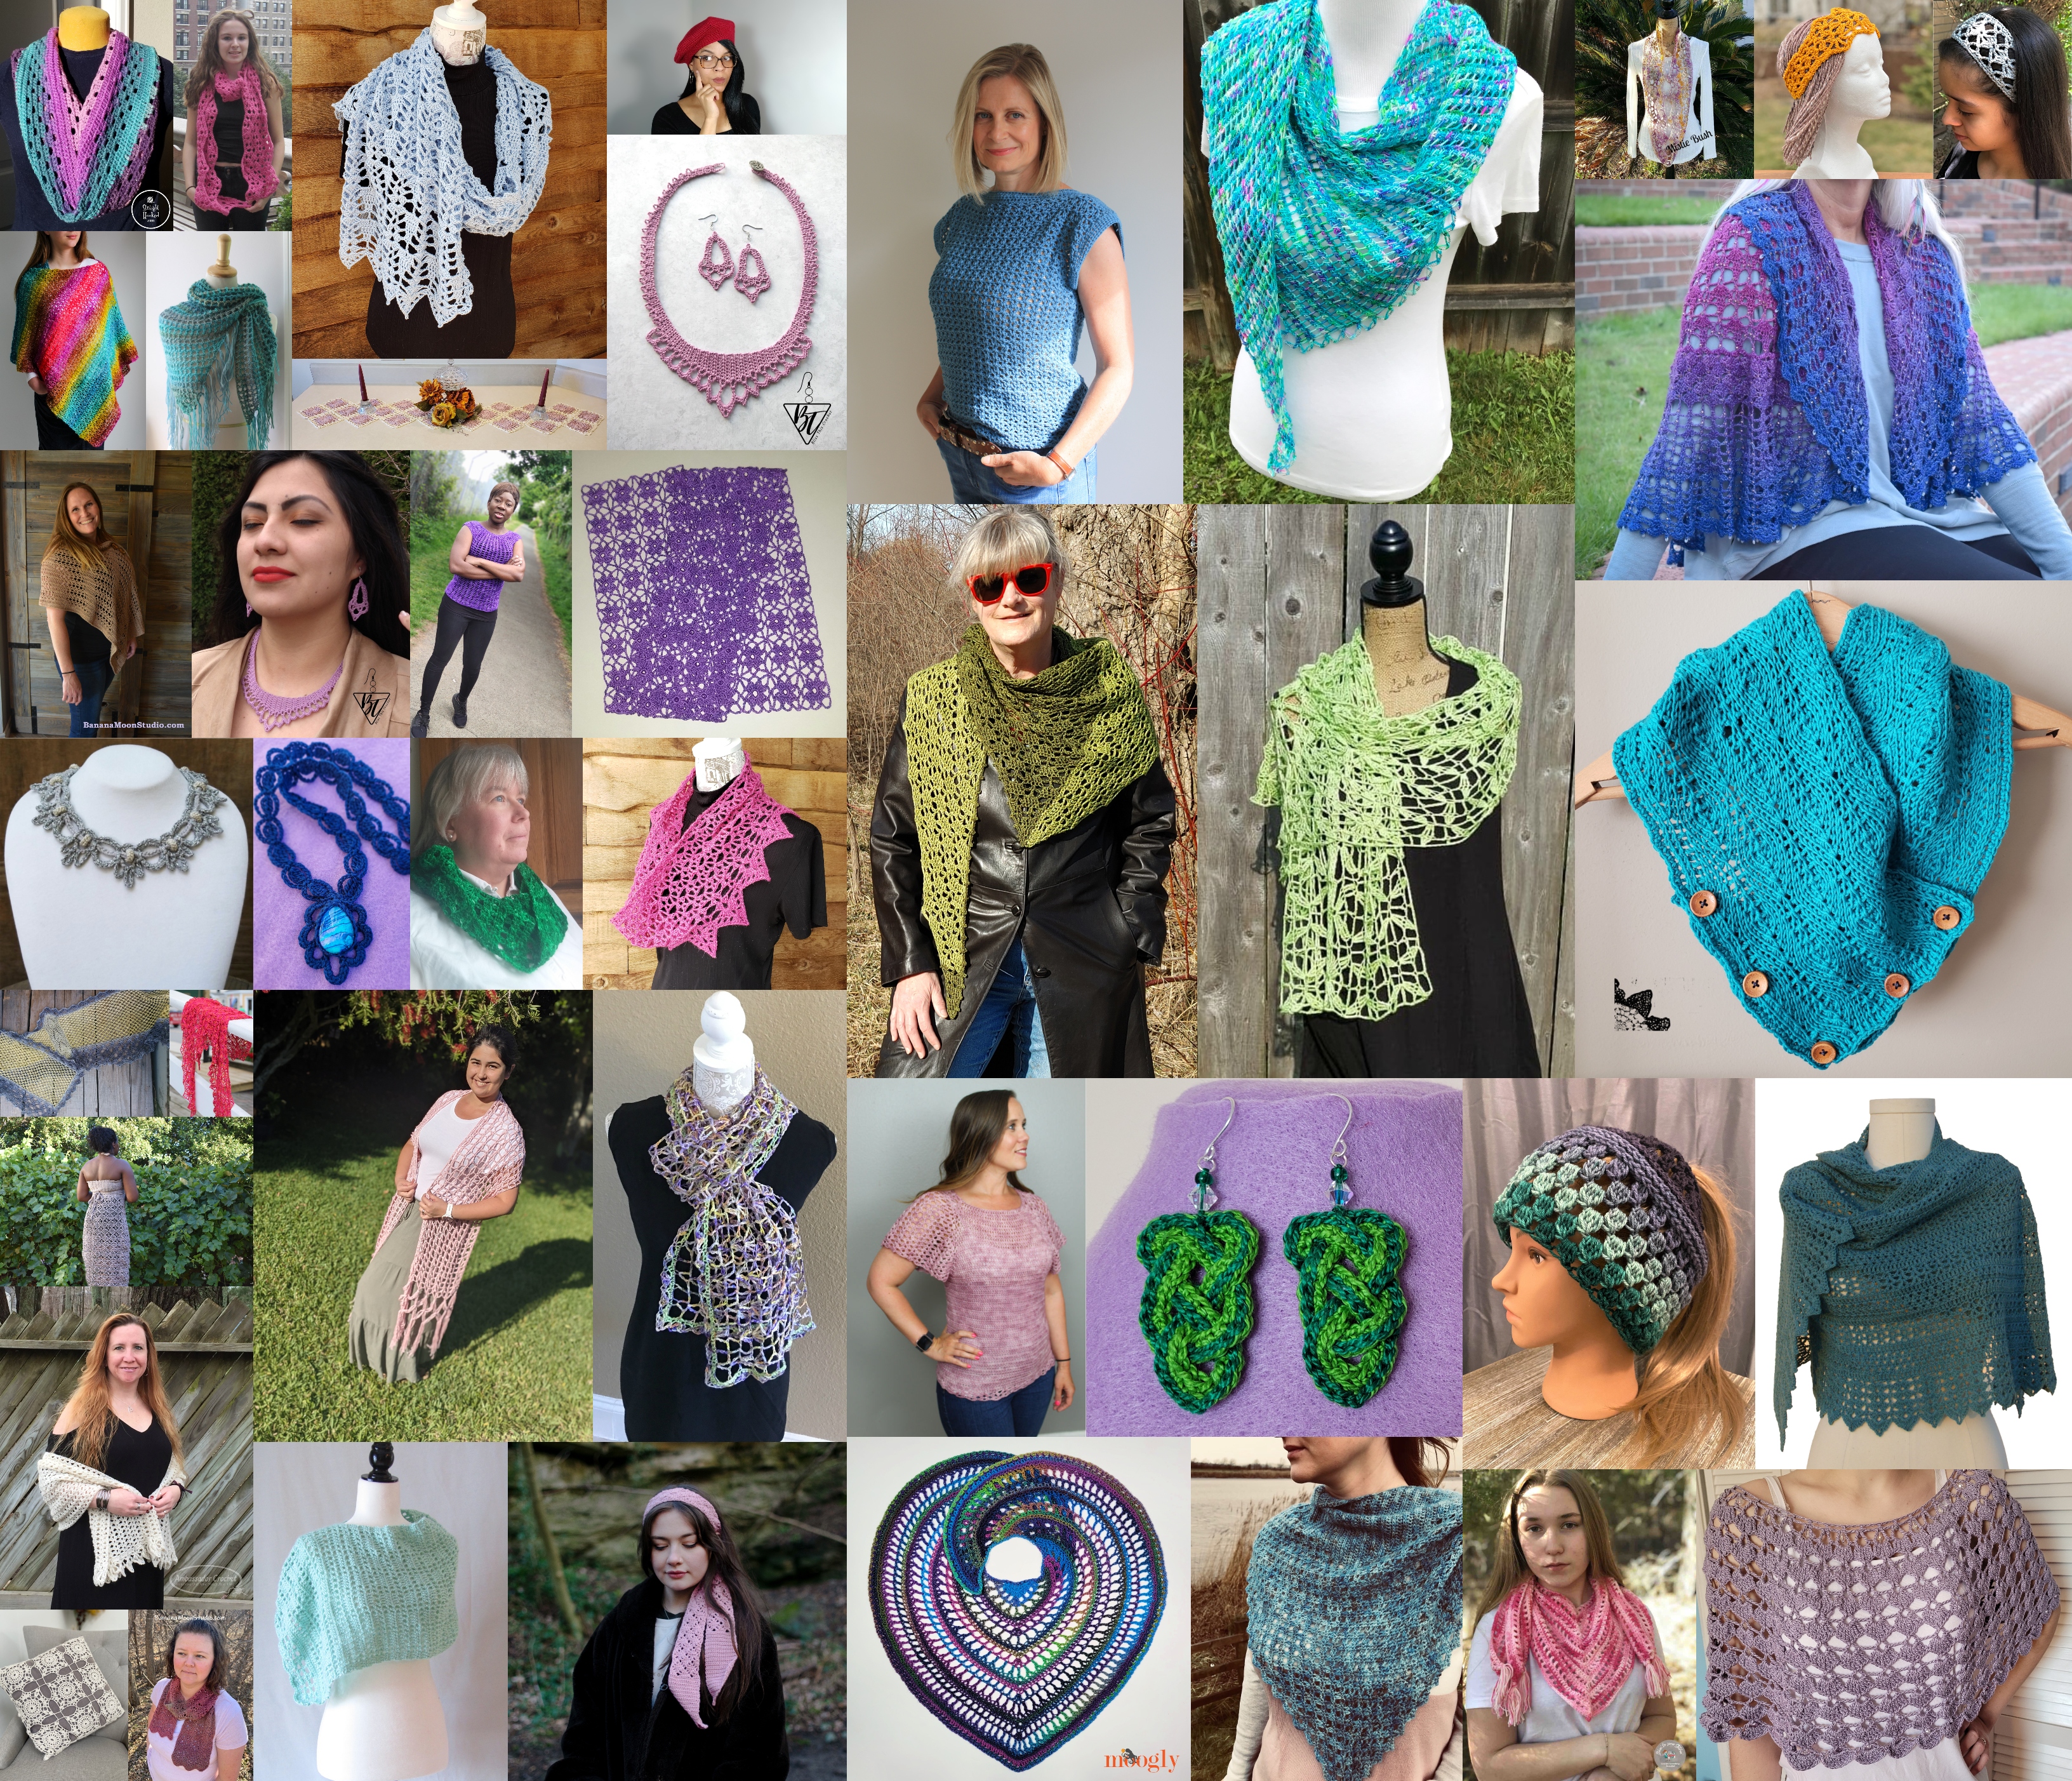
Many folks have asked me what patterns are in the Crochet for Me Lace Bundle? So I decided to make a blog post showing you photos of all the other designs. Remember this offer goes away at 11:59 PM Eastern time on Wednesday, April 21.
1 Pillow
1 Table Runner
5 Jewelry Pieces
4 Garments
4 Head wraps & 2 Hats
10 Scarves and Cowls
16 Shawls and Wraps
This is a limited time offer and the clock is counting down to 11:59 PM Eastern time on April 21, so act now and welcome the new season with a gorgeous, lacy project!
For those of you wondering how to purchase the Knit for Me Lace Bundle as well. When you click on the link above and put the Crochet for Me Lace Bundle in your cart, you will see the option to add the Knit Bundle for a discounted price. If you are only interested in purchasing the Knit for Me Lace Bundle use the link below.
Well it might not look like it at my house, but Spring has sprung. Soon the warmer weather will find us, even up here on the mountain, and when it does I’ll be looking for cool projects to work on. So my thoughts turn to lace! Lace to make – challenging stitches, airy patterns, gorgeous lightweight yarns – and lace to wear – the perfect items to get me from Spring to Summer or Summer to Fall.
In honor of Spring I joined 34 of my crochet designer colleagues and created the Crochet for Me Lace Bundle. It’s chock full of 46 individual patterns, never before offered in a bundle or for free, that will give you a wide range of patterns that will suit your lacy fancy.
All sorts of patterns are included from hats and headbands, to tees and shawls, to a dress and jewelry, and even a lacy pillow for your lounging pleasure.
I’ve contributed 2 never before released patterns to this gorgeous lace collection: Arrows Lace Wrap and Lace is the Point Cowl.
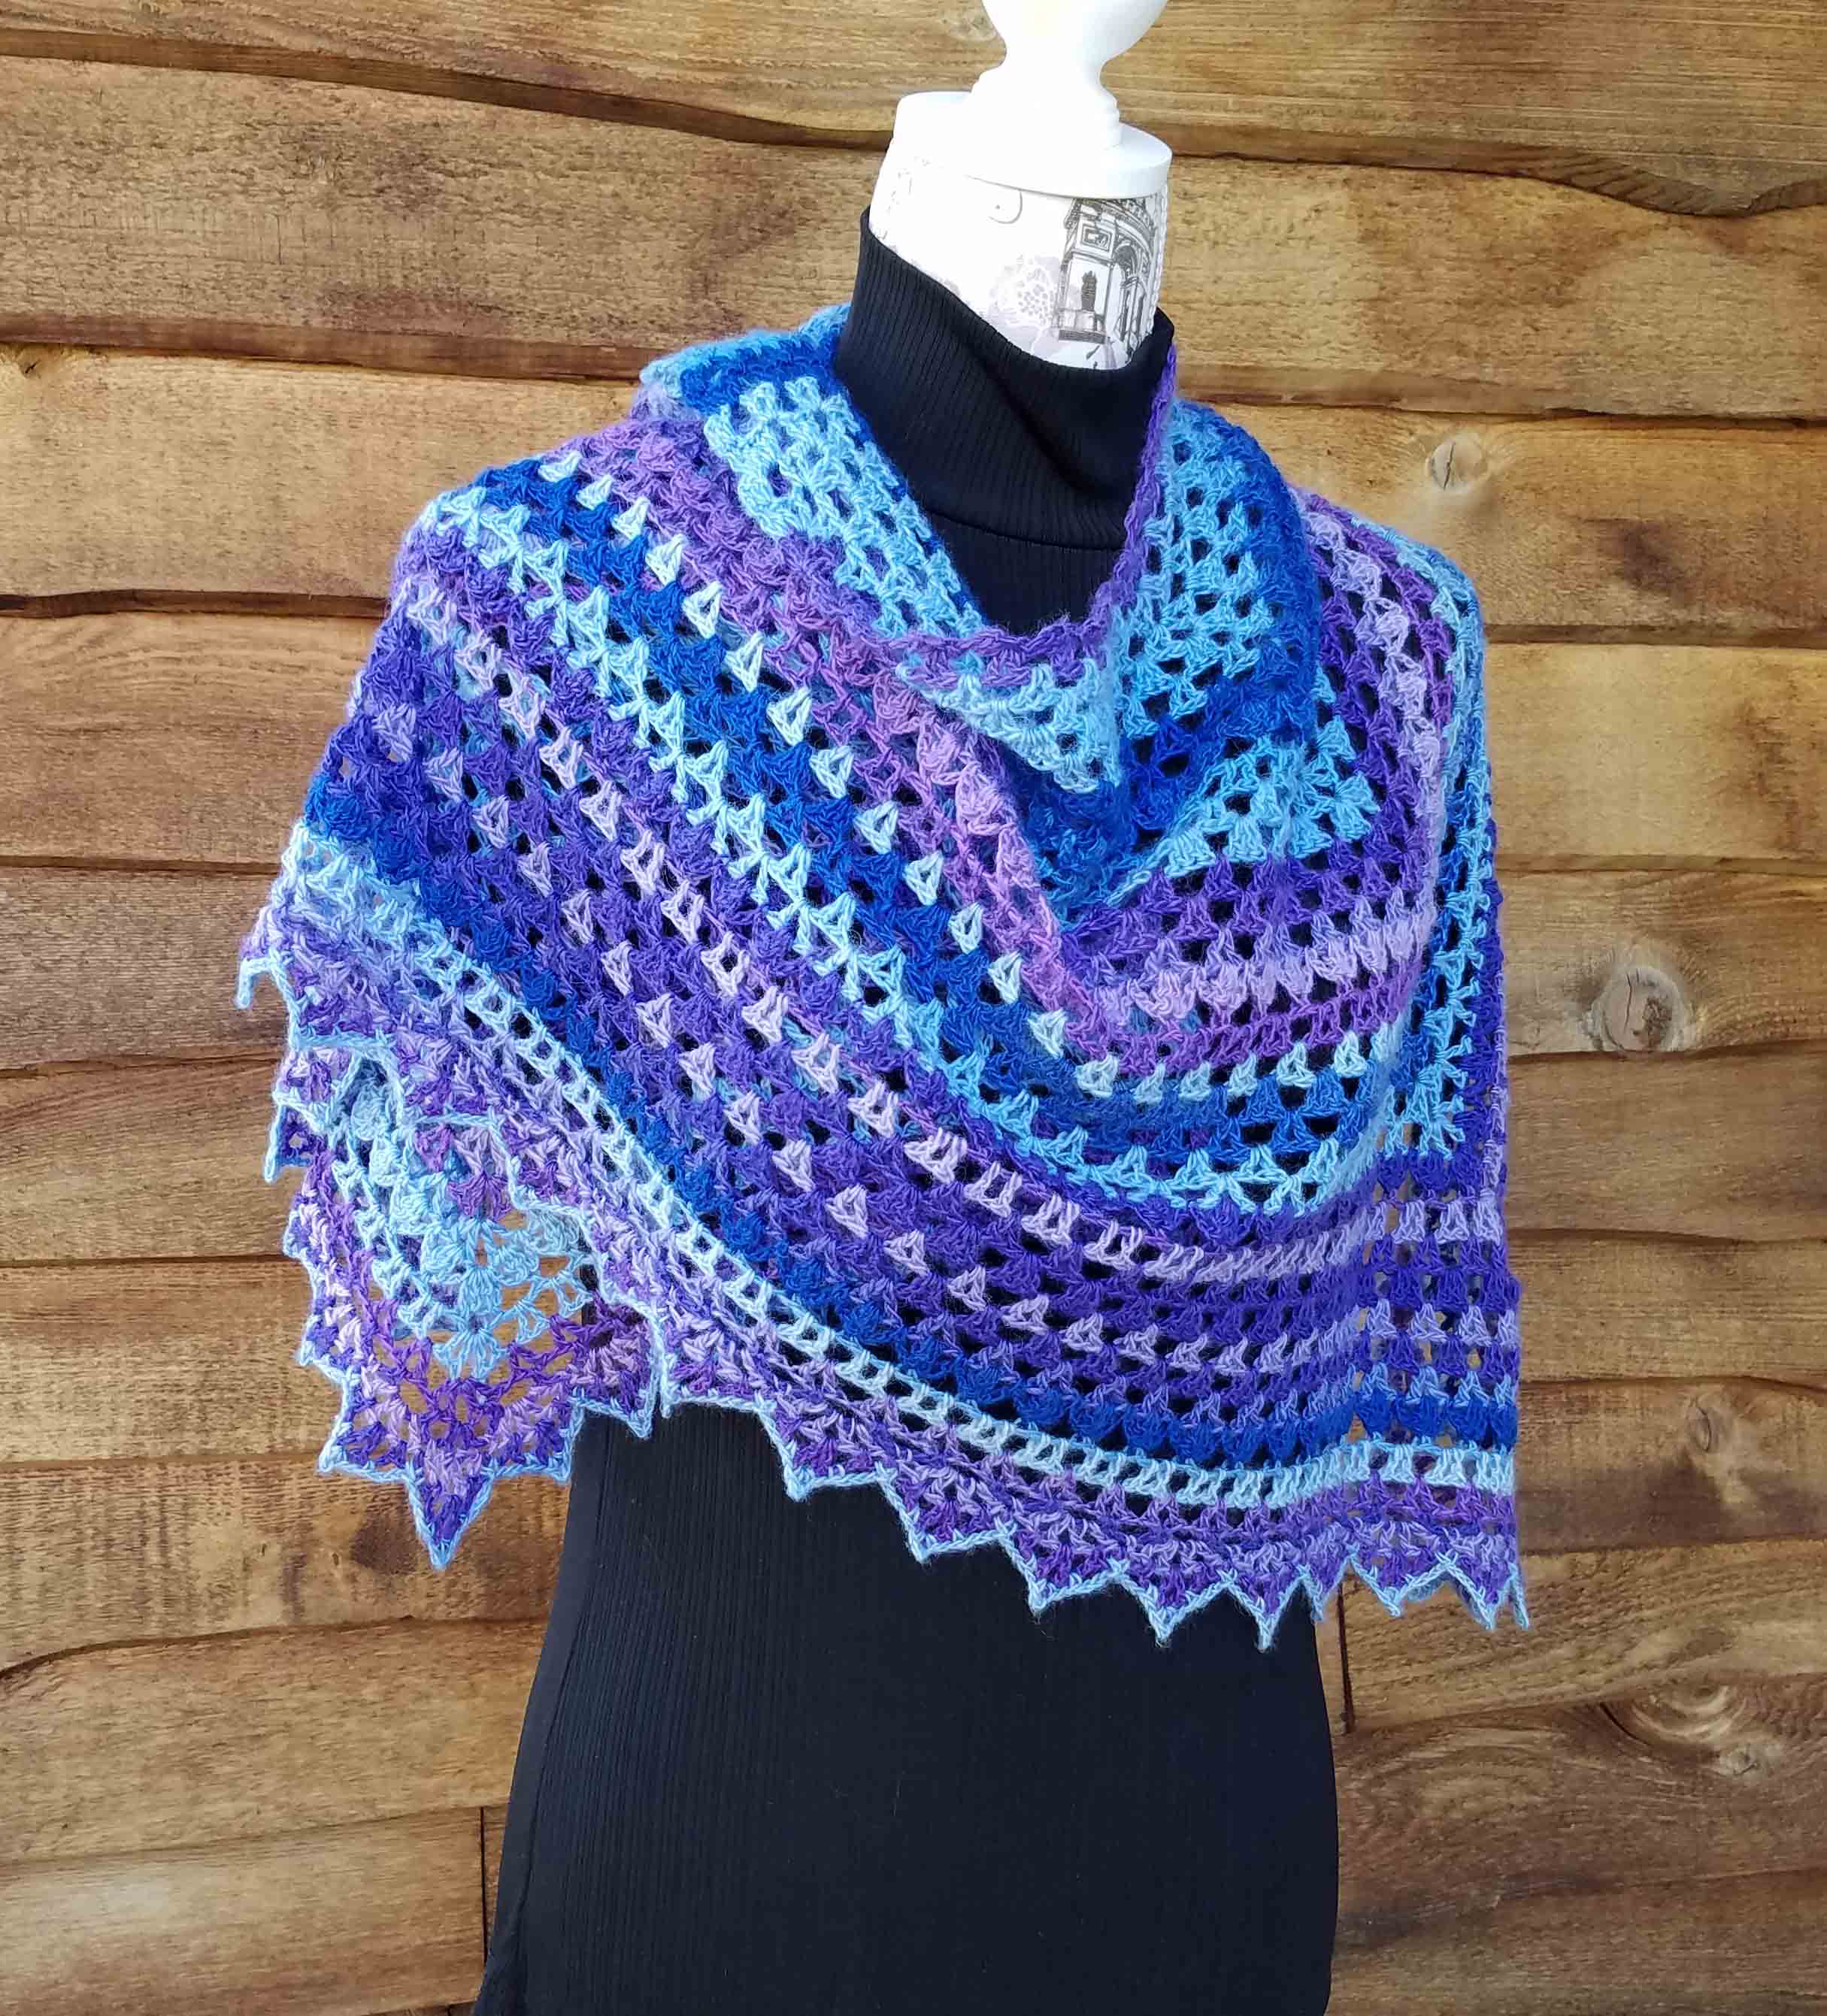
For the Arrows Lace Wrap I wanted to explore this fun 4 Row lace repeat. I used a central foundation with the wrap worked off each side and ending with an elaborate pointed border. The beginning and end of each row finishes the edge as you go, so once you are done all you have to do is block and weave in a few ends. This pattern is also available in my Ravelry Shop for $5.99.
For the Lace is the Point Cowl I was having some fun with the gorgeous “Folio” yarn from Berroco. The drape and soft fluffy feel of this yarn make it perfect for a cozy lacy layer for a cowl that can see you into the cooler weather. It takes less than 1 ball of yarn, so it’s a great project to splurge on yourself with. This pattern is also available in my Ravelry Shop for $4.99.
You get all 46 patterns featured in this bundle for only $25. That’s less than 55 cents per pattern! But the offer is only available through April 21, 2021, 11:59 PM Eastern, and it absolutely will not be extended nor repeated.
If you purchased these patterns individually they would cost you well over $200. And by buying from a coalition of designers like this instead of a huge publisher, you know that your money is going where it’s needed – into the pockets of your favorite designers so they can keep on creating the patterns you love to make.
If all of that is not enough to convince you you need this bundle here’s one more great thing. Once you gain access to the patterns you ALSO get a file with extra discount codes for additional products offered by some of our amazing designer friends. And there’s a 15 day money back guarantee so you have absolutely nothing to lose.
Knit For Me Lace Bundle Pattern
For those of my readers that also love to knit there is a Knit for Me Lace Bundle too! The Knit for Me Lace Bundle has 33 patterns for only $17. That’s less than 52 cents per pattern. If you purchased these patterns individually they would cost you well over $170. But the offer is only available through April 21, 2021, 11:59 PM Eastern, and it absolutely will not be extended nor repeated.
If you purchase both bundles together you get an even better discount.
So support the community that you love, rejoice in the fact that you are a clever bargain hunter, then put your feet up and crochet (or knit) something light and lacy as you watch the flowers bloom! Enjoy all of these things – and the lovely Spring weather – while they last.
What is a Cluster Stitch? The general definition is a group of stitches worked in one stitch or space that only counts as one stitch itself. Clusters are a great way to add texture and visual interest to your crochet projects.
There are a lot of different sizes of cluster stitches in crochet. One simple rule to keep in mind when clusters are in a pattern, is to know what stitches are the basis of the cluster. Most commonly a cluster stitch uses double crochet stitches, but sometimes you will see patterns that use treble or even taller stitches. The special stitches section of your pattern should clearly define the cluster stitch telling you which stitch and how many will be in clusters in the project you are making.
If you are a fan of stitch charts the stitch symbols used for the cluster stitch will give you a lot of information. Not only will they show where the cluster stitch is to be worked, they also show how many and what sort of stitches are to be used in each cluster.
When you are working cluster stitches you want to pay attention to keeping the working loop (first loop on hook) snug to the shaft. This loop can become over-extended making your stitch top wider than other single stitches in your project. For smooth looking cluster stitches you want your tension to be even and consistent. If your tall stitches, like doubles and trebles, tend to get leggy and loopy you may find your cluster stitches to be disappointing.
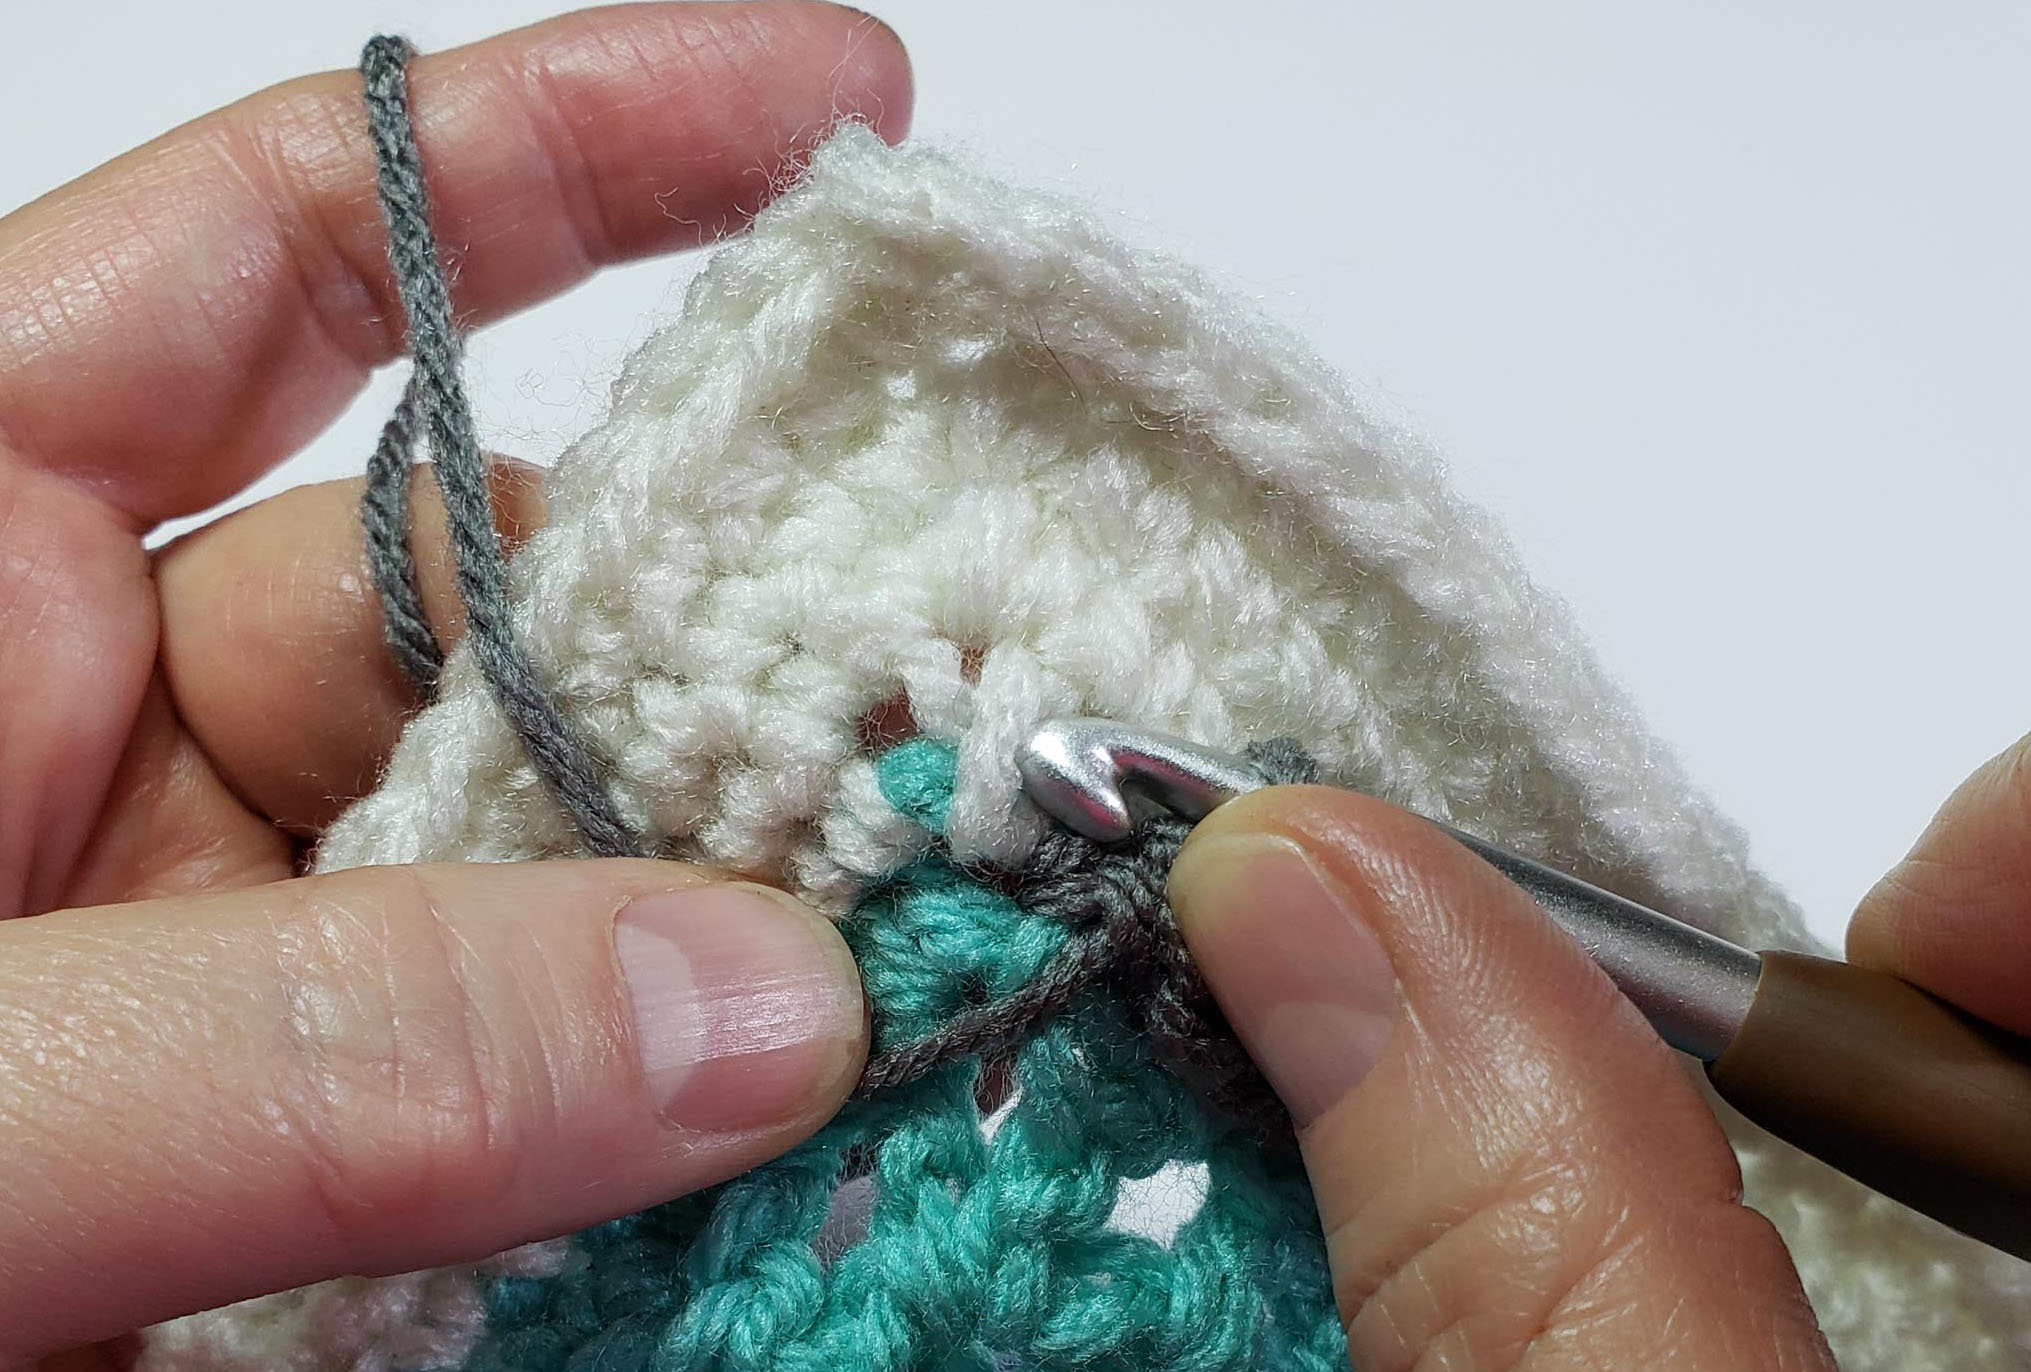
In a 3 dc cluster stitch you make the base of the 3 dcs being used, then work the final dc step for all 3 in one go. This same method applies to working any dc clusters, no matter the number of stitches. For cluster stitches using taller stitches like trebles you will work each step of the stitch up to the final “pull through 2 loops”, that final step will be completed once you have worked the bases of all the stitches in the cluster.
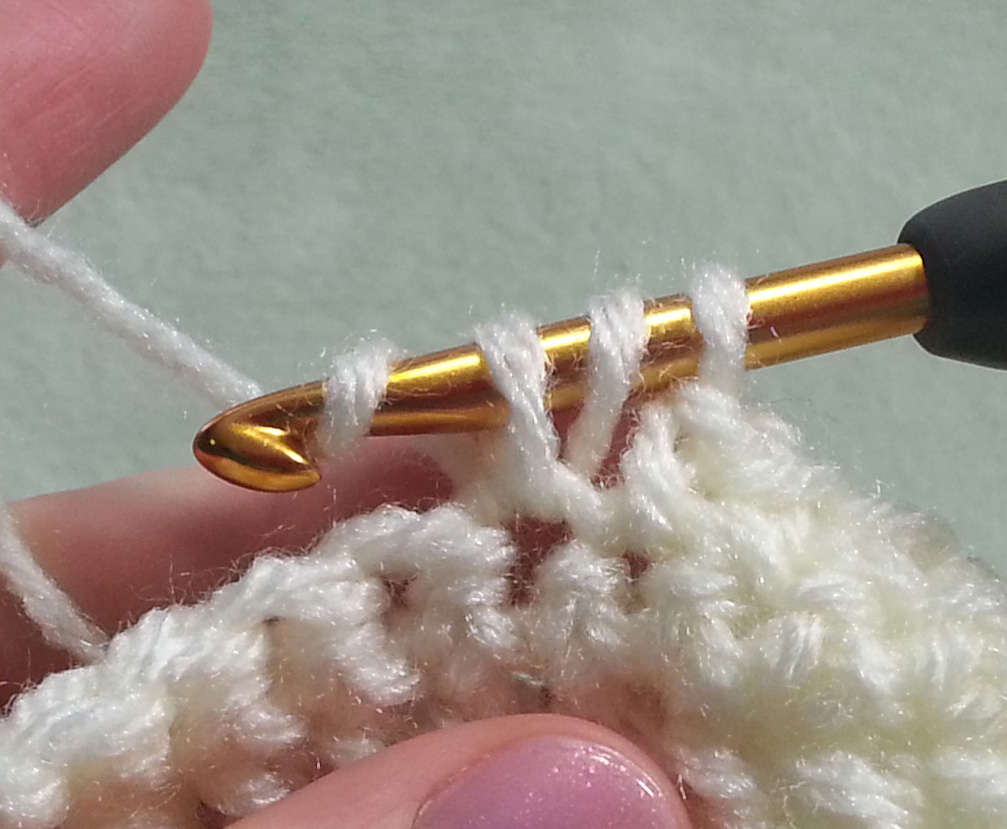
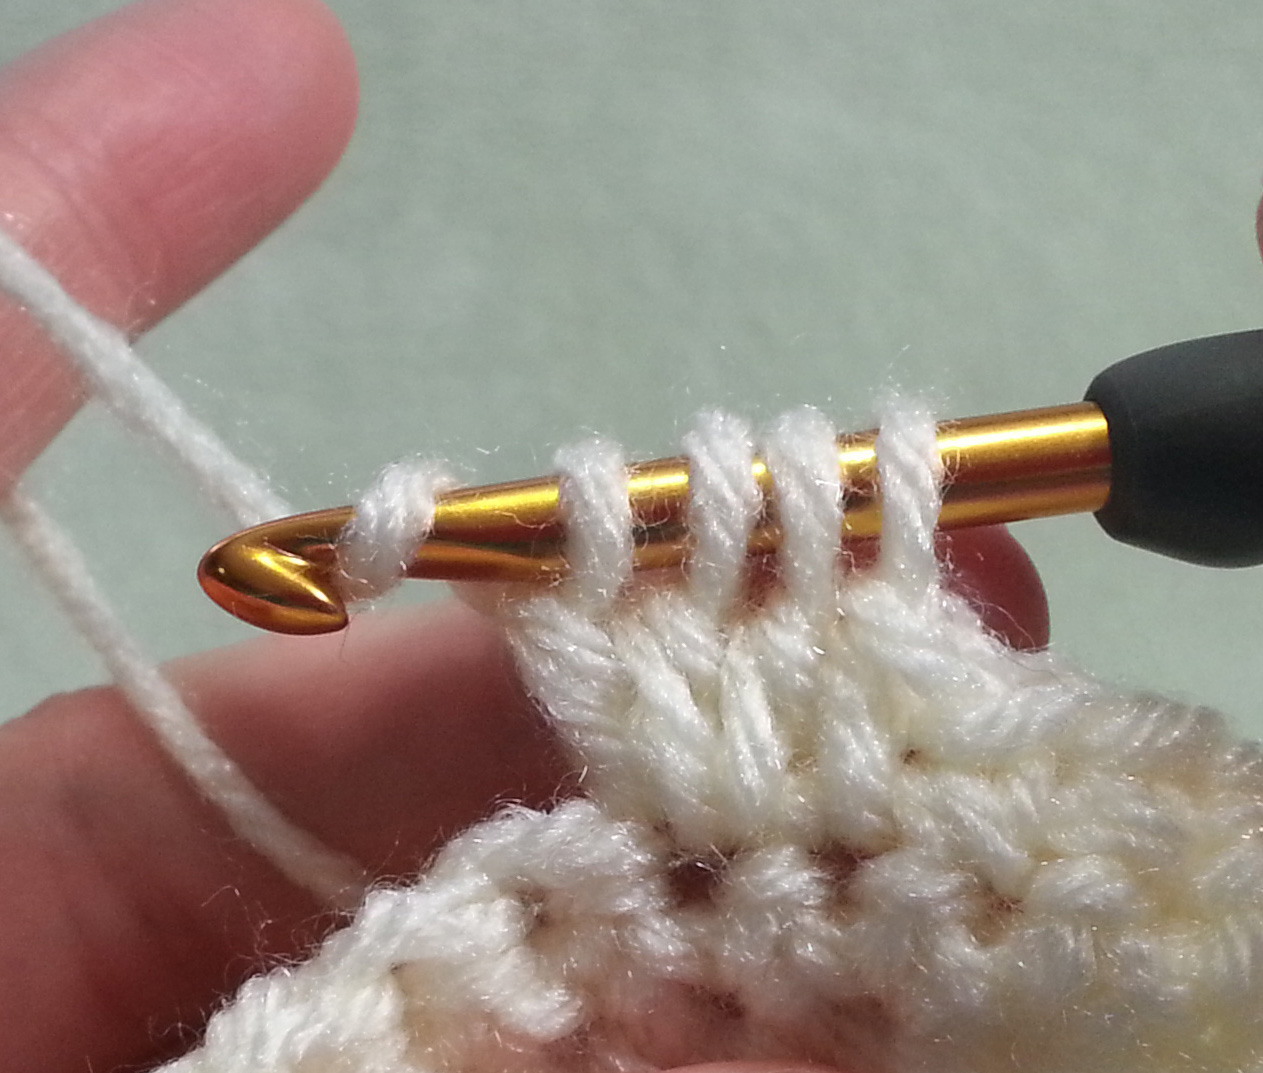
Photo A
To make a 3 dc cluster st, yarn over (yo) like making a double crochet and insert in st or sp, yo, pull up a loop (3 loops on hook), yo {Photo A},
Photo B
pull through 2 loops on hook (2 loops remaining on hook, 1st base made), yo, insert in same st or sp, yo, pull up a loop (4 loops on hook), yo {Photo B},
Photo C
pull through 2 loops (3 loops remaining on hook, 2nd base made), yo, insert in same st or sp, yo, pull up a loop (5 loops on hook), yo, pull through 2 loops (4 loops remaining on hook, 3rd base made), yo {Photo C}, pull through remaining 4 loops on hook.
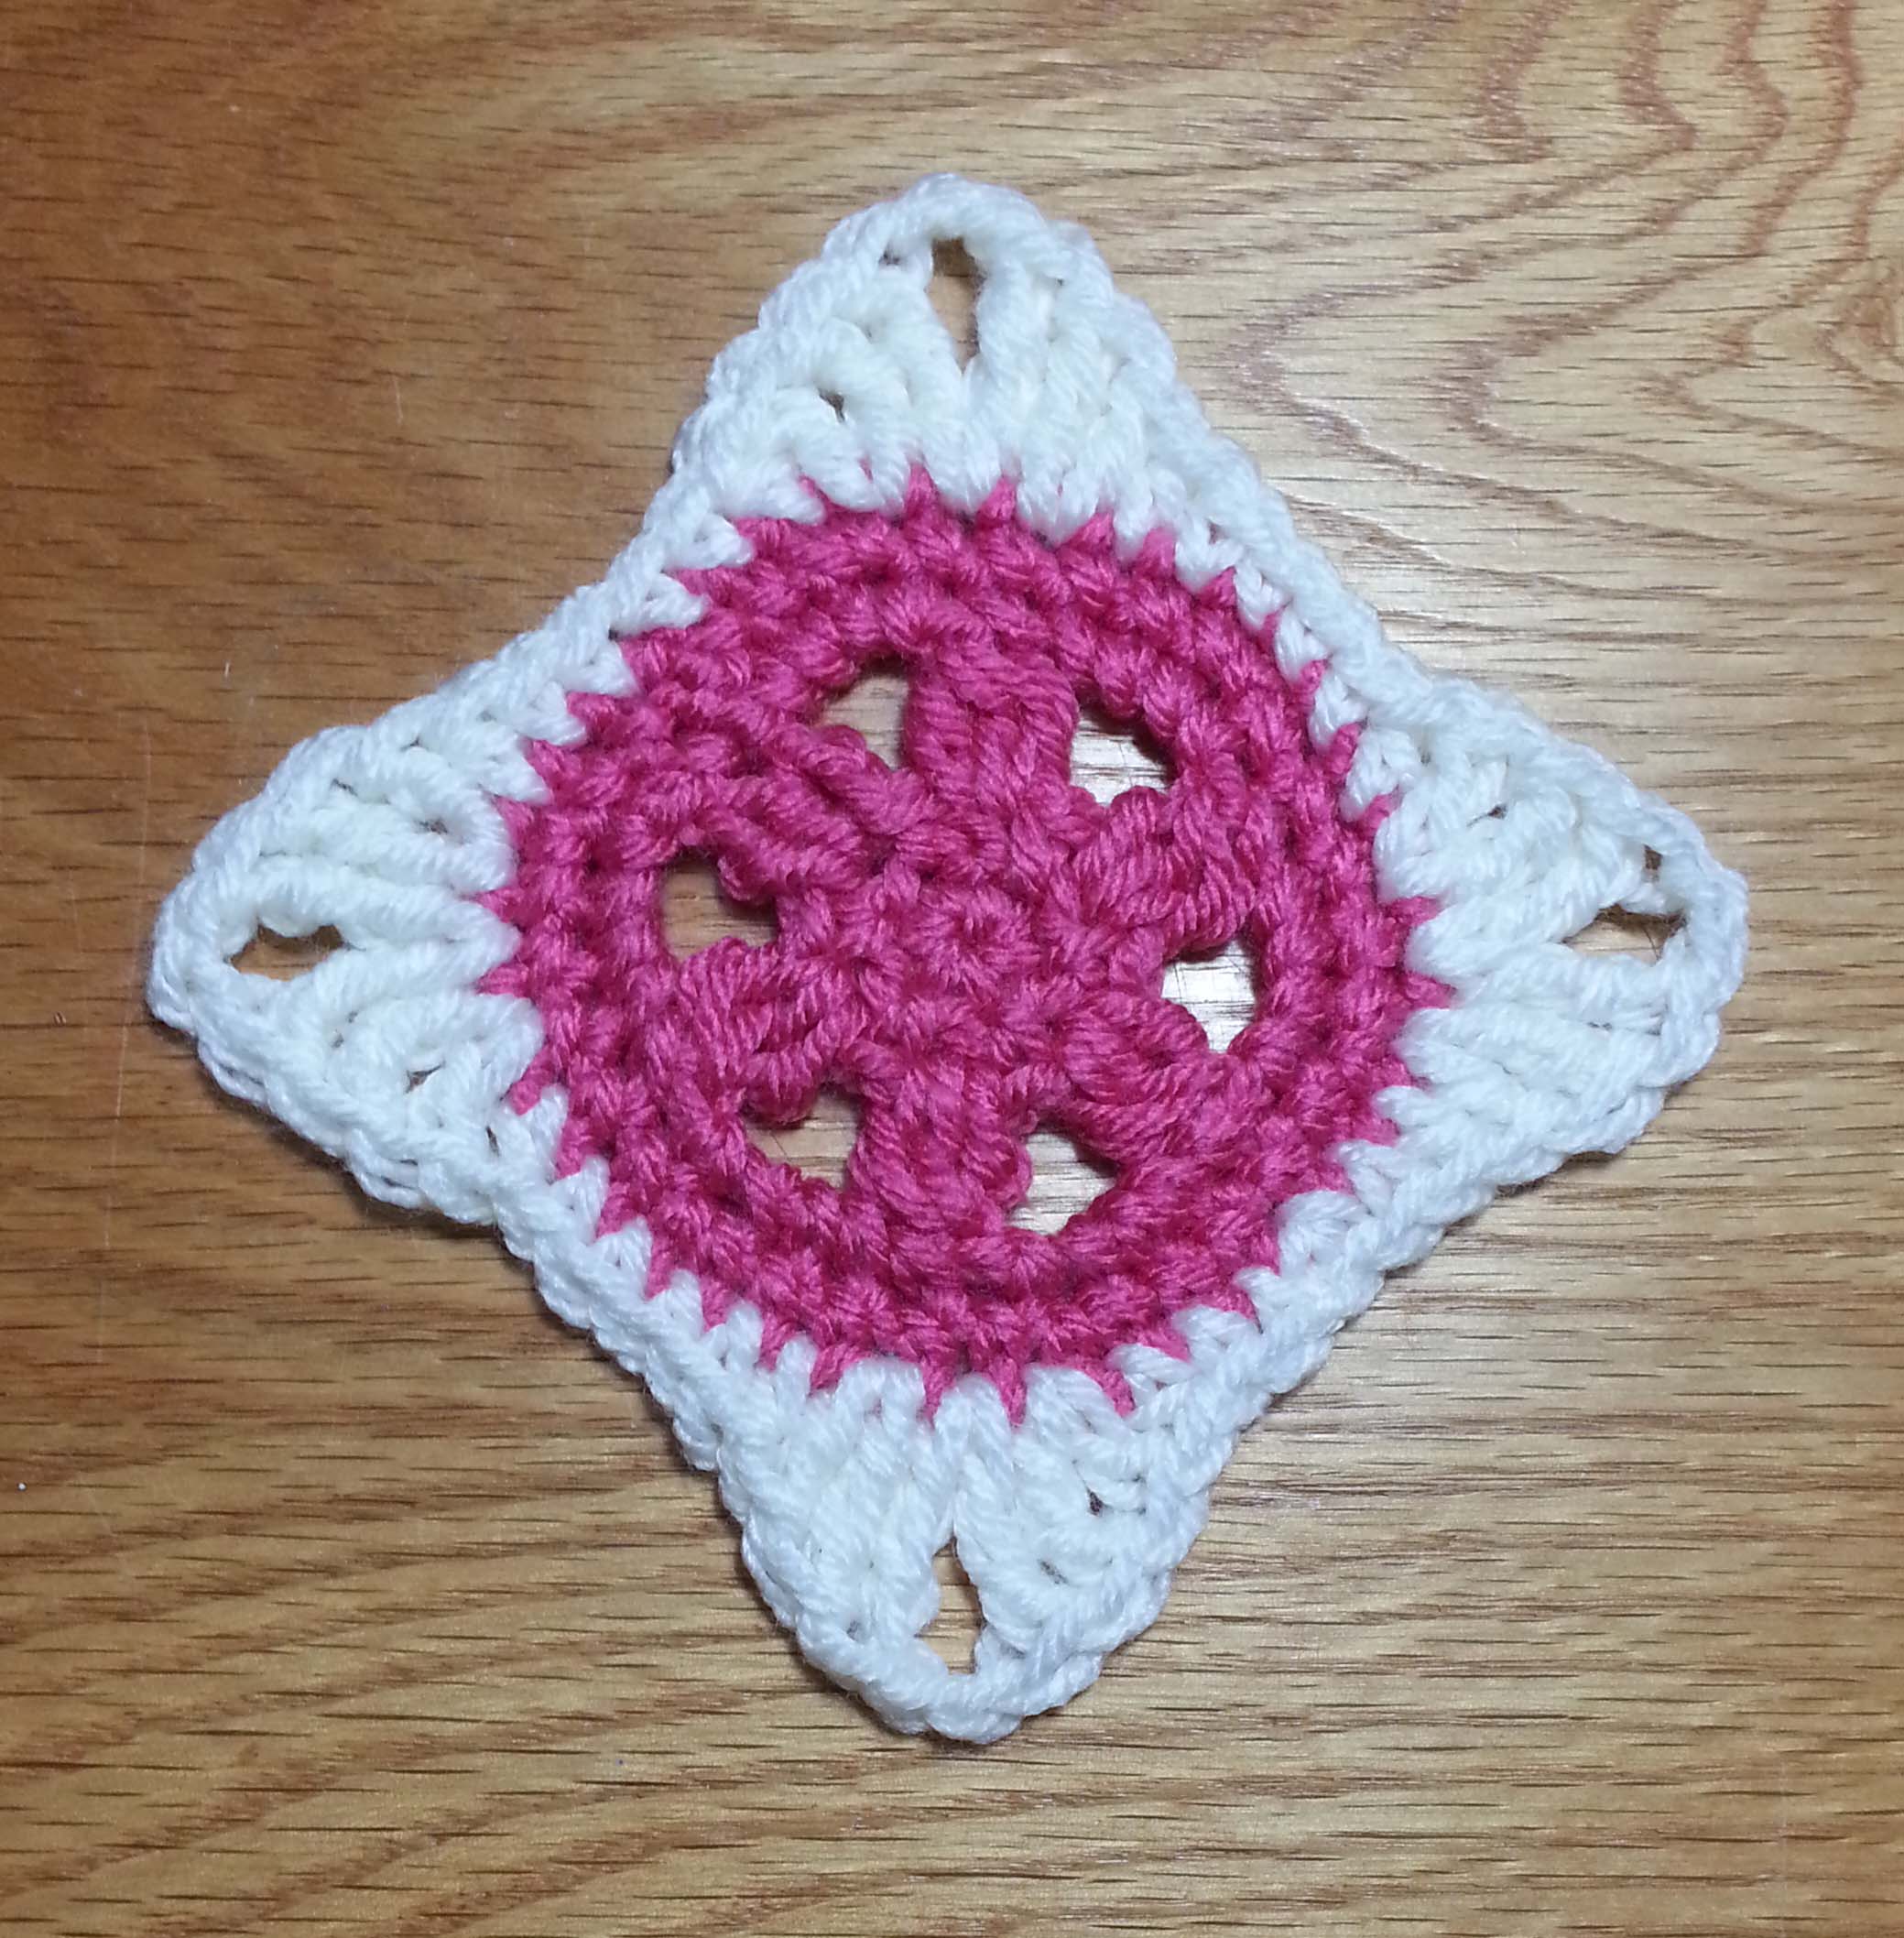
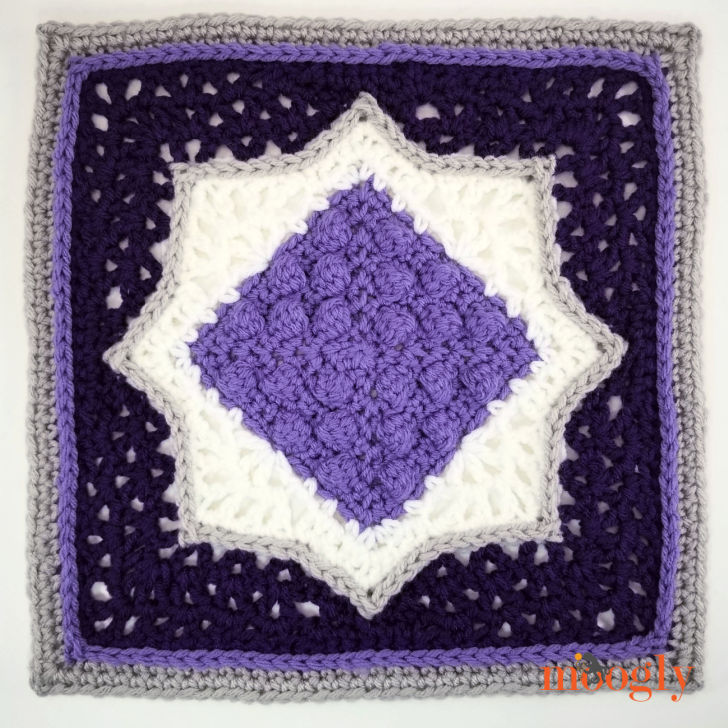
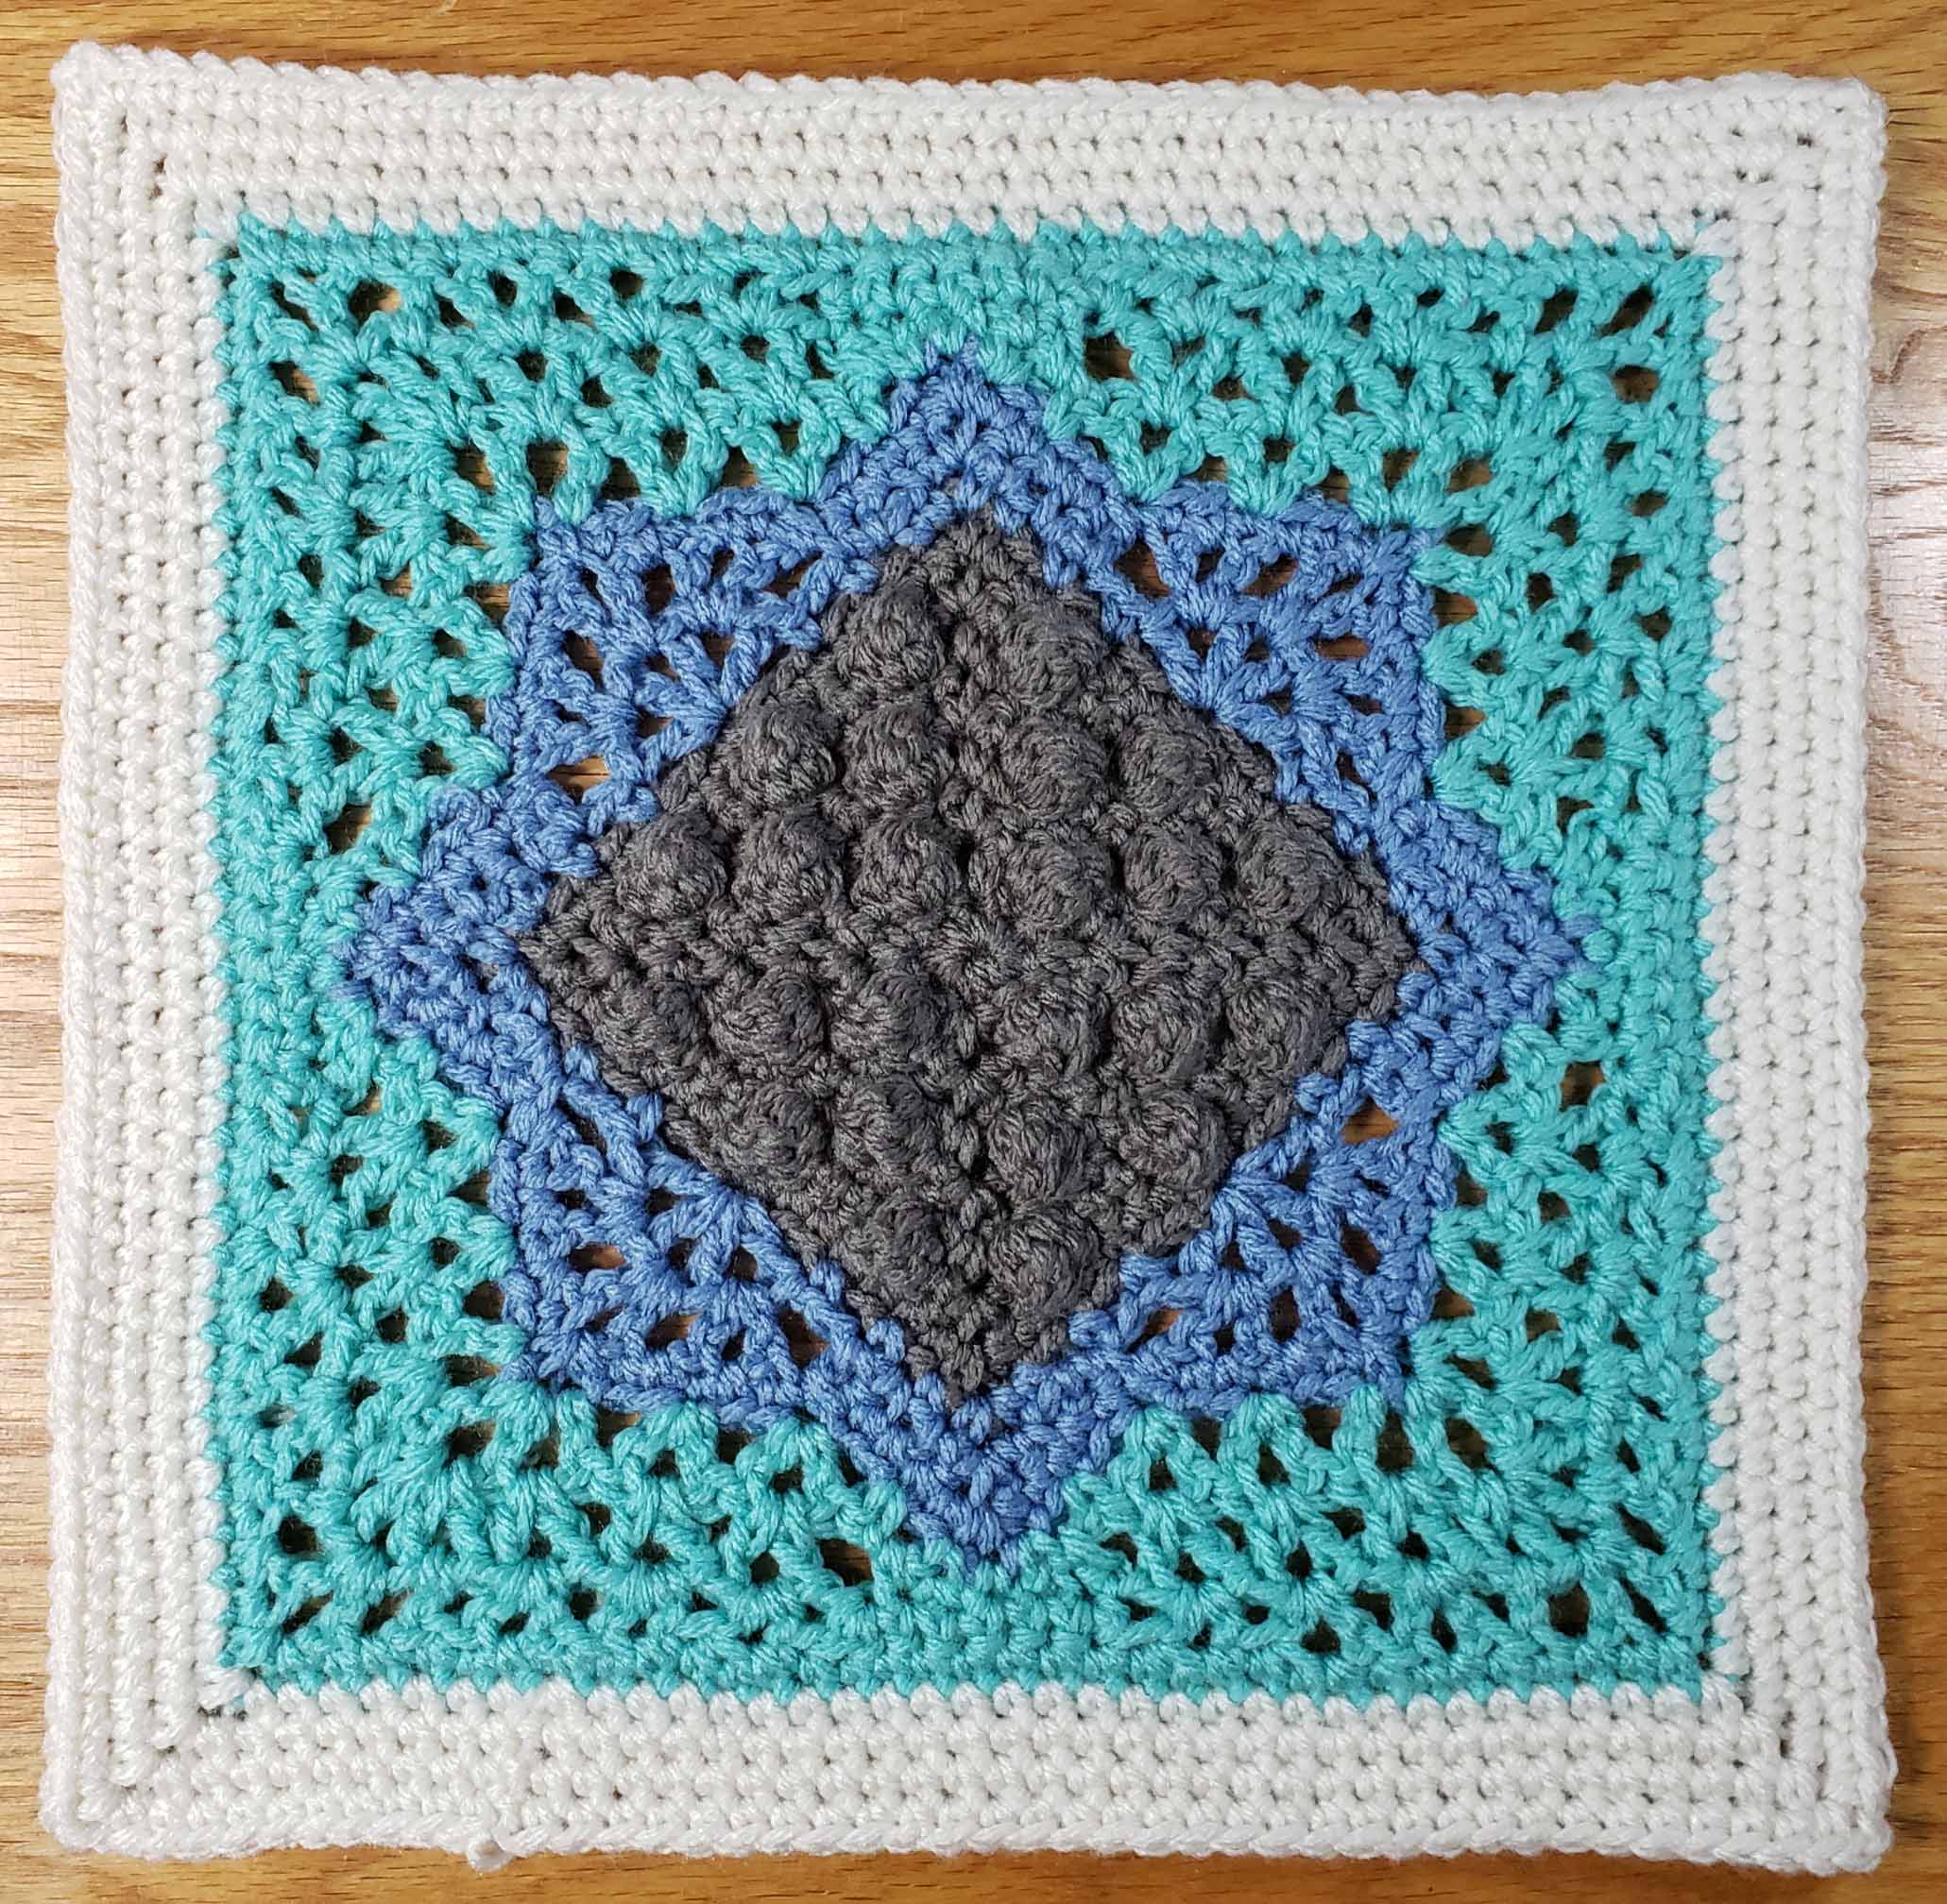
I also like to use cluster stitches to create “bobbles” on my work. A good example of that would be my “Pebbled Star Afghan Square” pattern. The cluster stitches are worked on wrong-side rounds with single crochet stitches framing each cluster so that they are pushed out creating an exaggerated bump on the right side of the fabric. The clusters in this pattern are 3 dc clusters, a 5 dc cluster gives a larger “bump”.
A cluster stitch doesn’t need to be all the same kind of stitches. You can combine stitches like double and treble crochet, this can be especially useful if you are making bobbles and want to make them stand up even more without creating holes in your fabric.
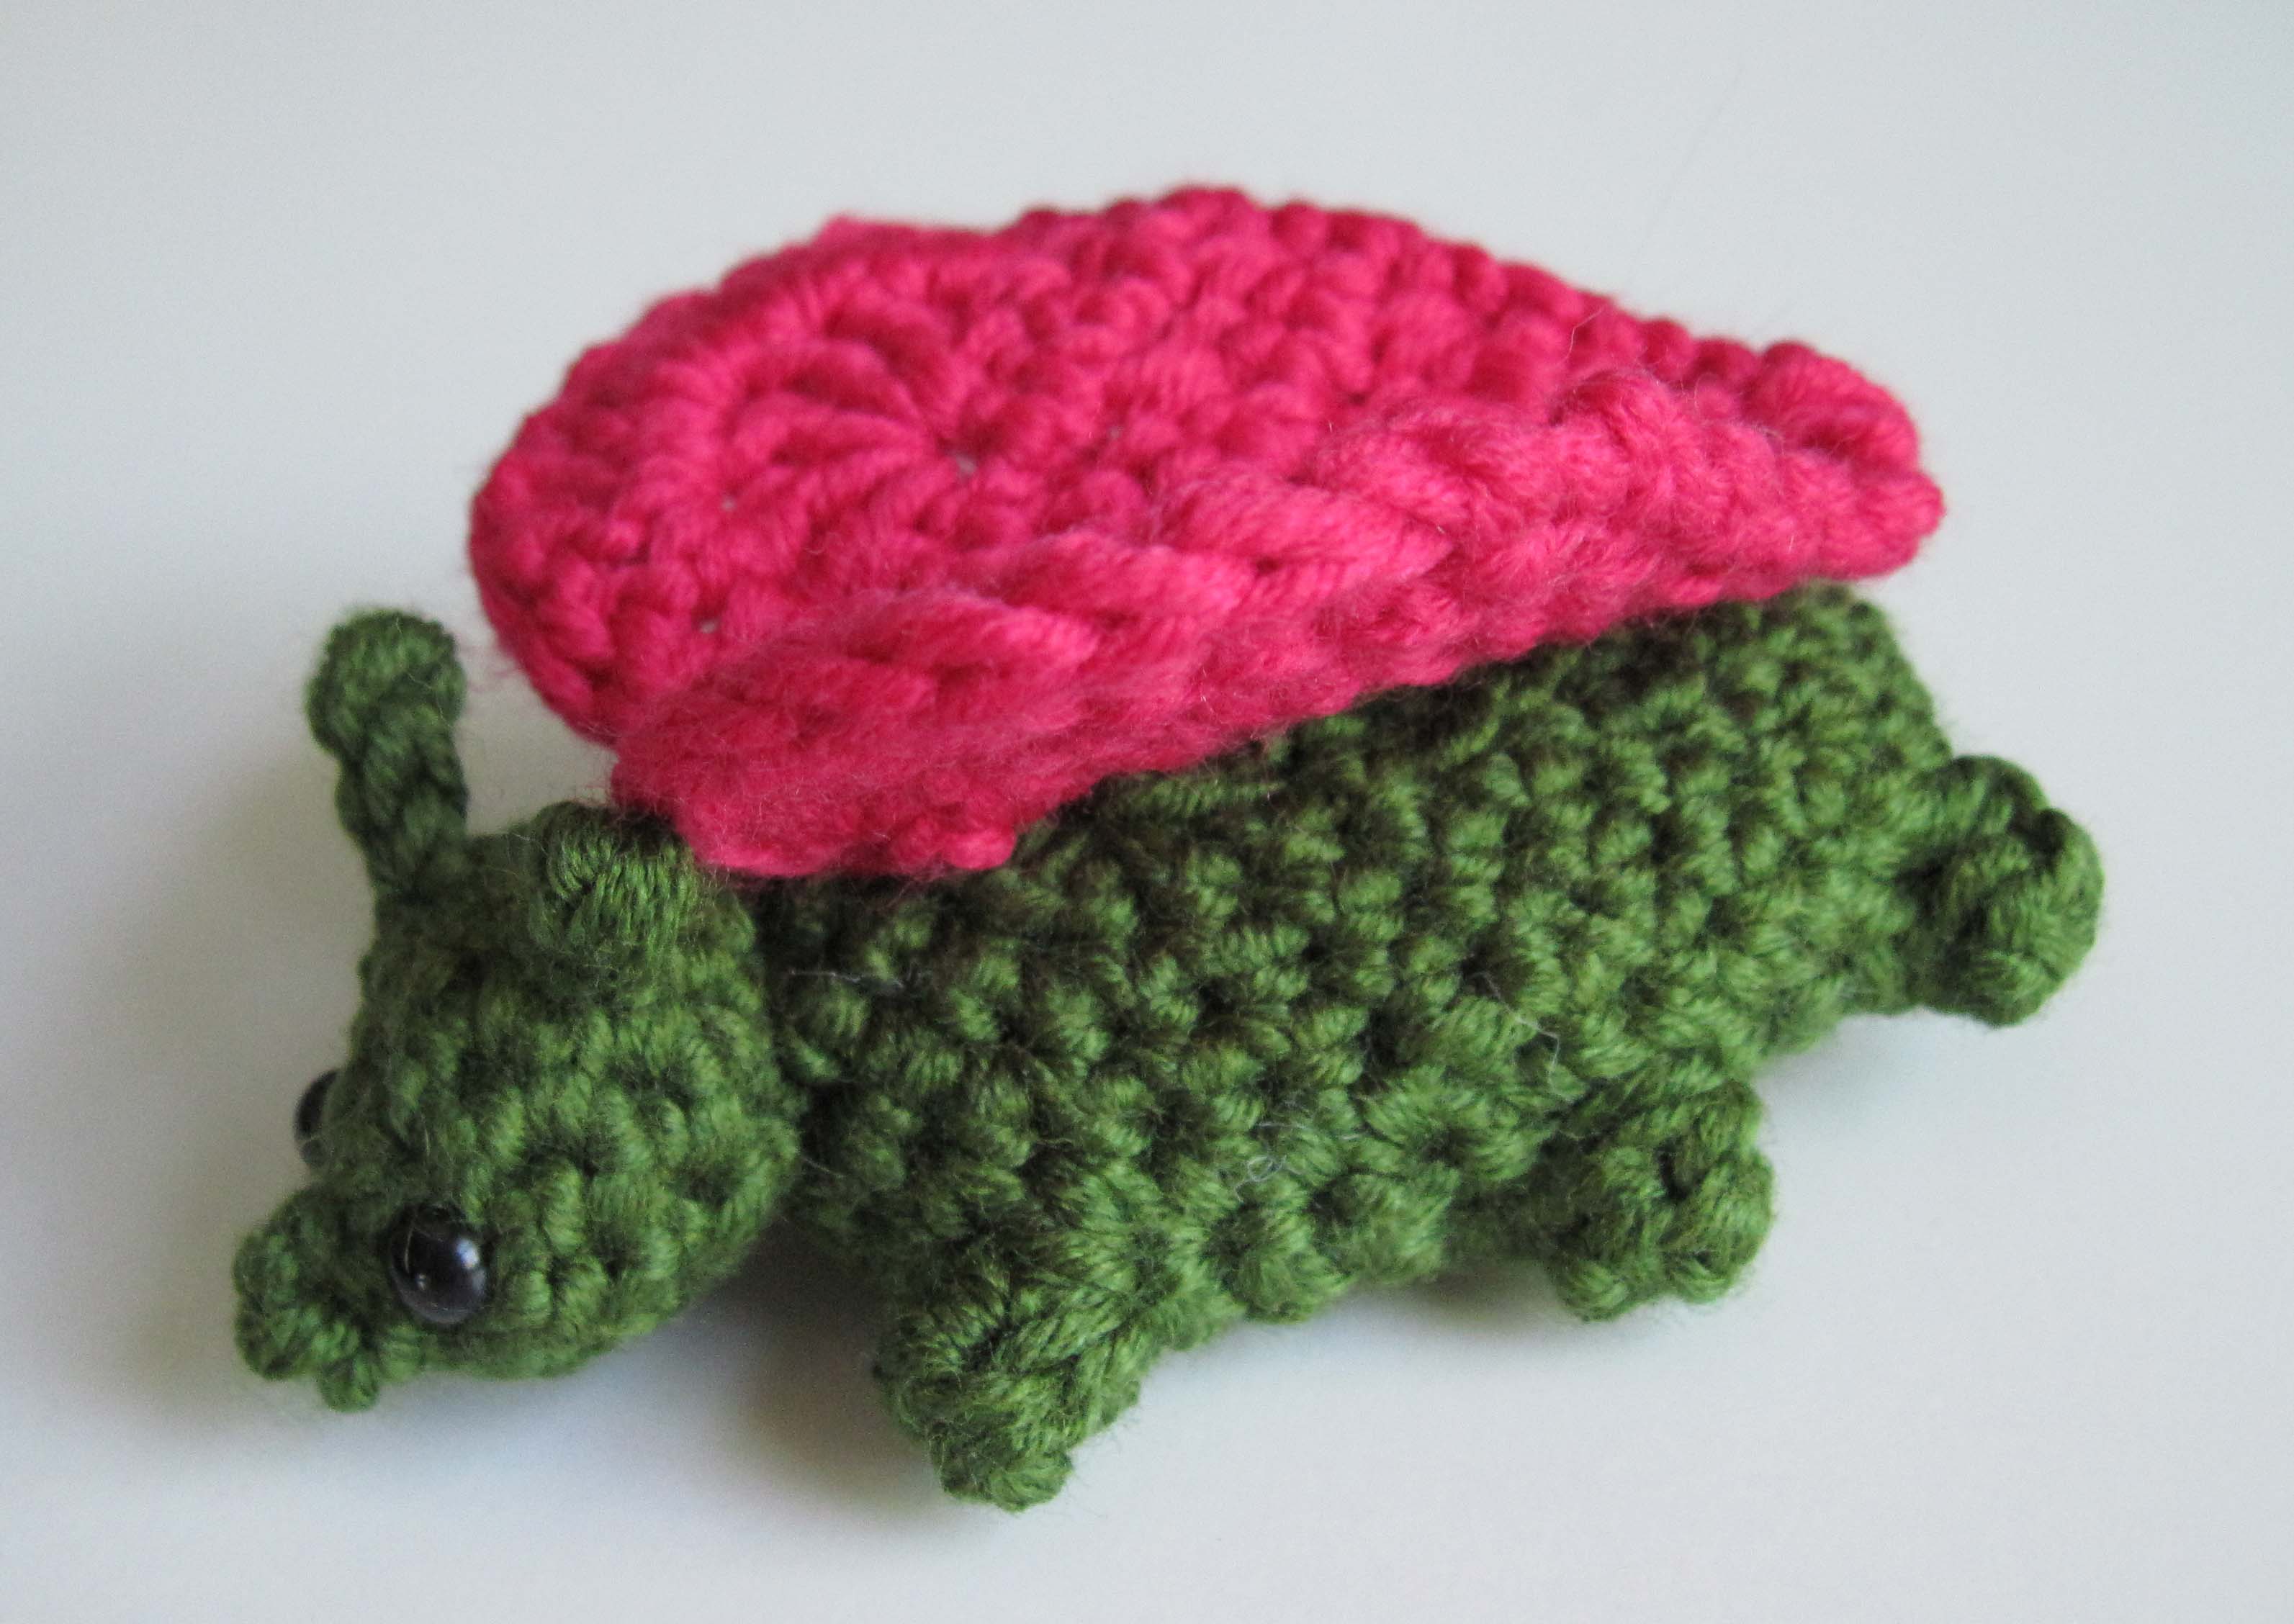
For example…make a cluster that uses (dc, 2 tr, dc). When framed with single crochets you get a bobble that stands out dramatically from the fabric. I used clusters in this way for the feet of my “Luv Bug” amigurumi pattern.
Some of my other patterns that use the cluster stitch are listed below:
Another National Crochet Month is here and I am helping the Longmont Yarn Shoppe celebrate by doing a Virtual Crochet Along project. I’ll be helping folks crochet my “Cool Snowflake Motif” via FaceBook Lives on the Longmont Yarn Shoppe page. The first session will be this Wednesday, March 3 starting at 1:45 p.m.
I made a fun spring time wrap using all the colors in the above photo. I’ll be unveiling it during the FB Live and later here on the blog.
I used Ella Rae “Cozy Worsted” yarn for this project, my motifs were a little smaller than the ones I worked in Red Heart “With Love” yarn. The Cozy Worsted is 75% Acrylic and 25% Wool, so the fibers are a little easier to block. I used my steamer to block the finished motifs and wrap. For the individual motifs I pinned them out then steamed. For the wrap I used wires to pin out the edges and steamed.
I’ll be sharing more tips and tricks thru-out the month here on the blog, including a photo tutorial on the Join-as-you-Go method I use in this pattern. Be sure to check back. Meanwhile I hope your NatCroMo is full of lots of crochet fun.
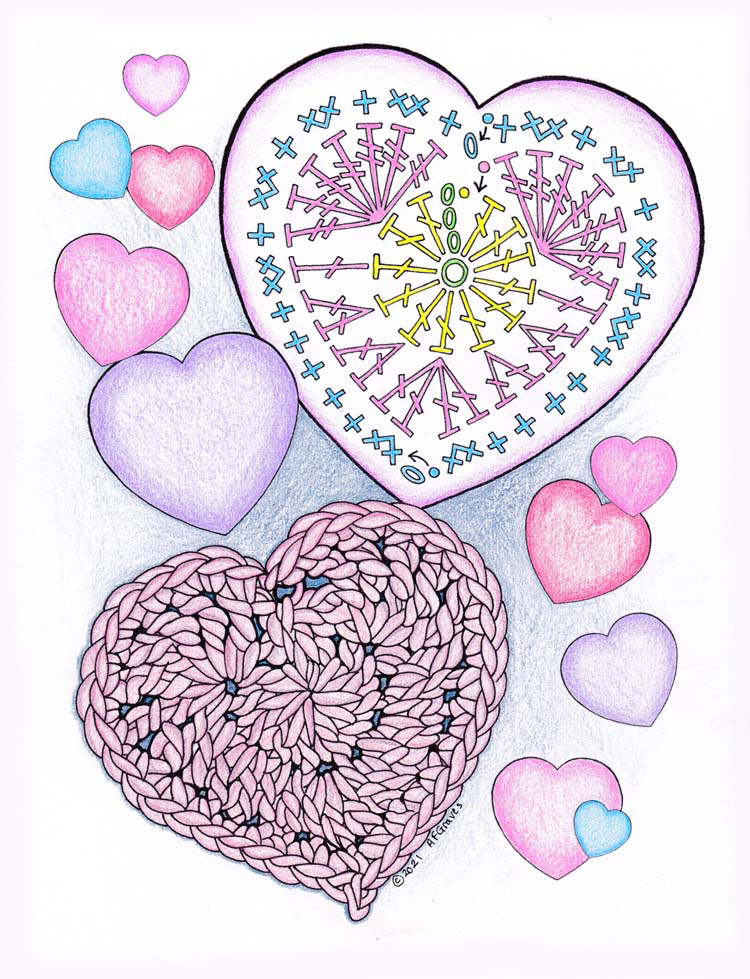
Hello dear readers, next Sunday is Valentine’s Day and I’m celebrating with a coloring page for all of you that also has a stitch chart for my favorite crocheted heart pattern. If you prefer to work from a pattern that is written out, you can find the text version of the pattern at the end of this post.
I have been super busy working on a bunch of designs that will be published later this year in a couple different magazines. Once they are published I will tell you more about those, but for now they are being kept secret. I will share that I am very happy with them and hope you’ll be just as excited to see them.
Otherwise it has been a cold and blustery winter up here on my mountain. Great for keeping the woodstove going and spending lots of time with my hooks and yarn. My design mojo is going strong and I only wish I had more hours in the day to crochet, probably best for my hands that I don’t though.
No matter where you are and what season you are contending with, I hope everyone takes a moment to celebrate love in their lives this Valentines Day.
Bordered Heart
Designed by Andee Graves
Skill level: Intermediate
Finished Size:
3.25” wide x 3” tall
Materials:
Yarn – Worsted wt (Sample uses Berroco Yarns “Ultra Wool” 100% Superwash Wool (3.5 oz/100g, 219 yd/200 m) Color #3315 Rose
Hooks – H / 5mm
Notions – Yarn/tapestry needle for weaving in ends
Gauge
Heart 3” tall and 3.25” wide
Abbreviations/Special Stitches
Joining slip st (slip st): Insert hook in indicated place, YO, pull up a loop thru place and loop on hook, continue to pull up on working loop until original loop is tight.
Picot Point st (picot): Ch 1, Insert hook in previous stitch using front loop and top side loop, YO, pull loop thru stitch and loop on hook and tighten.
Pattern Notes:
Heart starts with Adjustable slip knot, check my YouTube channel for video instructions if you don’t know how to make an adjustable slip knot.
Instructions
Rnd 1: Start with an Adjustable Slip Knot, ch 4, 12 dc in 4th ch from hook, sl st in top of ch-4.
Rnd 2: Skip 2 sts, 7 Tr in next st, dc next st, 2 dc next 2 sts, 4 dc in next st, 2 dc next 2 sts, dc next st, 7 Tr next st, sl st between last dc and join of Round 1.
Rnd 3: Ch 1, (sc in next st, 2 sc next st) 4 times, sc next 5 sts, 2 sc in next st, picot, 2 sc in next st, sc in next 5 sts, (2 sc next st, sc in next st) 4 times, sl st to first sc of Rnd, Fasten off.
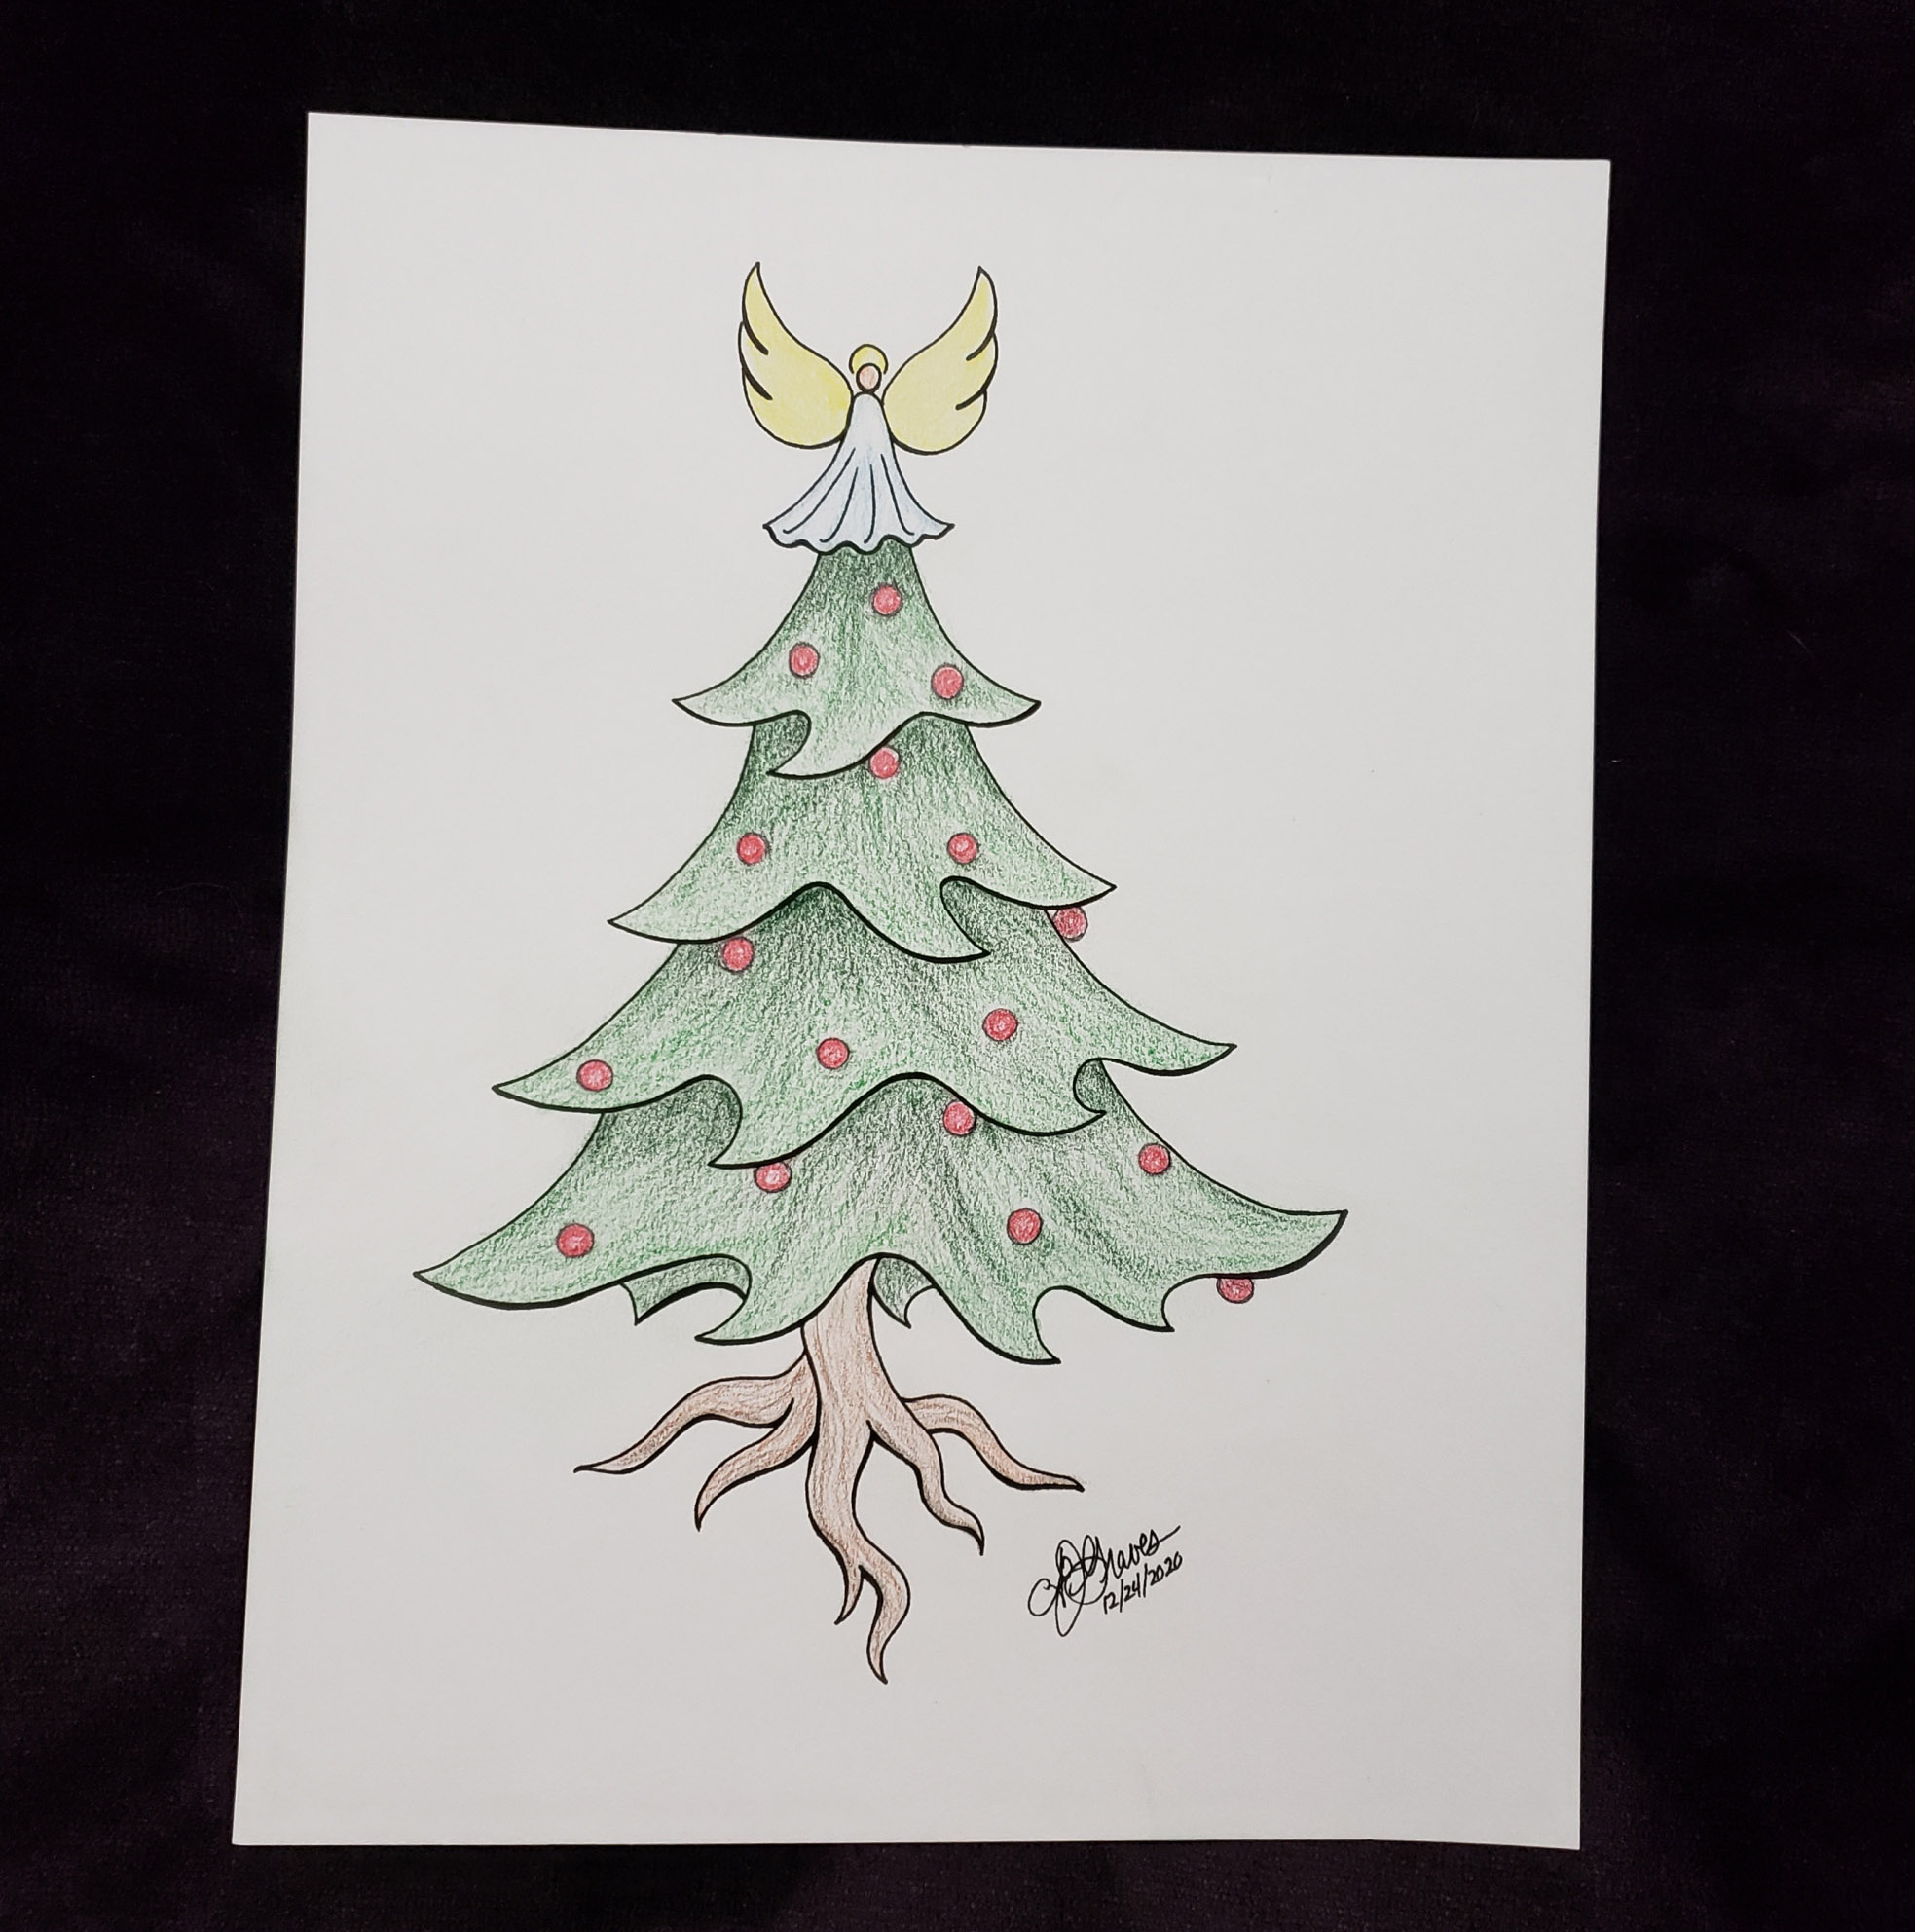
I’ve been a little slow finding my Christmas cheer this year. But last night as I was playing Santa’s elf and watching Christmas movies on Hallmark channel I was inspired to draw this coloring page. The saying that “A Christmas tree should have roots and wings,” was what woke up my creative spirit.
2020 has been a year of loss for so many of us. In my life this year I have lost 4 loved ones; my friend Cyndy in July, my friend Bonnie in September, my mother in October and just last week my friend Amy. Cancer took my 3 friends and Covid19 my mother. So this holiday season I am really focusing on making it about slowing down and connecting with loved ones as well as appreciating the things that are a comfort to me.
Note October 21, 2023: I have updated the PDF version of this pattern with instructions for making the angel’s head using a wooden bead and a 2 hole button as the halo.
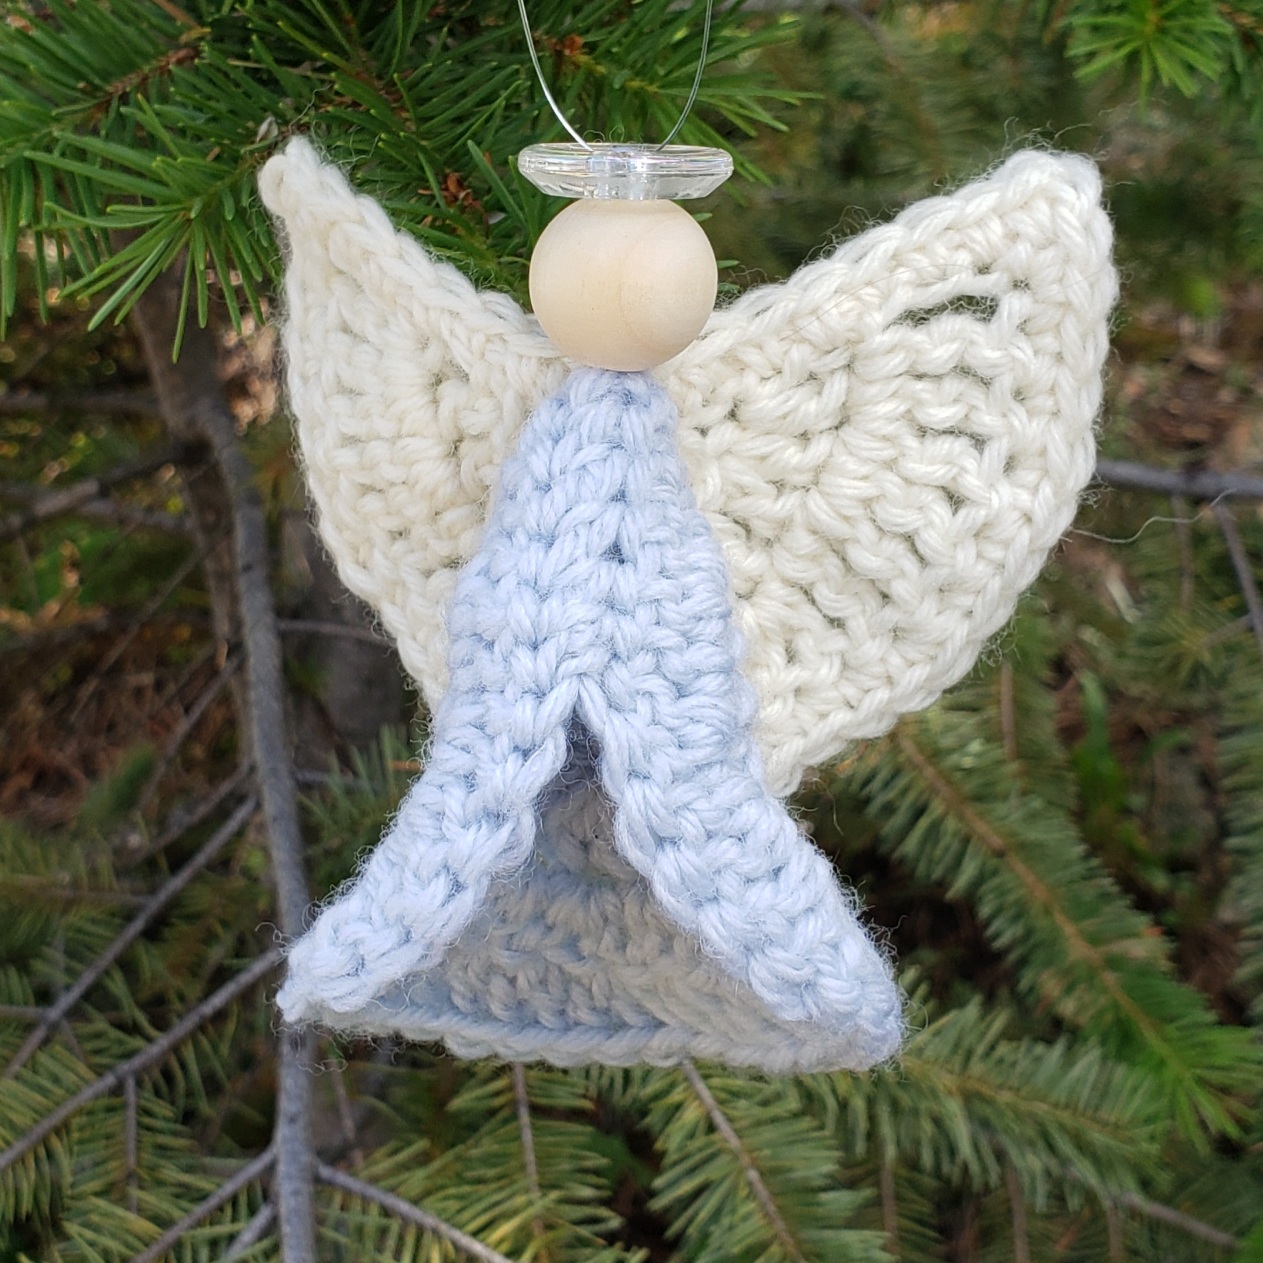
I decided I wanted to add some ornaments to our tree this year to remember not only the 4 loved ones I lost in 2020, but so many others that have gone before. I created an angel ornament design that I want to share with you today it is available for free here on the blog, or if you prefer an Ad free Stitch chart version you can purchase it in my Ravelry Shop. This is an easy intermediate crochet project that doesn’t take a lot of time or yarn to crochet.
It does take some attention to the work to follow, and that is the Peace part of this post. Crochet can be a wonderful way to meditate or even pray. The focus you need for this project means that you take a little break from what ever stresses are on your shoulders. Carving out that small space for peace in your life can be a total sanity saver, something I think we can all use after the intensity of 2020.
Gauge First 2 rounds of Body = 2.5” across diameter.
Special Stitches or Abbreviations:
(ExDc)Extended Double Crochet: YO, insert hook in indicated st, YO, pull up a loop, YO, pull thru 1 loop, (YO, pull thru 2 loops) 2 times.
(RS) Right Side
(sl st) Joining slip st: Insert hook in indicated place, YO, pull up a loop thru place and loop on hook, continue to pull up on working loop until original loop is tight.
Pattern Notes:
Angel is worked in 2 parts. The body and head are worked in one piece, the wings are worked separately and sewn onto the back of the body.
Instructions:
Body & Head
Rnd 1 (RS): Start with an adjustable slip knot, Ch 4 {counts as center and first dc of Rnd}, 11 dc in 4th ch from hook, slip st to top of beginning ch. [12 dc]
Rnd 2: Ch 3 {counts as first dc}, turn, 2 dc in next 11 sts, dc in same st as join from Rnd 1, slip st to top of beginning ch. [24 dc]
Rnd 3 (RS): Ch 3, turn, (2 dc in next st, 1 dc in next st) 2 times, 2 dc in next 7 sts, 3 dc in next st, 2 dc in next 7 sts, (1 dc in next st, 2 dc in next st) 2 times, (sl st, *ch 2, dc, 3 ExDc, dc, ch 2, sl st) in top of beginning ch-3. Fasten off with 10 inch long tail.
Instructions for head begin at * to make head in different color change color at *.Pull up loop of new color thru sl st before *, use body color for long tail at *.
Weave in beginning tail of body. Use ending tail of body to sew the indicated 7 stitches of body on either side of head together with a whip stitch, secure end of tail and fasten off excess.
Wings
Row 1: Start with an adjustable slip knot leaving an 8 inch long tail, ch 4, {counts as ceter and first dc of Row} 6 dc in 4th ch from hook. [7 dc]
Row 2 (RS): Ch 3 {counts as first dc of Row}, turn, dc in first st, 2 dc in next 6 sts. [14 dc]
Row 3: Ch 4 {counts as first Tr of Row}, turn, Tr in first st, 2 Tr in next 2 sts, Tr in next st, 2 dc in next 2 sts, dc in next 2 sts, 2 dc in next 2 sts, Tr in next st, 2 Tr in next 3 sts. [14 Tr, 10 dc]
Row 4 – Border (RS): Ch 1, turn, (sc in next 2 sts, 2 sc in next st) 8 times, ch 1, working along ends of rows, sc in end of sc border, 3 sc in end of Tr row, 2 sc in end of each dc row, 3 sc in end of Tr row, sc in beginning of border row. Fasten off with 10 inch tail. [48 sc]
Weaving ending tail 2nd time thru base of last 16 border sts.
Weave ending tail of wing thru wrong side of base of last 16 sc of border in both directions to stiffen top edge of wing, or crochet over a piece of floral wire when making the last 16 sc of border to make wings posable.
Weave beginning tail of wing to secure opening at base of Row 1, Do Not cut off tail .
Assembly
Place wings RS down on back of Body just below head and using remainder of wings beginning tail to sew down center of wing to secure to body piece.
Hanger options: Use nylon monofilament or ribbon thru center st of head as hanger for ornament, or weave remaining tails after sewing on wings up thru center stitch of head and tie for hanger.
Optional: Use a loop of yarn to hang a crystal or charm inside the lower opening of the body like a clapper on a bell.
You can open up the body of your angel and fold the wings back to create a more 3D style angel, or flatten the body and wings for a more 2D style angel.
I didn’t want to share sad news on my birthday pattern post, but for those of you that like to keep up with what is happening, there has been a milestone in my life. My 80 year old mother passed away the morning of the 12th of October. She died from complications from Covid19. But even before this sad event, we had lost our mother a piece at a time over the past 15 years. My mom had Alzheimers, and was often confused about who we were the past couple years.
She is the one that first placed a crochet hook in my hand, and was an amazing knitter, though she never taught me to knit. In the last year or so she could no longer remember how to crochet or knit. She could still wind a ball of yarn and the folks at the facility where she lived would often give her yarn to wind, she would even teach other residents how to wind the yarn.
Now, you would assume that with Mom teaching me to crochet that she would have been excited about my career choice of the past 10 years. Sadly that is not the case, my mother and I had what one might call a “difficult” relationship. I could never figure out if it was because we were too similar or too different.
Our similarity is striking for those that know both of us. I look a great deal like her and have the exact same voice. When I visited her 20 years ago in the town she had moved to in Northwest Kansas, I would walk into a local shop on my own and the people there would say, “You must be Wilha’s daughter.” She would jokingly say, “You poor thing,” when people would say I looked like her. She didn’t like the way she looked, but I’ve always thought my mom was beautiful and was happy people saw her in me.
One of our biggest differences is my habit of saying “What If”. I always annoyed my mom because I would change patterns all the time, whether it was crocheting or sewing. I always saw a different way I wanted to do things. I think that meant I was destined to be a designer. Once I started getting my crochet designs published, mom would offer criticisms no matter what I created. It wasn’t until years later that I found out she was always showing her neighbors and friends my published work and bragging about me.
Mom on the left laughing with her friend Isla.
Mom and I had some great times together though. She could make me laugh so hard. When we would get to laughing it would go on for 30 minutes or more. Sometimes it would be the silliest things that would get us going and then we couldn’t look at each other or we would start up again.
We went on a trip to Tucson, Arizona together when I was 5 months pregnant with my first child. She was running a T-shirt booth at a music festival and I went with her to help. One evening I lay down on the bed in our hotel room and couldn’t get up because of my baby bump. We both were laughing so hard she couldn’t help me get up.
When I moved to my home in the mountains we stayed in touch with monthly 3 – 4 hour phone calls. We both loved the Fire Mountain catalog and “Bead & Button” magazine, when the newest version came in the mail we would call each other and page thru it together. In her 50s she had taken up bead weaving, something I used to tease her about because threading those fine needles was a complete pain. We had many a chuckle about how you had to hold your mouth just right to thread a needle. I often laugh to myself when trying to thread a needle myself these days, because I hear her voice.
She grew up on farms and ranches in Kansas and Texas. Sometimes she would joke that she learned to ride a horse before she learned to walk. She loved horses right up to the end. I had sent her a pop-up birthday card with a herd of horses in it for her birthday this year. She also adored dogs. The photo above is Mom with her Sarah Dog at my wedding. I had the startling realization this week that I am now the same age as my mother was on my wedding day.
I designed my “One Skein Joy Slippers” because I wanted to make her some warm slippers for Christmas a couple years ago. When I was growing up, every Christmas morning there would be new slippers under the tree for each family member. Mom was an amazing knitter, but I wanted to relive that Christmas feeling with a crocheted version of the slippers.
It has been a big adjustment to know my mother is no longer in this world, but I comfort myself that she is now free of pain and confusion. Someone said to me a day after Mom was gone that she is watching over me, if that is the case I’m sure she is trying to get my attention to give me “constructive criticism” on my latest designs. Rest in Peace Mom, you were definitely one-of-a-kind.
Note: I’ve been a bit delayed getting this post up. This past weekend 2 wildfires took off very near where I live and my family and I had to evacuate to stay with my sister-in-law. We are currently waiting out the fires and hoping for a quick resolution. Things are a bit hairy, but I took a lot of yarn and my computers with me. I don’t have my usual arsenal of props and so forth, but I hope to continue with my design and blogging work while we weather this latest surprise 2020 has thrown at us.
Oh wow! The past couple of weeks have been really crazy for me, I’ll share more about that later. The question right now is how did we get to October and my birthday again?! That means it is time for a fun pattern as a gift to all my dear readers to celebrate. This pattern is available free to all of you here on my blog, but if you would prefer a PDF version with stitch charts, is available for purchase in my Ravelry Shop.
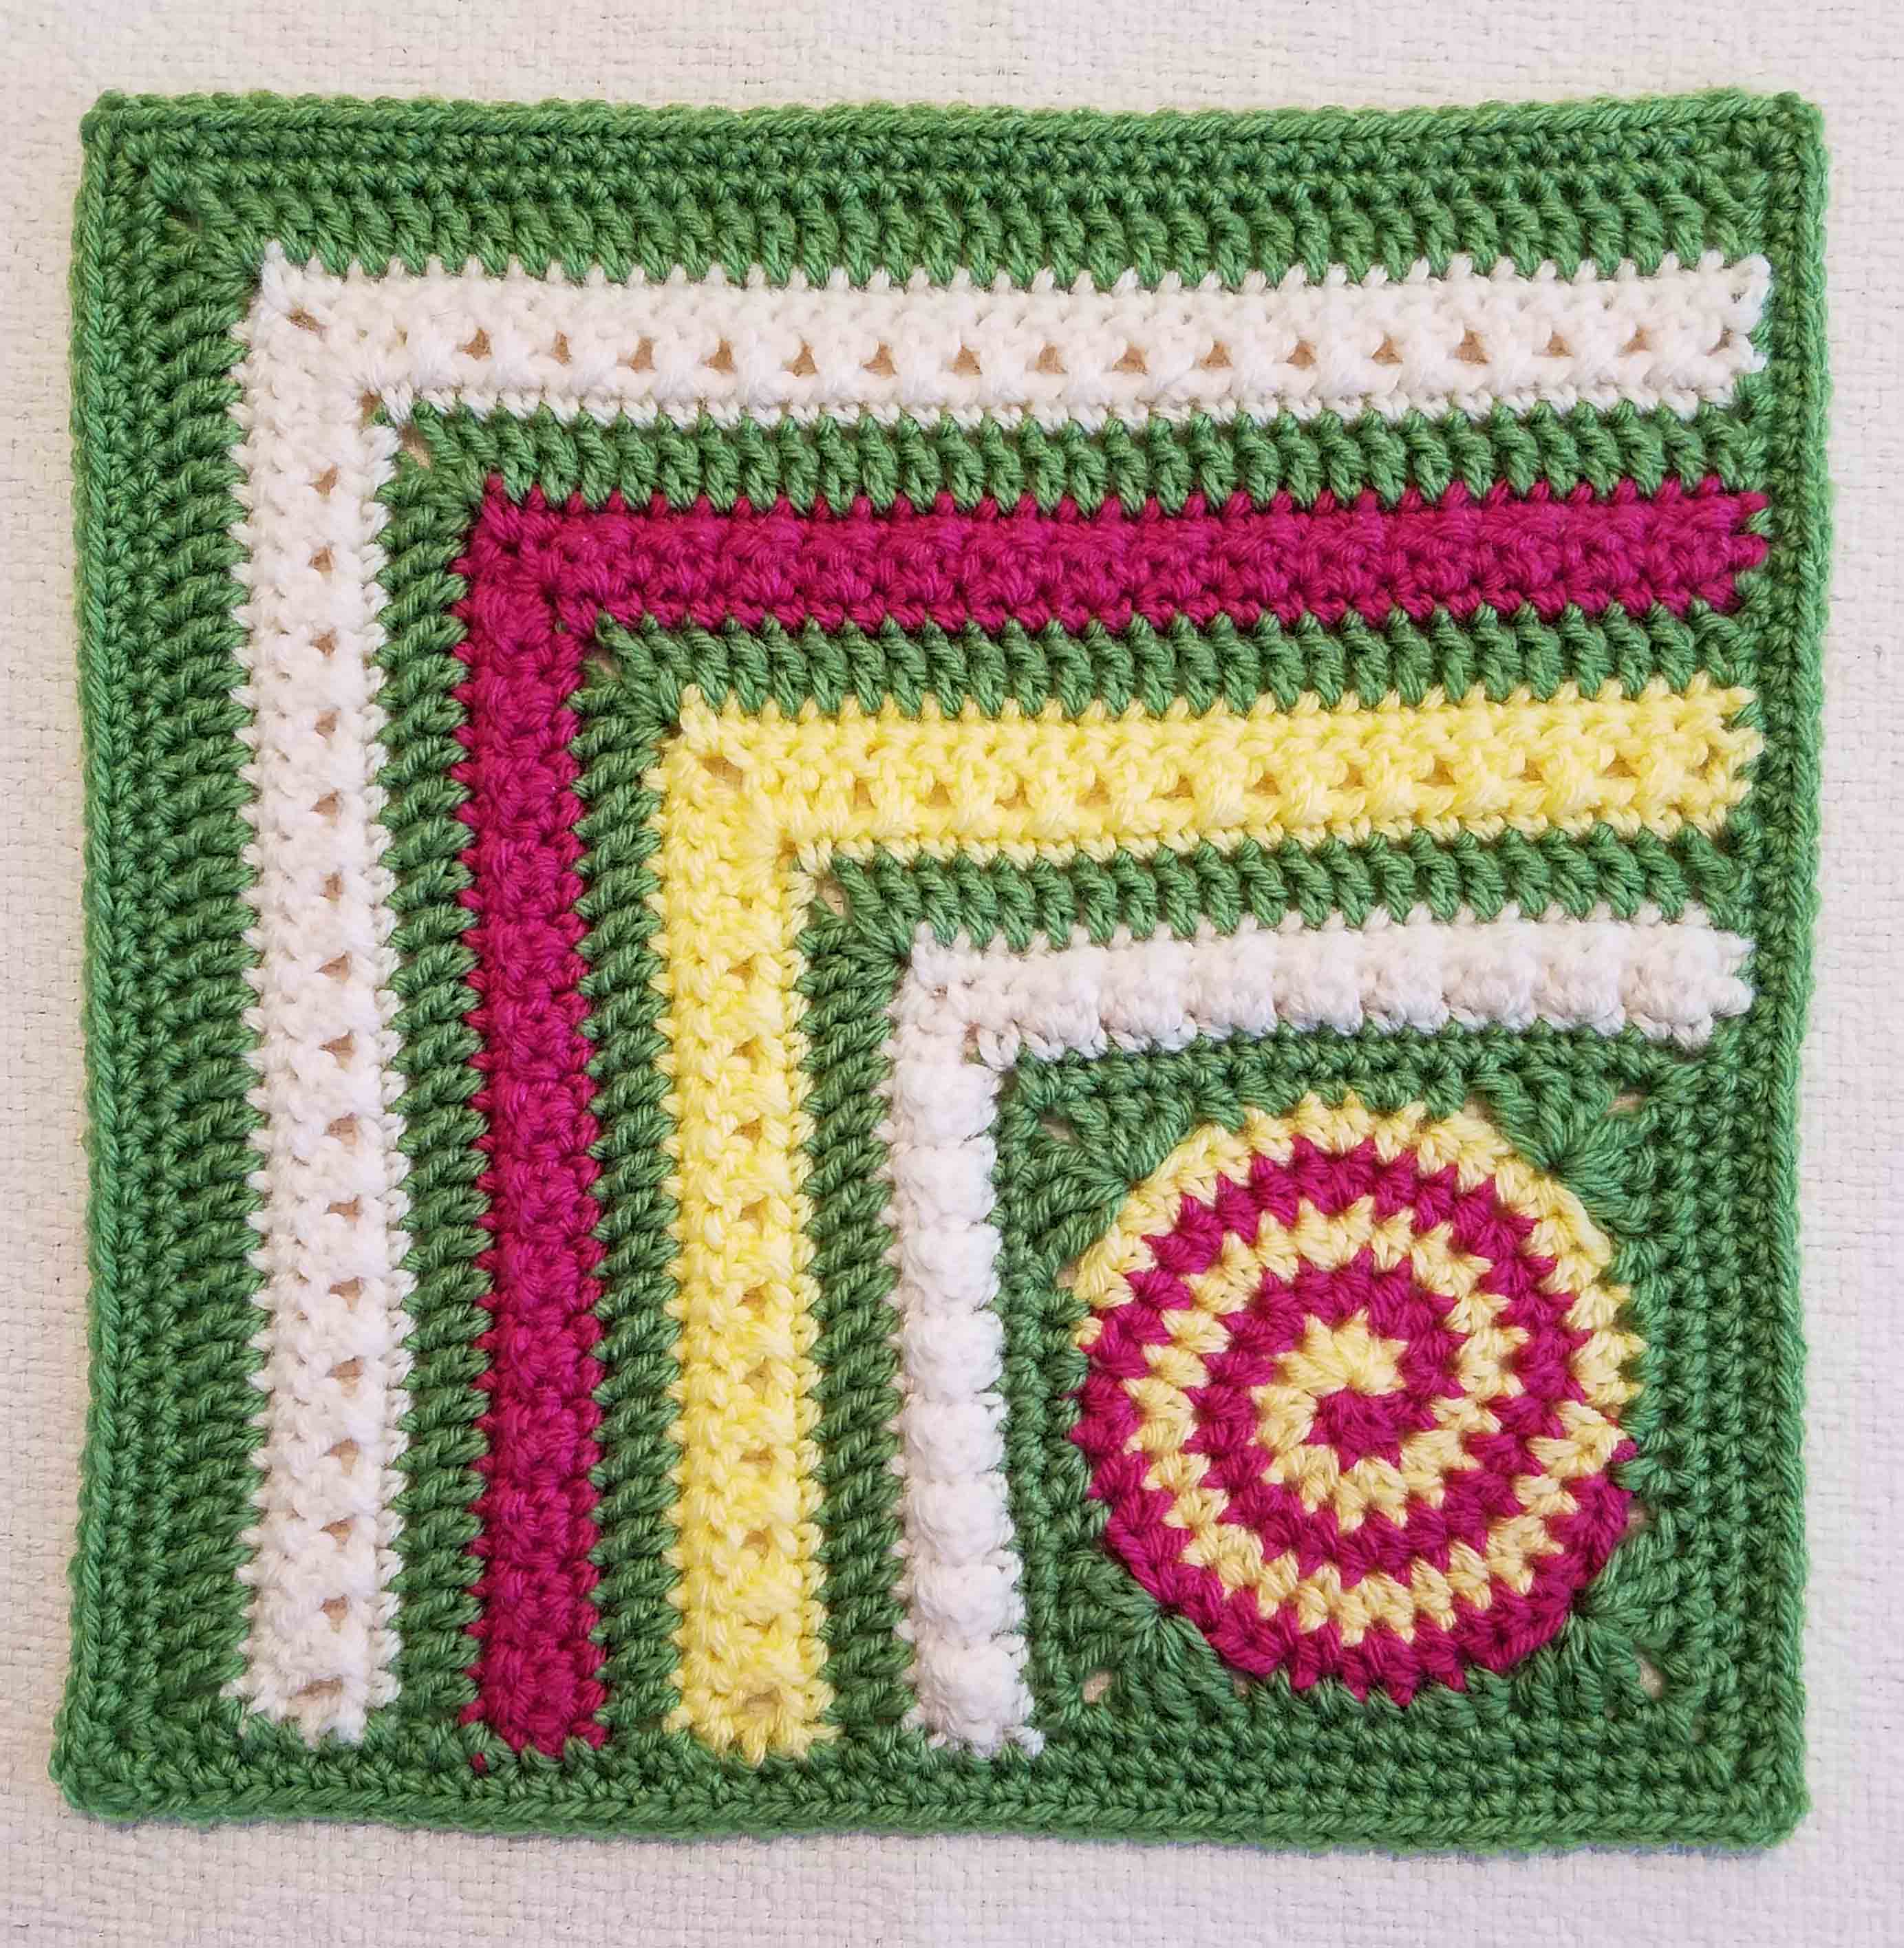
I’m really happy with this afghan square, I had a lot of fun changing directions with the center square becoming a diamond shape, as well as the fun textures of the little clusters and surface single crochet. This square is #21 in the Moogly 2020 Afghan CAL, you can find the other gorgeous squares designed by lots of my other crochet blogging friends.
Tamara’s version of my square crocheted in gorgeous purples.
Pebbled Star Afghan Square
Designed by Andee Graves
Skill level: Intermediate
Finished Size: 12” square
Materials:
Yarn – Worsted weight yarn in 4 colors : Sample uses Red Heart “With Love” 100% Acrylic (7 oz/198 g, 370 yds/338 m),
Color A: #1401 Pewter
Color B: #1805 Bluebell
Color C: #1969 Wintergreen
Color D: #1101 Eggshell
Hook – J / 6mm
Notions – Yarn/tapestry needle, Stitch markers
Gauge: First 7 rounds of pattern = 4” across square
Abbreviations/Special Stitches
(RS) Right Side: The side that will be the textured side of the fabric.
(WS) Wrong Side: The side that will be the flat side of the fabric.
(PM) Place Marker
(Cl) 3 double crochet cluster st: (YO, insert hook in indicated st or sp, YO pull up a loop, YO pull thru 2 loops on hook) 3 times, YO pull thru remaining 4 loops on hook.
(Fan) Fan Stitch: [(dc, ch 1) 3 times, dc] in indicated place.
(sl st loosely) Loose slip stitch: Insert hook in indicated place, YO, pull up a loop thru place and loop on hook keeping loose like making a chain st.
(sl st) Joining slip st: Insert hook in indicated place, YO, pull up a loop thru place and loop on hook, continue to pull up on working loop until original loop is tight.
(V-st) V-stitch: (dc, ch 1, dc) in indicated st or sp.
(sc2tog) Single Crochet 2 together: Insert hook in first st, YO, pull up a loop, insert hook in second st, YO, pull up a loop, YO, pull thru all 3 loops on hook.
(FPsc) Front Post Single Crochet: These are the surface single crochets worked around the post of the single crochets in Rnds 11 and 15.
Pattern Notes:
Start square with an adjustable slip knot. Beginning tail tightens the loop on the hook.
First 2 rounds are worked without turning, then Rounds 3-8 are worked in turned rounds. Round 9 will be joined and worked in same direction as Round 8. Rounds 10 – 15 are worked in turned rounds. Rounds 16-19 are worked without turning. It is important that Cluster stitch rounds are worked as wrong side rounds to be sure that they “pop” to the right side of the square.
Keep tails on wrong side of square as you work to help track which is wrong side and right side.
Stitch counts at the end of each round and row are shown in italicized brackets at end of each round or row.
When instructions specify “sl st loosely”, this means work those slip stitches similar to a chain stitch and do not pull the working loop to tighten them as in a joining slip stitch. You will be working into those loose slip stitches.
Surface crochet embellishment will be worked after square is finished. When working surface crochet stitches be sure to keep tension loose so that stitches sit squarely on the surface.
Instructions
Rnd 1 (RS): Begin with Color A. Starting with adjustable slip knot, ch 2, 8 sc in 2nd chain from hook, slip st to join to first sc of Rnd. [8 sc]
Rnd 2 (RS): Ch 1, [sc in next st, (sc, ch 2, sc) in next st] 4 times, slip st to join to first sc of Rnd. PM in each ch-2 sp to mark corners. [12 sc, 4 ch-2 sp]
Rnd 3 (WS): Ch 1, turn, [sc in next st, (sc, ch 2, sc) in marked ch-2 sp, move up st marker to ch-2 sp just made, sc in next st, Cl in next st] 4 times, slip st to join to first sc of Rnd. [16 sc, 4 Cl, 4 ch-2 sp]
Rnd 4 (RS):Ch 1, turn, sc in next 3 sts, [*(sc, ch 2, sc) in marked ch-2 sp, move up st marker to ch-2 sp just made,* sc in next 5 sts] 3 times, Repeat from * to * once, sc in next 2 sts, slip st to join to first sc of Rnd. [28 sc {7 sc each side}, 4 ch-2 sp]
Rnd 5 (WS): Ch 1, turn, sc in next st, [*Cl in next st, sc next st, (sc, ch 2, sc) in marked ch-2 sp, move up st marker to ch-2 sp just made, sc next st, Cl next st,* sc next 3 sts] 3 times, Repeat from * to * once, sc in last 2 sts, slip st to join to first sc of Rnd. [28 sc, 8 Cl, 4 ch-2 sp]
Rnd 6 (RS): Ch 1, turn, [sc in each st until reach marked ch-2 sp, (sc, ch 2, sc) in marked ch-2 sp, move up st marker to ch-2 sp just made] 4 times, sc in sts to end of Rnd, slip st to join to first sc of Rnd. [44 sc {11 sc each side}, 4 ch-2 sp]
Rnd 7 (WS): Ch 1, turn, [sc in next 3 st, Cl in next st, sc next st, (sc, ch 2, sc) in marked ch-2 sp, move up st marker to ch-2 sp just made, sc in next st, Cl in next st, sc next 3 sts, Cl next st] 4 times, slip st to join to first sc of Rnd. [40 sc, 12 Cl, 4 ch-2 sp]
Rnd 9 (RS):Change to Color B. With RS facing attach yarn at first sc on left corner. Ch 1, sc in same st as join, [*(sc, ch 2, sc) in marked ch-2 sp, move up st marker to ch-2 sp just made, sc in next st, (ch 1, skip next st, sc in next st) 2 times, skip 2 sts, Fan in next st, skip 2 sts, (sc in next st, ch 1, skip next st) 2 times*, sc in next st] 3 times, Repeat from * to * once, slip st to first sc of Rnd. [32 sc, 16 ch-1 sp, 4 Fan, 4 ch-2 sp]
Rnd 10 (WS): Ch 1, turn, [sc in next ch-1 sp, sc next st, ch 1, skip next 3 sts/sps, (V-st next ch-1 sp, ch 1, skip next st) 2 times, V-st next ch-1 sp, ch 1, skip next 3 sts/sps, sc next st, sc next ch-1 sp, ch 1, skip 1 st, sc next st, (sc, ch 2, sc) in marked ch-2 sp, move up st marker to ch-2 sp just made, sc next st, ch 1 skip next st] 4 times, slip st to join to first sc of Rnd. [32 sc, 24 ch-1 sp, 12 V-st, 4 ch-2 sp]
Rnd 11 (RS): Ch 1, turn, sc in next 3 sts/sps, [*(sc, ch 2, sc) in marked ch-2 sp, move up st marker to ch-2 sp just made, sc in next 4 sts/sps, sc2tog next st and sp, sc in next 5 sts/sps, (sc, ch 2, sc) in next ch-1 sp, sc in next 5 sts/sps, sc2tog next sp and st,* sc in next 4 sts/sps] 3 times, Repeat from * to * once, sc in next st, slip st to join to first sc of Rnd. [88 sc, 8 sc2tog, 8 ch-2 sp]
Round 12 in progress, moving corner stitch markers.
Rnd 12 (WS): Change to Color C.With WS facing, attach new yarn in first sc at right corner, ch 1, sc in same st as join, [*ch 1, skip 1 st, sc next st, (skip 2 sts, V-st in next st) 2 times, skip 2 sts, dc in next st, ch 1, (dc, ch 2, dc) in next ch-2 sp, ch 1, dc next st, (skip 2 sts, V-st in next st) 2 times, skip 2 sts, sc next st, ch 1, skip next st, sc next st, ch 1 , slip st in marked ch-2 sp, move st marker to ch-2 sp at point of star, ch 1,* sc in next st] 3 times, Repeat from * to * once, slip st to join to first sc of Rnd. [ 16 V-st, 16 dc, 24 ch-1 sp, 4 ch-2 sp]
Round 12 finished and new corners marked.
Rnd 13 (RS): Ch 1, turn, sc in same st as join, [*loose slip st in next ch-1 sp, skip slip st, loose slip st in next ch-1 sp, sc in next st, hdc in next ch-1 sp, ch 1, skip next 2 sts, (V-st next ch-1 sp, skip 2 sts) 2 times, V-st next ch-1 sp, Fan in marked ch-2 sp, move st marker up to middle ch-1 sp of Fan, V-st in next ch-1 sp, (skip 2 sts, V-st in next ch-1 sp) 2 times, ch 1, skip 2 sts, hdc in next ch-1 sp*, sc in next st] 3 times, Repeat from * to * once, slip st to join to first sc of Rnd. [8 ch-1 sp, 8 sc, 8 hdc, 8 loose slip st, 24 V-st, 4 Fan]
Rnd 14 (WS): Ch 1, turn, [sc and hdc in next st, skip next 2 sts/sps, (hdc, ch 1, hdc) in next ch-1 sp, skip 2 sts, (hdc, ch 1, dc) in next ch-1 sp, skip 2 sts, V-st in next ch-1 sp, skip 2 sts, dc in next ch-1 sp, ch 1, skip 1 st, (dc, ch 2, dc) in marked ch-1 sp, move stitch marker to ch-2 sp just made, ch 1, skip next st, dc next ch-1 sp, skip 2 sts, V-st in next ch-1 sp, skip 2 sts, (dc, ch 1, hdc) in next ch-1 sp, skip 2 sts, (hdc, ch 1, hdc) in next ch-1 sp, skip 2 sts/sps, hdc and sc in next st, sc in next st, sc in next 2 loose slip sts, sc in next st] 4 times, slip st to join to first sc of Rnd. [ 24 ch-1 sp, 16 sc, 32 hdc, 24 dc, 8 V-st, 4 ch-2 sp]
Rnd 15 (RS): Ch 1, turn, [sc in each st and sp until reach marked ch-2 sp, (sc, ch 2, sc) in marked ch-2 sp, move up st marker to ch-2 sp just made] 4 times, sc in each remaining st or sp until reach start of Rnd, slip st to join to first sc of Rnd. [136 sc {34 sc each side}, 4 ch-2 sp]
Rnd 16 – 19 (RS): Change to Color D. Ch 1, [sc in each st until reach marked ch-2 sp, (sc, ch 2, sc) in marked ch-2 sp, move up st marker to ch-2 sp just made] 4 times, sc in each remaining st until reach start of Rnd, slip st to first sc of Rnd. Fasten off at end of Rnd 19.
If you are not familiar with working surface single crochet you may find it easier to work the surface crochet first on Rnd 15. If you want to work the surface crochet before finishing the square, complete Rnd 12 before doing the surface crochet on Rnd 11, and complete Rnd 16 before doing the surface crochet on Rnd 15.
Surface single crochet around stitches of Rnd 11:
With Color D attach yarn with a standing sc around the post of any of the sc along a straight edge before a side point, [continue working a FPsc around the post of each sc until you reach the side point ch-2 sp, work one FPsc using the slip st from Rnd 12 as the “post”, continue with FPsc around the post of each Rnd 11 sc until reach the corner point ch-2 sp, work one FPsc using the inside strands of the 2 dc from Rnd 12 as the “post”] 4 times, continue working a FPsc around the post of each sc until you reach the beginning of your surface crochet round, slip st to join to first FPsc of round. [112 FPsc {14 between each point counting 1 point]
Surface crochet/FP sc around posts of Rnd 15:
Inserting hook using inside strands of the 2 corner sc from Round 16.
With Color A attach yarn with a standing sc around the post of any of the sc along a straight edge before a corner ch-2 sp, [continue working a FPsc around the post of each sc until you reach the corner ch-2 sp, work one FPsc using the inside strands of the 2 sc from Rnd 16 as the “post”] 4 times, continue working a FPsc around the post of each sc until you reach the beginning of your surface crochet round, slip st to join to first FPsc of round. [144 FPsc {36 each side counting 1 corner}]