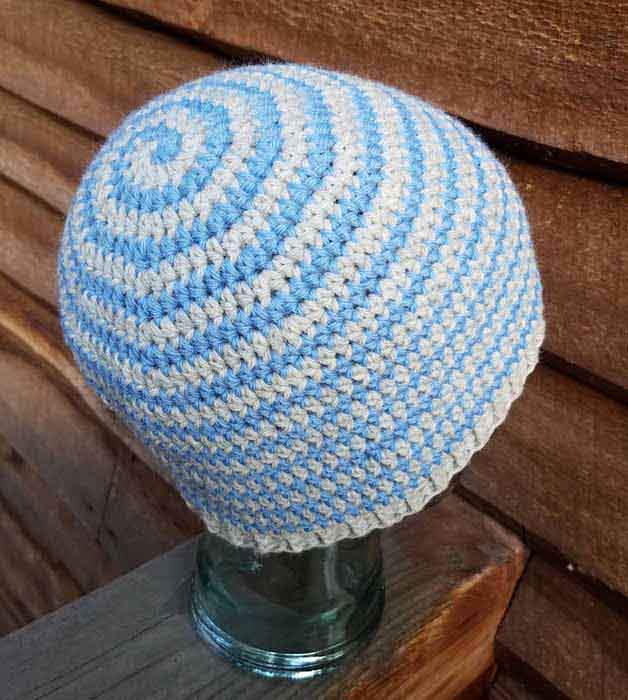
It has been super hot even here in Colorado, so I am looking for small projects to work on and hats are one of my favorites. I’m teaching a class next week “Spiraling Stripes Hat” that is a great way to add stripes to your hats without any seams. You can still register for this class until 8 a.m. Central time this Sunday, July 18, 2021.
I like the look of ribbed brims in knit hats, but since I crochet much faster than I knit, I wanted a version for when I was wielding my hook. After a lot of experimenting over the past 15 years I have settled on using “skinny” half double crochet post stitches as my all time favorite method. You will see this ribbing in a lot of my hat patterns (like the Spiraling Stripes Hat).
For those of you that have never worked post stitches, their name comes from the fact that they are worked around the “post” of a stitch instead of under the top 2 strands of a stitch. This gives them much more of a textured look and changes how the fabric behaves.
With a taller stitch like the double crochet it is quite easy to see the “post” of the stitch and to work around the center of this post when working post stitches. For a stitch like the Half Double or Single crochet that becomes a bit more fiddly to find.
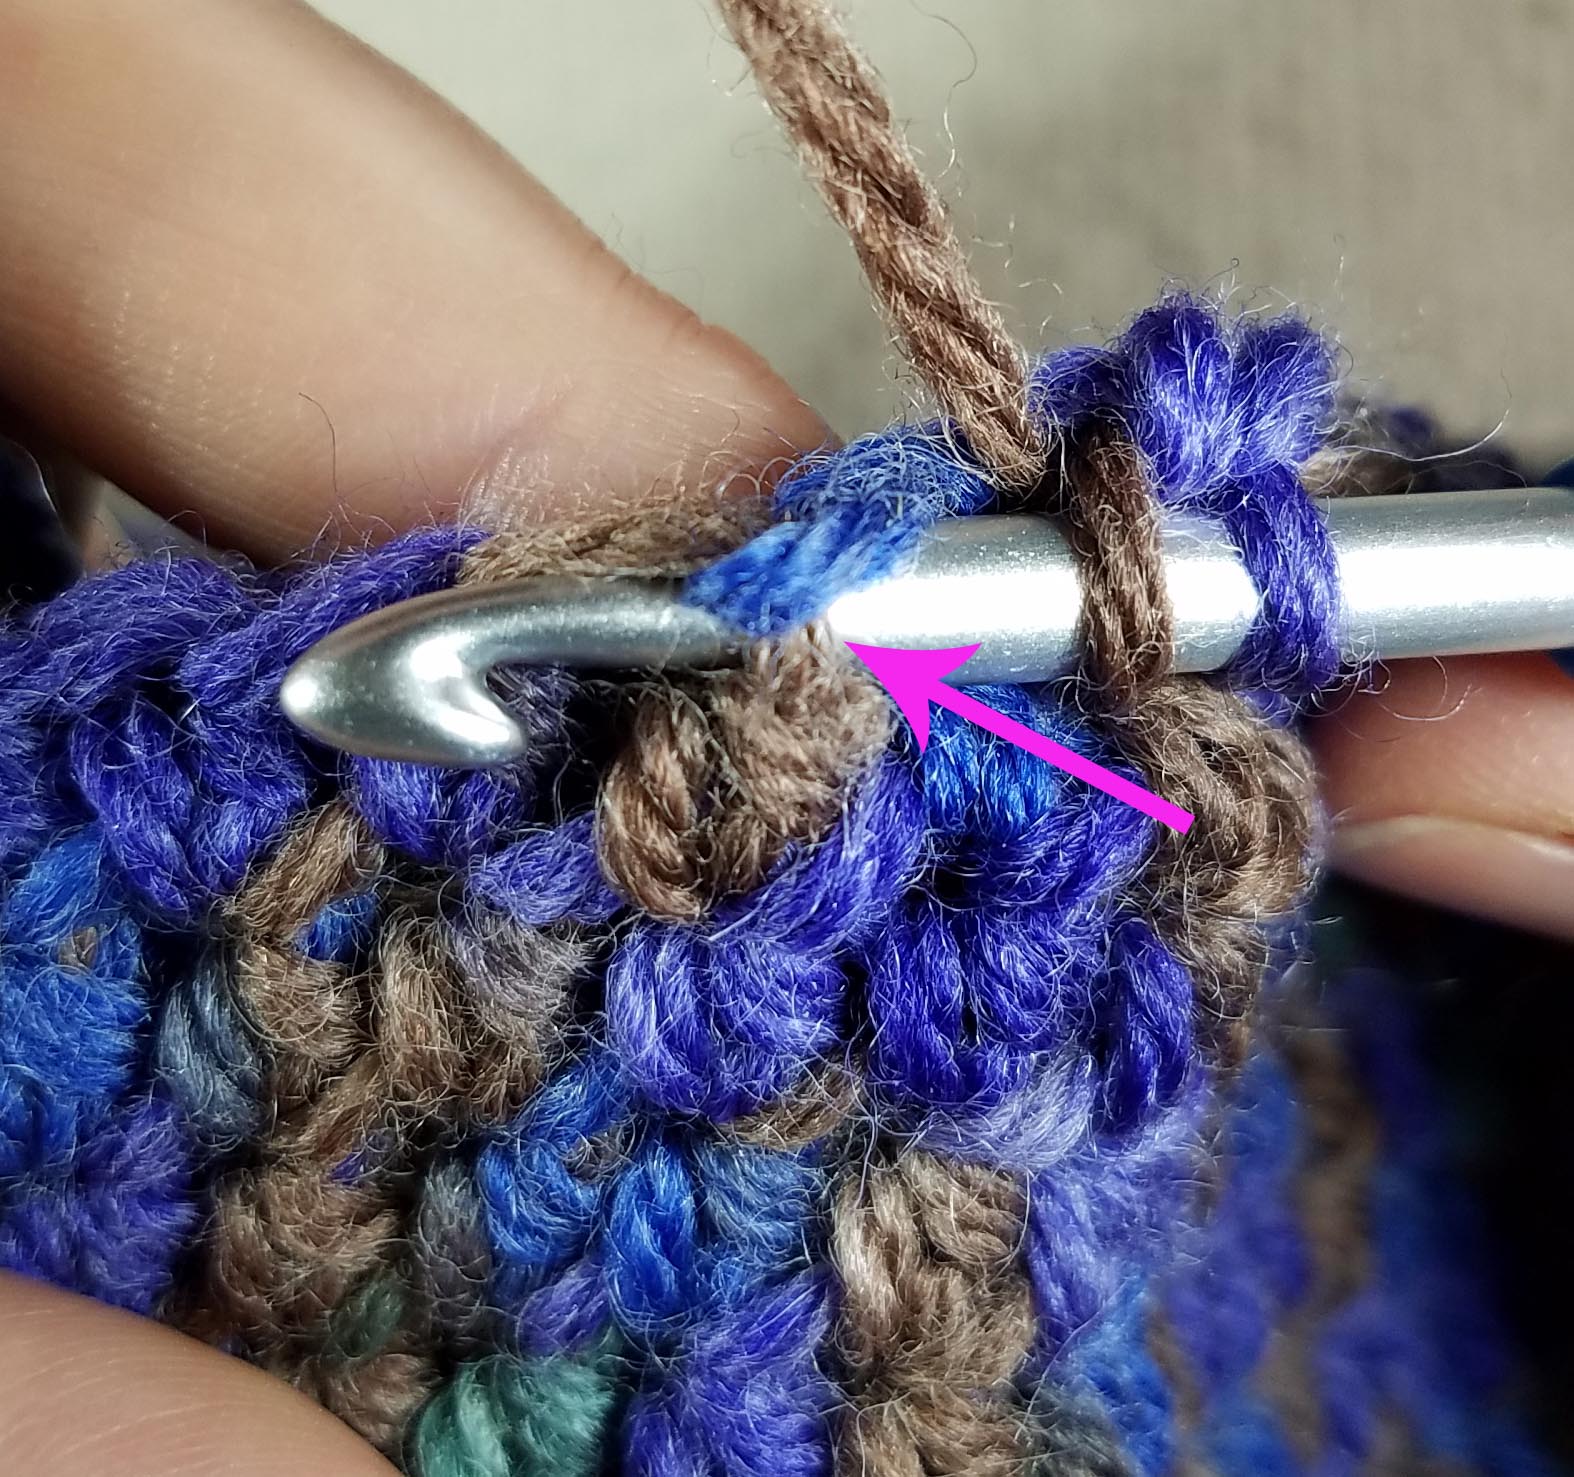
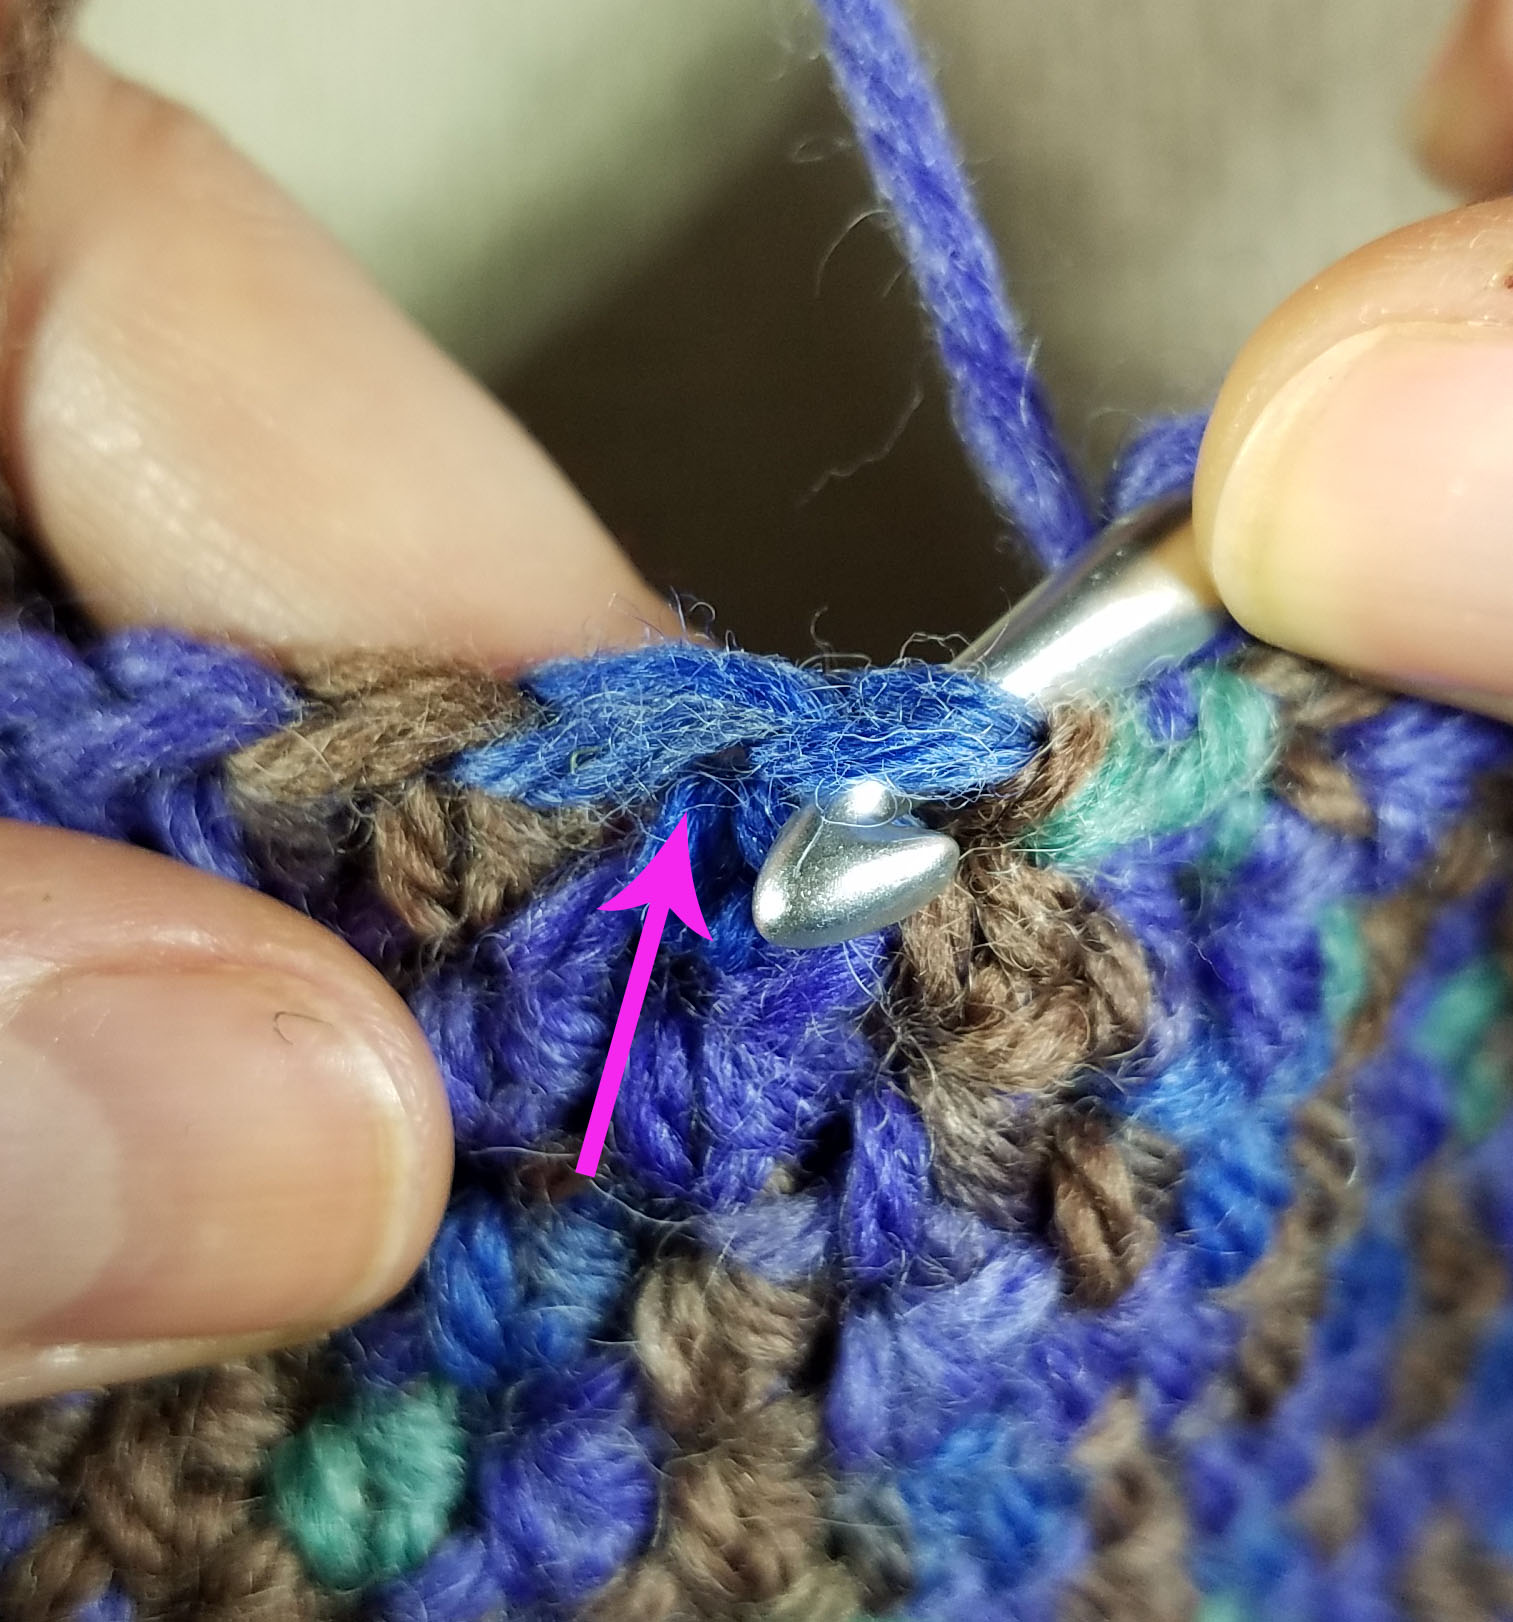
The first time I tried using post stitches for my ribbing I decided to do what I call “skinny” post stitches. Instead of working down into the stitch, I use the very top of the post just under the “v” that makes the top of the stitch (the bit of brown yarn the arrow is pointing to in the photograph above). This creates a slimmer looking stitch because the base of the post stitch isn’t stretched around the thickest part of the other stitch.
By the way this tutorial is showing the post stitches and finished work for right-handed crocheters. If you are left-handed and crochet with your hook in the left-hand, then reverse what I’m doing here.
For the ribbing affect I alternate my post stitches, so I needed an even number of stitches. I generally start with a FPhdc, and end the round with a BPhdc. The first round of ribbing is the trickiest.
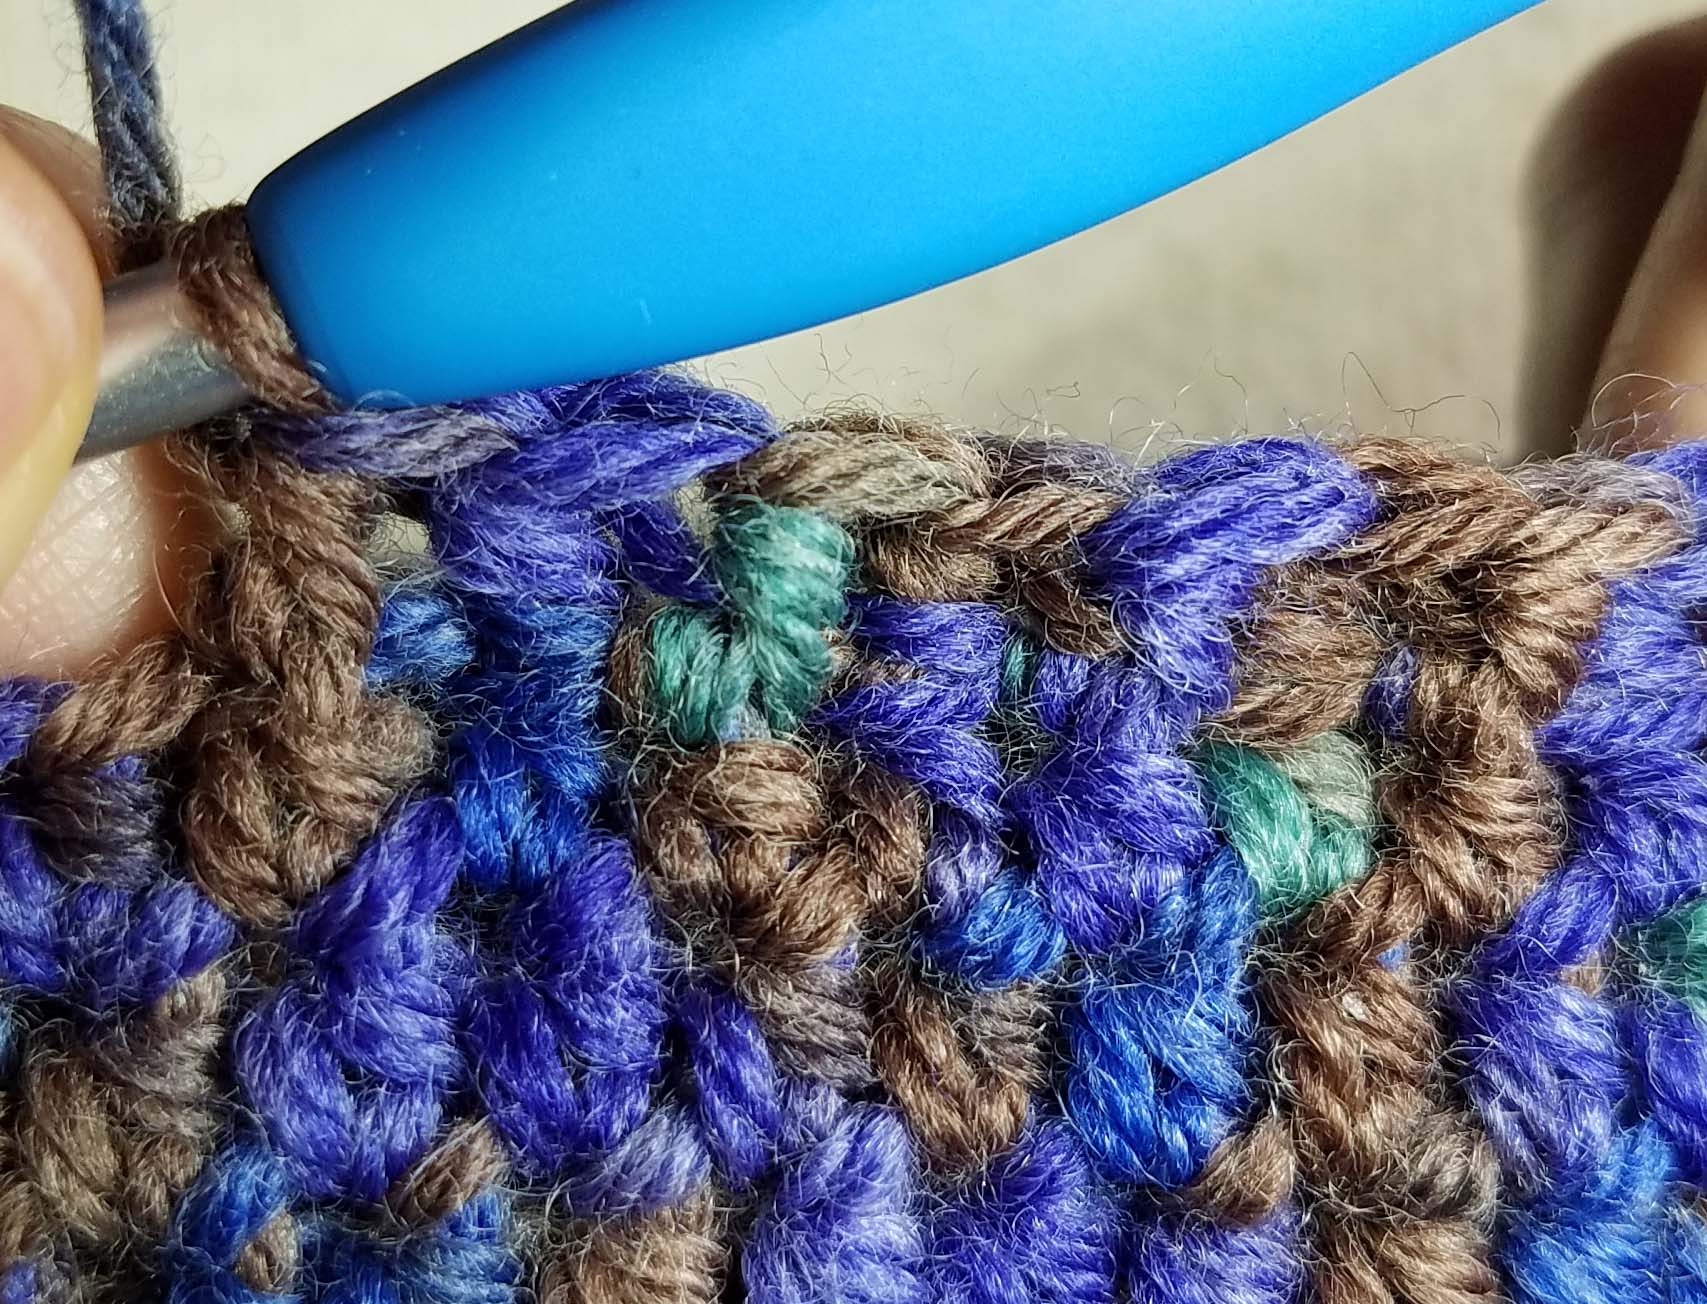
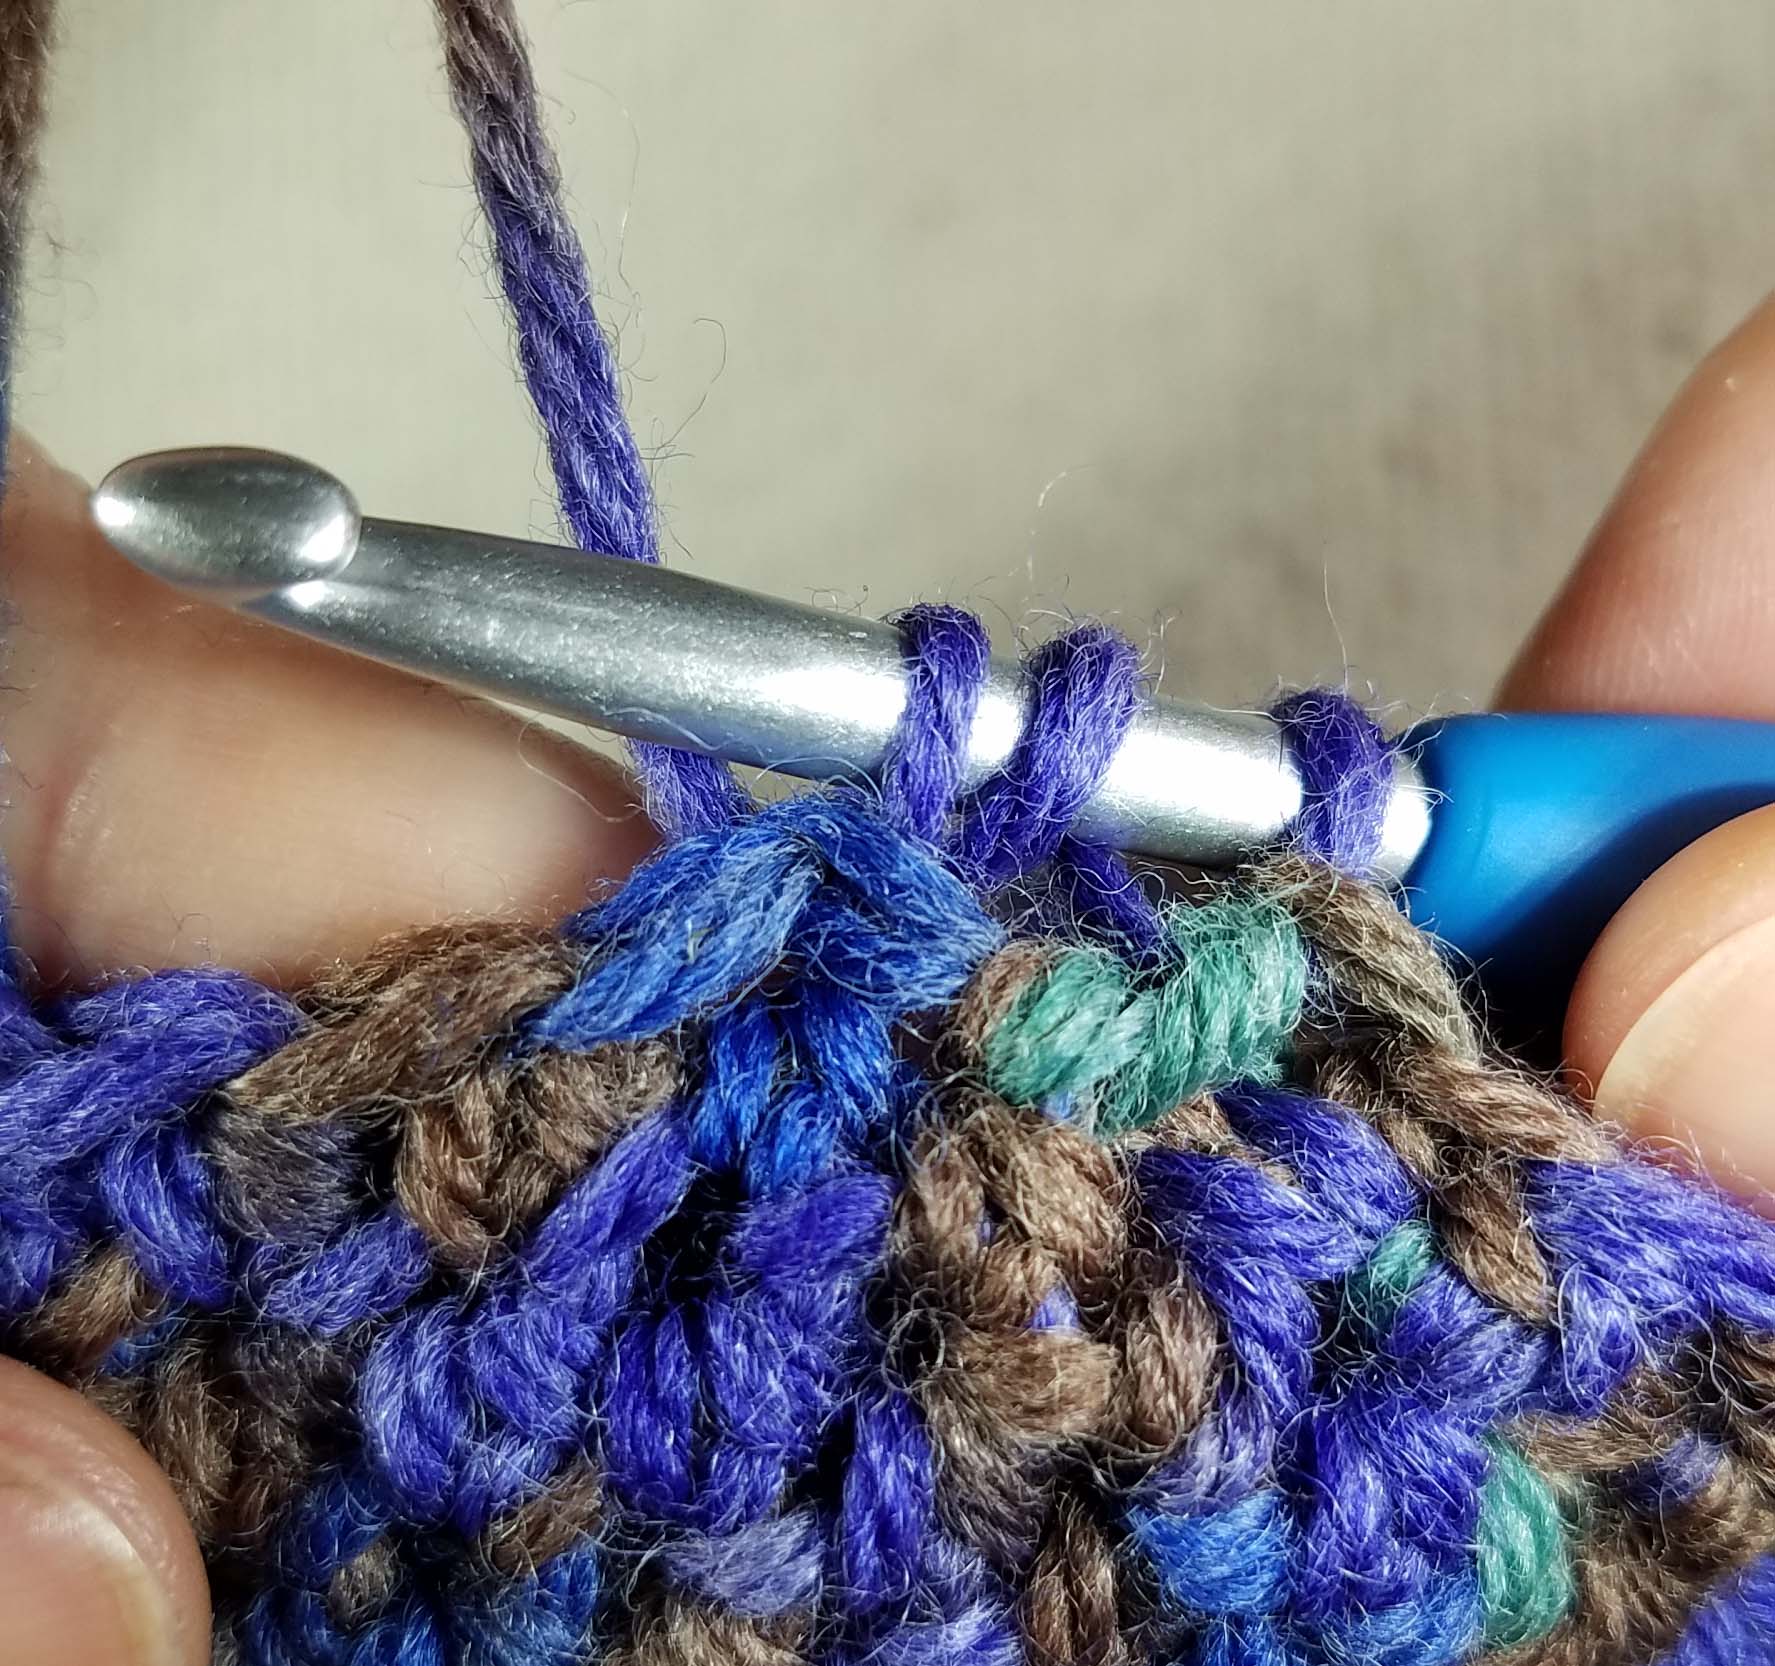
Once you have finished that round it just becomes a matter of working FP stitches into FP stitches and BP into BP. In the photo above you can see both the appearance of the ribbing from the front and back.

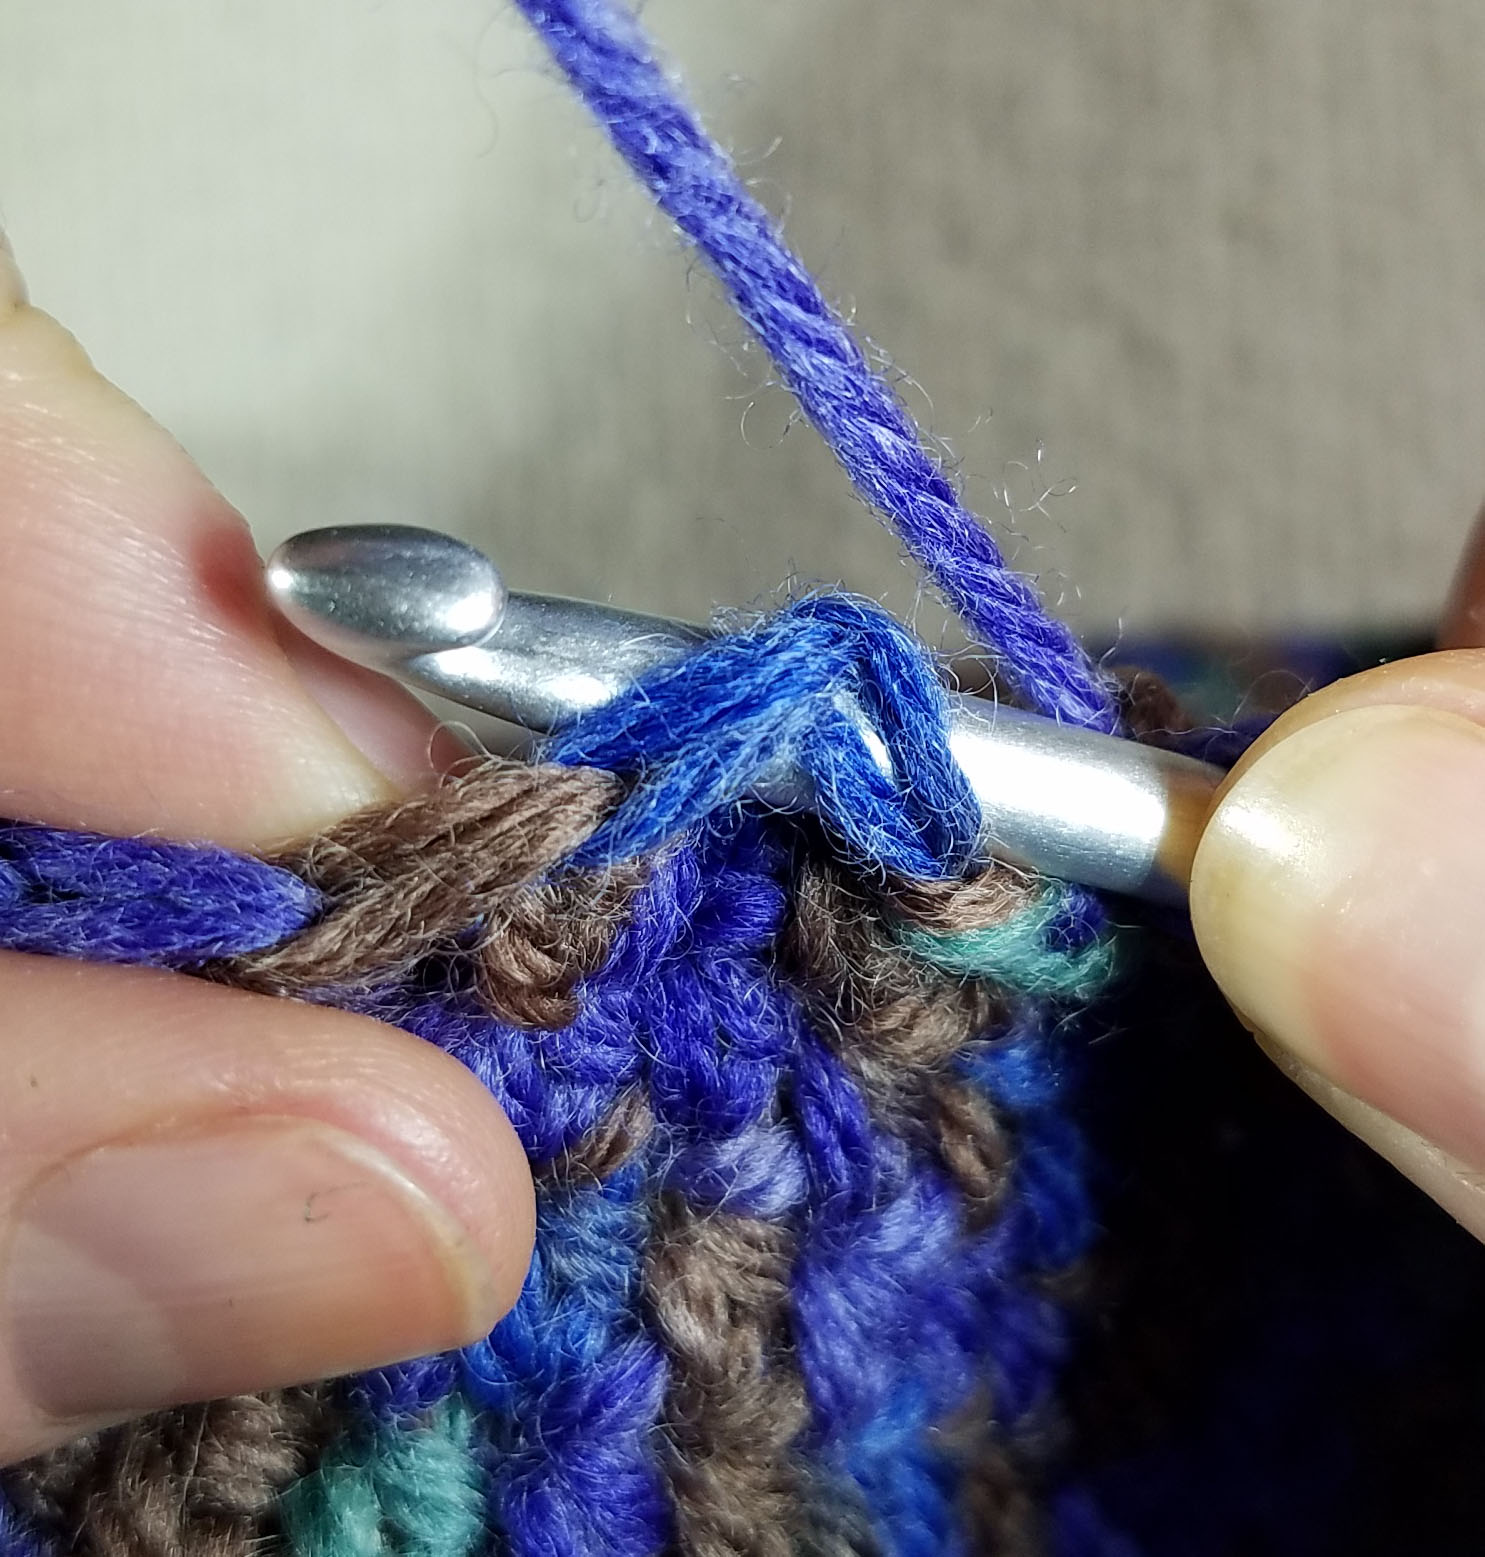
For a Front Post half double crochet (FPhdc): Insert the hook from front to back to the right of the post you want to work around, then bring the hook from the back to the front under the top of the stitch to the left of the post (indicated by arrow in photo above). Yarn over and pull up a loop thru all the stitches, yarn over and complete your hdc. The post of this new stitch will be sitting on the front of your fabric.
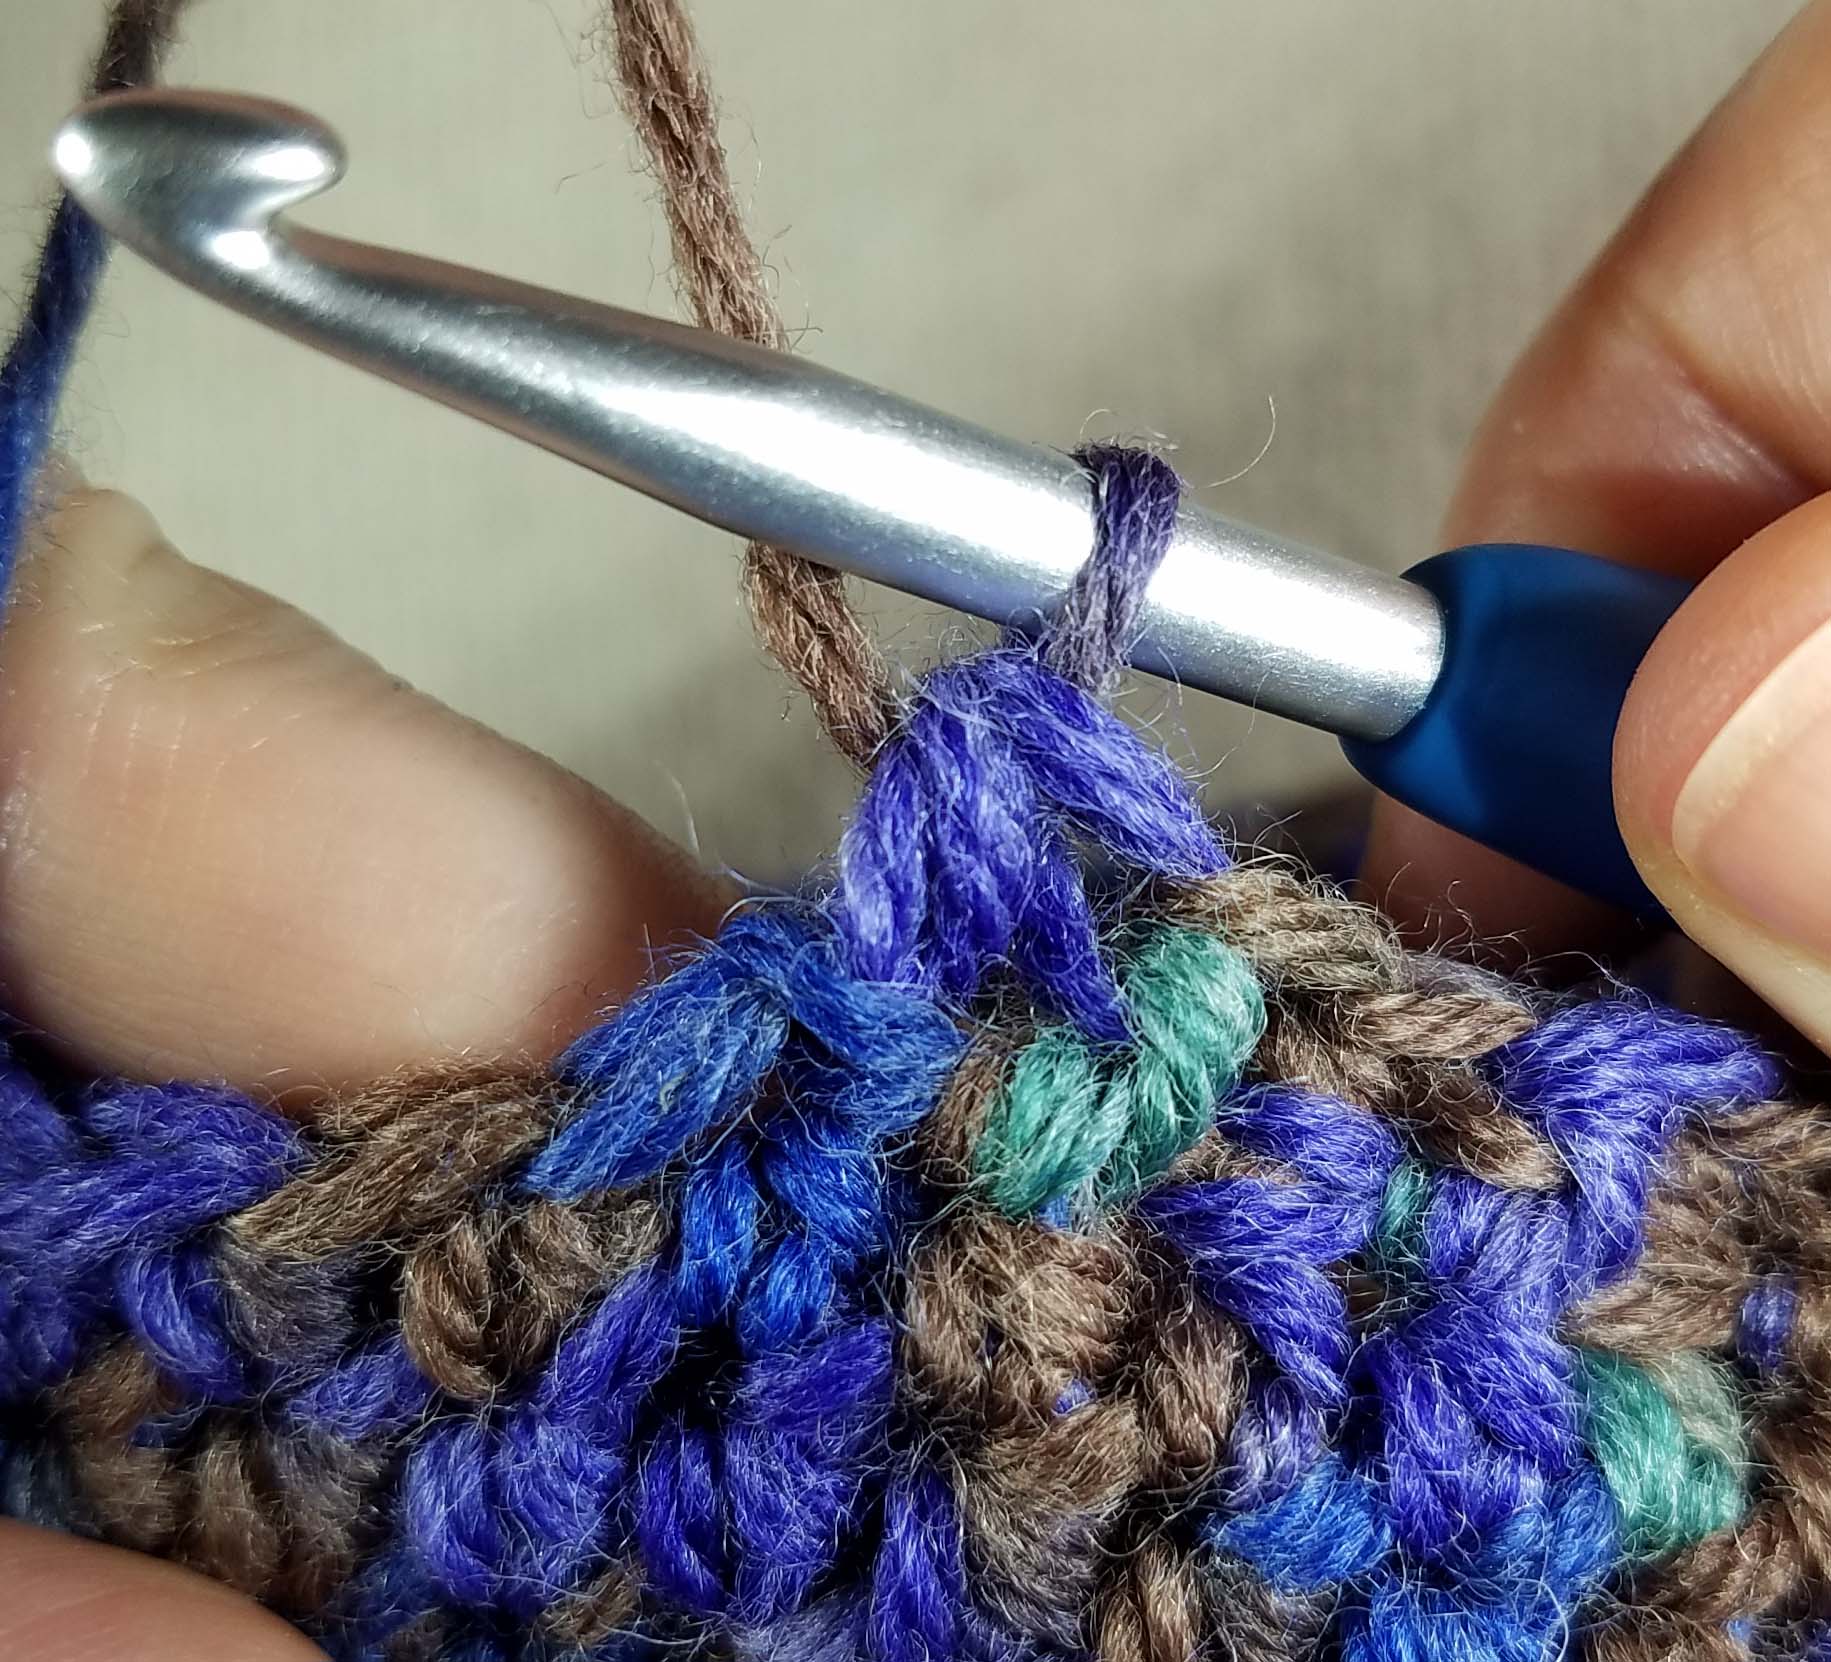
For a Back Post half double crochet (BPhdc): Insert the hook from back to front to the right of the post you want to work around, then bring the hook from the front to the back under the top of the stitch for the left of the post (indicated by arrow in photo above).
Yarn over and pull up a loop thru all the stitches, yarn over and complete your hdc. The post of this new stitch will be sitting on the back of your fabric.
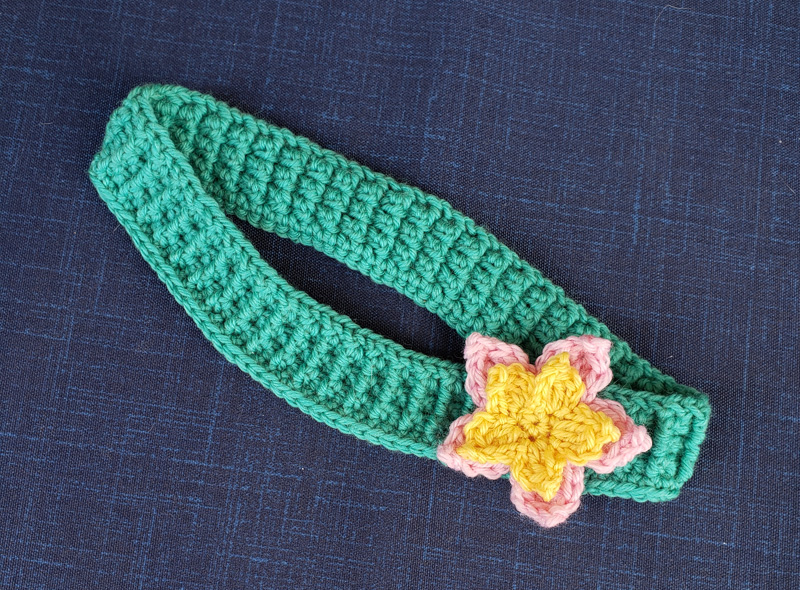
This is how I make my “skinny” front post and back post half double crochet stitches. You can modify this technique with any crochet stitch, but the half double crochet is my favorite. Practice working your skinny post stitches with this quick and easy headband pattern.
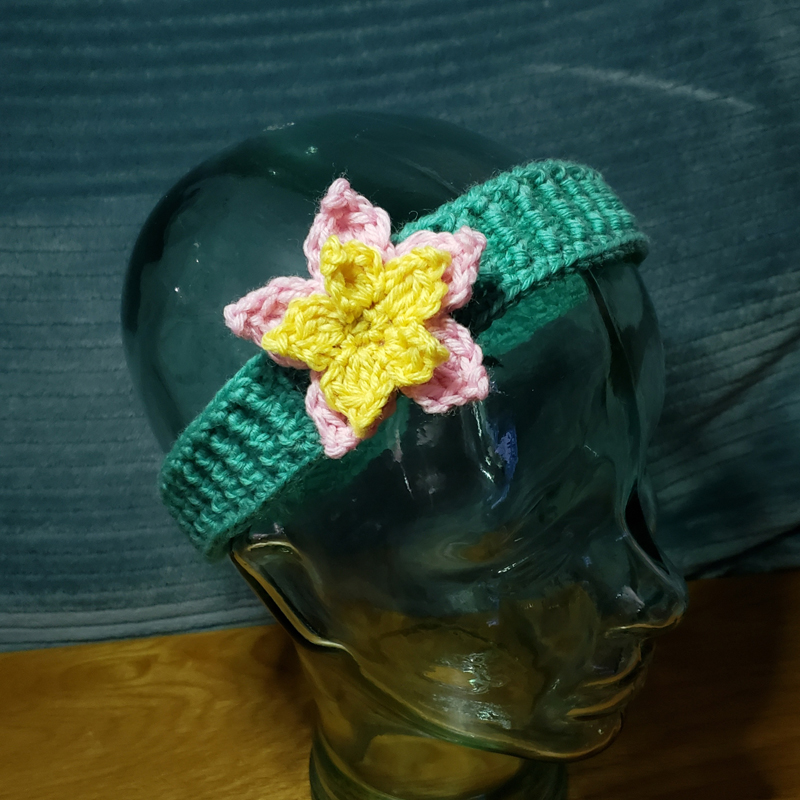
Summer Stretch Headband
Designed by Andee Graves
Skill level: Intermediate
Special Stitches
Materials:
Yarn – Berroco “Ultra Wool” worsted weight, 100% superwash wool, 219 yds/200 m, 3.5 oz/100 g
Color A – #3346, Color B – #3312, Color C – #3315
Hook – H (5 mm) or size needed to obtain gauge
Notions – yarn/tapestry needle
Gauge: 8 FSC = 2”
Special Stitches/Abbreviations:
fsc (Foundation Single Crochet)
FPhdc (Skinny Front Post Half Double Crochet) – The post stitch is worked under the top 2 strands of the stitch. YO, insert hook into top of previous st from front to back, then bring hook from back to front thru top of next st (this is working around post of st), YO, pull up a loop thru both st tops, YO, pull thru all 3 loops on hook.
BPhdc (Back Post Half Double Crochet) – The post stitch is worked under the top 2 strands of the stitch. YO, insert hook into top of previous st from back to front, then bring hook from front to back thru top of next st (this is working around post of st), YO, pull up a loop thru both st tops, YO, pull thru all 3 loops on hook.
Picot – ch 3, insert hook thru front loop and top side loop of indicated st, YO, slip st tightly.
Cl (2 dc cluster) – (YO, insert hook in indicated place, YO, pull up a loop, YO, pull thru 2 loops) 2 times, YO pull thru remaining loops on hook.
Exdc (Extended double crochet) – YO, insert hook in indicated place, YO, pull up a loop, YO, pull thru 1 loop, [YO, pull thru 2 loops] twice.
PM (Place Marker)
Pattern Notes:
Headband is worked in a 1×1 rib using skinny front and back post half double crochet stitches, then flower is worked in 2 parts and sewn to headband.
Instructions
Headband
Rnd 1: With Color A, crochet 96 fsc, without twisting join with a sl st in first fsc.(96 fsc)
Rnd 2: Ch 2, FPhdc around post of first st, [BPhdc around post of next st, FPhdc around post of next st] 47 times, BPhdc around post of last st and base of beginning ch-2, sl st to top of first FPhdc. (48 FPhdc, 48 BPhdc)
Rnds 3 & 4: Repeat Rnd 2.
Rnd 5: Ch 1, sc in next 96 sts around, sl st to first sc to join. Fasten off. (96 sc)
Use beginning tail to close gap at beginning of Rnd 1, weave in all loose ends.
Flower 1
Rnd 1: With Color B, ch 2, 5 sc in 2nd ch from hook, tighten center of circle, join with sl st to first sc of Rnd. [5 sc]
Rnd 2: Ch 3, Cl in same sc as join, picot in Cl, ch 3 [(sl st, ch 3, Cl) in next sc, picot in Cl, ch 3,] 4 times, sl st in first sc again. Fasten off.
Flower 2
Rnd 1: With Color C, ch 2, 10 sc in 2nd ch from hook, tighten center of circle, join with sl st to first sc of Rnd. [10 sc]
Rnd 2: Ch 1, sc in same sc as join, [ch 2, sc in next st, ch 1, sc in next st] 4 times, ch 2, sc in next st, ch 1, join with sl st to first sc of Rnd. [10 sc, 5 ch-1 sp, 5 ch-3 sp]
Rnd 3: Ch 1, [(sc, dc, Exdc, picot, Exdc, dc, sc) in ch-2 sp, skip next st, sl st in ch-1 sp, skip to next ch-2 sp,] 5 times, join with sl st to beginning sc of Rnd. Fasten off
Finishing
Weave in tails on flowers, then use remaining tails to sew Flower 1 to Flower 2, then both flowers on headband. Best spot to sew them is over joining seam. When weaving in ends follow the “columns” of your post stitches so you don’t lose the stretchiness of your ribbing.
