Yesterday was quite the crochet day for me. I taught the “Learn to Crochet” class at the Longmont Yarn Shoppe. I always have a great time teaching and love it when my students have that light bulb moment when things begin to work for them. It’s also a great reminder of what it’s like to be at the beginning of the crochet journey.
Then I ran a few quick errands in town and headed back home. At home it was a flurry getting my family herded up so we could head over to a friend’s house for a 50th birthday party. There were lots of kids there and our hosts have a nice trampoline that my kids headed straight for.
Meanwhile there were only a few people I knew, so I said “hi” then found a well-lit spot outside to sit with my crochet and keep an eye on my kids. After awhile I got a bit chilly so I came back inside.
One of the other women at the party asked me about someone in Jamestown and if I knew them. Turned out we had a mutual acquaintance. We introduced ourselves and had a chuckle when it turned out her name is Annette, though pronounced the German way, the “e” at the end sounds like an “a”. We chatted about living in the mountains and wildlife visiting my home.
While we were talking I was crocheting on my project and she asked me about my crochet. She is from Germany originally and both knits and crochets, though she said she was a bit out of practice. She told me that she had started a crocheted blanket project about 2 years ago, but had gotten a bit stuck when she went back to work on it.
Her husband had to run their teen-age daughter home about then and Annette asked him to bring her project bag back with him. When he returned the 2 of us dug thru the bag. There were a number of completed squares, but they were very tightly crocheted and we talked about how they would work in a blanket.
She had been inspired by a photo of a crocheted blanket in a catalog. She had the original inspiration photo in the bag. So we took a look at it together. Her squares were pretty different from the squares in the blanket so I asked her if she would be interested in trying something different.
I grabbed a ball of the yarn she had and began designing a different square there on the spot. I was having a great time playing with yarn, and we talked about crochet and our families as the square took shape. She liked what I came up with and thought it would be a nicer blanket than the tight squares she had done. Since she had made so many of those I suggested she use them for a pillow that would carry the same colors as her blanket.
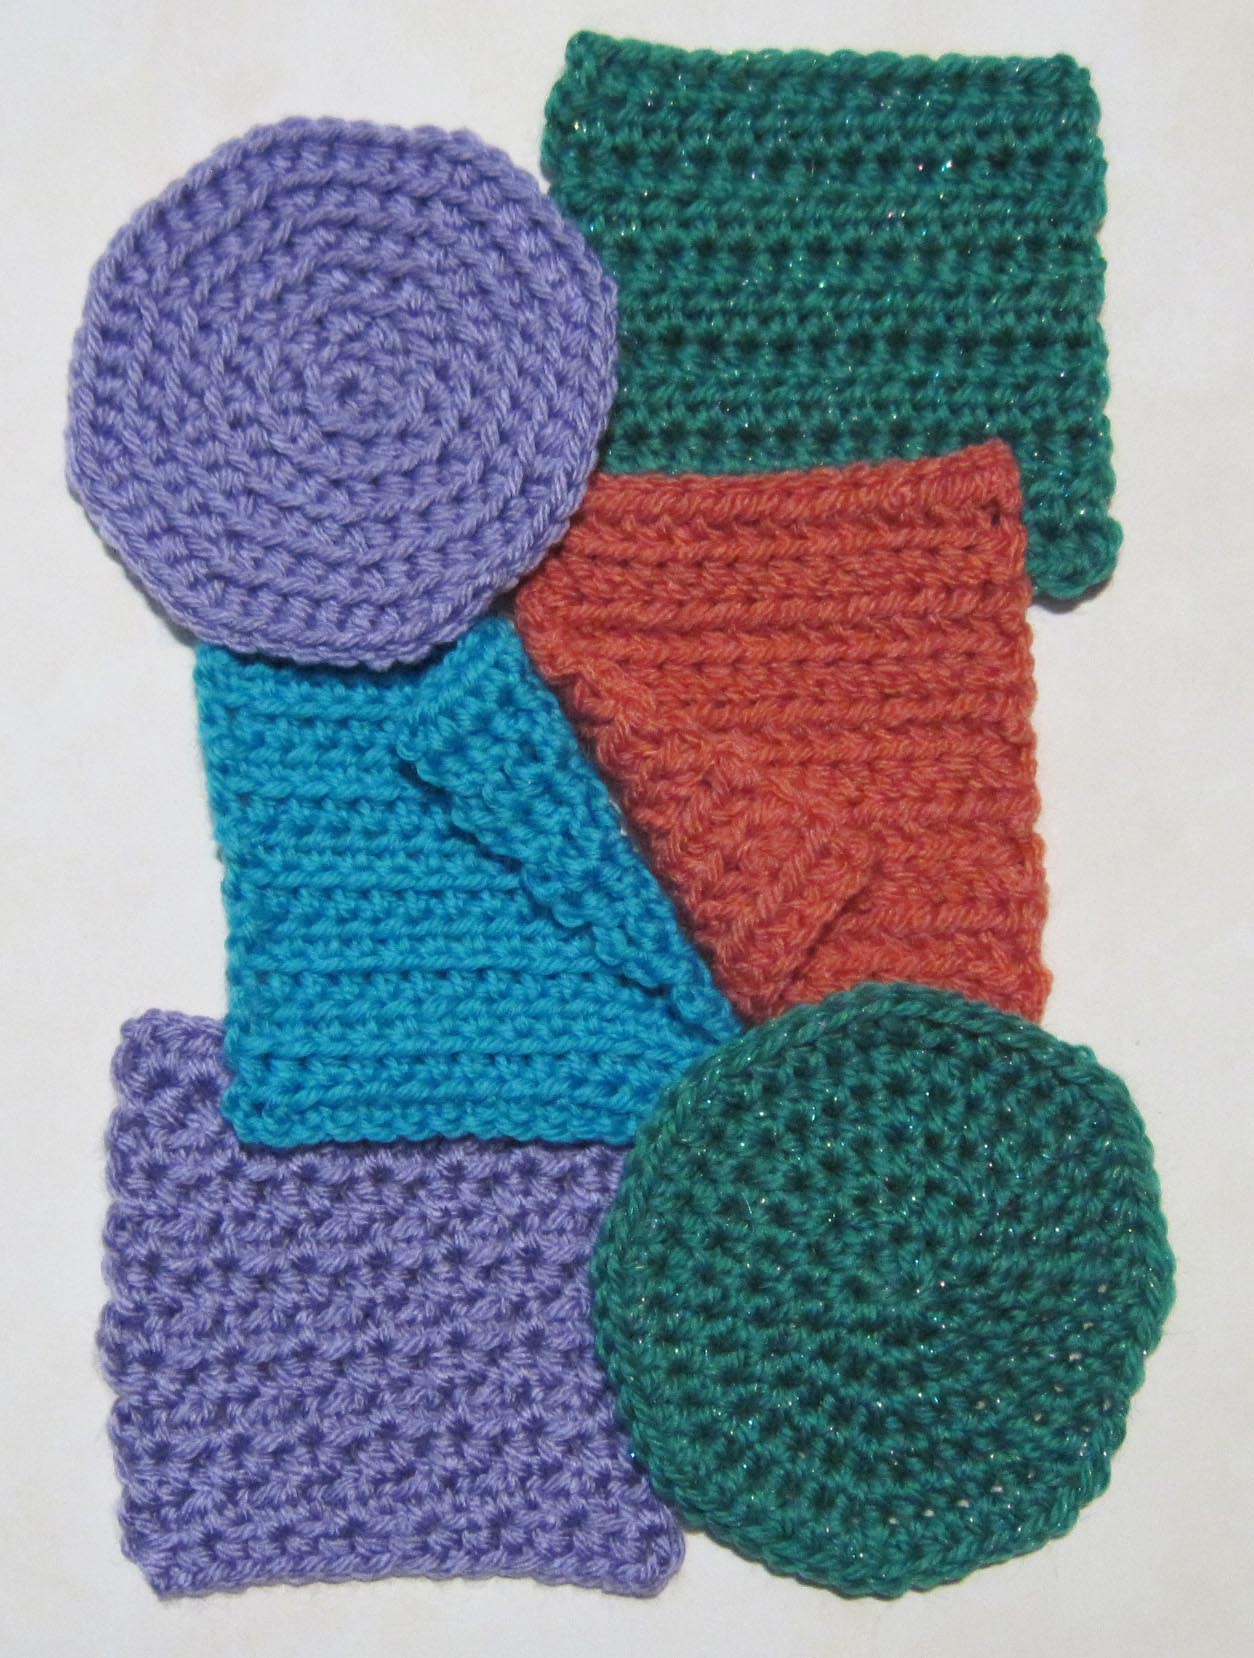
Today I experimented a bit more with the square pattern I had come up with last night and made these 2 versions. The difference between the 2 is in where I decided to make the color change. Instructions for the squares are below and, in honor of my new crochet friend, it is named the Annetta Square.
ANNETTA SQUARE
designed by Andee Graves
Skill level: Intermediate
Materials:
Worsted Weight yarn
I-9/5.5mm hook
Finished Size:
Approximately 3 7/8” square
Gauge:
First 3 Rounds = 2.25”
Special Stitches:
3 double crochet cluster st (Cl): (YO, insert hook in indicated st or sp, YO pull up a loop, YO pull thru 2 loops on hook) 3 times, YO pull thru remaining loops on hook. If you are having trouble with this stitch check out my blog post “Crochet and Springtime” for a tutorial on it.
Beginning 3 dc cluster st (Beg Cl): Ch 2, (YO, insert hook in indicated st or sp, YO pull up a loop, YO pull thru 2 loops on hook) 2 times, YO pull thru remaining loops on hook.
Instructions
Rnd 1: Starting with adjustable slip knot, ch 2, 6 sc in 2nd ch from hook, sl st to first sc of Rnd. [6 sc]
Rnd 2: Ch 1, sc in same st as join, (ch 1, sc in next st) 5 times, ch 1, sl st to first sc of Rnd. [6 ch-1 sps, 6 sc]
Rnd 3: Sl st and Beg Cl in next ch-1 sp, (ch 3, Cl in next ch-1 sp) 5 times, ch 3, sl st to top of Beg Cl. [6 ch-3 sp, 6 Cl]
Change color here to get suspended flower look
Rnd 4: Ch 1, sc in same st as join, (4 sc in next ch-3 sp, sc in next st) 5 times, 4 sc in next ch-3 sp, sl st to first sc of Rnd. [30 sc]
Rnd 5: Ch 1, sc in same st as join, sc next st, (2 sc next st, sc in next 4 sts) 5 times, 2 sc next st, sc next 2 sts, sl st to first sc of Rnd. [36 sc]
Change color here to get circle in square look
Rnd 6: Ch 1, sc next 2 sts,(*hdc next st, (dc, tr) next st, (tr, ch 2, tr) next st, (tr, dc) next st, hdc next st,* sc next 4 sts) 3 times; Repeat from * to * once, sc next 2 sts, sl st to first sc of Rnd. [16 sc, 8 hdc, 8 dc, 16 Tr, 4 ch-2 spcs]
Rnd 7: Ch 1, sc next 6 sts, *(sc, ch 2, sc) next ch-2 sp,** sc next 12 sts*; Repeat from * to * 2 times, then Repeat from * to ** once, sc in next 6 sts, sl st to first sc of Rnd. [56 sc, 4 ch-2 sps]
Fasten off
I really like how these little squares came out. I hope you enjoy making some to use in your projects this spring.
This post today is actually dedicated to my good friend Julia (@AberrantCrochet). Sadly, we don’t get to see each other much, but we communicate online. She recently tweeted a photo of a chair someone had decorated using crochet motifs.
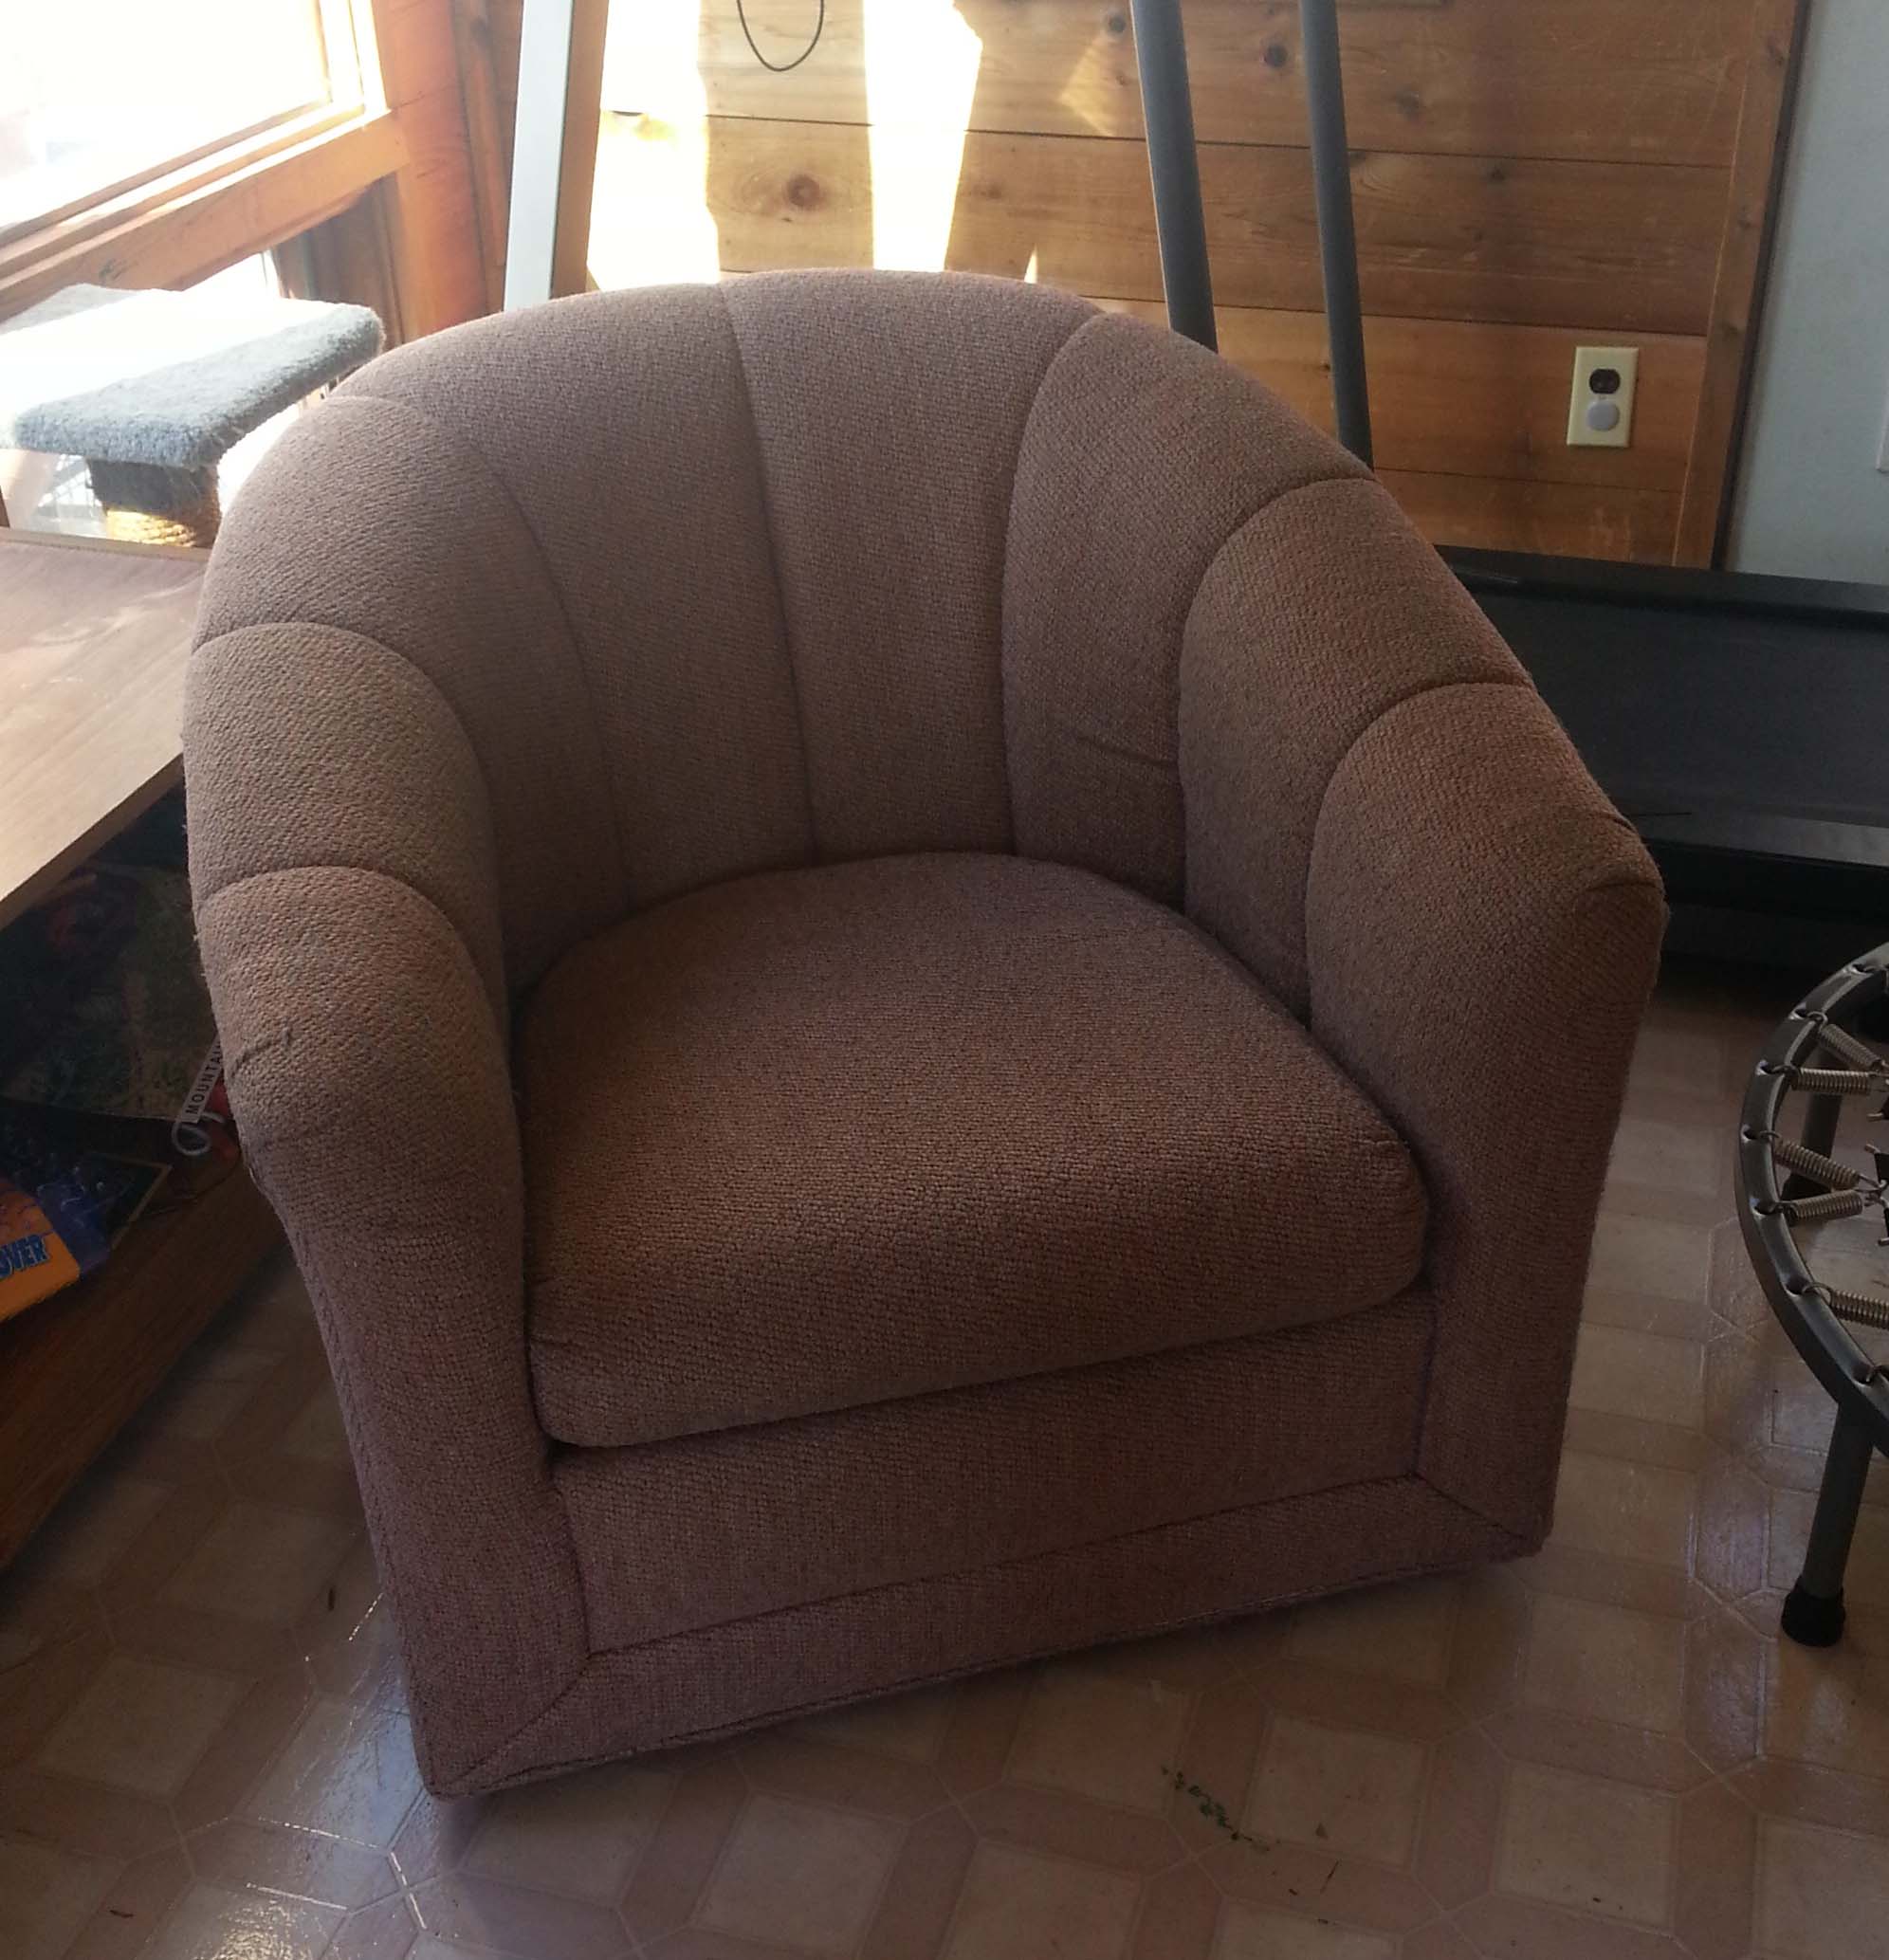
I thought this chair was really fun, and it reminded me that I really want to crochet a chair “cozy” for an old beat-up chair of mine.
Originally this chair belonged to a friend from massage school. She was getting rid of it and I took it off her hands. There was something about the shape and size of it that really appealed to me. Still does for that matter.
The upholstery was in rather worn condition, but I decided to sew a polar fleece covering for it and put it in my massage office as my “client” chair. It served that purpose well for many years.
Chair moved into Boys’ room as Reading spot.
Then I got a small sofa for my office about 7 years ago and I moved the chair to my boys’ room for a reading chair. Between dogs and boys the polar fleece cover has taken quite a beating. Which is what originally got me thinking that a colorful covering crocheted in 100% acrylic yarn might actually hold up better.
I’m going to use the old polar fleece cover to create a template that I will crochet pieces to fit. That way the chair can still be in use while I’m making the cover. Another option would be to crochet “scrumbles” and pin them to the chair until there are enough to join them together. But I want the boys to be able to continue to use the chair while I work on this project. My goal is to have it finished by the end of 2016.
Next step in this project will be to pick out the yarn I’m going to use. I have a lot of acrylic yarn in my stash, so it is going to be mostly about deciding what colors I am going to use. I also need to decide what style of crochet I’m going to use. Will it be a “Free Form” scrumbled looking piece or will it be more large swatches of more regular crochet fabric. I suspect it will be a combination of both once I really get working with hook and yarn.
I’ll keep updating here on the blog as this project evolves. This one will take some time, mainly because I’ll be fitting it in around my other crochet work.
One of the challenging things about designing garments is writing all the changes to a pattern for the various sizes. This particular task has been known to reduce otherwise sane designers to raving lunatics, yours truly included (and I love math).
Sparkling Lace Shrug – Annie’s Publishing
My “Sparkling Lace Shrug” that I designed for Crochet! Magazine was many hours of hair pulling and tears as I worked and re-worked the calculations. I learnt my lesson though. I took a Pattern Grading class with Kim Guzman thru Crochetville a couple of years ago and it was a great investment in my business (as well as my sanity).
The class is available again and enrollment is now. If you are an aspiring designer, or a designer that wants to take the fuss out of pattern grading here is your chance. Zip on over to Crochetville and sign up for the class.
You can watch a preview of what her class covers on YouTube just click here.
Kim helps you learn the methods for making your task much easier by using Excel spreadsheets to do the math for you. As well as explaining many of the sizing pit-falls that can snare the un-wary designer.
You will be very glad you invested the time and money, I know I am.
National Crochet Month is zipping by, and I am honored to be celebrating by participating again in the Crochetville NaCroMo 2015 Blog Tour. Amy Shelton and Donna Hulka are terrific supporters of the crochet community and designers.
Amy and I in Reno at the Knit & Crochet Show (yes, she is wearing a tiara)
I’ve met both of them in person thru the Crochet Guild of America (CGOA) and have spent many fun and often inspiring hours in their company.
One of my favorite things about being a member of the CGOA is how it has put me in touch with lots of other crocheters. I’ve met many wonderful crochet friends thru my involvement in CGOA, like Amy and Donna. It’s great fun to be with your “people”, folks that understand this love of playing with yarn. If you haven’t joined CGOA you may want to consider doing so, the annual conference is great fun to attend, but there is even more. Opportunities to meet up locally with other crocheters and to meet online on the CGOA website. The website is: Crochet.org.
As the owners and creators of the Crochetville community and dedicated CGOA members themselves, Amy and Donna are always aware of the importance of supporting others thru charitable work. This year’s blog tour charity project is making hats (or making a monetary donation) for Halos of Hope.
Halos of Hope is a 501(c)3 not-for-profit organization committed to providing volunteer-crafted hats to cancer centers across the country. You can make and send in hats to Crochetville in Alabama or donate money to help Halos of Hope pay for shipping hats to the centers. You can find the mailing address and read more about this project on the Crochetville blog.
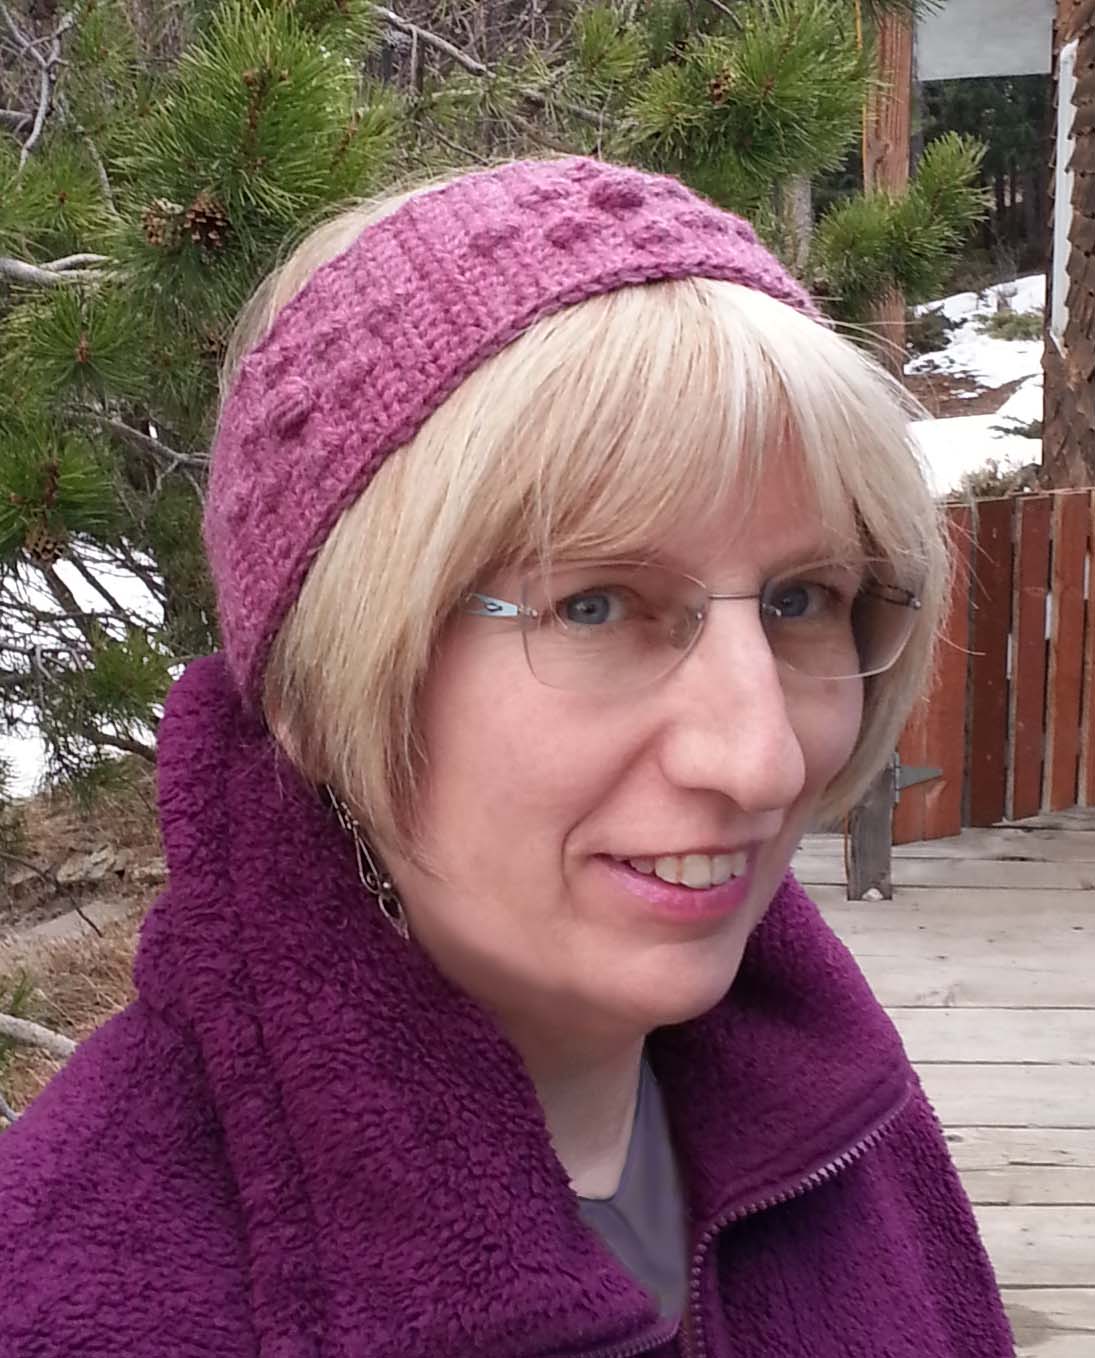
Hats are one of my favorite projects to work on but with this recent spring like weather I’m looking at transitional pieces. Headband/Headwrap/Earwarmers (I’m never 100% sure what to call them) are a great choice. I love them during the transitional seasons because they easily fit in a pocket and are a great way to keep my ears warm if the weather gets chilly. They also help keep my hair under control when the wind gets too blustery.
I tend to have light weight gloves and a headband tucked into the pockets of every jacket. Since I recently got my hair cut into a very short 1920’s style bob, headbands can also look quite stylish. In celebration of NatCroMo I’m offering this fun textured headband pattern to my visitors. I’ve used a lot of textured stitches in this project which helps make the fabric even warmer.
This is an intermediate level pattern, but it’s a great project to expand your skills with. I’m including a tutorial on making cluster and puff stitches here for those of you feeling like tackling a new crochet skill. For those of you that already have some experience with cluster and puff stitches the “Special Stitches” section in the pattern should be sufficient to get you started.
Cluster Stitch Tutorial
The cluster stitch for our headband has more texture to it because it is framed on either side by a shorter stitch, the half double crochet. If cluster stitches are worked with spaces and/or taller stitches on either side they are a bit flatter and more of a decorative grouping that doesn’t rise as far above the surface of the work.
The textured “bump” of a cluster stitch as used in this headband sits on the back side of your row, for a single sided project you want to work them only on alternate rows in the project.
In this headband project we are using a 3 dc cluster stitch to create our textured stitches. In a cluster stitch you make the base of the 3 dcs being used, then work the final dc step for all 3 in one go.
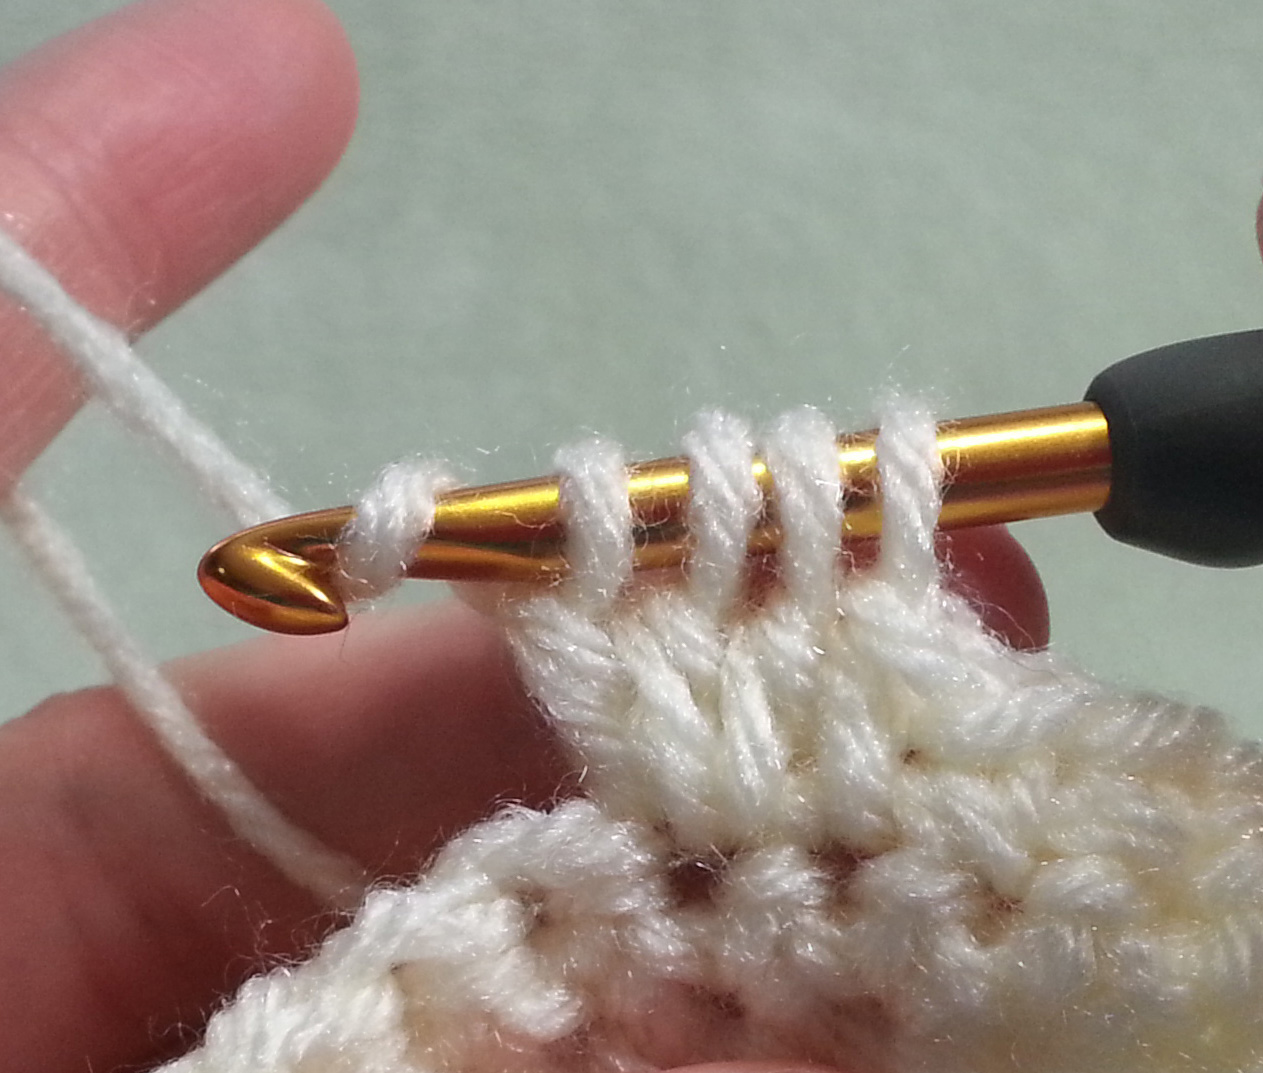
Photo A
To make a 3 dc cluster st, yarn over (yo) like making a dc and insert in st or sp, yo, pull up a loop (3 loops on hook), yo {Photo A},
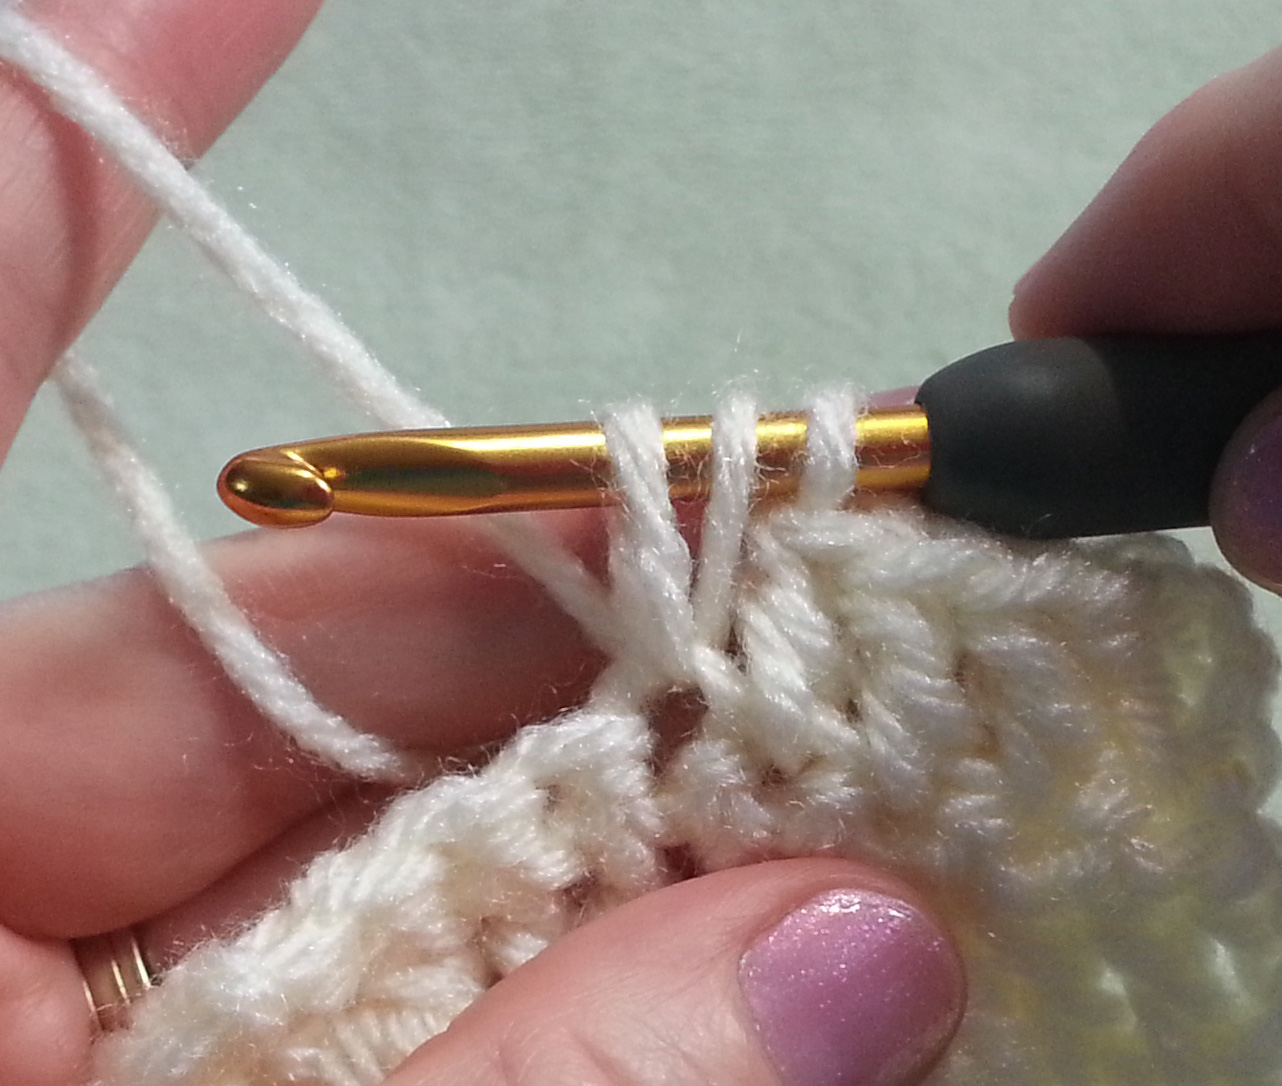
Photo B
pull thru 2 loops on hook (2 loops remaining on hook, 1st base made), yo, insert in same st or sp, yo, pull up a loop (4 loops on hook), yo {Photo B},
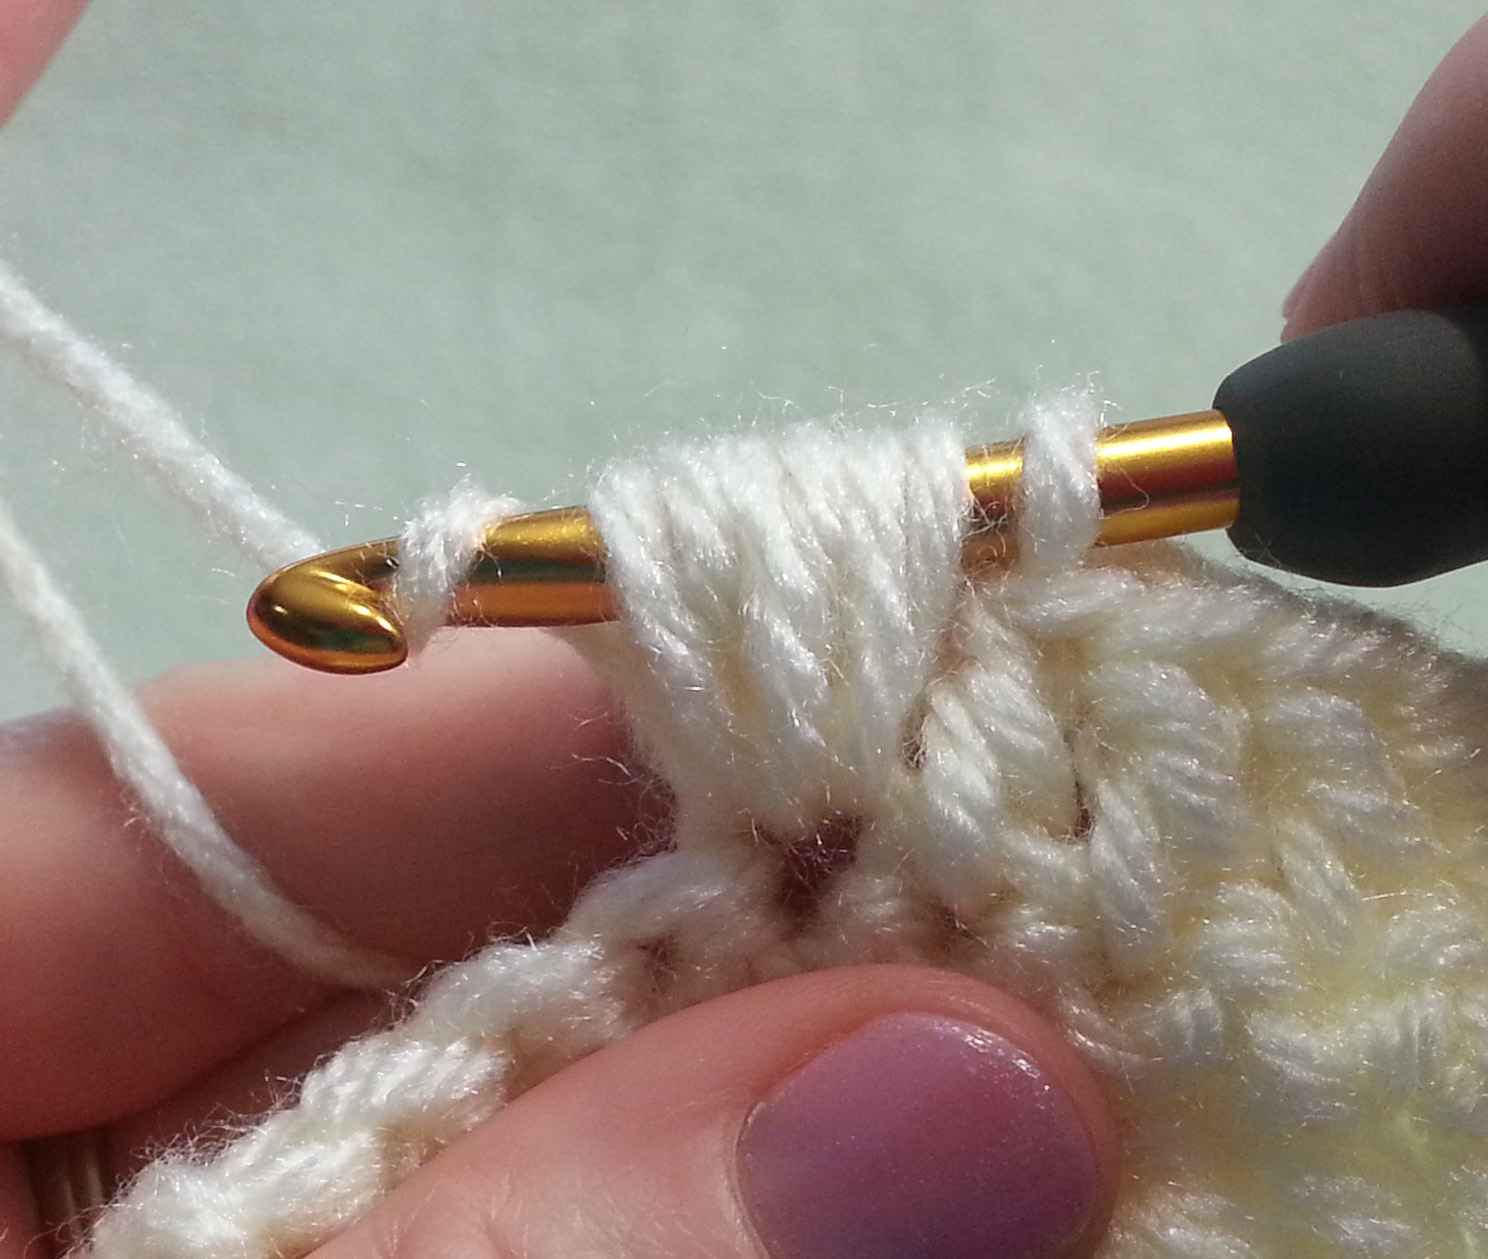
Photo C
pull thru 2 loops (3 loops remaining on hook, 2nd base made), yo, insert in same st or sp, yo, pull up a loop (5 loops on hook), yo, pull thru 2 loops (4 loops remaining on hook, 3rd base made), yo {Photo C}, pull thru all 4 loops on hook.
Puff Stitch Tutorial
This stitch is often a challenge to get right. The primary trick is getting all of your loops to the same length. That can be particularly challenging if you crochet tightly, so remember to keep your work loose.
Puff stitches tend to sit centered in the fabric, which makes them a great stitch to use in scarves, since the texture is visible on both sides of your fabric. In the case of this headband project we are framing the puff stitches with hdc stitches. Like with our cluster stitches this “framing” helps the stitch sit on the backside of the row and creates a 3D effect on the finished project.
There are a number of ways to make a puff stitch, the version I use in this project is secured at the top similar to making a single crochet (I think of these as “locked” puff stitches). For this project you will be making 5 “wraps” for the puff part. Each time you do a “wrap” you get 2 more loops on your hook.
Photo D
Yarn over (yo) and insert your hook in the indicated st or sp, yo, pull up the 2 loops to above the top of your previous st {Photo D},(yo, insert hook in the same st or sp, yo, and pull up the 2 new loops to the same height of the previous loops) 4 times.
Photo E
You will have 11 loops on your hook*, 10 tall loops for the “puff” and the original working loop. Yo {Photo E} and pull thru the 10 tall loops,
Photo F
you will have only 2 loops on your hook, yo {Photo F}, pull thru the last 2 loops, your puff stitch is complete.
* A peek into the design process: For the eagle-eyed amongst my visitors, you may have noticed in the photos for this tutorial I have only 7 loops on my hook at this point. This is because I made a change in the pattern after I shot the photos. Originally I thought I would like the 3 wraps for my puff stitches, but they weren’t dramatic enough for me in the sample. So I changed it for the final sample and pattern.
SPRINGTIME HEADBAND
designed by Andee Graves
SKILL LEVEL: Intermediate
FINISHED MEASUREMENTS
Headband is approximately 3.25”/8.125cm wide x 22”/55cm long.
#139 Dark Rose Heather sample used 31g/aprx 72 yards = approximately 2 Headbands from 1 skein
CROCHET HOOKS
Size US 7 / (4.5mm)
ADDITIONAL MATERIALS
Stitch markers
Yarn needle
GAUGE
6 rows & 9 sts in hdc = 2”
SPECIAL STITCHES
3 DC Cluster Stitch (Cl): (Yo, insert hook into indicated st or sp, yo, pull up a loop, yo, pull thru 2 loops on hook) 3 times, yo, pull thru 4 loops remaining on hook.
Puff Stitch (Puff): (Yo, insert hook into indicated st or sp, yo, pull up a loop to desired height) 5 times, 11 loops on hook, yo, pull thru 10 loops on hook, 2 loops left on hook, yo, pull thru remaining 2 loops on hook.
Half Double Crochet 2 Together (hdc2tog): Yo, insert hook into indicated st or sp, yo pull up a loop, insert hook in next st, yo pull up a loop, yo pull thru all 4 loops on hook.
NOTES
The Cluster stitches and Puff stitches in this project have more texture because they are “squished” between 2 shorter stitches. The texture is created on the back of the rows. The finished project will have the textured side as the right side of the fabric.
Once the first 65 rows of the headband are crocheted, edging is worked along one edge, then ends of headband are seamed together using slip stitches to reach 2nd side, then 2nd side edging is worked.
INSTRUCTIONS
Row 1: Ch 11, turn, working in back bumps, hdc in 3rd ch from hook and each ch back to beginning. [9 hdcc]
Row 2 (RS): Ch 2 {turning ch only, does not count as st here and thru-out the pattern}, turn, hdc in each st across. PM on front of row to mark right side. [9 dc]
Rows 3- 7: Repeat Row 2.
Row 8: Ch 2, turn, hdc next st, 2 hdc next st, hdc next 5 sts, 2 hdc next st, hdc last st. [11 hdc]
Row 9: Repeat Row 2. [11 hdc]
Row 10: Ch 2, turn, hdc next st, 2 hdc next st, hdc next 7 sts, 2 hdc next st, hdc last st. [13 hdc]
Rows 11 – 16: Repeat Row 2. [13 hdc]
Row 17: Ch 2, turn, hdc next 6 sts, Cl next st, hdc next 6 sts. [12 hdc, 1 Cl]
Row 18: Repeat Row 2.
Row 19: Ch 2, turn, hdc next 4 sts, Cl next st, hdc next 3 sts, Cl next st, hdc next 4 sts. [11 hdc, 2 Cl]
Row 20: Repeat Row 2.
Row 21: Ch 2, turn, hdc next 2 sts, Cl next st, hdc next 3 sts, Puff next st, hdc next 3 sts, Cl next st, hdc next 2 sts. [10 hdc, 2 Cl, 1 Puff]
Row 22: Repeat Row 2.
Row 23: Repeat Row 19.
Row 24: Repeat Row 2.
Row 25: Repeat Row 17.
Rows 26 – 28: Repeat Row 2.
Rows 29 – 52: Repeat Rows 17 – 28, twice.
Rows 53 – 55: Repeat Row 2.
Row 56: Ch 2, turn, hdc next st, hdc2tog next st, hdc next 7 sts, hdc2tog next st, hdc last st. [11 hdc]
Row 57: Repeat Row 2.
Row 58: Ch 2, turn, hdc next st, hdc2tog next st, hdc next 5 sts, hdc2tog next st, hdc last st. [9 hdc]
Rows 59-65: Repeat Row 2. Do not fasten off, Secure working loop so work doesn’t come unraveled.
EDGING
Side 1: Ch 1, with RS facing turn band to work along first edge, work sc in side of Row 1, then work 98 sc spaced evenly along edge in ends of rows (3 sc in the ends of the every 2 rows), sl st to first sc in round.
Align ends of band, RS together sl st loosely working thru both the top of sts in Row 65 and bottom of sts in Row 1 across to second edge.
Side 2: Turn work with RS facing and work along edge, ch 1, work 99 sc spaced evenly along edge in ends of rows, sl st to first sc in round. Fasten off.
FINISHING
Weave in ends. Block lightly, if desired.
Now you are ready to make a bunch of these headbands to be ready for those cooler spring days. Have a great time crocheting and keep celebrating crochet everyday.
I’ve been having way too much fun the last 2 weeks with my dear friend Jan. When we told various folks in our lives that she was coming out for 2 weeks they all thought that sounded like a very long visit. “Won’t you get sick of each other?” seemed to be the common refrain. The answer in a nutshell, “Not at all”.
What better way to celebrate National Crochet Month than hanging out with one of my dearest crochet friends? The 2 weeks of her visit flew by, and I was feeling a little sad as I dropped her off at DIA for her flight home this past Thursday.
So what have we been up to?
Sunday, March 8th we headed over to my friend and neighbor’s house for the monthly Mountain Top Stitching Group. Spent a lovely time visiting and everyone was playing with yarn and fiber. 3 of us (including Jan and myself) were crocheting, one was knitting and one was needle-felting. That evening Jan and I planned out the rest of our week’s adventures.
The old Fort
Monday, March 9th we drove over to Estes Park. We parked in the library lot and walked all the way up Elkhorn Avenue (the main street of shops). We had wanted to go the glass blowing shop at the end of the road, Patterson Glassworks of Estes Park, but they were closed. So we started back down and visited various shops on the way toward the local yarn shop near the library.
Sculpture outside the Library
The Stitchin’ Den is a lovely little yarn shop in Estes located on Virginia Ave. I hadn’t been there since the flood in September 2013. The shop had been closed for a while after the flood and I don’t seem to get to Estes except when we have visitors from out-of-state, or I’m meeting friends from Denver there for a special event at the fairgrounds.
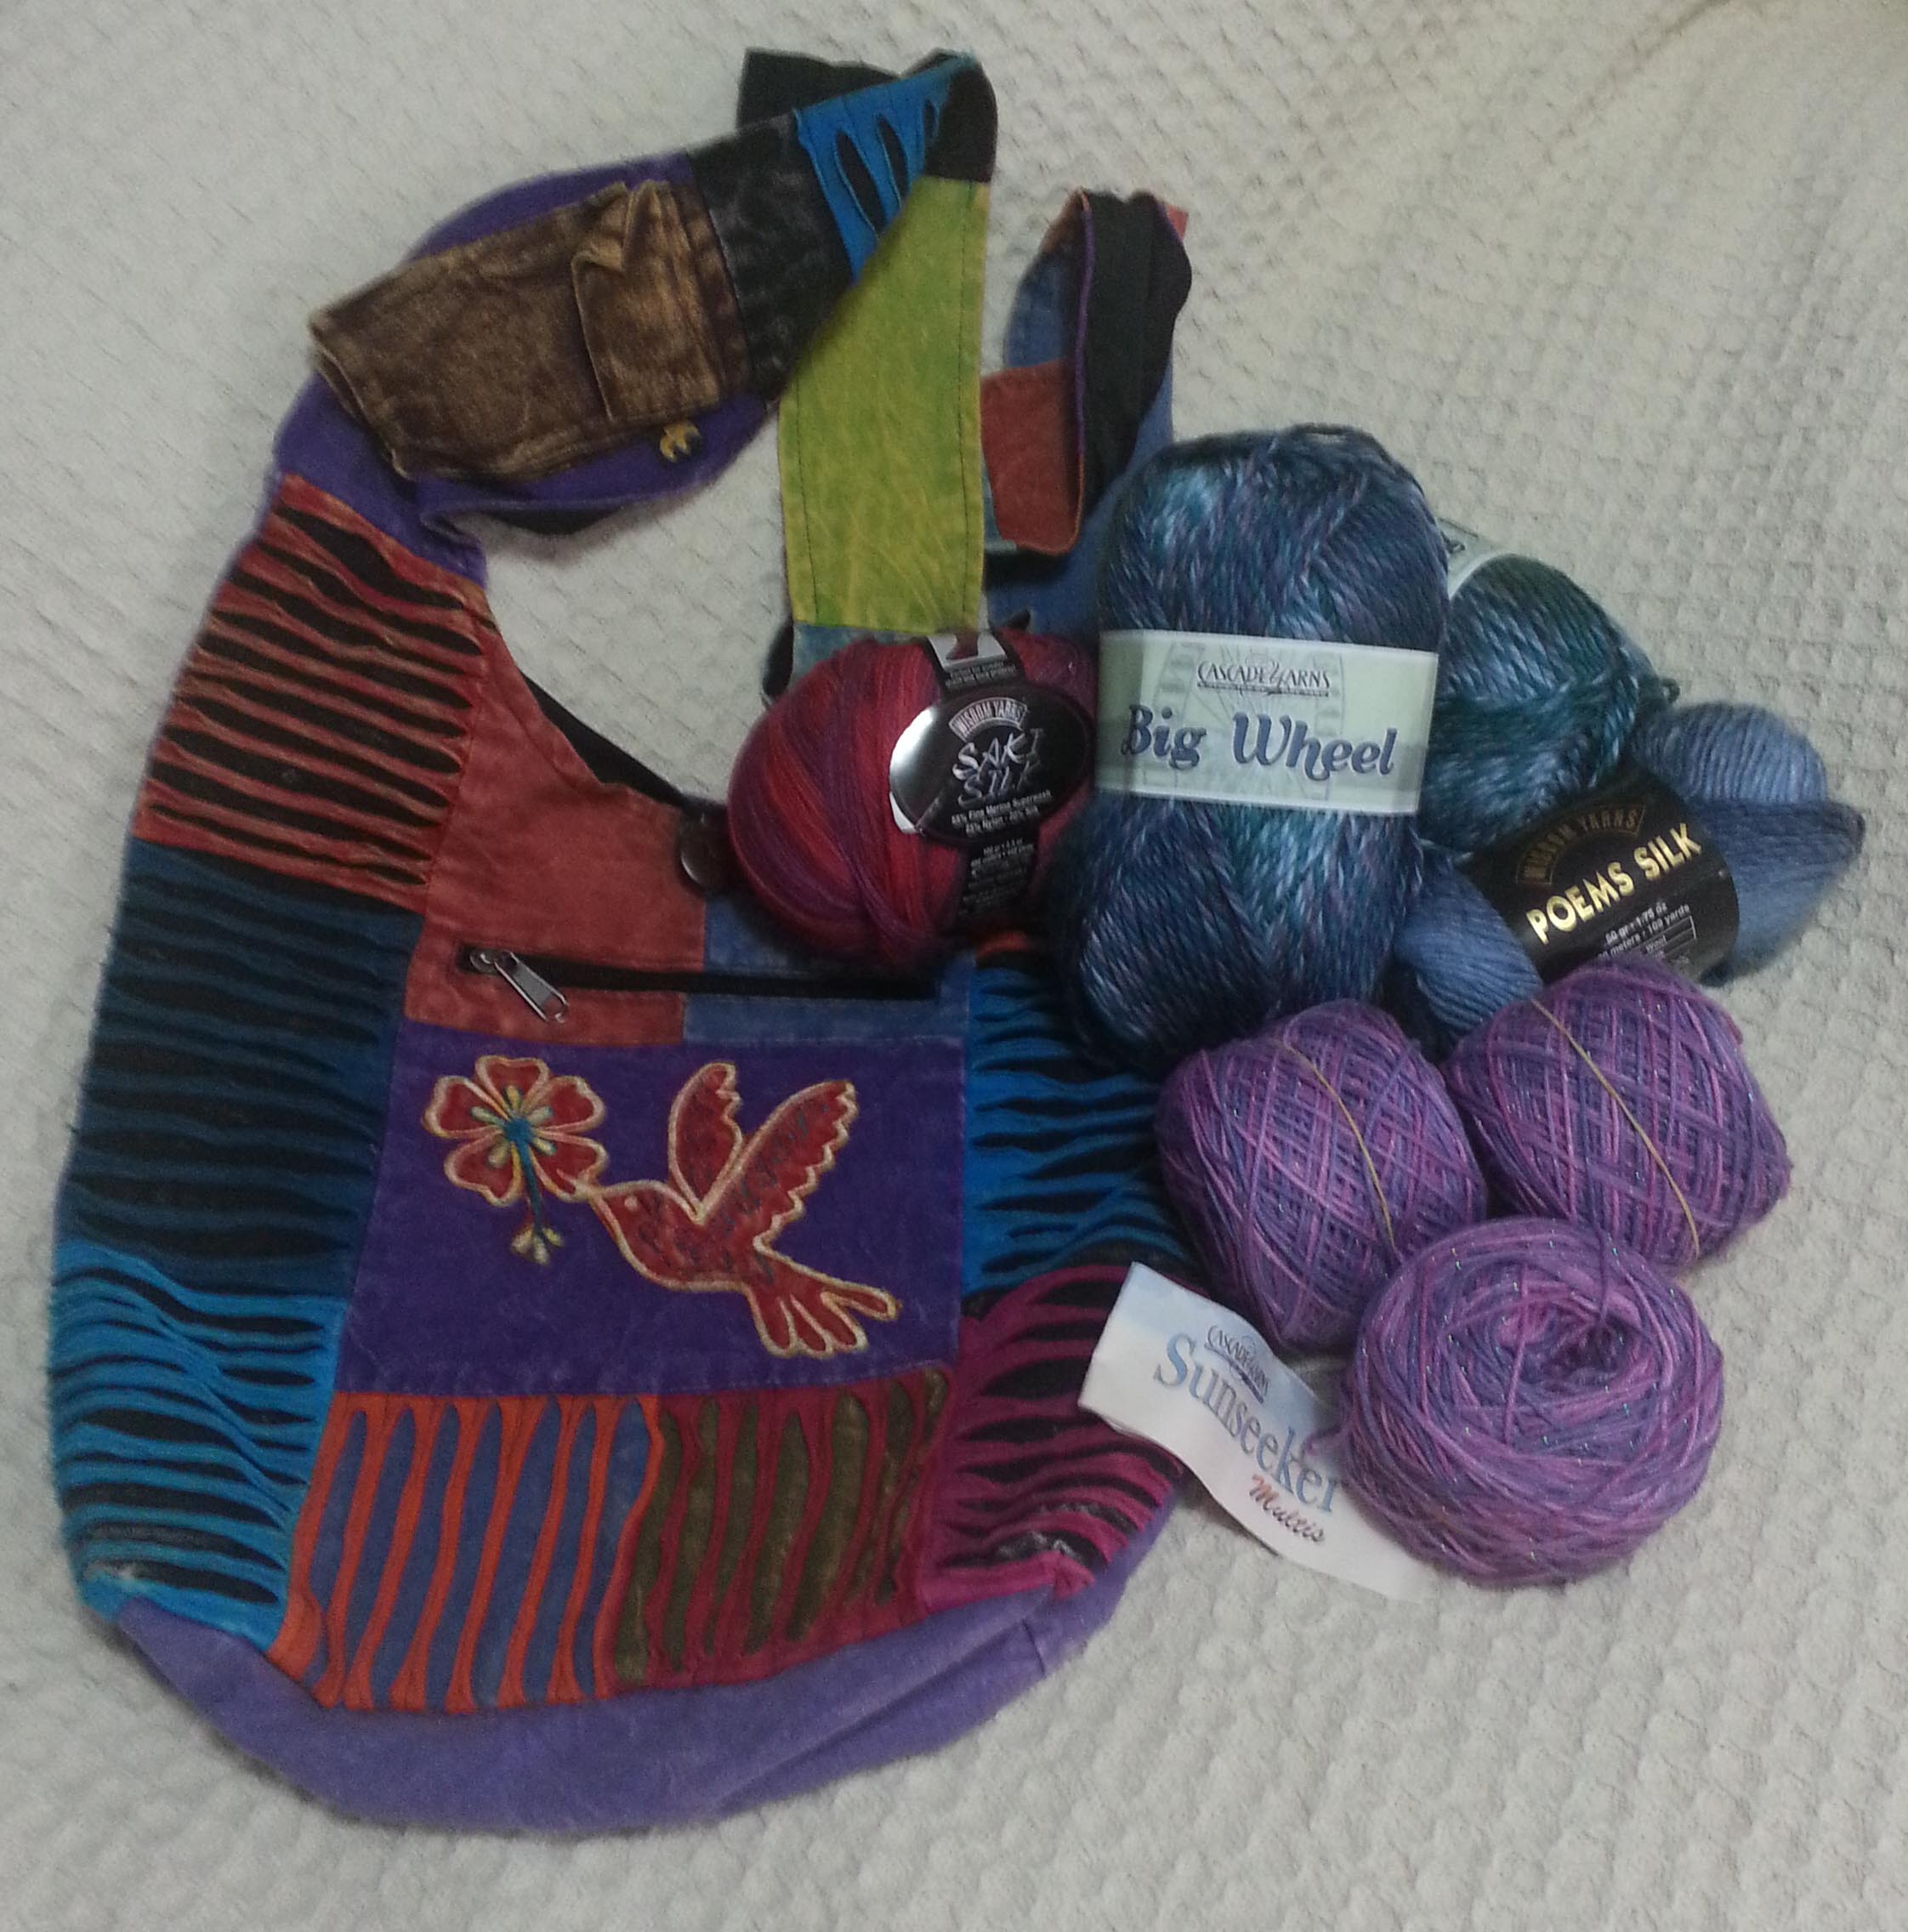
Some of my goodies from Estes Park
Jan and I both had a great time seeing how the shop had changed in the past 2 years. They had actually grown a bit by expanding their upstairs yarn space. So of course we had to really investigate the new space. Somehow, my determination to not purchase yarn was undermined (I think Jan had something to do with that, but it might have been the shop). I ended up with a tidy little pile of yarn.
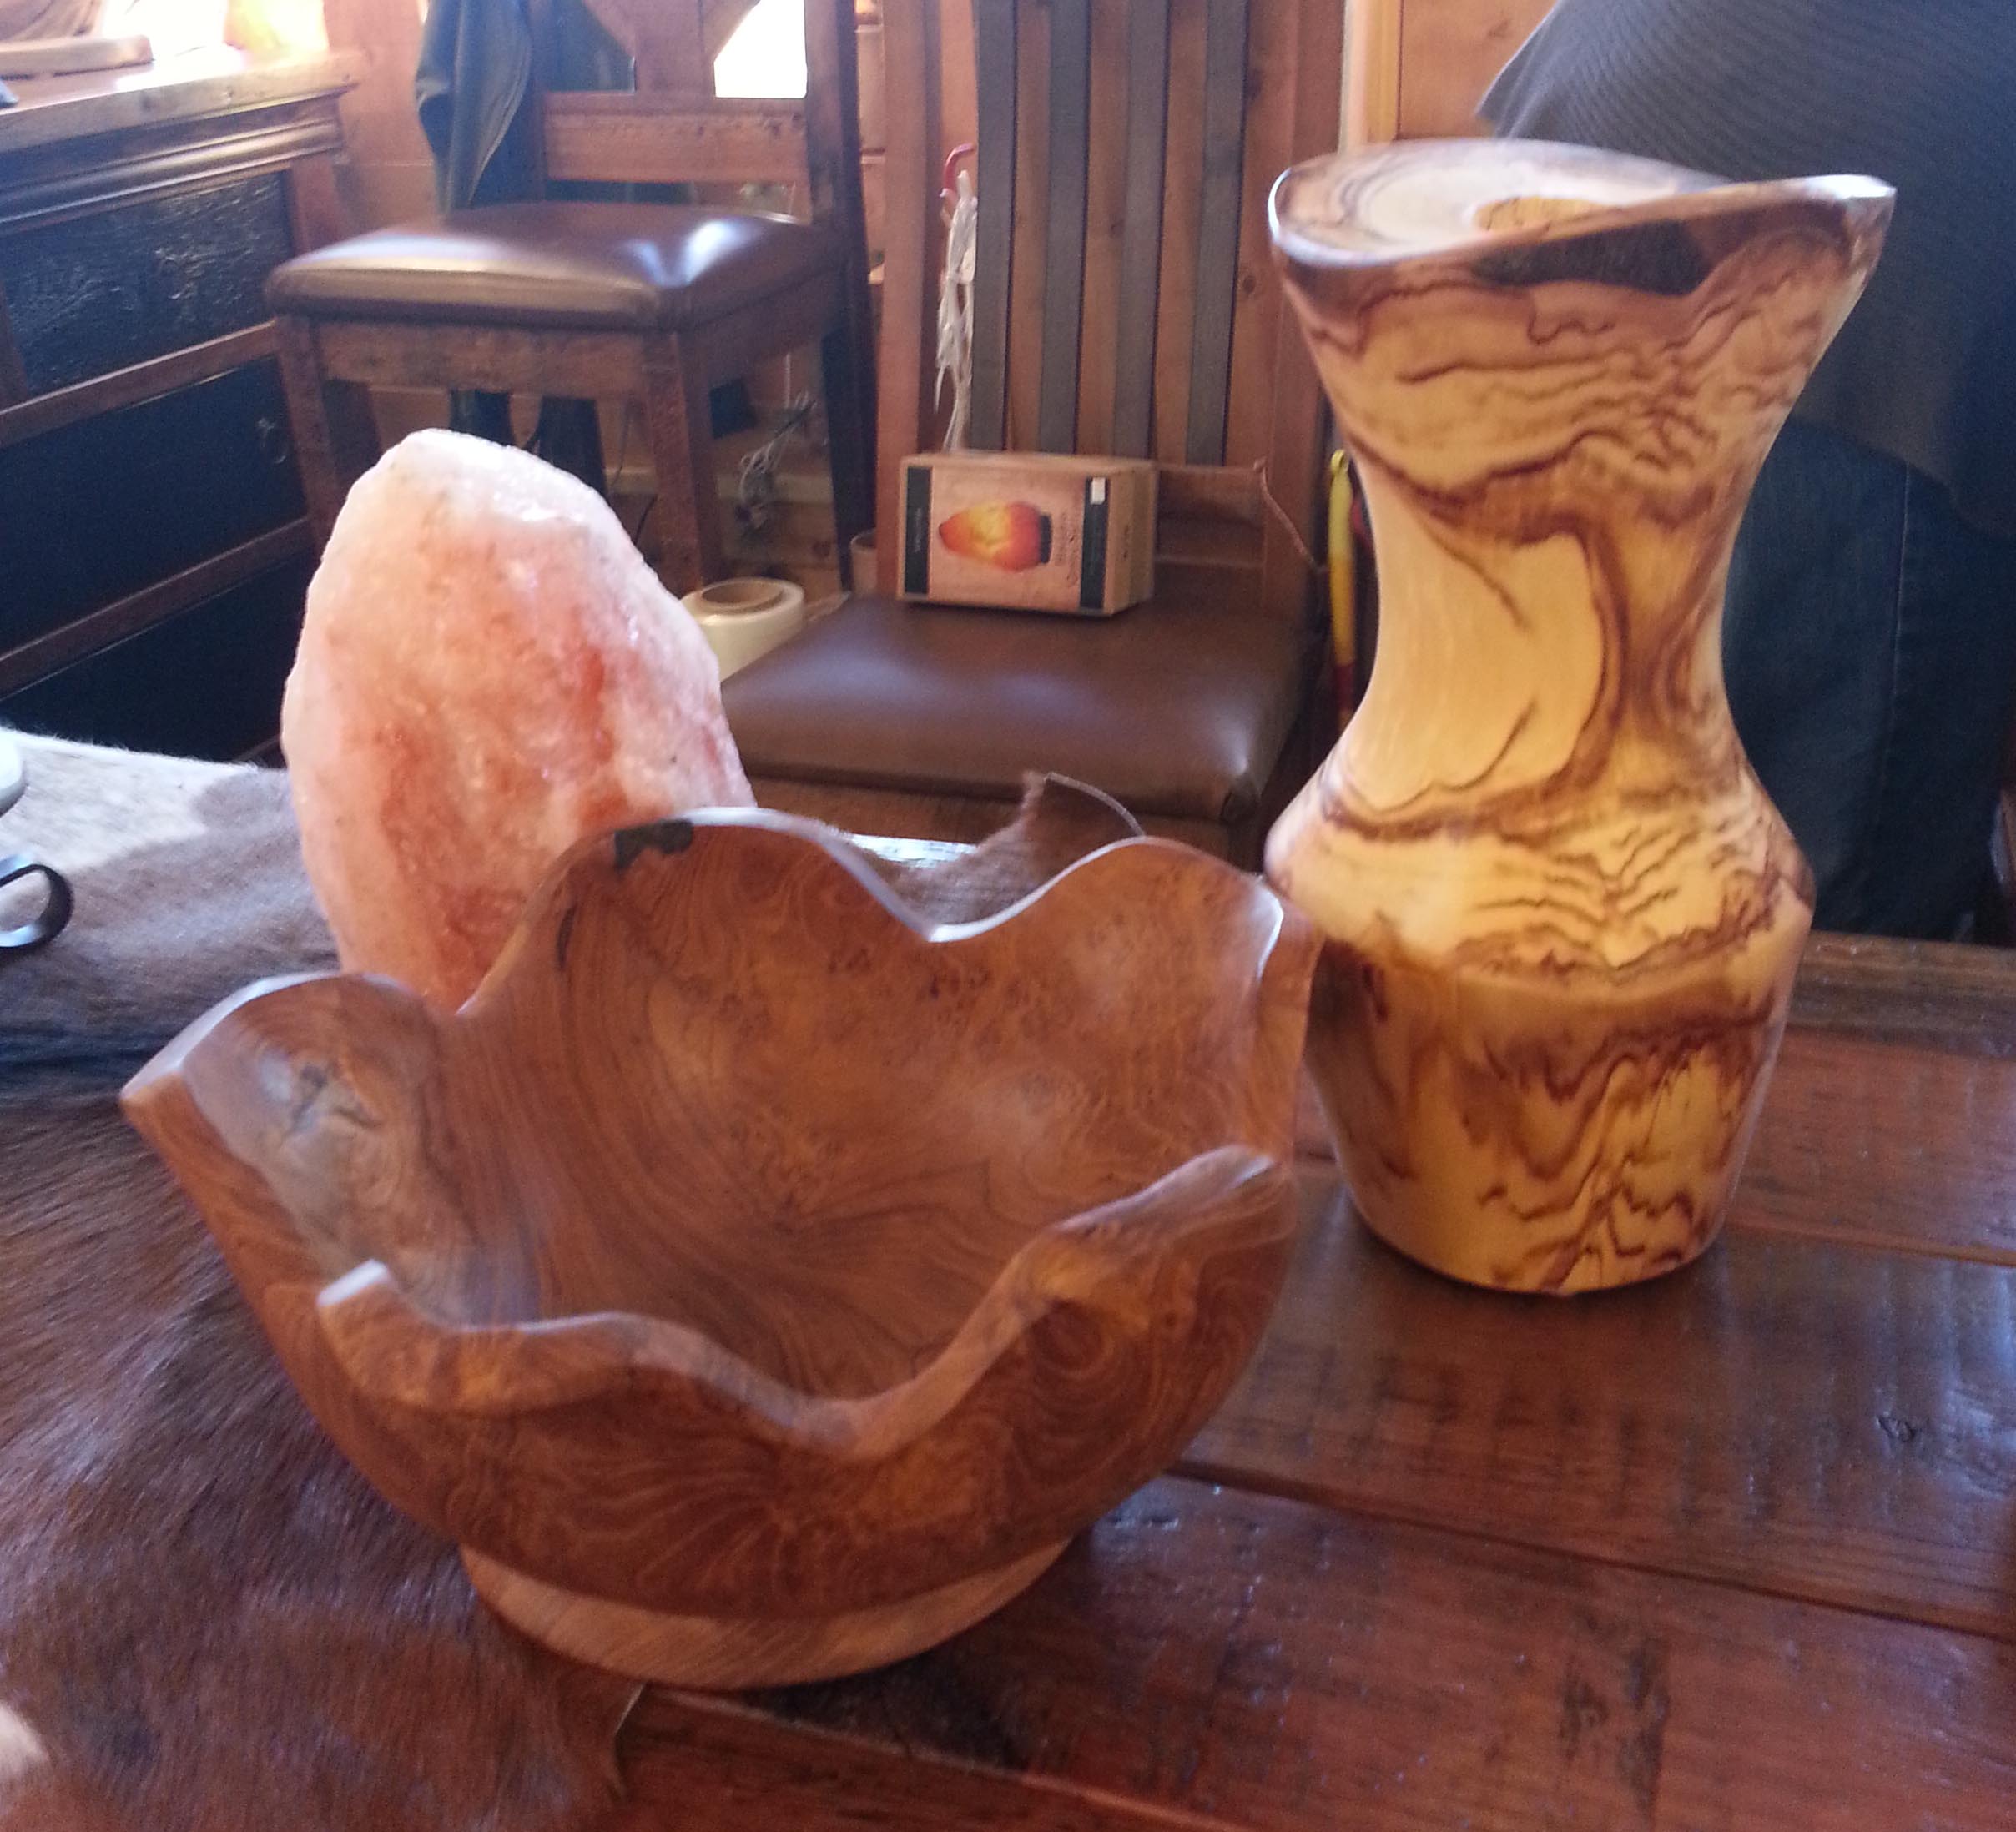
Jan’s goodies from Sticks and Stones
After we put our yarn purchases in the car we went to a local small coffee shop for lunch. We ate outside at picnic tables since the weather was so nice. Afterward we stopped at “Sticks and Stones” a fascinating shop full of hand crafted wood furniture and home accessories. Jan purchased some items to have shipped home to New Jersey.
Tuesday, March 10th we stuck a little closer to home. We went a short ways down the mountain to my friend Val’s house and had some fun crocheting and showing each other patterns and finished projects. Val enjoyed having a new audience to show her beautiful sweaters she has crocheted the last couple of years.
Then we went down to Boulder and I took Jan to the Pearl Street Mall (this is street that has been converted to pedestrian only traffic). We visited the Boulder Book Store, where I found a wonderful book on Erte’. Then we walked further down the mall to have lunch at The Falafel King and grabbed desert at The Rocky Mountain Chocolate Factory. After that we visited the Peppercorn store and The Little Jewel (my favorite tiny little jewelry store). Jan purchased the Gluten Free cook book for me at the Peppercorn.
Amazingly enough, we finished all those adventures in time for me to drop Jan off at a local coffee shop while I did my math tutoring at the elementary school. After picking up the boys we headed back up the mountain for a cozy evening at home watching murder mysteries and crocheting.
Wednesday, March 11th we started the day fairly early since we were driving down to Denver. Jan wanted to visit some of the Antique shops we had gone to during her previous visit. The one shop we wanted to go to the most wasn’t open, but we found some neat treasures at another shop and enjoyed looking at all the lovely things.
My treasure from the antique shop
Then we went into downtown Denver and walked along the 16th Street mall all the way down to the Tattered Cover Bookstore. We made a stop at the jewelry store where my wedding ring was purchased to find out about getting it re-sized.
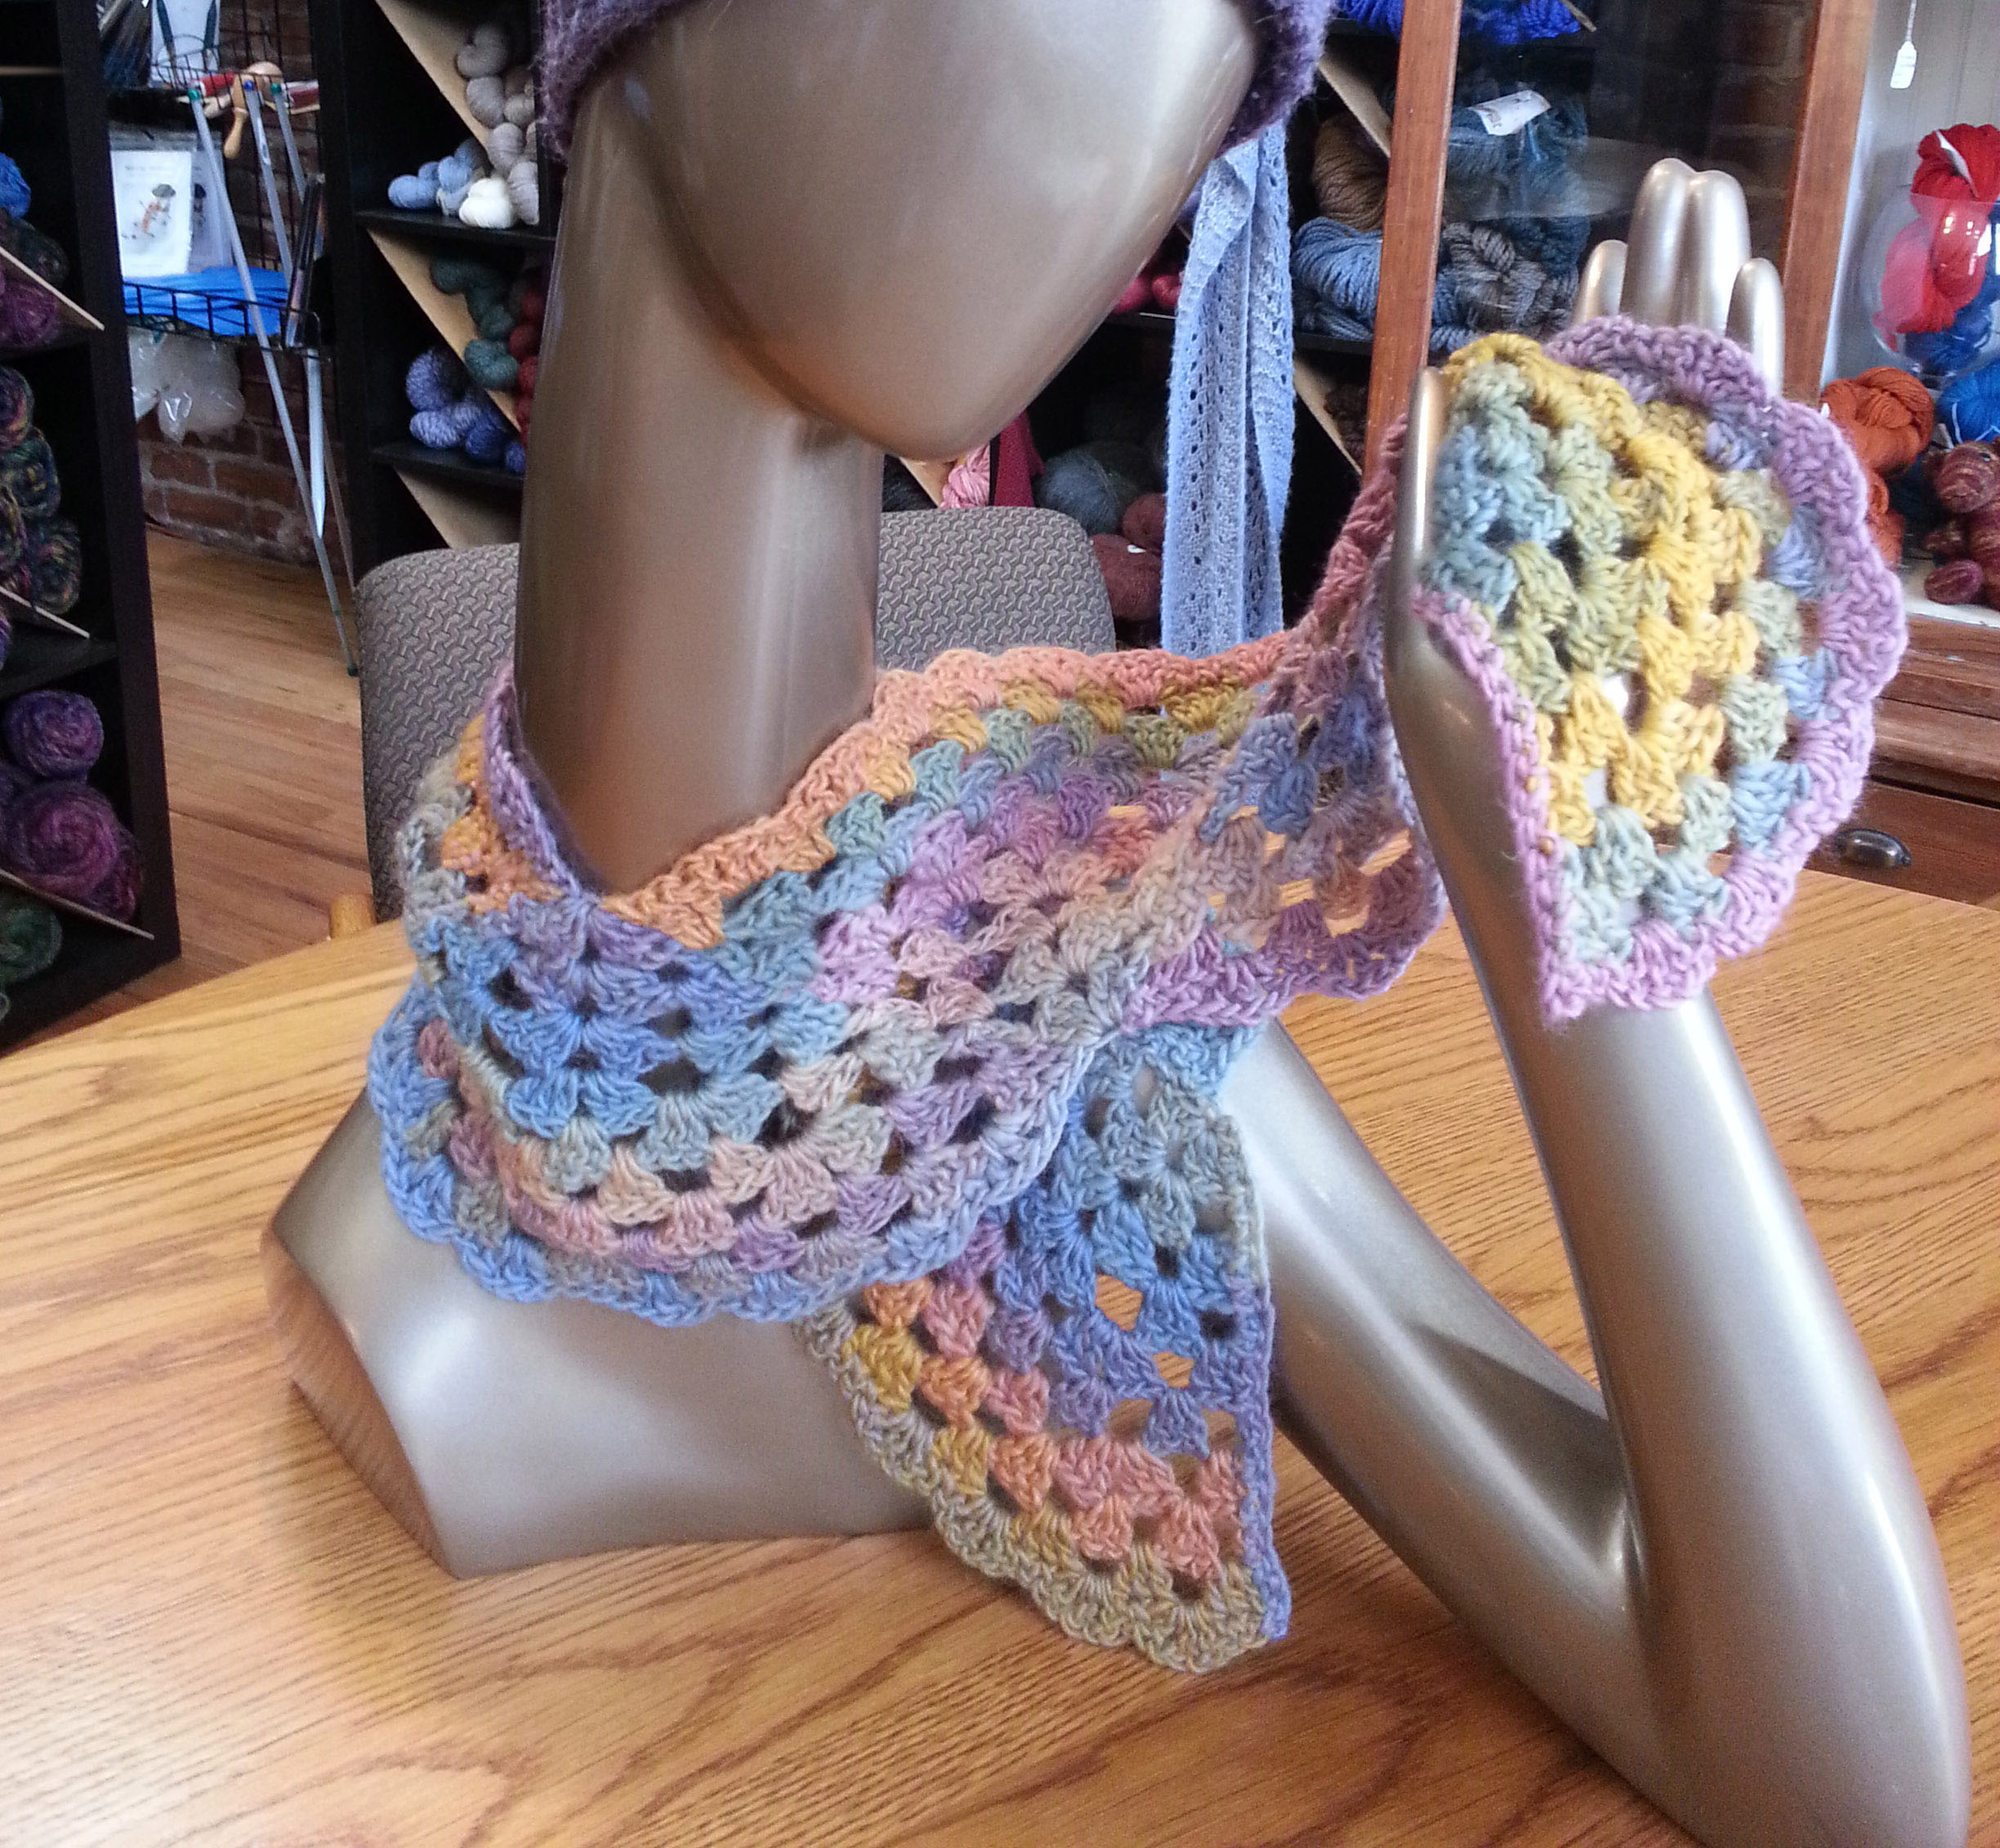
We didn’t want to get caught in the heavier 5 o’clock traffic on the highways, so after getting in a good walk on the mall we hopped in the car and headed toward Boulder. We stopped on the way to check out the Tebo Store Fixtures warehouse. I was on the hunt for a head mannequin similar to the one I borrow at the shop all the time to take photos. Unfortunately they didn’t have any more like that one.
I did get a hand mannequin for my fingerless mitts and an interesting shoulder mannequin. You’ll be seeing more of them both as I use them to as photo props for my designs. The folks there were super friendly and helpful, even though I am basically a “micro” business. I know they will be my first stop to look for any other display needs I have.
Jan and I got back to my house about 5 pm, so it was another evening of Netflix and crochet.
Thursday, March 12th we were headed back down to Denver because we had 10 a.m. tickets to the Cartier exhibit at the Denver Art Museum. Was a truly wonderous exhibit with loads of gorgeous designs. The exhibit was called “Brilliant” and was aptly named. A few of the pieces I thought I might need sunglasses to look at.
One of my favorite pieces from the Exhibit.
I enjoyed the exhibit so much that I spent the money for the hard cover “catalog”. Well worth the money. As much as I loved the sparkly stuff, I also really enjoyed seeing the design sketches and learning more about how these wearable works of art were created. Then it was time to head back to Boulder so I could be at the school in time for tutoring my math student.
Once we were back at home the evening was occupied with getting our gear together for the weekend. We were headed out for the 2nd annual Longmont Yarn Shoppe Spring Renewal Retreat. The retreat started the evening of Friday March 13th and went thru the morning of Monday, March 16th. I’ll tell you all about that tomorrow, otherwise this post would be way too long.
Tuesday, March 17th our last day to hang out at the house. We spent a good amount of our time in my design office winding yarn and doing a small sorting of my yarn stash. When we weren’t in the office we were in the house watching murder mysteries on Netflix and crocheting on various projects. Jan was also packing up in preparation for her departure.
Wednesday, March 18th we loaded up the car with Jan’s suitcases and some projects to crochet on. Then headed down to Longmont for Casual Crochet Wednesday at the Longmont Yarn Shoppe.
We had a little time before the meeting so walked around Main Street checking out the various shops and outdoor art. It was a little nippy, so we stopped off at a coffee shop across from the yarn shop. Jan had coffee and I indulged in some chai.
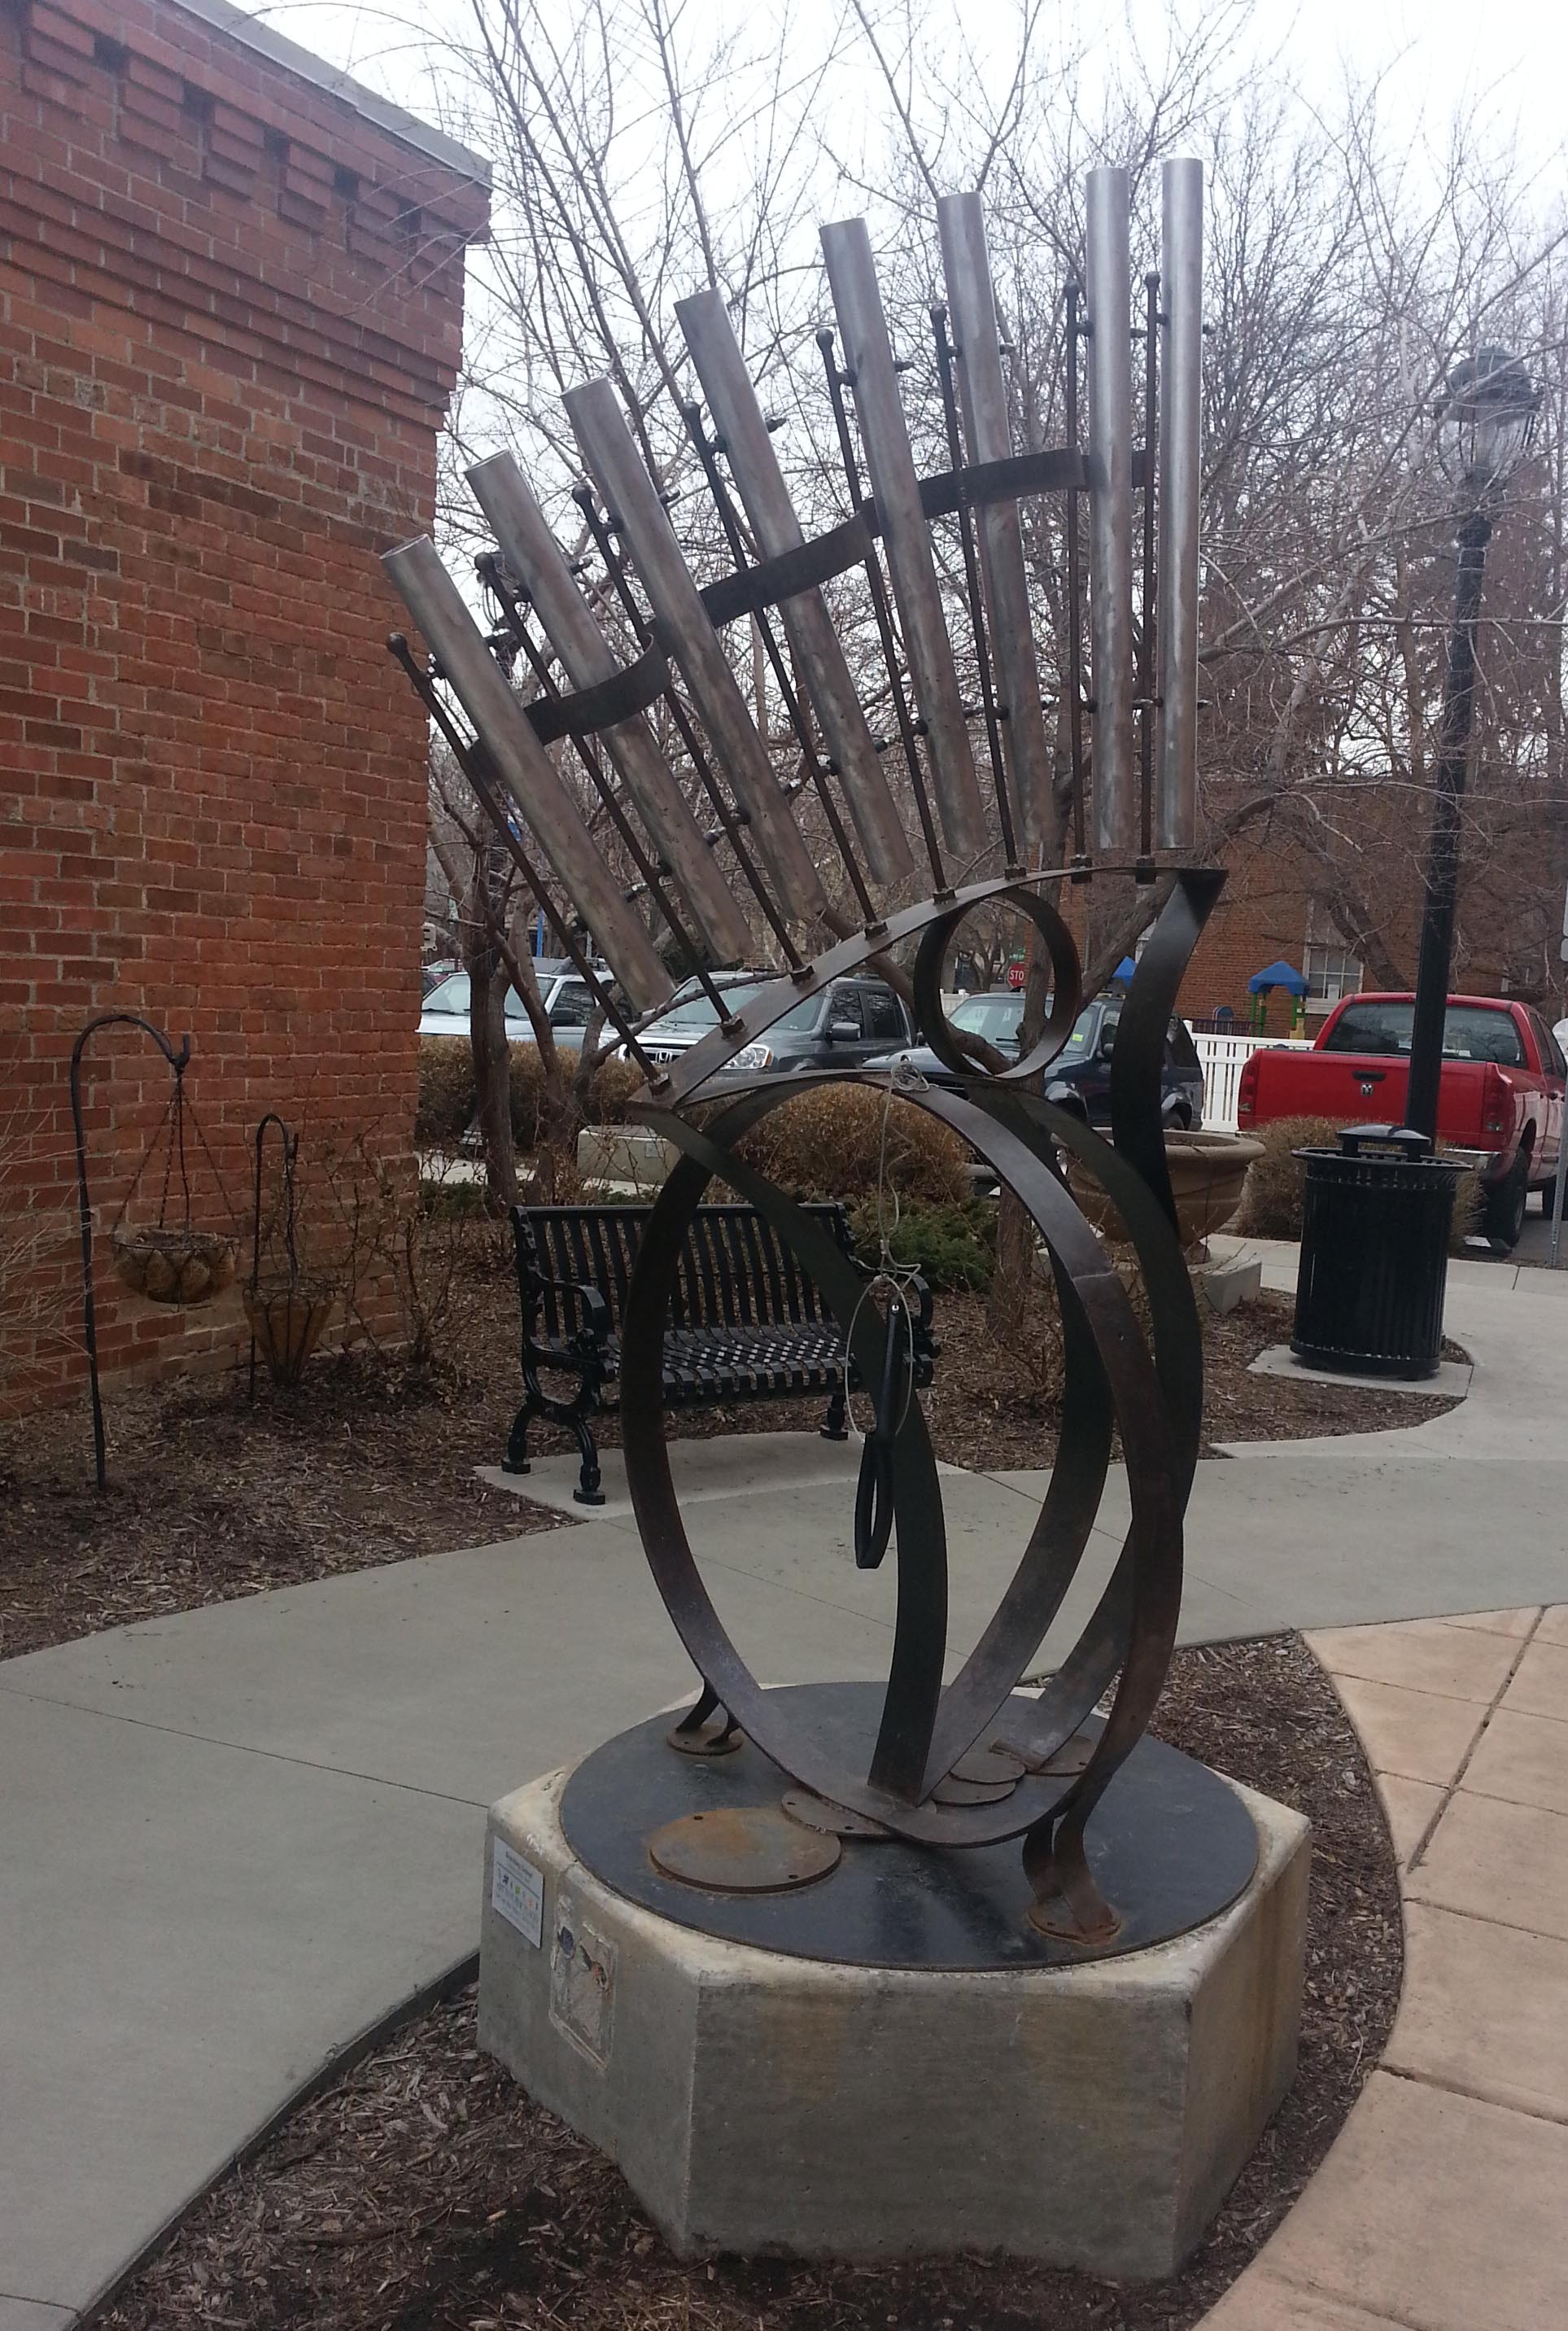
Musical Sculpture around the corner from LYS
Casual Crochet was very well attended. The lovely Brenda Bourg even joined us for a time despite her busy schedule. We all had a fun time crocheting and discussing various projects we are working on. Jan purchased some yarn that had caught her eye when we were on the retreat.
After the meeting we walked down the street and had lunch at an Indian restaurant I hadn’t tried before. The food was good and Jan told me about some of her adventures in India. Afterward we drove over to the opposite end of the walking path we had explored before. The park was still undergoing construction/repair from the flood damage, but the path was open.
Fish without the snow
We walked all the way to see the fish water fountain again, then headed back to the car. It was a very cloudy day and was starting to rain a little. We were headed down to Denver to stay at a hotel near the airport.
The drive down to the hotel was relatively un-eventful. We got there with daylight to spare. Once we were checked in we decided to walk to a nearby restaurant for dinner. Since we had been so good about getting lots of walking in that day that we splurged on the delicious gluten-free brownie desert.
We walked back to the hotel just in time to beat the rain, then spent the rest of the evening crocheting and discussing what classes we want to take at the Knit & Crochet Show in San Diego this July. We were both feeling a little sad that Jan’s visit was nearly over.
Thursday, March 19th drove Jan to the airport at 7:30 a.m. It was raining, gloomy and cold. Seemed a bit appropriate. Fortunately, we talk on the phone every Sunday. So that will help us stay connected until our next adventure.
What better way to celebrate National Crochet Month than having one of my best crochet buddies here visiting for 2 weeks! We are going to have such a great time. Jan’s flight got in Friday just before noon and we had some fun playing in Boulder before heading back to my mountain home.
We had lunch at Mad Greens and then our desert was some yummy french fries from 5 Guys, our favorite. We decided we’d better walk off those fries, so we headed across Boulder to visit Shuttles Spindles and Skeins yarn store. We did our walk while moseying around the store, petting yarn and drooling over buttons.
Jan’s Yarn and Buttons
A few buttons decided that they needed to go home with Jan. There was also some Southwest Trading yarn she couldn’t resist.
My Yarn and Buttons
I had to adopt some buttons too, and a lovely ball of Berocco Mixer.
Saturday I taught at the Longmont Yarn Shoppe and Jan joined me there as one of my students. She has been wanting to take my Perfect Fit Crocheted Hat class for ages, so the timing of her trip worked out perfectly for her to get to be one of my students this weekend.
Both of us are keeping track of our daily steps, so we decided to get a walk in at one of the Longmont parks beforehand. Since it is very muddy and slushy up here on the mountain, not to mention a tad colder than down in the plains. Our first choice of a park was busy with a special event so we headed across town and ended up at Lefthand Creek Park.
There is a nice paved path around the park, as we explored we discovered that there were art installations all along the way.
Ants Picnic Sculpture
The first sculpture we met were these “interesting” ants, they sort of freaked us out.
Serpent Water Fountain
We really liked this snake. The tile work was amazing and the sculpture is actually functional as the head of the snake is a drinking fountain. We didn’t try it to see if it worked though.
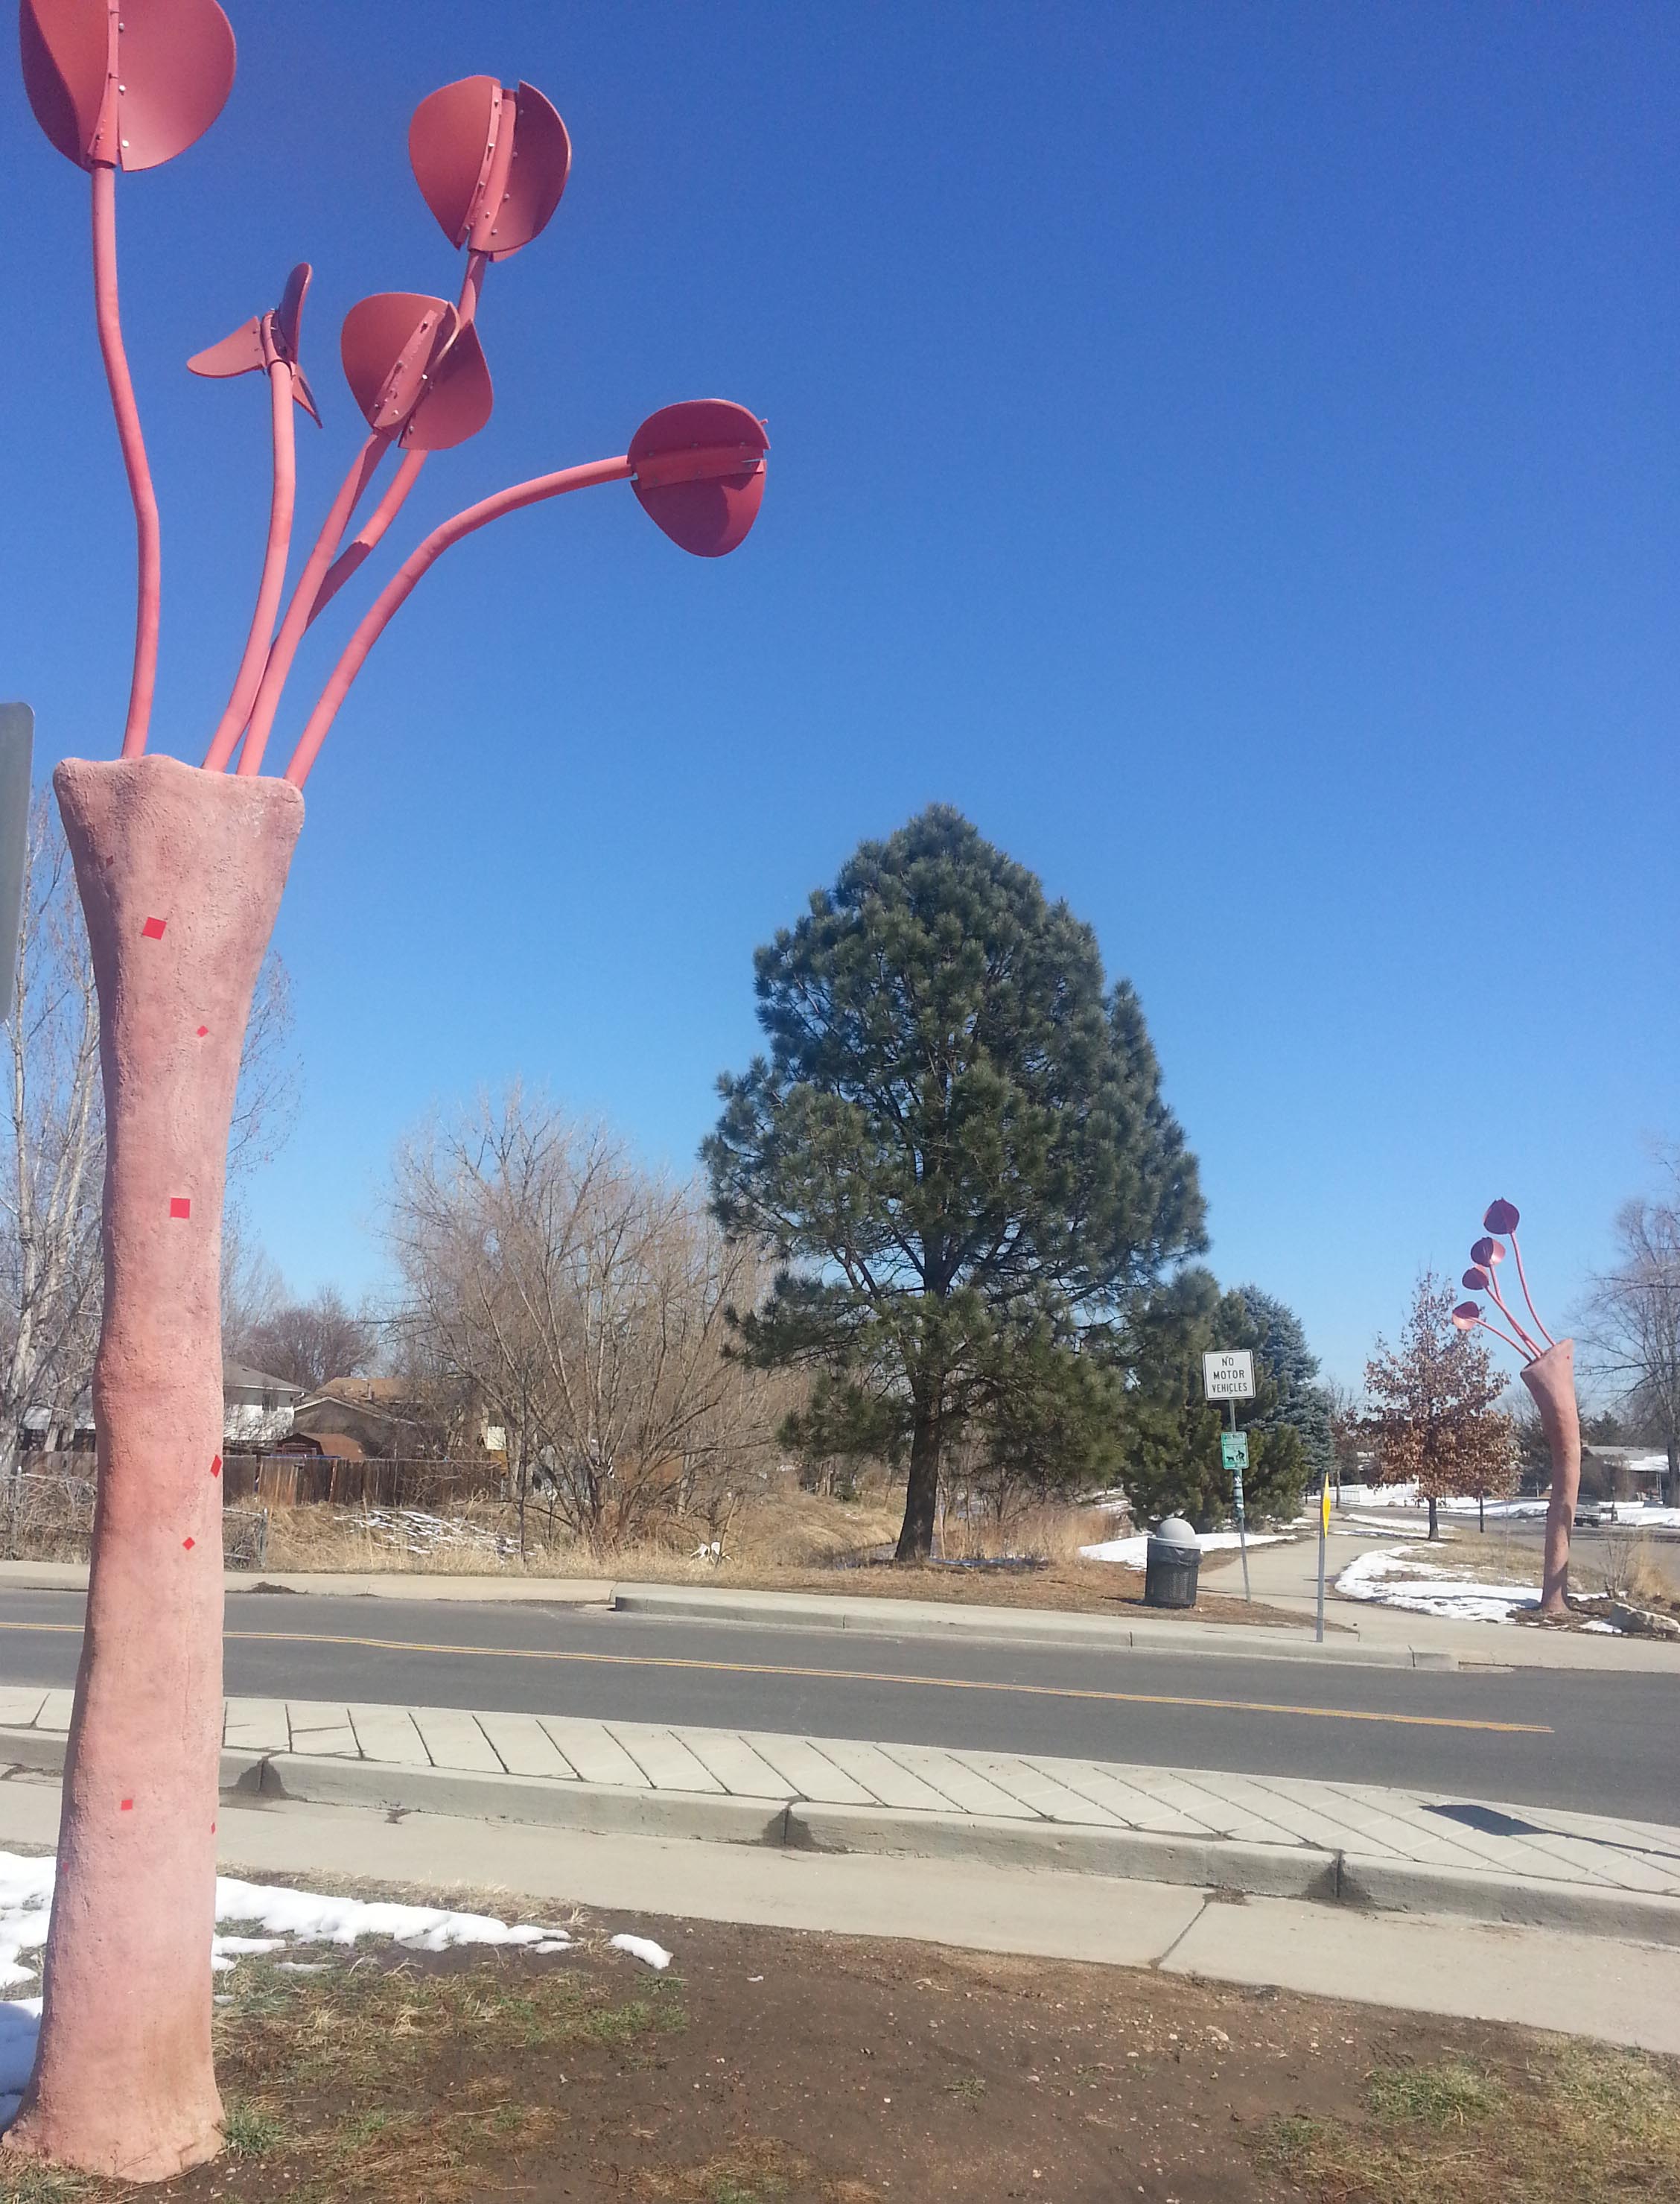
2 Seussian Trees
We turned around a headed back to the car after we reached these wonderful Dr. Seussian looking “trees”. We decided we would have to go down again and attempt to do the entire path to see all the other artwork.
After a quick stop at the grocery store for a few items, we headed on over to the yarn shop for some pre-class shopping and I set-up for my class. Students get a discount at the shop the day of their class, so of course Jan needed more yarn.
She obtained two lovely hanks of Raven Ridge Hand-Painted Yarn’s “Alight” 50% Merino, 50% Silk. The color is outside her usual palette, but is really gorgeous.
Then she needed to adopt a ball of the luscious Berroco Boboli Lace.
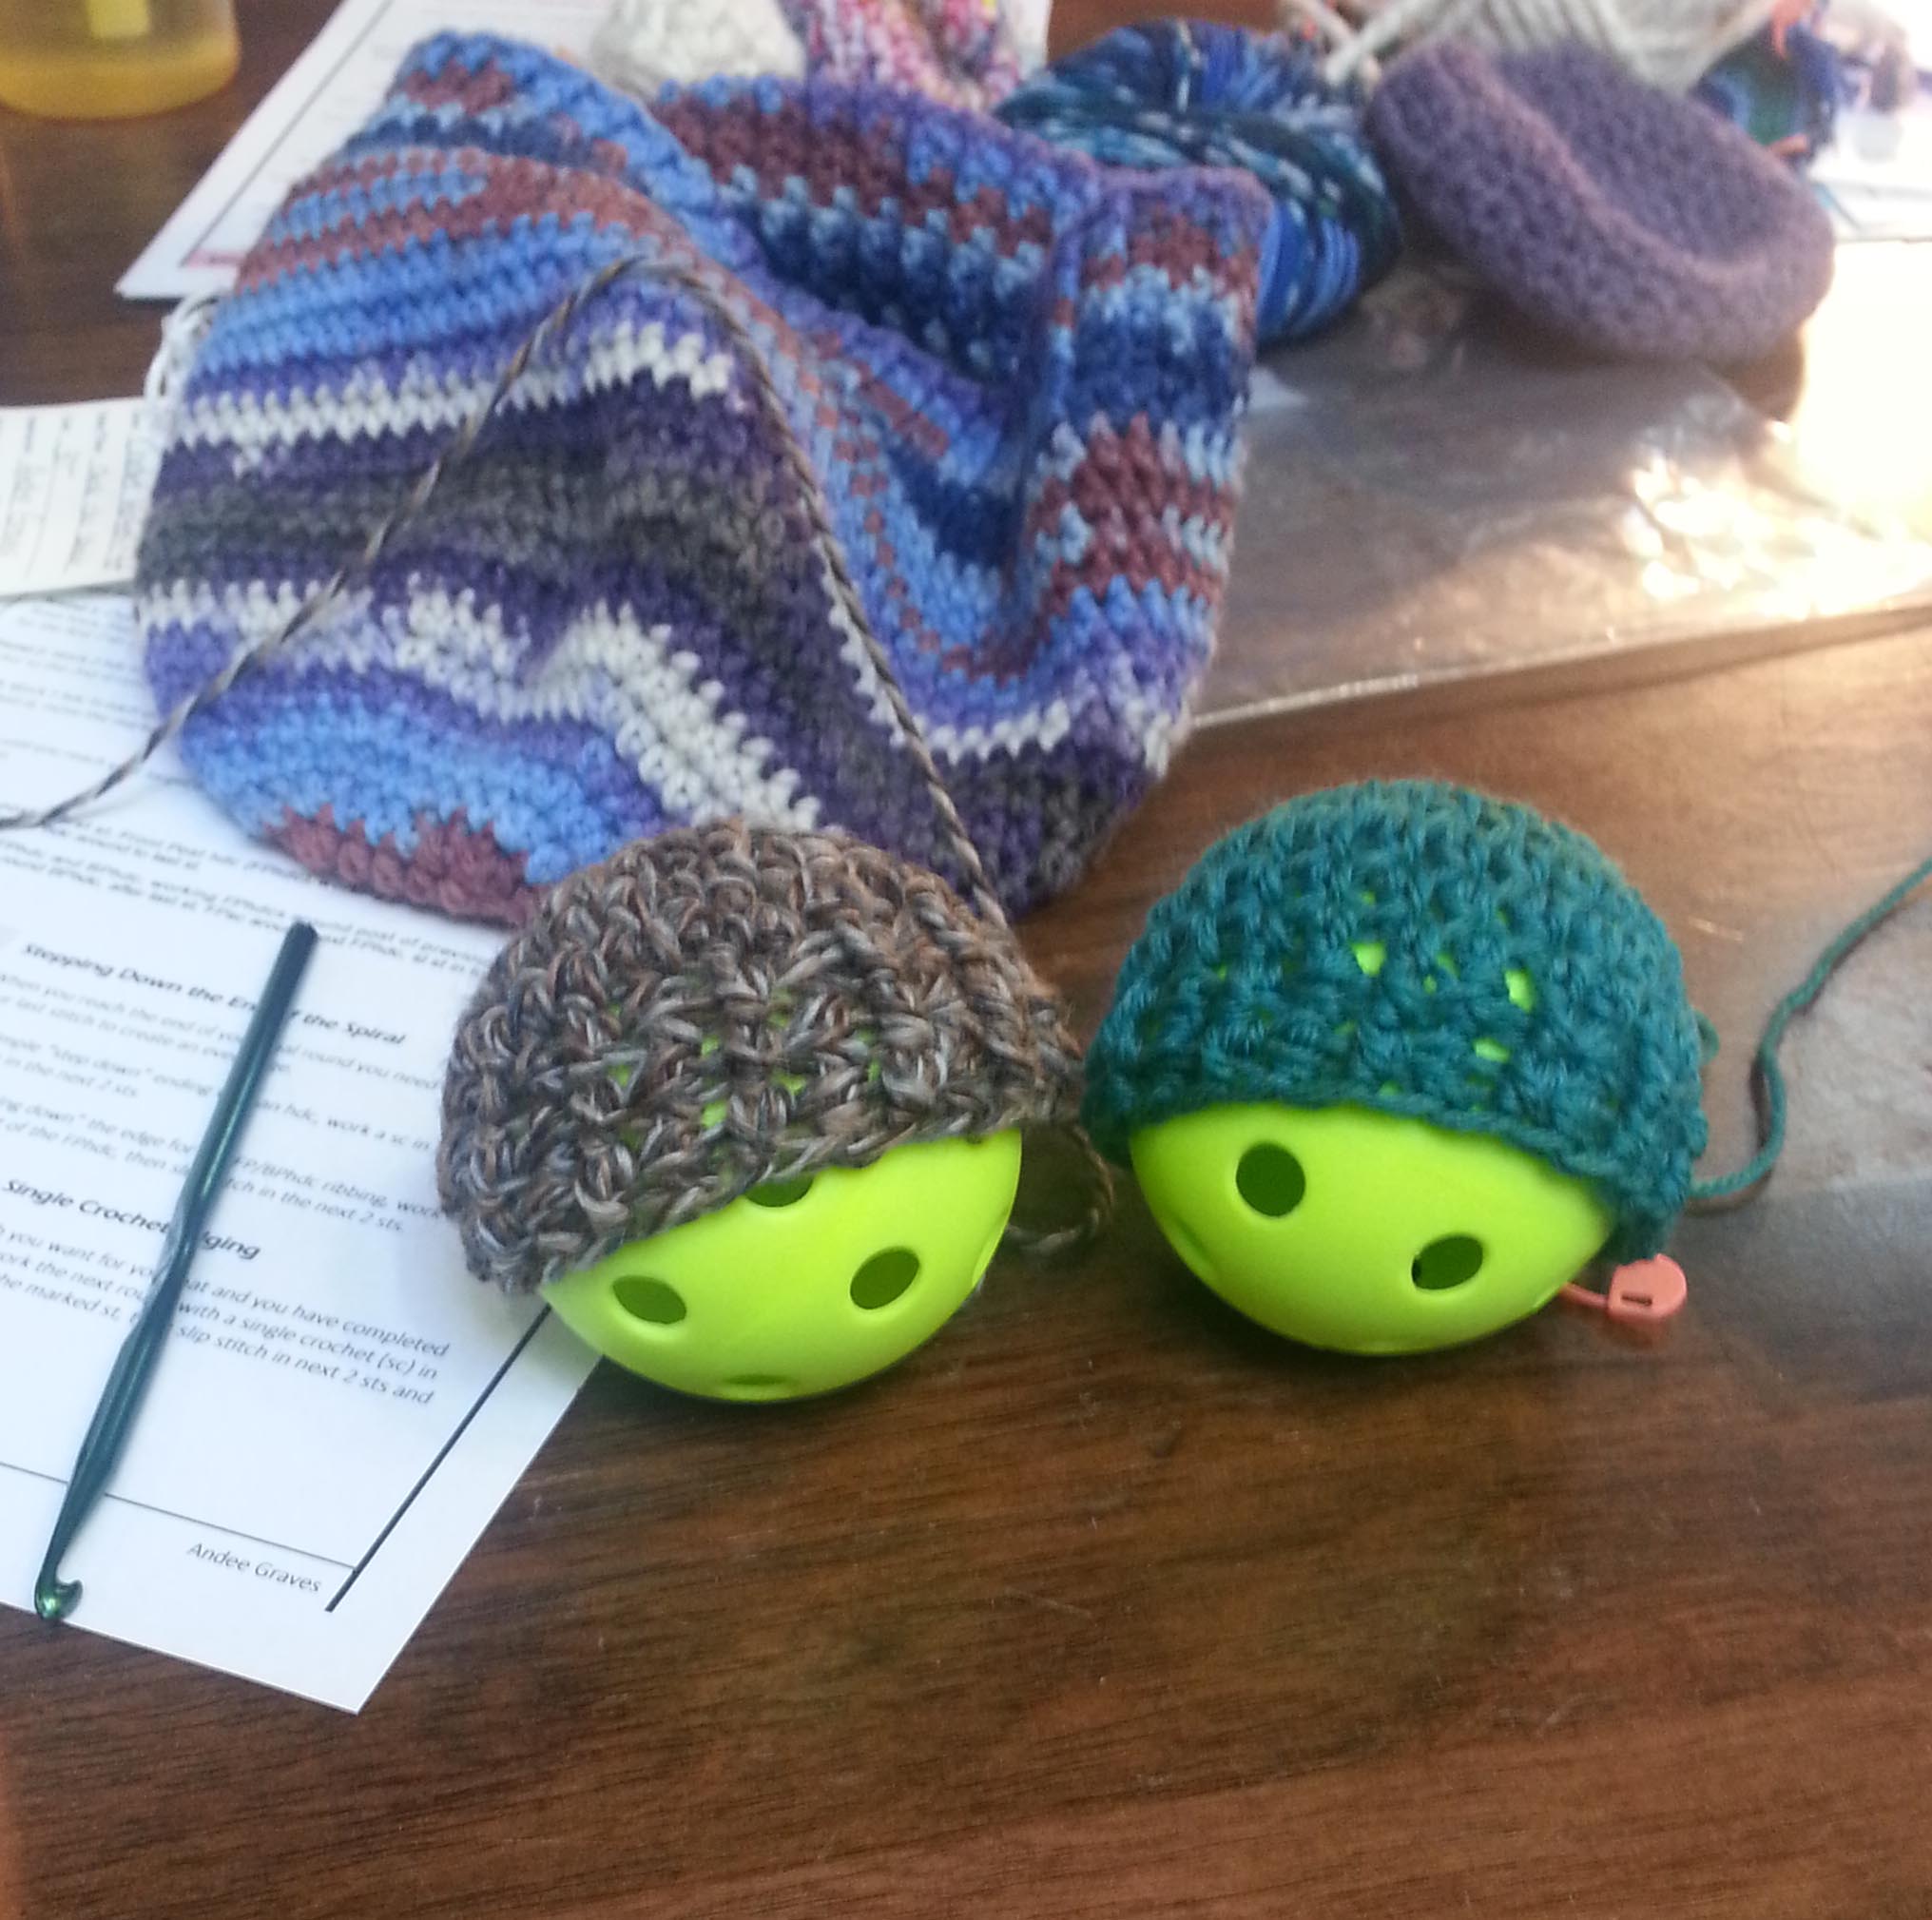
Aliens have landed at LYS.
During the class Jan and one other student finished their class project very quickly. I had the students practice measuring and making hats to fit “heads” which were whiffle balls. Jan and I decided the holes in the balls actually make these look like they are little faces. Next time I teach this though I think I need to use “egg” shapes. Fortunately with Easter right around the corner I should be able to find some that will be just the right size.
Next weekend is the Longmont Yarn Shoppe’s annual retreat. We are going to be hanging out with other yarn enthusiasts and eating great food at the Sunrise Ranch in Loveland, Colorado. It’s a long weekend, Friday thru Monday, a nice amount of time away from my boys and family responsibilities. So I’ll likely be posting after we return on the following Tuesday.
Change may be the natural order of life, but some days it can really throw you for a curve.
This past year, really 18 months, have been full of changes. Some were more in the nature of upheavals, like the 1000 year flood that hit my little mountain community in September 2013. There were some unpleasant changes from 2014 that involved me not getting paid for a work that took up a great deal of my time the first half of 2014. Then there are the changes in my routine with the boys attending school down in Boulder.
Some of the biggest changes I have been dealing with personally have been in my path as a crochet designer and teacher. The month of December sort of slid by me, I taught some small classes and individual crochet lessons at my local yarn store Longmont Yarn Shoppe. But mainly any spare time not spent preparing for a fun Christmas holiday with my family was spend pondering what was next. So the blog was very quiet.
I went to the TNNA Winter Trade Show the 2nd weekend of January. The week before I left I was hoping that I would discover an answer to the “What is next?” question by the time the weekend was finished. This is where that old saying about being careful what you wish for comes in.
As always, TNNA was a visual feast for my creative soul. Yarn in every texture, weight and color you could imagine and loads of other wonderful products. I also took 2 classes during the weekend: “Digital Marketing” with Zontee Hou and “How to stage your event like a Broadway Show Manager” with Patty Lyons.
Lots of great information in both classes, and many bright shiny new ideas hopping about in my head inspired by them. The hardest part of taking the classes was that they started at 7:45 a.m. Some of you that know me well know that I am not at my best before 9 a.m. Those mornings were a bit of a rough start, though well worth it.
Nothing will wake you up faster than taking a normally 3 hour long class with Patty Lyons when she has to fit it into 2 hours. All I have to say is, compared to her, I talk very slowly.
One thing that Patty mentioned in her class that has been sticking in my head was about trends with crafters and the hobbies they pursue. She said that most crafters switch what is their primary hobby every 5 years. One reason I find this interesting is that it has been 5 years since I started working on selling my crochet designs (and sold my first design). So it got me wondering if that is part of what is happening with my design mojo recently?
I still have lots of ideas for designs, but I’m more interested in pursuing alternate forms of publication. When I sell a design to a magazine or yarn company to publish, I have very little say in how the finished pattern is presented. Most of those sources publish patterns to a set format and style. That format and style is great for some crocheters, but doesn’t necessarily work for everyone.
When it really comes down to it, I like to teach. And when I design crochet garments in particular I like to incorporate unusual techniques, those don’t always lend themselves to the traditional pattern format and style. So I’ve decided that I need to marry my teaching tendencies and unusual techniques into writing “teaching” patterns.
I’m hoping to be publishing a series of patterns over the next 6 months that will have not only the typical pattern instructions, but will include photo tutorials and tips on how to modify the pattern so that crocheters can add to their repertoire of skills and create wonderful finished projects that they will be proud to wear themselves or give as gifts. Eventually I will be adding links to videos that demonstrate the techniques in these patterns as well.
If you are in the Greater Denver area of Colorado this next couple of weeks, you can come take a class with me in person. I’ll be teaching at the Longmont Yarn Shoppe the next 2 Saturdays.
Crochet with a Twist class sampleHandy HDC Class Swatches
Saturday, February 28th I’ll be teaching “Crochet with a Twist, Mastering the Moebius” and “Handy Half Double Crochet”.
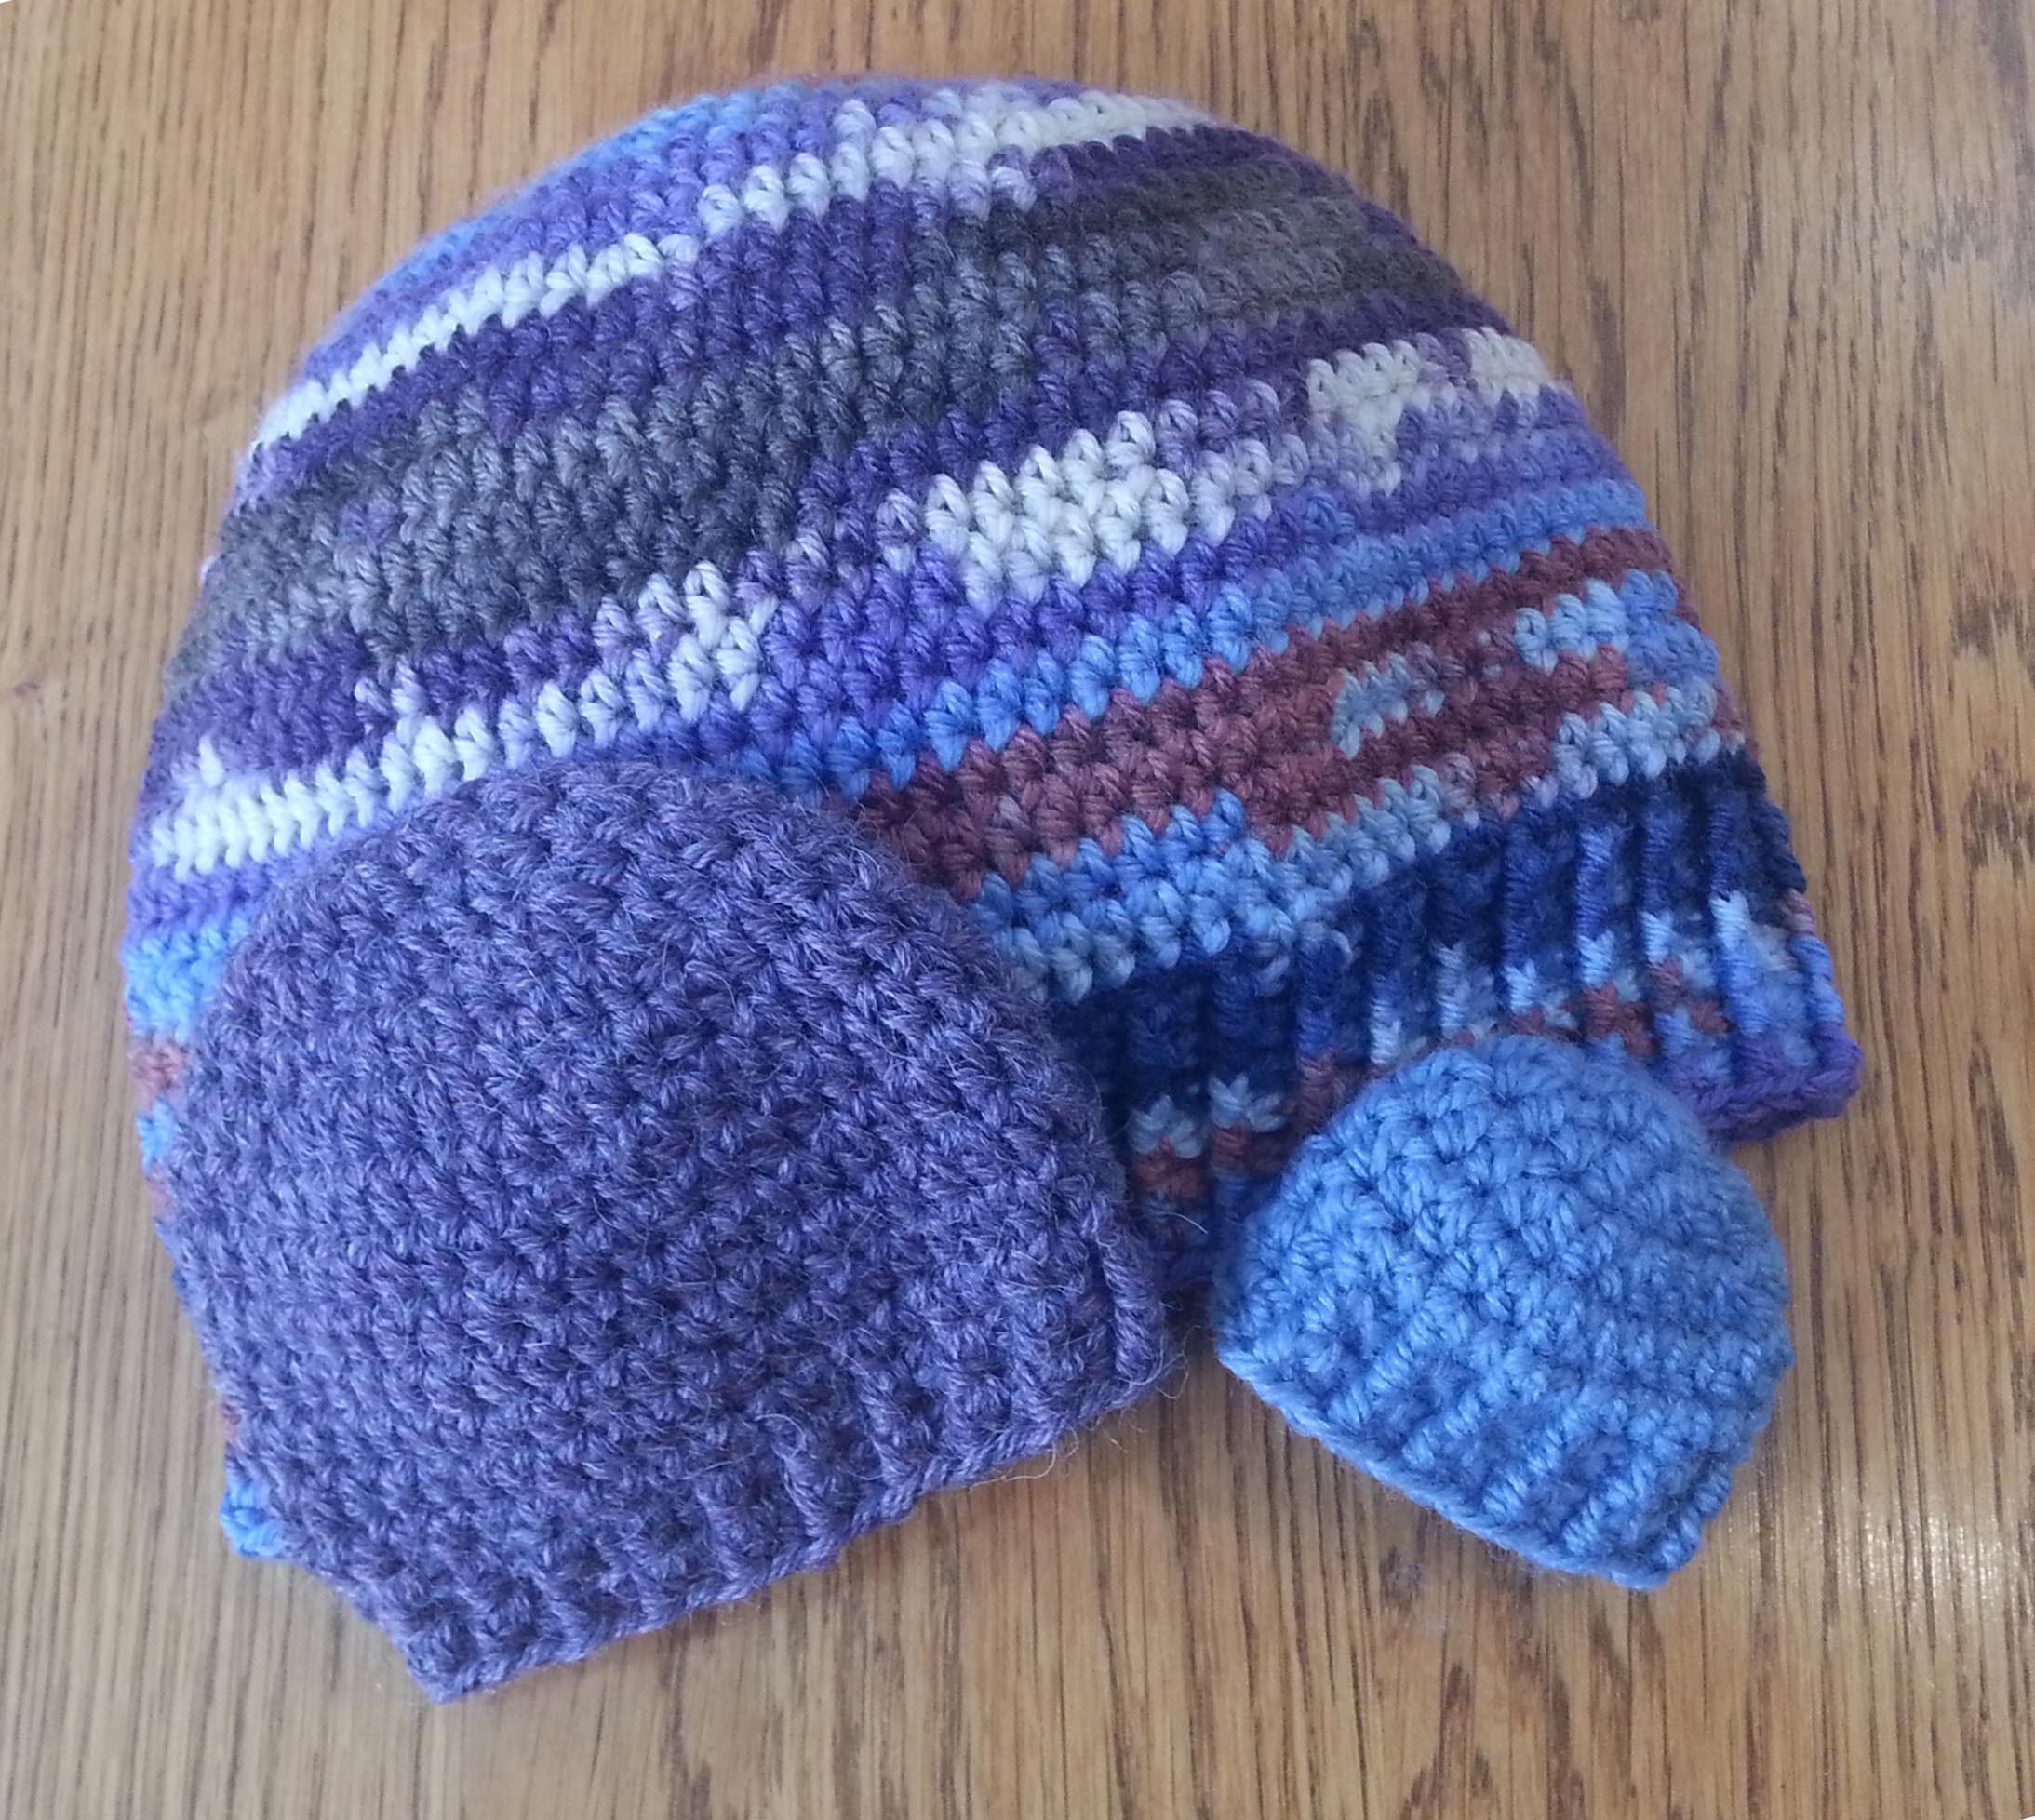
Granny Fans Scarf class sampleCrochet the Perfect Fit Hat class samples
Saturday March 7th I’ll be teaching “Granny Fans Scarf” and “Crochet the Perfect Fit Hat”.
Whether you join me for a class or decide to purchase one of my “teaching” patterns I hope you keep on learning new skills in your crochet (or knitting) journey. After all, Change is the natural order of things.
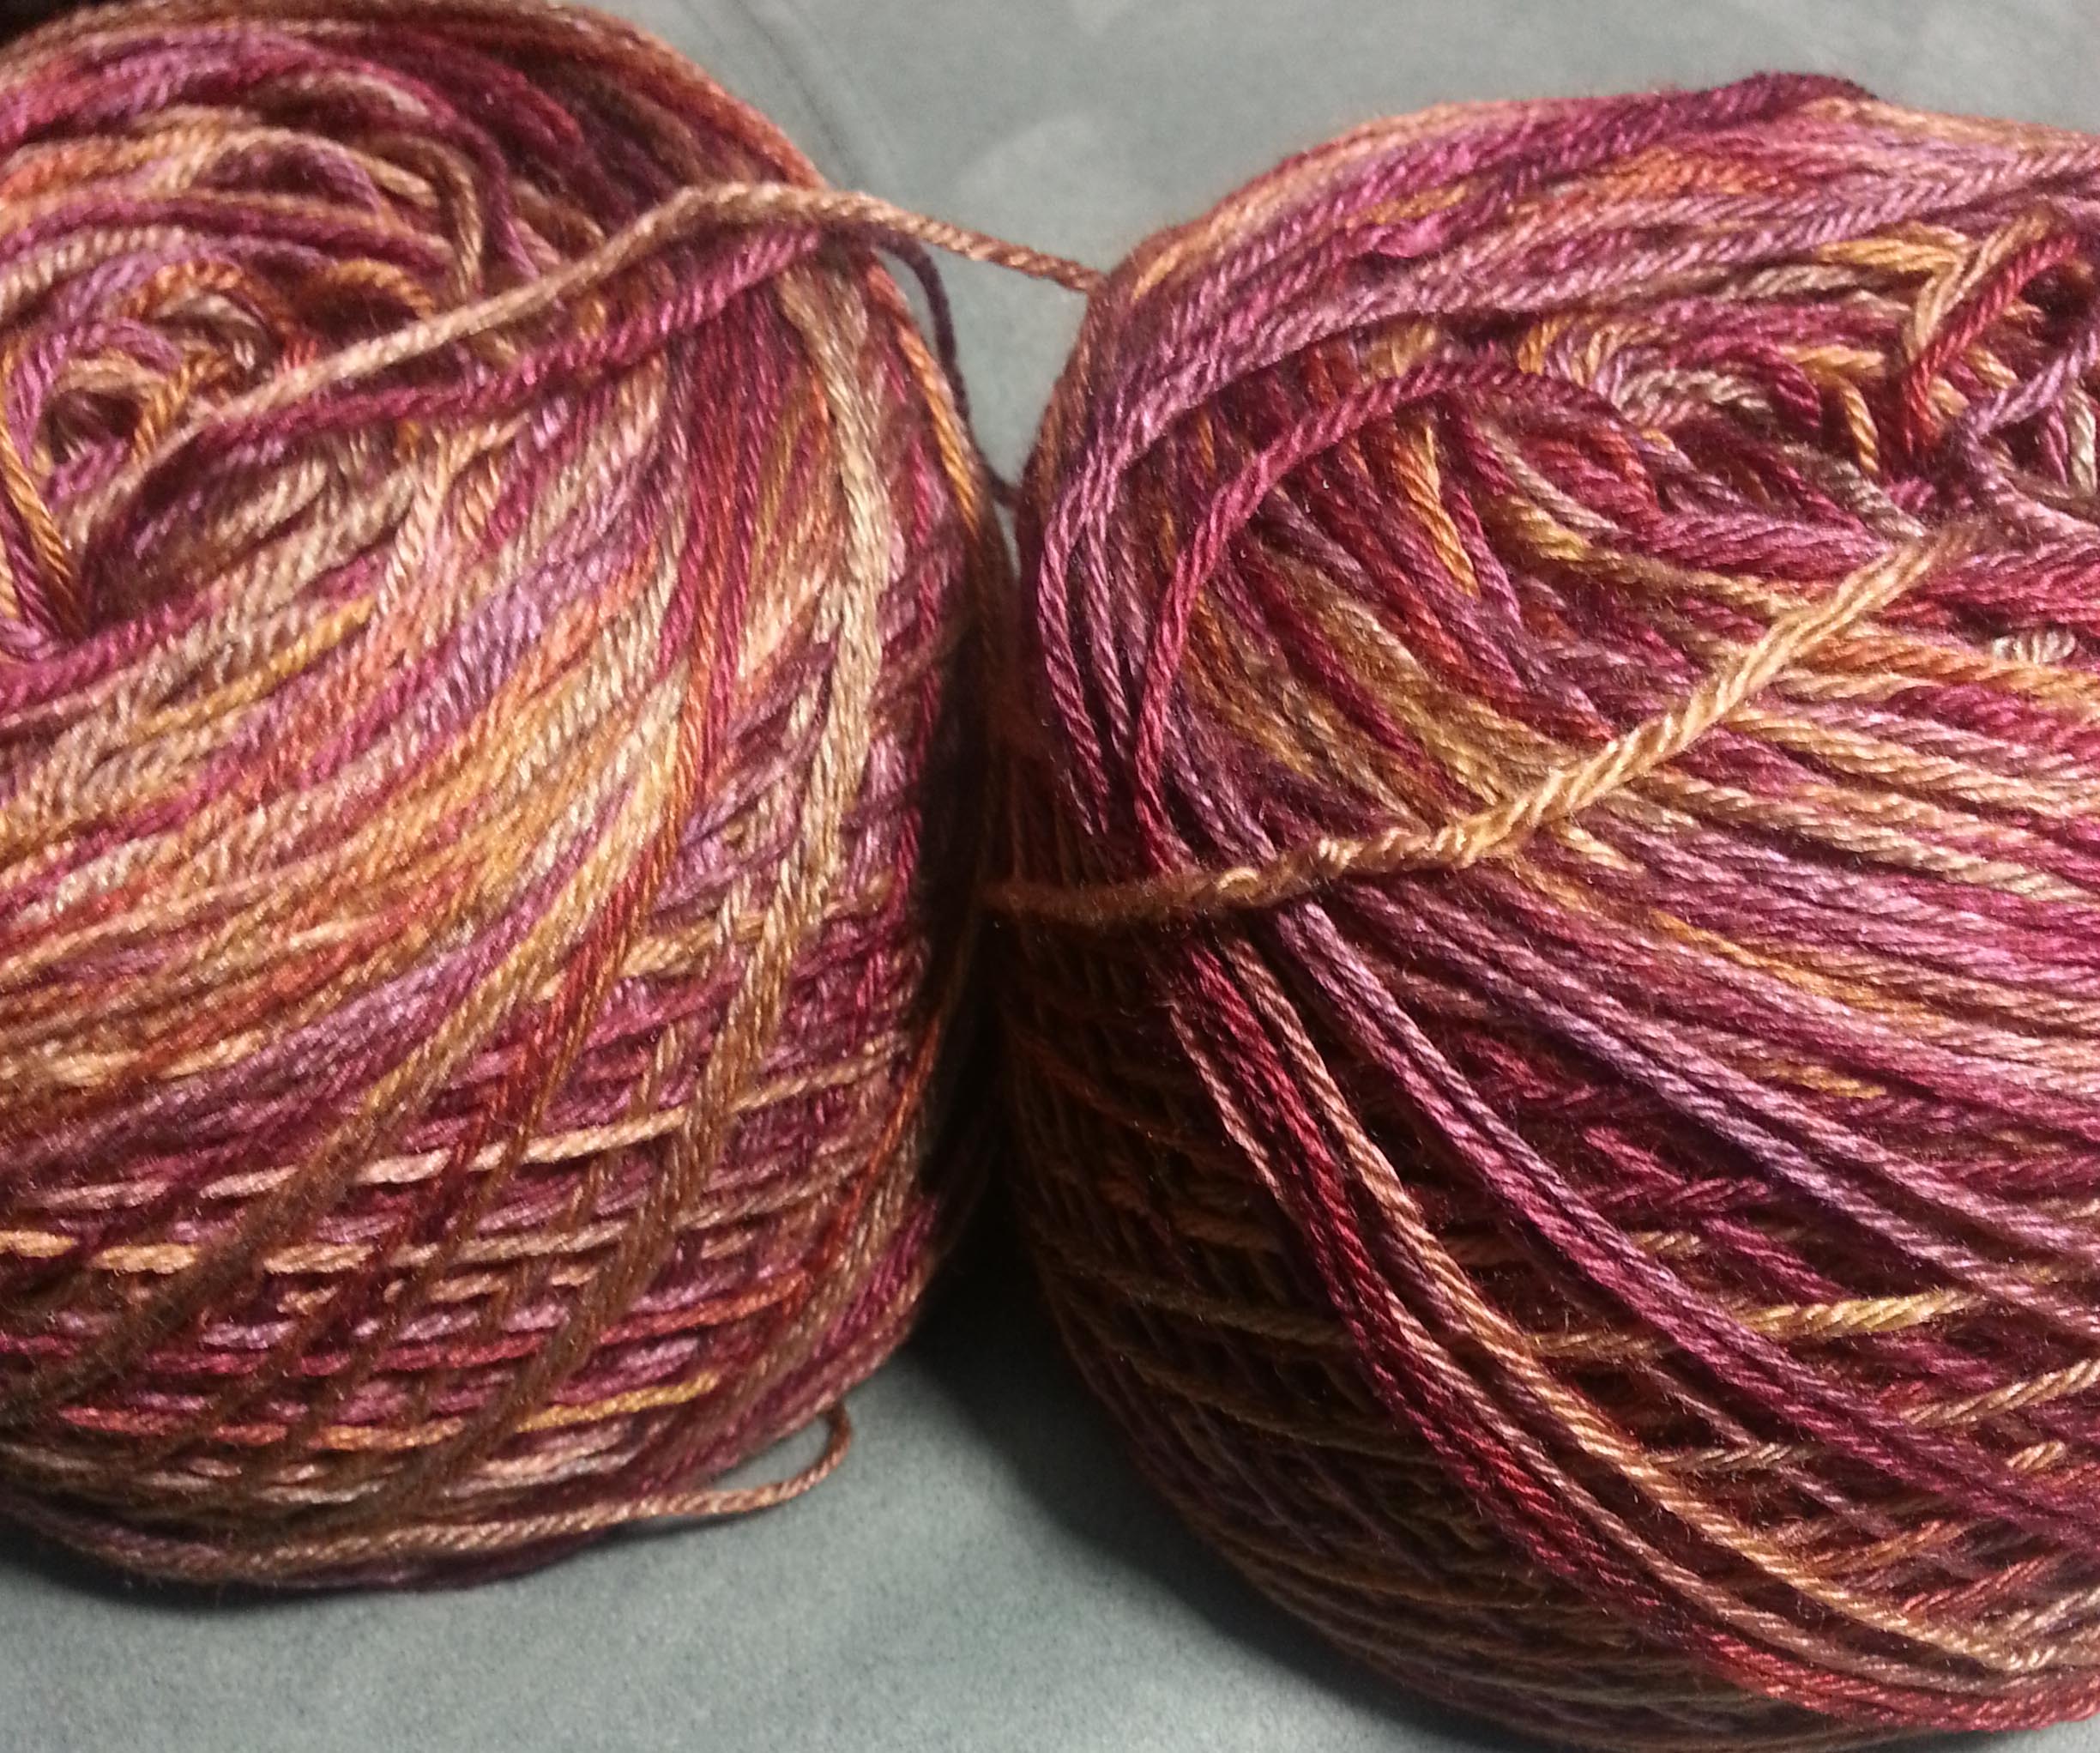
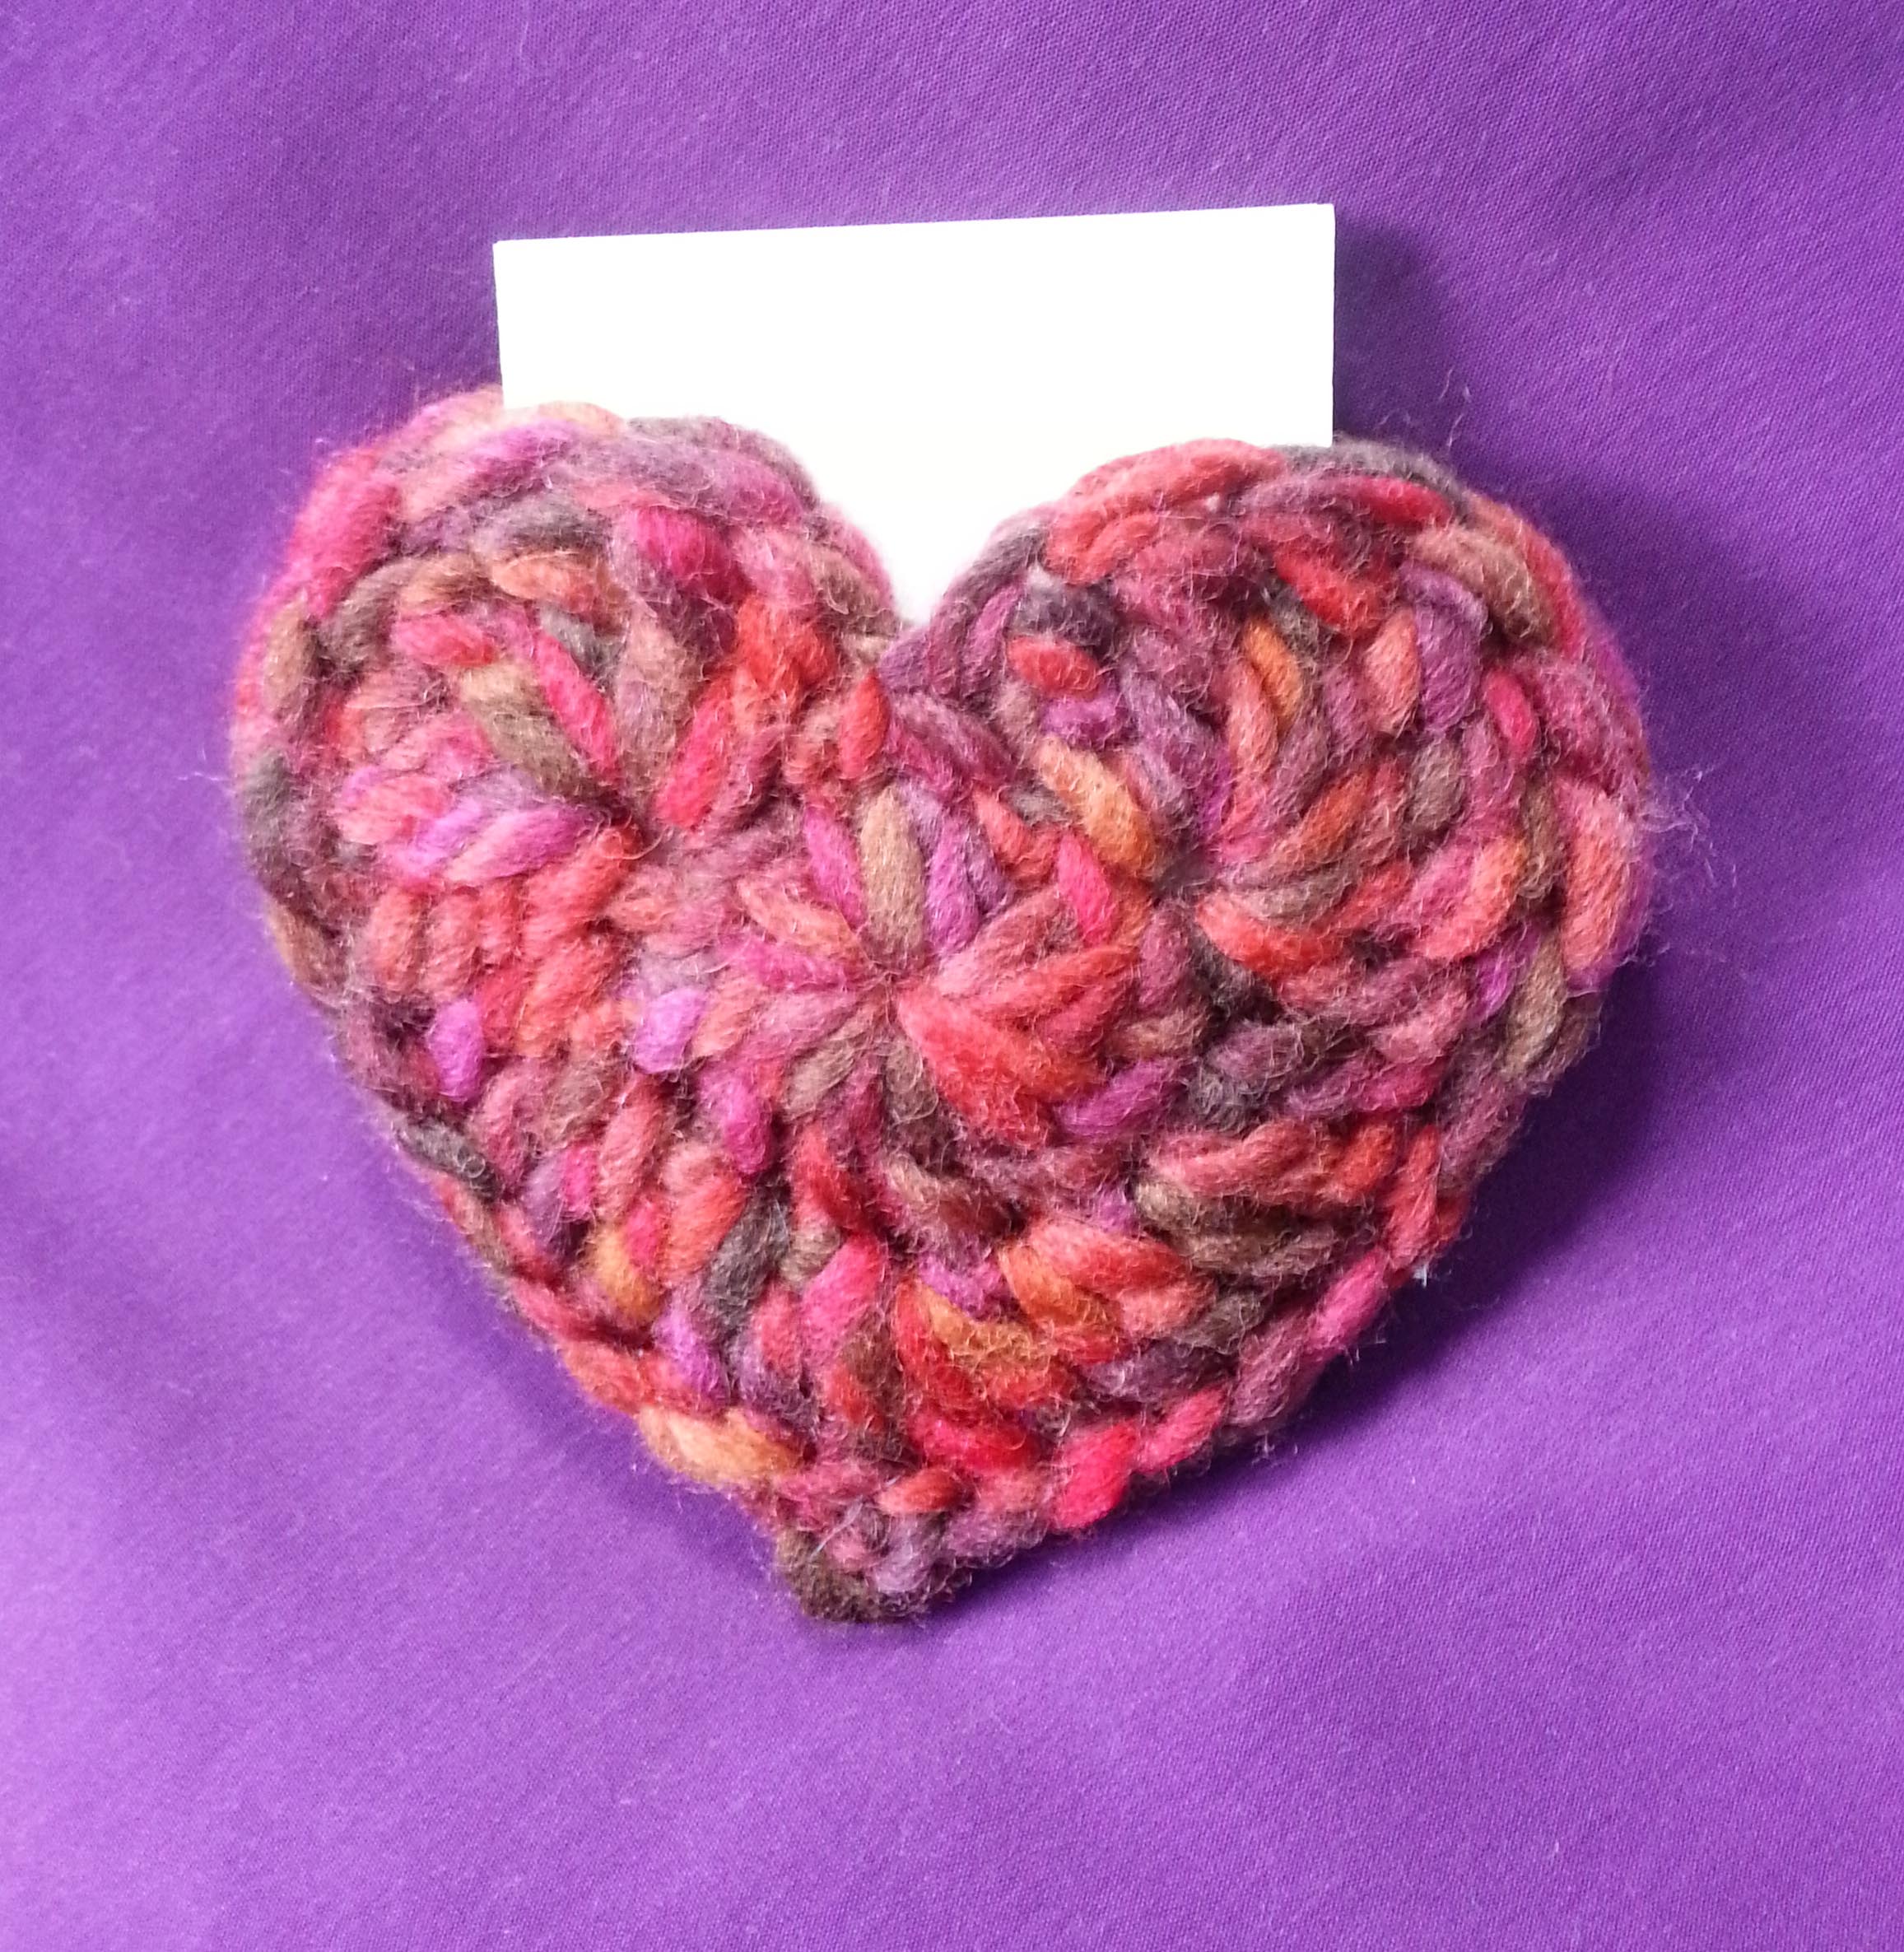
I made the little “pocket” heart above with some surprise chunky yarn that came to me from Edie Eckman. She was mailing back 2 of my little birdies from the “Christmas Crochet for Hearth, Home and Tree” book, and she said she thought they needed a little nest.
I liked the tones of red in the yarn color and felt like the browns and oranges balanced it enough that it wasn’t too feminine for a gift for my husband. 18 years ago he asked me to marry him on Valentines Day, so it’s a special celebration for us.
Even before I had a partner in life though, I always liked Valentines Day. I think we don’t celebrate Love enough in our lives, so it is nice to have one day a year that is dedicated to celebrating that emotion. I’m very blessed to love and be loved by good friends and dear family members. Plus there is always my love of art and playing with yarn.
It’s simple and quick to make you own “pocket” heart. A great little envelope for a small gift or note for a loved one.
I crocheted 2 of the hearts, completely finishing them off with weaving in tails. Then held them wrong sides together and sewed the edges together, leaving an opening of 6 stitches along the top of each heart. Tidied up the ends and put some candies inside with a note. Took me maybe 30-45 minutes from start to finish.
I hope you all have a Happy Valentines Day. Now I’m off the computer to go enjoy some chocolate.
Mainly because I have been very busy with lots of challenges and changes in my business. I’m working on implementing some new ways I publish my designs and expanding how and where I teach crochet and healthy crafting.
One of those changes may be moving my blog to a more customized website, the learning curve for that has been a bit more extensive than originally expected. I have every confidence in accomplishing it, just takes more time than I have easily to hand.
Meanwhile, here is some eye-candy for you yarnie ones. The following are few of the wonderful goodies I acquired at the TNNA Winter Trade Show in Phoenix the second weekend of January. Was a perfect time to travel south as the weather in Colorado and on my mountain was very cold and snowy. Spending a couple of days in warm and mostly sunny Phoenix was a nice change. Brutal returning to snow, ice and freezing temperatures when I came back though.
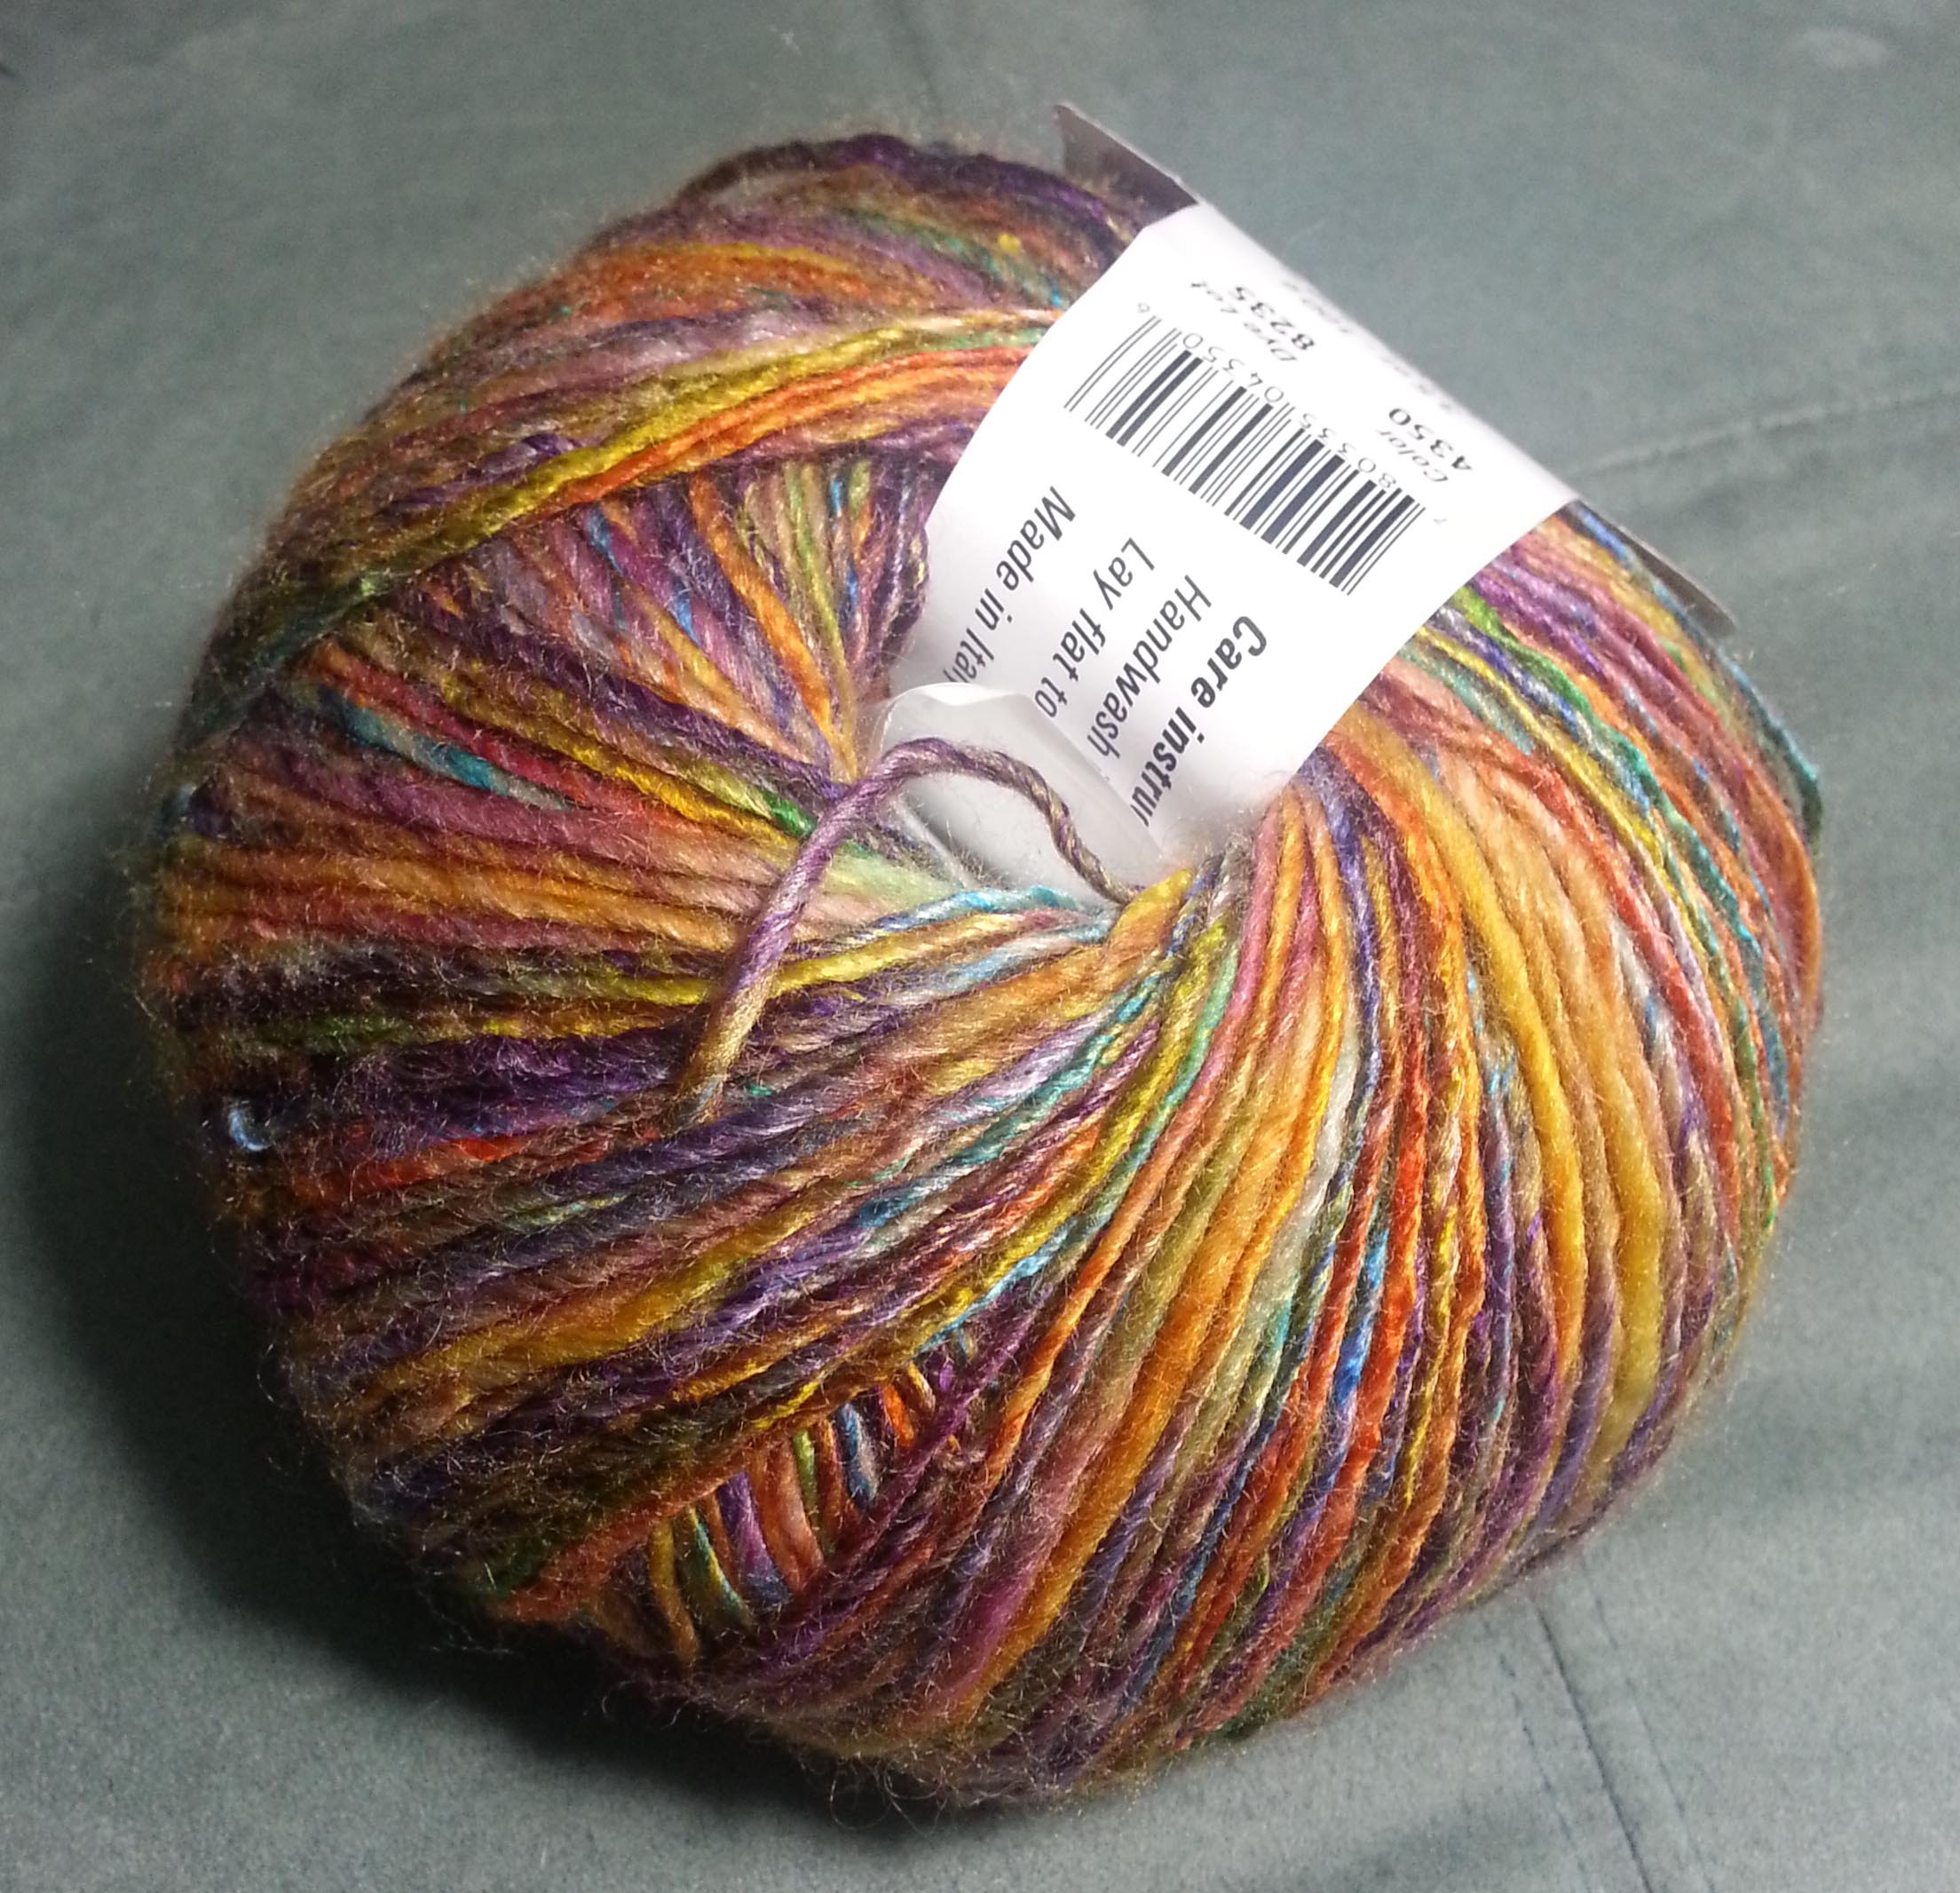
This was an exciting new product that I first saw being used by another attendee. The “Yarnit” is just too darn cool. Completely protects your ball of yarn and travels along with you easily. You can learn more about their products and where you can purchase them at their website.
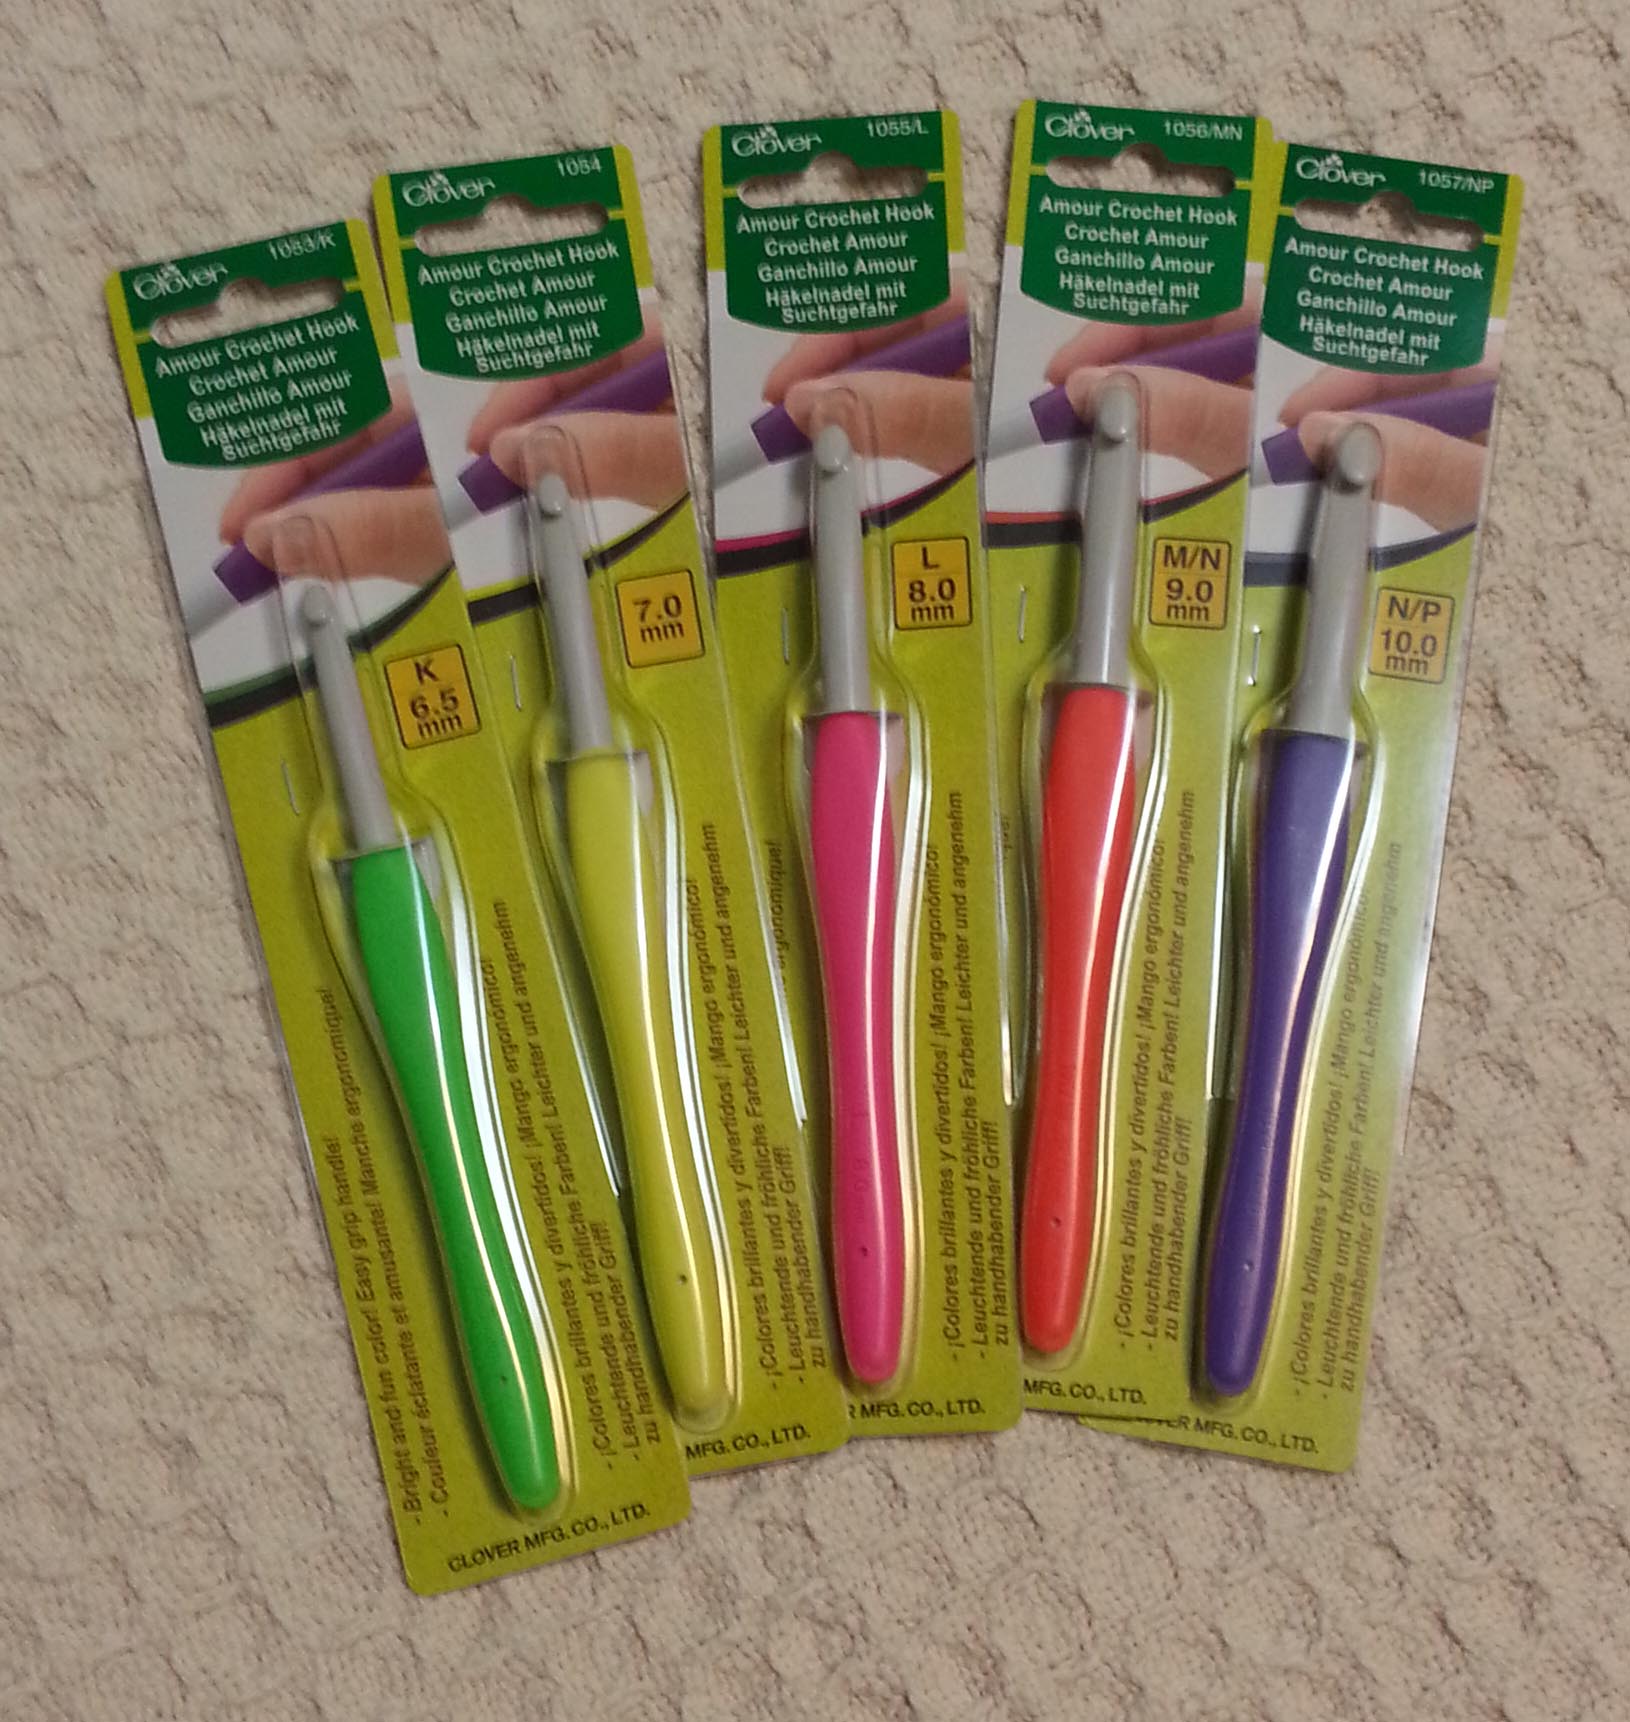
I’m really enjoying these new larger sizes of the Clover Amour hooks. They come in a range of sizes. K-6.5mm, then 7mm, 8mm, 9mm and 10mm size. The handles are shaped just like the Amour Yarn hooks, but the material is different. The hook part is a wonderfully smooth hard plastic with the handle a slightly softer plastic.
The best thing about these larger hooks are they have a decent length of shaft above the handle. This is really key if you want to crochet any stitches taller than a single crochet. Most of the larger sizes of hooks with handles on the market sacrifice shaft length to accommodate the handles.
The yarn above is from ElementalAffects and I’m going to be doing some exciting things using their yarns this coming year. The 2 hanks I brought home with me are both Fingering weight, the Cormo is 100% Cormo wool and has a lovely tight twist that gives marvelous stitch definition; the Civility is 70% Merino wool with 30% Mulberry silk so very soft with luxurious drape.
I only got a little bit of yarn during this show. Monday is usually the day at the show that I get samples of yarn, but our time on the floor was cut short when the fire alarm went off around noon. Then it was time to catch the shuttle to the airport and head back home.
Since my return I have been finishing a slew of patterns that will be self-published on Ravelry over the next couple of months. Currently they are out for final testing and technical editing. I’ll let you know as they become available.
Where I am now? Learning new stuff and creating new products for other crocheters and crafters. I’ll be back soon, I promise.


![halosofhope[1]](https://mamas2hands.com/wp-content/uploads/2015/03/halosofhope1.jpg)