Taking Care of Yourself

My kids are back in school and that means Summer is over for me.  As I’ve shared a bit already, this Summer was a super full one for me, 2 big family trips and 2 work trips. I’m now back into the swing of design work deadlines and preparing for teaching at the Scotts Bluff Valley Fiber Arts Fair and at the Longmont Yarn Shoppe this Fall.

There is also the awareness that I need to get to work on making my gifts for the Christmas season (only a wee bit over 18 weeks to go) and the slew of birthdays coming up over the next 4 months. That means lots of crafting hours. I’m sure I’m not alone in the crafting crunch as the weather cools off for those of us in the Northern Hemisphere.

I have a “survival” guide that I follow to be sure that all that crafting doesn’t lead to me being in pain. Today I want to share with you my top 5 tips to surviving the crafting crunch.

  1. Get enough sleep
  2. Stay well hydrated
  3. Take regular breaks
  4. Find some stretches that work for you
  5. Set realistic goals

Get Enough Sleep

I know, who has time for sleep?  I’m as guilty as the next person of cutting into my sleep hours to get more stuff done. But sleep is a major component to preventing injury. Getting enough sleep allows your body to mend and restore itself, as well as increasing the efficiency of your brain. You are much more likely to make mistakes in a project when you are too tired. It’s better to set aside the crafting and head to bed earlier, you will be able to work with greater clarity and speed after a good night’s sleep.

How much sleep do you need? That really depends, the typical recommendation is 8 hours, but some people need a little more and some a little less. Most doctors advise 7 – 9 hours of sleep every night. I know for me personally I seem to do best with 7 1/2 hours.

Stay well Hydrated

Our bodies are mostly water and we lose a lot of it each day thru respiration, elimination and perspiration. Drinking water regularly thru-out the day is one of the best things you can do for your health. Even mild dehydration can make us more prone to injury as well as causing mental fatigue. The classic recommendation is 12 – eight ounce glasses (96 ounces) of water thru-out the day. That doesn’t take into account different sizes of people and different activity levels.

My favorite formula for figuring out the minimum amount of water to drink thru out the day uses your weight. Take your weight in pounds and halve that number to get the amount of ounces of water you should be consuming each day.  Example – if you weigh 150 pounds you need to drink at least 75 ounces of water daily. If you are having a very active day, or you live in a hot climate, you may want to increase the amount of water you drink.

I say “water”, but there are many other drinks you can have that count toward your fluid intake.  Except caffeinated beverages. They actually act as a diuretic and remove water from your body thru elimination. So enjoy your cup of coffee in the morning, but remember to drink an extra glass of water to counteract the caffeine.

Take Regular Breaks

Taking a break doesn’t mean you have to stand on your head doing Yoga for 15 minutes, though that would be awesome if you want to do that. Taking a break means doing something else for a bit. I often have breaks built into my day by normal household maintenance chores.

Sometimes it is moving the laundry to the dryer, making myself some lunch, or taking the dog for a walk.  Just doing something different that gets me up and moving for a little bit at least every 30 minutes. It’s about the only way my house gets tidied, 10 minutes of cleaning chores every half hour.

The typical recommendation is to take a break every 20 minutes. If you are having some pain in your hands/neck/back from crafting that is a good strategy. More frequent breaks keep your body from seizing on a particular movement or posture as the only muscle setting. If you are drinking enough water you will be needing a “bio-break” every 2 hours or so, and that counts as well.

Find some Stretches that work for You

We all have a spot that hurts the worse after a day of intense crafting, so it is important to figure out how to stretch or strengthen your “spot”. I tend to feel it in my hands and neck when I have over done the crafting time. When I worked as a massage therapist I had a series of stretches I used to keep my hands working for me.
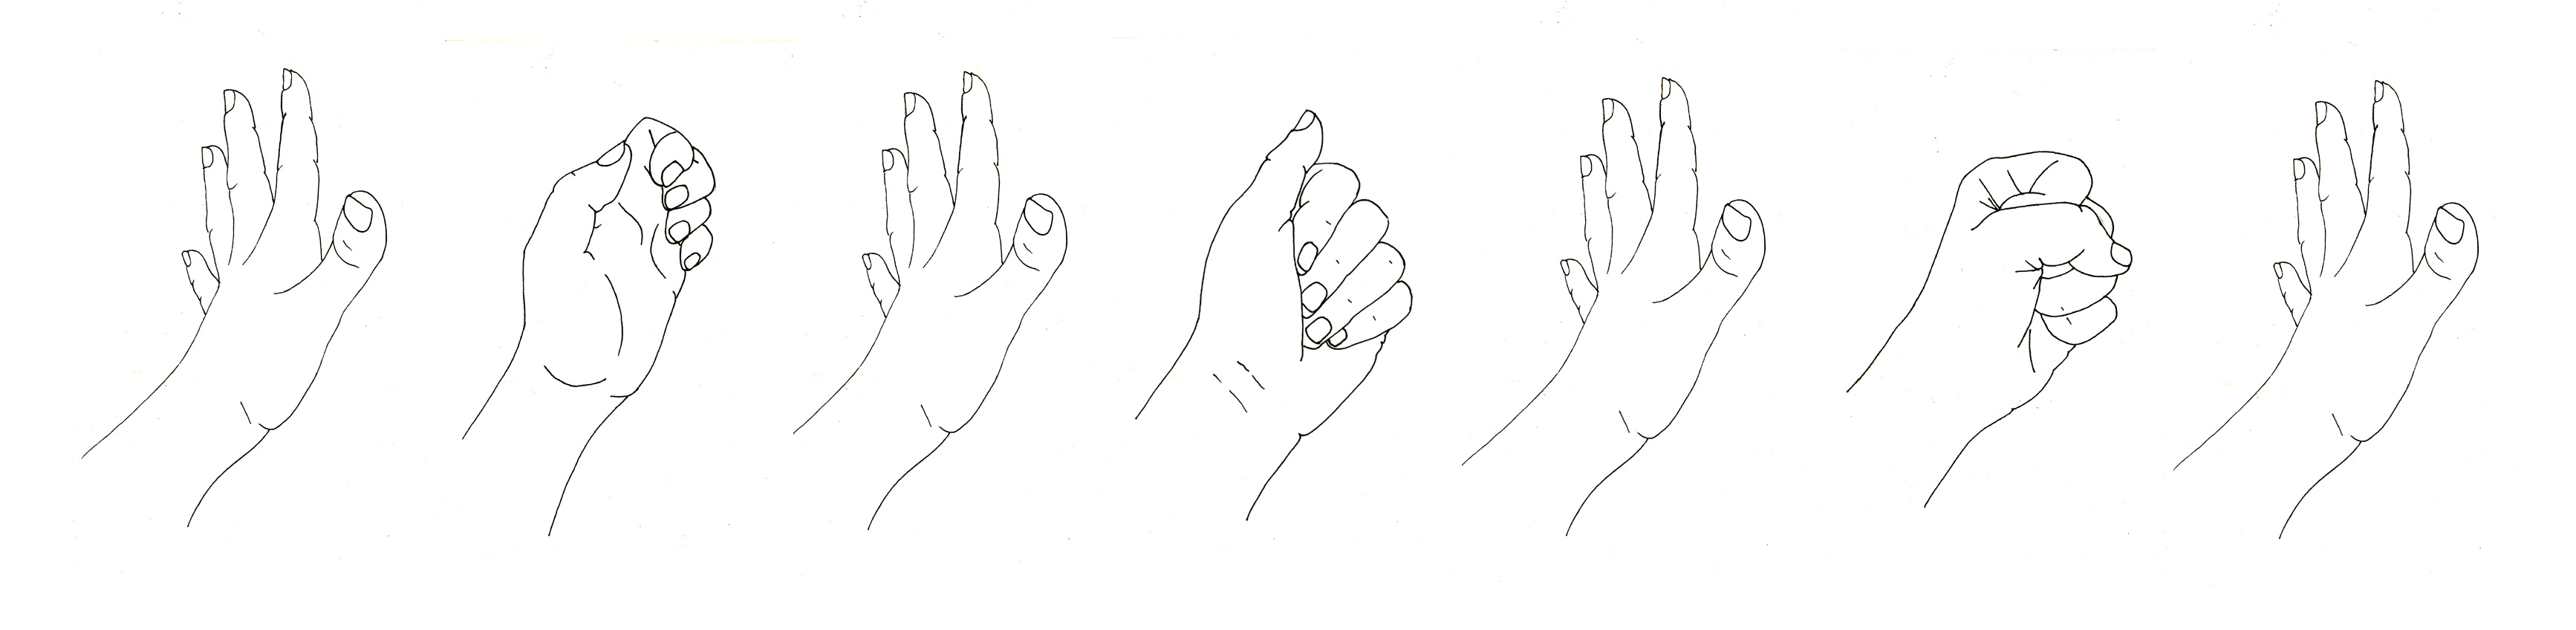
These are my favorite hand stretches. I do them at least 3 times during my work day and once more before I go to sleep. You can read a bit more about these hand stretches in my blog post: Keeping your Hands Happy.

Set Realistic Goals

I always seem to be hit with inspiration for the perfect massive gift about 2 weeks before the gift giving occasion. This rarely works out well and can lead to crazy nights of crocheting with only a few hours of sleep (Yup, that is how I know the importance of sleep).  I have finally learnt to be kinder to myself and have set more realistic goals for my gift making. If you want to do a large project for your gift you need to give yourself enough time to get it finished.

One of the things I have figured out after too many insane crochet deadlines is that it will usually take you about twice as long to finish a project than you think it will. Partially this is due to the fact that there is more to finishing a project than just the crochet. There is also all the weaving in of ends and blocking/washing the item and so on.

If you are looking at a couple of weeks before a gift is due to be presented, then look to smaller projects. The following are some links to patterns that make great gifts and are quick to crochet.
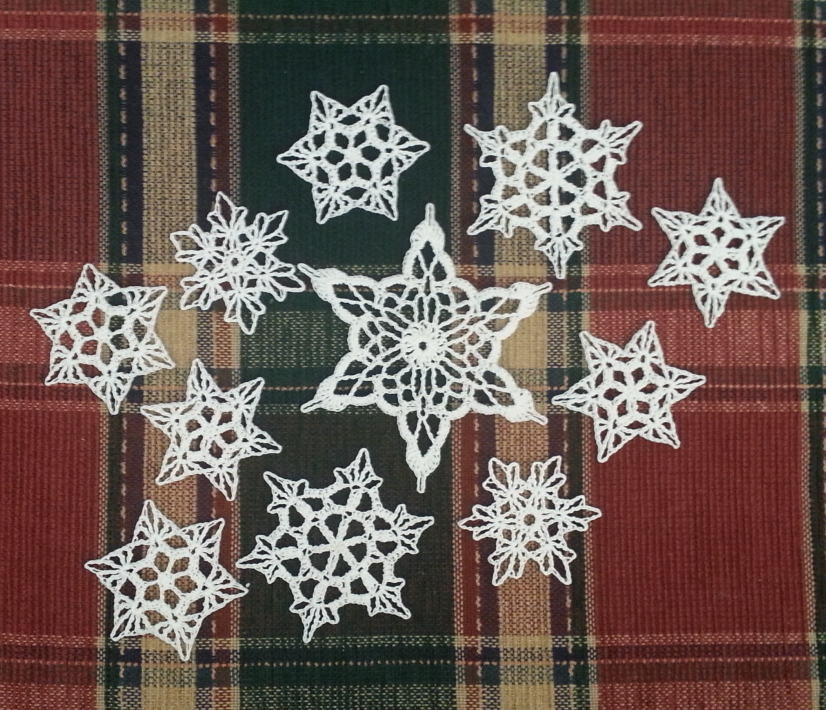
Snowflakes are one of my first choices for a fast gift. They are easy to ship and make great embellishments. You can work them in thread and stiffen them or attach the points to a larger ring for a beautiful addition to any holiday décor. I’ve also worked them in yarn and used them to embellish commercially made hats, scarves or gloves for a personalized gift.

I have 3 free snowflake patterns here on the blog.

Frozen Star Snowflake – This was last year’s snowflake pattern and it is a super quick one to work up with only 3 rounds to work up. This one is really ideal to work in a thicker yarn to attach to another project or a commercially made item as an embellishment.
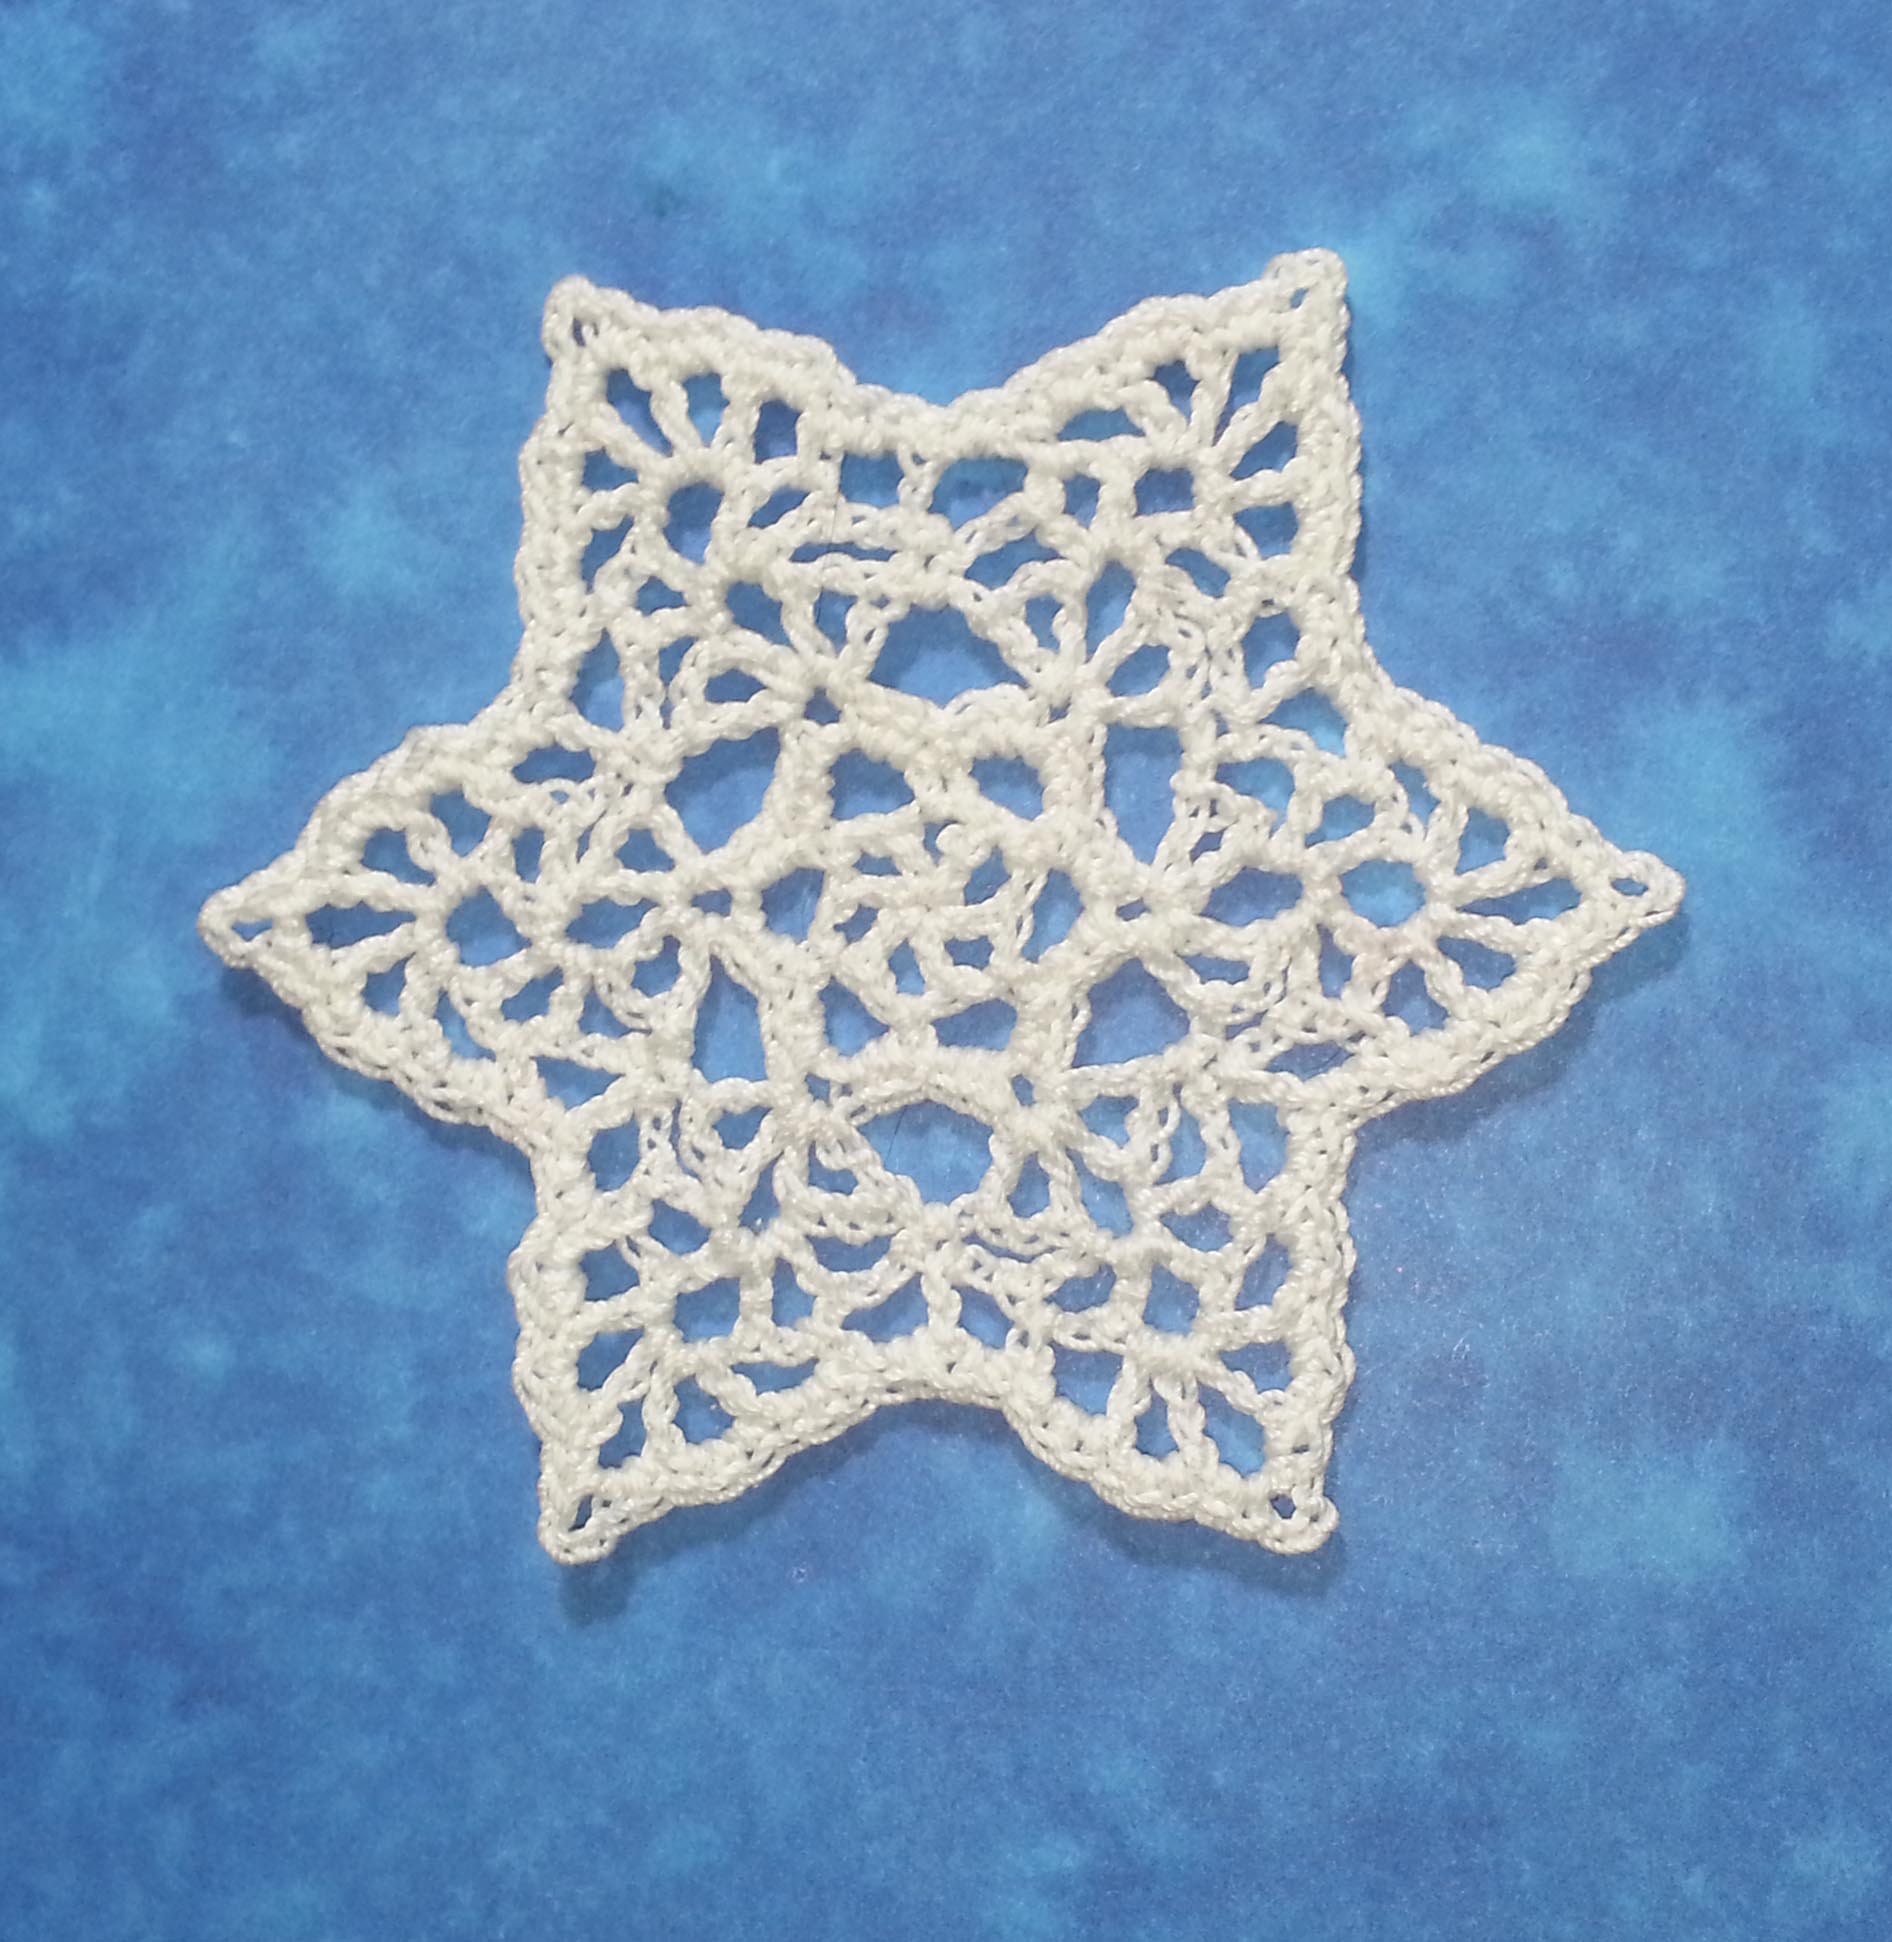
Lacy Snowflakes – This is my favorite snowflake pattern, it is a written instruction only pattern here on the blog – if you prefer charts along with the text you can purchase a PDF version of this pattern thru my Ravelry shop for $1.99.

Little Snowflake Ornament – This was the first snowflake pattern I shared here on the blog and it is a stitch chart only pattern.

I love hats, earwarmers and cowls for wearable gifts, they don’t take a lot of time or yarn to crochet.  I make a lot of hats for my family, it has become a bit of a Christmas tradition. I have a couple of hat patterns available for free here on the blog and a couple of hat patterns for sell in my Ravelry shop.

Whirlwind Hat – This is an intermediate level text pattern available here on the blog. I’ve included photos and a link to a video to help with learning the trick to working the spiral.

Simple Double Crochet Hat – This is a super easy hat that works up quick in double crochet stitches and a single crochet finish. Work it in variegated yarn for a colorful look, or use a solid yarn for a background that can be embellished with motifs.

Mountain Top Beanie – This is an intermediate level pattern available for purchase in my Ravelry Shop. The pattern includes stitch charts for the crown, sides and ribbing. The sample for this hat was worked in Ella Rae Lace Merino Aran yarn, a wonderful luxurious yarn that is so soft and colorful. Because the hat only uses 1 ball it is a fun splurge project.

Spiraling Crosses Hat – This is an easy intermediate level pattern available for purchase in my Ravelry Shop. The pattern includes a stitch chart of the crown and sides to help you with the placement for the cross stitches. The slightly cabled texture of this stitch pattern makes a good hat for either women or men on your gift list.

Perfect Fit Crocheted Hat – This is an easy level pattern full of all the tips and tricks I teach in my hat class. It is a great pattern for those wanting to create any size hat with any size yarn. You can purchase it in my Ravelry Shop.

Lace Hat – This pattern is available on the Red Heart website. This was one of the first designs I sold when I started out as a designer. For a time the yarn for this project was discontinued, but they have brought back a new version of “Heart & Sole” yarn.
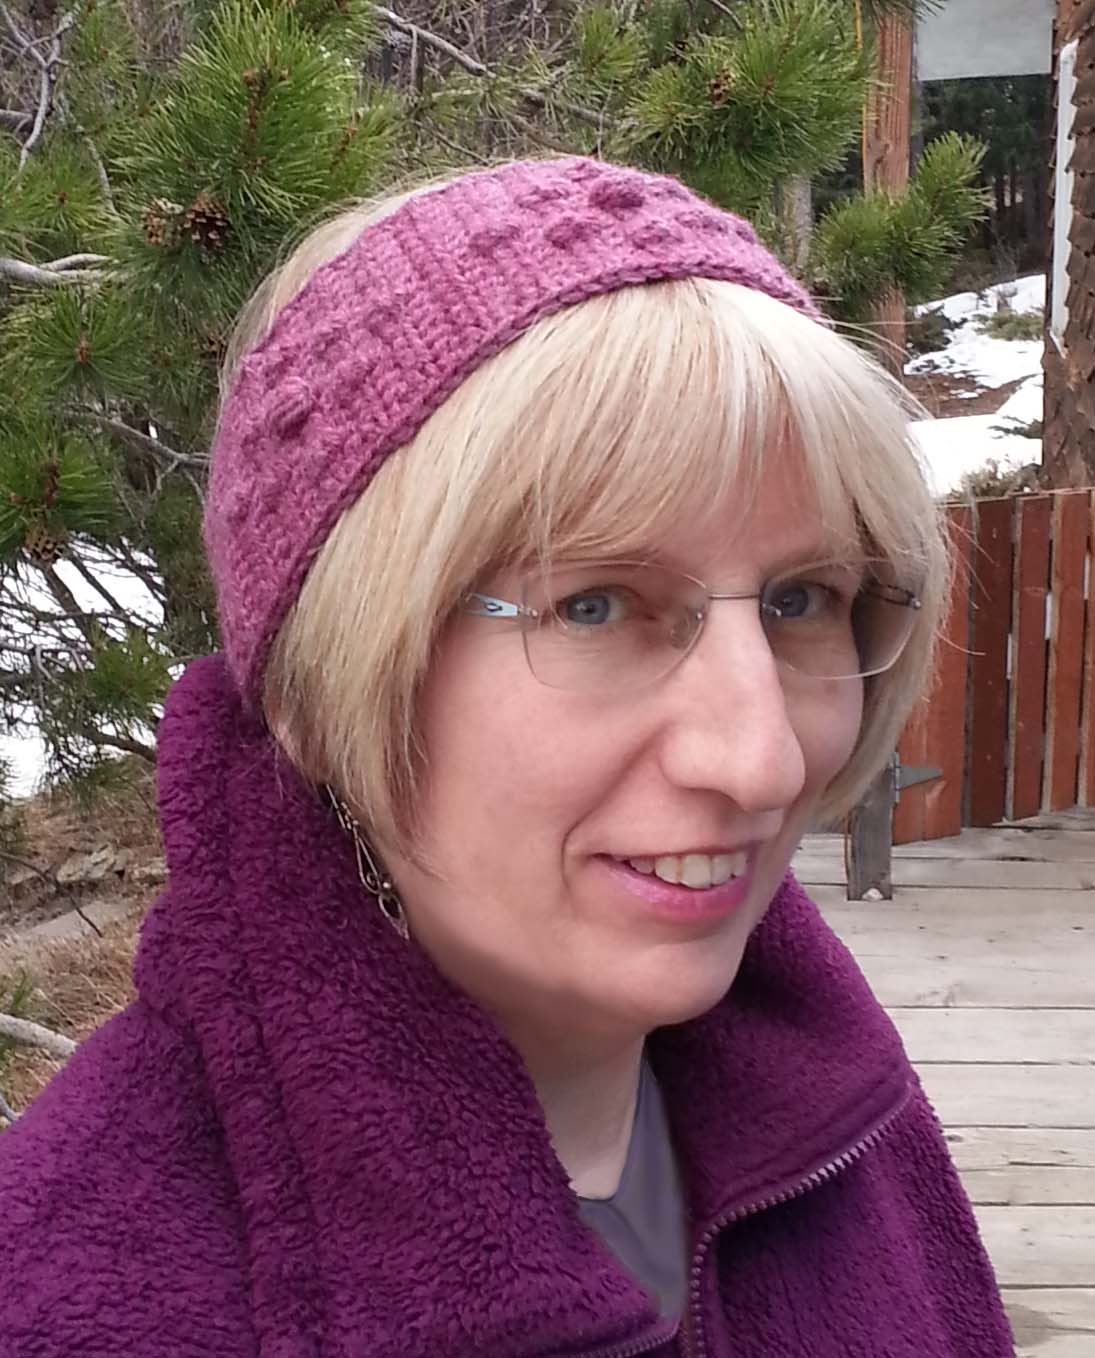
Springtime Headband – This is a pattern on my blog that is great for a quick gift, you can usually get 2 out of 1 ball of Lion Brand’s Wool-Ease in worsted weight. It is an intermediate level pattern, but I have included photo tutorials for the 2 texture stitches used in the pattern.

2 by 2 Cowl – This pattern is an easy level and speedy crochet project, it also uses only 1 ball of yarn. You can find the text pattern here on my blog and there is a link on the pattern post to a video to help you with the foundation I used.

Kellie Cowl – This pattern is available for purchase in my Ravelry Shop and is an intermediate level project. It would make a great gift for someone living in a warmer climate, or for those that don’t feel the cold all that much. The pattern has stitch charts to help you with the tricky parts and clear text instructions. It takes only 1 ball of the specified yarn and if you add the optional beads it is a fun dressy accessory to wear anytime of year.

These 3 moebius style cowls are quick and fun to crochet. The patterns are available individually in my Ravelry Shop.

Twisted Vs Cowl – A super quick project worked with bulky yarn and a big hook. The text pattern includes a photo tutorial about moebius construction.

Anna Moebius Cowl – Named after a friend’s grand-daughter this cowl is another fast one to work up in a chunky yarn. Pattern includes stitch chart and is an easy intermediate level project.

Twisted Garden Cowl – This pattern is an intermediate level project, with an interesting stitch pattern. This is still a small enough project to complete quickly, and is entertaining for more experienced or intrepid crocheters.

For those that don’t feel like working the moebius off a twisted foundation, there is always my Springtime Cowl. This pattern is available here on my blog and used 2 balls of the yarn for the sample. It is a simple stitch with the twist added when the 2 ends are sewn together.

If you have made it this far in my post I have a special gift for you. A 10% discount for any of my patterns over $3.50 price point. The code is: Crunch2017, and will only be valid until Friday, August 25th, 2017 at 11 p.m. Mountain time.

I hope this helps you all get started on the gift projects you need to complete and that you all survive the crafting crunch.

Having too much Fun!

Wow! This summer is nearly over for me, the kids’ first day of the new school year is this coming Wednesday. Sigh.

We have had an incredibly full and fun family summer. Both of my kids are at a great age for really active trips.

We just got back from visiting Mesa Verde National Park in Southern Colorado. A truly amazing and magical place.

There was a lot of hiking, climbing and learning going on. Our first tour started with a 32 foot ladder that we had to climb, to get into Balcony House, was just about my undoing.  I was very happy when I reached the top. If I had known what I would have to climb again to get out of Balcony House I might have turned around at the base of the first ladder. Our Park Ranger guide was Michael and he was super informative about the history of the site.

After Balcony House the hike in to tour Cliff Palace seemed easy. It was also easier to get good photos of the actual site.

We were staying in Farmington, New Mexico so we also did a quick visit to the 4 Corners Monument. My youngest wanted a picture of all 4 of us standing in different states. So we decided that a photo of our feet would work well. He had managed to find some mud to step into right before we took the photo. Truly my child, he can find mud in the desert.

The views as we were driving around the 4 corners and Mesa Verde area were just astounding. Everywhere made me want to break out my paint and brushes. The colors of the soil, rocks and greenery were pulling at me the whole time. I did very little crocheting despite having a project available, my eyes were too busy feasting on the scenery.

On our way home we stopped at the Great Sand Dunes National Park, though we weren’t able to stay long as the skies opened up and there was intense rain and hail.

I’ve really been bad about blogging this summer. Partly due to traveling so much, and then needing to recover once I got back home. I’ve also been doing a lot of learning. Sheep, Wire working, Yarn engineering, Video making and even some Crochet classes.

The 2 crochet classes I took this summer were at the CGOA conference in Chicago. Both classes I took were with the lovely and talented Myra Wood. I was so excited to see Myra teaching at the conference this year as she always has a wonderful approach to fascinating aspects of crochet.

I took her “Creative Crochet Lace Shawl” class. I know, you would think I already knew as much as I would ever need to know about crocheting lace shawls, but that isn’t the case. Myra was demonstrating her approach to basically crocheting a free-form but symmetrical shawl.

I’m a swatch it, do the math, then crochet it kind of person. This class really stretched my comfort level and helped me loosen up a bit and experiment with my creative side more. Something I used to do a lot before becoming a designer. It was a great class and I came out feeling really inspired.

The second class I took with Myra was “Tubular Bead Crochet Ropes”.   I’ll be honest, I really thought this would be a super easy class for me, in fact I wondered if I should even take the class. I’m so glad I did.  It turned out to be far more challenging than I had expected and I am excited to play with the techniques further.

The bit of beaded tube you see in the photo took me nearly the entire 3 hours of the class to make. But I now understand the technique fully, something I was in doubt would happen about an hour into the class.

I’ll be sharing more about the CGOA conference and all the adventures Jan and I got up to in the big city of Chicago. I’m going to be doing at least one blog post a week up thru the middle of September, then I’ll be getting back to my regular schedule of twice a week. I might sneak in a few extra if I can find the time.

Meanwhile I hope you are all having a wonderful summer, and for those of my readers that are contending with winter…I hope you are staying warm and cozy.

Summer is Flying By

This summer is going so fast, I’ve been traveling for both work and family stuff, so the times at home are super packed with household and work tasks.

We got back from our Lake Huron trip the evening of the 11th and I hit the ground running the next day.

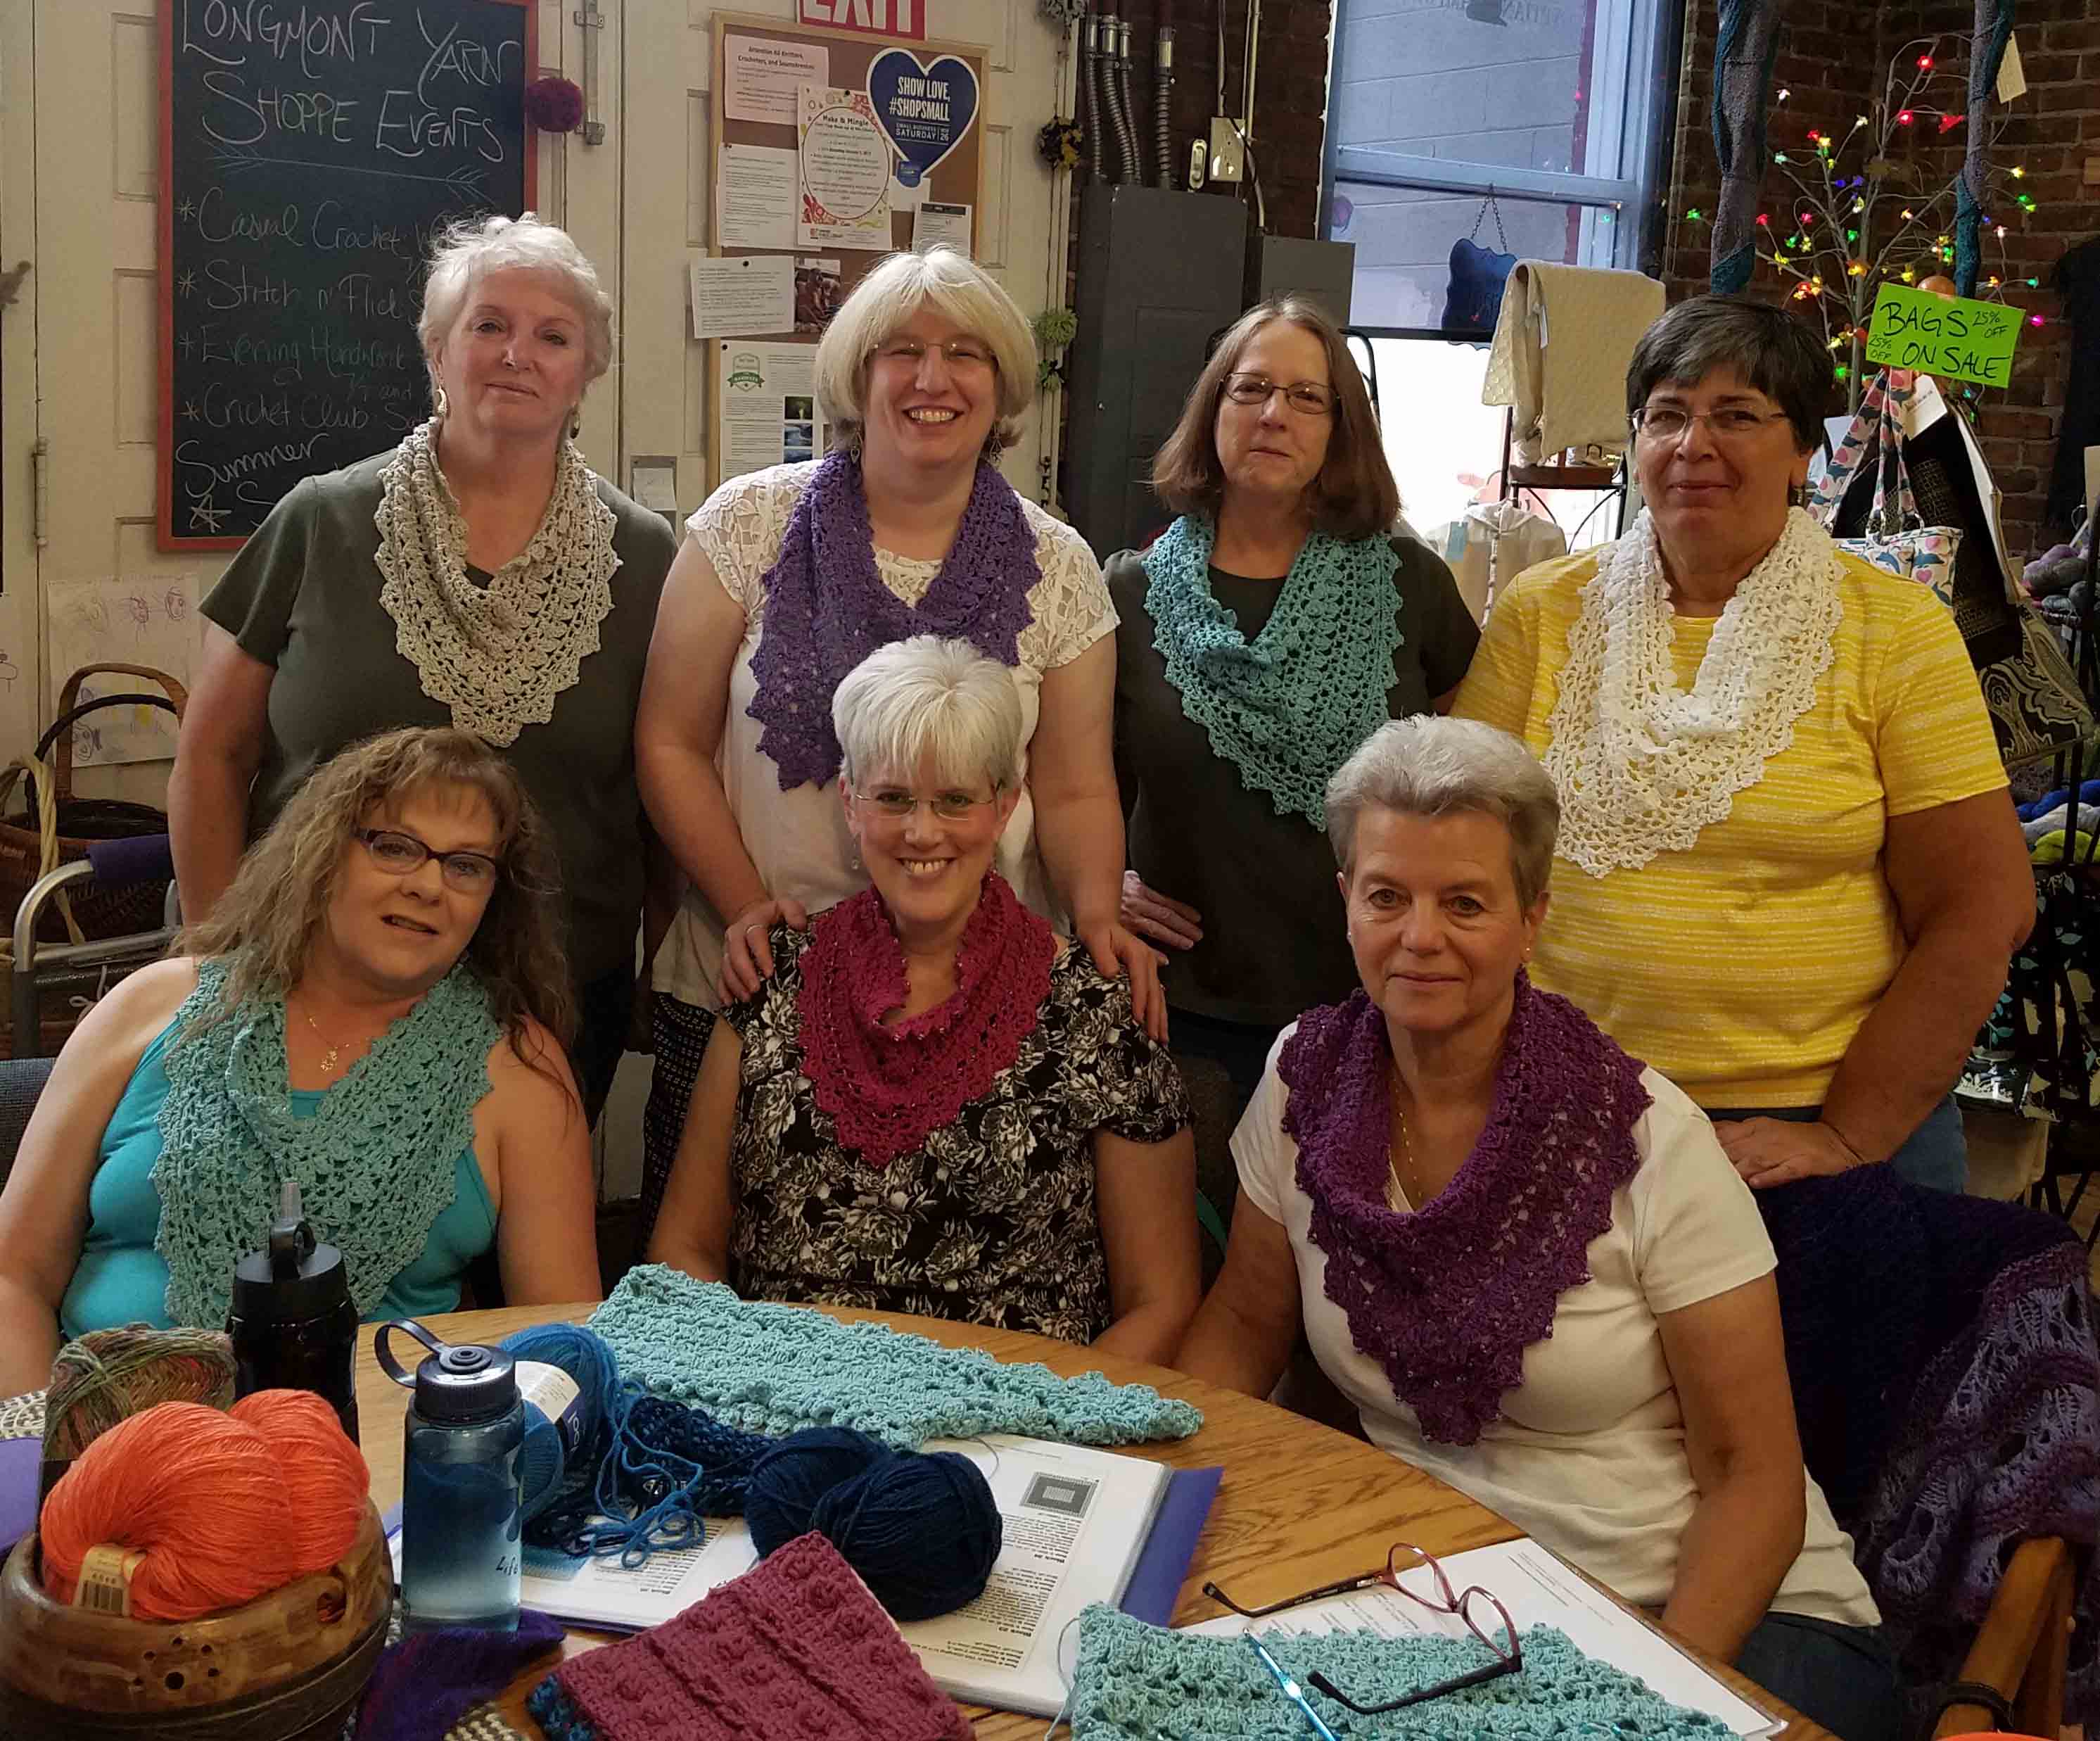
It was Casual Crochet meet-up and the end of our Testing Pool CAL. Everyone that could make it was there to get their photo taken wearing their cowls. A number of these ambitious crocheters had made 2 cowls. Can you tell that the Aqua colorway was very popular?

For naming this cowl I took all the names of my testers and put them in a hat. We drew out a name and this cowl is now known as the “Kellie Cowl”. That’s Kellie at the lower left in the photo.

You can purchase the pattern for this cowl in my Ravelry shop. It comes with detailed stitch charts for the foundation, joins and increase point.

I’m headed out to Chicago for the CGOA Chain Link Conference this week, so this may be a one post week again. We will see how busy it all is there and if I will have a decent internet connection. If you are coming to the conference be sure to say hello. I’m looking forward to seeing lots of my yarnie friends and making new ones.

Happy 4th of July!!!

Wow! Here we are again another July 4th celebration. For me this holiday has always been about family and fireworks.

This year is a big family reunion for my husband’s family on the Michigan shore of Lake Huron. We have lucked out on the weather and it is much cooler than they are accustomed to this time of year. Being mountain dwelling folks from Colorado we are loving the cooler temperatures.

His cousin arranged for the group to rent a lovely Victorian house right on the water and 2 campsites at the nearby State Park. We have all been riding bikes and hiking back and forth. Yesterday I spent some quality time with my kiddos playing in the water at the park beach

and collecting beautiful sand smoothed stones.

This pile of pebbles are very small and I am planning on doing some wire wrapping on them to turn them into jewelry.

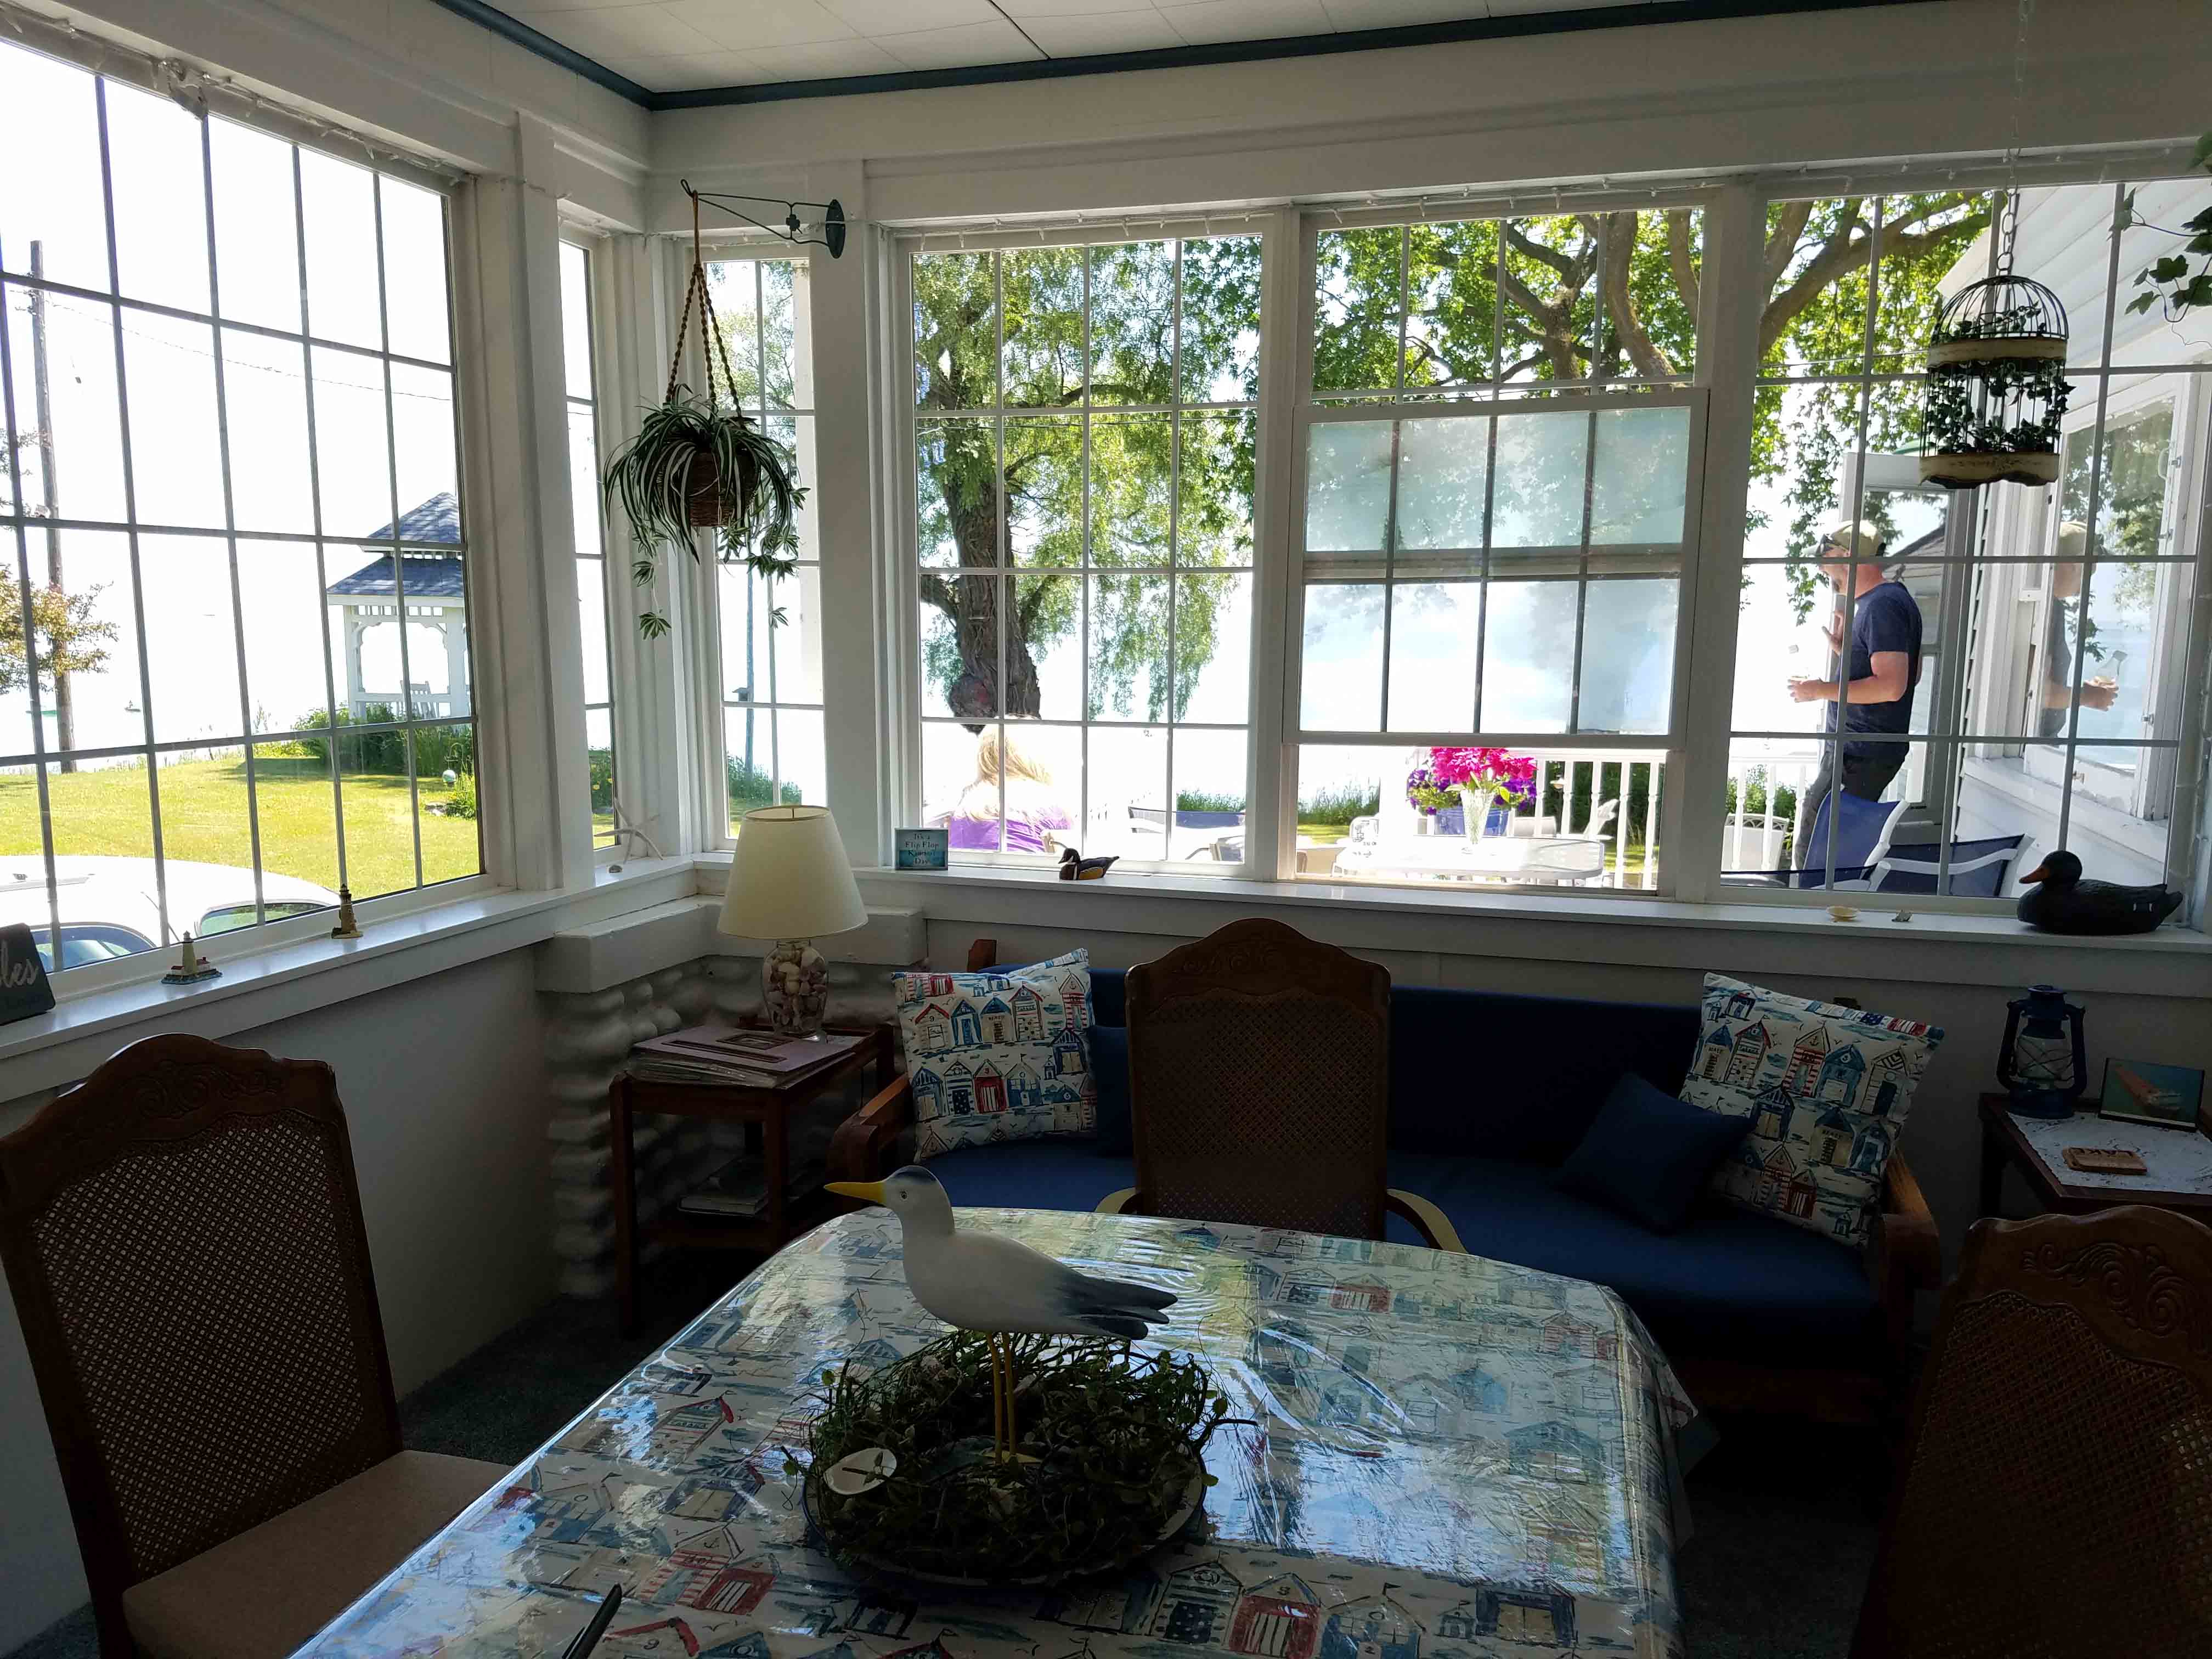
The house has a lovely dining room area that has 3 walls that are full of big glass windows with screened sections. It’s become my place to sit and do some crafting work each day. I try to stay completely out of the sun between 10 a.m. and 3 p.m., fortunately the view from this room are lovely, so I don’t feel left out.

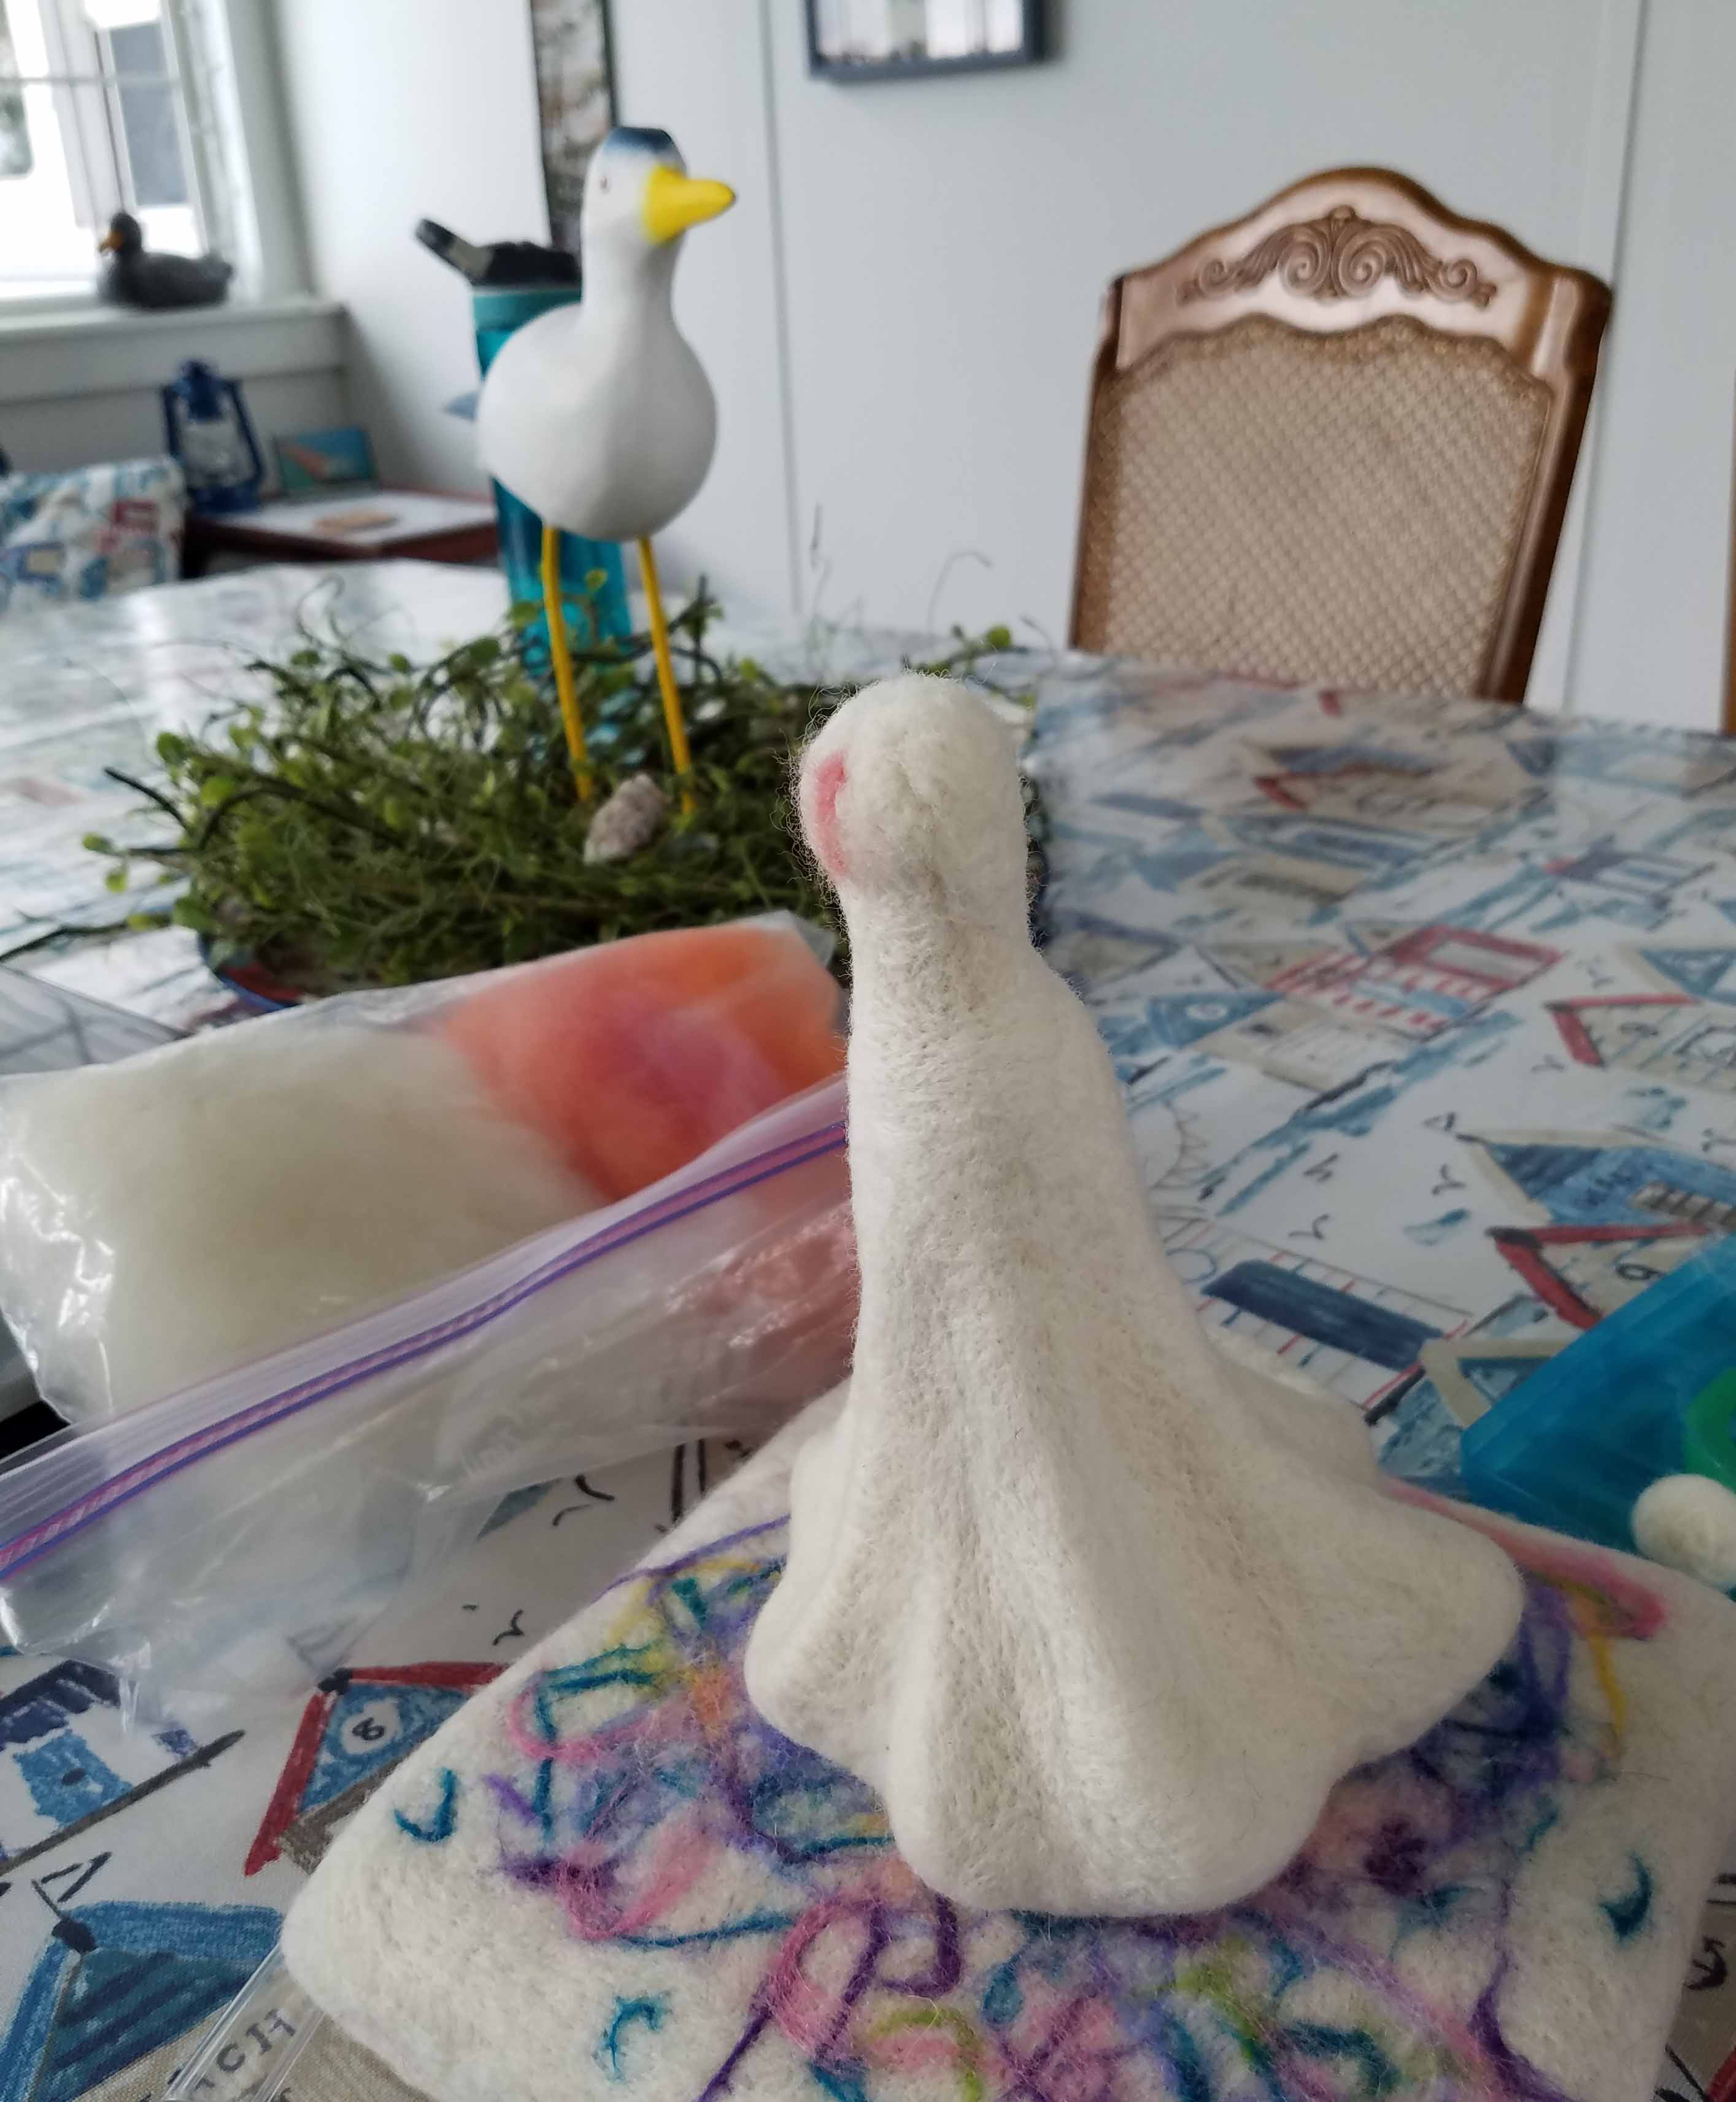
I’ve been working on this needle felted sculpture piece. Pretty awesome to sit here with birds singing, the sound of surf and a cool breeze. I’ve also packed along wire wrapping supplies, some beads, 4 crochet projects, 1 knitting project and my new Chameleon Art marker set. Hopefully I’ll get a chance to write a review on those while we are enjoying the time here.

Now I’m going to go do some more needle-felting and head to the beach for some toes in the sand time.

TNNA Goodies

I’m back from my little break and I have so much news for you. It’s likely going to take a few blog posts.

This summer has been moving fast and it seems every weekend has been full of excitement. First June weekend was sheep adventures, second was TNNA, and the third was playing with my dear niece and her adorable family.

I’ve shared quite a bit about the sheep adventures, though there will be more to tell on that front. For the moment though let’s roll the clock back to the second weekend and talk about the TNNA Summer Trade Show in Columbus, Ohio. For those of you that are new to my blog, or have never heard of TNNA, it is The National Needlearts Association and is a trade organization for folks that sell all sorts of fiber, yarn, needle crafting tools and supplies. It also includes needlearts teachers, designers and bloggers. You can learn more about TNNA at their website.

I had a little shorter visit at TNNA this time than I usually do, but it was still super productive. I flew out of Denver late Saturday morning. Had one of the most relaxing and enjoyable flights ever because of my seat mates. The woman at the window was traveling with her King Charles Cavalier Spaniel and he cuddled with me for most of the flight. Might not have been ideal for folks that don’t love dogs or critters, but it was perfect for me. The woman on the aisle was also a dog lover, so we had a great time.

Saturday evening was the Business & Creative Services dinner. Lots of interesting conversations with colleagues and show vendors. There was a great goodie bag. I made sure to go to each of the vendors during the rest of the show to thank them for their sponsorship.

Sunday morning I had an inspiring class with Zontee Hou called “Become a Video Whiz”. Just Wow! I feel like my brain was so full after that class that I needed to sit somewhere quietly for a couple of hours and think. Unfortunately that wasn’t an option that day, fortunately Zontee always provides detailed slides and hand-outs that let me re-live the class now I am home.

I needed to spend my Sunday after the class on the showroom floor to meet with a number of yarn companies and to talk tools with some of the other companies (like the lively folks at Clover).

It’s always exciting to see what products Clover has, both the old and new. I’ve got a few to experiment with over the next couple of months, so be sure to check back for those reviews.

It was also a blast to see my friend Eloise. She and I have known each other for ages, long before she began working with Clover. We had a good chuckle when she started working with them and I told her they were one of my very favorite crafting tool companies. We were laughing at this show because she lives in Denver, yet the last 2 times we have seen each other have been at shows that we had to fly to. Life just gets too busy and crazy at times.

I also found some other booths I needed to check out. Like the “Knitting Abacus”, “Glowving” from Kreinik and “Brittany Knitting Needles & Crochet Hooks”.

It’s not a real TNNA show without a stop by Daven’s “Love & Leche” booth for beautifully scented lotion bars for keeping my hands from drying out up here on the mountain.

One of the most wonderful things about being at TNNA is the yarn. A rainbow of colors and so many beautiful soft fibers. I can get very lost seeing all the yarn. That joke about being overwhelmed by yarn fumes? It could really happen at TNNA. There are so many new yarns to see.

The pile of yarn above is what I came home with, there will also be some more coming to my house soon. I’ve been sketching and making design notes on each of these in preparation for creating gorgeous new crochet designs. Some of these yarns are brand new to me, so I will also be posting reviews of those yarns as I get to work with them.

Sunday evening I got together with a bunch of my designer friends and we went out to dinner at Bare Burger. I loved this restaurant. Local sourced and organic food, cooks and wait staff that actually know what Gluten Free really means plus fun, quirky décor like the awesome decoupaged bear heads hanging all over the restaurant walls.

One stop that was at the top of my list for TNNA was the Unicorn Wash booth. I met Melanie, the owner, at my first TNNA show. You might recall I mentioned her when talking about my marvelous book about sheep? It was her drawing that I won it from. I wanted to make sure to check in with her and discuss her products because I have another big piece of news. I am now a part owner with my neighbor Margie of a sheep flock.

I bet most of you aren’t that surprised, after all the sheep adventures of the last couple of years. It’s been my dream for a long time and Margie gave me the push I needed to do it. Life is going to be even more interesting and busy now, but I figure it will off-set the gap that is opening in my life as my sons are becoming ever more independent. I know one thing after only one week of working with the sheep regularly, I’m going to be getting in great shape.

Hang onto your hooks and needles my dear readers, it’s going to be a wild time on the mountain.


Taking a Little Break

Hey there dear readers. This summer is speeding up on me big time. I just got back yesterday evening from the TNNA Summer Trade Show, that was the view out the plane window during one of my flights. Tomorrow my niece and her family are coming out to spend a long weekend with us.

I’m busily kid-proofing my house, since my niece is the amazing mom to 3 adorable little people 6 years old and younger. That’s me above with the newest one during our Spring Break trip. They are good kids, but it has been quite awhile since I had to think about what is down low that little hands should probably be kept away from. Currently I am really grateful that I haven’t removed all the childlocks that are on a number of our cabinets.

In a few short weeks I’ll be getting ready for my trip in July going to the CGOA Chain Link Conference in Chicago. For those of you thinking about going I really hope you join us, it’s going to be a blast. There are also going to be some big family trips for us this summer. The Graves clan is getting together for a week on the shores of Lake Huron. Then later in the summer Himself and I are planning to take our kids to Mesa Verde for a few days.

I’ll be sharing lots of fun news from TNNA with you soon, but I’m taking a little break from the blog and YouTube while I enjoy some special family time. I’ll be back with a new blog post late next week.  Be sure to check back, as I’ll be telling you the story behind the wild decoupaged bear pictured above.

I hope you are all having an awesome summer, for those in the northern hemisphere. For those of you in the southern hemisphere that are going into the winter season I hope you are staying warm.

Learning More about Sheep

I’m headed off to the TNNA Summer Trade Show this coming weekend. In between all the fun of packing and preparing for the meetings I’ll be having at the show, I’ve been reading a book that I won at my first ever TNNA show. That was the Winter 2012 show in Phoenix, Arizona.

This is “The Fleece and Fiber Sourcebook” written by Deborah Robson & Carol Ekarius. It is shock full of information especially from the standpoint of how various breeds of fiber animals fiber behaves in yarn and spinning. The first 30 pages are full of basic information on fiber and fiber animals.

Part 1 is all about Sheep and is divided by geographical region that the sheep are known for with breed specific sub-sections. Each breed specific section is really informative about the origin of the breed and the type of fiber that comes from that breed. There are photographic samples of the fiber; in both raw and cleaned form, a short length of hand spun, woven and knitted swatches, and sometimes multiple samples of carding and combing the fiber.

Following the specific sheep sections is Part 2, which deals with the other fiber creatures. It’s divided by critter sections: Goats, Goat crosses, Camelids (includes Alpaca & Llamas), Other Critters (Bison, Musk Ox, Rabbits, and Yak to name a few).

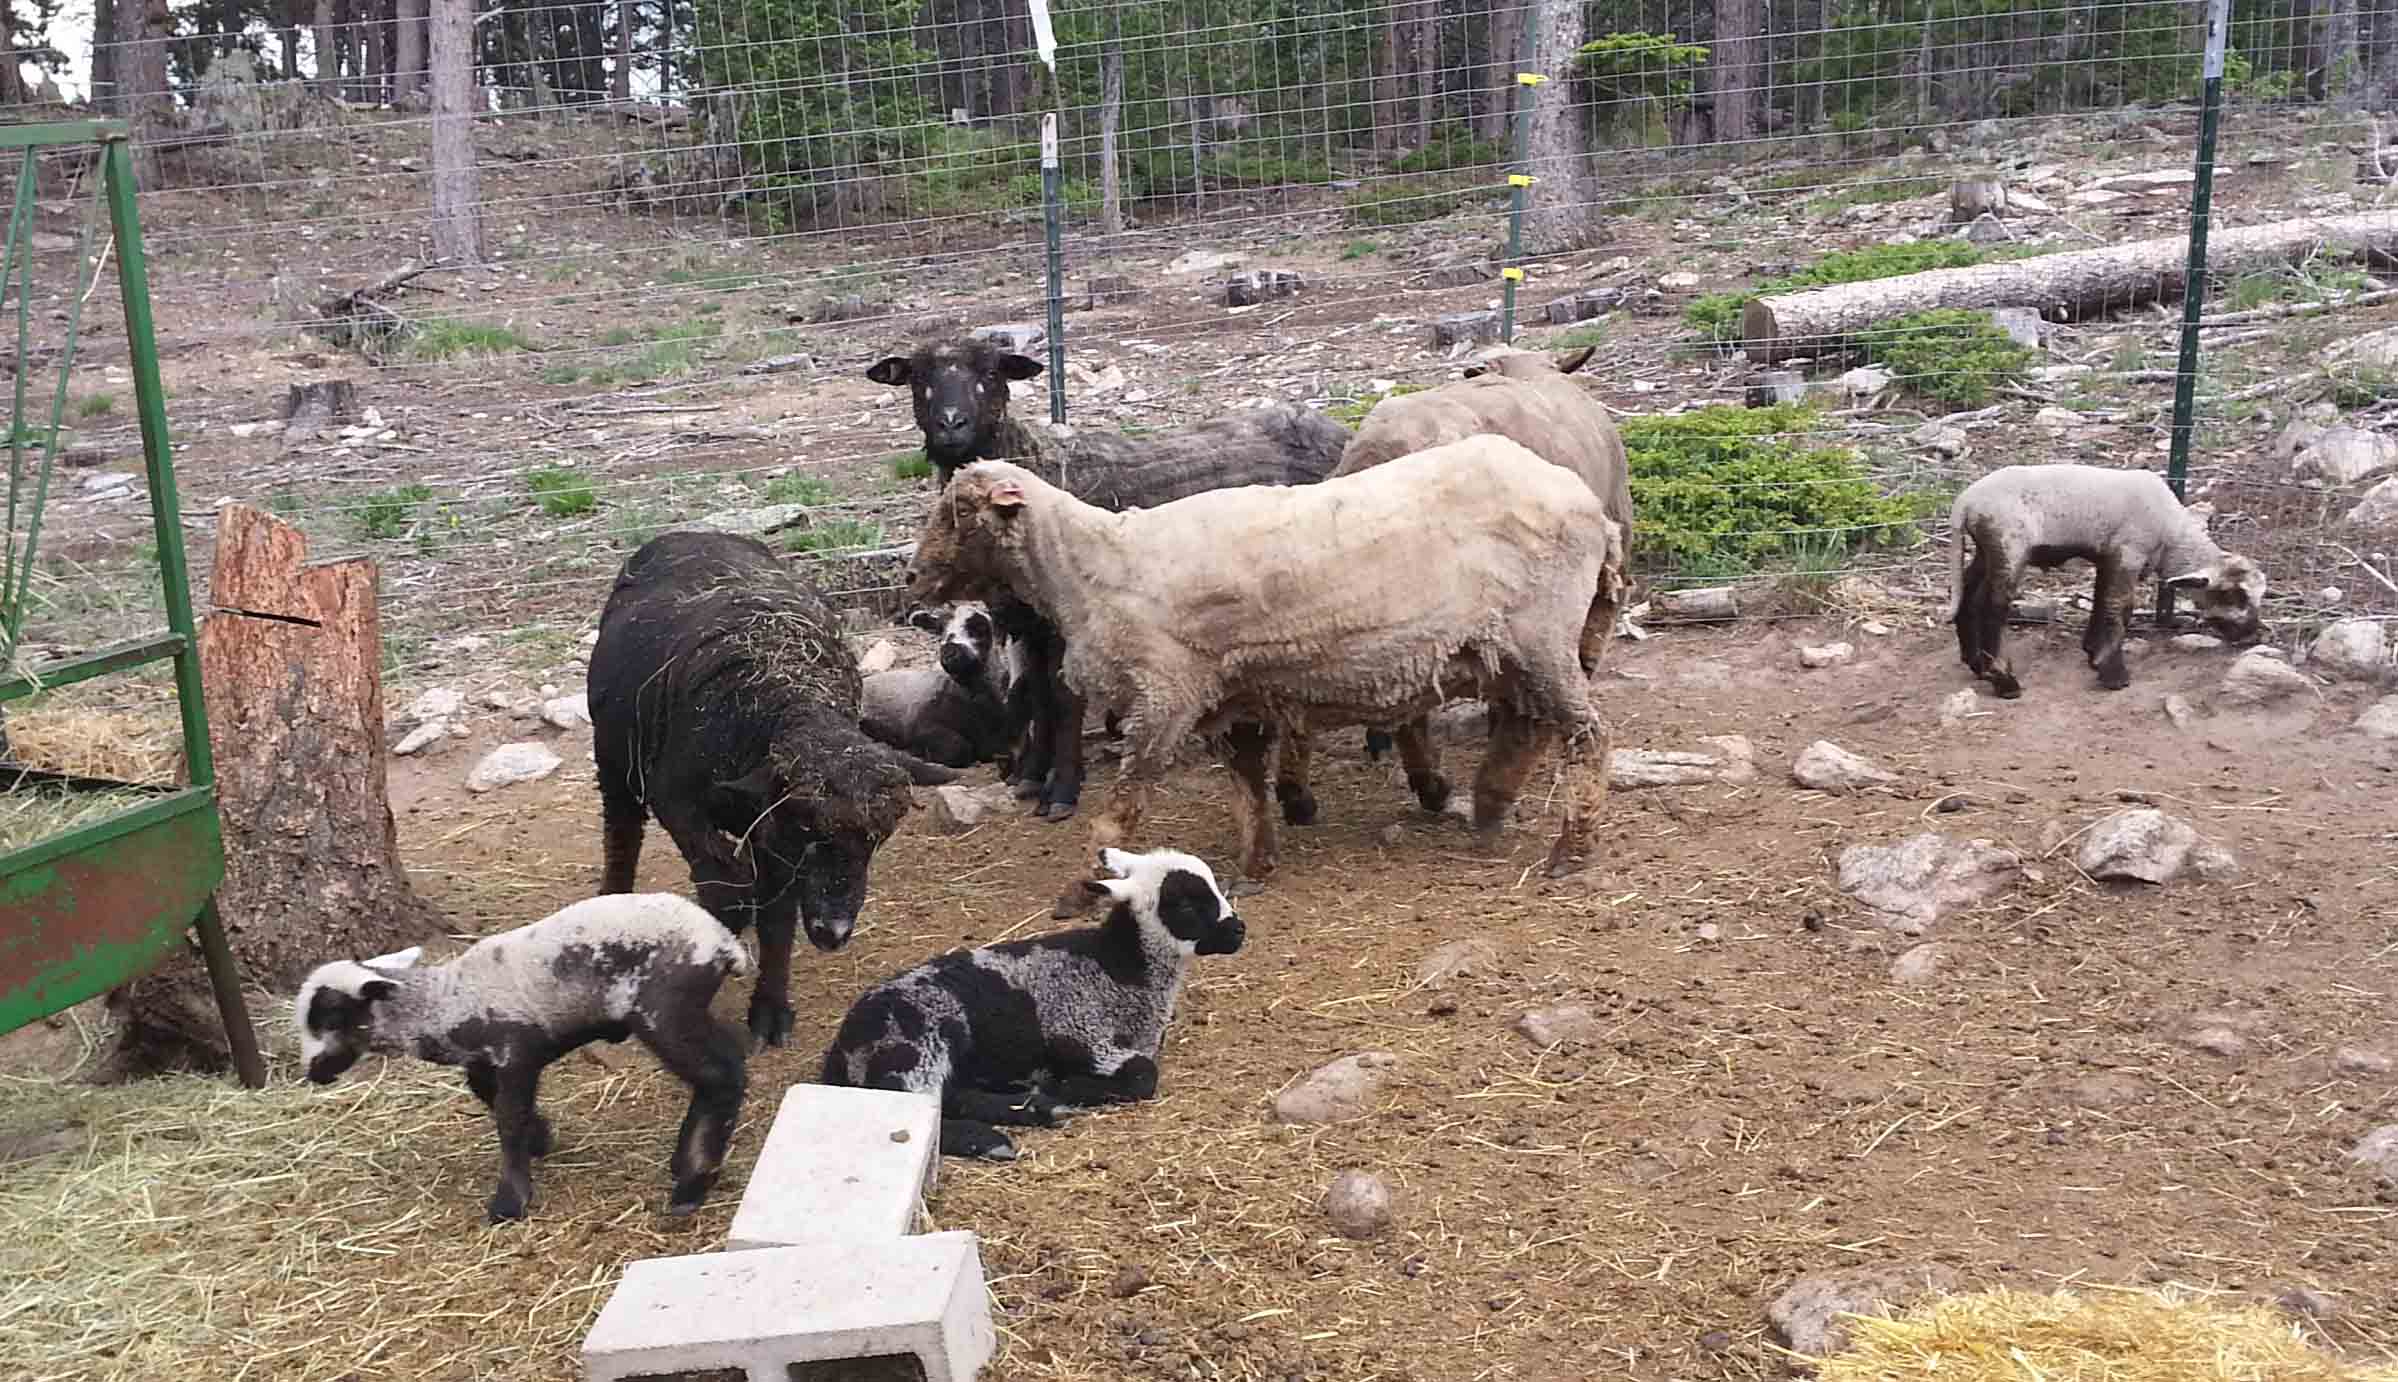
After my fun adventure with Margie’s herd last week I had wanted to learn more about the breed she is raising. She has CVM sheep, which is the abbreviation for California Variegated Mutant. A name for a geek to love. The CVM sheep are considered a Critical Conservation Breed. This means that there are not a lot of them around, keeping the breed going is important to maintain diversity in domestic sheep stocks. This is one of the reasons that Margie chose this breed of sheep for her herd.

Margie had told me a little about the breed, but I wanted to find out what their origin was. I knew I had tucked this book away on my reference shelf and am really glad I dug it out. I will be doing quite a bit of reading in this book the next couple of months. There is terrific information in there about sheep breeds, spinning and felting of fibers.

If you are interested in learning more about the fibers that go into your yarn or you like to spin your own yarn, this is a great book to have on your reference shelf.

Visiting a new Mill.

The mutant To-Do list got pushed around a lot this week. I had plans, I had good plans, but then I got distracted by sheep things.

Margie’s Herd – June 2016

You may recall that my next door neighbor, Margie, has a small herd of CVM sheep. Yesterday morning she called me to let me know her sheep were being sheared. Unfortunately I was sleeping in because I had stayed up late the night before working on a project. As soon as I got her message though I headed on over to help her skirt the fleeces in preparation for sending them to a mill to be processed.

Neither of us had ever really skirted a fleece before, we had both see it done many times and had an idea of what to do, so we jumped right in. All the rejected fleece bits we gathered up for me to take home. I’ll be cleaning and carding them to use for the interiors of some of my needle felting creations. Some of the better bits may be used for color work on my needle felting creations since Margie’s sheep are a wonderful mixture of colors; blacks, browns, beiges, grays and creams,

Margie didn’t have a mill lined up for her fleeces, so she spent the afternoon researching online. Later that evening she called me and told me she had found a new mill in Estes Park that could process her fleeces. She had set up an appointment to take her fleeces there as well as getting a tour of the mill. She asked if I wanted to go along. Of course I said, “Yes!”

I had a number of things on my list to do this morning, but who can pass up a tour of a new fiber mill? I made sure to wind a hank of yarn into a ball to take with me to crochet on during the drive.

Margie picked me up at 8 a.m. and we had a fun time talking about sheep, fiber and yarn on the 45 minute drive to the mill.

It is a gorgeous drive to Estes Park from our neighborhood. Margie stopped for me to get a photo of the clouds on the mountain tops over Peaceful Valley.

We saw some Elk with velvet on their antlers only a few miles before the turn off to the mill.  I took this photo thru the truck window and the sunlight was working against me a bit.

Finally we were at the Willow Creek Fiber Mill and were greeted by Daniel and Kat. Daniel helped us unload the bags of fleece and brought them into the mill building.

This is the area where it all begins. You can see there were already a number of fleeces on the drying shelves. In the far left corner is the big washing machine that the fleeces are cleaned in. The hook hanging in front of the window is where the fleeces were weighted. Margie’s fleeces had a total weight of 35 pounds. A lot of that will be lost once all the processing is finished. A big part of the weight is the “grease” in the wool.

Daniel pulled out one of Margie’s fleeces to see how we had done on our skirting work and to give us some pointers for next year. He told us we had actually done a pretty good job and showed us some of the stuff to watch out for next time. Margie and I had been talking about next year that we should skirt the fleeces as the shearers finished them. That way the messy stuff doesn’t get bundled into the good part of the fleece.

We talked about putting covers on Margie’s herd this coming year to keep the fleeces cleaner. Daniel said they had used covers on their herd in the past, but were considering leaving them off this year. We were all laughing that after processing Margie’s fleeces that they might be running to put covers on their herd.

I was curious about the other machines for processing the fiber. Behind Margie is the room where the cleaned fleeces are picked, carded, drafted and spun. On the Willow Creek website they had photos of each of the machines. I understood what “picking” and “carding” were about, but didn’t recognize the term “pin drafting”. Daniel showed me some fiber that had been thru the pin-drafter and the combs in the machine that get all the fibers lined up in preparation for being spun. I was so fascinated that I forgot to take any photos of this part of our tour.

They asked us if we would like to meet their herd. There were 9 sheep total, 3 were lambs. They had sold their other lambs. I was having lots of fun with petting the lambs and some of the older sheep thru the fence. Their sheep were very friendly. They have 5 children so the sheep get lots of time interacting with humans. I told Margie I’d be happy to come over and help socialize her herd.

This little lady was just too adorable. I got some nibbles on my fingers from her.

Then it was time to head back home and get back to my mutant To-Do List. Margie wanted to make one more stop at the stables in our neighborhood so I could meet her newest horse. I was having a bit of operator error with my camera, so this was the best photo I got of him. His name is Woody and he is a Gypsy Vanner.  Such a handsome and sweet fellow. He was enjoying noshing on some fresh grass from Margie’s hand.

My First Coloring Page

Along with the lettering/calligraphy practice and all the playing with yarn, I’ve been turning my hand again to illustration and drawing. When the coloring book craze first started off I kept thinking, “I could draw those.” I’ve always drawn and doodled. According to my parents, since I was old enough to hold onto anything to make marks with.

I gathered up my paper and drawing implements and began doodling some ideas. I’ve always loved using templates to create basic shapes then filling in the shapes with lines or organic shapes. I purchased many of these templates during my college days when I was taking graphic arts classes. You can find similar templates thru art and hobby supply shops.

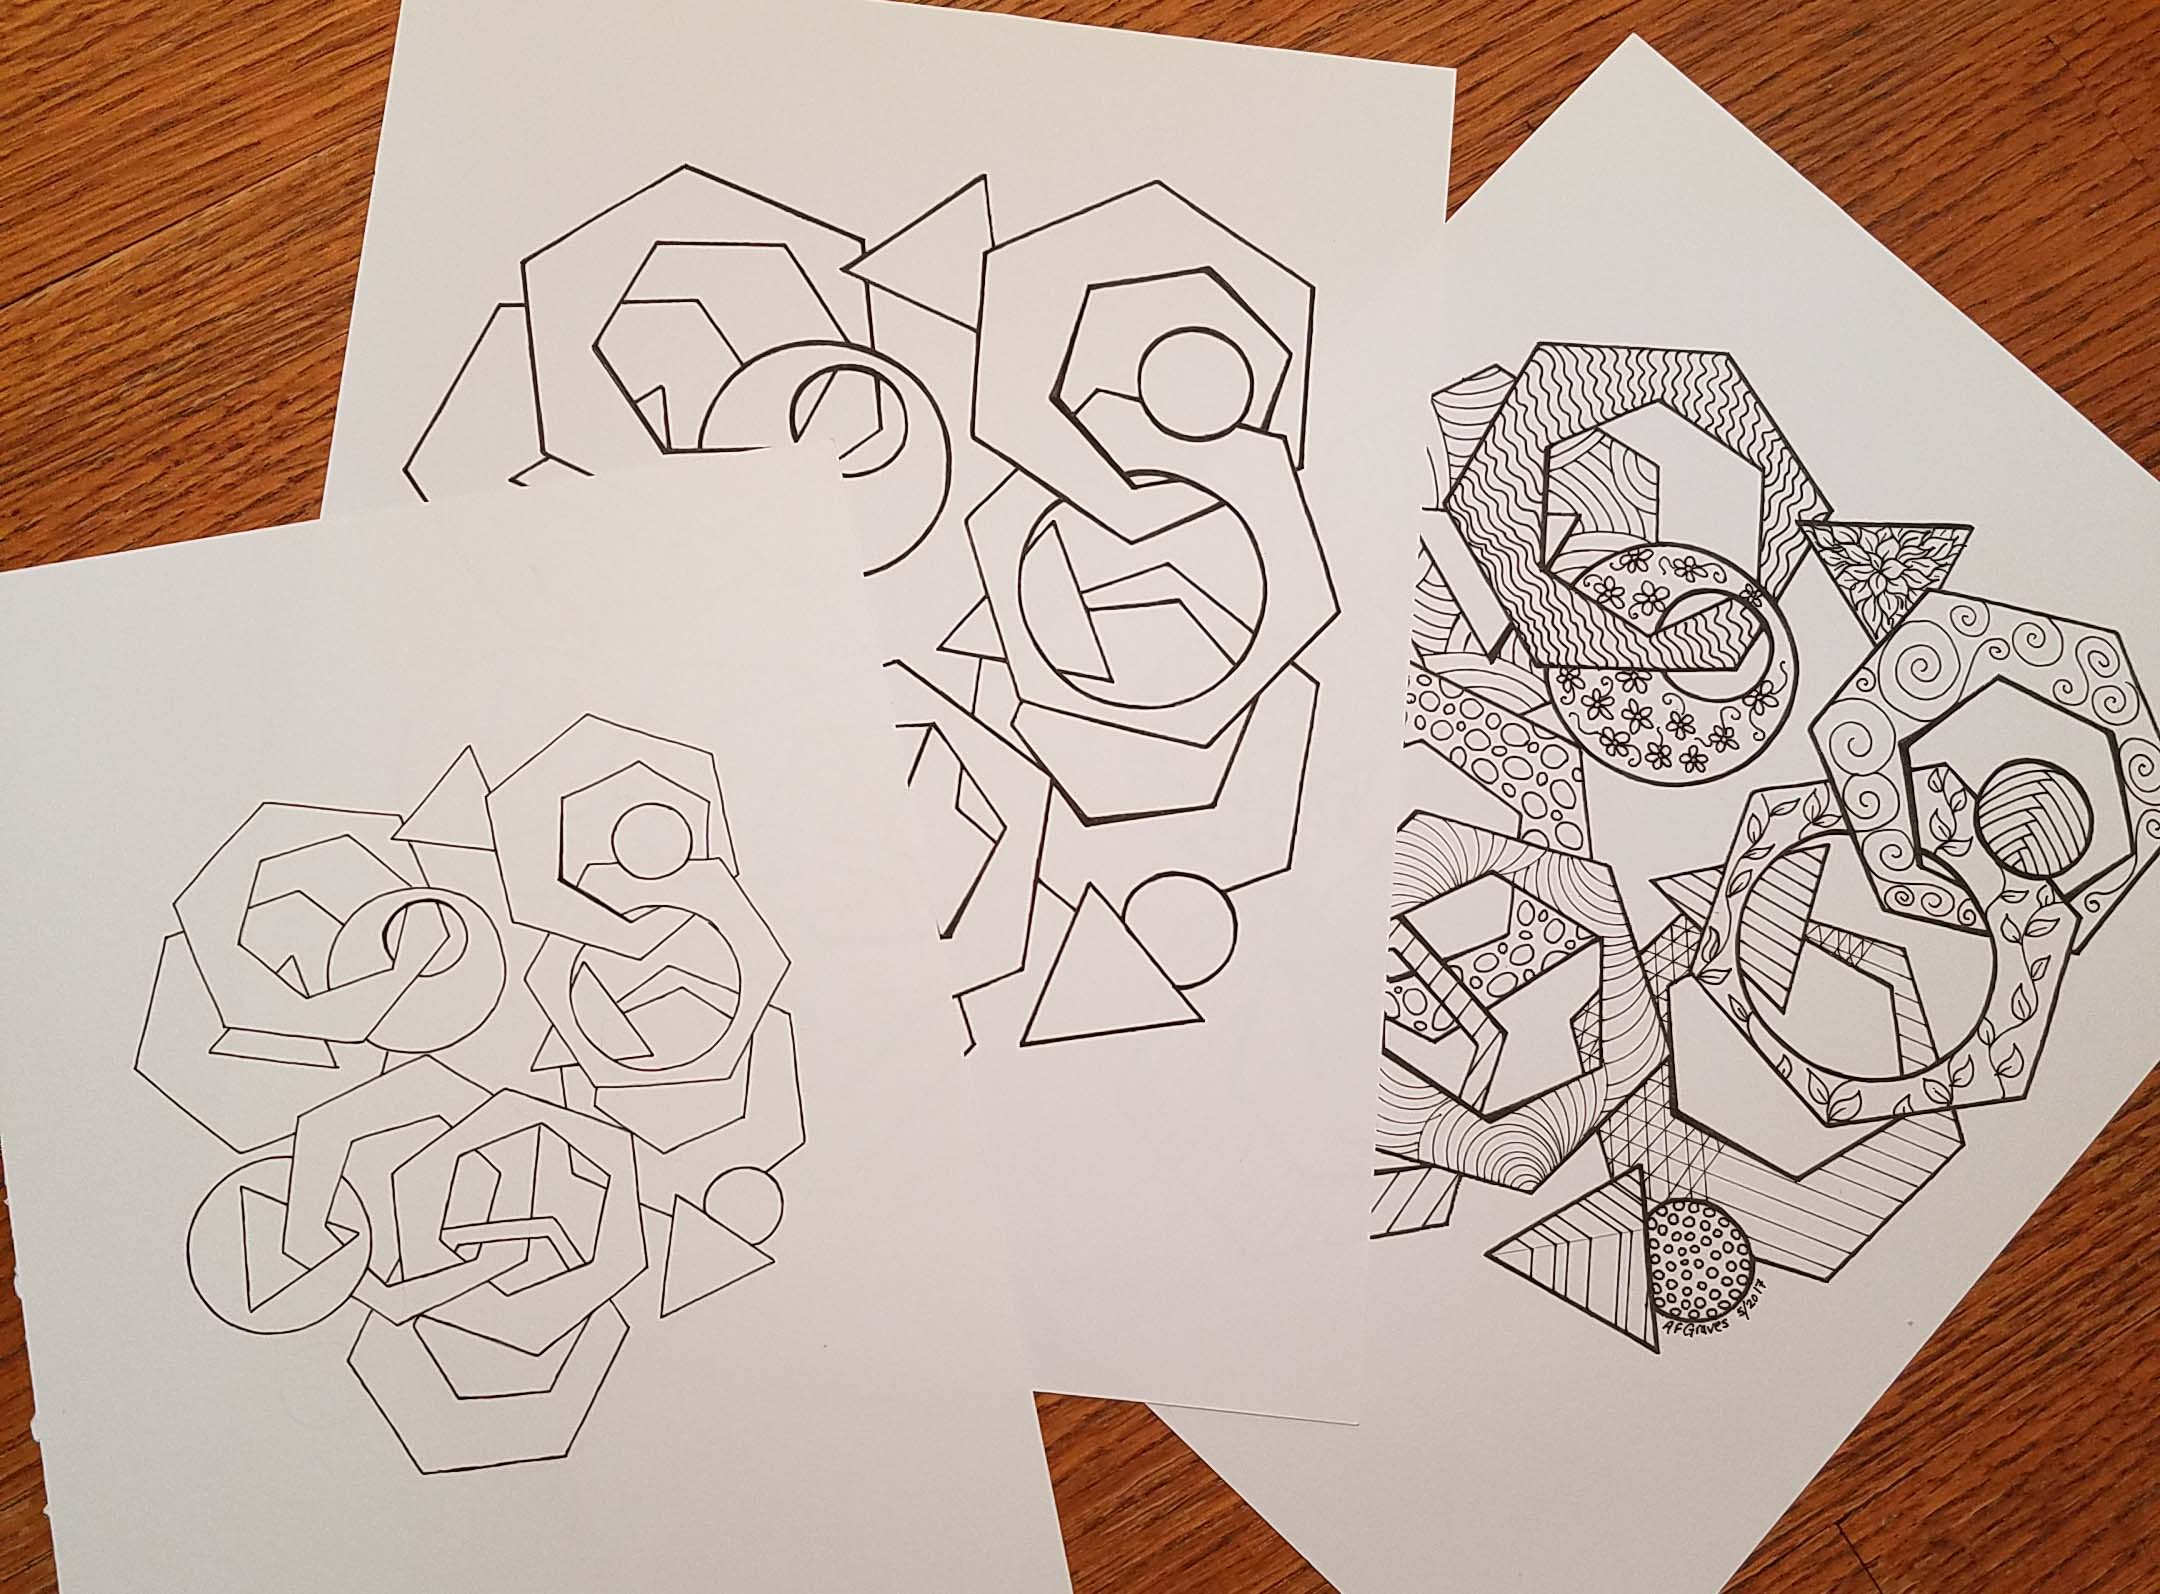
Geo 515 Coloring Page – 2017 – Andee Graves/M2H Designs

For those of my readers that would like to try their hand at coloring my finished page I’ve attached a PDF that you can download and print out to this blog post. Geo 515 Coloring Page 2017 – Andee Graves M2H Designs

I recommend using a nice heavy weight printer paper. If you are going to be coloring with pencils, look for a paper that has a bit of “tooth” to it. I purchased this ream of Neenah “Exact Vellum Bristol” a few months back and have been very happy with it. It is great for dry media like colored pencils, crayons, pastels and ball-point pens. I haven’t tried any of my color markers with it yet.

My pigment illustration pens work well with it too, as long as I don’t let the pen point sit on the paper surface too long. These pens are quickly becoming my favorites for final drawings. The variety of nib widths give me a number of options for thickness of lines and the ink supply is generous.

For this first drawing I drew a pencil sketch using my templates, then drew over the pencil drawing with my black ink freehand. A few of my lines came out a bit thicker than I wanted, but I wasn’t too concerned. I then scanned the drawing into my computer and used my graphics program to clean it up a bit. I printed it out on some of the cardstock and refined it with the pens, adding thickness to some of the other lines to balance out the original heavy lines.

I then copied this refined drawing on the heavy cardstock. I made a number of copies so I can try various “fill” drawings for the shapes. The drawing in the PDF is just my first try.

For those of my followers whose focus is on crochet and yarn crafts, don’t worry, I’m still designing and creating lots of fun crochet patterns. If all goes well the next month I’ll have a lot of exciting crochet designs and videos to show you very soon.

Learning Lettering

This weekend I’m running a bit behind. Our Friday was super busy, it was the last day of school for both the kiddos and there were ceremonies and socializing that kept us on the go all day. I was carrying around my crochet project, but only caught a few minutes here and there to work on it.

Saturday was our first “official” day of summer break, though you still couldn’t tell it by the weather. It was cold and damp all day. We even had a bit of hail, making me very glad I hadn’t purchased a hanging planter of petunias that I was looking at the other day.

Instead, we all hung out as a family watching movies on the television. Not the most exciting first day of summer break, but pretty awesome to not have to worry about the school schedule next week. I did spend some of my day inputting next Fall’s school calendar in my calendar app. I figured I would get it out of the way while I’m still in the “school” mind-set. Hopefully this means that the start of school in the Fall won’t sneak up on me.

I have my dreams (some might call them fantasies, but let’s not split hairs). It could happen, I even put in a reminder about getting school supplies before the shops are all sold out. For now I’m ready to be in summer mode with the kids.

One of my goals this summer is to practice handwriting exercises with the kids. Cursive writing and penmanship are not really taught in school these days, so I’m hoping to fill that gap with a little home education. This is also inline with my New Year’s resolution to learn how to do Calligraphy.

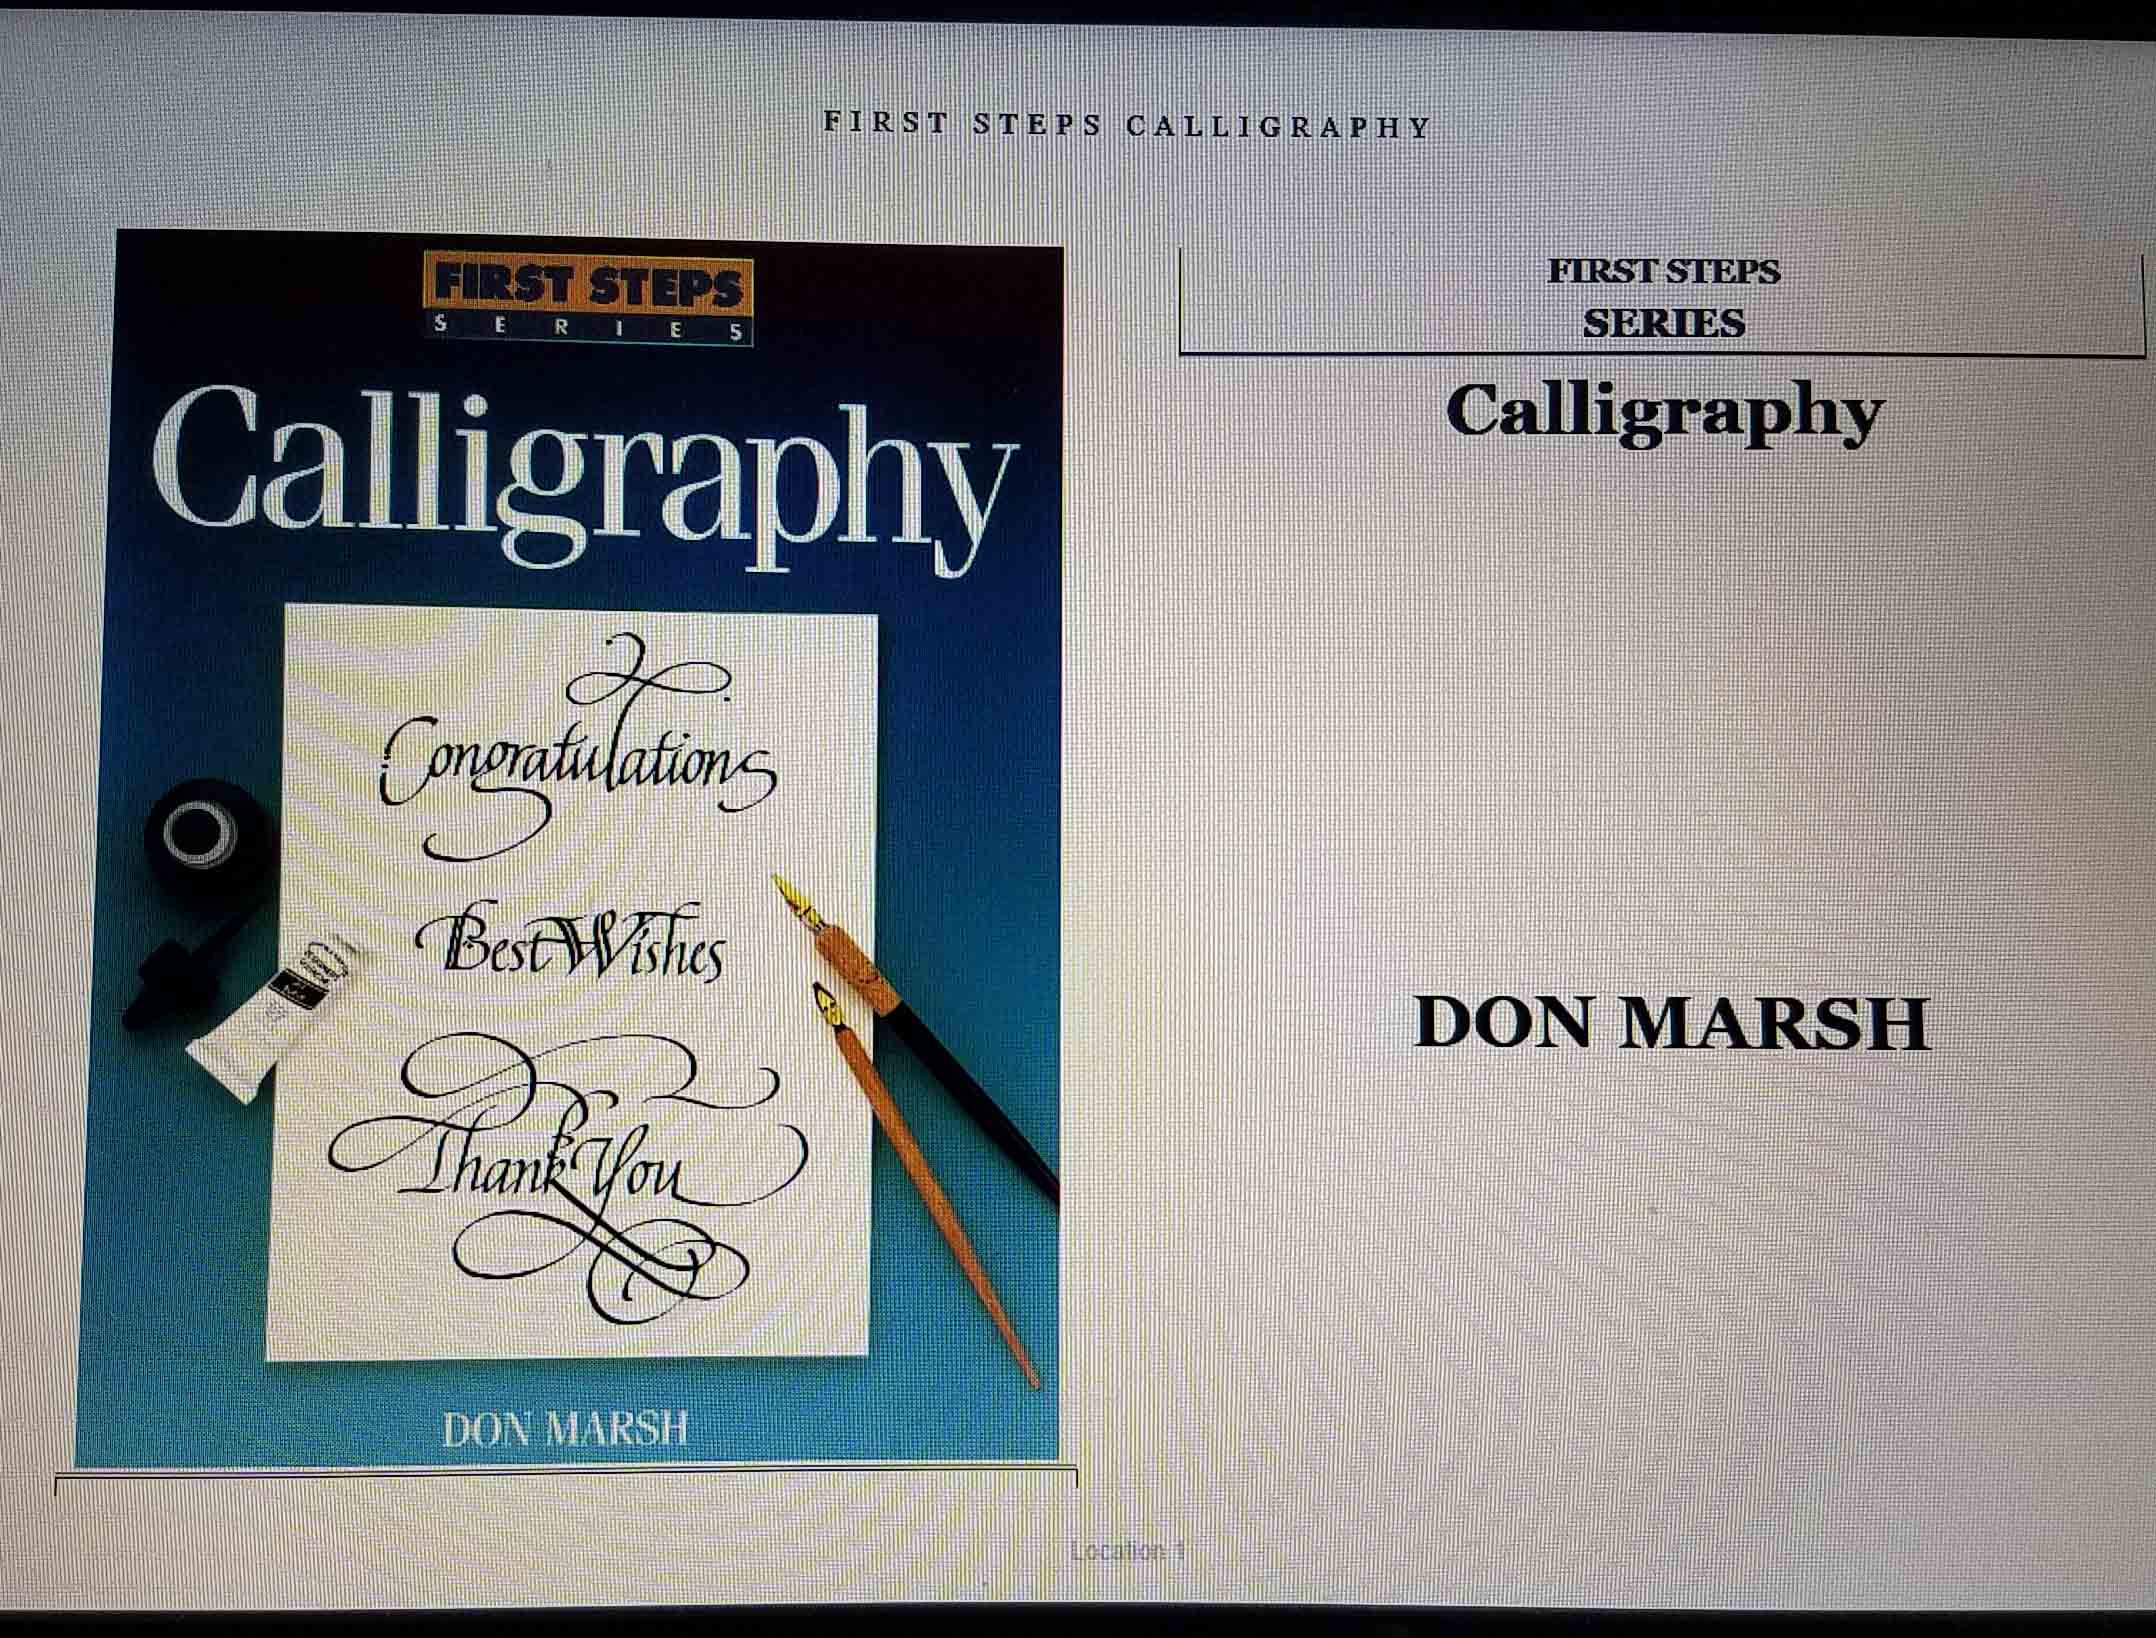
I’ve been working on that resolution. My first step when wanting to tackle something like this is to read all about. Being I’m a bit old fashioned that usually means books. I did update my way of reading the books this time. I purchased my first book as a Kindle book off Amazon, “The First Steps Series: Calligraphy” by Don Marsh; 1996, North Light Books.

This is a good “nuts and bolts” kind of book. Honestly I found it a bit of a slog initially, so I am treating it more as a reference book. When I feel the need to add to my knowledge base I go back to it. There is an amazing amount of jargon that goes along with this new art. I suppose there is also a lot of jargon in crochet and knitting, but they have been so much a part of my life for so long that it seems much more familiar.

I decided to focus more on the art of Hand Lettering, rather than the formality of Calligraphy. I was intrigued by the reviews on Amazon for the book “The Art of Whimsical Lettering” by Joanne Sharpe; 2014, Interweave Press. This is a really fun and inspiring book. Lots of samples in the book of Joanne’s work with suggestions and guidance on making your own hand-lettered work.

My favorite thing about this book is the encouraging tone of the book. Joanne starts the book off with a quote from “The Wizard of Oz” by Glinda the Good Witch, “You’ve always had the power”. A big aspect of the book is Joanne encouraging readers, that no matter how much you might hate your hand writing, it can be the basis of beautiful and artistic lettering. The book has loads of beautiful and inspiring examples of Joanne’s work. My head was buzzing with ideas once I had read thru it.

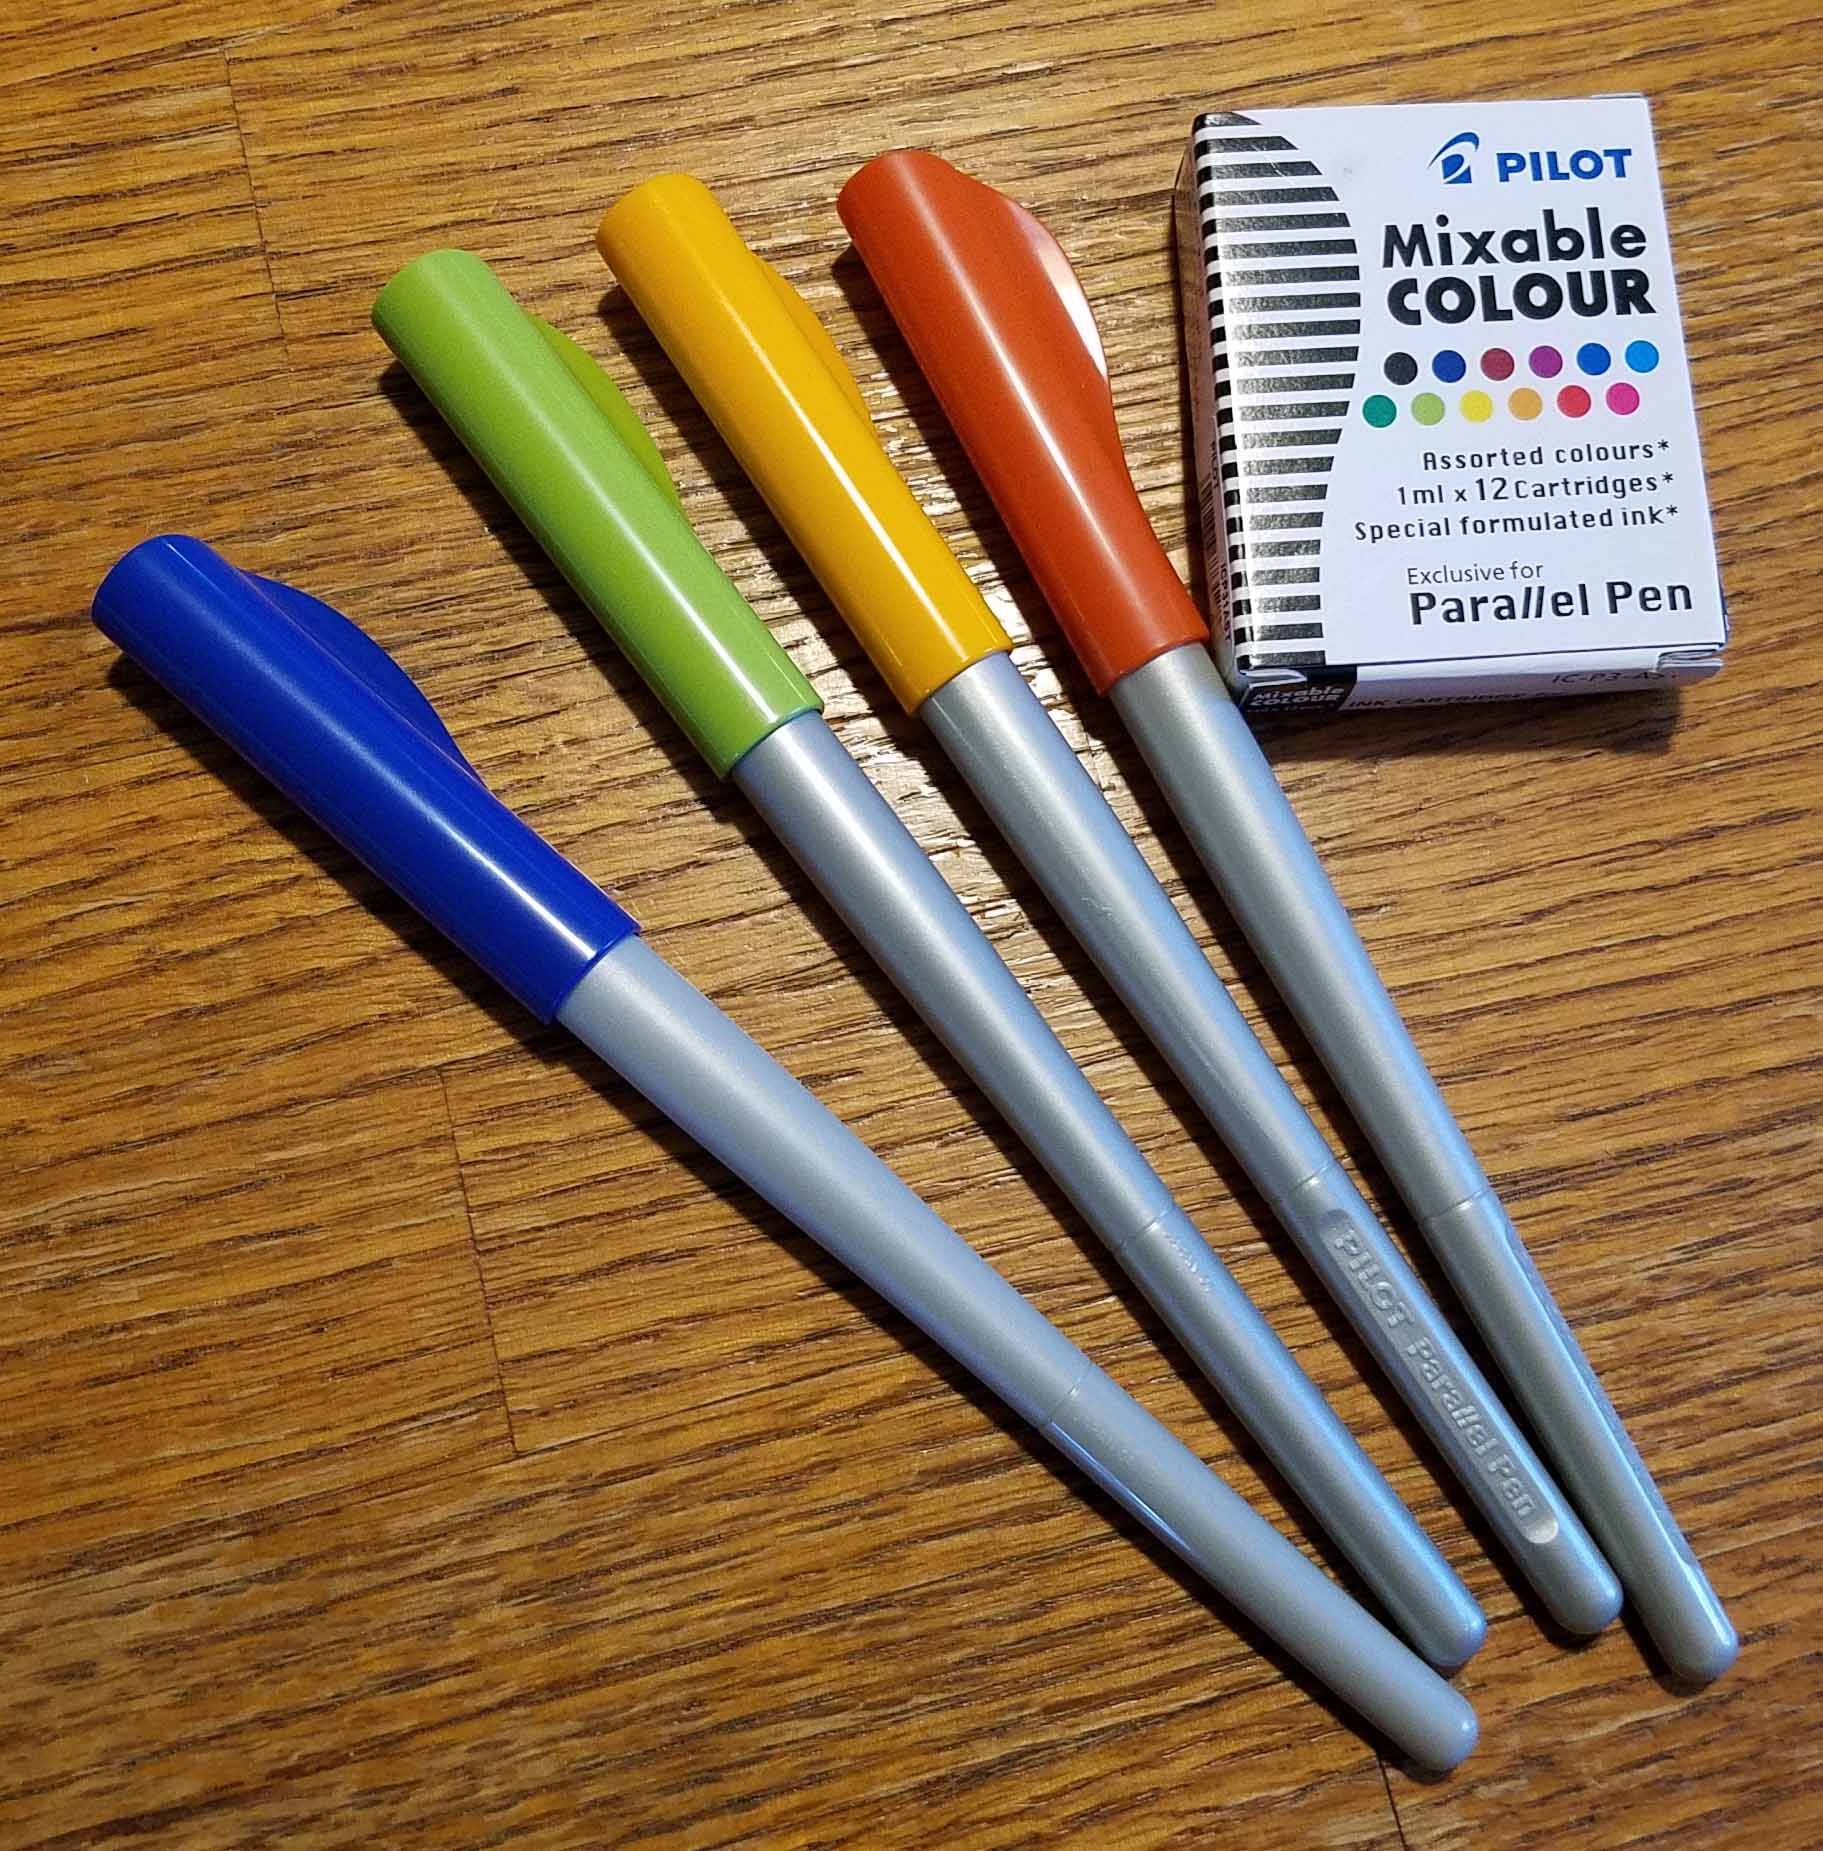
It was in this book that I read about the Pilot Parallel Pen. I purchased one and liked it so much that I purchased a set of them in 4 different sizes. They come with black and red ink cartridges and I purchased a set of 12 different colored cartridges as well. Currently 3 of the pens are filled with black ink, but I’ll be trying out the colors soon.

I had also purchased another book in print form. “Hand Lettering: An Interactive Guide to the Art of Drawing Letters”, written and illustrated by Megan Wells; 2016, Peter Pauper Press. The reviews I had read of this book made it sound like one that I should have a physical copy of. It is sort of a workbook/journal style and has lots of pages that you can use for practicing your lettering. I am still reading thru it and trying the various exercises for practicing my lettering.

My favorite bit so far has been the author’s advice to not think of hand-lettering as writing, to instead approach it as drawing your letters. Now that might sound quite simple, but it really rang a bell for me. Suddenly I didn’t feel like I was struggling so much with what I was doing. I could relax and depend upon all those years of drawing to help me create lettering that I would like.

I’m still really in love with calligraphy and it will play a big part in any lettering art I create. I’ve been practicing with the parallel pens drawing various letters and words. Getting the hang of holding the pen properly is a big part of the process. I finally was ready to try to create my first real serious lettering project.

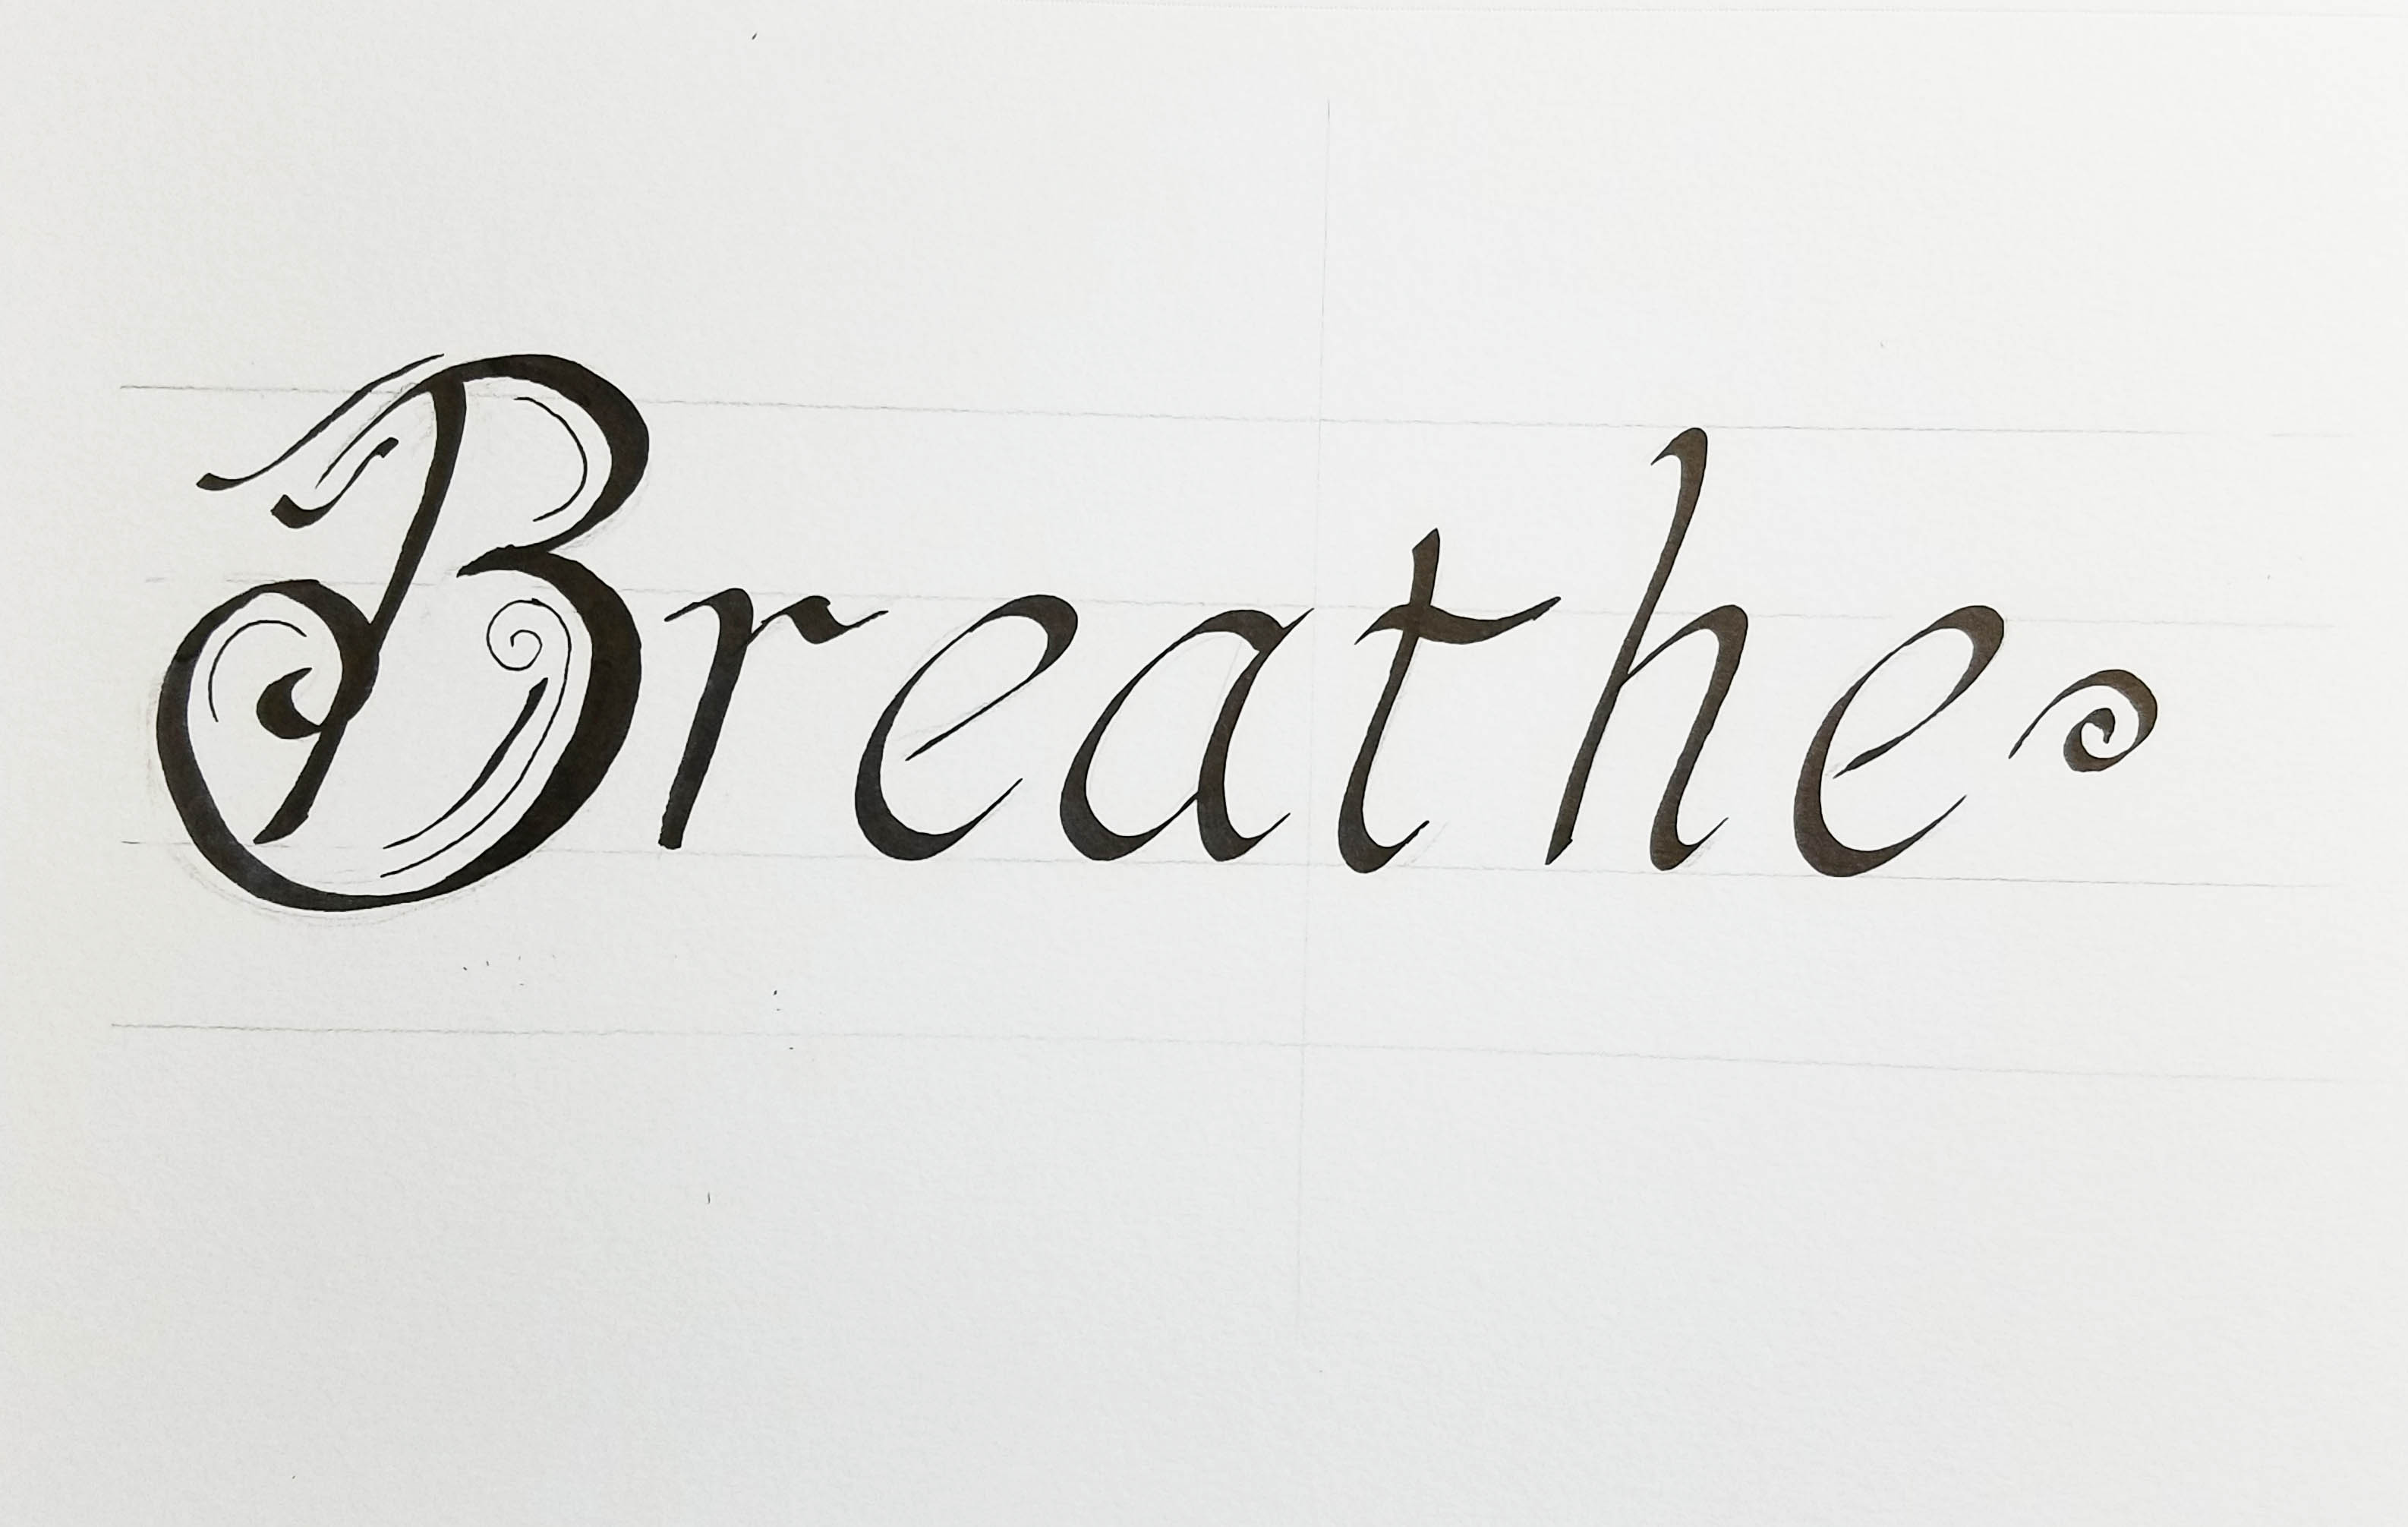
I used a pencil to create light lines on the paper to be guides for my letters. I also roughly followed the illustrations for writing italic style lettering. I picked one of my very favorite words.

I got really fancy with my letter “B”. But it still was a bit rough looking, the rest of the word needed a little cleaning up too.

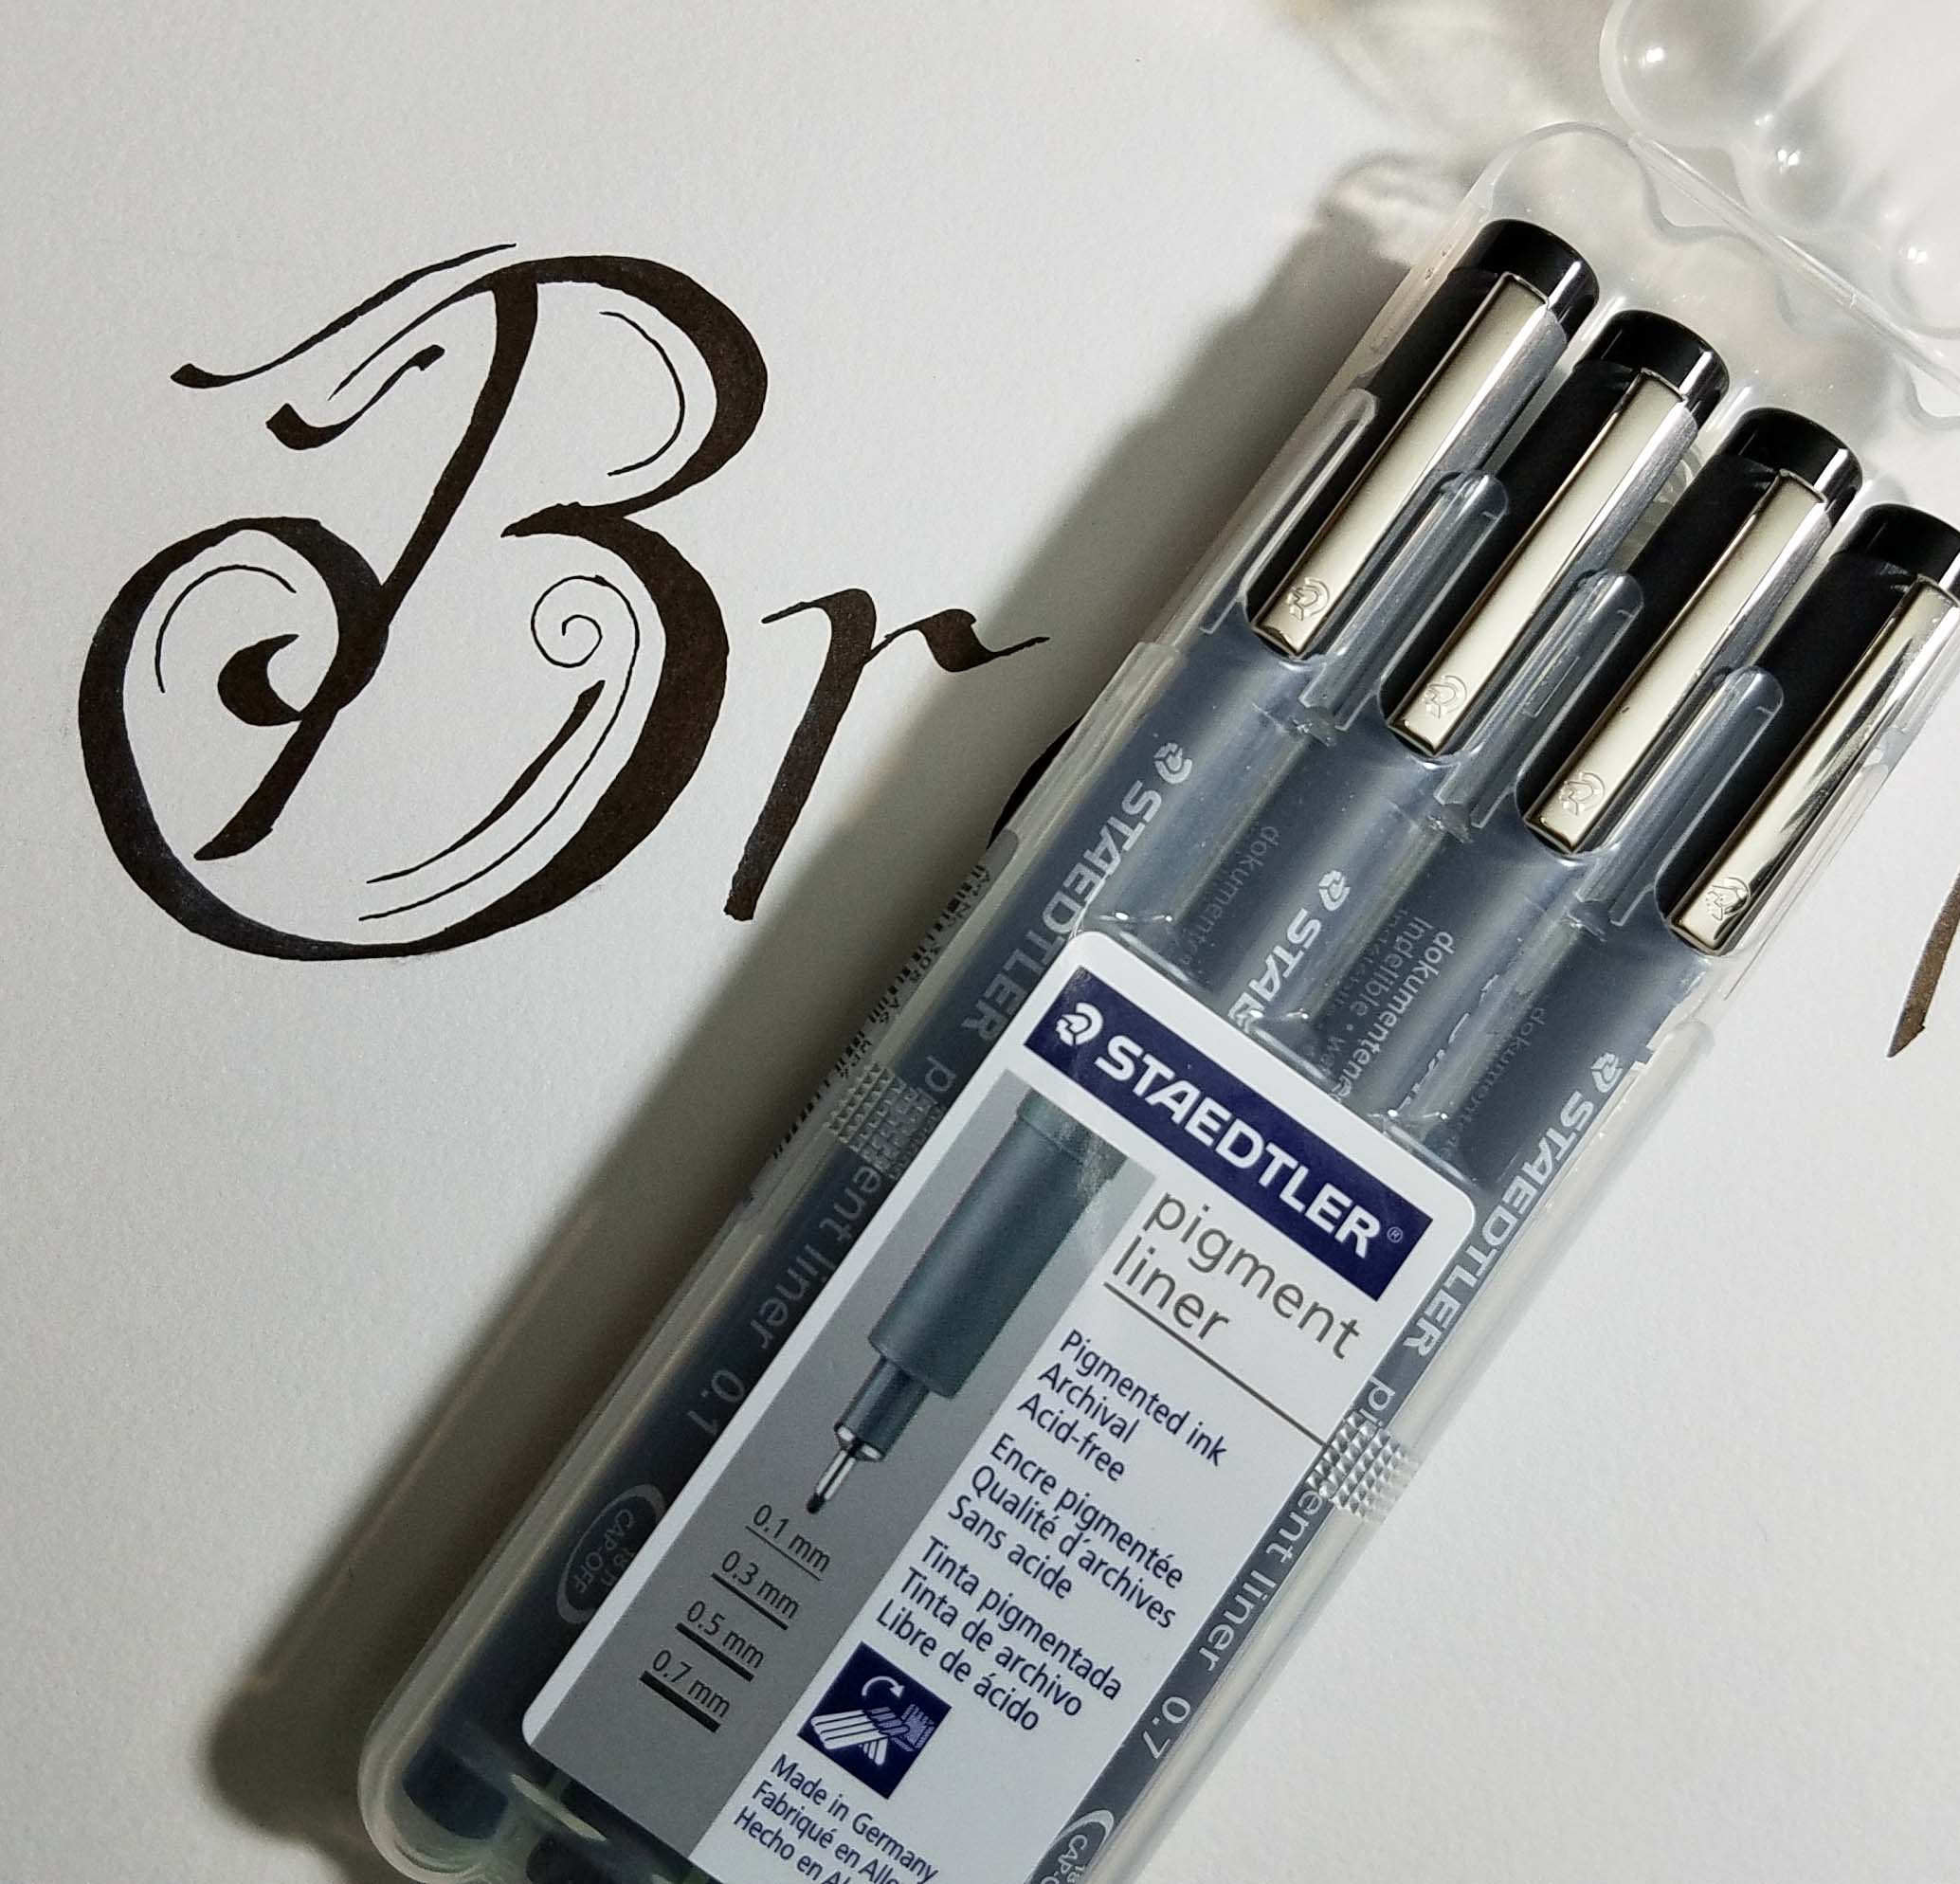
I got out my new Staedler pigment pens to do the “drawing” part of my lettering to re-shape and refine the letters.

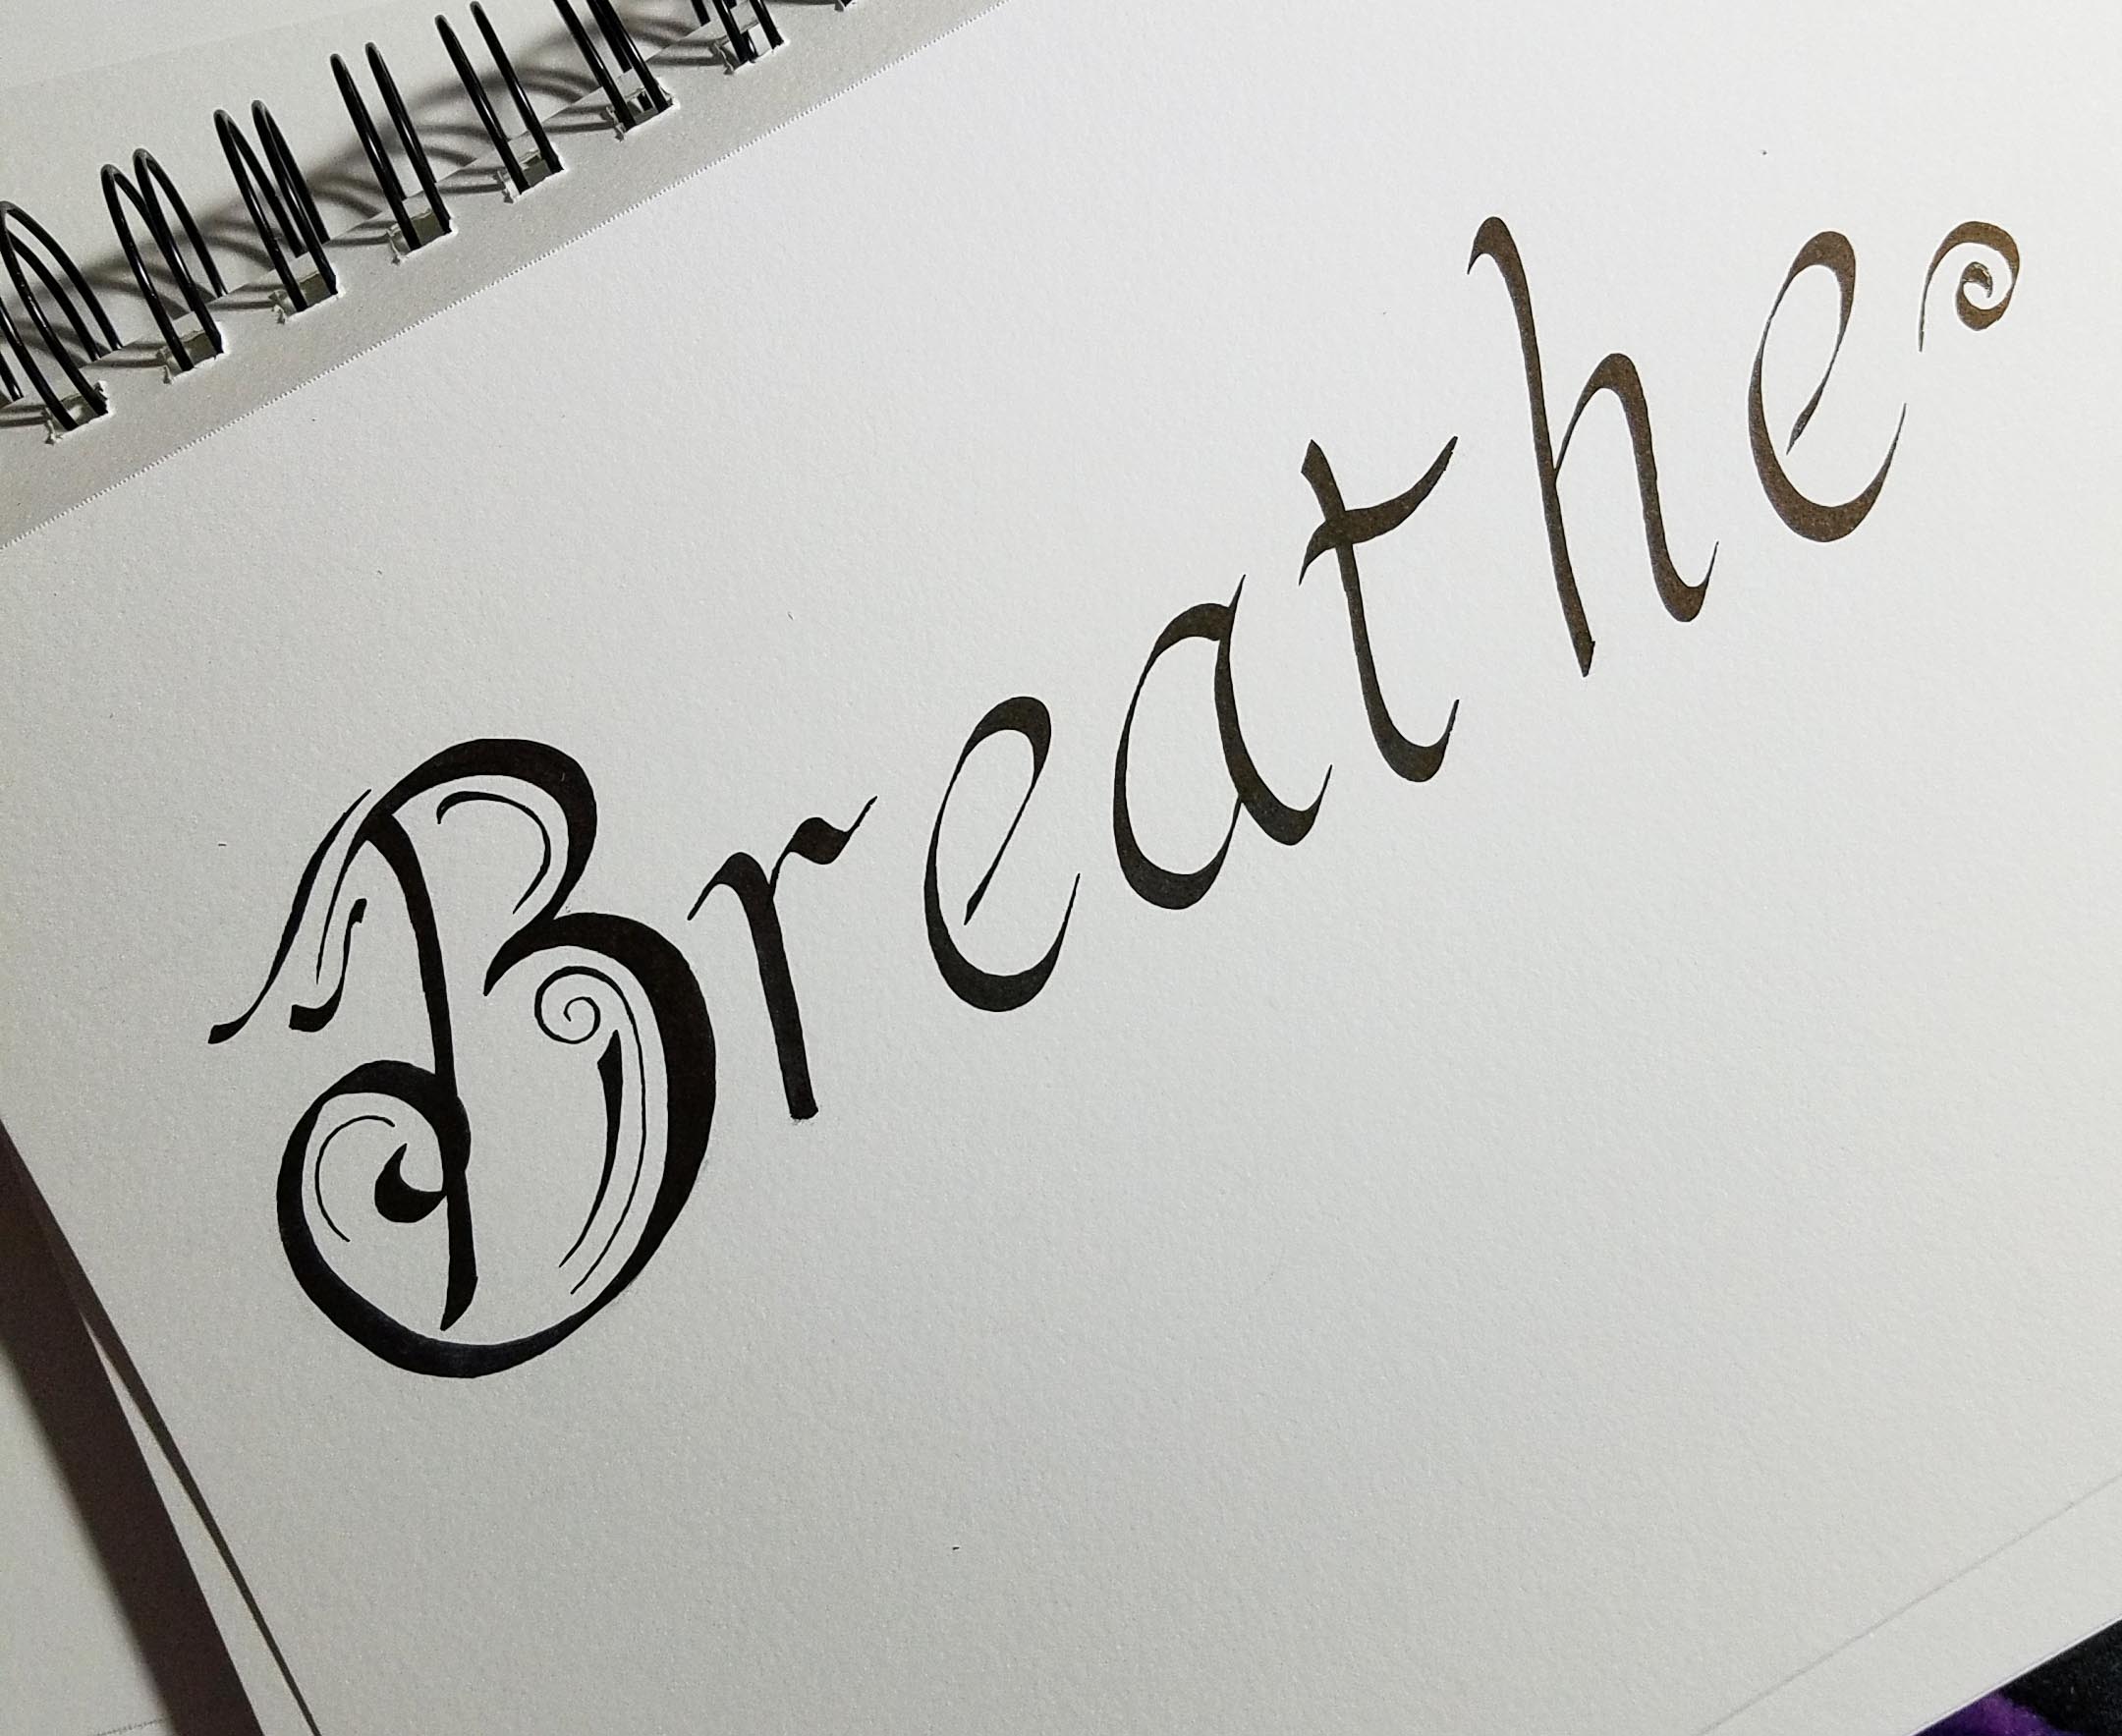
After all the tidying I was much happier with my work. I pulled the page out of my sketch book and copied it onto some heavy stock Vellum Bristol printer paper I purchased a few months back. I’m planning on playing with drawing and coloring on each of the pages to create different looks.

I also scanned my finished word into my computer, so I can play with it in my digital drawing program.

Like this.

I’ll hopefully have some other fun versions and more lettering to show you all soon. I’m excited about incorporating words and quotes in future art projects.

A fun exercise for you all in the meantime. Count how many words you can come up with that have “ea” in the middle and end with “e”. I’ll start you off with one of my other favorites: “Peace”.