Where did my MoJo Go?

Seems like all that traveling for the holidays is catching up with me this first week of the new year.  I’ve had a difficult time settling and sticking to any task. This was not helped by our busy weekend. We were celebrating my oldest’s 14th birthday. Wow! Hard to believe my sweet little baby is so grown up.

They had a couple friends come up Friday after school to spend the night. It was a very full house. Saturday afternoon Himself took them back down to Boulder to their homes and I had the house to myself for a few hours. I spent most of it clearing up the chaos though.

Sunday we took the kids plus another friend to see the “Fantastic Beasts” movie, then picked up pizza and wings to take home for dinner. Suddenly it was time to get ready for the coming school week and the weekend was mostly over.

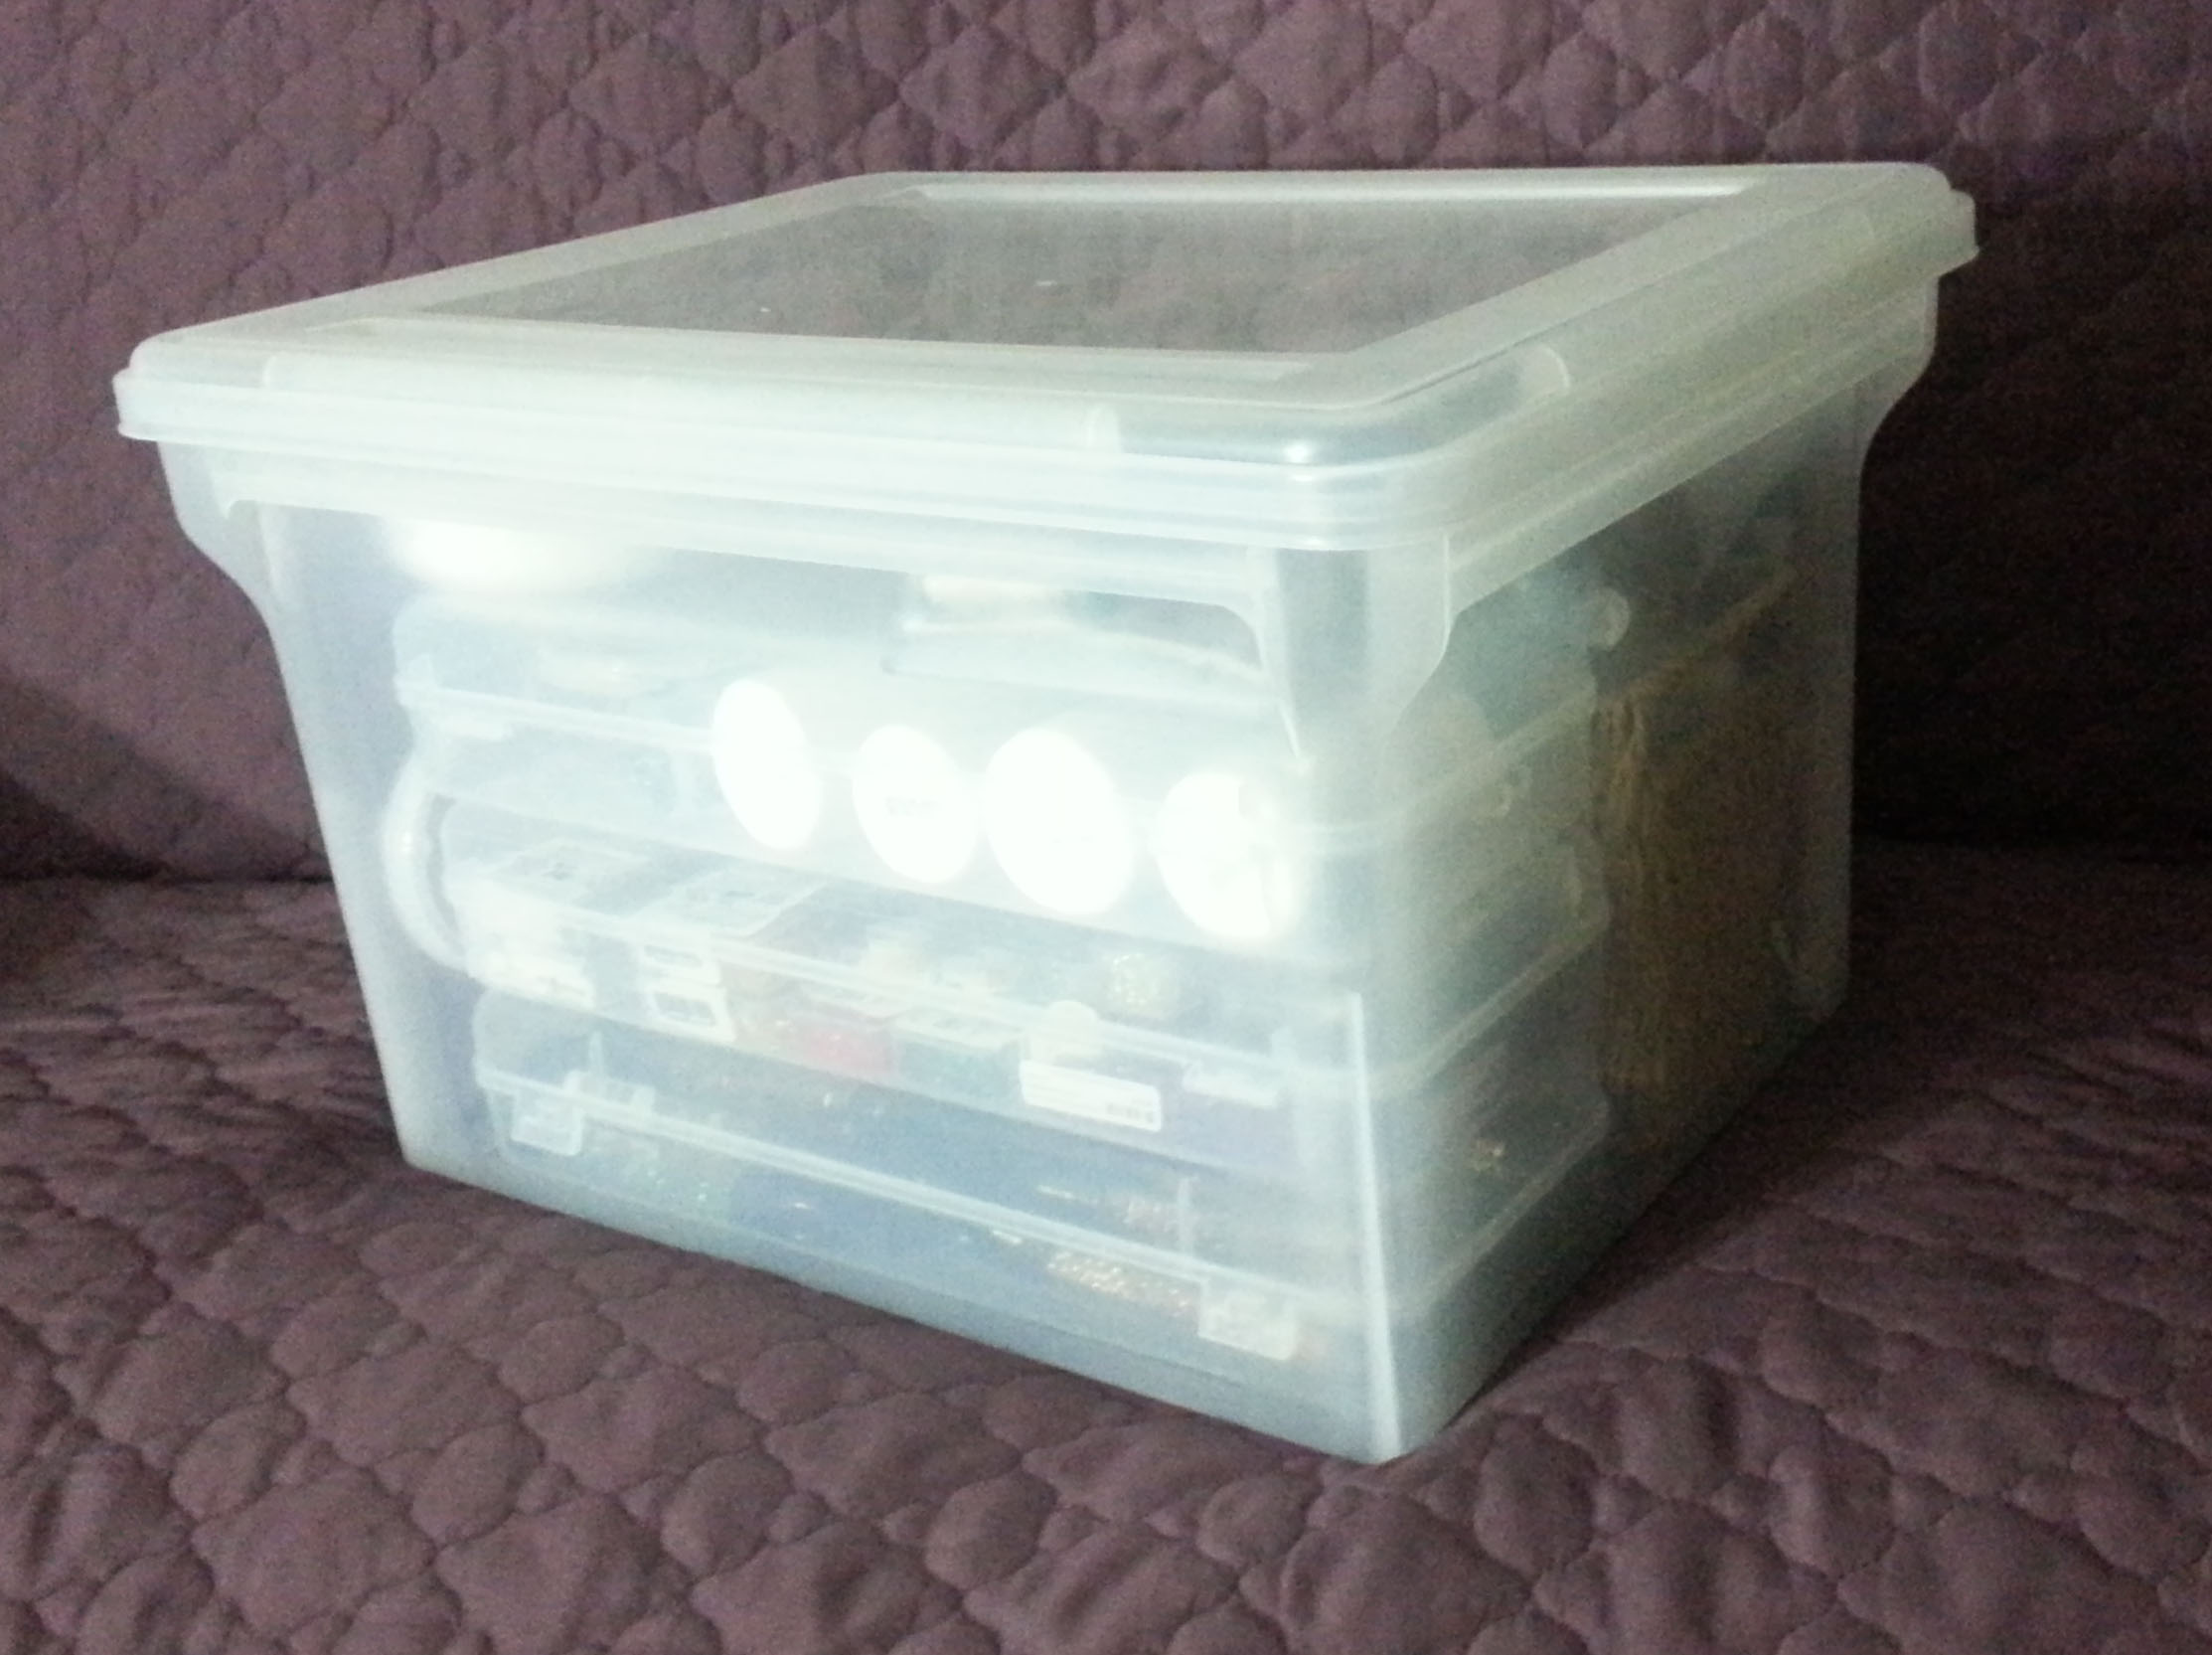
One of the things I’ve been working on has been trying to organize my supplies and tools for making jewelry and such for my coming Etsy Shop. I’ve also been online learning what I need to do and attempting to get all the information filled out for my shop.

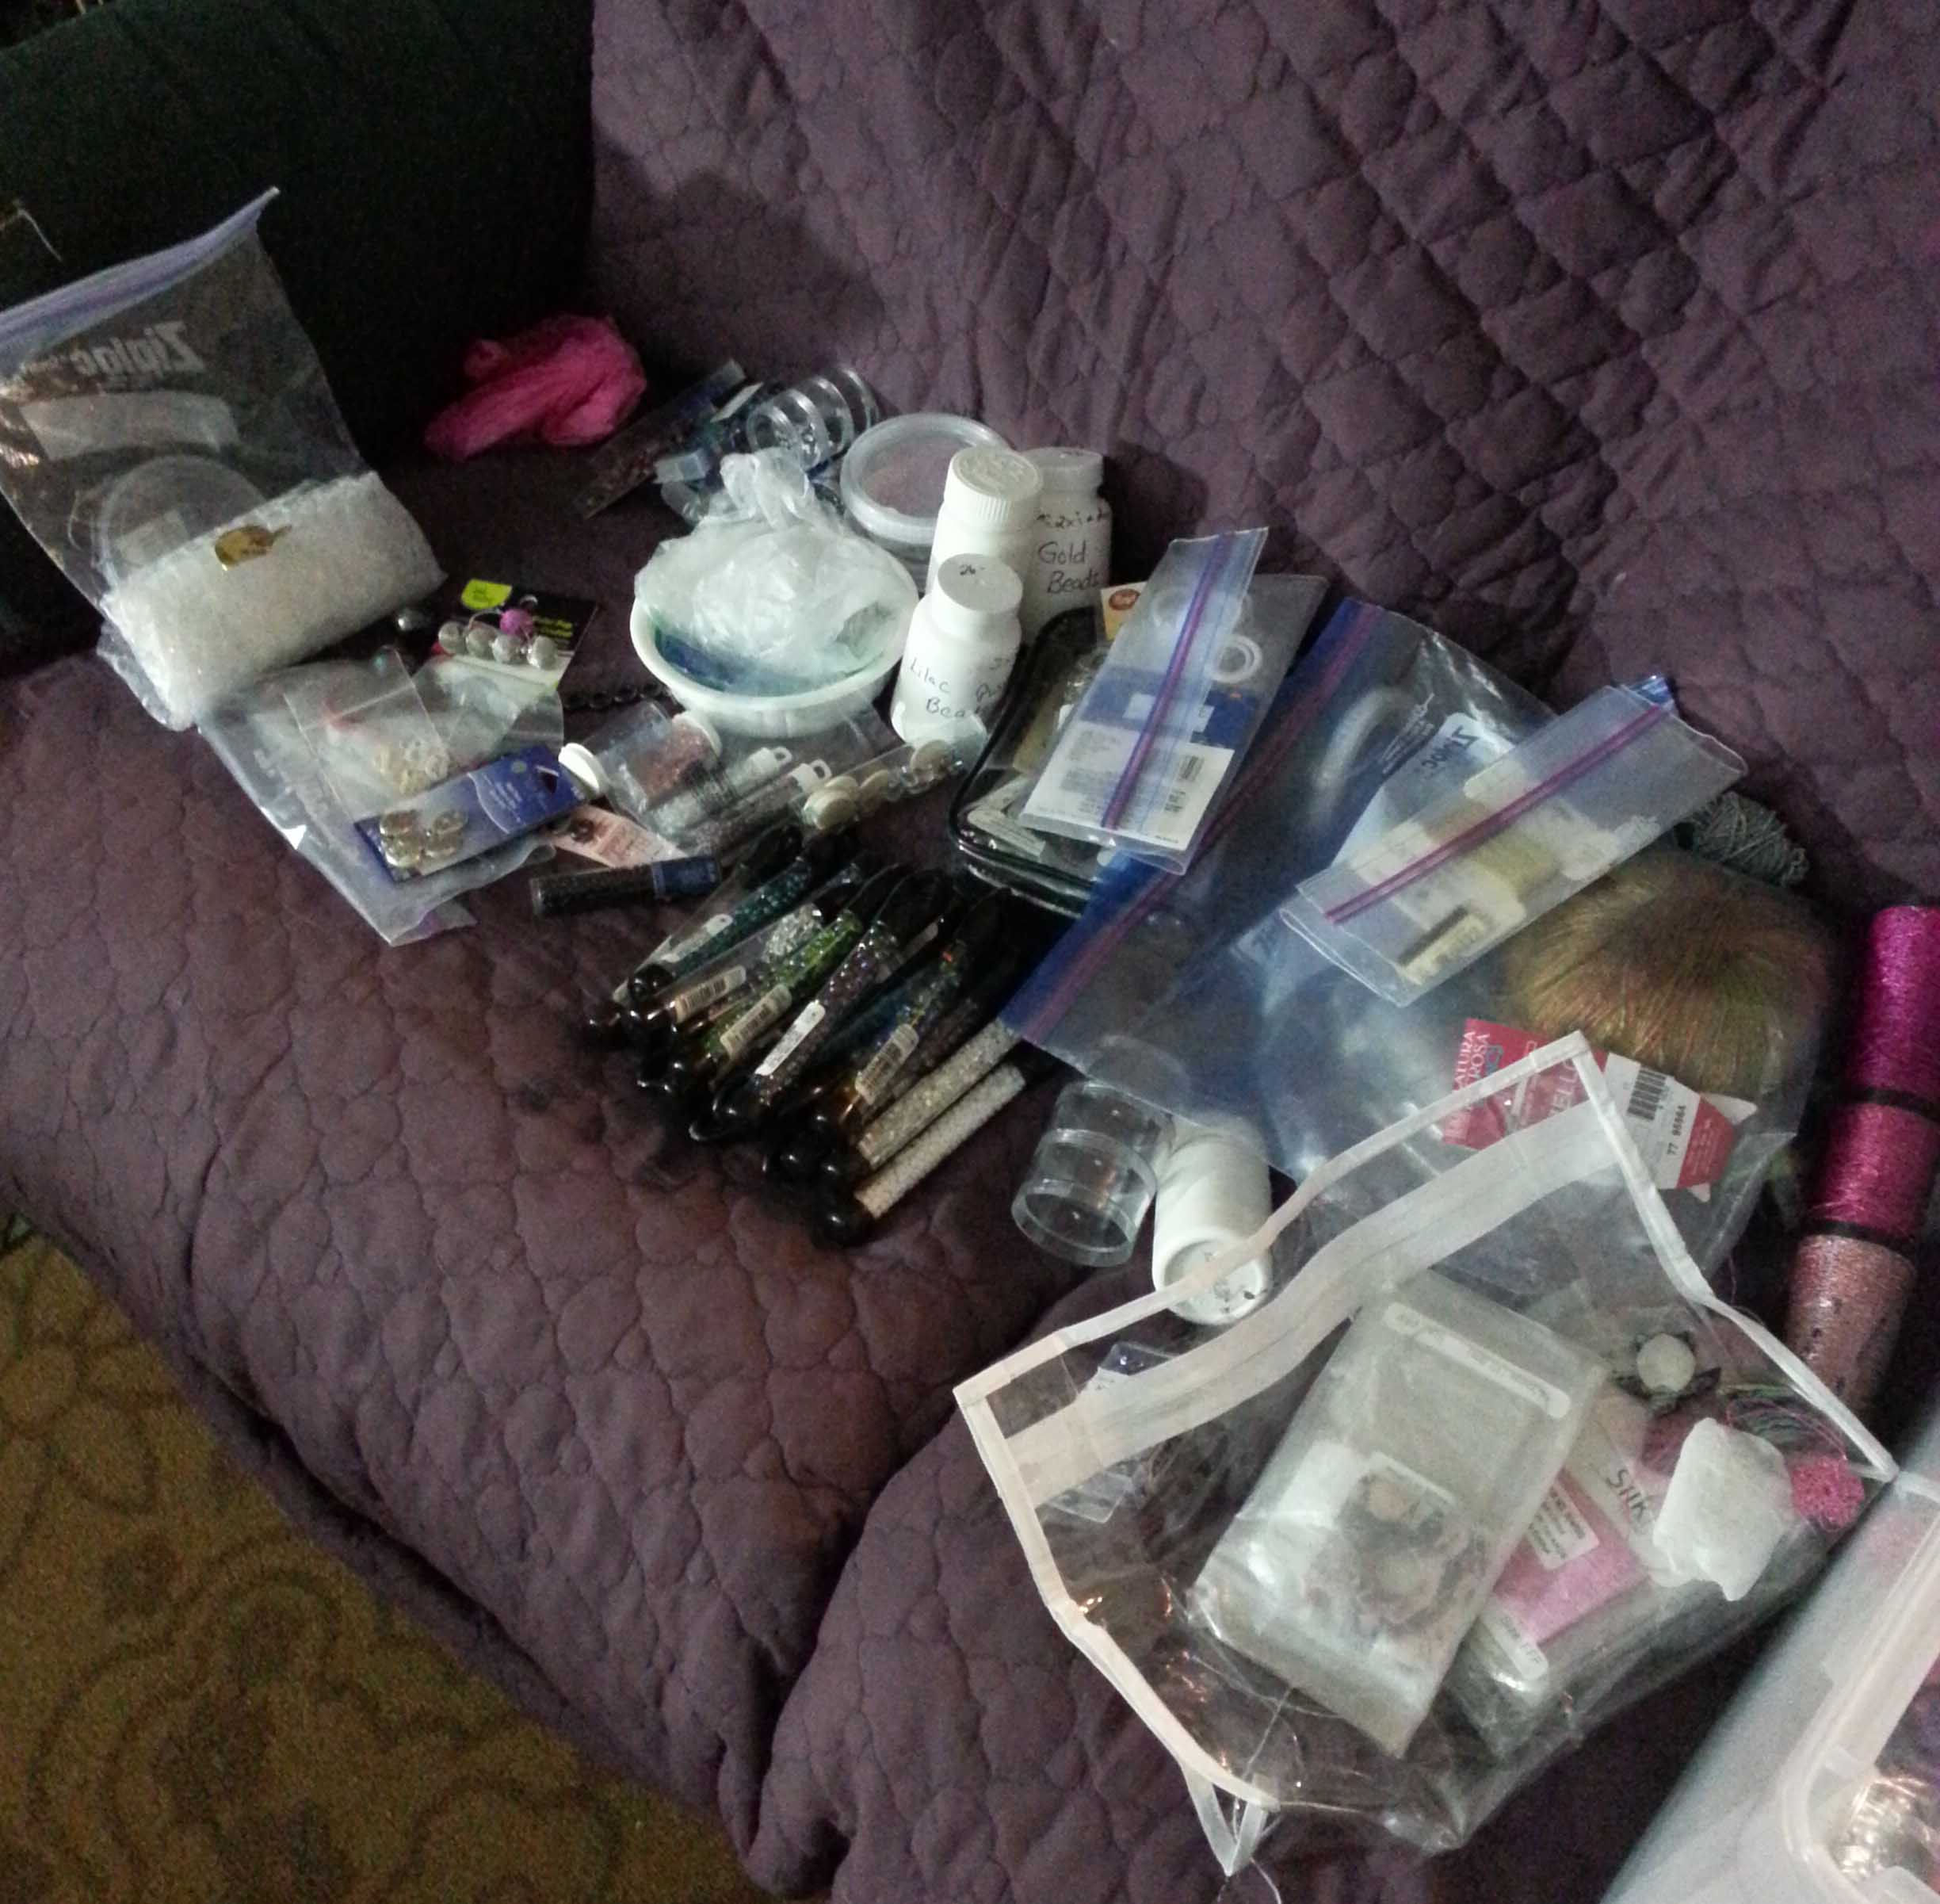
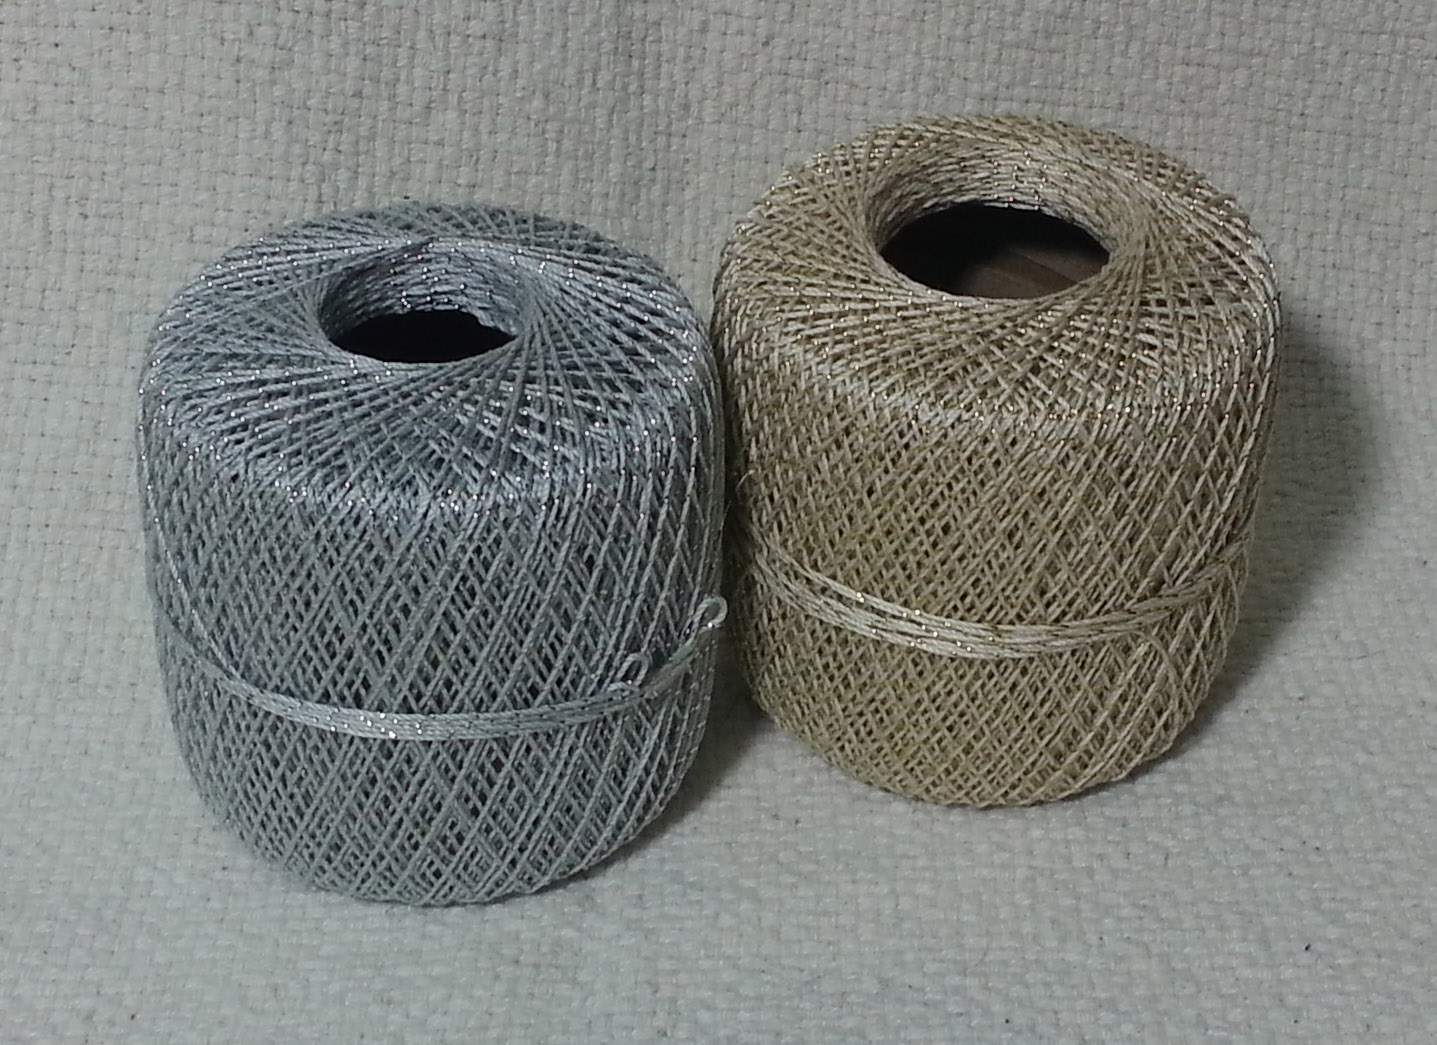
About a week before we left for our trip I had placed a couple of orders for supplies from Fire Mountain Gems. Unfortunately with the seasonal post office slow-down, I didn’t get my packages until our return. It was a bit like an extension of Christmas though, opening the boxes and looking thru all the goodies.

It’s always a bit tricky ordering supplies online, when I am purchasing something new-to-me I can’t be certain what it is really like until I receive it. Fortunately Fire Mountain has a decent return policy though, so most of the time it works out.

metal-stamps-and-beading-clips

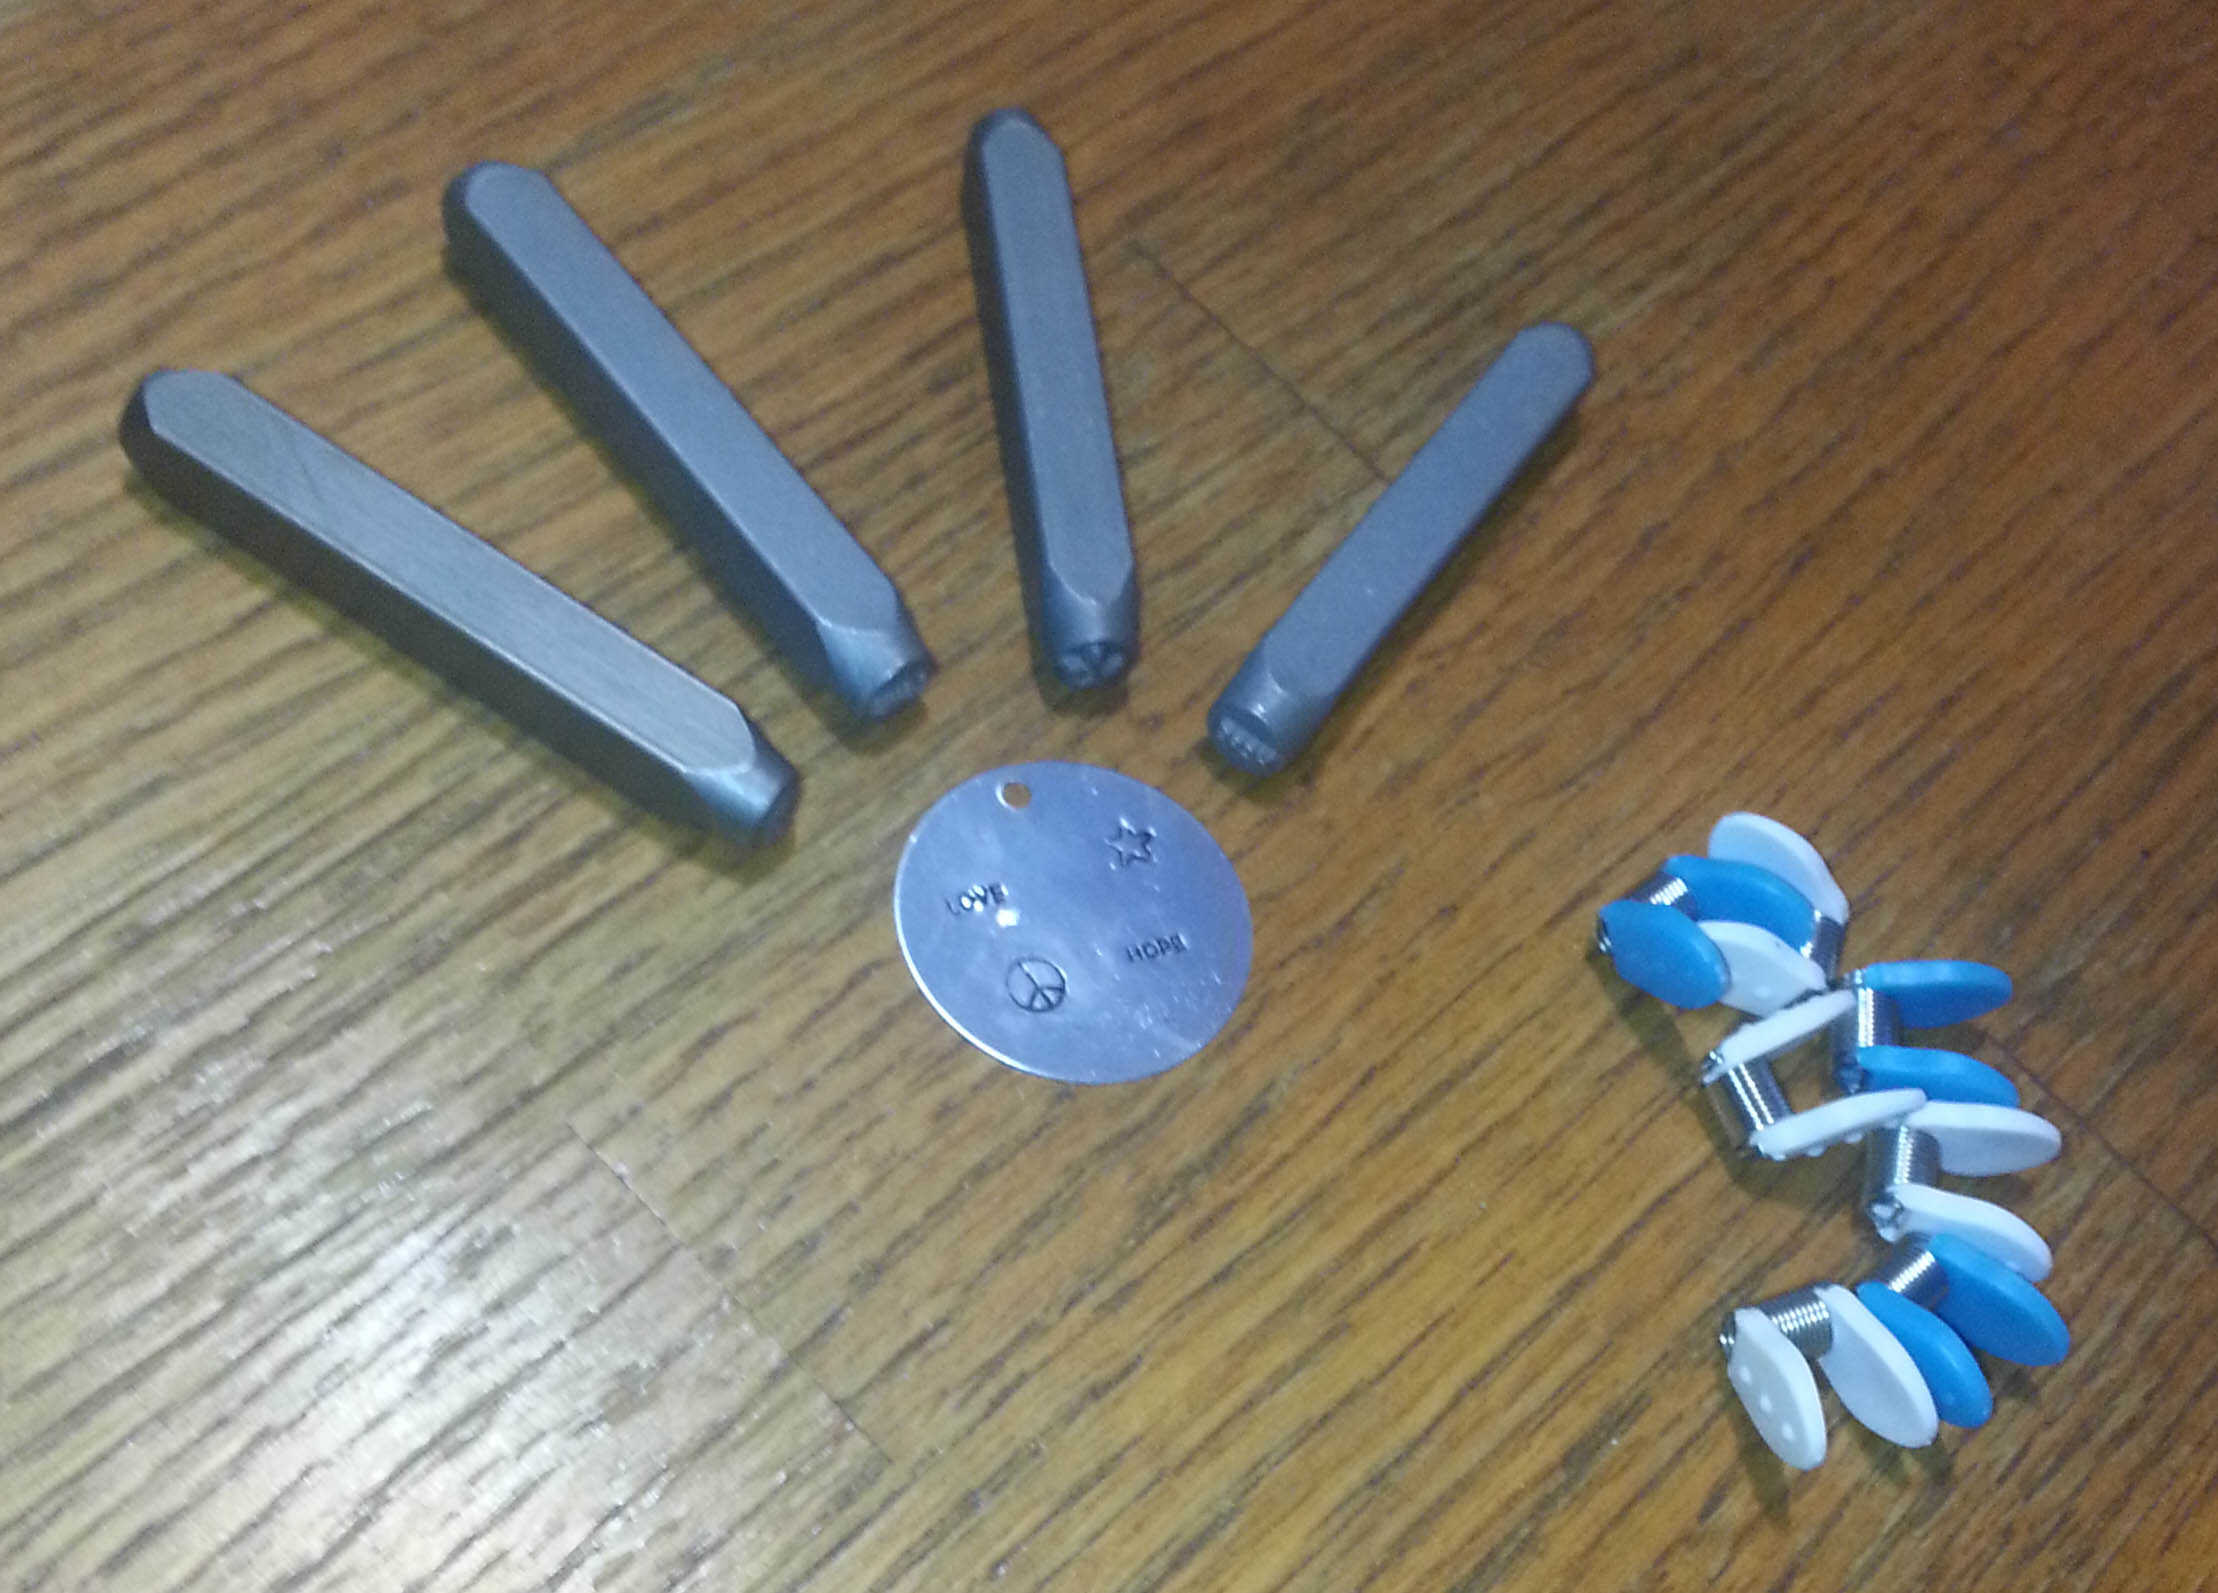
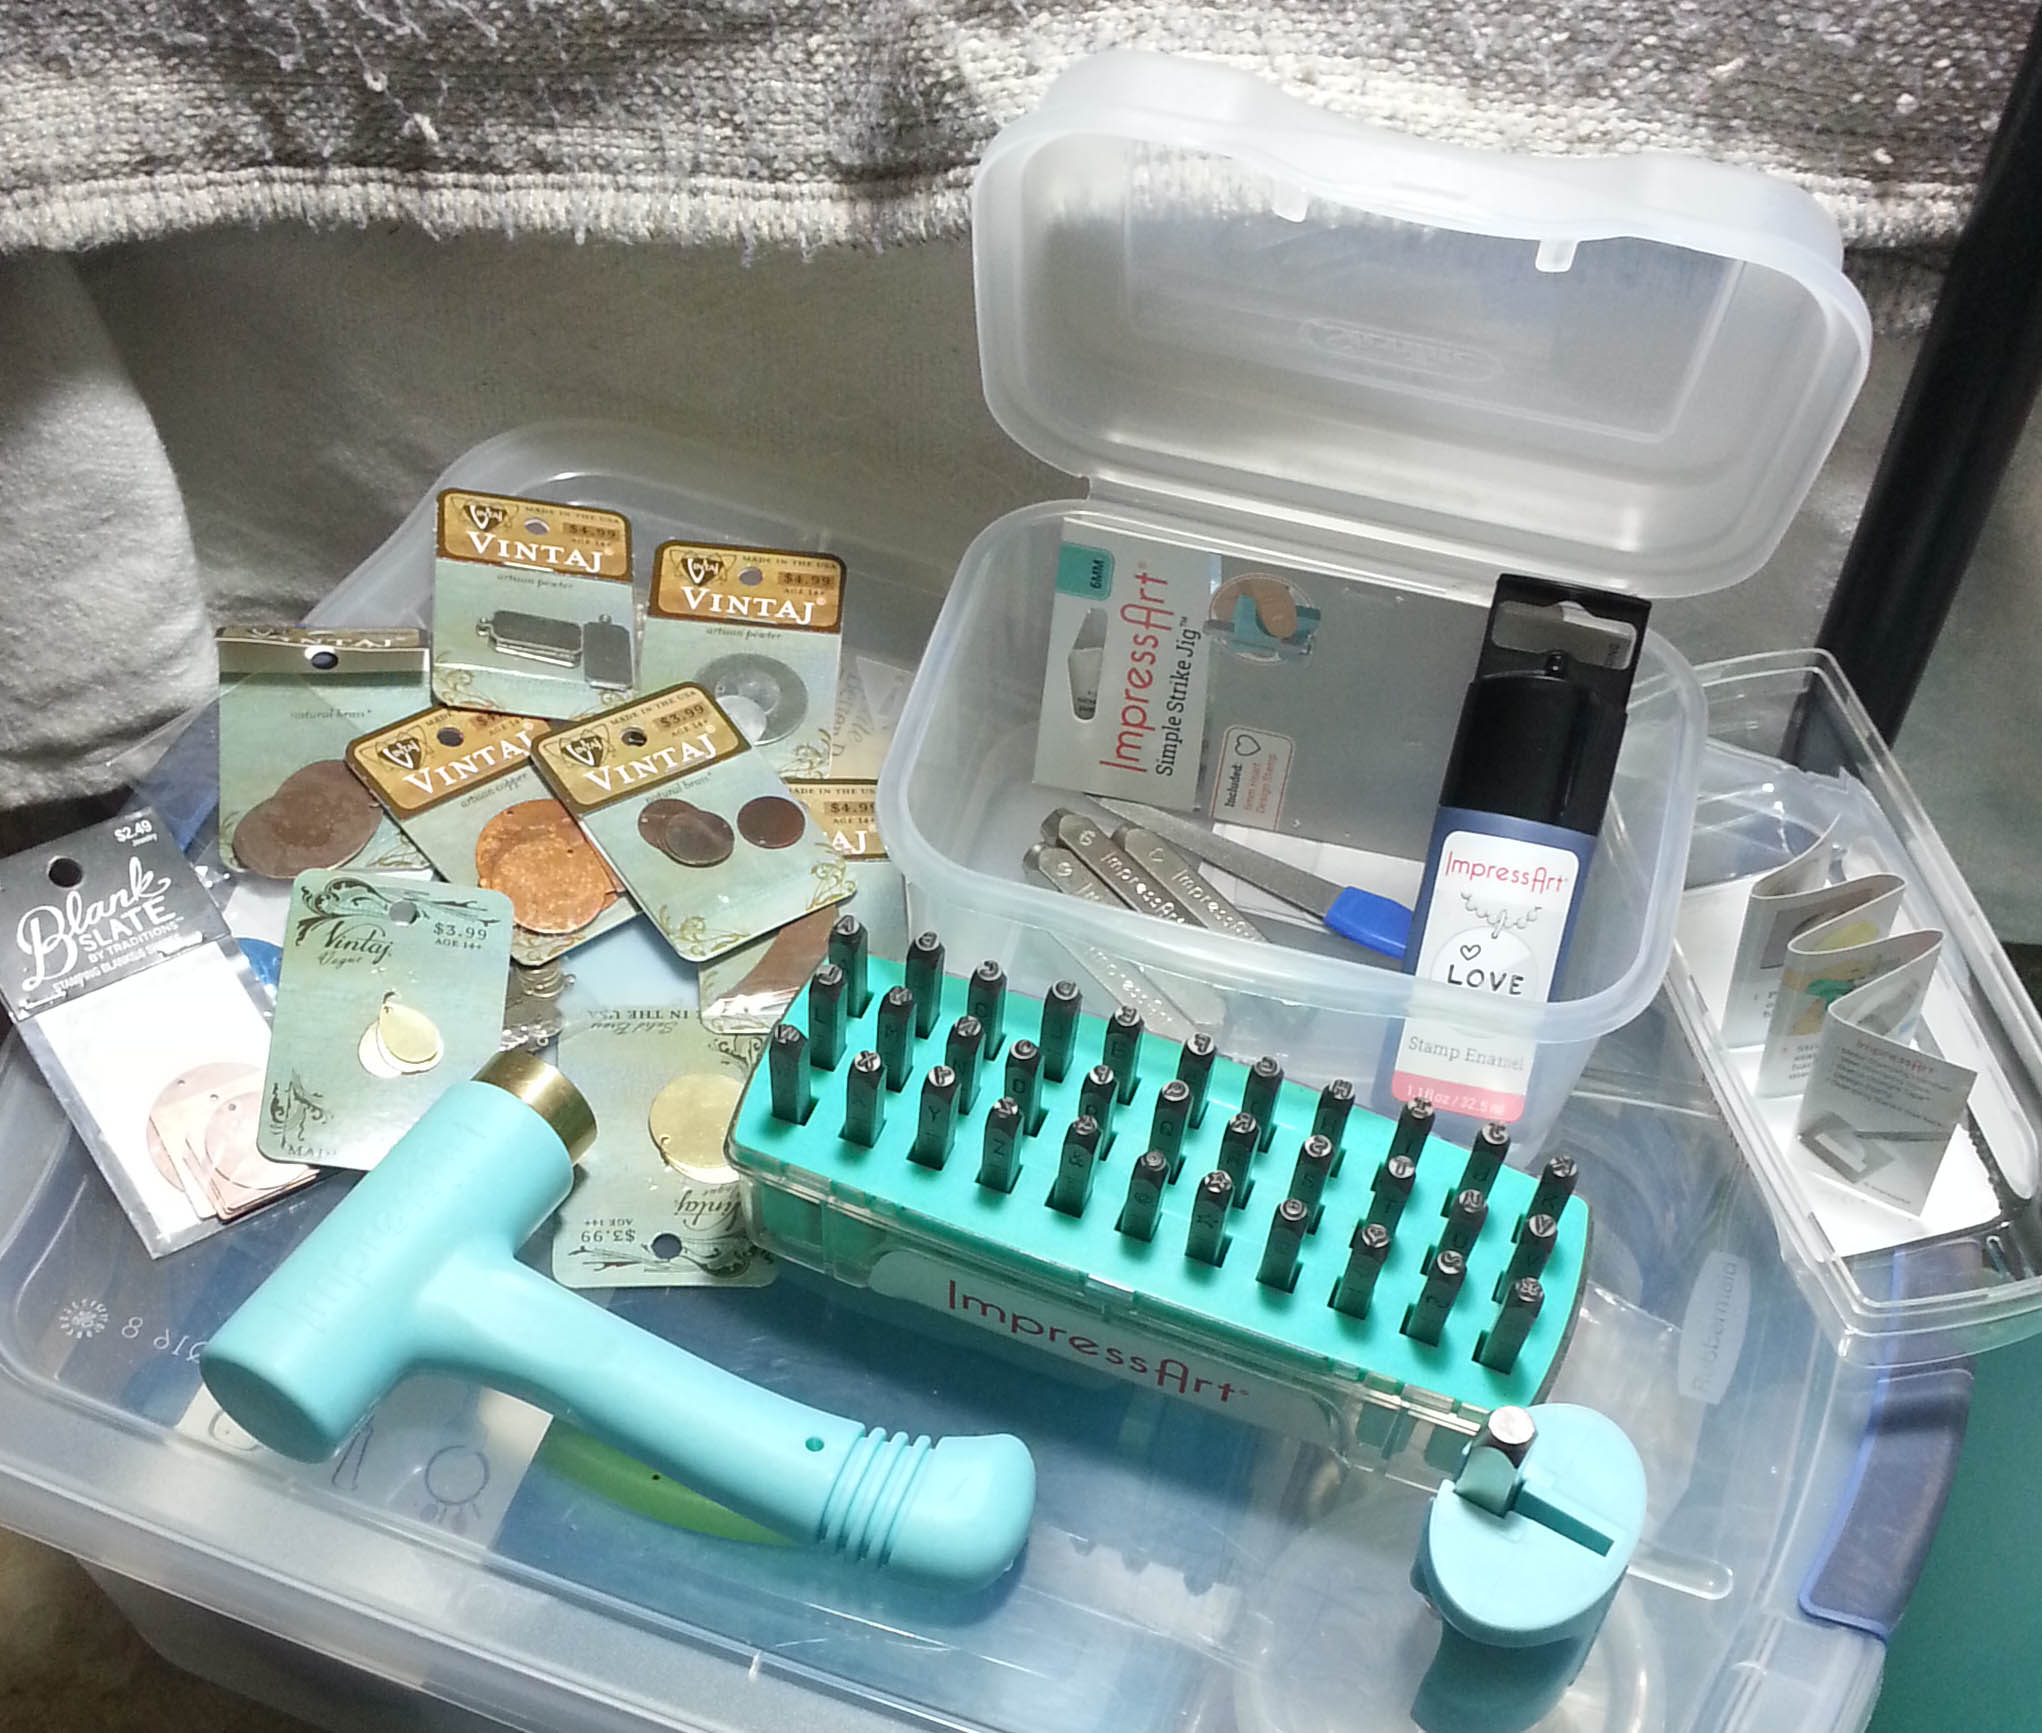
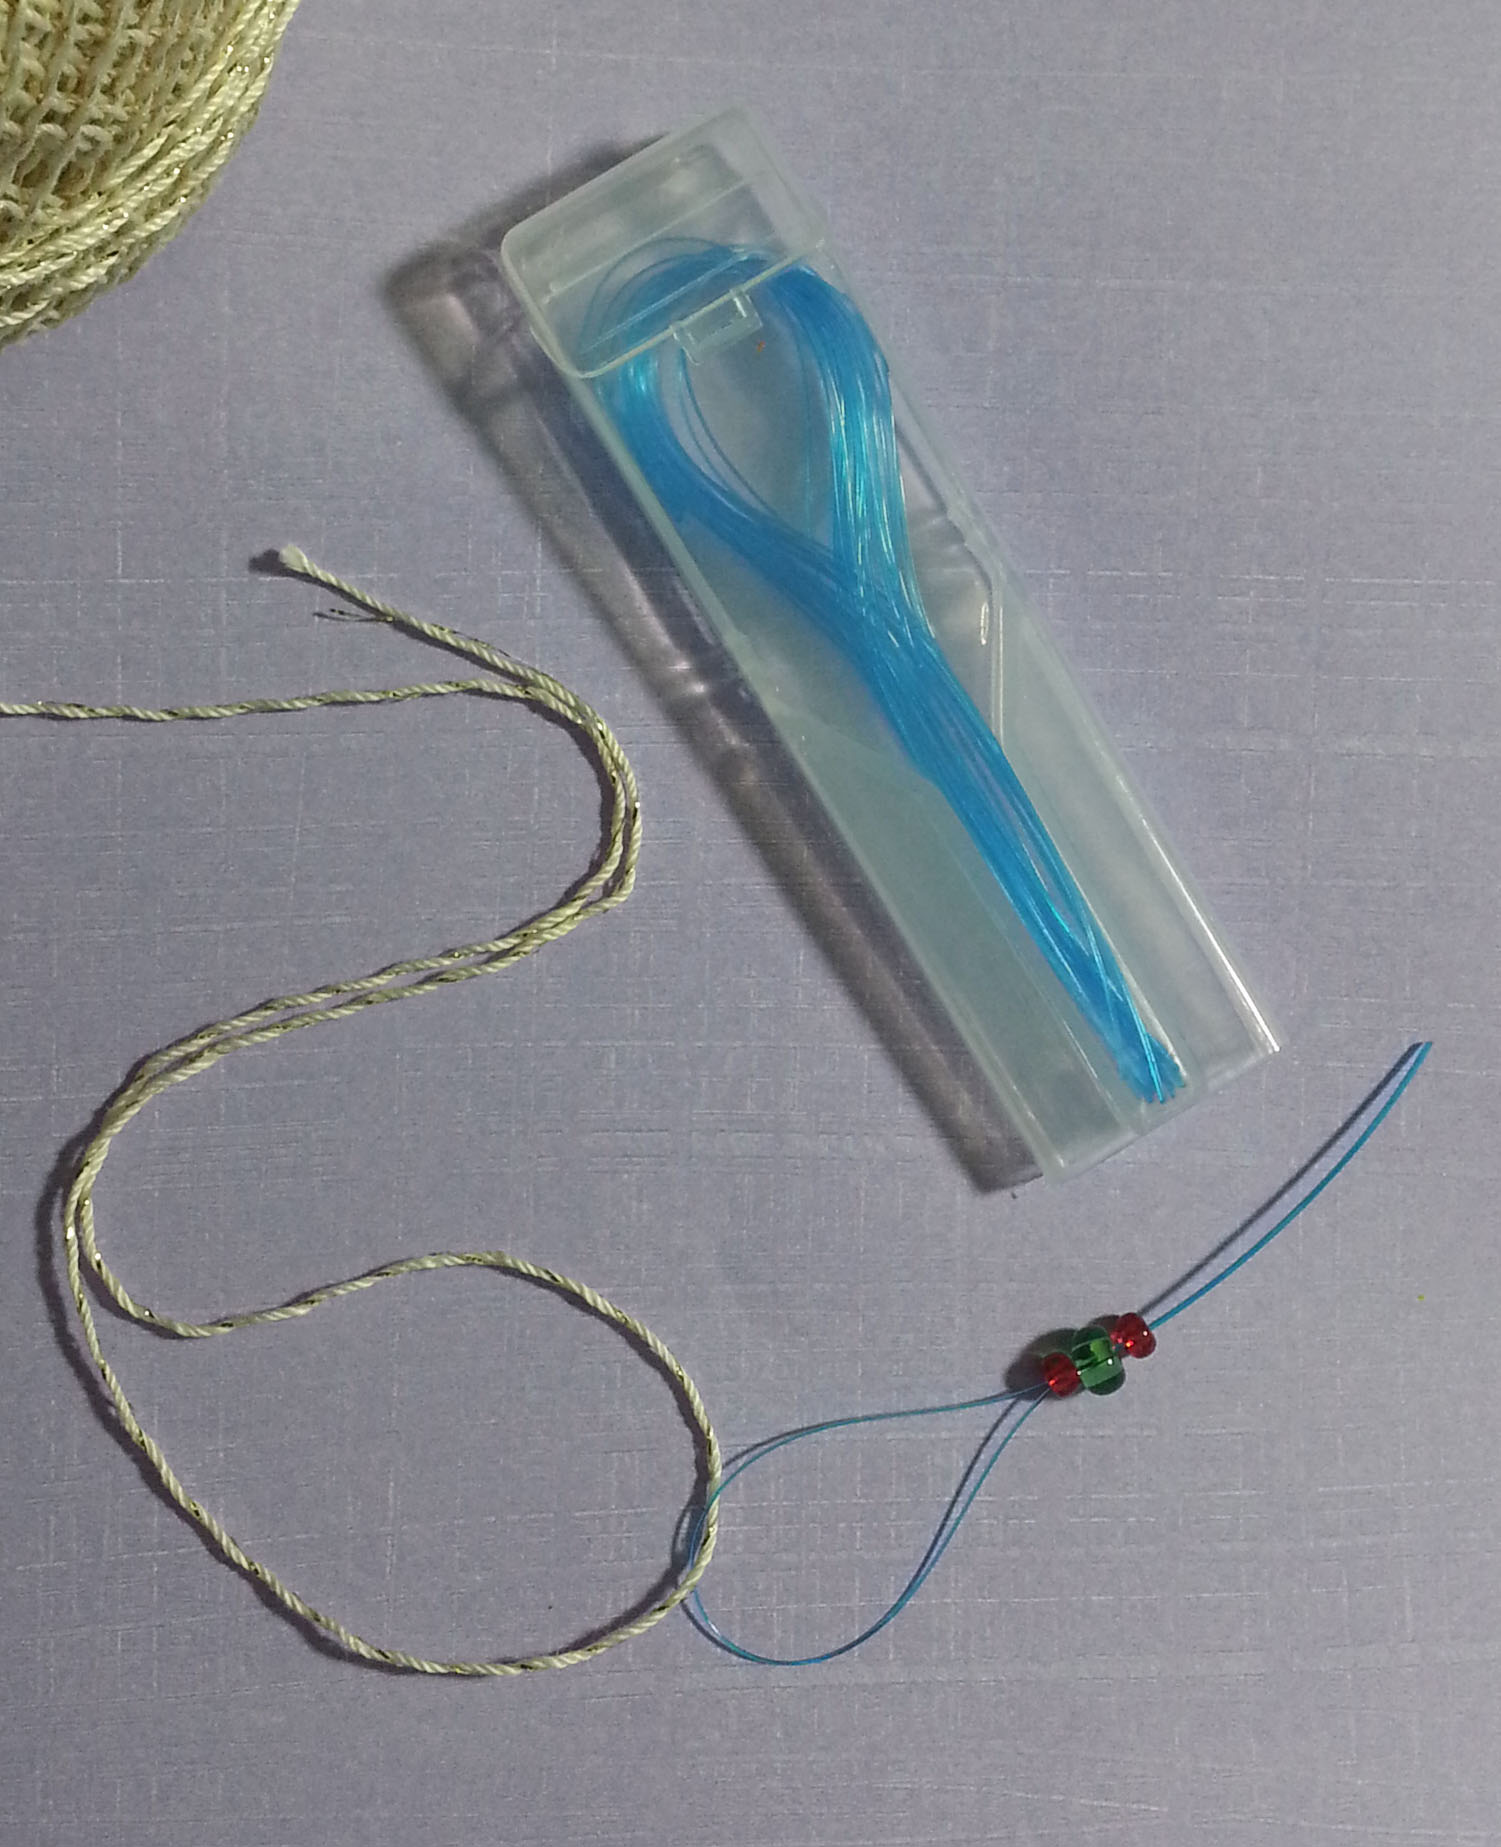
I purchased some additional tools; metal stamps and beading clips.

beads-and-charms

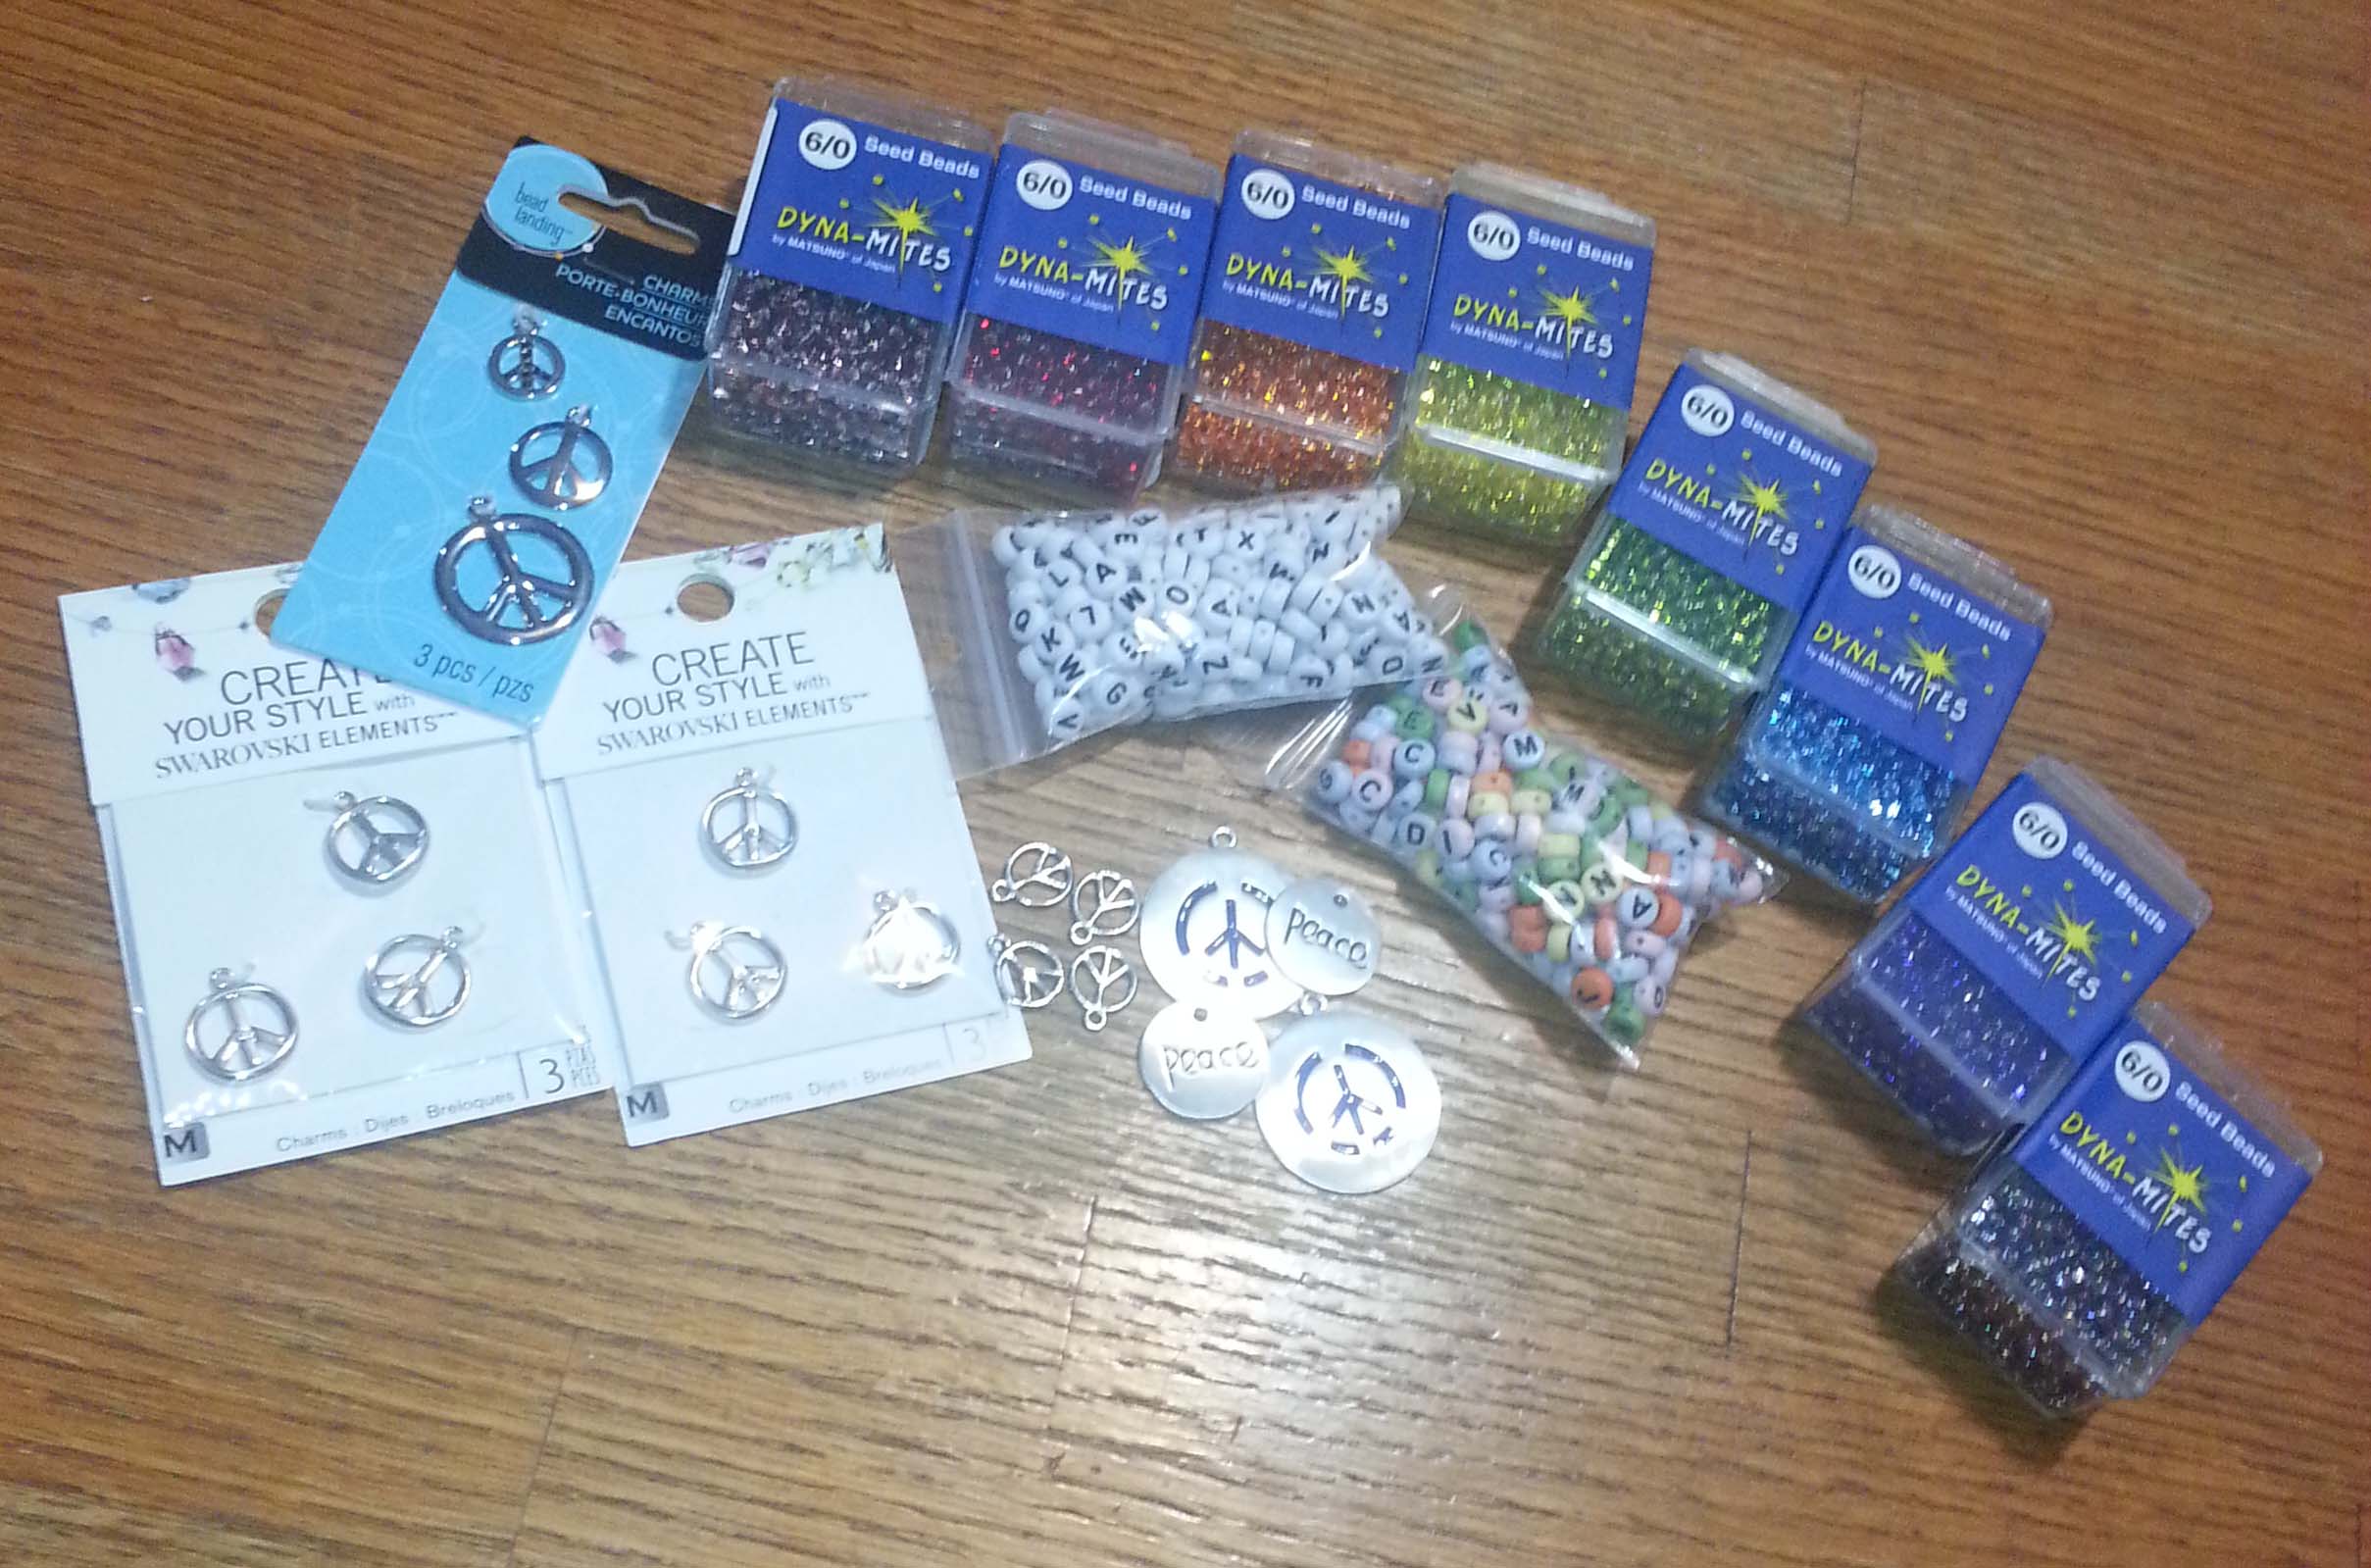
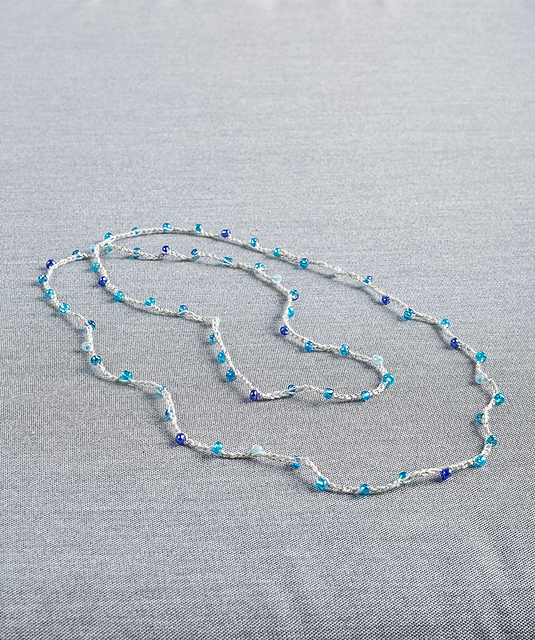
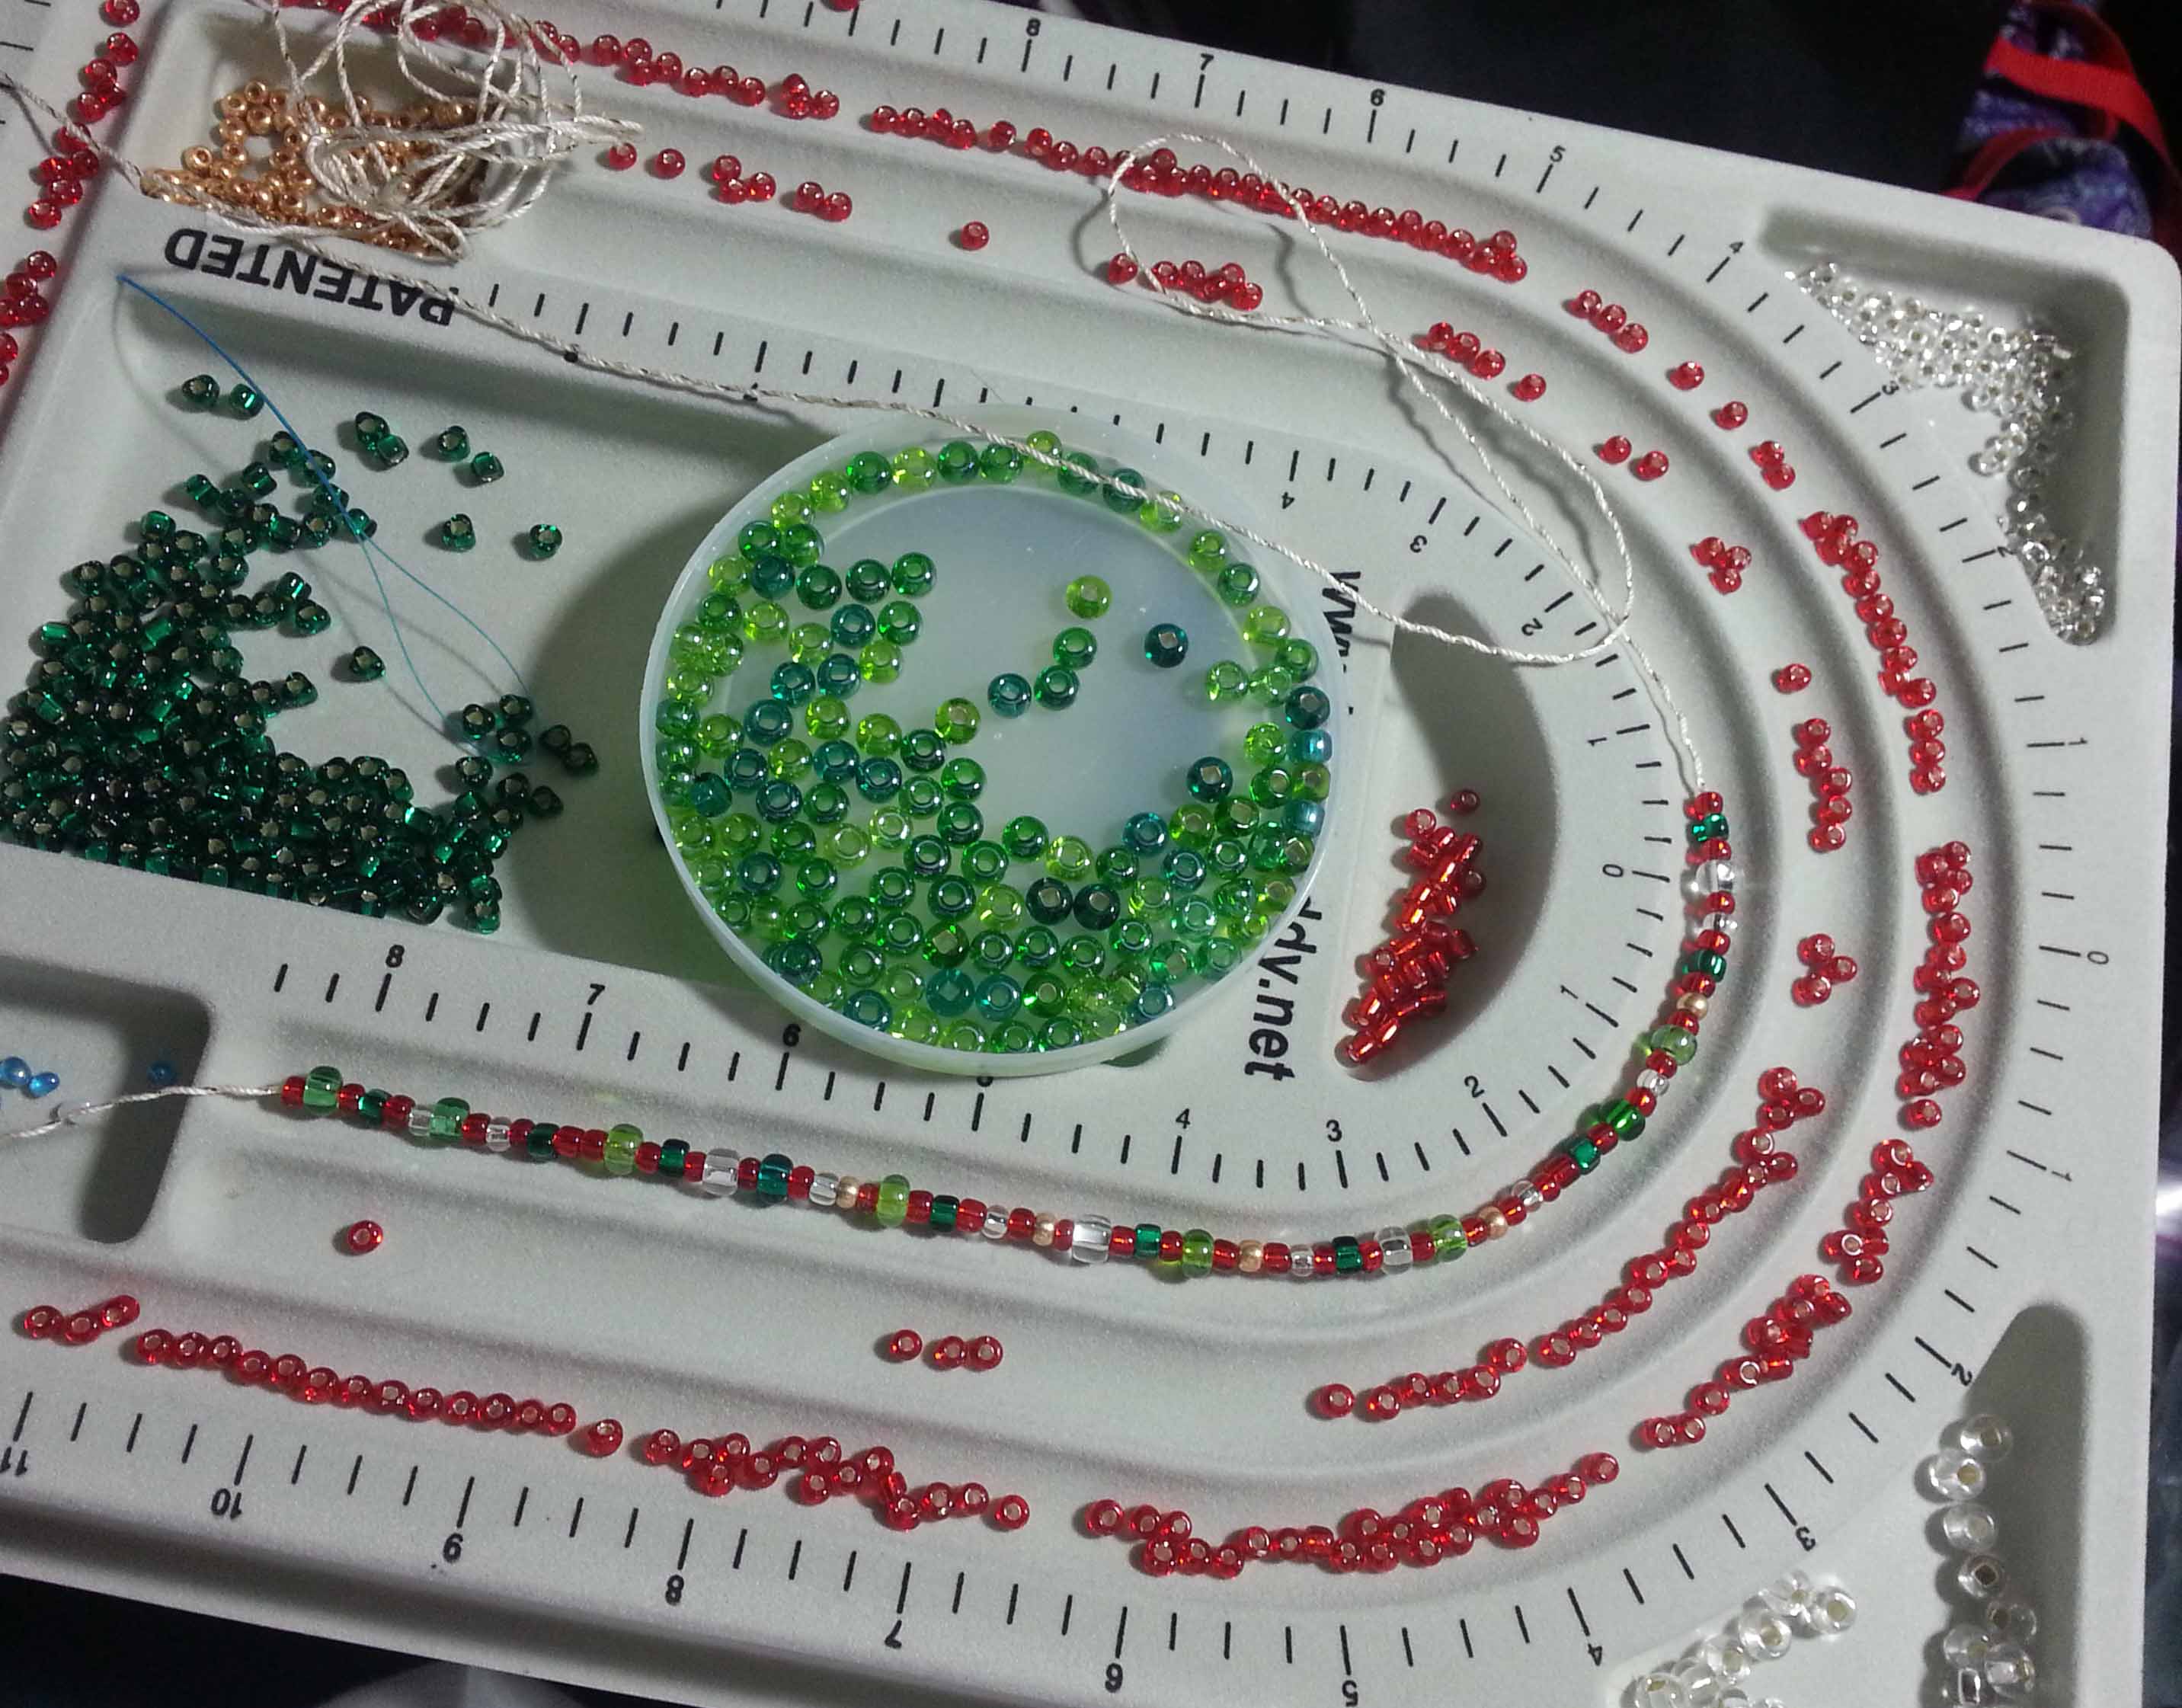
Then there were beads and charms.

stamping-blanks

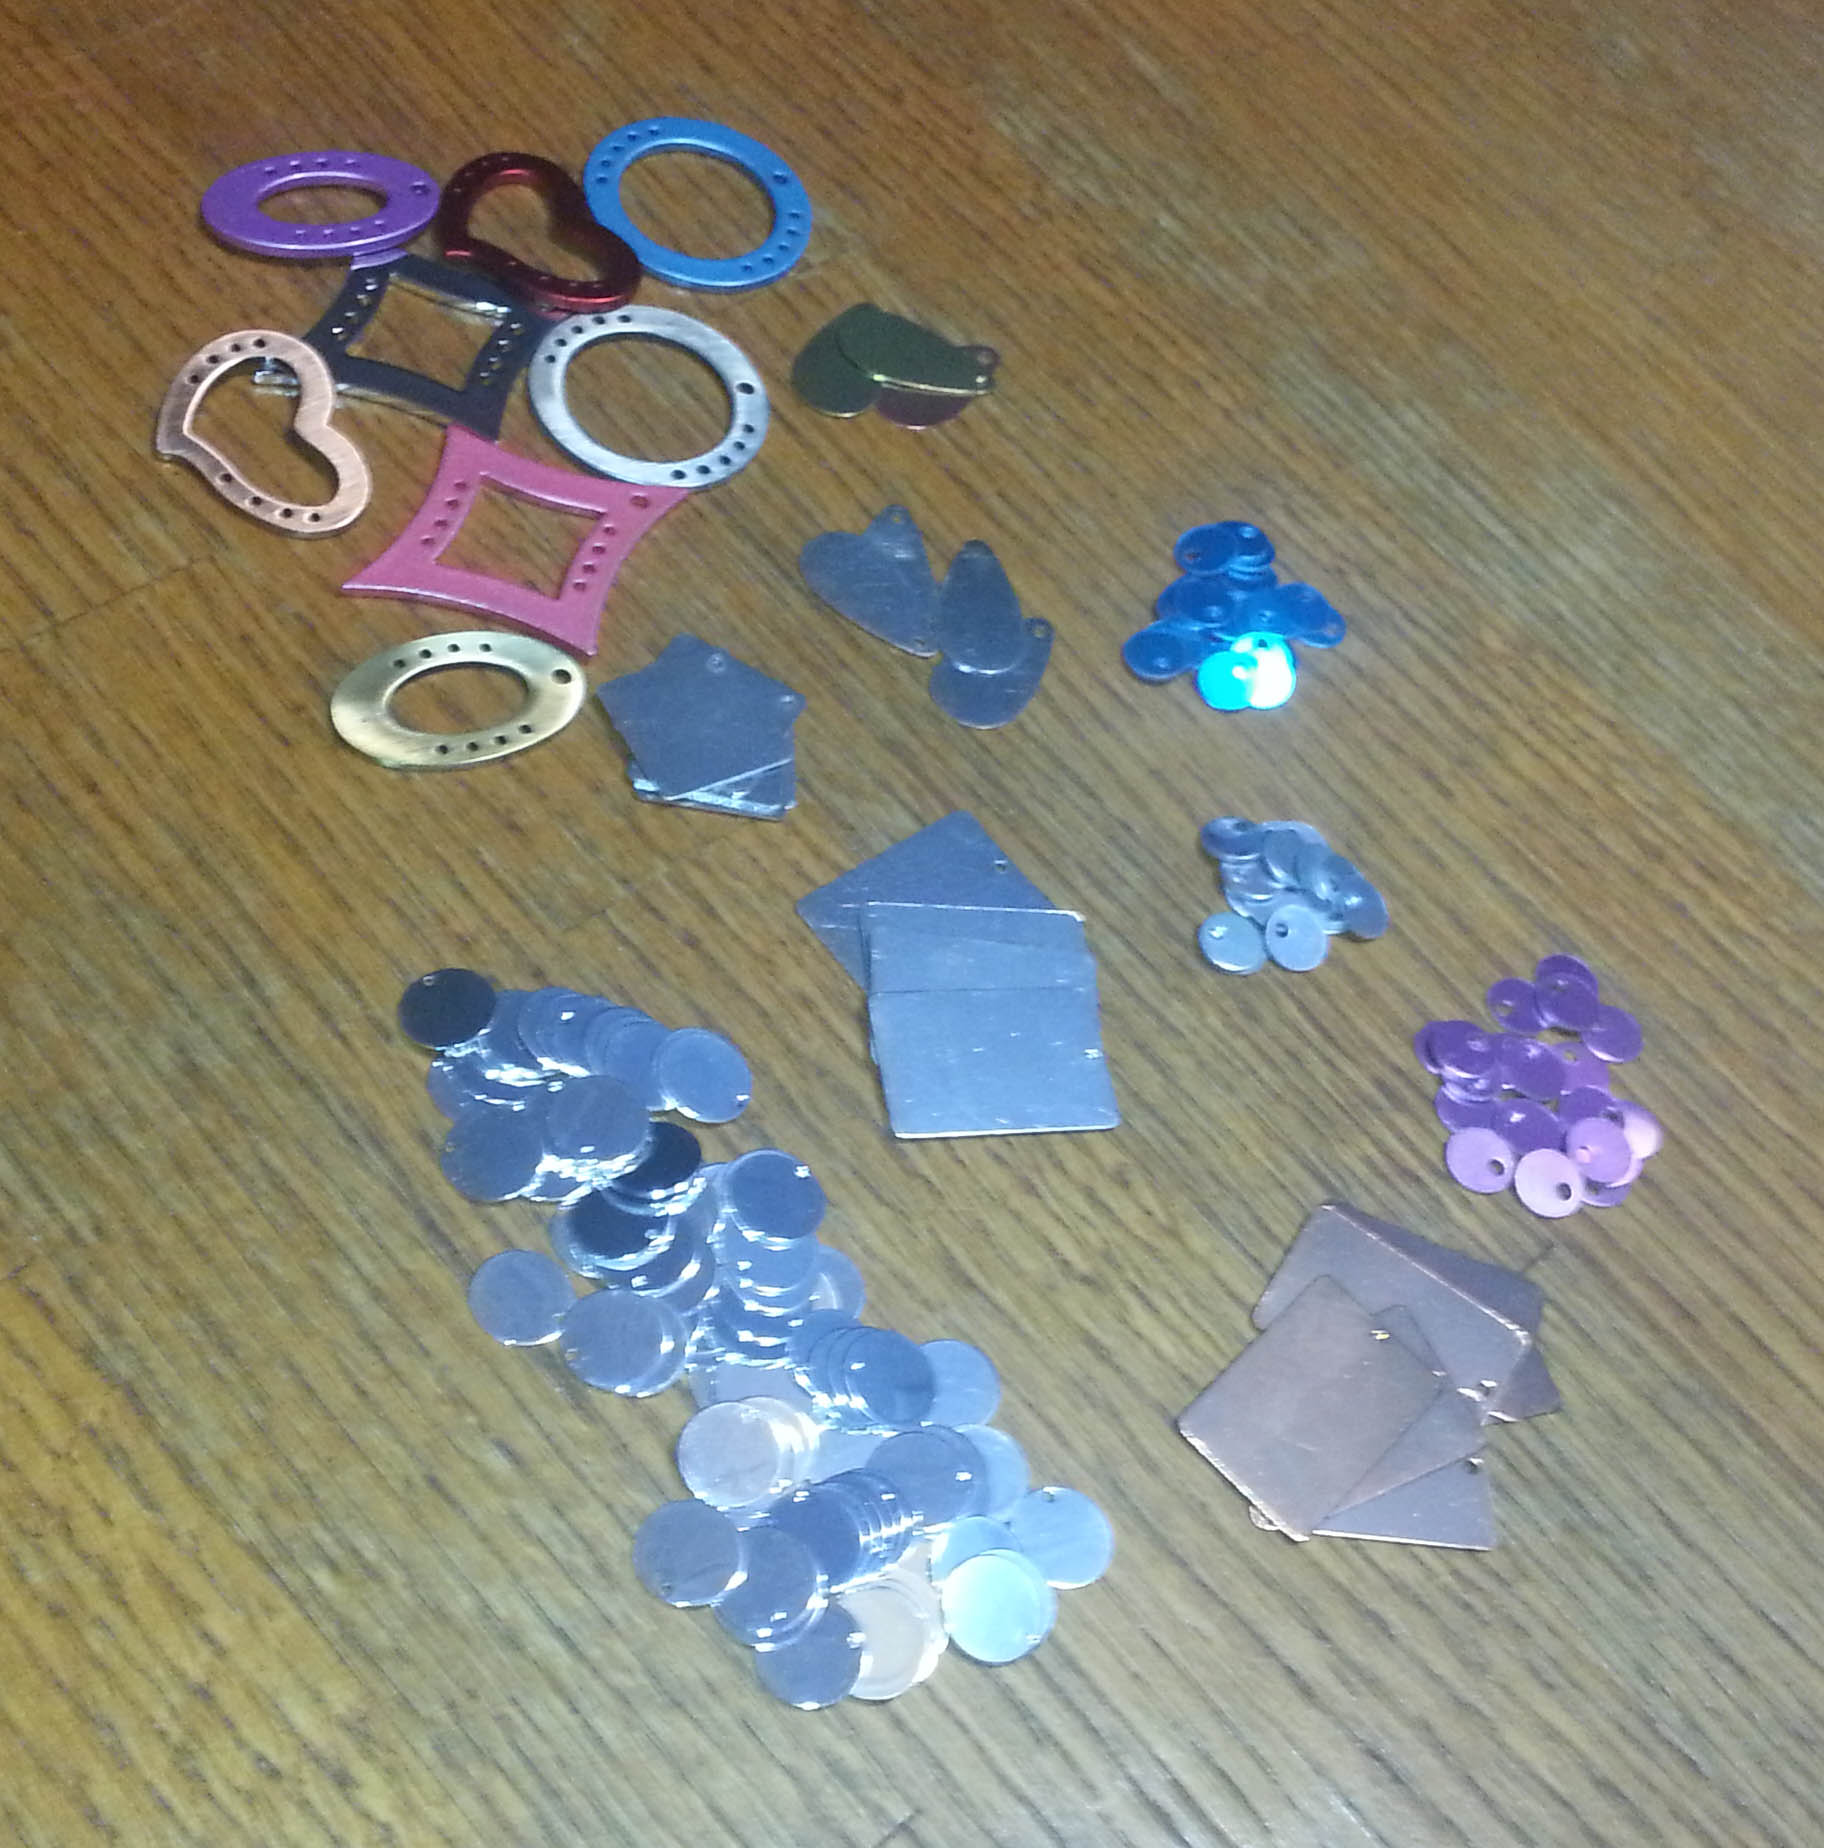
Plus a wide variety of metal blanks for stamping.

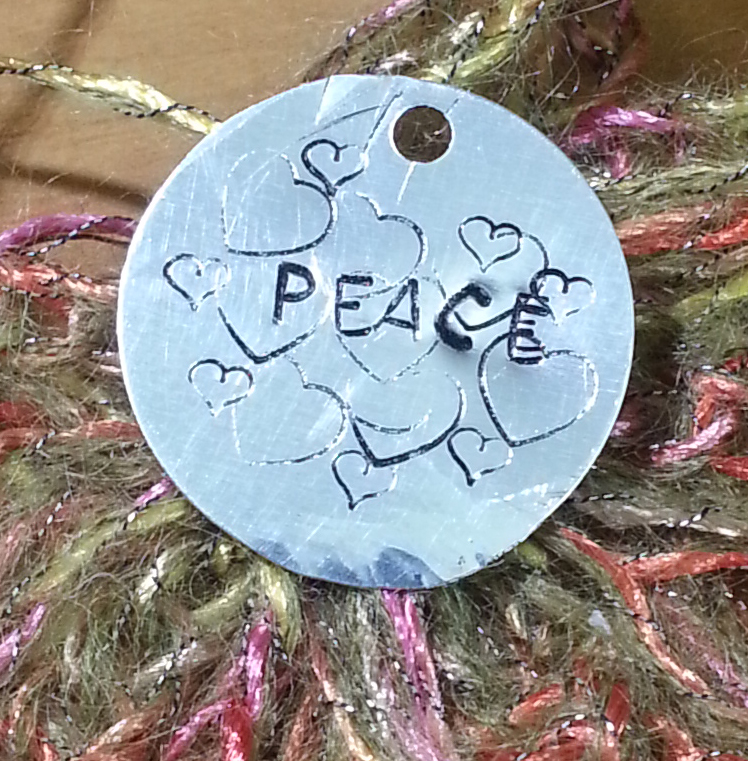
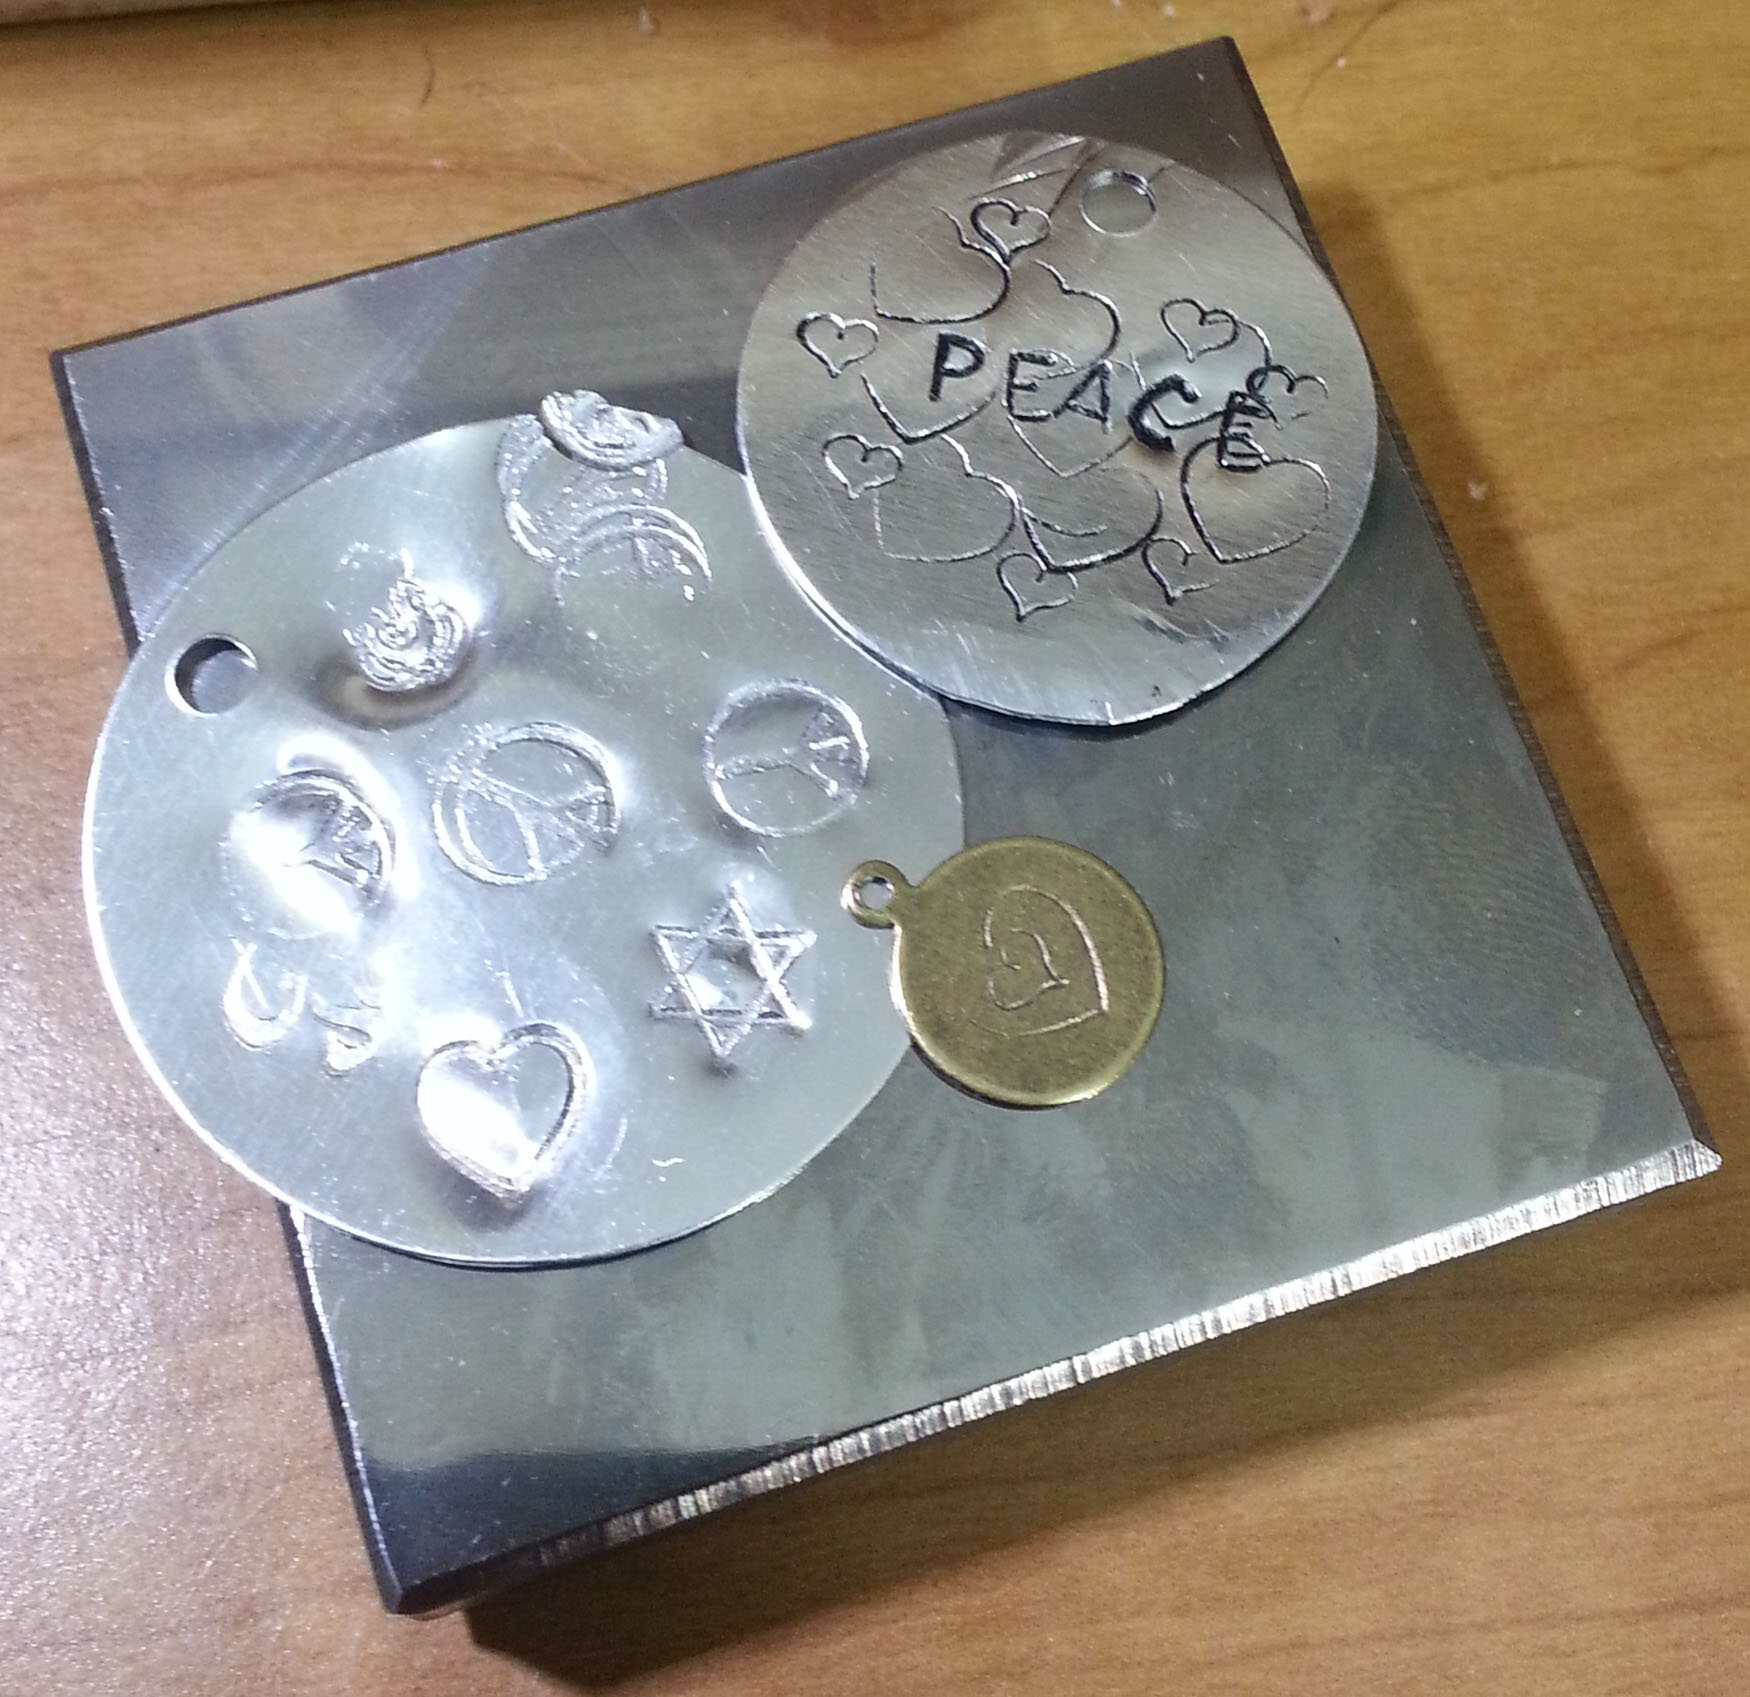
I’ve been doing some metal stamping, it’s going to take quite a bit of practice to become familiar with the right amount of force needed. It all depends on the size of the stamp and the density of the blank. I’m enjoying learning a new skill and exploring the options when things turn out differently than I had in mind.

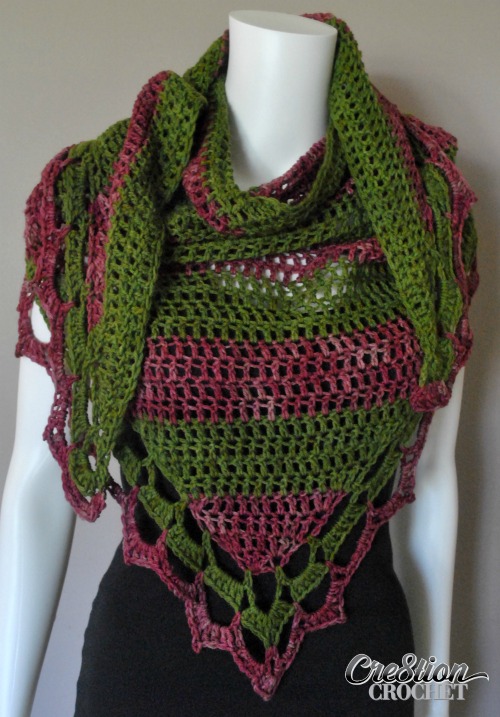
I haven’t had very much time to do much in the way of crocheting. I’m working on a few patterns, but they are still in the super secret stage.  Look for a new pattern here on the blog later this month, and if all goes well I’ll also have a new video and paid pattern before January ends.

Writing this all up I realize that I’ve been doing more than I realized. Just the length of the Mutant To-Do List makes me think I’m spinning my wheels. Turns out I must have some mojo going after all. Hooray!

Hope you are all having an energetic start to 2017.

2017 is Here!

cold-and-snowy-start

I hope everyone’s New Year has started off well. Ours is beginning with cold and snow. As you may have noticed, I took a little break from posting on the blog. The boys have been on their Winter Break from school and I’ve been enjoying some family-time. Far too soon these 2 will be too grown-up to want to hang-out with their folks, I figure I better take every minute I can now. Today they are back in school and I am playing catch-up.

We did a lot of traveling to visit family during the boys’ school break.  We celebrated Christmas on Christmas eve and day with my husband’s family in Ohio. The Tuesday after, we headed to Kansas to celebrate with my Dad, brothers and niece.

There was a lot of driving on this trip. Driving to Dayton, Ohio is a 20 hour drive from our house, so we break it up in 2 10-hour sections. We drove to Topeka, Kansas the first day then on to Dayton the next day. That was 2 days of pretty much solid driving. I spent part of the drive time finishing some crochet design samples. I’ll be sharing those patterns with you over the next couple of months. We were very lucky that the weather was unseasonably warm and clear, so no frightening roads or getting stuck along the way.

newest-great-niece

We made a stop in Hays, Kansas the first day at the Sternberg Museum and met up with my nephew, his wife and their new little baby. I got to give the baby her bottle and get in some great cuddles with her and hugs with her parents. I hadn’t seen my nephew since he was a little kid, he towers over me now.

christmas-lights-1

christmas-lights-2

Christmas Eve we drove around Lincoln Park in Kettering to look at the lights. The weather was warm enough that the boys and I ran around the lit pathways.

leaving-ohio

The morning of the 27th we left Ohio to drive to Topeka, Kansas. The weather was a little cooler, but it was clear and sunny out. Always sad saying good-bye to my Mother and Father-in-law, but the boys were looking forward to seeing their cousins and uncles.

We spent 3 nights in Topeka, to have some visiting time with my Dad, brothers and niece. Wednesday we had lunch with my niece and then played at the park with my great niece and nephew while my niece went to her doctor’s appointment. It was such fun playing with the kids. My great niece loved having us push her on the swings, while my great nephew was having a terrific time playing “hide-and-seek” with the boys.

Afterward we went to my Dad’s to have dinner with him and my younger brother, Cy. On the drive Tuesday I had gotten a text from Cy that he and Dad had a Christmas gift for me that I “must” take home with me.

cys-text-photo

He texted me a photo too. Oh Boy.  So we were really looking forward to at least meeting the “gift”, though I wasn’t too sure about bringing it home with us.

artsy-kitten-pic

I got in some cuddles with the kitten, but we all decided she was better off with my Dad and Cy. Their dogs were getting along with her well and we were really uncertain about how she would do with our big cat at home.

kitten-and-rocky

Not to mention that some serious “kitten-proofing” needs to happen at our house before I would feel comfortable bringing a new kitten home. It was tricky getting a photo of her as she was quite active even when I was holding her.

a-pool-full-of-cousins

The next day my older brother and his kids joined us at the hotel. All the kiddos played in the pool, then we had a pizza party for lunch. After lunch we headed out to see the latest Star Wars movie. Then we all went back to the hotel and played some board games and swam a little more. Finally had to say good-bye to the cousins as we would be heading out in the morning for the drive back to Colorado.

leaving-kansas

The drive home to Colorado went by fairly quickly. Once again the weather was staying clear and warmer than one would expect during the last week of December. We made a few stops for meals and gas, but got home before 8 p.m. Mountain Time.

It’s good to be back on the mountain. I’ve been taking down the Christmas decorations and sorting out all the laundry from our trip. Hard to believe 2016 is over now, hopefully I can catch up with myself before I fall too far behind in this new year.

I have a few resolutions this year:

  1. Learn to do Calligraphy. This is something I have always admired and I’ve some ideas for art work that combines words and images. I want the words to be as beautiful as the images.
  2. Open my Etsy Shop. My plan is primarily to sell art and jewelry pieces, but I may also have some crochet patterns for sell thru my shop. This will be an experiment. Some of the items I will be selling will be related to resolution #3.
  3. Clear out a lot of the clutter. Use up a good chunk of my art and crafting stash. Get rid of out grown clothing and other excess in the house that is just taking up space.
  4. Make more videos for my YouTube Channel. Not just “how-to” ones, but ones for entertainment/inspiration too.

Happy New Year to all my readers, I hope your 2017 is full of joy and health.


A Winter Wonderland

Oh yes indeed, it really is Winter now, and we have the snow to prove it. The past couple of weeks have been cold and snowy up here on the mountain. Though we have had a few odd days where it was actually warmer at my home, at 8500 feet above sea-level, then it was in the lower elevations.

frozen-star-ag-m2h-designs

In appreciation of the snow and to celebrate the holidays, I have a quick little snowflake pattern for you. With only 3 rounds to crochet you can make a whole drift worth of them in just a day.

I have always loved the beauty of snow, which is probably a good thing since I live on a mountain. My favorite snowflakes are the ones I can crochet. They last longer, they are a lot warmer, and best of all crocheted  snowflakes won’t leave a puddle of water on your floors.

I hope you have a fun time with my newest snowflake.

frozen-star-d-ag-m2h-designs

Frozen Star Snowflake

Designed by Andee Graves

Skill level: Easy Intermediate

Finished Size:

2 3/4 inches from point to point across center

Materials:

Yarn

Size #10 Crochet Cotton Thread

Hook

1.75mm Steel Hook (or size needed for your thread or yarn)

Notions

Yarn/tapestry needle

One stitch marker

Gauge

Total snowflake (3 rounds) measured across from point to point = 2 ¾ inches

Pattern Notes:

All rounds are worked without turning, RS of fabric is always facing out.

Instructions

Rnd 1: Starting with an adjustable slip knot, ch 2, 6 sc in second ch from hook, sl st to first sc of Rnd. [6 sc]

Rnd 2: Ch 4, Tr in same st as join (counts as first Cl), (ch 5, Cl in next st). 5 times, ch 2, dc in first Tr of Rnd (counts as first ch-5 space). [6 Cl, 5 ch-5 sp, 1 ch-2, 1 dc]

Rnd 3: ch 1, sc in first ch-5 space, (*ch 1, {dc, ch 1, Tr, ch 4, slip st in top of previous Tr, Tr, ch 1, dc} in next Cl, ch 1,* sc in next ch-5 sp) 5 times; Repeat from * to * once, slip st to first sc of Rnd. Fasten off [12 sc, 12 dc, 12 Tr, 24 ch-1 sps, 6 ch-4 sps]

Finishing

Weave in all tails.

andee-photo-aug-2016

Happy Holidays to all my dear readers.  Stay warm and enjoy some peaceful and joyful days no matter how you celebrate.

This post contains affiliate links. I may receive compensation (at no additional cost to you) if you make a purchase using these links.


The Stiffy Mod Podge is what I like to use to stiffen my snowflakes for hanging ornaments. If you can’t find it locally you can order it on Amazon. Just click on the photo above.

This post contains affiliate links. I may receive compensation (at no additional cost to you) if you make a purchase using these links.

Learning Something New

Earlier this month I shared with you my efforts to organize my bead stash. The primary motivation for that was because I am playing with designing jewelry again. Sometimes that means using beads and other jewelry components in my crochet wearables. Other times it means getting out the wire and jewelry making tools to create fun and sparkly pieces.

tools-and-supplies

As I’ve been organizing things and working on various jewelry designs, I became interested in metal stamping. This is a great way to add words and even quotes to my jewelry pieces. Which meant acquiring some new tools and supplies.

Yesterday evening I began to experiment with metal stamping. My sons were both very interested in what I was doing. This is definitely not a quiet craft. Both boys actually gave it a try.

thing-1-and-i

Then my oldest decided to be in charge of handing me the letter stamps I needed. This little disc of aluminum was our project we worked on together. Not too bad for a first attempt.

my-first-experiments

One of the fun things about this craft form is bashing the stamps and metal with hammers. It’s a great way to take out some controlled aggression. I was being a little timid at first, which is why that first piece had some rather faint impressions.  I soon overcame my timidity though and gave the stamps a hearty whack as needed.

2nd-alum-experiment

I made this little silvery aluminum disc next. I found I’m really not wild about aluminum, especially when it is this thin. It’s surprisingly strong, but super lightweight. I dropped this disc at one point and it practically flew away. I was hunting for it for 20 minutes. These discs would be great for earrings though, as being so lightweight they wouldn’t pull on the earlobe.

natural-brass-blank

Next I played with a brass blank. These blanks were labeled “natural brass” and don’t have that gleaming yellow color that I’m used to. Brass is a harder metal than aluminum, so it took more force to create a good impression on the blank.

final-project-of-the-evening

I am still figuring out the exact method for placing my stamps before striking them. I actually made a little mistake on this piece, but corrected it. Can you spot it?  Even with the mistake I’m pretty happy with how it came out.

You may be asking, “Are you nuts taking up a new craft during the madness of Christmas?” or even, “Where are you going with this Andee?”

If you have been reading my blog for very long, you already know the answer to the first question. Yes, I’m nuts. That said, I also find learning new things to be a good way for me to manage stress. In some ways this is all an early Christmas present to me.

Where I’m going with this is yet to be seen. I am playing around with the idea of finally getting my Etsy Shop going. It’s something I’ve wanted to do for years, yet it hasn’t ever come together.

compact-storage

Or this could just be a stop along my art journey as I keep expanding my creativity. It may seem counter-intuitive, but I find new creative energy for my crochet work by exploring other (sometimes un-related) crafts. For the moment this new craft isn’t taking up a lot of room mentally or physically…. and I’m having a lot of fun playing with hammers.


Some Holiday Bling

I’ve been super busy making last minute arrangements for our holiday celebrations. We are going to be having a number of visits with family and friends over the next couple of weeks. That means lots of house-cleaning, laundry, wrapping and shipping gifts.

snowy-valley

We’ve been getting some real snow accumulation and days of below freezing temperatures up here on the mountain the past week. The snowy cold weather has definitely gotten me in the mood for Christmas-time. I’ve been thinking about hats and ear-warmers. These are great crochet projects for a quick gift. Especially ear-warmers as they don’t take very much yarn or time. You may recall my Springtime Headband design that I published during NatCroMo 2015.

headband-on-model

I decided to make it again using Brown Sheep Wool’s “Lambs Pride” worsted weight yarn and some sparkly silver beads. A bit of bling for some holiday cheer. This headband might become a gift for one of my family members, or I may adopt it to keep me warm during all the running around we will be doing over the boys’ holiday break from school.

headband-w-beads-flat

It is very simple to make this headband with beads. You’ll need 38 beads. I used size 2/0 E beads, but any bead that has a large enough hole for your yarn to fit thru works. Crochet the headband following the pattern until you reach the Edging section.

headband-close-up

Following the Side One edging instructions as written for stitch placement, *work 22 regular sc, then place a bead on the top of the next sc, (work 2 regular sc, then place a bead on next sc) 18 times,* follow instructions for edging until reach the beginning of Side Two instructions; Repeat the modifications from * to* for bead placement, finish the edging following the original instructions from the pattern.

If you need help with how to add beads using the “hoist-on” method, there is a tutorial about half way thru my blog post: Making a Pendant.

You can use this hoist-on method to add beads to the top of any stitches, not just single crochets. Try using this method to add beads for some bling to any of your holiday projects. Think how pretty some beads could look on the edge of a cowl or the end of a scarf.


Trying to Organize the Beads

The past couple of months I have been working steadily away at getting my home, office and studio areas more organized. My most recent project in this endeavor was getting all my beads that I use with yarn corralled into a single container.

sorting-out-all-the-beads

This was the sorting process today on the Loveseat in my living-room. It is always astonishing to me how big a mess one ends up initially making when you start trying to organize and de-clutter. I did succeed in getting the majority of the beads into containers that make my collection more manageable, though I think I will be taking another run at it soon.

everything-into-the-box

This is the box that is the current home for the beads. It is a hanging file box similar in size to a typical “bankers” box. It’s a good size for this project since most of the beads are glass and a larger box would become extremely heavy. Inside the box are smaller boxes and other containers to keep the beads grouped.

st-chart-boot-camp-motif

I’ll be teaching this coming Saturday at the Longmont Yarn Shoppe. My class: “Stitch Chart Bootcamp” where I’ll be introducing students to the ins and outs of reading crochet stitch charts and diagramed patterns. If you are in the area and want to join us you can enroll thru the shop website here.

After teaching on Saturday it will be all about the holidays for me and my family. Usually December gets pretty wild here and I don’t post on the blog as often. I’ll try to have  a new post for you at least once a week. Meanwhile I hope everyone is having a wonderful month full of holiday celebrations with family and friends.

My newest pattern at Red Heart.com

Photo courtesy of Red Heart

A while back the folks at Red Heart asked me to design a simple beaded necklace that beginning crocheters could manage. They asked me to crochet it in their Red Heart Metallic Crochet Thread in Size #10.

crochet-thread

I’ve always loved this metallic crochet thread, mainly because I’m part magpie. If it has sparkle I will find it. So beads and sparkly crochet thread. I’m there!

beads

Remember these beads? They were for working out this design.

We are coming up on the holiday season. Lots of parties and packages and New Year’s Eve where sparkle is the Thing! This is a great quick crochet project to add some sparkle to your wardrobe or packages. It is even a terrific quick gift project.

lc5292inset2_medium2

The folks at Red Heart did a lovely job photographing the sample I made for them. You can find the free pattern on the Red Heart website here.  The pattern even includes a photo tutorial on making the beaded chain stitch.

multiple-strands

Of course for the holiday season I like my sparkle to really be kicked up a notch. That means I need lots of strands to my necklace.

Maybe sparkly thread isn’t really your thing? Take a look at all the other wonderful colors of Size #10 thread that Red Heart has available.

variety-of-beads-close

You can also have fun with mixing up the size and shape of beads you are using.

stringing-beads

I generally go with the size 6 E beads but in this strand I added size 2 and some triangle shaped beads. Look for beads with a smooth edge around the hole. Otherwise your beads will cut your thread or abrade the metallic tape.

floss-threader

I prefer to use a dental floss threader to string my beads onto the crochet thread (or yarn). The flexibility of the “eye” of the floss threader compresses easily to pull thru the hole in your beads and the sturdiness of the “point” end works well for scooping up beads. You can find these in most drug stores in the dental floss area.

Now it’s your turn. Time to get out the beads and thread and make some sparkle you can wear all year long.

Simple Double Crochet Hat

2016-tree-close-up

I hope everyone here in the USA had a great Thanksgiving Day with their friends and families. Last weekend my family and I put up our tree and decorated the house. Which means I’m now focused on what gifts I’ll be giving this year. Especially what gifts I’ll be crocheting.

My go-to projects for gift-giving are hats, they are quick and a great canvas for creating something special for my crochet-worthy family and friends. My favorite stitch for making a basic simple hat is the half double crochet. But that stitch can be a bit finicky for beginning crocheters.

simple-dc-hat-andeegraves-m2h-designs

So today I am posting an easy pattern for a basic hat worked in continuous rounds of double crochet stitch with 2 rounds of single crochet for the brim. You will only have to make 2 half double crochet stitches in the entire project.

This hat is slightly more “meshy” than the half double crochet because double crochet stitches have a longer “post”. The mesh like fabric lets the scalp breathe a bit more, nice for those that find some crochet hats to be too warm. This is an especially good pattern for alpaca blend yarns as they tend to make extremely warm fabric.

I chose not to use the single crochet stitch for the body of this hat because it is a tighter stitch and doesn’t have enough give or stretch for a comfortable hat fabric.  The only single crochets are for the “step-up”, “step-down” and the brim finish.

For all my hats I like to start at the center of the crown, so the beginning of the pattern is like working a motif. I like my adjustable slip knot start for that (video on my YouTube channel if you need help) as it allows enough room for the first round’s stitches without leaving a gaping hole in the top of your hat.

stitch-markers

Continuous rounds are basically a spiral. This spiral is less complex than the 4 armed spiral I used in my “Whirlwind Afghan Square” and my “Whirlwind Hat”. Just like in those patterns though, I use stitch markers to help me keep track of where the increases for my rounds are happening and the end of my round.

Simple Double Crochet Hat

Designed by Andee Graves

Skill level: Easy

Finished Size:

Head Circumference: Apprx 22”

Materials:

Yarn

Ella Rae “Cozy Soft Chunky” (25% Wool, 75% Acrylic) 3.52 oz/100g, 131 yds/120m: 1 ball

Hook

I-9 / 5.5mm or size needed to obtain gauge.

Notions

Yarn/tapestry needle

Stitch markers in 2 colors: at least 11 in one color and 1 in a different color

Gauge

3 rounds in flat circle = 3.5” diameter

Special Stitches/Abbreviations

Place Marker (PM)

Single Crochet Stitch (sc): insert hook in stitch, yarn-over, pull up a loop (2 loops on hook shaft), yarn over pull thru both loops on hook.

Half Double Crochet Stitch (hdc): yarn-over, insert hook in stitch, yarn-over, pull up a loop (3 loops on hook shaft), yarn over pull thru all 3 loops on hook.

Double Crochet Stitch (dc): yarn-over, insert hook in stitch, yarn-over, pull up a loop (3 loops on hook shaft), yarn over pull thru 2 loops on hook (2 loops remain on hook shaft), yarn over pull thru last 2 loops on hook.

Pattern Notes:

All rounds are worked without turning, RS of fabric is always facing out.

Instructions

Crown

Rnd 1: Starting with an adjustable slip knot, ch 2, (sc, hdc, 10 dc) in 2nd ch from hook,

PM in each st using different color in last dc.  [1 sc, 1 hdc, 10 dc]

End of Round 2 with St Markers in place.

Rnd 2: (2 dc next st, move st marker to 2nd st made)12 times.[24 dc]

Rnd 3: (Dc next st, 2 dc in marked st, move st marker to 2nd st made)12 times. [36 dc]

Rnd 4: (Dc each un-marked st, 2 dc in marked st, move st marker to 2nd st made) 12 times. [48 dc]

Rnds 5 – 6: Repeat Round 4. Stitch count end of Round 6 [72 dc]

Starting with first st marker remove every other marker (1, 3, 5, 7, 9, 11).

Rnd 7: (1 dc in each un-marked st, 2 dc in marked st, move st marker to 2nd st made) 6 times. [78 dc]

Remove all but the last st marker.

Sides

Rnd 8: Dc in each st around, PM in last st of Rnd.

Rnds 9 – 16: Repeat Rnd 8.

Brim

Rnd 17: Hdc next st, sc next 77 sts.

Rnd 18: Sc next 77 sts, sl st next st, sl st back loop next st. Fasten off.

Finishing

Weave in all tails.


Happy Thanksgiving Day

It has been another busy week here at the Graves household. My boys are off from school for the Thanksgiving holiday, so we have been doing lots of family stuff. Including a quick shopping expedition with my oldest on Monday. He was complaining that his snow boots were too tight, so I took him to town to get new ones as well as some new regular shoes as well. No wonder his boots had felt too tight, he had grown 2 full sizes since last winter!

Today is Thanksgiving Day here in the US, we are having a small celebration with just the 4 of us. We will have our traditional roasted turkey and all the fixings, this year my oldest son is planning on helping with the meal. He is developing a love for cooking, which I will be hoping to encourage over the next couple of years.

4-squares

I’ve been crocheting quite a bit this week too. Working on a number of Christmas presents and a couple of new designs that I will be sharing with you soon. Best of all though, I finally finished editing the footage for my “Fans & Lace Square – Part 2”. You can find the video on my YouTube Channel now.

I’m thankful for all my wonderful readers and visitors to my YouTube Channel. For those of you in the US and celebrating Thanksgiving I hope you are all having a lovely time with family and friends.

“Wraps for All Seasons” Blog Tour – Stop #6

Hi everyone. My book “Wraps for All Seasons” has been on a blog tour. We will be making 6 stops for this tour. Today is our last stop. Each of the bloggers will be giving away a copy of the book, so be sure to visit them to see what they have to share with you about my book.

lorene-photo

Stop #6 is with the talented Lorene Eppolite of Cre8tion Crochet. Lorene and I met in October 2013 at the Knit & Crochet Show and have stayed in touch over the years since. Last time I saw her was in Charleston this summer at the Knit & Crochet Show again. We had a lot of fun goofing off in the evenings. Lorene has a busy website where she posts lots of patterns and reviews.


napa-valley-shawl-free-triangle-shawl-pattern


Patterns like this lovely slightly asymmetrical shawl. It is the “Napa Valley Shawl”. I really like the colors she used for her sample in the photos, but could see it made in any combination of favorite colors. Simple stitch work for the body with a lacy and intriguing border.

free-crochet-pattern-for-the-braided-and-broken-wrap

And if texture is what you love, check out the gorgeous “Braided and Broken Wrap”. Simple construction for a sophisticated look. I could see this worked up in a deep purple or silvery gray to become a staple item in my cool weather wardrobe. Hop on over to Lorene’s site to check out all her other patterns and to enter her drawing for a copy of my book.

133673

Thanks to all my blogging friends for doing this blog tour. And for all my readers that may have missed out winning a copy of my book. You can purchase it at the Annie’s Craft Store or on Amazon.com.