As you all know, I recently returned from the TNNA Winter Trade Show in San Diego. One of the things that is always under discussion at these shows is wondering what our consumers want, whether it is in yarns at the shops or types of patterns we publish. So now is your opportunity my dear readers to weigh in with your opinions.
The fiber arts community needs your feedback.
Please take the TNNA Fiber Arts 2016 Survey at https://www.surveymonkey.com/r/fiberarts16, part of a major study of U.S. knitters, crocheters, needlepointers, cross-stitchers, weavers, and spinners. The survey will only take about 10 minutes to complete, and the more folks that complete it the better we designers and other yarn industry folks can understand your needs.
By taking this survey you will…
– Help fiber arts organizations and businesses serve you better
– Tell retailers and brands what you want
– Explore your fiber arts life
– Get the chance to win one of five $100 fiber arts store gift cards
This survey is anonymous – you will not receive marketing spam.
The results of this survey will appear in the fifth edition of the TNNA State of Specialty NeedleArts Study at http://www.tnna.org/?page=Research. The survey results will be available to non-profit fiber arts advocacy groups and TNNA members in mid-2016. TNNA is an association of hundreds of independent and family-owned fiber arts brands and retailers.
Second Sock Syndrome (SSS) is often spoken about by those that like to knit or crochet socks. One sock gets finished and the second half of the pair waits in the project bag for ages sometimes to never be seen again. Today I’m going to share my cure for SSS and how to finish 2 at a time in crochet, whether it is socks, mitts, slippers or sleeves.
Making 2 identical objects is always a challenge for me. Being I seem to have been born with the designer gene I tend to “fiddle” with patterns. Unfortunately, if you don’t write down the fiddling bits when doing the first object, you are a bit sunk when making the second one. Sometimes my pairs are more like fraternal twins than identical and a few times it was questionable as to if they were even from the same family.
Photo from Red Heart Website
Along comes the idea of making 2-at-a-time. Quite popular with my sock knitting friends it seemed a good idea for me when crocheting fingerless mitts. Especially as I was doing the original designing bit. You can find the free pattern for the above design at the RedHeart.com website here.
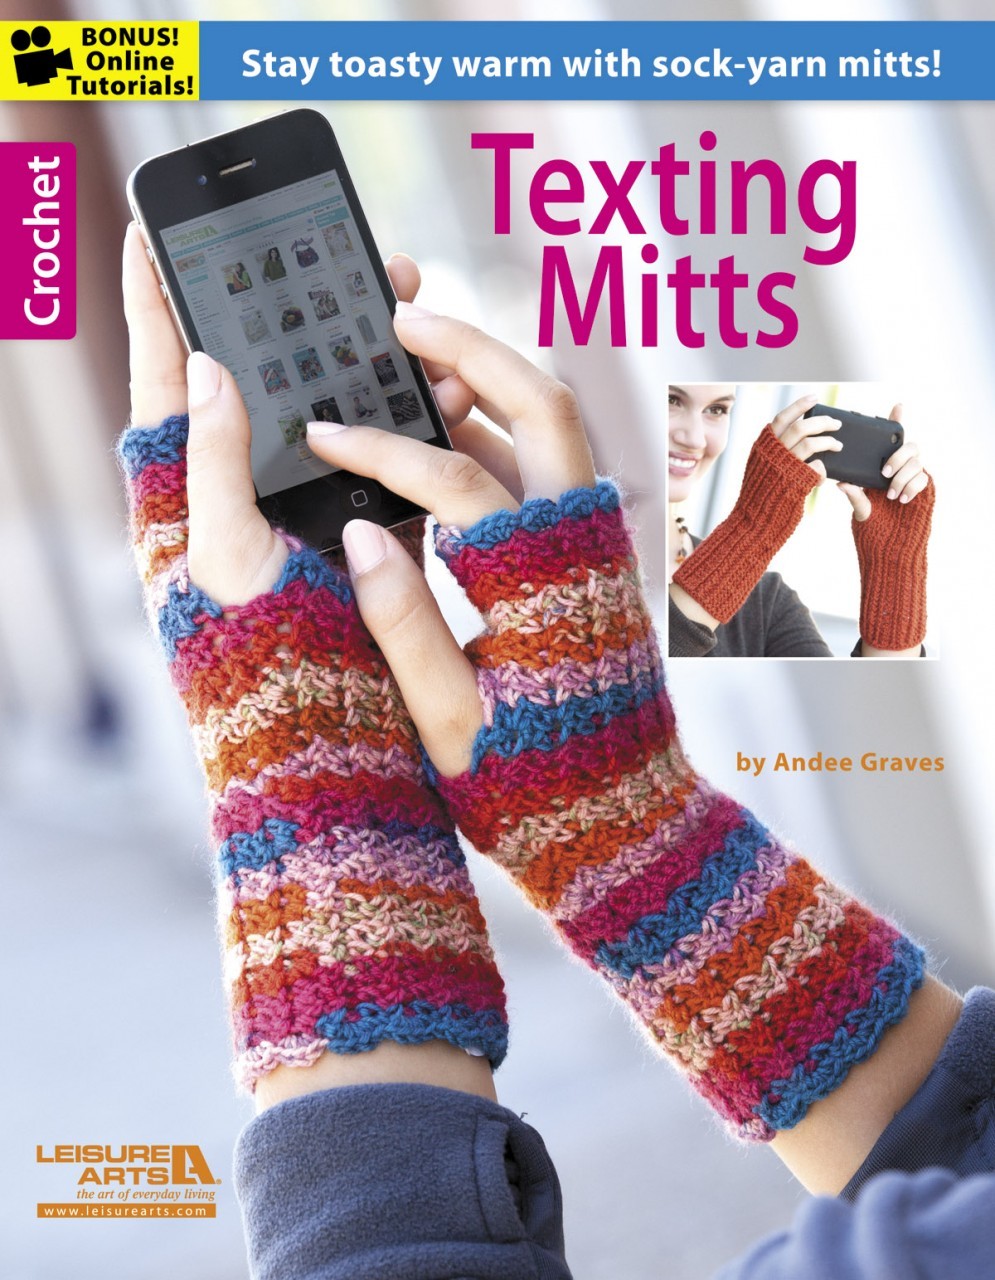
Photo courtesy of Leisure Arts Publishing
I worked all the samples for my mitts in my “Texting Mitts” book using this method (You can purchase an electronic version or paperback version of my book on the Leisure Arts website here). The great thing is you get to the end of the pattern and you have 2 mitts all done!
What you will need:
2 balls of yarn
At least 2 locking stitch markers, more if your pattern calls for them.
Pattern for pairs: Either mittens, gloves, slippers or socks (or the sleeve section of a sweater pattern).
I recommend 2 balls of yarn. Some folks use the 2 opposite ends of the same ball. I find that to be a bit tricky and tangly. If I already have 2 balls of the color I want to use, I just go with them. If not, I weigh the yarn and do a quick calculation of yards/per grams(or ounces) then use my 2 yard niddy noddy to measure out half of the yarn.
Measuring Yarn on my Niddy Noddy
Pop that onto my swift and wind it up into another ball (I generally wind the other half remaining in the original ball too as it gives me a tidier ball to work with and is less likely to tangle…I hate tangles).
The 2 balls of Yarn to Work From
Now you need the pattern. Any crochet pair pattern could be worked similarly. No matter what pattern you are using I highly recommend that you work the foundation/start in the same sitting if at all possible.
I am sharing this from a sad experience. I was making myself a set of mitts and thought I would work the palm bit then return to the foundation and work the palm bit of the 2nd mitt. Unfortunately, I was a few rows into the palm of the 2nd mitt and discovered my gauge was too different in my foundation round.
The real trick to working 2 at a time in crochet is the locking stitch markers. One of the wonderful things about crochet is that you have only one “live” loop at a time. The locking stitch marker placed in that loop means you can run off with the hook to work on the 2nd object or even a completely different project and your stitches will not unravel.
As you work back and forth between your 2 items you place the stitch marker in the working loop of the “resting” item. I use 2 different colors to keep track of which 1 of the 2 I’m working on. These were the start of some fingerless mitts I made using one of my patterns from my “Texting Mitts” book a few years back.
I crocheted the foundations for each mitt, placing the locking stitch marker in my working loop as I finished the foundation. Then I worked 2 rounds of the first mitt, placed the stitch marker in the working loop, removed the stitch marker from the working loop in my 2nd mitt, inserted my hook and crocheted 2 rounds of the 2nd mitt.
There are other methods for securing your working loop, but I like the stitch markers because you don’t need to make the working loop super large to keep it from getting pulled out. That allows me to be fairly speedy in my crochet work and that helps me with deadlines.
When I am designing my mitt or other pair patterns, I crochet 1 round at a time noting any design changes and switching back and forth between the 2 objects. Sometimes I will pin the 2 objects together to make it easier to switch back and forth. Just pin them so that you don’t obstruct the area you need to crochet into.
Now dear readers, it’s your turn to tackle some pairs. Hopefully you will end up with 2 of a kind.
I am really happy to share my latest beaded chain pattern with all my readers. This was an idea that has been bumping around in my brain for a while. It’s a very simple project to crochet, but does take a bit of coordination.
You’ll need to be comfortable with working chain stitches [ch], beaded chain stitches [bdch] and single crochet stitches [sc]. I have a tutorial on crocheting beaded chain stitches here on my blog (scroll down to the bottom half of the post) for those of you needing a refresher on that stitch.
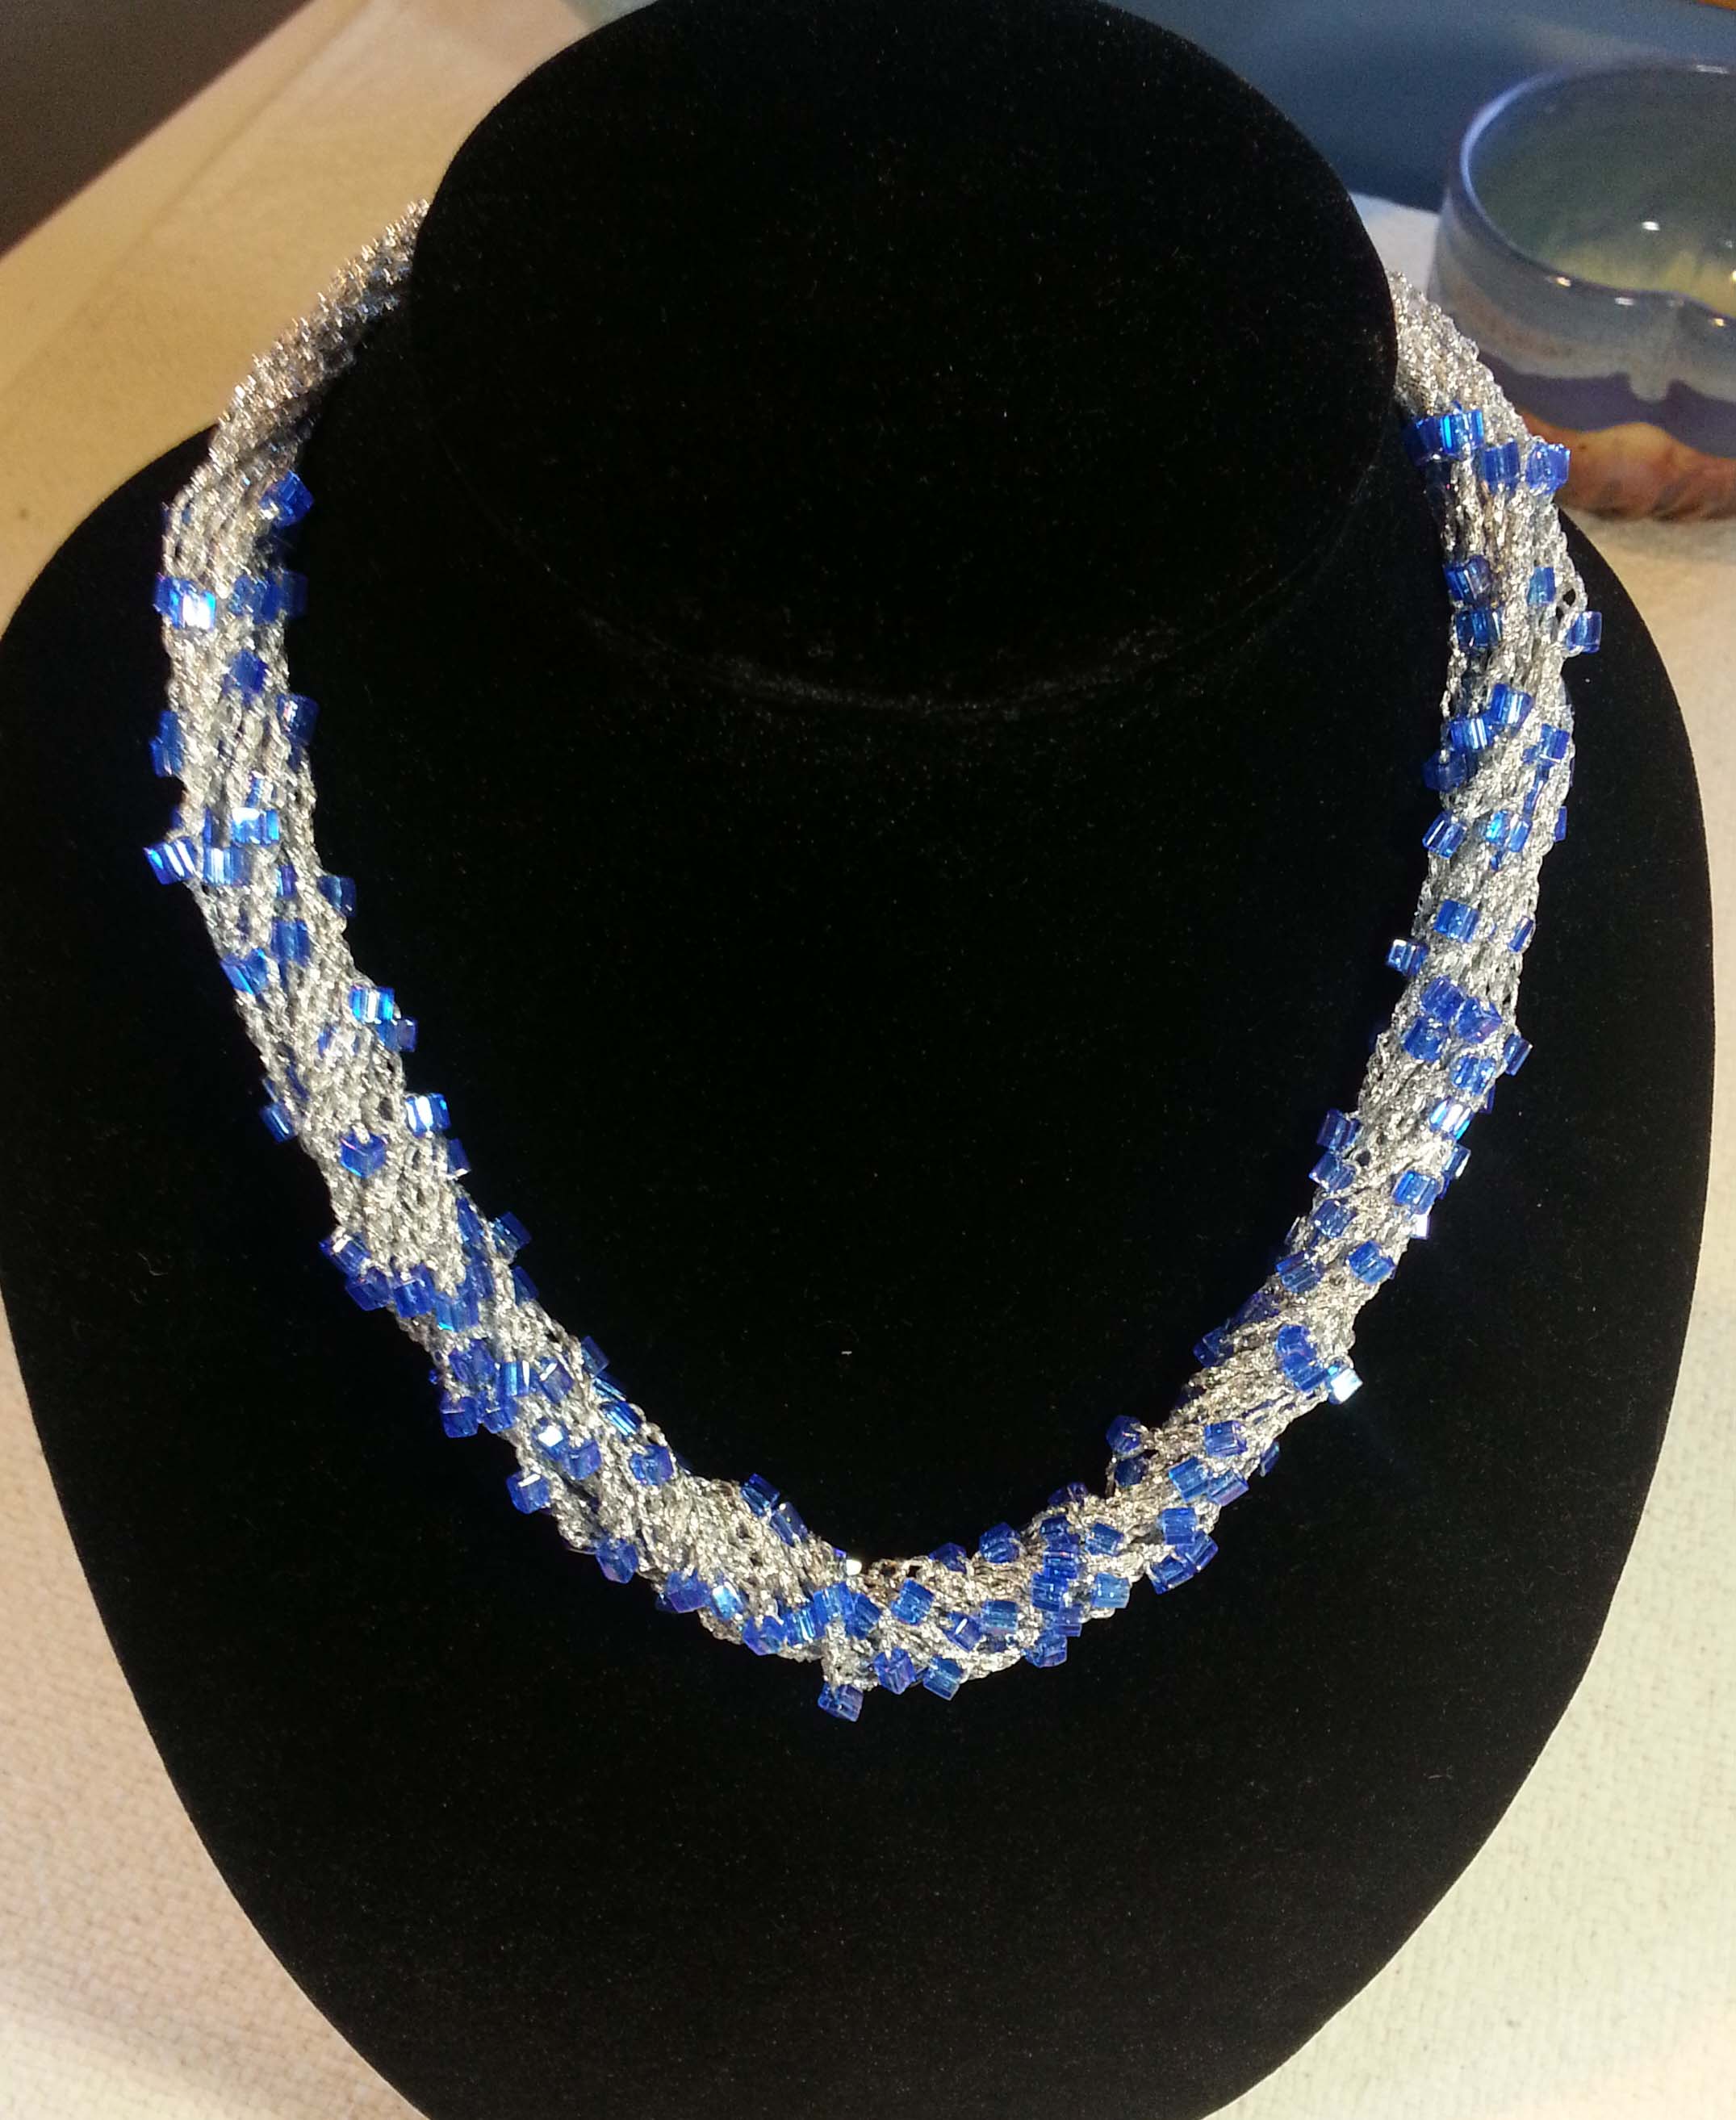
Sophisticated Simplicity Necklace
Designed by Andee Graves
Skill level: Easy
Materials
Thread/Yarn: Sample was made with Kreinik’s Ombre Twist thread, took approximately 45 yards (3 yds per strand), you can get approximately 6 necklaces out of one cone depending on how many strands you decide to have in your necklace.
2 metal split rings (I used rings that were 1/2″ in diameter) and a large lobster clasp necklace fastener.
Gauge:
15 chain stitches = 2″
Instructions:
Before you begin crocheting, string all the beads you want to use onto the thread (I always add in a few extra when stringing my beads just to be on the safe side). Also work the ring of the lobster clasp onto one of your split rings.
Leaving about 6 inches of thread for your beginning tail make a slip knot and place loop on your hook. Slip st into one ring, chain 1 and single crochet into the ring to secure the end of your first strand.
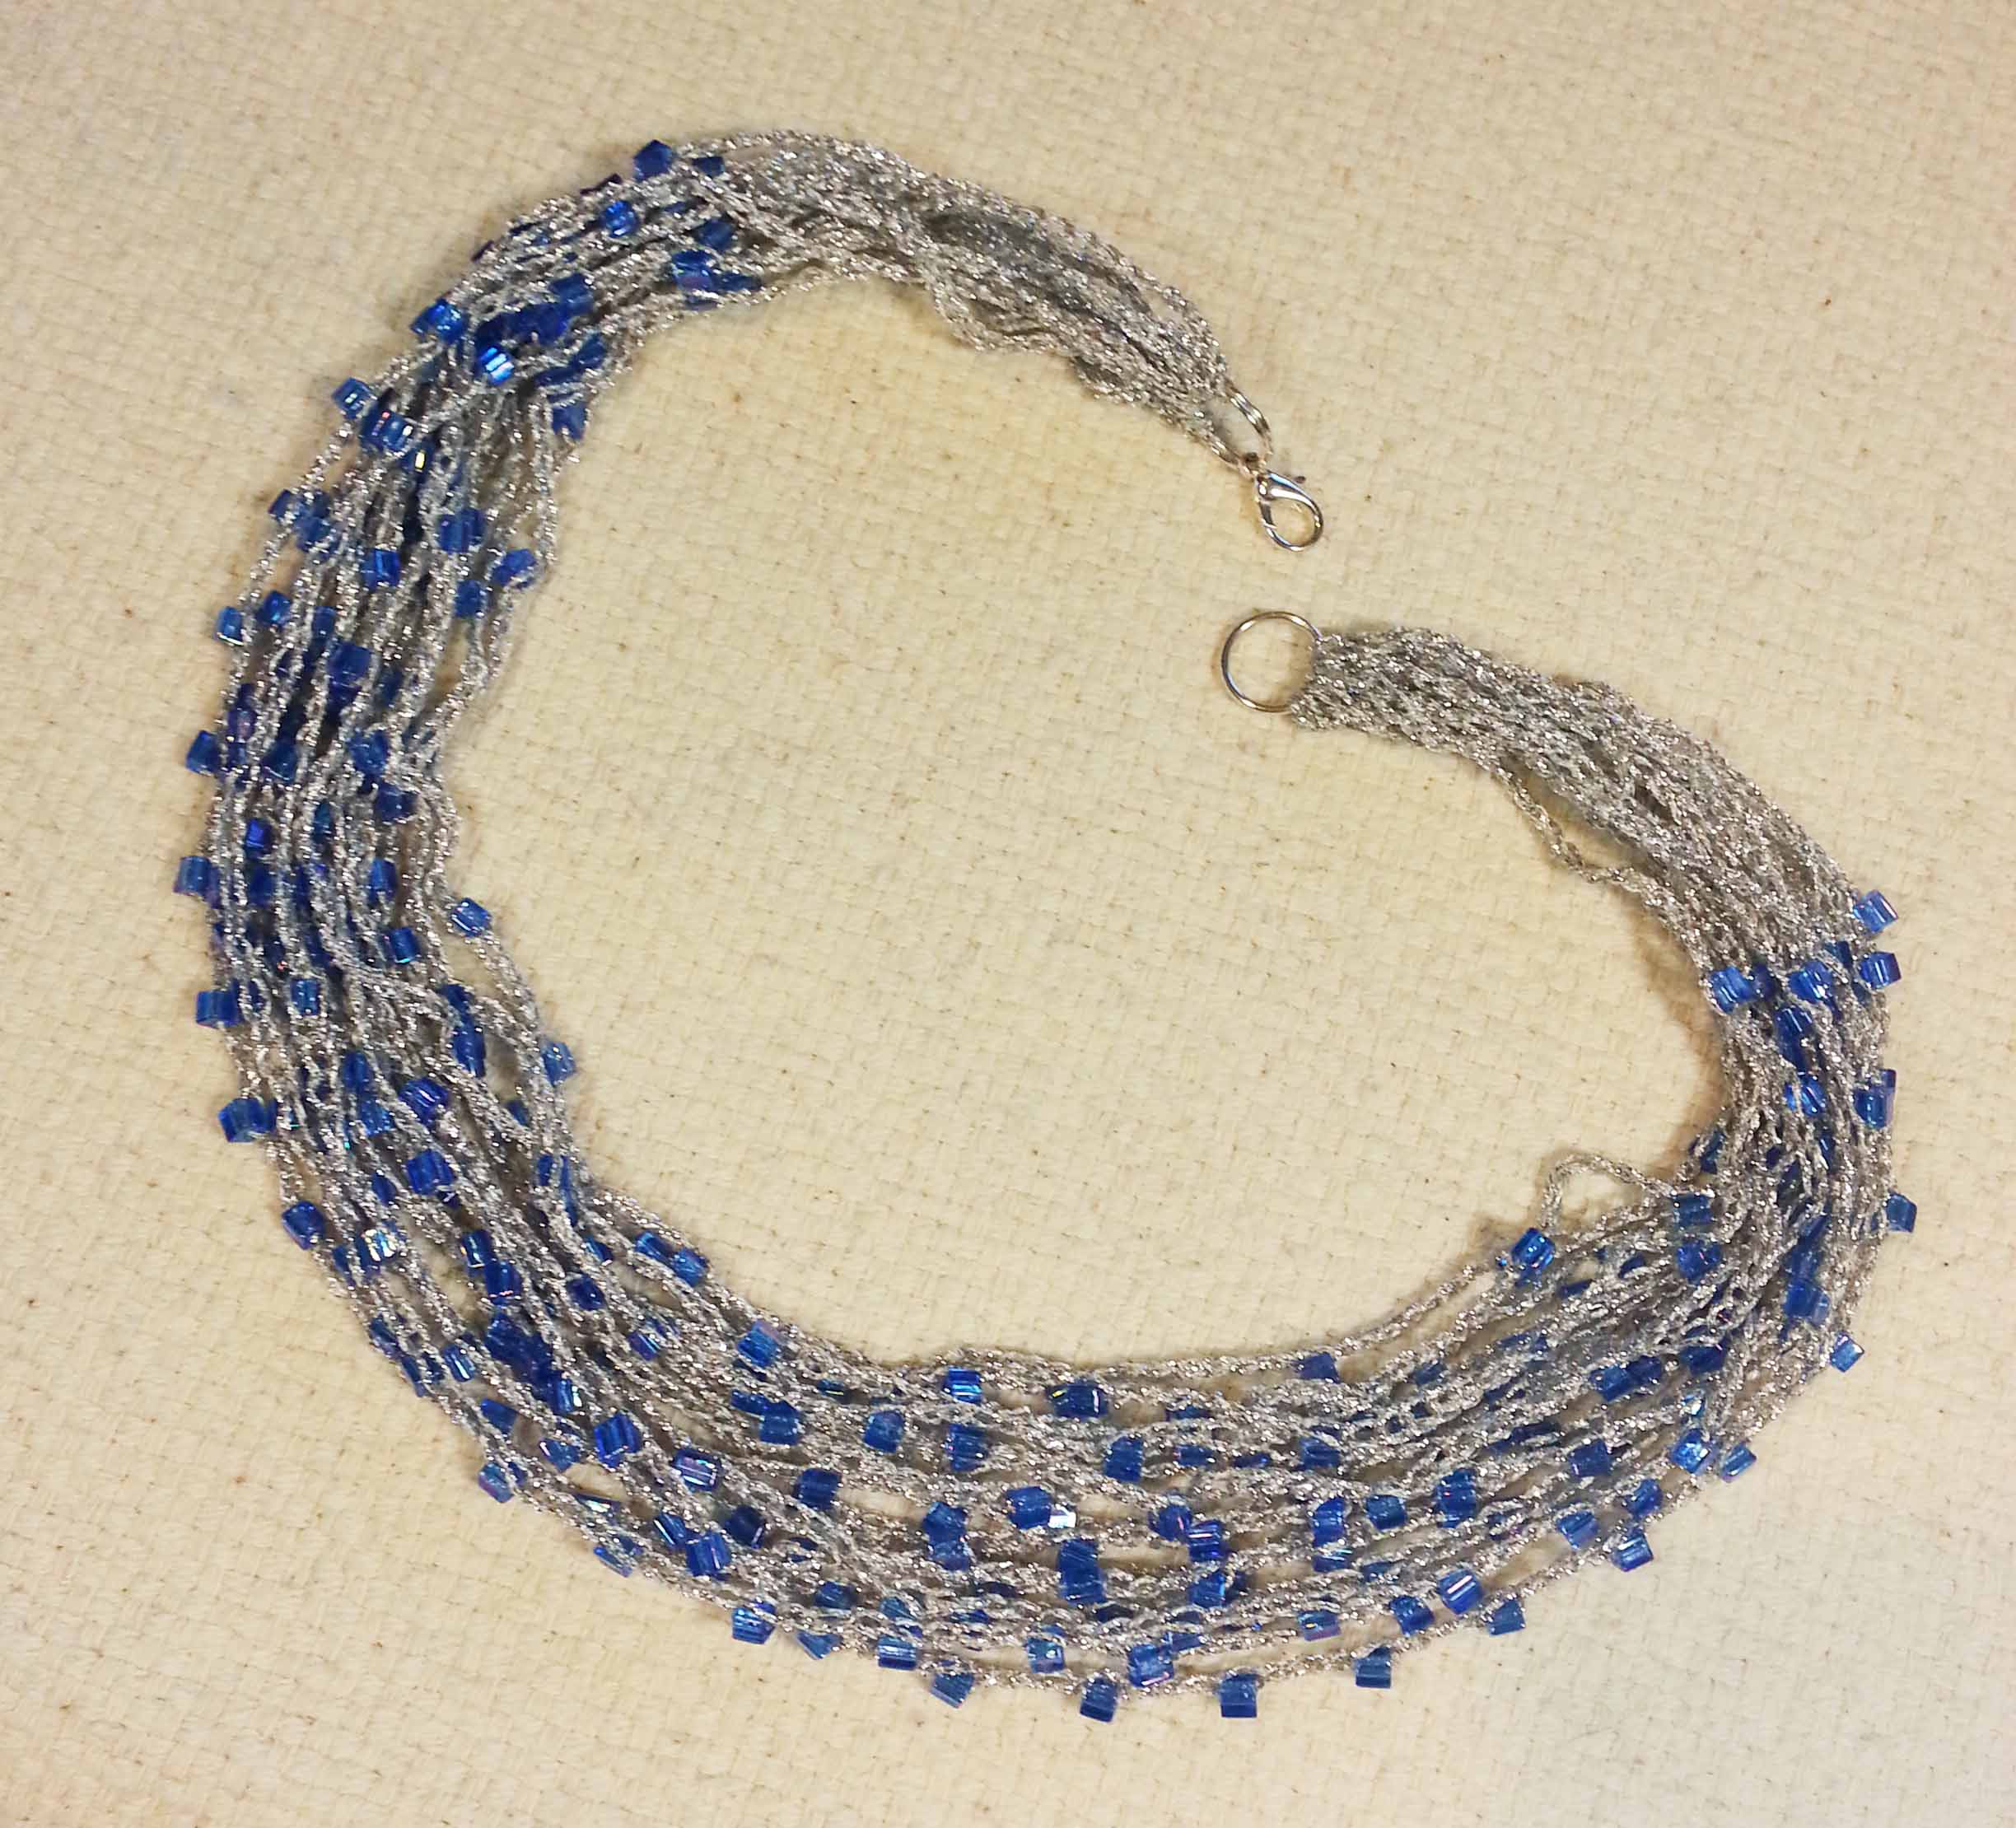
You will work the necklace by working chained strands in 3 different styles:
I alternated working the various styles of strands until I had completed 15 strands (5 strands of each style). You could do more or less, you’ll just want to adjust the number of beads you string before starting your project.
Once you have crocheted all your chain strands and have made the final sc in the ring, fasten off with a six-inch long tail. Weave the ending and beginning tails in and trim off excess thread. If you need to you can secure the tails further with a drop of cyanoacrylate glue (sometimes known as “Super Glue”).
Tips and Tricks for Success
When I was working on my sample in the photos I kept getting carried away with crocheting the beaded chain intervals. About half way thru I discovered a little trick that really sped things up and saved me some frogging and frustration.
Start the next strand by crocheting the chain stitches before the first beaded chain. Bring the number of beads for the strand you are working close to your hook, and push the remaining beads further down your thread so you have plenty of thread to work with while crocheting the strand. Make a slip knot in the thread right before your extra beads and put a locking stitch marker in the loop.
Now work your strand of chains and beaded chains, when you run out of beads you know it is time to finish that strand and connect it to the opposite ring with a single crochet. If you use up the thread you had pulled up, just move the extra beads further down the thread, undo your slip knot and create another slip knot down the thread. Replace your stitch marker and finish your strand.
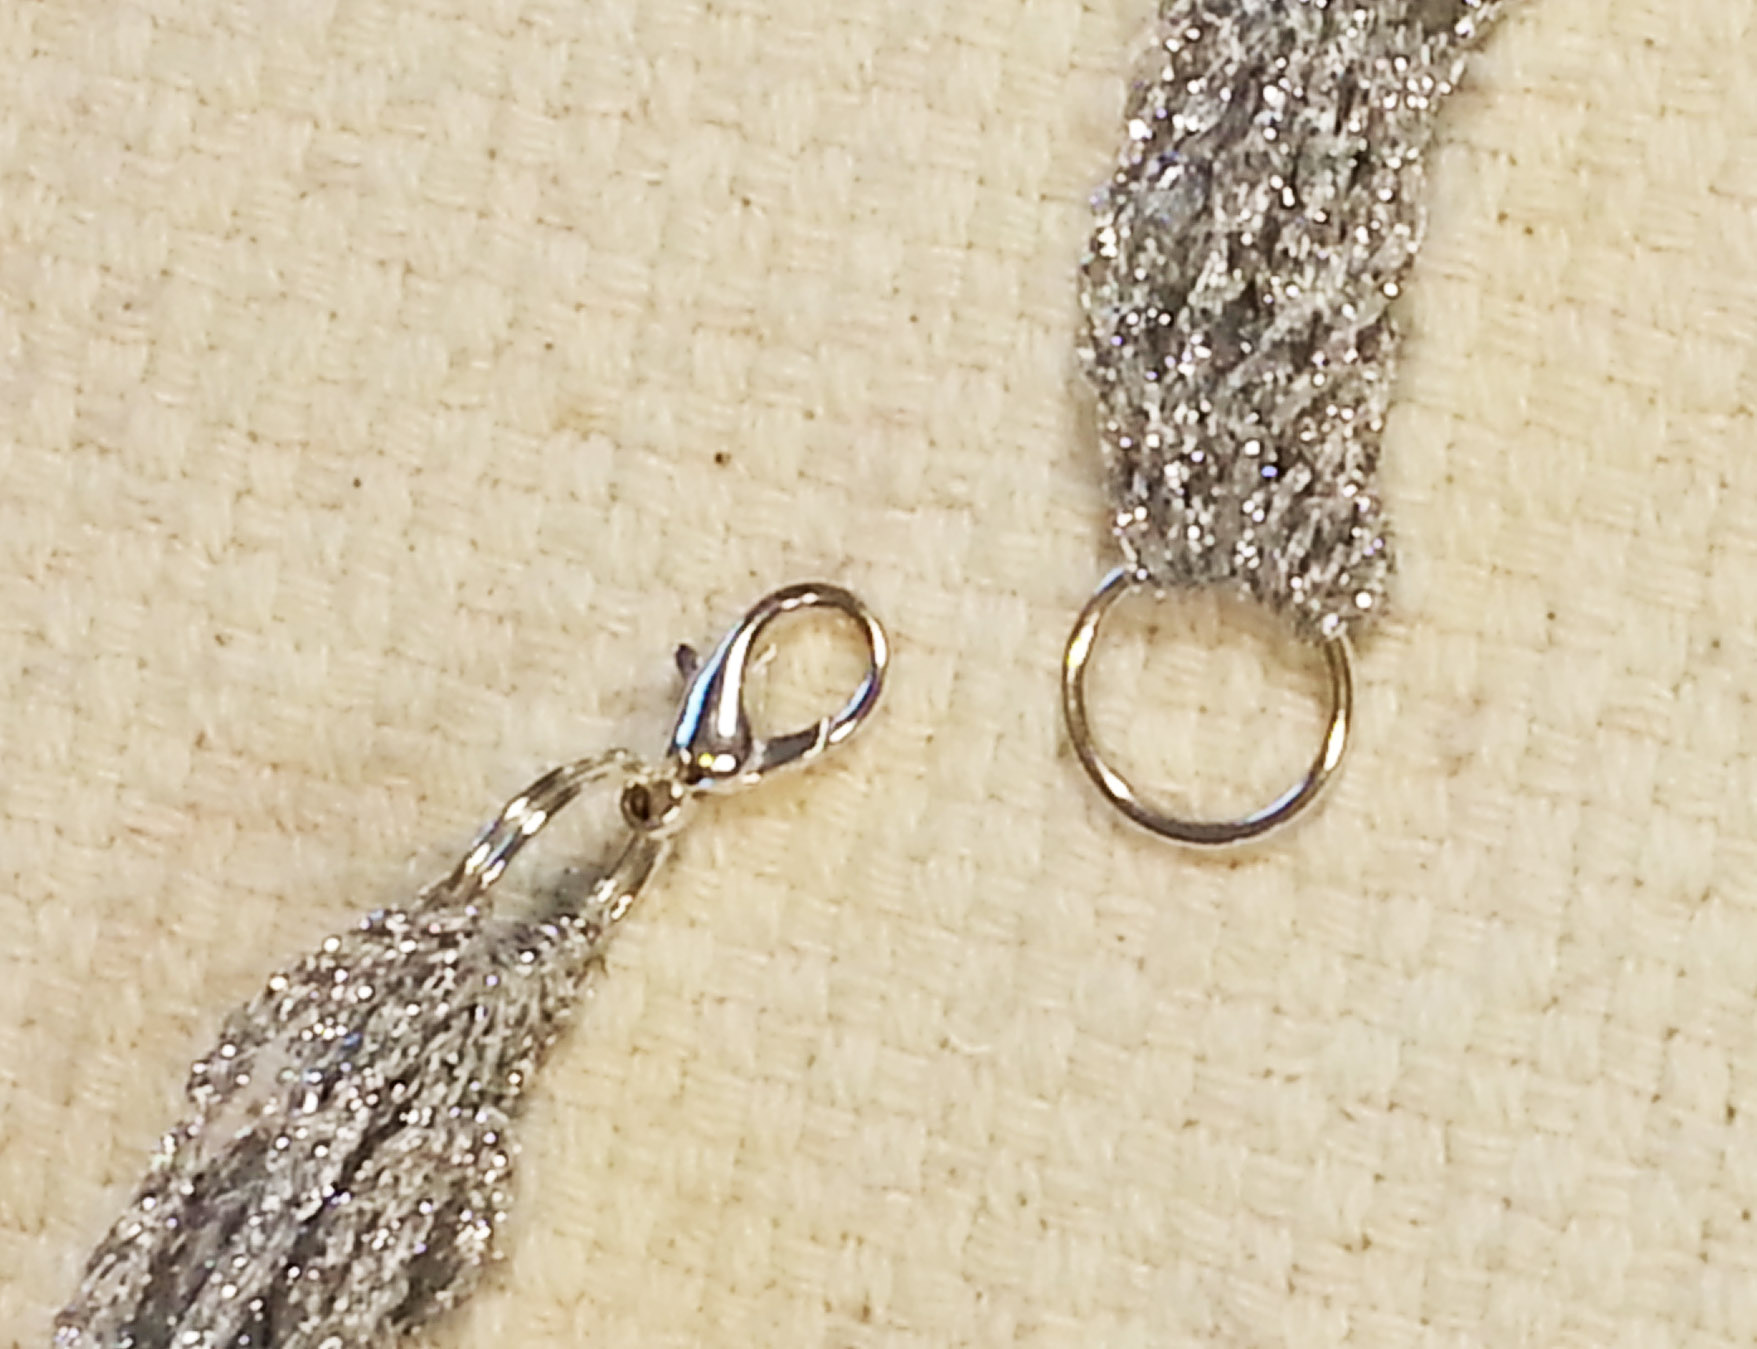
Note about the rings you use for the ends: I choose split rings because there is not an opening that the thread can slip thru causing your strands to drop off. If you prefer to use regular jump rings make sure that the opening in the ring is tightly closed.
I would also recommend placing a drop of thin cyanoacrylate glue over the join and let it dry completely before proceeding with your project. You want the thin runny type of glue that can penetrate the tight space between the 2 ends of your jump ring, not the thicker “gel” formulas that are also available. Obviously you want to have your lobster claw fastener placed on the jump ring before you seal it with the glue.
Now it’s your turn dear readers. Find some beads that appeal to you and crochet a Sophisticated Simplicity Necklace that will turn heads. No one needs to know how easy it was to make.
At the TNNA Winter Trade Show last week I took a couple of classes. I enjoyed them both, but the one that was most closely related to playing with fiber was the Needle Felting class I took.
Owl I made in the “Needle Felting Owl with Woolbuddy” class.
I have played with needle felting over the years. But I hadn’t really tried to do the sculptural stuff. One reason was I was a little scared of the super sharp needles one uses to create the project. At least with 2 dimensional needle felting I was a little more certain of keeping my fingers out of the way of the needle.
But I love sculptural work and knew it was finally time to take a class on it. My hopes were that I would learn the correct way of approaching the process and possibly shed less blood that way. Mostly that was what happened. I did manage to poke myself a couple of times, but it wasn’t when I was actually felting. I learnt that one should put the needle down safely when reaching for more fiber for the project.
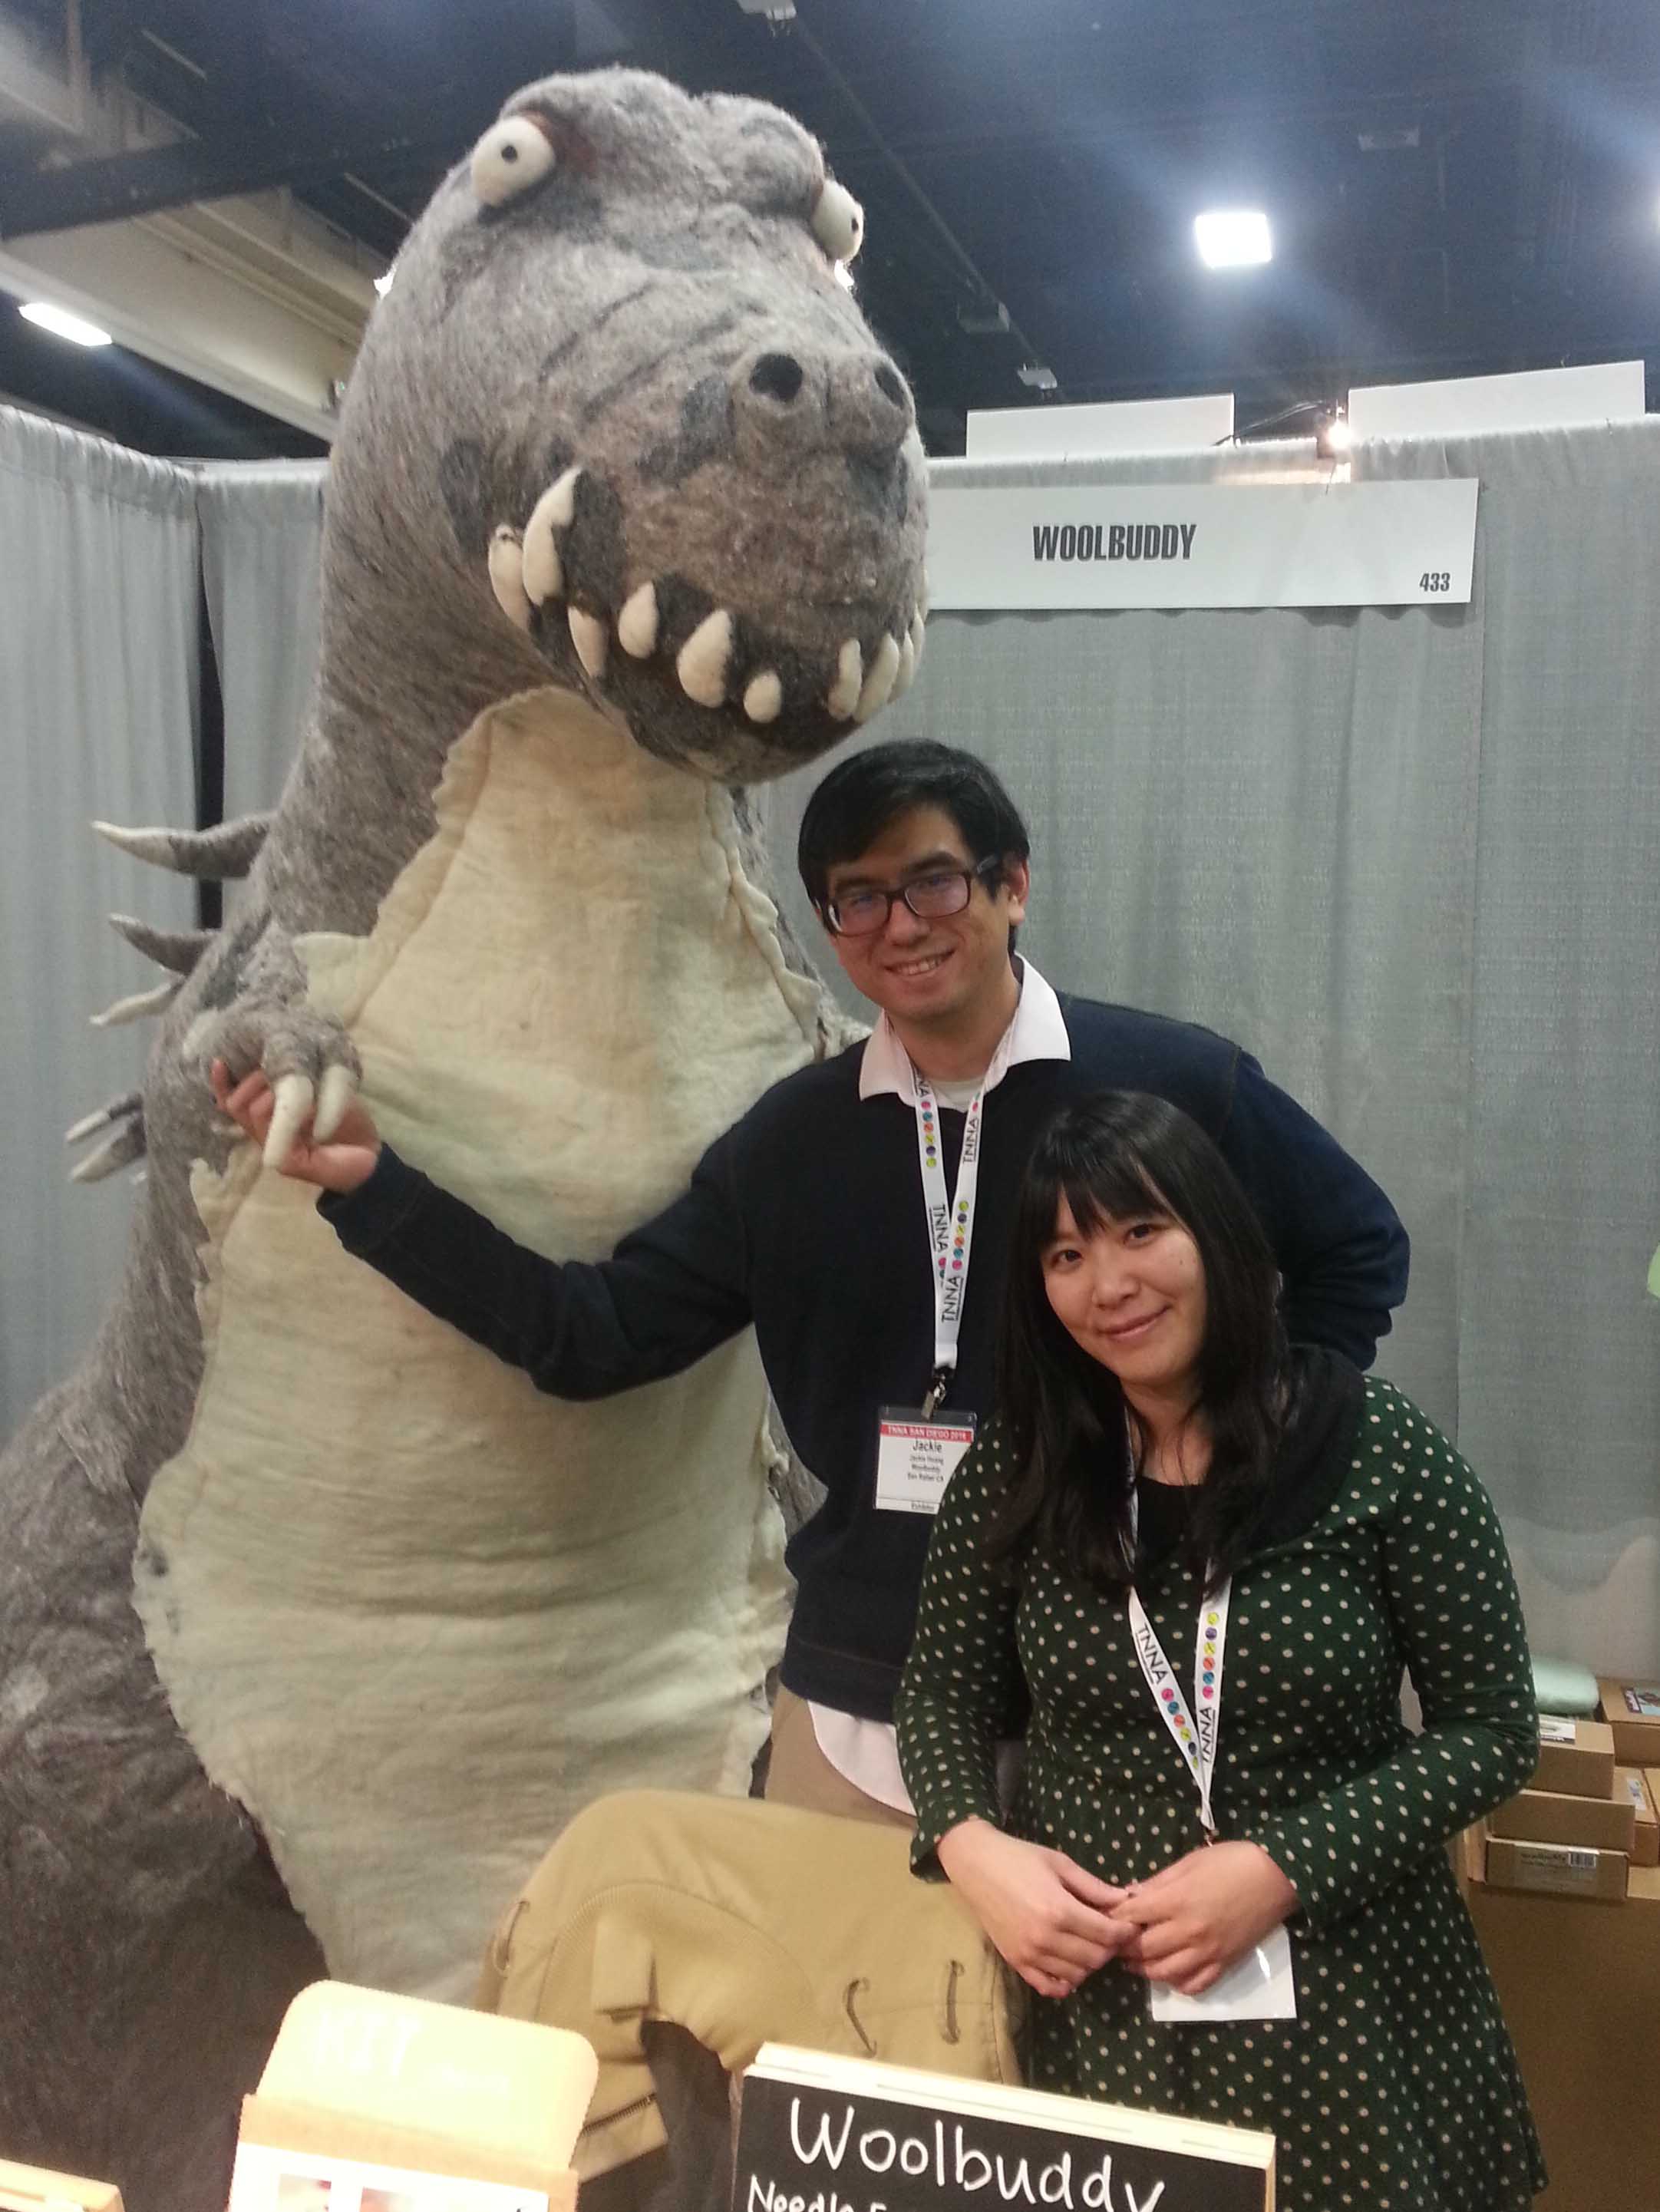
Initially I had not signed up for this class when I registered. I decided I would see if there were any slots available for the class on Saturday afternoon if I was still interested. The class was taught by Jackie Huang of Woolbuddy and they also had a booth on the show floor.
When I meet him and his wife at their booth and saw all the adorable and fun products I decided I had to take the class. My friend Tamara (MooglyBlog.com) signed up too. Look at the amazing full size dinosaur in their booth. Jackie said it took them 6 months to make it. You can read more about their company and even order online from them at their website: woolbuddy.com
In the 2 hour class we each made an adorable little owl starting with a handful of loose fiber. I had a great time making my owl and am looking forward to making more needle felted creations. I purchased one of their “Sea Turtle” kits the last day of the show. The kits are packaged in a sturdy little box with 2 needles, all the fiber you need and a step-by-step photo tutorial to make the character.
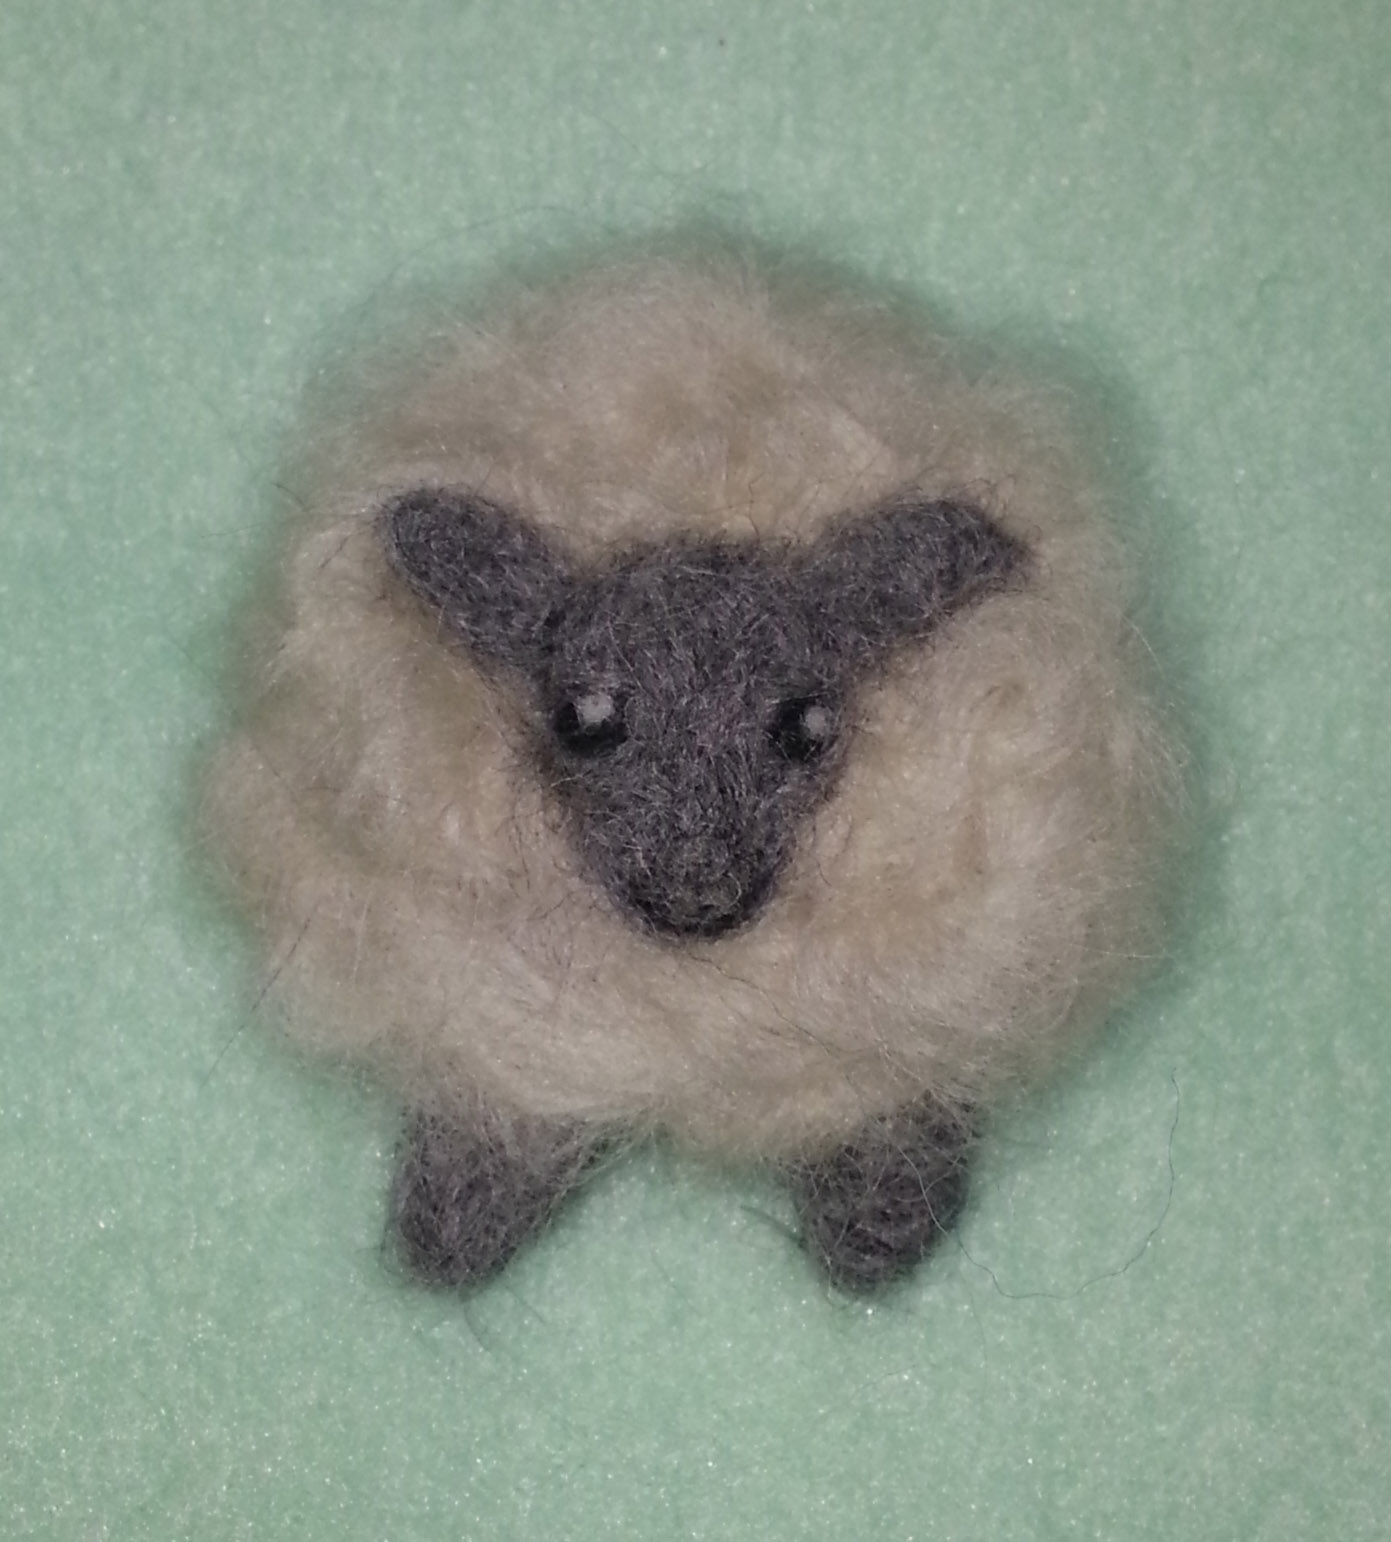
I haven’t tackled the kit yet. Instead, I have a bit of wool roving of various colors at home, so I have been practicing on it since my return. I made this fun little sheep that is going to become a pin. She is only about an 1 1/2 inches wide and a tiny bit taller (cause you know, Legs). I love all things sheep since they are a great symbol for me of the fiber crafts that hold a large place in my heart.
I’m hoping to teach my boys how to needle felt too. The boys need to make their own owls, since they keep attempting to “borrow” mine. It is definitely a craft that you have to pay attention to, yet you can see results fairly quickly when doing it. There might be a few injuries, but I’ll have the bandages handy if needed.
Wednesday was my first full day back home from this year’s Winter TNNA Trade Show. And you all got to hear how that turned out. We are still having frequent moments of “sad” missing our Tango boy, but there are happy thoughts too. Like how much fun I had at TNNA and how gorgeous San Diego, California was.
View of hotel pool area from the lounge.
That was where the show was held. The TNNA Winter show has been in San Diego before, but I wasn’t able to attend that one. I really lucked out with the weather. It was below freezing and horizontal snow in the air when I caught my flight in Denver, when I landed in San Diego it was 60F and sunshine (with palm trees). A lovely change from home. Just the day before it had been pouring rain in San Diego, but I missed out on all that.
Once again Karen Whooley and I roomed together. This was the view out our hotel window. Not too shabby? Right? We were staying at the Marriott Marquis right on the harbor.
The weather was nice the whole time I was there. Of course most of the time I was on the show floor inside the conference center checking out the yarns and new products, so I didn’t really get to enjoy the weather until I went outside to walk back to my hotel or go out to dinner with friends.
I came home with a bunch of yarn and some nifty products. You’ll be hearing more about those in the coming weeks. But for now the above photo gives you a taste of everything that came home with me. I’m going to be a very busy designer and teacher in 2016.
I took 2 classes at the show this year, and will be sharing more about those later as well. I really love to take classes at TNNA even though they are usually at 7:45 a.m. on Saturday and Sunday mornings. That is an hour of the day I would really prefer not to be attempting to absorb new information. But needs must.
Tuesday was all about packing up and traveling home. I had stayed a day longer than I usually do. I didn’t want the mad rush when the show ended on Monday to get the last bits of goodies packed and then make it to the airport in time for my flight. I think I may be staying that extra night from now on.
I got a good night’s sleep, then took my time organizing and packing all my stuff from the show as well as my dirty laundry. Even got some more visiting time with my good friend Tamara and we grabbed lunch together at the airport. I liked her beer bottle so much I took its photo and she gave the bottle to me.
RaineMara
My flight home was very pleasant. I had fun seatmates, Raine and Mara, who were game for modeling my lovely cloche’ that I purchased in San Diego. I’ll have to get a good photo of me wearing it soon.
I’ll have more fun posts for you with details on the goodies I collected and the classes I took over the next few months. There is a lot happening this spring in my design and teaching work, so be sure to stop by again.
I’m a bit behind today, in fact I’m behind by a day from my normal blogging schedule. I just got back from the TNNA Winter Trade Show in San Diego. Walked in the door last night at 9 p.m. I’ll tell you all about TNNA and the fun stuff I did there in my Friday post.
Today is about my darling dog Tango. The last few weeks he has been going downhill fast, but he waited for me to get back from this trip. When I checked on him last night I knew he was ready to leave us, even if it was so hard to let him go.
My husband had told me on the way home from the airport that he had been unable to persuade Tango to eat anything for the past 2 days and it was getting harder and harder to get him up to walk outside for bathroom needs.
Tango came to us thru the Rocky Mountain Lab Rescue (RMLR). At that time we were fostering for RMLR. We had limited access to our home because of the road damages on our canyon caused by the historic floods in September 2013, so we hadn’t been fostering for a while at the time. But we had agreed to take him temporarily while his regular foster was out of the state for Thanksgiving.
He was a mess when we met him. He had mostly recovered from recent surgery on his knee for ACL issues and on his side where a large cancerous tumor had been removed. His hair was shaved over 1/3 of his body. He was 6 1/2 years old by the vet’s estimate. And his RMLR name was Fango. But he was so very sweet and had the most beautiful eyes. I fell in love with him pretty much at first sight.
We were only supposed to foster him for 6 days, then he was going to go back to his first foster until a forever home was found for him. But the original fosters had a family emergency that meant they couldn’t take him back. We were happy to take over as fosters, because by that time we were reluctant to let him go.
He was so lovey and sweet, our other dog even got along with him. But we didn’t want to adopt him because he was so big. At 104 pounds that was a lot of dog in our little house. We got very few calls from approved adopters interested in him. The calls we did get were discouraged by his medical history combined with his age.
Once the winter holiday break rolled around we were all in love with him. The boys really wanted to keep him. I had bought him a nice big bed to sleep on and he was the constant companion of our youngest son. By Christmas Eve day we decided we were going to keep him for ourselves.
We filed the adoption papers with RMLR and re-named him Tango. We picked that name because he tended to “tap-dance” when ever it was dinner-time or we were giving out treats.
He was fully recovered from his surgeries by early February and he really became part of the family. He played with our other dog, Kenna, and loved to go for walks. When I was working at my desk he would come put his head in my lap for some ear rubs, then lay down beside my chair while I was at the computer.
Every day we reminded ourselves that our time with him might be limited. So we made sure to give him lots of love and hugs. When we adopted him I wasn’t sure if we would even have him a full year after everything he had been thru. Amazingly enough he was with us for over 2 years before this morning’s sad events.
We kept the boys home from school this morning and our wonderful vet, Lisa Cass, came to the house to help us say goodbye. Right now my eyes are very sore from crying but I know we gave him a happy life for the 2 years he was with us. He gave us so much love and joy. He will be missed, but we don’t regret having adopted an old dog.
Tomorrow I will be back into my daily routine, but today is about remembering one of the sweetest dogs that has been part of our family.
Today is my oldest’s 13th birthday. Really not sure how that went by so fast. I took a walk down memory lane looking at photos of both my kiddos as babies.
Babies are so much fun, especially when they belong to friends and extended family. I really like crocheting wearable gifts for them because they are quick to make. It’s that nearly instant gratification aspect.
If you don’t have a baby to crochet for check with your local hospital to see if they have a program for accepting donated hats for little noggins.
Finished Little Noggin Cap – M2H Designs
I was asked by my friends at the Longmont Yarn Shoppe to crochet a baby hat for a sample recently and this is the little hat I made. I used my Little Bitty Noggin Cap pattern from my November 2010 blog post. I actually had enough yarn left over that I could have made some booties to go along with it. It took less than 1/2 a 50g ball of yarn.
The yarn I used was Plymouth Yarns “Dreambaby DK; Paintpot”. I started with a G (4mm) hook, but felt the fabric was coming out too stiff, so I pulled it all out and switched to my 7 (4.5mm) hook. The fabric still came out solid, but had a bit more stretch to it and a softer feel.
I made this hat a little bigger than the hat in my “Little Noggins” blog post. But essentially I used the same instructions. I made the flat circle for the crown larger by repeating the increase instructions for 8 rounds (instead of 6), I worked 10 more rounds without increases and then 2 rounds of ribbing. I wanted this hat to be ideal for a brand new baby, which is typically 14 – 15 inch head circumference.
The half double crochet stitch has nice stretch to it and babies tend to have silky hair, so I made this hat to be a little snug by aiming for a circumference in the 13.5 inch range.
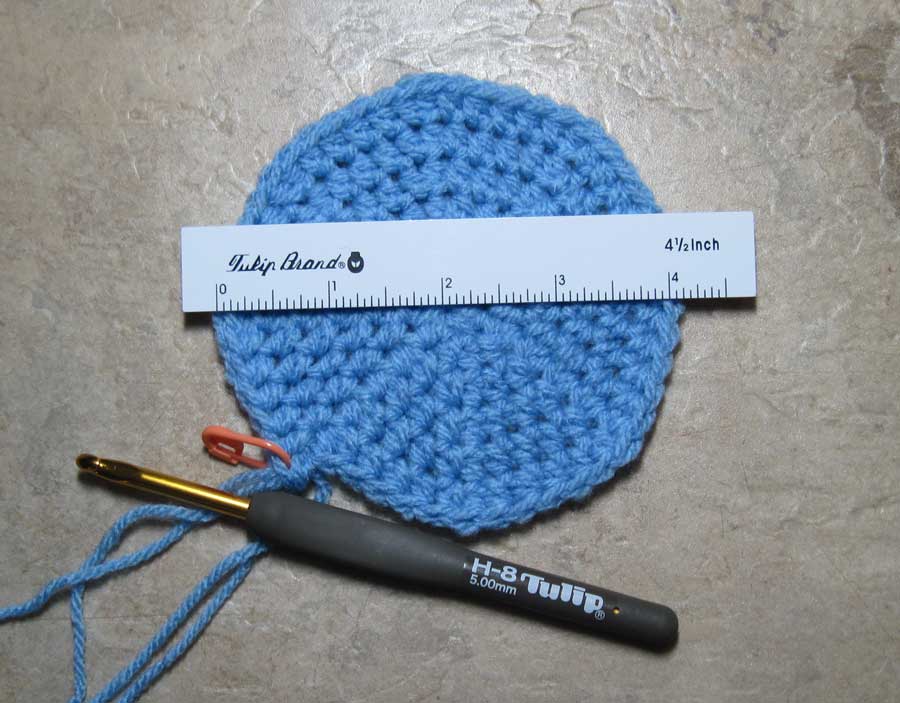
Measuring across the diameter of your crown. This was the original Little Noggin Cap.
If you would rather have a hat that is bigger, work your increase rounds until your crown diameter is just over 5 inches. That will give a hat that is a tad large for most newborns, but they grow very fast and will likely fit it in just a few short weeks.
I also changed how I work the ribbing at the brim for my hats. In the original pattern I had you step down the continuous spiral and then work the brim in joined rounds. I’ve since discovered that I can go right into the back post/front post ribbing without stepping down and it isn’t really all that obvious. Then I work the step down at the end of the ribbing rounds. Much easier that way.
I hope you have fun making some hats for the little noggins in your life.
I’m off to San Diego for the TNNA Winter Show. Hope to have some fun new yarns and products to show you all when I get back. My next post may not happen until Wednesday morning. So thanks for your patience.
One of the most interesting things about being a designer is working with a variety of colors in designs.
Sometimes the color of yarn chosen for a design is up to me, other times it is decided by the editor. There have been a few times when I wasn’t too sure about the color picked. It was a color or combination of colors that I don’t normally like together.
Or an editor might have decided that a design I like in a solid color would be better in a multi-colored yarn.
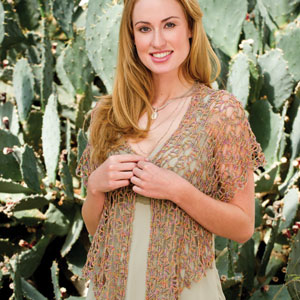
Right Angle Wrap Photo courtesy of Annie’s Publishing/Crochet! Magazine
A prime example of that is my “Right Angle Wrap” that was in “Crochet !” magazine. I had originally envisioned that design as a single color. But the editor decided to go with a multi-color in the yarn.
Me wearing the “Right Angle Wrap”
In the years since I created that design I’ve actually grown very fond of the colorful version. I’m wearing it in the photo above.
The best part of crocheting though is you have the choice of making a project in any color that pleases you. Many times I’ve seen a photo of a design in the magazine and thought, “If I made that I think I would use a different color”. Often I have a yarn in my stash that I know will work up well in a design and I don’t even worry about color (most of my personal stash yarn has already been chosen for color). I’ve even re-worked some of my published designs in a different color just to see how they would look.
Photo Courtesy of Annies
I made a “Winged Columns Wrap” for my mother one year in the silver grey color of that yarn. Unfortunately I didn’t take a photo of it before sending off the gift to her.
An example of some of my readers changing colors are all the gorgeous “Whirlwind Afghan Block” projects folks made for the Moogly 2015 CAL. Some folks even changed the number of colors they used in the block adding to or subtracting from the original 5 colors in the pattern. I love to see that kind of creativity.
So the next time you are looking at patterns for a project, remember the color choices are all up to you.
Hope all my readers have had a good start to 2016. I have had a very interesting end to 2015.
When I posted before the holidays I had a brilliant plan, which of course means that said plan would be quickly and completely demolished. Isn’t there a proverb about “if you want to make the Divine laugh, make a plan.”? Certainly seems that way for most of my 2015 and the last 2 weeks proved to be no different. Sure hope the Divine is having a good laugh. Clearly I am getting many opportunities to practice my “letting go of perfect” pledge.
First off I did manage to get most of my gift items finished in time for Christmas, and had our guest room ready for my lovely in-laws visit. After those successes things got a little interesting. Starting with the in-laws arrival.
They made it to Denver without any problems and my husband took our SUV to pick them up at the airport the Monday evening before Christmas. They stopped at the grocery in Boulder to pick up a few items and while there my Father-in-Law (Baba) took a fall in the parking lot. He wouldn’t go to the hospital at that time, but by the morning he was admitting that he was hurt worse than he thought.
The plan for that Tuesday was decorating the Christmas tree with Nana and Baba and me going to town for an appointment and errands for the big day. Instead it was about getting Nana and Baba to the hospital emergency room for X-rays, stitches and a splint for some broken bones in his hand. Fortunately with some help from my sister-in-law we worked out all the logistics without too much headache for any one person.
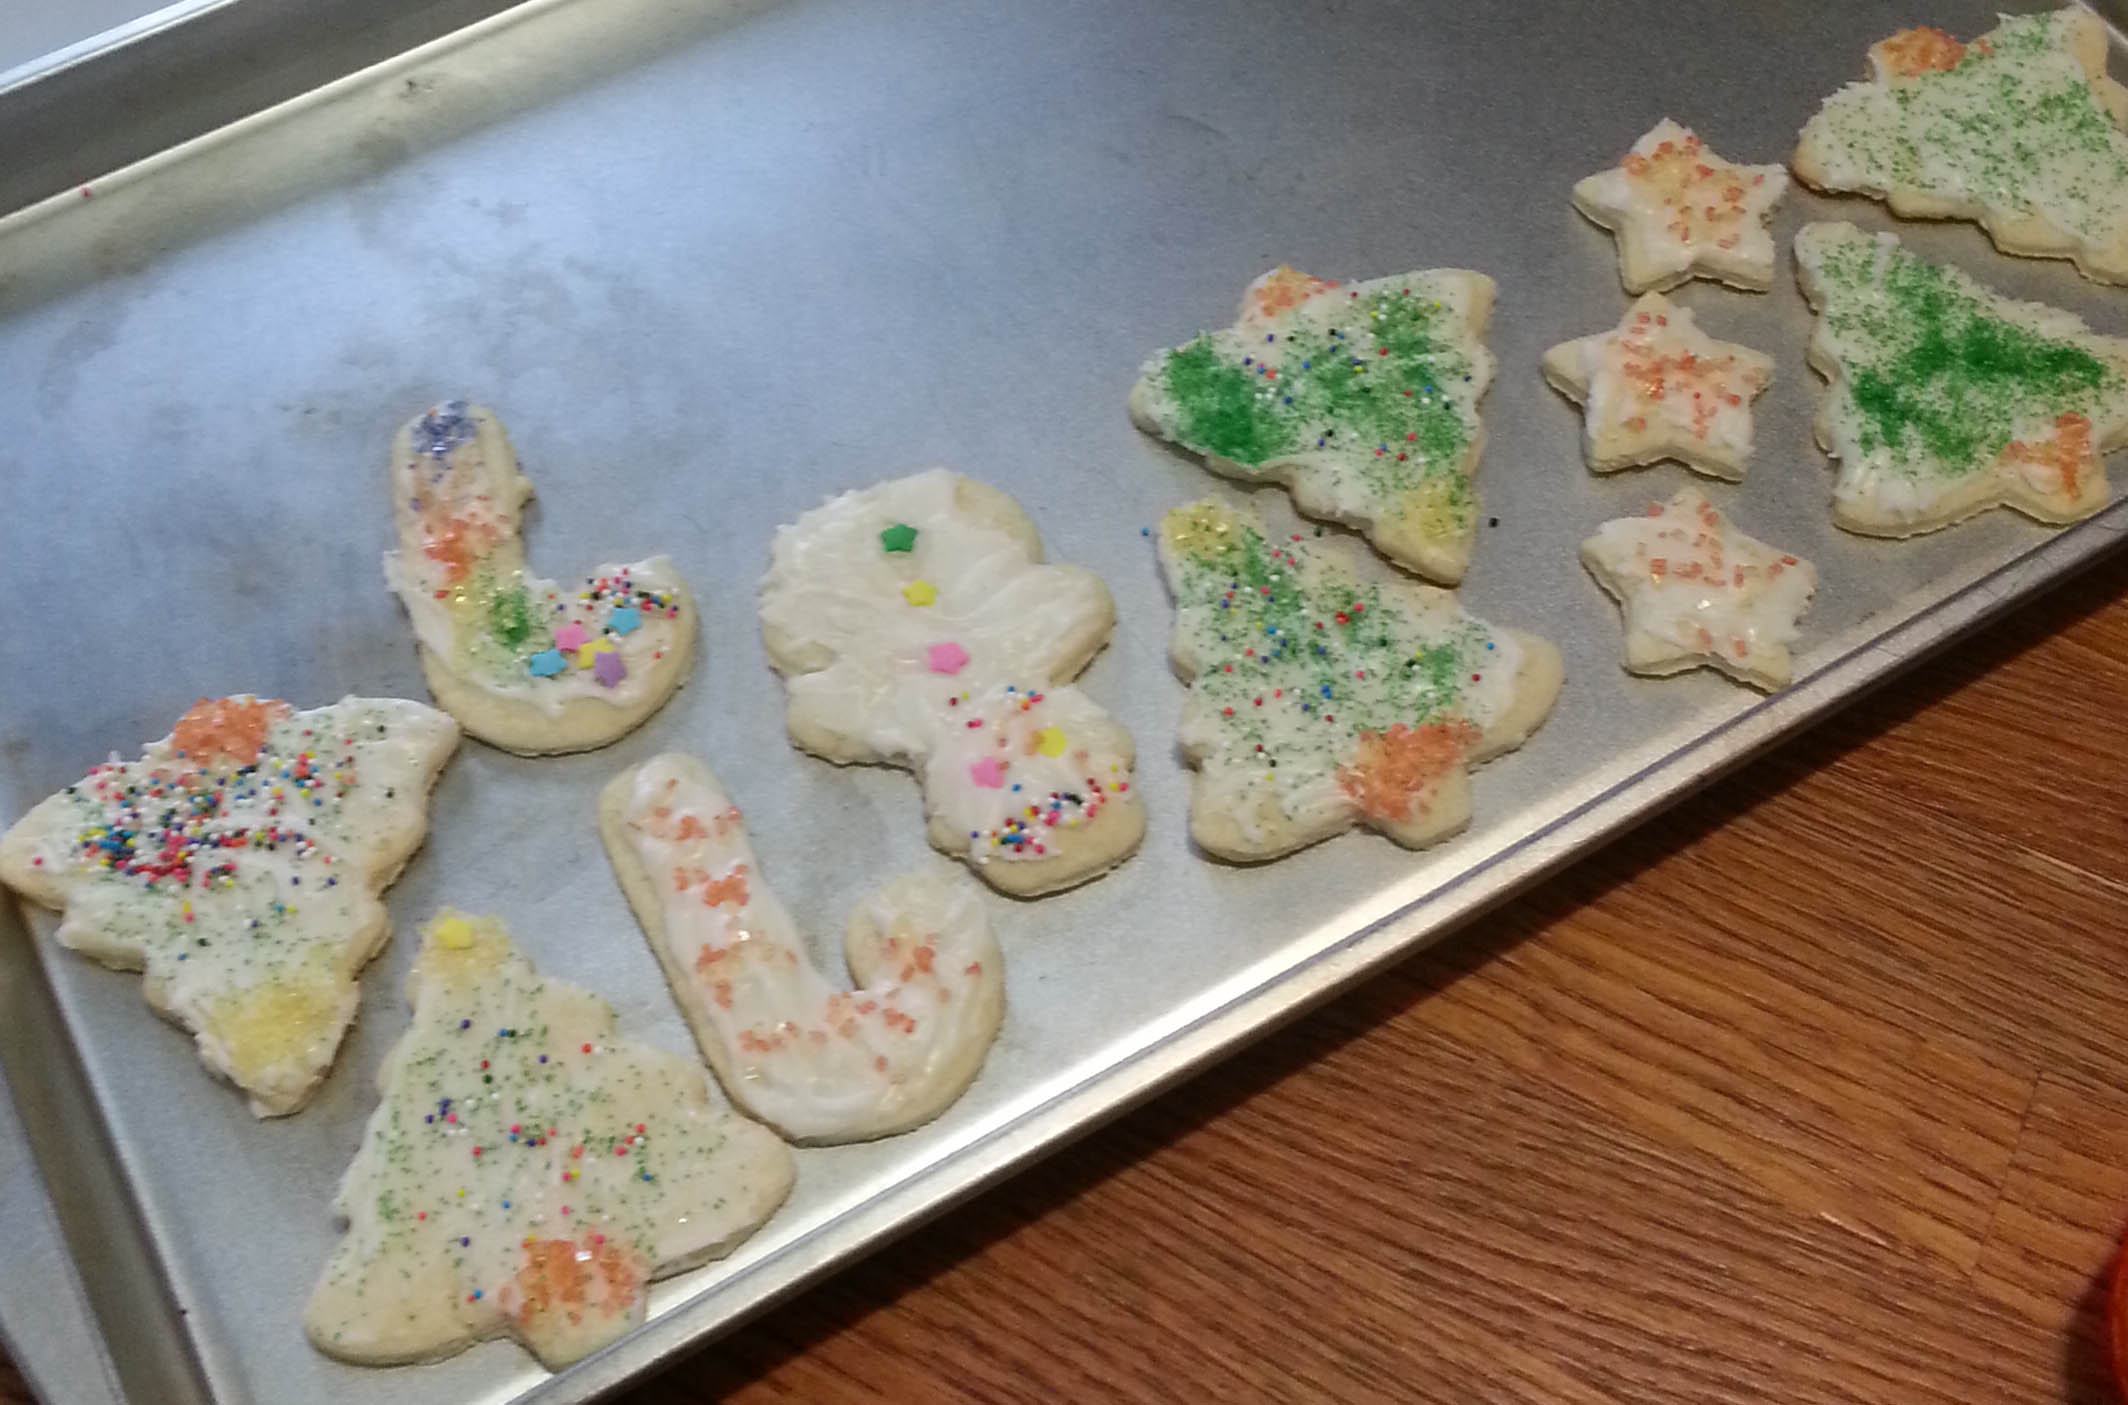
The kids made cookies with Nana.
The rest of the week went a little better. We had a fun Christmas with a house full of family. By the end of Christmas day I was feeling a bit worn down and the Sunday after Christmas I realized I was really coming down with a cold. I said good-bye to my in-laws Monday morning when they left for the airport, and went back to bed.
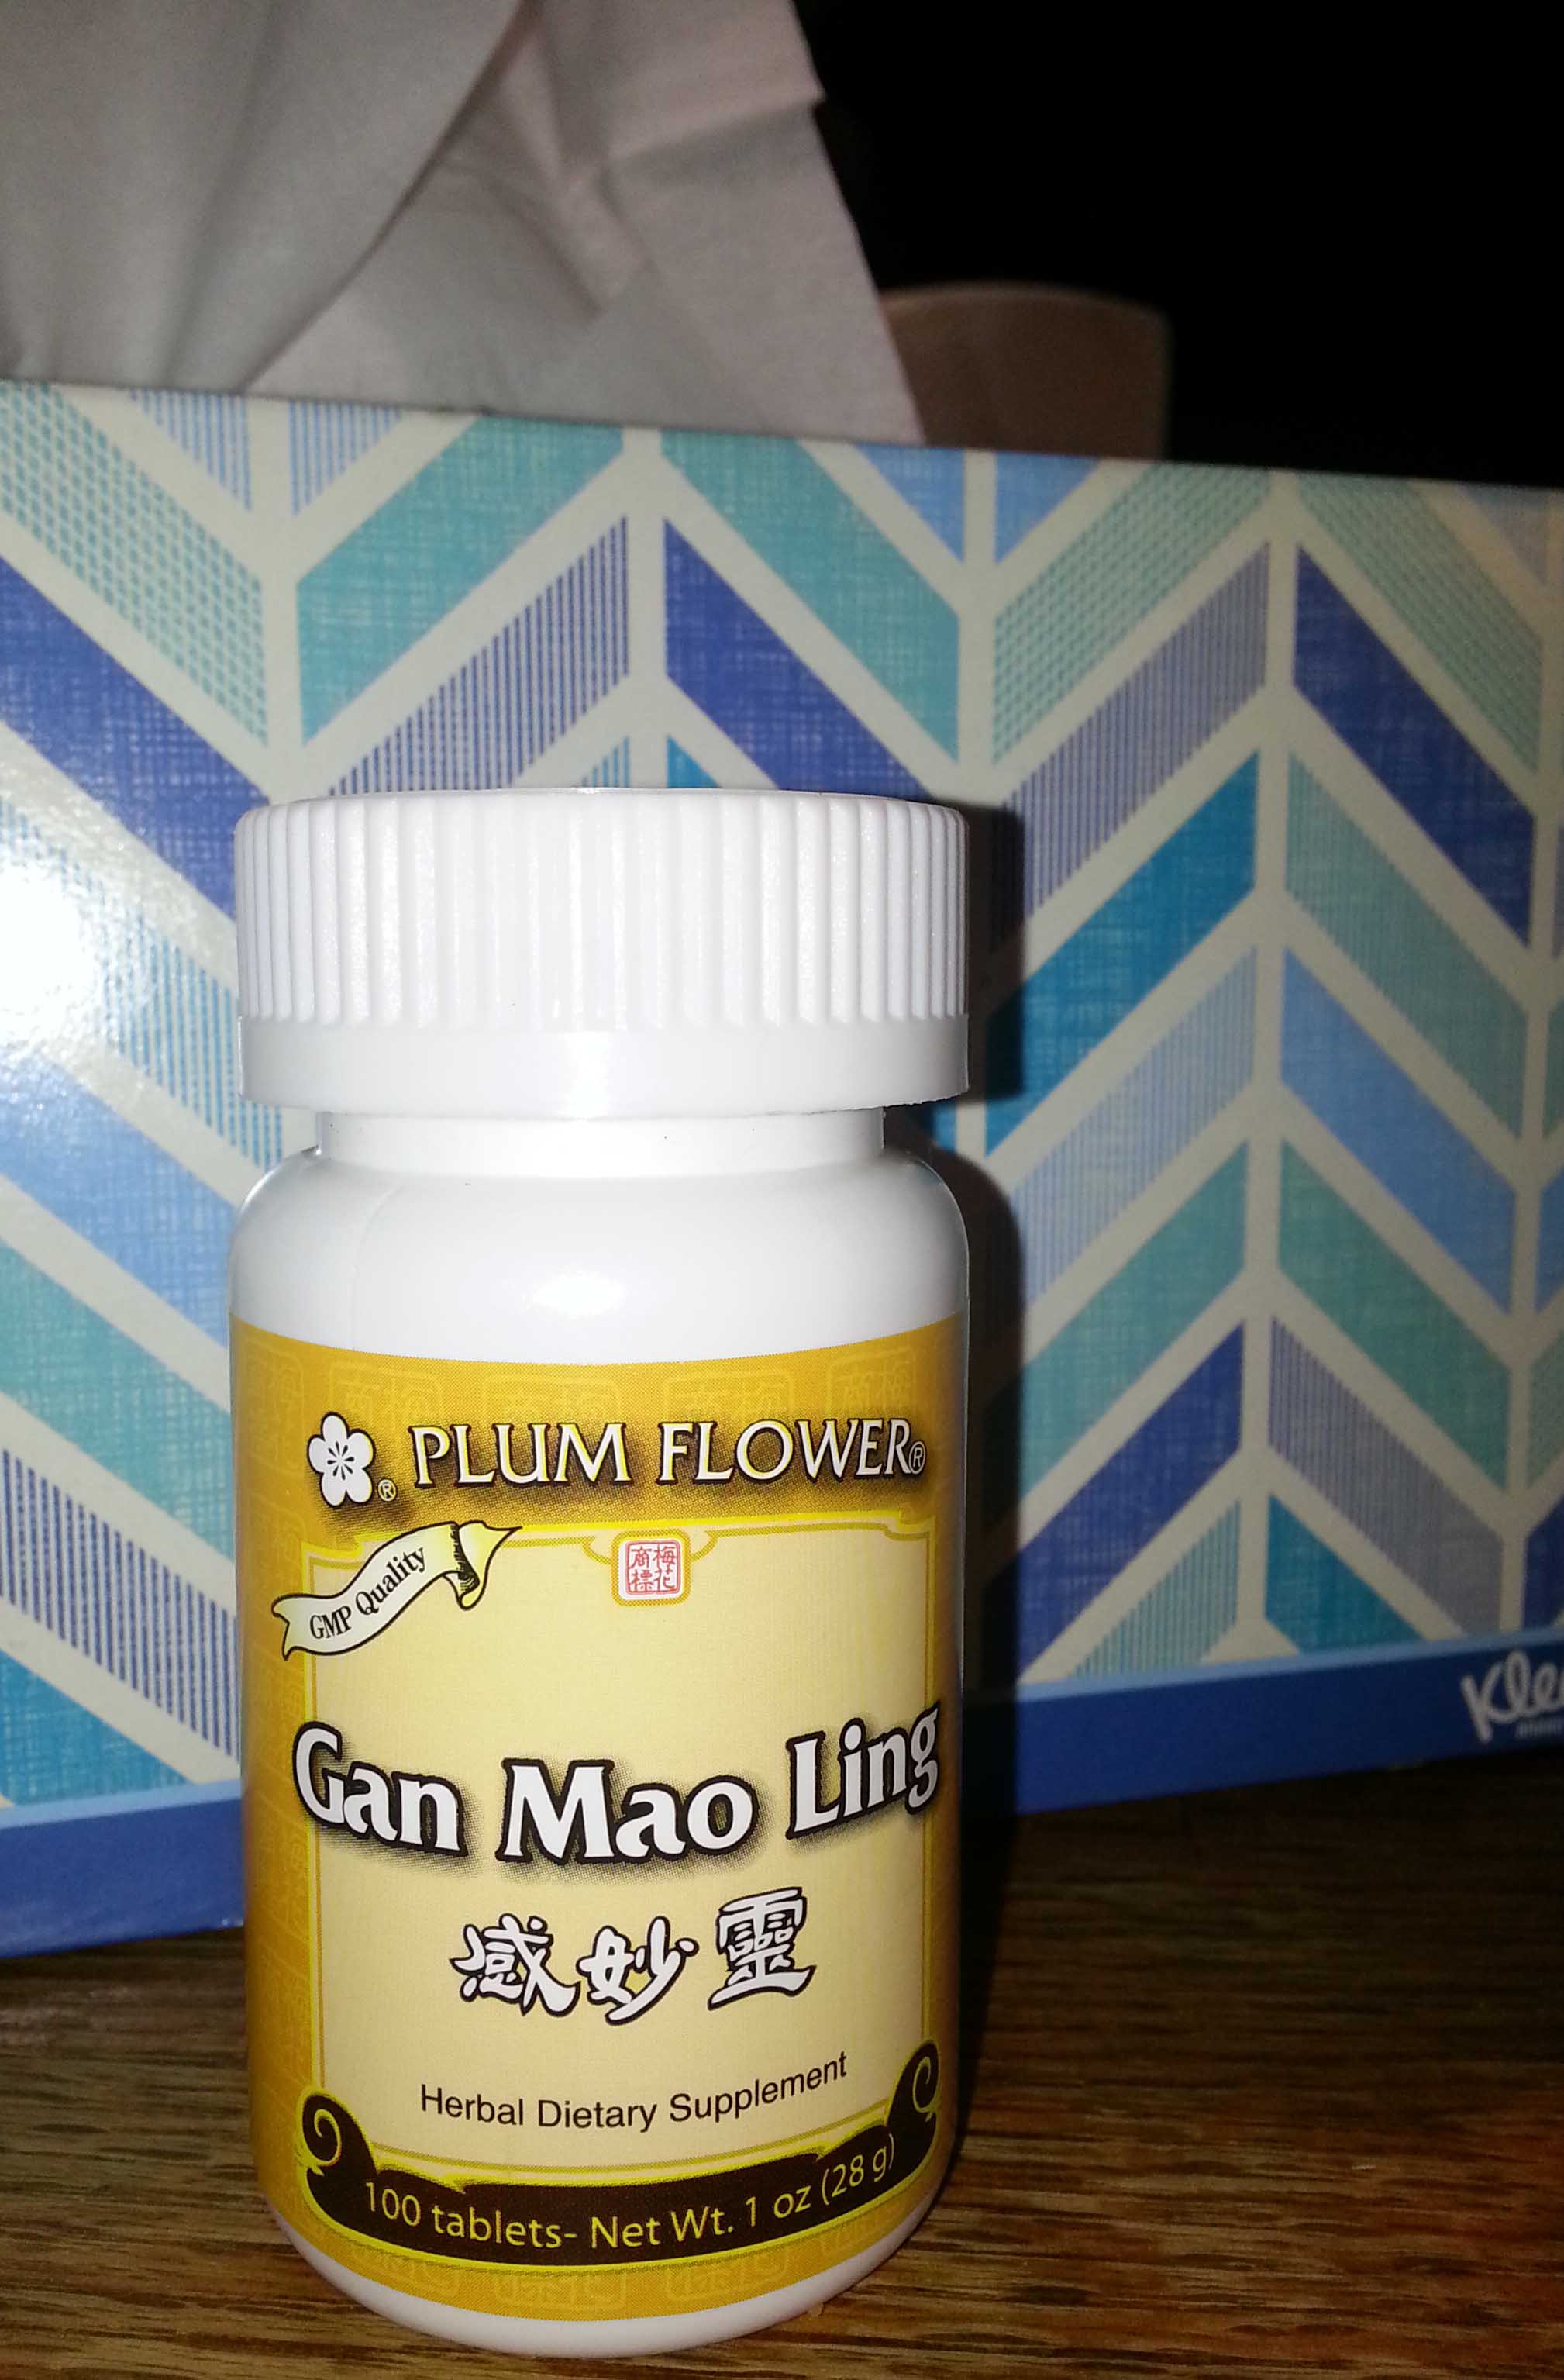
My best friends this past week.
My grand plan for that Monday until New Year’s Day was to get lots of work done while the kids were still on school break. Unfortunately this week has instead been the “Graves Zombie Household” with both Himself and I down with this nasty virus.
Until today I was hopeful that the kids had escaped the virus, but it looks like my oldest may have been infected. I suspect my youngest is the one that gave it to us. He has always been good about sharing. He is bouncing around like a happy little puppy while the rest of us are snuffly and sneezy.
Fortunately colds do eventually run their course, and I am feeling a bit better today This is good, as I am headed to San Diego next Friday for the TNNA Winter Trade Show. Lots to get done in the next 6 days before then.
Tomorrow I finish taking the Christmas Tree down. Though I am enjoying one last night of the beautiful lights before it is down til next Christmas.
Though 2015 has been full of surprises and ended with more of a whimper than a bang, I am very optimistic about 2016. I hope to have lots of fun designs, videos, classes and some surprises to share with all of you very soon.