Today is Thanksgiving day here in the US. For my family it is a day to get together with family and friends for a big meal and be thankful for what we have.
In keeping with this year’s tradition of school holidays, the kids are both sick with pink-eye and colds. It’s looking like himself and I are fighting off the cold part as well. I’m at least grateful for not having to juggle the kids missing school days along with everything else.
Another thing I am thankful for is the training I have had in medical science. I treated the kids with Lavender essential oil and raw honey until himself could take the them to the doctor. Both kids have reported that their eyes are no longer itching. The doctor only gave my youngest eye drops because he was the only one with swelling and discharge.
Fortunately today I’m feeling a lot better and my youngest seems to be turning the corner. My younger brother and his girlfriend came up for dinner, but stayed in a hotel in town to avoid too much time with the germs. I’ve been looking forward to seeing the 2 of them for the past month.
Tomorrow we will be decorating our new Christmas Tree. This year I decided it was time for a skinnier tree. We have always had an artificial tree because of himself’s allergies. We have a very full house between the kids’ stuff and my yarn, so I’ve been campaigning for a smaller tree. I was especially attracted to the “pencil” trees that I had seen, and to the “pre-lit” trees.
My least favorite part of decorating the tree is fighting with putting on the lights. I’m so excited to finally have a “pre-lit” tree! We will also be decorating a big swath of greenery over our largest living room window too. That way we can put out some of the ornaments the animals like to attack.
For many folks Thanksgiving marks the beginning of Christmas shopping with Black Friday sales at all the big retailers. I hope some of you will be looking at shopping also on Small Business Saturday to support small businesses that make up the back bone of the US economy.
Speaking of Small Business Saturday, I’ll be offering 10% off any 2 patterns in my Ravelry Shop to all my wonderful readers. Just put 2 of my patterns in your cart then use the coupon code SBS2017Thanks to get the discount. This coupon code will only be good on Saturday, November 25, 2017 from 1 a.m. – 11:00 p.m. Mtn Time.
Thank you to all my dear readers for your support of my very small business.
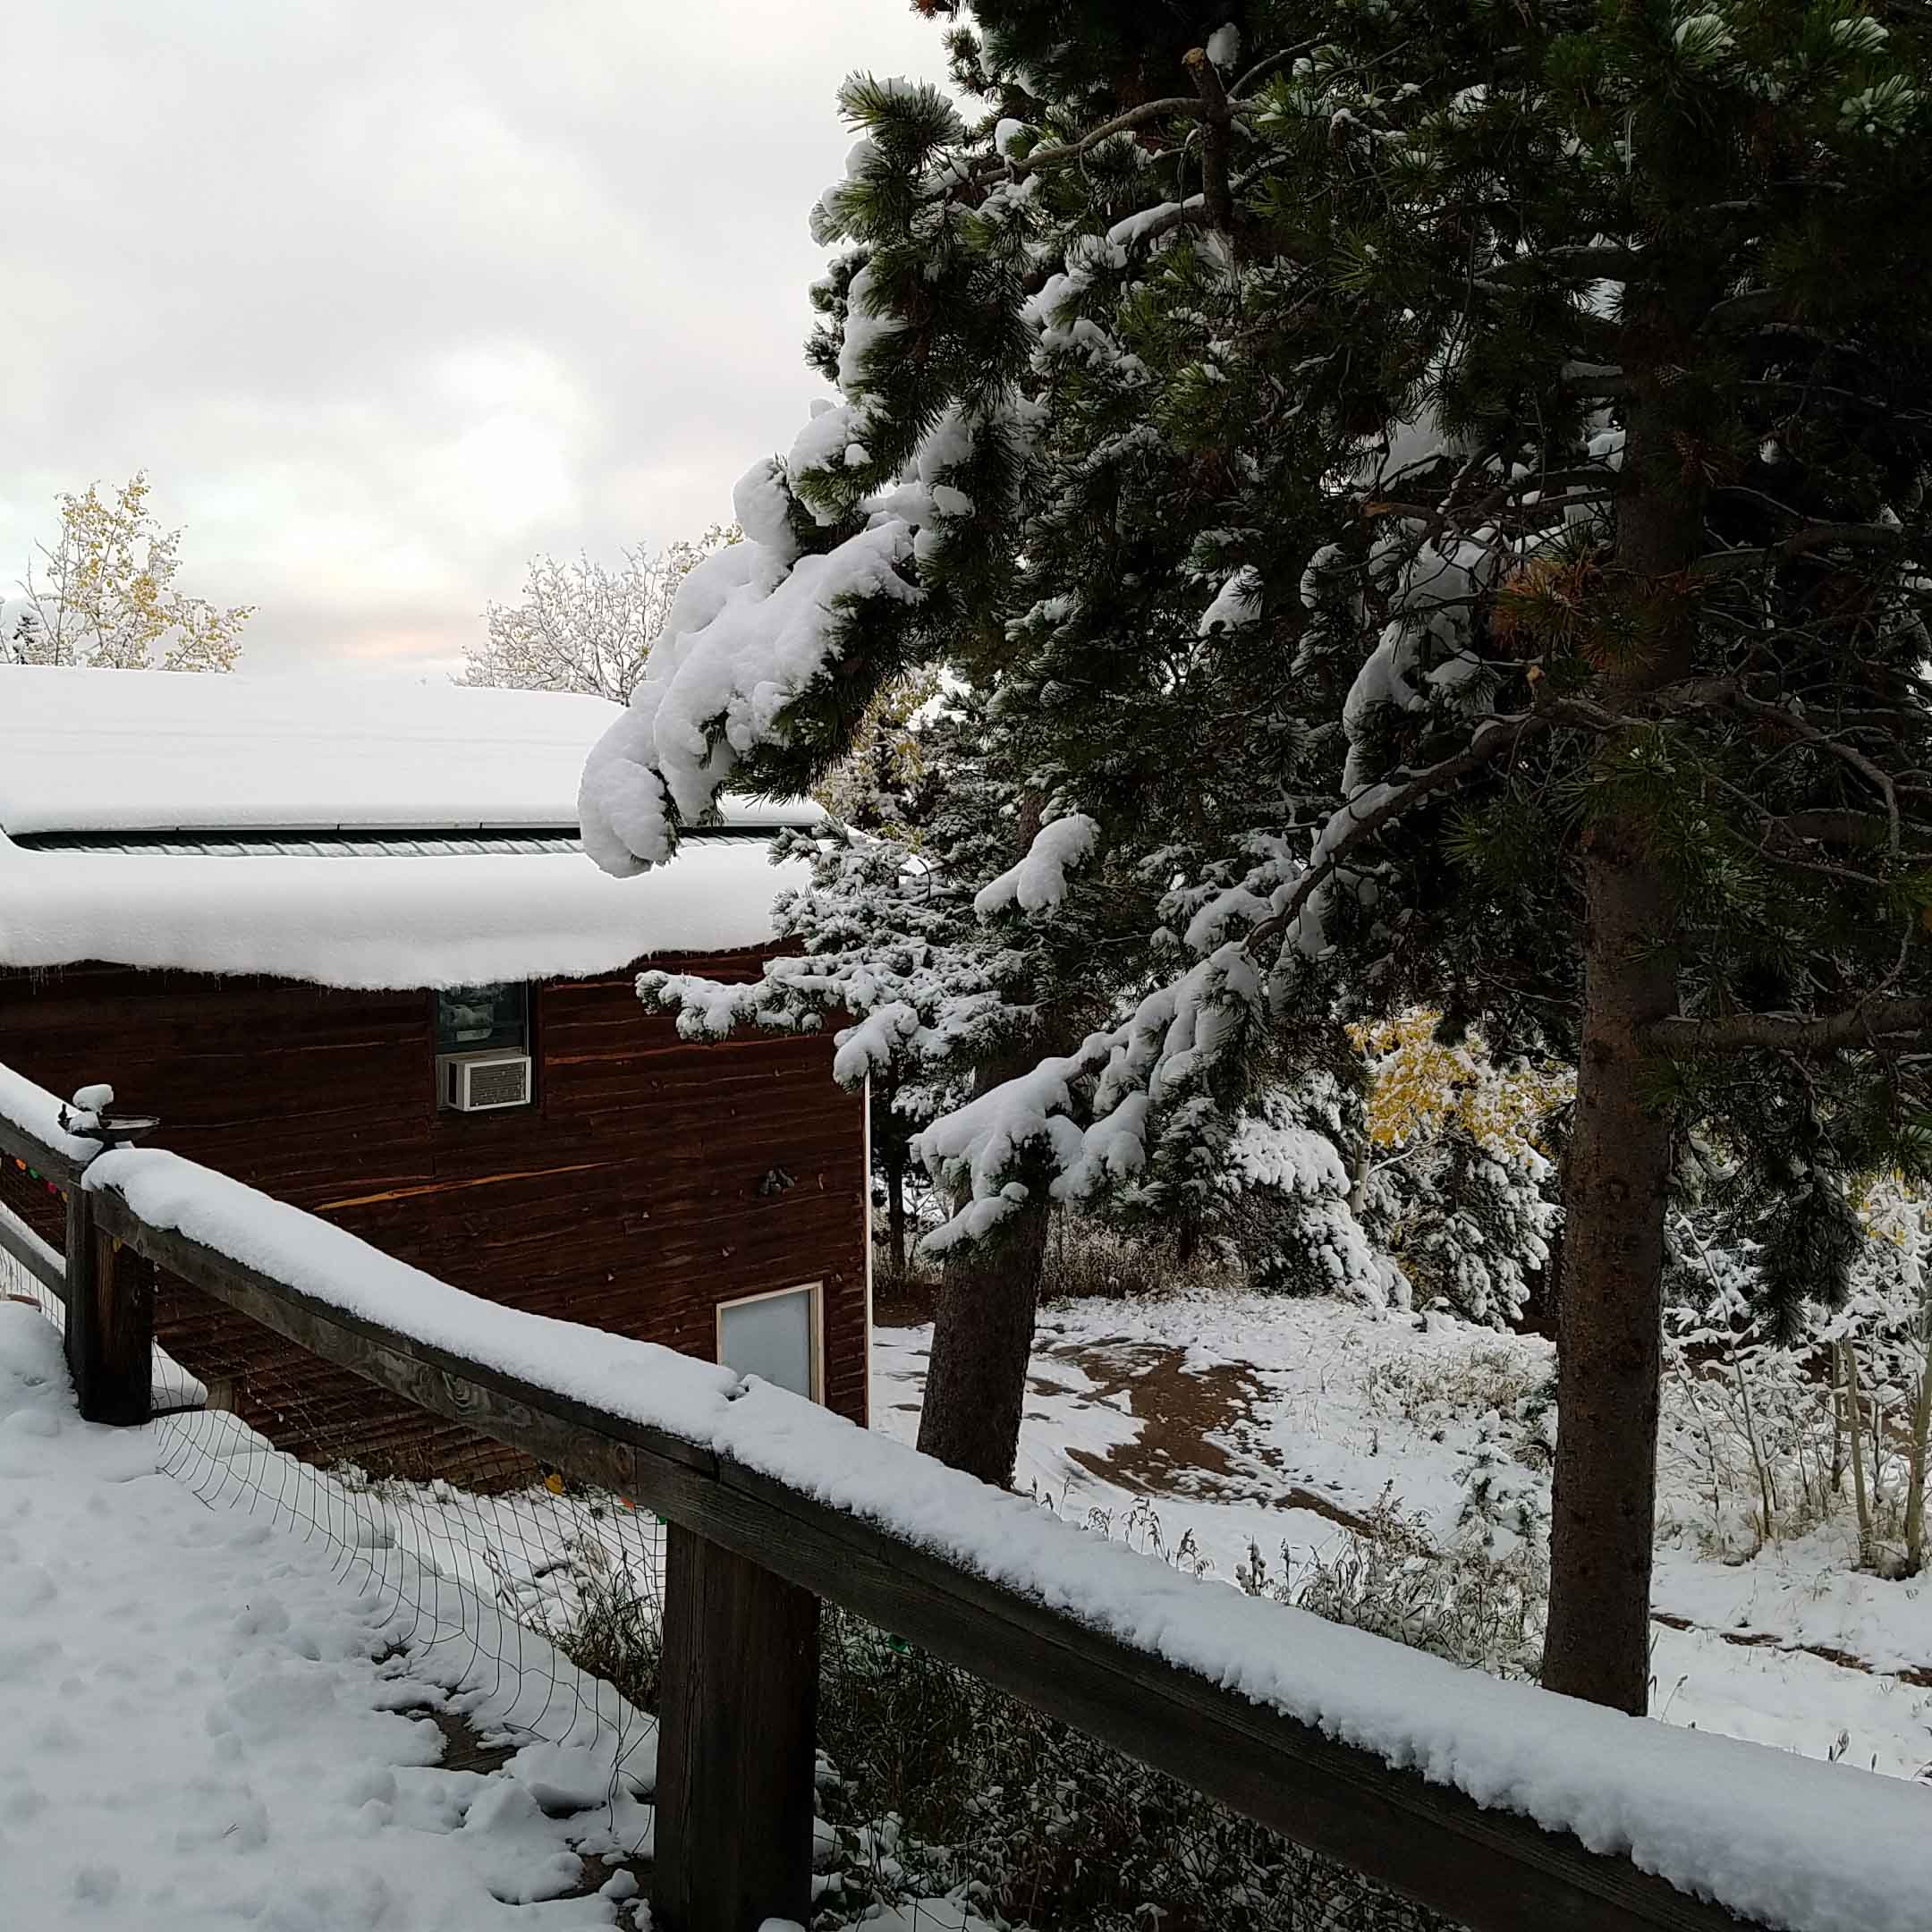
It is Winter up here on my mountain again, though technically it is still Autumn on the calendar. We have had numerous snow storms and a number of days that the temperatures barely crawled above freezing. I’m looking forward to the days of winter when the air sparkles with snowflakes in the sunshine.
I’m happy for the colder weather though, as it has helped me feel more in the mood for Christmas time.
I’m listening to my Christmas music and will be digging out my Christmas movies for watching after we’ve eaten our Thanksgiving dinner. Having gotten into a Christmas mood I’ve decided to get a head start on my Christmas gifts, and especially my gift to all my lovely readers.
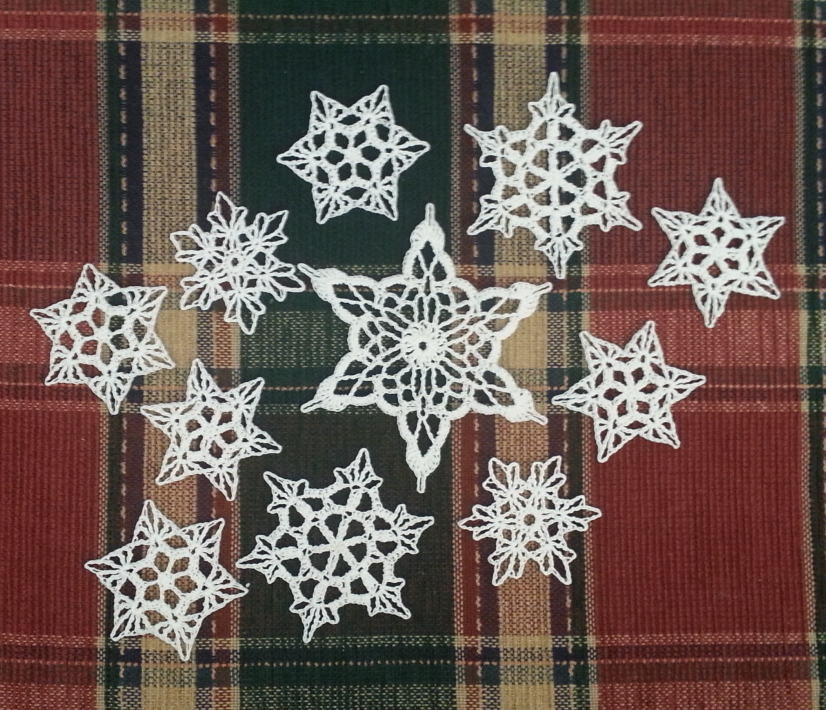
Yes, my friends, it is time for a snowflake design again. This year I’m giving us all a bit more time to work on the new snowflakes. That way you can send some out with your Christmas cards if you want.
Not only do I have a pattern for you, but I am also including a photo tutorial on stiffening your snowflakes. Pattern first, since you’ll need some snowflakes to work with.
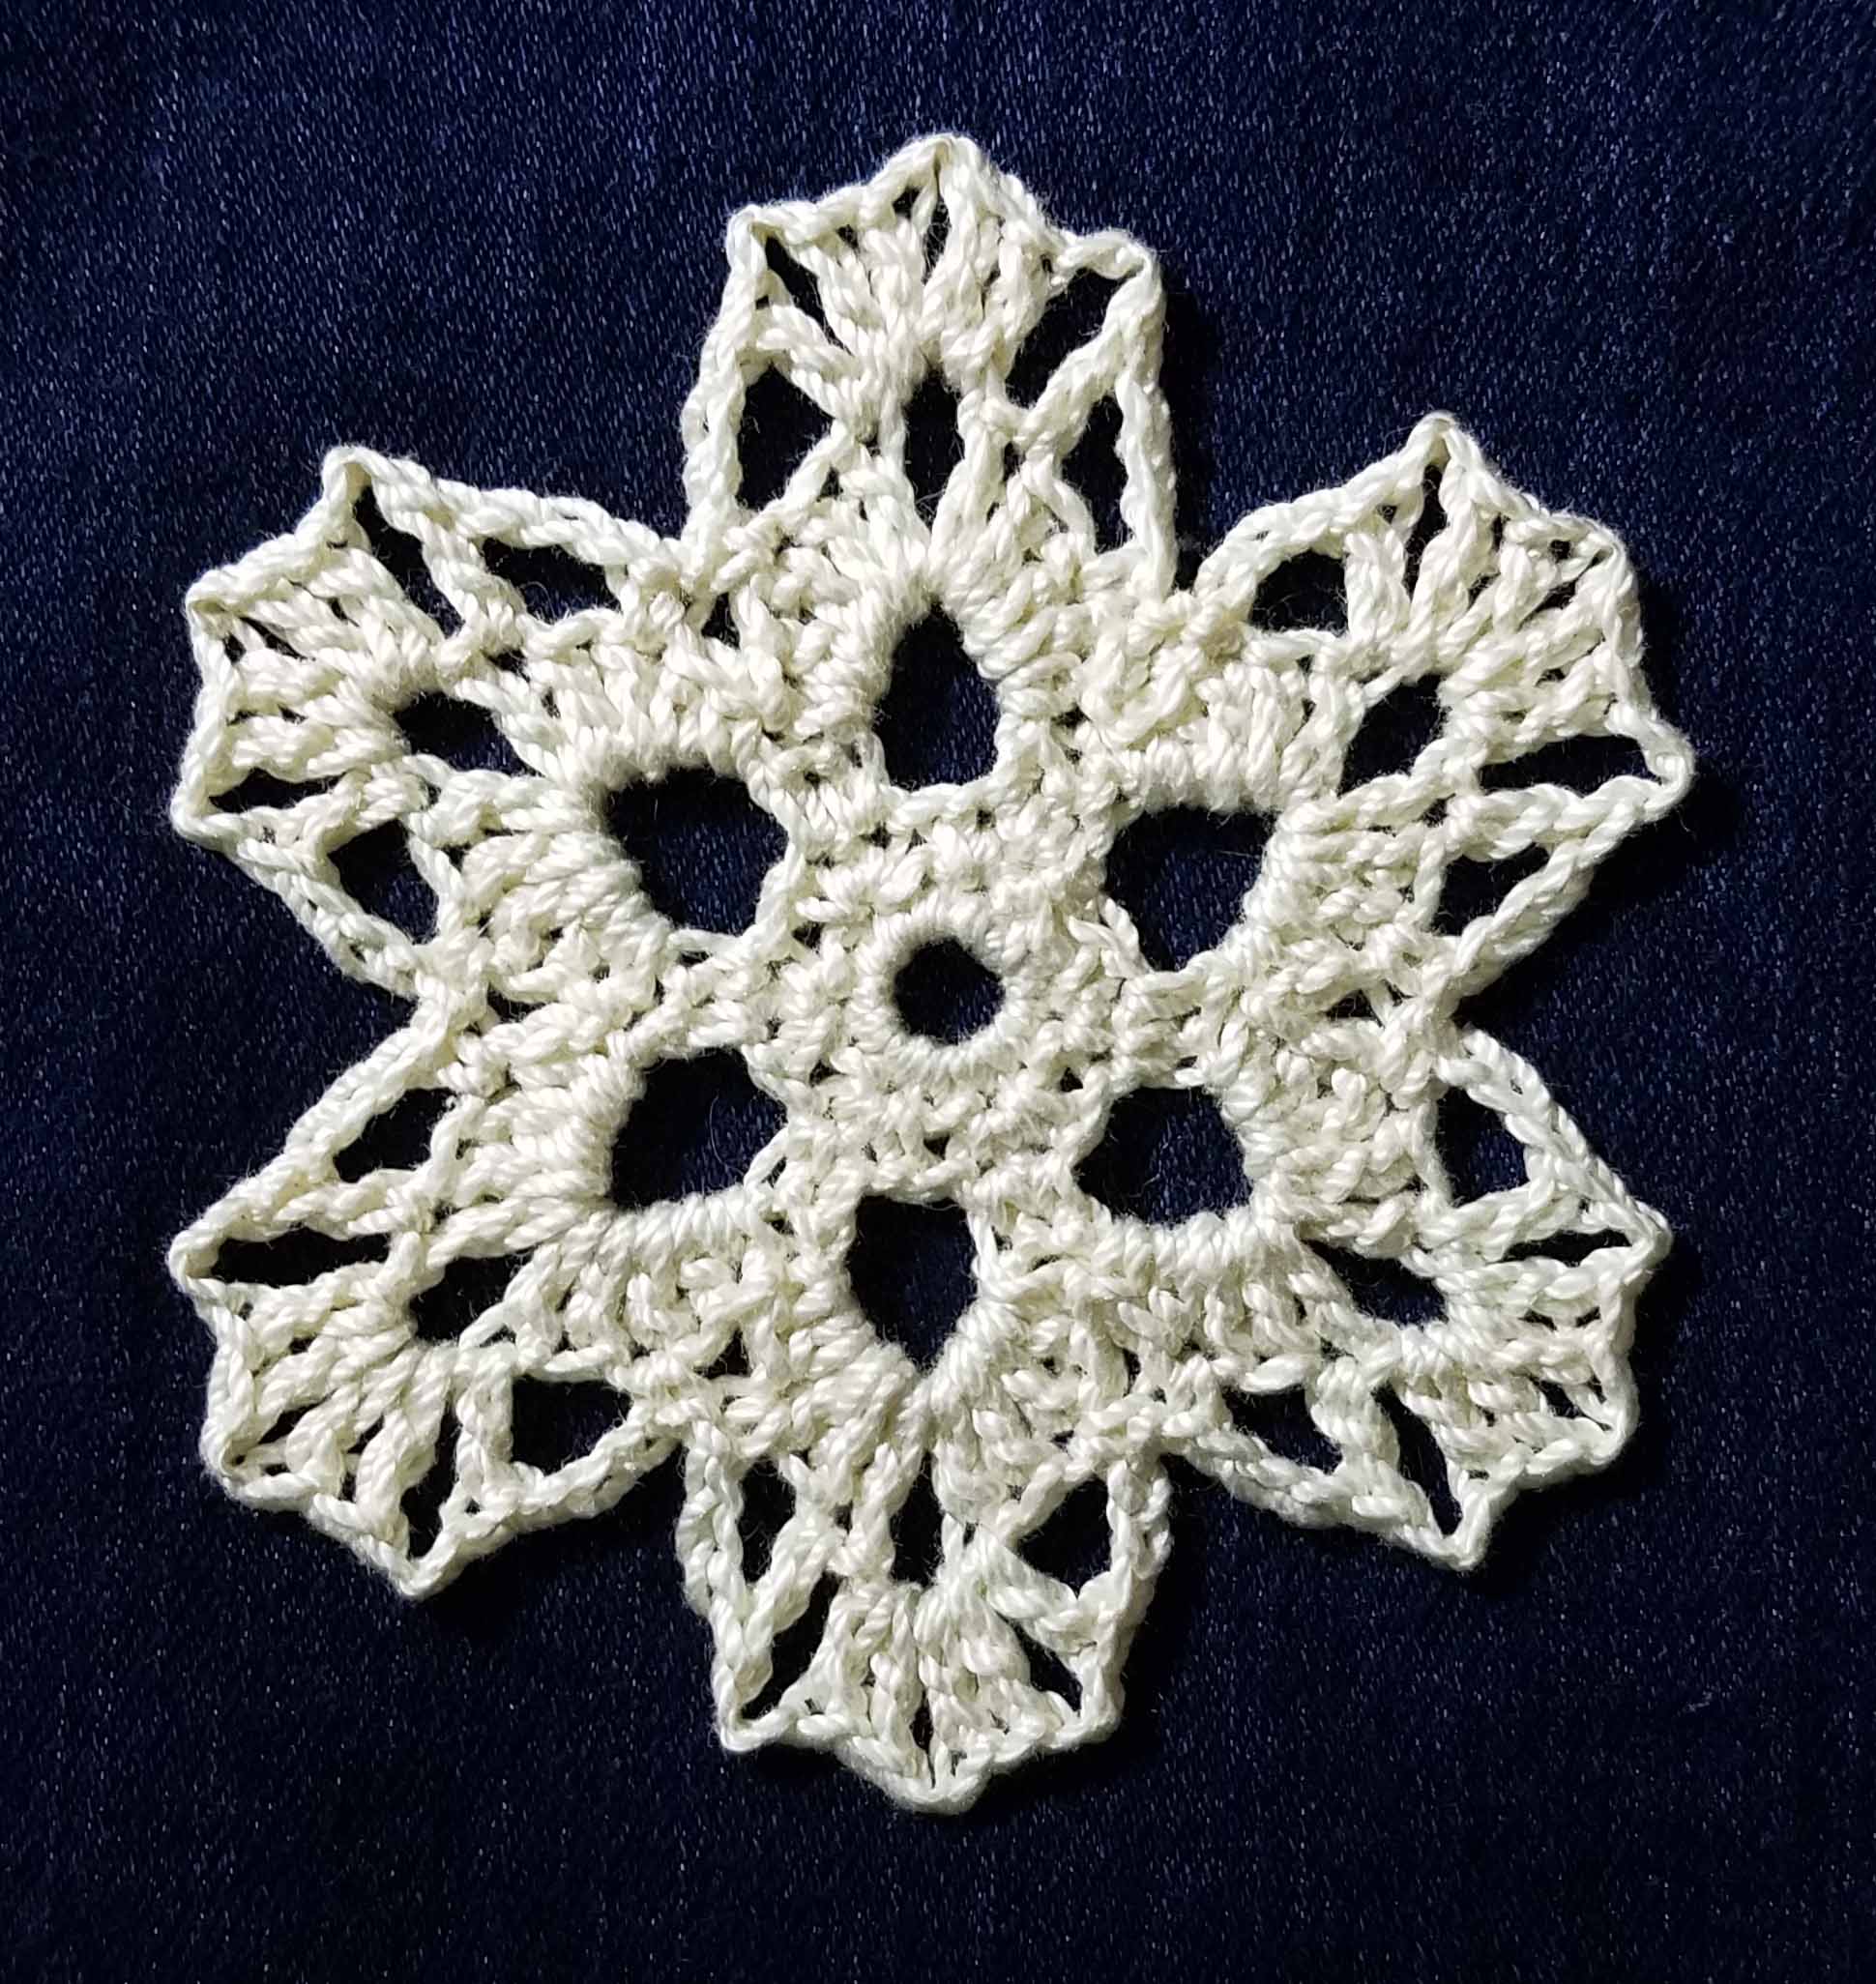
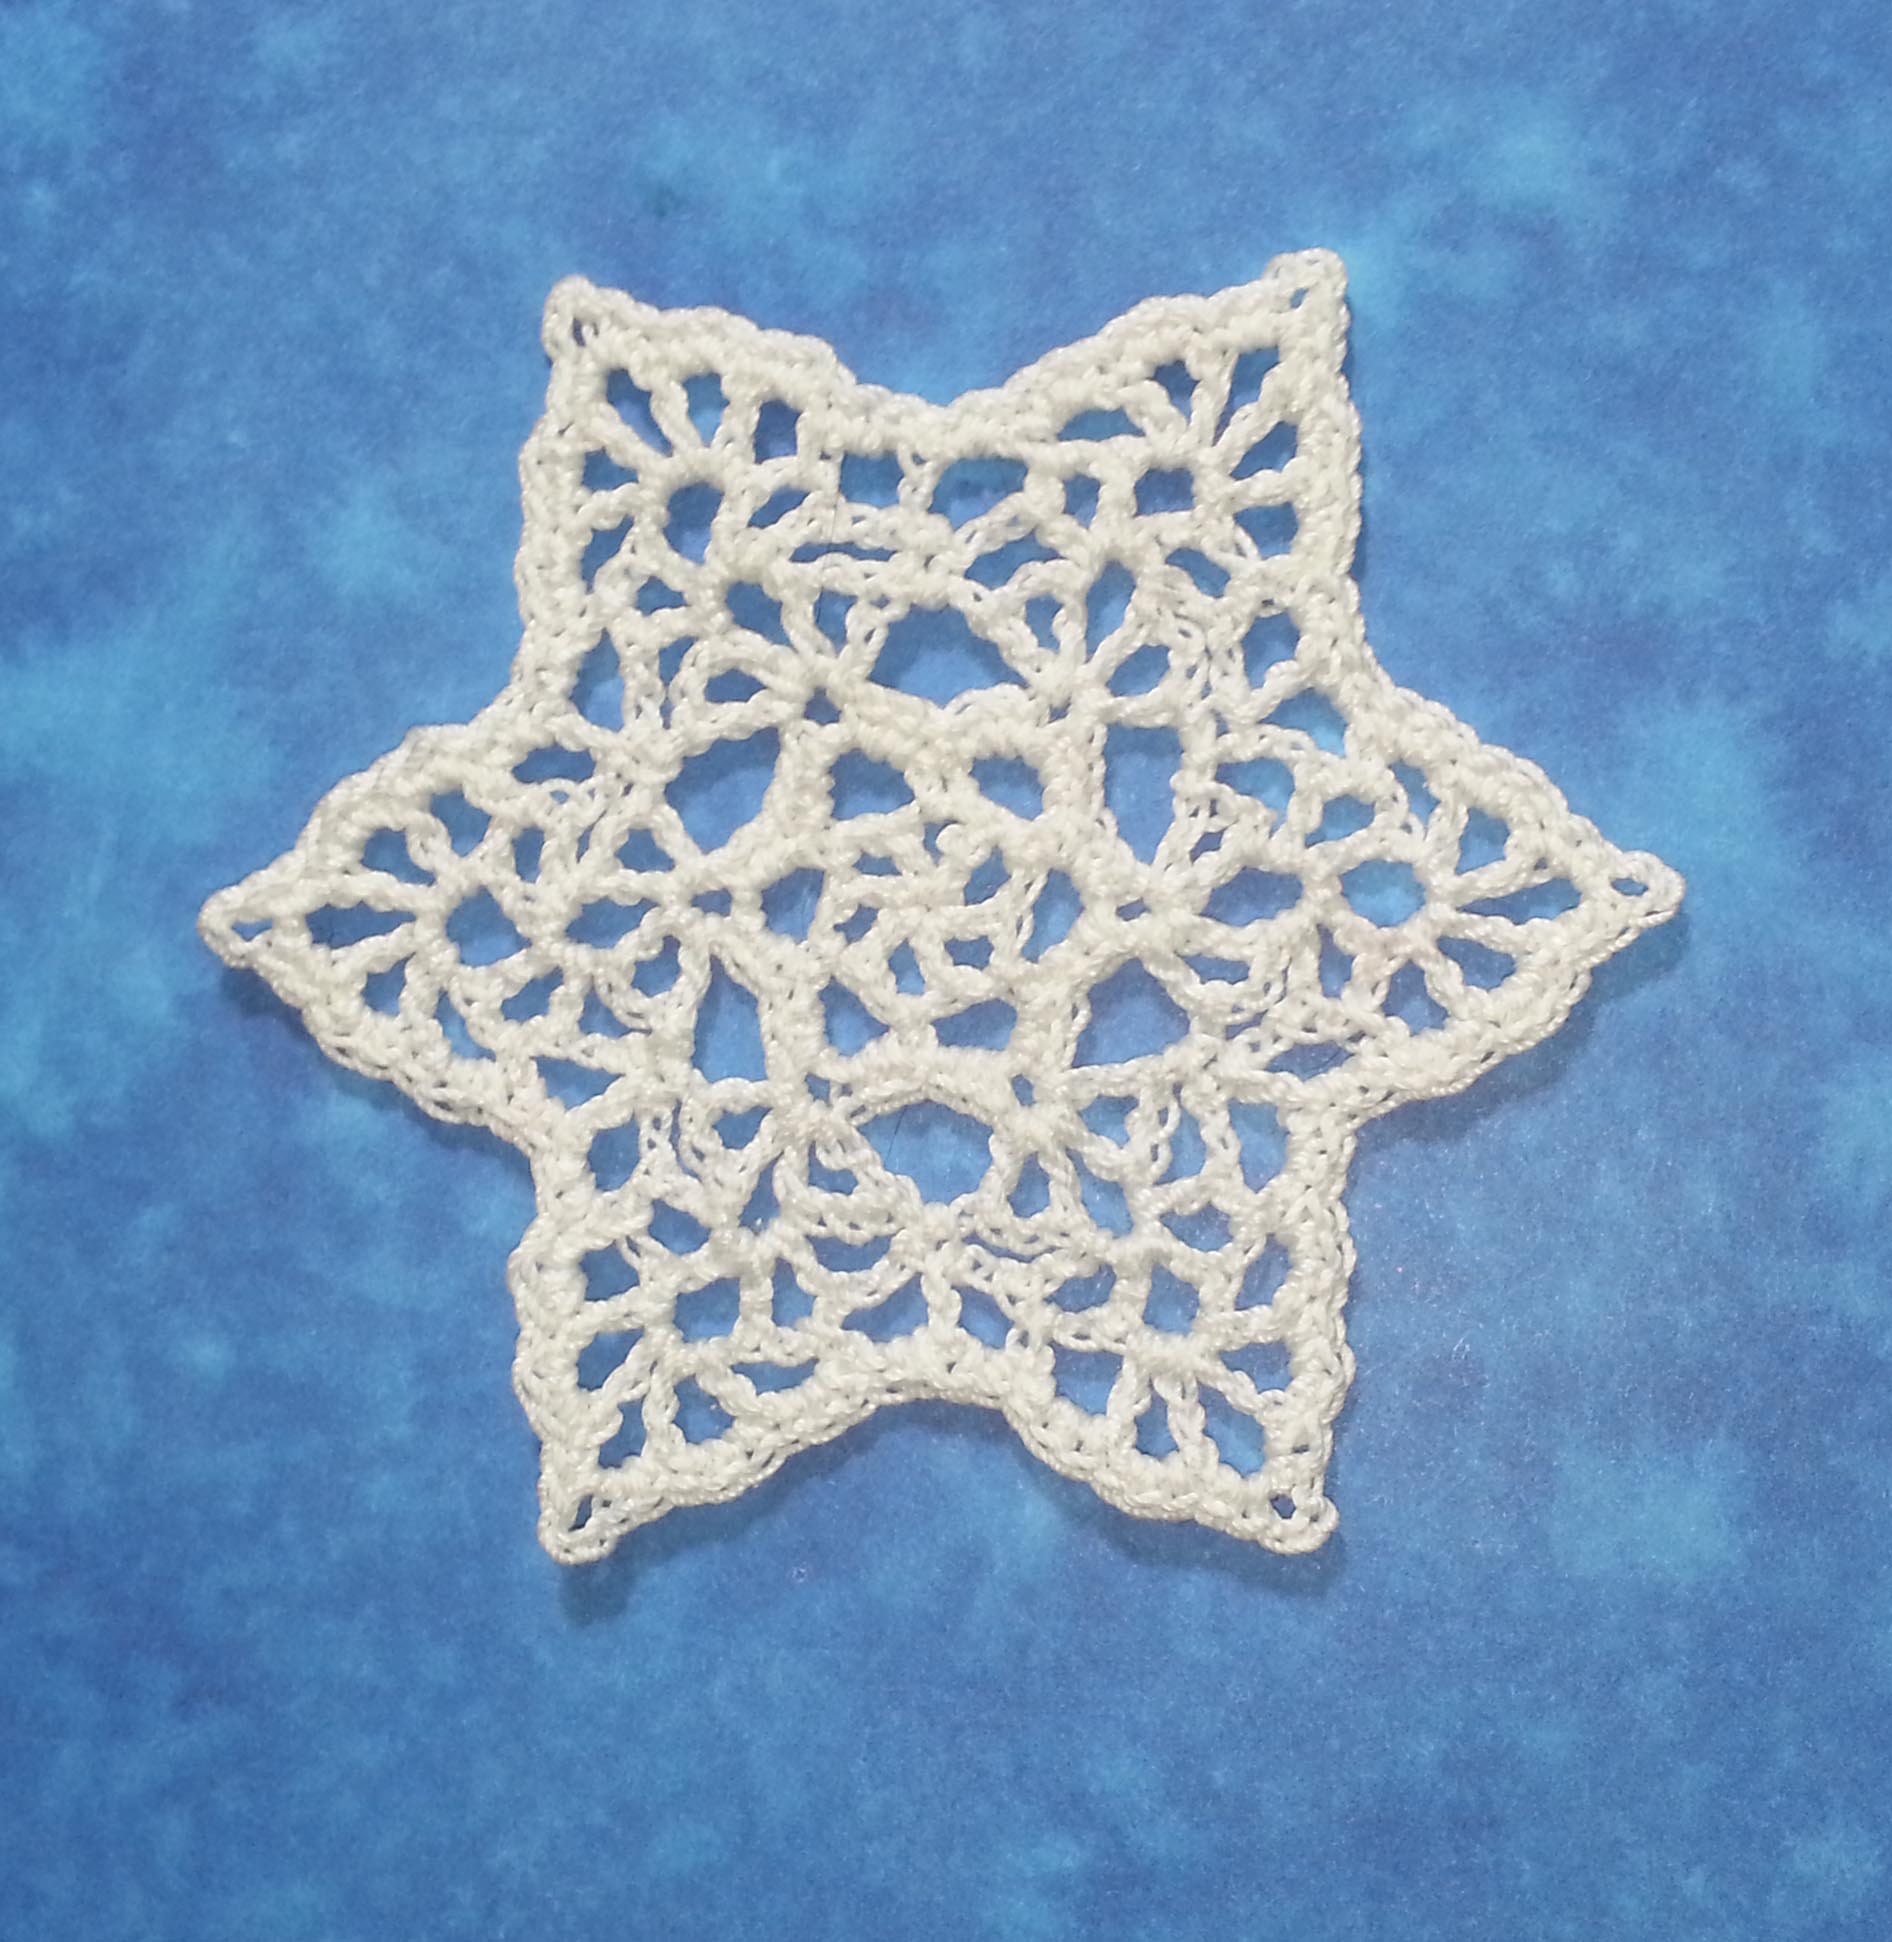
Sparkling Ice Snowflake
Designed by Andee Graves
Skill level: Easy
Materials:
Size 3 Cotton Crochet Thread with hook size: B (2.25mm)
Rnd 2: Ch 1, (2 sc in next st, ch 1, skip 1 st) 6 times, slip st to first sc of Rnd. {12 sc, 6 ch-1 sp}
Rnd 3: Ch 1, sc in next 2 sts (ch 6, skip next ch-1 sp, sc in next 2 sts) 5 times, ch 6, skip next ch-1 sp, slip st to first sc of Rnd. {12 sc, 6 ch-6 loops}
Rnd 4: Ch 1, [(sc, hdc, 3 dc, ch 3, 3 dc, hdc, sc) in next ch-6 loop] 6 times, slip st to first sc of Rnd. {12 sc, 12 hdc, 36 dc, 6 ch-3 sp}
Rnd 5: Slip st in next hdc, *sc in next st, ch 3, skip next st, dc in next st, ch 2, (2 dc, ch 1, 2 dc) in ch-3 sp, ch 2, dc in next st, ch 3, skip 1 st, sc in next st,** skip 4 sts*; Repeat from * to * 4 times, Repeat from * to ** once, slip st to first sc of Rnd. Fasten off {12 sc, 30 dc, 6 ch-1 sp, 12 ch-2 sp, 12 ch-3 sp}
Finishing
Weave in all ends. Block snowflake and use favorite stiffening method.
If this snowflake doesn’t please you, I have 3 other snowflake patterns available here on the blog:
When stiffening your snowflakes you want to consider the climate you live in. Especially the humidity of your region will effect what stiffening agent you should choose, as well as how you want to set up your drying area.
The basic supplies you will need to stiffen your crocheted snowflakes are:
Pins – Nickel-plated or rust proof pins are best, otherwise you can end up with rust marks on your finished snowflakes. My favorites to use are nickel-plated T-pins, Size 16, 1 inch long.
Waterproof (or resistant) Surface – You want to use something that will hold the pins firmly in place and can either be thrown away or washed off. Wax or Parchment paper over cardboard is an affordable option. Afterward the paper goes in the bin and the cardboard can be recycled or re-used if not too punctured. I didn’t have wax paper in the house for this latest batch of snowflakes so I used Press-n-Seal plastic over my surface. I liked using one of my foam blocking board as it held the pins better than cardboard.
Stiffening Agent – This can be anything that is initially wet enough to be absorbed in the cotton of your stitches without obscuring them, and that dries rigid. I use a product I purchase at my local Michaels store called “Stiffy” from the Plaid company (same folks that make Mod Podge), but something like PVA school glue can work too.
Some of the PVA glues are a little too flexible when dry, so if you want a more rigid finished object you can try adding a bit of corn starch to the glue. If your glue is too thick, you can experiment with adding water to thin it. I use distilled water when doing this. I find a very thin liquid to be best for maintaining the stitch definition of my snowflakes.
This post contains affiliate links. I may receive compensation (at no added cost to you) if you make a purchase using these links.
Brush and Bowl – No matter what application method you prefer you will need both of these objects. If you are planning on using the “soak” method you will want a bowl wide enough that your snowflake will fit inside it. For your brush you will want stiff short bristles, that can help get the stiffening solution down into the stitches or help remove excess solution from the pinned snowflake.
Drying Surface – An old towel or a piece of fine metal screening. If you live in a humid climate you really want a drying surface that lets air circulate around your snowflakes, you might even want to use a fan or a blow-dryer on a low setting. I tend to use a dry towel.
Getting Started
Obviously you first want to crochet your snowflakes, I like to have a pile to work with before I begin the stiffening process. Sometimes I will wet block my snowflakes first. The pinning process is the same as when I am stiffening my snowflakes.
If your snowflake is crocheted tightly and you wet block it with pinning you may have a stable shape without additional stiffening. Or it will hold the shape well enough to just brush on the stiffener without it being pinned. You will want to experiment.
I prefer to use the brush method of applying the stiffener as it helps me keep better stitch definition. If you want to do the soak method you will immerse your snowflake in your solution, then remove it from the solution letting excess drain off. Proceed to pin the snowflake to the desired shape. Once you have the snowflake pinned out, use paper towels to blot off excess solution. Be careful during the blotting that you don’t glue bits of paper towel to your snowflake.
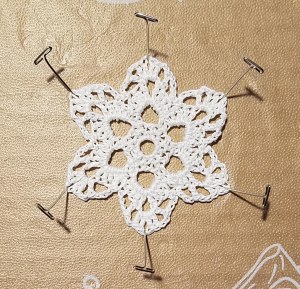
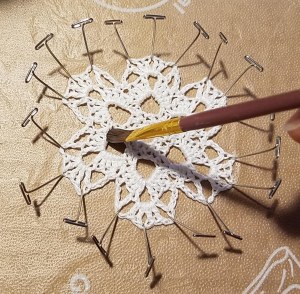
In this demonstration we are trying to get a symmetrical looking snowflake. I approach the pinning like stretching a drumhead (something I learnt from my younger brother, Cy the Drum Guy).
This means securing one point on the snowflake then stretching to the opposite point, continuing to work around the points of the snowflake back and forth.
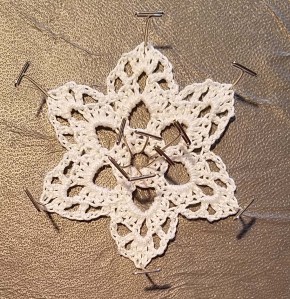
It can be helpful to also place pins in the center of the snowflake after securing the first 2 points. This is especially helpful with really open stitch work, it will keep the other 4 points from pulling it off center. I remove the center pins once I’ve got the 6 points secured.
Then look at the other areas of the snowflake that you might want to open up. This is how you can really change the look of your snowflakes even when they are crocheted from the same pattern.
In the case of the Sparkling Ice Snowflake I added 2 pins to each point in the ch-2 spaces to square up the points of the snowflake, or….
Placing the 2 additional pins in the ch-3 spaces creates a pointed look.
Now it is time to brush on the stiffening solution. I usually pin my snowflakes wrong side facing up and brush on the stiffening solution to set the shape. I keep brushing the solution to help it absorb and get deep into the stitches. Usually your thread will change color enough that you can see where you still need to brush on more solution.
Once the solution is dry I carefully un-pin the snowflake. Usually this isn’t stiff enough to hang, so I will turn over the snowflake and paint the other side of it with a light coating of stiffening solution. The shape of the snowflake is already set though and I don’t pin it in place again.
If you want to add some sparkle to your snowflake this is a good time to add glitter. Sprinkle glitter over the wet surface. Tap off any excess and set aside to finish drying.
I usually move the snowflake to the drying surface after painting on the second coating of stiffener to prevent it from sticking to the work surface. If you are in a humid climate you may want to un-pin and move your snowflake to the drying surface once it is mostly dry and set from the first coat, this will help it dry quicker.
Once your snowflakes are completely dry use ribbon or light weight nylon line to create hangers. I prefer the nylon line because it is nearly invisible. I usually use about 4-6 inches and thread it thru an opening on the edge of the snowflake and tie a knot over the 2 ends.
Have fun making snowflakes.
This post contains affiliate links. I may receive compensation (at no added cost to you) if you make a purchase using these links.
The past couple of months have slipped by too fast. Strange that I feel that way, as while I was in each individual day they seemed to drag. This all reminds me of something a friend told me the day before my first child was born, “Motherhood is full of long days and short years.”
I think the “long days and short years” are true for all of us, parents or not, especially as we get older.
I remember being startled in my 20s when I was talking on the phone with my younger sister. She was still in high school living in Kansas and I was living in Colorado. She was asking me if I was coming back to visit for Home Coming. I told her that was a few months away and I didn’t know if I could, she told me it was the following week. It had seemed to me at the time that the new school year had just started. That is the first time I really remember that feeling that time was moving faster than it felt.
It’s only gotten more noticeable as I’ve added years to my personal odometer.
Honestly, my kids just got out of school for summer break and Halloween was yesterday. Now I’m feeling the insanity of the BIG holidays coming down the highway. For my family that is Thanksgiving (USA) and Christmas. We are going to have company for both holidays this year so I need to kick it into high gear.
My fantasy of a relaxed December may be out the window at this point. Being laid up with Whooping Cough for nearly 2 months has certainly narrowed down my prep time. But this may be a gift in its own way. Nothing like having less time to help you prioritize and force you to let go of unrealistic fantasy.
Most of my remaining gift making is focused on smaller projects like slippers, hats, cowls and some snowflakes. So that will help me with completing things in a timely manner. Fortunately I don’t need to ship those gifts either, since the majority of my “crochet-worthy” friends and family will be here with us.
Christmas cards may suffer again. I seem to get worse about sending those out every year. I may have to do “Happy New Years” cards again instead. I’m just hoping at some point to really review this year, even 10 months into it 2017 has been incredibly busy and eventful, both on the personal and work fronts.
I’ll be playing catch-up for quite some time. If there is something that I mentioned earlier this year that you are waiting for, please drop me a reminder in the comments on this post and I’ll try to put it in the top 20 of my To-Do List. I hope everyone else is heading into the end of 2017 healthy and better prepared than me.
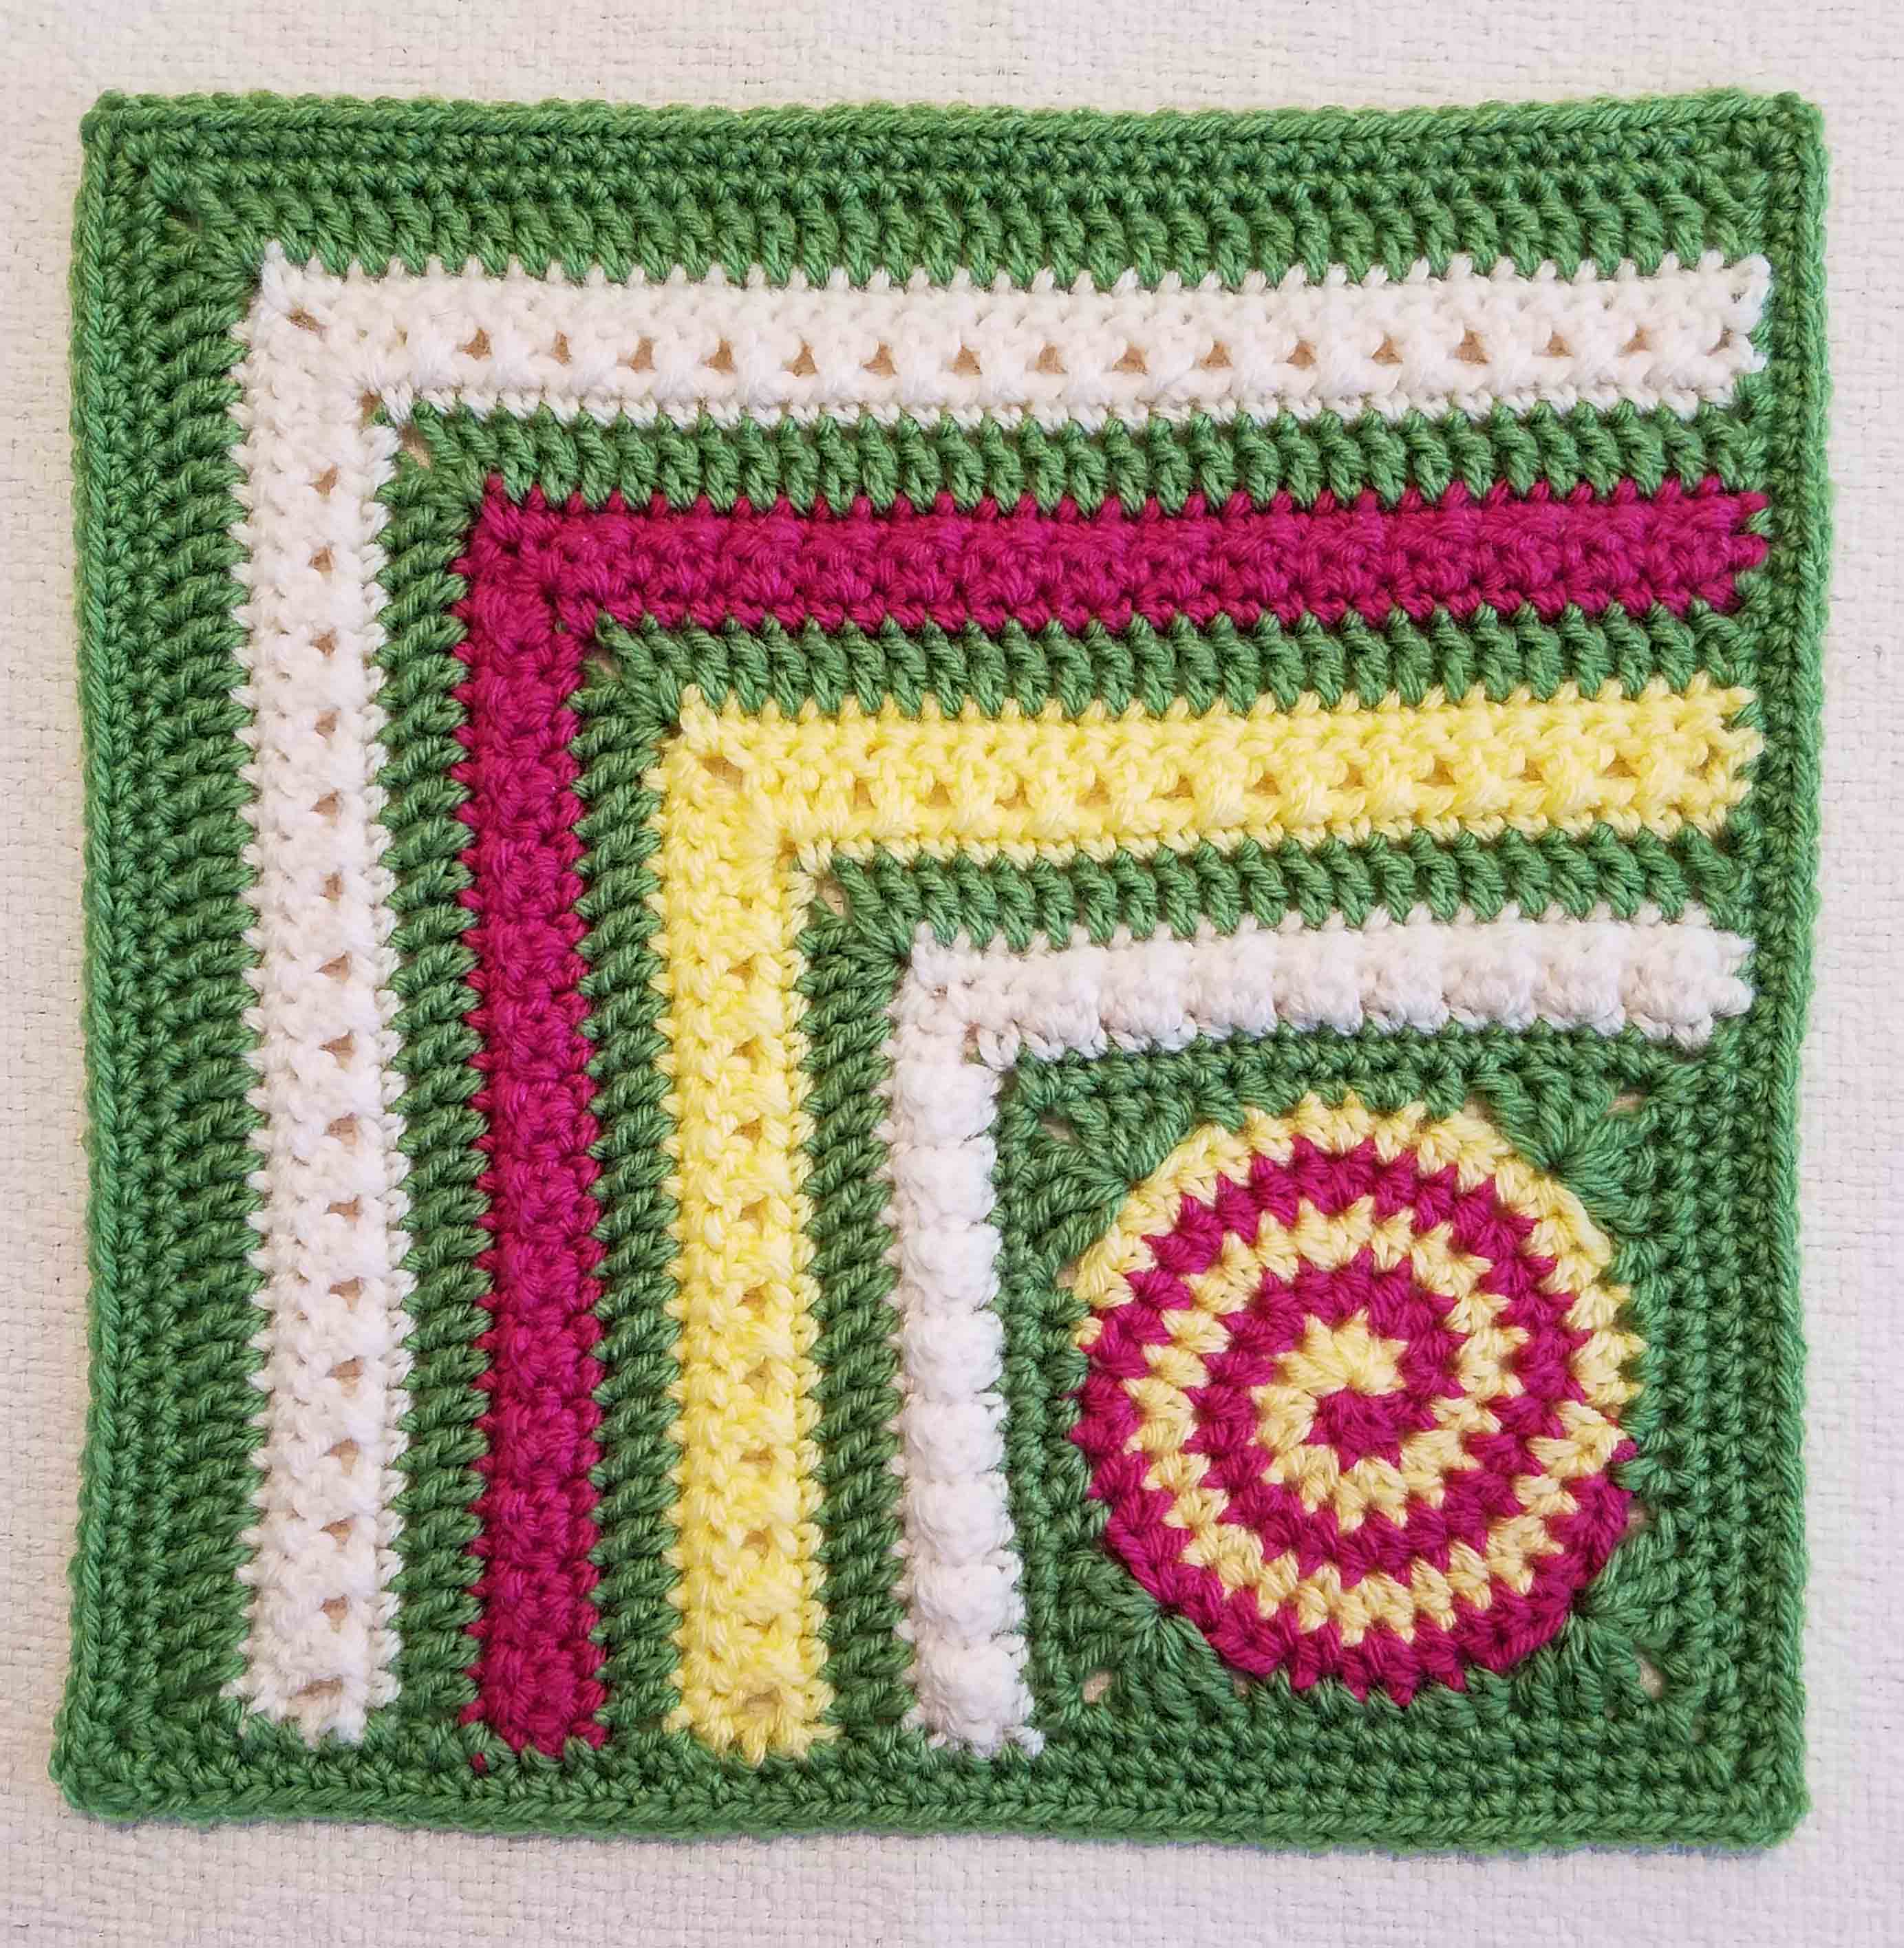
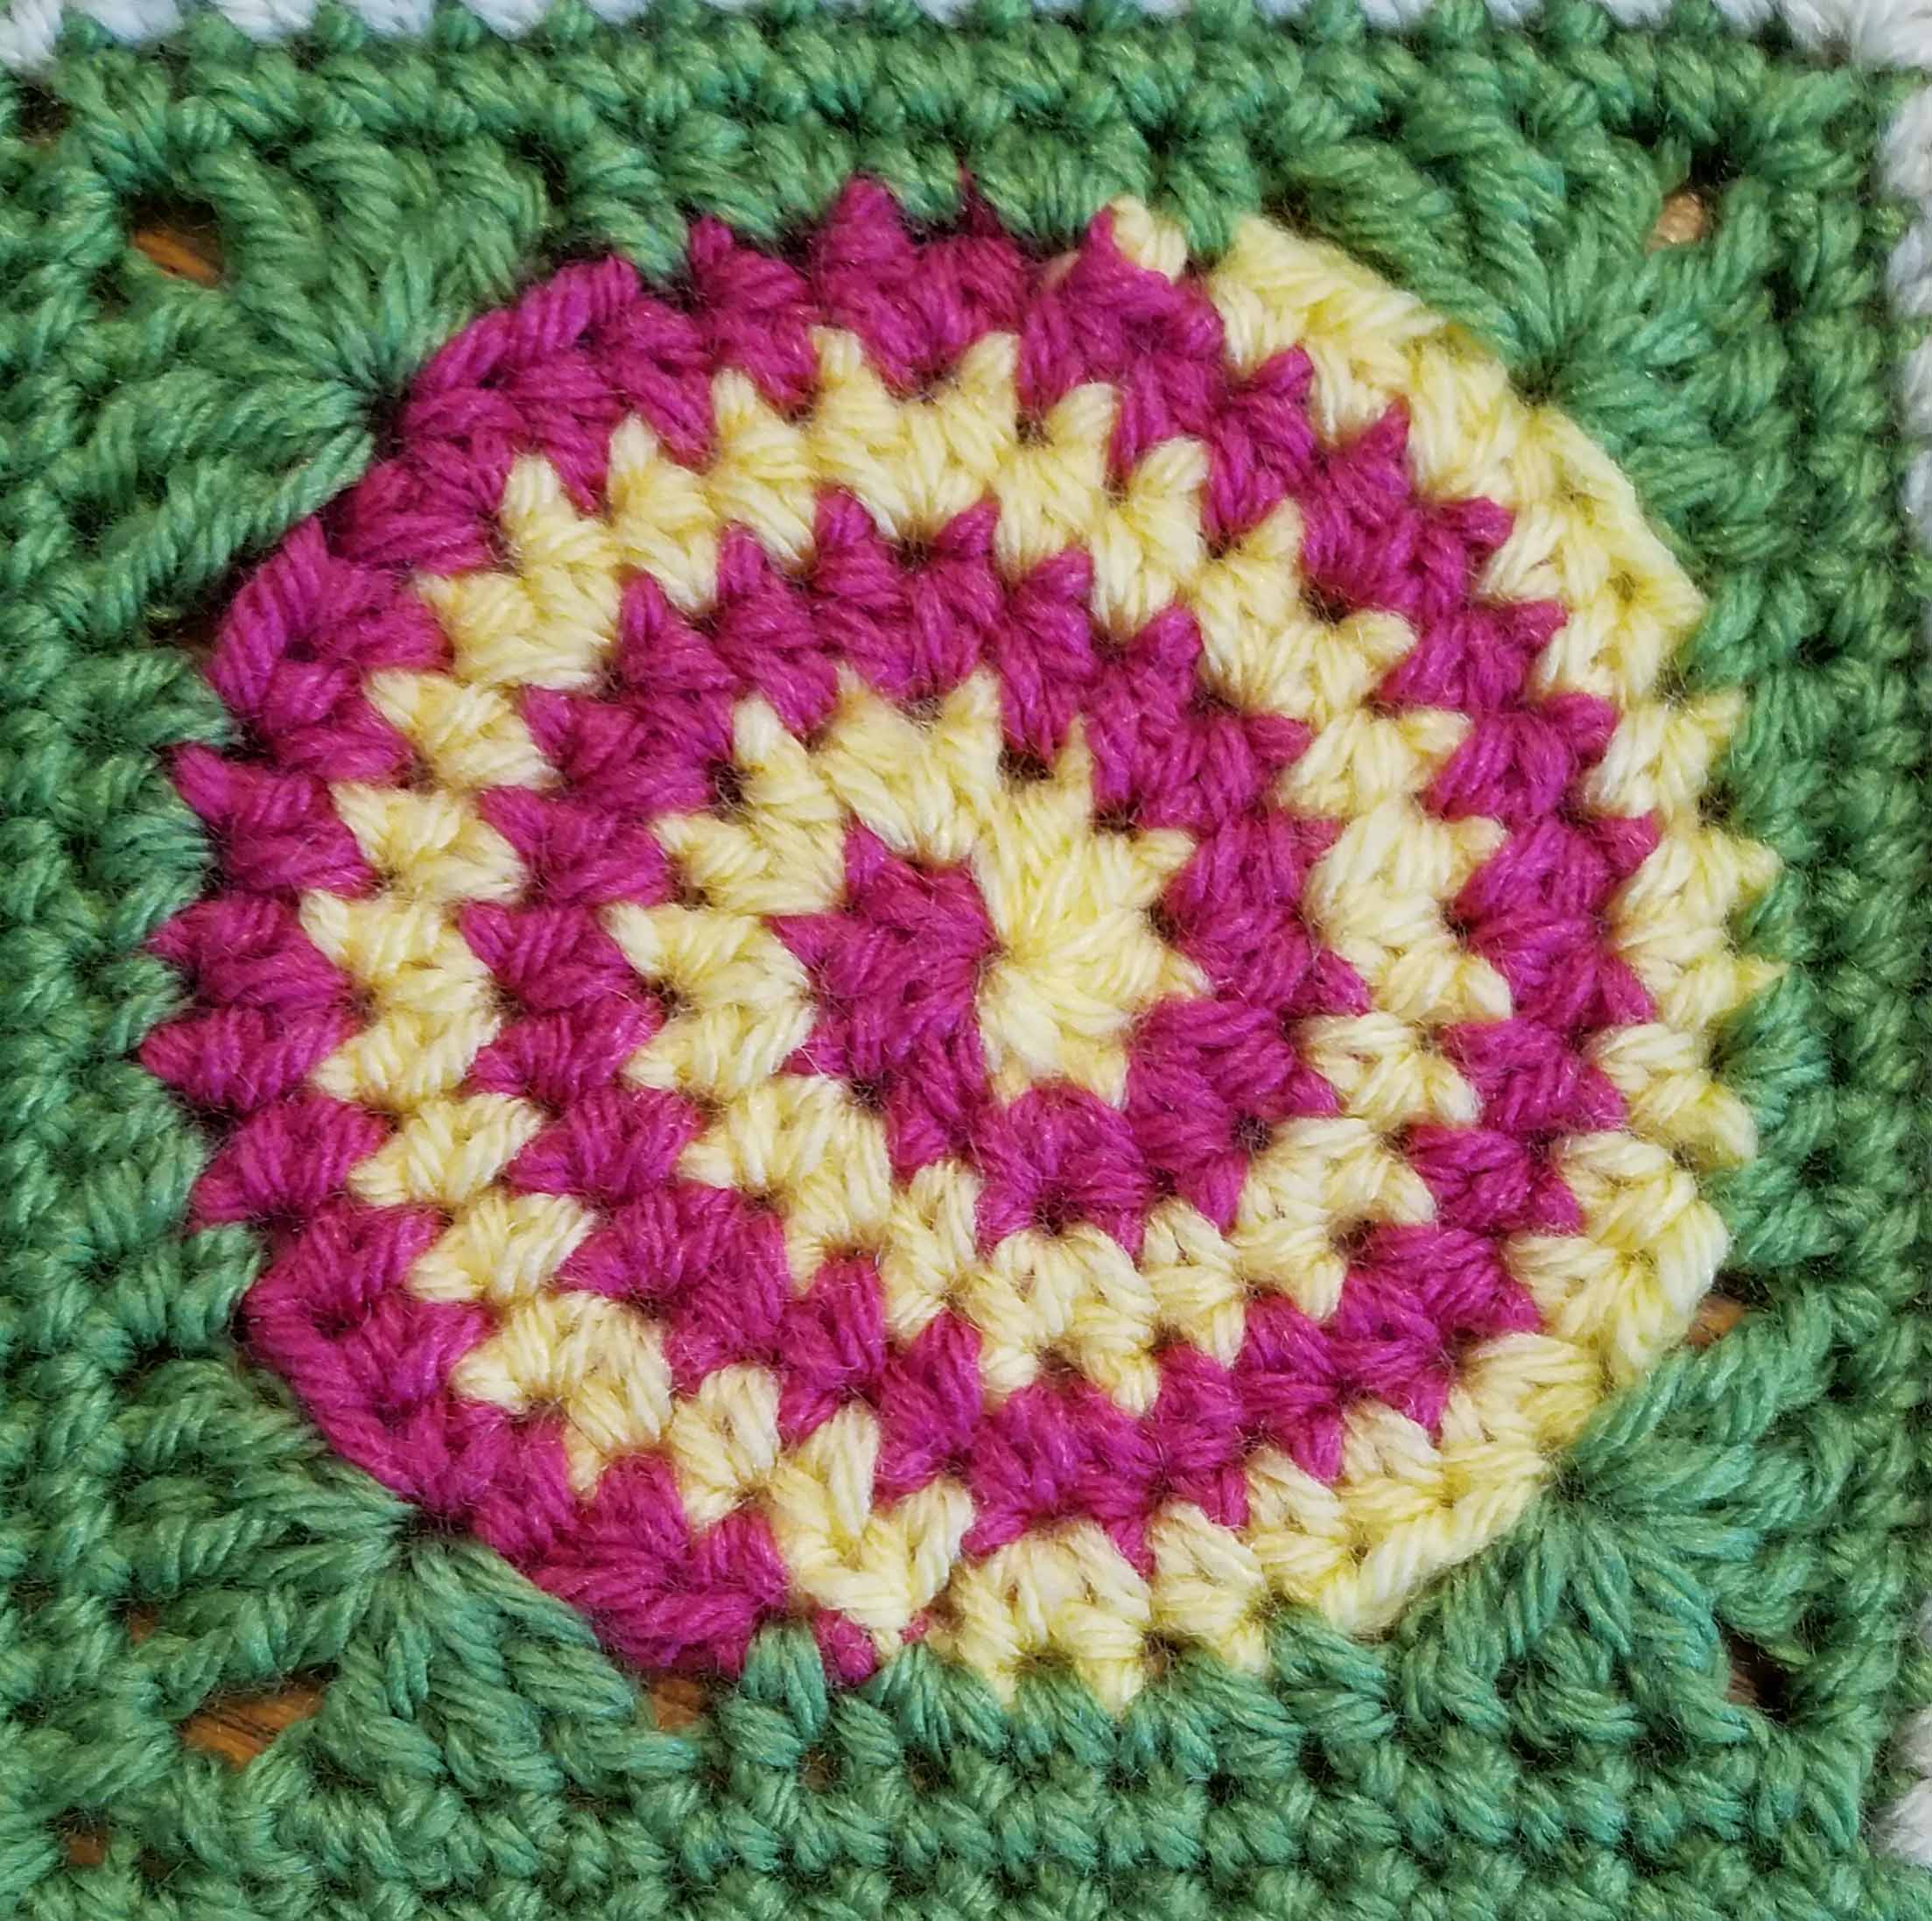
Tomorrow is my birthday and I am keeping with my tradition of celebrating with a blog pattern for my readers. Once again I wanted to have some fun with my favorite crochet technique: Spirals. I also wanted to play with some textures in this project and incorporated clusters and cross stitches for that aspect.
The result is my “Dizzy Corner Afghan Square”.
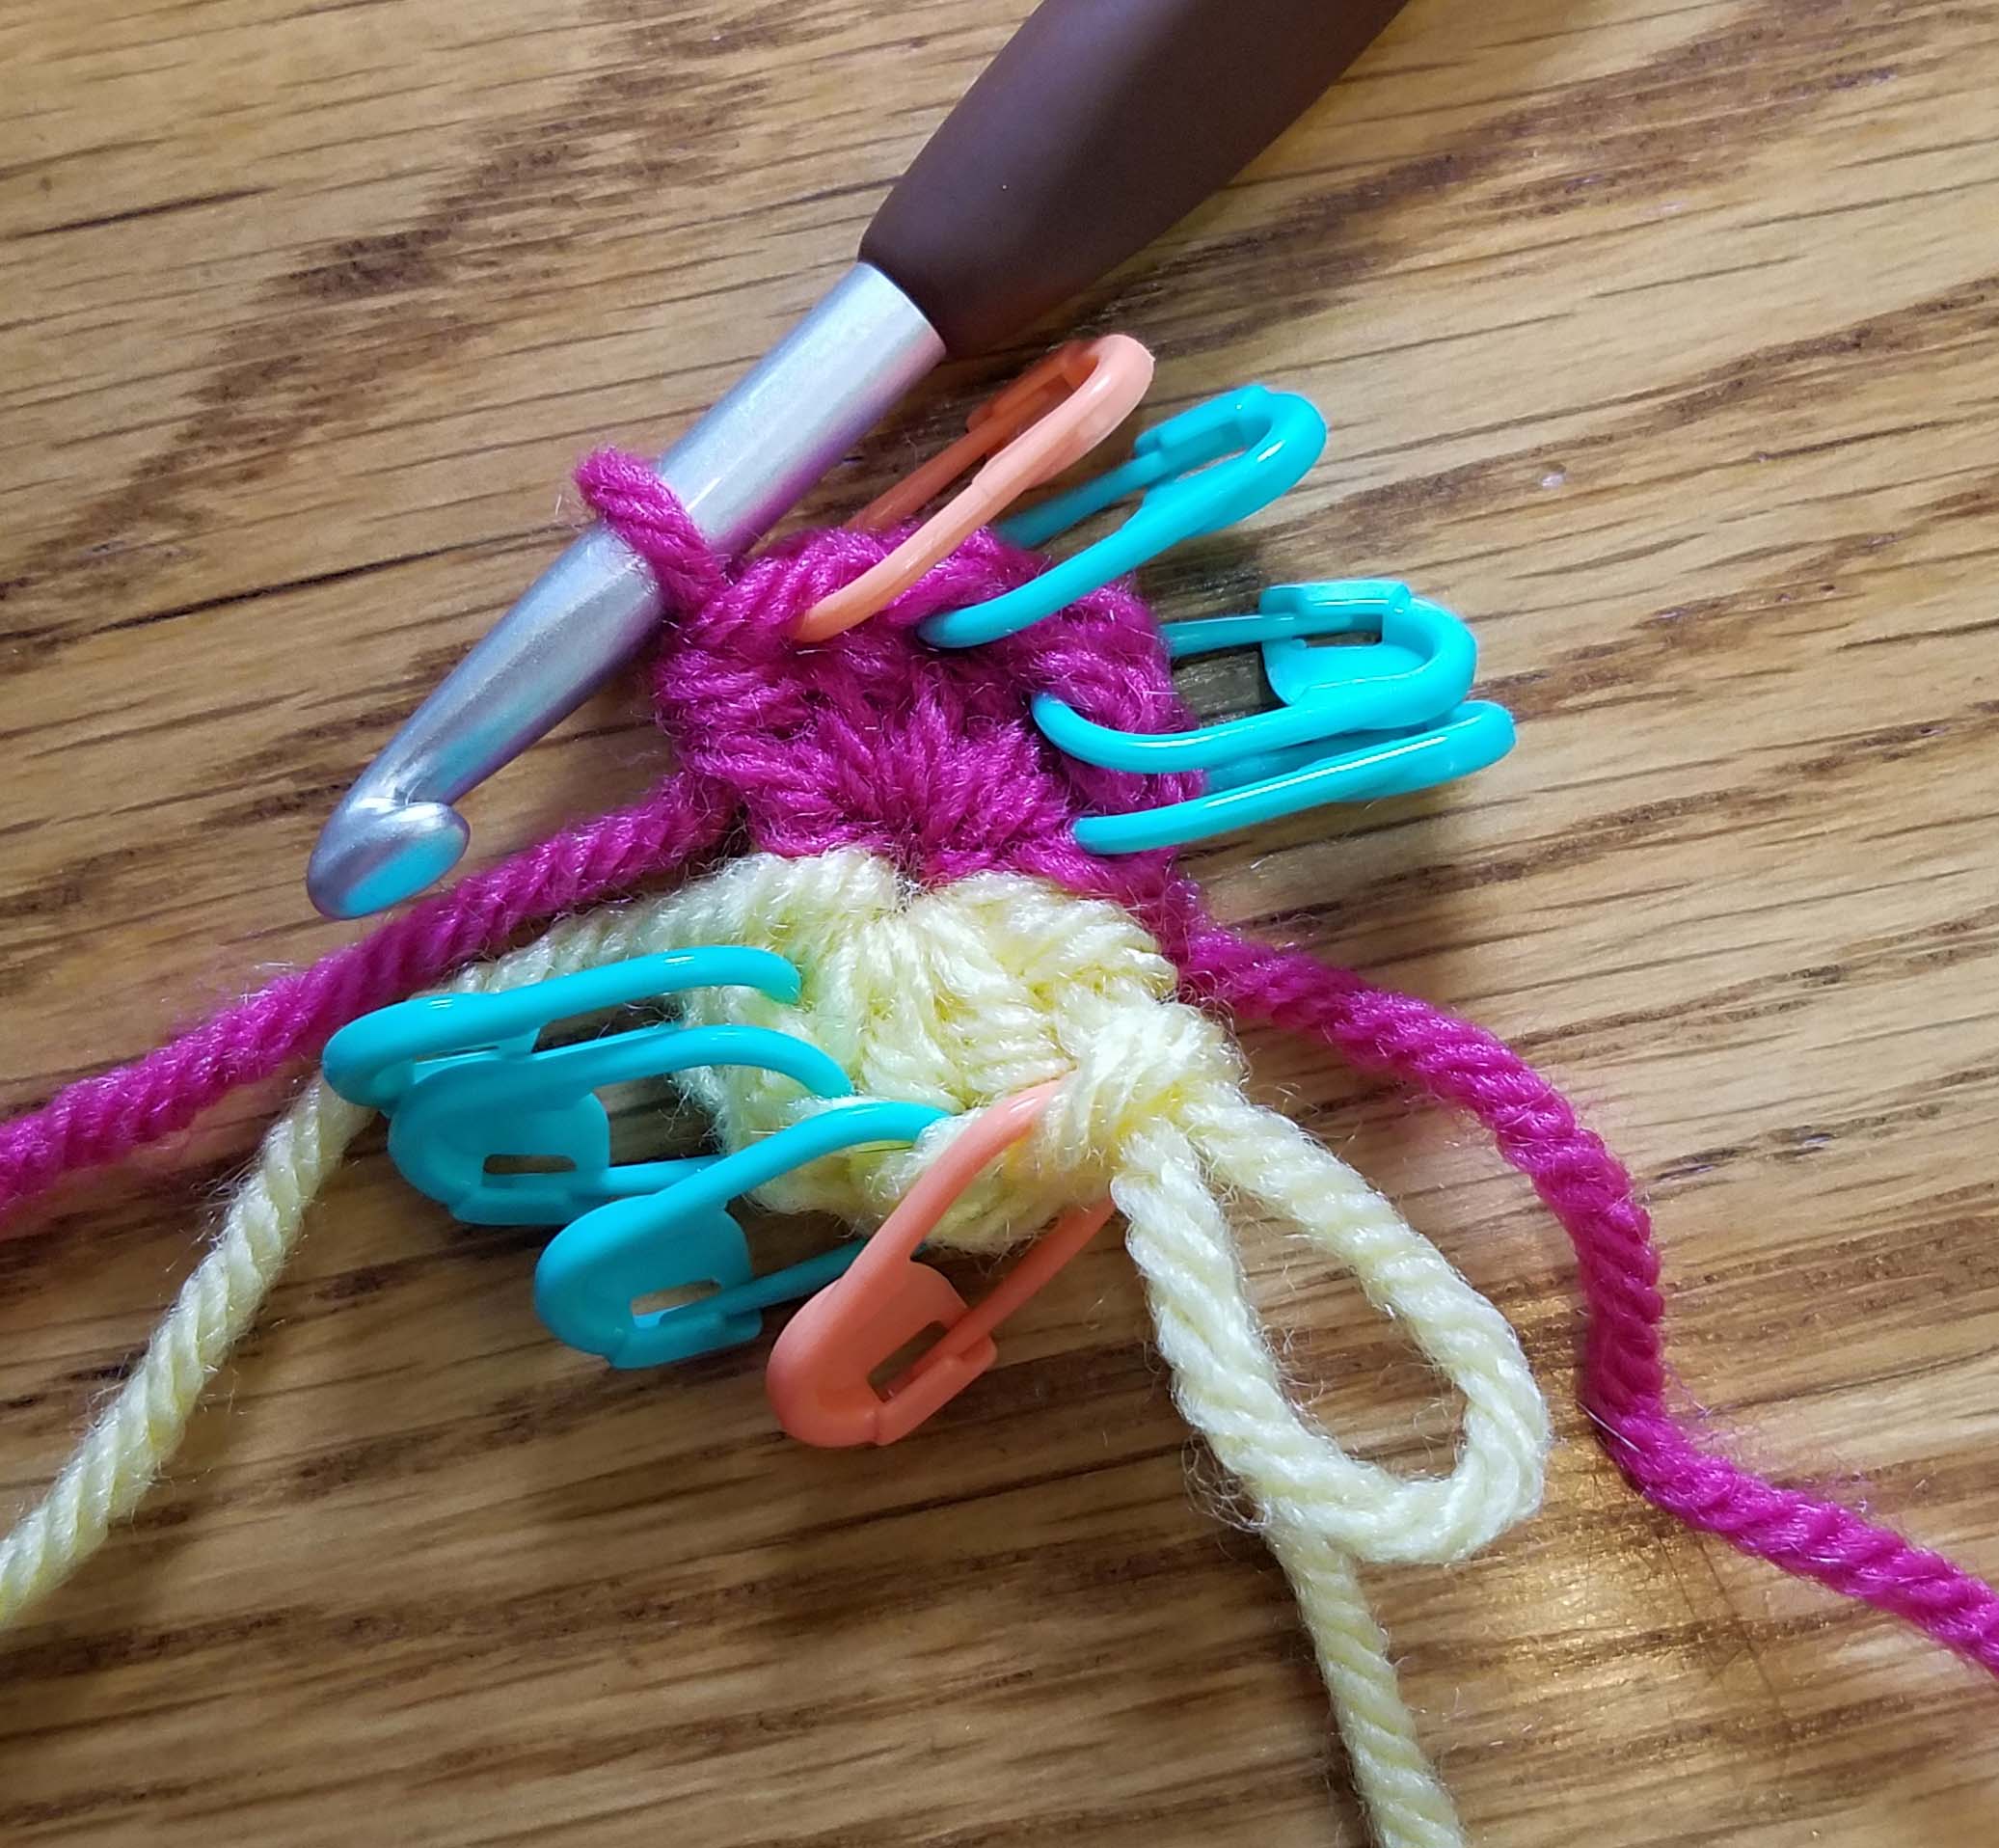
Working spirals can be a little tricky, and this spiral is made with 2 arms in 2 colors. I’ve used my favorite method of spiral making using stitch markers to help keep track of the increases and the ends of each round.
You mark each stitch of Round 1, using a different color stitch marker for the last stitch in each color.
In the following 4 rounds you work 1 stitch in each unmarked stitch and 2 stitches in each marked stitch, moving the stitch marker up to the 2nd stitch.
End of Round 5 Spiral stitches
When you work a continuous spiral in crochet you will need a step-up and a step-down to get a perfect round. At the beginning of Round 1 the first stitch is a single crochet followed by 3 half double crochets to create the step-up.
Then Round 5 of the spiral ends with a step down. In the instructions for the pattern I have broken out the step-down instructions at the end of Round 5.
Color A: #159 Lemon (sample used approximately 22 yards/12 grams)
Color B: #112 Raspberry (sample used approximately 20 yards/11 grams)
Color C {primary color}: #171 Fern (sample used approximately 62 yards/35 grams)
Color D: # 098 Fisherman (sample used approximately 30 yards/17 grams)
Hook
J / 6mm
Notions
Yarn/tapestry needle
Stitch markers
Gauge
First 5 rounds of pattern = 4” across square
Abbreviations/Special Stitches
Standing Double Crochet (Standing dc): make slip knot in yarn and place loop snugly on shaft of hook, yo and insert hook into indicated st, yo, pull up a loop, (yo, pull thru 2 loops on hook) twice.
Standing Single Crochet (Standing sc): make slip knot in yarn and place loop snugly on shaft of hook, insert hook into indicated st, yo, pull up a loop, yo, pull thru 2 loops on hook.
Loose slip stitch (loose slip st): Insert hook in indicated place, YO, pull up a loop thru place and loop on hook keeping loose like making a chain st.
Joining slip st (slip st): Insert hook in indicated place, YO, pull up a loop thru place and loop on hook, continue to pull up on working loop until original loop is tight.
Extended Double Crochet (Edc): YO, insert hook in indicated st or sp, YO pull up a loop, YO pull thru first loop on hook, (YO, pull thru 2 loops on hook) 2 times.
2 double crochet Cluster (Cl): (YO, insert hook in indicated st or sp, YO pull up a loop, YO pull thru 2 loops) 2 times, YO pull thru remaining loops on hook.
Double Crochet Cross Stitch (X-st): Skip one st, dc in next st, working around previously made dc, dc in skipped st. Each X-st uses 2 sts and creates 2 sts.
Pattern Notes:
Start square with an adjustable slip knot. Beginning tail tightens the loop on the hook.
Stitch counts at the end of each round and row are shown in italicized brackets at end of each round or row.
Square starts with a 2 color hdc spiral circle in one corner, then rounds to square the circle. Next 16 textured mitered rows are worked off 2 sides of that square, ending with 2 rounds of sc encasing entire afghan square.
When instructions specify “sl st loosely”, this means work those slip stitches similar to a chain stitch and do not pull the working loop to tighten them as in a joining slip stitch. You will be working into those loose slip stitches.
Instructions
Rnd 1 (RS): Begin with Color A, ch 2, (sc, 3 hdc) in second ch from hook, pull up long loop of color A and remove hook, insert hook in same ch as previous work, pull up a loop of Color B on shaft of hook, ch 1, (sc, 3 hdc) in same ch st, pull beginning tail of Color A to close center tightly. Place st markers in each st using a different color marker to indicate the last st of each color section. [1 sc, 3 hdc, in each color]
Rnd 2: Begin with Color A, *(2 hdc in marked st, move st marker up to second st worked) 4 times*, pull up loop of Color A, switch to Color B, Repeat from * to *. [8 hdc, in each color]
Rnd 3: Begin with Color A, *(hdc in next st, 2 hdc in marked st, move st marker up to second st worked) 4 times*, pull up loop of Color A, switch to color B, Repeat from * to *. [12 hdc, in each color]
Rnd 4: Begin with Color A, *(hdc in next 2 sts, 2 hdc in marked st, move st marker up to second st worked) 4 times*, pull up loop of Color A, switch to Color B, Repeat from * to *. [16 hdc, in each color]
Rnd 5: Begin with Color A, *(hdc in next 3 sts, 2 hdc in marked st, move st marker up to second st worked) 4 times*, pull up loop of Color A, switch to color B, Repeat from * to * once, [Count at this point is 20 hdc in each color]
step down: **hdc next st, sc next st, slip st loosely in back loop and back bar of next st, slip st tightly in back loop and back bar of next st**, fasten off Color B, switch back to Color A, Repeat from ** to ** once, fasten off Color A. [21 hdc, 1 sc, 2 slip st, in each color] 4”diameter.
To prepare for working round to square, remove every other st marker leaving 4 markers equally spaced around circle.
Rnd 6: With RS facing attach Color C yarn with a standing dc in any marked st, 2 Edc in same st, *skip 2 sts, hdc next st, hdc & sc next st, sc next st, sc & hdc next st, hdc next st, skip 2 sts, (2 Edc, dc, ch 2, dc, 2 Edc) nextmarked st, move marker to ch-2 sp just made*; Repeat from * to * 2 times; skip 2 sts, hdc next st, hdc & sc next st, sc next st, sc & hdc next st, hdc next st, skip 2 sts, (2 Edc, dc) in first worked st, ch 2, slip st to first dc of Rnd. [16 Edc, 8 dc, 16 hdc, 12 sc, 4 ch-2 sp]
Rnd 7: Ch 1, *sc in next 13 sts, (sc, ch 2, sc) in marked ch-2 sp*; Repeat from * to * 3 times, slip st to first st of Rnd, fasten off Color C. [60 sc]
Row 8: With RS facing attach Color D with a standing sc in corner ch-2 sp, sc next 15 sts, (sc, ch 2, sc) in next corner ch-2 sp, sc next 15 sts, sc in next corner ch-2 sp. [34 sc, 1 ch-2 sp]
Row 9: Ch 1, turn, sc in first st, *Cl next st, sc next st*; Repeat from * to * until work in st before corner ch-2 sp, (sc, ch 2, sc) in ch-2 sp, sc next st, Repeat from * to * until work in last st of previous row. [16 Cl, 1 ch-2 sp, 18 sc]
Row 10: Ch 1, turn, sc in first st, sc in each st until work in last st before corner ch-2 sp, (sc, ch 2, sc) in corner ch-2 sp, sc in each st until work in last st of previous row. Fasten off Color D. [38 sc, 1 ch-2 sp]
Row 11: With RS facing attach Color C with standing dc, dc in each st toward corner until work in last st before ch-2 sp, (2 dc, ch 2, 2 dc) in ch-2 sp, dc in each st away from corner until work in last st of previous row, Fasten off Color C. [42 dc, 1 ch-2 sp]
Row 12: With RS facing attach Color A with standing sc, Repeat Row 10. [42 sc, 1 ch-2 sp]
Row 13: Turn, sc in first st, ch 2, *X-st over next 2 sts*, Repeat from * to * 9 times, dc next st, (2 dc, ch 2, 2 dc) in ch-2 sp, dc next st, Repeat from * to * 10 times, dc in last st of previous row. [20 X-sts, 8 dc, 1 ch-2 sp]
Row 14: Repeat Row 10 in Color A, Fasten off Color A. [50 sc, 1 ch-2 sp]
Row 15: With RS facing attach Color C with standing dc, Repeat Row 11, Fasten off Color C. [54 dc, 1 ch-2 sp]
Row 16: With RS facing attach Color B with standing sc, Repeat Row 10. [56 sc, 1 ch-2 sp]
Row 17: Ch 1, turn, (sc next st, dc next st) 14 times, (sc, ch 2, sc) in ch-2 corner space, (dc next st, sc next st) 14 times. [28 dc, 30 sc, 1 ch-2 sp]
Row 18: Ch 1, turn, Repeat Row 10, Fasten off Color B. [60 sc, 1 ch-2 sp]
Row 19: With RS facing attach Color C with standing dc, Repeat Row 11, Fasten off Color C. [64 dc, 1 ch-2 sp]
Row 20: With RS facing attach Color D with standing sc, Repeat Row 10. [66 sc, 1 ch-2 sp]
Row 21: Turn, sc in first st, ch 2, *X-st over next 2 sts*, Repeat from * to * 15 times, (2 dc, ch 2, 2 dc) in ch-2 sp, Repeat from * to * 16 times, dc in last st of previous row. [32 X-sts, 6 dc, 1 ch-2 sp]
Row 22: Repeat Row 10, Fasten off Color D. [72 sc, 1 ch-2 sp]
Weave in all tails so far.
Row 23: With RS facing attach Color C with standing dc, Repeat Row 11, DO NOT fasten off Color C. [76 dc, 1 ch-2 sp]
Edging Rounds
Rnd 1: With RS facing turn work counter clockwise to work along edges of Rows, ch 1, 2 sc in side of Row 23, sc in side of Row 22, 2 sc in side of Row 21, sc in side of Row 20, 2 sc in side of Row 19, sc in side of Row 18, sc in side of Row 17, sc in side of Row 16, 2 sc in side of Row 15, sc in side of Row 14, 2 sc in side of Row 13, sc in side of Row 12, 2 sc in side of Row 11, sc in side of Row 10, sc in side of Row 9, sc in side of Row 8, sc in corner ch-2 sp of beginning square, sc in next 15 sts,
(sc, ch 2, sc) in next corner ch-2 sp,
sc in next 15 sts, sc in next corner ch-2 sp of beginning square, sc in side of Row 8, sc in side of Row 9, sc in side of Row 10, 2 sc in side of Row 11, sc in side of Row 12, 2 sc in side of Row 13, sc in side of Row 14, 2 sc in side of Row 15, sc in side of Row 16, sc in side of Row 17, sc in side of Row 18, 2 sc in side of Row 19, sc in side of Row 20, 2 sc in side of Row 21, sc in side of Row 22, 2 sc in side of Row 23,
ch 2, turn and sc in top of first st of Row 23, sc in next 37 sts,
(sc, ch 2, sc) in next corner ch-2 sp,
sc in next 38 sts, ch 2, slip st to first sc of Rnd 1. [156 sc, 4 ch-2 sp]
Rnd 2: Ch 1, *sc in each st until work in last st before ch-2 sp, (sc, ch 2, sc) in ch-2 sp*; Repeat from * to * 3 times, slip st to first sc of Rnd 2, fasten off. [164 sc, 4 ch-2 sp]
I’m still working on getting well from the Whooping Cough. I am past the constant coughing stage, but am currently wearing my ribs strapped because I have managed to cough a couple of ribs out of place. Friday afternoon my chiropractor got me fixed up and told me to wear the strapping until I had a full 48 hours pain free. Good thing the weather has cooled off a bit, this rib support is really warm.
Meanwhile, what is a busy crochet designer supposed to do with herself when she is stuck “resting” all the time? Design something of course. The best bit of my recovery is I feel like crocheting again, for a while there I was just too wiped out to do more than move my pillows around. I still need lots of sleep, but when I am awake I can crochet and watch movies.
I had 2 balls of Lion Brand’s “Shawl in a Ball” that I purchased this summer. I picked out the “Restful Rainbow” colorway because it has so many of my favorite colors in it. I started a couple of different shawl ideas in it, but finally decided to go with my simple 2 x 2 pattern with increases for a top down wrap.
It’s perfect for crocheting on while watching movies and if I fall asleep while working on it, it isn’t confusing to figure out where I am in the row. I’ll be publishing this pattern later this fall here on the blog once I have finished my sample.
Meanwhile some other news. For those of you that are CGOA members you may have seen already, but I am one of the nominees for the CGOA Board of Directors. The voting begins November 1st thru December 26th, so be sure that your membership is current and vote for your top 4 picks from the nominees. I hope you will vote for me as I know I have a lot to bring to the board and CGOA.
If you want to join CGOA there is no time like the present. You can find out everything you need to join at the CGOA website: Crochet.org. When you think Crochet, think CGOA!
Sorry for going so silent the past couple of weeks folks, it may be quiet here on the blog for awhile yet. Turns out I’ve been super sick with Whooping Cough.
My youngest came down with it the last week of August. I had no idea that was what it was. We thought it was just a mild cold and fever thing. After all he had received his last inoculation for Whooping Cough in May 2014. Both kids had. Unfortunately turns out that isn’t a guarantee that they wouldn’t catch it. Because of his vaccination he had a mild case, but the same can’t be said for the rest of us.
My oldest and I came down with it the 2nd week of September. We got a nasty case of it as did my husband a week after us. Now we know what we are fighting, we are all doing much better. I’ve been feeding us all healthfully and getting lots of sleep. Unfortunately sleeping is really all I want to do. So it will be some time before I can do an interesting post on here.
I’ve been too tired to do much crocheting, so I have been unraveling some old projects that have been in the “frog” pond. At least it is something constructive.
This summer has been all about traveling and it’s time to share some of the highlights from my trip to Chicago the last week of July. I had a great time, both at the CGOA Chain Link Conference and exploring downtown Chicago with Jan.
The conference was full of wonderful reunions with lots of my crocheting friends. Though once again I barely took any photos with my friends. I had 4 big commitments at the conference: Wednesday I was presenting at Professional Development Day, Friday & Saturday morning I had marvelous classes with Myra Wood, and Saturday evening I produced the Fashion Show for the Banquet. Then there were the evening events: CGOA Business Meeting, Market Preview and the Excellence in Crochet Awards.
My flight got in just after noon on Tuesday at Midway airport, so I needed to get across Chicago almost all the way to O’Hare airport. For those of you wondering, I flew into Midway because I try to always fly with Southwest Air and they don’t fly into O’Hare. I really lucked out though, I contacted AllStar Cab Dispatch and arranged to get a lift with one of their flat rate suburban drivers. My driver was Mike, he was helpful, friendly and we had a great chat driving across Chicago. I got a card from him in case Jan and I needed a cab later during our visit.
Jan and Pam were flying in a little later than me to O’Hare, so we had all decided that we would go out to dinner to PF Changs before the general madness of the conference started the next day. We had hoped to take the hotel shuttle, but the timing didn’t work with our evening, so I told them “I know a guy.” “How is that possible? You’ve been in Chicago like 5 minutes!”. Was a great laugh and our first call to Mike for a cab ride to and from dinner.
The next day was Professional Development Day and I was presenting in the afternoon. The morning started with presentations from Tamara Kelly of Moogly about social media then Nirmal about managing financial tasks for our business. Nirmal gave away fun little acupressure finger rings that everyone loved.
The afternoon was mini sessions of 6 different topics. 3 topics were presented in the first half of the afternoon and the other 3 were presented in the last half of the afternoon. Each topic was presented 2 times allowing attendees to sit in to 4 topics. My topic was “Super Submissions” and my 2 presentations went well. I enjoyed sitting in on Kathy Lashley’s and Cari Clement’s presentations after I was finished with mine.
Wild Women of Crochet: (left to right) Amy Shelton, Tammy Hildebrand, Laura Krzak & Donna Hulka
That evening I went out to dinner while Jan went to a class. Laura K lives in the Chicago area, she wasn’t able to come to the conference due to work and family obligations, but she wanted to get some of us together for dinner at her favorite restaurant. We had a lovely dinner and lots of fun laughing and catching up.
The next morning I was up bright and early for my first class with Myra Wood and that afternoon I started working on the Fashion Show.
Most of my free time at the conference was spent zipping around getting things together for the Fashion Show. I had a small room with 2 tables and garment racks to organize the fashion show entries. That room would also be our changing room during the show. The photo above is what it finally looked like about 1 hour before the banquet was scheduled to start. It was a bit of tight squeeze once we had all the models in there, but Jan and I made it work.
This year was a bit different from the other fashion shows I have been involved with at the conference. We didn’t have a runway for the models to walk. Instead they were on a small stage with our MC (the lovely Melissa Leapman), then they walked around the banquet room while the next model was on stage. To help the audience know which garment was which I decided they would carry signs with the name of the garment on them.
Initially I was going to hand letter the signs, but fortunately the brilliant Pia Thadani stepped in and typed the signs for me on the computer and we were able to have them printed at the registration desk. Pia and I even had a moment to clown around together afterward.
Despite all the running around I managed to get some shopping in. Especially the evening of the Market Preview. There were some familiar faces and some reunions with vendors I hadn’t seen in a few years.
My friends at Artisanal Yarns were there with lovely yarns.
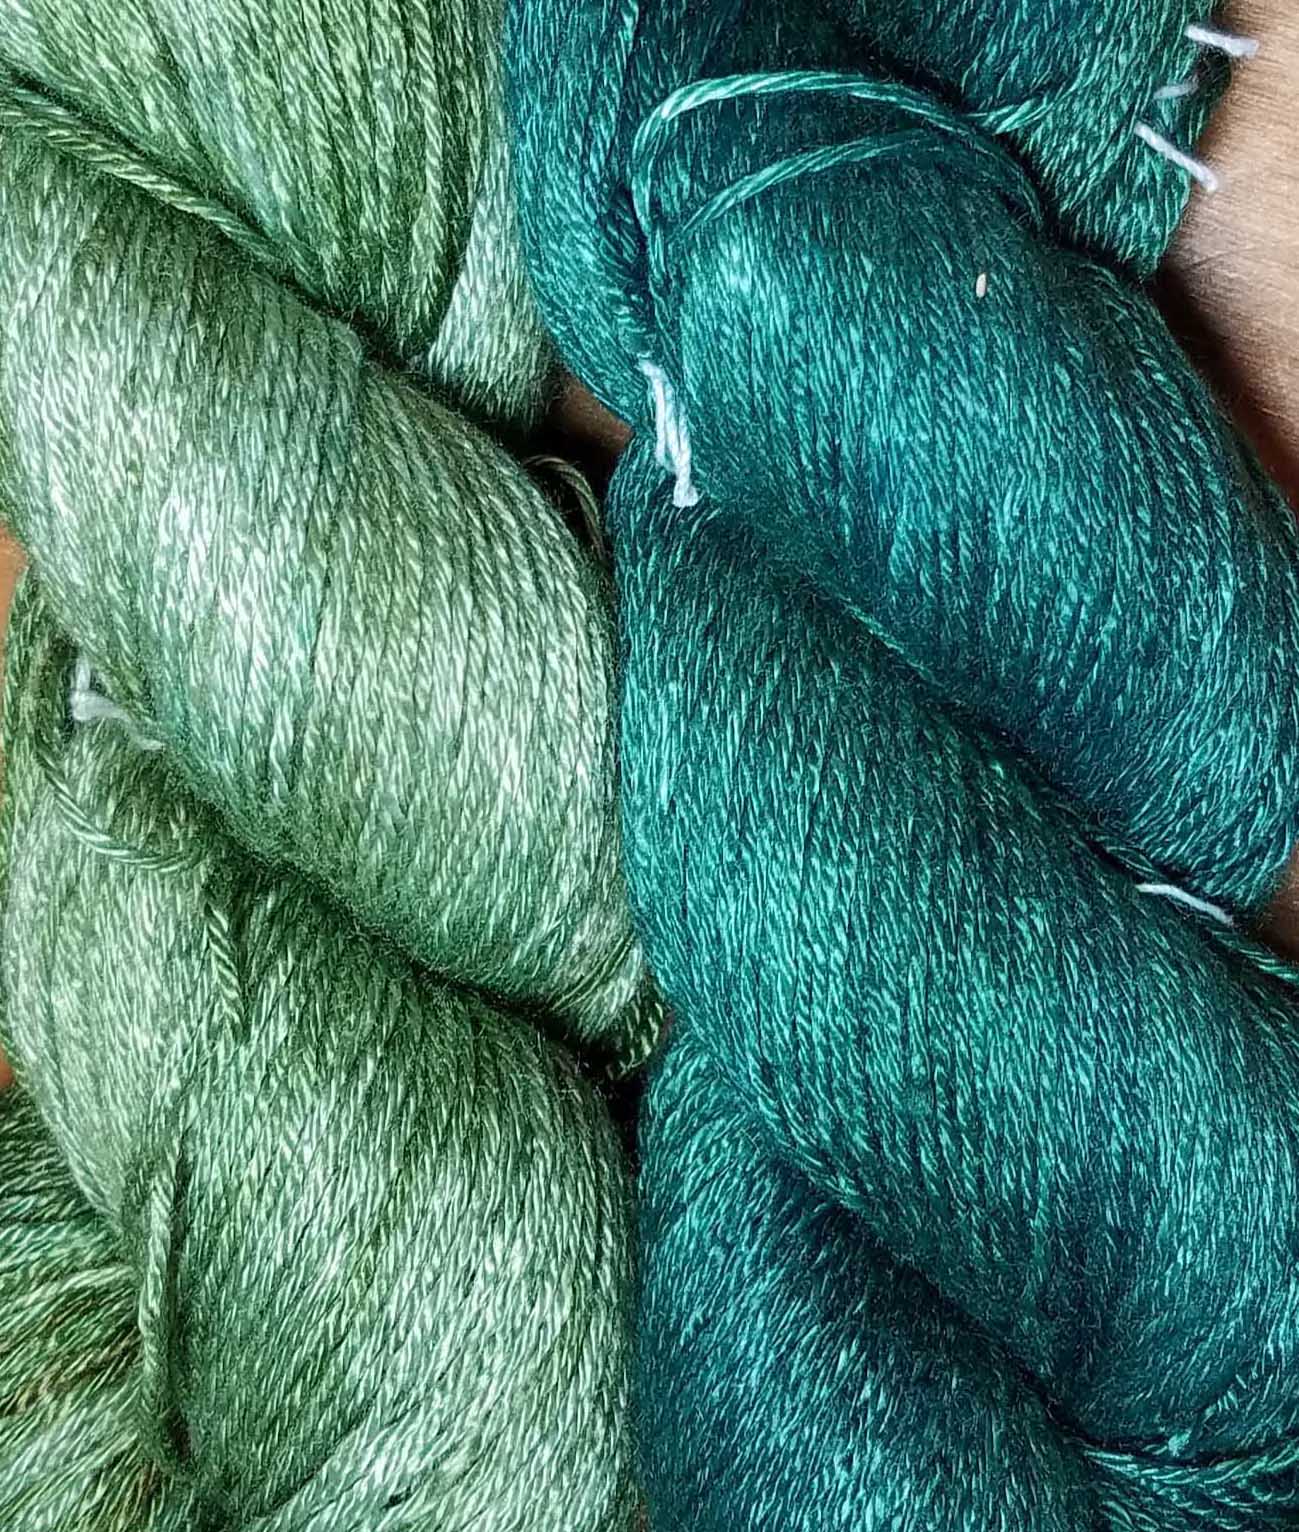
I had to adopt a couple hanks of the silk blends with sparkly beads in them. I’ve got a couple of ideas of what these beauties will become.
Remember this photo? This was taken at the Reno Knit & Crochet Show in 2012. The very young Harrison Richards and his amazing Furls hooks.
Well he and his company are all grown up and were there for the Chicago show. He had a beautiful booth set-up and lots of wonderful new products. His was one of the busiest booths the evening of the preview, so I had to grab a moment Friday afternoon to take some photos.
My magpie eye of course went right to the shiny colorful CandyShop hooks and accessories.
The Odyssey hooks, accessories and lovely wooden yarn bowls were enticing as well.
Harrison was taking pre-orders for his new colors of the Odyssey hooks. Bet you can’t guess which one I ordered. Nope, not the pink, though it was a near thing.
Harrison insisted that we needed a photo together. I joked that I felt like I was his proud mom. So happy to see him doing so well.
I stopped in for a little bit of shopping Friday and Saturday. Jan kept finding things in the market, then tempting me to add to my collection. We are really rather dangerous together.
I had to get these crochet hooks, I don’t know that I’ll crochet with them, but the handles and colors were so pretty. I think they are going to look gorgeous on the wall in my design office. Jan bought the ones with black handles, but the pretty colors were calling my name.
I also purchased a bit more yarn. The Jenny King yarn is a little hard to find here in the US and it was a beautiful purple color.
Most of the yarn and goodies I brought home from the show were from the amazing goodie bags and give-a-ways at the various evening events. The night of the Excellence in Crochet Awards we were each given a huge bag full of all kinds of wonderful stuff. Yup, that is a wooden yarn bowl in there.
These were the yarns in my Crochetville bag that evening (sorry for the blurry photo). After the event was over there was lots of trading going on as everyone’s bag had different things in them. Jan and I received almost the same items, just different colors.
The evening of the business meeting each chair had a package of yarn. I received the bag of Bernat’s Mega in the gold color and a woman sitting in front of me gave me her bag of oyster colored.
The night of the banquet these were the goodies on my chair. I was very excited about the Bernat Maker Home Dec yarn because it was a color that would go very nicely with the 2 balls I had received the night of the Excellence in Crochet event.
A big Thank You to all the sponsors that donated so many wonderful products to the conference events. There were so many wonderful things that I’m still sorting thru everything. I had quite a time trying to fit it all in my suitcases for the flight home. I actually ended up giving some of the yarn to Laura K for her crochet group. They do blankets and other warm projects for charity, so I knew it would be well received and put to use.
The conference ended with the banquet Saturday evening. But Jan and I were not finished with Chicago yet. Jan used to live there and wanted to show me around downtown Chicago. Especially the Art Institute of Chicago. So we were both staying until Tuesday. That meant 2 days to explore downtown Chicago. I’ll tell you all about that in the next installment of Jan & Andee’s Chicago Adventure.
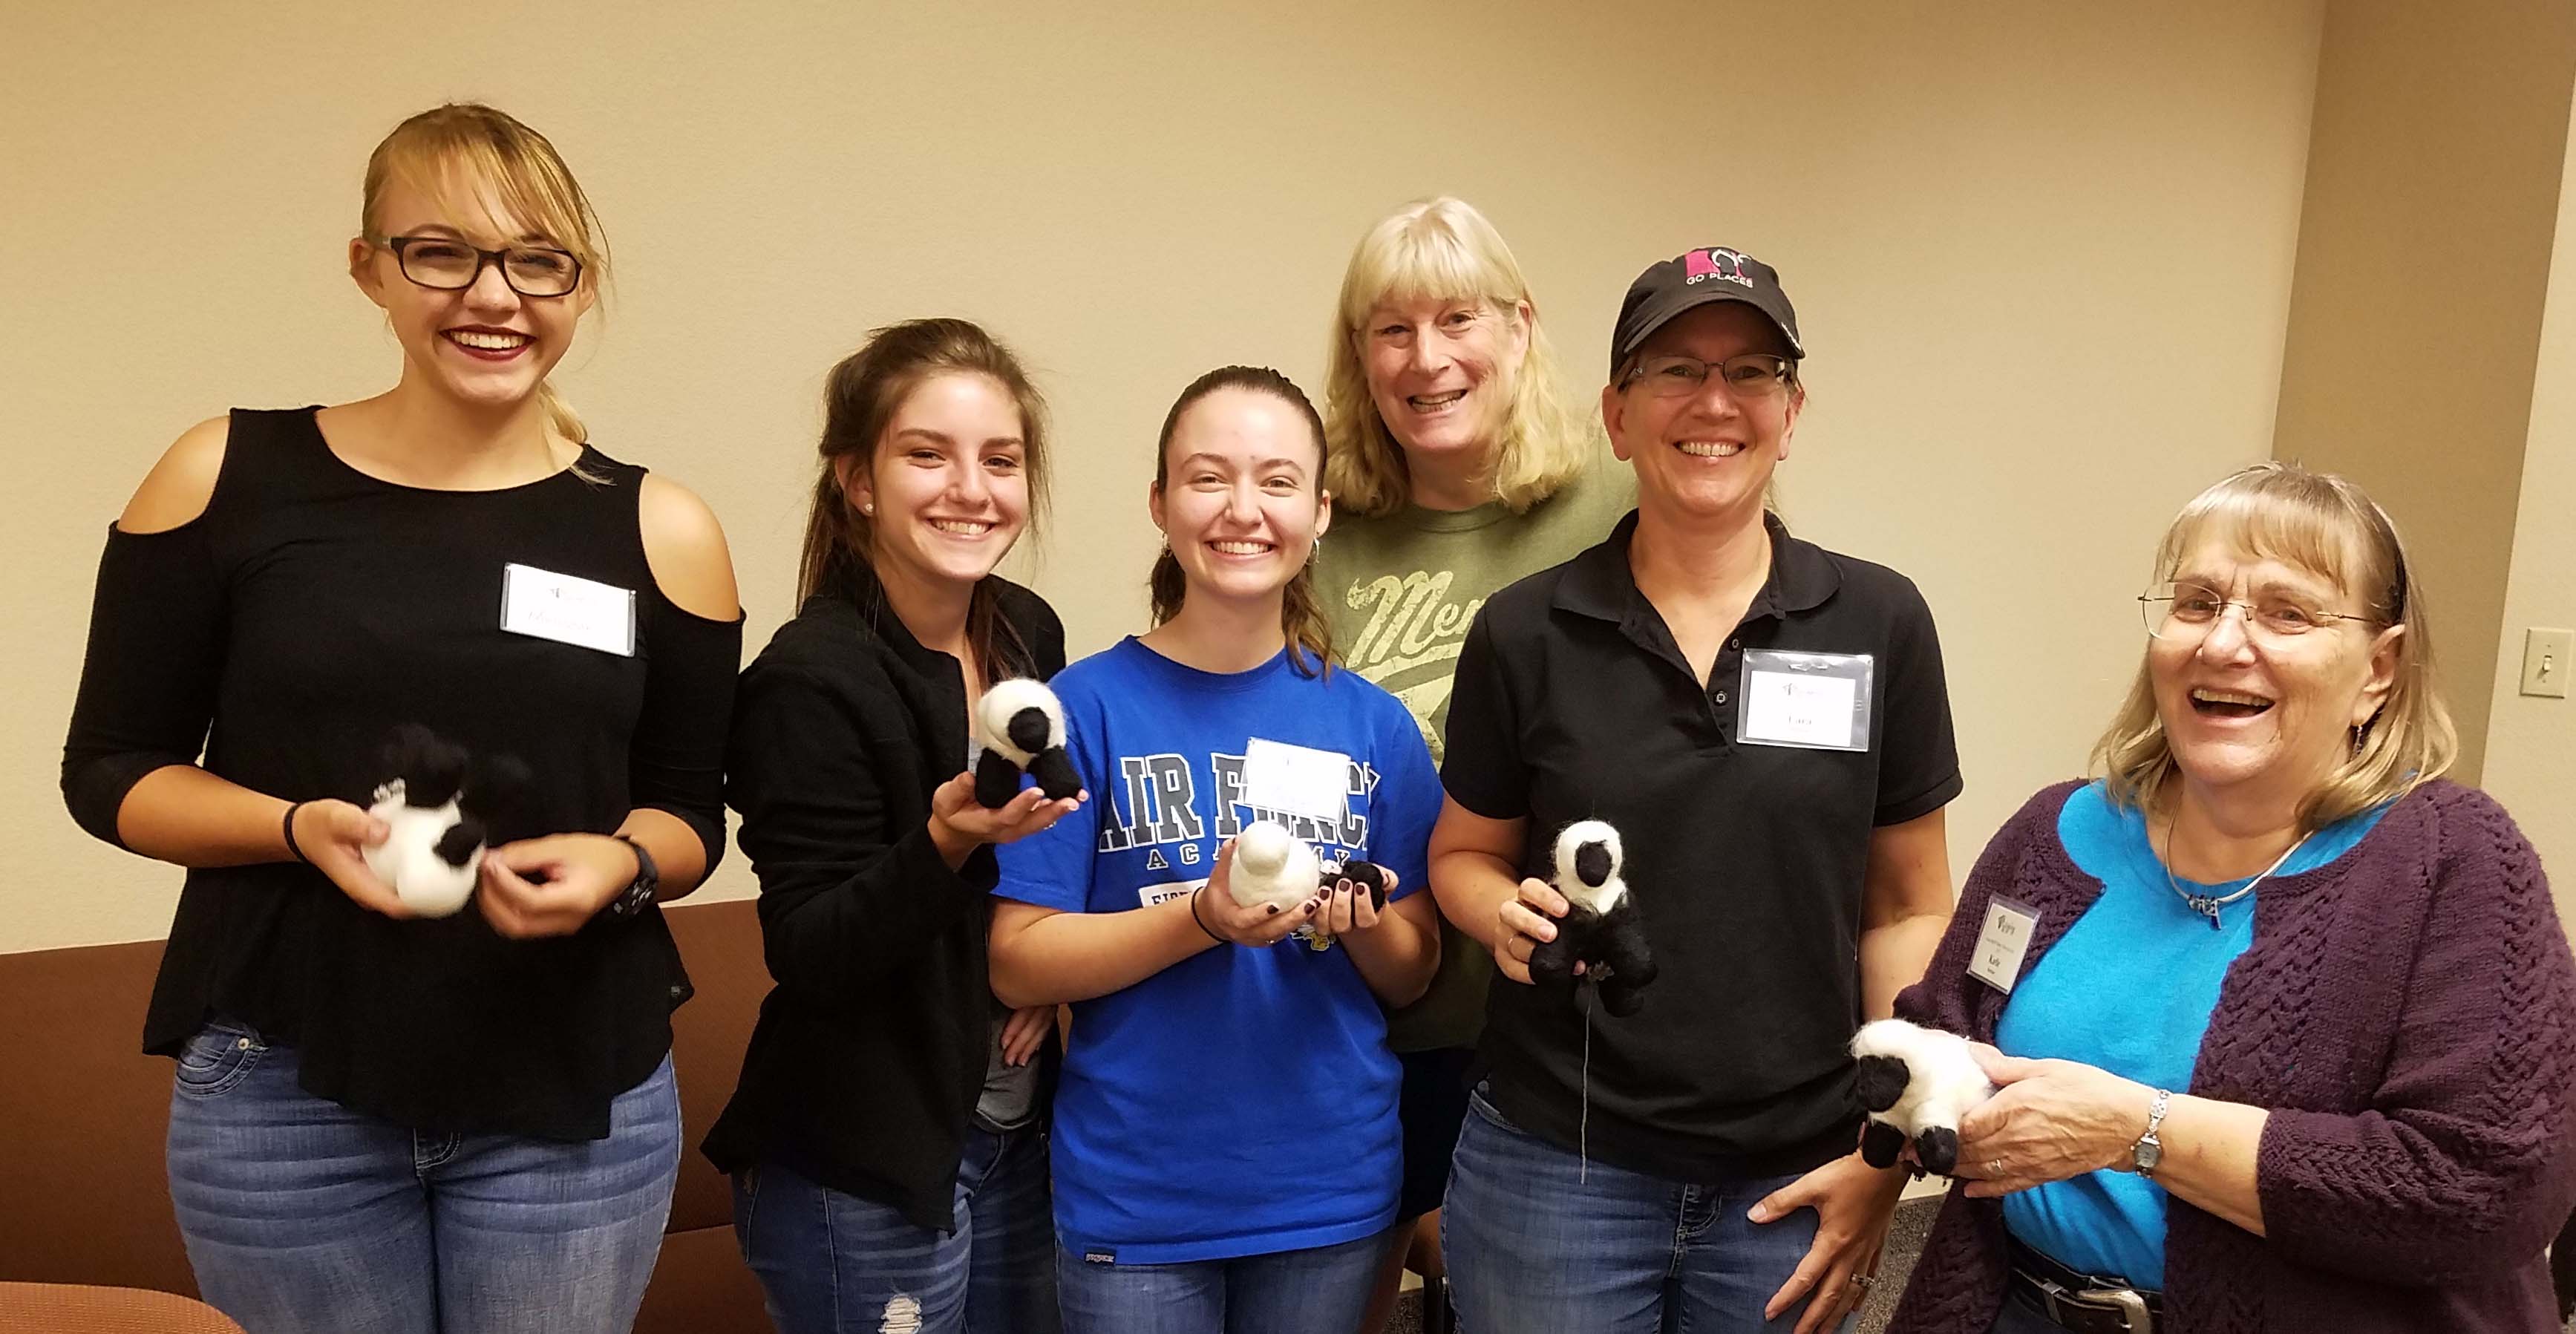
This past week has been another whirlwind as I was preparing for the Scottsbluff Fiber Arts Fair. Today was all about Needle Felting, I taught 2 classes on the subject.
The morning class was “Needle Felting in 3D” and my afternoon class was “Sweet Sheep Toy: Needle Felting”. Both classes were well attended and I had such a great time with my students.
The sheep class students really applied themselves to the project, and everyone left with a new appreciation for how to create needle felt toys. Tomorrow I’ll be teaching a Learn to Crochet class for Knitters “The Crocheted Edge”. This was a fun class I originally developed for teaching at the Longmont Yarn Shoppe. I’m looking forward to helping my fellow yarn crafters add crochet to their skills.
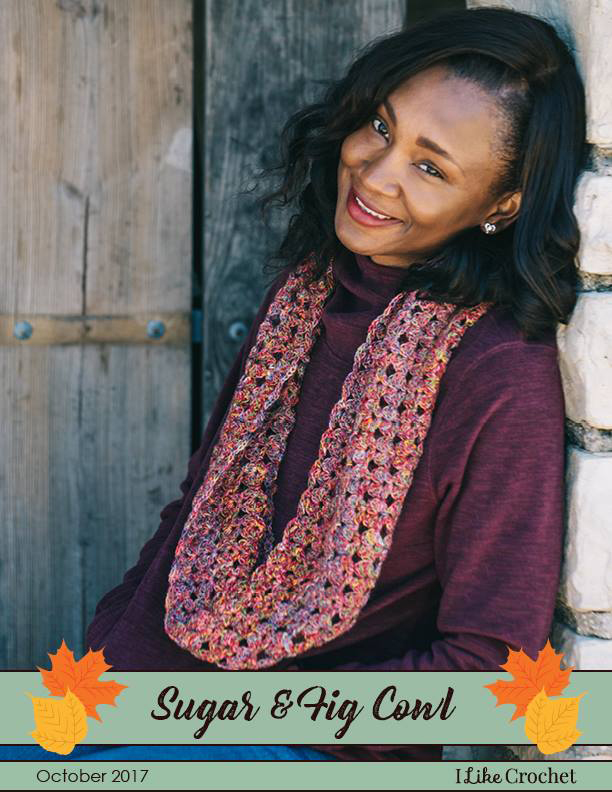
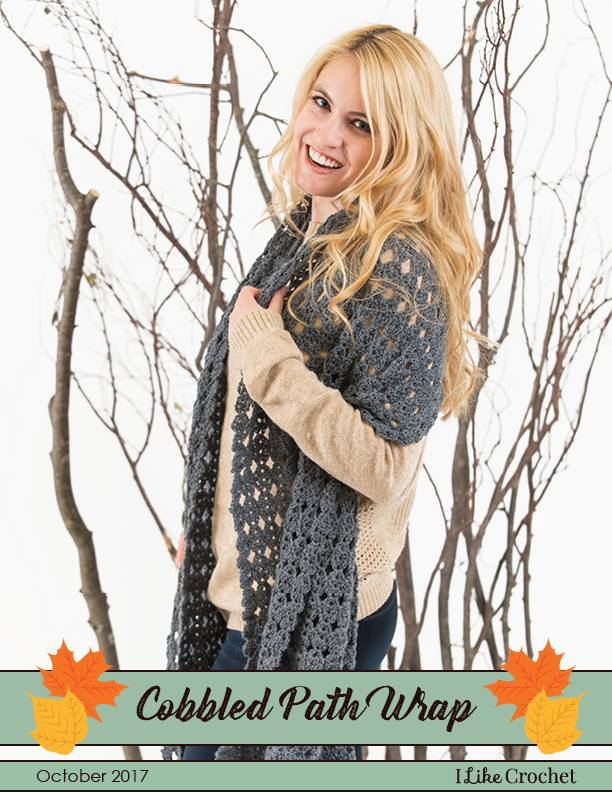
Speaking of crochet. I’m so excited to show you my 2 latest designs to be published in the October issue of the online magazine “I Like Crochet”. Both of these designs were inspired by the idea of working fabric that has the appearance of little motifs without all the joining and tail weaving usually involved in that type of fabric. Instead the look of motifs is created by working continuous rows and using spike stitches gather the rows together. The edging and finish for each project is also worked continuously , so when you are finished with the crocheting, all you have left is weaving in a few ends and blocking
The “Sugar & Fig Cowl” is made in Berroco Yarns “Boboli Lace”, this is a colorful yarn with a lovely subtle sheen. The “motifs” are created in a 2 row repeat that is easy to memorize so you’ll have your cowl finished before you know it.
The “Cobbled Path Wrap” is a rectangular stole crocheted in Premier Yarns’ Deborah Norville “Serenity Sock”. The motif look in this design is worked in a 3 row repeat giving the look of ovals. This repeat is a tiny bit more challenging, but with the length of the wrap you will get into the swing of it pretty easily.
Both designs were worked in fingering weight yarns with lots of fluidity for finished projects with lovely drape and wearability.
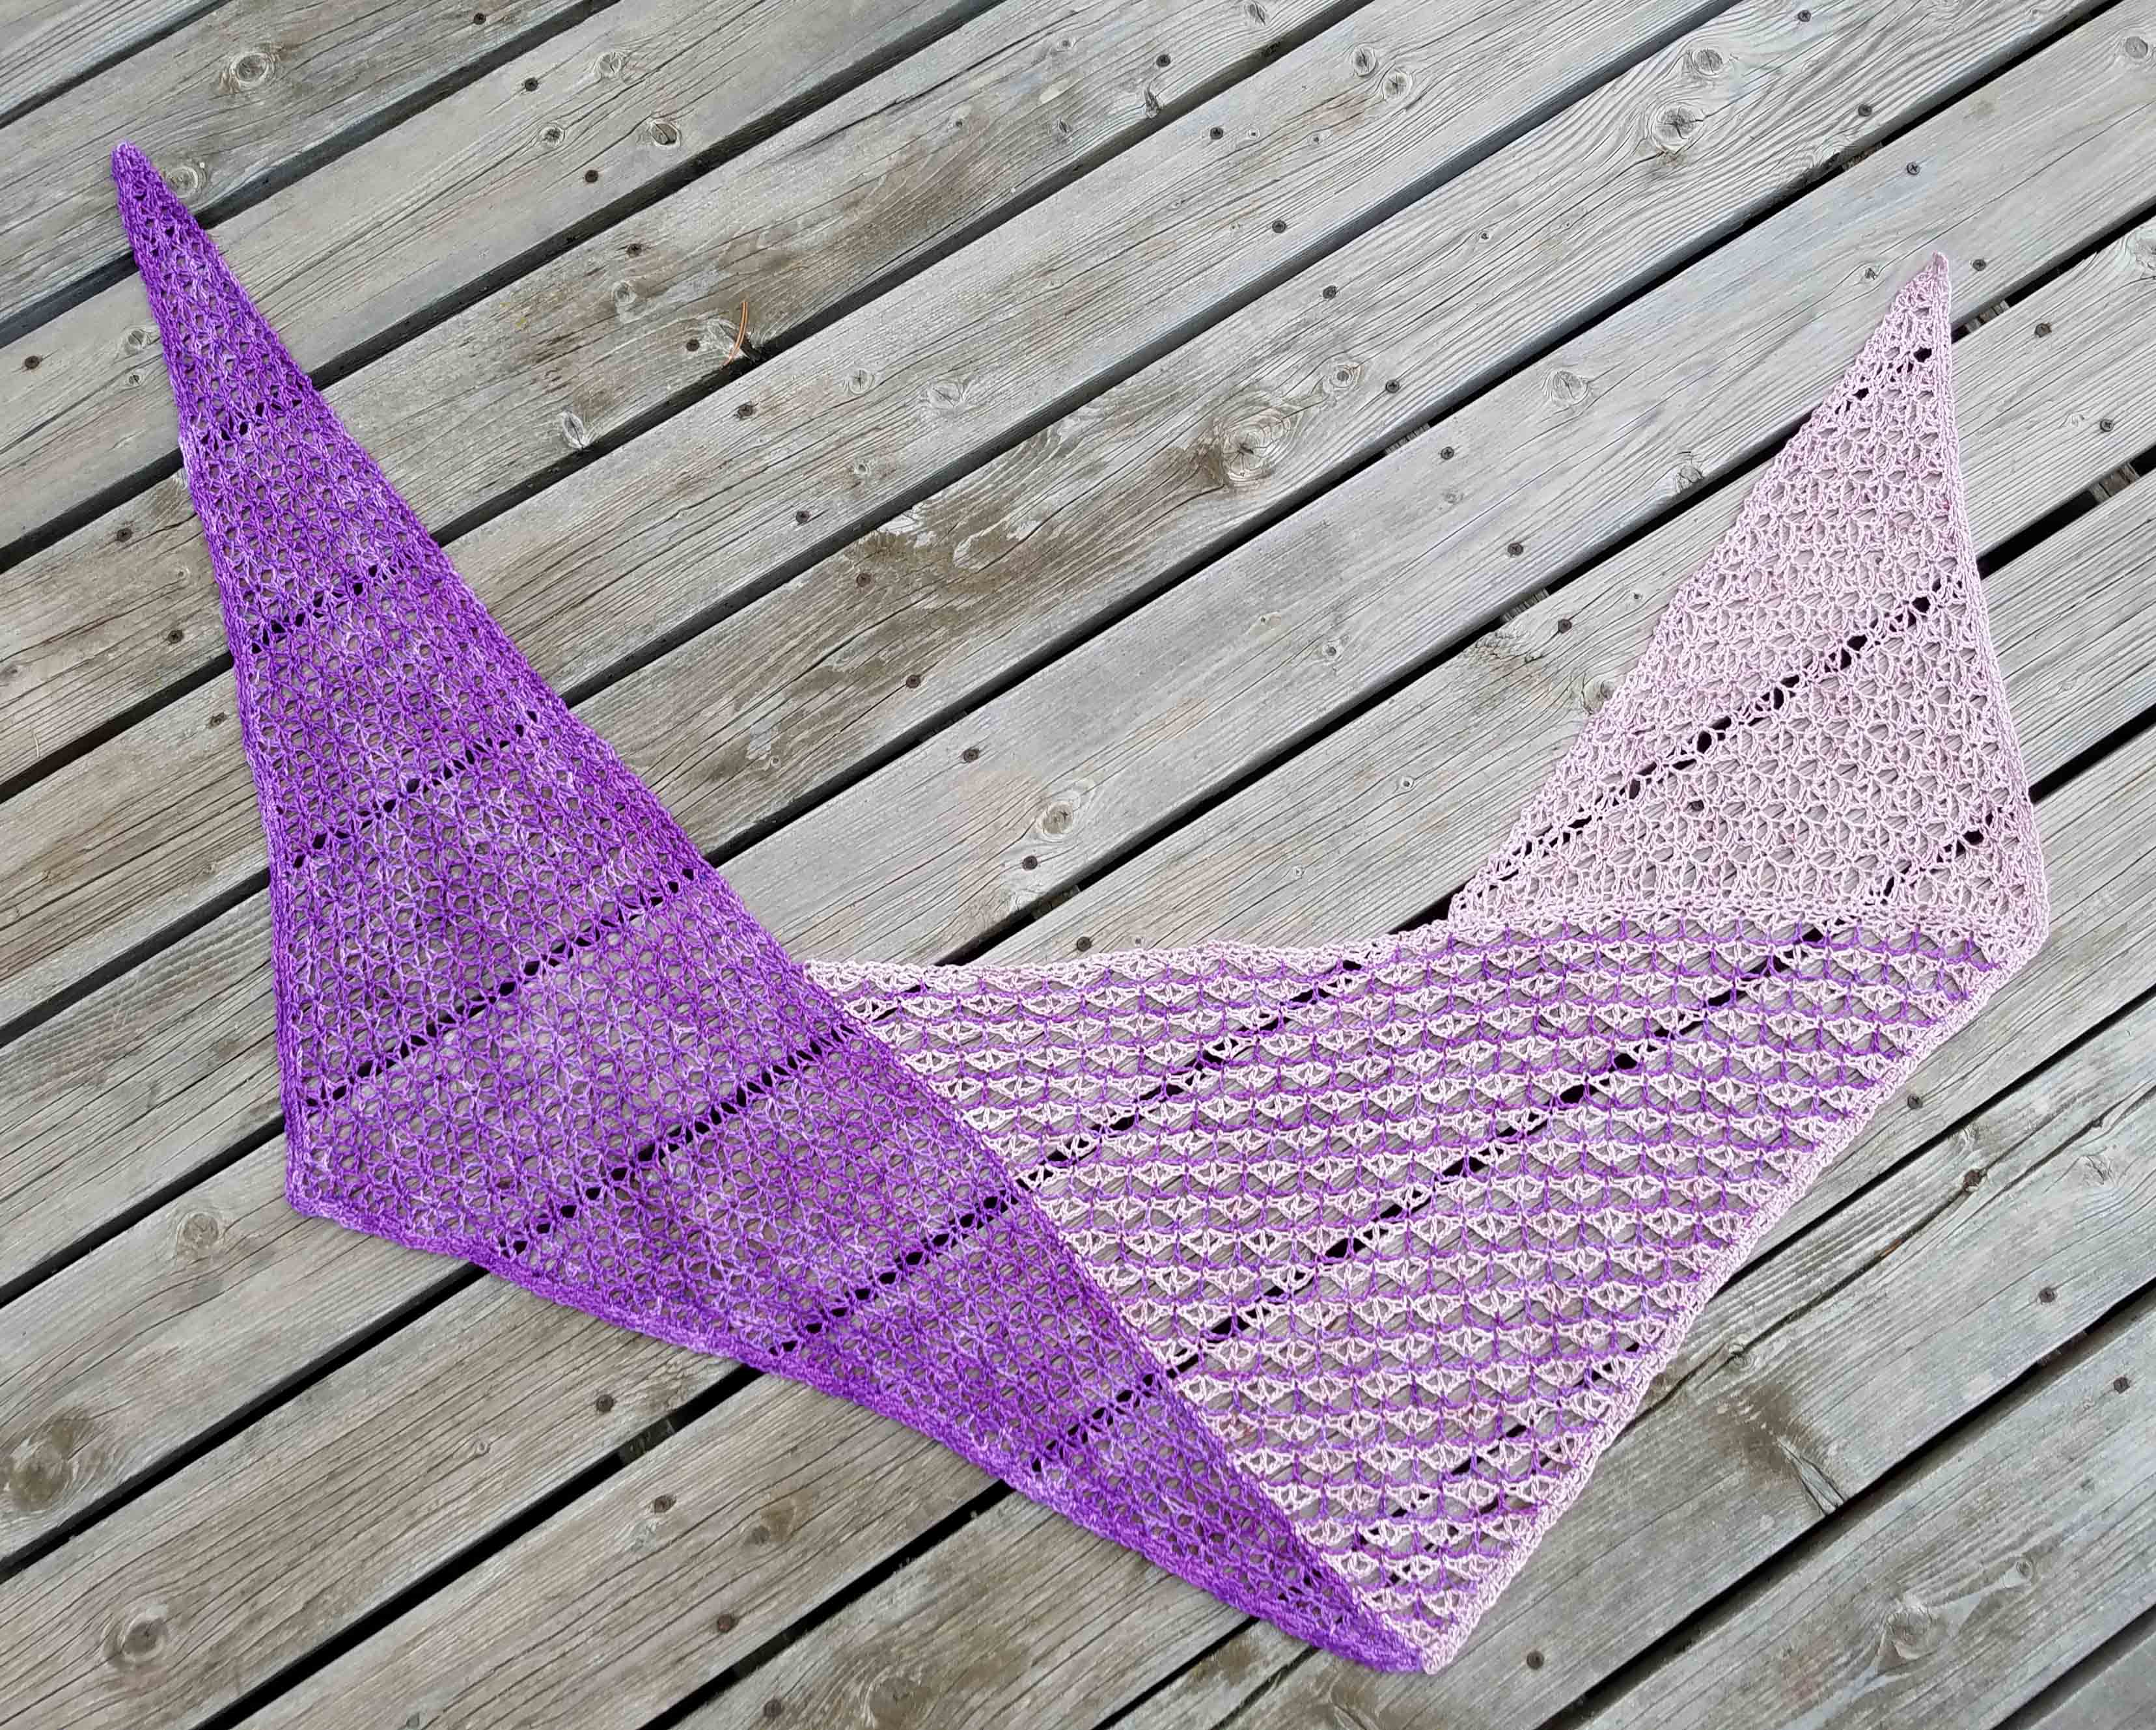
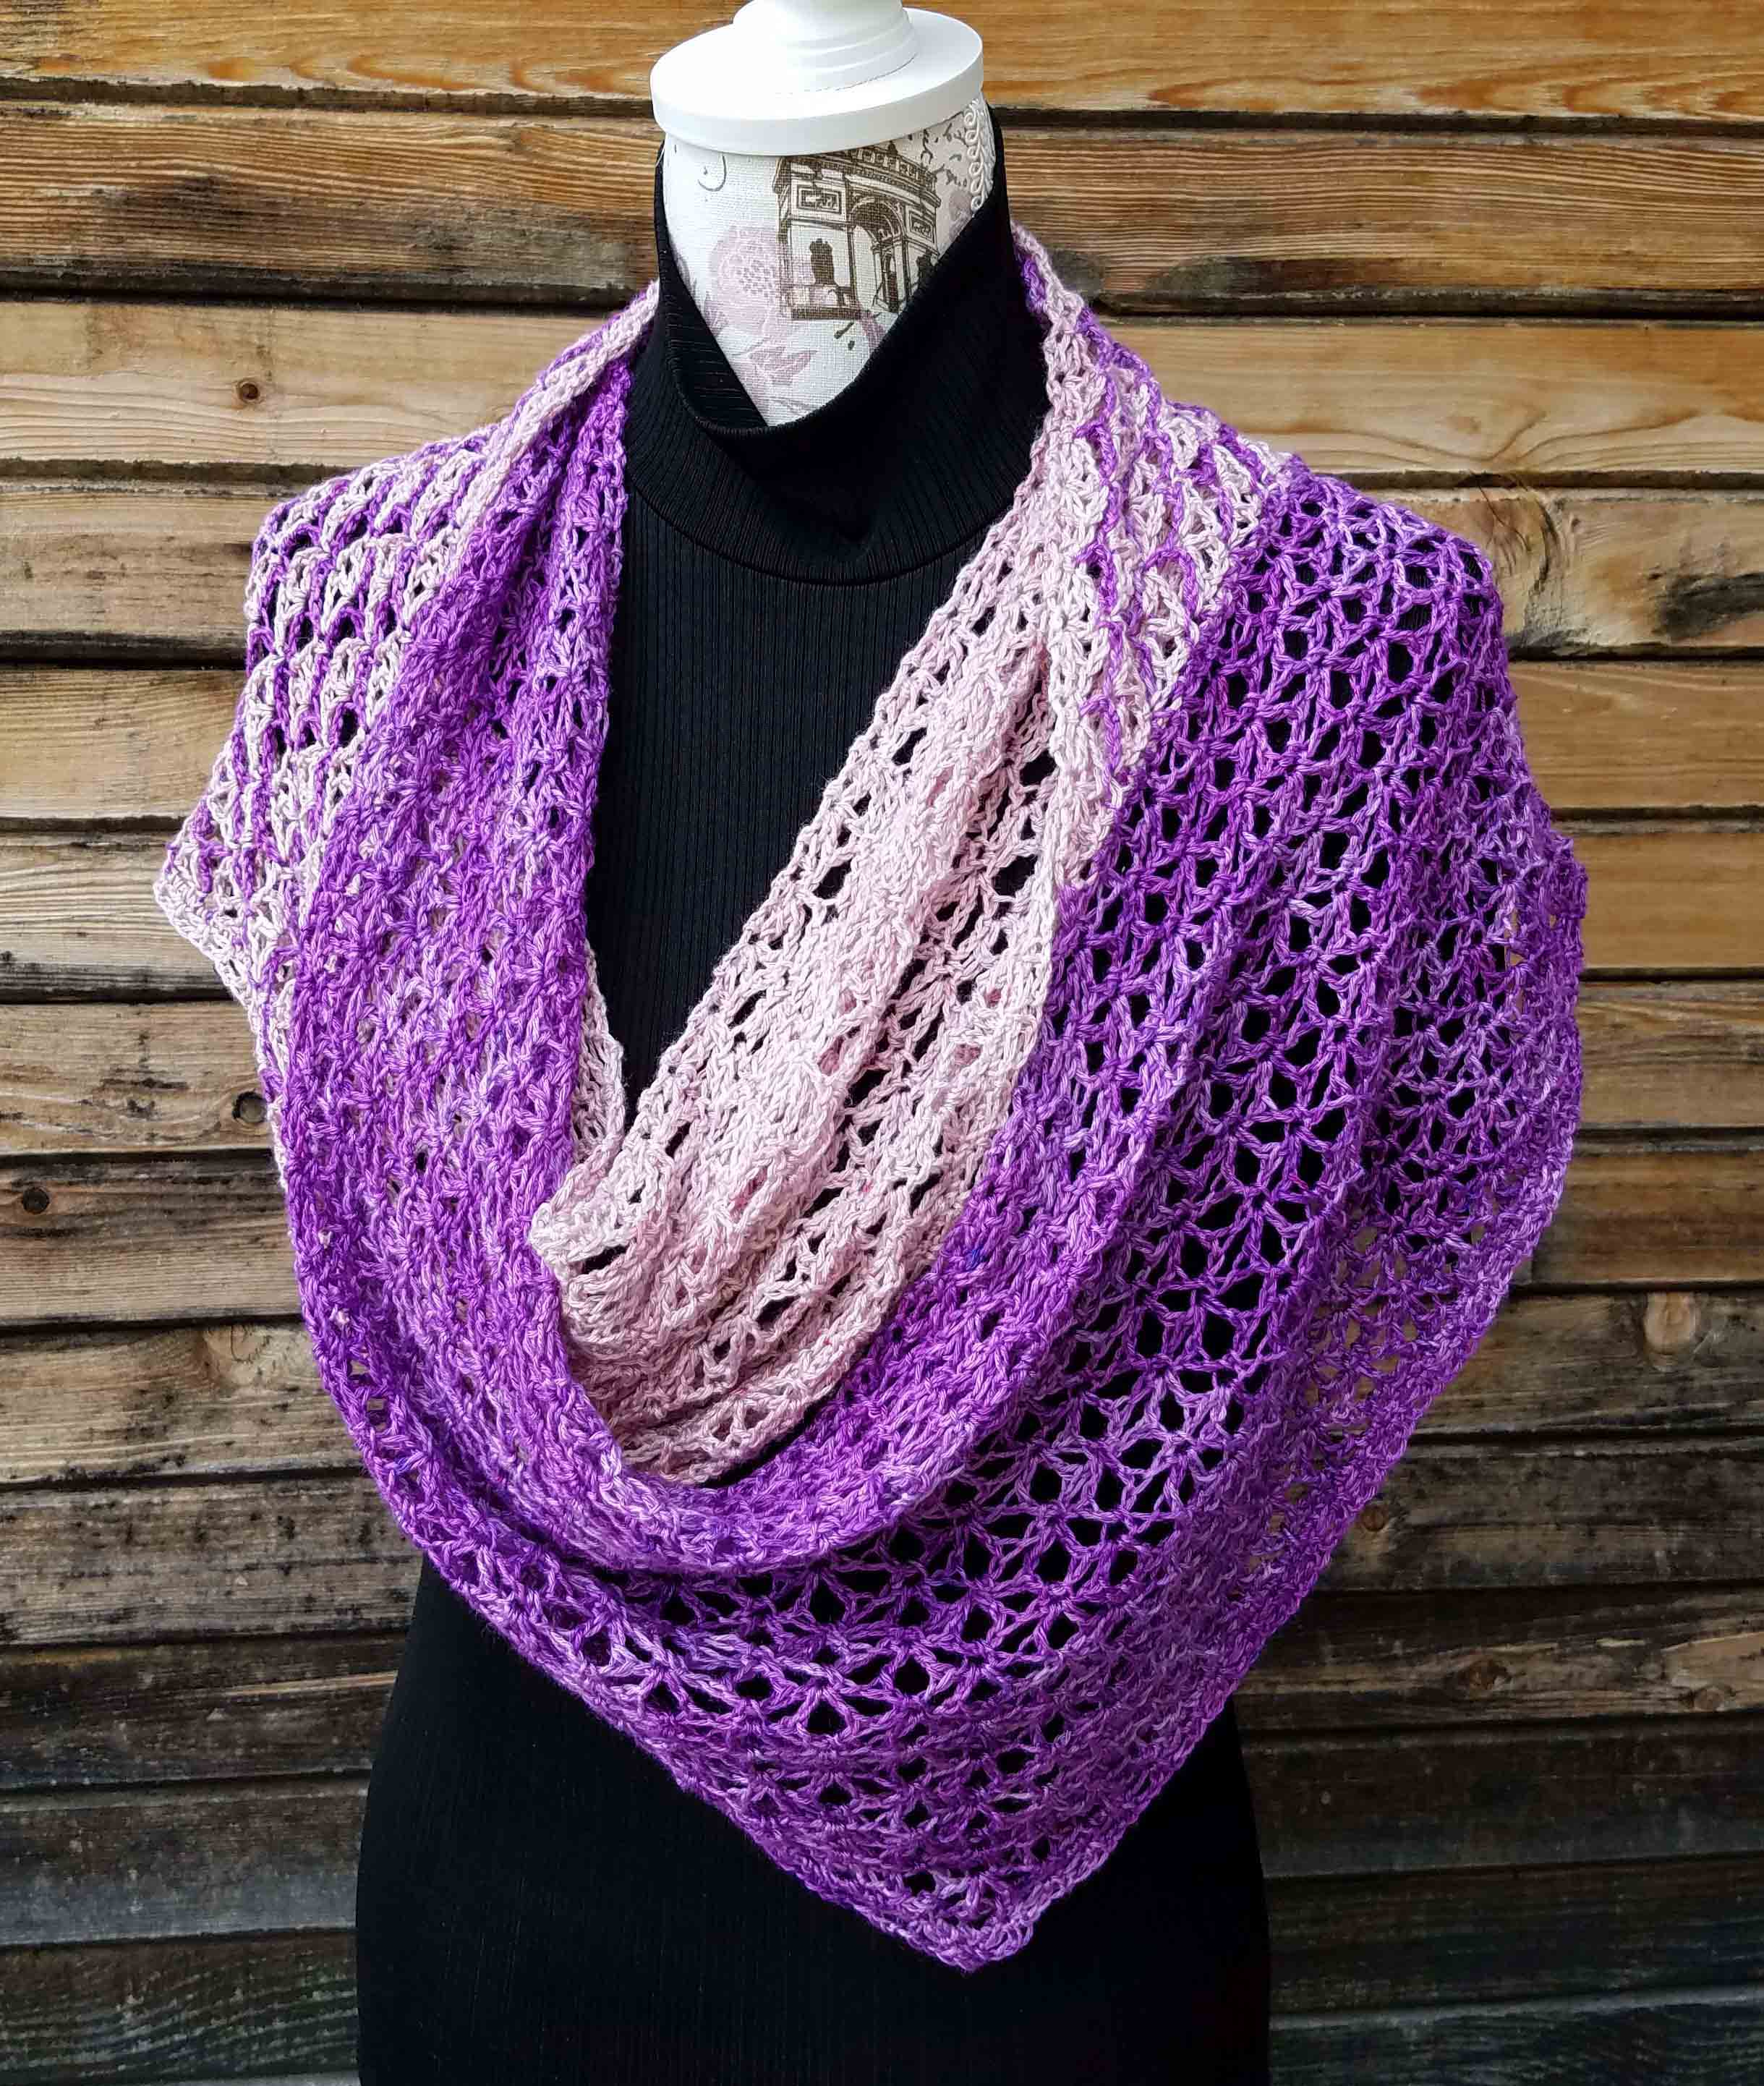
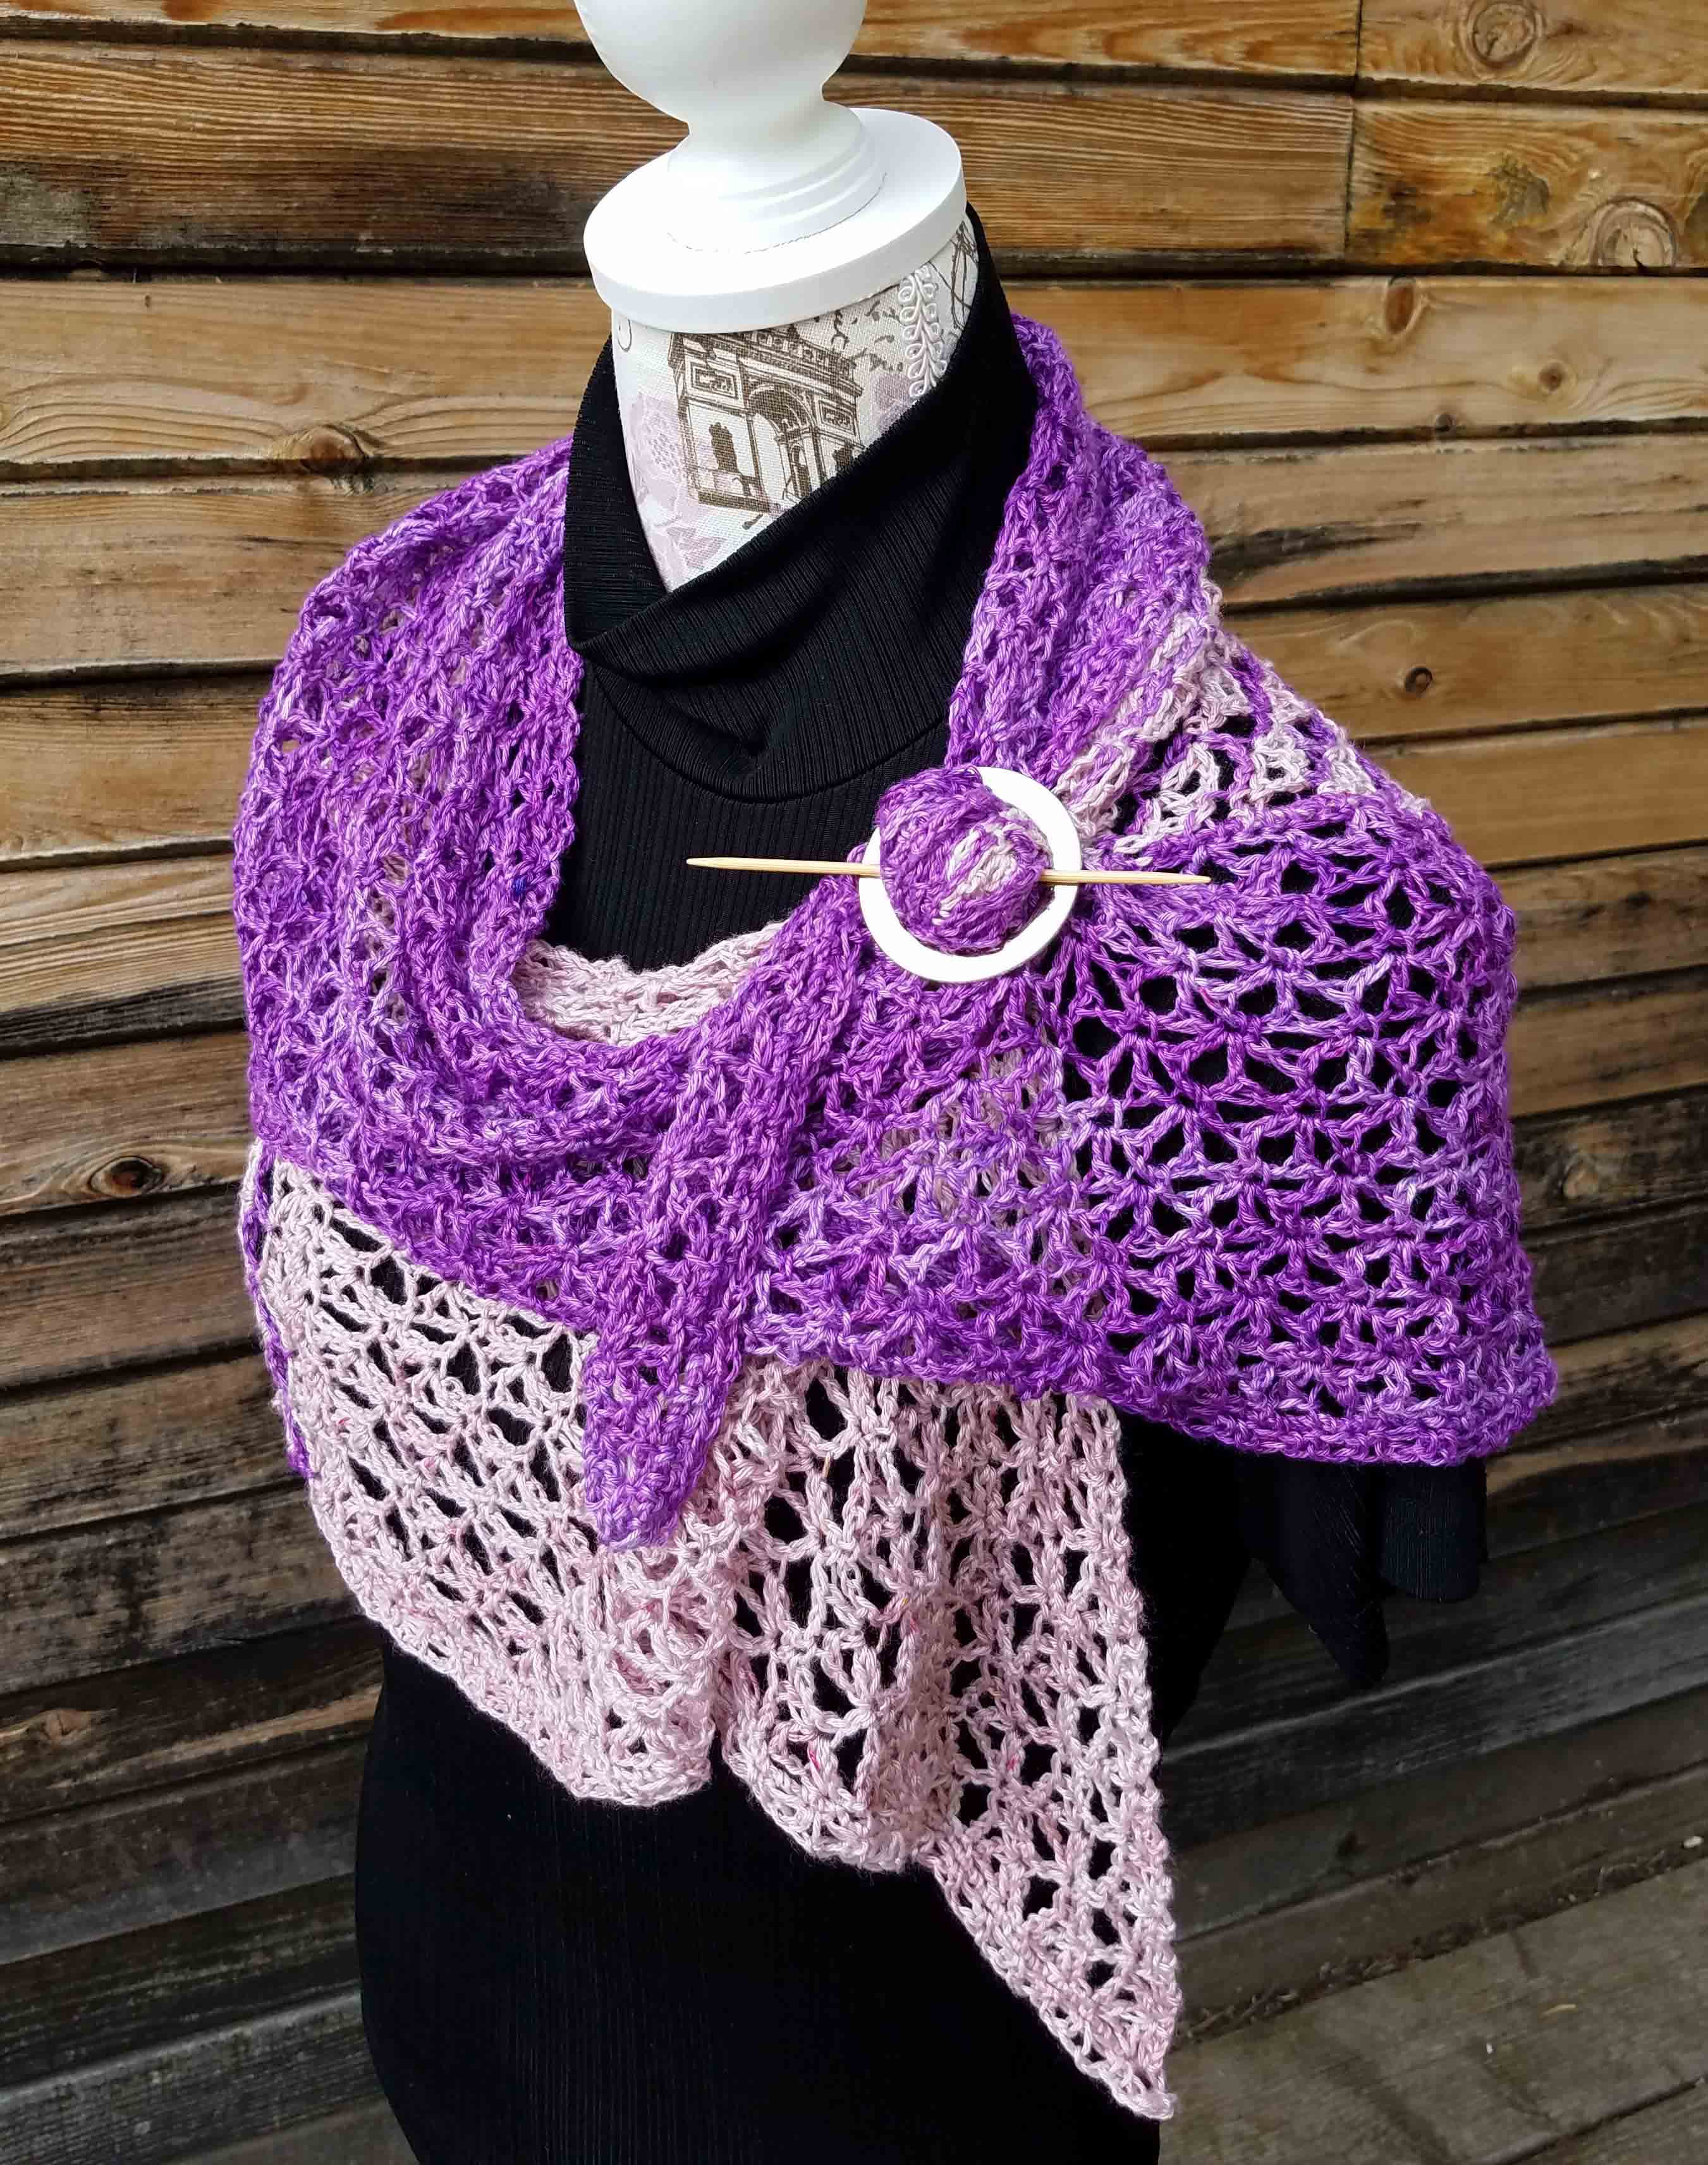
The Flatirons Shawl is my latest independent published design. This was what I was working on during our Mount Rushmore/Eclipse road trip. It is made with Theodora’s Pearls “Auxanometer” hand-dyed yarn, dyed in Longmont. This is a lovely rayon yarn that has beautiful sheen and drape in the finished project. Each hank contains approximately 400 yards of fingering weight yarn.
It is constructed of 3 triangles crocheted continuously from one triangle to the next, creating an asymmetrical wrap that has only 4 tails to weave in at the finish. There are 2 different lace patterns used to create the triangles and 2 colors of yarn to add textural interest. The triangles inspired the name “Flatirons” because of the dramatic rock formations bordering the Boulder Valley.
Back view of Kerchief wrap
Between the yarn and the shape this is an extremely wearable shawl. I tried styling it a number of ways on Collette.
Pinned Ends Cowl style
For this wearing option I pinned the two tips of the shawl at the back of the neck and made a doubled circle across the shoulders to create a cowl look.
Fastened with Shawl Pin
Then there is always the useful shawl pin option. This style really shows off the drape of the fabric and gives great coverage of the shoulders.
The pattern is an advanced intermediate level, so a definite skill builder. It involves working 4 row repeating lace patterns, decreases, color work, and changing direction of stitches. The pattern contains stitch charts for the lace pattern in each triangle as well as a detailed schematic for the edging directions.
Foothills Sunrise
Chautauqua Moonlight
Boulder Canyon
St. Vrain Trail
Today is the launch of this project at the Longmont Yarn Shoppe. As part of their 5th year anniversary celebration the shop is doing kits of the above 4 different color combinations for $62 each. The pre-order of the kits starts today, September 5th thru September 17th. If you pre-order the yarn during this time the shop will provide a complimentary copy of the pattern. The yarn will be delivered to customers the week of the 25th.
Then I’ll be hosting the CAL starter party Saturday, September 30th from 2p – 4p at the shop. We will also have a thread in the Longmont Yarn Shoppe Ravelry group. So even if you live far from Longmont, Colorado you will be able to participate in the CAL and the pre-order of the yarn. Just call the shop to order your kit at 303-678-8242.
The color kits will still be available after the 17th, but will not include the complimentary pattern. You will be able to purchase the pattern thru my Ravelry shop at any time.
As I’m sure most of you know, this past Monday was the Solar Eclipse that traveled across the US. Being we are a family of geeks, and we live only 3.5 hours south of where the path of totality was (the pink dot is approximately where we are in Colorado), it was definitely time for one more road trip.
Our kids started back to school the previous week but Monday was only the 3rd full day of school for them. We decided that this was a great educational opportunity and they could miss a day at school. We weren’t the only ones. Many of the Colorado schools had students missing.
I have to give complete credit to my amazing husband for pulling this together. He decided we should go to Rapid City, South Dakota and spend 2 nights there. That way we could visit Mount Rushmore and then drive down into Nebraska on Monday morning into the path of the total eclipse and watch it.
I had always wanted to see Mount Rushmore and hadn’t realized it was so close to us. It was about a 6.5 hour drive, not counting stops for gas and food. He had even ordered an Eclipse watching kit that included 5 pairs of eclipse glasses to look at the sun safely.
We left home about noon on Saturday and drove all the way to Rapid City, South Dakota. The drive was beautiful and I crocheted on a swatch for a new shawl design. We got to our hotel about 7 that evening, had a quick dinner then called it a night.
The next day we spent exploring Mount Rushmore. So gorgeous there, and we all hiked up the stairs that took us to the foot of the sculpture. I took that photo from about half way up, the closer we got to the sculpture the more challenging it was to get a good photo. The trees are pretty grown up around the base and the fact we were looking up the presidents’ noses, not ideal photography conditions. Still beautiful and well worth the hike.
My oldest stayed with me as I hobbled up the 255 stairs, turned out we had picked the wrong direction to go on the path, if we had started to the left side of the sculpture we would have been going down stairs most of the way. Ah Well. If you get a chance to visit there hopefully you will learn from my experience.
When we got back to the hotel later that afternoon I was ready to put my feet up and crochet. I’ve been asked by Longmont Yarn Shoppe to design a crocheted shawl to help celebrate their 5th year anniversary. I had been swatching with the yarn trying to figure out the right stitch combinations. Having some quiet time in the hotel room was great and I finally got the swatch and math to cooperate.
Himself and the kids were playing in the water park that was attached to the hotel. I joined them later to soak in the hot tub and have some dinner at the pizza place. After everyone was water-logged from swimming we went back to our hotel room and packed up in preparation for an early departure the following morning.
By 7:30 a.m. Monday we were on the road and headed South toward the predicted path of totality. There was quite a bit of traffic headed the same direction, though nothing compared to what we were seeing on Google maps for the Interstate coming up from Denver to Wyoming. We had a couple of spots we were considering going to watch from, but we were concerned about cloud cover obscuring the sun.
We were watching our location in relationship to the path of totality so we knew, if we had to, we could just stop on the side of the road to watch the eclipse. We were heading toward Agate, Nebraska and passed by a scenic overlook that didn’t have a huge crowd. The sky ahead of us was beginning to look very cloudy and we were trying to decide if we should keep going or head back to the overlook. After about 15 minutes we decided to turn around and go to the overlook.
It was a great decision. There were around 25-30 other groups there, probably 50 people total. People from Minnesota, Iowa and New York (Long Island) as well as closer by. Everyone had eclipse glasses and was ready to watch the sun as the partial eclipse began.
My youngest had science class homework for taking notes on about the eclipse. He had black stickers to overlap yellow sun stickers on the paper, he had to note the time and the percentage of coverage. So we decided on the times he would make his observations then set a series of alarms on my smart phone so he didn’t have to be constantly looking at his watch and missing the eclipse.
It was a great family experience as well as a science experience. The kids got a little impatient waiting for the totality to happen, but we treated it as a great learning opportunity for them. Fact: Sometimes the waiting in scientific observation is boring.
Once the totality got closer everyone got really excited. The wind picked up and, being at one of the highest points in the area, we could see the dimness of the totality coming toward us. Those of us watching the sun as the totality happened suddenly couldn’t see anything thru the eclipse glasses.
When we took the glasses off we saw the beautiful ring of the solar corona. It was stupendous! The kids declared all the waiting had been completely worth it. My youngest pronounced this the best trip of the summer. Both kids are more determined than ever that they want to be scientists when they grow up.
Then we drove to Scotts Bluff to have a picnic lunch and stop by Brown Sheep Wool Company. We weren’t the only eclipse hunters that had decided to stop by Brown Sheep. They were really busy, but I managed to find some yarn and fiber to adopt. Quite a bit of that yarn will be presents for Christmas, including slippers for all my family. I had them pick out the yarn and color they wanted because they are getting a bit picky about what they will wear anymore. Believe it or not the hot pink yarn in the center isn’t for me, my oldest picked it out for slippers.
I also got to introduce my family to 3 members of the Brown Sheep Family; Brittany, Andy and Peggy.
After yarn shopping we drove to the Visitors Center at Scotts Bluff National Monument. Again we were in company with a lot of other folks, but we decided to go ahead and wait in the line to drive to the top of the bluff. We were really glad we did since the views from there were beautiful.
We managed to miss the worse of eclipse traffic returning to Colorado and Denver in particular. With all our stops in Nebraska we thought we would miss it entirely, instead we ended up taking some back roads and avoiding the interstate. We stopped for dinner and ice cream in Ft. Collins and got home at 10:21 p.m. We had 2 very tired kids the next day, especially by the end of their school day, for once I didn’t get any arguments about going to bed.
I spent a lot of our trip crocheting on the anniversary shawl design that I am creating for the Longmont Yarn Shoppe, it’s always good to have a crochet project for the road. The launch date for the shawl is September 2nd. You can see a little sneak peak video on their facebook page. I’ve been working lots of math and writing the pattern as well as crocheting the sample since our return.
I’ll have more to share with you soon about that shawl and some other designs for this Autumn. This weekend I’ll be selling some of my wire wrapped pins and other crafts at our local craft fair. It’s the first one we’ve had since the flood of 2013. I’m looking forward to seeing lots of local friends and spending time in our little park once again.