The Dilemma of Naming Designs

As I have said before, trying to think up names for my designs can be one of the most challenging aspects of my work. It’s not just me though it turns out. Thursday this week I was facing the naming struggle once again and decided to tweet about it.

“Sometimes the hardest thing about being a #crochet designer is coming up with a name for my designs.”

My tweets show up on my Facebook page and I had a chuckle today when I finally looked at my page today and read the many responses from loads of my yarnie friends.

Some of my designer friends had funny stories about how they came up with a name. My friend, Bonnie Barker, had some help from family recently.

“Yep. I get that! That’s why when I was out of ideas (while working on my latest book), I spoke out loud wondering and my son replied with a silly (but catchy) name, and I ran with it! That’s how the Fergus Shrug got its name.”

My friend Kathryn White shared her solution, that sometimes creates it’s own problems. Turns out the talented Vashti Braha has this same solution and problem.

“Oh I know that problem. Whenever I see or hear a possible name I try and jot it down. But then I have to remember where I put the note….”

There were a number of designer friends who had some very helpful advice that I will be taking note of.

My good friend April Garwood of Banana Moon Studio says,

Lately if I can’t think of one easily I use city names in Oklahoma. There is a list of all of them on Wikipedia. Maybe choose a theme: flowers, birds. I also once used part of a scientific name. The color of the scarf reminded me of purple cabbage, so I looked up the scientific name for the plant. That became Brassica Scarf.”

The talented designer and editor of “Crochet! Magazine” for Annie’s Publishing, Ellen Gormley had this helpful advice,

“Street names, city names, flower names, rock/gems, color names, simple words in other languages… I look at all of these to help.

My dear friend, Brenda Bourg shared her favorite resource,

I have a site with over 20,000 names in all different languages. It makes it pretty easy to find names. If I can pronounce it, and I like the meaning, I run with it.

I think the suggestion that made me smile the most was from Elfie, one of my good crocheting buddies from Kansas City,

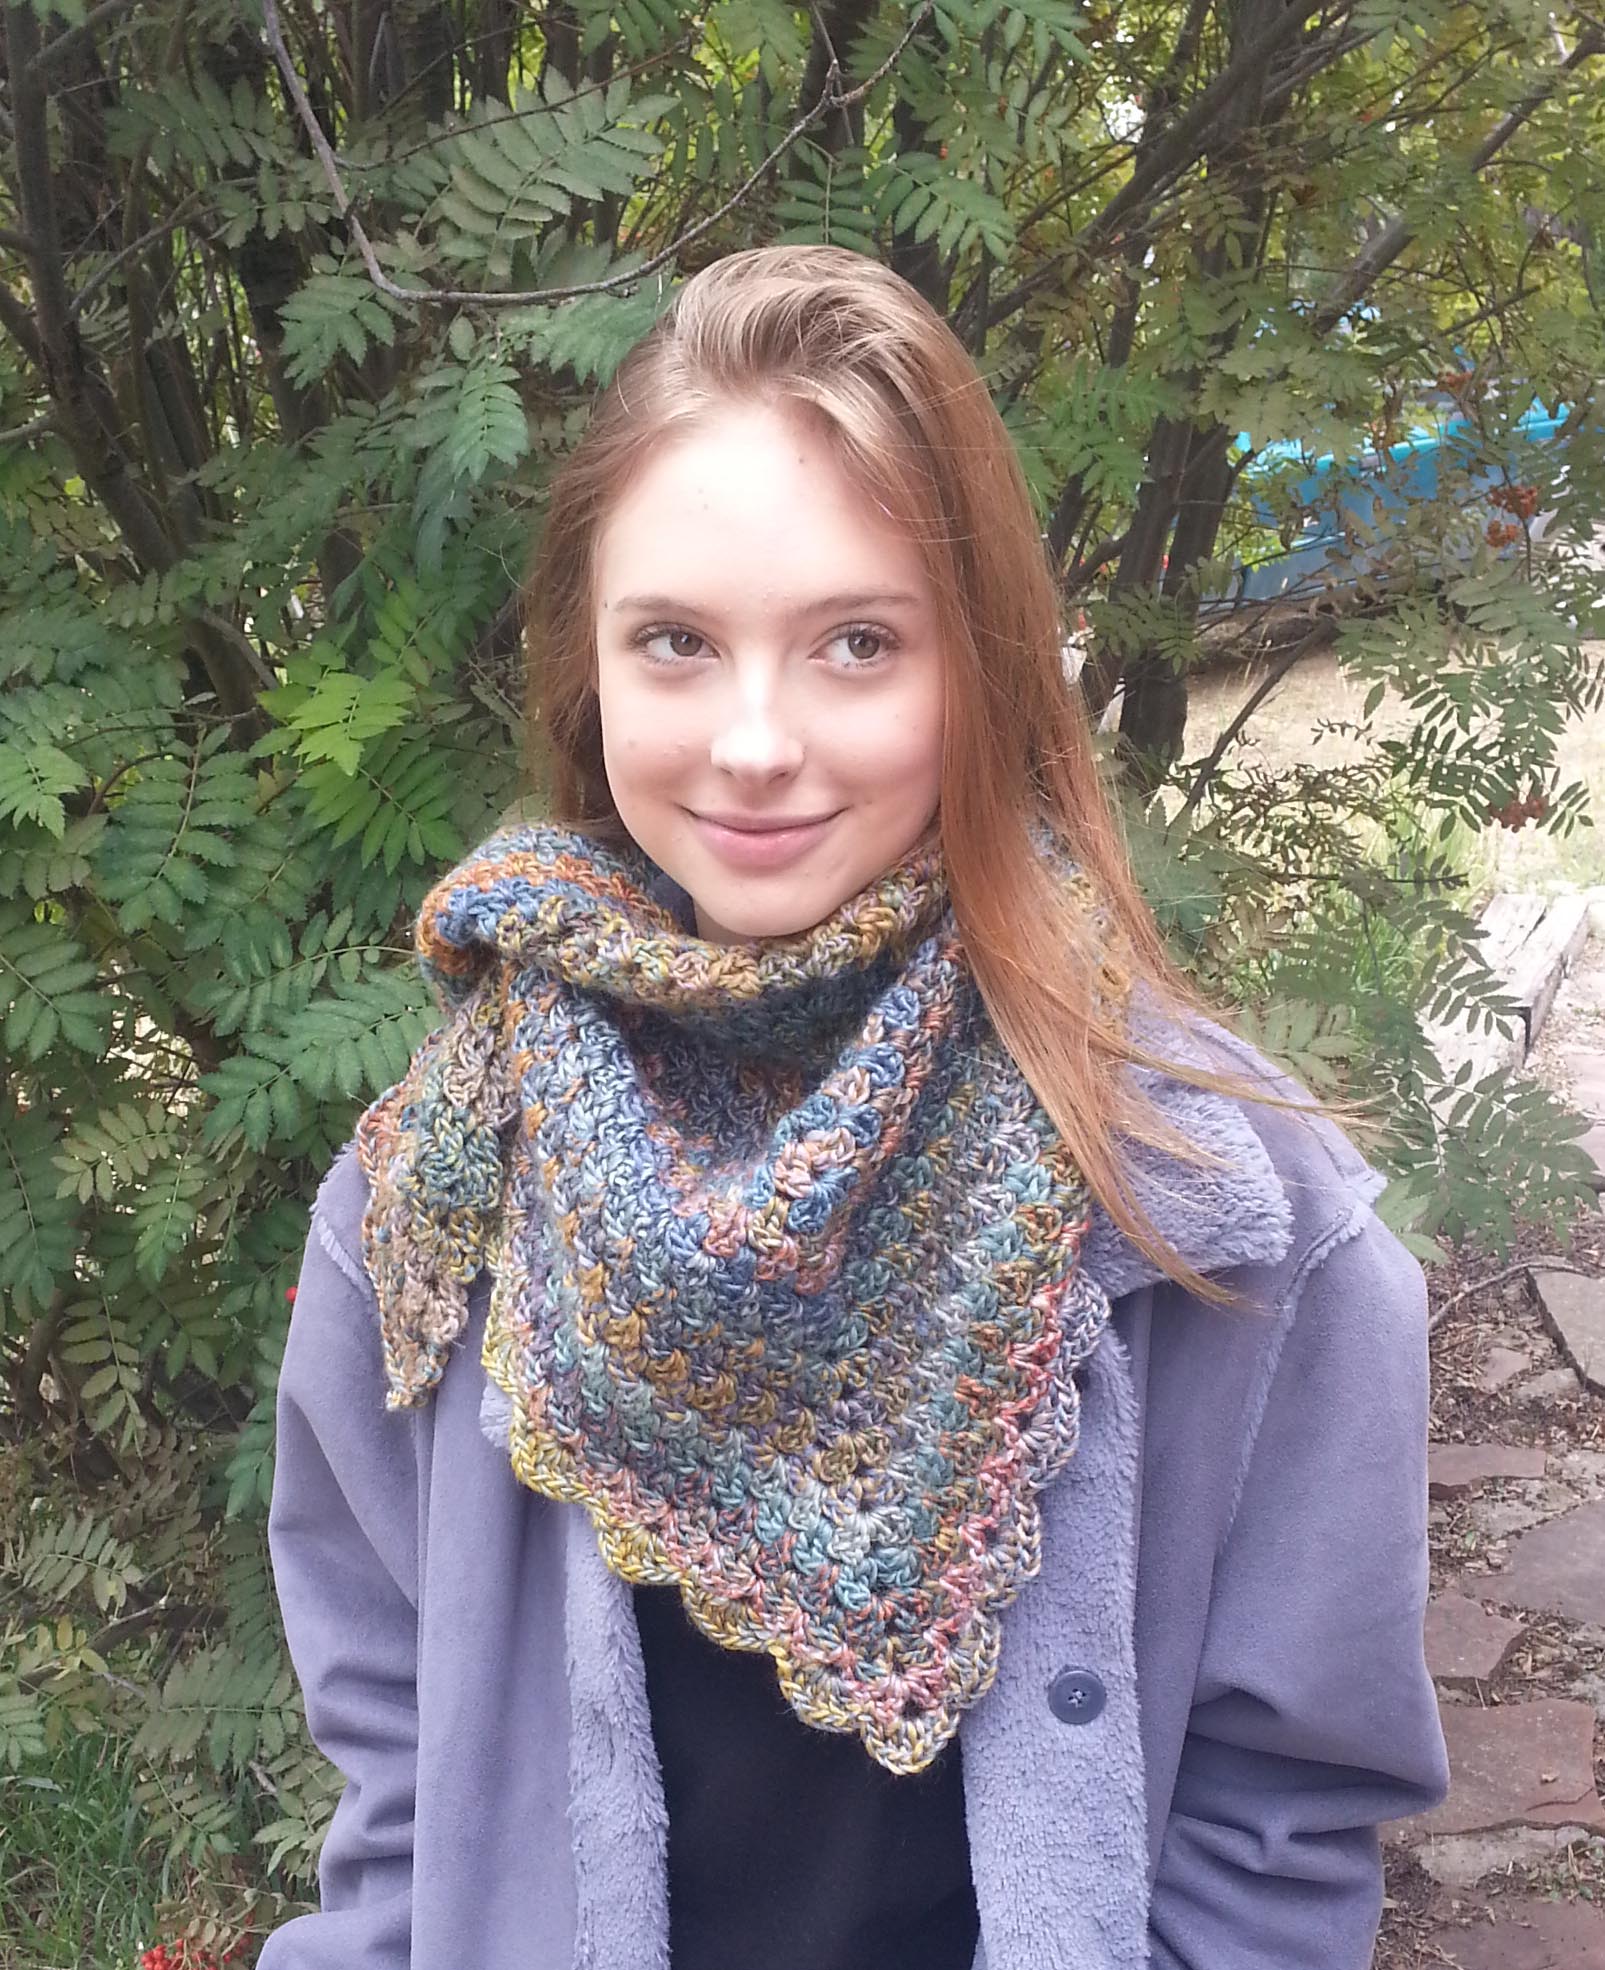
“Name then after your friends… for instance a hooded oversize sweater made with dark and sparkley with hints of green yarn would be an Elfie in the woods ..lol…or a purple butterfly shawl Erin about town..”

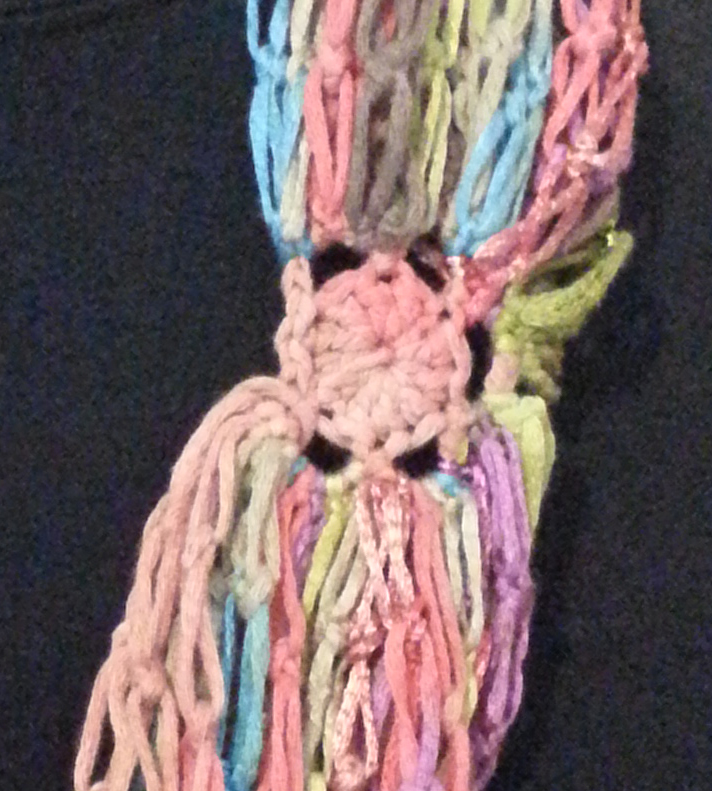
I still need to come up with a name for this latest design, in fact I’m working on 6 designs right now that are in need of a name. I tend to like “geeky” names or names that have a pun to them.

Playing with Triangles Shawl

Recently I named this series of blog posts and the resulting shawl pattern “Playing with Triangles” which is a bit of a geeky inside joke.

Sophisticated Simplicity Necklace - Andee Graves/M2H Designs 2

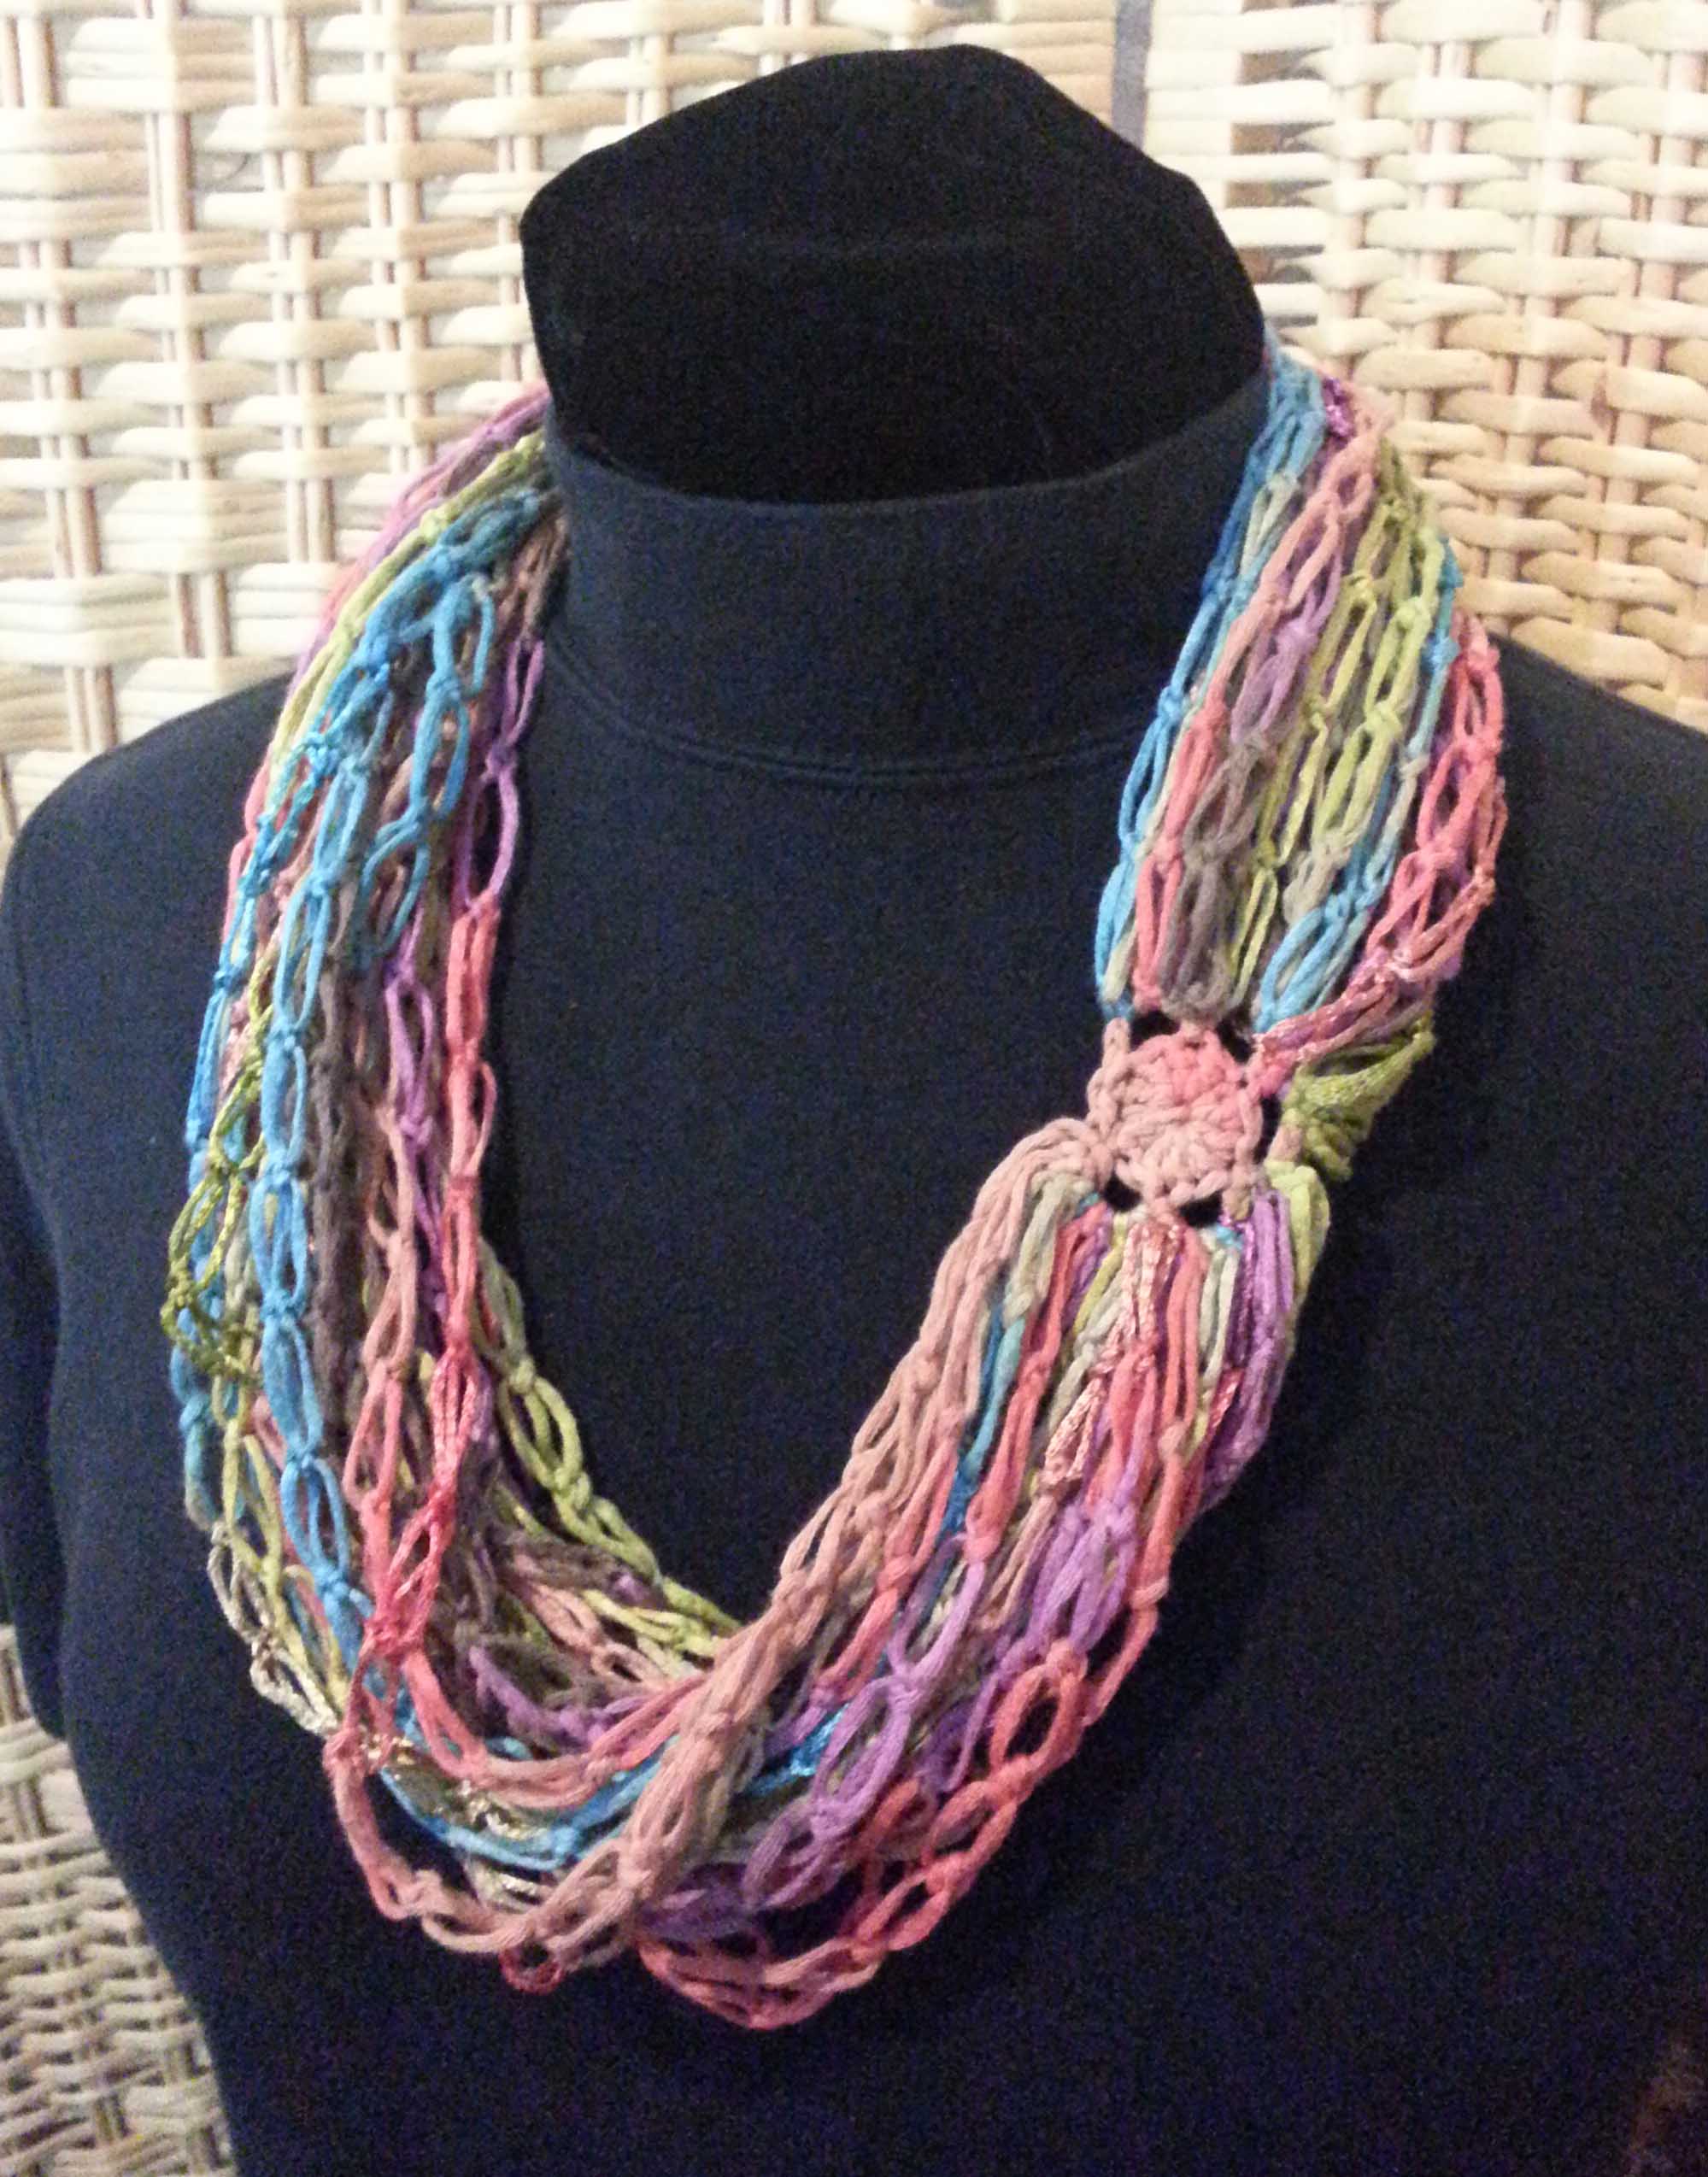
And there was my alliterative and contradictory “Sophisticated Simplicity Necklace”.

Mountain Whisper Shawl

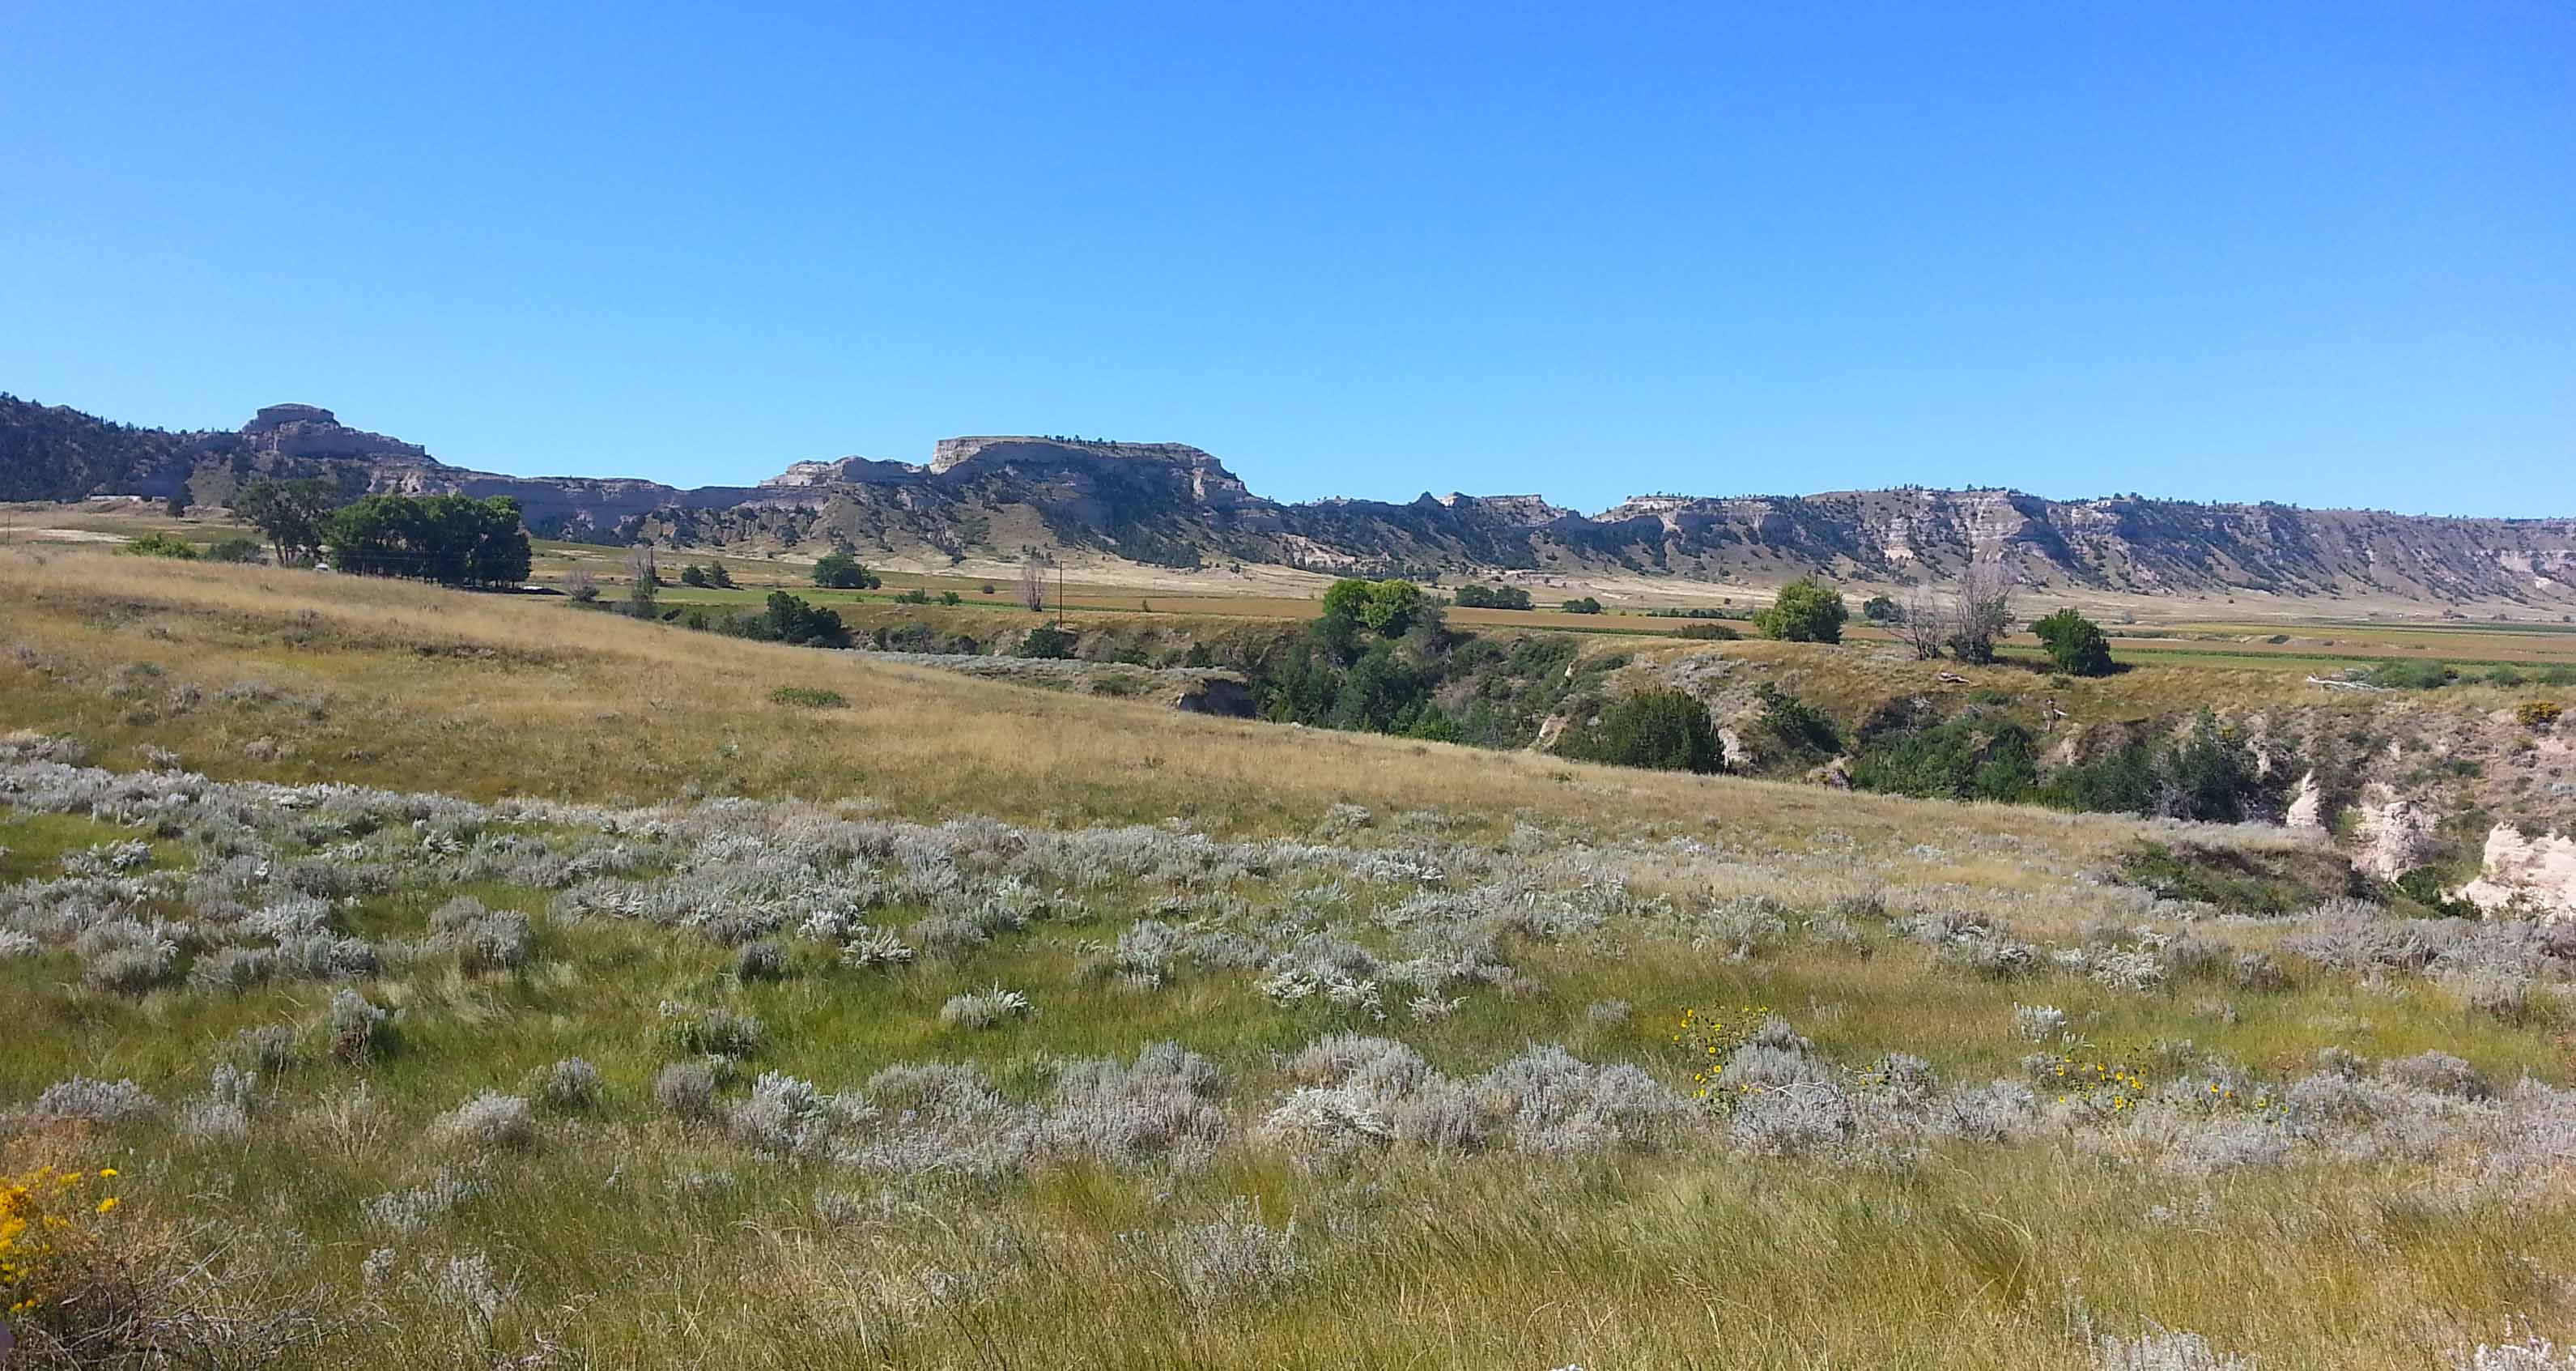
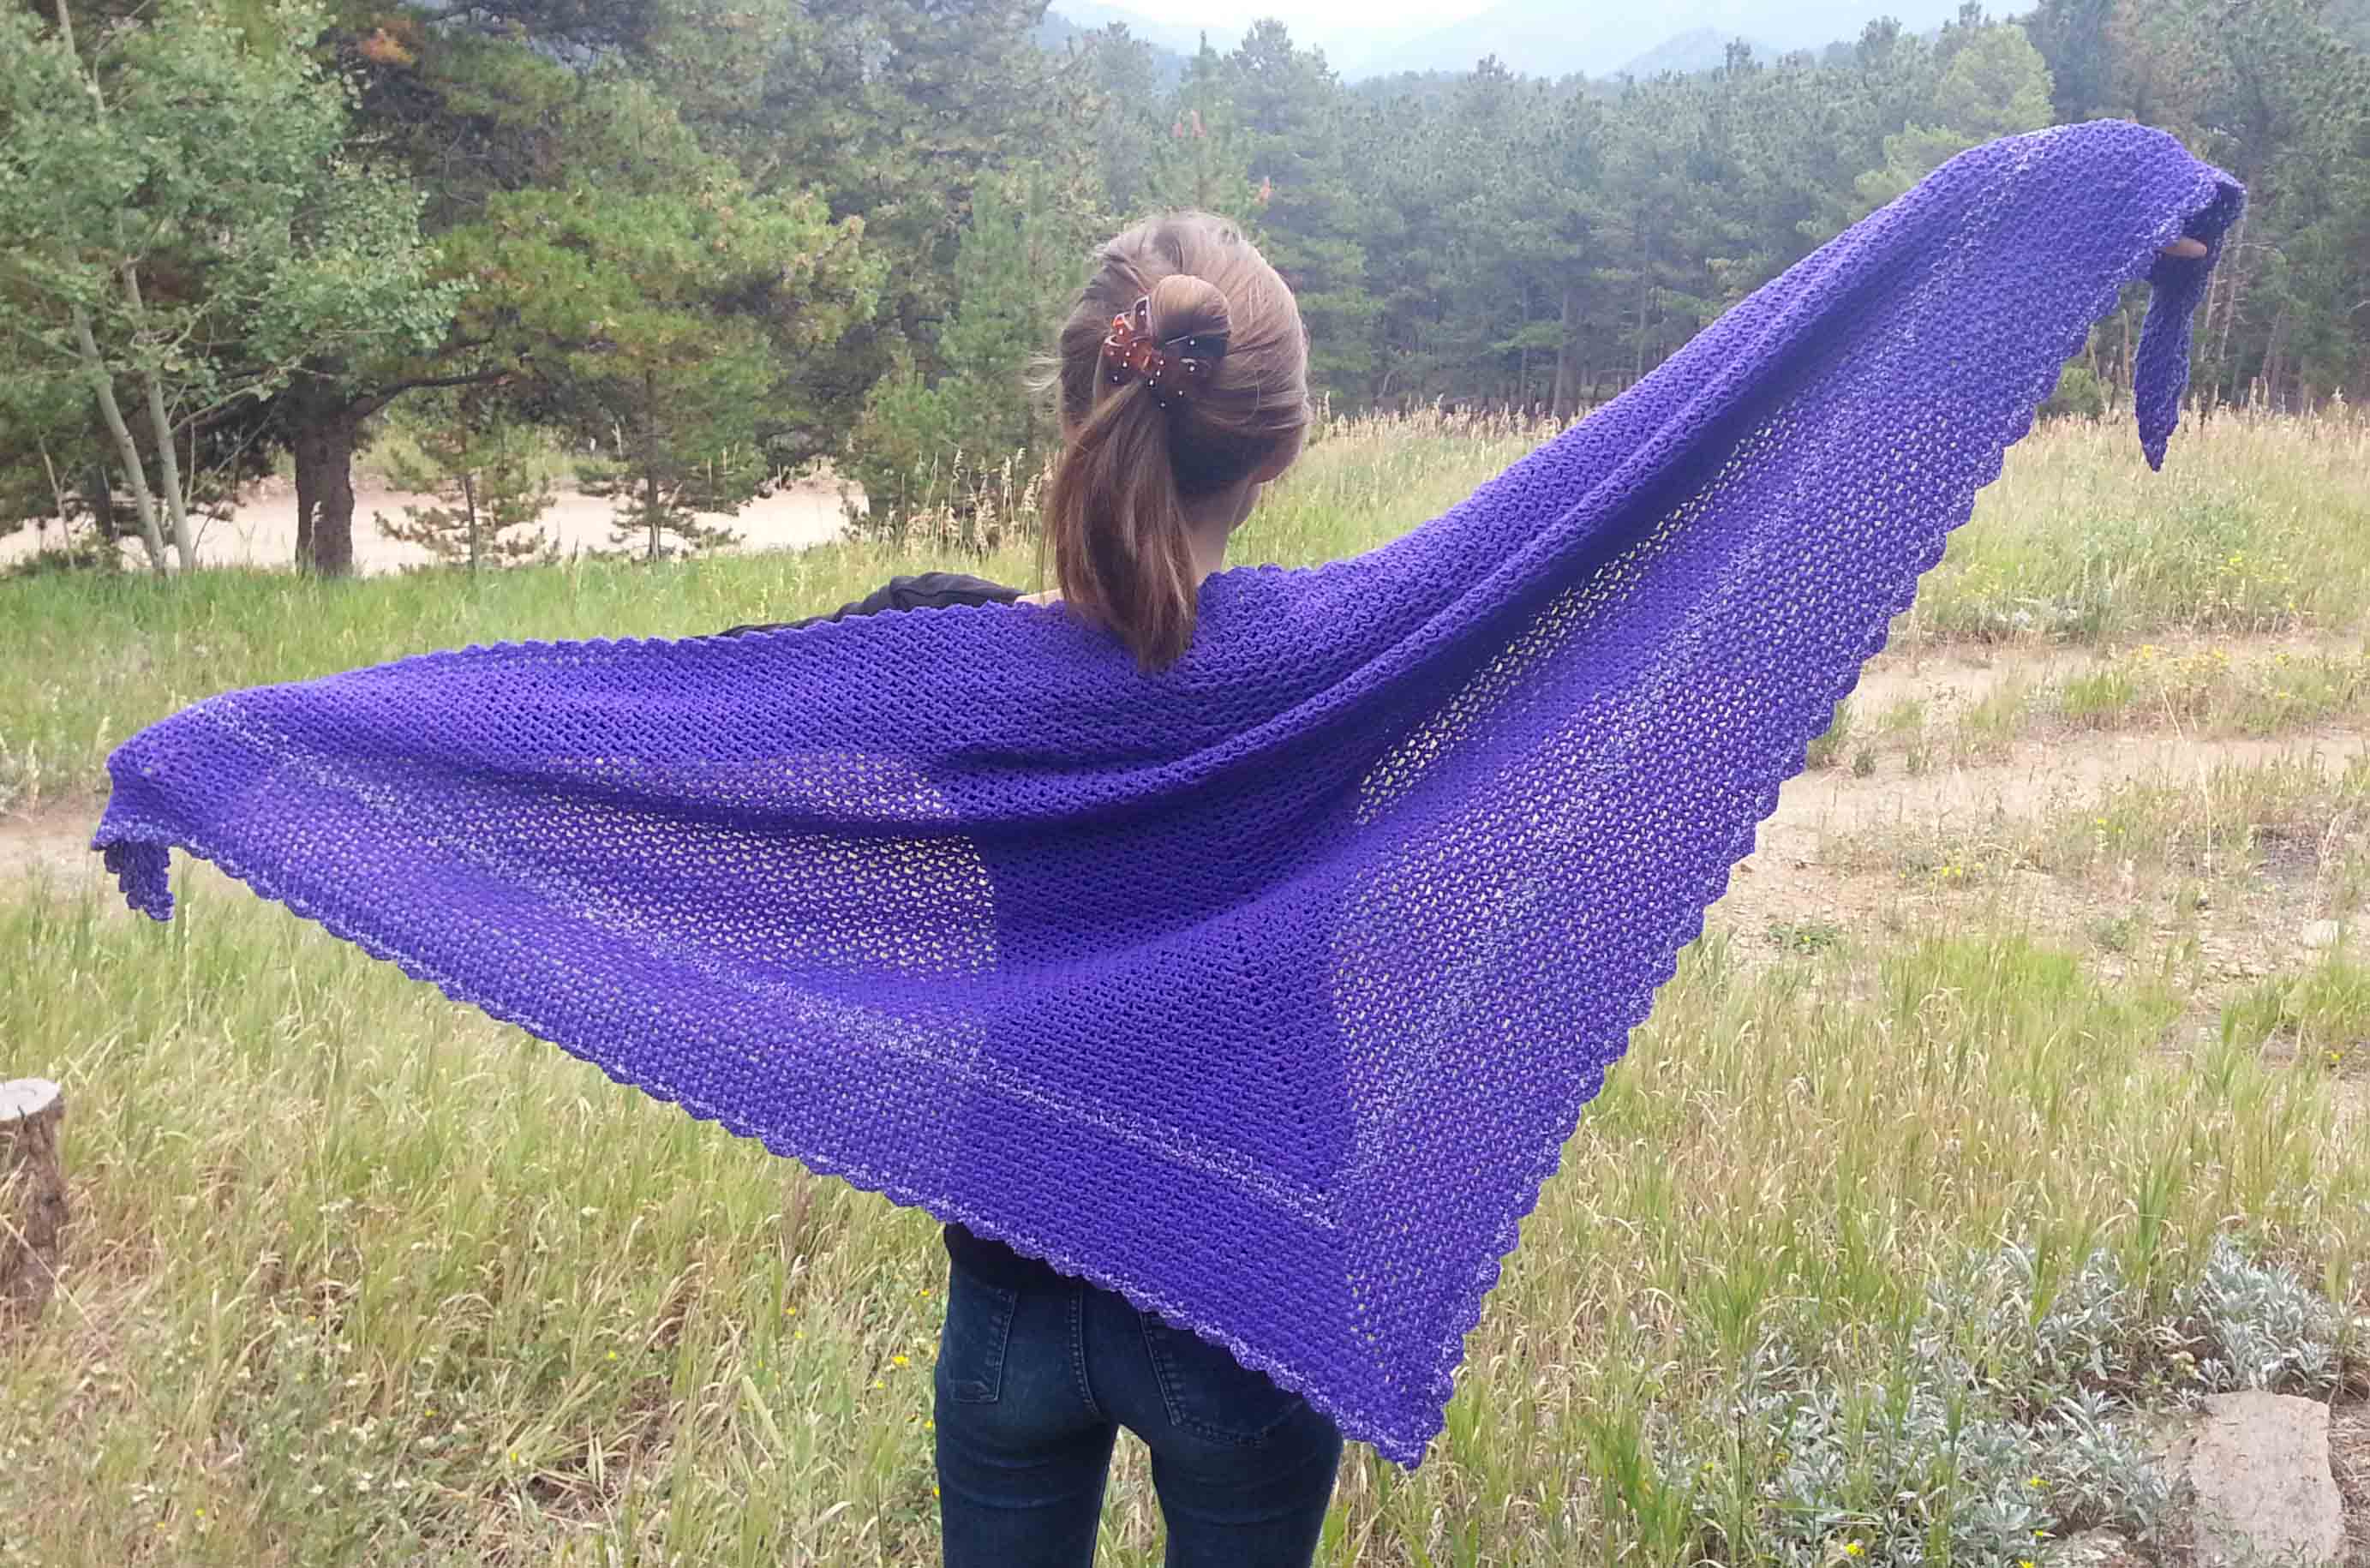
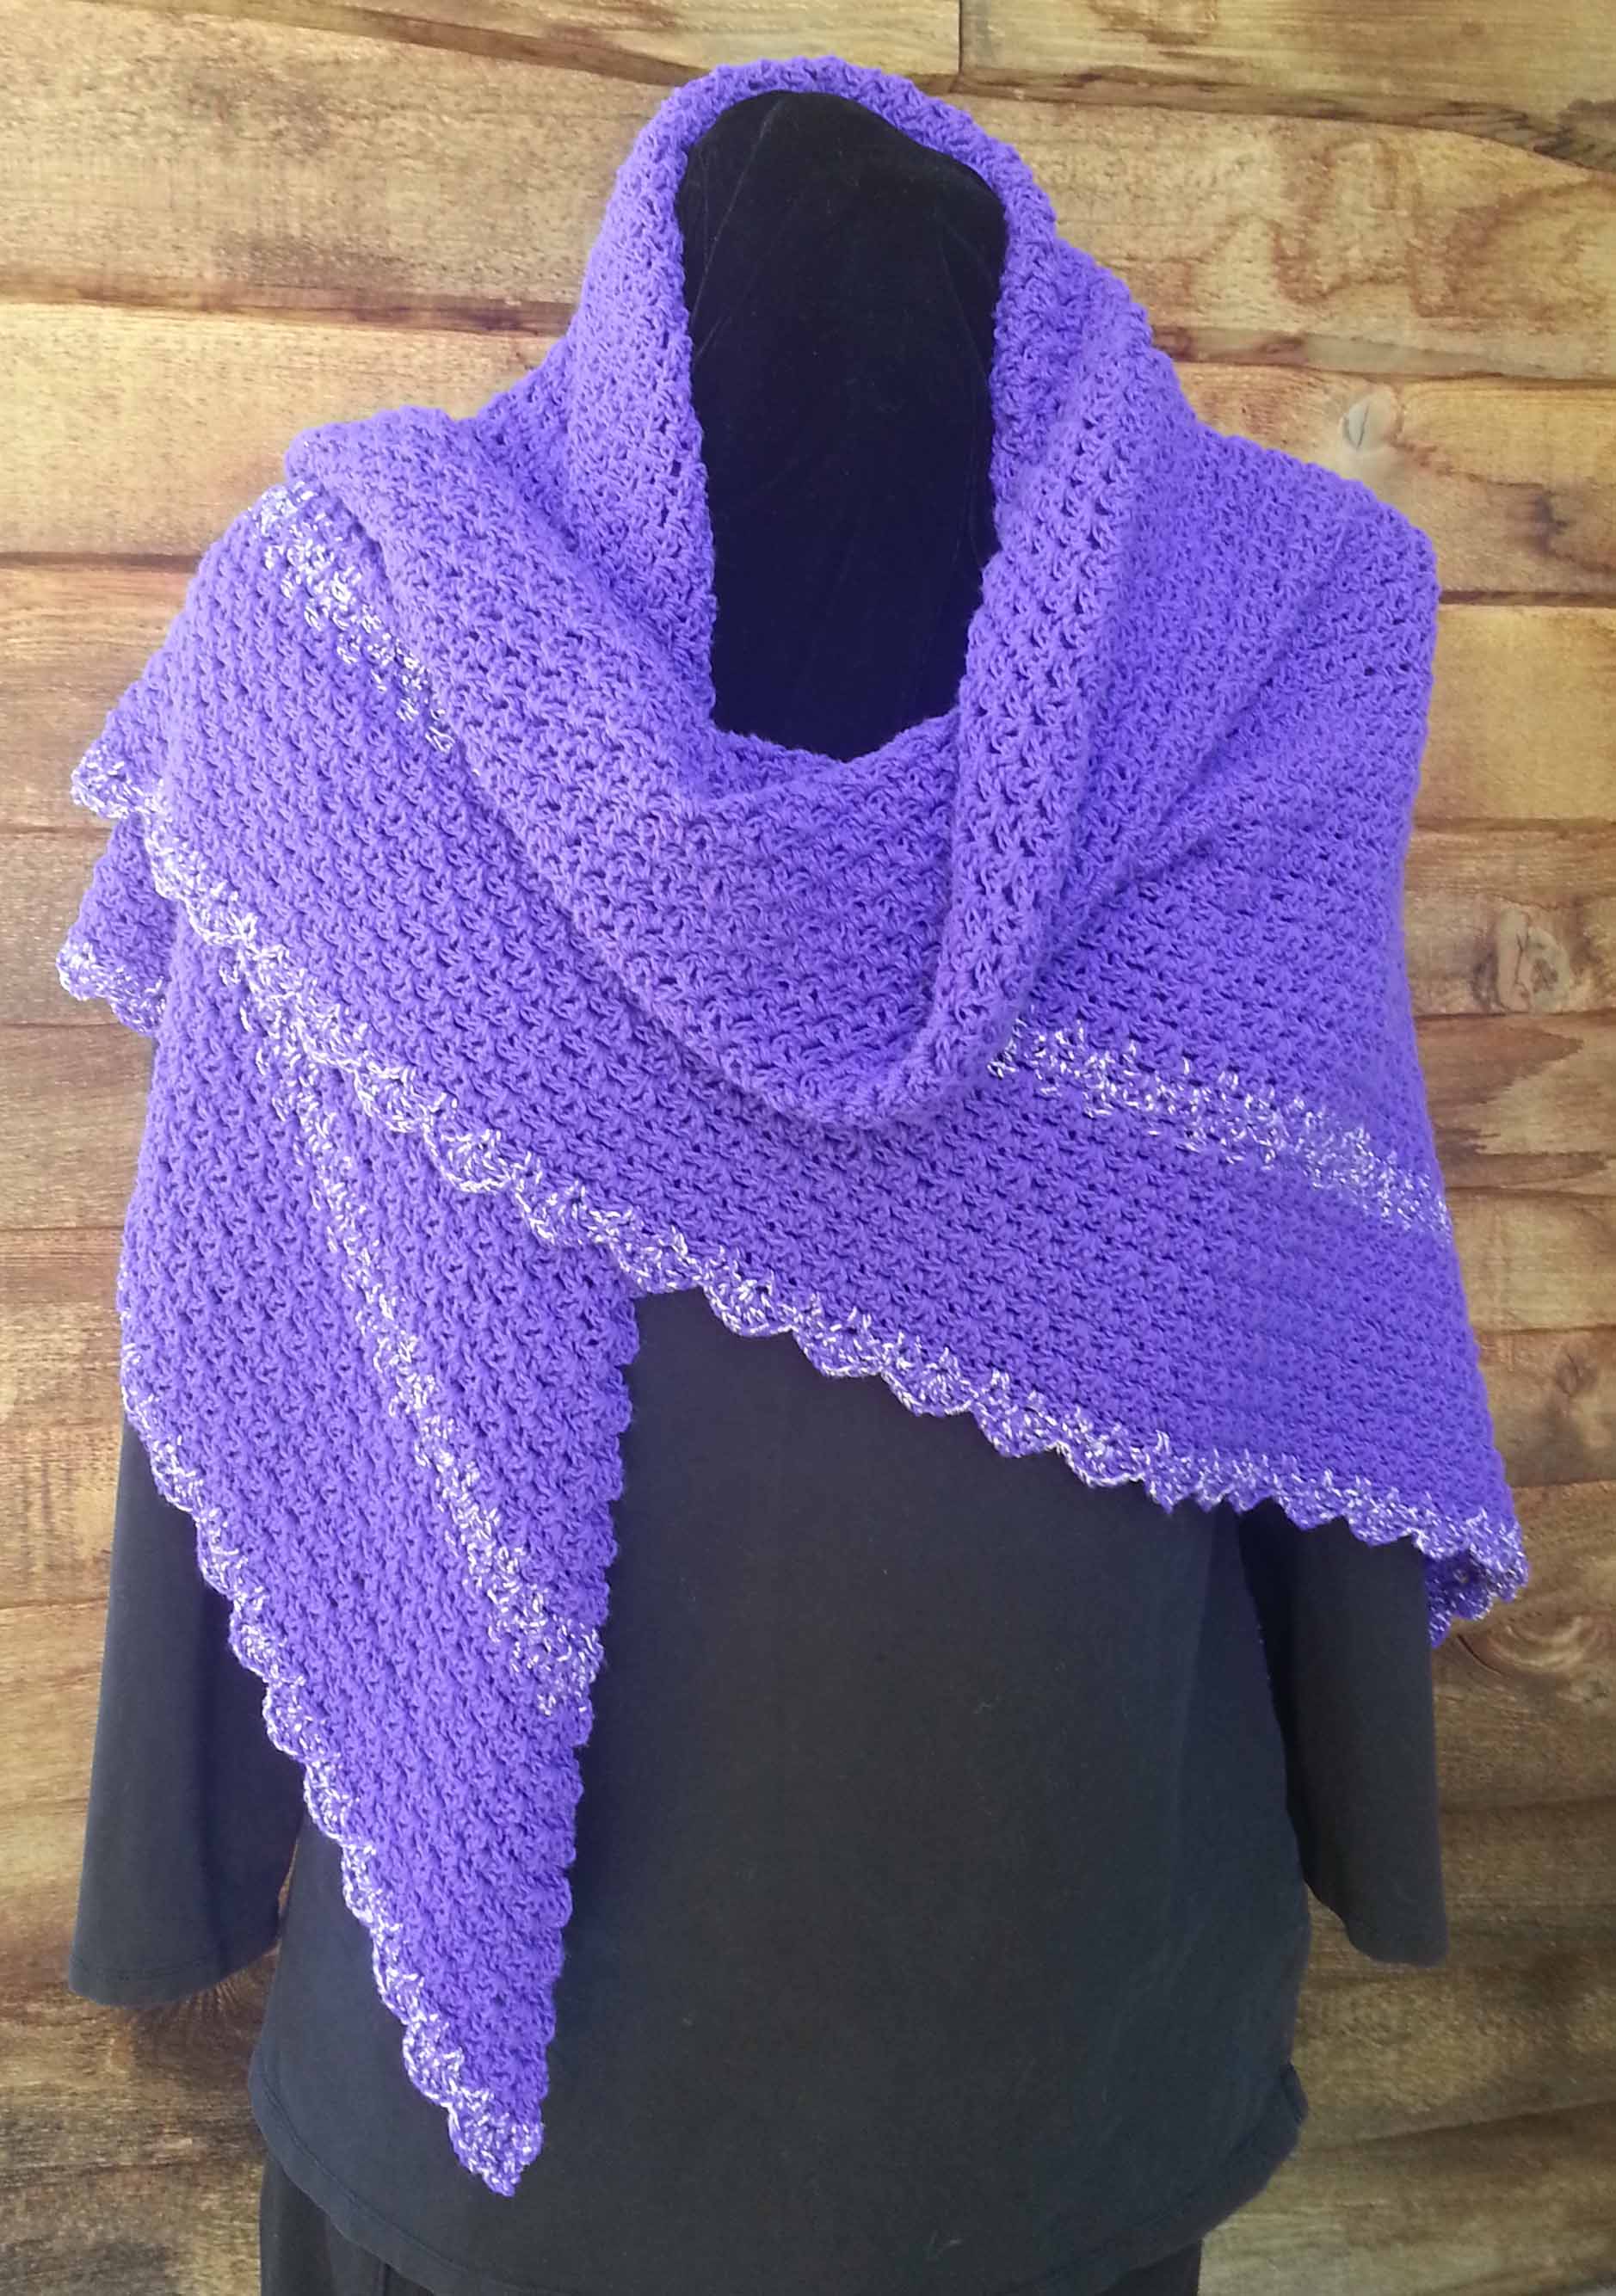
Last fall when I was stumped for a name for this light and lacy shawl, I asked visitors to the blog to vote on a name. “Mountain Whisper Shawl” was the name that won. I tend to stick “mountain” into names as a nod to where I live.

One thing is clear, naming my designs may not get easier. Fortunately that won’t stop me from dreaming up new ones all the time. Have a great weekend dear readers. I’m off to see a special exhibit at the Denver Art Museum tomorrow and then I’ll be teaching crochet to knitters on Sunday at the Longmont Yarn Shoppe.


Crocheting in Longmont

Today I was at my crochet group in Longmont at the Longmont Yarn Shoppe, “Causal Crochet”. We had been getting together on the third Wednesday of each month for 2 hours starting at 10:30 a.m. This was our first meeting on the 2nd Wednesday of the month, and we will be having 2 meetings a month from now on.

If you are in the area you can join us at “Causal Crochet” for at least the next 8 months on the 2nd and 3rd Wednesday of the month. We will see if the schedule still works for everyone once summer rolls around.

Our group today discussed what our fall “Crochet-A-Long” project is going to be. Looks like we will be working on a blanket square. I’ll be putting the pattern up here on my blog and my YouTube Channel during the first week of October. That’s just 3 weeks away!

teaching-swatch-2

I was teaching a private crochet lesson today after the group met. This weekend I am teaching a “Learn to Crochet for Knitters” class, but one of the knitters that wanted to take it wasn’t going to be able to make the class. Instead we made arrangements to have a one hour lesson together at the shop. I think it went very well and she is well on her way to being able to add crochet to her knitting projects.

hank-of-green-berroco-vintage

It’s always so fun to see a crafter get the hang of a new skill. This was my little practice piece for demonstrating the stitches to my student. I was working with Berroco “Vintage” yarn. I have 3 hanks of the green color in my stash, left-over from another project and I decided I needed to add some new colors for a project percolating in my brain.

sunflower

Fall is definitely in the air up here on the mountain, even though it is late summer most days down in town. I’ve been seeing lots of sunflowers blooming everywhere. They are one of my favorite flowers, maybe that’s because I grew up in Kansas (The Sunflower State).

pile-of-berroco-vintage-yarn

I picked the 2 yellows and the brown to go with the green I already have. They really put me in mind of sunflowers. Will have to see what they grow up to be. Berroco’s “Vintage” is a great machine washable work-horse yarn that is a blend of 52% Acrylic, 40% Wool, and 8% nylon. The nylon makes it very durable, which is really nice for afghans, blankets and hard working hats or scarves for the family.

If you are feeling too impatient to wait for my new afghan square, you can check out some of them I’ve already published here on the blog.

Whirlwind Square - M2H Designs

Whirlwind Afghan Square: the pattern is here on my blog, and I have 2 videos to help you work it here on my YouTube Channel: Whirlwind How-To Part 1 and Whirlwind How-To Part 2.

My 2 squares today

Annetta Square: the pattern is here on my blog.

Hot Spot (Annetta Square #2) : the pattern is here on my blog.

Rnd 5 finished_edited-1

The Humble Granny Square: the pattern is here on my blog.

I hope all my US readers are enjoying some cooler temperatures and enjoying the last bits of summer. Soon we will have snow up here on the mountain. I’ll be digging out my warmer clothing in the next couple of weeks. The good news is, I will have lots of opportunities to wear some of my favorite scarves, shawls and hats again.


Back from Teaching in the Wilds of Nebraska

This weekend I was at the Scotts Bluff Valley Fiber Arts Fair. Yes, that is a mouthful.

sunday-sbnm-5

Friday morning I was a busy bee getting the car loaded up and double checking that I had everything I for the 2 classes I was teaching on Saturday.  I left a little bit later than I had wanted to, and I got to experience lovely stop-and-go commuter traffic on the I-25 highway.  I just kept singing along with my radio and driving carefully. Once I passed Ft. Collins it was much better. Note to self, when driving up to Nebraska, be sure to be past Ft. Collins before 4 p.m.

bluffs-friday-night

Good news was I made it to Scotts Bluff before sunset, though barely. The best part was I did most of the drive in good daylight and the got to enjoy the scenery. My photos can’t really do it justice and some of the most stunning views there wasn’t a good spot to pull over and take a photo. The twilight sun really made the bluffs extra dramatic looking.

big-bag-of-loose-wool-fiber

The next day was all about teaching, though I did get a little shopping time in with my friends at the Brown Sheep Wool Company booth. I brought home another 4 pounds of loose fiber and some beautiful hanks of their Hand Paints in various weights. The yarn was “seconds” and they were selling it by the weight, so I got a little carried away.

yummy-pile-of-brown-sheep-yarn

Most of this yarn I’ll be using for gifts I’m making for other folks. Though once again I’m realizing that I left planning gifts for Christmas a bit late. I know you are thinking Christmas is months away, but I know it will get here way too quickly when it comes to making and finishing gifts in time.  That is 104 days for those of you that like exact numbers. I’m not counting today or Christmas day. For some of my gifts I need to ship them, so really I have more like 94 days. Eep!

After all the teaching and shopping I was ready for a quiet evening in my hotel room. I made myself some dinner and watched a movie while I crocheted. The next day was going to be a much more relaxed pace and I was looking forward to it. As much as I love my family, sometimes it is nice to have some all alone time.

I sleep in until 8 a.m. then ate some breakfast, took a leisurely shower and packed up my last bits and bobs. I did have something interesting happen that could have been a bit frightening. While I was in the shower I thought I heard a knock on my door, then a thump. But I decided I must have been mistaken and even if I wasn’t I didn’t see any need to hop out of the shower wet and soapy to answer my door.

When I finally emerged from the bathroom I realized that someone had tried to come thru the door. Fortunately I had used the safety latch and they were not able to enter. I’m sure it was a mistake by house-keeping, since they were the only folks with a key that could unlock my room. I did call the front desk to let them know what happened. It was a little unnerving, so sort of interrupted my relaxation momentum of the morning. Lesson to anyone traveling alone, always use the safety latch when you are in your room.

I shook it off and gathered up all my luggage, I took 2 trips to my car because I wanted to get extra steps in. I knew most of my day was going to involve sitting in a car driving and there would not be a lot of opportunities to walk. When I went to check out the front desk manager added 1000 points to my rewards account and apologized again for the snafu with house keeping.

sunday-sbnm-1

One of the reasons I had stayed an extra night was I really wanted to explore the Scotts Bluff National Monument a little. That was where I was headed after I stopped for some petro for the car. My little Google GPS gal (also known as Gina) said that it was only a 15 minute drive from my hotel, and I could see it from the hotel parking lot.

sunday-sbnm-2

GPS Gina was a bit insistent on this trip. Coming up on Friday she really wanted me to drive up thru Wyoming instead of sticking to the interstate highways. On Friday I over-rode her wishes. Though she did try to get sneaky when I stopped for my traditional Wendy’s French Fries in Cheyenne, my next exit on I-25 is the one to take, she told me to continue north on I-25 for 16 miles. Gina was determined that I was going to take that other route.

sunday-sbnm-3

Sunday when I used my Google Maps for directions to go home Gina once again told me to take the other route. It was the middle of the day and clear sunny weather so I told her okay, this time we would go the way she wanted. First we went to visit the Scotts Bluff National Monument.

sunday-sbnm-4


sunday-sbnm-6


sunday-sbnm-7

I picked the best photos I took, but as before they really don’t capture how beautiful it is there. I’m actually just grateful that the pictures came out relatively clear. It was extremely windy and I was challenged to keep my body steady when taking photos. I attempted to get a good photo of the angle of the bluff as seen from my hotel parking lot, but couldn’t get close enough without it being obscured by trees and houses. Next time.

I hope you all had a really good weekend. I’m still a bit tired, but I really enjoyed my visit to Nebraska. I hope some of you get a chance to see the Scotts Bluff Valley for yourselves in the near future. It’s a beautiful area with lots of history, and of course, the Brown Sheep Wool Company.


Prize Winner!

C2C Scarf 1

Last Autumn I facilitated a Crochet-A-Long at my local yarn shop: Longmont Yarn Shoppe. I introduced our Causal Crochet group to the “Corner to Corner” crochet technique. Each crocheter picked a yarn in the shop that they wanted to try, and we each made a scarf.

One of the participants was Margie C. She enters the Boulder County Fair each year, submitting a number of crochet projects and this year she decided to enter the scarf she made. Last month when we all got together she shared the following photo with the group.

margie-cs-cty-fair-ribbons

Her scarf had garnered 3 ribbons! Yay Margie!

If you would like to try your hand at the corner-to-corner technique you can find my tutorial and pattern on my blog post: Playing with Corner to Corner.

C2C projects M2H Designs

Corner to Corner is a really fun crochet technique. My favorite aspect of it is that you have that “small start” that I love to use. When you use a yarn with long gradual color changes you can get a truly impressive looking piece of fabric with minimal ends to weave in.

pwt-shawl-rose

I’m heading off this weekend to Scotts Bluff, Nebraska for the Scotts Bluff Valley Fiber Arts Fair. I’ll be teaching 2 classes on Saturday, my “Playing with Triangles Shawl” in the morning and my “Don’t Let Your Hobby Hurt” in the afternoon.

pwt-unforgettable-rose-2

I’m really excited about teaching the shawl class, I’ve added some fun variations to the basic shawl pattern and I’m hoping to inspire my students creativity. If you are in the area you can still enroll for the Saturday classes, just visit the website for more information on how and where to register.

If Scotts Bluff is too far away for you, you can find the pattern for the shawl here on my blog in my post: Playing with Triangles (the post also includes a link to an animated tutorial version of the pattern).

Hopefully I can get some pictures of the beautiful landscape around Scotts Bluff to share with you all next week. And some cute fiber critters as well.

A Sanity Break

The past couple of months have been rushing here and there in preparation for and then dealing with back-to-school for my boys. I’m getting back into the school routine but it hasn’t been easy. I’ve also been busy with lots of crochet work that I can’t quite share yet.

Fortunately I got to take a little break this week.

My friend Sharon lives in California and she is having an adventure with her friend Carol. The two of them are driving across the country and back on a 3 month road trip. They are stopping to visit friends and family along the way and having a great time.

They had just spent a couple of days up in the mountains of Colorado around Grand Lake. They got to drive one of my favorite adventure roads, Fall River Road on their way to their friend’s cabin in Grand Lake. On their way back down to the plains we arranged to meet in Estes Park. There is a wonderful shop in Estes Park called “The Stitchin’ Den” that has lots of lovely yarns and embroidery supplies, and I suggested we meet there.

Valley View heading to P2P

I live about 40 minutes drive away from Estes Park, Colorado. My drive over was a little longer as I encountered road construction delays. Seems like this has been the summer for serious road construction repairing damage from the 2013 floods in a lot of Colorado. I really enjoyed my drive though, the scenery along the way is breath-taking everywhere you look, and it was a beautiful day.

The timing worked out quite well. I parked in the big lot at the library in Estes and had just texted Sharon I was there. I asked her to text me when they got to town. A few moments later she texted me they were in the parking lot. I went looking for them and when I found them I got my first big hug of the day. Sharon gives great hugs.

There was Sharon, Carol and the friends they had been staying with, Linda and Larry. It was around noon and they were all very hungry and we decided to find somewhere to have lunch. “Claire’s” was open and I had always heard good things about it, we walked across the town square park to take a look at the menu.

The menu met with everyone’s approval and we were seated in just a few minutes. Everyone enjoyed their lunch and we had a lovely visit. Sharon had funny stories about driving Fall River Road, she wanted a “I survived the Fall River Road” sticker.  After lunch they decided not to join me at the yarn shop since Sharon is on a yarn diet. She and Carol have a limited amount of space in their car for cargo on the trip.

Sharon and me

We had to get a photo of Sharon and I together. Carol was our photographer, since neither Sharon or I are very good at the “selfie” thing. After a final hug the 4 of them headed off and I walked over to the yarn shop.

Purple Ella Rae Lace Merino

It is a really fun shop with various levels and nooks and crannies full of lovely fiber and yarn. I decided I really needed to adopt some purple yarn. This is more of the wonderful Ella Rae Lace Merino, but in a lighter weight than I had made my Mountain Top Beanie from. I was also interested in working with it because it was a tonal colorway instead of the busy variegated style.

I am thinking these 2 hanks will become something open and lacy to be worn close to my skin. The texture of this yarn is so soft and comfy. There is over 900 yards all together, so I should be able to make something very nice.

My Favorite Historical Landmark

On the way to Estes Park I had seen my favorite historic landmark and told myself if it wasn’t raining on the way home I would stop to take a photograph. This is “The Chapel on the Rock” at the St. Malo Retreat Center. I had a nice little walk taking photos and still managed to make it home before my boys were back from school.

I hope all my U.S. readers have a lovely Labor Day weekend. It’s the weekend that marks the end of summer for many of us. I hope you all get a little time for a “sanity break” of your own.

Reading your Stitches – Part 2

Part 1 of my “Reading your Stitches” was posted back in June this summer. Originally I was going to show you the Half Double Crochet stitch for Part 2, but I realized I needed to go a bit more basic first. Instead, I’m showing you some guidelines for working into chain foundations.

Even after over 45+ years of crocheting I find that the most aggravating and tedious part of a crochet project is the beginning. My favorite part is after the first rows or rounds are established, then I can just crochet peacefully along. Even a complex stitch pattern is preferable to the start. This is the reason that I tend to design the majority of my projects with small starts that have increases allowing the work to grow from there. Because I want to get to the “good stuff” as quickly as possible.

All that said, knowing how to work into traditional chain foundations is a good skill to have in your crochet tool box.

The typical start for a crochet project is to chain a length and then work back into the chain. Of course this often leads to the question from beginners about how to work into the chain. Which loop do you work under and how many of them?

Vs on front of Chain Sts

First of all, let’s look at the anatomy of a chain. The tops of the stitches are the V that we saw with the top of our single crochet stitches in Part 1.

Back Bumps of Chain Sts

The chain stitch doesn’t have a “post” or “legs”. There is simply the back “bar” or “bump”. You will see either term used in patterns. It will depend on the publication what terminology they chose.

Chain w larger hook

If you find that your chain stitches seem to always be much tighter than the rest of your crochet fabric it can help to use a hook one size larger for the foundation chain, then switch down to the next hook size when you are ready to begin your first row into the chains.

sts worked in back bump


Sts wrkd in back bump base view
Arrow points to base Vs of stitches worked into back bump.

If a pattern doesn’t specify which loop of the chain to use, I tend to use the back bar. I like the way the finished foundation looks as it echoes the top of the stitches on the last row of the project. When putting an edging all the way around the finished project I find the base of this foundation easier and neater looking to work into.

Traditional method

One of the first ways I learned to work into a chain was by going into the center of the V on the top of the chain and catching the back bar and top leg of the V in the stitch being made. This is the more traditional way of working into a foundation chain.

Trad method free loops

This leaves a single strand at the base of the stitches in your first row. This can work well if you are working pieces of a garment that are going to be seamed together along the base of the foundation rows.

Trad method showing twist

The first row worked into the chain using the traditional method tends to have quite a bit of twist to it before you work additional rows.

Shells worked into chain

It also is more stable when you are starting a stitch pattern that requires multiple stitches worked into some of the chain stitches of your foundation. For example…shell stitches.Wkig under 2legs V

Another option is to work under both legs of the V on each chain st. I find this to be the most difficult way to work into the chain. It does give you a very stable foundation and the single strand at the base is free for seaming pieces together along the foundation. Working into a chain using this method is easier when your foundation chain is loose enough.

Trad method free loops

The finished row will again have single strands at it’s base, but they will be a bit more centered. This row will have a lot of twist to it like the traditional method of working into a chain.

Now that you have the chain foundation out of the way, we are going to take a closer look at the single, half double and double crochet stitches in Part 3.


Loopy De Loop Necklace

Loopy de Loop Necklace

Right before I left for the CGOA conference in Charleston I posted about this necklace and said I would get the pattern up soon. It didn’t happen as soon as I had hoped, but here it is. This post contains the written pattern and I have a new video on my YouTube channel that walks you thru the pattern and the techniques you need to complete this fun necklace. It also has some animated stitch charts for those of you that like charts (like me).  Click here to watch the video: “Loopy de Loop Necklace”.

I used Classic Elite’s “Santorini” yarn for this project because of the mixture of textures and colors in each ball. You can use other yarns, just remember to adjust your hook size if you need to. I choose a size F (3.75mm) hook for my necklace because I wanted the “knot” part of my love knots to be snug, since they provide the structure of this piece.

Loopy de Loop Necklace blocked - Andee Graves M2H Designs

One thing to note, my love knots collapsed in the heat and humidity of Charleston, basically it was “blocked”. The necklace is still pretty but looks different now from my original photos.

This is a simple project, but I am using some techniques in slightly different ways. Hopefully between the pattern below and the video you will be crocheting along without any hiccups.

Loopy De Loop Necklace

designed by Andee Graves

Finished size: Approximately 32″ around

designed by Andee Graves

Finished size: Approximately 30 inches around

Materials list

Yarn: Classic Elite “Santorini” (58% Vicose/42% Cotton), 50g /125 yards.

Hook: F (3.75mm)

Gauge:

1 Love Knot = 1″ in length

Foundation Motif Rnd 1 = 1″ in diameter

Pattern Notes:

This necklace is worked by crocheting long Love Knot strands off a foundation motif. Each strand is attached at its beginning and end as it is worked.

Instructions

Foundation Motif (dc yo-yo with chain loops)

Rnd 1: Starting with adjustable slip knot, ch 4 (counts as a dc and center), 11 dc in 4th ch from hook, sl st to top of beginning ch-4. [12 dc]

Rnd 2: (Ch 4, sk 1 dc, sl st next dc) 5 times, ch 1, sl st next st, ch 1, sl st in first ch-4 sp, sl st above ch-4 space.

Do not Fasten Off

Note: You may find it helpful to weave in the beginning tail at this point to get it out of your way. I show my favorite way of weaving in the beginning tail in my “Loopy de Loop” video.

Love Knot Strands

LdL Attaching Strands - Andee Graves M2H Designs

Note: Ends of strands are connected to the Foundation Motif in the ch-4 loops created in Rnd 2.

Strand 1: Chain extending the loop on your hook to approximately 1 inch in length, sc in back loop of ch just made, first Love Knot created, continue making love knots until strand is 27 inches long (unstretched) or 32 inches long (stretched), sl st in center of third ch-4 space along motif.

Note: My love knots are consistently an inch long, so it takes 27 of them to reach the length of strand that I used. If your love knots are consistent in size you can count  how many you have in your first strand, then crochet that number of love knots for the rest of your strands instead of measuring.

Strand 2: Sl st tightly above ch-sp to lock end of previous strand, work love knots until strand is desired length, sl st in first ch-4 space to right of previous strand starting point.

Loopy de Loop - joining to motif

Strands 3 – 28: Work similar to Strand 2, slip stitching into ch-4 spaces along the foundation motif working back and forth to fill in the ch-4 spaces.

Fasten off and weave in all ends.

I hope you have fun with this project. You can vary the length and number of your strands to make a longer necklace or even a bracelet. Add beads, play with yarn, most of all…have fun crocheting.


“Uncle!”

Sometimes getting back into the routine of school days is a rough transition. That would definitely be the case this week. This is the first full week my boys are back in school and to add to the fun (not): my husband is out of town for work and there are major construction delays on the 2  shortest routes down the mountain to school.

I am really glad that we are getting our roads back to better-than-before. If you all remember back in September 2013 there was a nasty flood here and we had extreme damage to numerous roadways in Colorado, especially in the mountains. The construction has been on-going for the past 3 years, with the big job starting last year about this time.

What all this means for me though, is less time in my office at home. Being on the go isn’t too bad when I’m crocheting away on a pattern, but it gets a bit tricky when I need to do photography and video work.

I had planned to have an awesome Tuesday post for all my dear readers. Unfortunately, I finally had to accept reality since it is now Wednesday evening and I still don’t have the awesome post completed. I’m crying “Uncle” this time. Awesome post is being moved to my Saturday post instead.

But I won’t leave you with a completely empty plate. No starving children in Mama Andee’s house!

One of the good things about being trapped down in town this week, I had the opportunity to get lots of shopping errands out of the way. Seems like there are always little errands that get pushed off the day’s list when I come down during summer break.

This past Tuesday I took care of all my grocery errands, but I also made some time for errands that were a bit more fun. Like stopping by JoAnn’s and Michaels.

RH WaterLily

I needed some foam cushions for a project and knew that JoAnn’s would have the ones I wanted. I spent a few minutes having a wistful browse of all the lovely Ott-Lites they have in stock. I did resist that temptation, but a skein of yarn said it needed to come home with me.

RH Friends

I really like crocheting with Red Heart’s “With Love” yarn (very aptly named as well). It is nice and soft with a lofty springy twist to it. Great for making home décor or even wearables. I picked the Water Lily color because I thought it would play well with some purple that I had in my stash. Don’t they look nice together? Will be coming back to them later this winter.

There has been a lot of posting in social media about Caron Yarn’s newest product “Caron Cakes”. They are only in Michaels stores from what I understand. They did have them online at the Michaels website, but as of this writing they are out-of-stock. You can take a look at the various colors online though and see if there is a store near you that carries them.

Caron Cakes at Michaels

I wanted to see if I could find them in my local Michaels. The store I go to is located in Superior, Colorado in the same shopping area as my nearest Costco.  I decided I had time for a stop in Michaels before heading to Costco for groceries. I was pleased to see the yarn there, though they had already sold quite a bit of it.

My Caron Cakes

I had to adopt a few balls for myself. I decided on 2 balls of the purple toned “Bumbleberry” and 1 ball of the “Blueberry Cheesecake”. The yardage in each ball is very generous at 383 yards. It is a yarn that requires a bit more care, the instructions on the label say “Hand Wash. Lay flat to dry.” A little surprising as the fiber content is 80% Acrylic/20% Wool. The yarn is very soft in the ball and doesn’t have that slight scratchiness you sometimes get with wool blends.

Jessies Cakes Round-Up

I’m looking forward to working with this yarn and seeing what new designs it inspires for me. Meanwhile my good friend and fellow yarnie blogger Jessie has put together a Round-up of pattern suggestions for folks that are wondering what they can crochet with this yarn.

C2C Scarf 1

You can find Jessie’s suggestions and the links to the patterns on her blog: Jessie At Home. I was flattered that she included my C2C Basics Scarf in there.  Some of my other patterns that could work up nicely in this yarn are:

Granny Fans Redux - Andee Graves/M2H Designs

Granny Fans Redux, this is one of my paid patterns that has detailed charts and the instructions for 3 different styles of neck wear. The long runs of color in the Caron Cakes would likely give you fans in each color.

2nd PWT

Playing with Triangles Shawl, this pattern is available here on my blog and I have a “how-to” video on my YouTube Channel.

3rd PWT attempt

You can see in the above photo how fun the color changes were using Red Heart’s Treasure. With the Caron Cakes the color stripes would be even more dramatic. The squishy loft of the Cakes yarn would make a very snuggly shawl, perfect for a gift for a dear friend or family member this coming holiday season.

Enjoy the rest of your week, and be sure to stop by on Saturday for another fun pattern and video.

Crocheting for the Family

When I crocheted up my sample for my Mountain Top Beanie design, my older son tried it on and really liked it. This is the kid that wears a stocking hat almost all year long. He asked me if I would make him one, I offered the one I had made for the sample, but he felt the colors weren’t right for him.

Mountain Top Beanie - Andee Graves M2H Designs

Thus a plan was hatched to take him to the Longmont Yarn Shoppe to pick out the color he wanted. The yarn is Ella Rae Lace Merino Aran. It is a super soft and cushy 100% Superwash Merino and all the colors have that rich-toned hand-dyed look to them.

I thought we would make it down to the shop long before the summer break was over, instead we finally got there this past Wednesday during my monthly Causal Crochet get together at the shop. Thing 1 and I had been at his Middle School earlier that day for his locker assignment and to get his school photo and ID.

Progress Photo of Beanie 1

Once we got to the yarn shop he looked at the various colors in the Ella Rae and picked this fun one that combines purples and greens. Worked up in the beginning swatch the colors reminded me of a vineyard.

Progress Photo of Beanie 2

I’ve been working on this hat every time I had a spare moment for the past 3 days and finished it late last night. Overall I think it took me about 3 hours of crocheting time. That’s counting a couple of times when I had to pull out some of my work due to not keeping track of my stitches.

Ending Tail Whew

I almost ran out of yarn at the end. I actually had to fudge a little on the last stitch, but it still looks good.

Bits of Tails left

These were all I had left after weaving in the tails.

Happy Boy

I think he is very happy with his new hat. He is 13.5 years old and actually wears an adult size hat already. It’s a good thing my niece and nephew are both having babies this coming year, I need some little ones to crochet for again.

Now I have to make a hat for my poor husband, he was promised one for Christmas and it hasn’t materialized yet. Whoops.

Mtn Top Beanie full view

If you want to make your own Mountain Top Beanie the pattern is available here in my Ravelry Shop. The pattern has detailed written instructions as well as 2 stitch charts for those that are more visual. The pattern also includes instructions for making a child-size or infant-size hat. I’ll also be teaching a project class  for this hat at the Longmont Yarn Shoppe, Saturday, October 29th from 10 a.m. to 1 p.m. if you are in the area.


Scrap Projects: Yo-yos

Pile of Yoyos

One of the easiest of scap projects is the humble crocheted yo-yo. I’ve always enjoyed these fun little circles of color and find them a terrific learning project for new crocheters. When worked in worsted weight yarn with a size I-9 (5.5mm) hook they use just under 2 yards of yarn each.

Beginning chain 4, arrow indicates 4th ch from hook.

I make my Yo-yos by starting with an adjustable slip knot, then chain 4,

11 dc in ch

11 double crochet in the 4th chain from the hook,

Tightening center, arrow indicates beginning tail.

Tighten the center of the stitches by pulling the beginning tail snug,

Insert hook in top of Tch

Insert hook in top of the beginning chain 4,

Sl St completed

Slip Stitch to close round of stitches. Fasten off.

Weave in beg tail

Weave in the beginning tail in the center. You can weave in the ending tail as well, or use it for sewing the yo-yos together. For my yo-yos I did weave in the ending tail, because I will be crocheting these yo-yos together.

Weaving in the ending tail. Arrow indicates the slip stitch.

To weave in the ending tail I like to insert my yarn needle thru the top of the chain stitch that I had slip stitched to.

Weave in end tail 2

Then I turn the yo-yo over and weave the tail thru the back bumps of that beginning chain and on around the center of the yo-yo. I pull this end gently when weaving it in so I don’t collapse the side of the yo-yo.

Finished Yoyo

I trim off the excess yarn from the yo-yo and it is ready to join my other yo-yos. I will fill a bag with yo-yos until I have collected enough to make them into a project.

You can use yo-yos in any number of projects. My favorite is to make scarves with them. You can also make yo-yos in other yarns or threads. You will need to adjust the size hook you use to get a yo-yo fabric that you find pleasing.