Whirlwind Hat

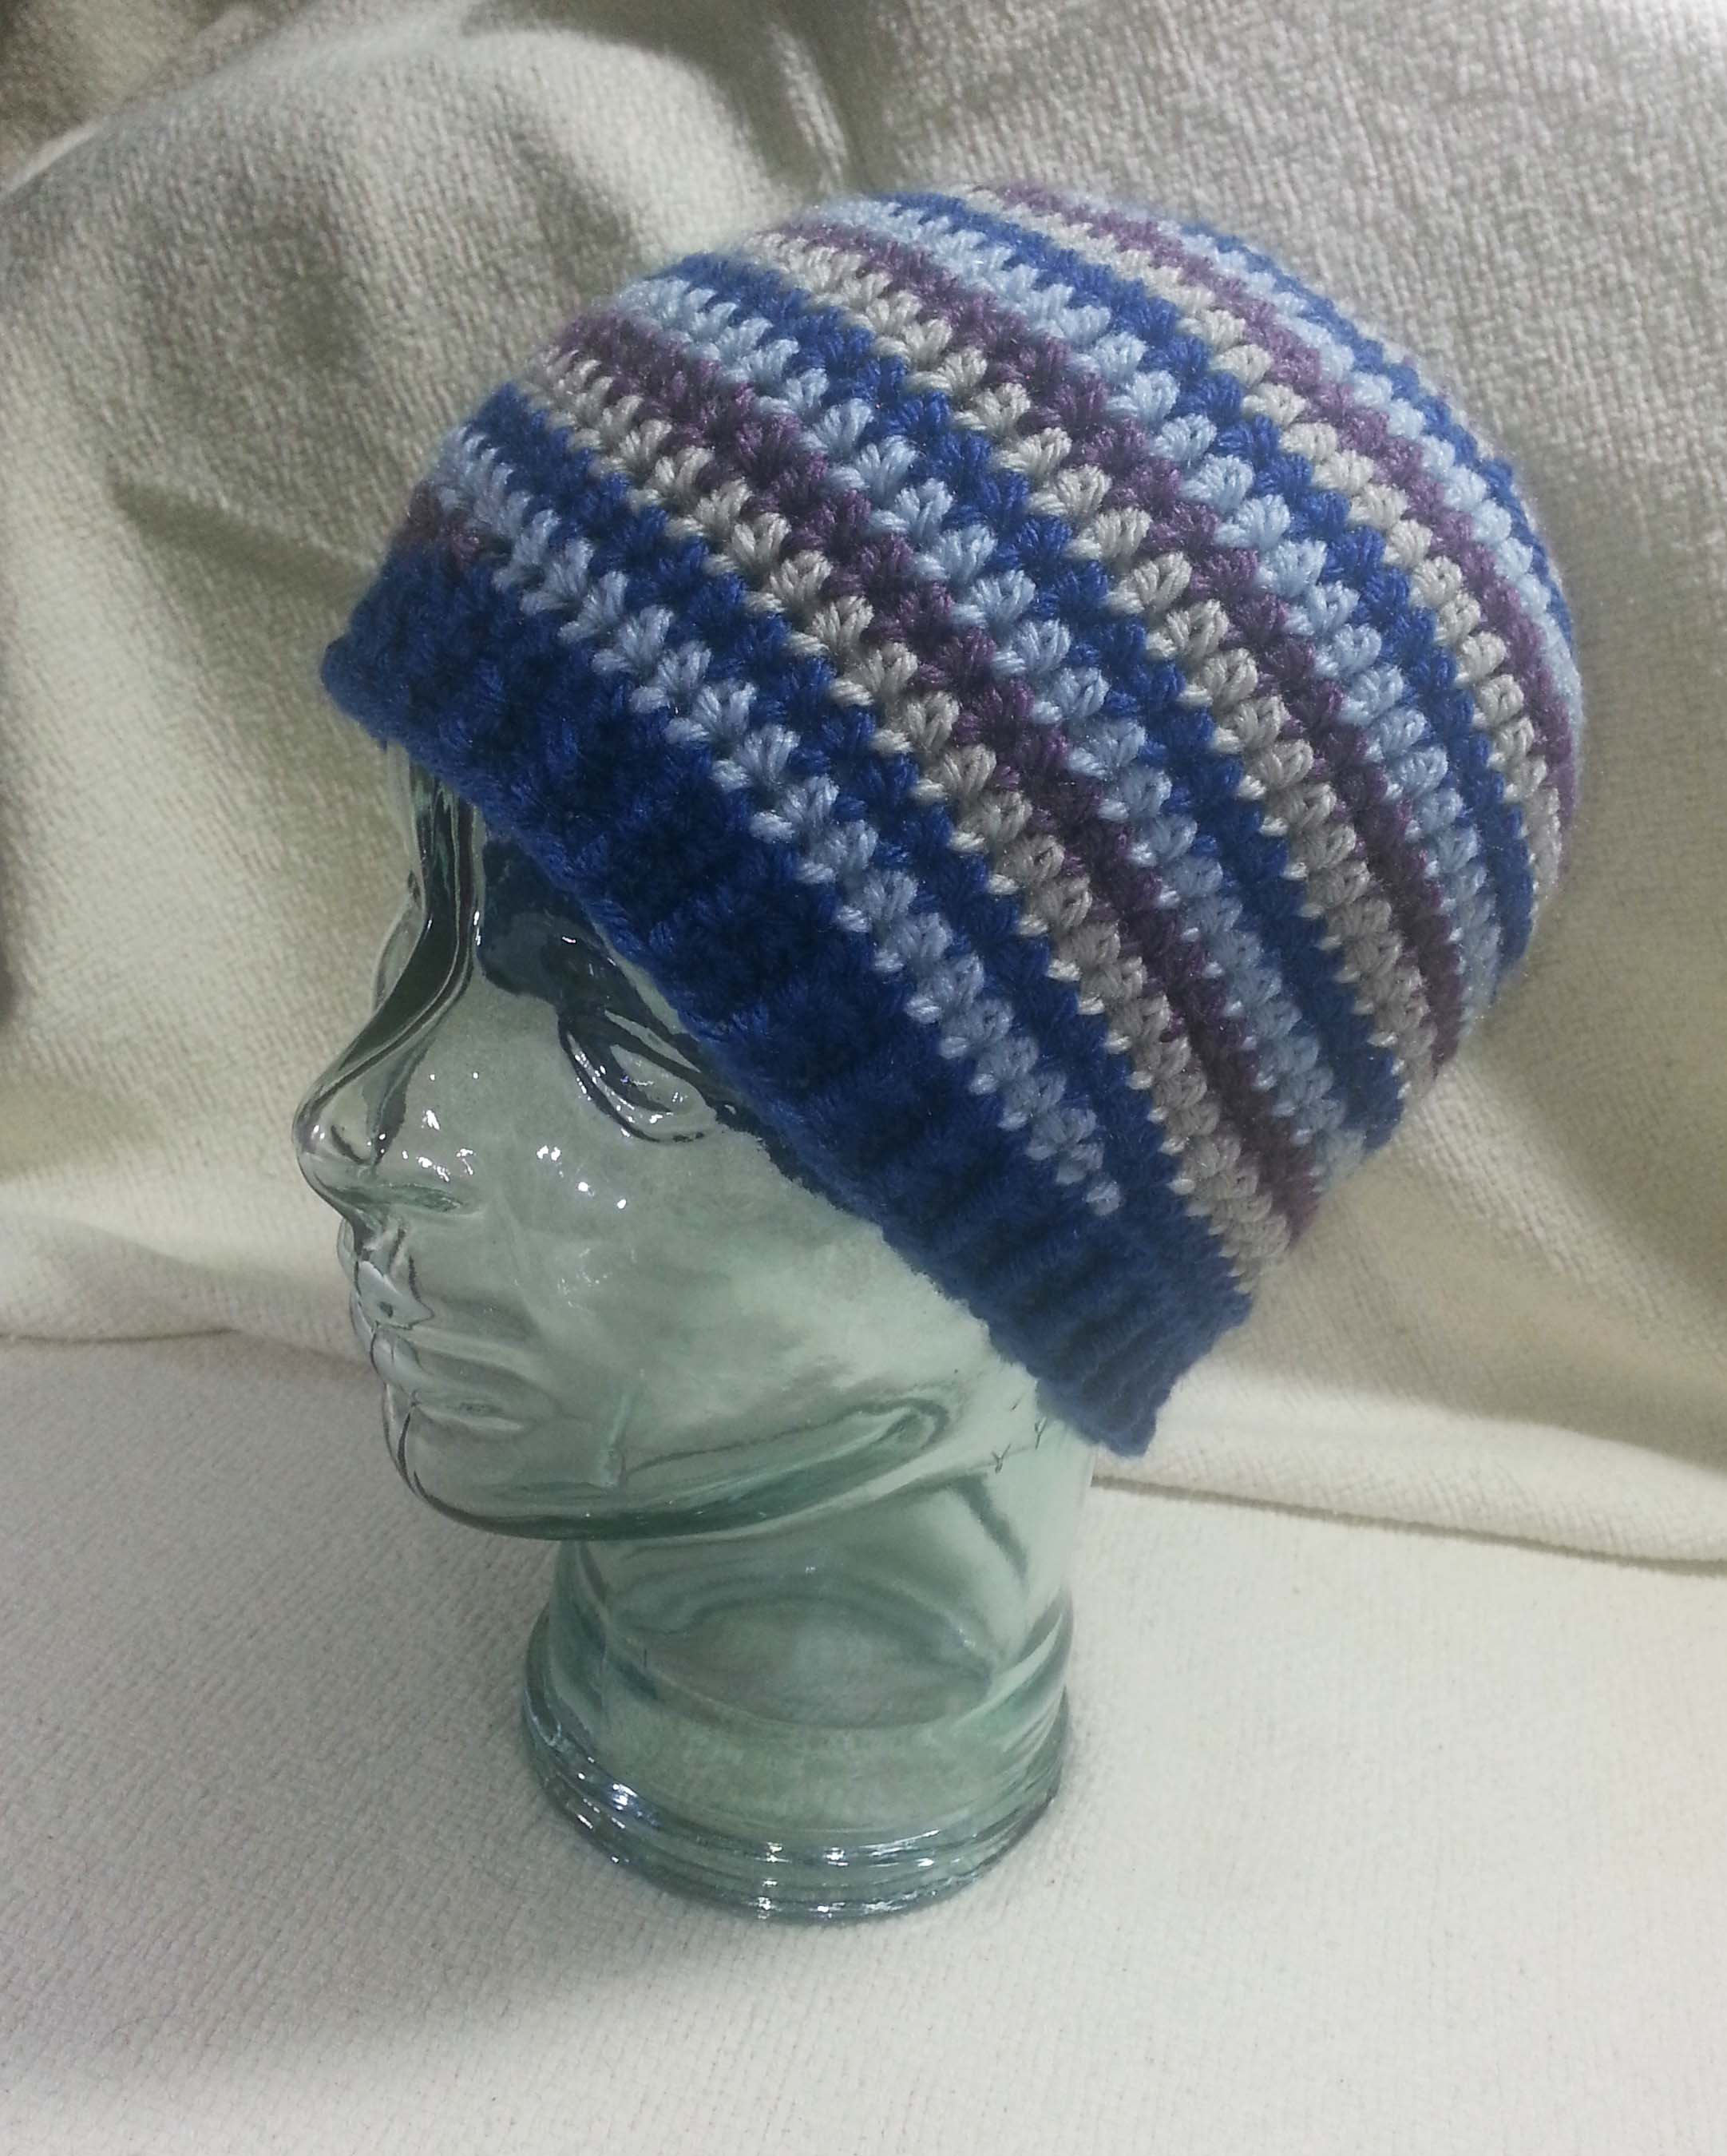
As many of my readers already know, I love to crochet hats. They are a fun quick project and a great canvas for experimenting with stitch patterns and new yarns. I seem to also make them frequently for gifts to family and friends.

My favorite construction method is working crown down in continuous rounds. Because there isn’t a join for each round the hat will come out seamless in appearance. This also creates a nice elastic fabric, a handy attribute for a project that will need to fit comfortably on your head.

But what if you want a hat with color stripes and you aren’t using one of the handy yarns with gradual color changes?

You can create stripes of color in your hats by changing the color of yarn as you work, but that can leave you with a “jog” in the fabric when you change colors.  Another option in this style of color change is to “step down” your stitches in the first color, then “step up” with the new color. It will look less disruptive to the fabric colors, but it is a bit fiddly and not always ideal for the elasticity of your hat fabric.

What is a crocheter to do?

whirlwind-hat-andee-graves-m2h-designs

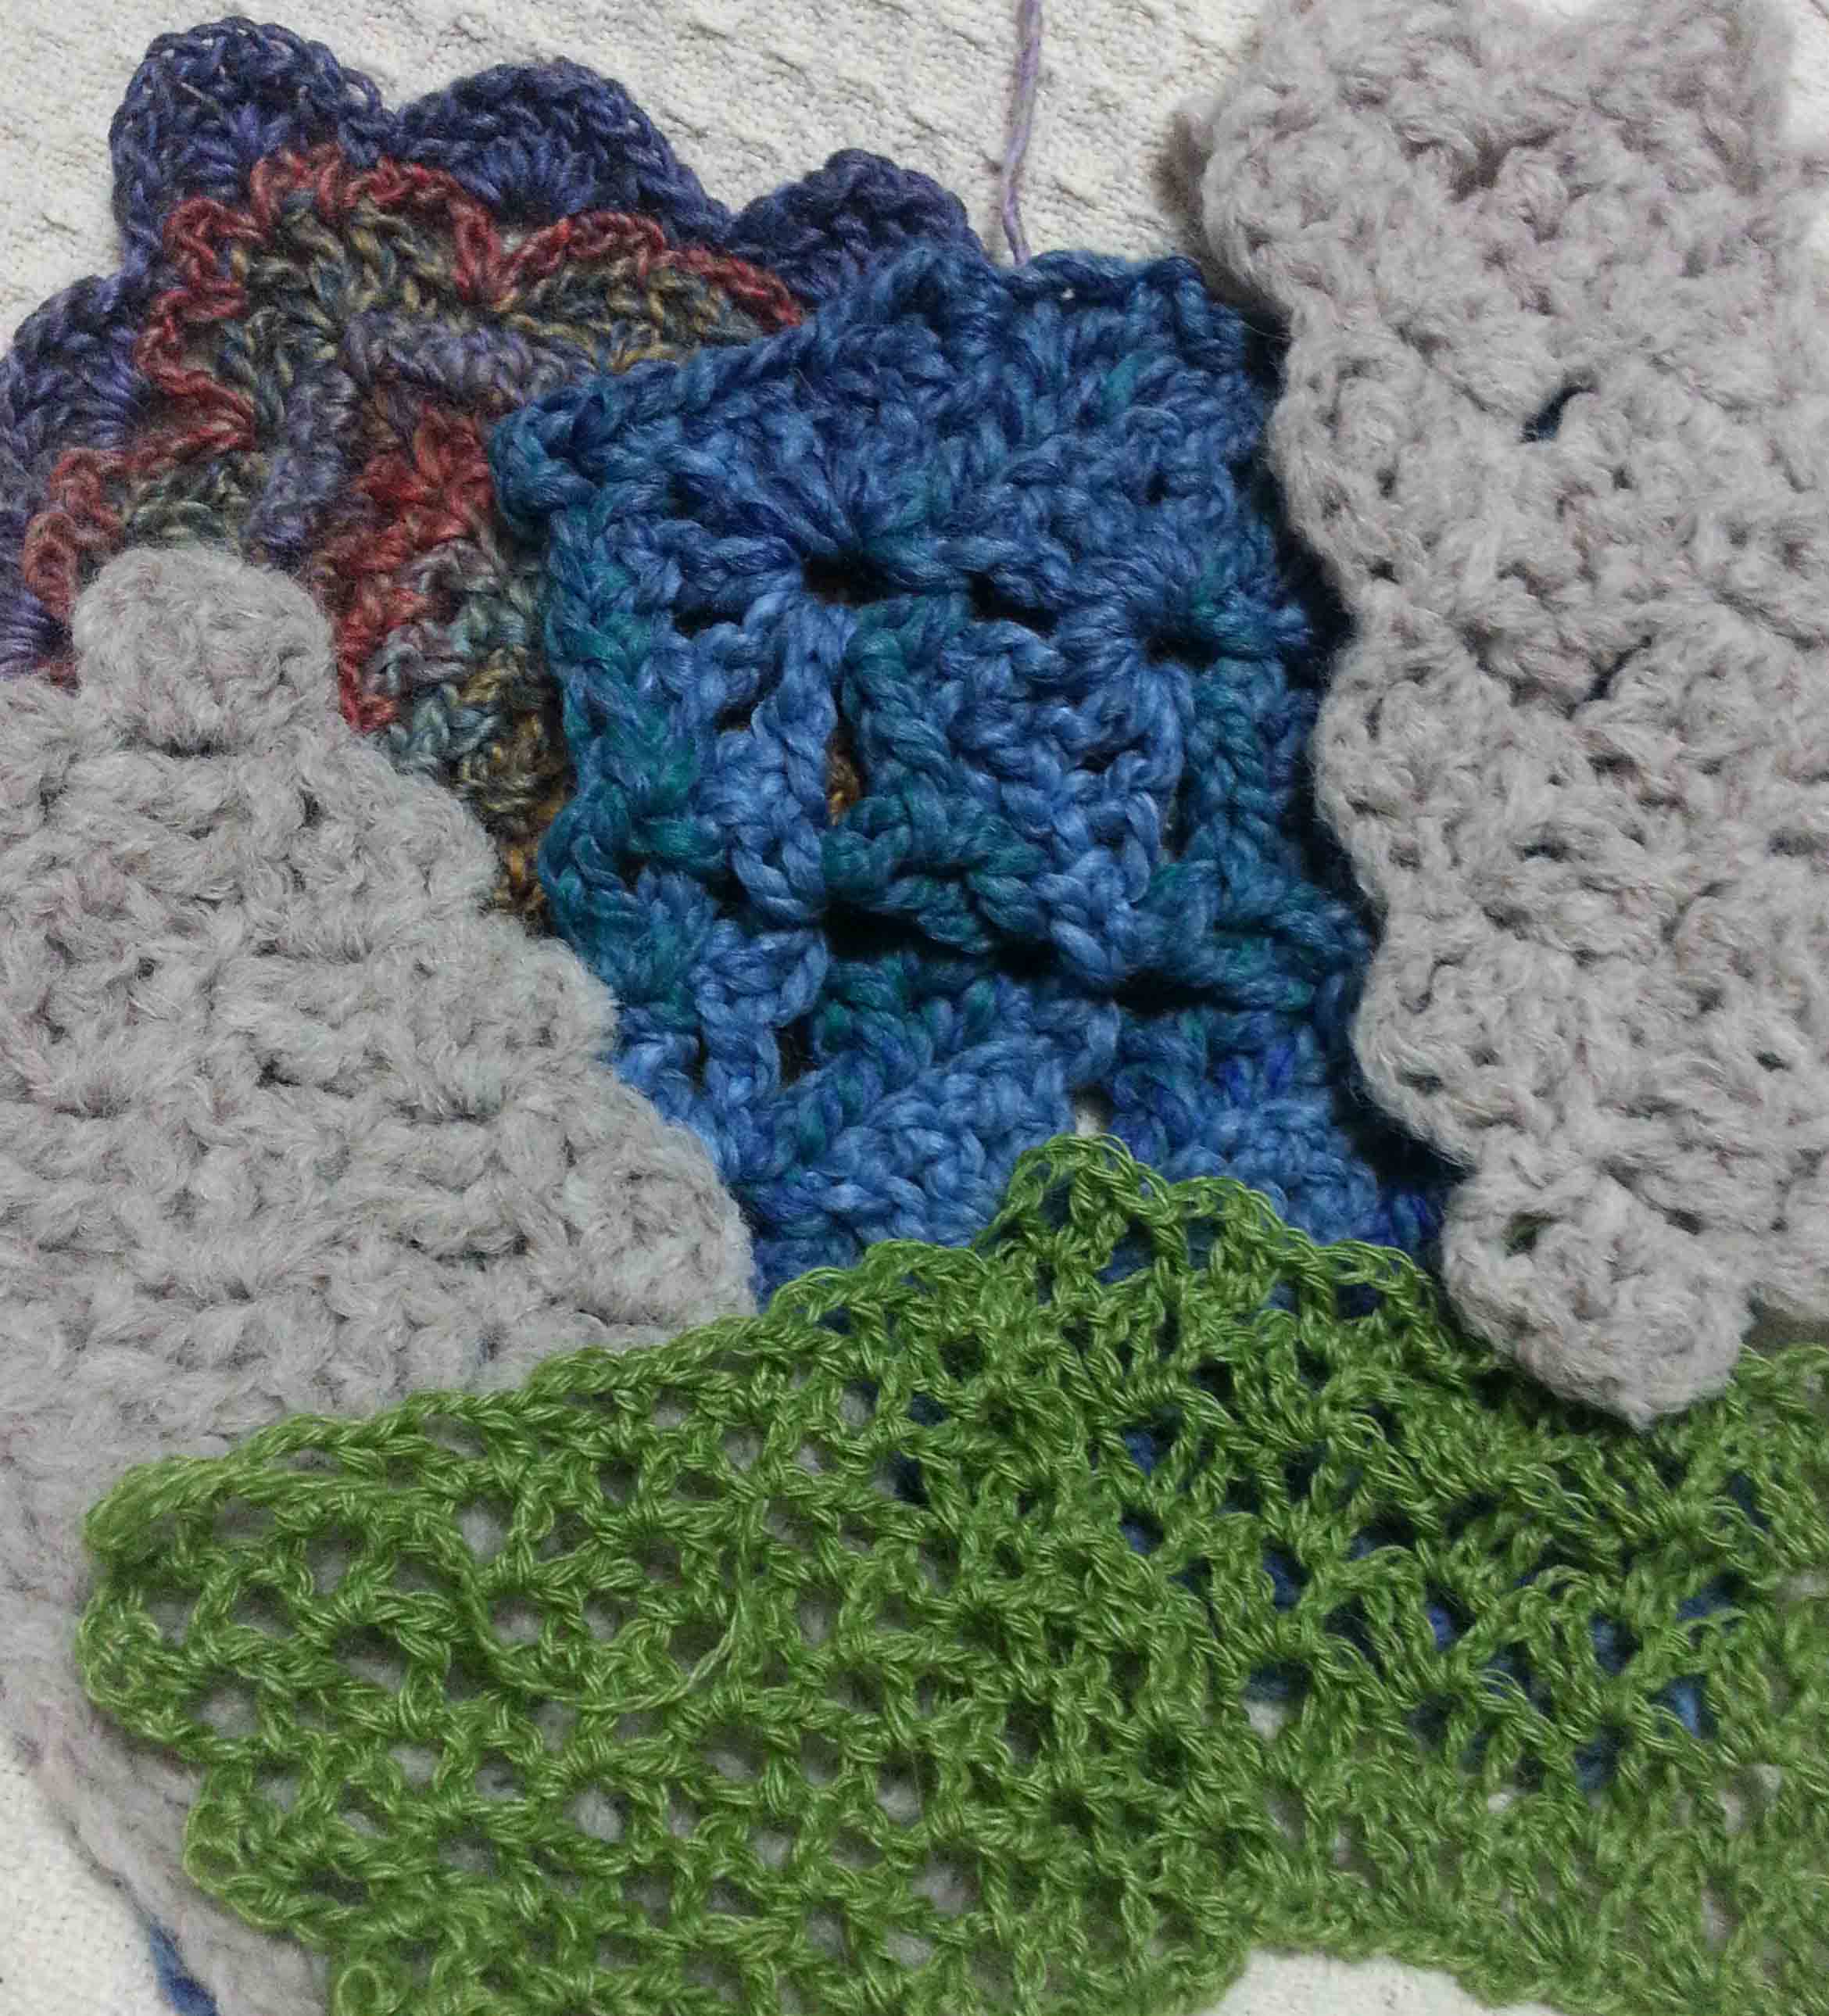
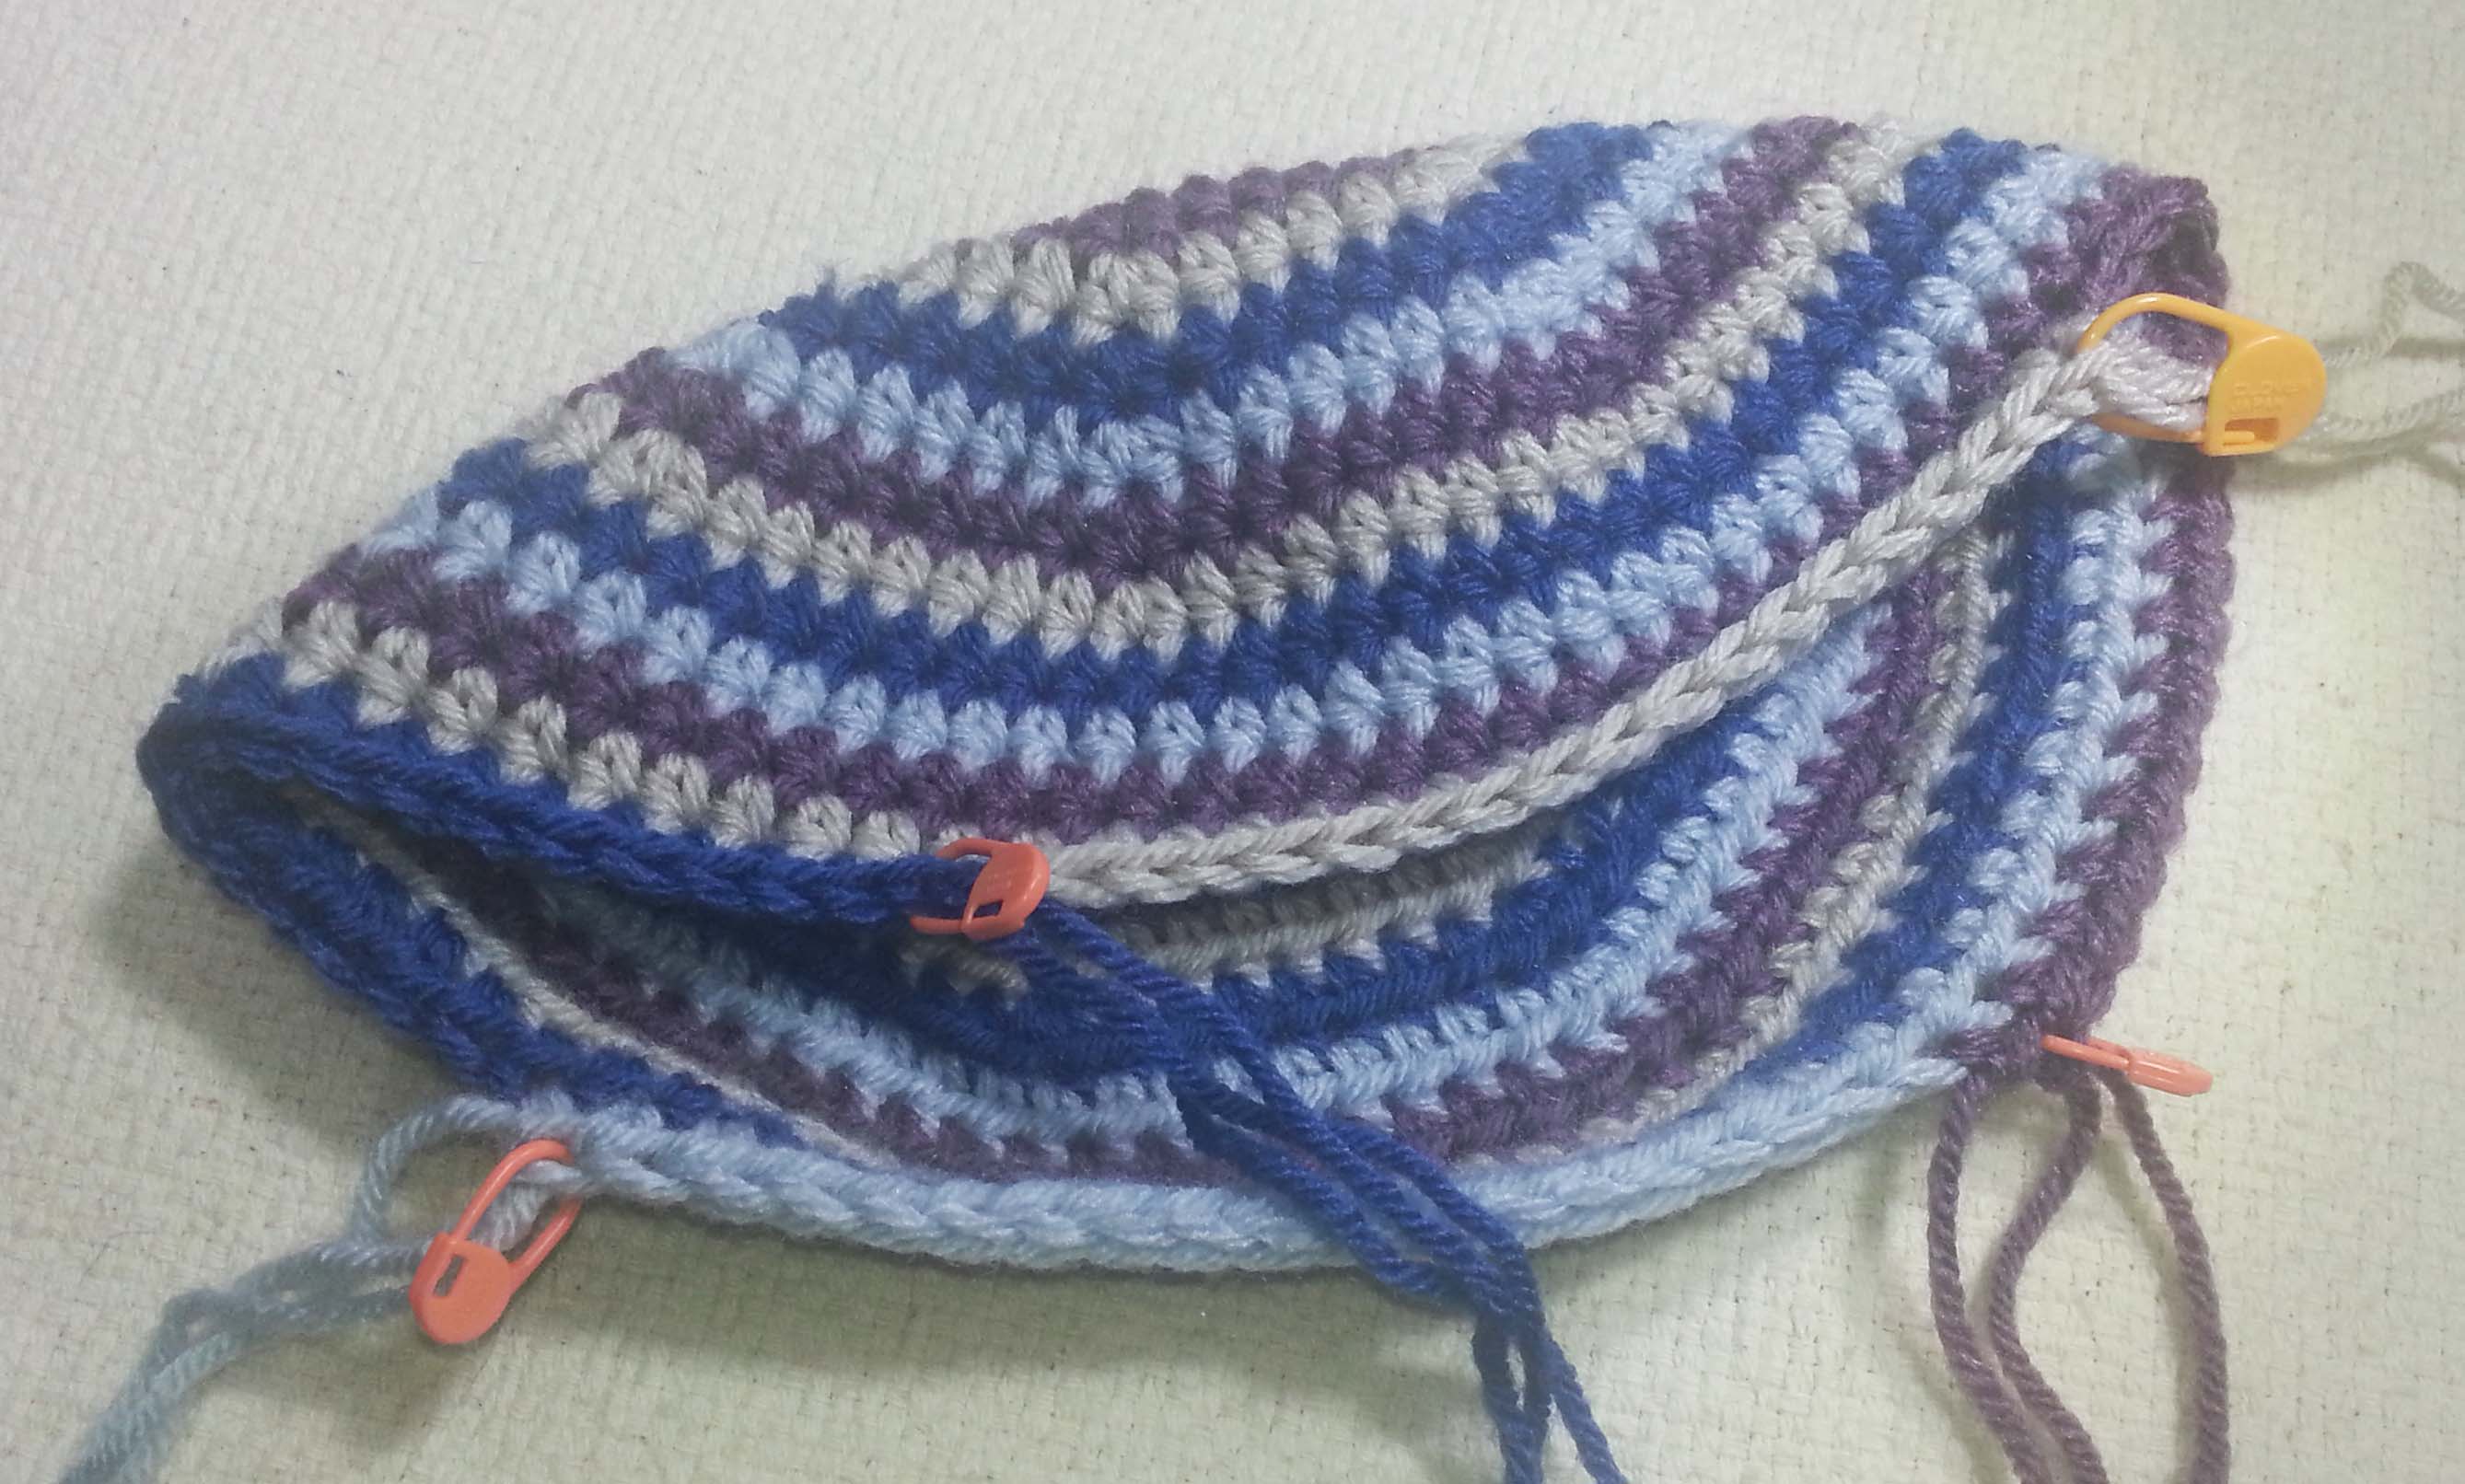
Fortunately the solution is actually quite simple. Spirals.

crown-of-hat

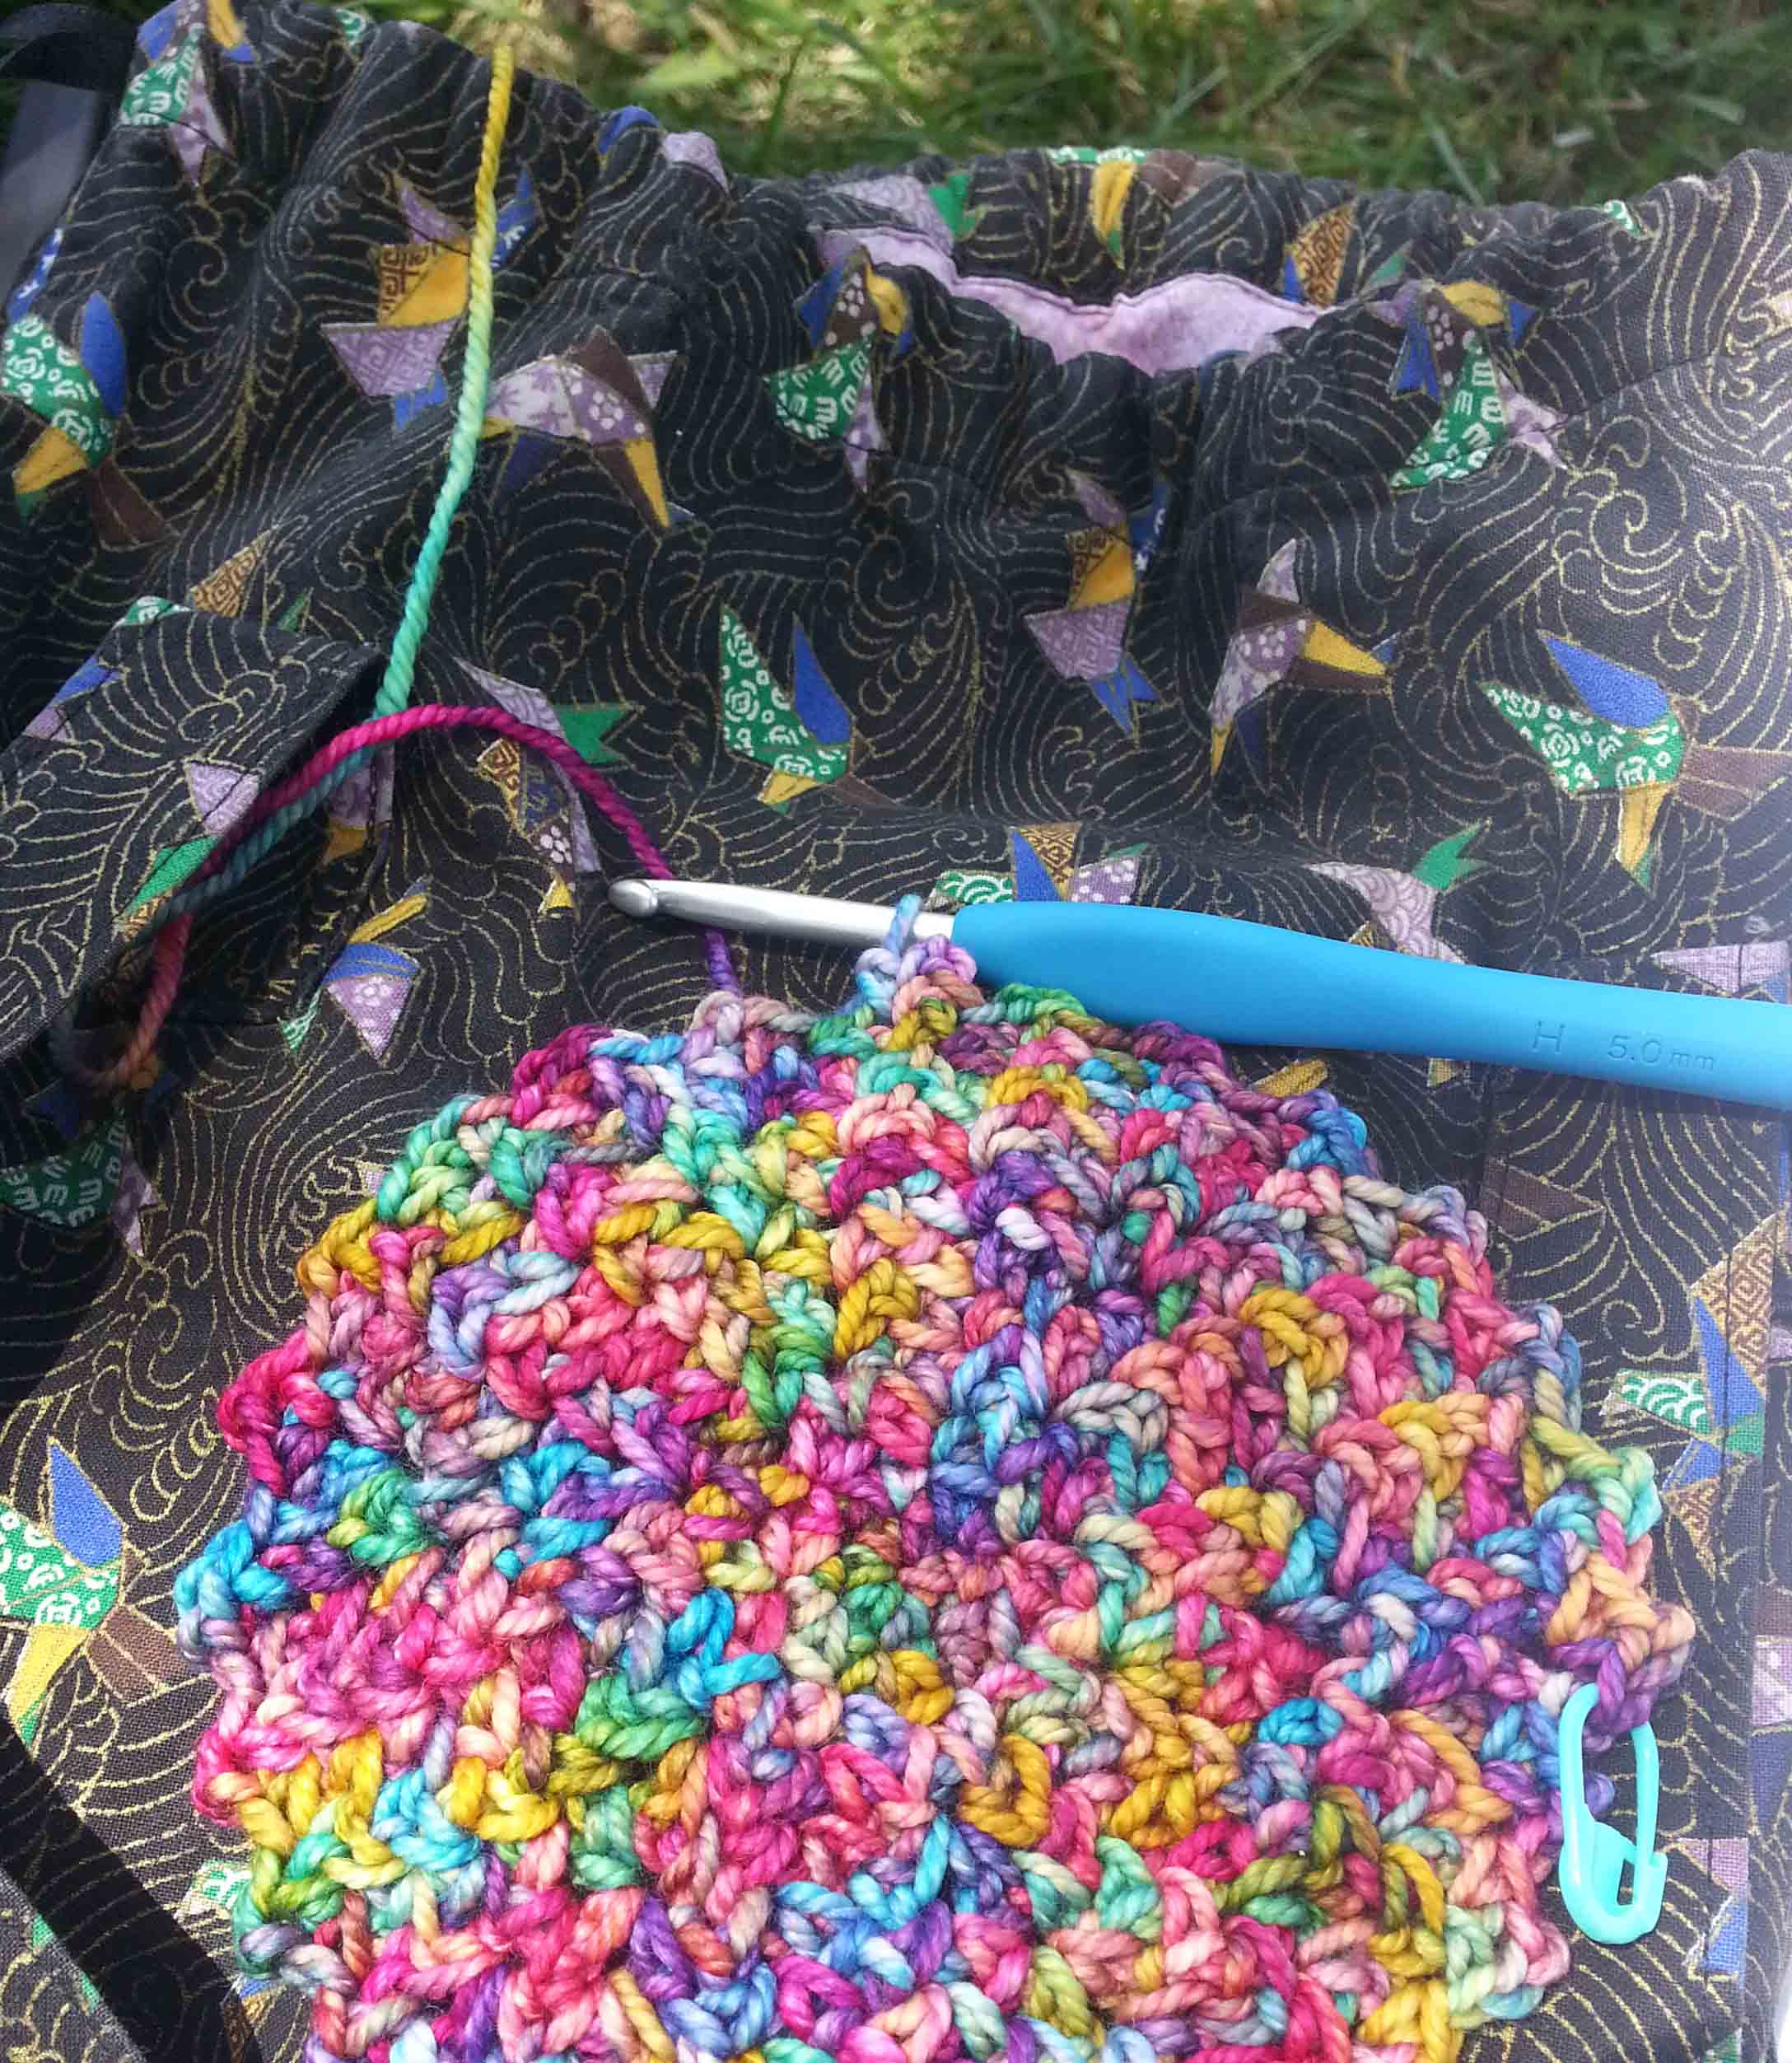
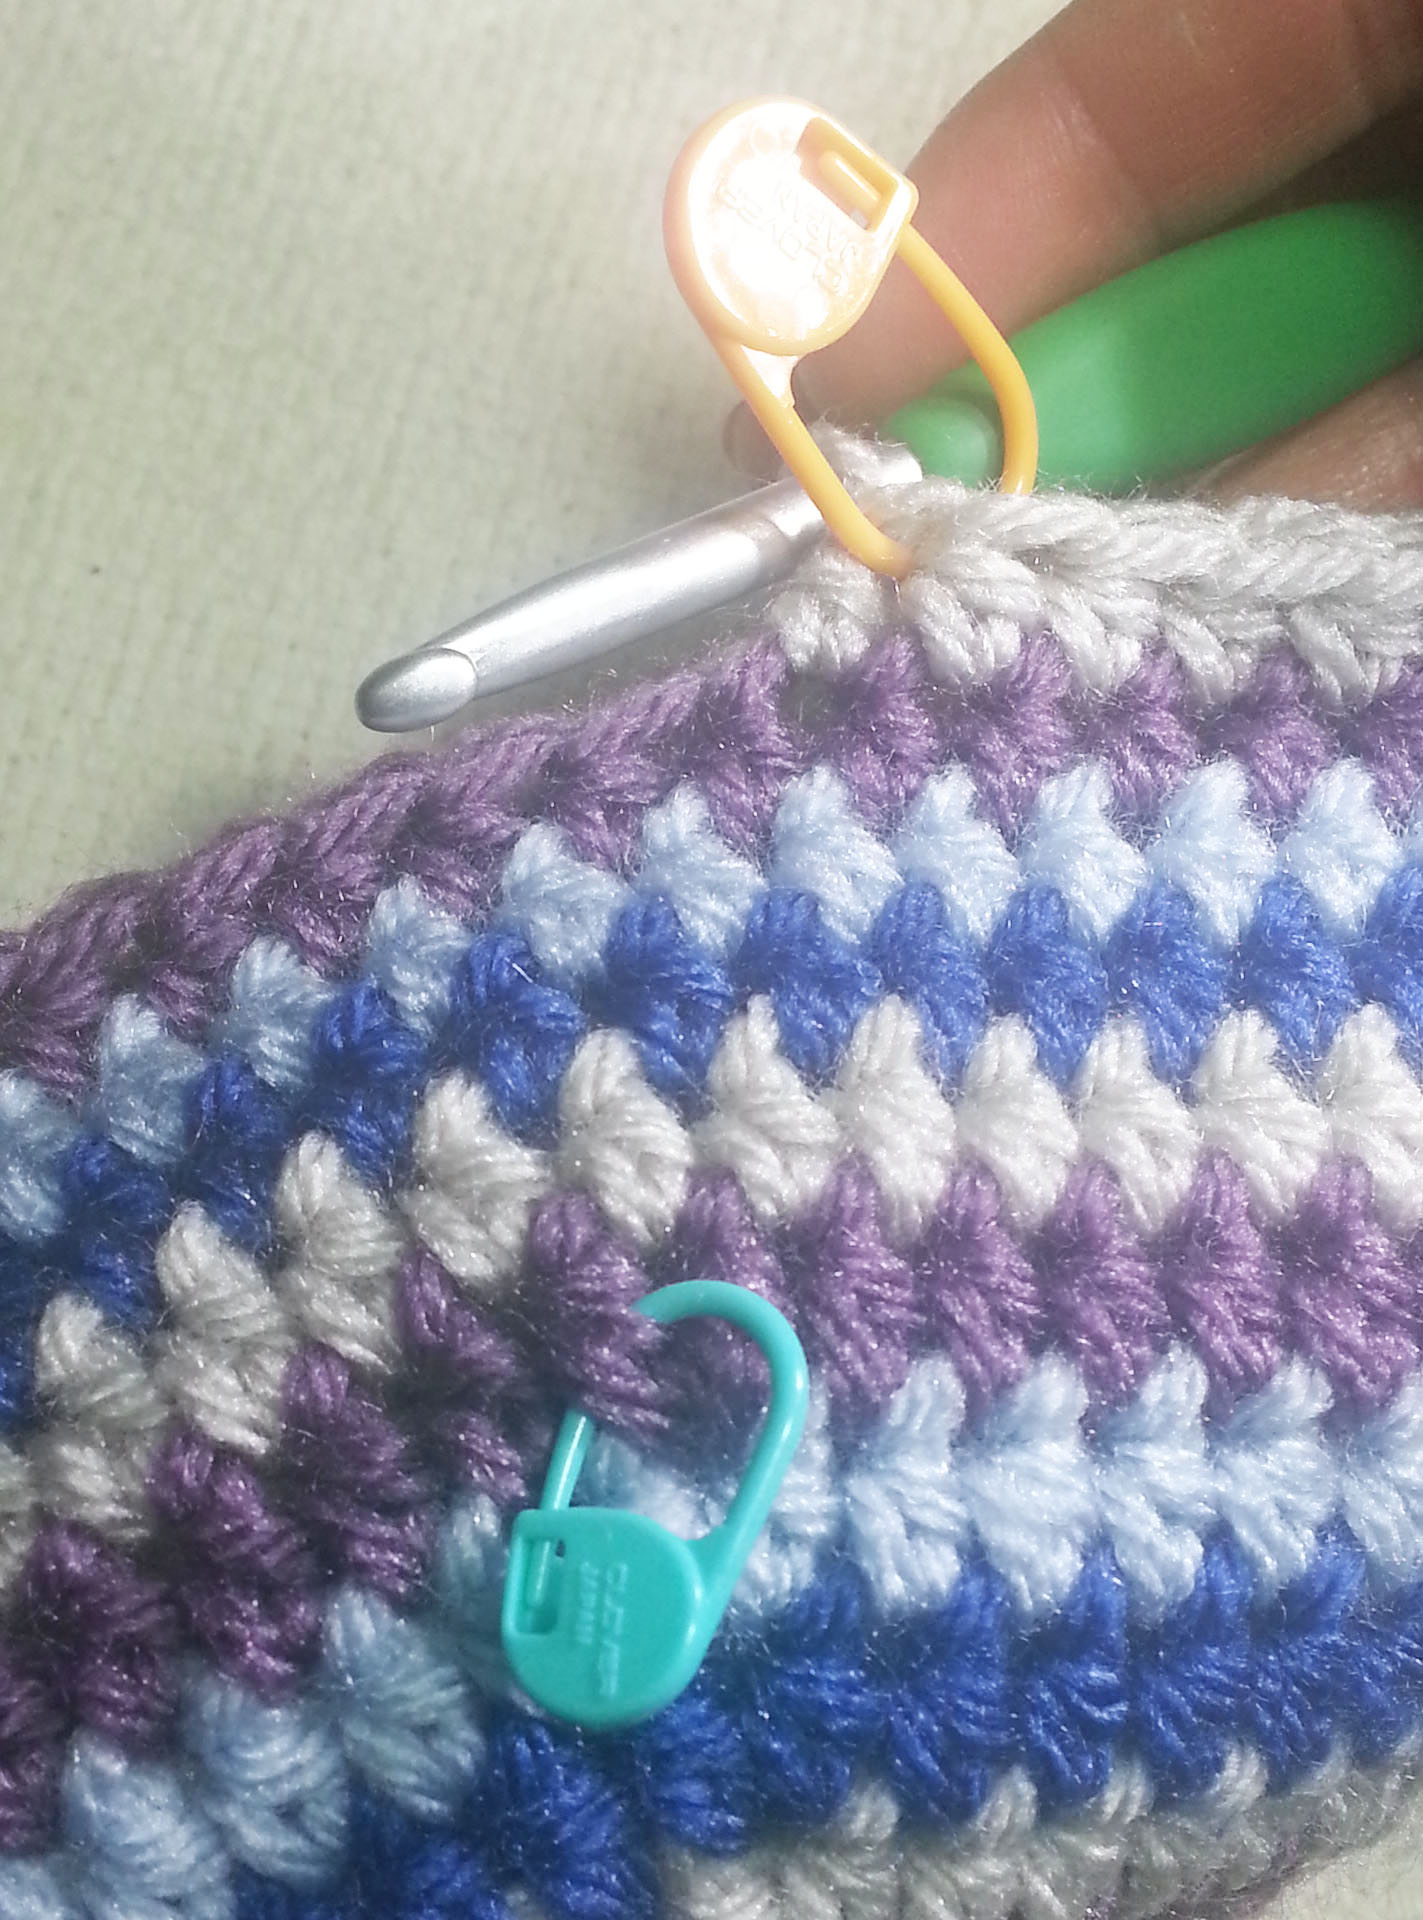
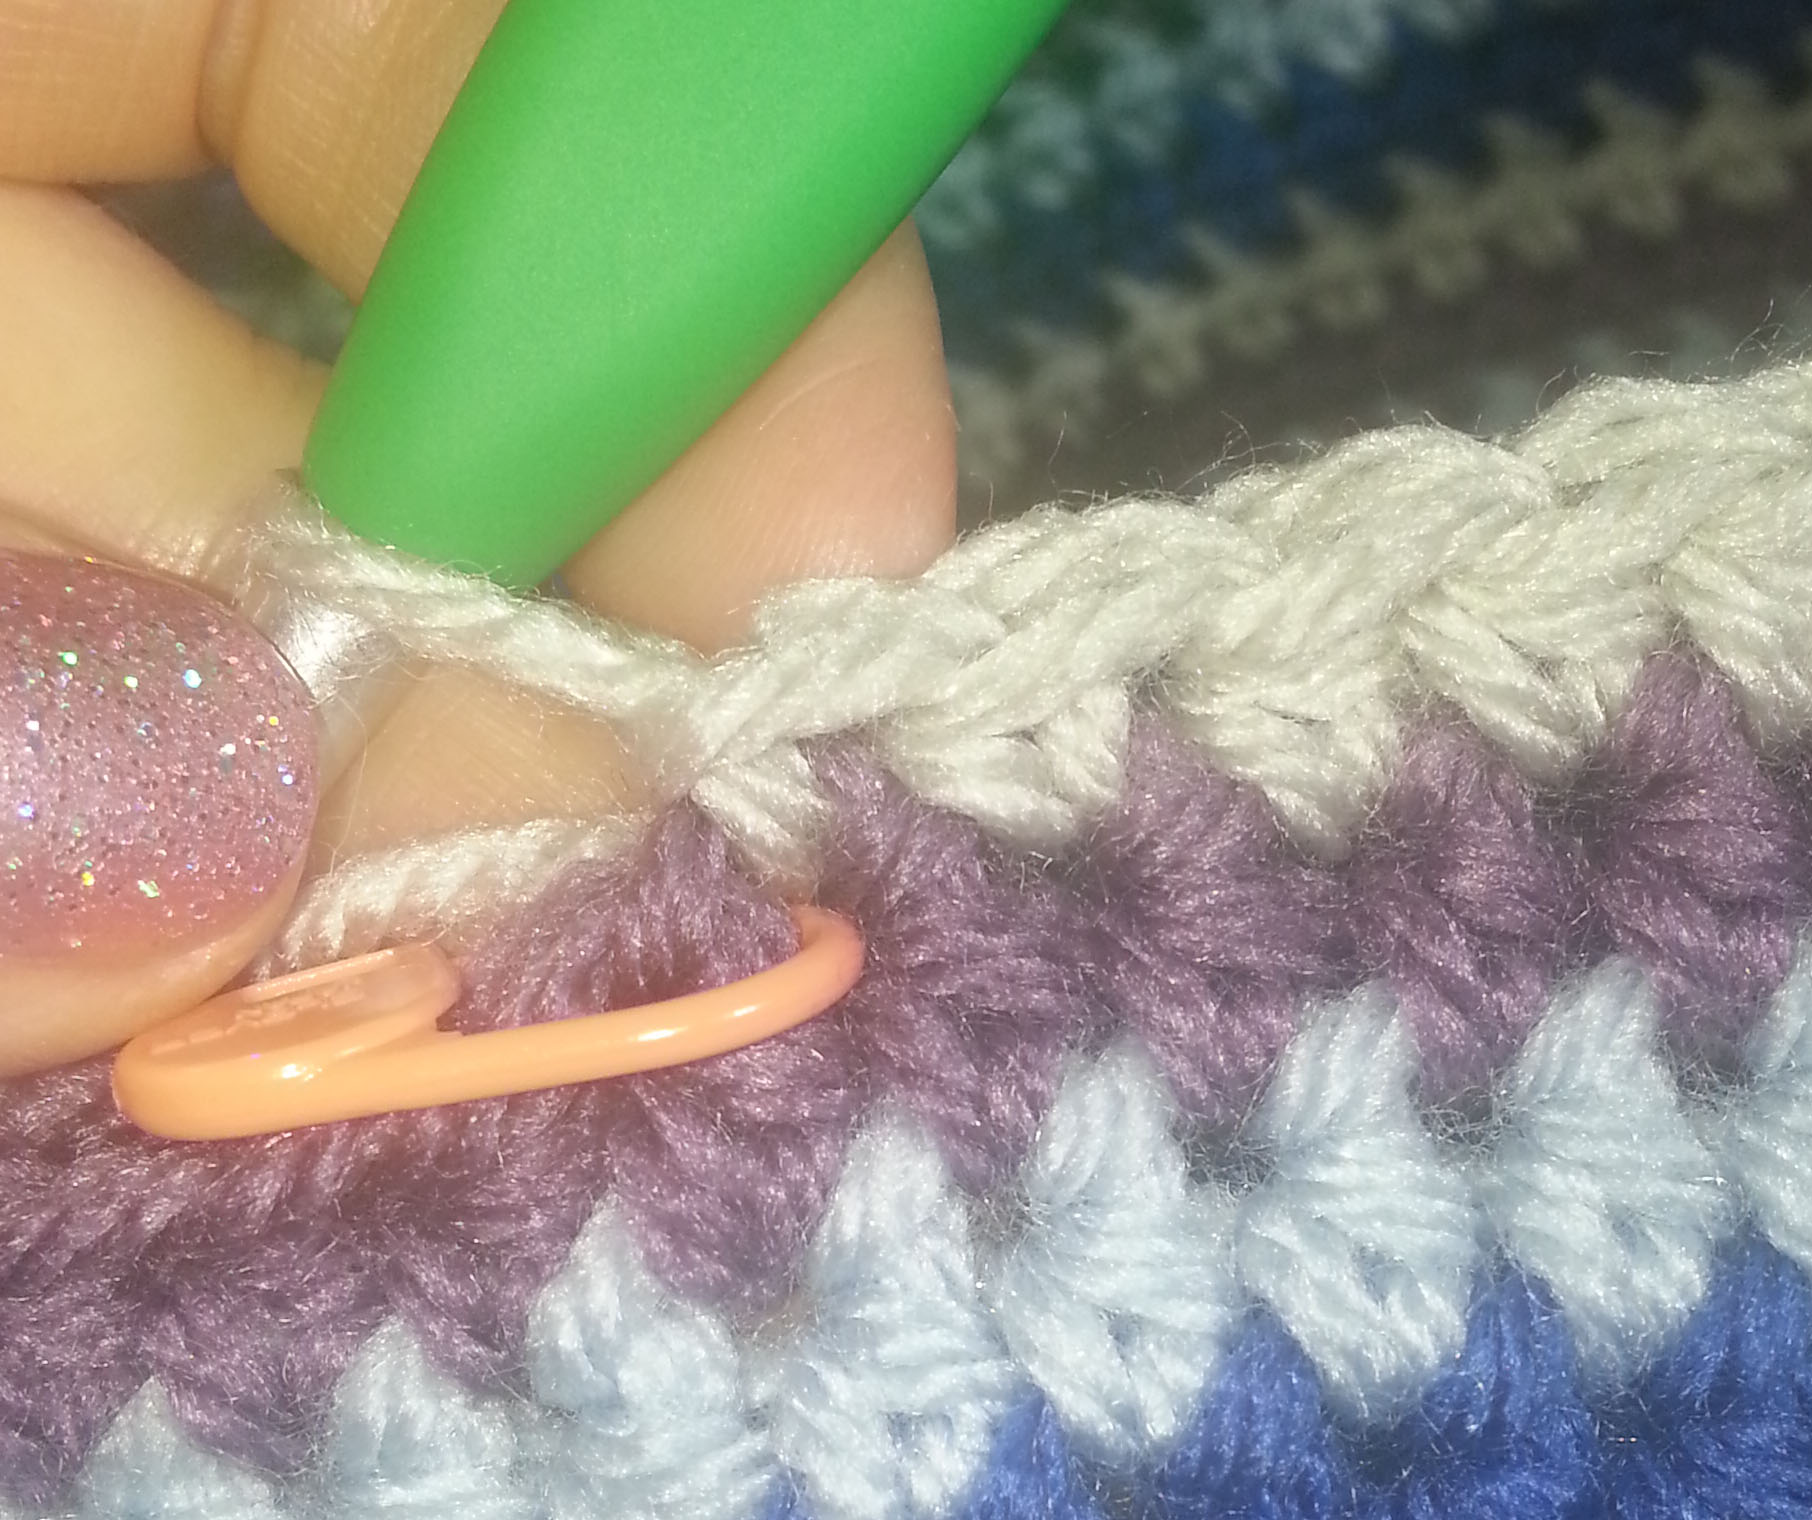
This method gives you not only a lovely smooth striped fabric, it also creates a visually interesting crown for your hat. You can work with anywhere from 2 to 8 “arms” in your spiral and use a different color for each arm to get the different color of stripes. Using stitch markers will make this method almost mindless as you work the hat.

yarn-management-solution

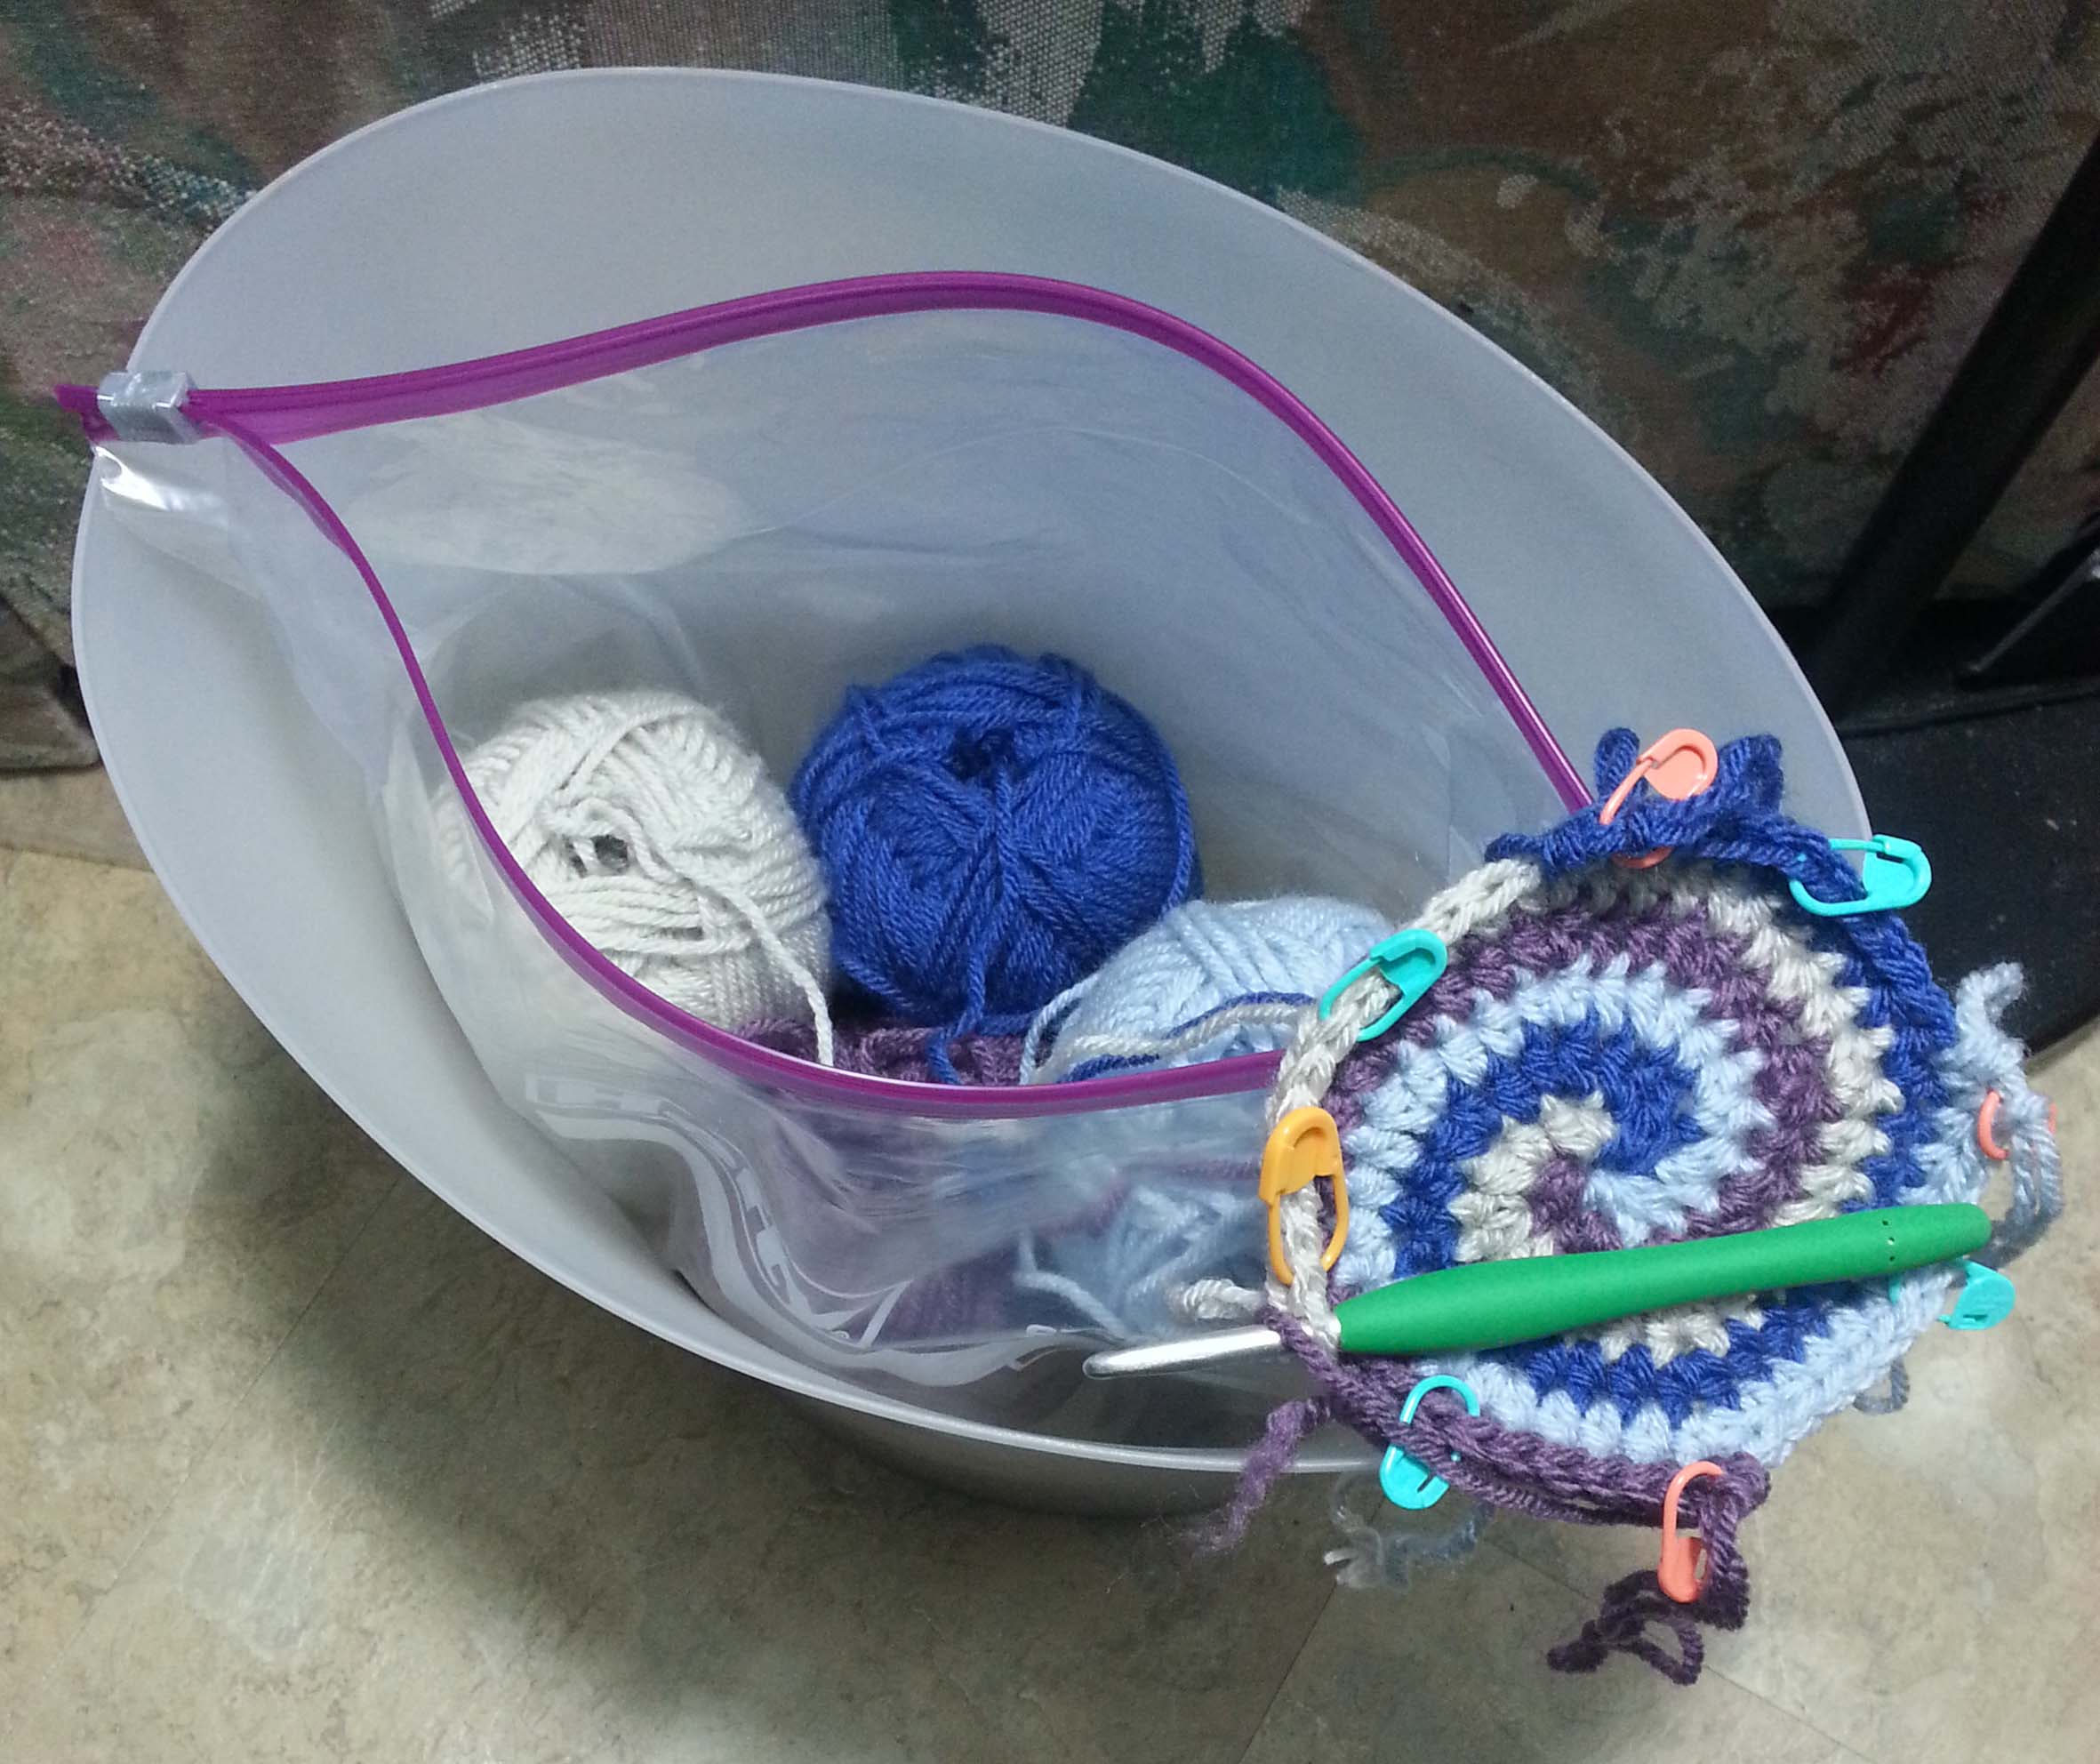
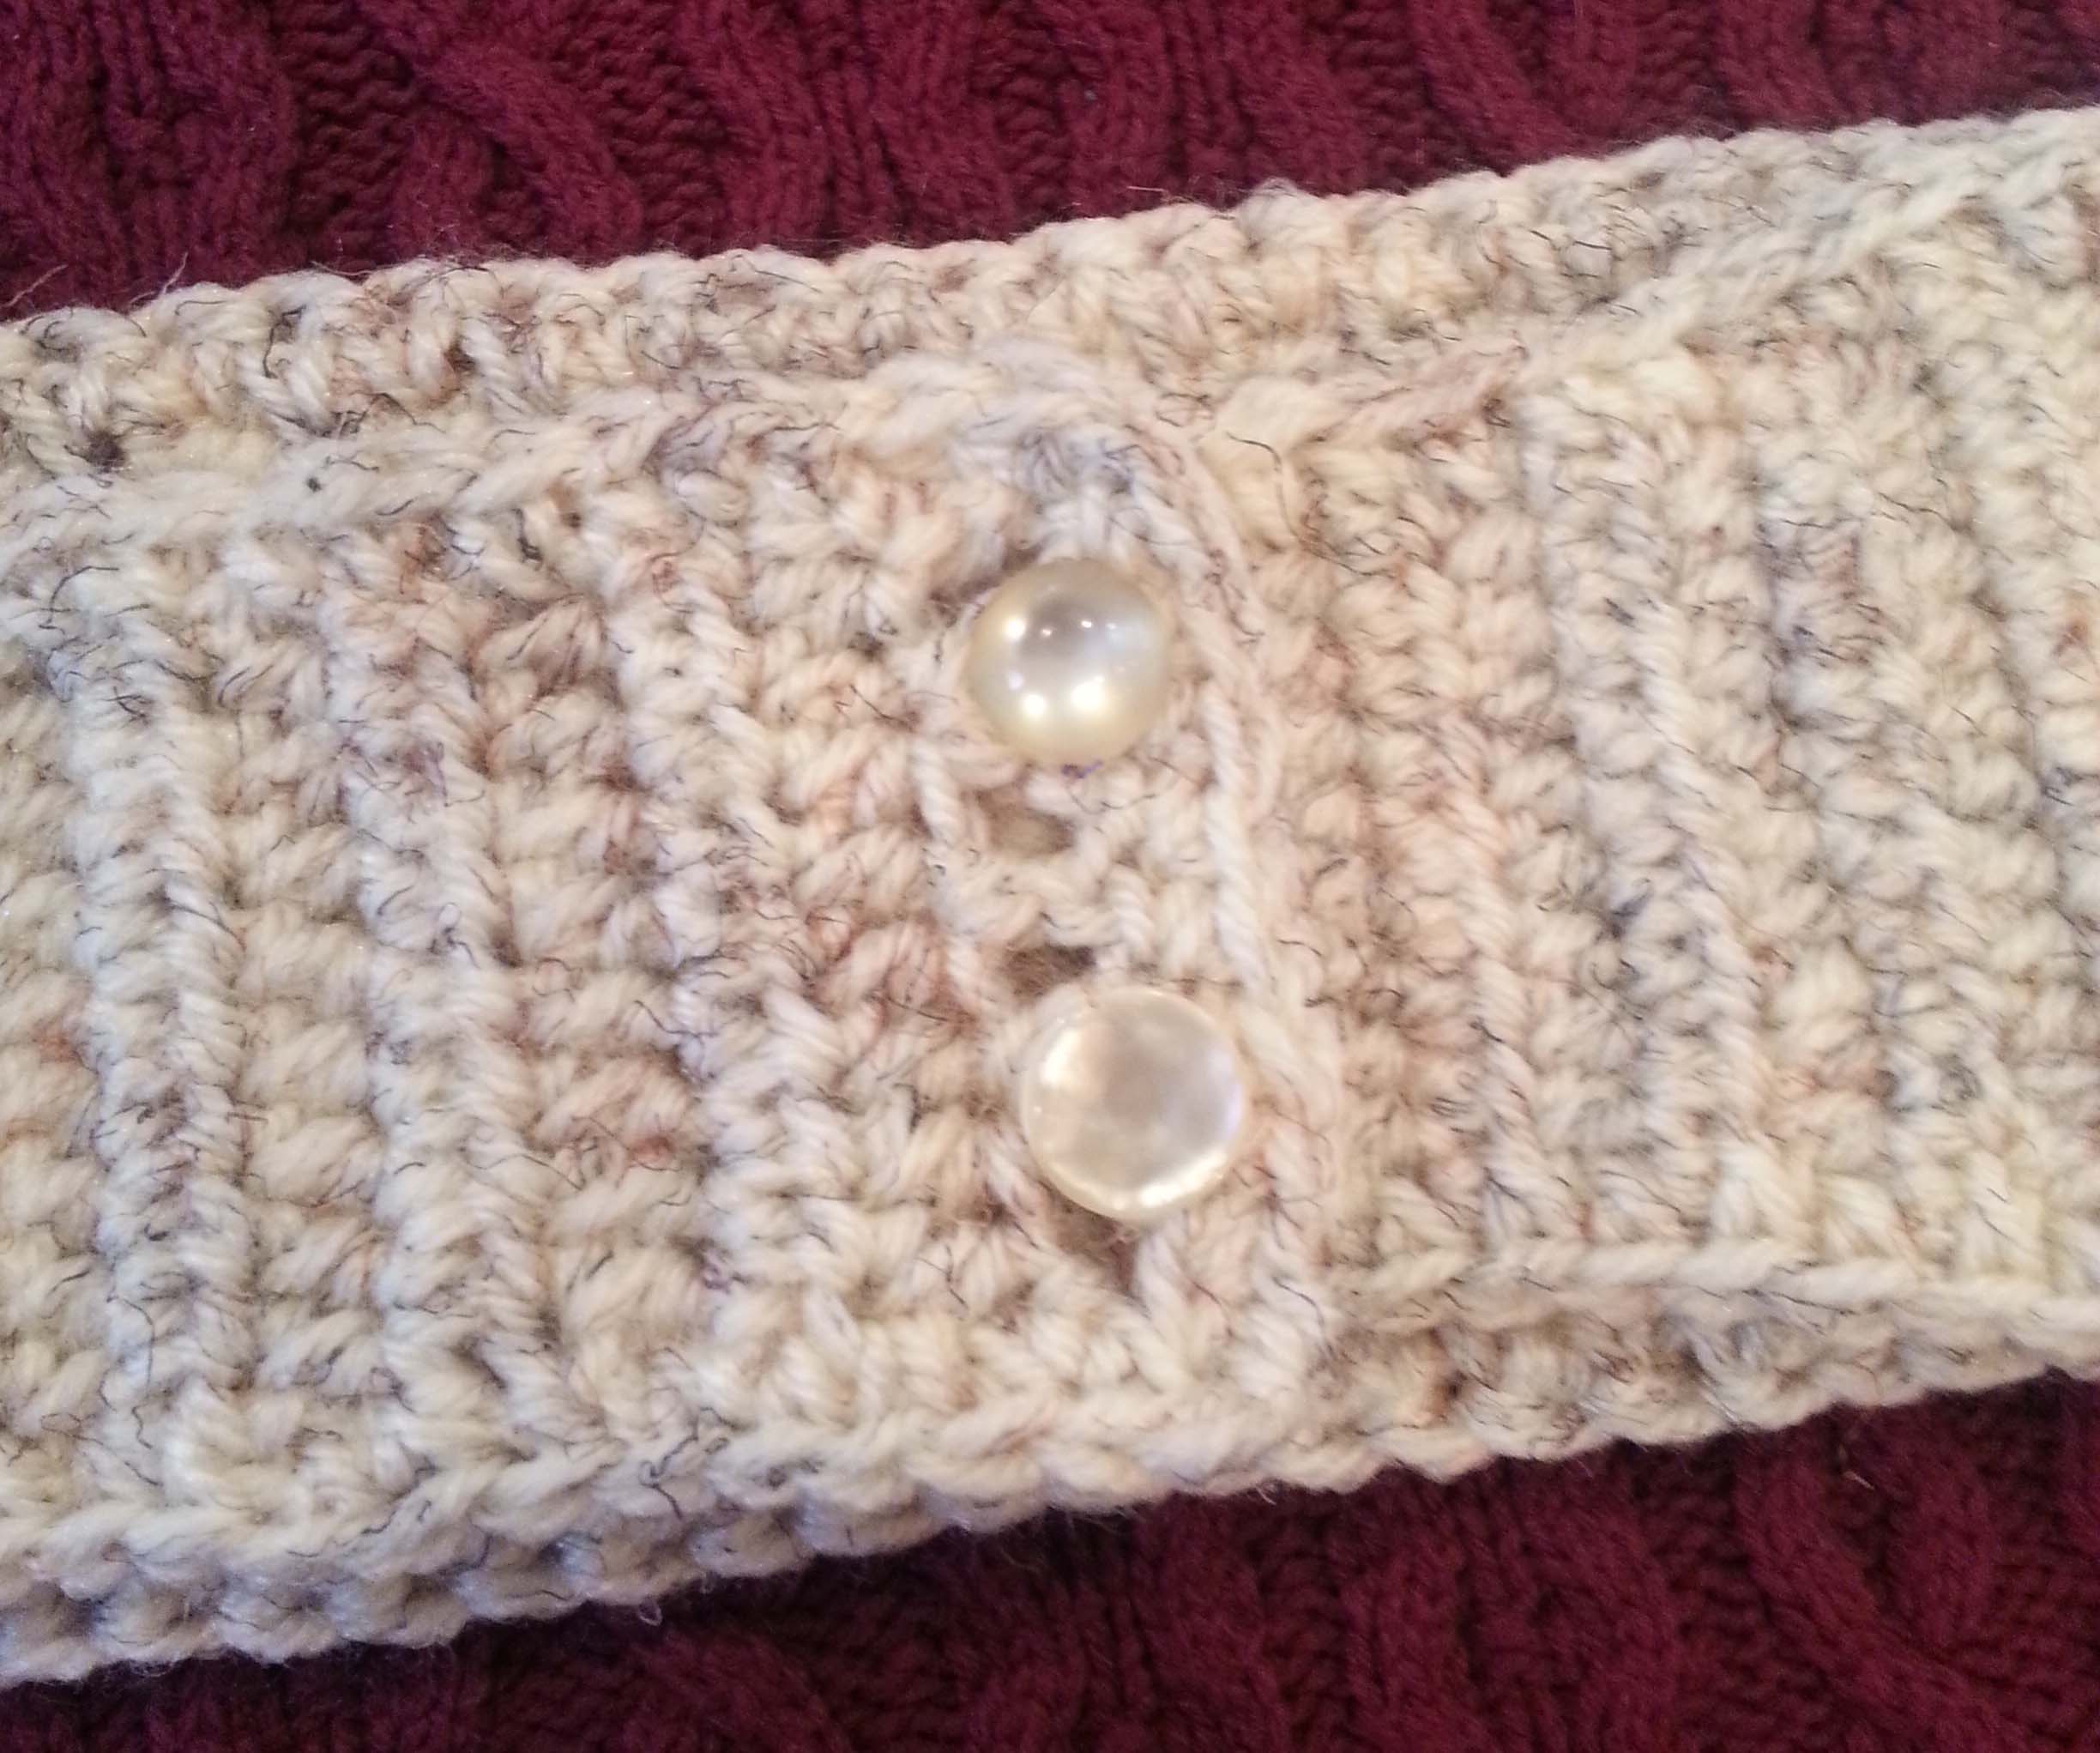
The only thing you have to contend with is how many balls of yarn you are juggling. My favorite way to keep the yarn from tangling is to have the balls snuggly secured in a container. Then I turn the container as I work each color. In the photo above I used a small clean waste bin to hold the yarn.

As you see in the photo I also have my yarn inside a large clear plastic storage bag. If needed I can toss the hat, hook and pattern into this bag and grab the whole thing to take with me to work on while I’m on the go.

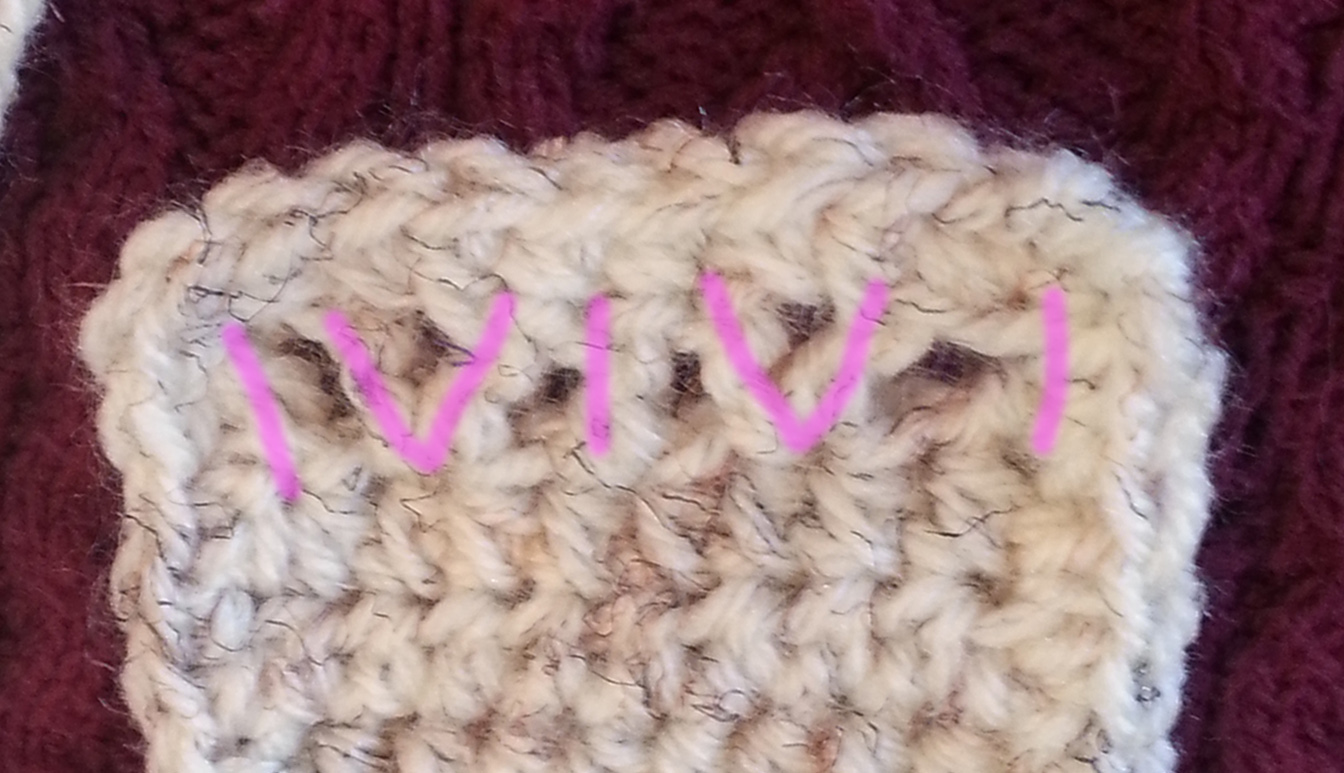
Today I have a hat pattern for you that some may find a bit challenging. Fortunately my video tutorial for my Whirlwind Afghan Square: “Whirlwind How-To Part 1” uses the same technique as the first 8 rounds of the hat, and should help you understand the construction of the spiral.

Whirlwind Hat

Designed by Andee Graves

Skill level:       Intermediate

Finished Size:

21” circumference

Materials:

Yarn

Worsted wt (Sample uses Lion Brand Yarns “Vanna’s Choice” 100% Acrylic (3.5 oz/100g, 170 yd/156 m)

Color A: #105 Silver Blue (used approximately 28 yds)

Color B: #109 Colonial Blue (used approximately 46 yds – this was my Brim color)

Color C: #099 Linen (used approximately 28 yds)

Color D: #146 Dusty Purple (used approximately 28 yds)

Hook

I / 5.5mm

Notions

Yarn/tapestry needle

8 Stitch markers

8 Stitch markers in 3 colors (1 in first color, 3 in next color, 4 in last color)

Gauge

First 5 rounds of pattern = 4” in diameter

Abbreviations/Special Stitches

Adjustable Slip Knot – Beginning tail tightens the loop on the hook shaft. Video on my YouTube Channel if you need help.

Hdc – Half double Crochet stitch

PM – Place stitch marker

FPhdc – Front Post half double crochet stitch

BPhdc – Back Post half double crochet stitch

BPsc – Back Post single crochet stitch

Pattern Notes:

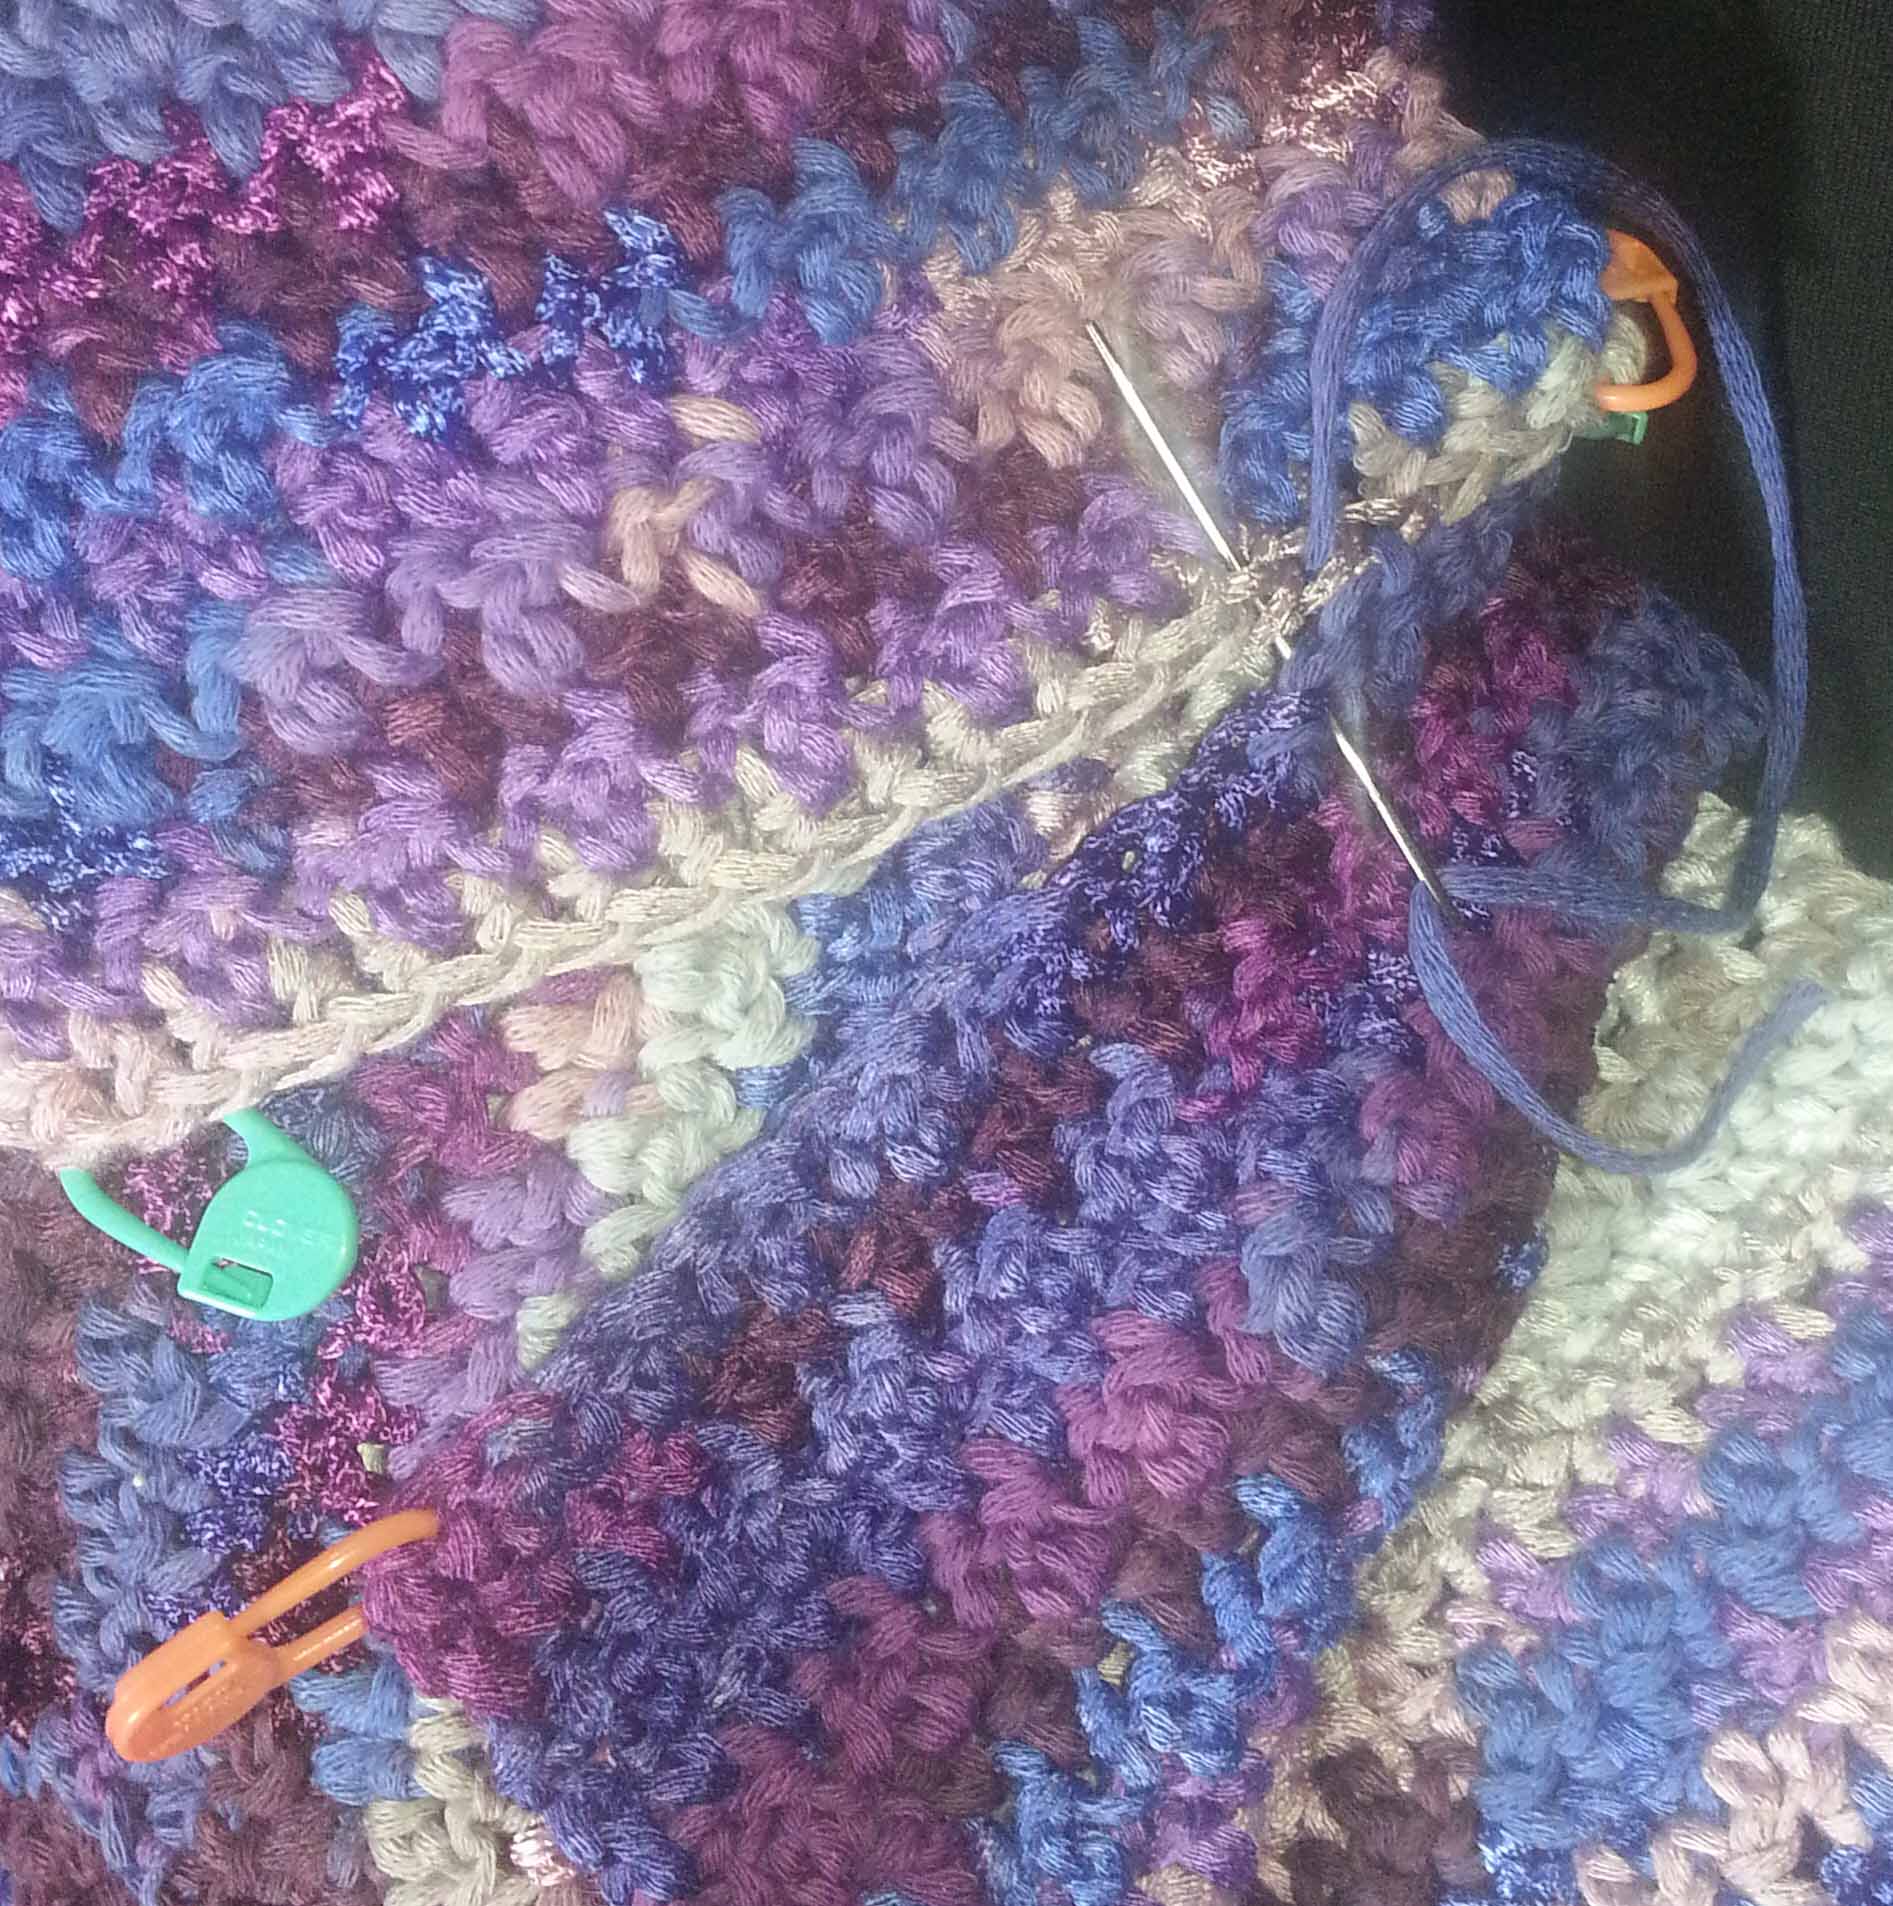
Hat uses 4 colors, follow instructions for using stitch markers so you don’t lose your place.

Color 1 of stitch markers is used to mark last stitch of entire round as well as last stitch/increase point of that color section.

Color 2 of stitch markers is used to mark the other 3 last stitch/increase point of color sections.

Color 3 of stitch markers is used to mark the first increase point in each color section.

When working the first 9 rounds move stitch markers up to 2nd stitch worked in each increase point, For Rounds 10 – 18 you will only be using the markers for the last stitch of each color section.

Instructions

CROWN

Crown at End of Round 9

Rnd 1: Starting with color A make an adjustable slip knot, ch 2, (sc, hdc) in 2nd ch from hook, pull up a long loop and remove hook, with color B *insert hook in center/first ch of round, pull up a loop on hook, ch 1, (sc, hdc) in same center/ch, pull up a long loop and remove hook,* ; Repeat from * to * with Color C and D. PM in each hdc w/end of color/round markers (placing single color marker in hdc of Color D), PM in each sc with first increase markers. [4 sc, 4 hdc]

Rnd 2: *2 hdc in next 2 sts, move st marker to 2nd st worked in each st, pull up long loop and remove hook**, insert hook in next color*; Repeat from * to * 2 times; Repeat from * to ** once. [16 hdc]

Rnd 3: *(Hdc in next st, 2 hdc in marked st, move st marker to 2nd st worked) 2 times, pull up long loop and remove hook, insert hook in next color*; Repeat from * to * 2 times; Repeat from * to ** once. [24 hdc]

Note: Measure gauge after finishing Round 5, if your gauge is small and you don’t want to start over work 10 rounds following the increase pattern, if your gauge is large only work 8 rounds following the increase pattern.

Rnds 4 – 9: *(1 hdc in each unmarked st, 2 hdc in marked st, move st marker to 2nd st worked in marked st) 2 times, pull up long loop and remove hook,** insert hook in next color*; Repeat from * to * 2 times; Repeat from * to ** once. Stitch count for end of Rnd 9 [72 hdc]

SIDES9th-rnd-inc-markers-removed

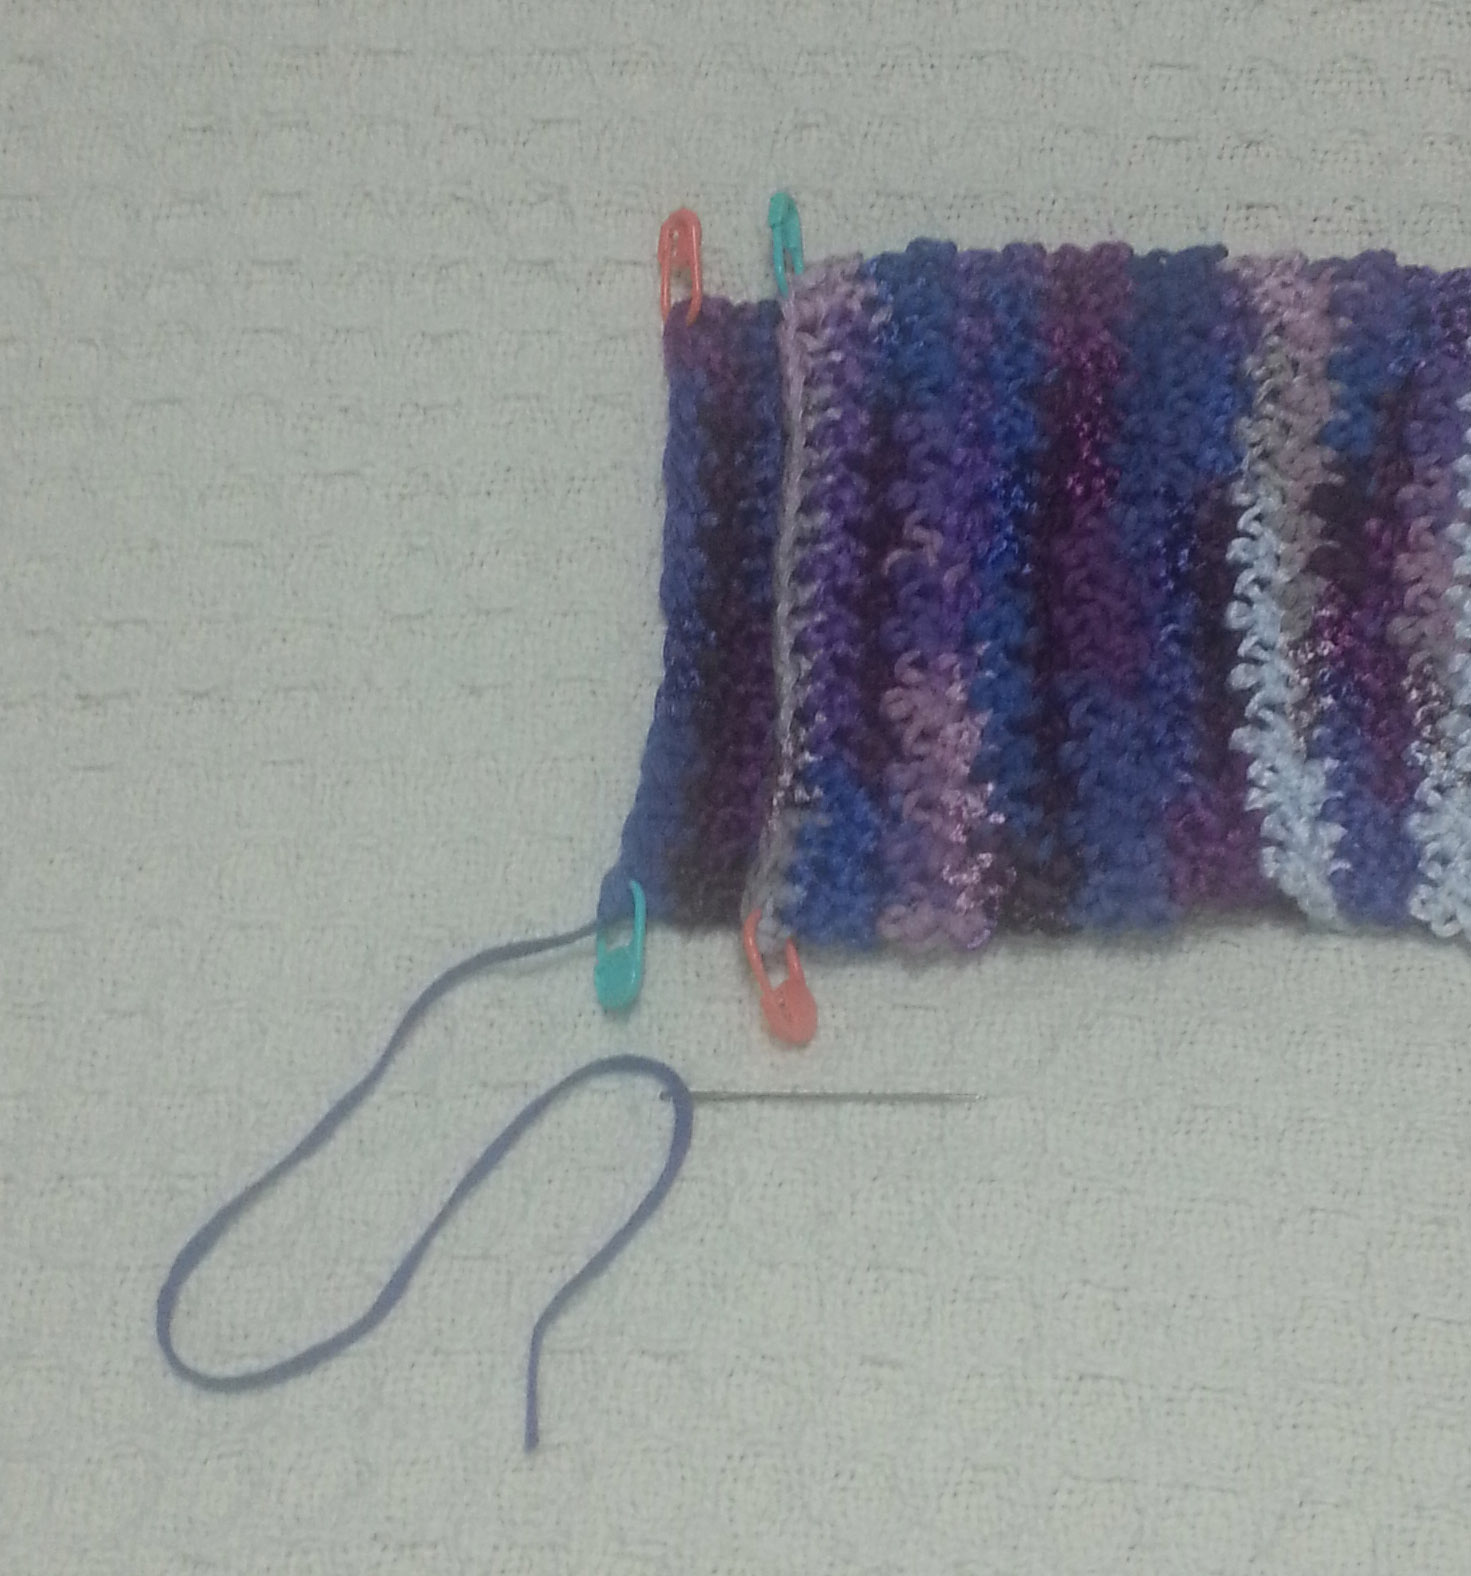
Remove the Color 3 stitch markers – you will not be increasing any further.

st-marker-side-of-round-9-last-st

I put one of these stitch markers in the side of the last stitch in Round 9, this makes it easier to keep track of the number of side rounds worked.

working-sides-with-color-sections

Rnd 10: * hdc in each st until work in marked st, move marker up to st worked in marked st,** insert hook in next color*; Repeat from * to * 2 times; Repeat from * to ** once. [72 hdc]

Rnds 11 – 20: Repeat Rnd 10.

Rnd 21: Step down to one color: Decide which of your 4 colors you want to be your brim color,

stepping-down-colors

then with each of the other 3 color segments: Hdc in each st until one st remains un-worked before the marked st, sc next st, slip st loosely in next st, pull up a long loop, remove st marker.

With brim color: Hdc in each st ending in the marked st, place stitch marker in last st;

Go back to other 3 colors: slip st snugly in next st, fasten off and pull end thru last slip st.

Stitch counts at end of Round 21 [66 hdc, 3 sc, 3 loose slip st]

BRIM

Rnd 1: Hdc in each st around, move st marker up to st worked in marked st. [72 hdc]

Rnd 2: (FPhdc next st, BPhdc next st) 36 times. [36 FPhdc, 36 BPhdc]

Rnd 3 (FPhdc next st, BPhdc next st) 35 times, FPhdc next st, BPsc next st, loose slip st next 2 sts, slip st snugly next st, fasten off and pull end thru last slip st. [35 BPhdc, 36 FPhdc, 1 BPsc, 2 loose slip st]

Finishing

Weave in tails.

Now have some fun making hats. Play around with the colors you use, make 2 arms of the spiral in 1 color and the other 2 arms in a contrasting color for a 2 color version. Mix it up with using a variegated yarn for one of the arms and pulling solid colors for the yarns you make the other 3 arms with.

Fans & Lace Afghan Square

************

October 13, 2016: Hello dear readers and new visitors just a little update to this post.

Happy Birthday to Me! I’m 21 today! No, not 21 years old, my Fans & Lace Afghan Square is block #21 in the 2016 Moogly Afghan CAL.

If you hadn’t heard about the Moogly Afghan CAL it’s not too late to join the fun. You can hop on over to Mooglyblog.com to get all the details and see Tamara’s interpretation of my square.

My video tutorial “Fans & Lace Square – Part 1” for this pattern will be is up on my YouTube Channel this Saturday.

Thank you so much to Veronique HoRaive for providing a French Translation of this pattern, you can find the PDF of the pattern here. fans-and-lace-afghan-square-french-1

Check out today’s blog post to find for some fun ideas on playing with color choices and the number of colors used in the square. “Changing Color, Changing the Look”.

************

It’s October again and the first week has gone flying by! I’ve less than a week before I celebrate my birthday, but I thought I would get an early start with my present to all my lovely readers.

fans-n-lace-square-3-andee-graves-m2h-designs

This is my newest afghan square. I was playing with changing the height of stitches within the rounds. This is a skill building pattern with techniques that some may find challenging. Next week I’ll have a video on my YouTube channel that will walk you thru the pattern and the tricky bits.

I worked my sample square with just 3 colors, but you can use fewer or more than that. Next week I will also have a post showing you how changing the number of colors and when you change colors can dramatically change the appearance of your square.

FANS & LACE AFGHAN SQUARE

Designed by Andee Graves

Skill level:       Intermediate

Finished Size:

12” square

Materials:

Yarn

Worsted wt (Sample uses Lion Brand Yarns “Vanna’s Choice” 100% Acrylic (5 oz/142g, 251 yd/230 m)

Color A: #142 Rose (sample used approximately 52 yards)

Color B: #101 Pink (sample used approximately 48 yards)

Color C: #146 Dusty Purple (sample used approximately 38 yards)

Hook

I / 5.5mm

Notions

Yarn/tapestry needle for weaving in ends

Gauge

First 2 rounds of pattern = 2” across square

Pattern Notes

Start square with an adjustable slip knot. Beginning tail tightens the loop on the hook. *If you haven’t ever used an Adjustable Slip Knot this video shows you how.

Round 2 specifies “sl st loosely”, this means work the indicated slip stitches similar to a chain stitch and do not pull the working loop to tighten them as in a joining slip stitch. You will be working into those loose slip stitches in Round 3.

Special Stitches and Abbreviations

(Standing dc) Standing Double Crochet: make slip knot in yarn and place loop snugly on shaft of hook, yo, insert hook into indicated st, yo, pull up a loop, [yo, pull thru 2 loops on hook] 2 times. If substituting for a chain start of a round, do not work the first 3 chains of the round instructions.

(3dc Dec) 3 double crochet decrease: YO, insert hook in first st, YO pull up a loop, YO pull thru 2 loops, [YO insert hook in next st, YO pull up a loop, YO pull thru 2 loops] 2 times, YO pull thru all remaining loops on hook.

(V-st) V-stitch: (dc, ch 1, dc) in indicated st or sp.

(Fan) 10 Treble Fan: (5 Tr, ch 1, 5 Tr) in indicated st or sp.

(CL) 3 double crochet Cluster: [YO, insert hook in indicated st or sp, YO pull up a loop, YO pull thru 2 loops] 3 times, YO pull thru remaining loops on hook.

(8TrShl) 8 Treble Shell: (4 Tr, ch 1, 4 Tr) in indicated st or sp.

(GrnShl) Granny Shell: 3 dc worked in indicated st or sp.

Instructions

Rnd 1: Starting with Color A, ch 4 {counts as center and first dc}, 11 dc in 4th ch from hook, sl st to top of beginning ch-4. Gently pull beginning tail to tighten center. [12 dc]

Rnd 2:  [Sl st loosely before next dc in space between stitches, ch 3, 3dcDec worked across next 3 sts, ch 3] 4 times, sl st tightly into first loose sl st. Fasten off. [4 3dc dec, 8 ch-3 sps]

Rnd 3:  Change to Color B. (Standing dc, ch 1, dc) in any loose sl st, {counts as first V-st}, [*ch 2, skip ch-3 sp, (sc, ch 3 sc) in top of Dec, ch 2, skip ch-3 sp,* V-st next sl st] 3 times, Rep from * to * once, sl st to first V-st. Fasten off. [8 sc, 8 ch-2 sps, 4 ch-3 sps, 4 V-sts]

Rnd 4:  Change to Color C. Begin as with Standing dc, YO, insert hook into ch-1 sp of any V-st in Rnd 3, YO, pull up a loop, YO, pull thru 2 loops on hook, [YO, insert hook in same ch-1 sp, YO pull up a loop, YO pull thru 2 loops] 2 times, YO pull thru remaining 4 loops on hook {counts as first CL}, [*skip 4 sts, Fan in next ch-3 sp, skip 4 sts,* CL in next ch-1 sp] 3 times, Rep from * to * once, sl st to beginning CL. Fasten off. [4 CL, 4 Fans]

Rnd 5:  Change to Color B. Standing dc in any CL from Rnd 4, ch 1, dc in same st {counts as first V-st},[*ch 2, skip 2 sts, sc next st, ch 3, skip 2 sts, (sc, ch 3, sc) in next ch-1 sp, ch 3, skip 2 sts, sc next st, ch 2, skip 2 sts,* V-st next st] 3 times, Rep from * to * once, sl st to first V-st of round. Fasten off. [16 sc, 4 V-sts, 12 ch-3 sps, 8 ch-2 sps]

Rnd 6:  Change to Color A. Standing dc in ch-1 sp of any V-st in Rnd 5, [ch 1, dc] 2 times in same ch-1 sp, [*skip ch 2 sp, (dc, ch 2, dc) in next sc, skip 1 ch-3 sp, 8Tr Shl in next ch-3 sp, skip next ch-3 sp, (dc, ch 2, dc) in next sc, skip next ch-2 sp,* ({dc, ch 1} 2 times, dc) in next ch-1 sp] 3 times, Rep from * to * once, sl st to first dc of Rnd. Fasten off. [28 dc, 32 Tr, 12 ch-1 sp, 8 ch-2 sp]

Rnd 7:  Change to Color C. Standing dc in first ch-1 sp in direction of work from corner ch-1 sp, dc in same ch-1 sp, skip one st, 2 dc next ch-1 sp, [*skip 2 sts, GrnShl in next ch-2 sp, skip 2 sts, GrnShl next st, skip 2 sts, (GrnShl, ch 2, GrnShl) in next ch-1 sp, skip 2 sts, GrnShl next st, skip 2 sts, GrnShl in next ch-2 sp, skip 2 sts,* {2 dc in next ch-1 sp} 2 times] 3 times, Rep from * to * once, sl st to first dc of Rnd. [24 GrnShl, 16 dc, 4 ch-2 sp]

Rnd 8:  Ch 3 {counts as dc}, *dc in each st along side until reach corner ch-2 sp, (2 dc, ch 2, 2 dc) in corner ch-2 sp,* Rep from * to * until work last corner of square, dc in each st until reach first dc of Rnd, sl st to first dc. Fasten off. [104 dc, 4 ch-2 sp {26 dc each side}]

Rnd 9:  Change to Color A. (Standing dc, ch 1, dc) in 12th dc in direction of work from ch-2 corner sp, {counts as first V-st}, [*skip 2 sts, V-st next st,* Rep from * to * until 2 dc remain before corner ch-2 sp, (V-st, ch 2, V-st) in corner ch-2 sp] 4 times, Rep from * to * until 2 sts are left before first V-st of Rnd, skip 2 sts, sl st to first st of V-st. [40 V-st, 4 ch-2 sp {10 V-st each side}]

Rnd 10: (Loosely sl st, ch 3, 2 dc) in first ch-1 sp {counts as first GrnShl}, [*GrnShl in ch-1 sp of each V-st* until reach ch-2 sp at corner, (dc, ch 2, dc) in corner ch-2 sp] 4 times, Rep from * to * until reach first GrnShl of Rnd, sl st to first st of GrnShl. Fasten off. [40 Gr Shl, 8 dc, 4 ch-2 sp {10 GrnShl each side}]

Rnd 11: Change to Color B. (Standing dc, ch 1, dc) in middle st of any GrnShl along a side {counts as first V-st}, [*V-st in middle st of each GrnShl *until work in last GrnShl before corner ch-2 sp, (V-st, ch 2, V-st) in corner ch-2 sp] 4 times, Rep from * to * until reach first V-st of Rnd, sl st to first st of V-st. [48 V-st, 4 ch-2 sp {12 V-st each side}]

Rnd 12: Repeat Rnd 10. [48 GrnShl, 8 dc, 4 ch-2 sp {12 GrnShl each side}]

Finishing

Weave in tails and block.

My New Book!

133673

Well, I’ve been mostly quiet about this project, waiting for the book to actually be available. You can purchase it now on the Annie’s Craft Store, online here.

Pile of Swatches

I’ll be telling you a lot more about this book and my inspiration and processes creating these designs over the next couple of months. You might recall this teaser shot of swatches from last Autumn. That was the beginning of this book.

For now, I’ll just leave you with some eye-candy of the designs so beautifully photographed by the folks at Annie’s.

133673_6

133673_5


133673_4


133673_3


133673_1

133673_2


Modifying a Pattern

daisies-in-vals-garden
Daisies in Val’s Garden

My friend Val and I get together most Tuesday mornings to crochet and visit. This Tuesday she was determined to finish up some small projects that she had in her basket. One of those projects was a headband she was making from my “Springtime Headband” pattern.

headband-open

She wanted the headband to be adjustable, so I came up with a modification to add a button band and buttons to it. We were both pleased with how the finished headband looked and Val was really happy to have one of her projects completed.

Blog Headband alone


I thought some of my readers might enjoy using this modification as well. I’m posting the changes we made. The original pattern can be found on my “Crochet and Springtime” post from March 2015. The post also includes a photo tutorial on making cluster and puff stitches.

buttoned-up

SPRINGTIME HEADBAND w/BUTTONS

modifications and design by Andee Graves 

SKILL LEVEL: Intermediate

FINISHED MEASUREMENTS

Headband is approximately 3.25”/8.125cm wide x 23”/55cm long.

YARN

Worsted weight yarn – approximately 35g or 82 yards

Val was using Lion Brand Yarns, Vanna’s Choice, I used Lion Brand Yarns, Wool-ease for my original project.

CROCHET HOOKS

Size US 7 / (4.5mm)

ADDITIONAL MATERIALS

2 – buttons 3/4 inch diameter

Stitch markers

Yarn needle

GAUGE

6 rows & 9 sts in hdc = 2” 

SPECIAL STITCHES

3 DC Cluster Stitch (Cl): (Yo, insert hook into indicated st or sp, yo, pull up a loop, yo, pull thru 2 loops on hook) 3 times, yo, pull thru 4 loops remaining on hook.

Puff Stitch (Puff): (Yo, insert hook into indicated st or sp, yo, pull up a loop to desired height) 5 times, 11 loops on hook, yo, pull thru 10 loops on hook, 2 loops left on hook, yo, pull thru remaining 2 loops on hook.

Half Double Crochet 2 Together (hdc2tog): Yo, insert hook into indicated st or sp, yo pull up a loop, insert hook in next st, yo pull up a loop, yo pull thru all 4 loops on hook.

V-Stitch (V-st): (dc, ch 1, dc) in indicated st or sp.

NOTES

The Cluster stitches and Puff stitches in this project have more texture because they are “squished” between 2 shorter stitches. The texture is created on the back of the rows. The finished project will have the textured side as the right side of the fabric.

Once the first 65 rows of the headband are crocheted button band row is added and edging is worked all the way around with the right side of fabric facing you.

INSTRUCTIONS

For the buttoned version of this headband work Rows 1 – 65 in original pattern.


Button Band:

buttonband-reading-sts

Row 66: Turn, DO NOT CHAIN, sc in first st, ch 2 (counts as first dc), *sk 1 st, V-st next st, sk 1 st, dc next st, Repeat from * once. [3 dc, 2 V-st]

buttonband-st-diagram

EDGING 

Ch 1, with RS facing turn band to work along first long edge, *work sc spaced evenly along edge in ends of rows (3 sc in the ends of the every 2 rows), ch 2, turn to work along end of headband, sc in next 9 sts, ch 2*, turn to work along second long edge, Repeat from * to *, sl st to first sc in round.

FINISHING

Weave in ends. Block lightly, if desired.  Sew buttons to right side (textured side) to align with openings in V-sts.

With the colder weather we are beginning to have up here on the mountain it is time to have some extra layers of warmth handy when I’m walking the dog or taking the boys to school. I may be putting an ear warming headband in the glovebox of my car, just in case.

They are also great quick gift projects for those of you thinking about your holiday gift-giving lists.


The Dilemma of Naming Designs

As I have said before, trying to think up names for my designs can be one of the most challenging aspects of my work. It’s not just me though it turns out. Thursday this week I was facing the naming struggle once again and decided to tweet about it.

“Sometimes the hardest thing about being a #crochet designer is coming up with a name for my designs.”

My tweets show up on my Facebook page and I had a chuckle today when I finally looked at my page today and read the many responses from loads of my yarnie friends.

Some of my designer friends had funny stories about how they came up with a name. My friend, Bonnie Barker, had some help from family recently.

“Yep. I get that! That’s why when I was out of ideas (while working on my latest book), I spoke out loud wondering and my son replied with a silly (but catchy) name, and I ran with it! That’s how the Fergus Shrug got its name.”

My friend Kathryn White shared her solution, that sometimes creates it’s own problems. Turns out the talented Vashti Braha has this same solution and problem.

“Oh I know that problem. Whenever I see or hear a possible name I try and jot it down. But then I have to remember where I put the note….”

There were a number of designer friends who had some very helpful advice that I will be taking note of.

My good friend April Garwood of Banana Moon Studio says,

Lately if I can’t think of one easily I use city names in Oklahoma. There is a list of all of them on Wikipedia. Maybe choose a theme: flowers, birds. I also once used part of a scientific name. The color of the scarf reminded me of purple cabbage, so I looked up the scientific name for the plant. That became Brassica Scarf.”

The talented designer and editor of “Crochet! Magazine” for Annie’s Publishing, Ellen Gormley had this helpful advice,

“Street names, city names, flower names, rock/gems, color names, simple words in other languages… I look at all of these to help.

My dear friend, Brenda Bourg shared her favorite resource,

I have a site with over 20,000 names in all different languages. It makes it pretty easy to find names. If I can pronounce it, and I like the meaning, I run with it.

I think the suggestion that made me smile the most was from Elfie, one of my good crocheting buddies from Kansas City,

“Name then after your friends… for instance a hooded oversize sweater made with dark and sparkley with hints of green yarn would be an Elfie in the woods ..lol…or a purple butterfly shawl Erin about town..”

I still need to come up with a name for this latest design, in fact I’m working on 6 designs right now that are in need of a name. I tend to like “geeky” names or names that have a pun to them.

Playing with Triangles Shawl

Recently I named this series of blog posts and the resulting shawl pattern “Playing with Triangles” which is a bit of a geeky inside joke.

Sophisticated Simplicity Necklace - Andee Graves/M2H Designs 2

And there was my alliterative and contradictory “Sophisticated Simplicity Necklace”.

Mountain Whisper Shawl

Last fall when I was stumped for a name for this light and lacy shawl, I asked visitors to the blog to vote on a name. “Mountain Whisper Shawl” was the name that won. I tend to stick “mountain” into names as a nod to where I live.

One thing is clear, naming my designs may not get easier. Fortunately that won’t stop me from dreaming up new ones all the time. Have a great weekend dear readers. I’m off to see a special exhibit at the Denver Art Museum tomorrow and then I’ll be teaching crochet to knitters on Sunday at the Longmont Yarn Shoppe.


A Few Quick Projects

I’m down to the last minute stuff for my trip next week to the Knit & Crochet Show a.k.a. Chain Link.

Been a busy week getting the household in shape for me to be gone 7 days. My boys will have it completely destroyed by the time I get back, but I try to have it looking nice before I head out the door.

I’ve gathered up everything I want to take, now I just need to weed it out to what I really need so that my suitcases don’t go over the weight limit.

I’ve finished 2 sweaters that are currently blocking and I’ll be sharing more with you about those after my return from this trip. Meanwhile I wanted to show you 2 fun neck wear pieces that I finished for the trip.

Loopy de Loop Necklace

This is my “Loopy de Loop Necklace” made with just one ball of Classic Elite’s “Santorini” yarn. The variety of colors and textures really looked great in this simple fluffy necklace. I’ll be sharing the pattern for it along with a fun video later this month autumn. The blog post with the pattern is done now! “Loopy de Loop Necklace” (August 27, 2016) and the link to the video on my YouTube Channel is here.

Sweet Song Decorative Scarf

This is my “Sweet Song Decorative Scarf” made with one hank of Lion Brand’s Silk. I bought this yarn and the beads at the Knit & Crochet Show a couple years ago and finally came up with the perfect project for it.  The toughest part of working this project is that is starts off with a very long chain foundation and the regular chain stitches are periodically interspersed with beaded chain stitches.

I’m hoping to have a helpful video up for this project soon, though it could be as late as August. In the meantime here is the written pattern.

Sweet Song Decorative Scarf

design by Andee Graves

Skill Level: Easy

Materials

Yarn: Lion Brand Yarns “LB Collection Silk”, 100% Silk (1.75 oz/50 g; 163 yds/150 meters): 1 hank

Hook: Clover Amour Size 7/4.5mm

Beads: 600 Size E glass beads thread all on yarn before starting project.

Gauge: 27 chains = 5.25″, 9 rows Shells = 3.25″

Special Stitches

Beaded Chain Stitch (BdCh): slide bead up near hook, yo and pull thru loop on hook capturing bead on back bump of chain stitch.

Slanted Shell Stitch (Shl): (dc, ch 2, 3 dc) in indicated place.

Pattern Notes

The first 2 rows are the most difficult, check count carefully while working them.

Instructions

Row 1: Chain 11, *(BdCh, ch 2) 4 times, BdCh, ch 14,* Repeat from * to * 11 times.

Row 2: Turn, dc in 4th chain from hook, sk 3 chs, Shl next ch st, sk 2 chs, dc next ch, *ch 3, (BdCh, ch 2) 4 times, BdCh, ch 3, sk 19 chs, dc next ch st, sk 3 chs, Shl next ch st, sk 2 chs, dc next ch, * Repeat from * to * 11 times.

Row 3 – 11: Ch 3, turn, * dc in next dc, sk 3 dc, Shl next ch-2 sp, sk 1 dc, dc next dc, ** ch 3, (BdCh, ch 2) 4 times, BdCh, ch 3, sk 19 chs,* Repeat from * to * until reach last Shl segment, Repeat from * to ** once.


Is it too Hot to Crochet?

Summer is truly here now. Even up on my mountain we are feeling the heat. Of course what seems “hot” to us is nothing compared to what friends and family all over the country are dealing with. This past week temperatures have been over 100F in lots of places. Making me very grateful for our easy days of 87-90F days at my house.

When I go down to town to do errands it can be significantly warmer. But at least in Colorado humidity isn’t the factor that it is for many others. I’m looking forward to seeing all my yarnie friends at the conference in a few weeks, but it will be in Charleston, South Carolina. I suspect that I may be melting in the heat and humidity that they are experiencing.

In heat like that how does one keep crocheting? My choice for travel and for hot weather crochet is to work with small projects.

If afghans are your favorite type of project this is the time of year to tackle a motif afghan that requires lots of smaller pieces to be completed before being all sewn or crocheted together. The motifs are great projects to carry along with you to the beach and outings thru the summer. Then when the cooler weather finally rolls around you can do the joining work to make them into an afghan.

My 2 squares today

If you want some fun motifs to play with try my “Annetta Square” here on the blog.

Hot Spot Square copyright 2015 M2HDesigns/Andee Graves
Hot Spot Square
copyright 2015 M2HDesigns/Andee Graves

Or my “Hot Spot Square”.

I often take advantage of the warm weather season to get ahead on my holiday gifts. I work on my cotton thread snowflakes. They are fun and relatively quick projects that don’t take up a lot of room in my project bag. I can get a nice stack of them finished up before the hot weather is over with. The stiffening stage goes faster too as they dry super fast in the warmer weather.

Light as Lace Snowflake - M2H Designs
Lacy Snowflake – M2H Designs

I’ll be making quite a few of my snowflake pattern “Lacy Snowflake” that I designed for last December. You can find the pattern here on the blog. Who knows, maybe you’ll feel cooler crocheting snowflakes.

My very favorite projects for gift-giving and small project crochet are Hats. All my boys (including Himself) love getting hats for Christmas. I made a hat for my Dad a couple of years ago for Christmas and it was well received too. I also like making hats for various charities.

I’ve taught classes on crocheting hats at my local LYS and will be teaching my “Perfect Fit Crocheted Hat” class at the Scotts Bluff Valley Fiber Arts Fair this September. I also have a couple of other hat patterns in my M2H Designs line.

Spiraling Xs Hat 3 Andee Graves

This is my “Spiraling Crosses Hat” and is made in a slightly mesh like stitch pattern that allows for a combination of breathability and warmth. You can purchase the pattern for this hat in my Ravelry shop here.

Mtn Top Beanie full view

My newest M2H Designs pattern is the “Mountain Top Beanie” in my Ravelry Shop. This hat is crocheted in a super stretchy all over stitch pattern that looks beautiful in variegated yarn or solid colors. I made this sample in Ella Rae Lace Merino Aran weight. This is a gorgeous yarn that was lovely to work with. I’m planning on taking my oldest son to the Longmont Yarn Shoppe to pick out the color he wants to make him a beanie to wear in the coming school year.

Crocheting at Reunion

This hat was one of the projects I was working on during our recent trip to Kansas for a big family reunion. The project fit entirely into one of my small project bags with room in the outside pocket for my phone. Worked great for a small crochet project to keep my hands busy while visiting with family. Most importantly it wasn’t too hot to work on as crocheting on a larger project could have been.

So to answer the question I posed in my title today. No, it isn’t too hot to crochet. You just need the right project. Air conditioning is a good idea too. Stay cool all my Northern Hemisphere friends. For those of you in the Southern Hemisphere heading into your cold season we may soon be jealous of you.

Springtime Retreat

I’m a little tardy getting my weekend post up because I ran away from home yesterday. Well, not really. I’m writing you from lovely New Jersey at Jan’s house. Had quite the travel adventures getting here, but eventually it all worked out. Of course that means I arrived at Jan’s door at 2 a.m. today.

As you all know, Jan and I love to get together and crochet, so this is sort of our own little springtime retreat. Jan took time off from work and the 2 of us will be hanging out with hooks and yarn. We are also going to do a few fun day trips, heading into NYC to visit MoMA on Monday and maybe will get to see some of our NY friends while there.

The later part of next week is predicted to be fairly rainy, so we will be kicking back with some crochet projects and enjoying each other’s company. Of my 2 suitcases I checked, one is filled with crochet projects and yarn, so I’m all set.

Springtime Cowl 1

In the meantime, I finished my experiments with the Classic Elite Yarn’s “Santorini” yarn. It did grow up to become a cowl, but I changed the width of my fabric in order to get a bit more length from the 2 balls of yarn I had. I like the look of the finished project and it is a nice size for a little added warmth in transitional weather.

I wore it when traveling yesterday and it was handy at 1 a.m. waiting outdoors for the car service to pick me up. On the plane and in the airport I wore the cowl as an infinity scarf and when I needed warmth I doubled it.

Springtime Cowl 2

For those of you that would like to try out this design I have a pattern for you.

Springtime Cowl

Designed by Andee Graves

Skill – Beginner

Stitches you need to know: Chain (ch), Double Crochet (dc), Single Crochet (sc)

Finished size: Approximately 5” wide x 38” around

Special Stitches

Materials

Yarn: Classic Elite Yarns “Santorini”; 58% Vicose/42% Cotton, 50 grams/125 yards. (sample was made with 2 balls of color #2156)

Hook: I-9/5.5mm

4 stitch markers; 2 in each color

Blunt yarn needle

Gauge:

15 rows and 16 stitches in pattern = 4”

Pattern Notes

First row is worked in the back bump or “bar” of each chain st so that base of row will be Vs like the top of stitches.

When reach the last row fasten off with a long tail, this tail will be used to sew the final row stitches to the base of the first row of stitches.

Springtime cowl finished fabric

Twisting the strip of fabric 180 degrees turns your project into a moebius, if you want you can skip the twist and just sew the ends together to create a ring. Another option is to weave in the ends and make your strip of fabric into a short scarf.

Project used almost all the yarn in the balls, so if you don’t get gauge you may need to shorten your foundation or the number of rows you work.

Instructions

Row 1: Ch 21, working in back bumps, sc in 2nd ch from hook, (dc next st, sc next st) 9 times, dc in last ch. (10 sc, 10 dc)

Row 2: Ch 1, turn, sc in first st, (dc next st, sc next st) 9 times, dc in last st. (10 sc, 10 dc)

Rows 3 – 138: Repeat Row 2. Fasten off with long tail.

Springtime cowl fold n mark2

Lay out strip of fabric horizontally and mark top corners with one color of stitch marker, then mark bottom corners with other color of stitch marker.

Springtime cowl flipped

Fold strip so ends are close together with matching colors of stitch markers, twist top end so that stitch markers are mis-matched.

Springtime Cowl sewing

Using ending tail whip stitch tops of Row 138 stitches to bottom of Row 1.

Weave in all loose tails.

Gently block if desired.

Wishing all of you a very lovely spring weekend and a Happy Mother’s Day.

Budding Leaves and Lilacs

It’s beginning to look like springtime finally. Off the mountain in town a lot of the trees are showing leaves and the flowers are in bloom. Up top though it’s been a slower sense of the season. Yesterday I was at my friend and neighbor V’s house for our weekly crochet and crafting visit.

V's Garden last Friday
V’s Garden last Friday

V has a lovely garden and a number of her bulbs were showing off blooms. Best of all to me though was that her lilac bushes are getting leaves and buds. I didn’t get any photos though since the weather got wet and cold. Hopefully the weather will be kind and the lilacs won’t be frozen before blooming and sharing their lovely scent.

Meanwhile we are still getting some cold days and a bit of snow up here on my mountain. We are at 8,400 feet above sea level and V’s house is around 7,000 feet.  There is a fairly big difference in the seasons between our houses, and V is a much more talented and dedicated gardener than I am.

Lilacs at Denver Zoo Spring 2012

I need to make a trip to the Denver Zoo with my family soon as the lilacs there are generally in bloom long before the ones up here on the mountain. They have a lot of lilacs on the zoo grounds and I always try to make at least one visit there while they are in bloom.

M2H Designs: Tumbling Leaves Scarf

I decided it’s time to crochet some transitional pieces to add to my wardrobe. It’s been over 4 years since I published my “Tumbling Leaves Scarf”. This is a fun project to crochet for experienced or intrepid intermediate stitchers.

Mochi Plus Scarf WIP

Originally I created this design with a bulky yarn worked with a P size hook, but I wanted to try it in a lighter weight yarn with a smaller hook for a skinny scarf to wear this spring. I picked a ball of Crystal Palace’s “Mochi Plus” that reminded me of my favorite colors of springtime and used an I (5.5mm) hook to crochet with.

Scarf SectionI love “Mochi Plus” because it comes in so many lovely color combinations. I enjoy working with and designing with yarns that have long runs of color that blend together and this yarn doesn’t disappoint. My original scarf was 6.5 inches wide and 75 inches long. Using the “Mochi Plus” and the smaller hook this scarf came out 3.5 inches wide and 41 inches long before blocking.

Because of the faux motif design of this scarf I am going to try a different blocking technique with it and will share my results with you later.

If you’d like to make a scarf like this you can purchase the pattern in my Ravelry shop by clicking here.

The pattern includes both US crochet terminology text and charted directions.


A Little Sparkle for Spring

I’m still celebrating NatCroMo, and those of you looking for something pretty to wear this spring will appreciate this little pattern.

Gold w Gold Earrings

I made these earrings over the last couple of weeks. I’ve been having a great time experimenting with Size #10 Crochet Cotton and beads worked over a split ring armature.

Red w Gold Earrings 2

As you can see, it’s possible to get really different looks just by altering the size and colors of beads used. Both of the above earrings used the same metallic gold/cream thread, the only change was the beads I’ve chosen. It’s endlessly entertaining making these with the various beads in my stash.

Earwires

I like the Ball Hook Earwires because I can make a variety of earrings, and use the same wires by interchanging the crocheted part. I purchased these at my local JoAnns Craft and Hobby shop.

Simple Victorian Drop Earrings

Designed by Andee Graves

Stitch Chart for
Stitch Chart for Simple Victorian Drop Earrings


Materials

#10 Crochet Cotton Thread

Hook  1.75 mm & .90mm steel

2 – 20mm Split Rings

10 – glass beads with large enough holes for thread to fit thru doubled

Gauge:

29 single crochet with a chain-2 space should cover the ring fully without being too crowded.

Special Stitches

Beaded Chain Stitch (bdch): Remove hook from working loop, place bead on smaller hook and insert in working loop, slide bead onto working loop, remove smaller hook and replace larger hook in working loop, YO and make chain stitch. Need help with this step check out my blog post “Making a Pendant”

Instructions

Begin by fastening your thread around the ring and placing working loop on larger hook. Need help with this step check out my blog post “Getting Started on a Thread Earring”

Round 1: Ch 1, 23 sc working into the ring, ch 2, 6 sc working into the ring, sl st to first sc of Rnd. (29 sc, 1 ch-2 sp)

Round 2: Ch 1, sk 1 st, sc next 2 sts, *ch 1, bdch, ch 1, sk 2 sts,* sc next st, Repeat from * to *, (dc, ch 1, bdch, ch 1, dc) next st, Repeat from * to *, sc next 2 sts, ch 1, sl st next st.

Fasten off and weave in tails.