Swatching and more Swatching, and Why that is good.


I’ve got a BIG project I just agreed to. I can’t tell you a lot about it yet. But I spent most of my weekend crocheting up swatches to figure out the amounts of yarn I would need to finish the samples for the project.

Pile of Swatches

The pile above is what I ended up with. Some of these yarns are just too lovely for words and I am really looking forward to crocheting the final pieces.

Next step, as I wait for yarn to arrive, is to write the first draft of the patterns for these designs. Because I am a geek I tend to swatch, do a bunch of math, write the pattern, then work the sample from that pattern.  It is the method I’ve found works the best for me. Then I can make corrections or additions to the pattern as I encounter trouble spots while stitching.

Photo Courtesy of Annies
Photo Courtesy of Annies Publishing

An example of this process was my Winged Columns Wrap in the Crochet! Magazine presents: Fall 2014 Special: Crochet Gifts in 1-2-3.

Stole Wrap Sketch 4web

Originally I submitted the idea for a smaller accessory, but had included a sketch and description of it as a rectangular wrap. The editor decided she wanted it as a wrap. She and I discussed the size of wrap she wanted. We decided on approximately 18″x 60″.

I then swatched with the yarn she had chosen, Premier’s Alpaca Dance. My swatch was 6″ x 6″. I then weighed my swatch in grams. That allows me to calculate how many yards of yarn are in the swatch. According to the ball band information there are 371 yards in a 100g ball of yarn. So 3.71 yards/gram.

The target size of my finished stole was 18 x 60 = 1080 square inches. My swatch was 36 square inches and took 23.4 yards to make. 1080 divided by 36 = 30. 30 x 23.4 = 702 yards. Which means I needed 2 balls of yarn to make the sample.

Now, how does this all help you?

Have you ever wondered if you have enough yarn to complete a project? Swatching in the stitch and yarn you will be using, then weighing it can get you there. Once you know the weight of your swatch and what size your final project is supposed to be, you can tell if you will need to go purchase more yarn.

Of course, once you are purchasing yarn you might find some other yarn that needs to join your household too. Yarn shopping does tend to add to our stash. But using the above formula, you’ll always know if you’ll need more yarn for the current project (or the next one).

What’s in a Name?

Scotts Bluff National Monument 4web
Scotts Bluff National Monument

Last weekend was lots of fun. I was teaching at the Scotts Bluff Valley Fiber Arts Fair in Scottsbluff, Nebraska. I hope to be teaching there again in 2016 and will let you all know as those dates and classes are decided on. Hopefully more of you can join me there.

Brown Sheep Sign on Building

One of the major sponsors for the event was the Brown Sheep Company. I have used Brown Sheep yarns for years in my felting projects. My favorite thing about their “Lambspride” yarn is the color doesn’t fade away with heat felting, which means I can depend on my finished project having the same colors as the yarns I picked out. And I love that they are a “Made in the USA” product.

Andrew Wells
Andrew Wells

At the fair this weekend attendees could sign up for a tour of the Mill where the lovely yarns are created. Brown Sheep is a family owned business and our tour guide, Andrew, is the most recent generation working there. You can learn more about their company history by visiting their website here: BrownSheep.com.

“Bumps” of clean wool fiber ready to start thier journey to being made into yarn.
Fluffy wool fiber ready to be spun.

It was really fun to see all the stages the fiber goes thru from clean fiber in “bumps” to the almost rope like fluffy roving that goes into the spinning machines. A lot of us on the tour found the rope like look of the fiber ready to be fed into the machines very beautiful.

Now, of course there was yarn, and being I was at a Fiber Arts  event some yarn had to come home with me.

ShelleyLyn Designs Handspun

While at the fairgrounds I met one of the vendors that is actually from my neck of the woods. ShelleyLyn Designs. She hails from the Longmont area and had some lovely knit products as well as patterns. Of course I was drawn to her beautiful hand-spun yarn and had to adopt 2 hanks of this gorgeous pink and black yarn. I’m thinking I’ll be coming up with a lovely hat or headband to wear this winter when the cold-weather “blahs” are making me wish for summer again.

At the end of the tour at the Brown Sheep Company there were mill-ends of yarn and fiber that could be purchased. A few balls of yarn needed to come home with me again.

Brown Sheep Lambs Pride Superwash Sport - Green Envy

When I initially spotted this ball I thought the color was a gray. Then I got a closer look and realized it had a wonderful combination of lavender and 2 different greens called “Green Envy”.

Lambs Pride Superwash Sport - Finches

I got these 3 balls with something pretty for the Fall season in mind. I’m often drawn to the warm fall colors, though I don’t wear them as frequently as I used to.

Navy Brown Sheep LanaLoft Sport

These 2 balls of Navy yarn are either going to be a hat or slippers for my youngest son this Christmas. He isn’t quite as avid about hats as his Dad and older brother, so I am waffling on what I’ll pick for his Christmas gift.

Shawl as neck wrap

Meanwhile, one of the projects I was working away on before leaving for the fair, is this lovely new Shawl design. I made this shawl with Brown Sheep’s  “Wildfoote” luxury sock yarn. It was a perfect choice for a lace construction that I wanted to aggressively block.

Shawl from Back

Peggy of Brown Sheep was delighted to see the shawl when we got together at the fair on Friday. She was threatening to take it away with her, but I did persuade her to let me hold on to it so I can get the pattern published first. This pattern is going to be available the 25th of September.  But it needs a name and I am stuck on 3 different ones.

Fleur de Lis Shawl

Royal Veil Shawl

Mountain Whisper Shawl

I thought it would be fun for all my readers to help choose which one of the 3 I will use. So I’ve set up a little survey for you to vote on. Everyone that votes will get a coupon code to use for 15% off the pattern the first 3 weeks it is available. Voting will start today at Noon thru 10 p.m. September 22nd.

Update: Well the survey site I chose isn’t working properly.  So change of plans, vote in the comments below: Tell me which name you like best (can only pick one) and I’ll send you the coupon code thru your email (codes will be sent next week after the voting ends). Please don’t share the coupon code with others.

I’ll post the winning shawl name and the link to the pattern in my Ravelry shop on Friday, September 25th.  No matter which name wins, all who vote will be a winner. Just be sure you go to the survey site to vote to get the coupon code.

I’ll leave you with a bit of poetry from William Shakespeare, who had Juliet speak some thoughts about names in “Romeo and Juliet”:

“What’s in a name? that which we call a rose by any other name would smell as sweet; So Romeo would, were he not Romeo call’d, retain that dear perfection for which he owes without that title. Romeo, doff thy name, and for that name which is no part of thee take all myself.”

Granny Fans Redux

Photo of Granny Fans Scarf

This design is one of my favorites. Originally I created it for Michele Mak’s online subscription site, MainlyCrochet.com, back in October 2012 and it was published on there in the Fall of 2013.

Of course, after I send in a pattern and the sample, my brain keeps coming up with new ideas to expand on the original.

Granny Fans Redux - M2H Designs

When the rights for this pattern came back to me I knew I needed to re-visit those notes. Which is why this pattern in my Ravelry Shop: M2H Designs is called “Redux”.  I’ve re-done the design added in and sometimes subtracting things.

The new pattern is really more like getting 4 patterns in one.  There are lots of stitch diagrams for those (like me) that prefer those, as well as clear text instructions to help you make a Neck Cozy, Scarf, Tube Cowl or Moebius Cowl.

You can find the pattern in my shop on Ravelry by following this link: Granny Fans Redux

Tomorrow is “International Crochet Day” so I hope you get some crochet into your Saturday. I’ll be teaching at the Scotts Bluff Valley Fiber Arts Fair and touring the Brown Sheep Wool Company’s Mill. Going to be a day about fiber as well as crochet for me.

Hopefully I’ll have some photos of adorable fiber critters to share with you when I get back.

Getting the Twist Right

Anna Moebius Cowl - Andee Graves M2H Designs

Hopefully most of you reading this post got to participate in the “Hop” I was part of last Tuesday, and now you are the proud owner of my pattern for the “Anna Moebius Cowl”.  The moebius is one of my favorite shapes to use in designs as you can see below, all 3 of these designs (as well as the Anna Moebius Cowl) start the same.


Infinite Grande Cowl - M2H Designs
Infinite Grande Cowl – M2H Designs


Twisted Garden Cowl - M2H Designs
Twisted Garden Cowl – M2H Designs


Twisted Vs Cowl - M2H Designs
Twisted Vs Cowl – M2H Designs

Today I’ve created a little photo tutorial with tips on creating your foundation to begin any of these cowls. I use this same foundation in almost all of my moebius designs, so once you get the hang of it you’ll be set to try my other patterns.

FSC toplast btm1st 4web

When you finish the length of foundation single crochet that the pattern specifies lay it out flat. The stitches have a top and bottom. The green stitch marker is in the bottom of the first stitch and the orange marker shows the top of the last stitch.

Fold ends together 4web

Fold the foundation to bring the 2 ends together.

Circle to match top to btm 4web

To get the moebius twist you only want to add 180 degrees of twist. Which means you join the top of the stitch where your hook is, to the bottom of the first stitch you made.

Slip St Closure 4web

I use a very tight slip stitch.

Beg Crchtg Rnd1 4web

I usually let the beginning tail hang and then later use it to tidy up the join between the ends of the foundation. Meanwhile I just start crocheting my moebius.

Rchd Opp side 4web

When you get to the join you will be on the opposite side of the foundation from your beginning.

Rchd Opp side2 4web

You are working into the bottoms of your foundation stitches and then into the tops of those same stitches as you crochet your first round. You will have doubled the number of stitches in your first round from the number you made for your foundation.

Little Mini Moebius
Little Mini Moebius

Paper Moebius Strip

If you want to learn more about moebius strips and my geeky fascination with them take a look at my post: The Twists and Turns of a Moebius.

Summer’s End

I’ve had a really fun week. I hope all of you got a chance to visit my blog this past Tuesday for the Flash Giveaway Blog Hop. That was quite the whirlwind and a total blast. I think I, and my 7 other designer friends were all blown away by the response.

Now we are going into Labor Day Weekend. This weekend always marks the end of summer for me, even though the calendar says Autumn officially starts September 23rd.

Labor Day Sale Sq for Blog

Labor Day originally was created to celebrate the contributions of American workers. For my celebration I’m having a Labor Day Weekend Sale on 6 of my patterns, because you all work hard and who doesn’t like to save a little money? I selected patterns that use 1-2 balls of yarn and are great for gift giving (since we all know that deadline is sneaking up on us, only 112 days left).


Tumbling Leaves Scarf - M2H Designs
Tumbling Leaves Scarf – M2H Designs

One of my favorite “small start” projects. Each of these motifs are worked off each other and you can vary the length of your scarf according to the amount of yarn you have. Can even make it shorter as a “Neck Cozy” just add a pretty button and use any of the openings in the lace as a “buttonhole”. This pattern is a great one for using chunky yarns with gradual color changes.


Twisted Vs Cowl - M2H Designs
Twisted V Cowl – M2H Designs

Another one of my moebius twist crochet projects. I love to design like this because these projects need so little fussing with to finish. Worked in a chunky yarn this is another quick project to crochet up in an evening for your gift giving needs.


Infinite Grande Cowl - M2H Designs
Infinite Grande Cowl – M2H Designs

I loved working with this luxurious chunky alpaca yarn, the resulting cowl is squishy and so snuggly. A great project to make for someone special on your gift list who can really use a warm hug.


Ebb & Flow Scarf / M2H Designs

This is a crochet project for the more intrepid crocheter. The stitch pattern is changeable so you won’t get bored and the lacy fabric looks so elegant when finished you may want to keep it for yourself. The pattern has detailed text instructions and a full stitch diagram so you won’t get lost.


Paris Garden Scarf / M2H Designs

Ah Paris. This pattern is fun for experienced crocheters and a great “next-step” for newer crocheters. The stitch pattern alters every 2 rows, but is repetitive enough that it is easy to memorize. Another fun project that can be made in the original full length for a scarf, or shortened with buttons added to become a neck cozy.


Twisted Garden Cowl - M2H Designs
Twisted Garden Cowl – M2H Designs

One of my favorite moebius cowls that I’ve designed so far. This one is a little unusual in when you need to turn for your rounds, so you won’t get bored. But the rounds go so quickly that you’ll have a finished cowl before you know it. This cowl works great in color changing yarns, but would be gorgeous in a solid color as well.


Coupon code: LDWTMT15 will get you 15% off the price of any or all of these 6 patterns until 10 p.m. Monday, September 7, 2015 (that is Mountain time). That means you can save $3.59 if you purchase all 6 patterns. You can only use the coupon code once though, so be sure you select all of the 6 that you want to purchase in one go.

There are links for each of the patterns in the name of the pattern under each’s photo to make it easy for you to find them on Ravelry. Or you can get to my Ravelry Shop by clicking on this link: M2H Designs.


If you’ve never used a coupon code on Ravelry before it’s super easy.

If you are purchasing just one pattern go to the pattern page and select the “Buy Now” option in the upper right hand side of the screen.

You’ll get a nifty shopping cart box.

In the new box, look for the little tag that says “use a coupon code”.

Click on that tag, you’ll get a spot to enter the coupon code.

Once you’ve entered the code the price will be adjusted.

If you want to purchase more than one pattern, use the “Add to Cart” button on each pattern page, and once you have all the patterns in your cart that you want, click on the “use a coupon code” button and enter the coupon code.

Enjoy the sale. I hope you get lots of crochet time in during your Labor Day Weekend. Or at least some quality time with your friends and family.


Just Around the Corner

This past week I looked at the calendar and said, “Eek!”  I had just realized that I had less than a week before September was here.  That means that I have a bunch of birthdays coming up in the next 6 weeks and after that Halloween, Thanksgiving and Christmas festivities with all my loved ones.

Most of all this means those gifts that I had planned to get crocheted for “next year” are coming up quite quickly. I know I am very likely not alone in this quandary. So today I wanted to share a round-up of links to patterns from some of my blogging designer friends. Some of these patterns are free (just requiring a visit to their blog) and others are available for sale thru their Ravelry shops.

All of these pattern suggestions are for projects that are fairly portable, so you can get a few stitches in whenever you have a spare minute.

Scarves

I wear a lot of scarves and with the cold weather season coming along I like making them as gifts. There is such a wide variety of scarf patterns out there, from the super simple to the superbly sophisticated.

Artfully Simple Angled Scarf

For those living in warmer climates, or that tend to run on the warmer side the Artfully Simple Angled Scarf designed by Tamara Kelly of Mooglyblog.com is great. This is a wonderful project to use some luxury yarn to create a statement piece for the fashionista on your gift list. This free pattern also has video tutorials and a stitch diagram to get you crocheting along without a hitch.

Sands_of_Time_Scarf_medium2

This scarf pattern from Elena Hunt at Beatrice Ryan Designs looks like a lot of fun to make, and I love the name: Sands of Time Scarf. It is a lovely scarf to showcase those long color change yarns that are so fun to work with. With dressy tassels and beads on the ends it’s a scarf that can be worn for warmth and fashion.


Infinity Scarves

These projects are always interesting to me. They are usually relatively narrow so like a scarf, but because they are a long loop they are generally worn like a cowl. I decided for today’s purposes they get their own category.


Rolling In the Deep Scarf

Rolling in the Deep Infinity Scarf from Lorene at Cre8tion Crochet is a scarf and it’s a big loop, so it can be worn a number of ways. Contrasting colors worked with ripples make this scarf a relaxing project to work and an exciting one to wear. This pattern is available for sale thru her Ravelry shop for $4.95.


melting-snow-infinity-scarfedit_medium

Melting Snow Infinity Scarf from Tamara Kelly is a pretty and simple infinity scarf that you “just keep crocheting until you run out of yarn, then sew the ends together”. No muss, no fuss and another gift project is finished up. Available thru her Ravelry shop for $2.


Cowls

For me a cowl is a scarf with some hutzpah. Cowls can be wide or narrow, long or short. Just really depends on the tastes of your giftee, or how much time you have to commit to crocheting up the project.


Christmas_Present_CAL_2015_Project__1_Using_Worsted_Weight_Yarn_by_ELK_Studio

Kathy Lashley of Elk Studio knows all about the rush to get gifts ready for the Christmas holidays, so she has a couple of CALs going this fall that you can join at any time. I love this textured take on a cowl.  This is the first pattern in her Christmas Present Crochet-a-longs series and it is a lovely quick project for the crocheter that likes to work with texture using post stitches.


Chloe_V_Puff_Stitch_Cowl_Free_Pattern_brought_to_you_by_Cre8tion_Crochet_medium

The Chloe V Puff Stitch Cowl from Lorene at Cre8tion Crochet is another fun project for those wanting a gift with texture and pizazz. The puffy stitches are great for a cushy fabric that your friends and family will love to snuggle into when the winds are blowing cold. You can find this free pattern on her Cre8tion Crochet blog.


Coraline_in_San_Francisco_-_Free_crochet_pattern_by_Celina_Lane__Simply_Collectible_9_medium2

Check out the free pattern for the Coraline in San Francisco Cowl designed by Celina Lane of Simply Collectible. This is a large cowl in a mesh stitch that has lots of options in how it can be worn. A great wearable gift project that is easy to crochet


Hats

You all know I love hats. They are one of those marvelous crochet projects that don’t take a lot of time to complete (quick gratification), yet are generally challenging enough to keep most of us happily stitching along. Hats also seem to be one of the favorite gifts that my family and friends get from me. At least I see them wearing them regularly.


Desert_Hope_Slouch_Beanie_Free crochet pattern by Celina Lane_

First off I have to share another free pattern from Celina Lane of Simply Collectible, the Desert Hope Slouch Beanie. This is such a fun take on a V-st hat that I am totally making it for my oldest son. Worked in a masculine color it will be ideal for the boy who loves to wear crocheted hats all year long.


Effortless-Chic-Crochet-Beanie

Check out this lovely hat pattern from Elena Hunt at Beatrice Ryan Designs: Effortless Chic Crochet Beanie. I love the button detail and the vertical striping. Worked in a yarn with long color changes it is going to have a distinctive look, or use a solid color yarn and let the texture be the focal point.


Christmas-Present-Crochet-Along-Worsted-Weight-Project-2-by-ELK-Studio

Project #2 in Kathy Lashley’s Christmas Crochet-a-long is a hat worked in the same textured stitches as the cowl. Perfect to make as a set or just make the hat alone if you are pressed for time.


Max-ear-flap-hat-crochet-pattern-samples

I am really intrigued by this great earflap hat pattern from Jessie Rayot of Jessie-At-Home: Max Hat. Jessie has created a clever hat that incorporates the earflaps into the last rows of the hat.  The striping with changing stitch heights makes a lovely detail over the flaps. She has shown numerous ways to modify the hat to make it perfect for your giftee and it’s sure to be a hit. You can purchase the pattern thru her Ravelry shop for $4.


Some Super Duper Quick Projects

Time has run out and you need something that you can stitch up in just a few hours. Take a look at these little projects for those last-minute gifts.

Chain-Wrap-Bracelet-Cover-Square_medium2

This Chain Wrap bracelet from Jessie Rayot of Jessie-At-Home is a wonderful way to show off a pretty button. Or make up a little kit for your giftee to make their own. Instead of a crocheted gift you can give the gift of learning to crochet. It’s a free pattern on Jessie’s blog and she even has videos on how to make it from start to finish.


Now it’s time for the fun part, picking out the yarn and getting your project bags ready to go. I’ll have about 5 different project bags traveling with me in the car so I can get in a few stitches whenever I am waiting to drop off and pick up the boys from school. Hope you all enjoy planning out your projects and getting in some quality crochet time.

Flowers, Flowers, Flowers

Summer Flowers

Yes, I like flowers. One might even say I Love flowers.  Up here on the mountain the growing season for having flowers outdoors is very short. This summer I didn’t even attempt to grow any since we were still having freezing temperatures well into the middle of June.

What to do though, when you can’t grow flowers? Well, crochet them of course.

A couple of years ago I created a class on crocheting flowers for my local yarn store: Longmont Yarn Shop.  The class is really about taking all different shapes of flower motifs and working them in a variety of yarns: chunky to fingering weights. Then you can stack them, add buttons or beads and have all sorts of fun.

Flower Projects

They make wonderful embellishments for commercial items like hats, gloves, scarves or bags. Or even better add them to dress up your crochet projects. You can even turn all those flowers into fabric, or add a pin back to make a brooch.

In just a few short weeks I’ll be teaching my “Flowers, Flowers, Flowers” class at the Scotts Bluff Valley Fiber Arts Fair. The fair is September 11 and 12 in Mitchell, Nebraska.

In this class I teach working in the round, Puff and Cluster stitches, invisible joins, reading simple stitch diagrams, tips and tricks for working with novelty yarns, and two methods of adding beads to yarn, as well as a chain mesh join for turning your flowers into fabric.

Elegant Garden Mitt 2 4web

I’ll also be teaching my “Crocheting Wristers” and “Don’t Let Your Hobby Hurt” classes. If you are in the area come on up and join the fun. The Scotts Bluff National Monument is right there and the landscape is beautiful. You can find out more information and enroll for classes at the website: NebraskaFiberFair.com.

Just a Smidgen Left

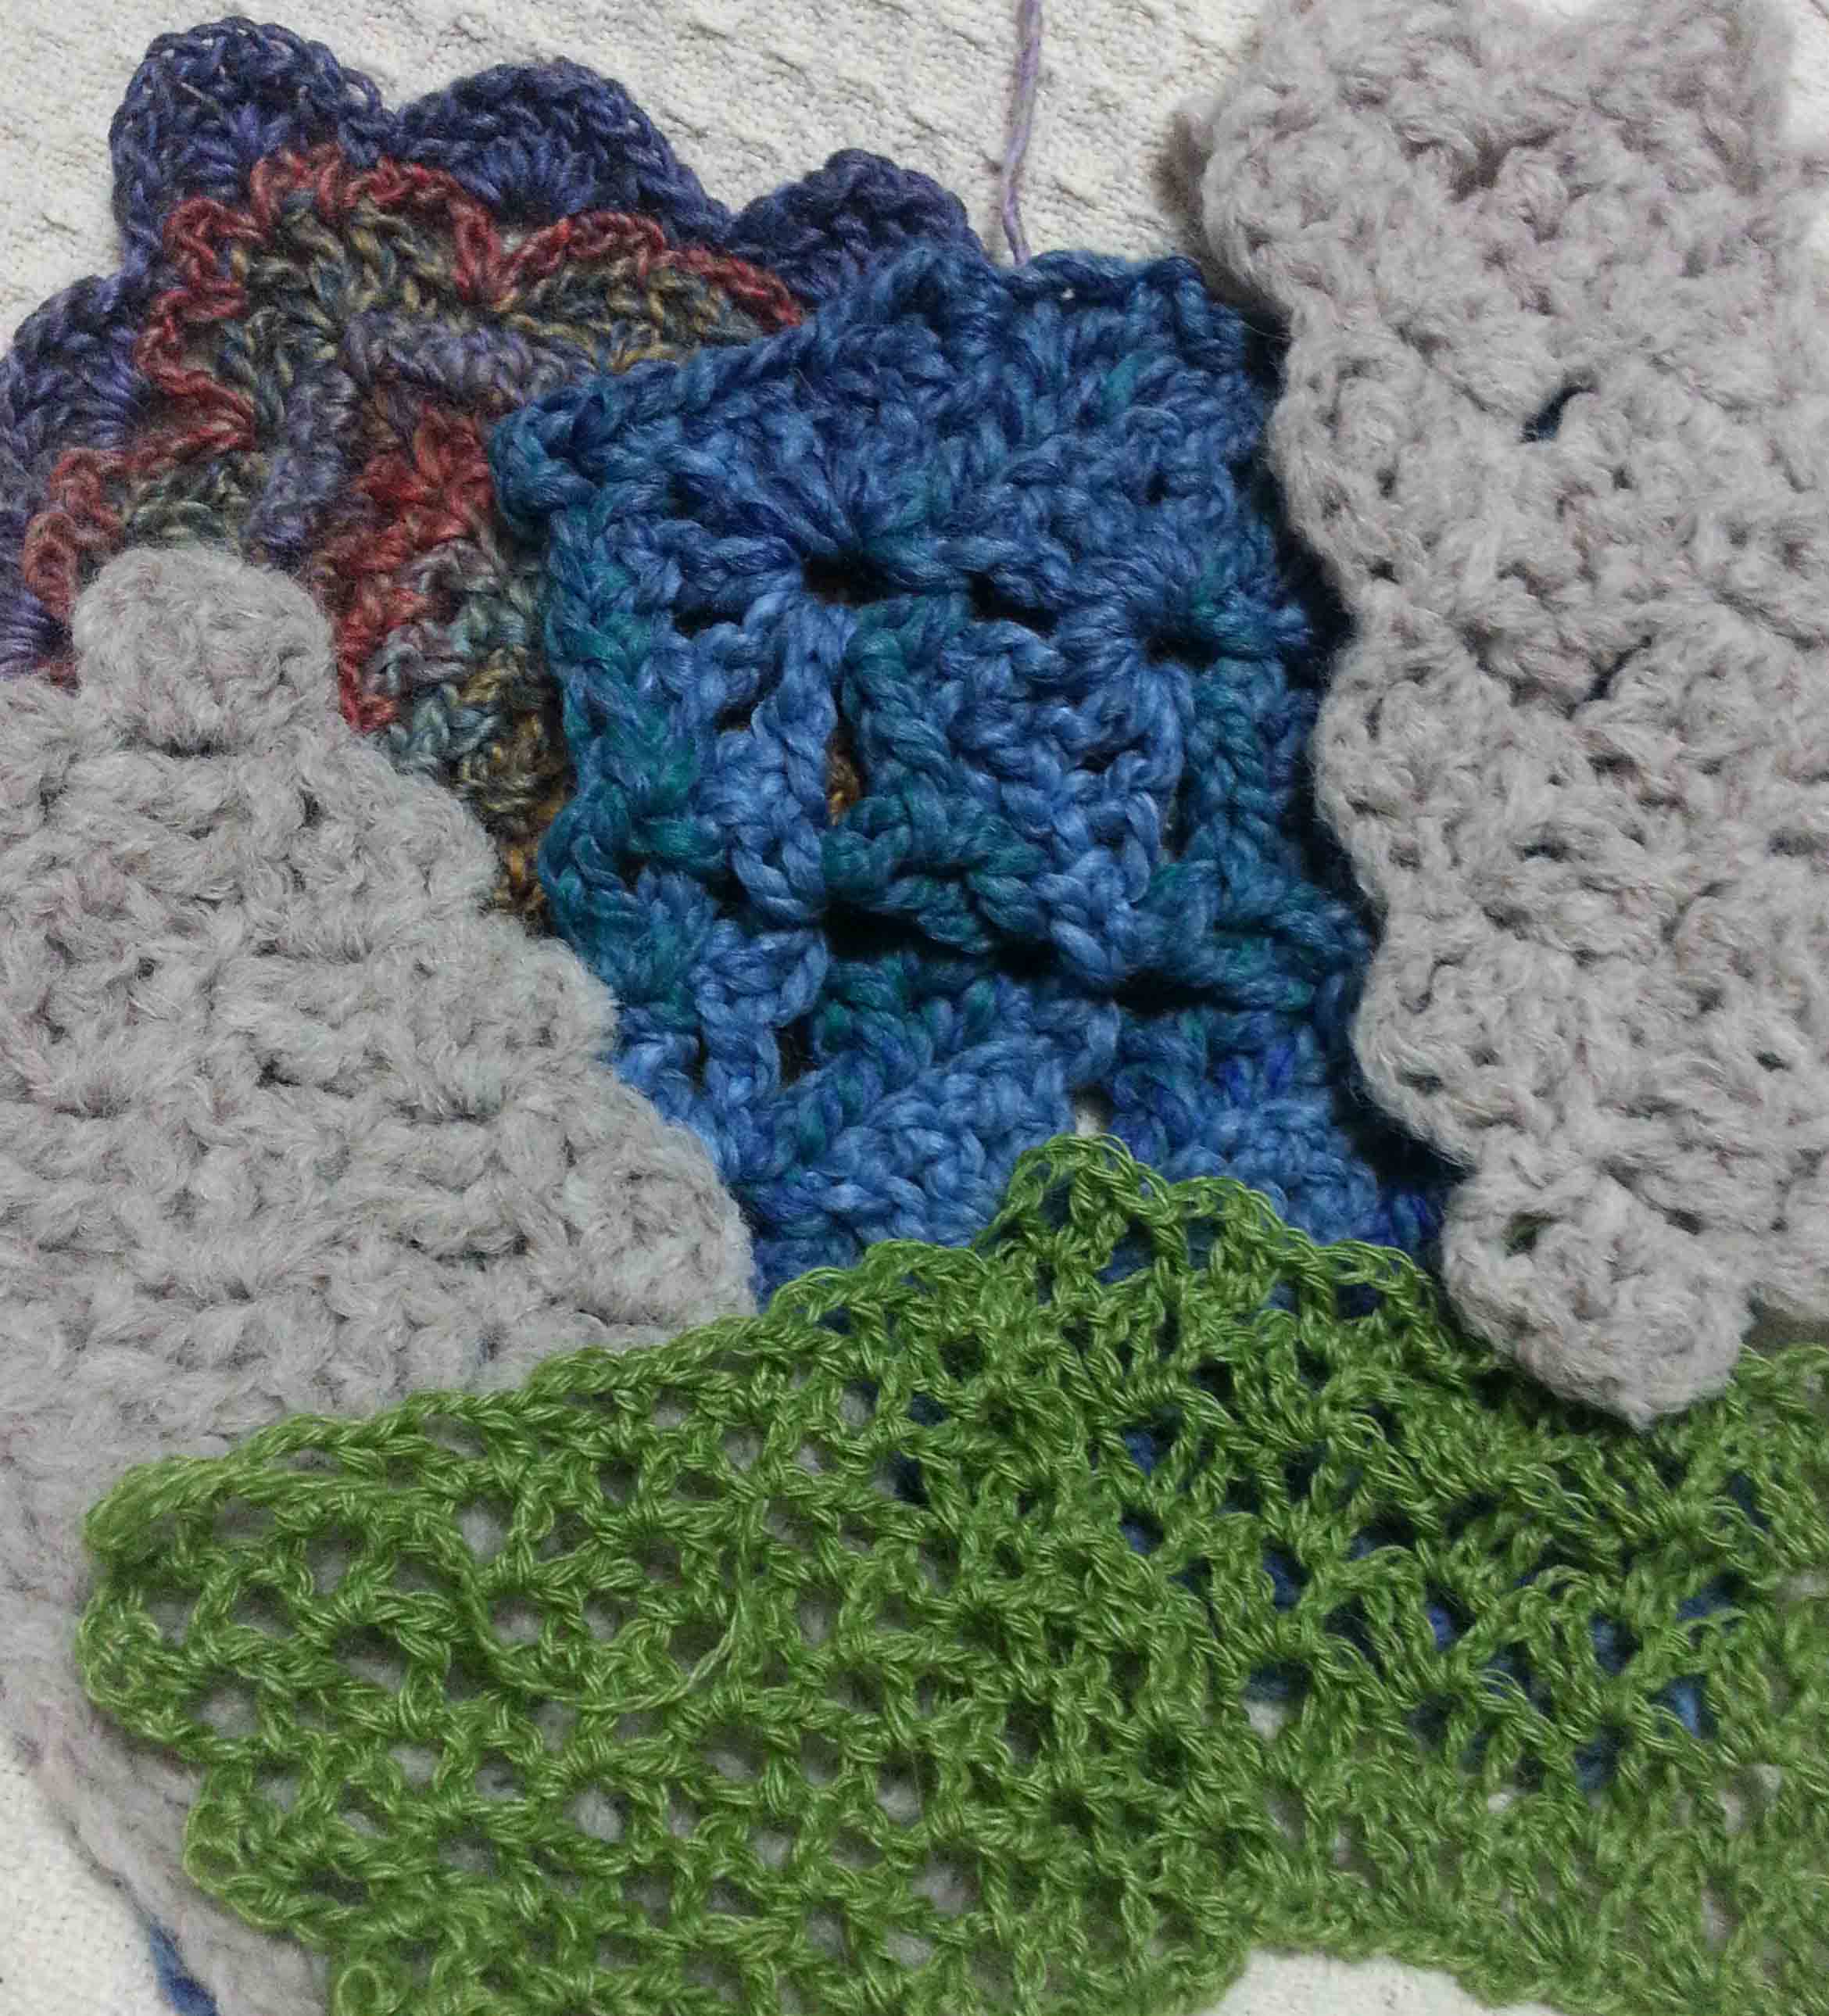
This past Wednesday I was at the Longmont Yarn Shoppe. I facilitate our 2 hour “Causal Crochet” get together on the third Wednesday of each month at 10:30 a.m. In the afternoon I work at the shop as their “crochet help” person. I answer questions for our crochet customers helping them if they are stuck with a project or needing to find the right yarn for a new project. When there aren’t customers for me to help I crochet up swatches in the yarns so folks can see how they look in crochet as well as knit.

Ball of Gusto yarn and starting chain

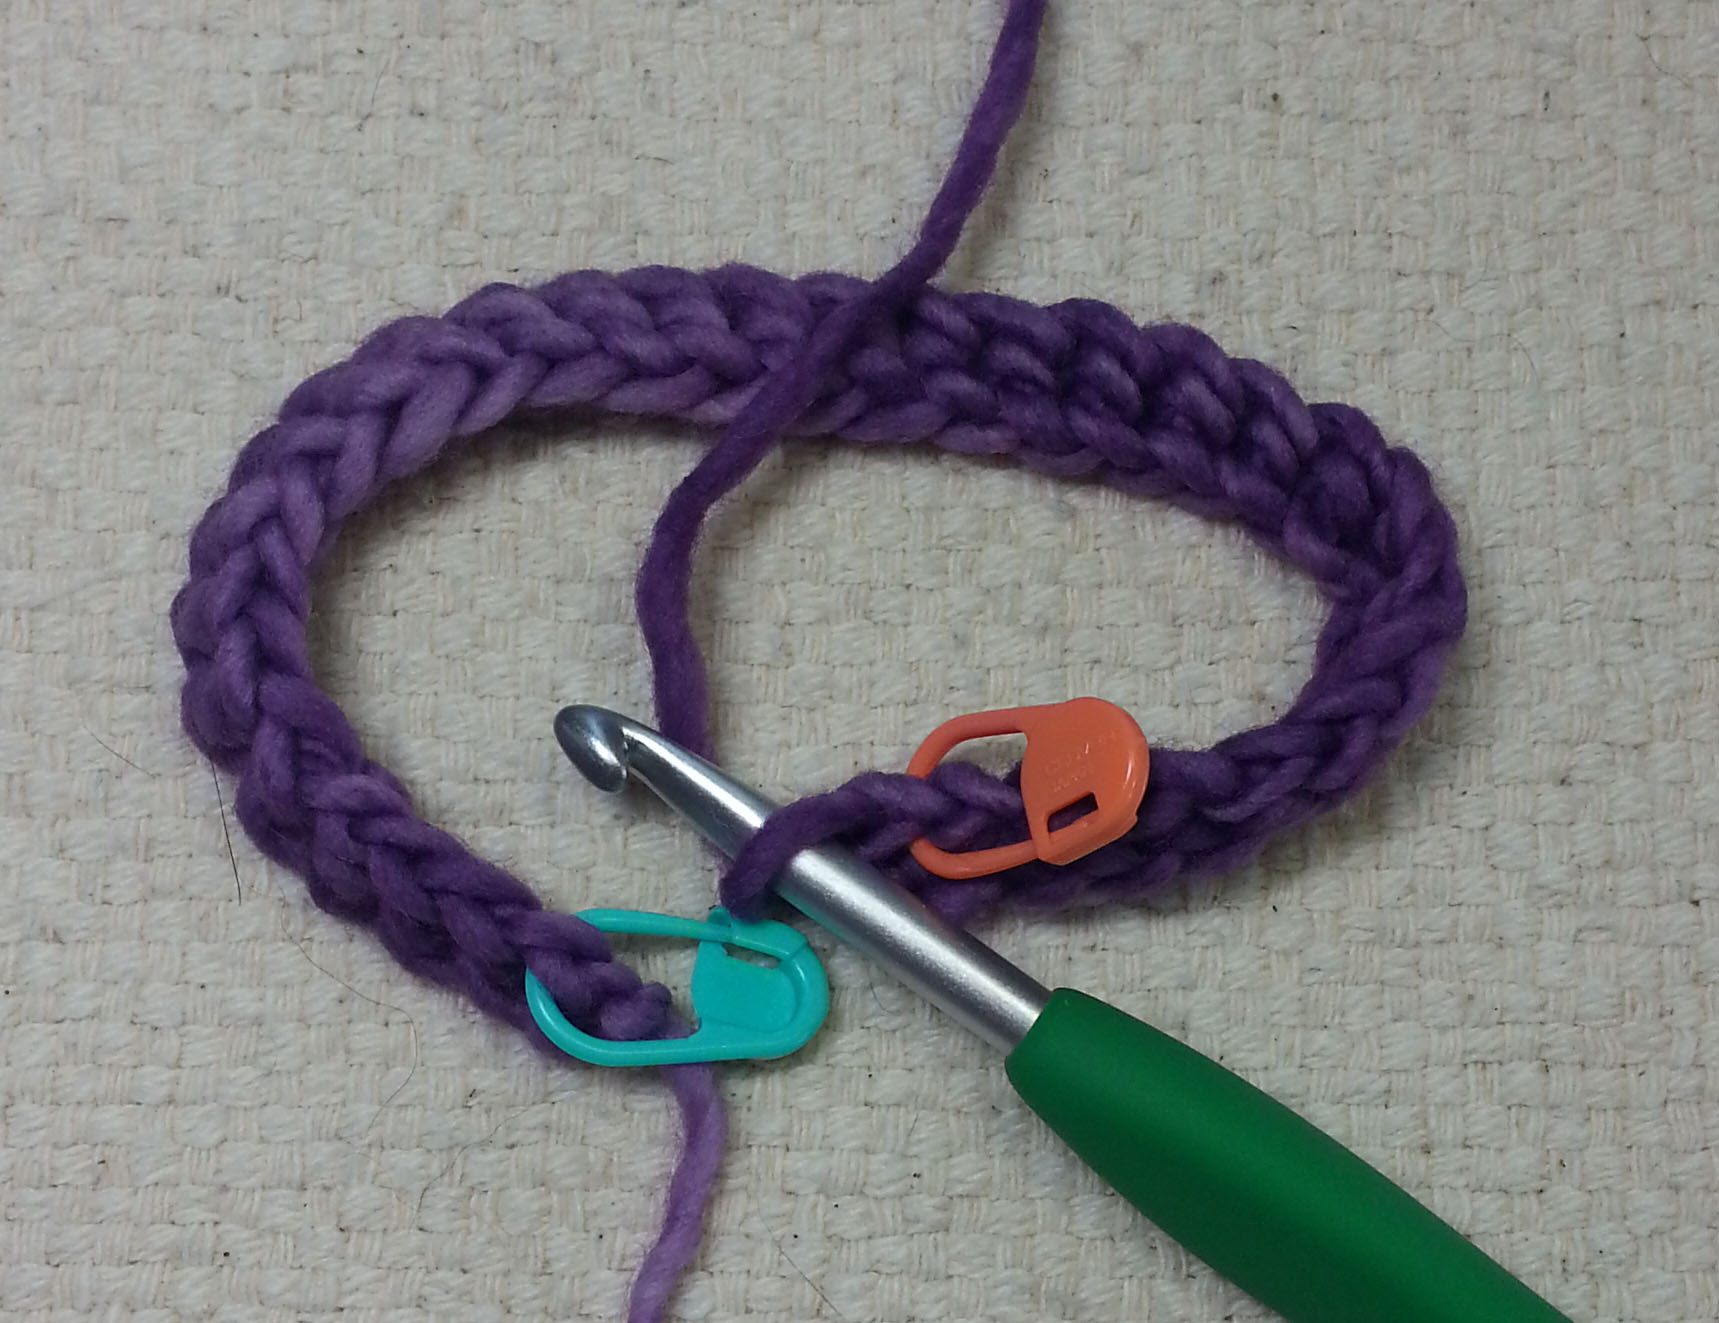
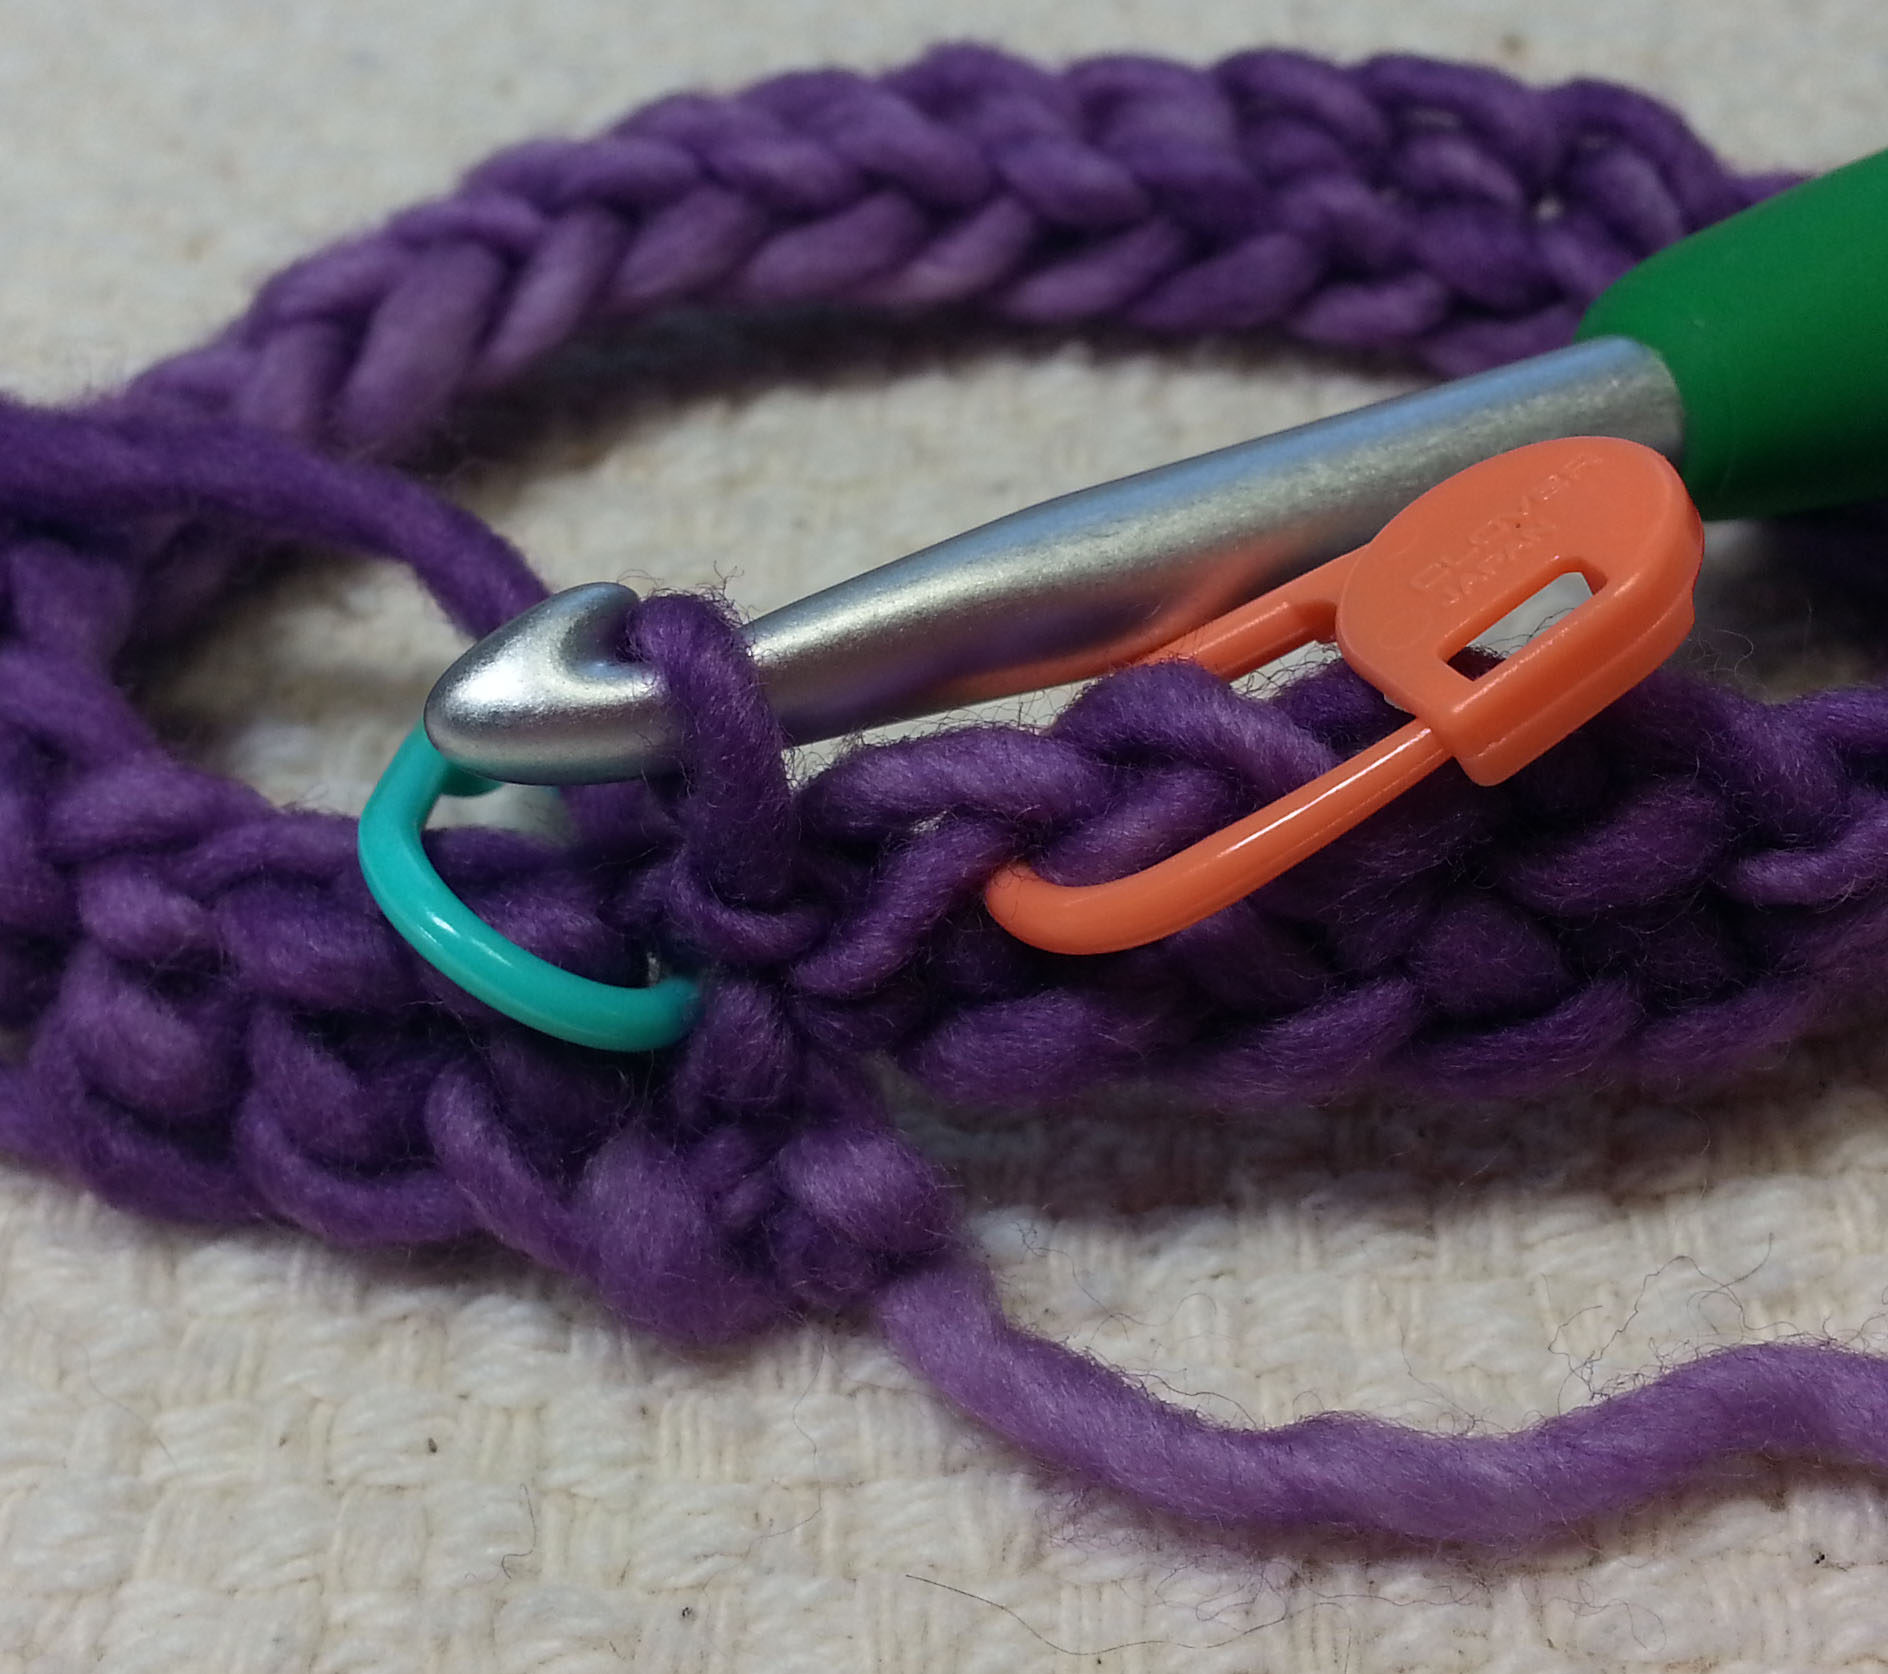
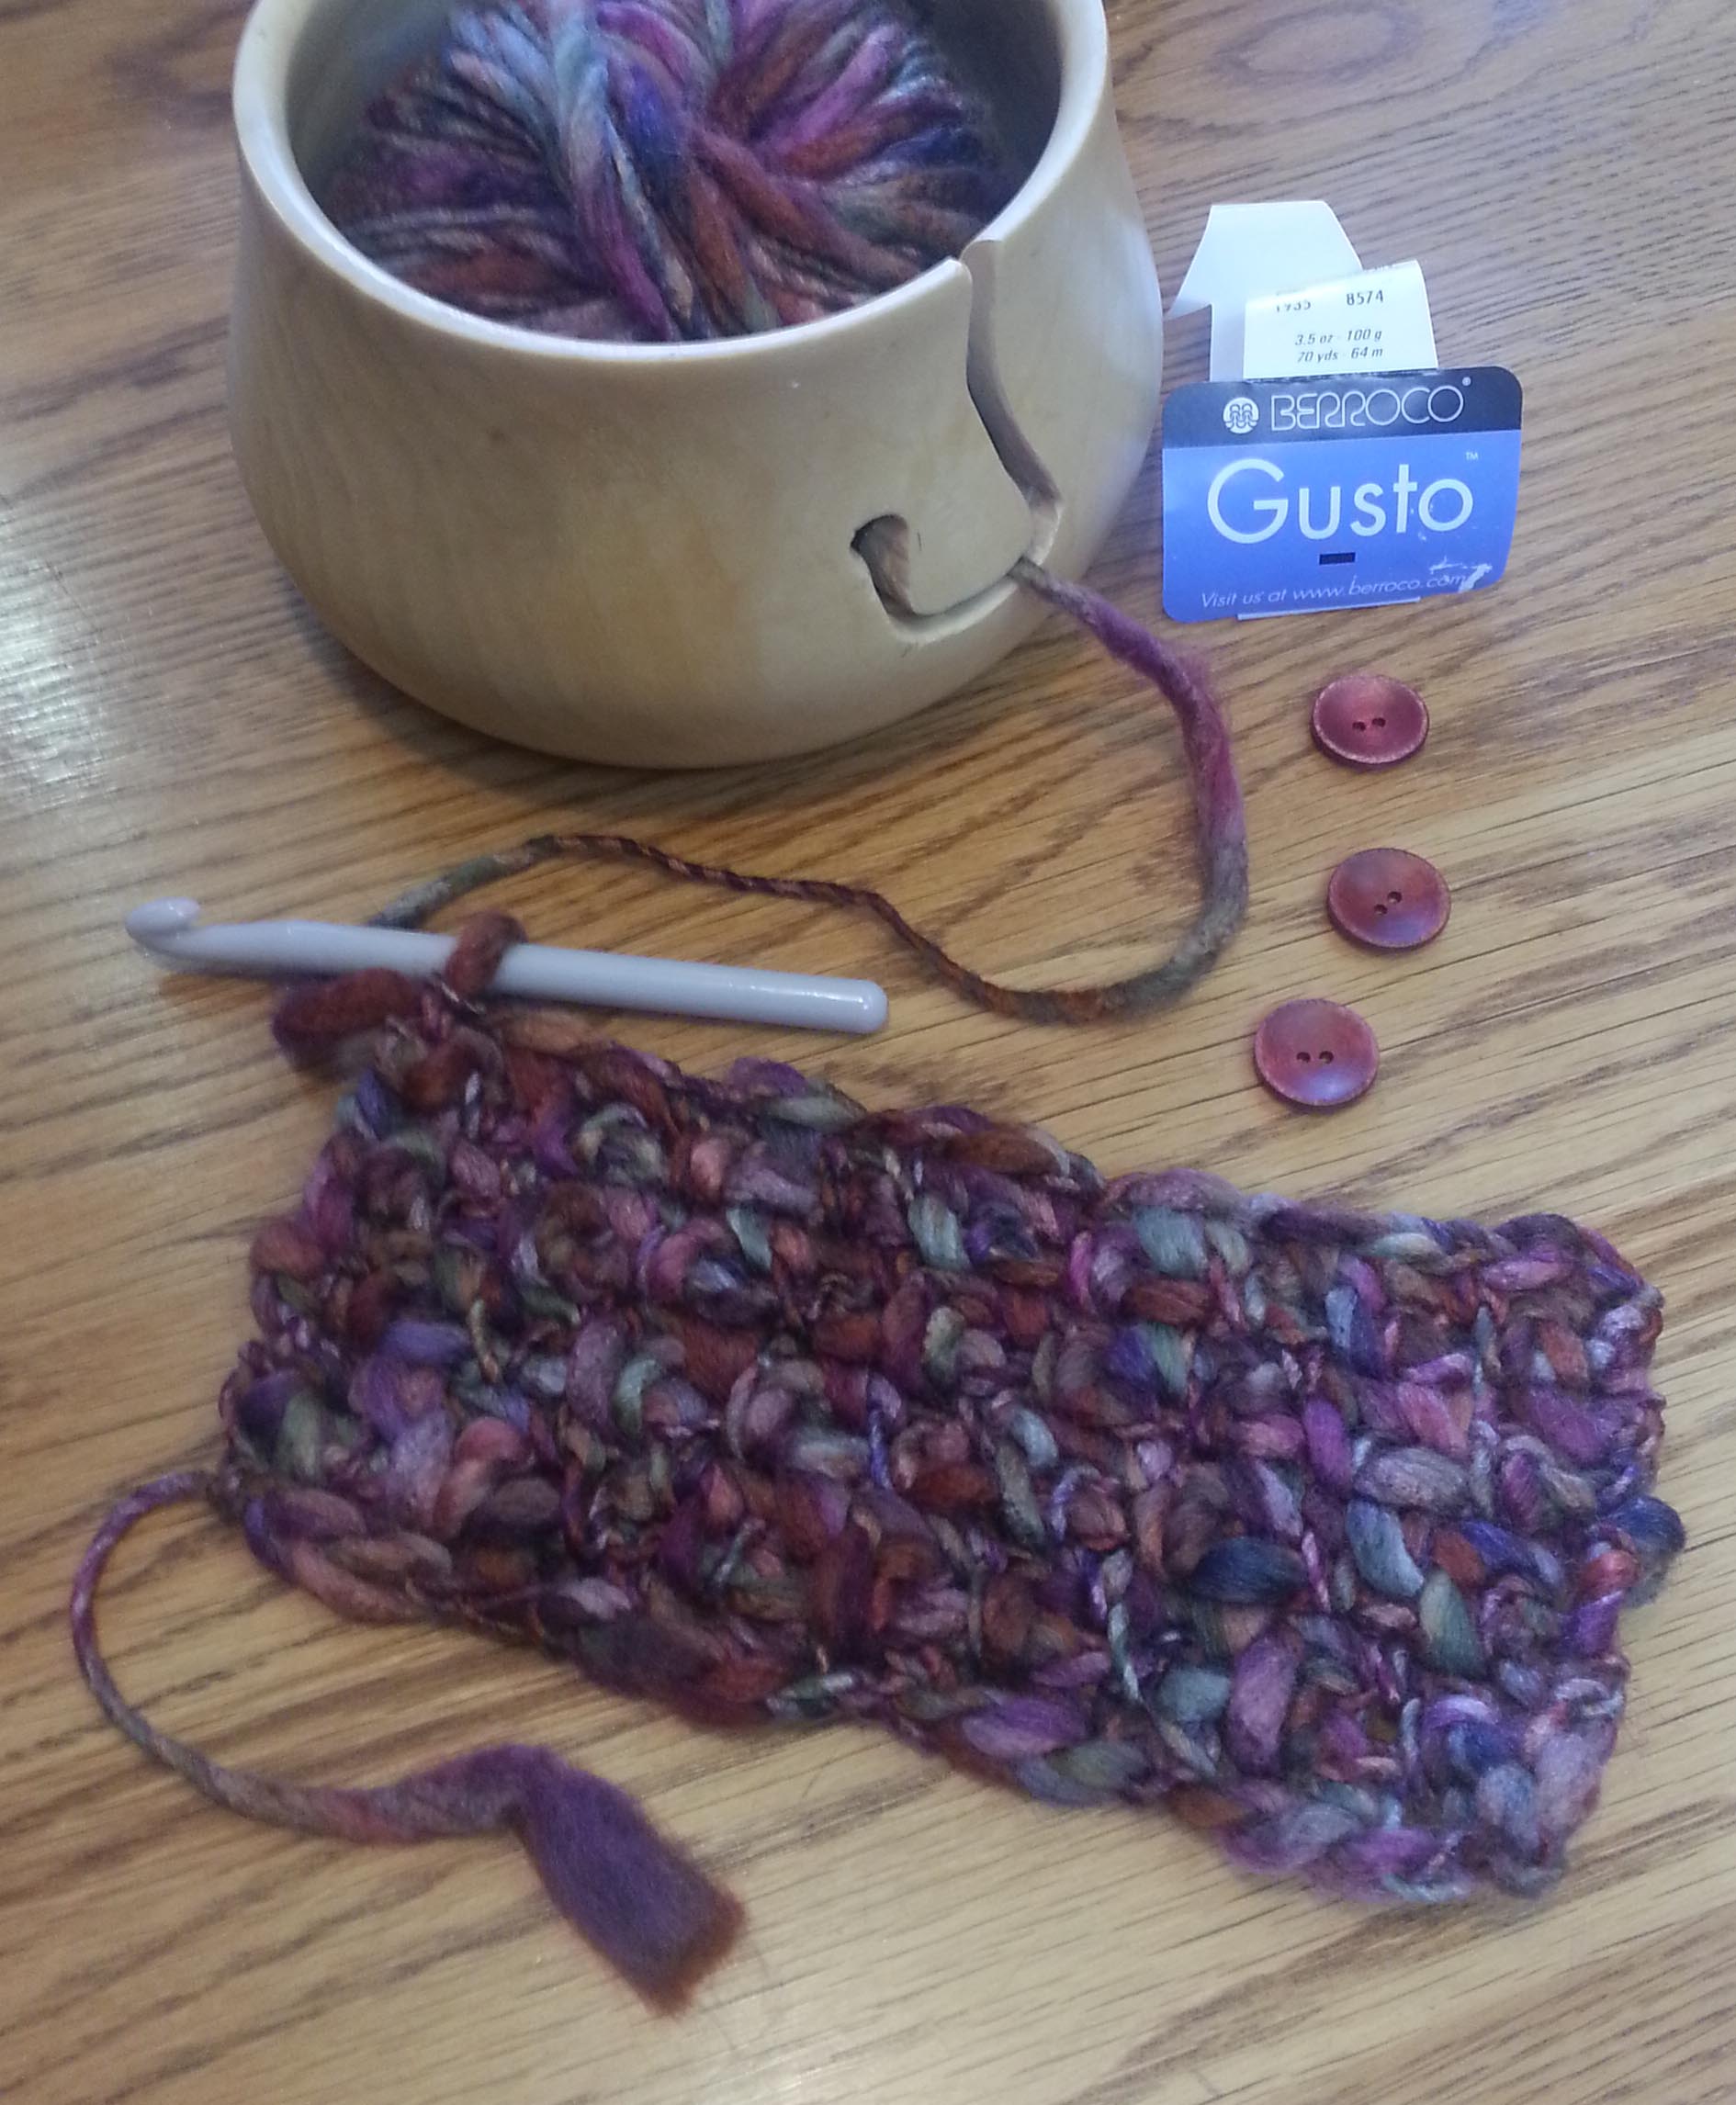
This time Jane and Gail asked me to swatch in Berroco’s new yarn “Gusto”. This is a colorful Thick and Thin yarn constructed from 45% wool, 45% Acrylic and 10% Vicose. My initial chain to begin a swatch really charmed me. A chain alone could make a fun “crafty” necklace and would be really pretty with some beads added using the “hoist-on” method.

First Swatch and 3 buttons

I had decided to use the “seed stitch” (sometimes called “Linen stitch”) with this yarn since it would allow the changes of weight in the yarn to breathe. As I began to work my swatch I wondered how much fabric I could create from the one ball and spoke to Gail and Jane about what a cute neck cozy it would make. I pulled out some buttons from the shelf that I thought would look nice with the yarn.

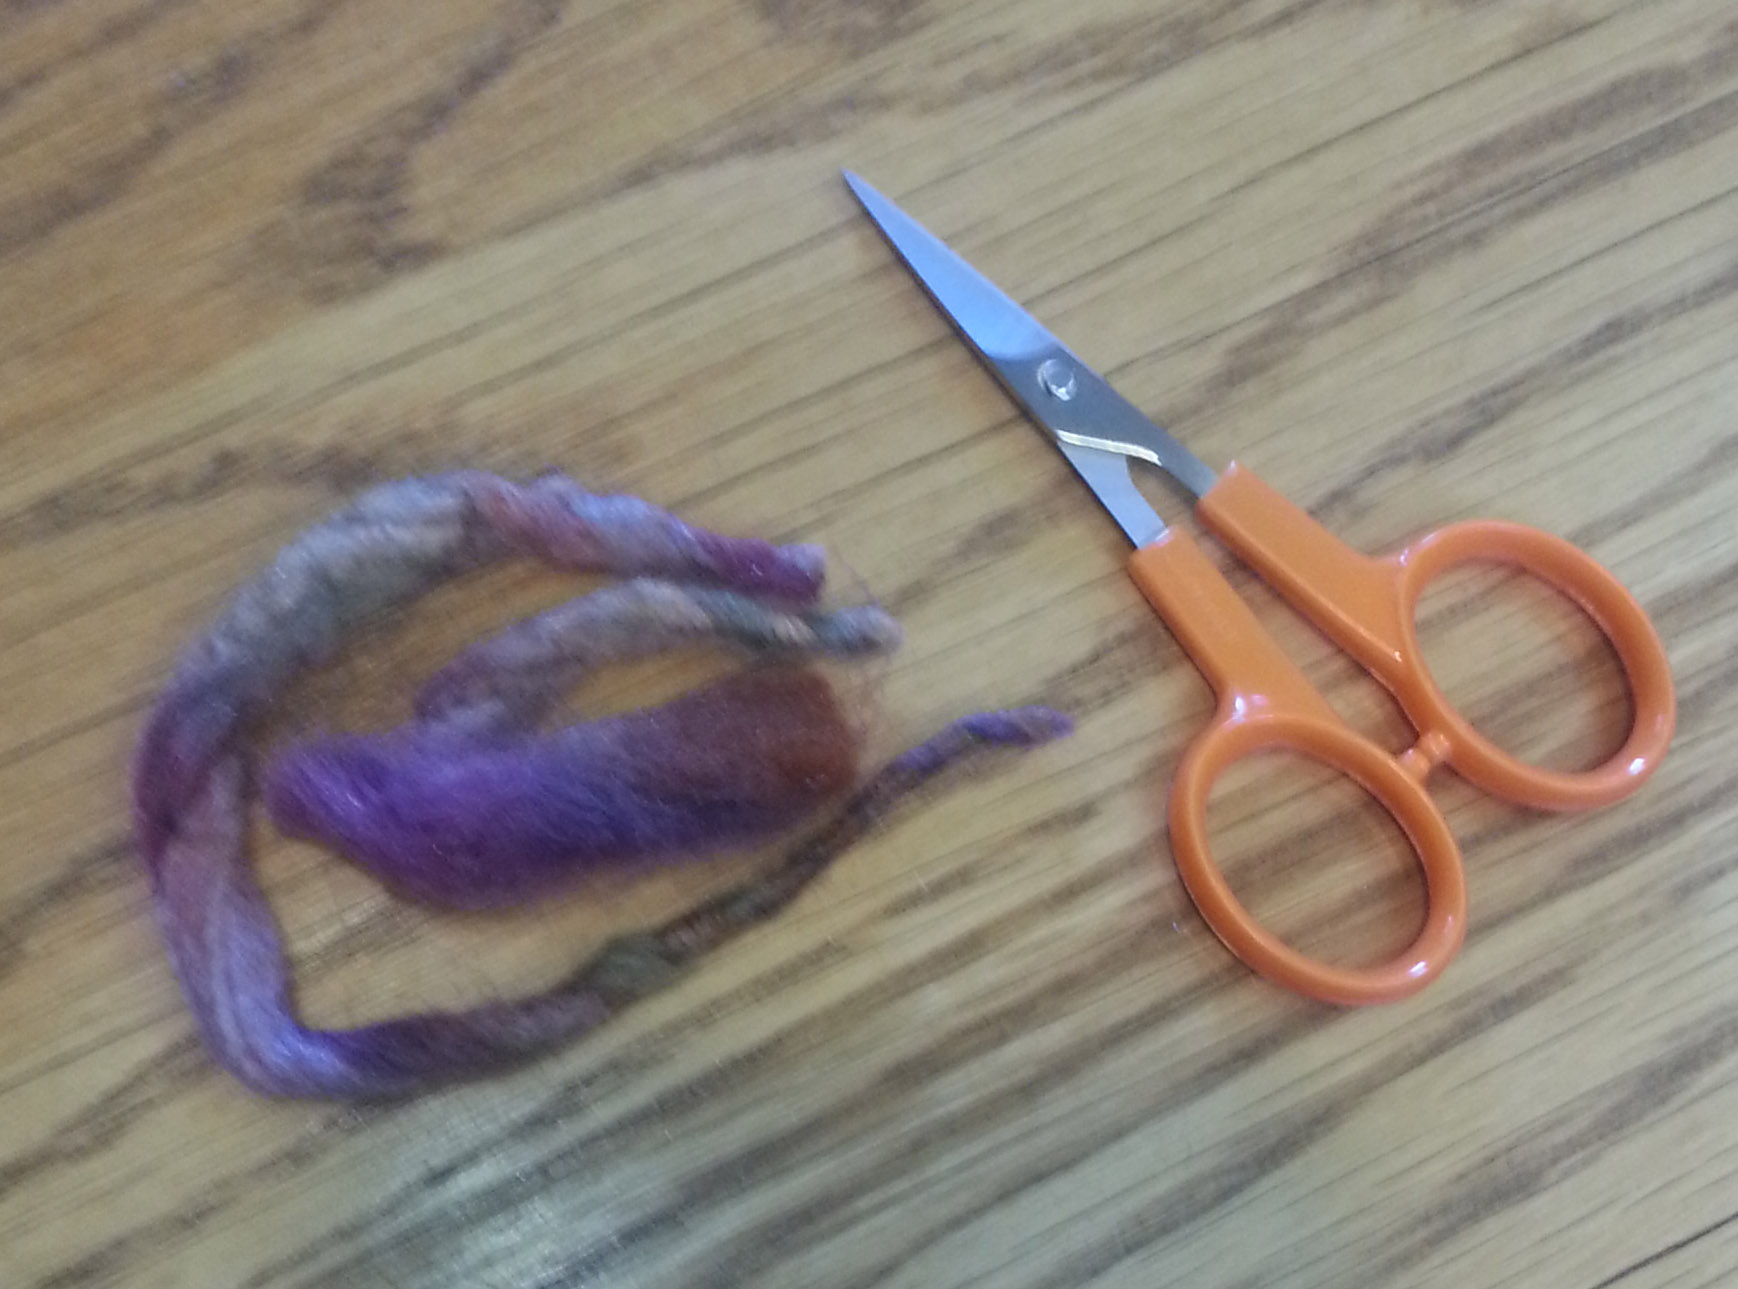
As I got closer to the end of the ball of yarn I realized I was going to run out of yarn before I had enough length to the fabric. So I tried decreasing along one edge to taper the end and squeeze out a bit more length. It was still too short. After a consultation with Gail and Jane, I decided I needed to pull it all out and start over again.

Gusto yarn - loose bits

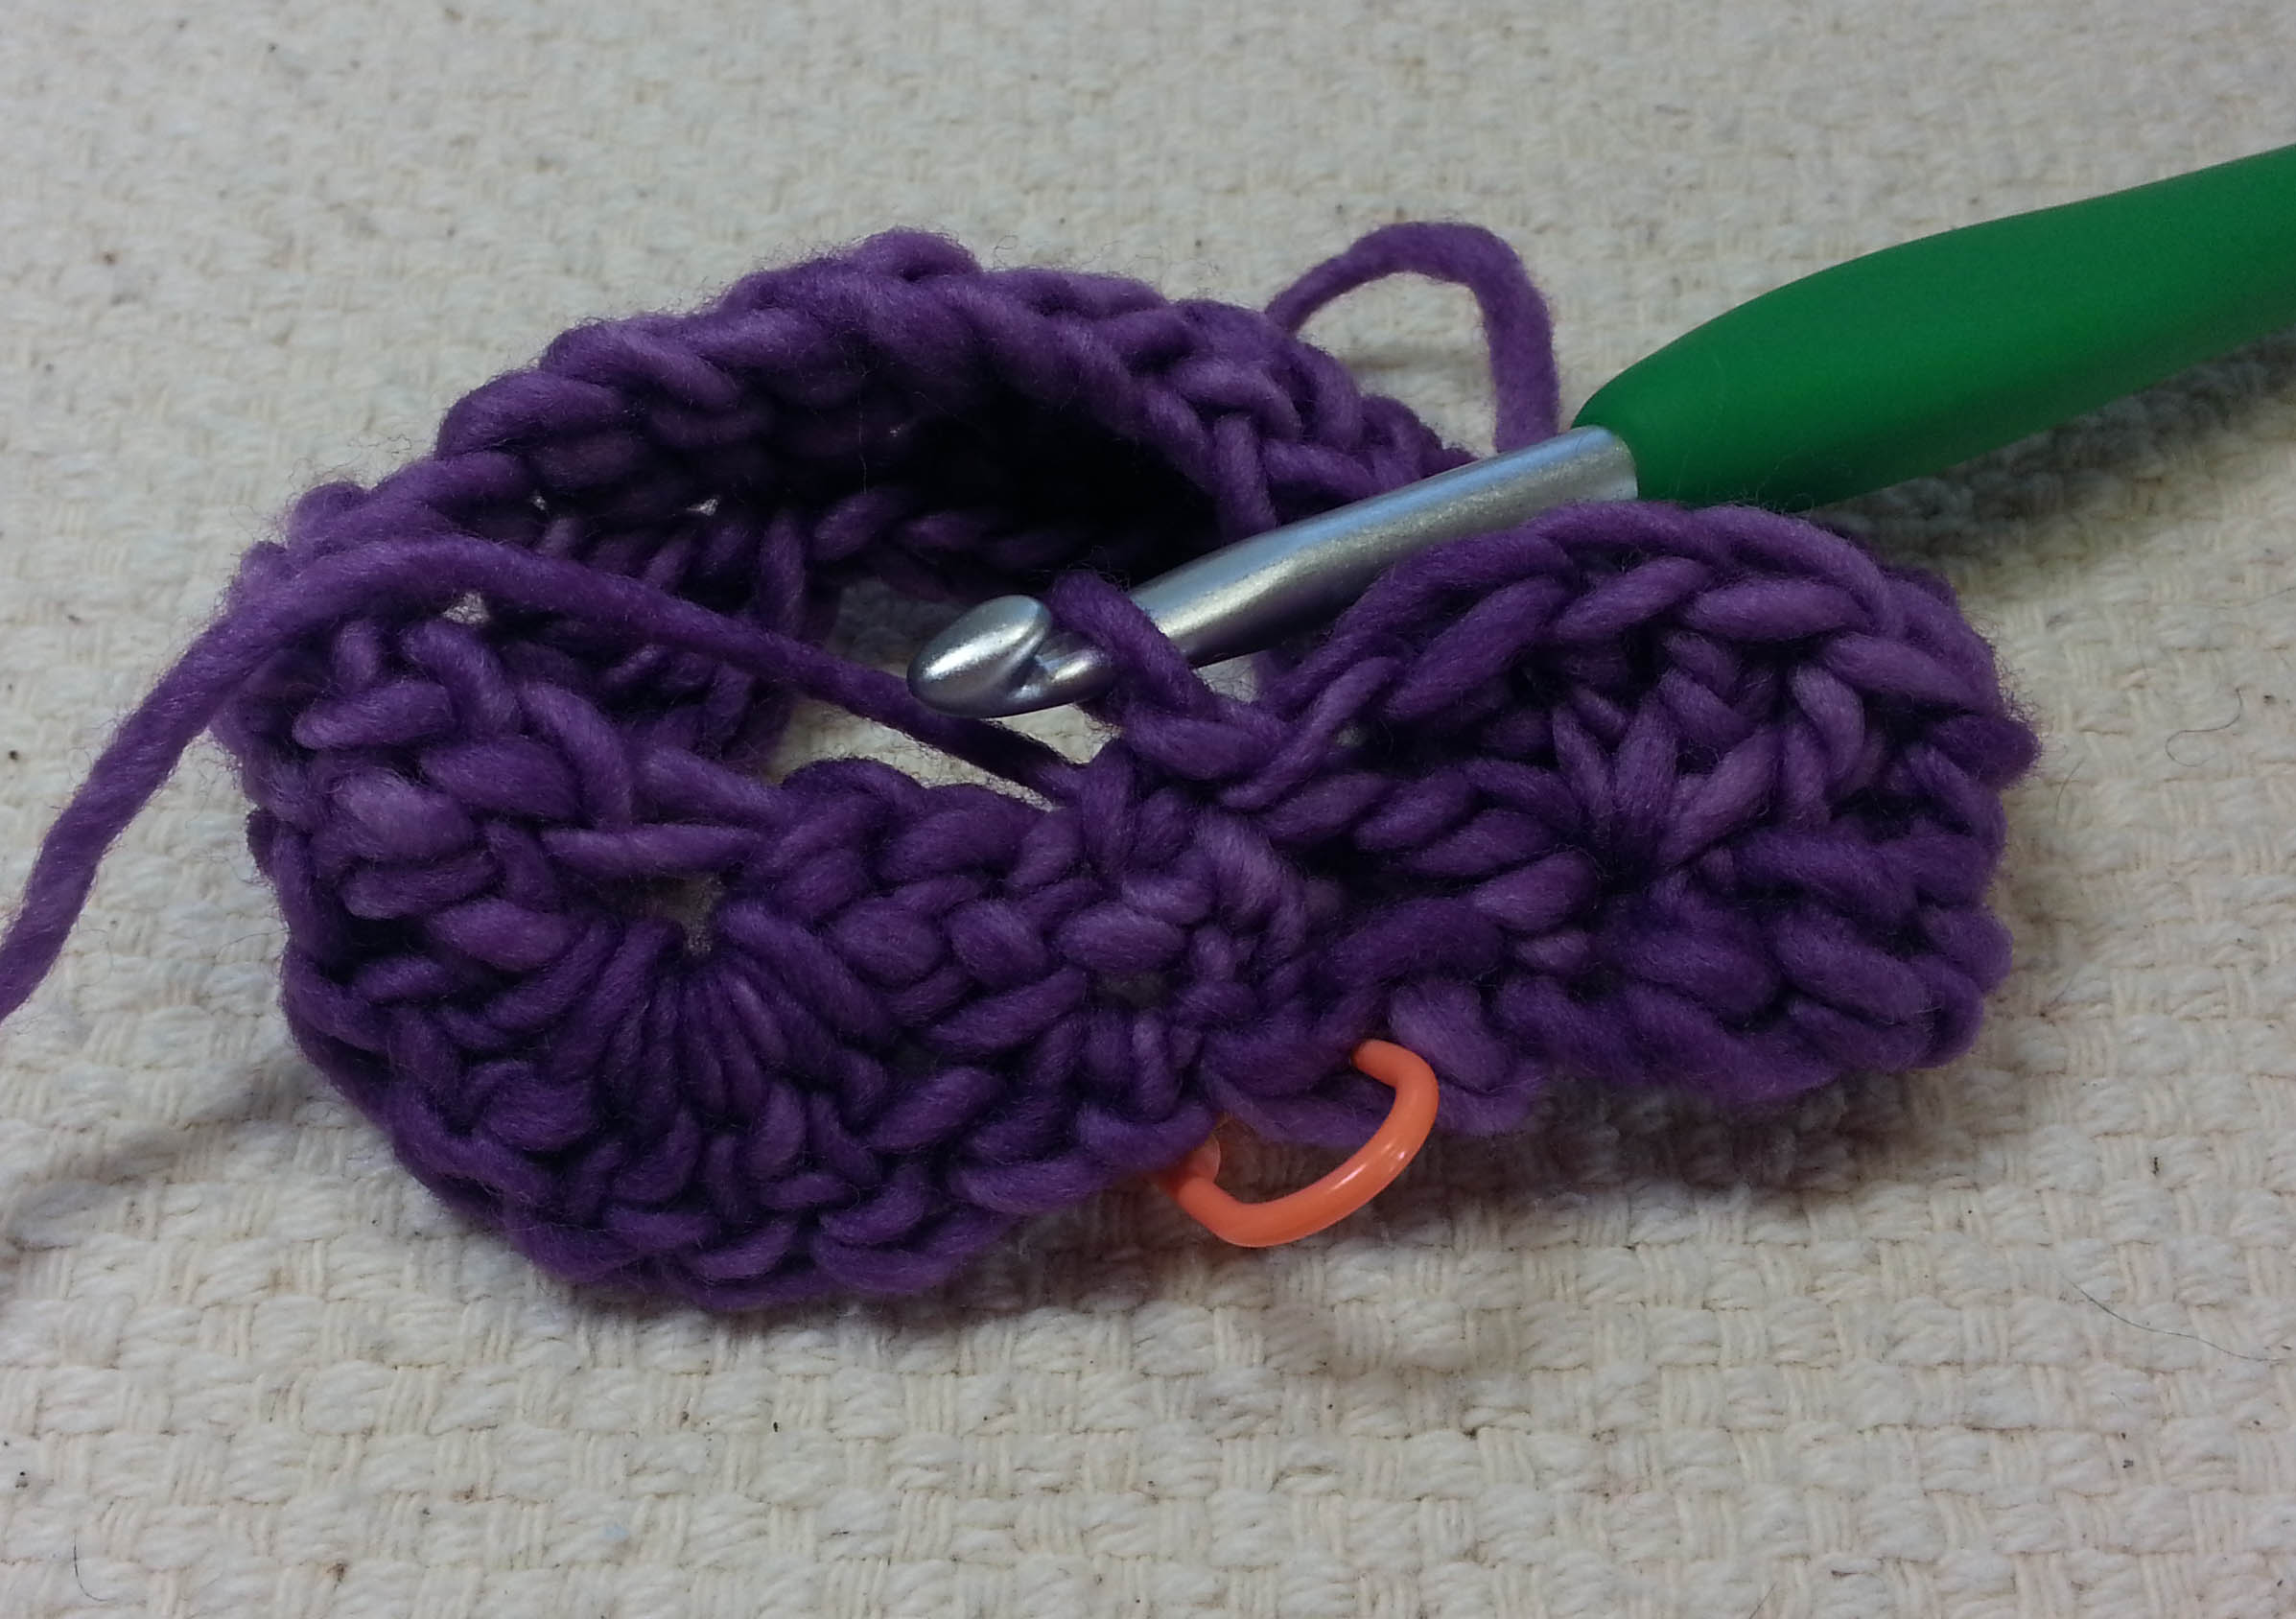
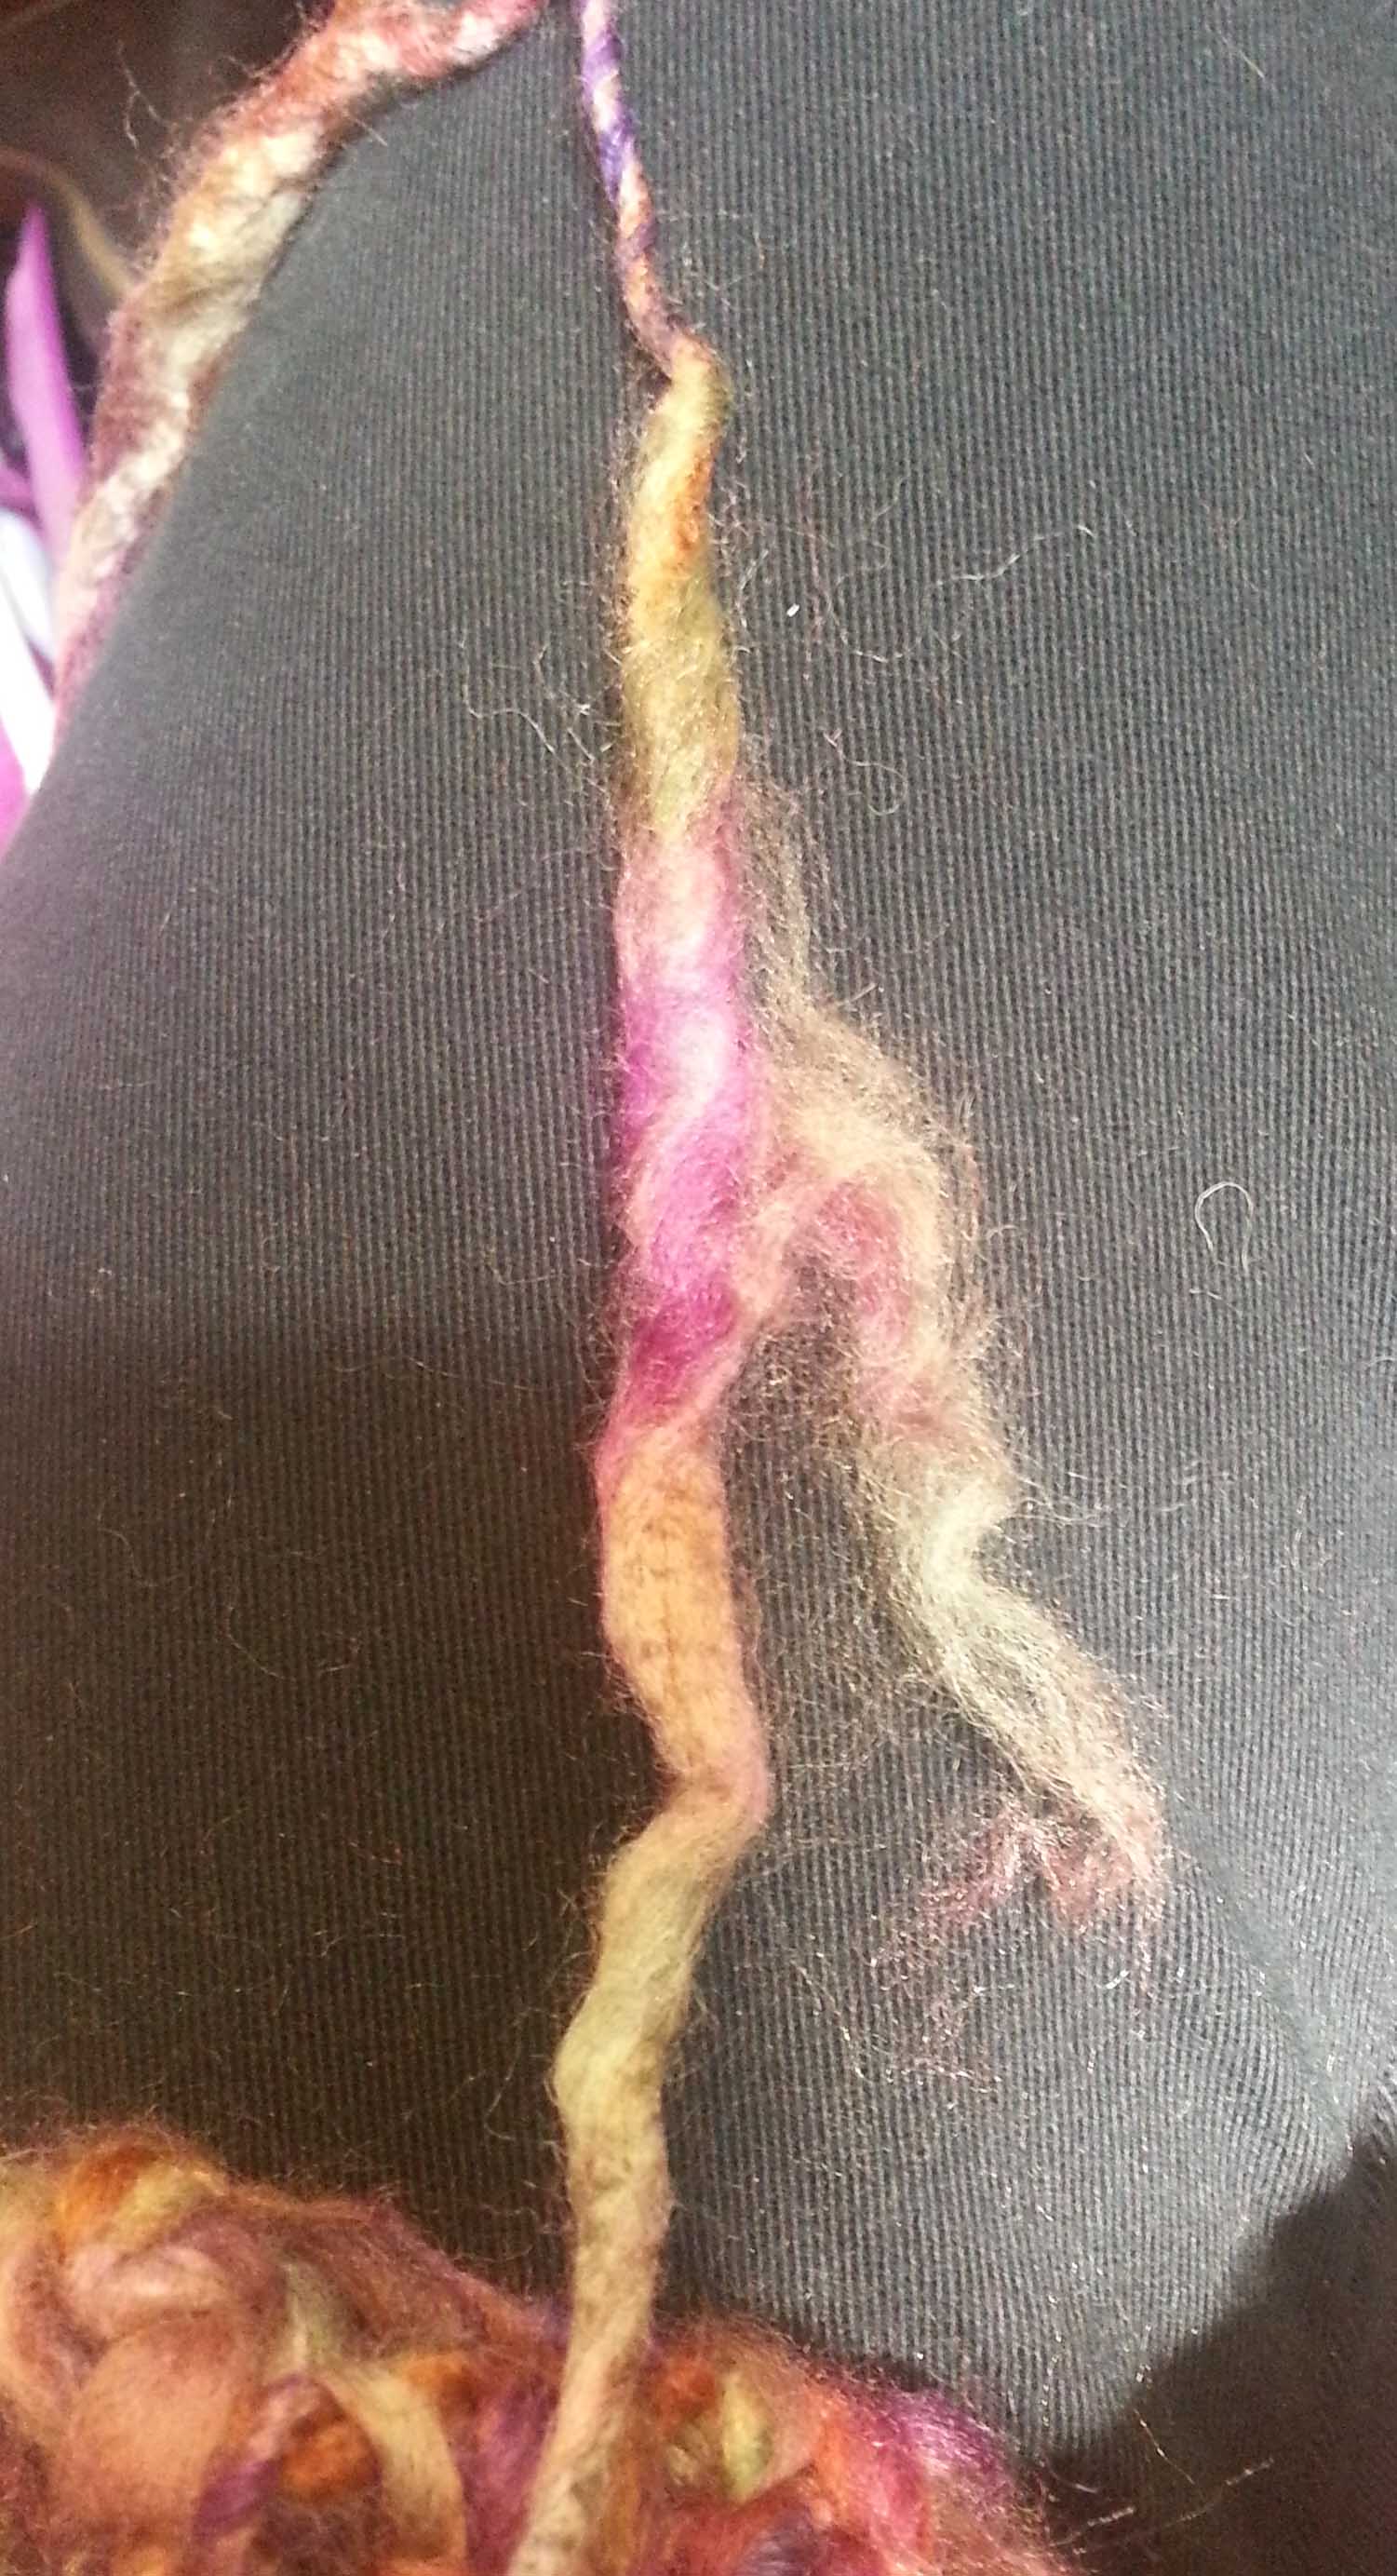
With this yarn you want to pull-out the stitches a bit carefully or you will damage the yarn. In a few spots I had to tease the stitch loose. If the thick part of the yarn gets frazzled like above, just wrap the loose bits gently around the yarn and continue crocheting. The stitches will secure the “fluff”.

Finished fabric and new button

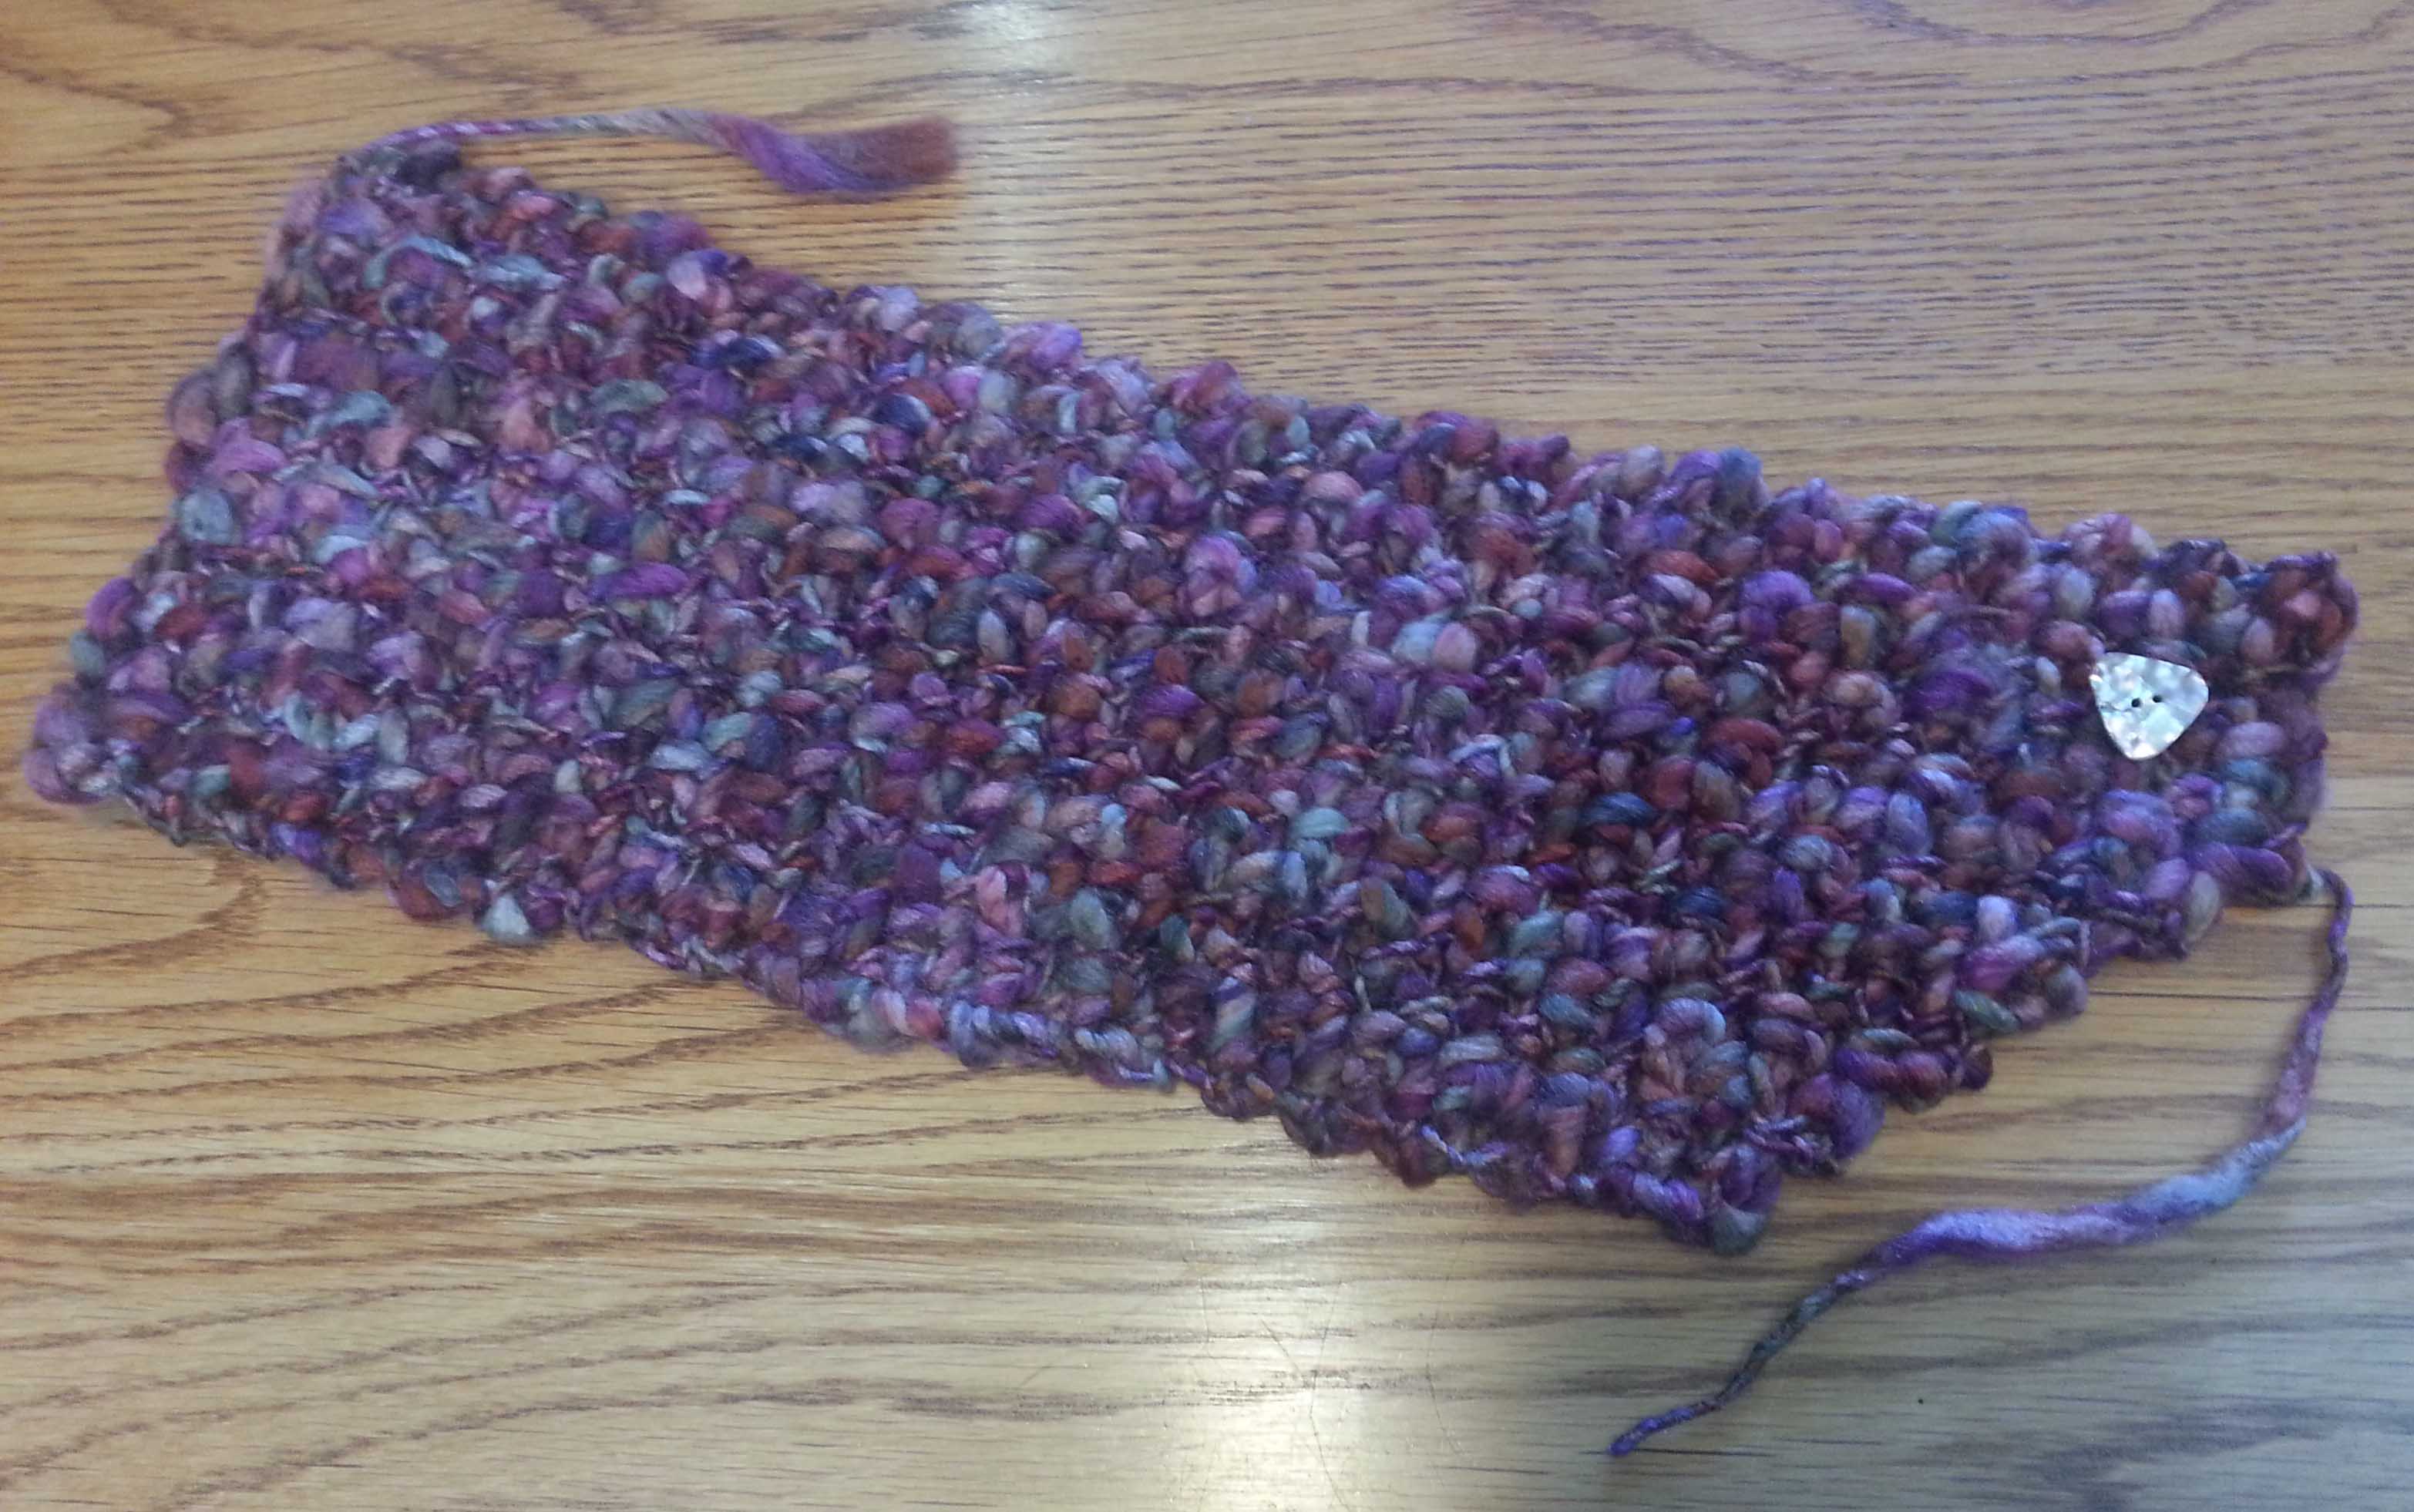
The next 2 hours were a few fits and starts, but finally I had settled on a width that worked. Jane and I decided that we liked a more asymmetrical look to the cozy so we picked out a single button that could be a feature on the finished project.

Smidgen Cowl flat view

I’m really happy with how this cozy finally came out. It is a quick project to crochet up (when you aren’t designing it). For less than $20 and 2 hours of your time you can whip up one of these neck warmers for someone special on your gifting list. The yarn comes in a wide range of colors, so you are sure to find one that is perfect for your giftee.

The Smidgen left over

Since I only had a “smidgen” of yarn left after I had woven in the tails I named this design the “Smidgen Cozy”.  The pattern instructions follow, I hope you enjoy making this cozy.

Smidgen Cowl - M2H Designs

SMIDGEN COZY

Designed by Andee Graves

Skill Level: Easy

Finished Size: 21″ (52.5cm) long x 7″ (17.5cm) wide

Materials

Yarn: Berroco “Gusto” (45% Wool/45% Acrylic/10% Vicose; 70 yds) 1 skein in color #1935 Jasper

Crochet Hook: US N (10 mm) or size needed to obtain gauge.

Additional Materials:

Button ¾” diameter or size to fit thru ch-1 sp,

Yard of lighter weight smooth yarn to sew button on with,

Yarn needles (big one for weaving in ends, small one for sewing on button),

Stitch markers

Gauge: 4 stitches and 9 rows = 4″ (10 cm)

Pattern Notes

Because this is a thick-n-thin yarn it is a good idea to count your stitches each row to be sure you haven’t missed or added one.

Sample used up almost every smidgen of the ball of yarn, be sure to leave only 6” of tail at the beginning.

Row 1 is worked into the back bump (or bar) of the foundation chain to create a finished look to the starting edge.

Instructions

Row 1: Ch 17, sc in 2nd ch from hook, (ch 1, sk 1 ch, sc next ch) 7 times, sc last ch. [7 ch-1 sp, 9 sc]

Row 2: Ch 1, turn, sc first st, (ch 1, sk 1 st, sc next ch-1 sp) 7 times, sc last st.

Rows 3 – 37: Repeat Row 2. Place stitch marker at beginning of Row 37 leave in place until completed crocheting, marked side is decrease edge for next 9 rows.

Row 38: Ch 1, turn, sc first st, (ch 1, sk 1 st, sc next ch-1 sp) 7 times. [7 ch-1 sp, 8 sc]

Row 39: Ch 1, turn, sk first st, sc next ch-1 sp, (ch 1, sk next st, sc next ch-1 sp) 6 times, sc last st. [6 ch-1 sp, 8 sc]

Row 40: Ch 1, turn, sc first st, (ch 1, sk 1 st, sc next ch-1 sp) 6 times. [6 ch-1 sp, 7 sc]

Row 41: Ch 1, turn, sk first st, sc next ch-1 sp, (ch 1, sk next st, sc next ch-1 sp) 5 times, sc last st. [5 ch-1 sp, 7 sc]

Row 42: Ch 1, turn sc first st, (ch 1, sk 1 st, sc next ch-1 sp) 5 times. [5 ch-1 sp, 6 sc]

Row 43: Ch 1, turn, sk first st, sc next ch-1 sp, (ch 1, sk next st, sc next ch-1 sp) 4 times, sc last st. [4 ch-1 sp, 6 sc]

Row 44: Ch 1, turn sc first st, (ch 1, sk 1 st, sc next ch-1 sp) 4 times. [4 ch-1 sp, 5 sc]

Row 45: Ch 1, turn, sk first st, sc next ch-1 sp, (ch 1, sk next st, sc next ch-1 sp) 3 times, sc last st. [3 ch-1 sp, 5 sc]

Row 46: Ch 1, turn sc first st, (ch 1, sk 1 st, sc next ch-1 sp) 3 times. [3 ch-1 sp, 4 sc]

Finishing

Weave in tails securely. Use lighter weight yarn to sew button on Row 3 an inch in from the longest edge. Use a ch-1 sp on Row 43 or 42 as your button-hole.

Everything Moves

I’ve been inspired by and attempted a lot of things in my life. Sometimes people look at me oddly for all the things I’ve done. Of course, many of them I’ve only gotten a taste of.

2 Little warm glass pieces I made in my class.

For example, the “warm glass” class I took one Saturday nearly 10 years ago.  I really liked it, but I found out 2 days later I was pregnant with my 2nd child. It did give me a great appreciation for the work of glass artists though, and I always visit the glass making shops in Estes Park whenever I get a chance.

Once, what seems a life-time ago (in my early twenties), I was inspired to go to college because I wanted to become an animator. Life happened and I didn’t finish that course of study, though I really enjoyed those years in college and was introduced to amazing literature and art.

My love for artistic and interesting animation didn’t wane. In fact, I had a pretty extensive collection of animated films and shorts on VHS long before I had children in my household. Finally, nearly 30 years after that dream of being an animator was left in the dust, I’m brushing off that fantasy and making another try at it.

One of the lovely things about today’s technology is that animation for the hobbyist is far more readily and affordably available. With just my digital camera, laptop and some video editing software I will be able to create my own stop-motion animation.

My set-up in the Design office for filming my first Stop-Motion animation.

Even better, my first attempt is going to be using crochet and yarn as my “objects”. Nothing I love better these days than combining my “art” and “crochet”.

I’ve been researching on-line what the recommendation is for the number of frames per second. The more frames you use the smoother the motion will appear. I’m a little impatient and have decided to go with 15 frames per second, I also like the “artsy” look of the slightly jerky motion from fewer frames. Will see what I think of it after I create this first short little film.

Even at 15 frames per second (15 FPS) I’m still going to be taking a lot of photographs for a 20 second sequence. That’s 300 photos. Then I have to import those all into my video editor and turn it into a film. This might take a while. I’ll let you know once it is done.

Meanwhile if you want to see a marvelous example of Stop-Motion animation in a feature-length movie, go check out “Shaun the Sheep the Movie”.

Great Minds

Those of you that have been following my blog for a while have heard me mention my good friend and mentor, Karen Ratto Whooley. Karen was my official CGOA mentor when I signed up to be an Associate Professional member of CGOA. Even though I officially graduated to Professional status some time back, we are still good friends and remain in regular contact.

Karen and I

I got to see Karen again, albeit briefly at the Knit & Crochet Show in San Diego a couple of weeks ago. We even managed to get a photo of the 2 of us.  We chuckled afterward because we were each wearing the other’s “colors” in this photo. Karen in her hot pink blouse and me with a blue-green scarf.

Ebb & Flow Scarf worn Jabot style
Ebb & Flow Scarf / M2H Designs

That scarf was actually part of our hilarity. Not because of the color but because it is one of my designs from my summer collection: “Ebb & Flow Scarf”.

The week before I left for the show I got Karen’s newsletter in my email and it was about her design, “Undulating Shells Shawl”.  I just about choked because I had used the same stitch pattern for my scarf. A definite case of great minds having the same idea or in this case, very similar ideas.

One of the wonderful things about being a designer is seeing all the different ways my fellow designers and I can interpret stitch patterns to create wearable and decorative objects in crochet. I thought it would be fun for you, my readers to get a glimpse into some of those differences.

Ebb & Flow Scarf / M2H Designs

I created this scarf from some lovely fingering weight yarn hand-dyed by the talented Riin of “Happy Fuzzy Yarns” (don’t you love the name). This is blend of merino and tencel making for super soft fabric with a gorgeous drape.

I created my scarf by working off a center foundation, with half the scarf growing from the “top” of the foundation coming to an end that is an exaggeration of the shell pattern in the length of the scarf. The second side of the scarf is a repeat of the first side worked off the “bottom” of the center foundation. The side edging is worked with each row of shells creating a simple scalloped appearance along the long sides of the scarf.

Undulating Shells Shawl / KRW Knitwear Studio

I took a closer look at Karen’s shawl on Ravelry. I determined that though the body of the fabric was made with the same stitch pattern, we had both taken very different approaches to how we designed our projects.

KRWs ending edging of shawlKaren’s shawl is worked in laceweight bamboo yarn off a foundation in one direction, ending with a row of stitches that match the foundation row then a lovely stacked shell ending edge. That same edging is also worked off the base of the foundation row. Her side edging is the simple line of the undulating shells.Back of KRWs Shawl


You can purchase both of these patterns on Ravelry:

Undulating Shells Shawl / KRW Knitwear Studio  $7.50

Ebb & Flow Scarf / M2H Designs   $4.99