I’m way late with my mid-week post, but I have been having a Whirlwind of a week. Clearly I jinxed myself naming my newest hat pattern that.
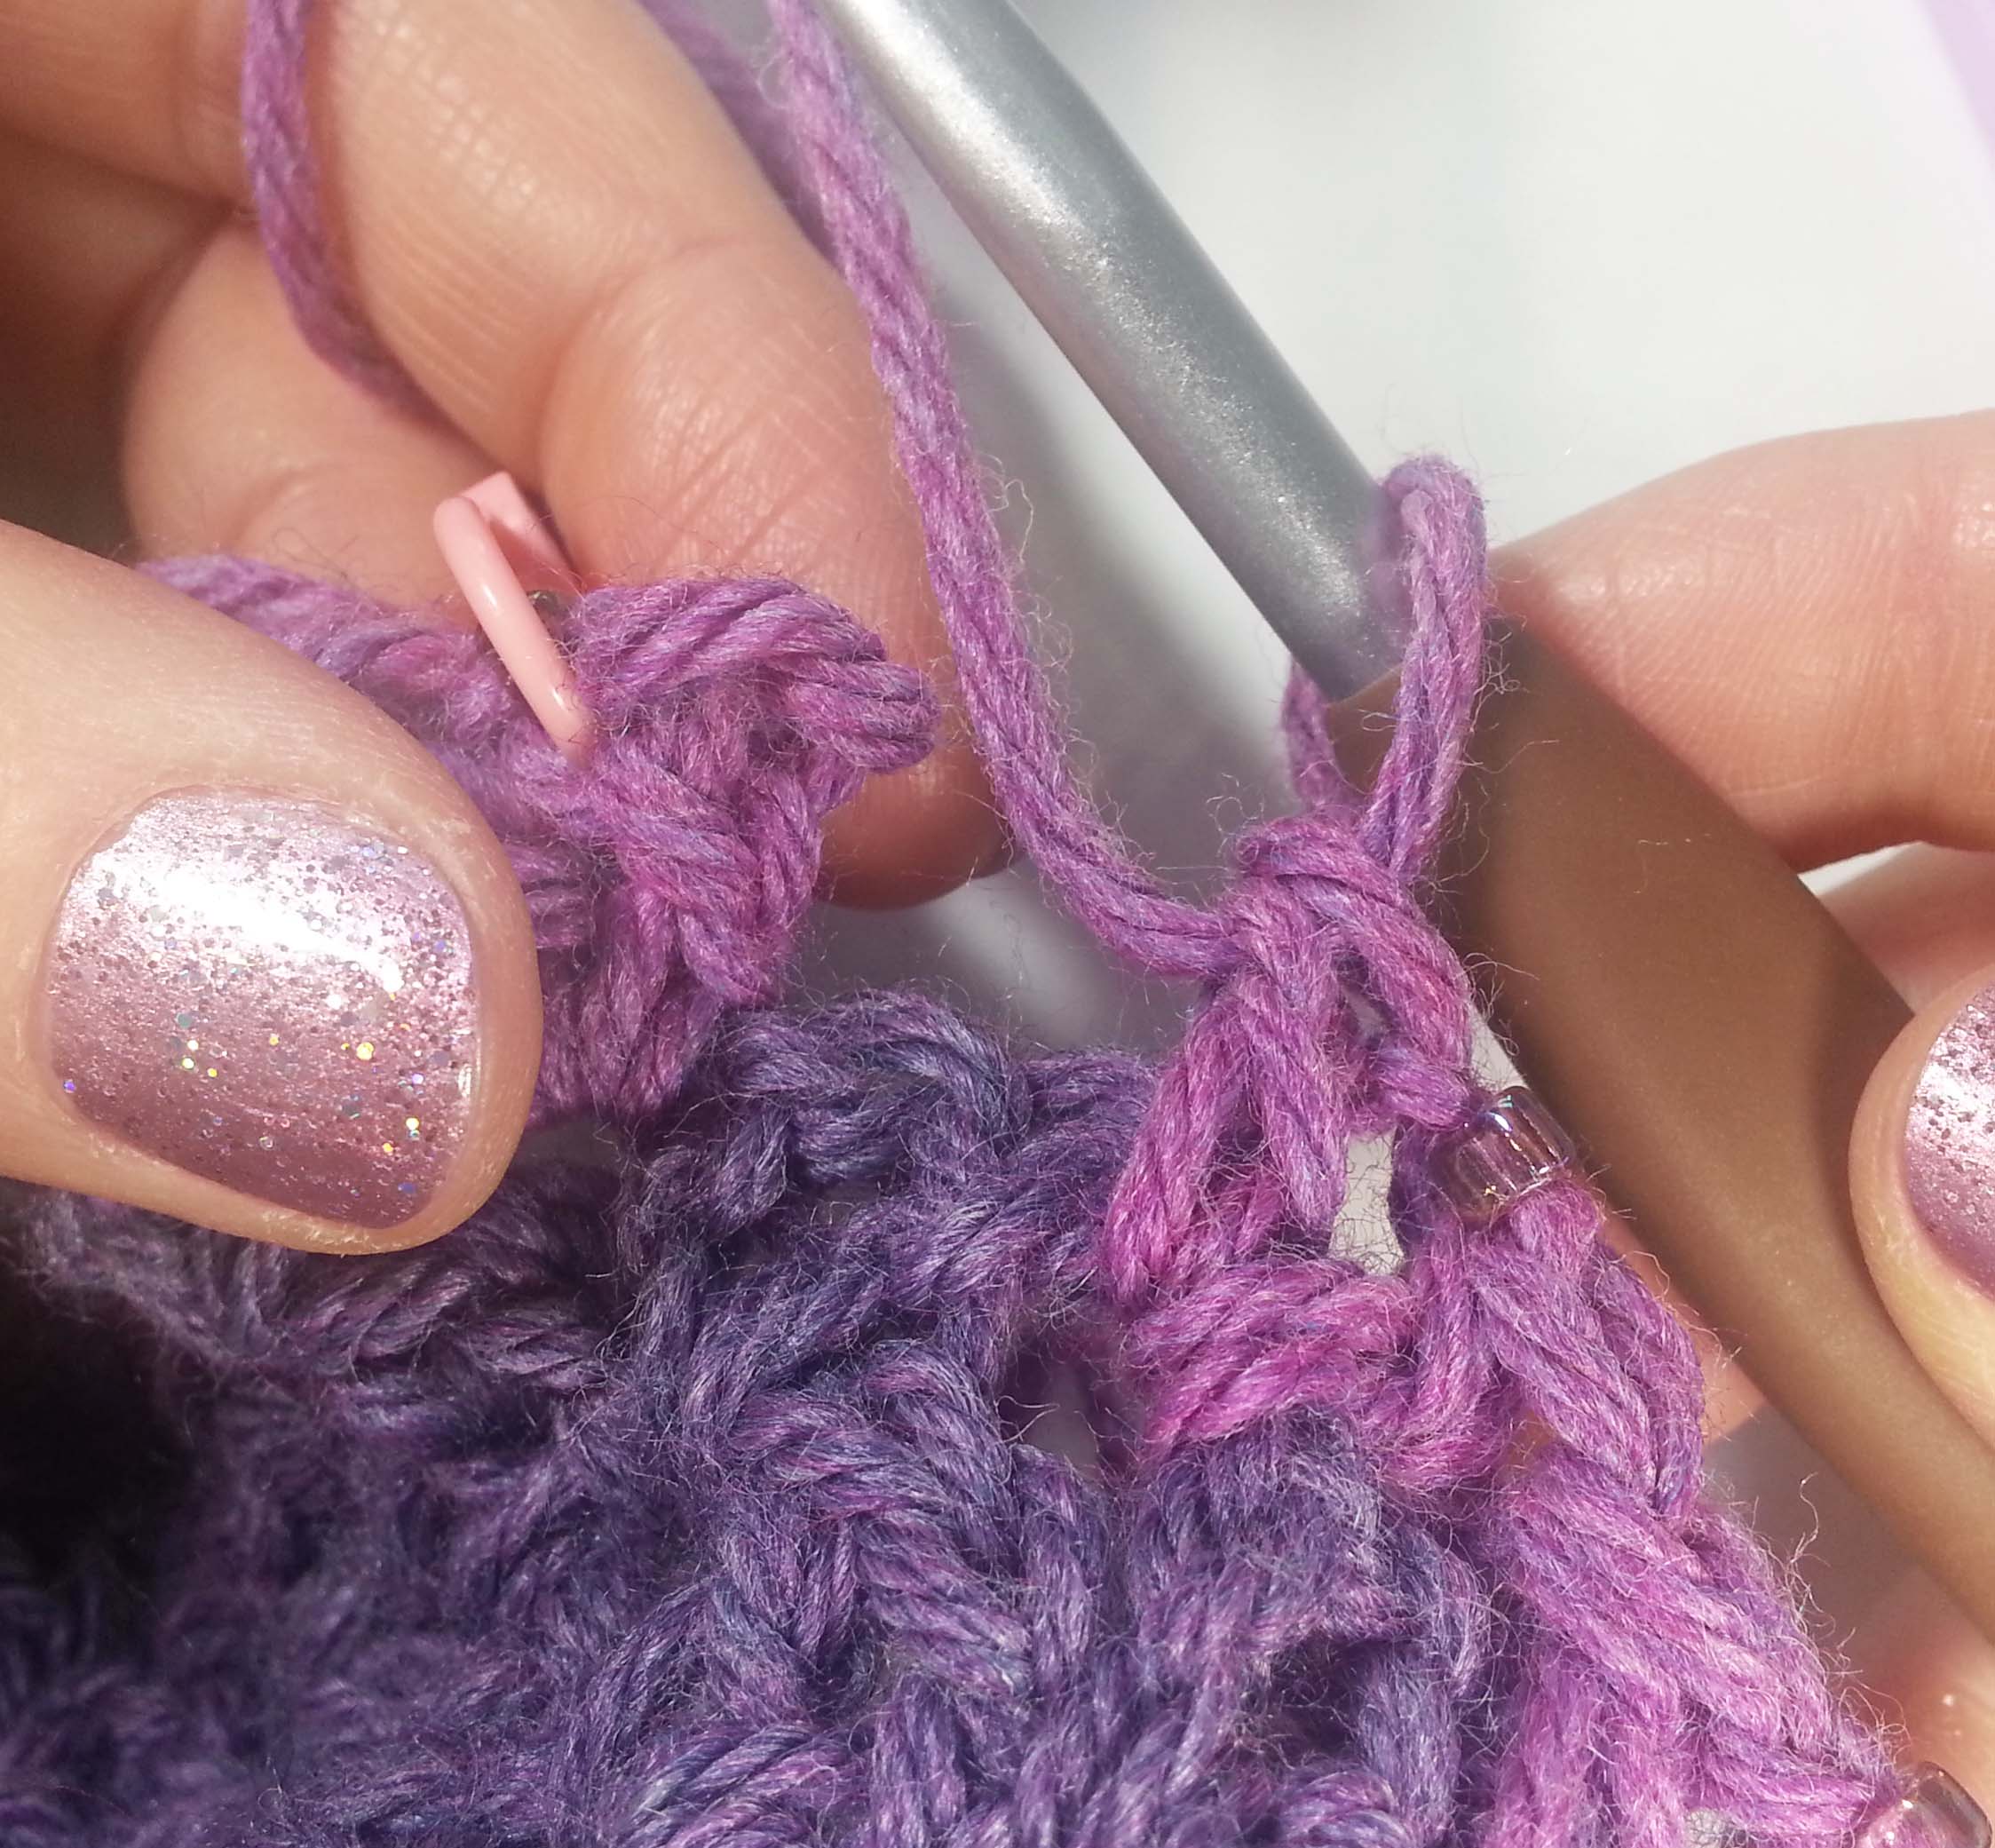
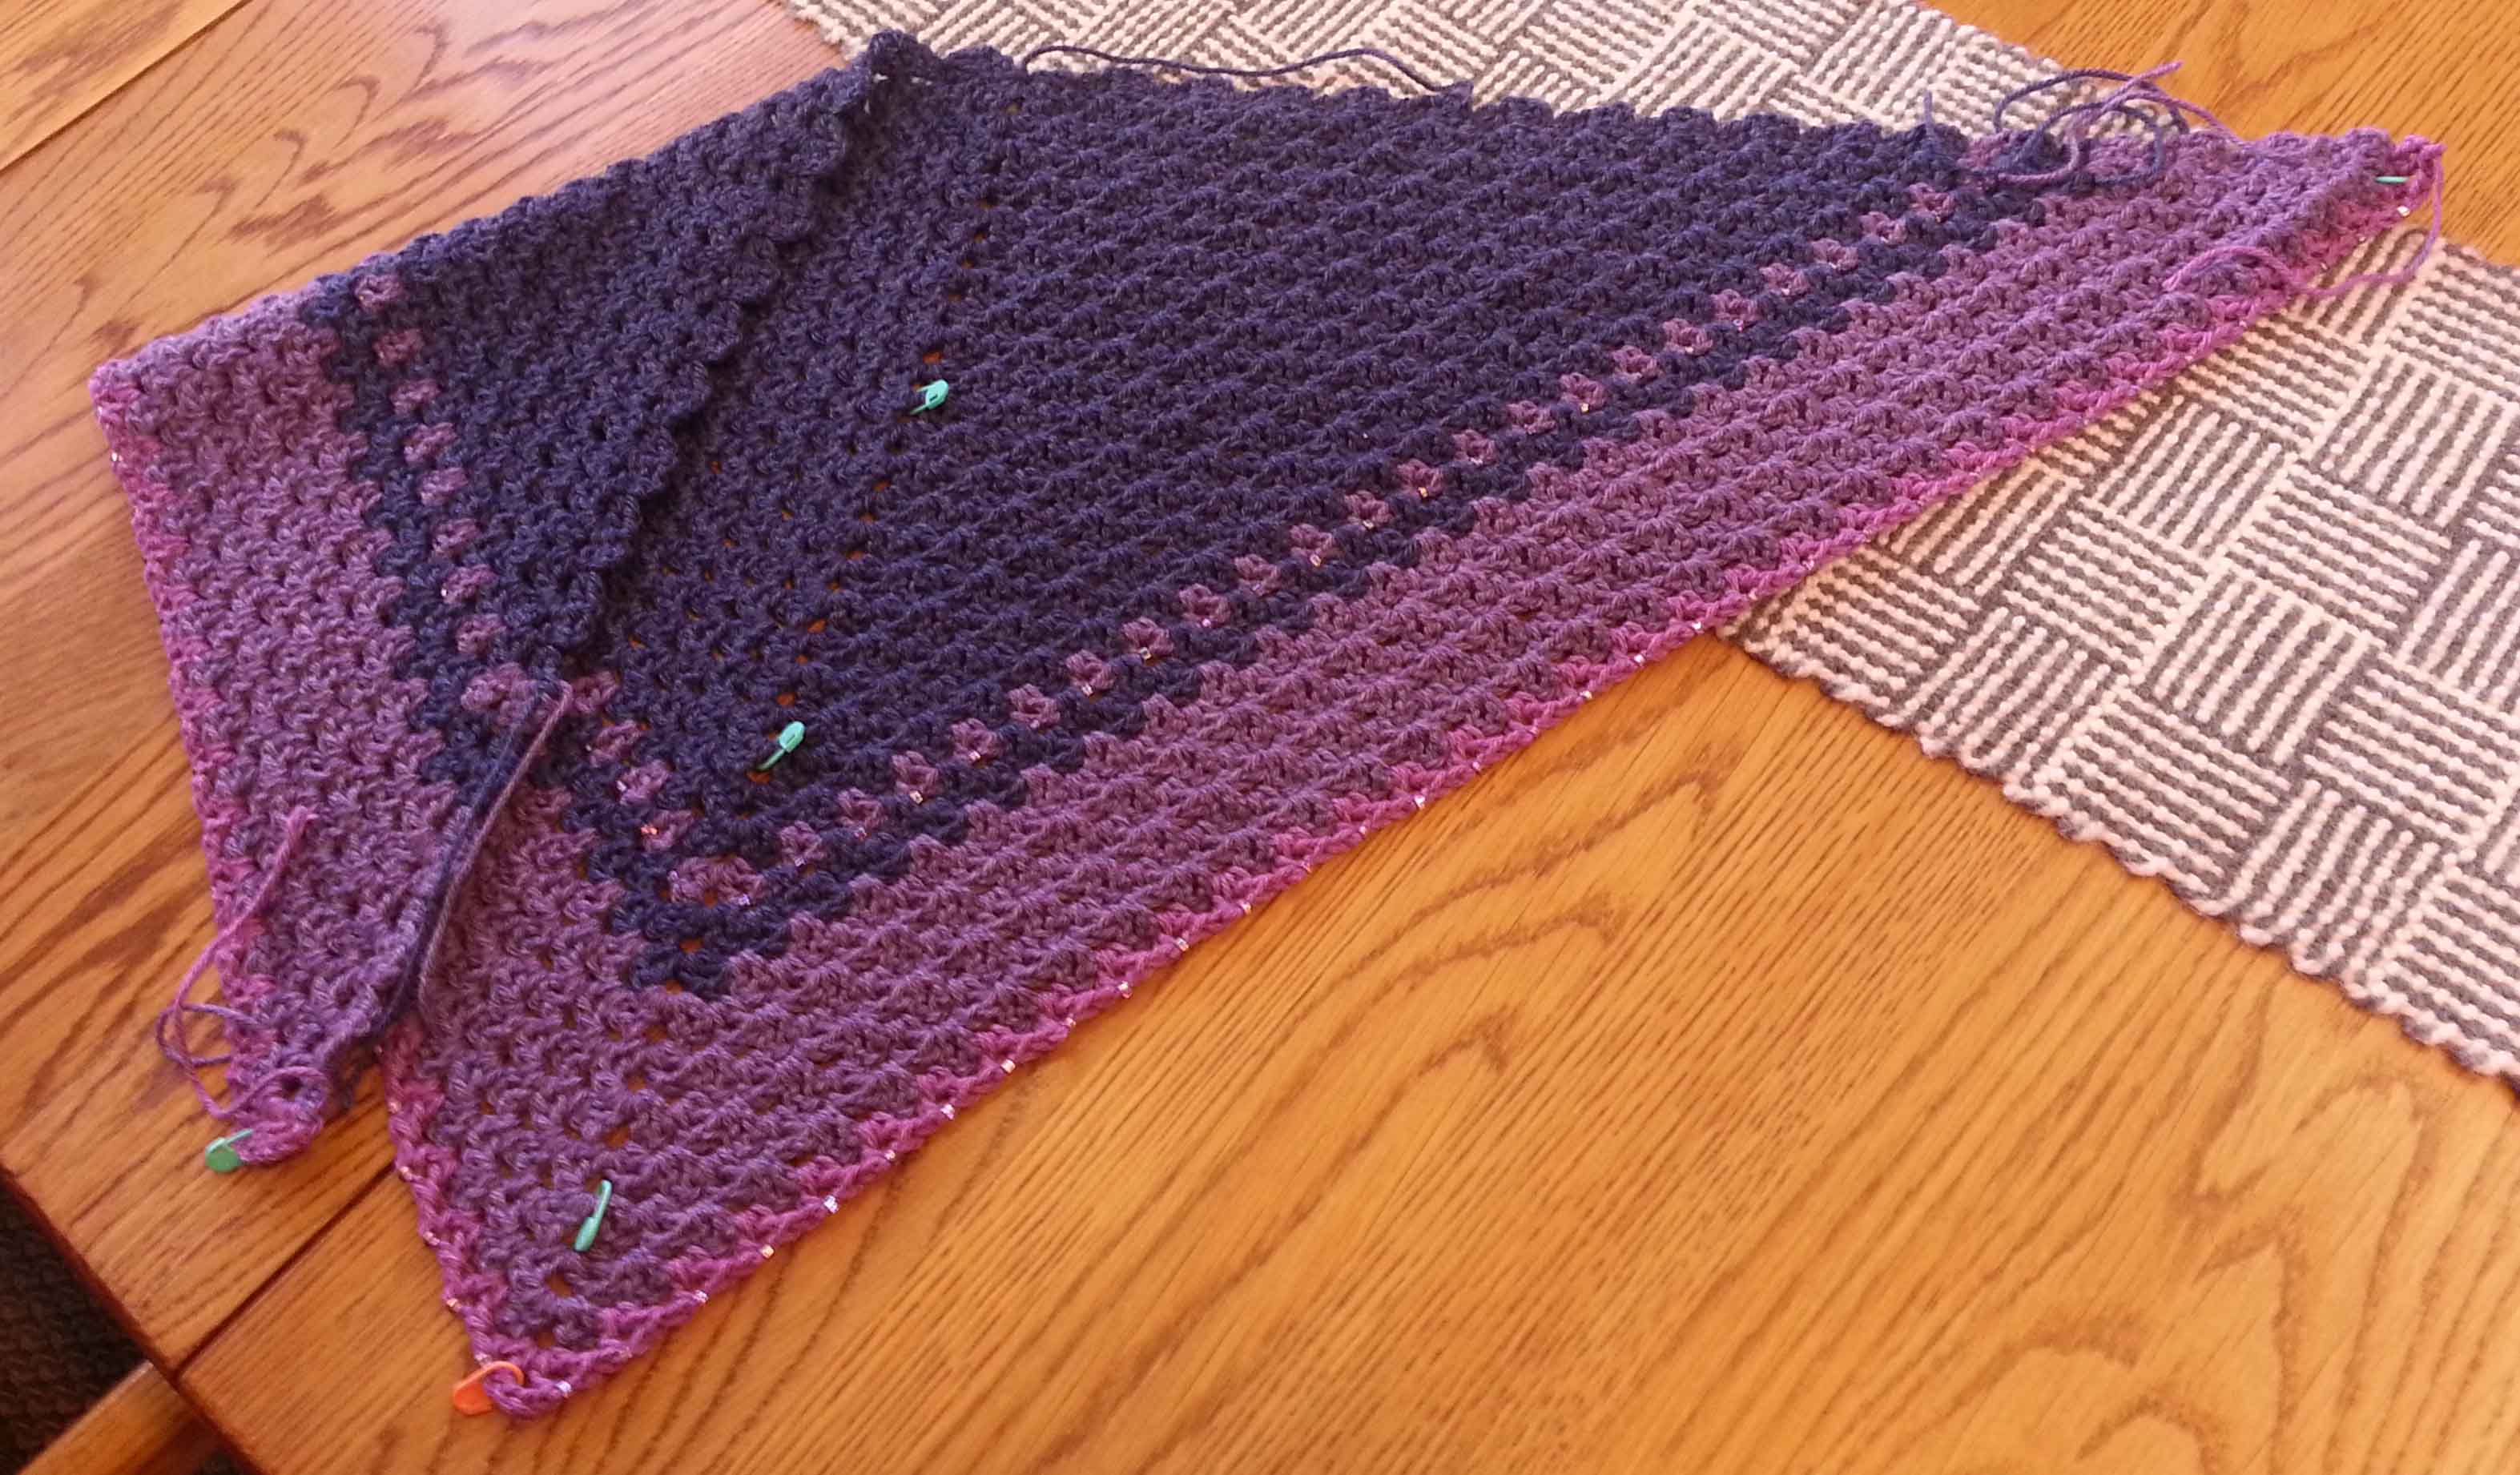
Amongst all my other tasks I’ve been tackling, I’ve been crocheting my latest Playing with Triangles Shawl and ran into a little problem. I had finished the second beaded row and cut my yarn when I discovered that one of my V-stitches in the beginning of the row only had one leg of the V.
It had taken some time to work that row because each V-stitch had a hoisted-on bead on the chain one. I really didn’t want to pull out the whole row and re-do all those beaded stitches. Plus I wasn’t sure I would have enough yarn to finish the whole row once I put in the missing double crochet stitch.
Instead I decided to do a little surgery on my project.
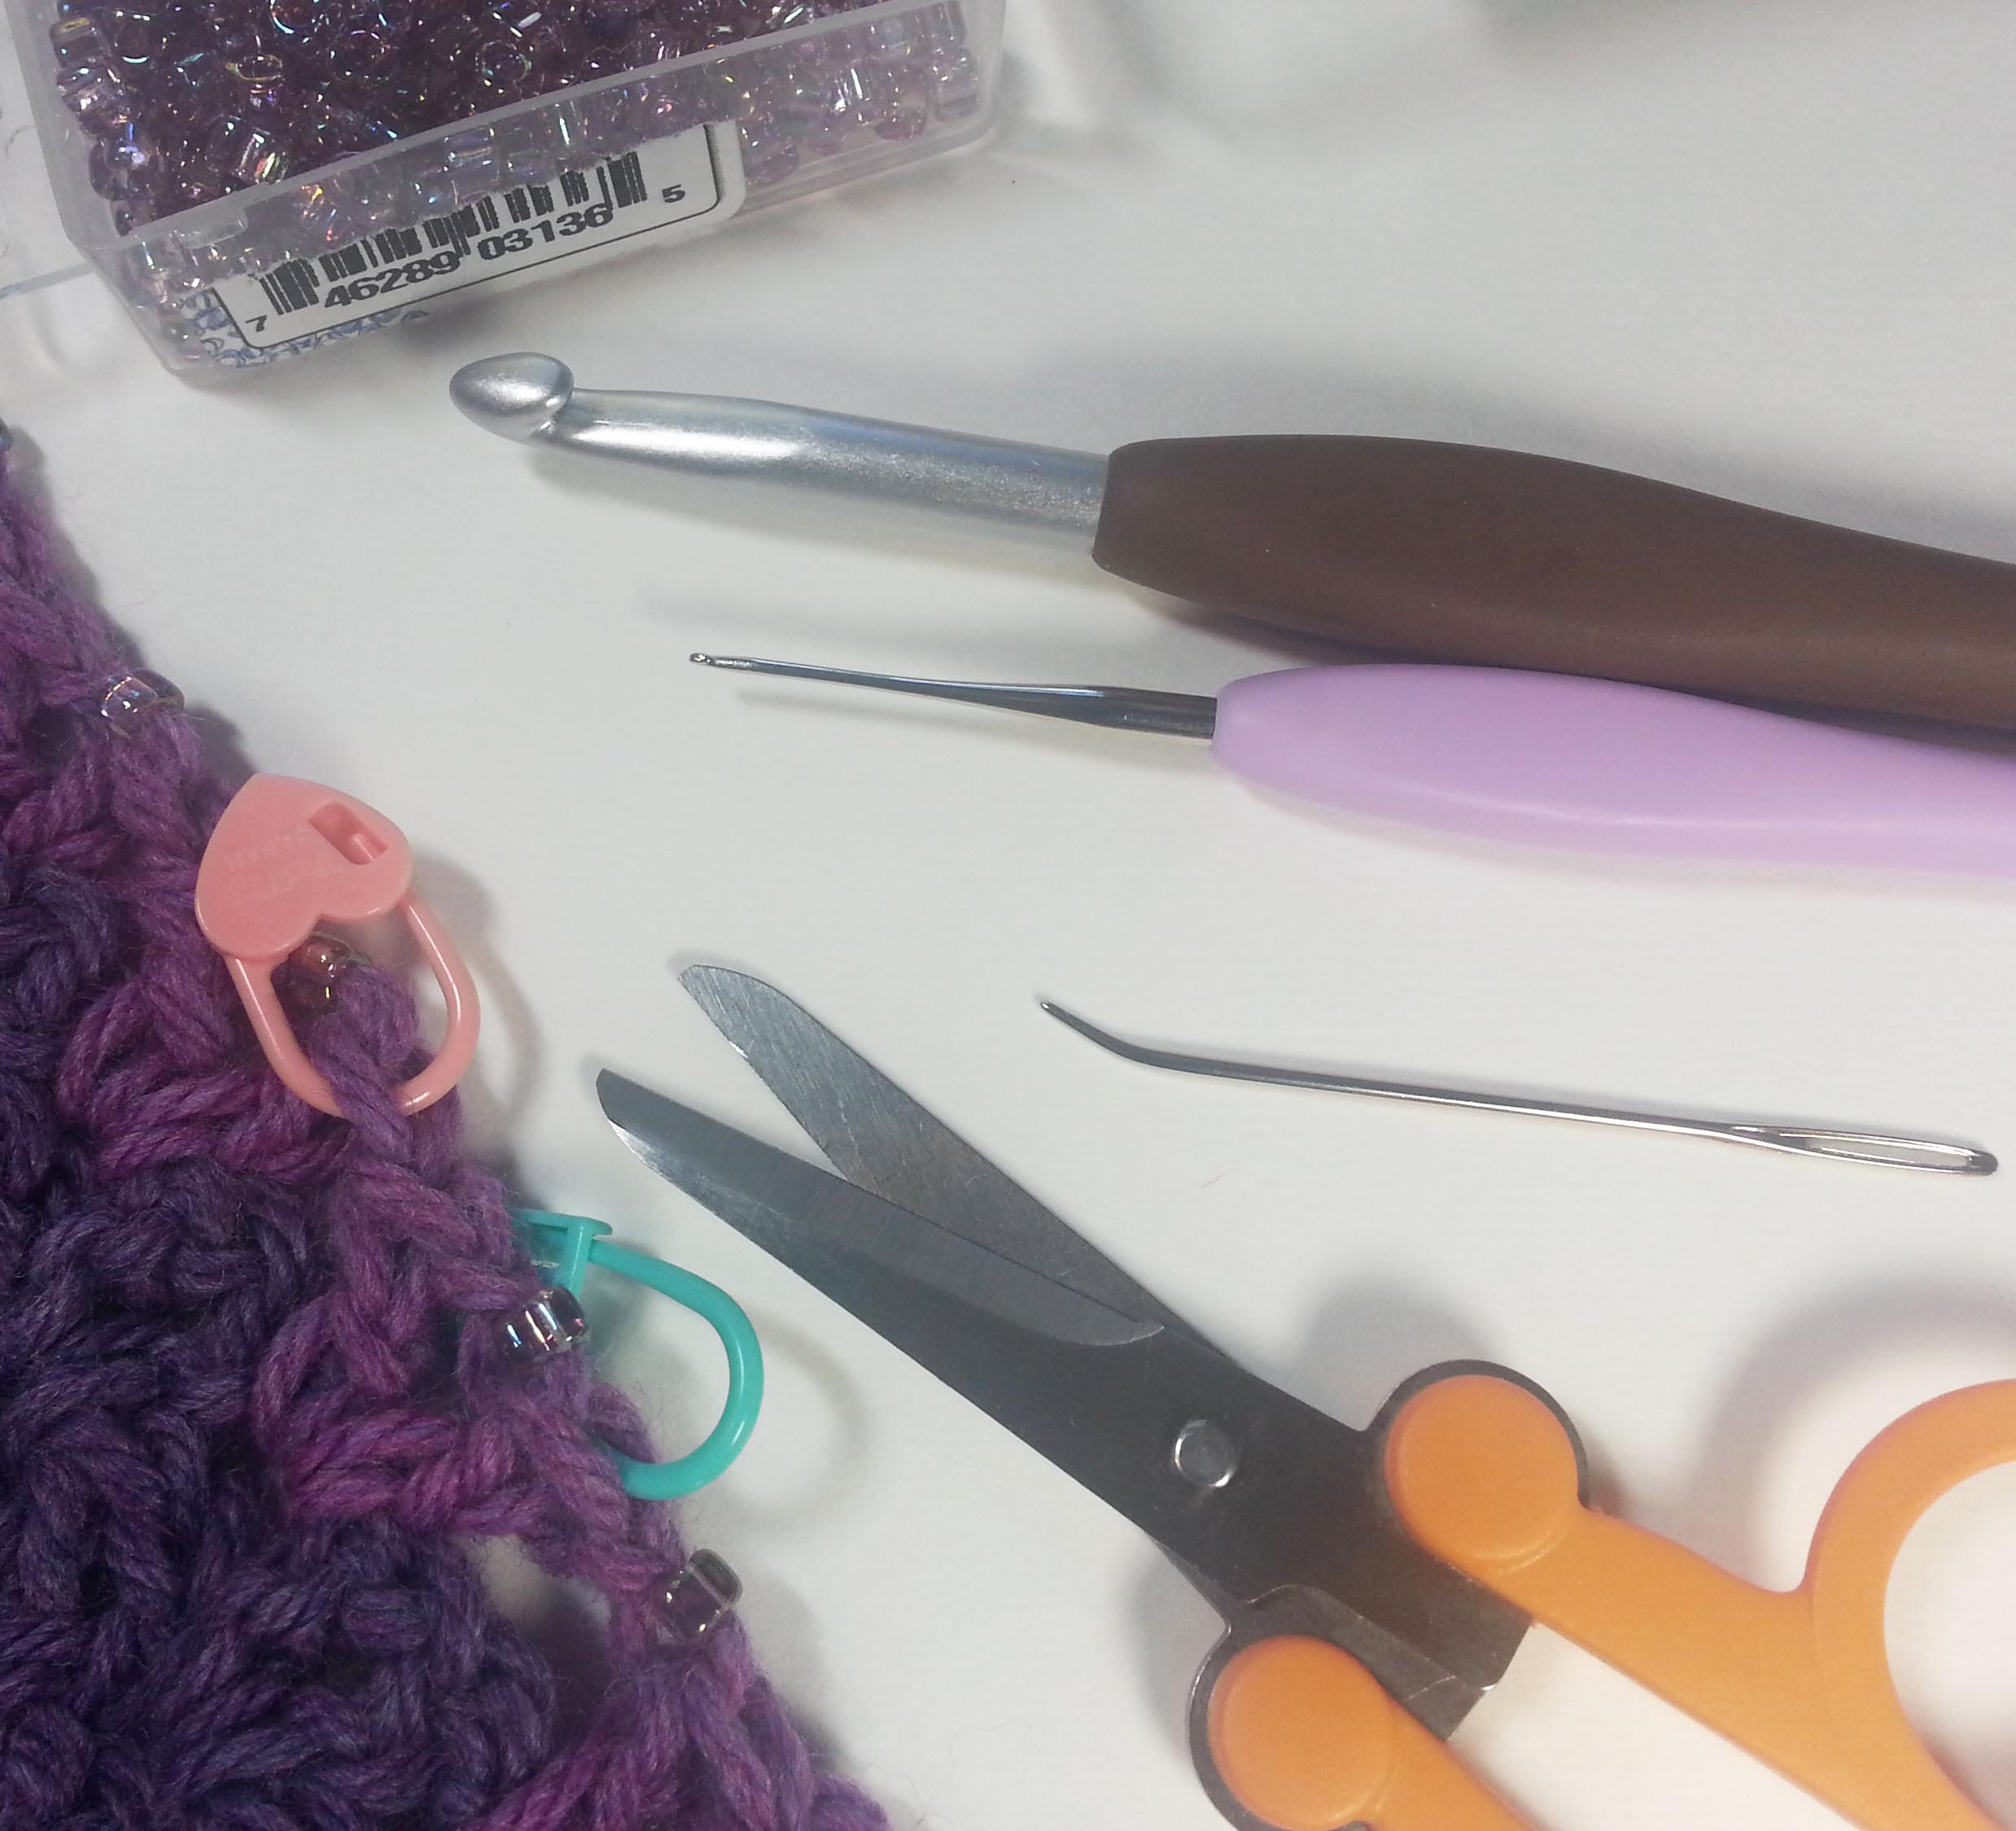
It’s a bit un-nerving taking scissors to my crochet work, but I am getting more comfortable with it all the time. This row wasn’t so bad, since it was the last row I had worked. I wouldn’t have to incorporate the new stitches with a row above.
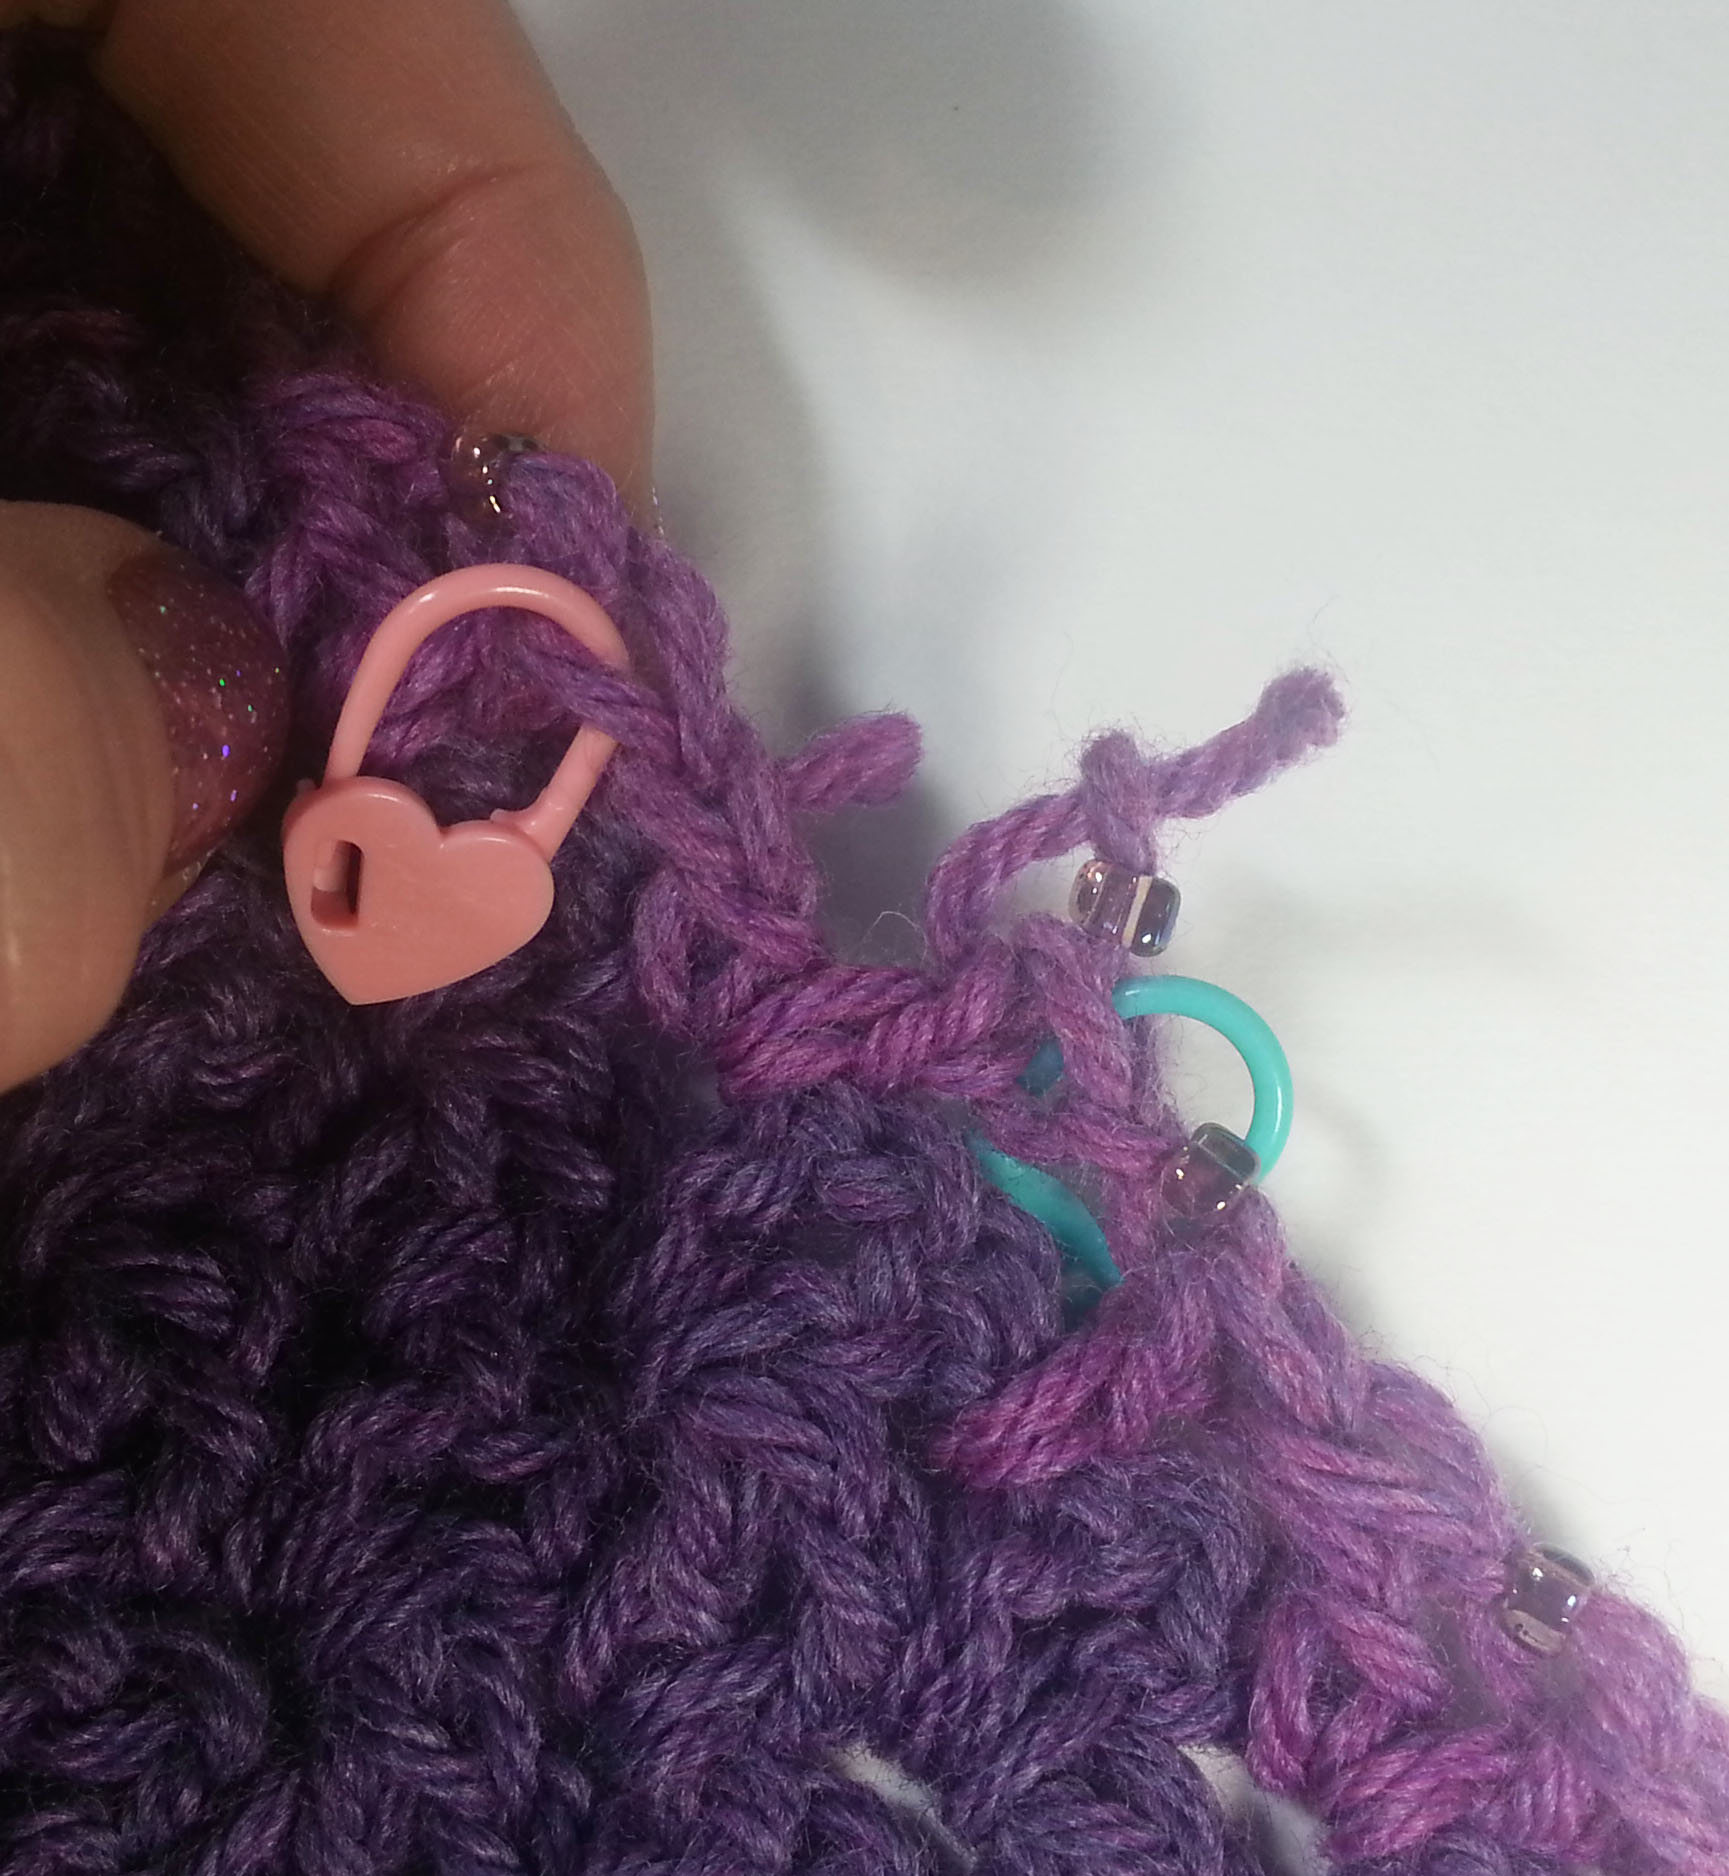
Unraveling to where I need to work the missing double crochet.
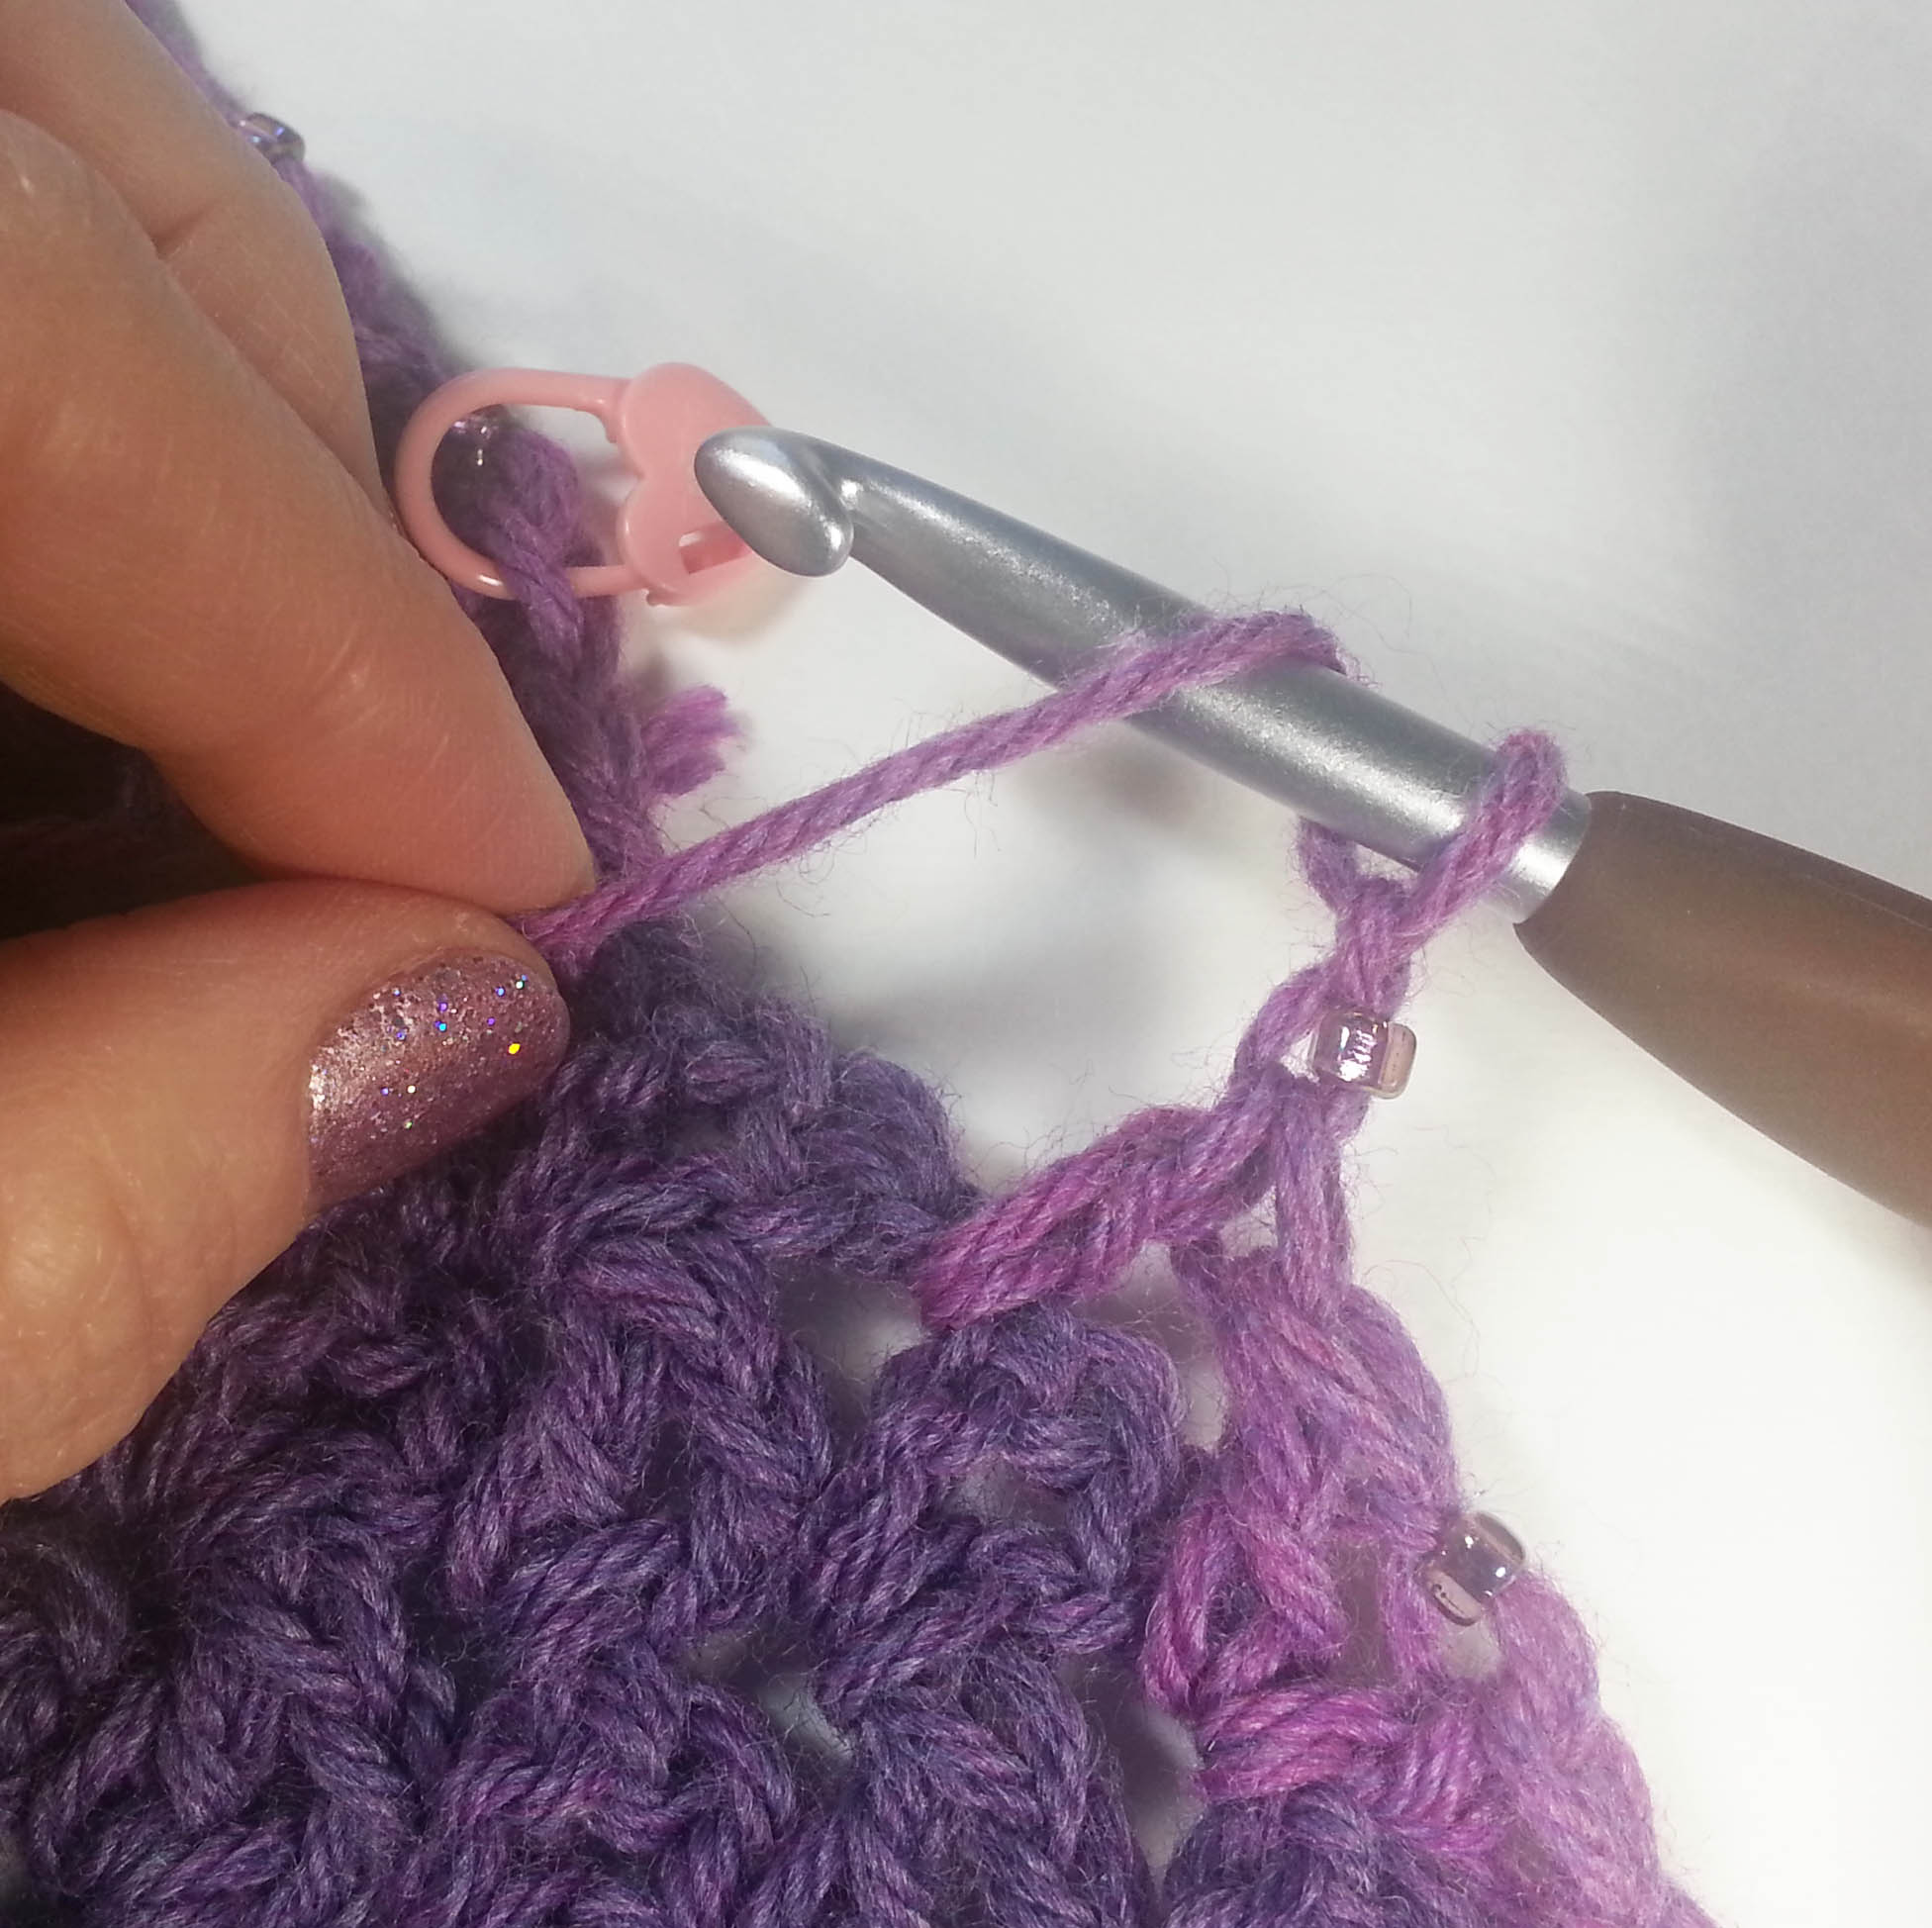
Starting repairReady to add new yarn
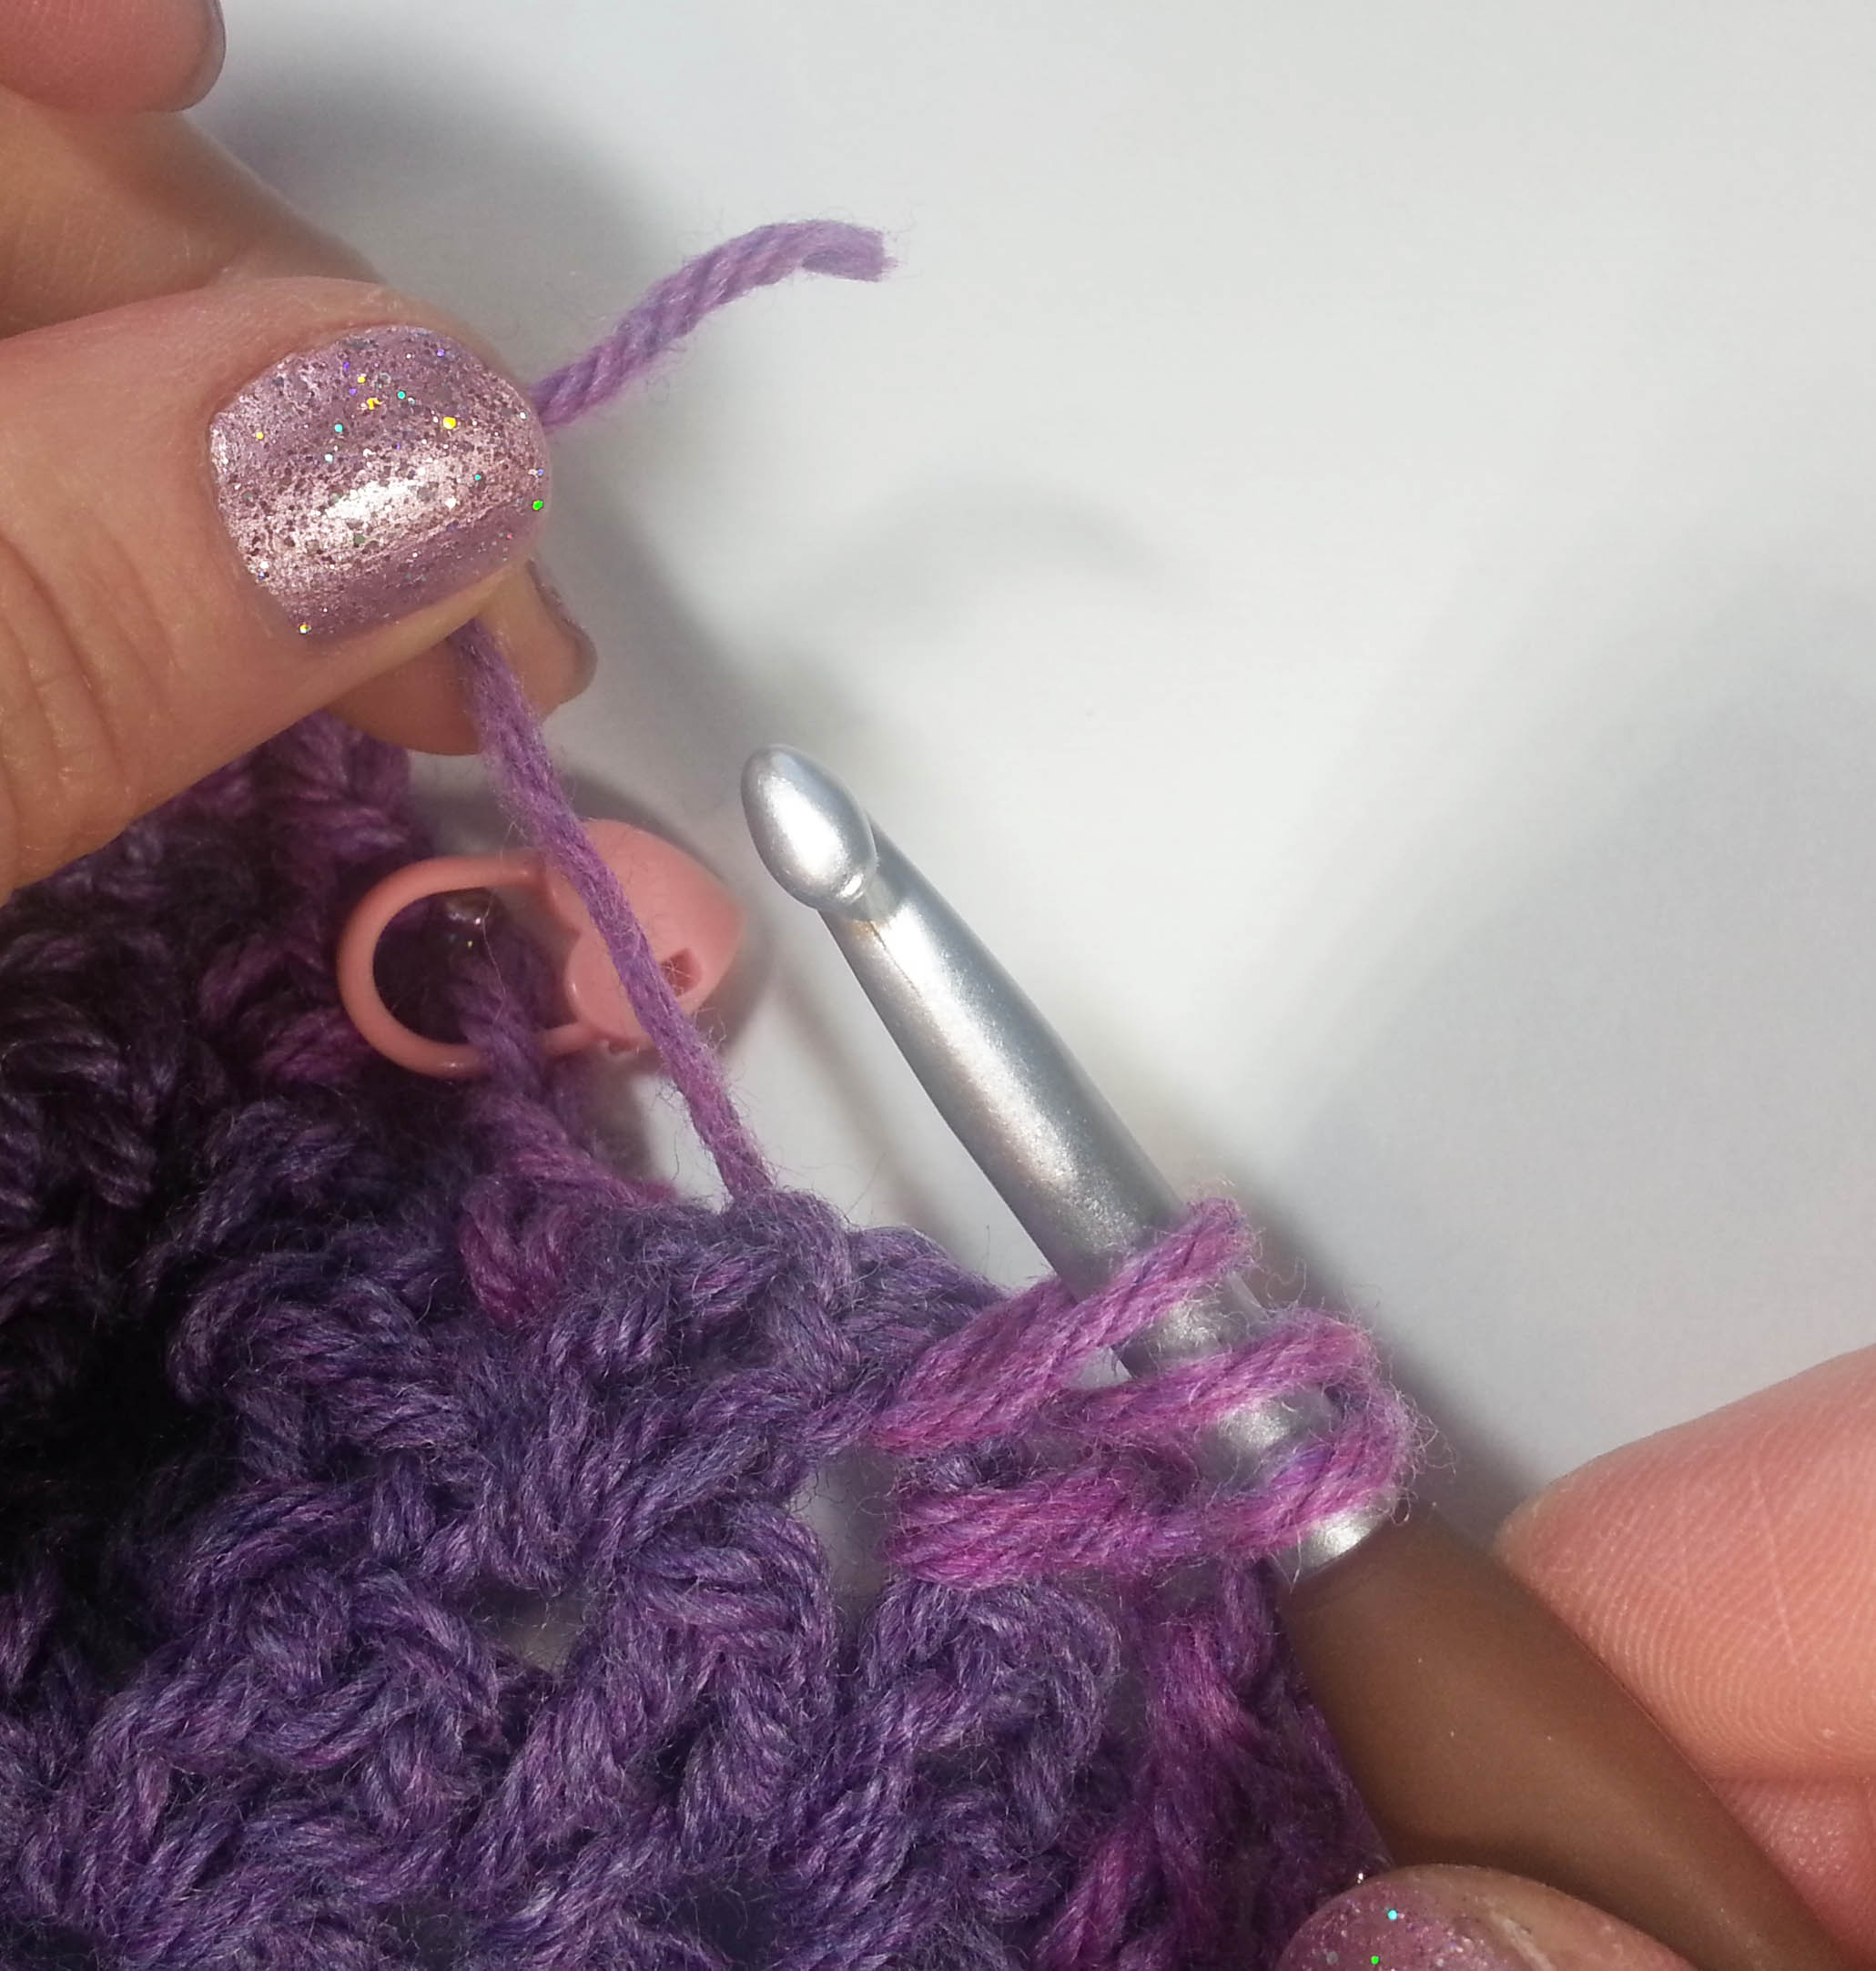
New Yarn and Old Yarn loops on hookPulled thru old yarn end
New beaded chain-stitch madeUn-raveling to beginning of next V-st.Securing top of stitchPreparing to join the 2 V-stitches
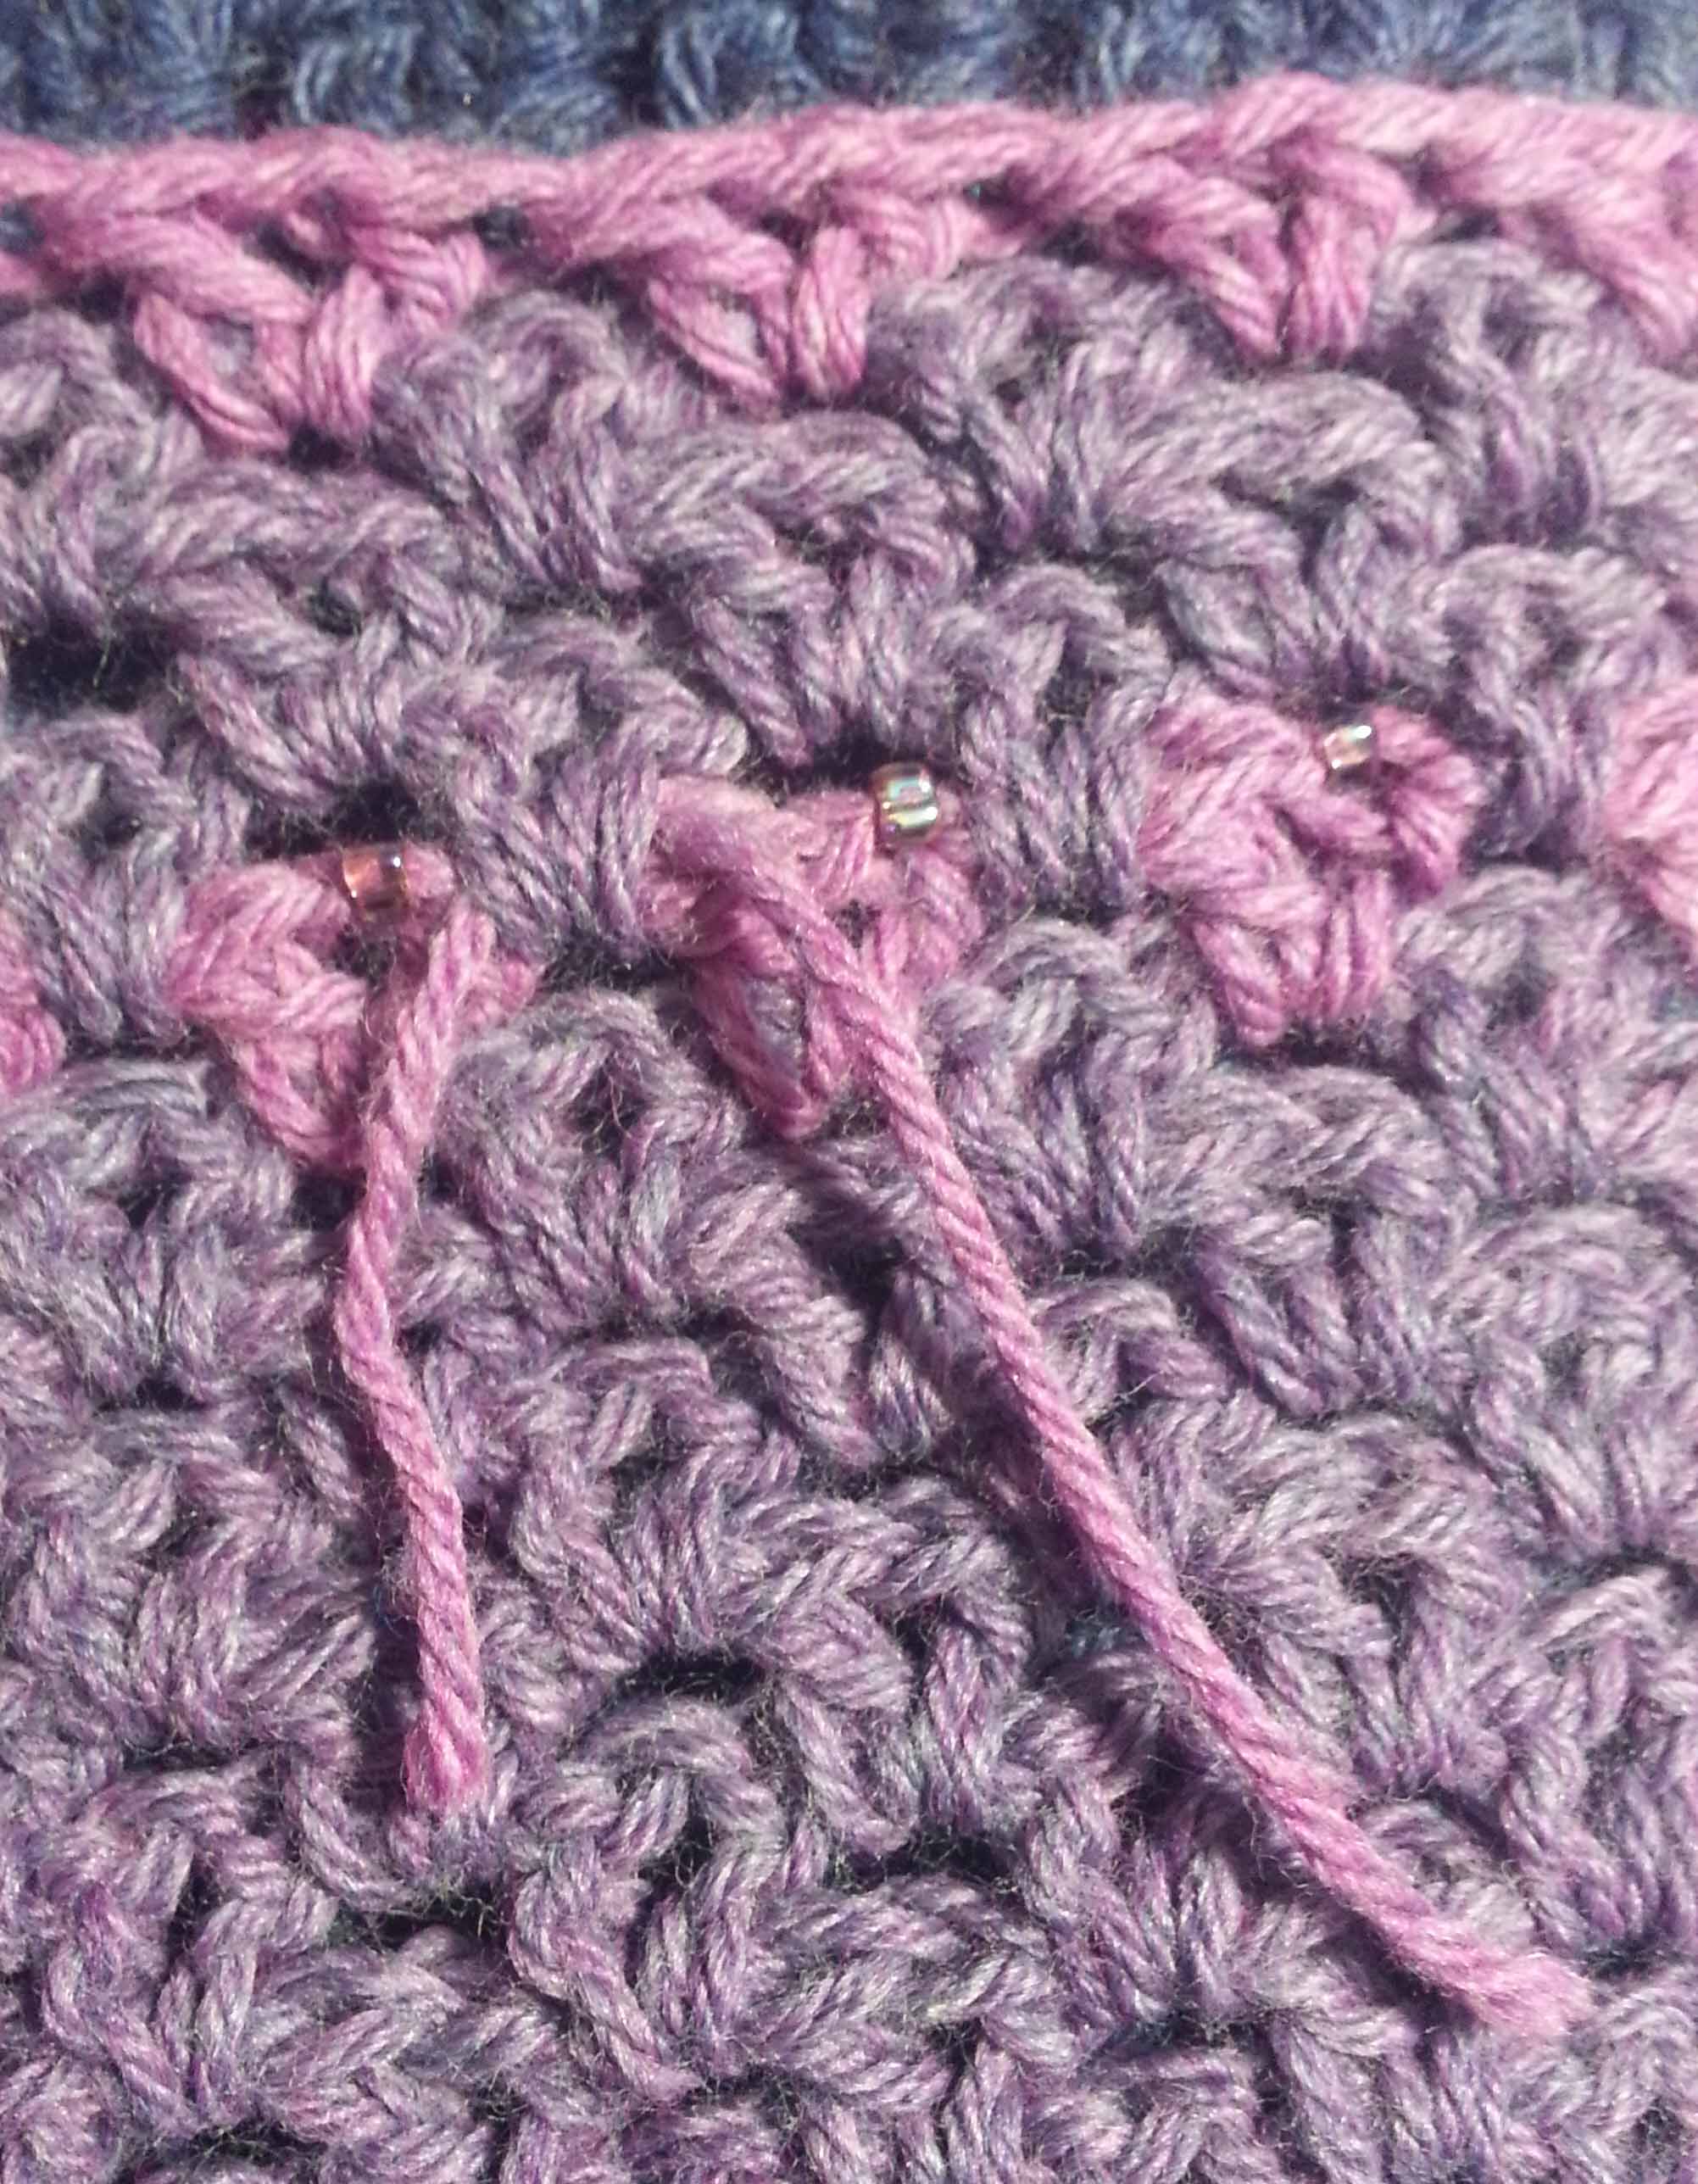
After all the cutting and un-raveling I joined in some new yarn and crocheted the stitches I pulled out. It is a little hard to see what I was doing with these stitches since the new yarn and old yarn are the same color. But this is more just to show you that no one is perfect.
Surgery is over and the patient has survived.
Once the extra tails are woven in, you won’t be able to see where the surgery even happened.
I’m reminded of something Margaret Hubert said in a class I took with her, “Admire your work often, you’ll catch your mistakes sooner.” I’ll be admiring my work a lot more before I cut my yarn from now on.
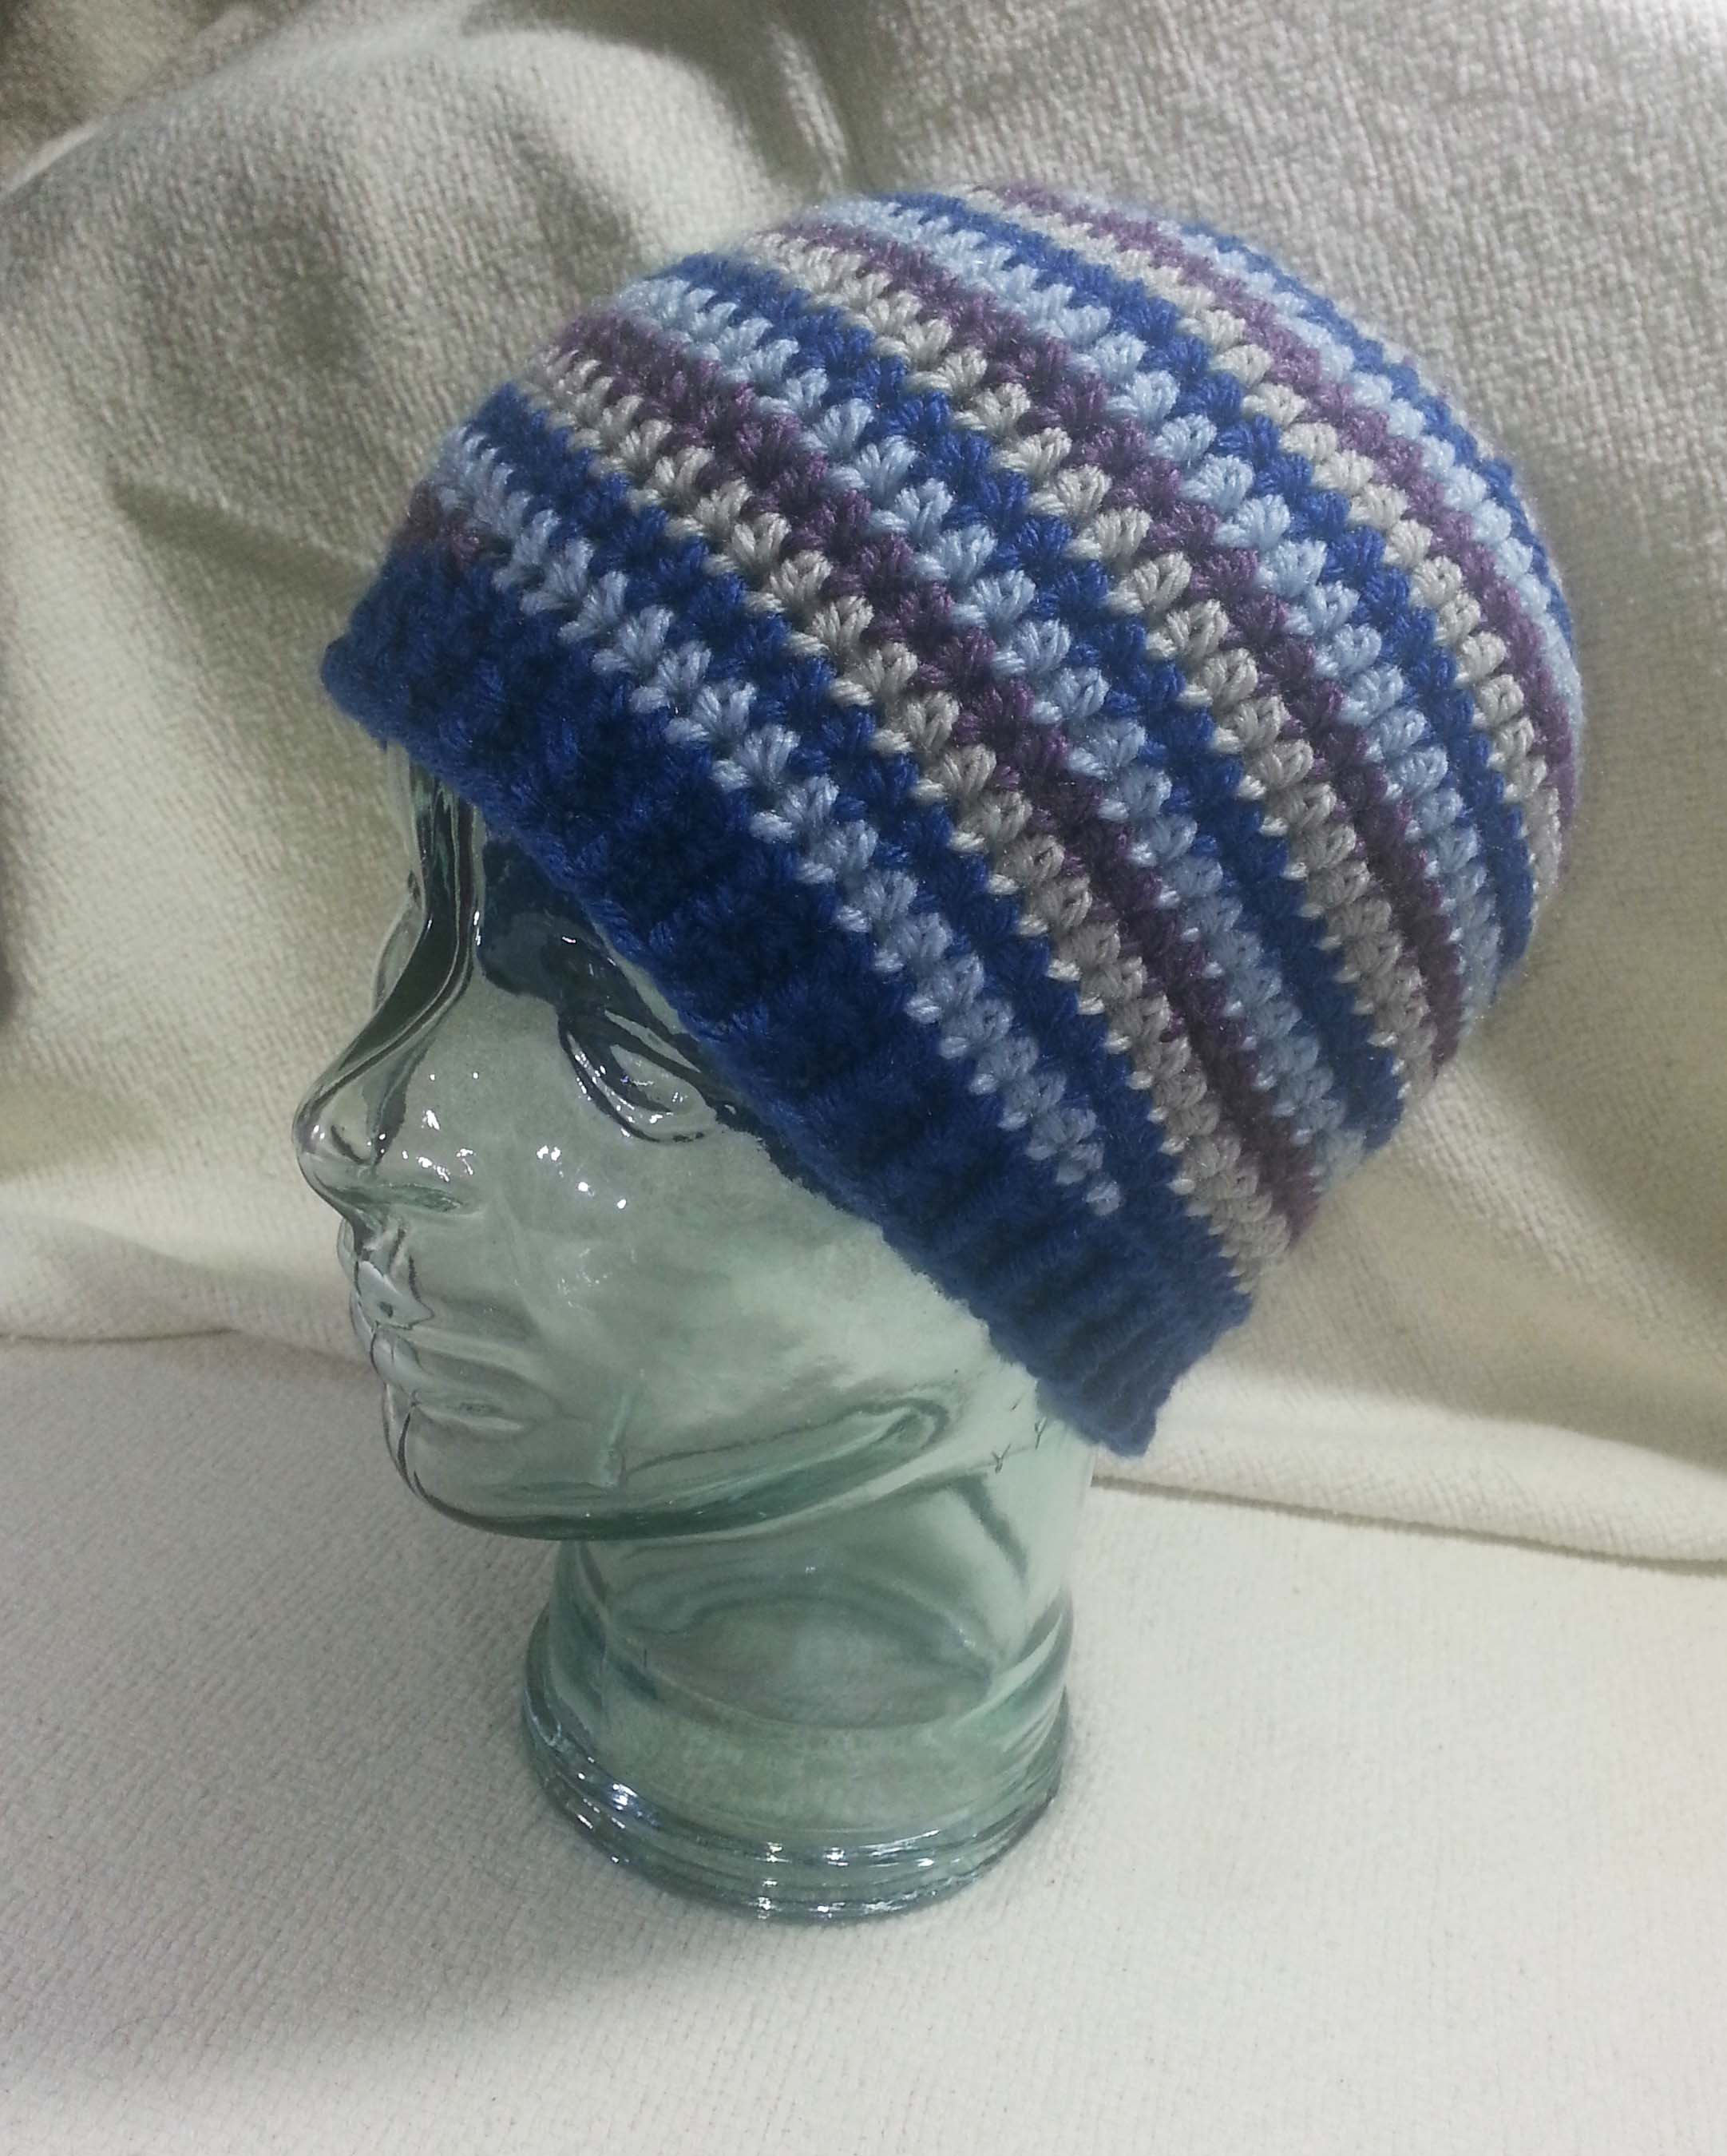
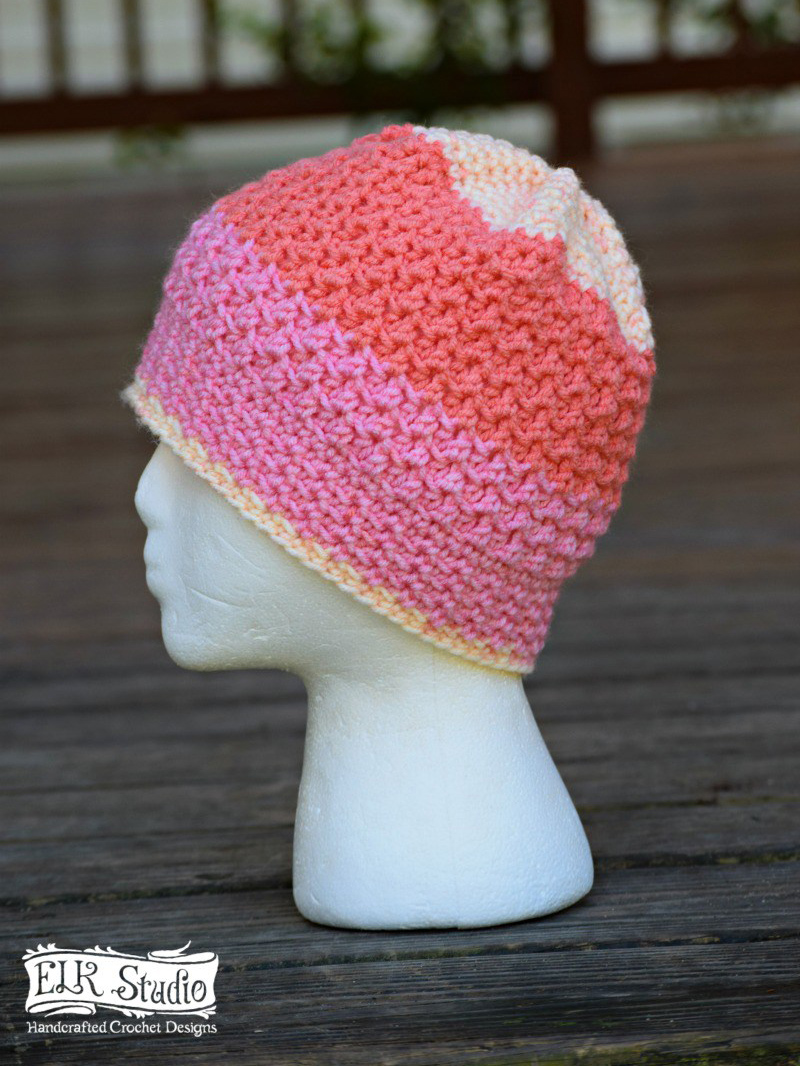
As many of my readers already know, I love to crochet hats. They are a fun quick project and a great canvas for experimenting with stitch patterns and new yarns. I seem to also make them frequently for gifts to family and friends.
My favorite construction method is working crown down in continuous rounds. Because there isn’t a join for each round the hat will come out seamless in appearance. This also creates a nice elastic fabric, a handy attribute for a project that will need to fit comfortably on your head.
But what if you want a hat with color stripes and you aren’t using one of the handy yarns with gradual color changes?
You can create stripes of color in your hats by changing the color of yarn as you work, but that can leave you with a “jog” in the fabric when you change colors. Another option in this style of color change is to “step down” your stitches in the first color, then “step up” with the new color. It will look less disruptive to the fabric colors, but it is a bit fiddly and not always ideal for the elasticity of your hat fabric.
What is a crocheter to do?
Fortunately the solution is actually quite simple. Spirals.
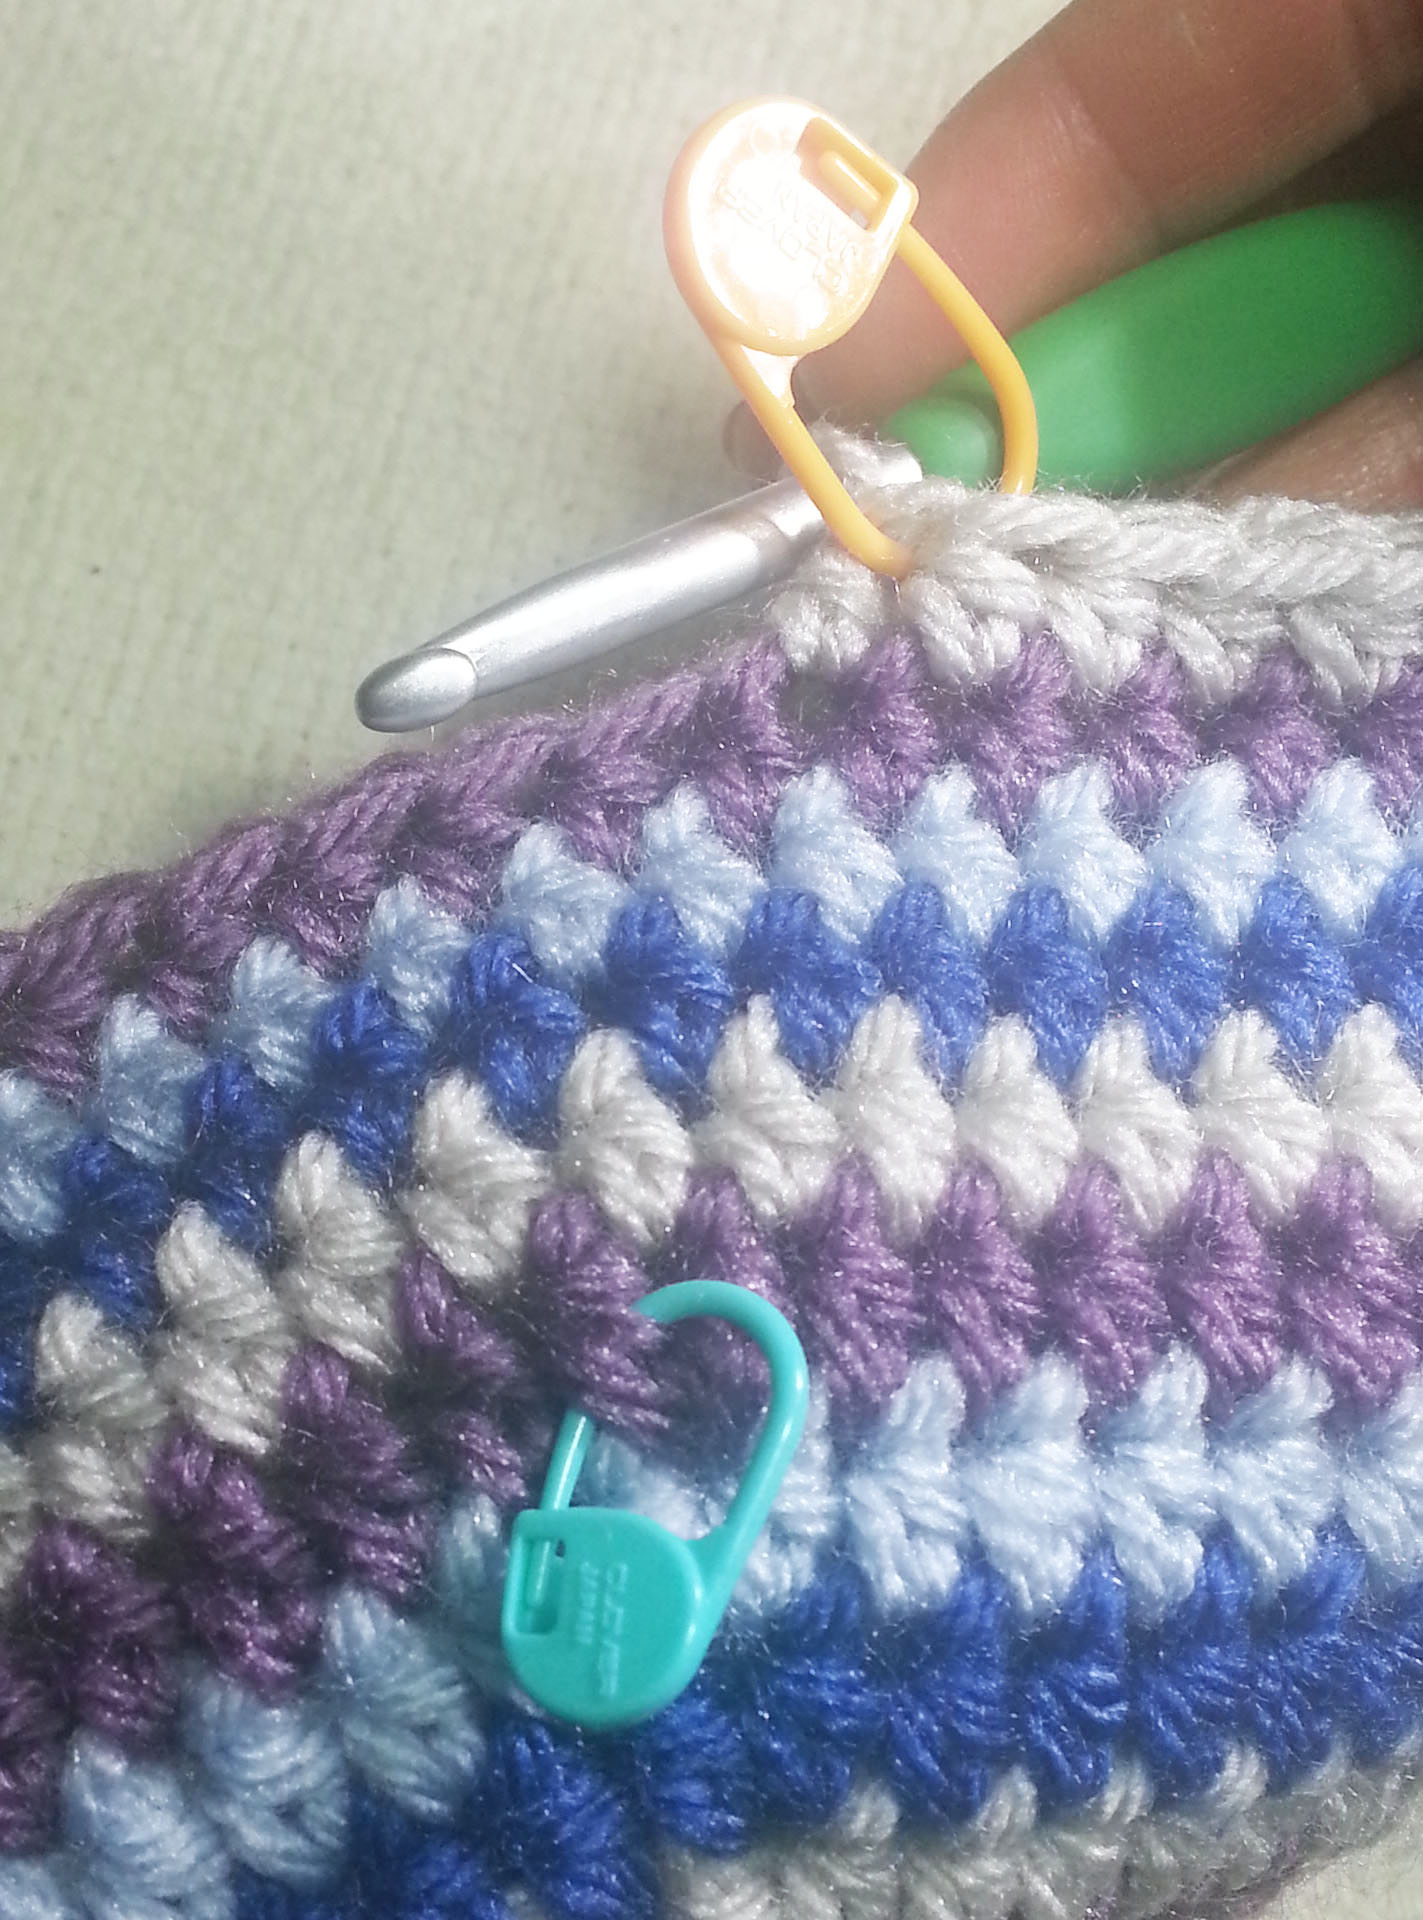
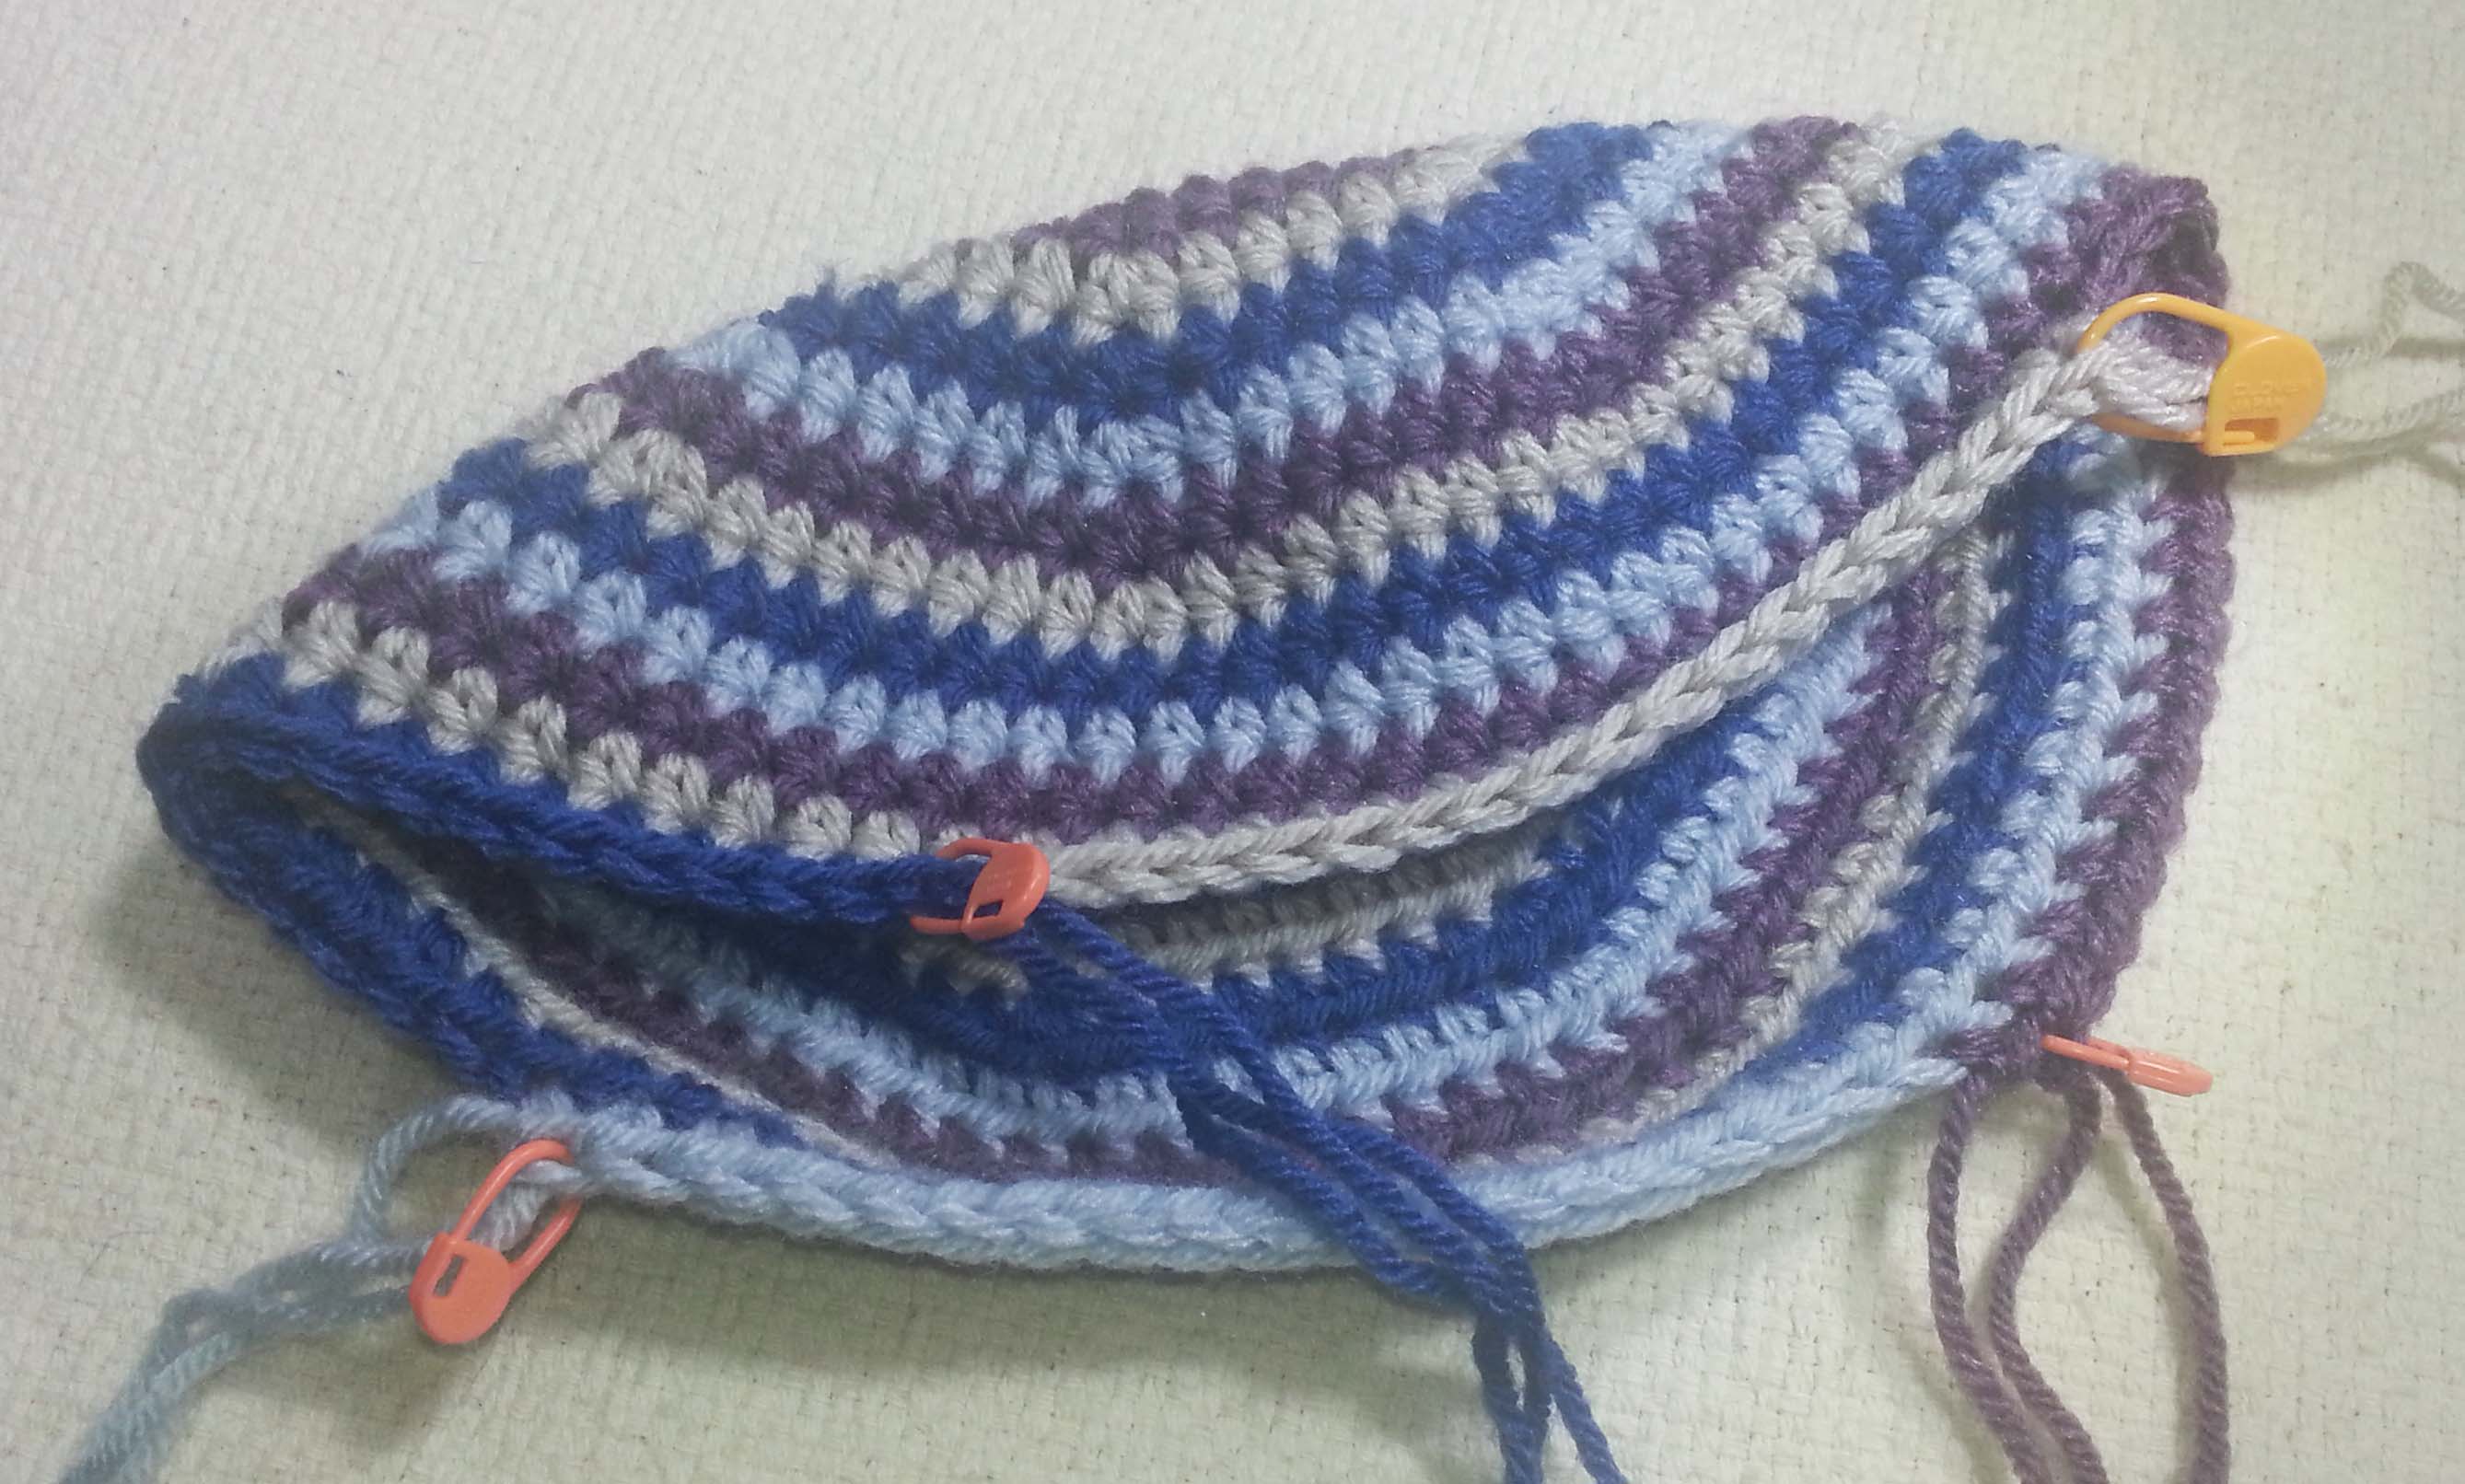
This method gives you not only a lovely smooth striped fabric, it also creates a visually interesting crown for your hat. You can work with anywhere from 2 to 8 “arms” in your spiral and use a different color for each arm to get the different color of stripes. Using stitch markers will make this method almost mindless as you work the hat.
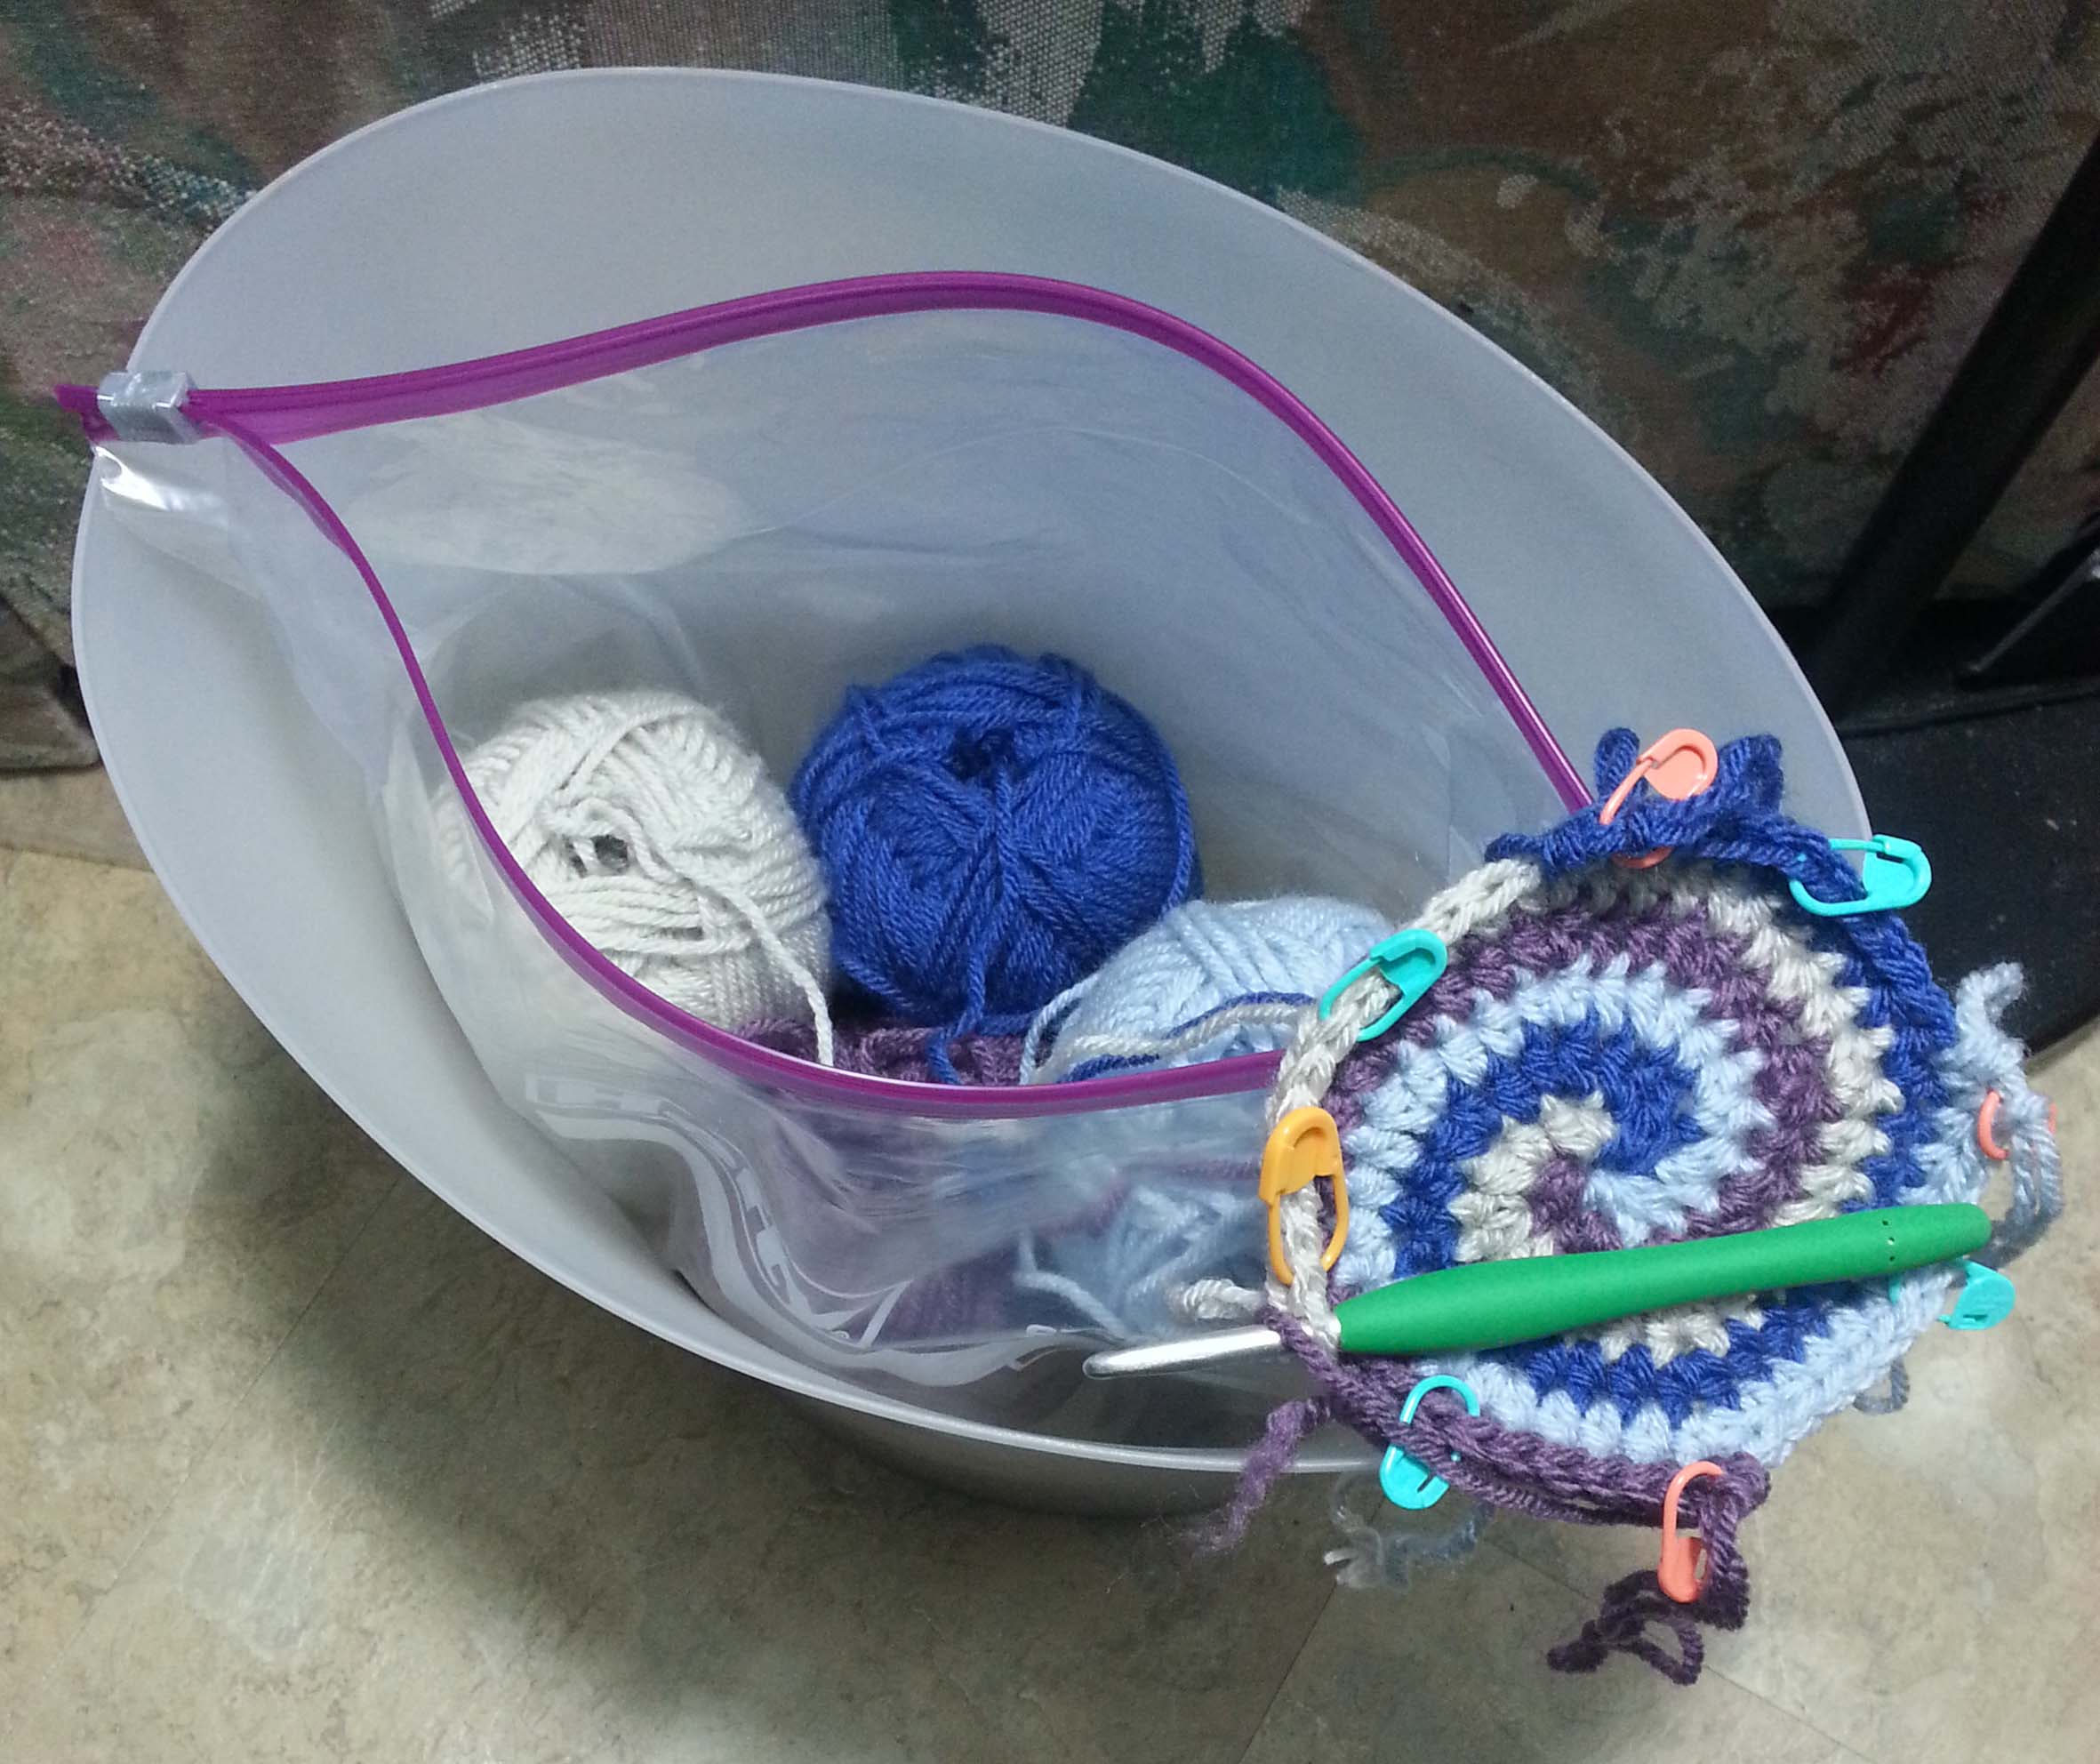
The only thing you have to contend with is how many balls of yarn you are juggling. My favorite way to keep the yarn from tangling is to have the balls snuggly secured in a container. Then I turn the container as I work each color. In the photo above I used a small clean waste bin to hold the yarn.
As you see in the photo I also have my yarn inside a large clear plastic storage bag. If needed I can toss the hat, hook and pattern into this bag and grab the whole thing to take with me to work on while I’m on the go.
Hat uses 4 colors, follow instructions for using stitch markers so you don’t lose your place.
Color 1 of stitch markers is used to mark last stitch of entire round as well as last stitch/increase point of that color section.
Color 2 of stitch markers is used to mark the other 3 last stitch/increase point of color sections.
Color 3 of stitch markers is used to mark the first increase point in each color section.
When working the first 9 rounds move stitch markers up to 2nd stitch worked in each increase point, For Rounds 10 – 18 you will only be using the markers for the last stitch of each color section.
Instructions
CROWN
Crown at End of Round 9
Rnd 1: Starting with color A make an adjustable slip knot, ch 2, (sc, hdc) in 2nd ch from hook, pull up a long loop and remove hook, with color B *insert hook in center/first ch of round, pull up a loop on hook, ch 1, (sc, hdc) in same center/ch, pull up a long loop and remove hook,* ; Repeat from * to * with Color C and D. PM in each hdc w/end of color/round markers (placing single color marker in hdc of Color D), PM in each sc with first increase markers. [4 sc, 4 hdc]
Rnd 2: *2 hdc in next 2 sts, move st marker to 2nd st worked in each st, pull up long loop and remove hook**, insert hook in next color*; Repeat from * to * 2 times; Repeat from * to ** once. [16 hdc]
Rnd 3: *(Hdc in next st, 2 hdc in marked st, move st marker to 2nd st worked) 2 times, pull up long loop and remove hook, insert hook in next color*; Repeat from * to * 2 times; Repeat from * to ** once. [24 hdc]
Note: Measure gauge after finishing Round 5, if your gauge is small and you don’t want to start over work 10 rounds following the increase pattern, if your gauge is large only work 8 rounds following the increase pattern.
Rnds 4 – 9: *(1 hdc in each unmarked st, 2 hdc in marked st, move st marker to 2nd st worked in marked st) 2 times, pull up long loop and remove hook,** insert hook in next color*; Repeat from * to * 2 times; Repeat from * to ** once. Stitch count for end of Rnd 9 [72 hdc]
SIDES
Remove the Color 3 stitch markers – you will not be increasing any further.
I put one of these stitch markers in the side of the last stitch in Round 9, this makes it easier to keep track of the number of side rounds worked.
Rnd 10: * hdc in each st until work in marked st, move marker up to st worked in marked st,** insert hook in next color*; Repeat from * to * 2 times; Repeat from * to ** once. [72 hdc]
Rnds 11 – 20: Repeat Rnd 10.
Rnd 21: Step down to one color: Decide which of your 4 colors you want to be your brim color,
then with each of the other 3 color segments: Hdc in each st until one st remains un-worked before the marked st, sc next st, slip st loosely in next st, pull up a long loop, remove st marker.
With brim color: Hdc in each st ending in the marked st, place stitch marker in last st;
Go back to other 3 colors: slip st snugly in next st, fasten off and pull end thru last slip st.
Stitch counts at end of Round 21 [66 hdc, 3 sc, 3 loose slip st]
BRIM
Rnd 1: Hdc in each st around, move st marker up to st worked in marked st. [72 hdc]
Rnd 2: (FPhdc next st, BPhdc next st) 36 times. [36 FPhdc, 36 BPhdc]
Rnd 3 (FPhdc next st, BPhdc next st) 35 times, FPhdc next st, BPsc next st, loose slip st next 2 sts, slip st snugly next st, fasten off and pull end thru last slip st. [35 BPhdc, 36 FPhdc, 1 BPsc, 2 loose slip st]
Finishing
Weave in tails.
Now have some fun making hats. Play around with the colors you use, make 2 arms of the spiral in 1 color and the other 2 arms in a contrasting color for a 2 color version. Mix it up with using a variegated yarn for one of the arms and pulling solid colors for the yarns you make the other 3 arms with.
Hi everyone. My book “Wraps for All Seasons” is going on a blog tour. We will be making 6 stops for this tour. Each of the bloggers will be giving away a copy of the book, so be sure to visit them to see what they have to share with you about my book.
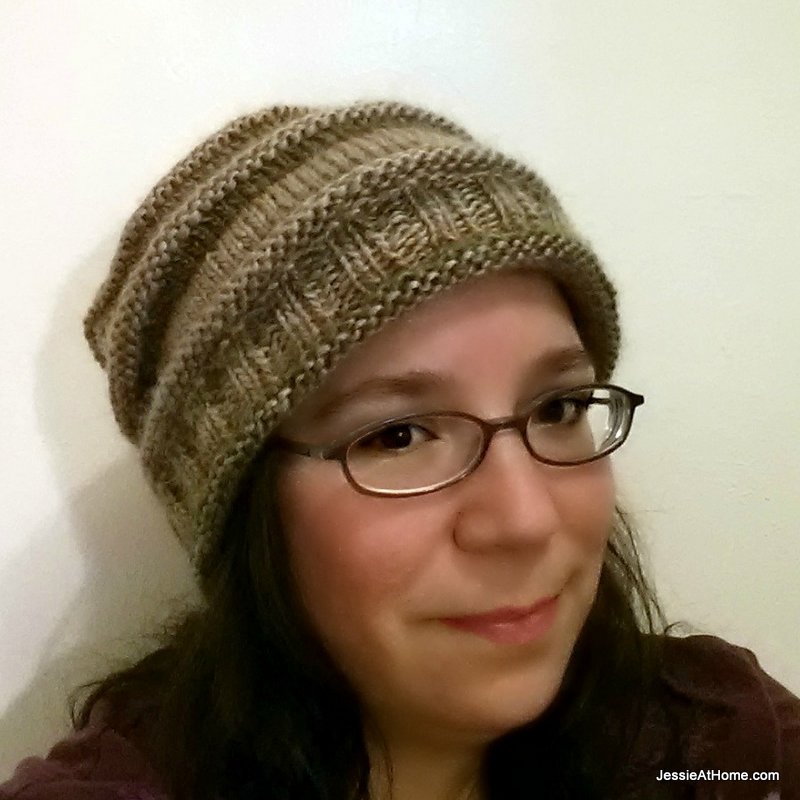
Stop #5 is the absolutely amazing Jessie Rayot of Jessie-At-Home.com. I had the honor 3 years ago of being Jessie’s CGOA Mentor, though frankly, this talented and driven woman didn’t need much mentoring. She has amazing designs in Crochet and Knit.
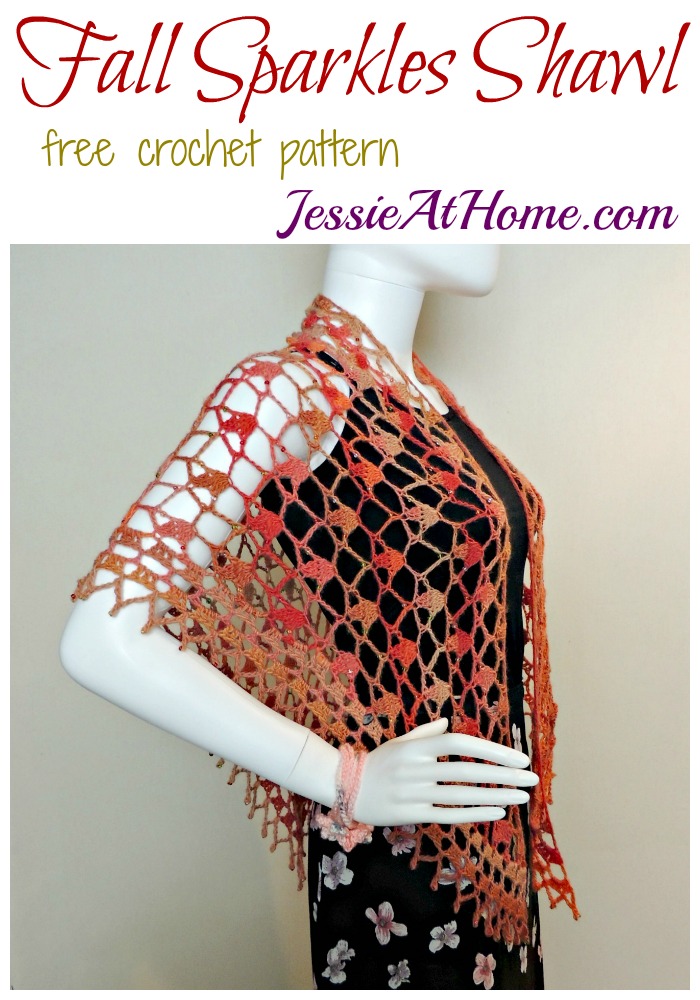
Jessie has lots of lovely patterns available on her site. Like her gorgeous “Fall Sparkles Shawl”. The shawl uses a pretty lace work pattern, simple elegant border and beads for a bit of bling. It would make a great gift for the holidays or make it for yourself to wear to a party.
Or if you are feeling the chilly weather heading into winter, the “Holiday Poncho” might be just the ticket. Snugly warm, stylish look and simple construction. What more could any crocheter ask for? Be sure to hop on over to Jessie’s site to check out these patterns and enter to win a copy of my book.
The last stop for the “Wraps for All Seasons” blog tour will be next Friday, November 18th.
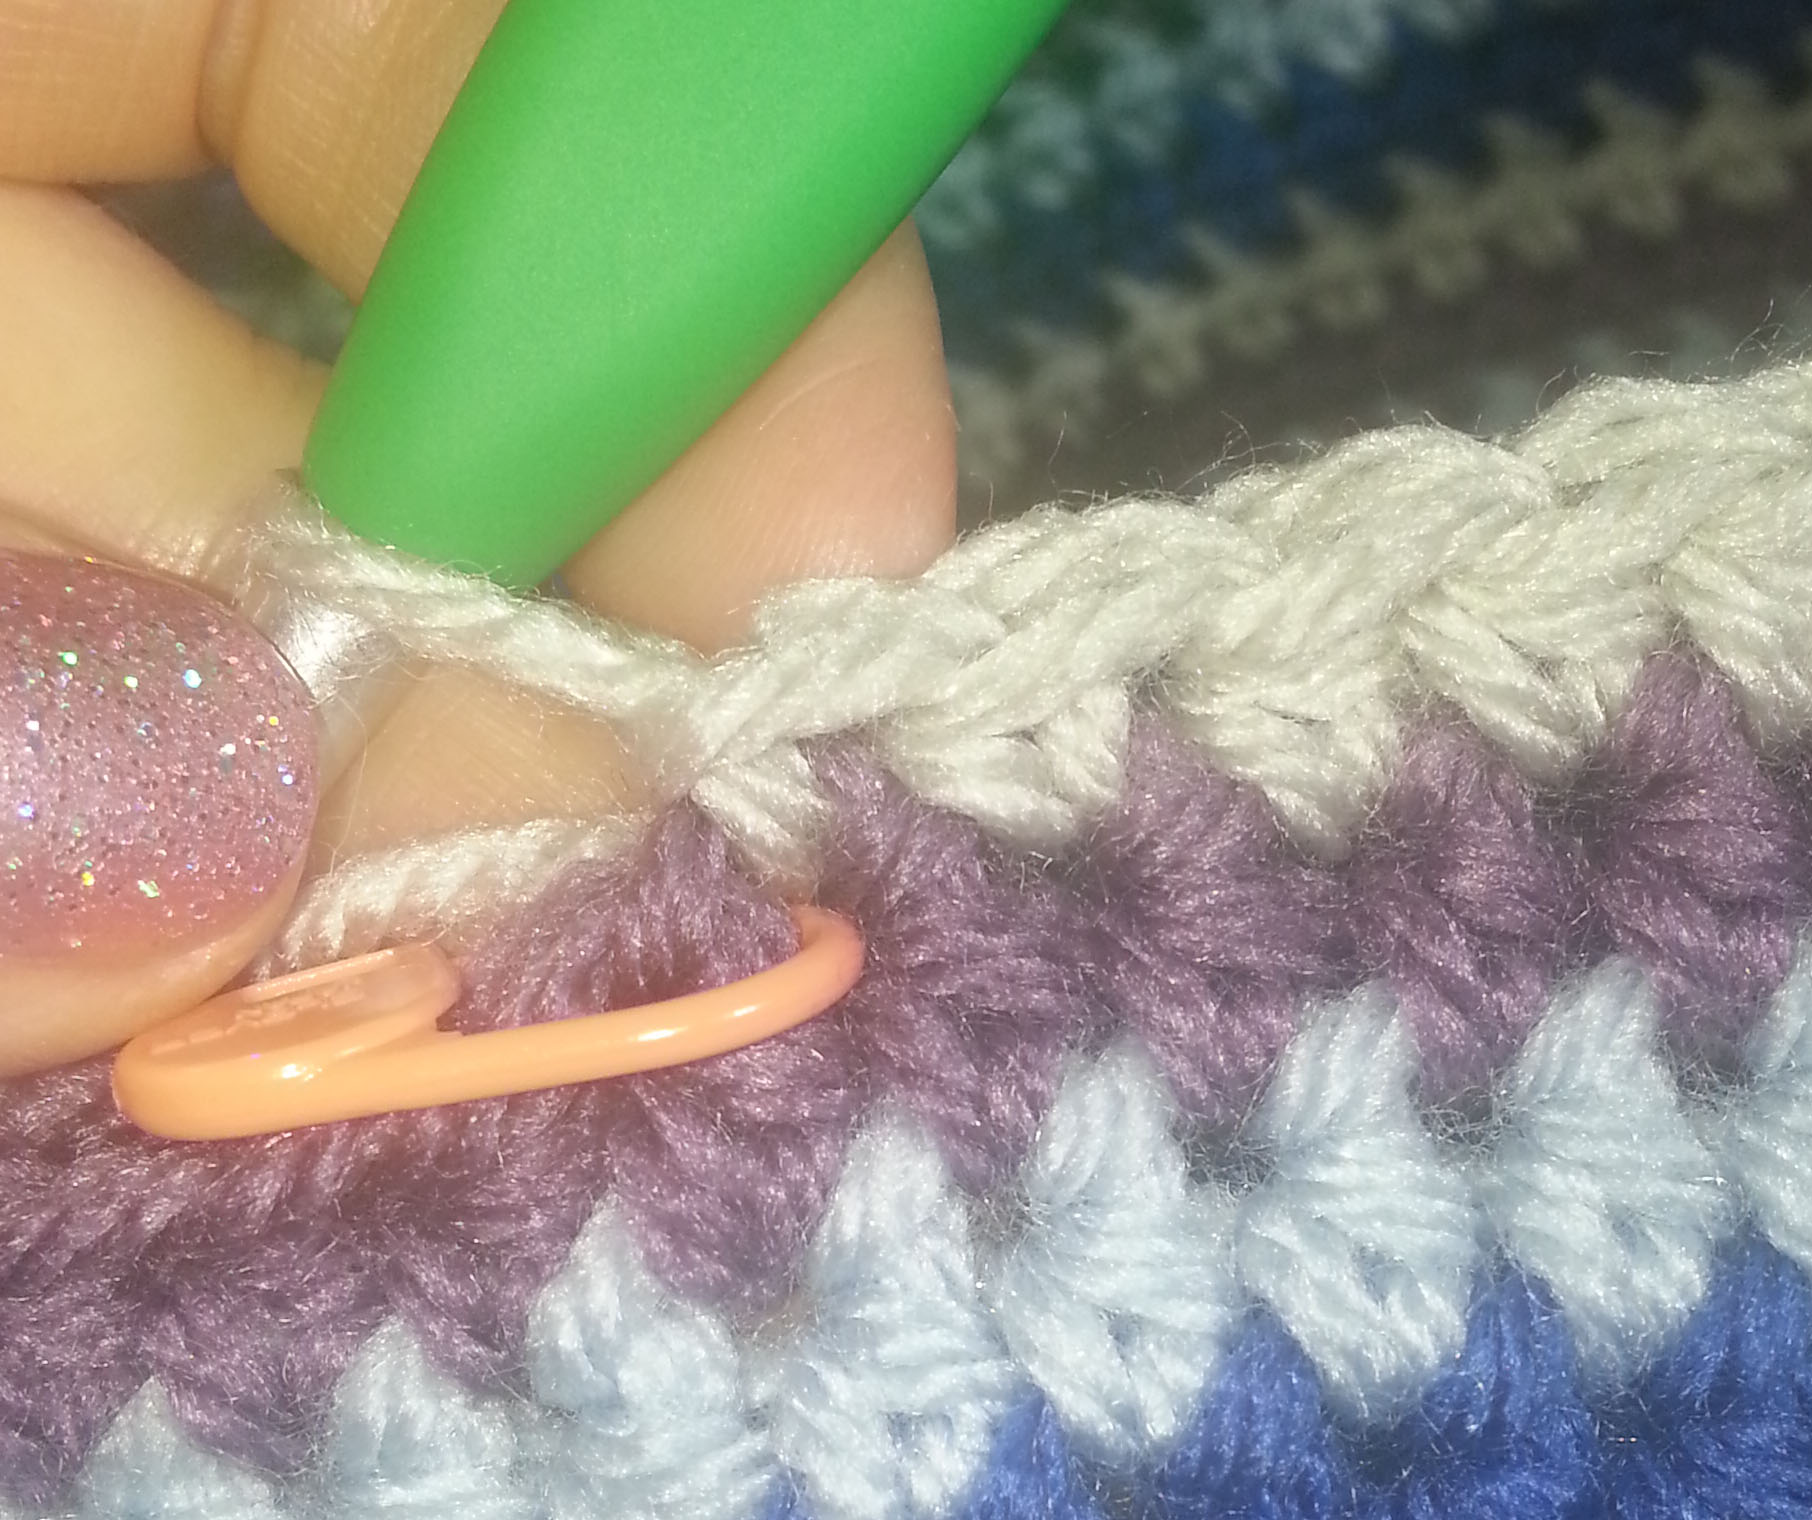
Stitch markers are handy tools to have in your crochet kit. My favorites are locking stitch markers, the ones I use the most are made by Clover and I tend to have a package of them in every project bag.
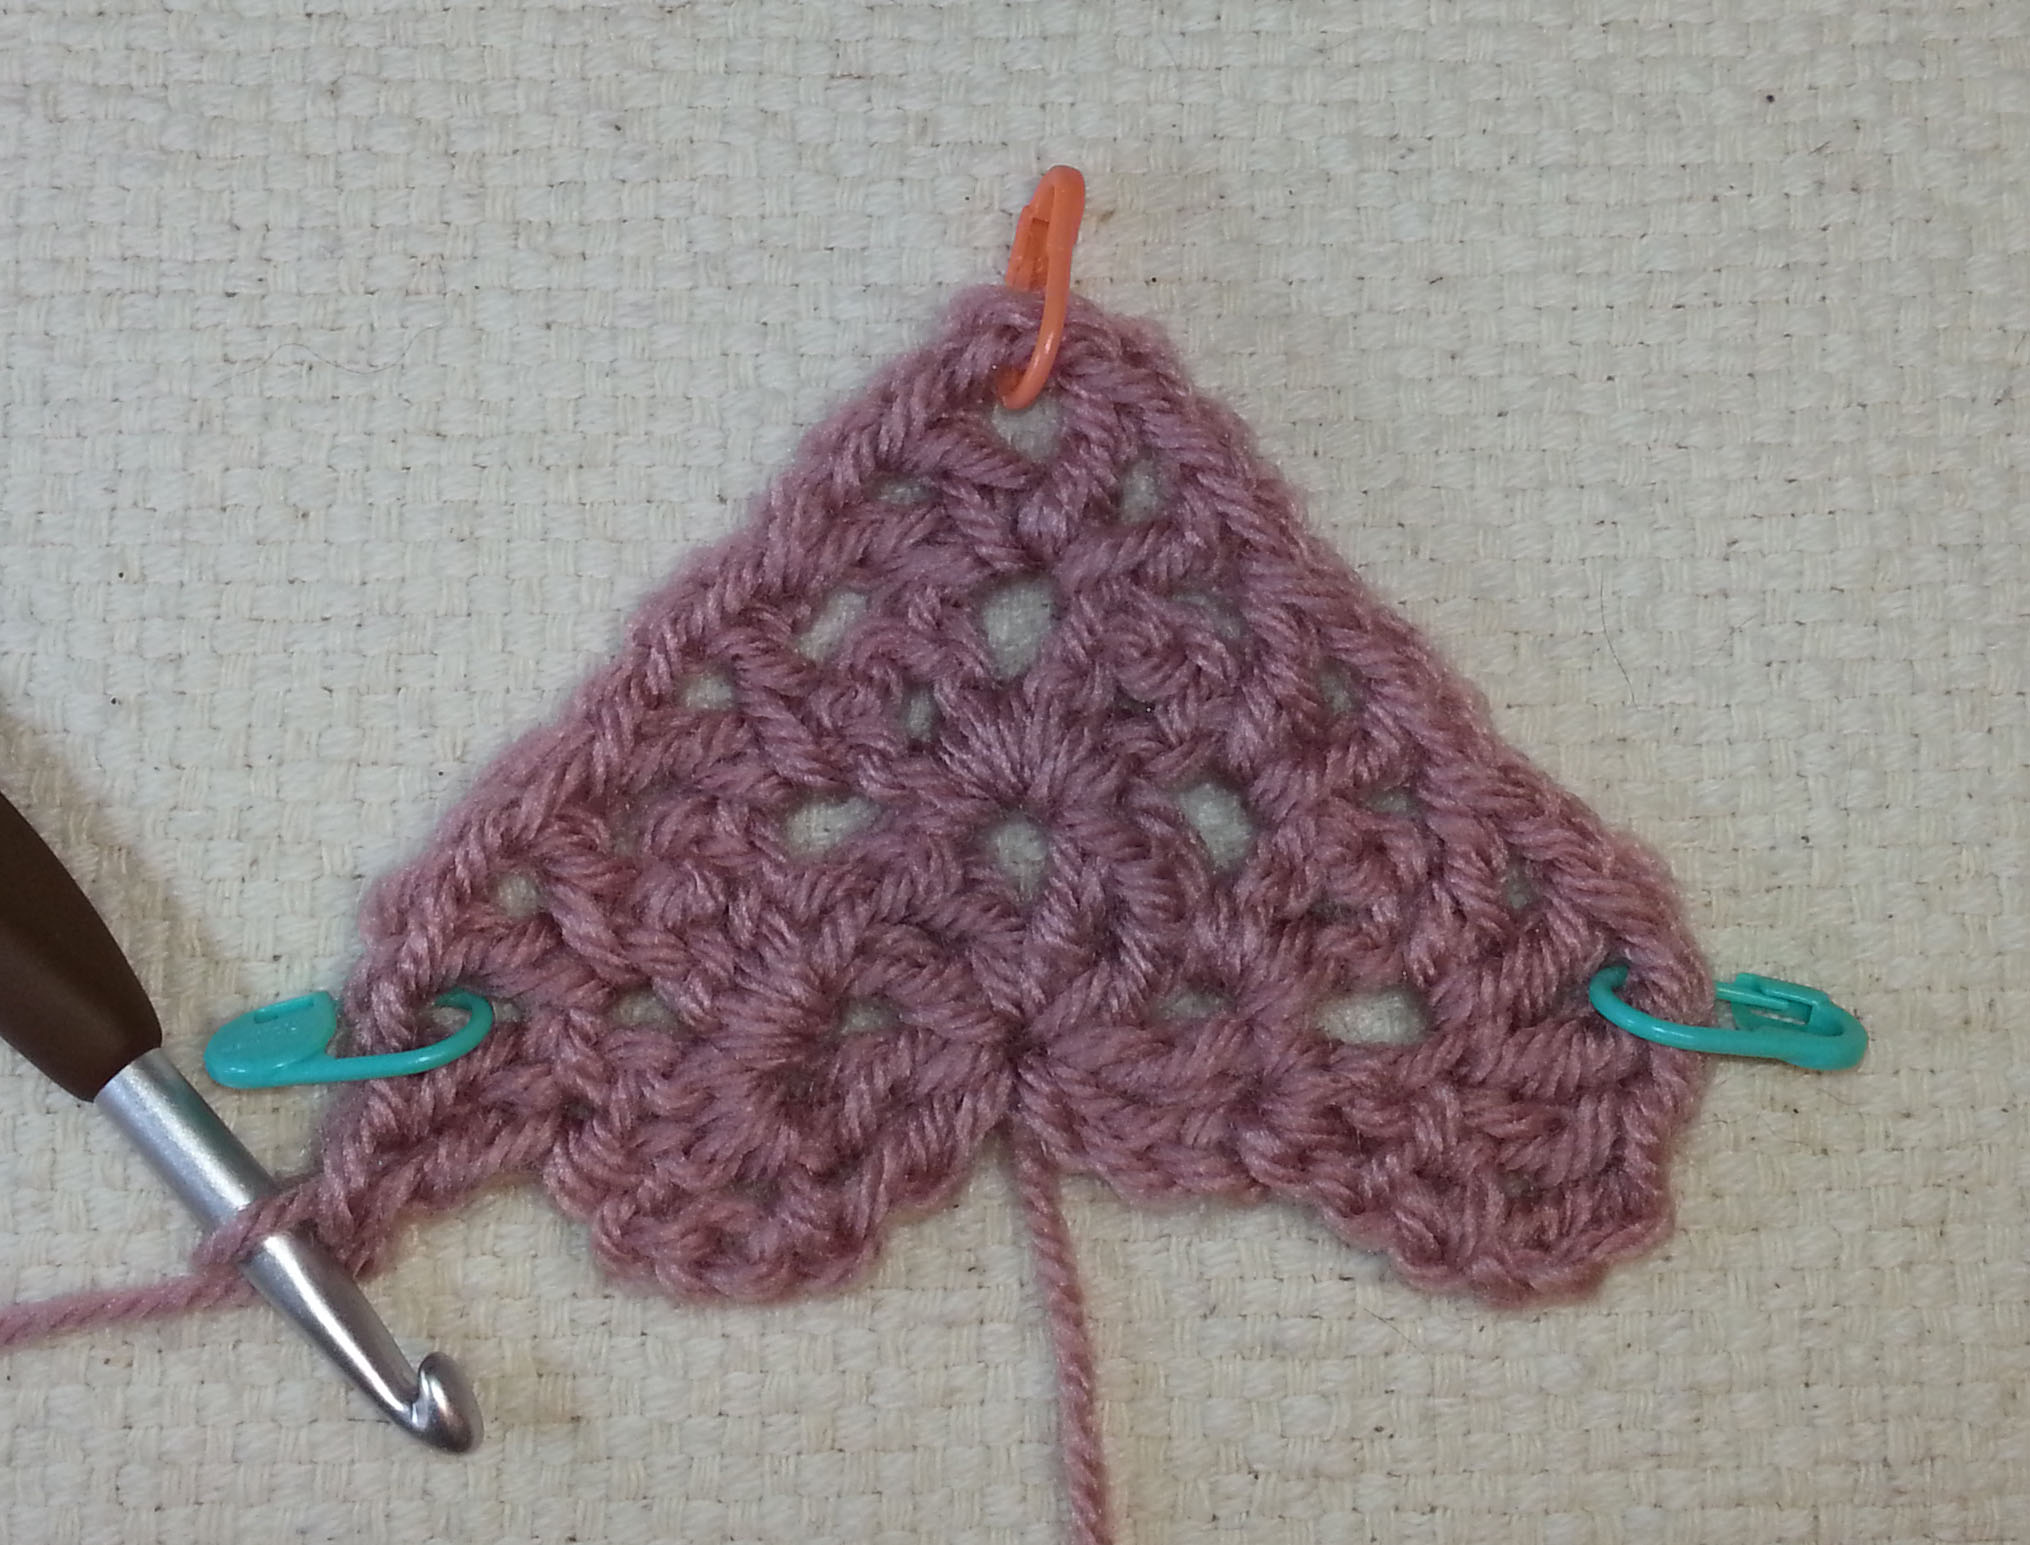
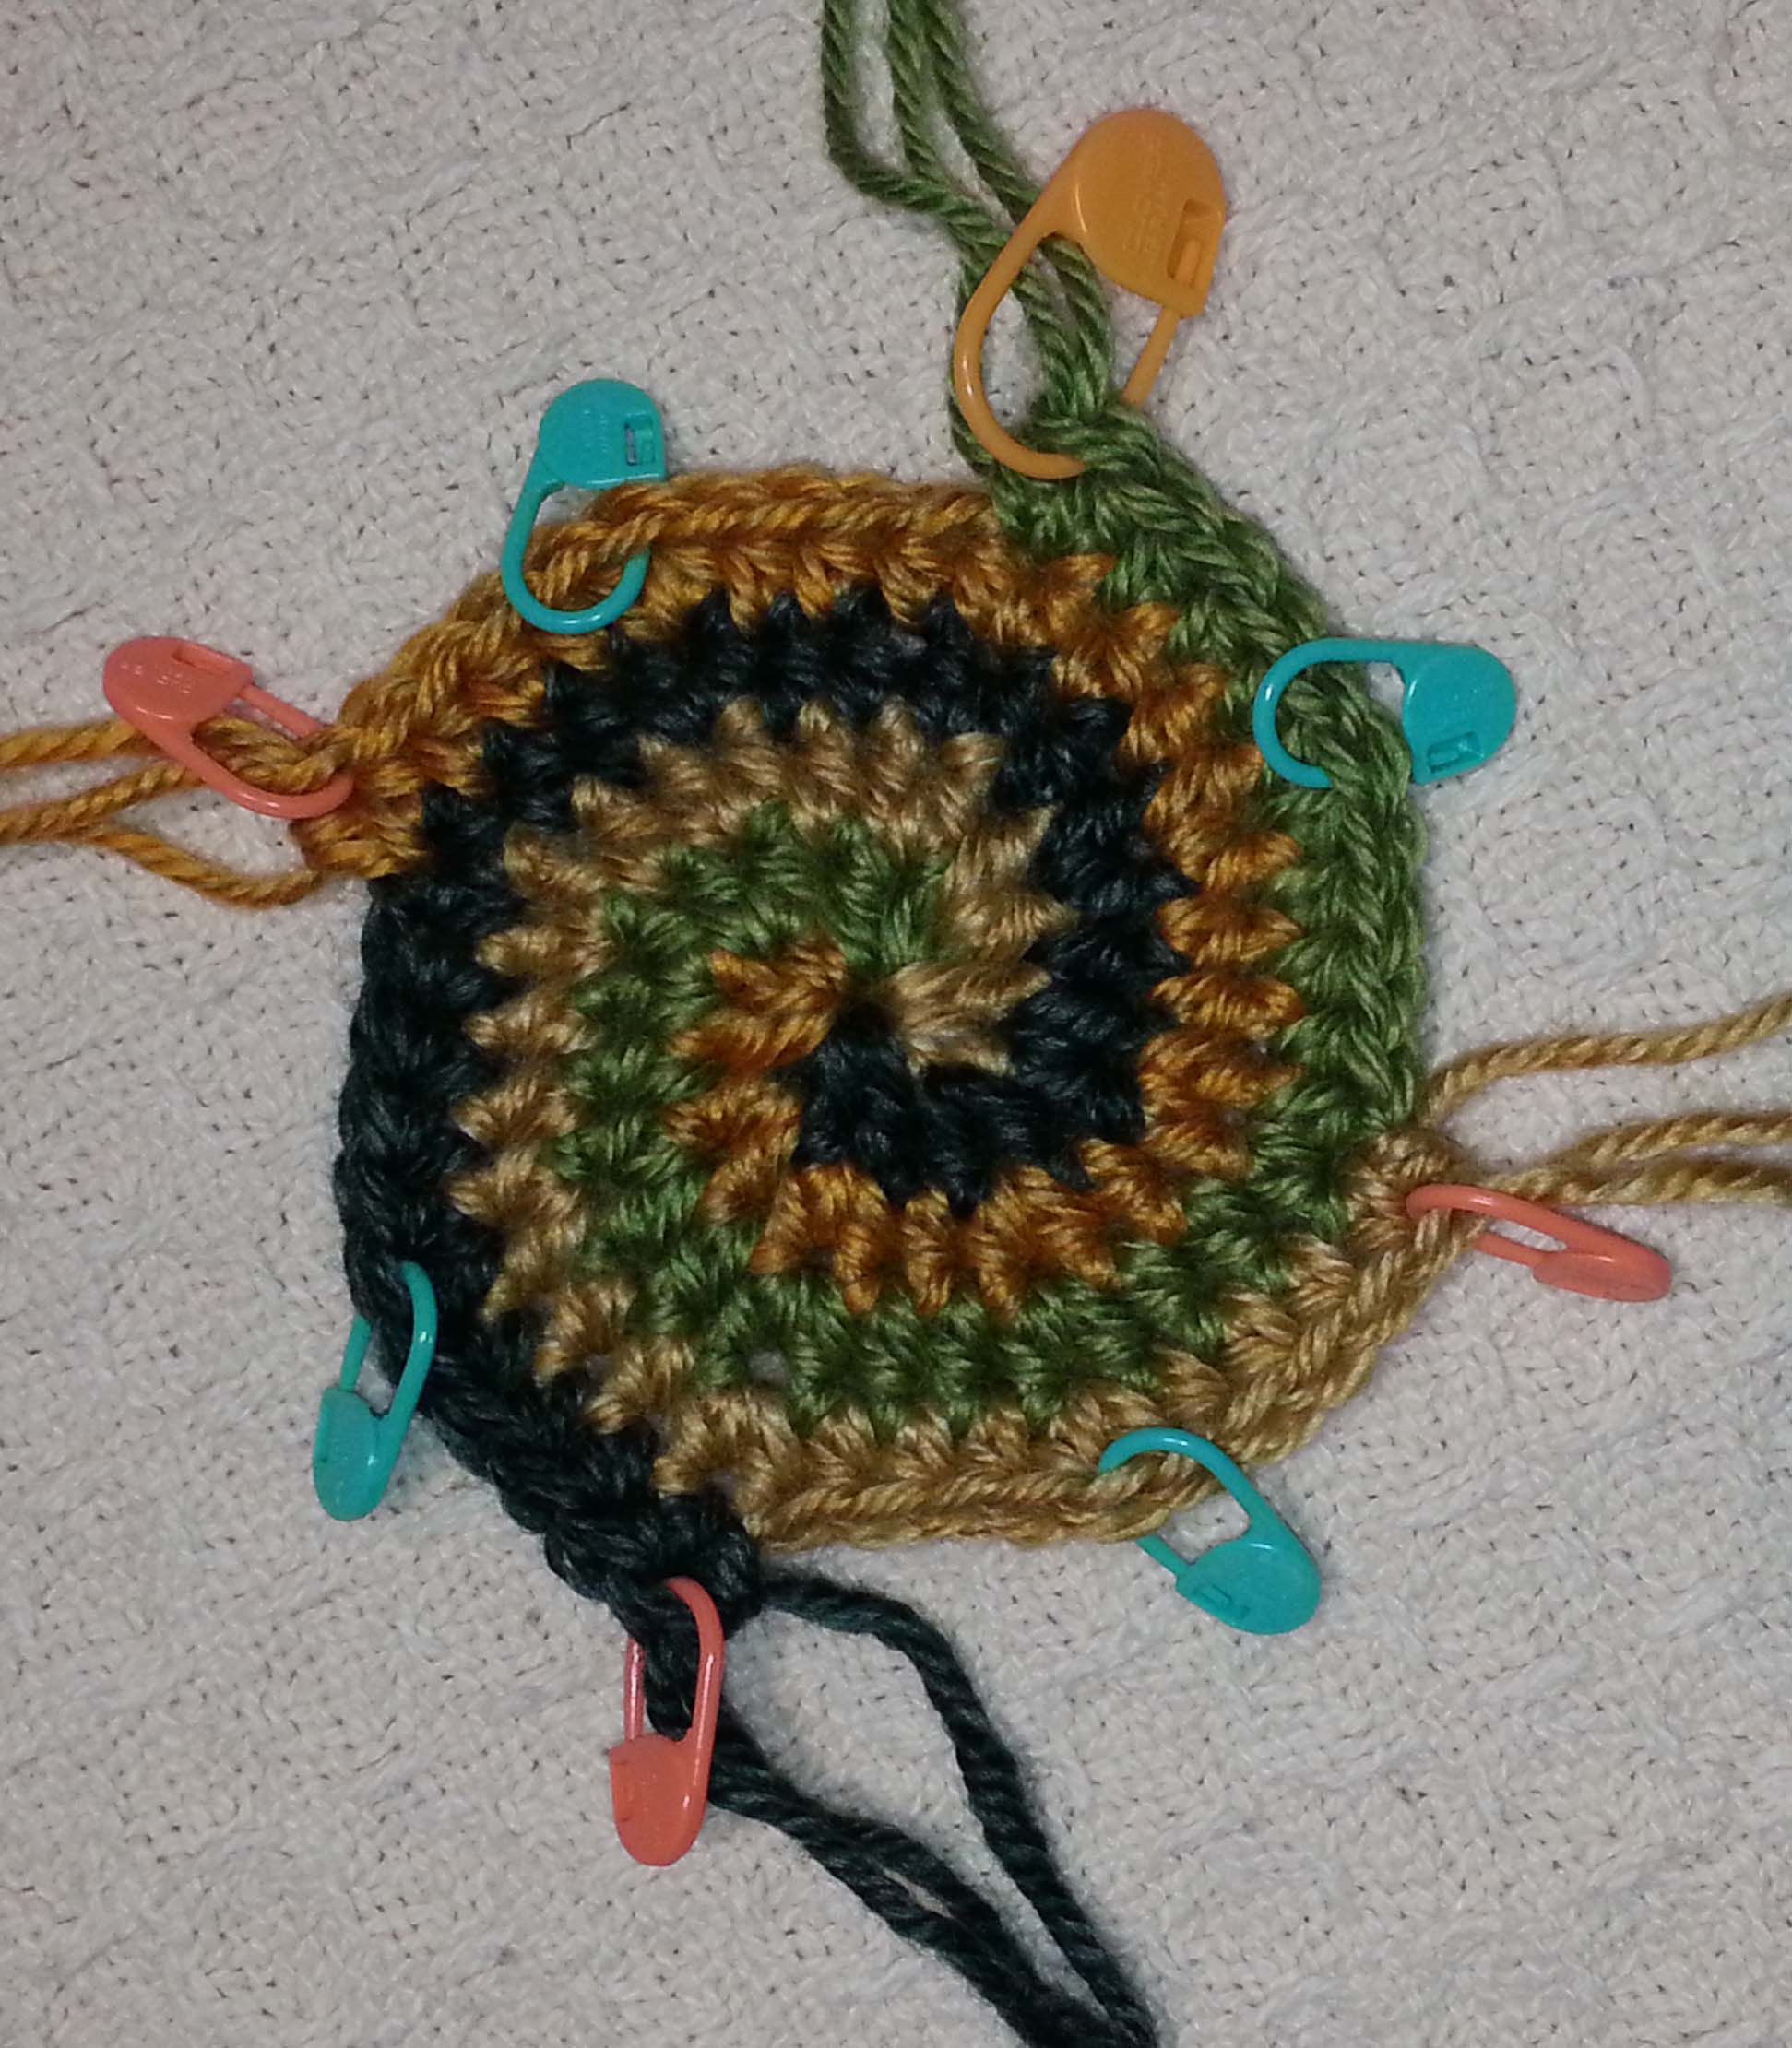
Increase points marked with Stitch Markers
I most often use them to mark stitches that will have something different happening, such as an increase or decrease. This allows me to enjoy stitching along without worrying about when I’ll need to change what I am doing with my stitches, I know that once I get closer to the next stitch marker I’ll have to pay closer attention.
I use directions for stitch marker placement in many of my patterns for purposes of clarity. Such as, “hdc in each un-marked st, 2 hdc in marked st”. An example of this is my pattern for the “Whirlwind Afghan Square” and you can see how I move my stitch markers in the video “Whirlwind How-To Part 1” on my YouTube Channel.
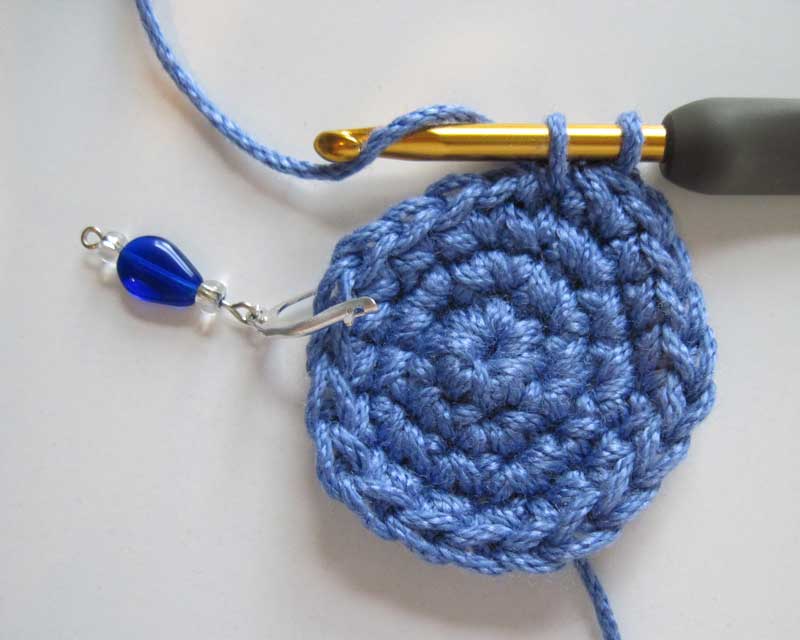
First stitch of Round marked with Stitch Marker.
They are also very handy for marking the first stitch of a round/row, making it easy to keep track of where to join a round or end a row.
I place a locking stitch marker in the working loop of my project before placing it in my project bag. That way I don’t pull out stitches when pulling the project out to work on it.
When working a long starting chain I will place stitch markers every 10 or 20 chains as I crochet to make counting them easier. Especially handy for those patterns that instruct you to “Chain 300” at the beginning of the instructions.
I will also use this same method to help me keep track of rows or rounds in larger projects, placing the stitch markers in the side of a stitch every 10 or 20 rows.
I will even use stitch markers to mark where I need to frog back to when I spot a mistake.
Now it’s your turn, get out those stitch markers and see if they don’t become your favorite tool (after your hook) in your crochet kit.
Hi everyone. My book “Wraps for All Seasons” is going on a blog tour. We will be making 6 stops for this tour. Each of the bloggers will be giving away a copy of the book, so be sure to visit them to see what they have to share with you about my book.
Stop #4 is with the amazing Tamara Kelly of Mooglyblog.com. Tamara and I met for the first time in real life at the 2014 CGOA conference in Manchester, NH. Since then we have gotten to be good friends and enjoy talking crochet and kids together. Tamara is a genius at designing simple fun projects that work up quickly, check out her blog for all kinds of patterns and crochet information.
I think this Tidal Wave Shawl is so fun. It is crocheted with simple stitches and shaping that even a beginning crocheter can tackle. The added drama comes from the color changes you work in the last half of the project. Think of all the beautiful color combinations you could use! I’m thinking it could even be a great “stash buster”, since who says you need to stick to 2 colors only.
For those of you that prefer making afghans and blankets, you’ll love the Happiest Blanket Ever. This is another fun “stash buster” project that you can play with color in. Tamara has provided sizing information in the pattern, so you can make the size that is just right for you.
The next stop for the “Wraps for All Seasons” blog tour will be this Friday, November 11th.
Hi everyone. My book “Wraps for All Seasons” is going on a blog tour. We will be making 6 stops for this tour. Each of the bloggers will be giving away a copy of the book, so be sure to visit them to see what they have to share with you about my book.
Stop #3 is with the brilliant, kind and talented Karen Whooley. As many of my long-time readers know, Karen is not only an incredible designer of both Crochet and Knit patterns, she was my CGOA mentor when I first began the journey of becoming a crochet designer myself.
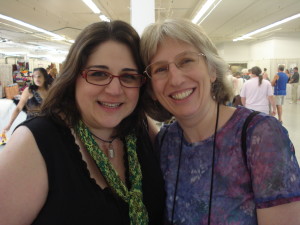
This photo is the two of us in 2010 at the Manchester CGOA conference. We’ve both changed a lot in our appearance, but our friendship is still strong. She is one of the people I can really depend on in my life to tell me when an idea or design is utter garbage, so I know when she has good things to say I’ve earned it. It’s good to have folks that keep you on your toes.
Karen is a marvelous teacher and many of the books she has written over the years reflect that. She is the rock star of crocheted socks, she has all styles of sock patterns available in her shop on her website. I had a hard time picking a favorite, but I do love her “Mix and Match Toe-Up Socks” as the best pattern to purchase for the beginning of learning to crochet socks.
Check out her beautiful pattern for the “Spring Leaf Shawlette”. This shawl is worked from side to side including the lace border, so once you reach the end of the rows you are finished. Definitely a good pattern to add to your shawl pattern collection. You can purchase it over on her website.
The next stop for the “Wraps for All Seasons” blog tour will be next Tuesday, November 8th.
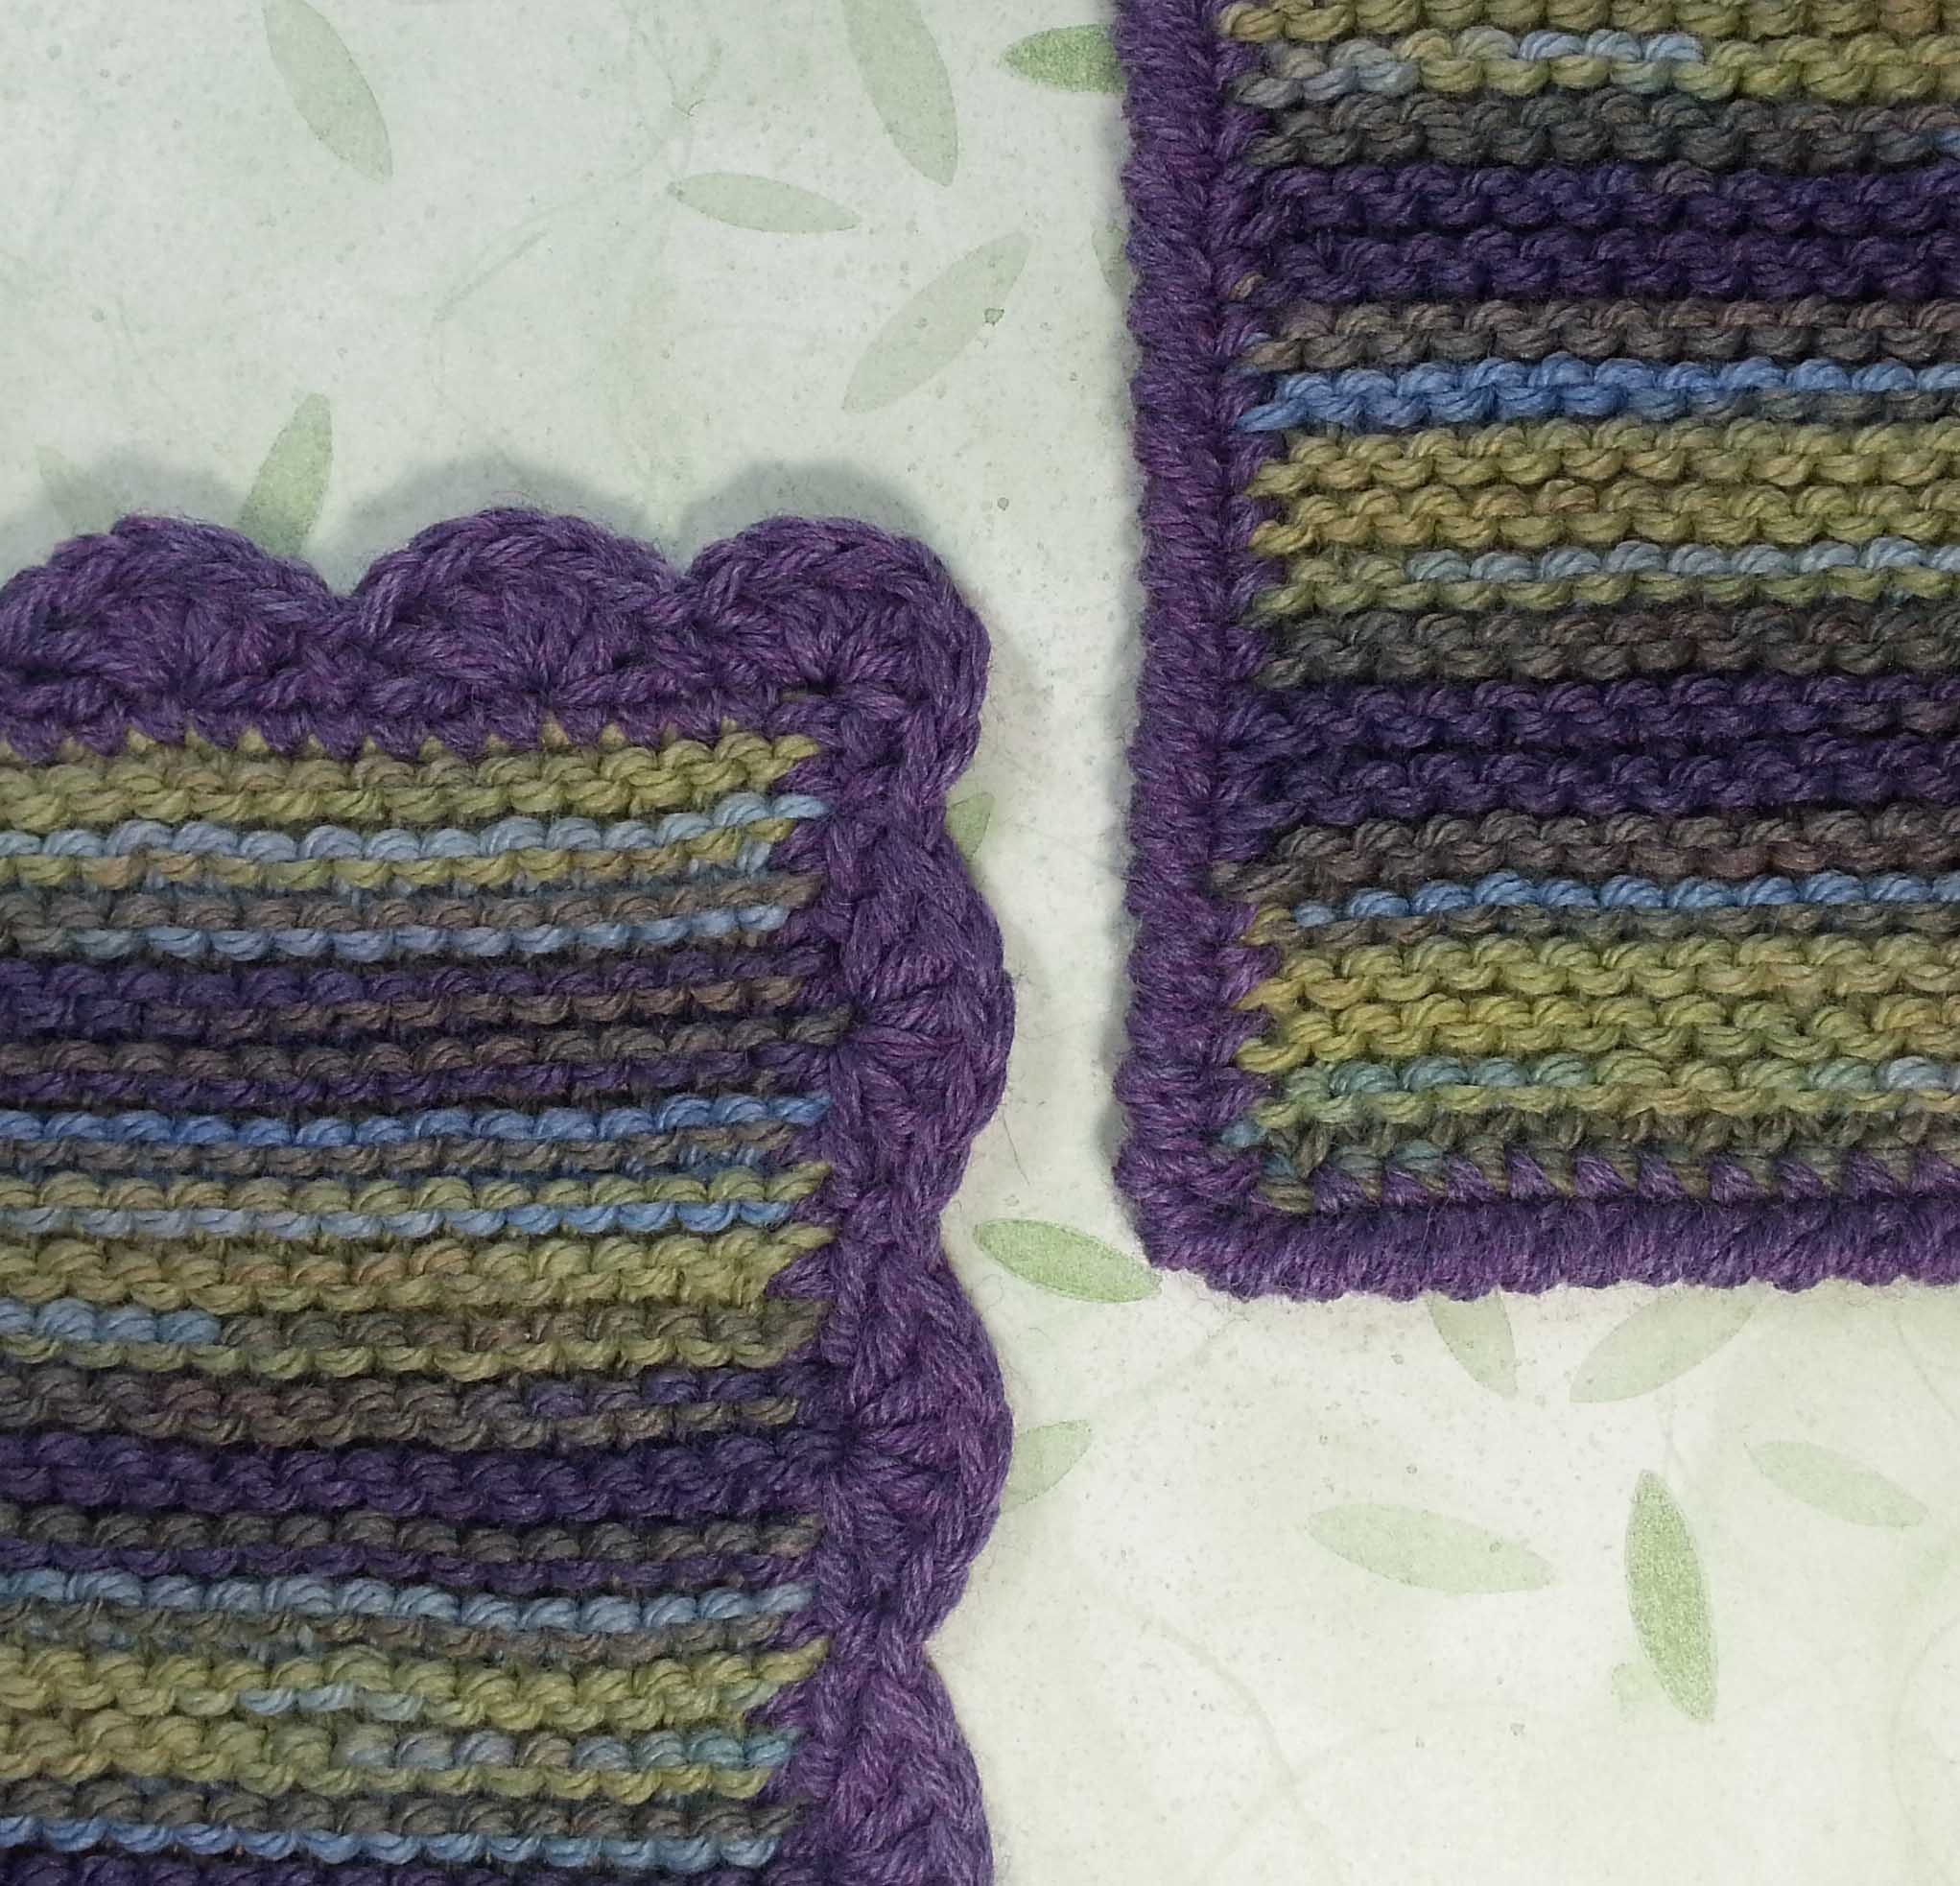
This past weekend I taught 2 classes at the Longmont Yarn Shoppe. My “Mountain Top Beanie” class on Saturday and my “Pretty Crochet Edges for Knitters” class on Sunday. It was great fun, but ate up a lot of time. Then Sunday was a super late night for me as I madly sewed and glued to finish Halloween costumes for my boys.
By the morning of Halloween day I was pretty wiped out. I slept in and Himself took the boys to school. Unfortunately that meant I didn’t get any good photos of the boys in their costumes. All the Halloween costume and décor stuff is packed away until next year now.
To keep the week even more interesting, my oldest wasn’t feeling great on Monday and by Tuesday morning he was running a fever and complaining of a sore throat. He ended up staying home for the day from school. Later that day I went down to pick up my youngest from school and get my hair cut.
In between everything I was writing proposals for new classes for the Longmont Yarn Shoppe’s Winter class offerings. Finished up with those about 8:30 p.m. then started working on editing Part 2 of the Fans & Lace Afghan Square video until 1 a.m.
Got up to see the boys off to school at 7 a.m. and then went back to sleep for awhile. When I woke up I had a text message from my husband that he was picking our oldest up from school. The nurse was sending him home because he was running a fever again.
This has all meant that my grand plan for having the video finished and up with a blog post today has been de-railed. It is the glamorous life of owning your own small (some might say “micro”) business. When you play all roles the juggling can get interesting.
To add to the fun I am beginning to feel like the bug my kid has is trying to catch up with me. Dosing myself with herbs and planning an early bed-time tonight to ward it off.
Meanwhile I am getting a bit of crocheting time in, as that is something I can do while running boys to-and-fro and when I’m feeling a bit crummy. These 4 balls of Berroco “Vintage” are going to be another PWT Shawl when I finish crocheting with them. I’m deciding as I work if I will use both the balls of the dark blue or just one.
I will have the video of the Fans & Lace Square – Part 2 completed soon. Hopefully no one is too stymied by the last 6 rounds for the square.
I hope you are all staying healthy and having some fun with yarn this week. Be sure to stop by Friday as I’ll have another stop for the book blog tour to tell you about.
Hi everyone. My book “Wraps for All Seasons” is going on a blog tour. We will be making 6 stops for this tour. Each of the bloggers will be giving away a copy of the book, so be sure to visit them to see what they have to share with you about my book.
Check out Kathy’s awesome hat pattern “Swirling Pebbles”. This hat is part of her Christmas Present CAL that she has put together to help her readers get a jump on holiday gift making. A quick project with a fun yarn that does all the color changing for you.
If you’ve been wanting to try out a pattern for a super scarf you’ll love her pattern for “The Woodman Super Scarf”. This design has a load of texture worked in 3 different colors of Red Heart Soft Yarn. Kathy chose Black, Charcoal and White for her sample, but with the wide range of colors in the Soft Yarn line you’ve got all sorts of options.
The next stop for the “Wraps for All Seasons” blog tour will be next Friday, November 4th.
After far too many adventures and the acquisition of new skills I am happy to announce that the first video for my “Fans & Lace Afghan Square” is up on my YouTube Channel. If you missed the post with the pattern you can find it here.
This video was coming out rather long, so I split it up. Part 1 shows Rounds 1-6, Part 2 will be Rounds 7-12 with a quick animation of Rounds 1-6. There is still a bit more production work to finish up on Part 2. Part 1 has all the “tricky” bits of the pattern though.
Hope you are all having a great start to your week. In between working on videos and new designs, I’m in the trenches of helping my boys pull together costumes for Halloween. They’ve both picked characters from a video game called “Undertale”.
Hi everyone. My book “Wraps for All Seasons” is going on a blog tour. We will be making 6 stops for this tour. Each of the bloggers will be giving away a copy of the book, so be sure to visit them to see what they have to share with you about my book.
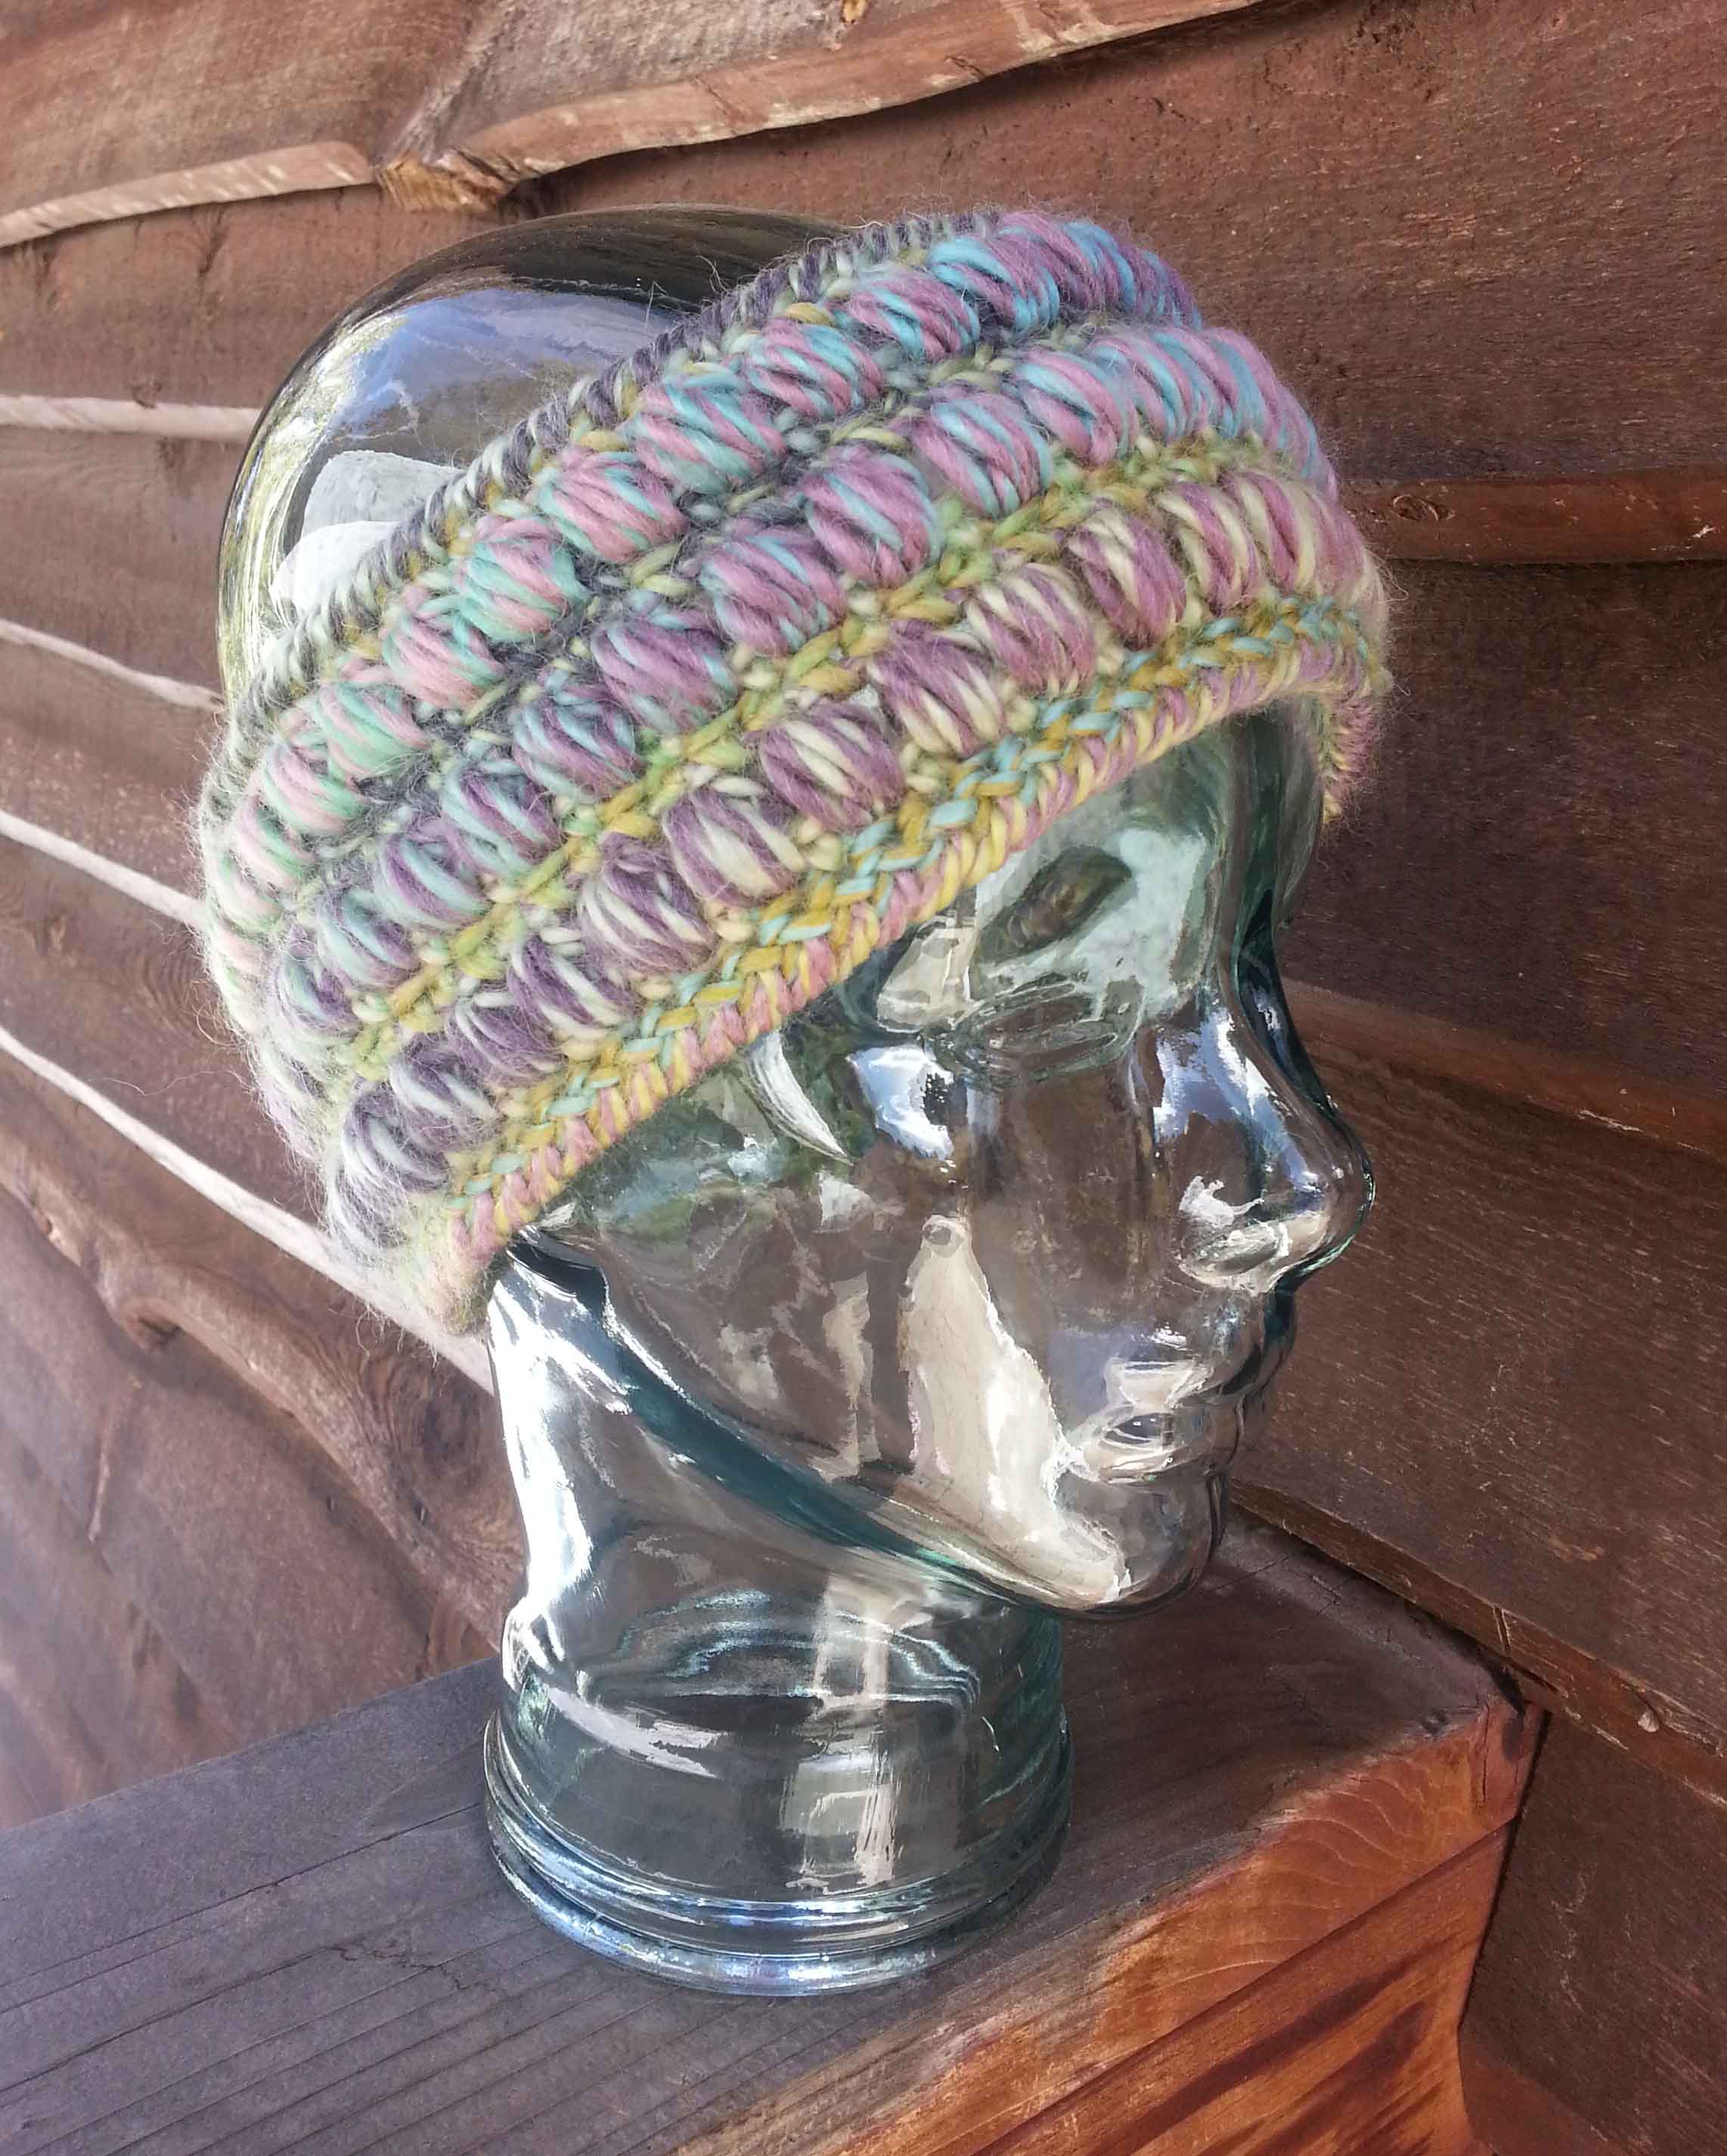
Elena is a talented designer and has lots of fun patterns available on her blog, like her “Amazing Grace Blissful Slouchy Hat”. This design is part of her Amazing Grace series and you might recognize the fancy stitch pattern from the headband I crocheted awhile back.
That was from her “Amazing Grace Headband” pattern. You can find the whole series of Amazing Grace Patterns on her blog, just look at the top of the page for the tab to take you there.
And her “Effortless Chic Poncho”. The gorgeous striping came from the yarn Elena picked, Plymouth Encore Dynamo in Color #020. Beautiful and the yarn does the heavy lifting, so you get a relaxing time crocheting.
The next stop for the “Wraps for All Seasons” blog tour will be next Friday, October 28th.